
Chapter Three: Hope
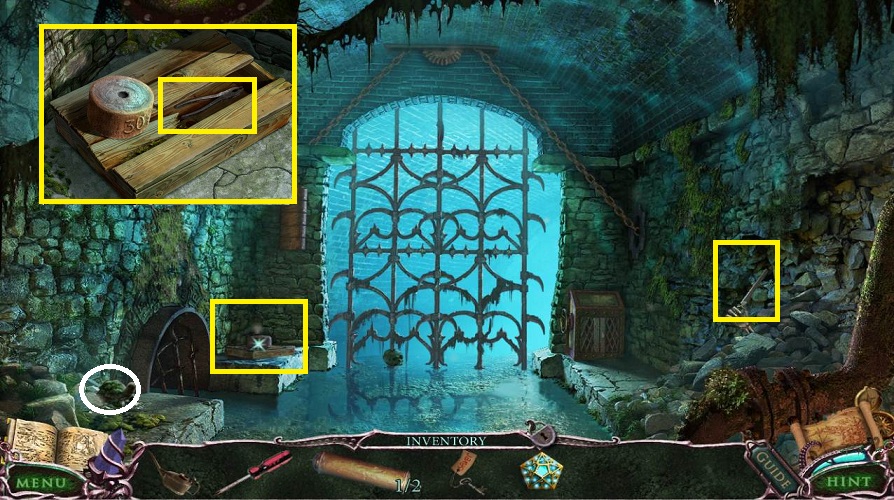
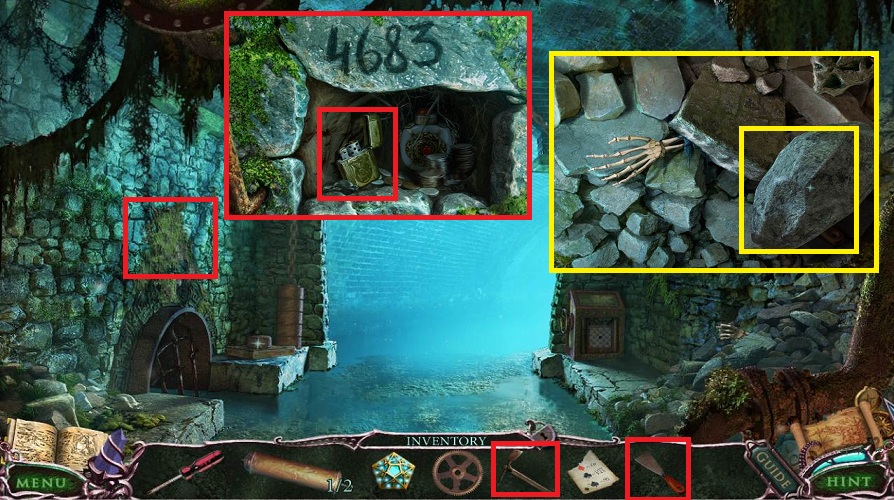
- Examine the skeletal hand to the right
- Pick up the FILE
- Examine far left corner
- Pick up the CORKSCREW
- Pick up the now exposed PLIERS
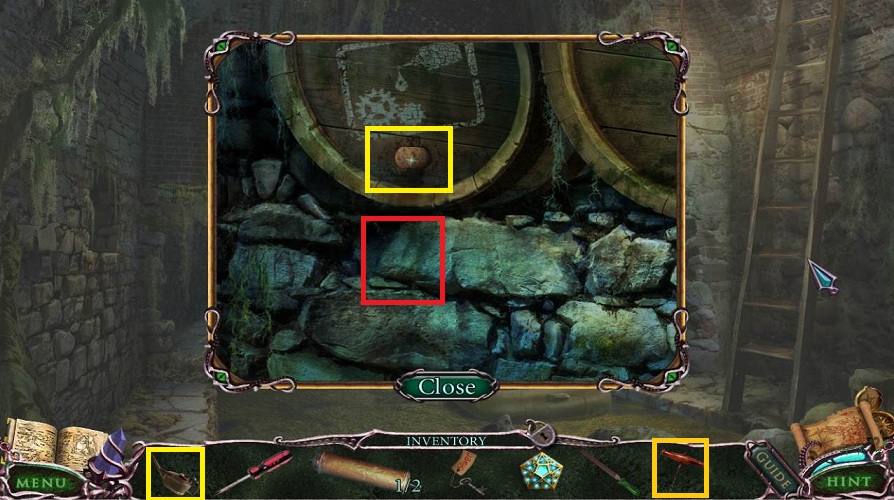
- Back up once
- Use the CORKSCREW on the cork of the oil barrel
- Use the OILER in the flow
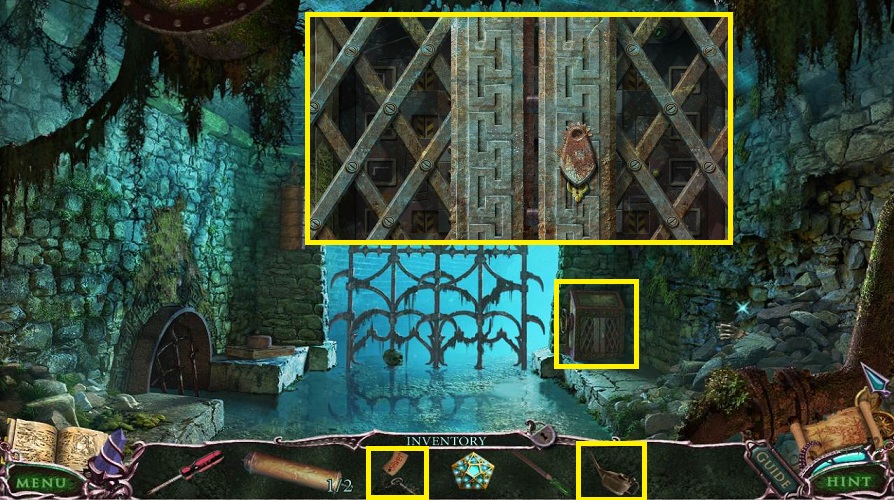
- Go forward and examine the box to the right
- Use the OILER
- Use the SEWER KEY
- Click on the door
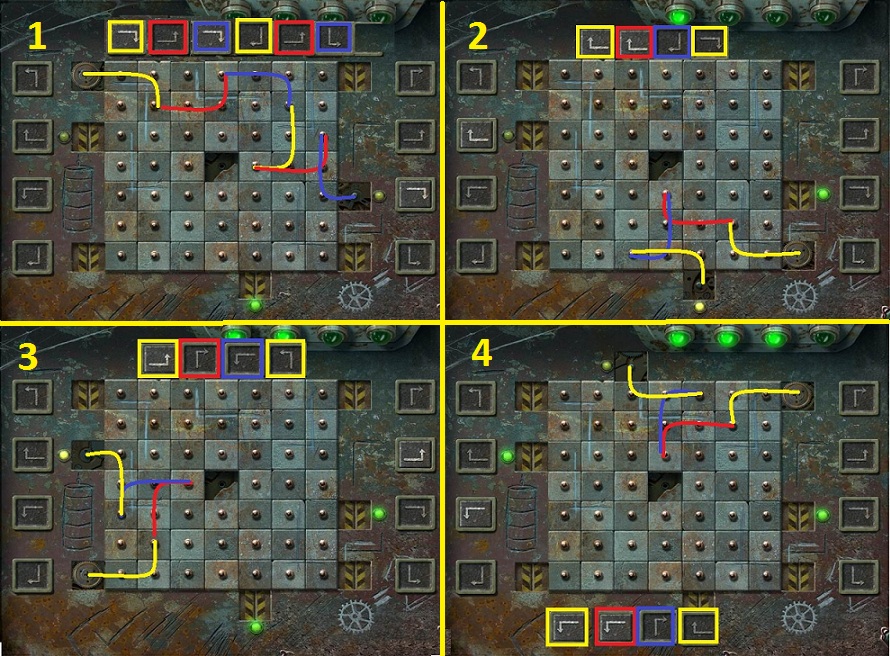
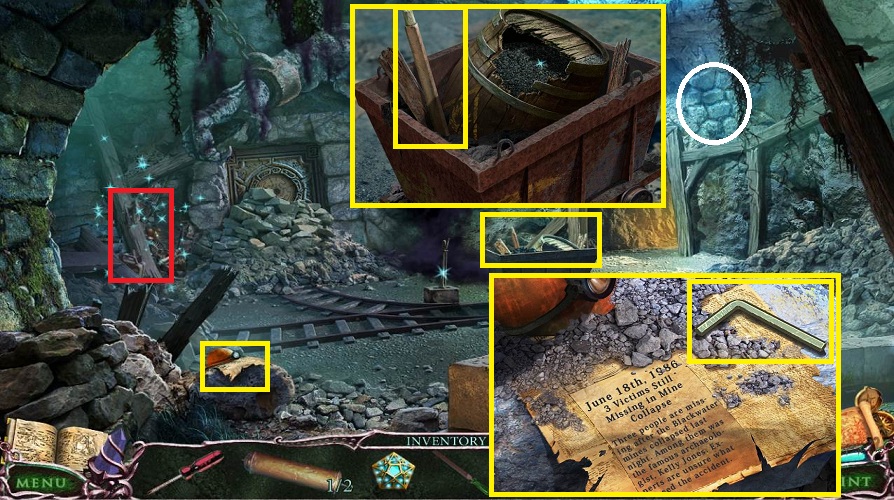
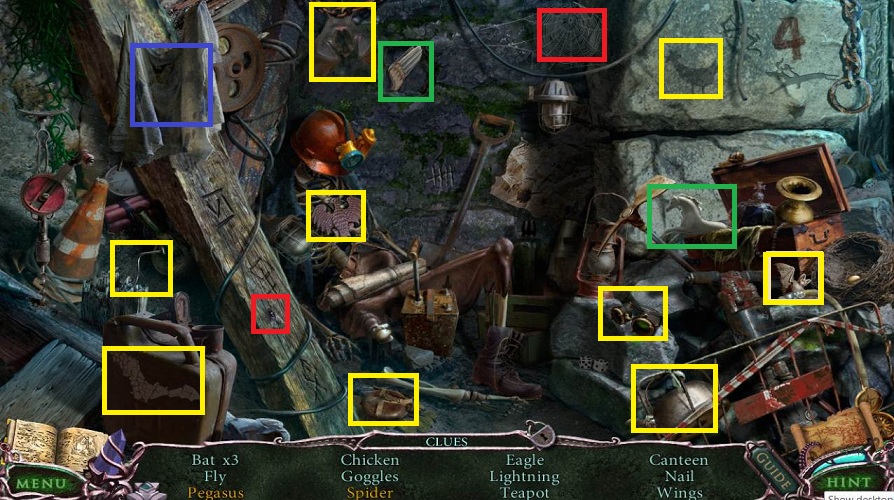
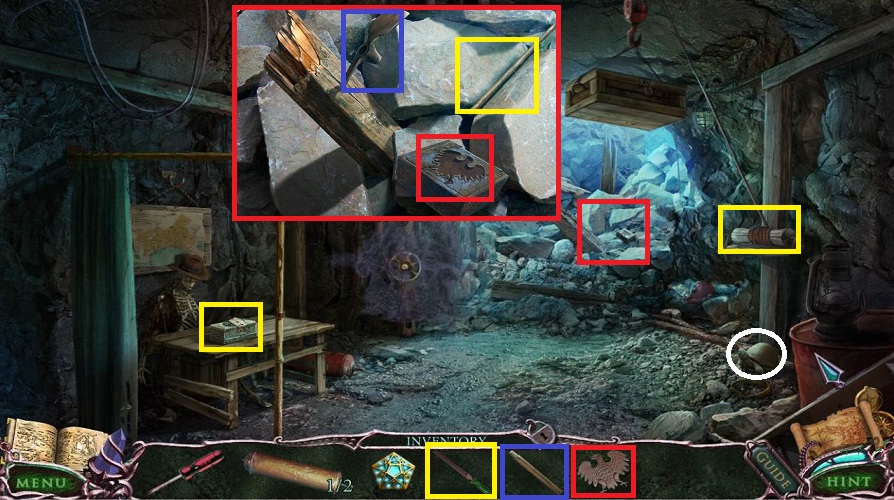
- In this puzzle you need to move 4 gears from the starting point to the open lamp location
- Click on the 8 side buttons to move the gear as noted; it will go two squares in one direction and one square in the next
- Use the solution for help; the buttons to be pressed are noted in left to right order.
- Go forward
- Examine the mine cart
- Pick up a WOODEN HANDLE
- Examine the yellow helmet to the left
- Pick up the HEX KEY
- Do the hidden object scene
- Pegasus: Use the wing on the horse
- Spider: Use the fly on the spider web
- Lightning: Click on the rag
- Receive the EAGLE
- Head forward
- Click on the curtain to the left
- Examine the rocks in the back
- Use the EAGLE on the box
- Pick up the GEARS
- Pick up the ROD
- Use the WOODEN HANDLE on the pick axe head
- Pick up the PICK AXE
- Examine the table
- Pick up the LIST
- Examine the cable holding the crate up
- Use the FILE
- Examine the crate; you need numbers.
- Back up twice
- Use the ROD to remove the rocks on the skeleton arm
- Pick up the SCRAPER
- Examine the moss to the left
- Use the SCRAPER and note the numbers
- Use the PICKAXE
- Pick up the LIGHTER
- Go forward twice
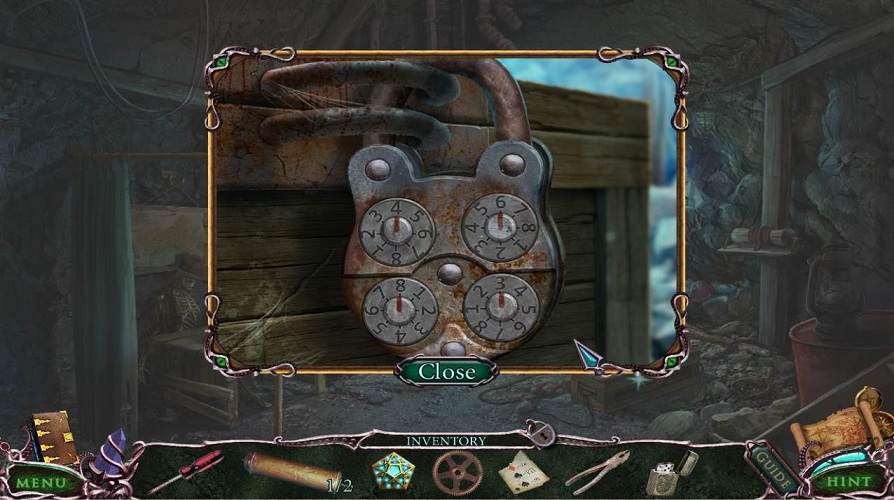
- Examine the crate
- Enter the numbers
- Pick up the FUSE
- Go back once
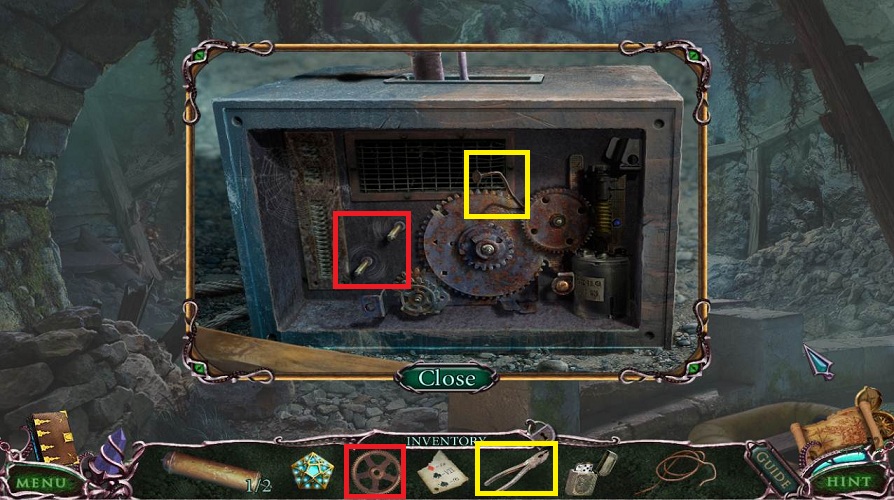
- Examine the switch box
- Use the HEX KEY to get the cover off
- Use the PLIERS on the nail
- Place the GEARS
- Examine the mine cart
- Place the FUSE
- Use the LIGHTER
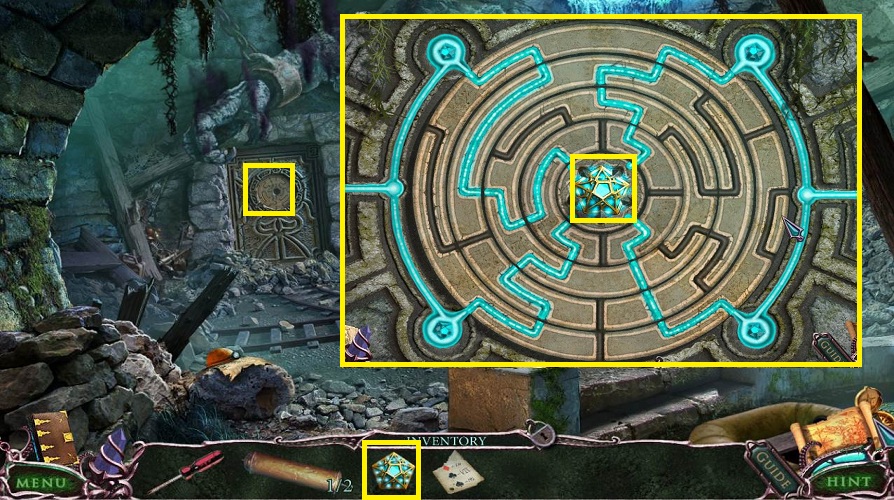
- Examine the door on the left
- Place the CRYSTAL
- Turn each circle (starting from the center) until the blue flows to each small crystal
- Enter the room
- Examine the wall to the left
- Pick up the BIG FISH KEY
- Back up once and go right
- Examine the table
- Use the BIG FISH KEY on the lock
- Pick up the CRYSTAL
- Return
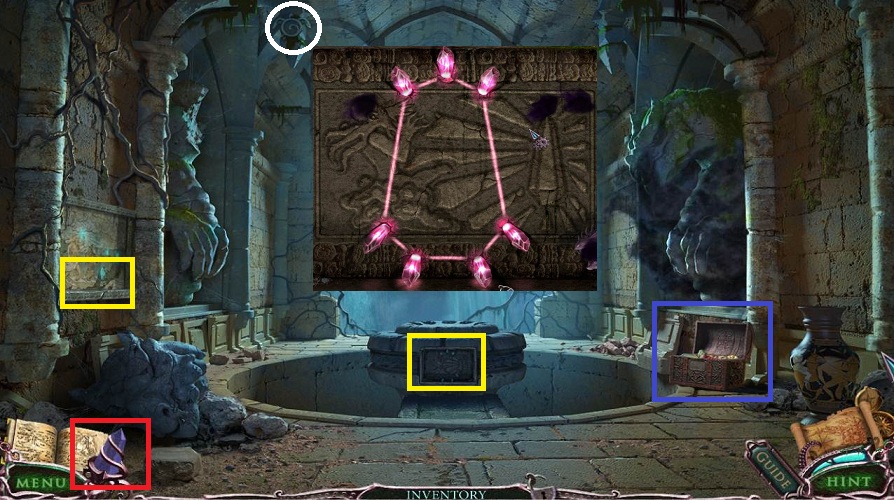
- Examine the center
- Place the CRYSTAL
- Click on the screen to move the light to each crystal in a clockwise direction
- If the black smoke hits it while its moving, it will simply go back to the last crystal
- When finished the obelisk will rise
- Click on the blue crystal next to your inventory to charge it up
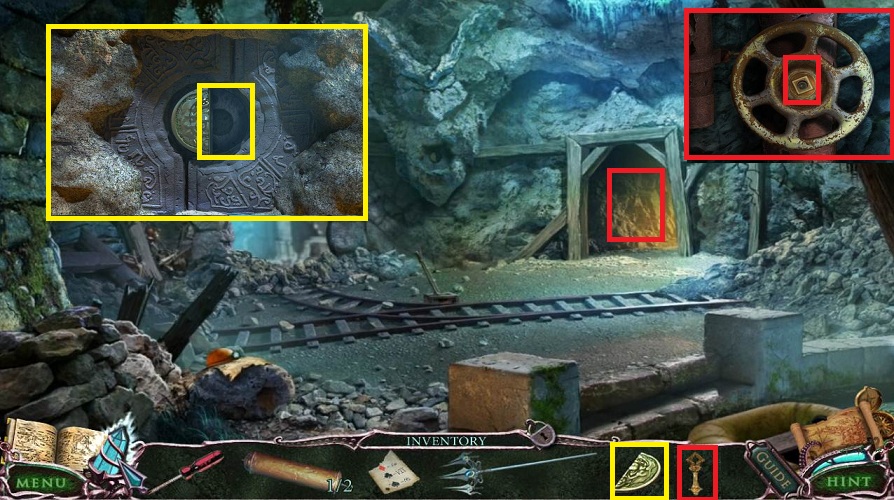
- Examine the chest to the right
- Pick up the TRIDENT and AMULET HALF
- Back up once
- Use the crystal
- Examine the back wall
- Use the AMULET HALF
- Pick up the SQUARE WRENCH
- Go forward to the right
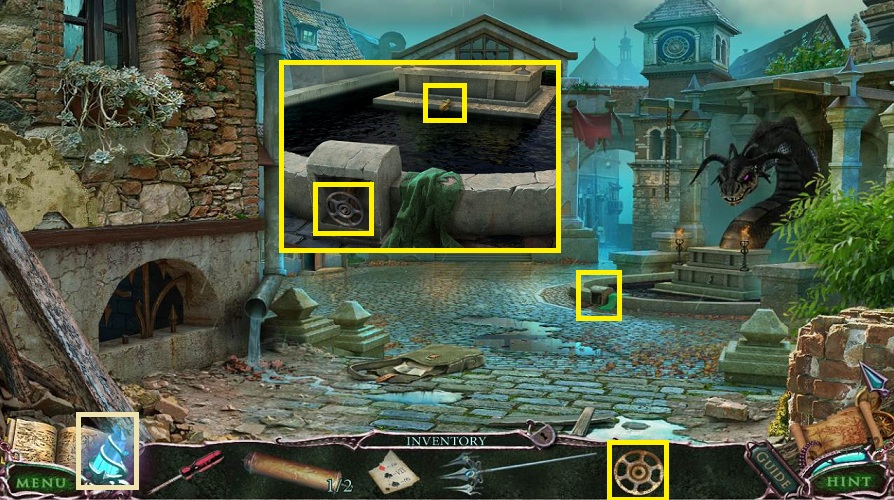
- Use the crystal
- Examine the valve
- Use the SQUARE WRENCH
- Pick up the VALVE
- Back up 3 times, go up the ladder, and back into the square
- Use the crystal
- Examine the fountain
- Click on the cover
- Use the VALVE
- Pick up the SEA HORSE
- Go forward, up the ladder, to the right, forward, and into the clock building
- Examine the statue on the right
- Place the TRIDENT
-
Pick up the STETHOSCOPE
- Go down the ladder
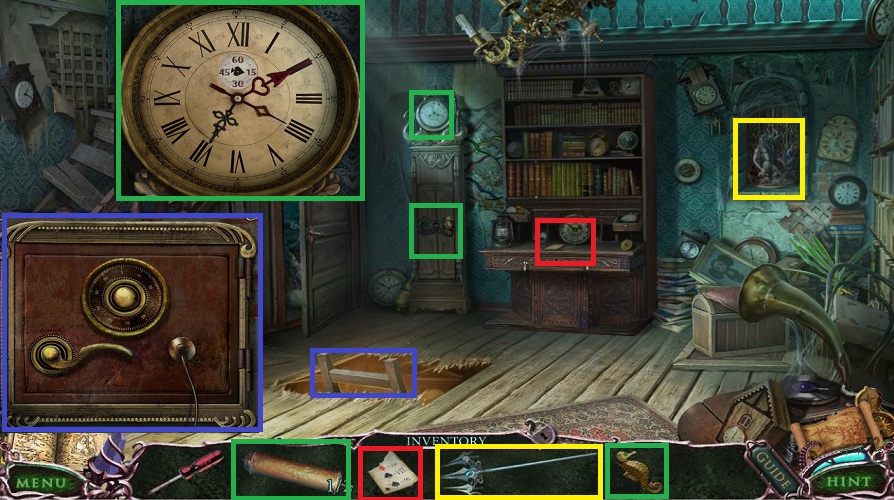
- Examine the safe
- Use the STETHOSCOPE
- Pick up the WEIGHT (2/2)
-
Go back up stairs
- Examine the desk
- Use the LIST
- You will get the code for the clock
- Examine the grandfather clock
- Use the SEA HORSE
- Use the WEIGHTS
- Examine the clock face
- Drag the hands to match the numbers now in your diary
- The clock hands each have the shape to match on them
- The desk will move to open a secret passage
- Go forward to end the chapter
Comments will load when you reach this part of the walkthrough.