

Chapter Four: Swamp of Sorrows
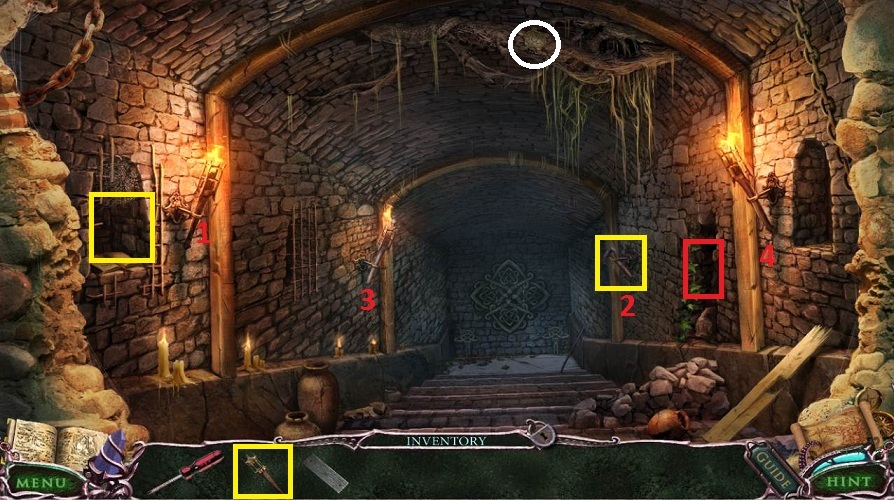
- Examine the first left alcove
- Pick up the TORCH
- Examine the second right alcove
- Pick up the STEP
- Examine the empty bracket at the bottom right
- Pick up the HAMMER
- Place the TORCH
- Press the 4 torches in the proper order
- Examine the door
- You need to stop the stakes from touching the gear
- If a stake touches it will move the gear back a little or a lot
- Just keep clicking
- Exit the door
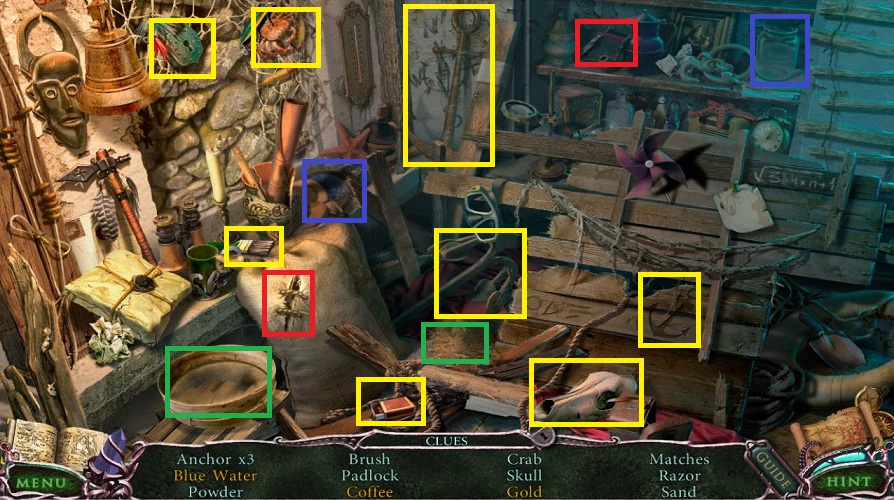
- Do the hidden object scene in the far left corner
- Blue water: Use the blue powder on the jar
- Coffee: Use the razor on the bag
- Gold: Ue the sand on the pan
- Receive MATCHES
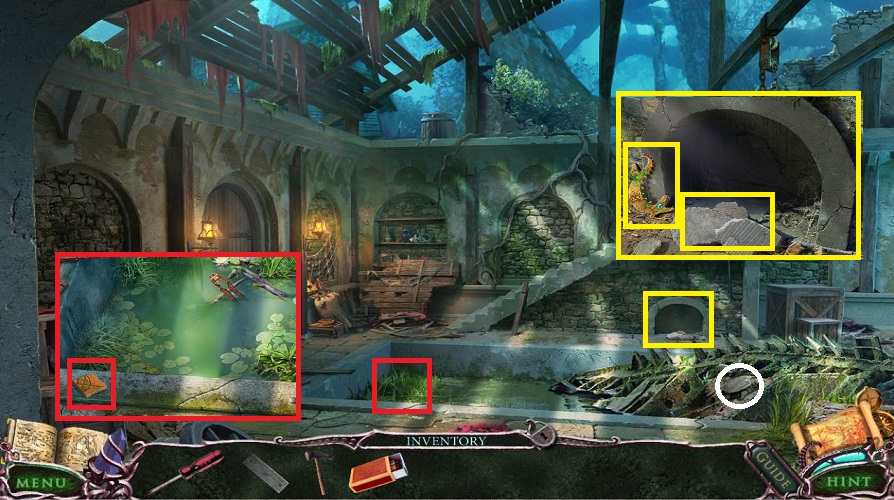
- Examine the pool
- Pick up the WOODEN PUZZLE PIECE (1/2)
- Examine the area under the steps
- Click on the stones (3)
- Pick up NAILS and METAL LIZARD (1/2)
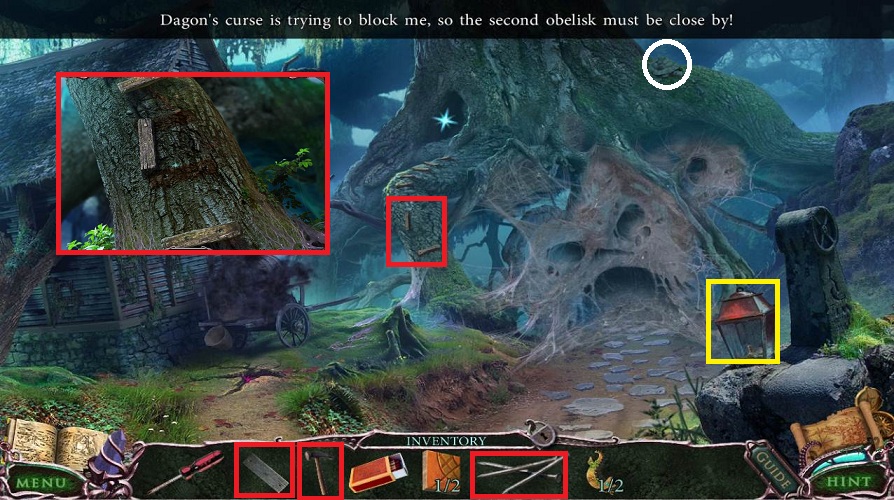
- Go forward
- Pick up the LANTERN
- Examine the tree
- Place the STEP
- Use the NAILS and HAMMER
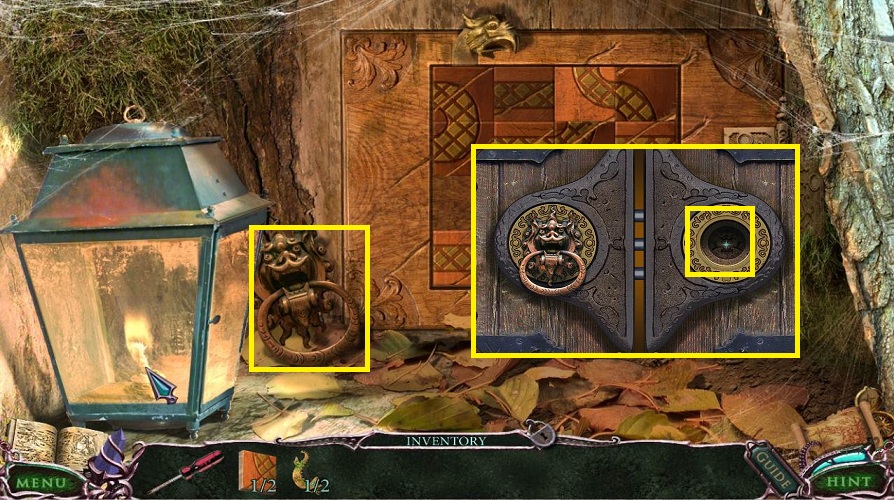
- Examine the hole in the tree
- Place the LANTERN
- Use the MATCHES
- Pick up the HANDLE
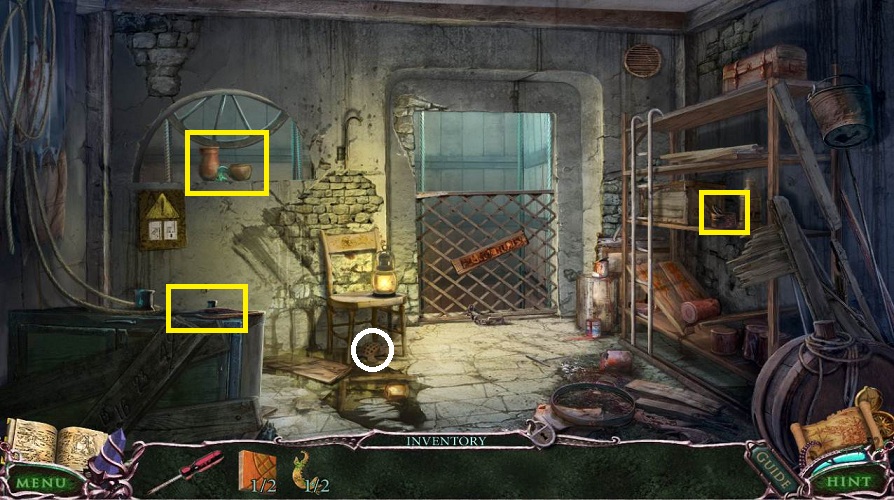
- Back up twice
- Examine the door
- Place the HANDLE
- Go left
- Examine shelves
- Pick up the TIN CAN
- Examine the box to the left
- Pick up the TWEEZERS
- Examine the window to the left
- Pick up METAL LIZARD (2/2)
- Click on the pot top
- Pick up SCREWS
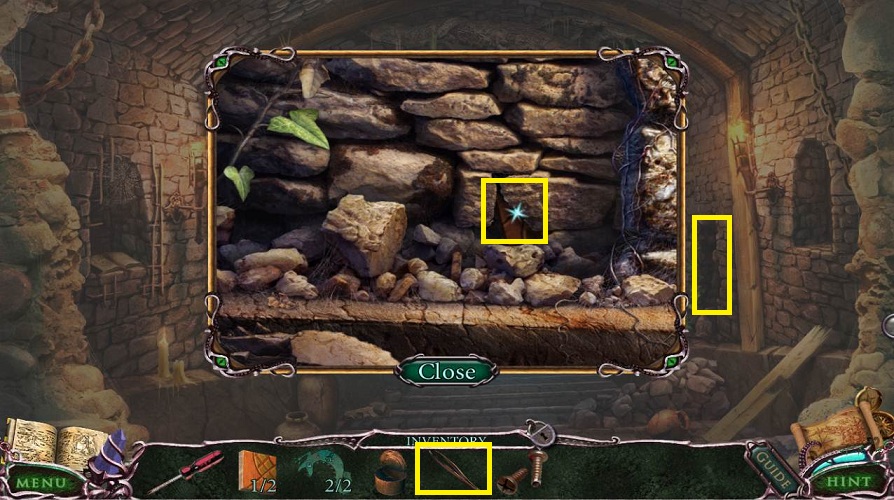
- Back up twice
- Examine alcove on the right
- Use the TWEEZERS
- Pick up the WOODEN PUZZLE PIECE (2/2)
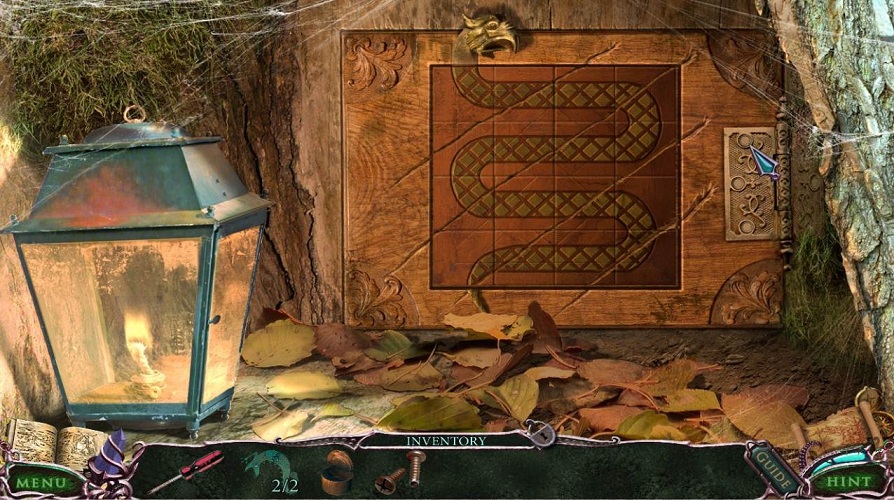
- Go forward twice
- Examine the tree hole
- Place the 2 WOODEN PUZZLES PIECES
- Swap the tiles to complete puzzle, noting the scratch marks
- The tiles will darken when they are in the correct place
- Use your crystal to recharge
- Use the crystal outside; it will destroy the web
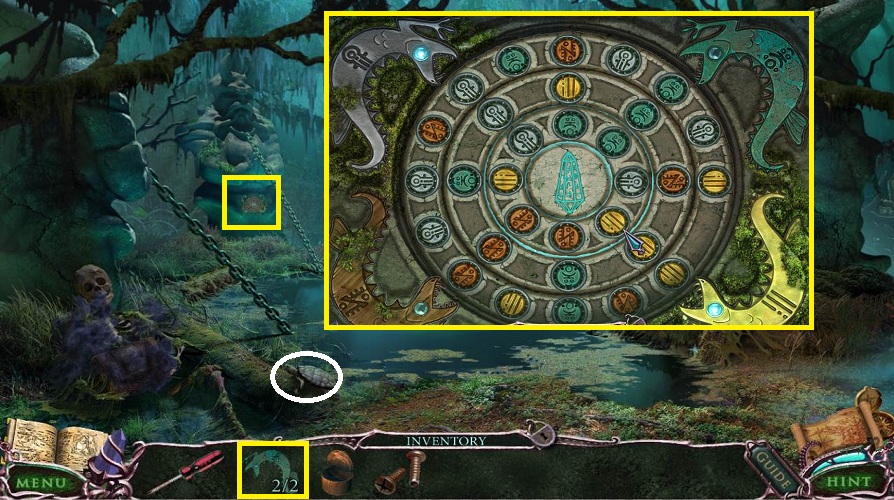
- Go forward
- Examine the back left statue
- Place the METAL LIZARDS
- Rotate the circles so that the stones in line with the lizards are the same color as the lizard
- Pick up the WHIP
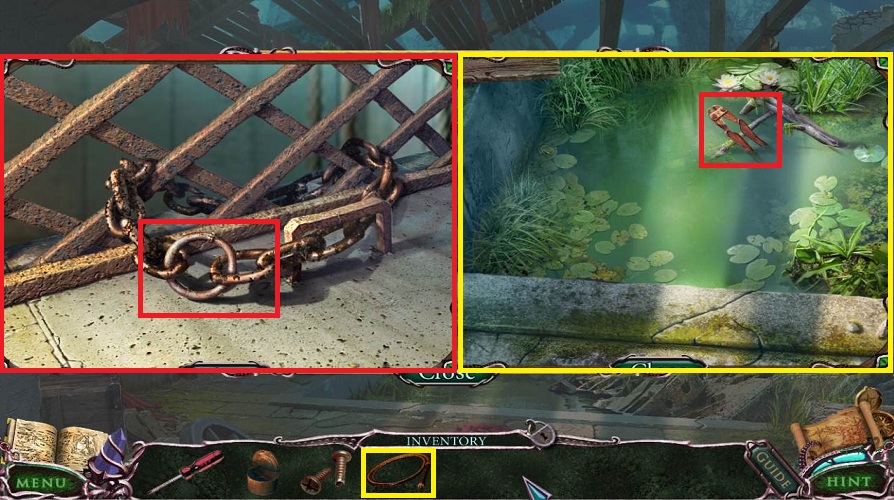
- Back up 3 times
- Examine the pond
- Use the WHIP
- Pick up the BOLT CUTTER
- Go right
- Examine the elevator
- Use the BOLT CUTTER
- Go forward
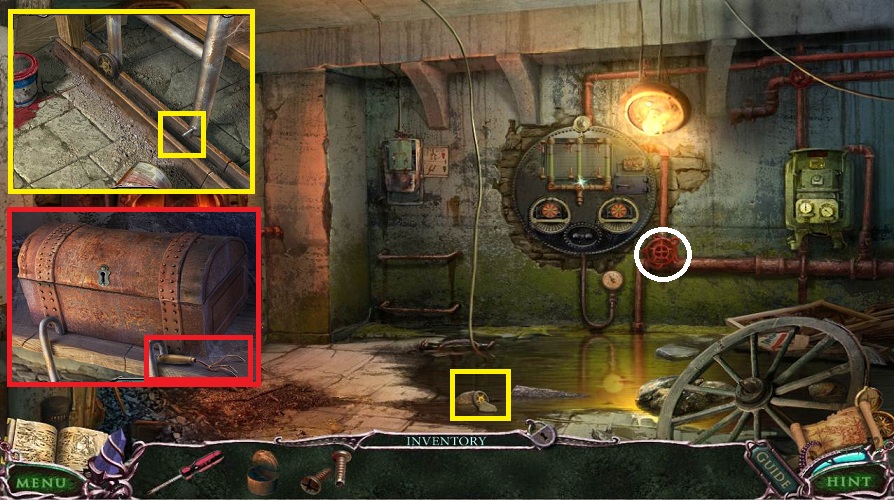
- Examine the floor
- Pick up the WHEEL
- Back up once
- Examine the base of the ladder
- Place the WHEEL
- Click on the ladder
- Examine the top
- Pick up the HOE
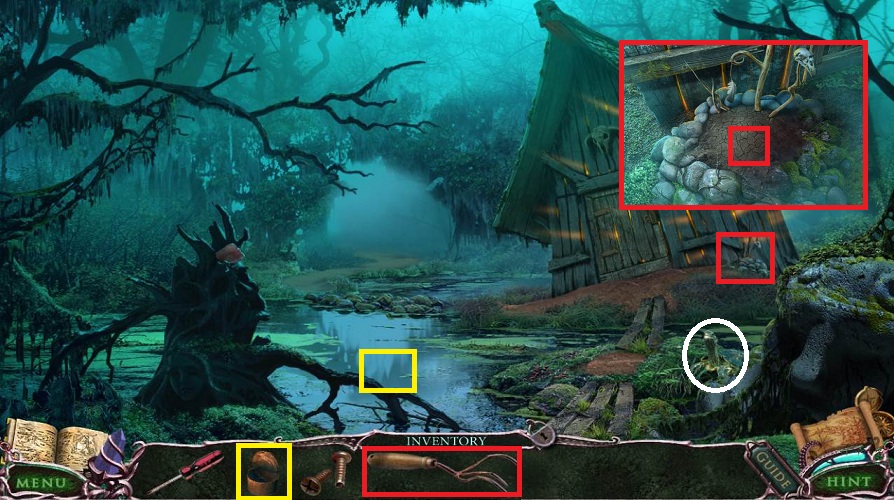
- Back up once and forward twice
- Examine the water
- Use the TIN CAN and receive water
- Examine the right side of the house
- Use the TIN CAN and then the HOE
- Pick up the SMALL KEY
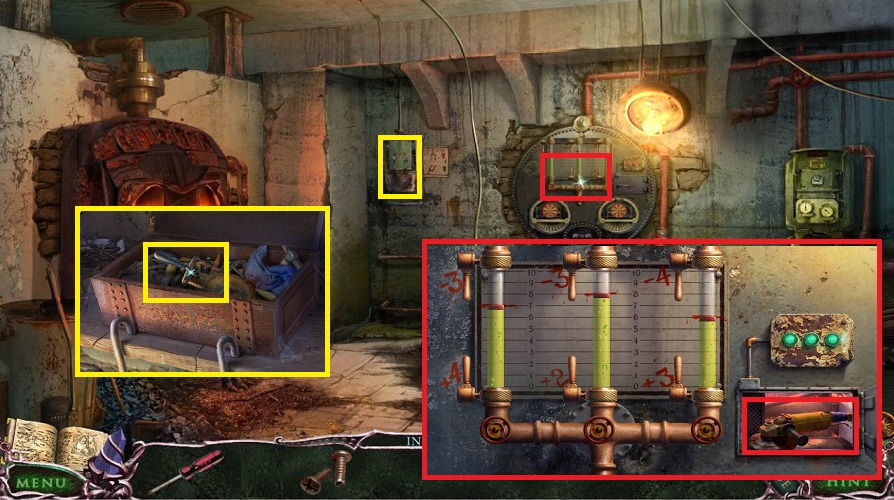
- Back up twice and head left
- Examine the tool chest
- Use the SMALL KEY
- Pick up the KNIFE SWITCH
- Head into the elevator
- Examine the circuit breaker box
- Use the KNIFE SWITCH
- Examine the center
- Use the two gold levers to adjust the water level in each tube
- Left, +4, -3, -3, +4
- Middle, +2, -3, +2, +2
- Right, +3, -4, +3, -4, +3
- Pick up the CIRCULAR SAW
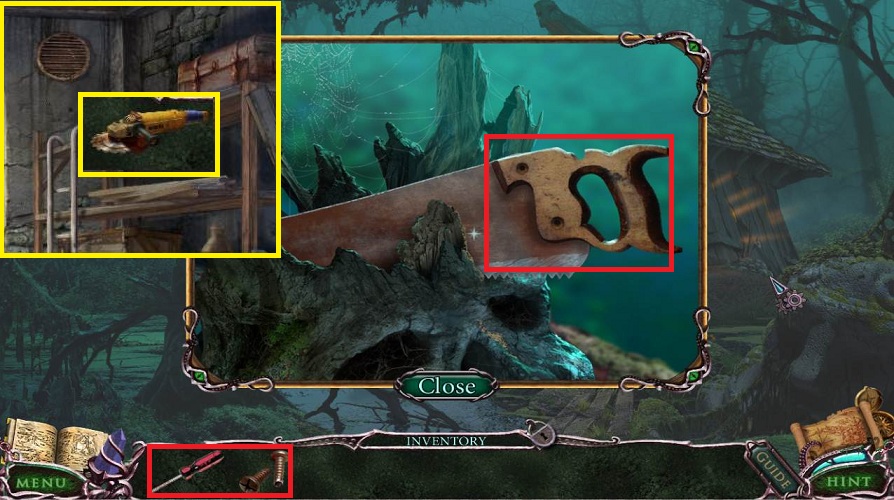
- Back up once
- Examine the grate over the shelving
- Use the CIRCULAR SAW
- Pick up the SAW HANDLE
- Back up once and forward twice
- Examine the tree stump
- Use the SAW HANDLE on the blade
- Use the SCREWS and the SCREWDRIVER
- Pick up the SAW
- Examine the door to the hut
- Use the SAW
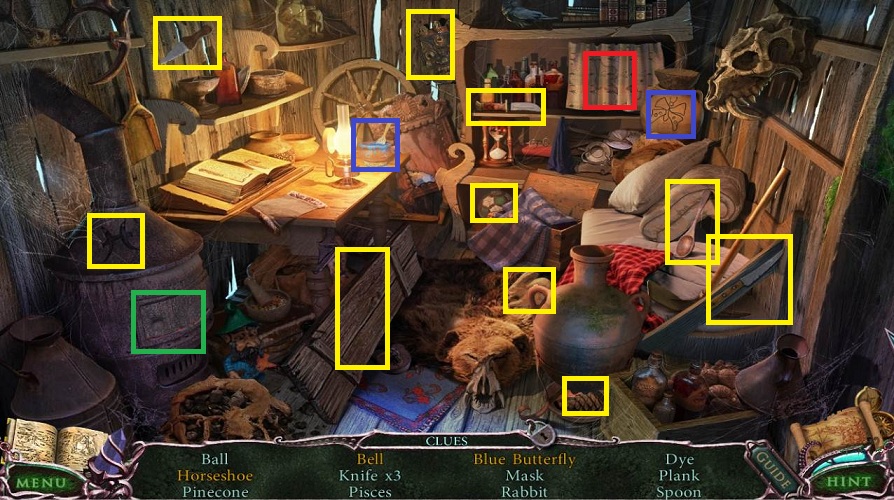
- Do the hidden object scene
- Horseshoe: Click on the stove door
- Bell: Click on the little curtain
- Blue butterfly: Use the blue paint on the butterfly
- Receive the PLANK
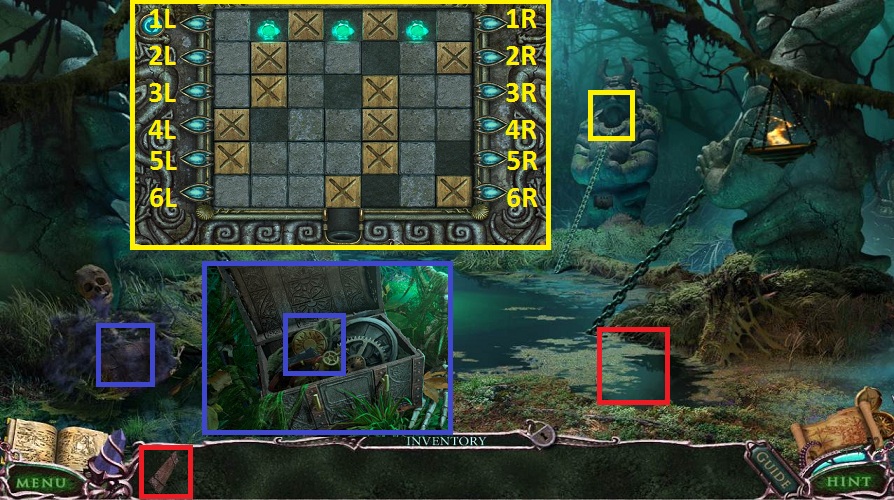
- Go forward once
- Use the PLANK
- Examine the back right statue
- Use the blue lights on both sides to slide a row back and forth
- The row won't go past an X
- One crystal at a time move the rows so the crystal drops down to the center hole
- 1L, 2L, 4R x2, 5R x2, 4L x2, 6L x3, 6R x2
- 1R, 4R x2, 4L x2, 6L x2, 6R x2
- 1R x2, 4R x2, 4L x2, 6L x2, 6R x2
- Recharge your CRYSTAL
- Examine the chest
- Pick up the SUN
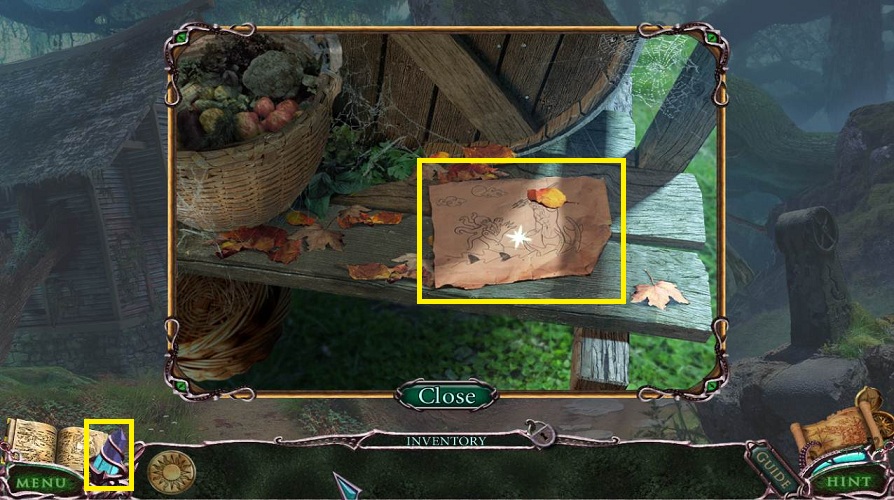
- Back up twice
- Use the CRYSTAL
- Examine the wagon
- Pick up the PLAN
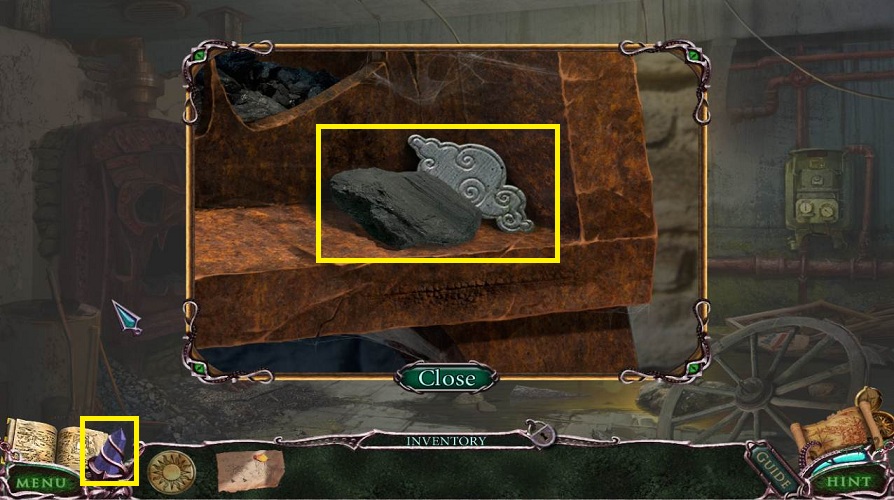
- Back up once, go right, and down the elevator
- Use the CRYSTAL
- Examine the stove
- Pick up the COAL and CLOUD CHARMS
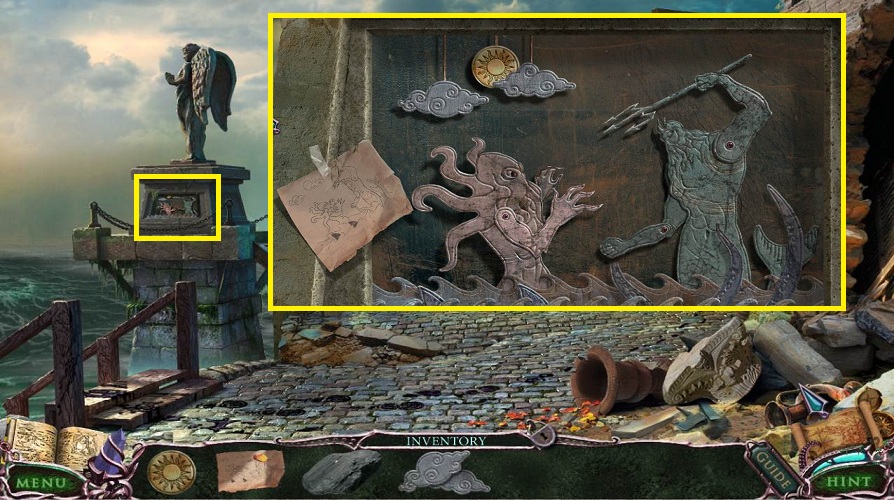
- Back up 5 times
- Examine the base of the statue
- Place the SUN and CLOUDS
- Place the PLAN
- Match the arm positions, sun, and clouds to the plan
- Pick up the BRIDGE KEY
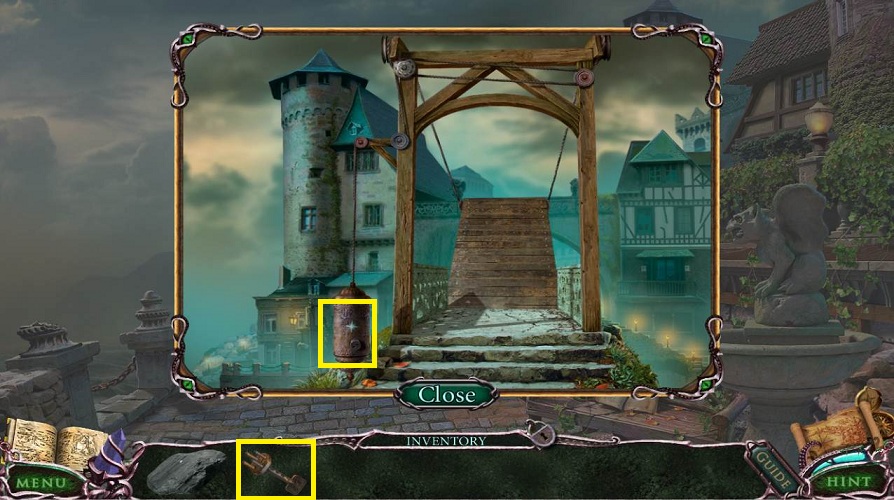
- Go forward
- Examine the bridge
- Use the BRIDGE KEY
- Head across to end the chapter
Comments will load when you reach this part of the walkthrough.