
Chapter Six: We Need to Find Derek
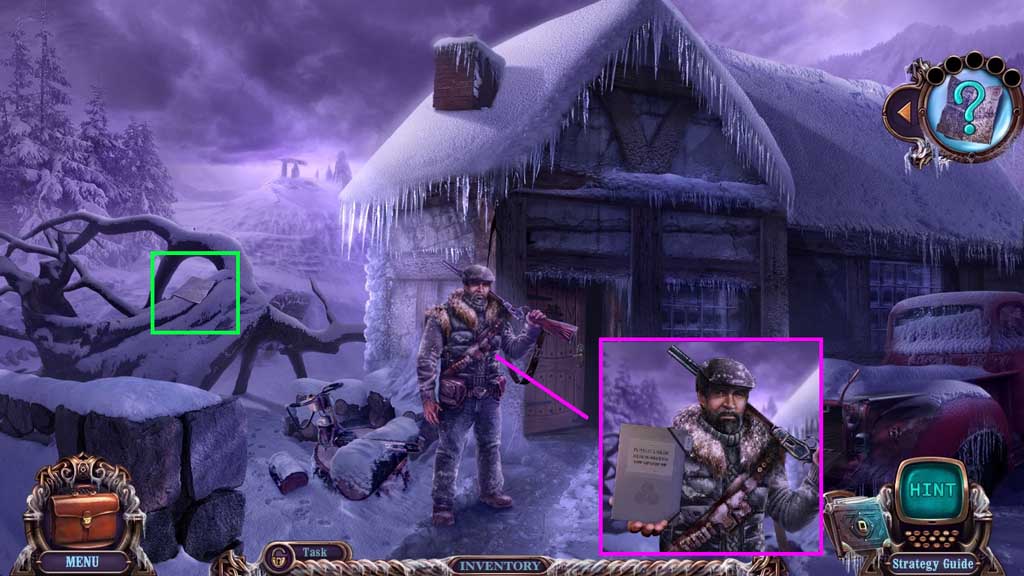
- Speak to Samuel; receive 0 /6 folders.
- Collect 1 /6 folders.
- Move ahead.
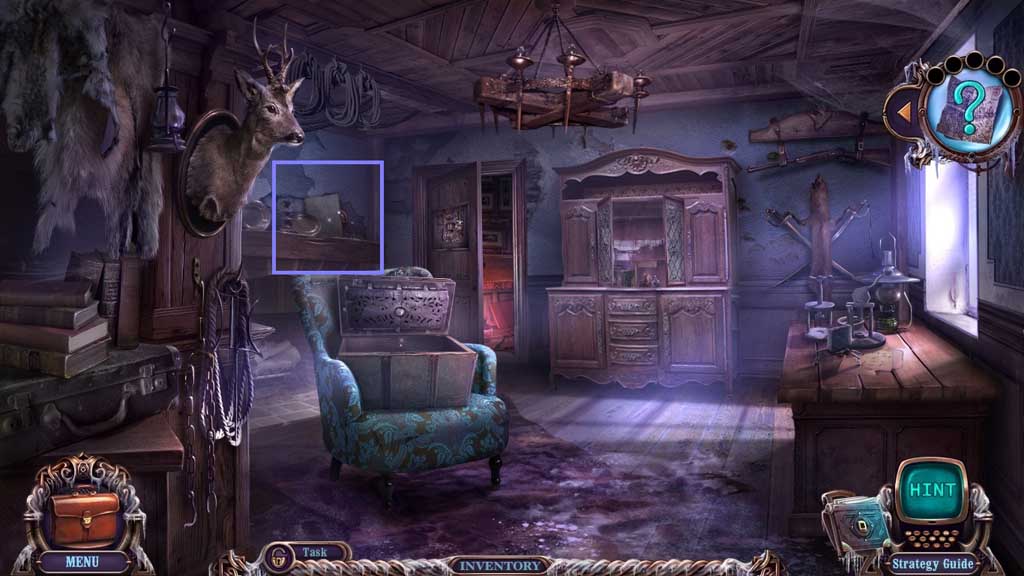
- Collect 2 /6 folders.
- Move to the area Outside Museum.
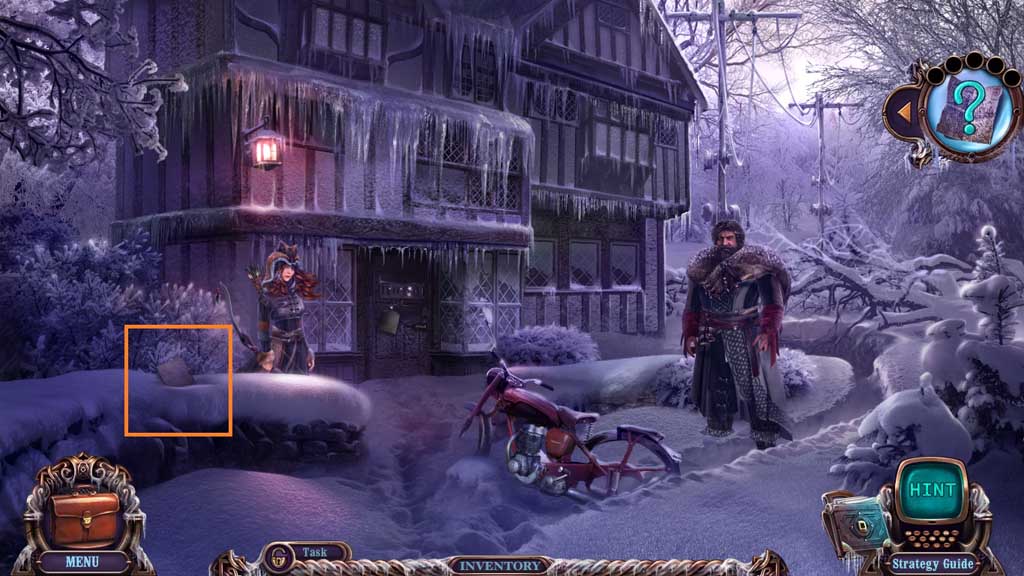
- Collect 3 /6 folders.
- Move to the Shop.
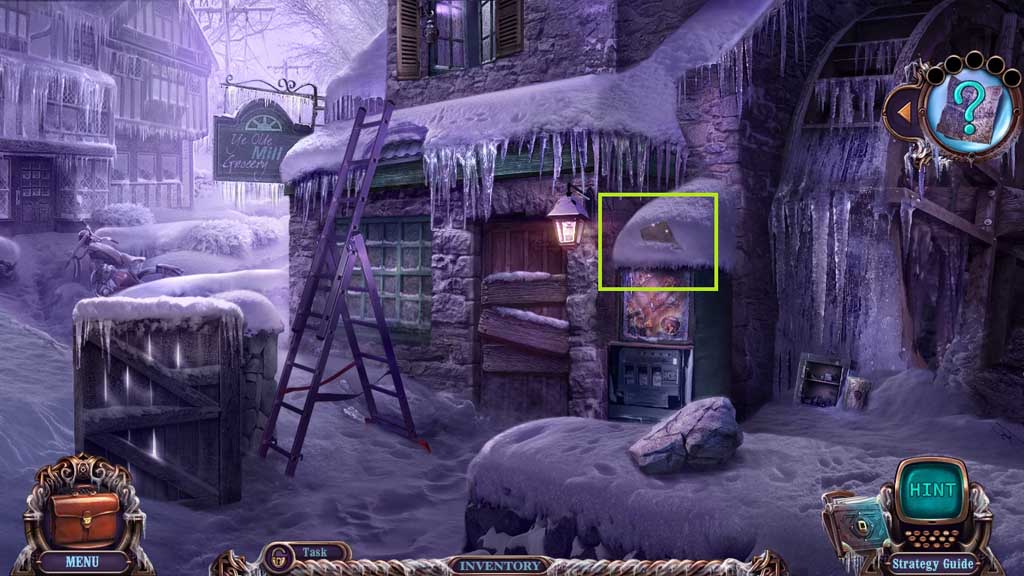
- Collect 4 /6 folders.
- Move down once.
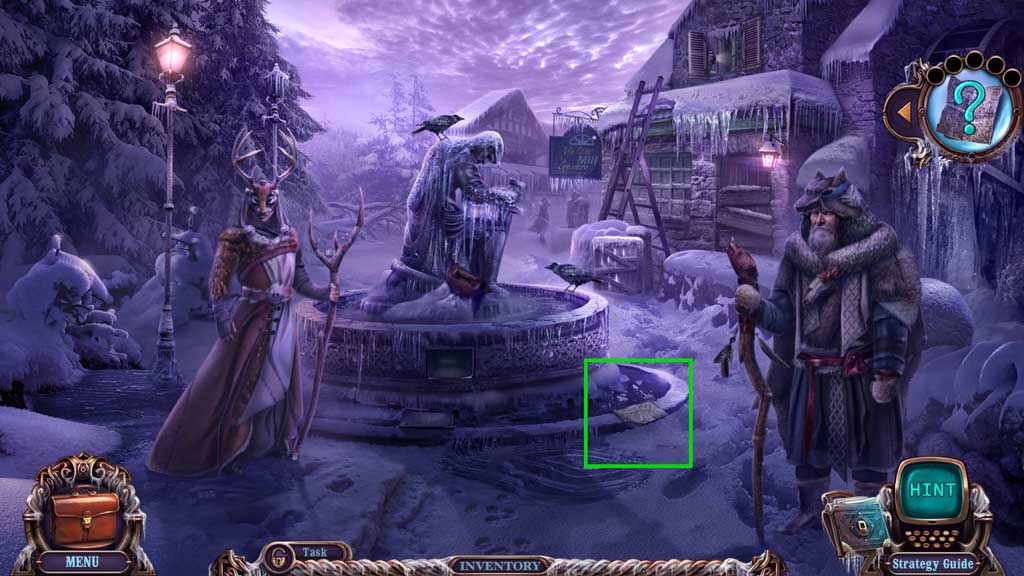
- Collect 5 /6 folders.
- Move down once.
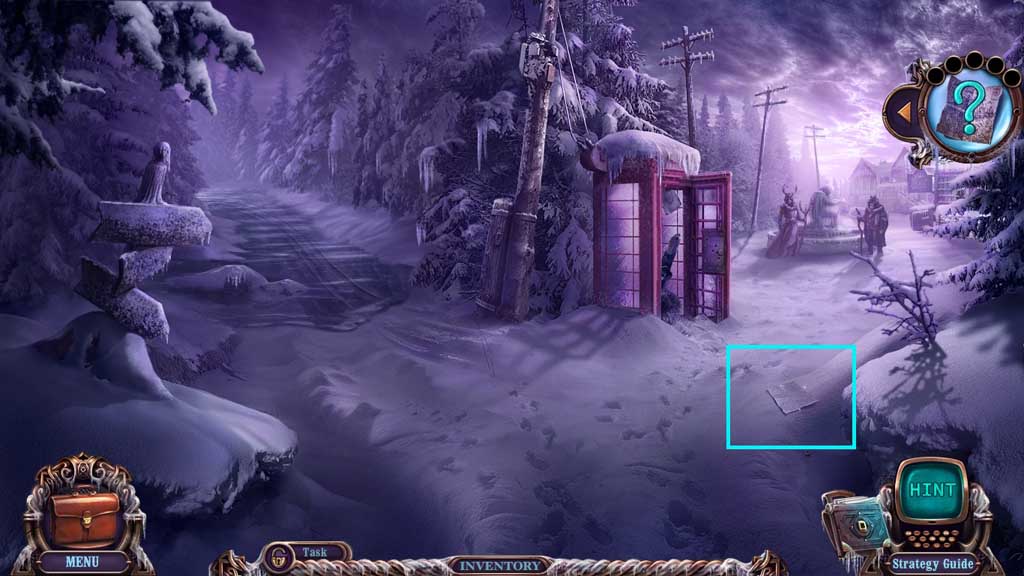
- Collect 6 /6 folders.
- Move to the left to Derek’s House.
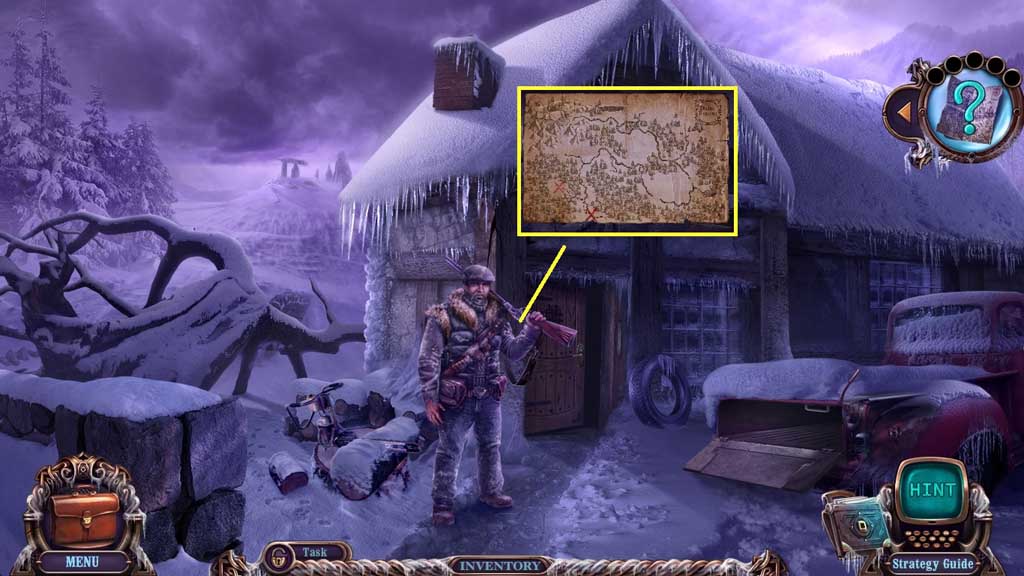
- Speak to Samuel; collect the map.
- Move to the Square.
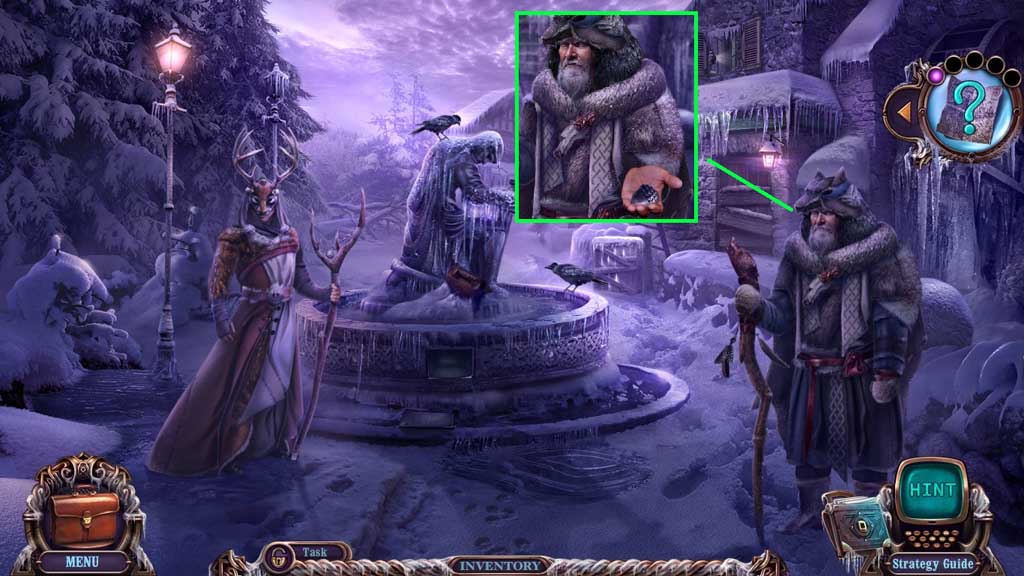
- Speak to Ulf; receive the acorn.
- Move to the Shop.
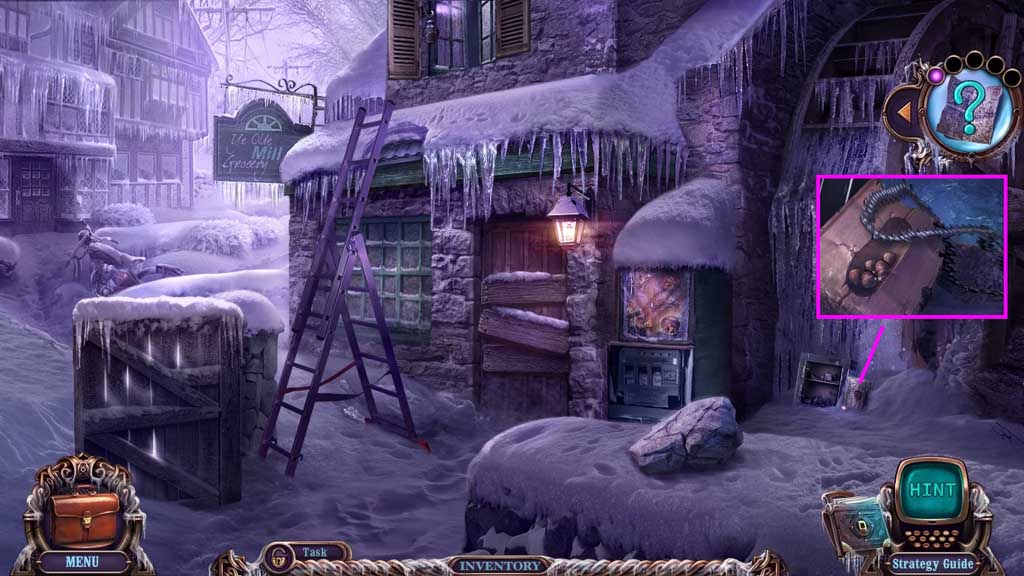
- Insert the acorn.
- Collect the acorn and chains.
- Move to Derek’s House.
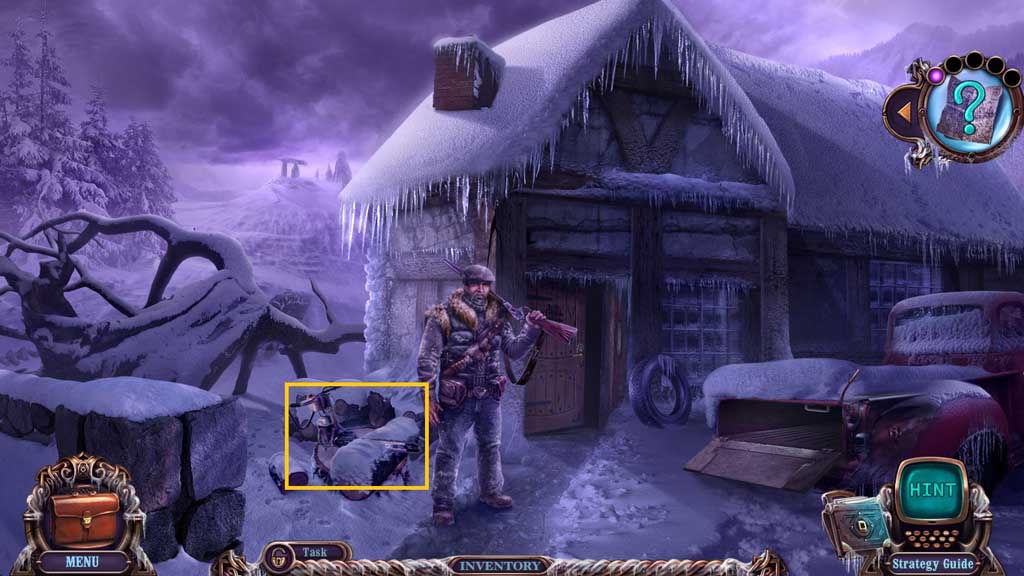
- Attach the saw chain.
- Click the saw.
- Move to the left.
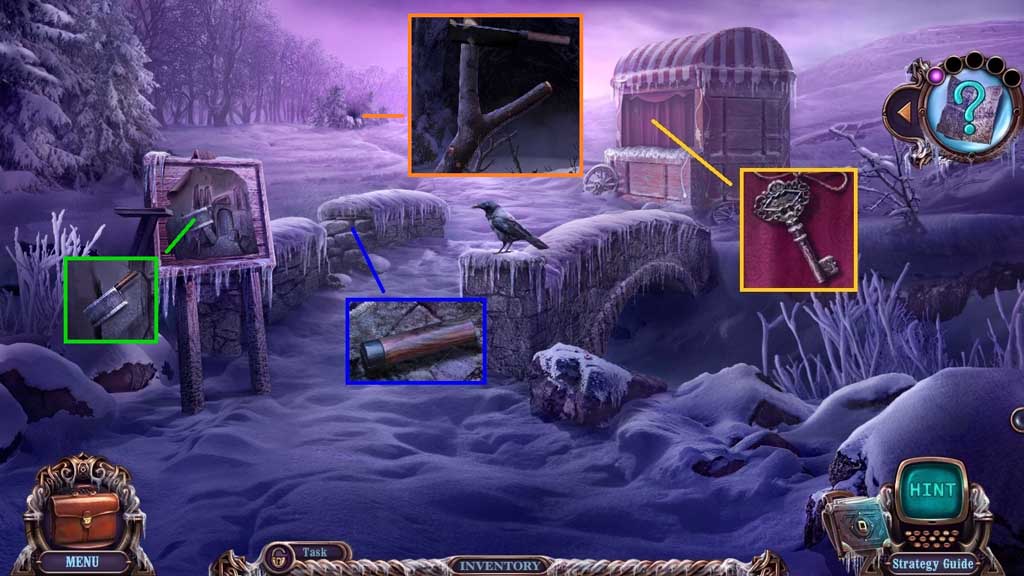
- Collect the hatchet handle.
- Collect the cellular key; click the curtains.
- Attach the hatchet handle; collect the hatchet and use it 2x’s to collect the slingshot base.
- Move ahead.
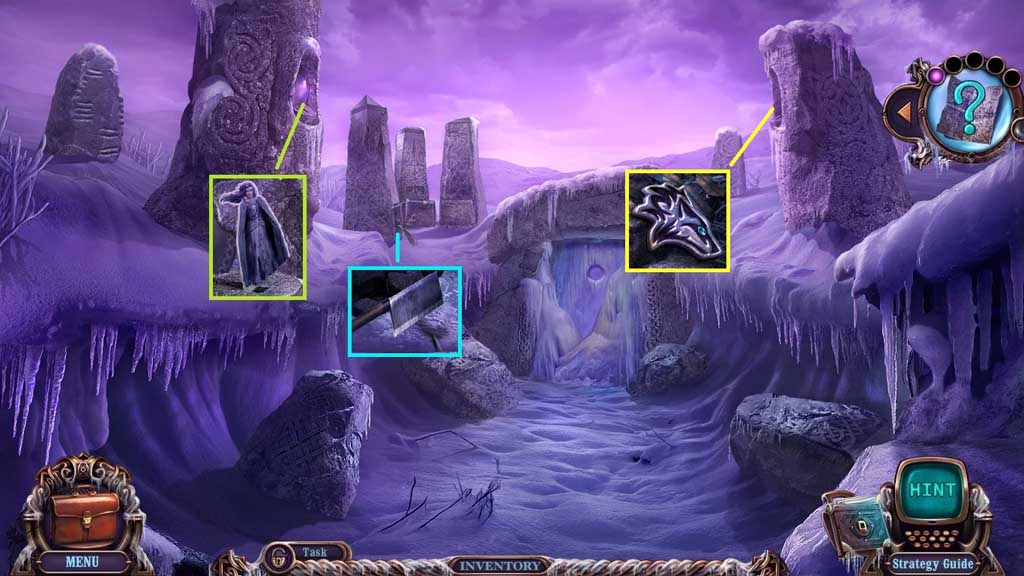
- Collect the 1st figurine.
- Select the hatchet to collect the leather band.
- Collect the head.
- Move to the area Outside the Pharmacy.
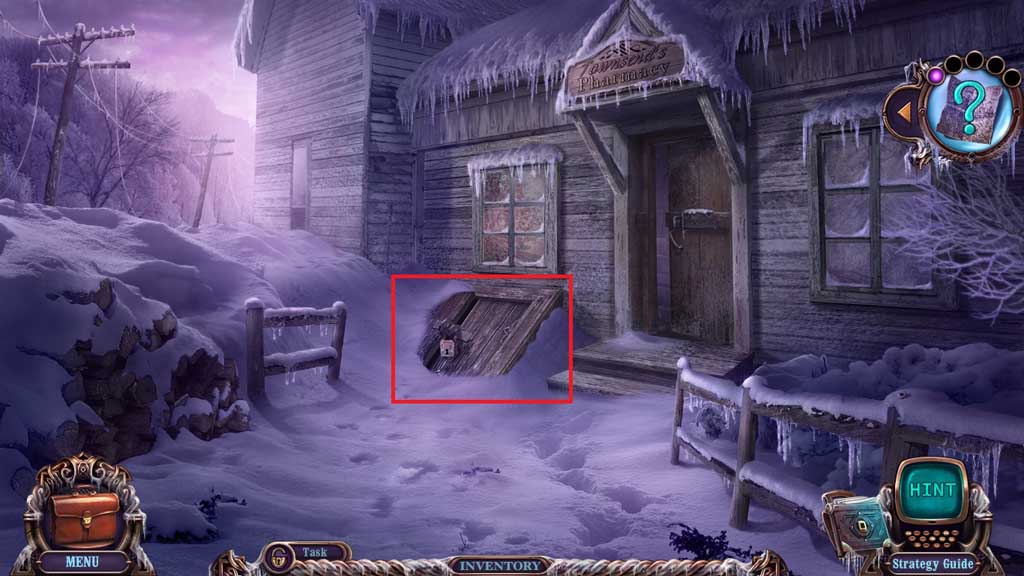
- Select the cellular key to collect the key lock.
- Click the hidden objects area.
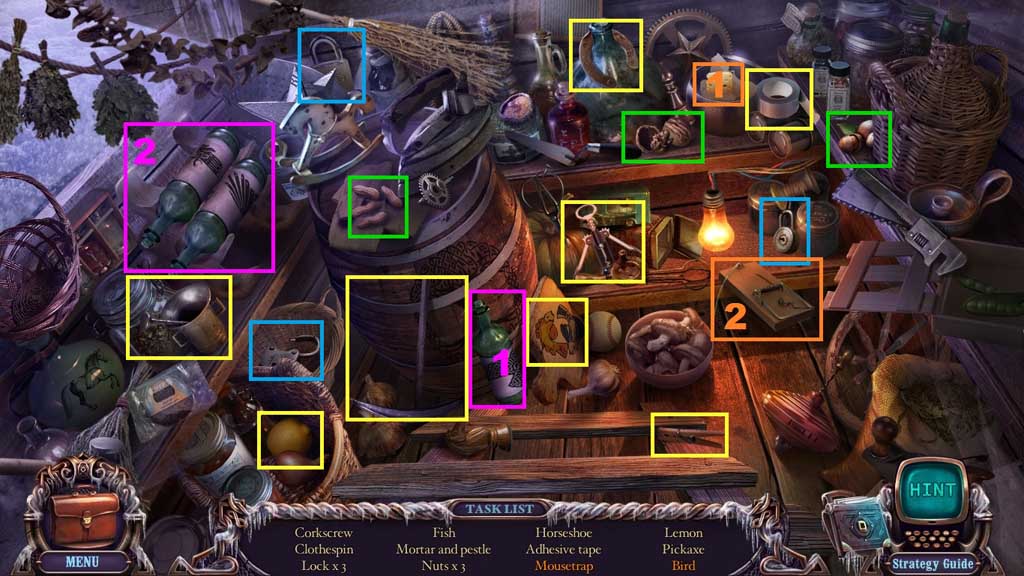
- Find the items.
- Select the cheese and place it into the trap; collect the mouse trap.
- Select the bottle and place it with the others then arrange them correctly to collect the bird.
- Collect the pick axe.
- Move to the Banshee Hall.
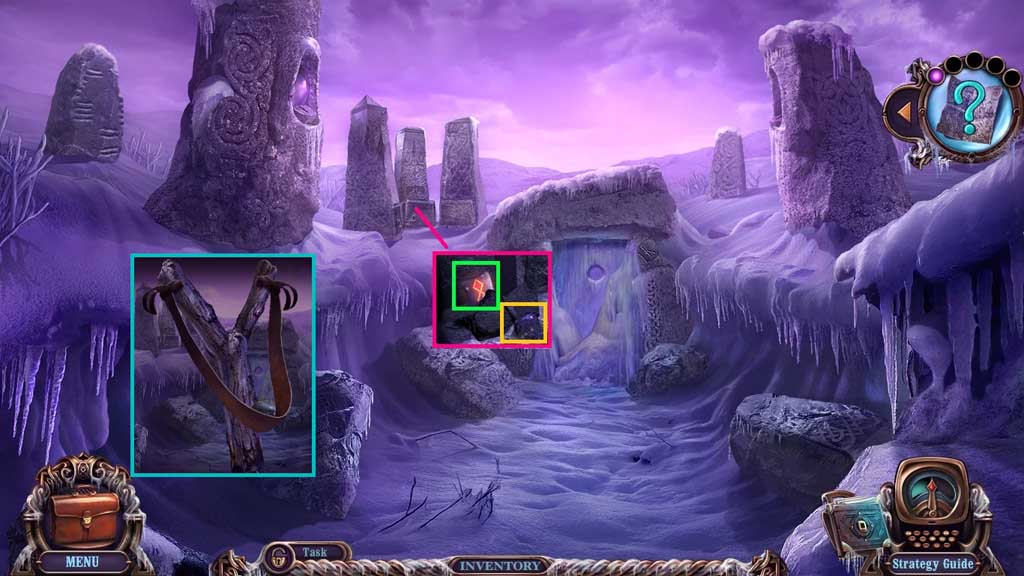
- Select the pick axe to reveal and collect the 1st fire rune and the stones.
- Attach the slingshot base, leather band and the stones; collect the slingshot.
- Move down once.
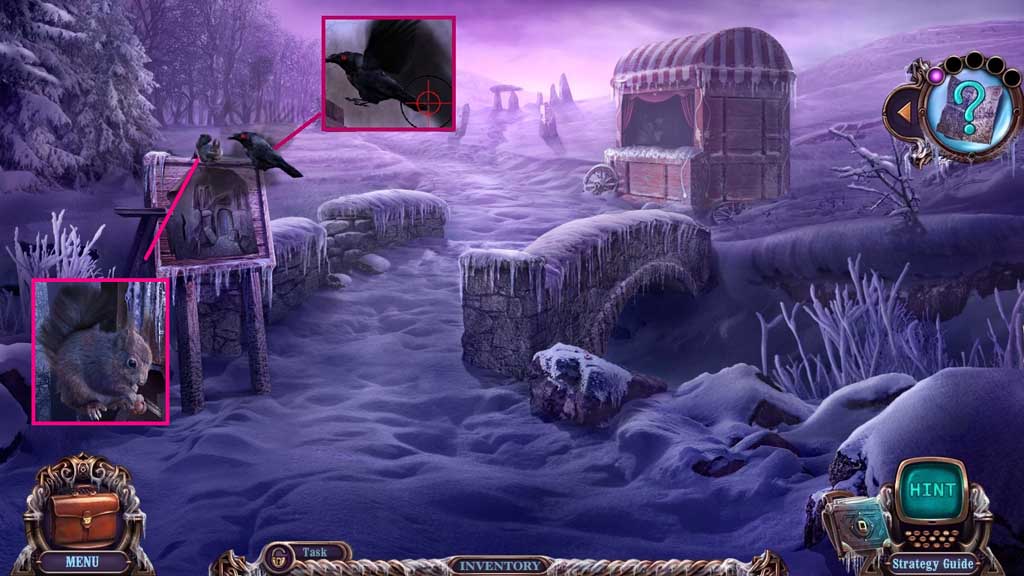
- Shoot the slingshot toward the crow 3x’s.
- Feed the squirrel the acorns; collect the squirrel.
- Move to the Square.
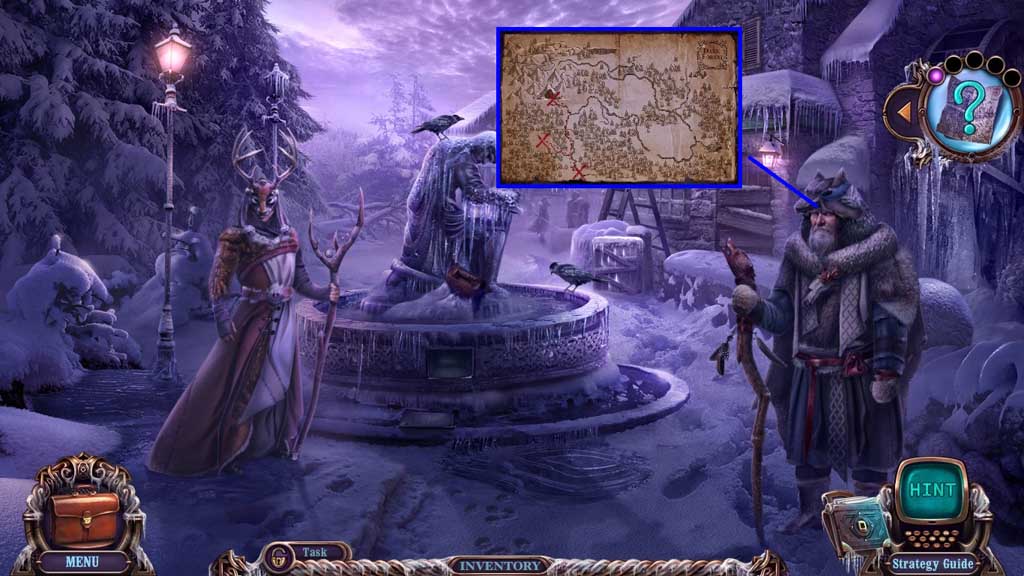
- Speak to Ulf.
- Click the map to collect Ulf’s information.
- Move ahead.
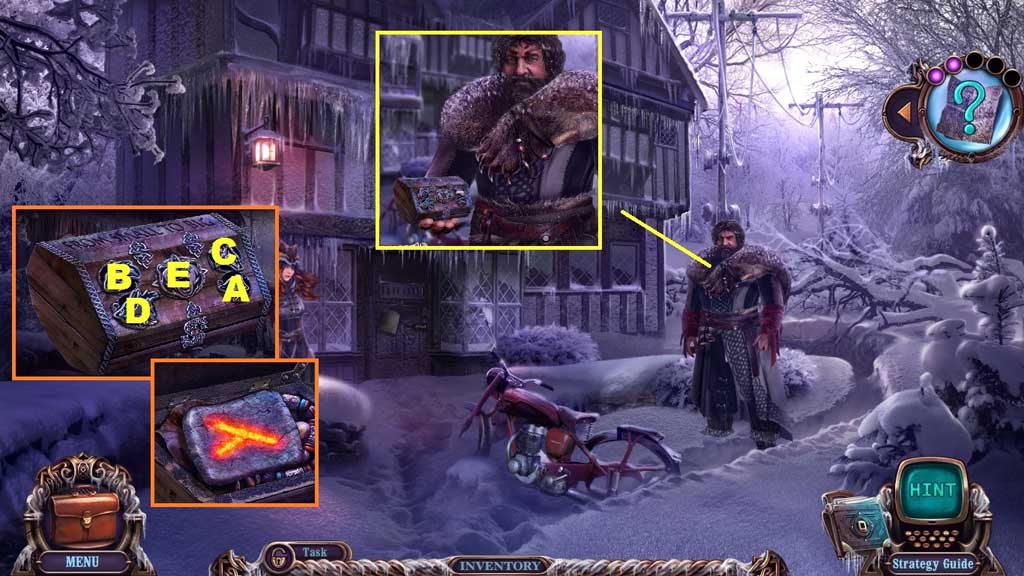
- Speak to Bjorn; receive Bjorn’s box and insert the head onto it.
- Click the heads in ABC order.
- Collect the 2nd fire rune.
- Move to Banshee Hall.
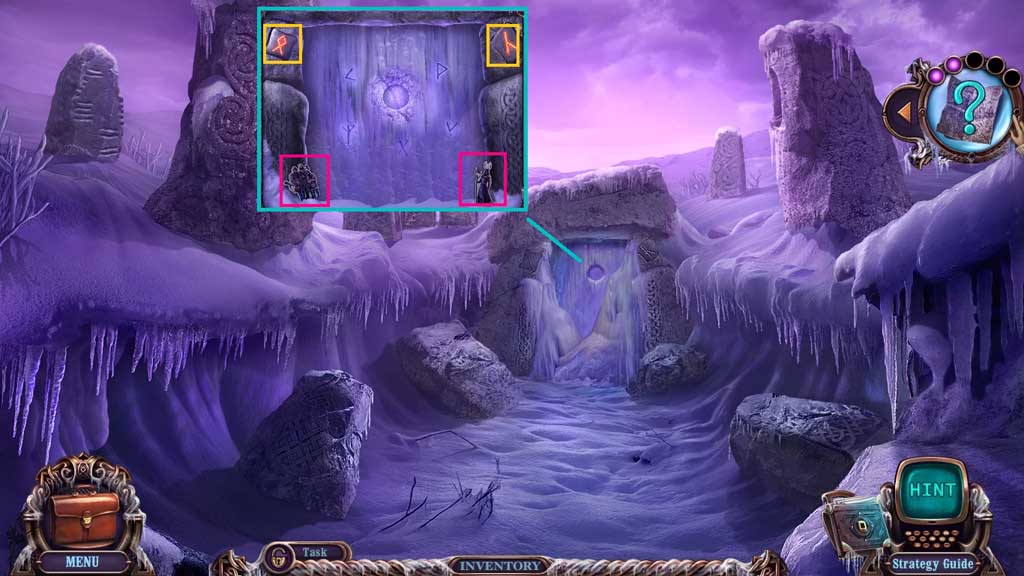
- Insert the 2 fire runes.
- Collect the 2nd and 3rd figurines.
- Move down once.
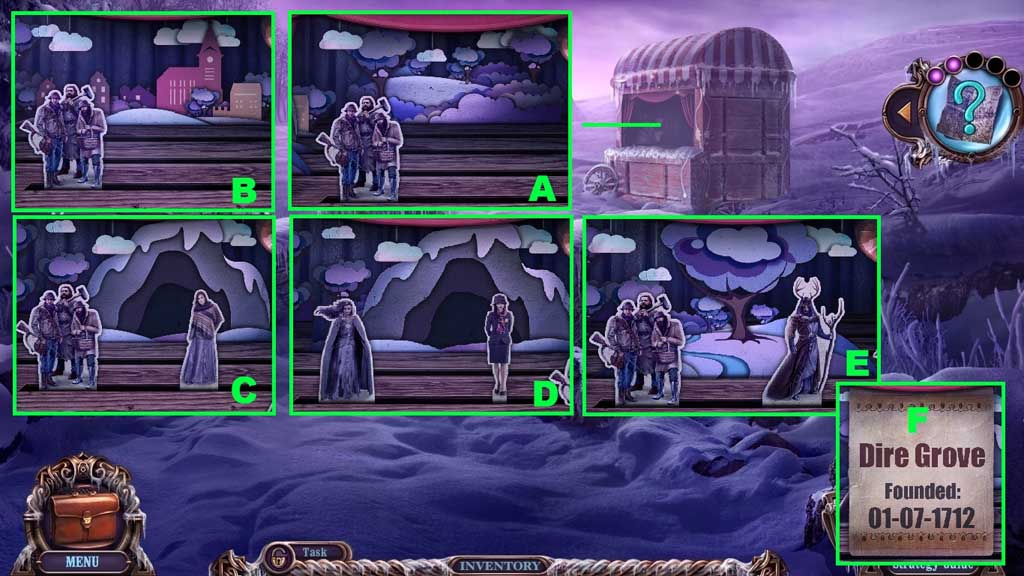
- Click the puppet stage and place the 3 figurines to trigger a mini game.
- Click the trees and citizens.
- Click the town and the citizens.
- Click the cave, the citizens and the young woman.
- Click the cave, the banshee and the detective.
- Select the Sacred Grove, the citizens and the Mistwalker.
- Click the cave, the Mistwalker and the Banshee.
- Collect the date founding.
- Move to the area Outside Museum.
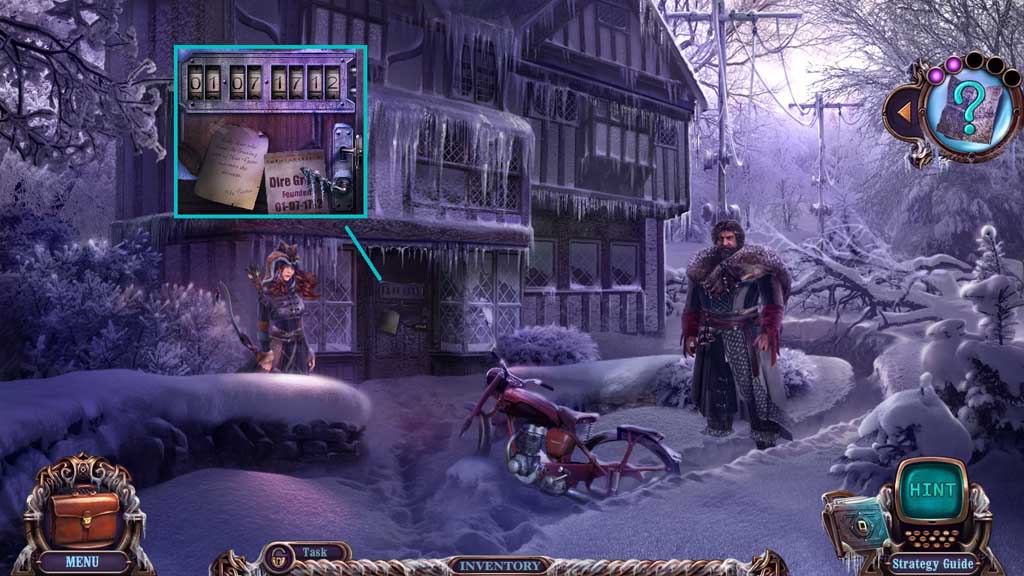
- Place the date of founding onto the door.
- Enter the date.
- Move ahead.
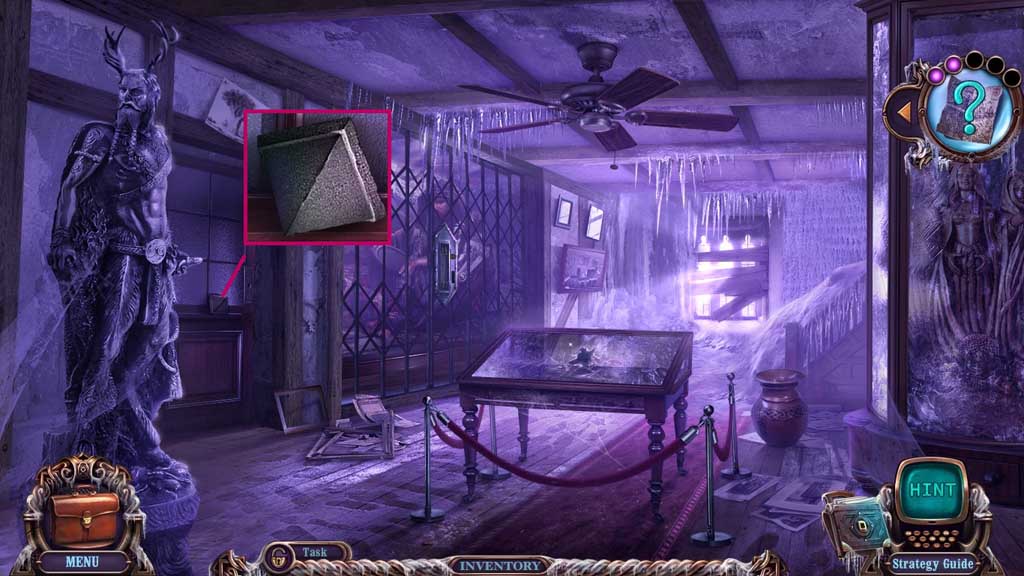
- Collect the obelisk top.
- Move to Banshee Hall.
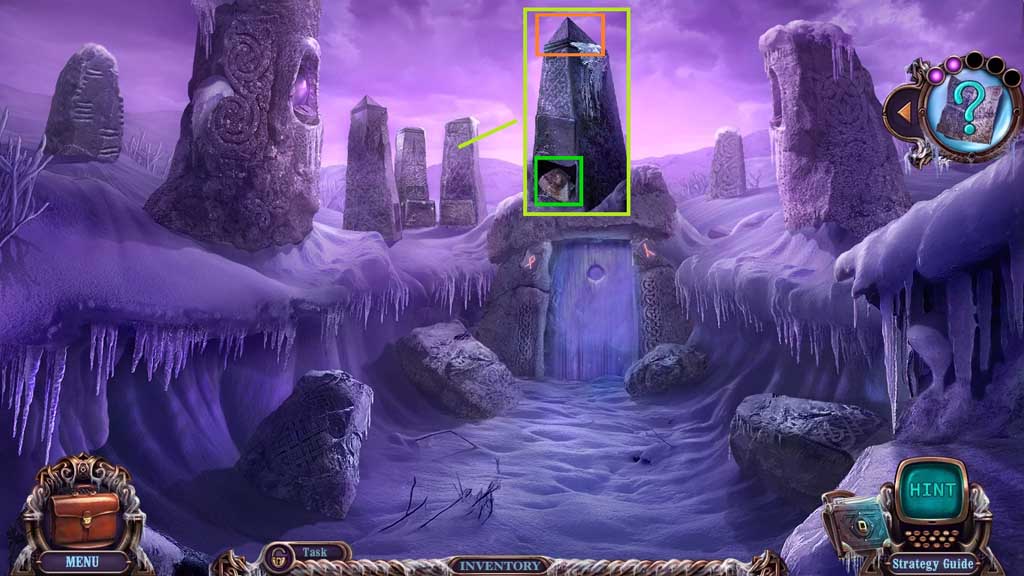
- Place the obelisk top; collect the glove.
- Move to the area Inside Museum.
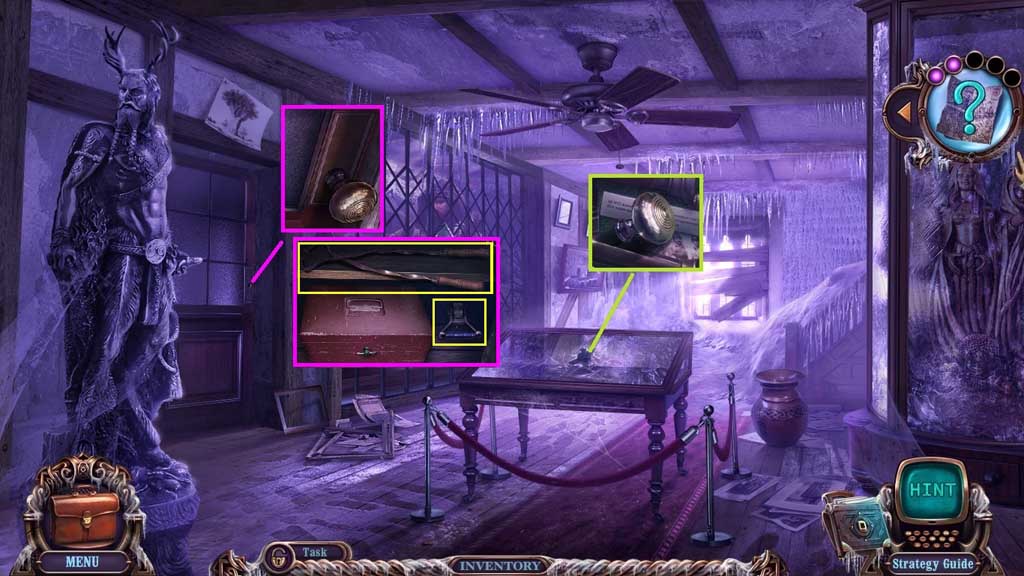
- Select the glove to remove the glass; collect the door knob and place it onto the door.
- Collect the tongs and the switch.
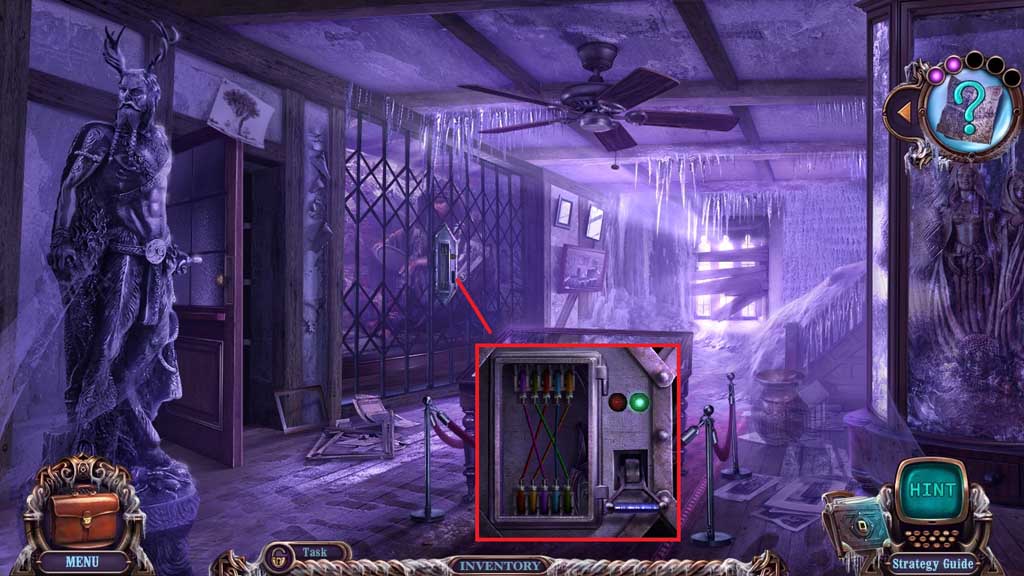
- Attach the switch.
- Adjust the wires correctly.
- Click the switch to trigger a hidden objects area.
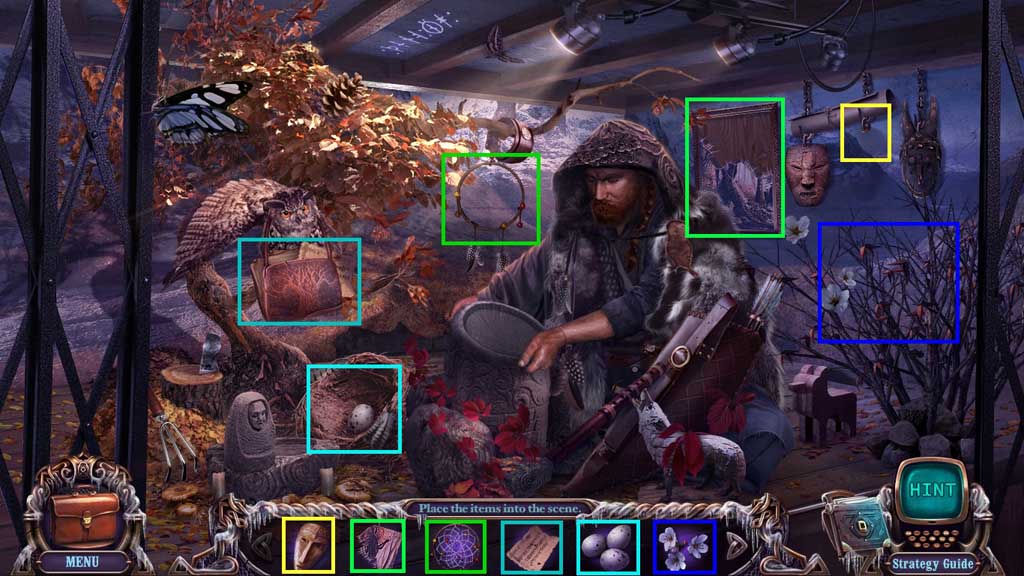
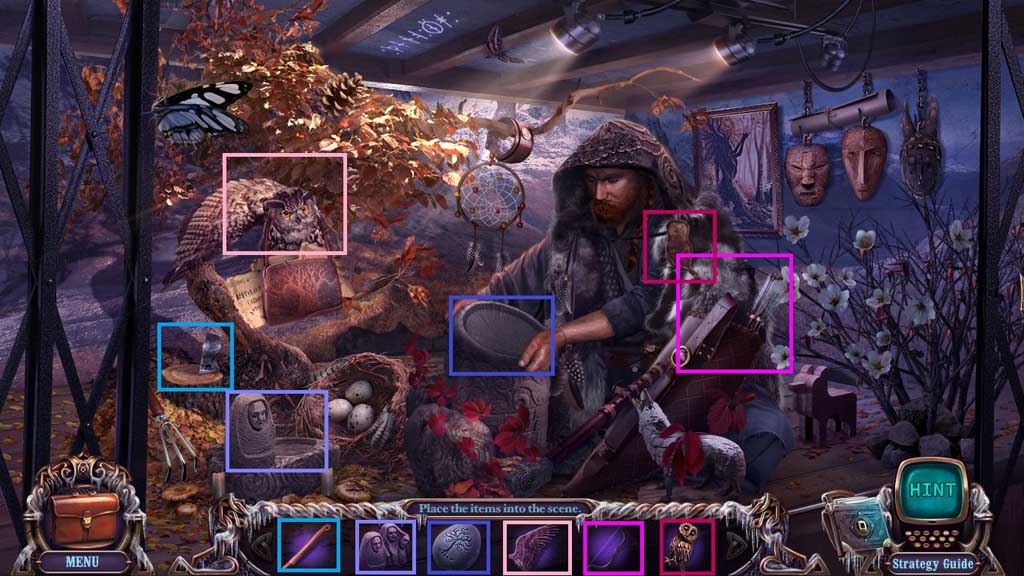
- Place the items correctly.
- Collect the bear totem.
- Move down once.
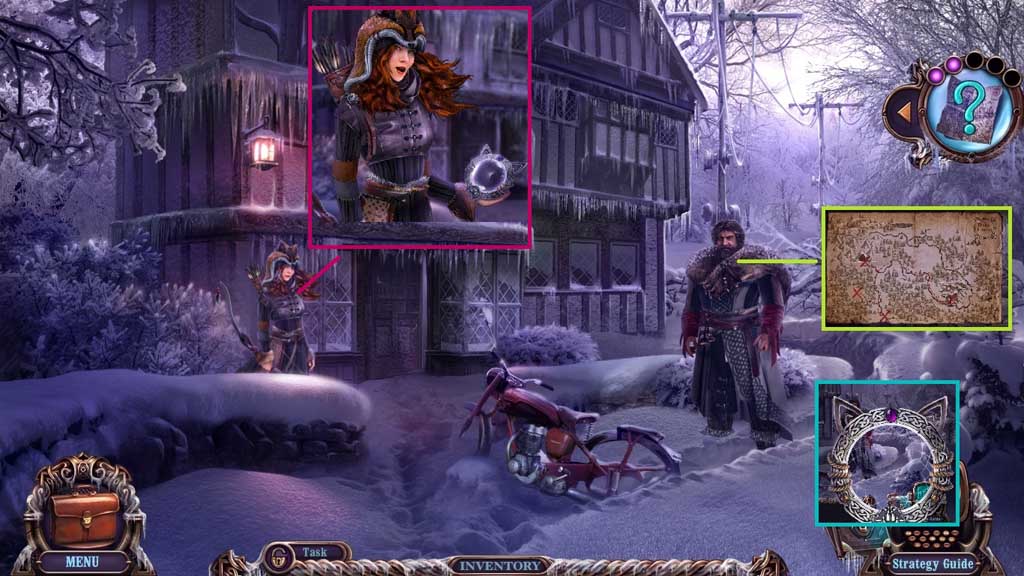
- Speak to Bjorn.
- Click the map to collect Bjorn’s information.
- Speak to Camryn; receive 0 /7 memory holders and memory lenses.
- Select the memory lens to collect 1 /7 memory holders.
- Move ahead.
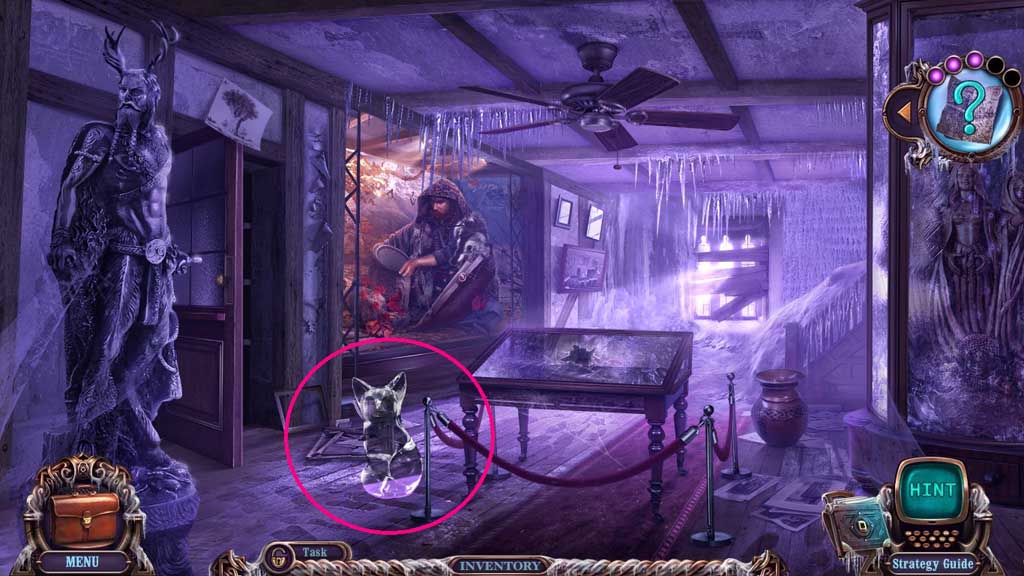
- Select the memory lens to collect 2 /7 memory holders.
- Move to Derek’s House.
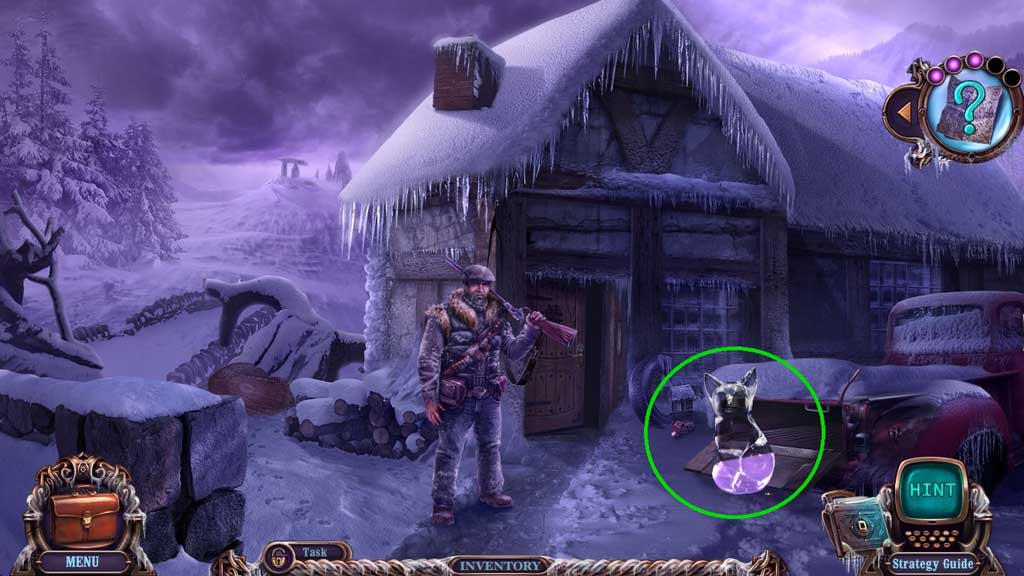
- Select the memory lens to collect 3 /7 memory holders.
- Move to the area Inside House.
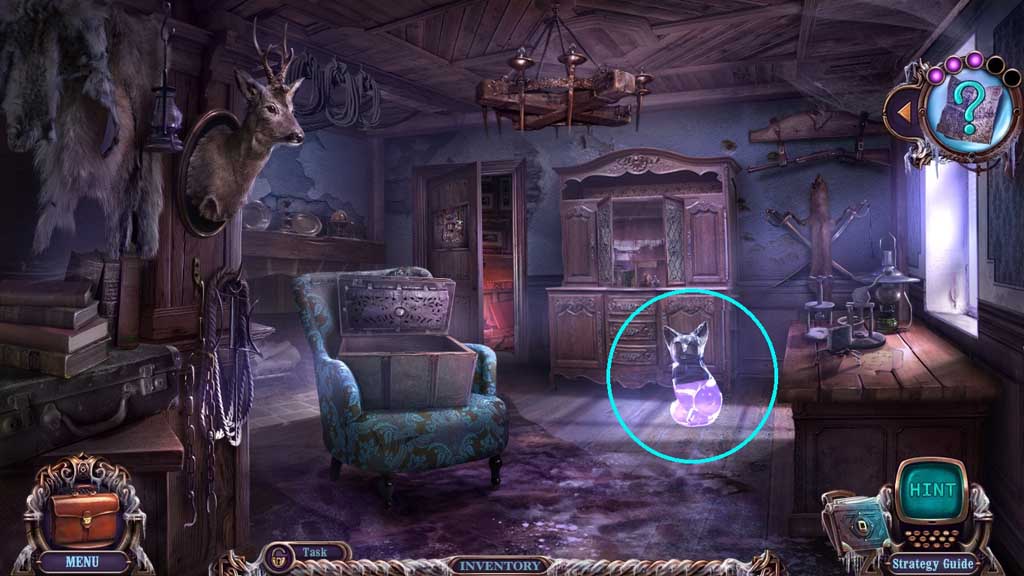
- Select the memory lens to collect 4 /7 memory holders.
- Move to the Shop.
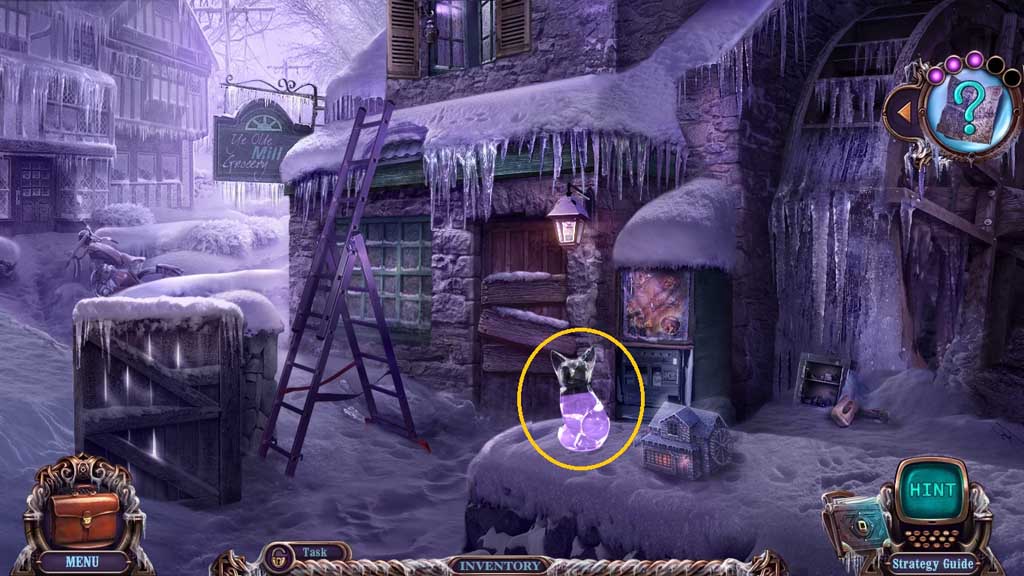
- Select the memory lens to collect 5 /7 memory holders.
- Move to Banshee Road.
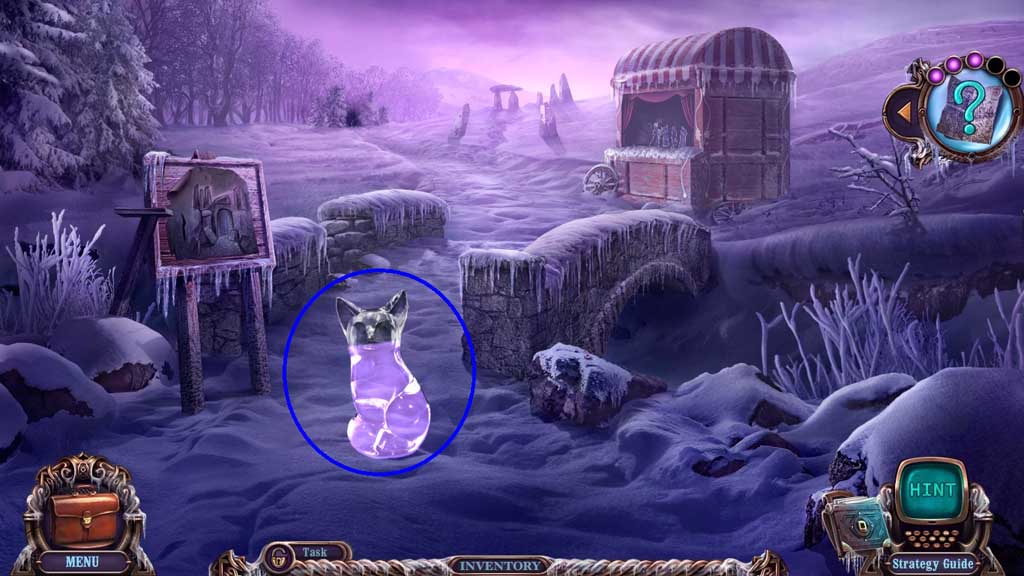
- Select the memory lens to collect 6 /7 memory holders.
- Move ahead.
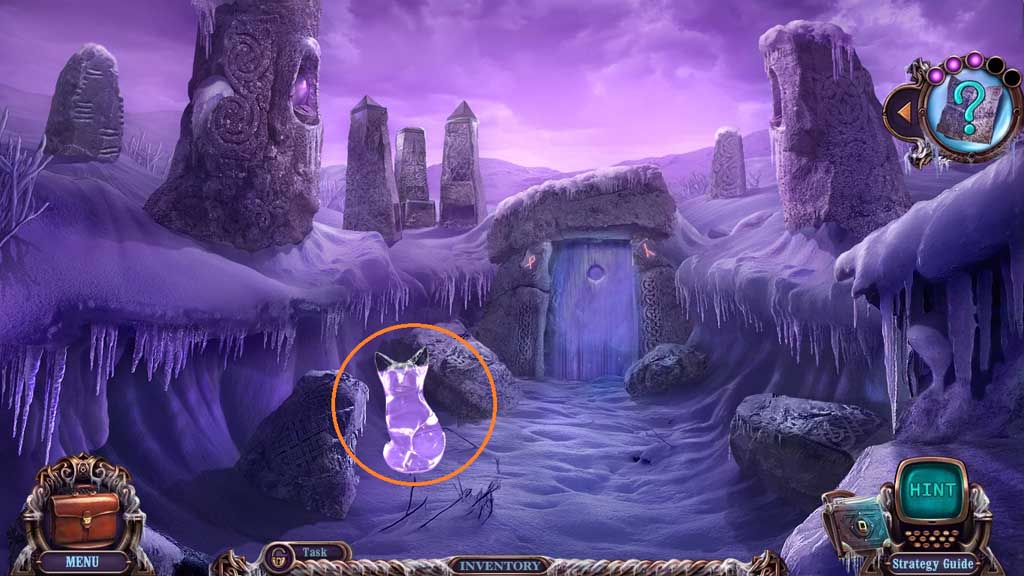
- Select the memory lens to collect 7 /7 memory holders.
- Move to the area Outside Museum.
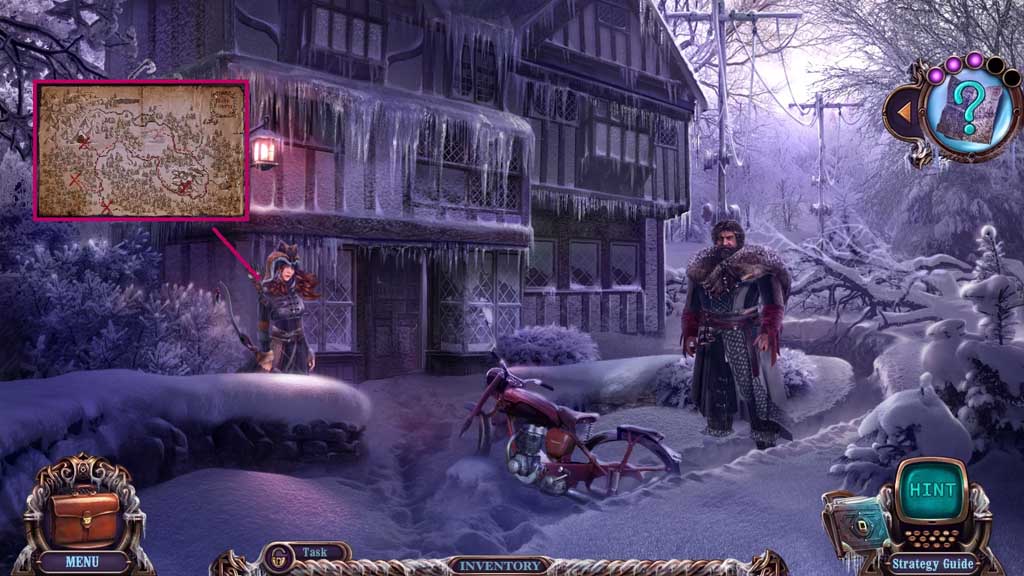
- Speak to Camryn.
- Click the map to collect Camryn’s information.
- Move down once.
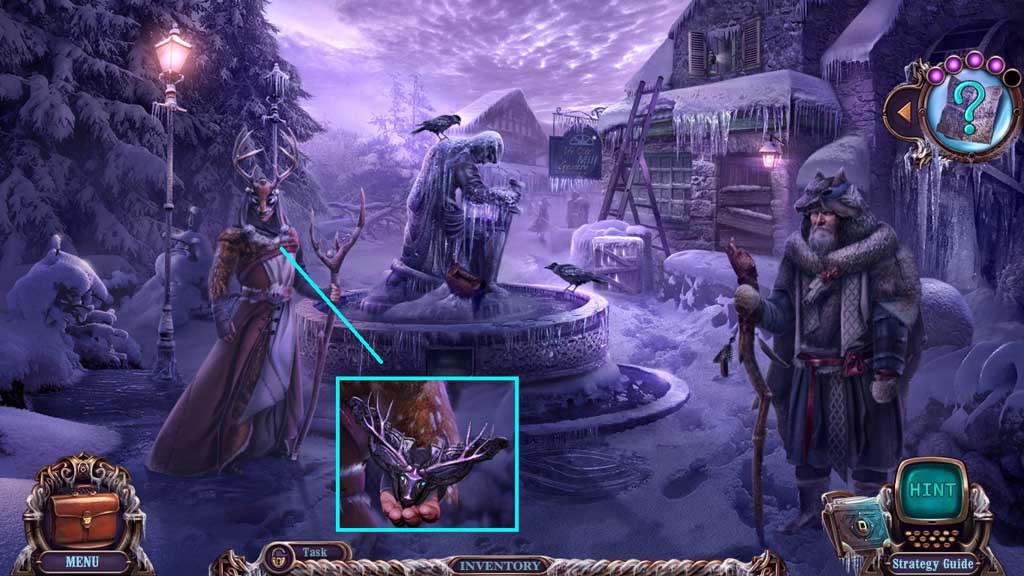
- Speak to the masked druid; receive the thicket amulet.
- Move to Banshee Road.
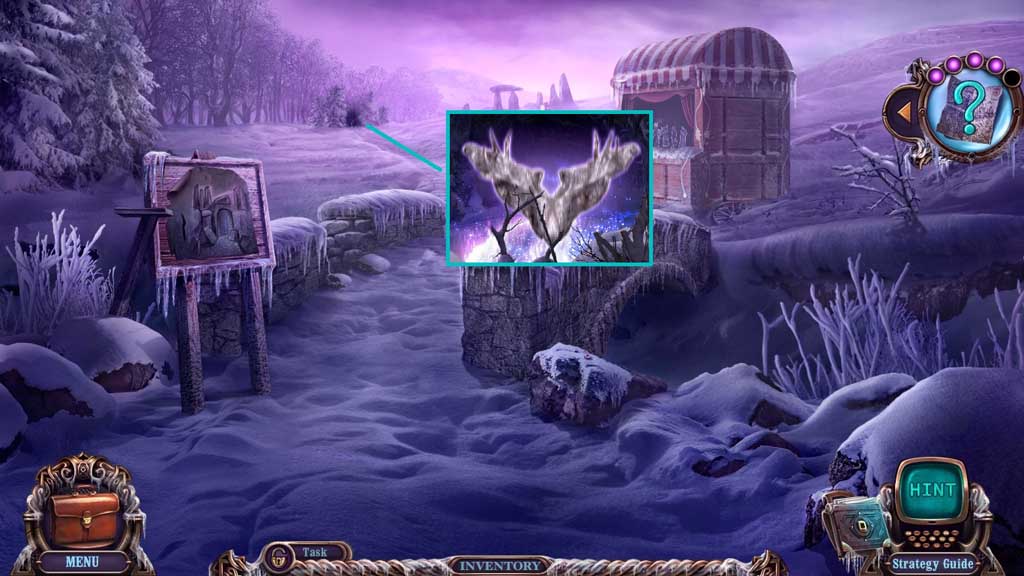
- Select the thicket amulet to use on the scene.
- Move to the Grove.
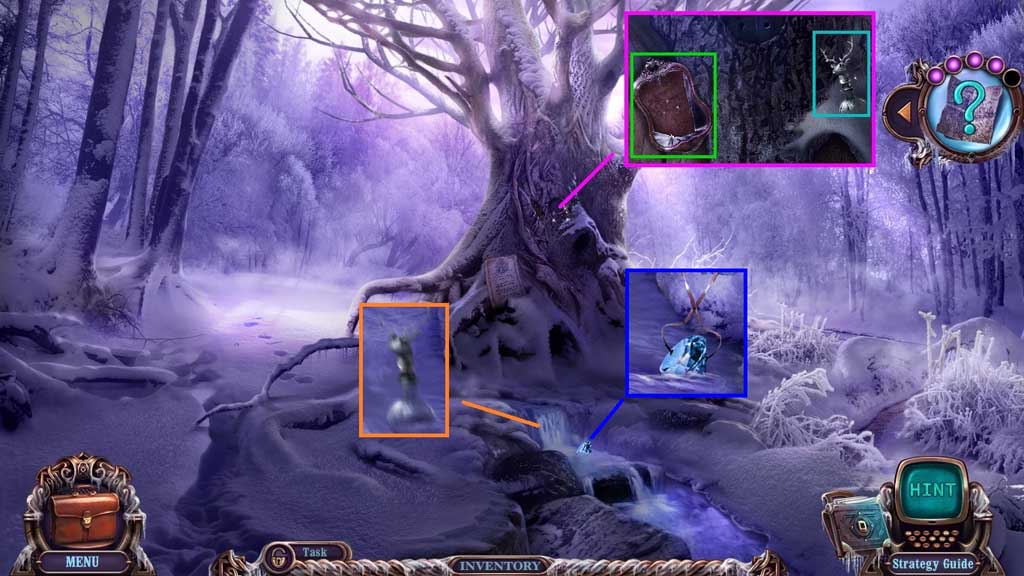
- Collect the broken window and the empty vial.
- Repair the broken window to create the mirror.
- Select the tongs to collect the diamond.
- Select the empty vial and place it into icy water to create the ice vial.
- Move to the area Inside Museum.
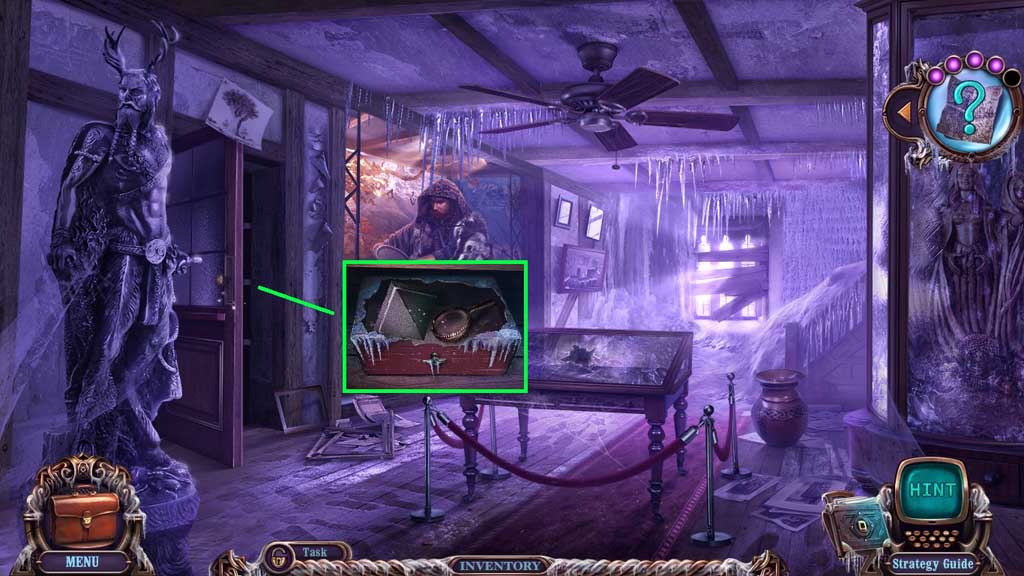
- Select the ice vial to pour onto the lock box; click the ice 4x’s.
- Collect the magnifier and the obelisk top.
- Move to the Banshee Hall.
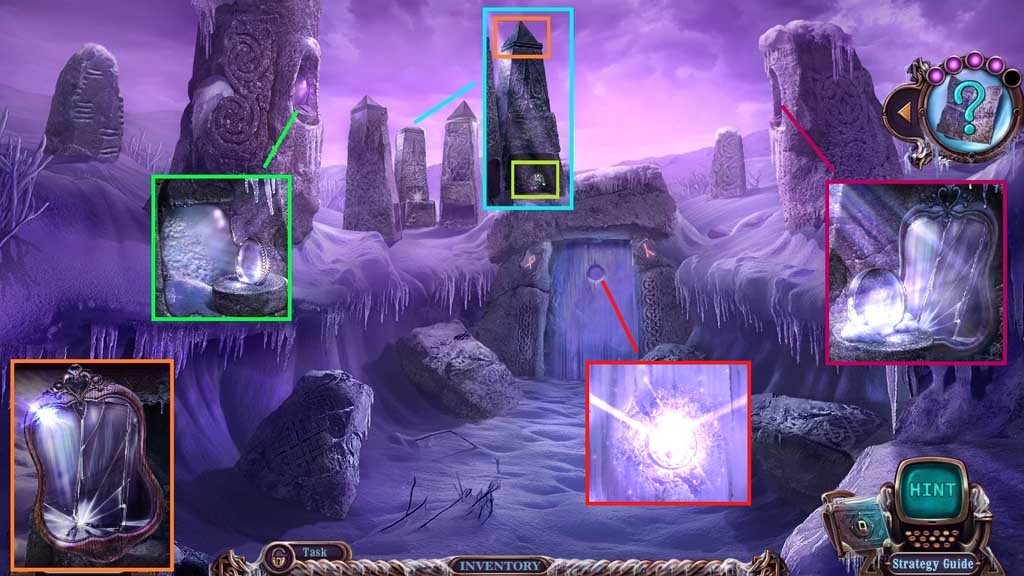
- Attach the obelisk top; collect the summoning disk.
- Place the magnifier; click it once.
- Click and reassemble the mirror; place the mirror and click it and the lens once.
- Place the diamond.
- Click the hidden objects area.
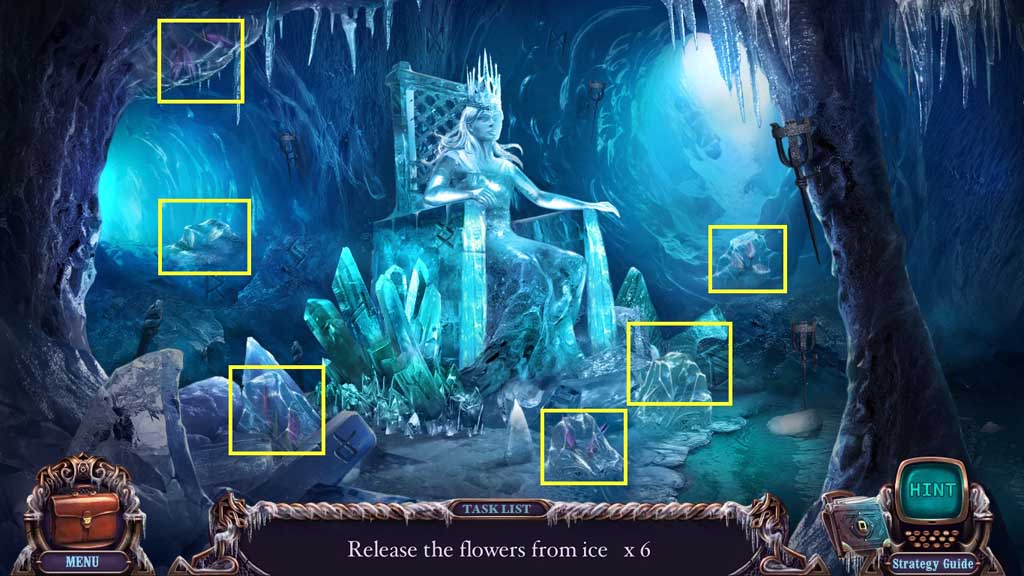
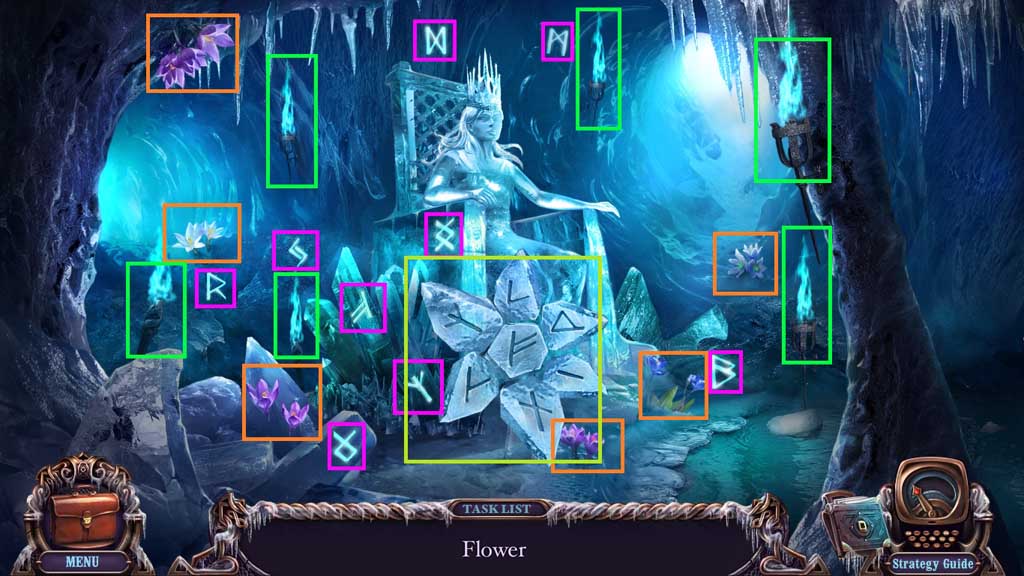
- Find the items.
- Collect the banshee’s flower.
- Move to the Grove.
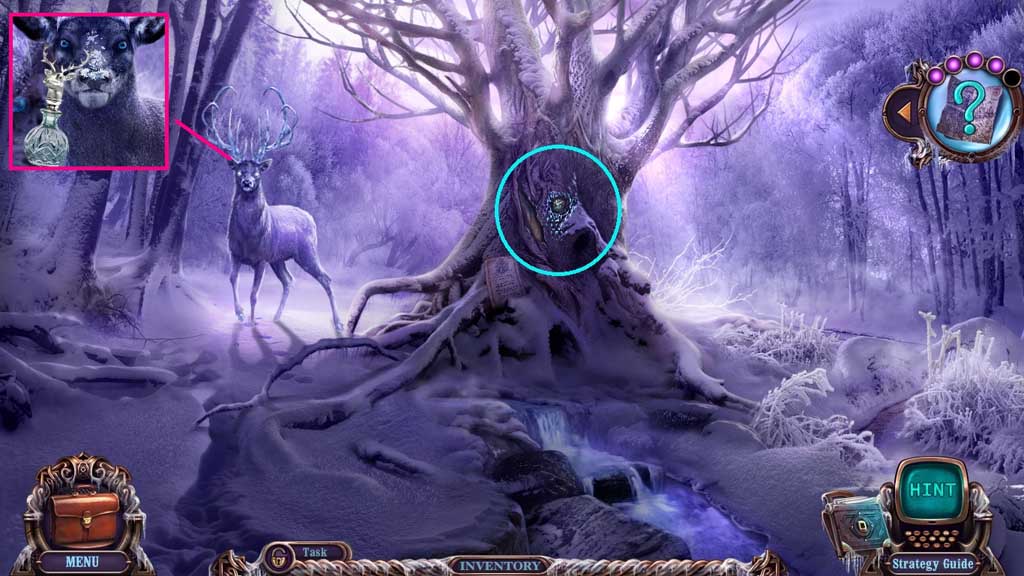
- Insert the summoning disk.
- Speak to the ancient spirit; receive the tear vial.
- Move to the Square.
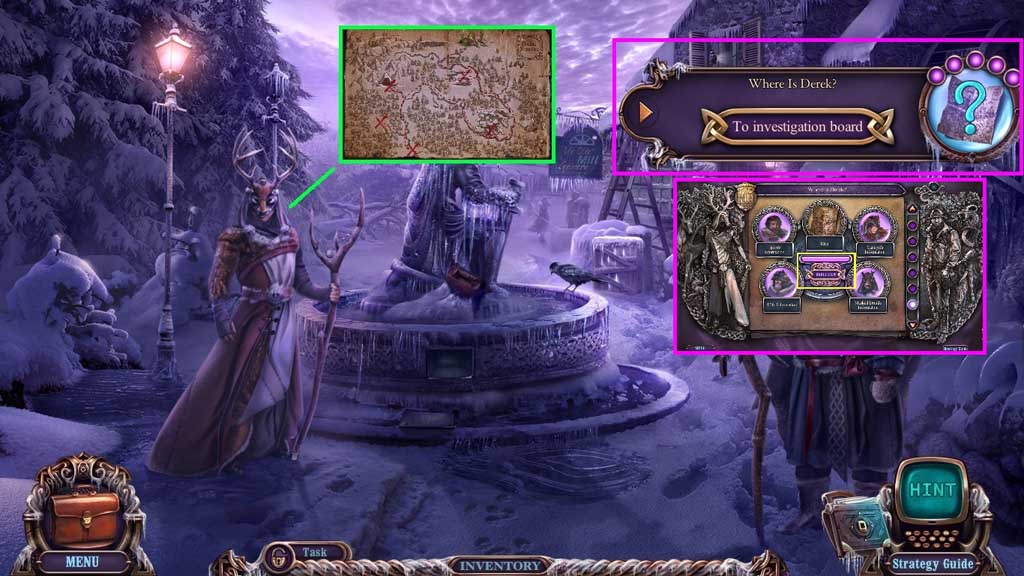
- Speak to the masked druid.
- Click the map to receive the masked druid’s information.
- Click the investigation board.
- Click Deduction.
- Move to the Hideout.
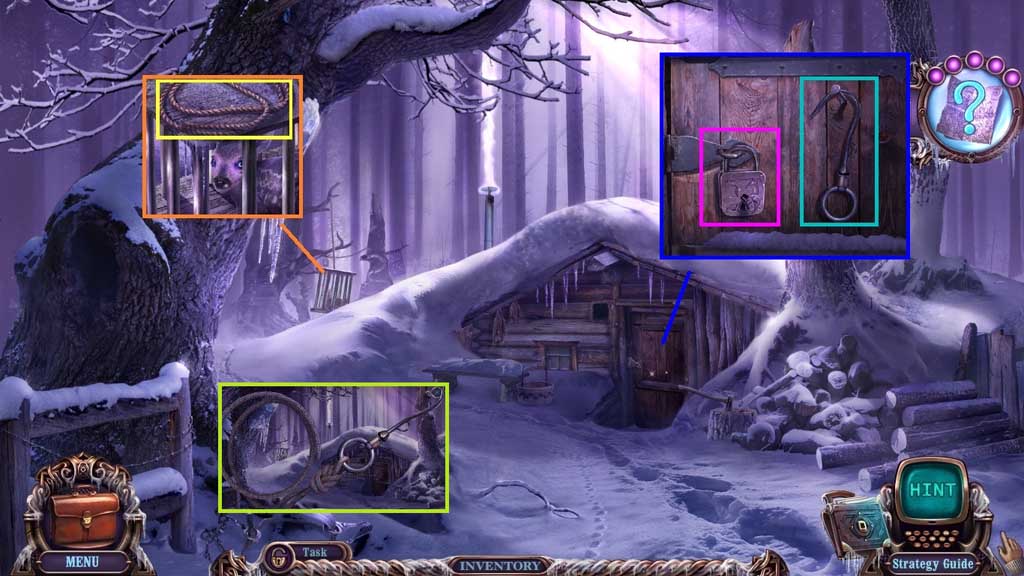
- Collect the rope.
- Click the door and use the key lock to lock it.
- Collect the hook and attach the rope to create the rope key.
- Move to Banshee Road.
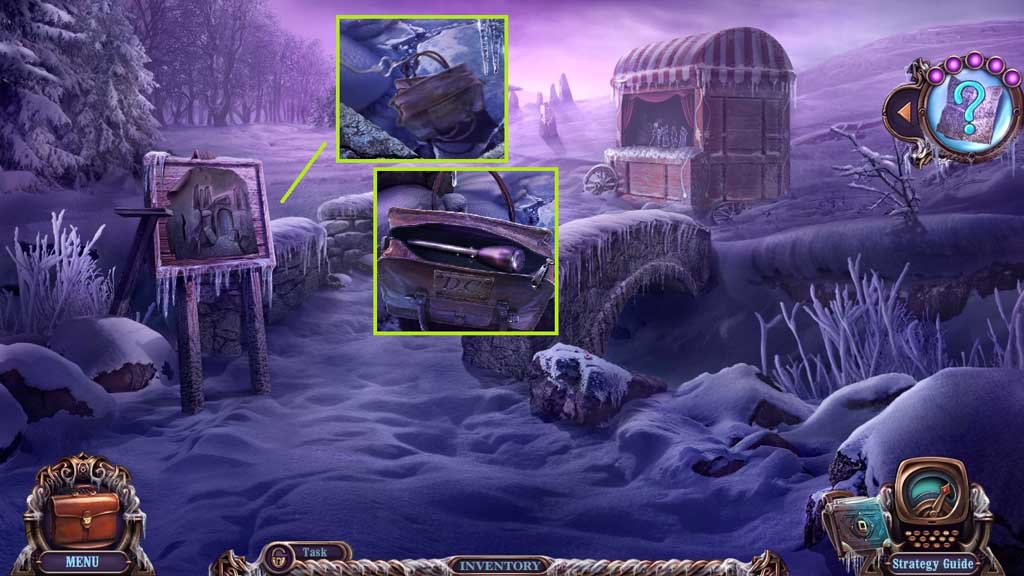
- Select the rope key to retrieve the bag.
- Click the bag; collect the carved lever.
- Move to the Hideout.
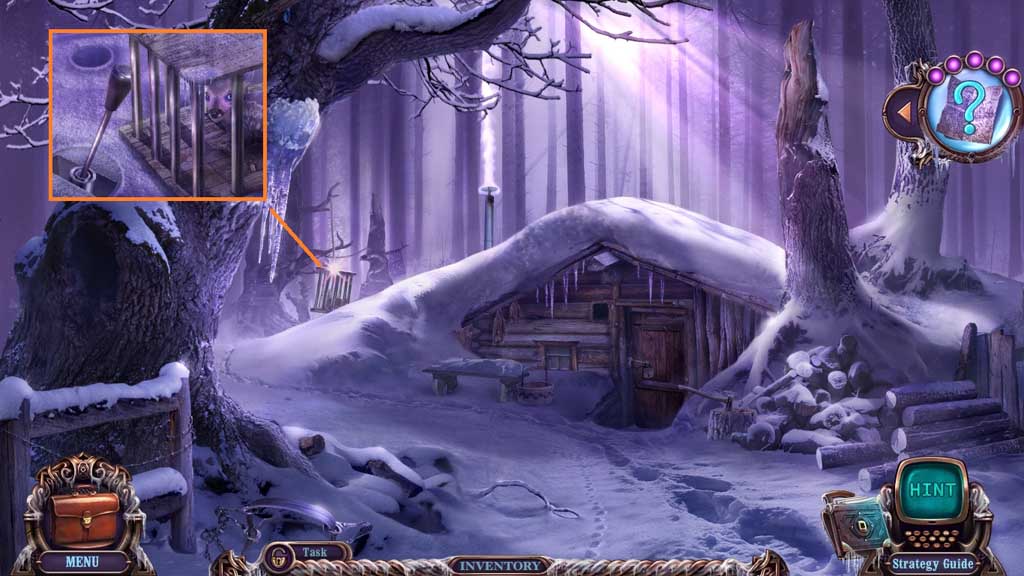
- Attach the carved lever and click the cage to trigger a mini game.
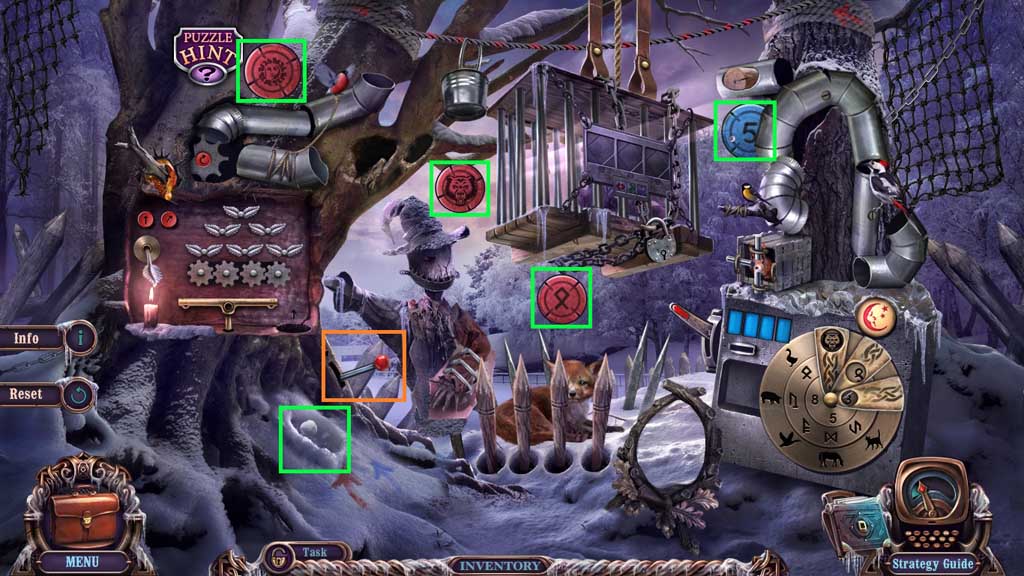
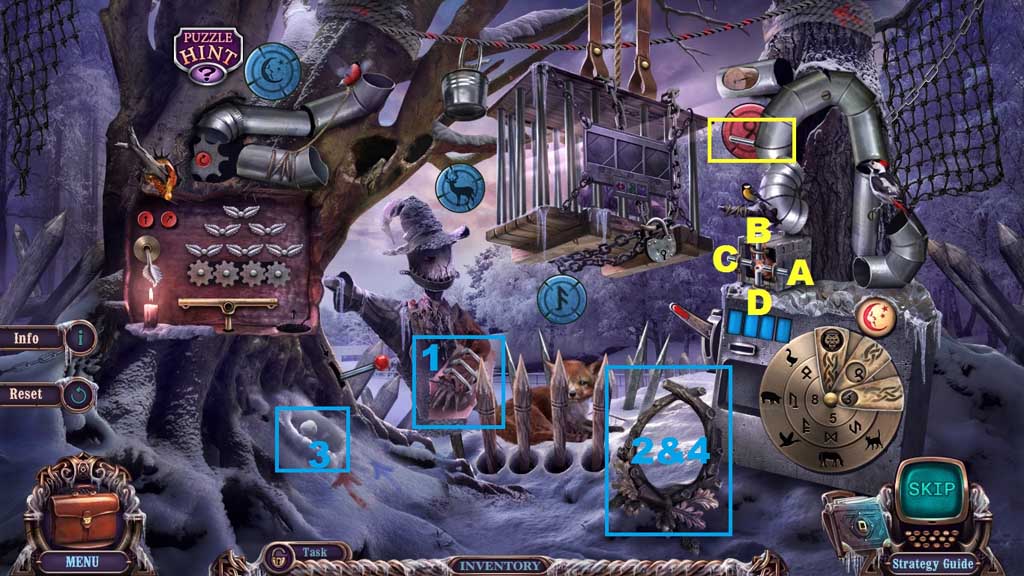
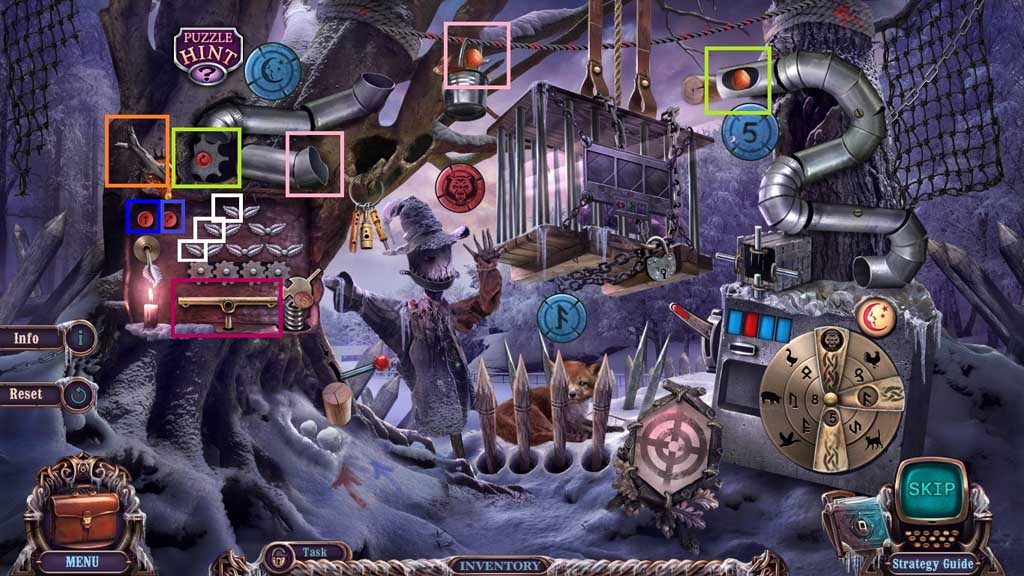
- Click the lever (orange).
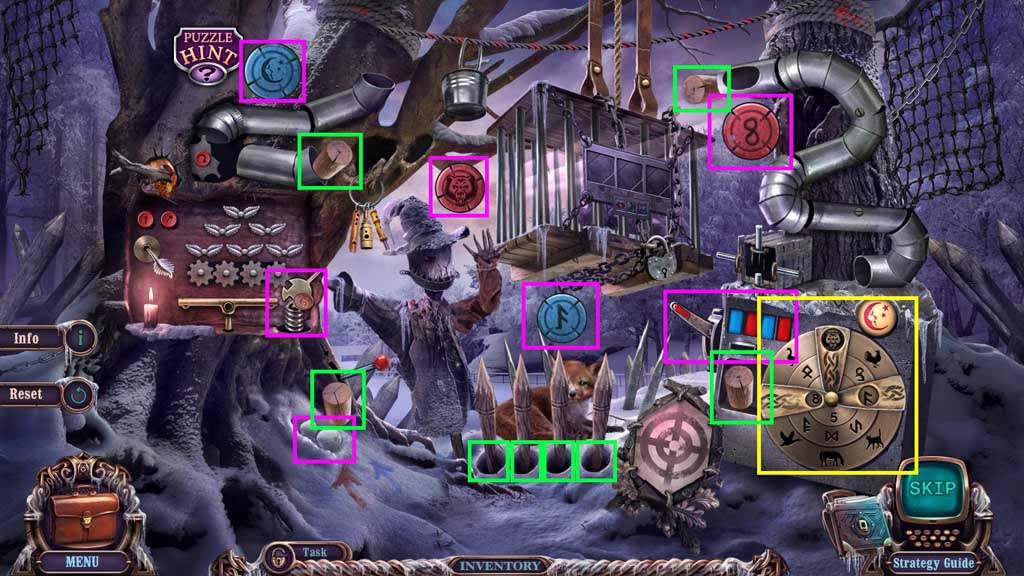
- Make snowballs by clicking the snow multiple times and toss it towards the targets (green).
- Move the rod to the squirrel cage; click the rods in ABC order (yellow).
- Click the 3 clamps; move the target to the frame and toss a snowball toward the target (blue).
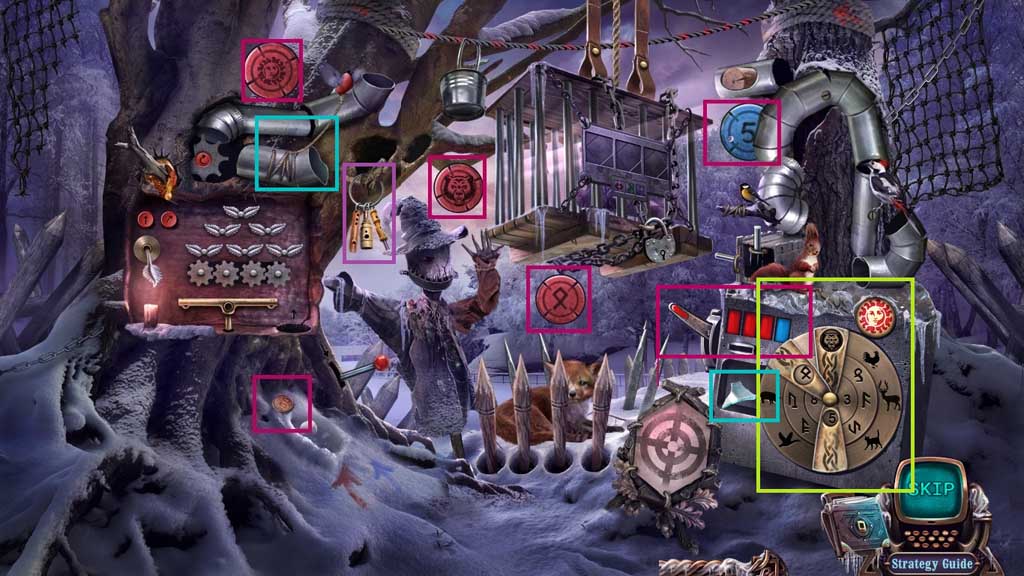
- Insert the coin into the slot and click the lever (magenta).
- Use the snowballs to adjust the colored targets to match the bars on the machine (magenta).
- Click the arms on the disc as shown; click the button (green-yellow).
- Select the shard to slice the rope (blue-green).
- Click the 3 whistles (lavender).
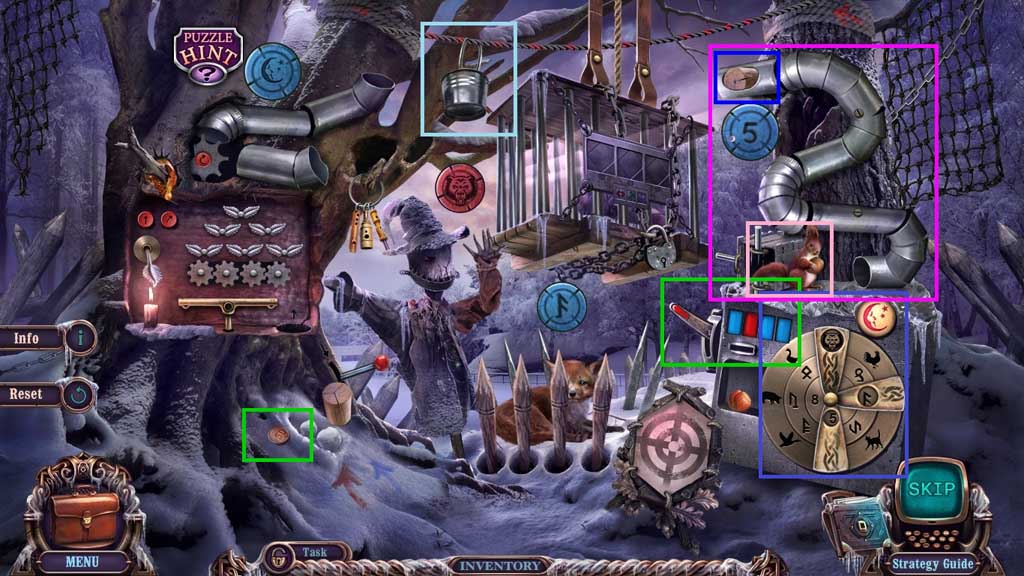
- Insert the coin into the slot and click the lever (green).
- Toss the snowballs to adjust the colored targets to match the bars on the machine (green).
- Click the arms on the disc as shown; click the button (purple).
- Adjust the pipes as shown (hot pink).
- Give the squirrel the acorn (pink).
- Insert the acorn into the top of the far right pipes (blue).
- Click the bucket all the way to the right and insert the acorn; click the bucket all the way to the left (light blue).
- Select the acorn from the far right set of pipes and place it into the cog area; click the cog 2x’s (green-yellow).
- Place the acorn from the bucket into the end of the left set of pipes; click the cog (pink).
- Click the left arrow 3x’s (blue).
- Click the branch 4x’s (orange).
- Click the left arrow (blue) 2x’s the right arrow (purple) once and the left 2x’s.
- Click the left leaves to guide the drop to the bar (white).
- Click the left and right sides of the bar to make the drop disappear (magenta).
- Insert the coin into the slot and click the lever (hot pink).
- Toss the snowballs to adjust the colored targets to match the bars on the machine (hot pink).
- Click the arms on the disc as shown (yellow).
- Place the 4 corks onto the spikes (green).
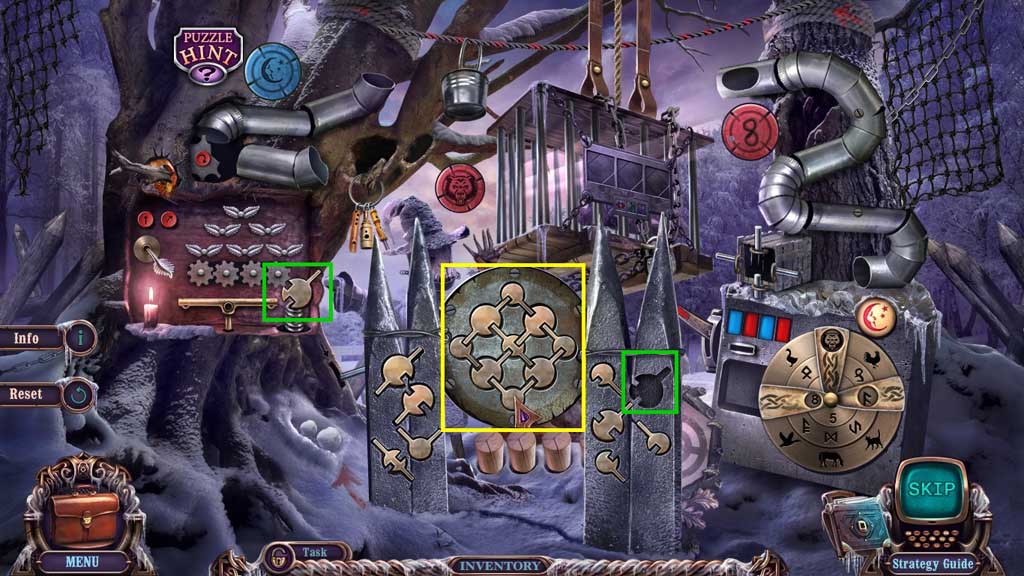
- Move the button to the machine (green).
- Arrange the buttons to the panel correctly (yellow).
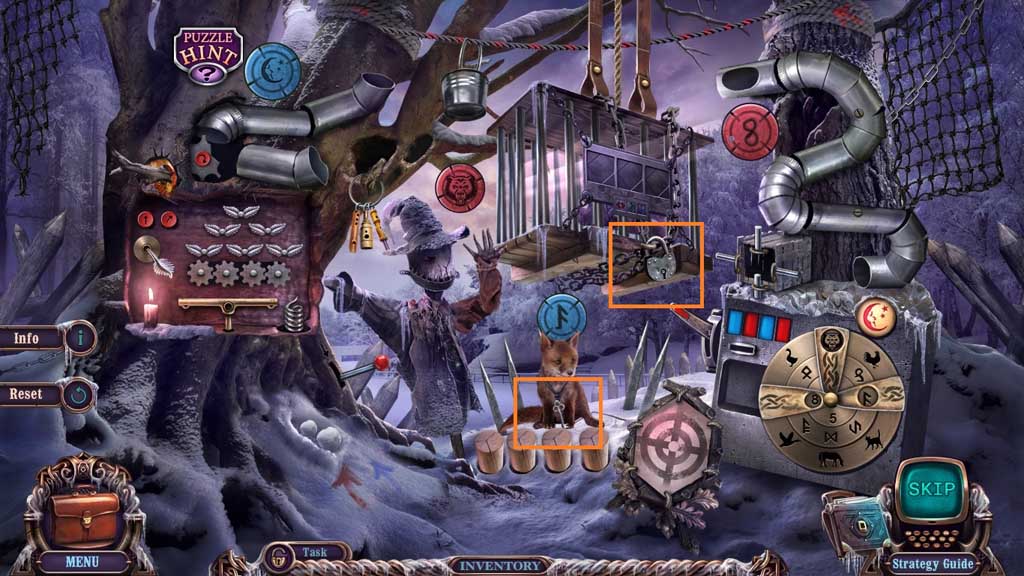
- Insert the key into the lock (orange).
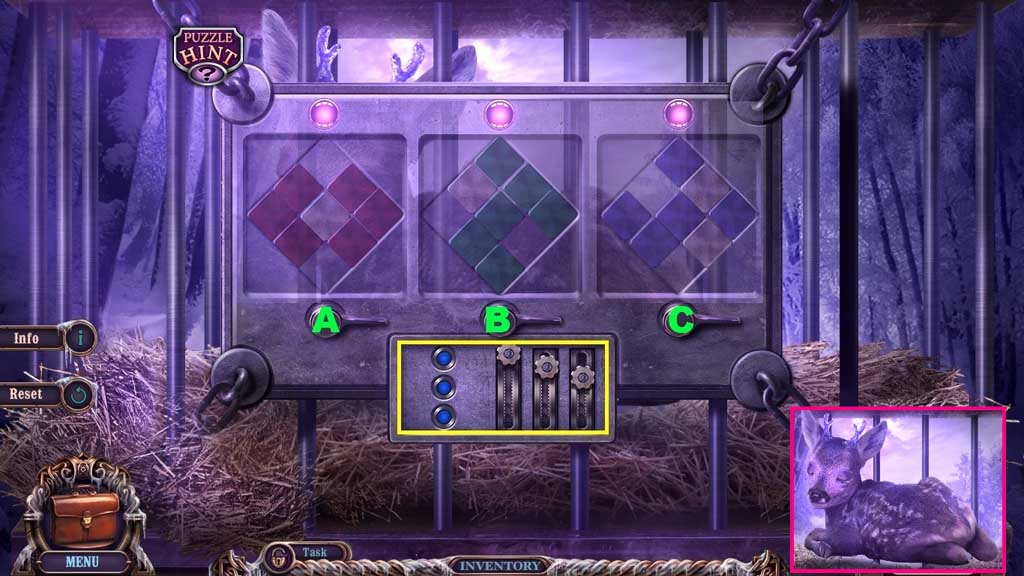
- Slide the knobs (yellow) as follows: bottom – top - middle.
- Click the knobs in the following sequence: A – B x 3 – C x 3 then click the tiles to produce the color patterns.
- Congratulations! You have successfully completed the main game of Mystery Case Files: Dire Grove, Sacred Grove C.E.
Comments will load when you reach this part of the walkthrough.