

Chapter Three: Around the Shipping Dock
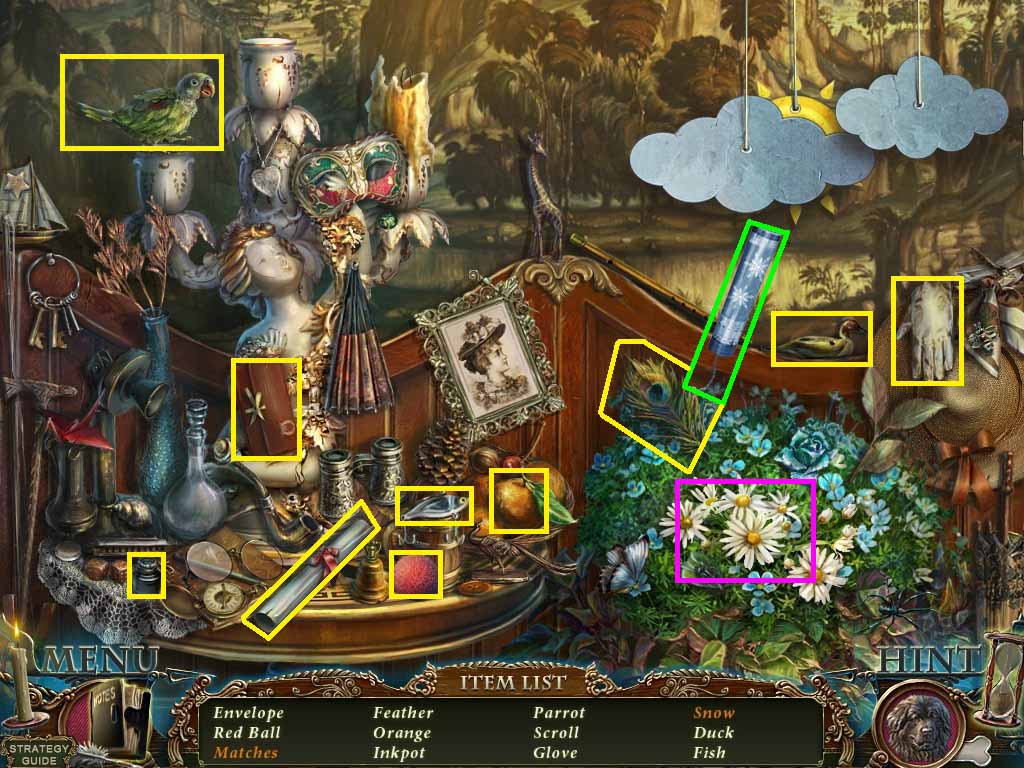
- Find the listed items.
- Collect the matches by moving the flowers.
- Click the popper to create the snow.
- Collect the matches.
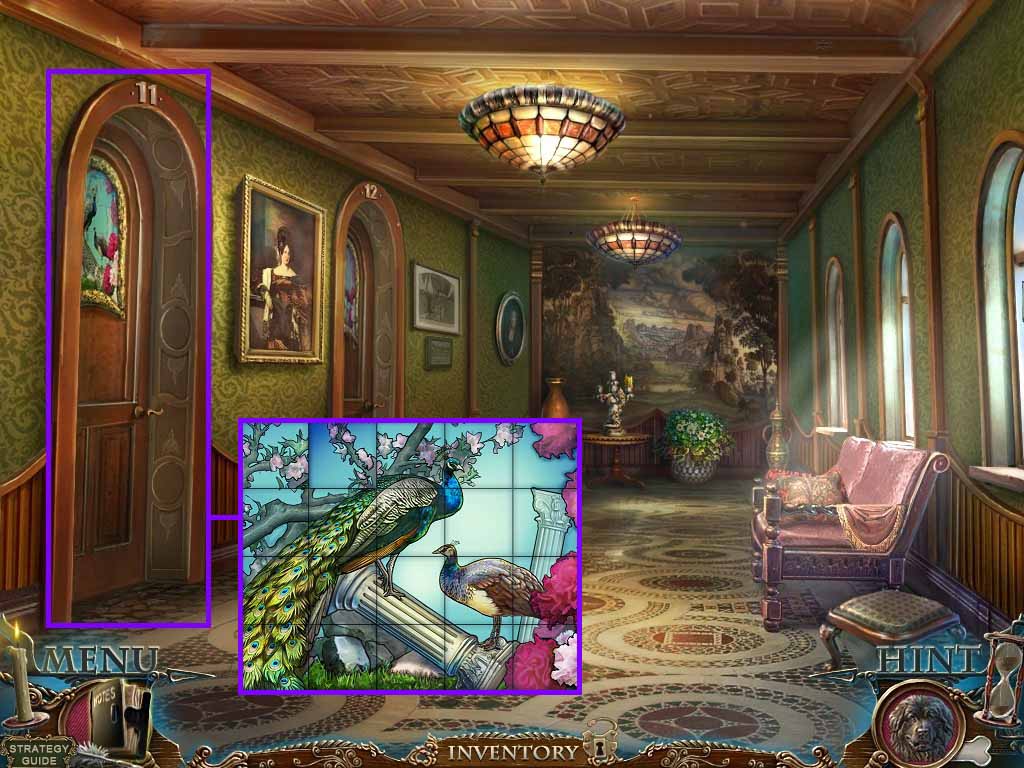
- Zoom into the door; insert the piece of stained glass to trigger a puzzle.
- Click and drag the pieces into the correct arrangement.
- Move left and into room 11.
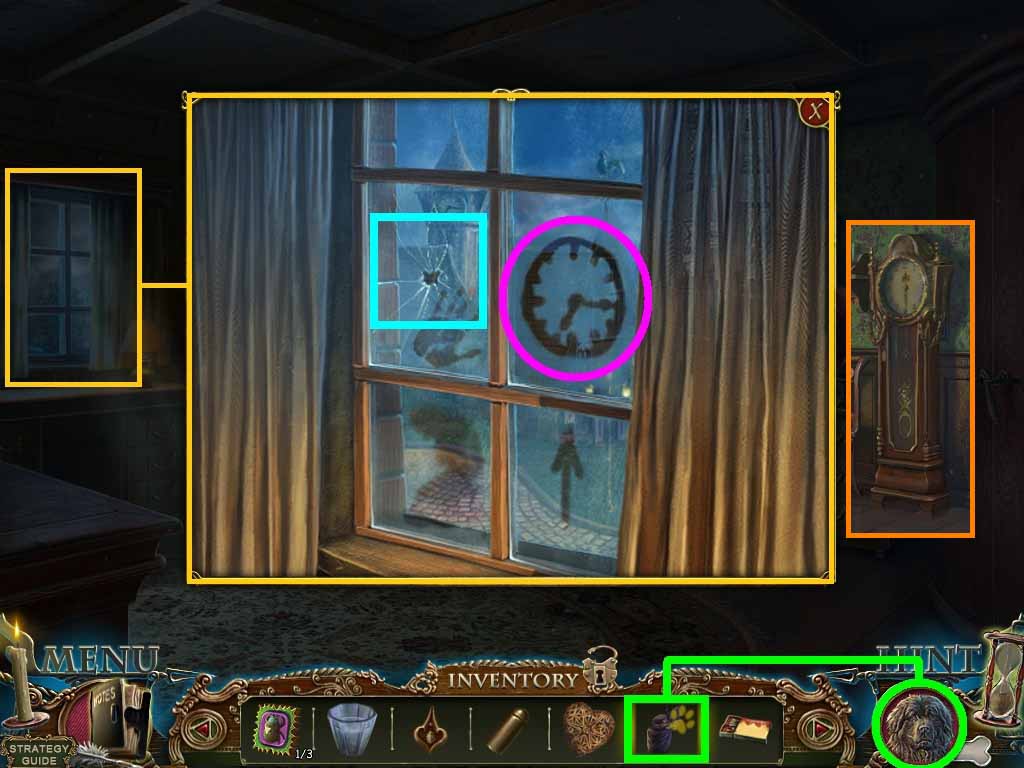
- Zoom into the top most window panes.
- Click the hole in the glass.
- Notice the time 7:15.
- Hand Arthur the veil.
- Close the close-up.
- Zoom into the clock face; insert the 2 weights onto the chains to trigger a puzzle.
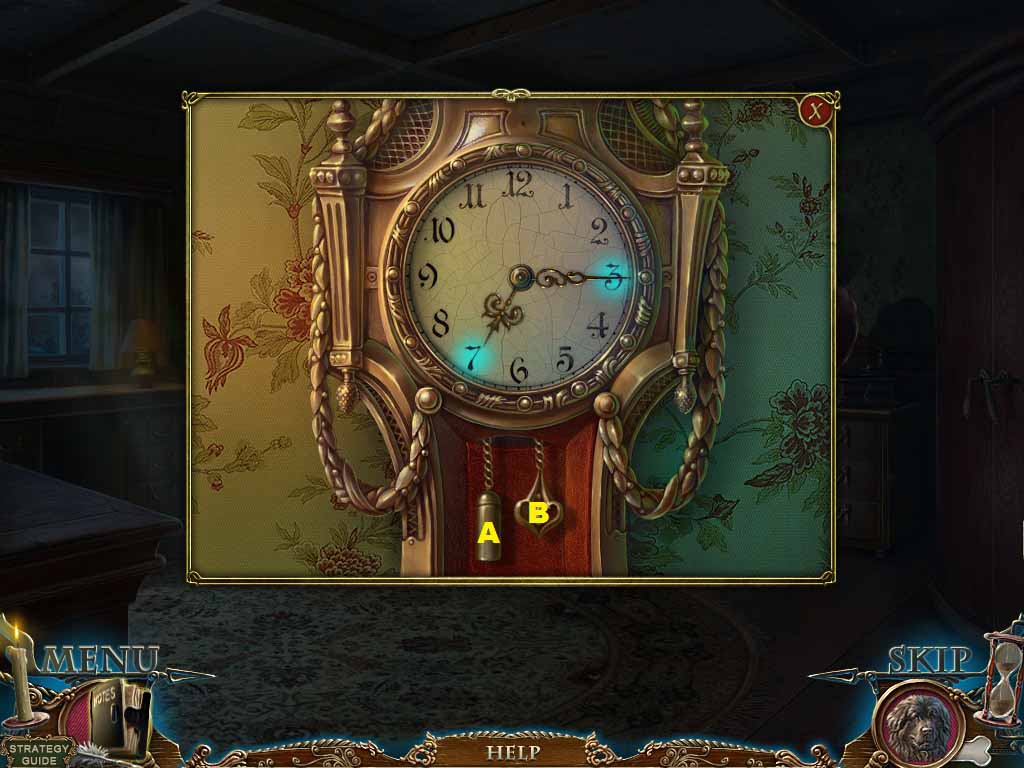
- Solve as follows:
- B: 3 x’s
- A: 8 x’s
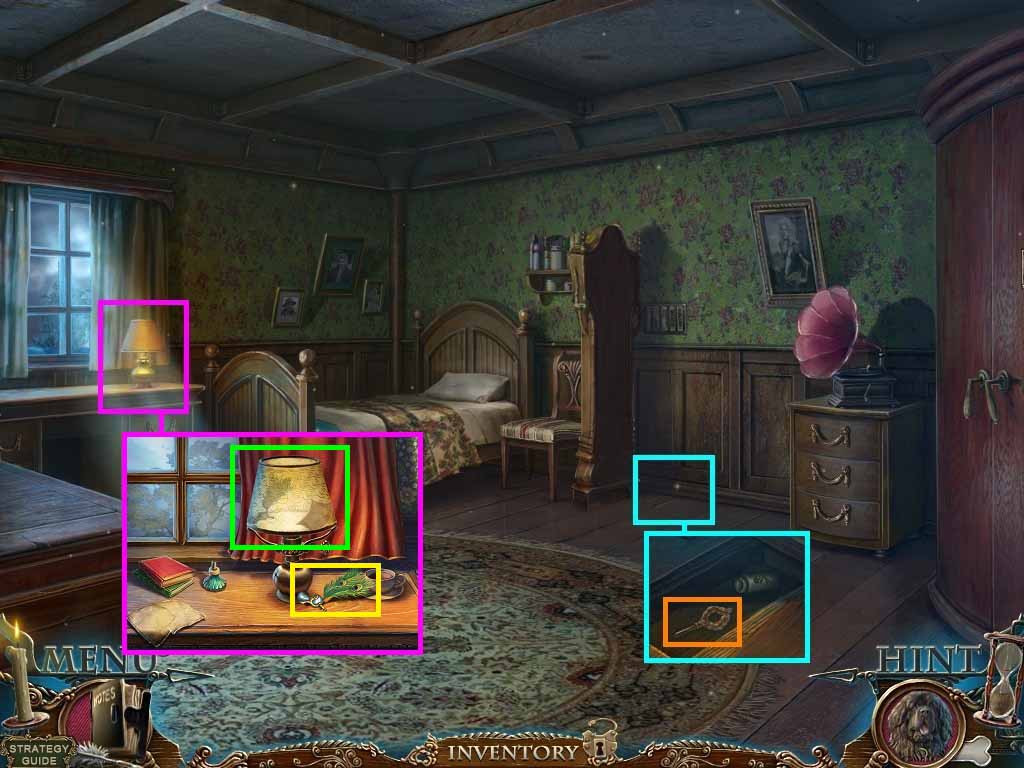
- Zoom into the floor.
- Click the floor board; collect the lamp valve.
- Notice the poison bottle.
- Zoom in two times to the lamp on the desk.
- Insert the lamp valve into the hole; click the valve.
- Click the lamp shade; collect the note.
- Collect the ringer bird’s head.
- Move back three times.
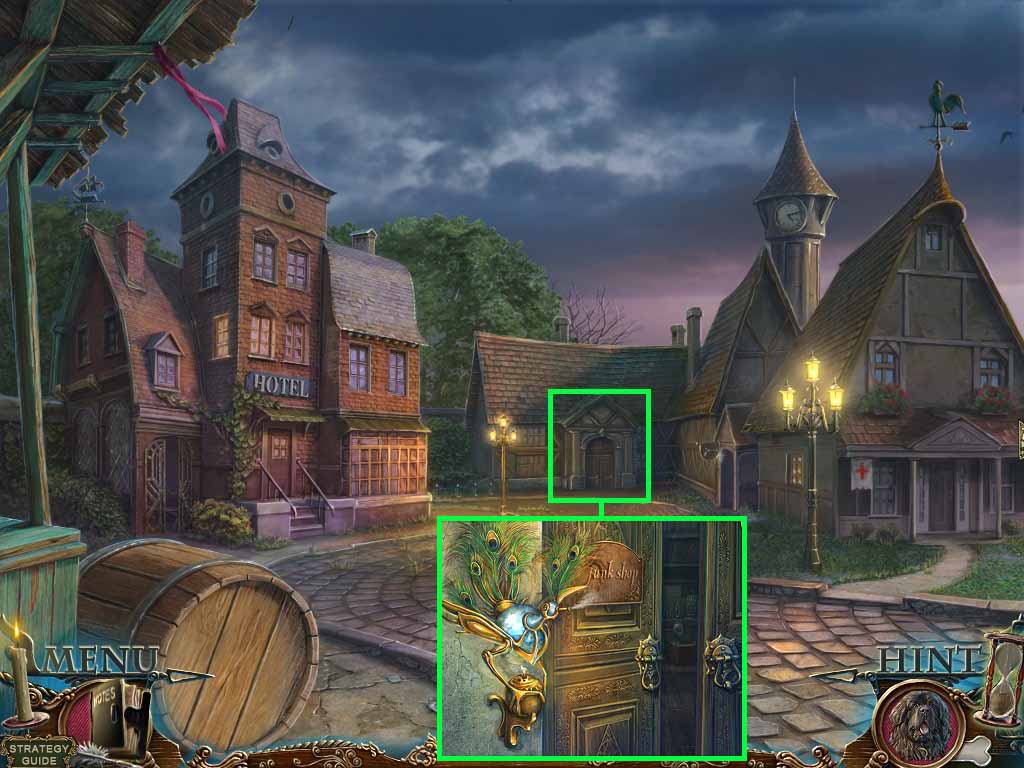
- Zoom into the junk shop door.
- Pour the vase with water into the ringer.
- Place the ringer bird’s head onto the top of the ringer.
- Use the matches on the burner.
- Go into the junk shop.
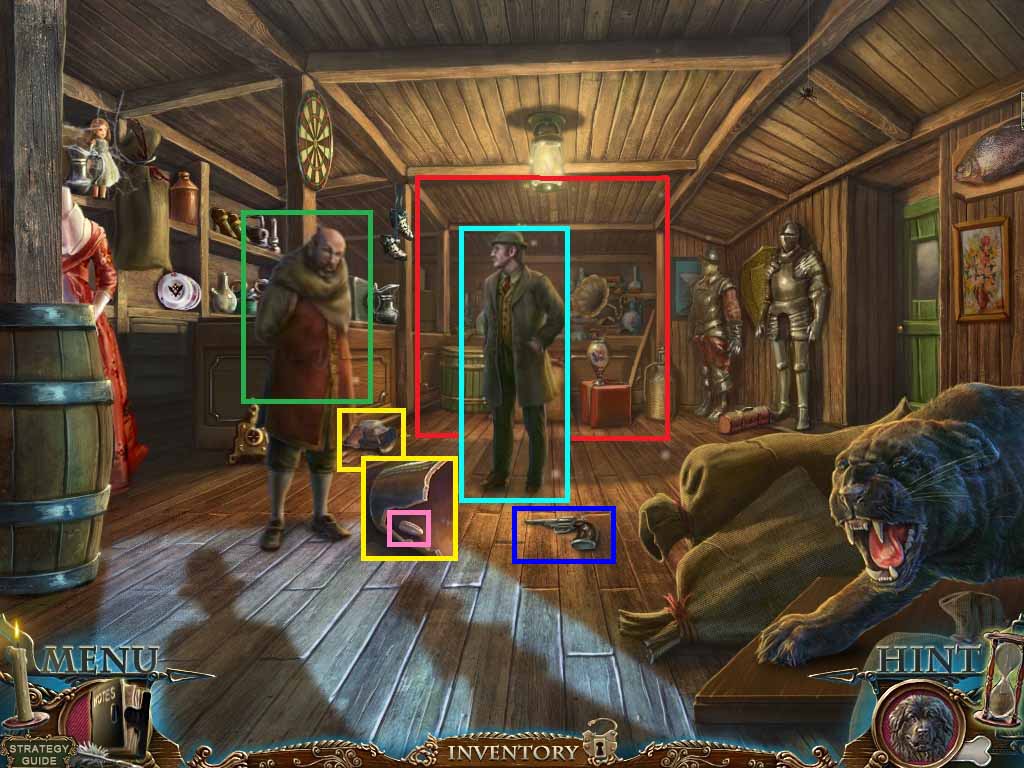
- Click Le Grand.
- Hand the junk dealer the note.
- Zoom into the broken vase; collect the bullet 1/ 2.
- Collect the gun.
- Zoom into the back wall to access a hidden objects area.
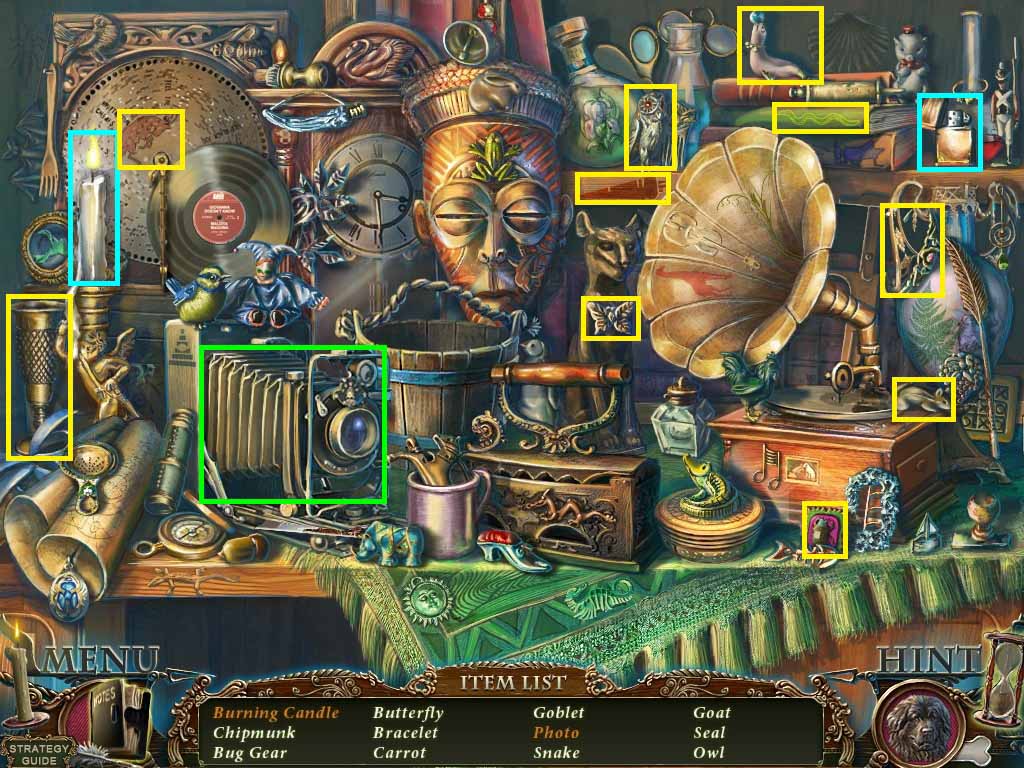
- Find the listed items.
- Click the camera to collect the photo.
- Light the candle using the lighter; collect the burning candle.
- Collect the insect gear 2/ 3.
- Move out the door on the right.
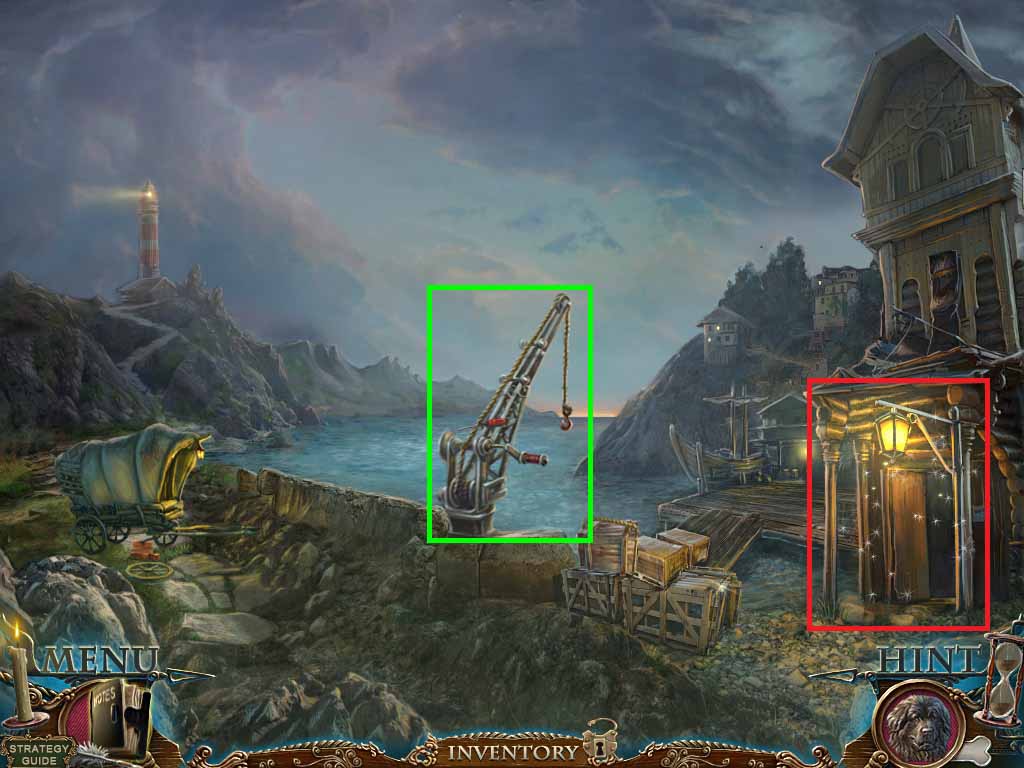
- Zoom into the crane; collect the screwdriver.
- Zoom into the building entrance to access a hidden objects area.
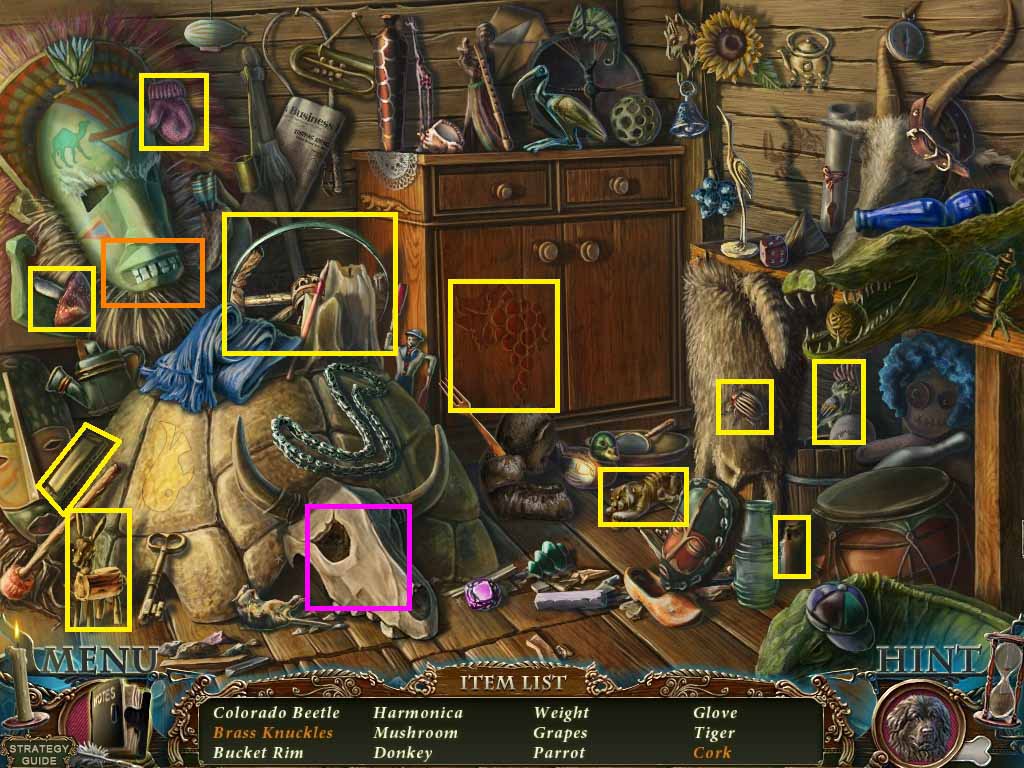
- Find the listed items.
- Click the skull; collect the brass knuckles.
- Click the mask jaw; collect the cork.
- Collect the iron rim.
- Move back two times and go into the hotel; move upstairs.
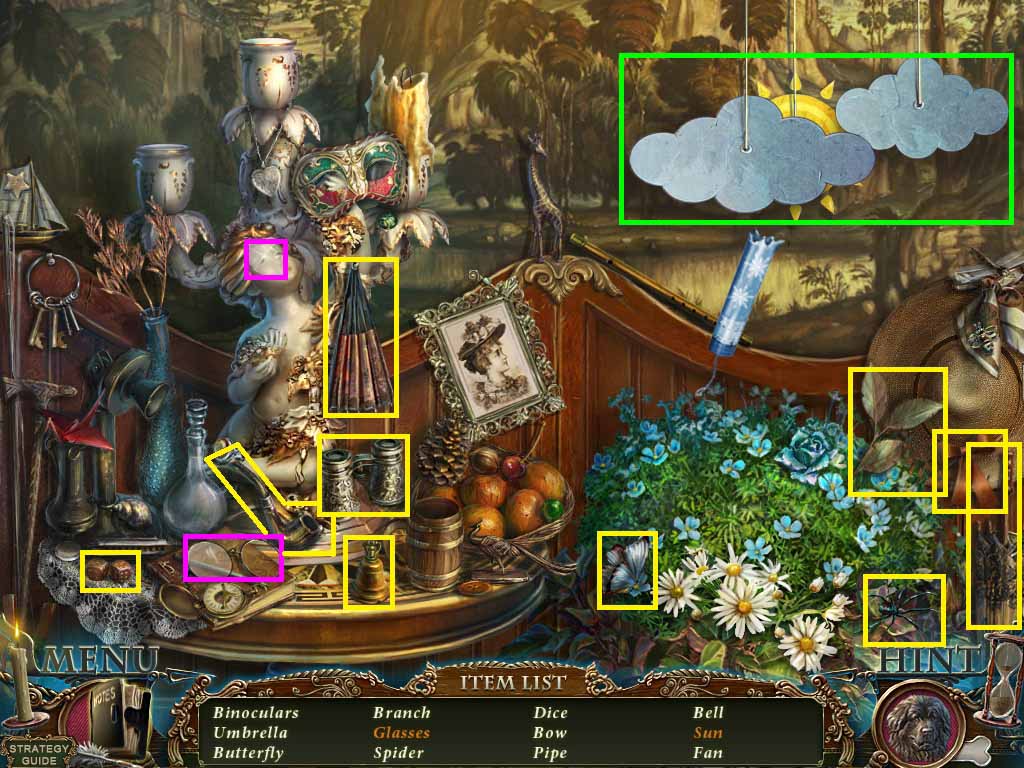
- Zoom into the end of the hallway to access a hidden objects area.
- Find the listed items.
- Click the clouds; collect the sun.
- Place the lens into the frame; collect the glasses.
- Collect the binoculars,
- Move left into the room 11.
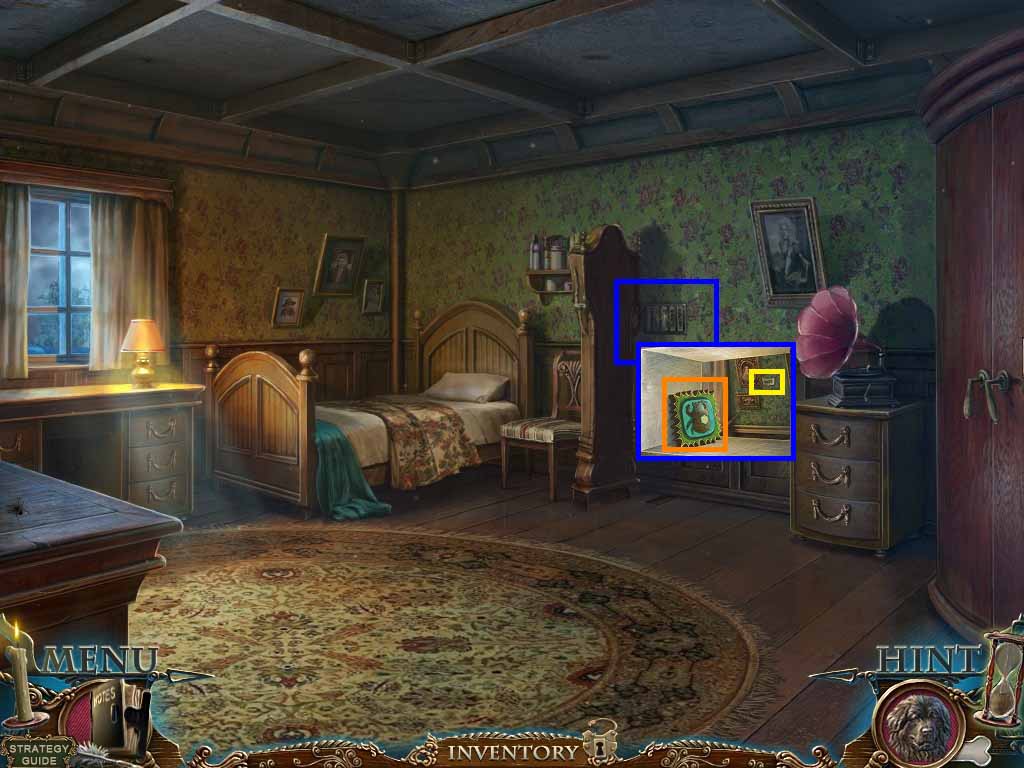
- Zoom into the wall grate.
- Use the screwdriver on it; collect the insect gear 3 /3.
- Use the binoculars on the code.
- Move back two times.
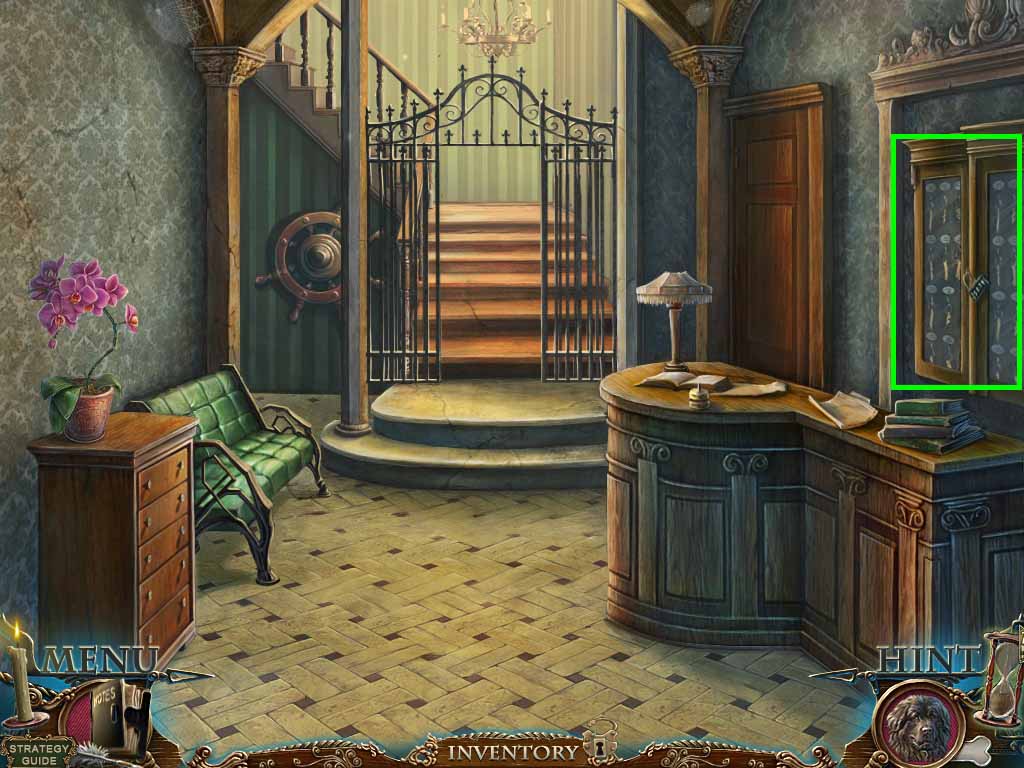
- Zoom into the key cabinet two times.
- Use the code from upstairs: 4895.
- Click the cabinet to trigger a puzzle.
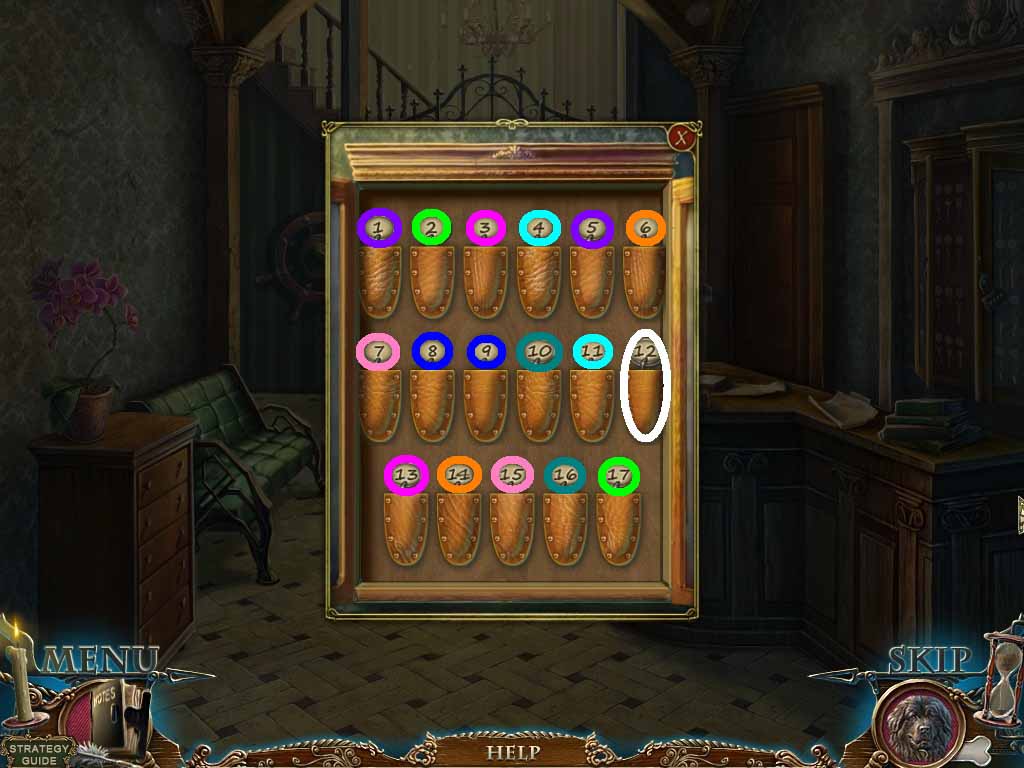
- Find the matching pairs of keys.
- Collect the head waiter’s key.
- Move up the stairs.
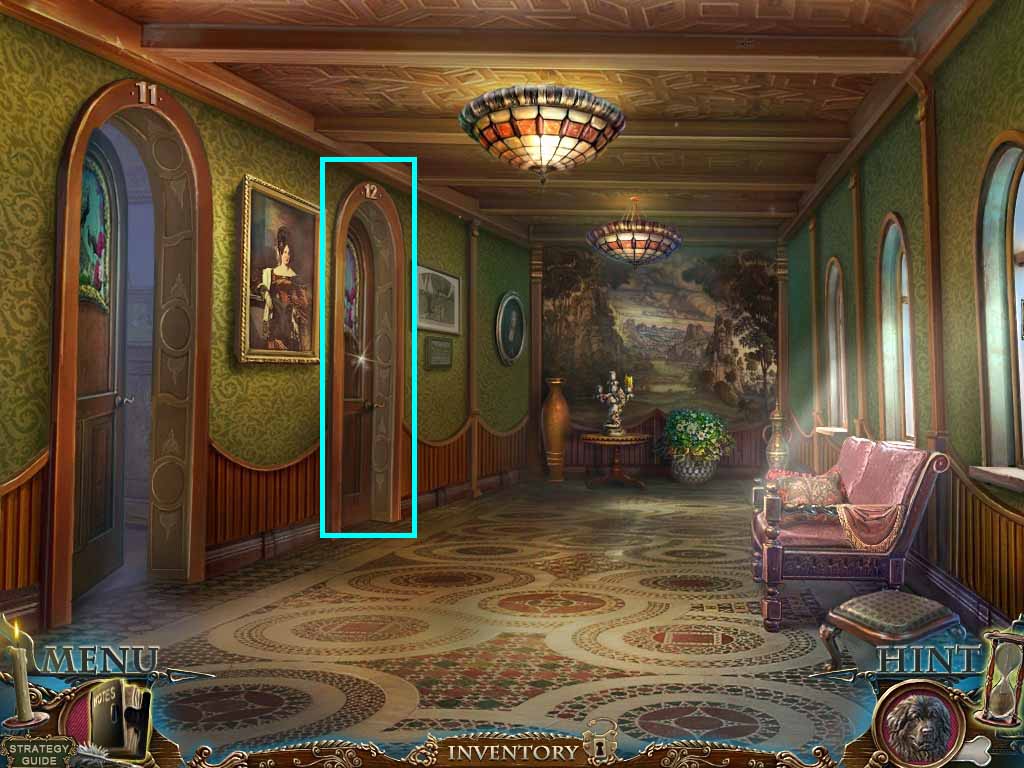
- Zoom into the room 12 door.
- Insert the head waiter’s key into the lock; click it.
- Move into room 12.
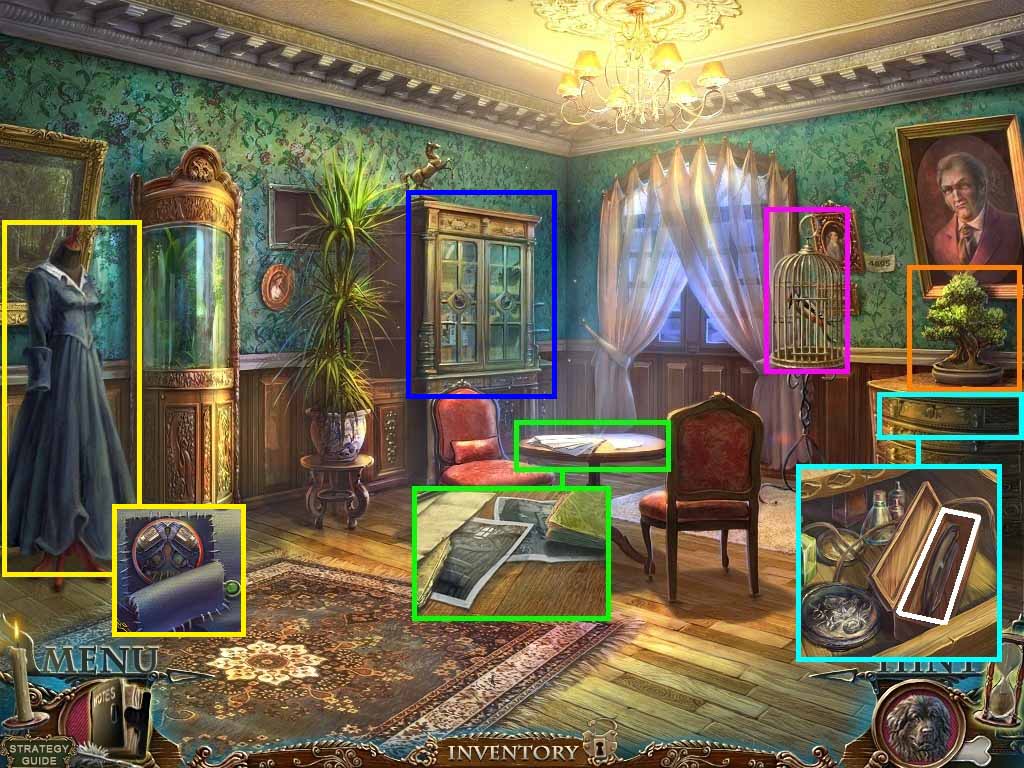
- Zoom into the table; collect the pictures and bullet 2/ 2.
- Zoom into the bonsai tree; collect the pin.
- Zoom into the birdcage; insert the pin into the lock and collect the woodpecker.
- Click the drawer and zoom in.
- Click the box and collect the razor.
- Zoom into the dress.
- Cut the patch using the razor; collect the gun shop part.
- Click the right cabinet and zoom in.
- Move back three times.
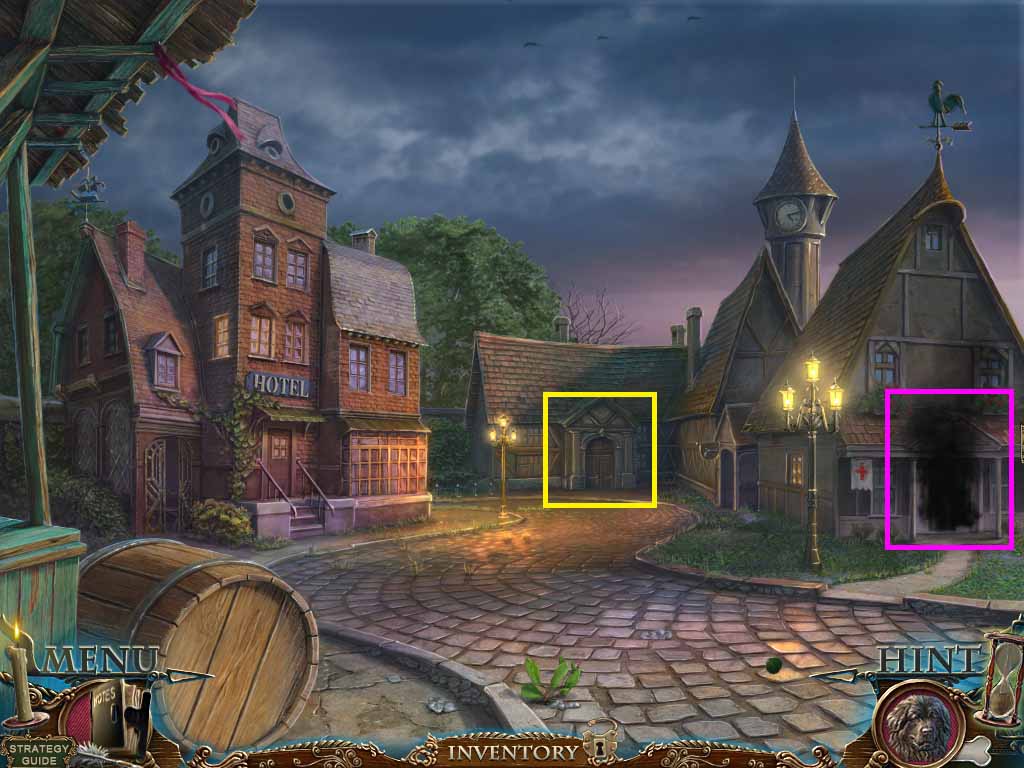
- Zoom into the smoking doorway.
- Move forward into the junk shop.
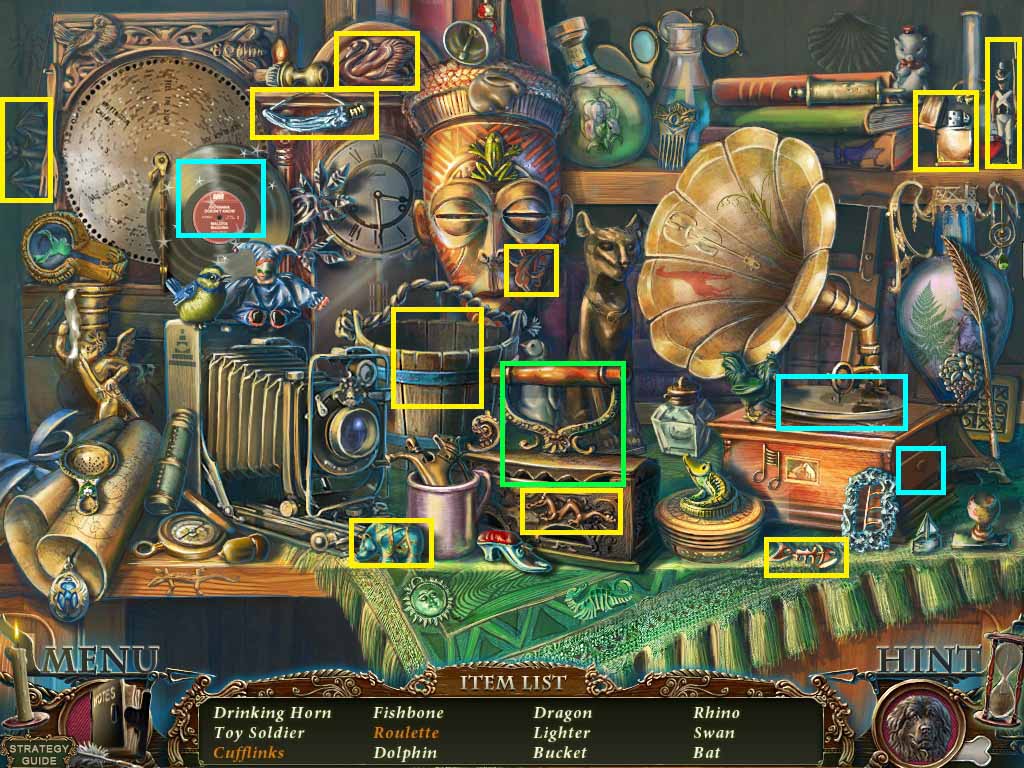
- Zoom into the back wall to access a hidden objects area.
- Find the listed items.
- Click the iron; collect the roulette.
- Put the record on the phonograph; collect the cufflinks.
- Collect the empty bucket.
- Move out of the door in the right.
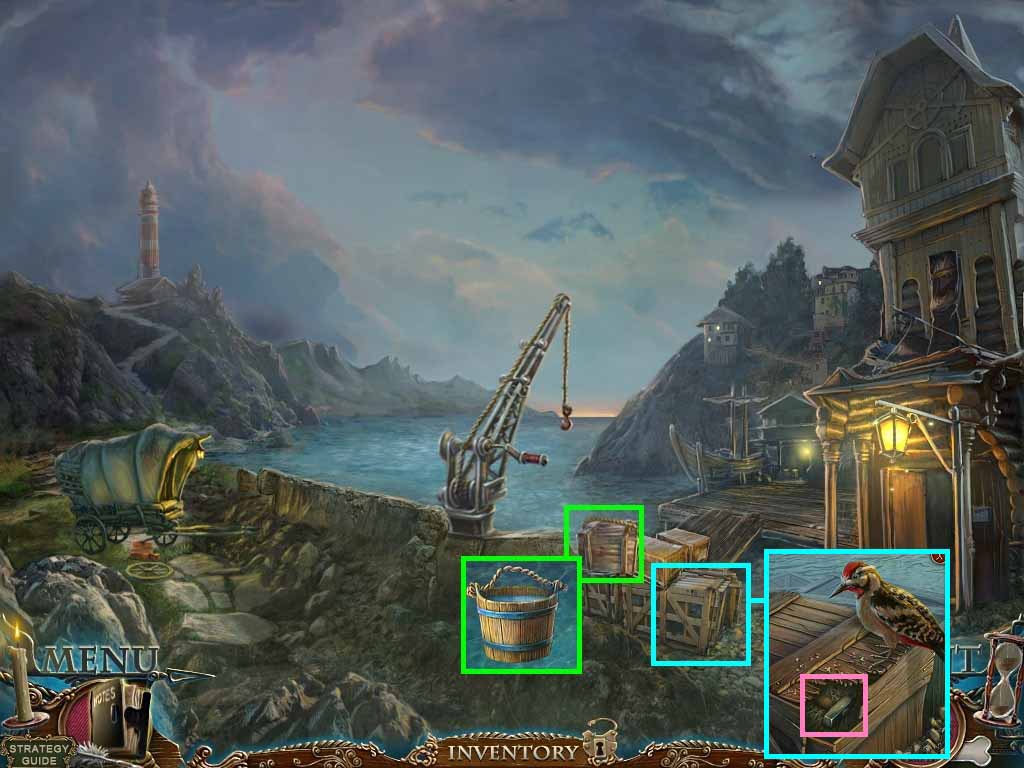
- Zoom into the top crate.
- Dip the bucket into the water; collect the bucket with water.
- Zoom into the bottom right crate.
- Place the woodpecker onto it.
- Collect the hammer.
- Move back two times.
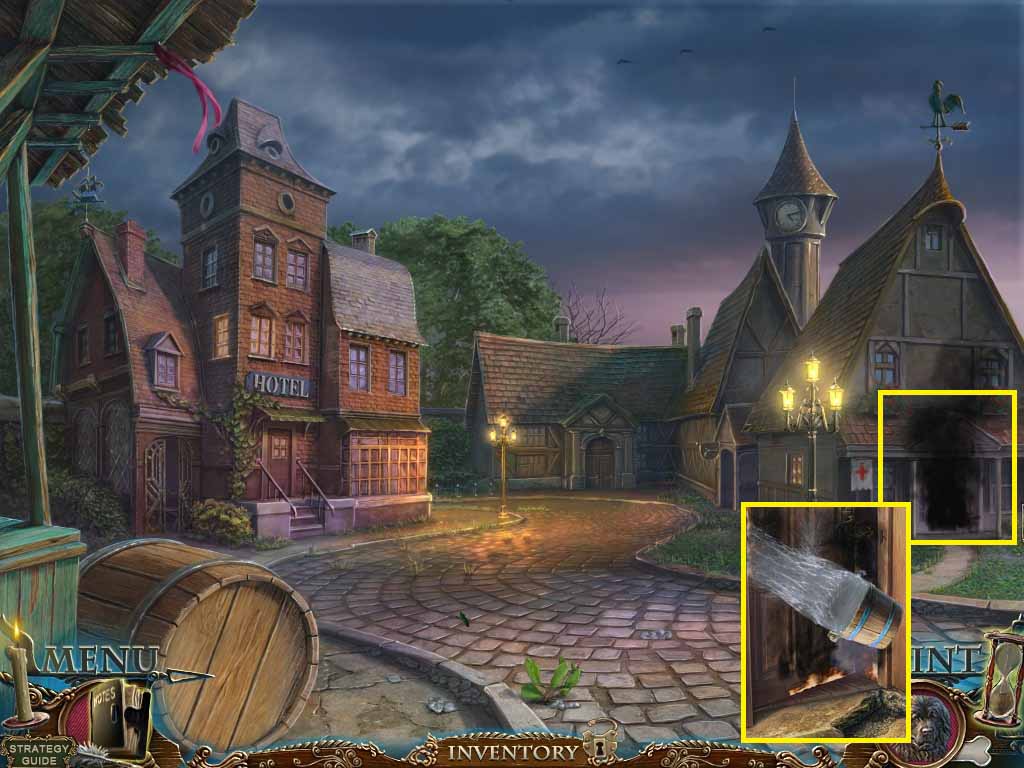
- Zoom into the smoking doorway.
- Pour the bucket with water onto the flames.
- Move into the doctor’s lab.
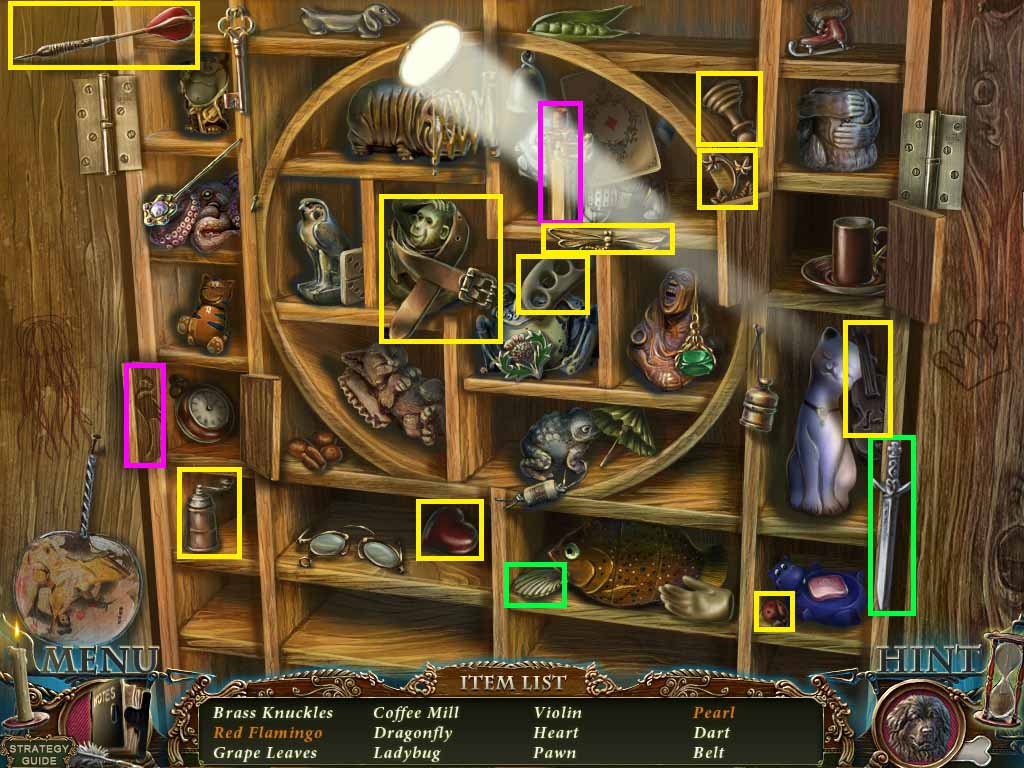
- Zoom into the left cabinet to access a hidden objects area.
- Find the listed items.
- Collect the pearl by using the knife on the shell.
- Paint the flamingo using the red lipstick to collect the red flamingo.
- Collect the belt.
- Move back one time.
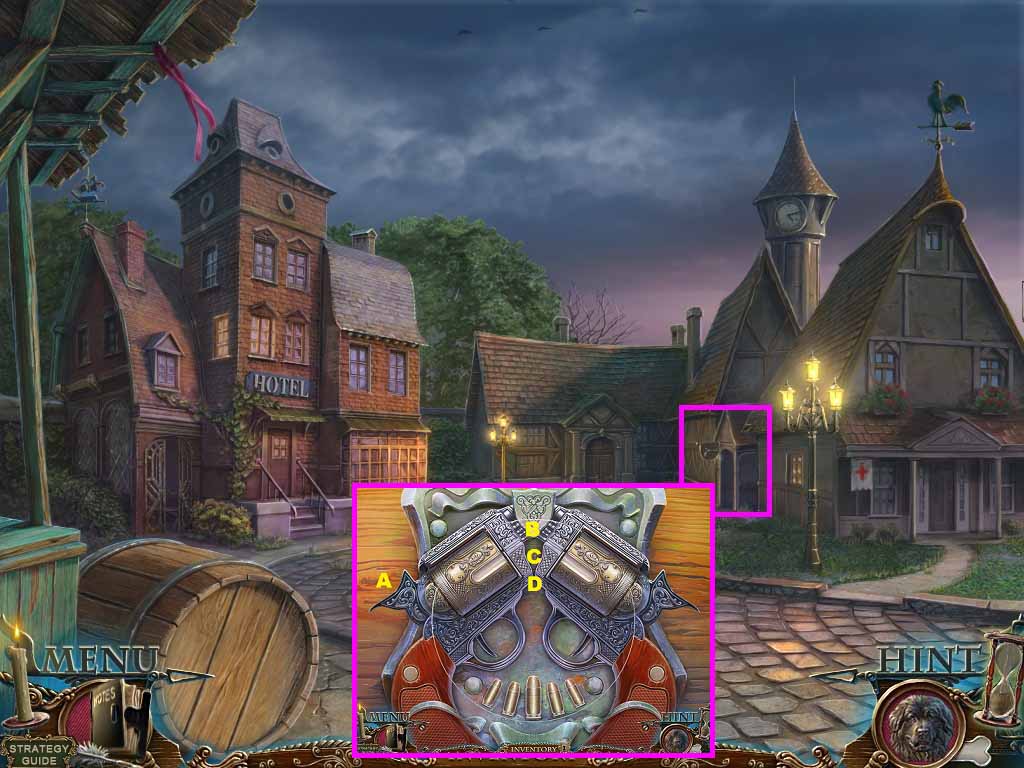
- Zoom into the gun shop door two times.
- Insert the gun shop part into the lock; a puzzle will trigger.
- To solve the puzzle use this formula:
- B: 1x
- A: 2 x’s
- C: 1x
- A: 6 x’s
- D: 1x
- A: 2x’s
- Move into the gun shop.
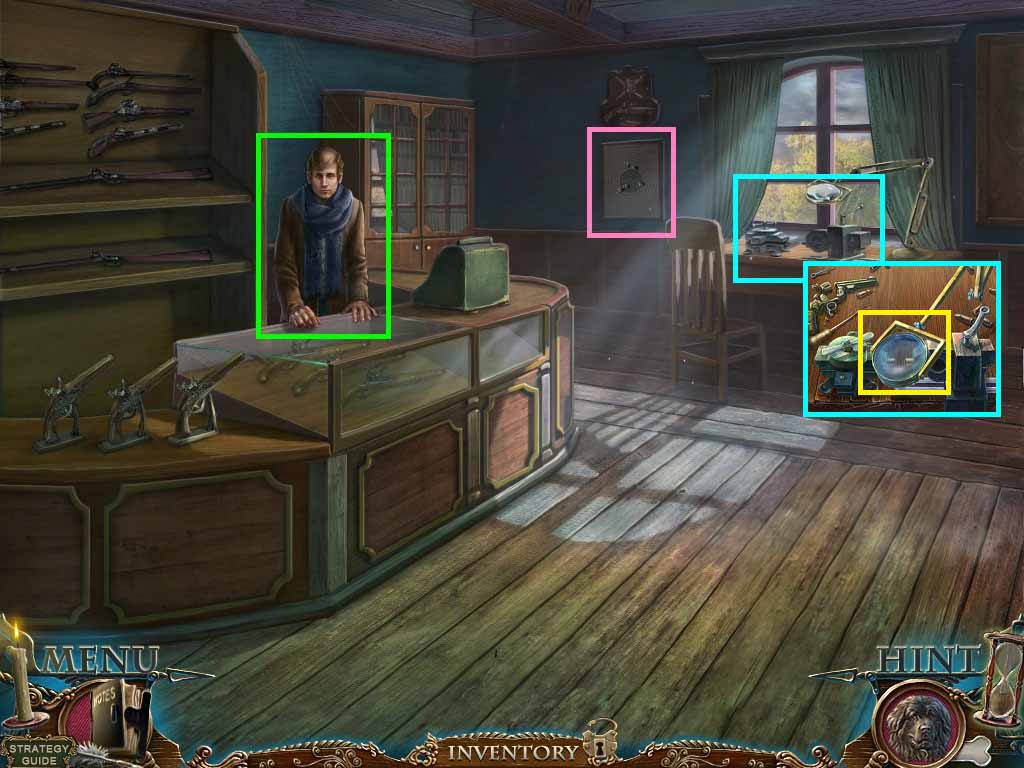
- Give Mike the gun.
- Zoom into the picture; collect the nails.
- Zoom into the desk.
- Put the 2 bullets into the vise; click the magnifying glass to trigger a puzzle.
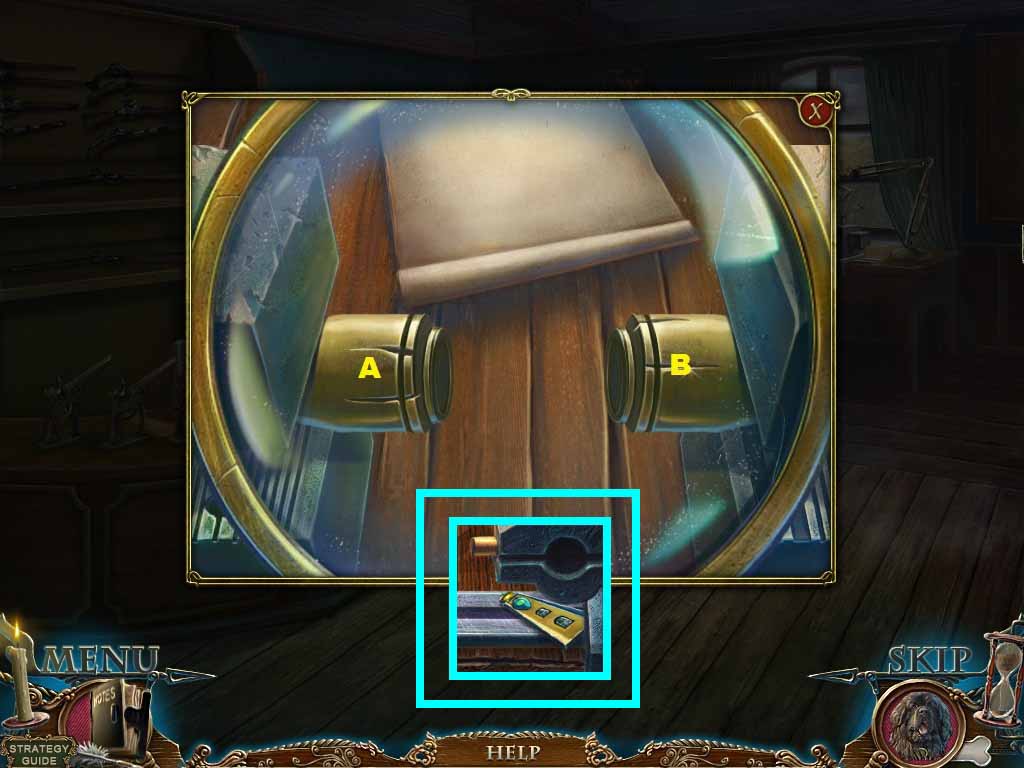
- Match the bullets grooves.
- Rotate the bullets as follows
- A –A – B - B - A – B
- Collect the lighthouse door part 1/ 2.
- Move back once; go forward through the junk shop and then right out the door.
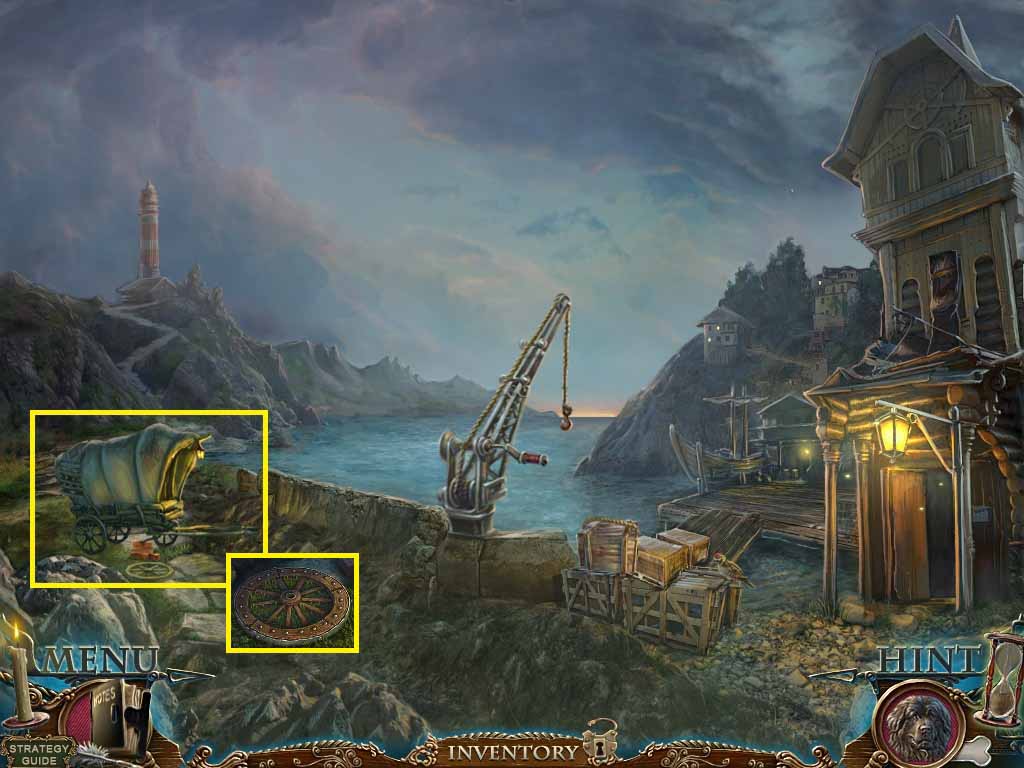
- Zoom into the wagon.
- Use the iron rim, nails and the hammer to fix the broken wheel; collect the wheel.
- Put the wheel onto the axle.
- Collect the wheel.
- Move up the cleared path.
Comments will load when you reach this part of the walkthrough.