

Chapter Two: Exploring the Town Square
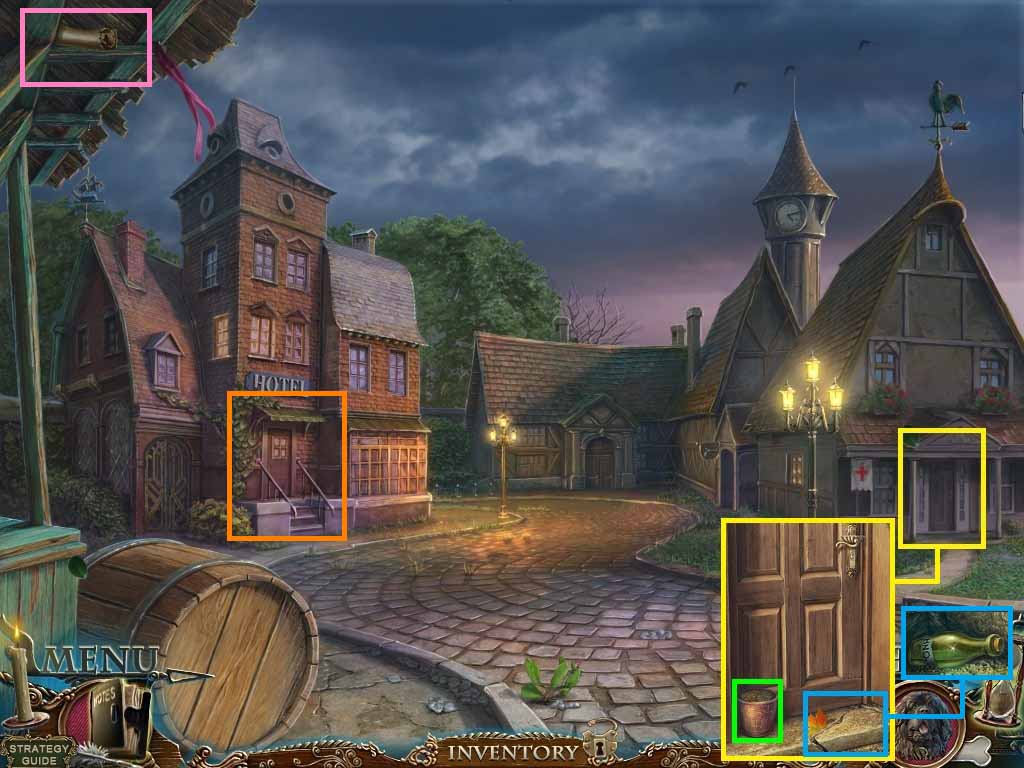
- Zoom into the clinic door; collect the flowerpot.
- Click the broken stair.
- Zoom into the bottle.
- Collect the acid.
- Click the scroll and collect it from Dupin.
- Move into the hotel.
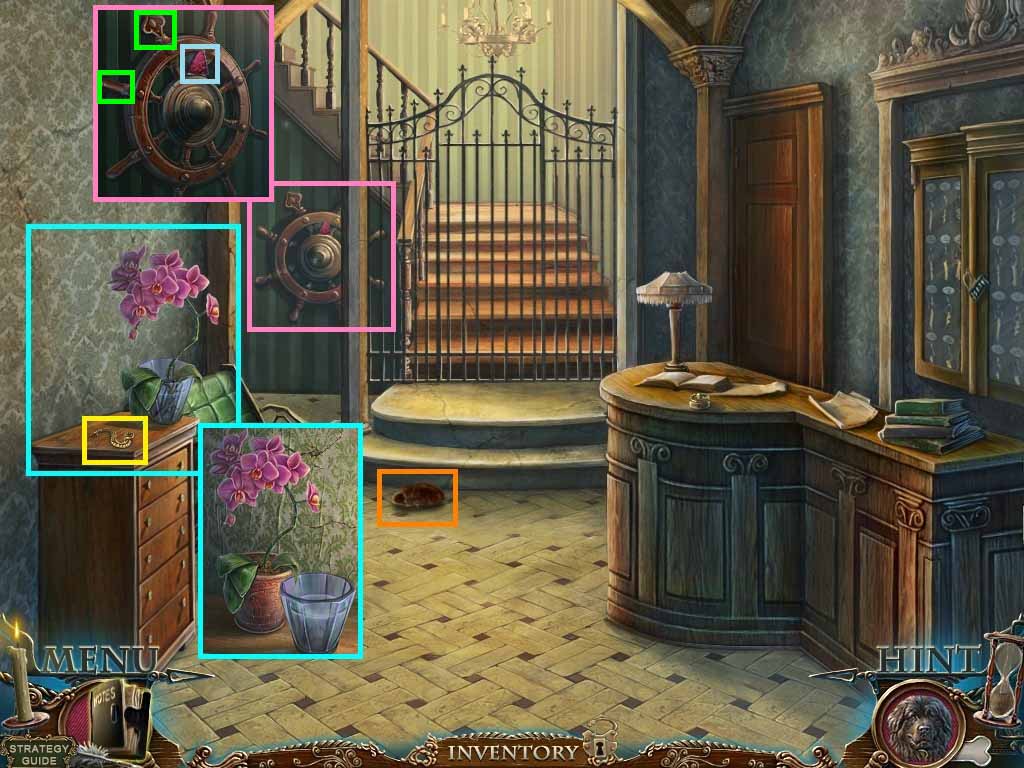
- Zoom into chest of drawers; collect the snake.
- Move the flowerpot next to the vase.
- Place the flowers into the flowerpot; collect the vase with water.
- Collect the shoe.
- Zoom into the ship’s wheel; collect the stained glass piece, and the 1st and 2nd weights.
- Move back once.
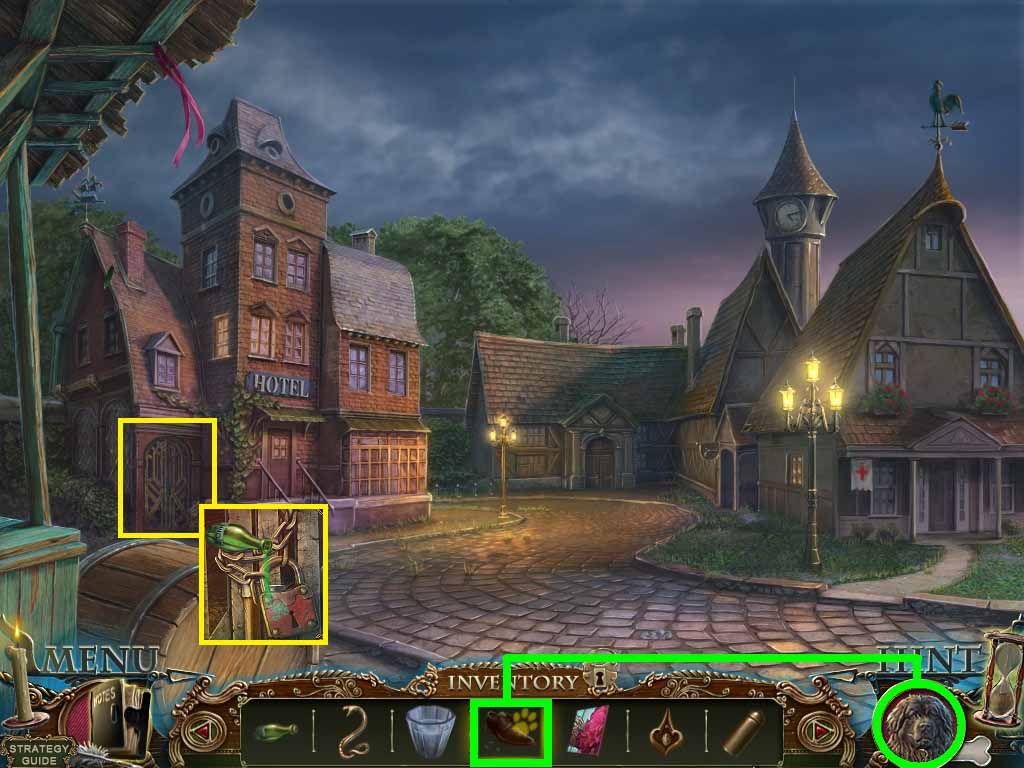
- Give Arthur the shoe.
- Zoom into the lock and pour the acid onto it.
- Go into the room.
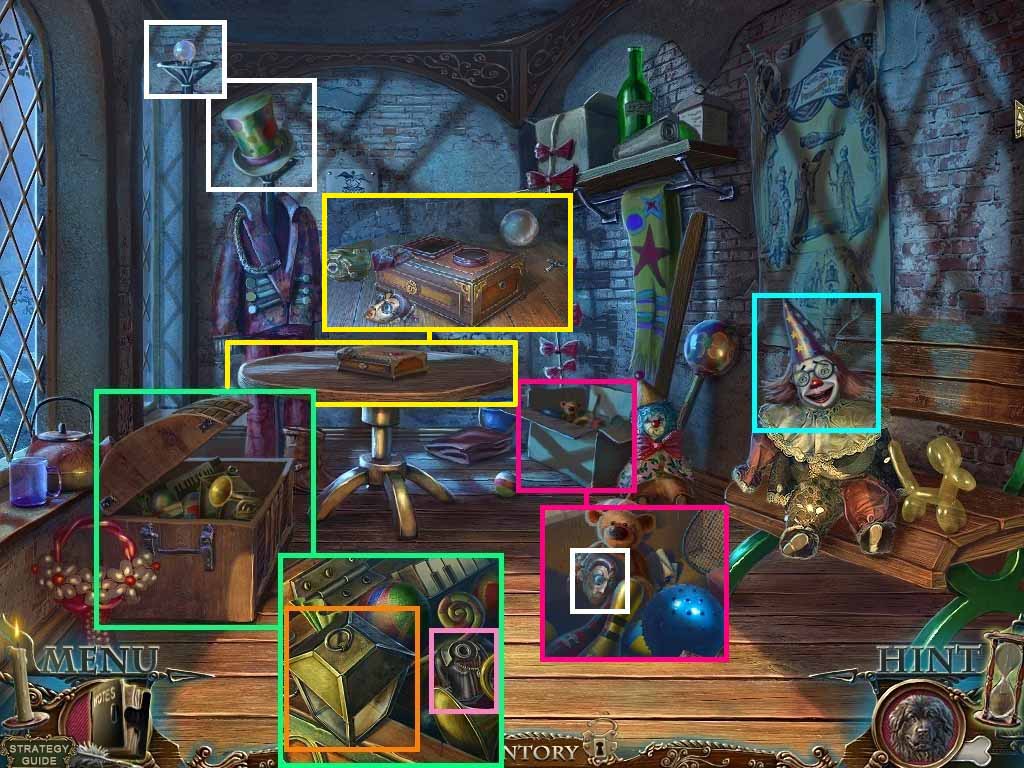
- Click the chest and zoom in.
- Click the lantern; collect the fortune teller’s body.
- Zoom into the hat; click it.
- Collect the magic ball.
- Zoom into the clown; collect the wind up key.
- Zoom into the box; click the blue ball.
- Collect the fortune tellers head.
- Zoom into the table.
- Place the wind up key, the fortune tellers head and body and magic ball onto the table.
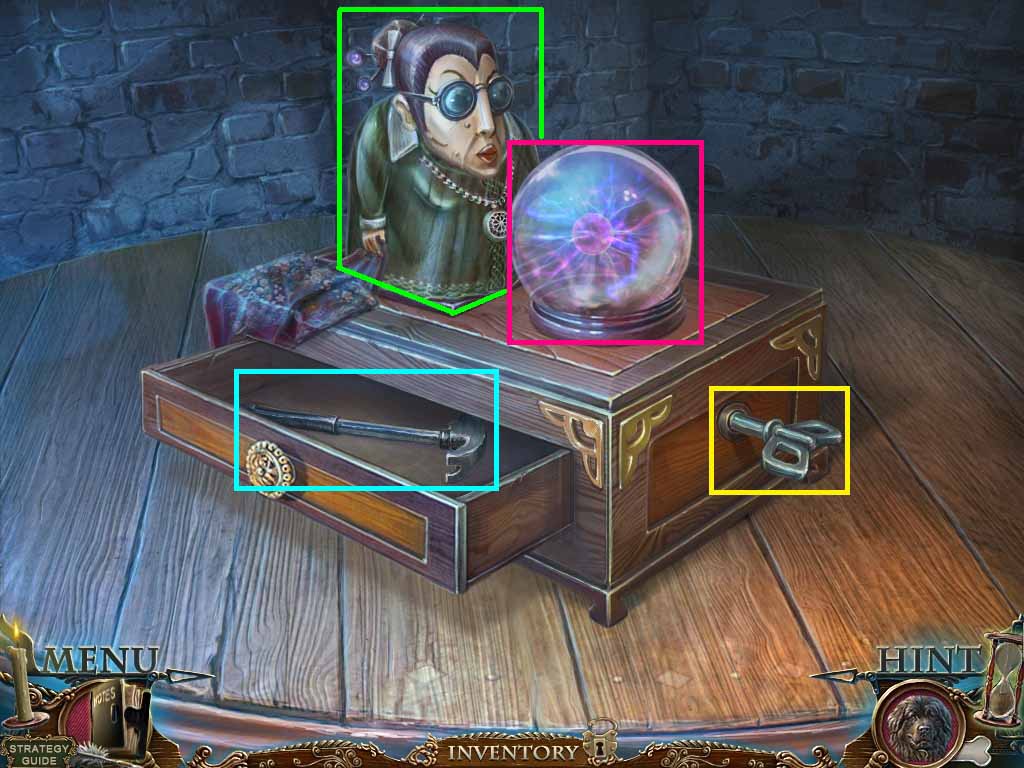
- Put the body, head and the ball on top of the box.
- Insert the key into the hole and click it.
- Collect the hammer.
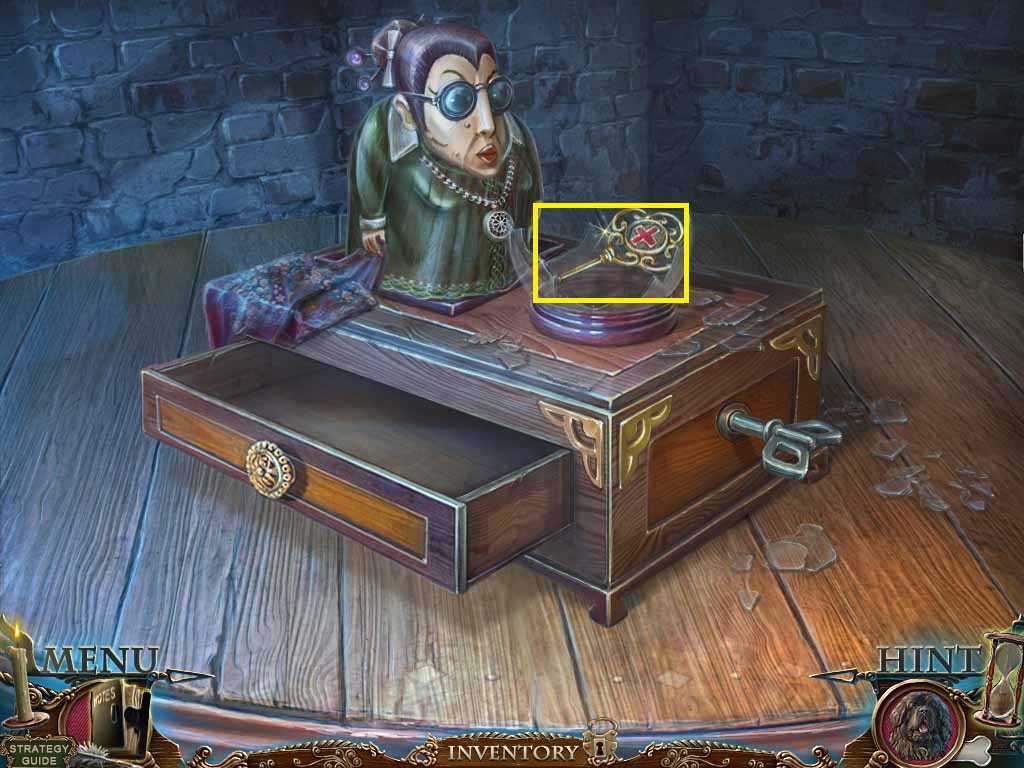
- Smash the ball using the hammer.
- Collect the doctor’s key.
- Move back one time.
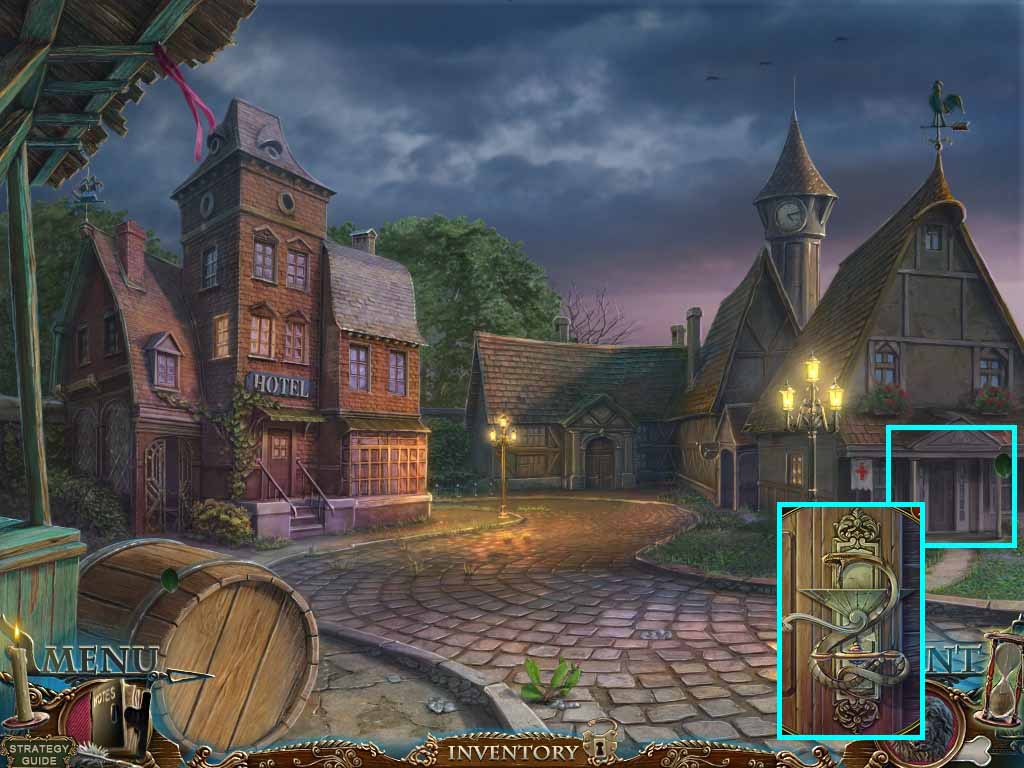
- Zoom into the clinic’s door lock.
- Insert the snake.
- Insert the doctor’s key and click it.
- Go through the door.
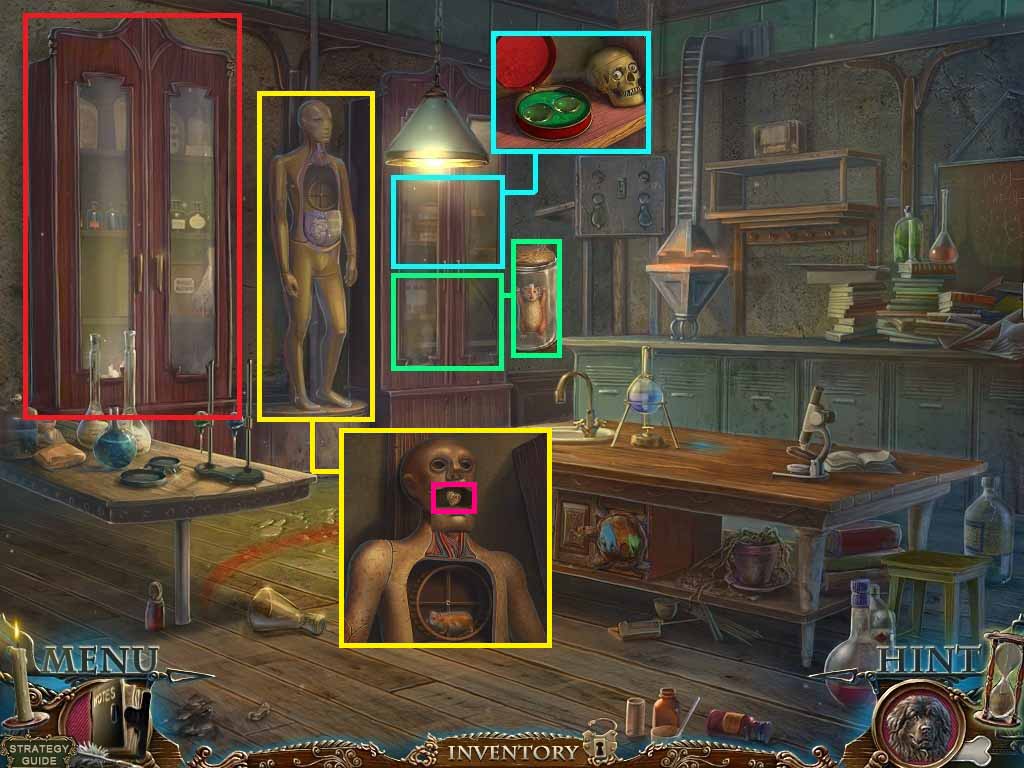
- Click the cabinet; zoom in.
- Click the container; collect the lenses.
- Zoom into the shelf.
- Click the jar lid and collect the hamster.
- Zoom into the dummy.
- Inset the hamster into the wheel; collect the rusty heart.
- Click the cabinet to access a hidden objects area.
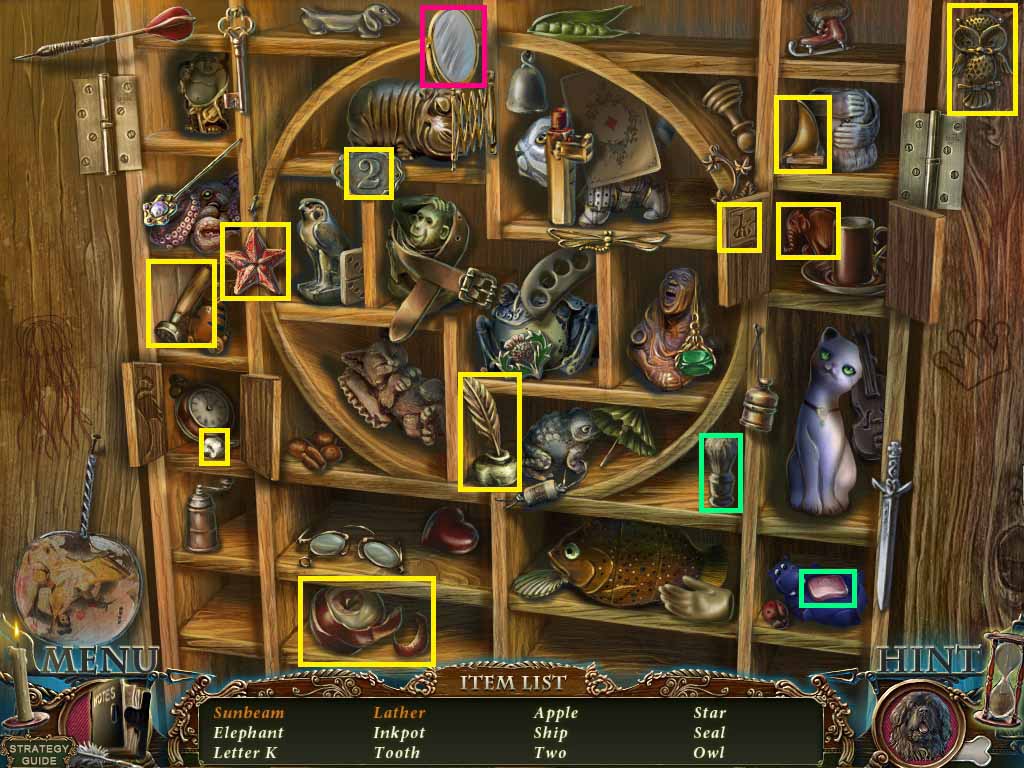
- Find the listed items.
- Click the cabinet doors to collect the elephant, the letter K and the tooth.
- Click the mirror two times to collect the sunbeam.
- Place the brush onto the soap to collect the foam.
- Collect the elephant.
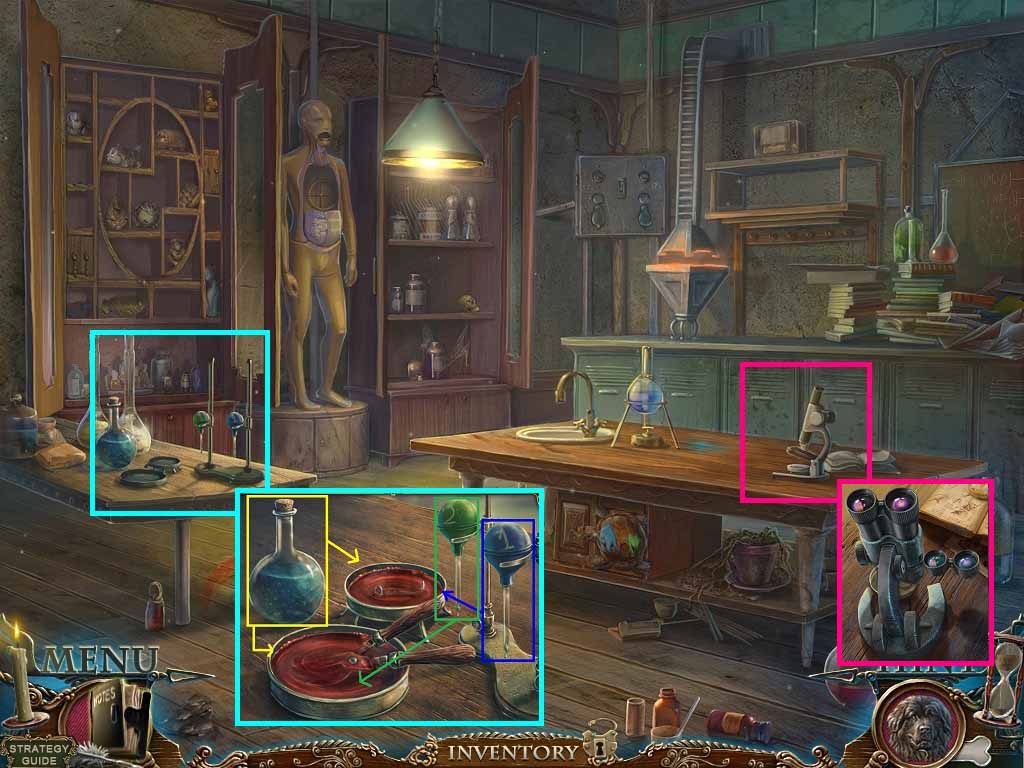
- Zoom into the table.
- Place the bloody nail and the bloody pruner into the dishes.
- Click the cork from the beaker.
- Pour the liquid into the dishes.
- Pump pipette 1 onto the nail dish.
- Pump pipette 2 onto the pruner dish.
- Collect the 2 pipettes with blood.
- Zoom into the microscope; pump the 2 pipettes with blood into the dish.
- Put the lenses into the holder and click them.
- Put the dish onto the tray; click the tray.
- Examine the scope to trigger a puzzle.
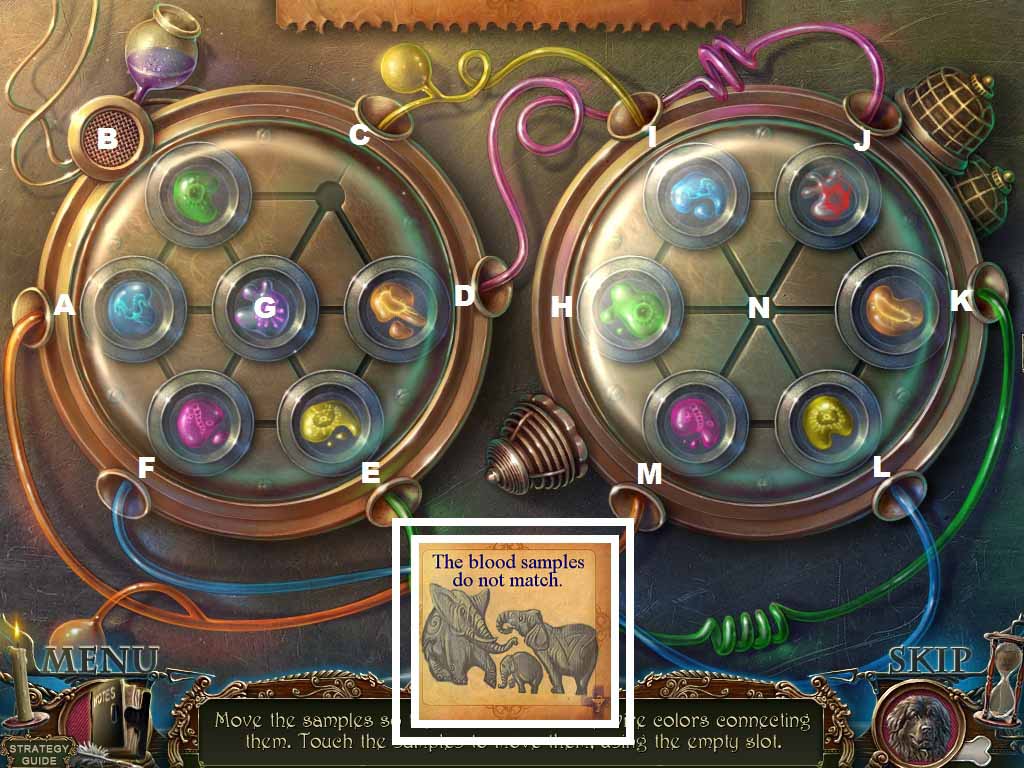
- Match the color samples.
- To solve follow this sequence:
- B – A – G- D – E – F – A –B – C – D – E – F – A – G – J – I – H – M – L – K- J – I – H – M – L – K – J – I – H
- Collect the instructions.
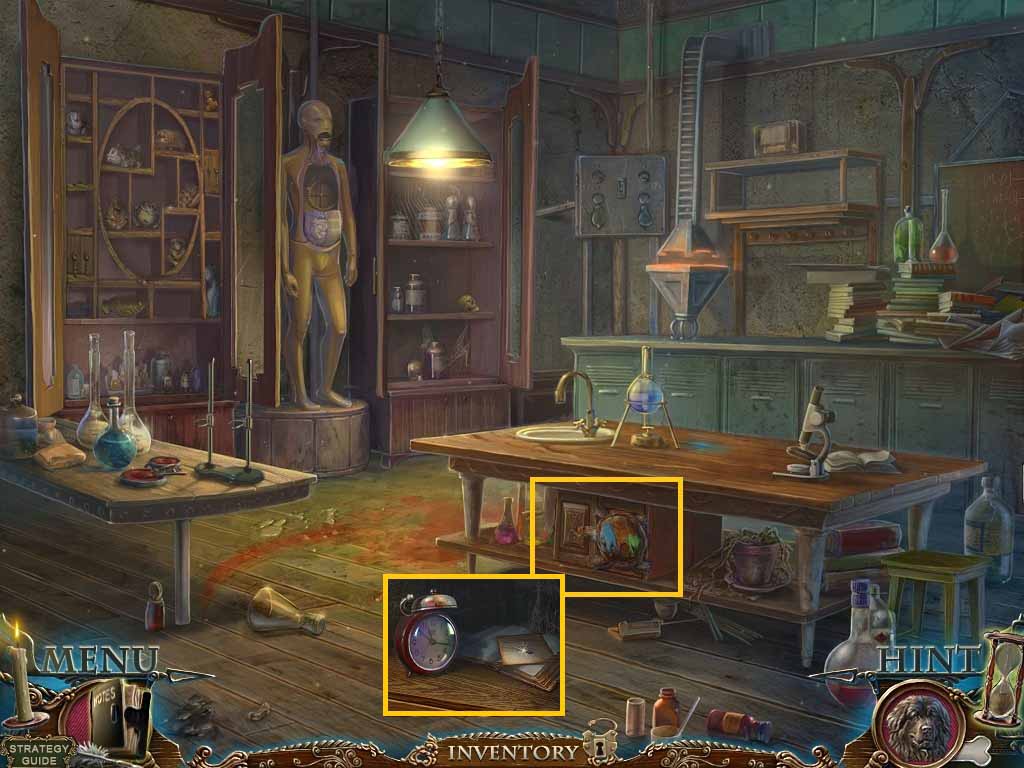
- Zoom into the cabinet.
- Place the instructions on the left and insert the elephant into the slot.
- Click and drag the elephant heads to match the instructions.
- Click the cabinet and collect the note.
- Click the alarm clock; collect the bell.
- Move back one time and go into the hotel.
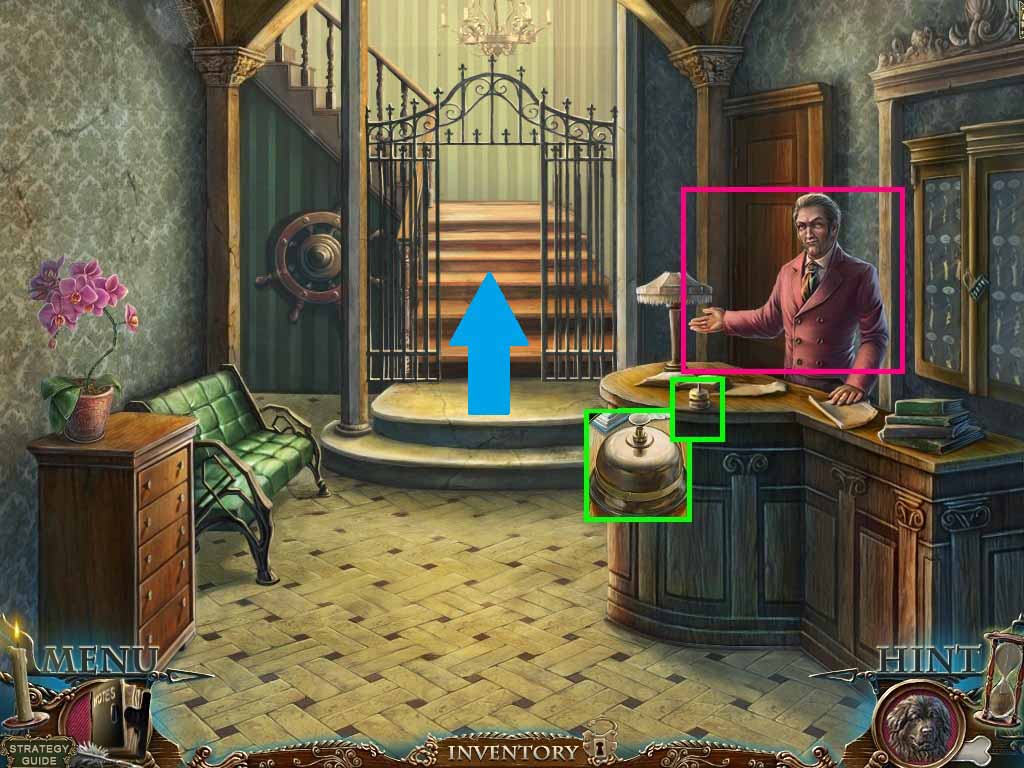
- Zoom into the front desk.
- Put the bell onto the bell bottom.
- Click and drag the bell button on the top.
- Ring the bell.
- Hand the concierge the note.
- Move upstairs.
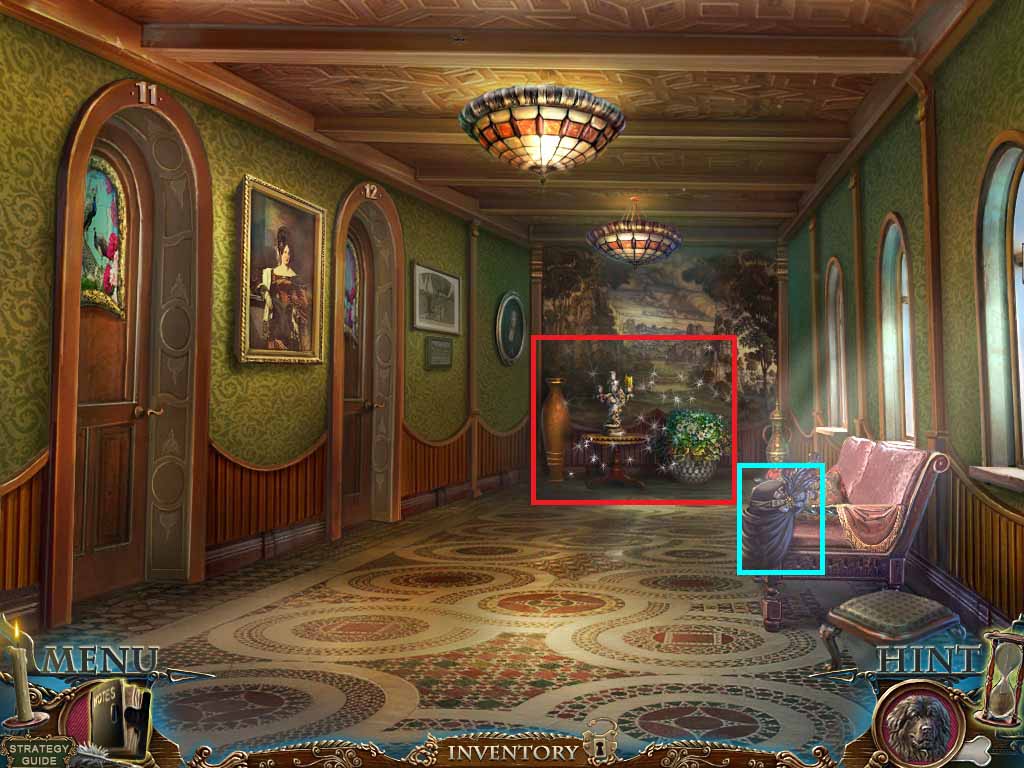
- Collect the veil.
- Zoom into the table to access a hidden objects area.
Comments will load when you reach this part of the walkthrough.