
Chapter Four: The Lighthouse
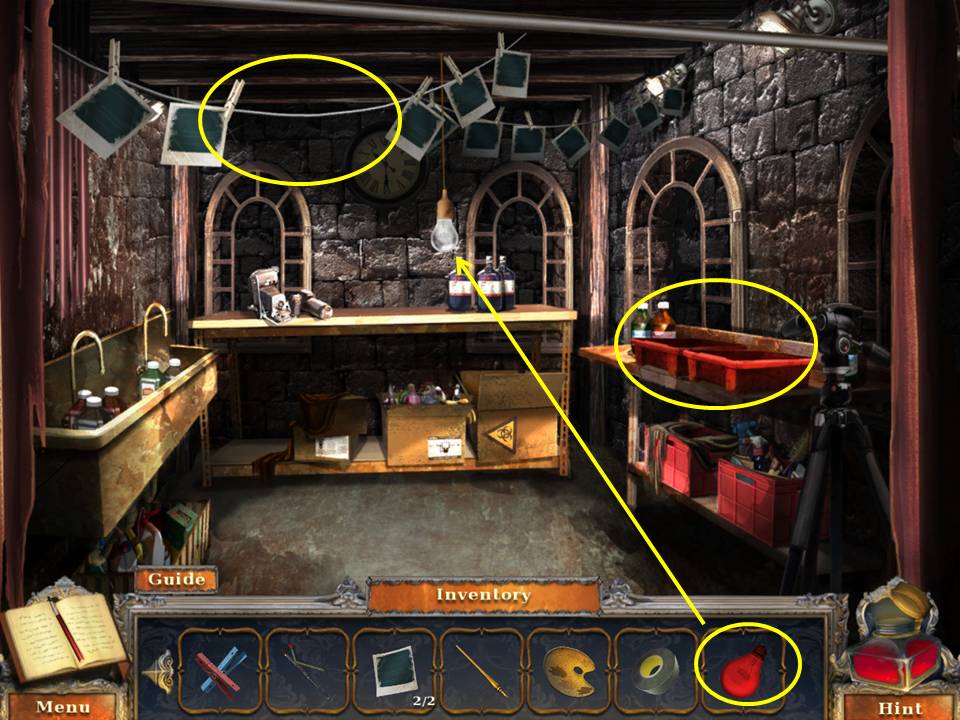
- Zoom into the lightbulb socket.
- Replace the white lightbulb with the RED LIGHTBULB.
- Zoom into the developer trays.
- Pour the developer inside.
- Put the two UNDEVELOPED PHOTOS in the tray.
- Withdraw the WET PHOTOS with the tongs.
- Zoom into the line. Pin the WET PHOTOS with the CLOTHESPINS.
- Take the PHOTOS OF VIRGIL.
- Go to the backyard.
- Give the PHOTOS OF VIRGIL to Rosario.
- Receive the RADIO.
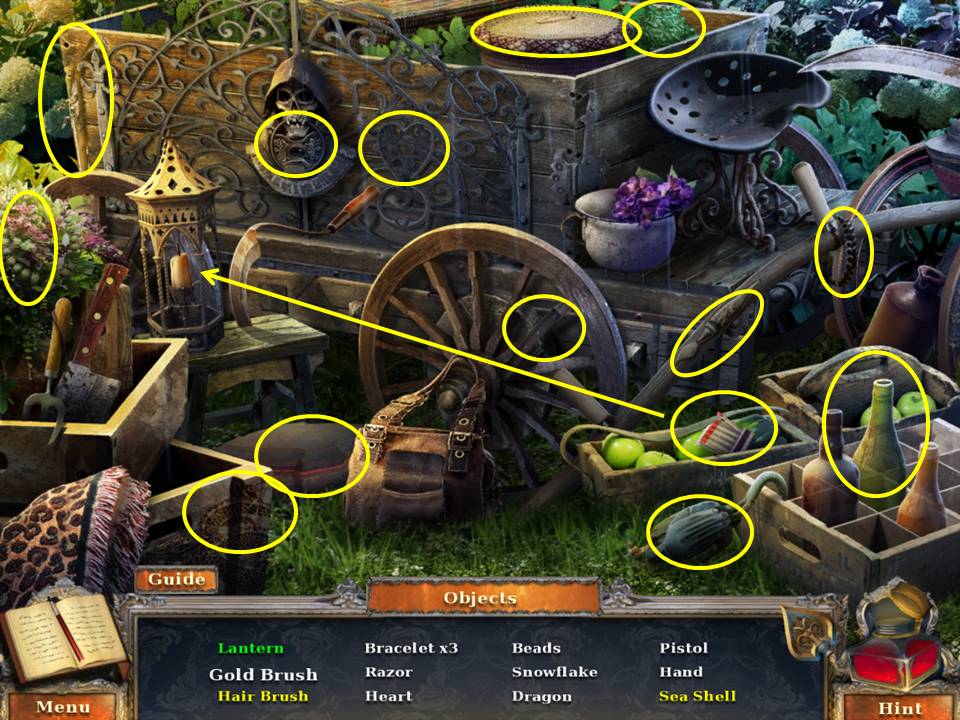
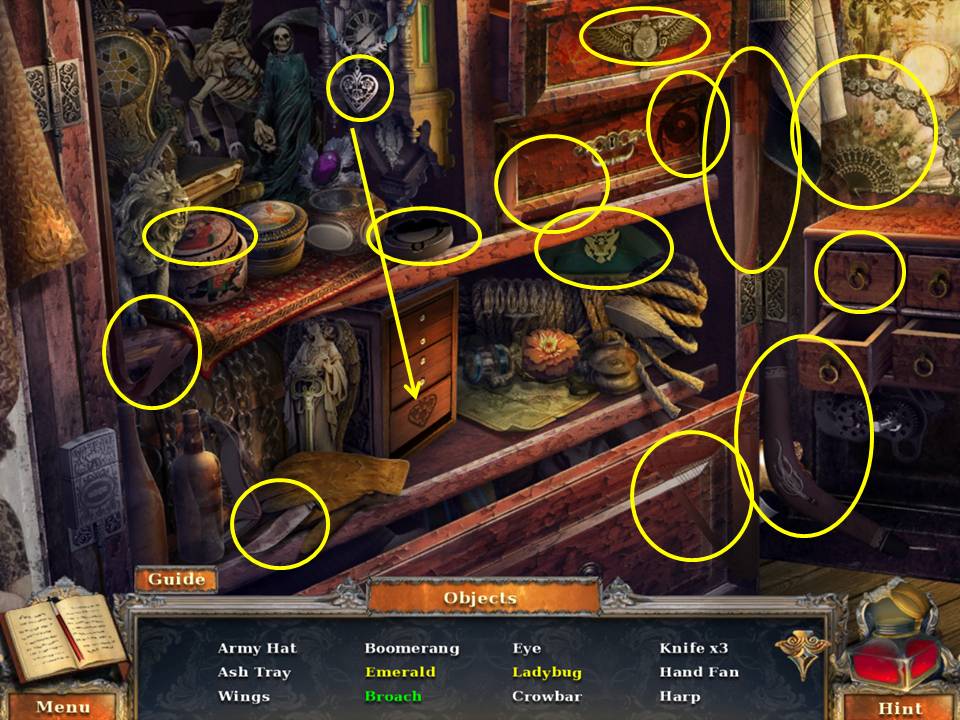
- Play the HOA.
- Find the items listed.
- Use the matches to light the lantern.
- Click the box to get the seashell.
- Click the wine bottle to get the hair brush.
- Receive the GOLD BRUSH.
- Go back to the church.
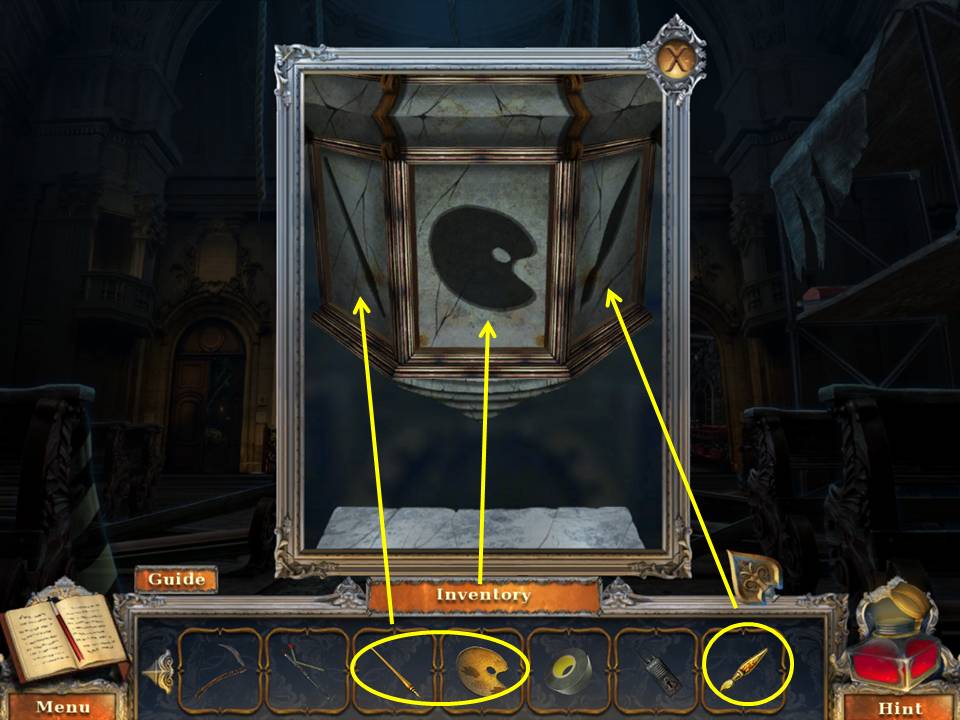
- Zoom into the panel.
- Place the GOLDEN PALETTE, GOLDEN PEN, and GOLD BRUSH in the spots.
- Receive the FLUTE.
- Go to the cemetery gate.
- Zoom into the gate.
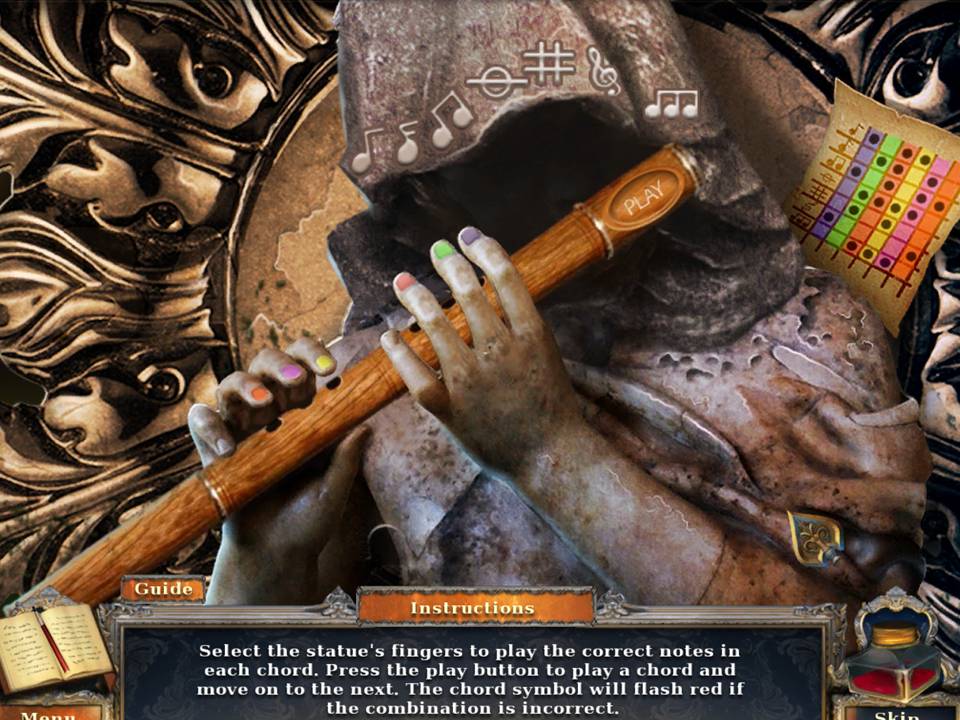
- Put the FLUTE in the figure’s hands.
- The object of this game is to position the fingers according to the music sheet in the top right corner.
- Follow each row beginning with purple and going across.
- For any space with a black circle click the corresponding finger to put it down.
- If no circle is there, leave the finger in the up position.
- Hit “play” after positioning each row.
- When finished, go through the gate into the cemetery.
- Go forward to the outside of the lighthouse.
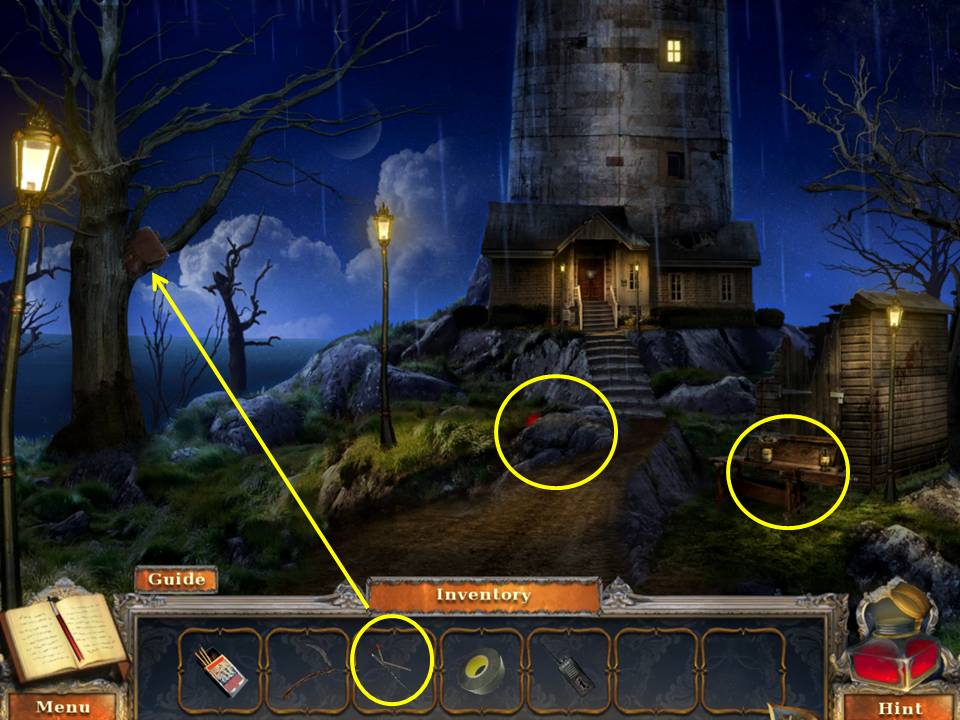
- Zoom into the bench.
- Take the ROTARY WHEEL.
- Zoom into the tree.
- Take the bag with the reaching tool.
- Open the bag.
- Take the THIN BRUSH and the STONE ROSE.
- Zoom into the stone.
- Take the first LIGHTHOUSE EMBLEM SHARD.
- Return to the cemetery gate.
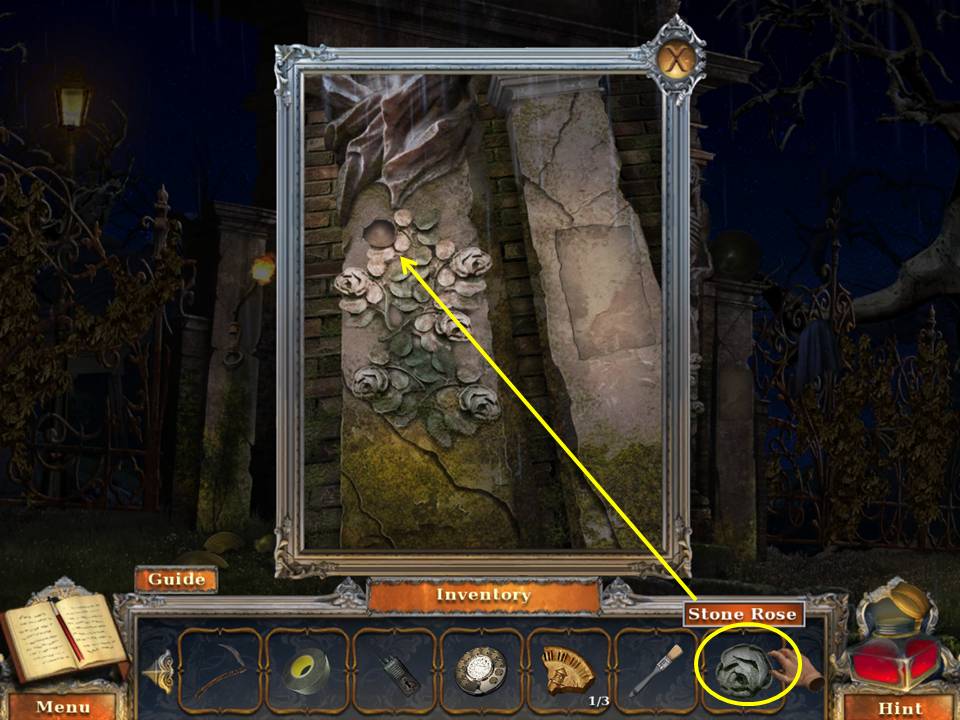
- Zoom into the right side of the gate.
- Place the STONE ROSE in the appropriate space.
- Take the clue, code, and SILHOUETTE STONE.
- Go back to the cemetery.
- Zoom into the open grave.
- Shovel the dirt to uncover the box.
- Zoom into the box and dial the number 940.
- Take the clue, the second LIGHTHOUSE EMBLEM SHARD and the invoice.
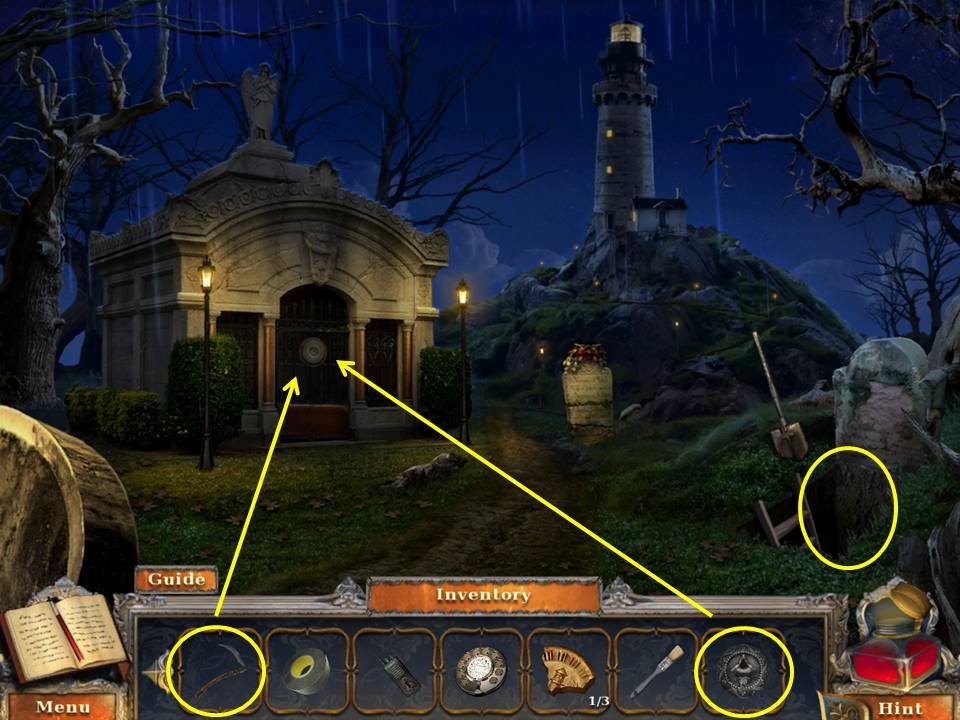
- Zoom into the mausoleum door.
- Place the SILHOUETTE STONE, then the SCYTHE REPLICA in the appropriate spaces.
- Click to open the casket.
- Take the WORK GLOVES and VALVE.
- Light the candle with the MATCHES.
- Take the third LIGHTHOUSE EMBLEM SHARD.
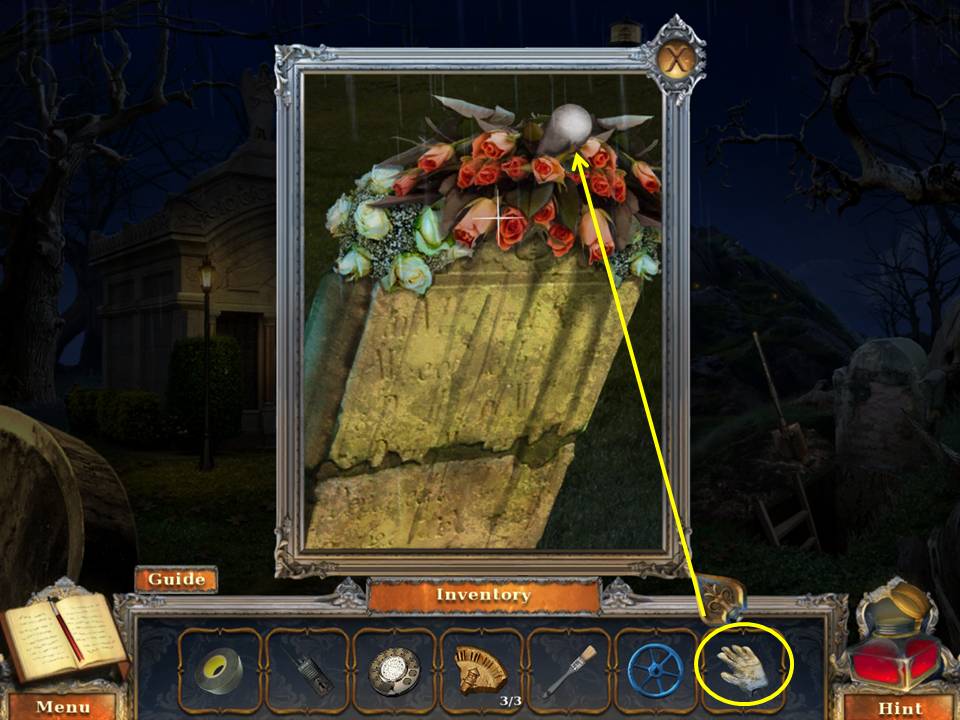
- Zoom into the gravestone.
- Don the WORK GLOVES to take the LEVER.
- Go back to the cemetery gate.
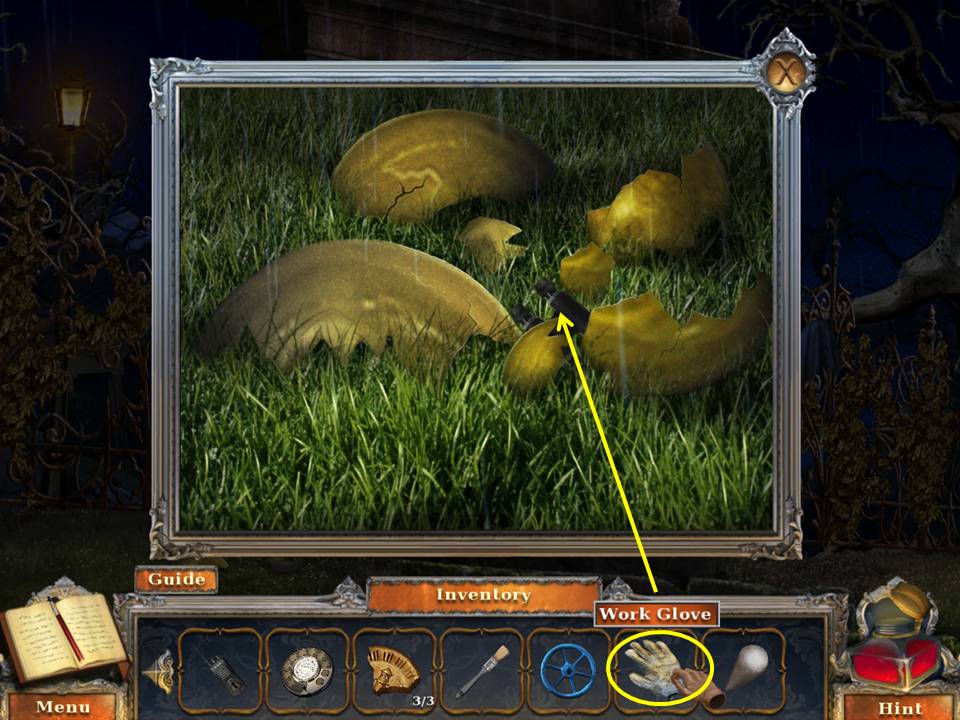
- Zoom into the broken shards.
- Wear the WORK GLOVES to take the CONDUCTOR.
- Go back to the outside of the lighthouse.
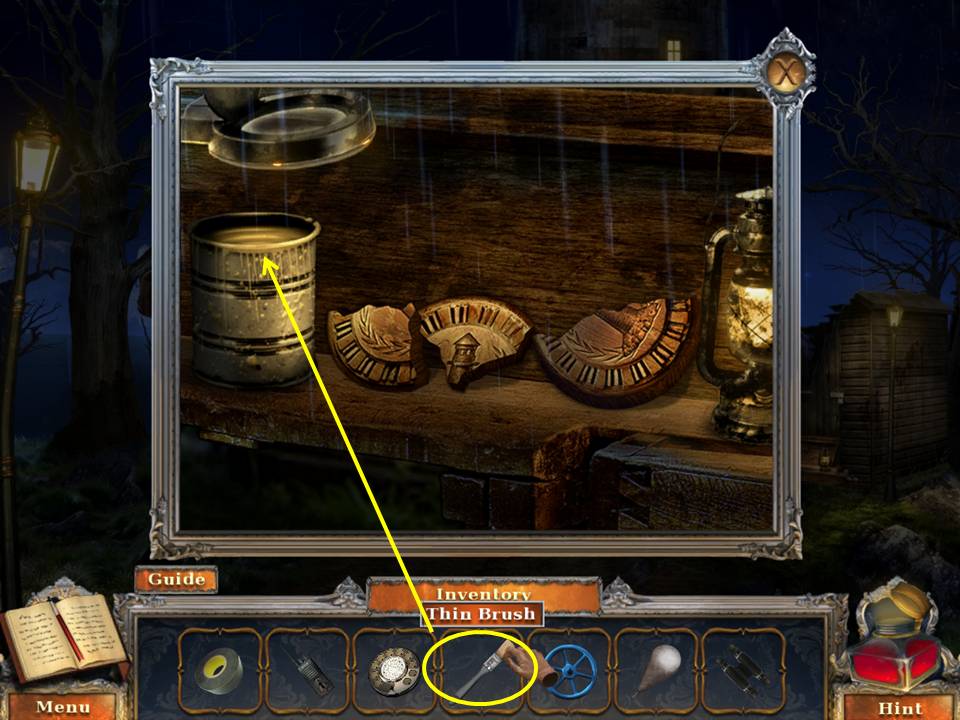
- Zoom into the bench.
- Put the three LIGHTHOUSE EMBLEM SHARDS on the bench.
- Dab glue on the shards with the THIN BRUSH.
- Take the repaired LIGHTHOUSE EMBLEM.
- Zoom into the lighthouse door and place the LIGHTHOUSE EMBLEM into the niche.
- Go into the lighthouse.
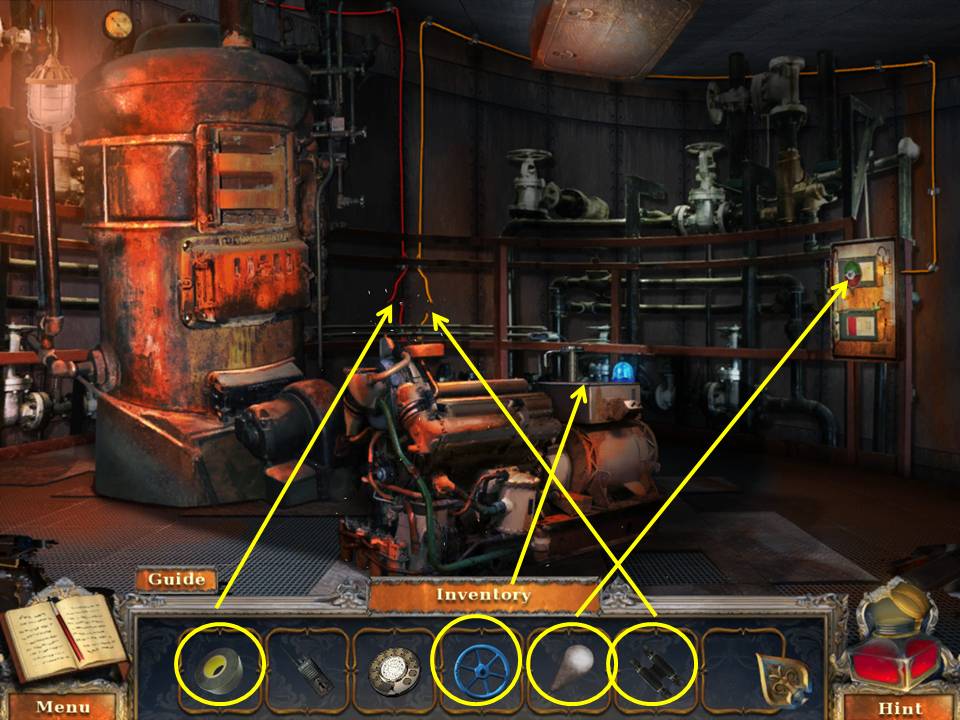
- Zoom into the generator.
- Place the VALVE on the post.
- Click the valve to cut the power.
- Zoom into the cut wires.
- Fix the wires with the CONDUCTOR.
- Secure with ELCTRICAL TAPE. Zoom back into the generator.
- Restore the power.
- Zoom into the panel.
- Place the LEVER on the switch.
- Click it to lower the stairs.
- Ascend the stairs to the lighthouse loft.
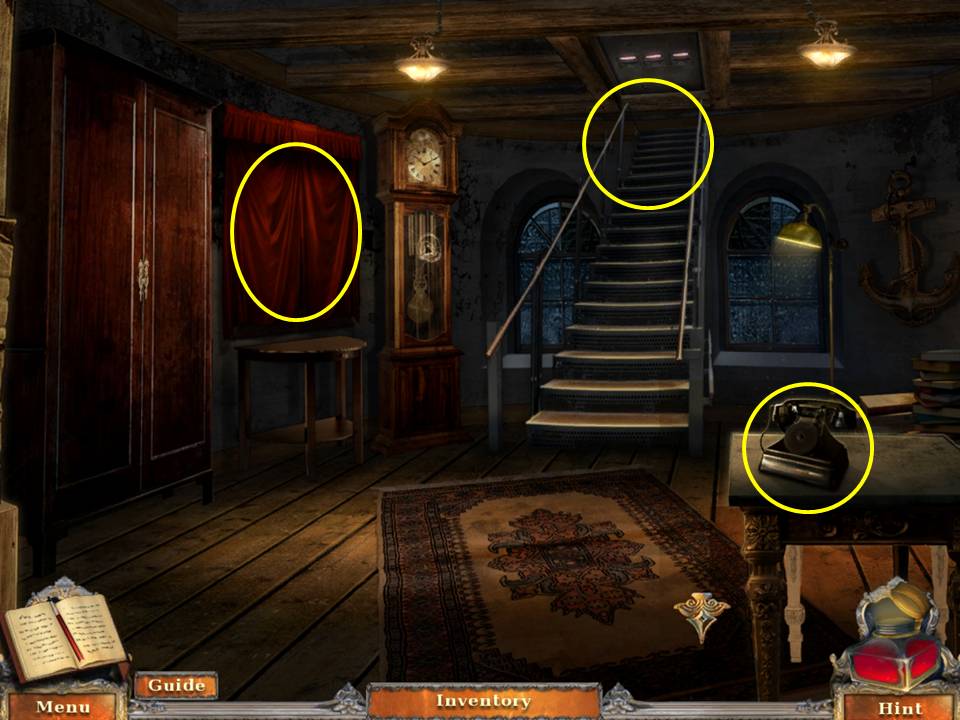
- Click to open the curtain.
- View the painting.
- Zoom into the phone.
- Place the ROTARY WHEEL on the phone.
- Take the SCREWDRIVER.
- Zoom into the stairs.
- Take the WARDROBE HANDLE.
- Put it on the wardrobe.
- Play the HOA.
- Find the items listed.
- Open the drawer to get the emerald.
- Click the lid to get the ladybug.
- Use the heart to open the box and get the brooch.
- Receive the CROWBAR. Return downstairs.
- Zoom into the furnace.
- Unscrew the panel with the SCREWDRIVER.
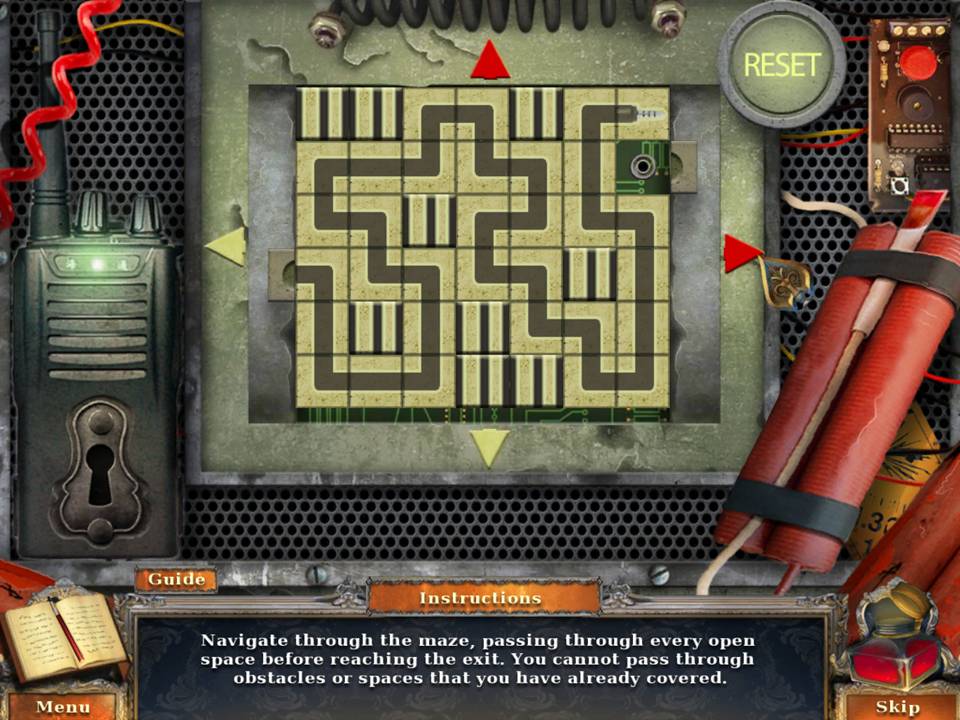
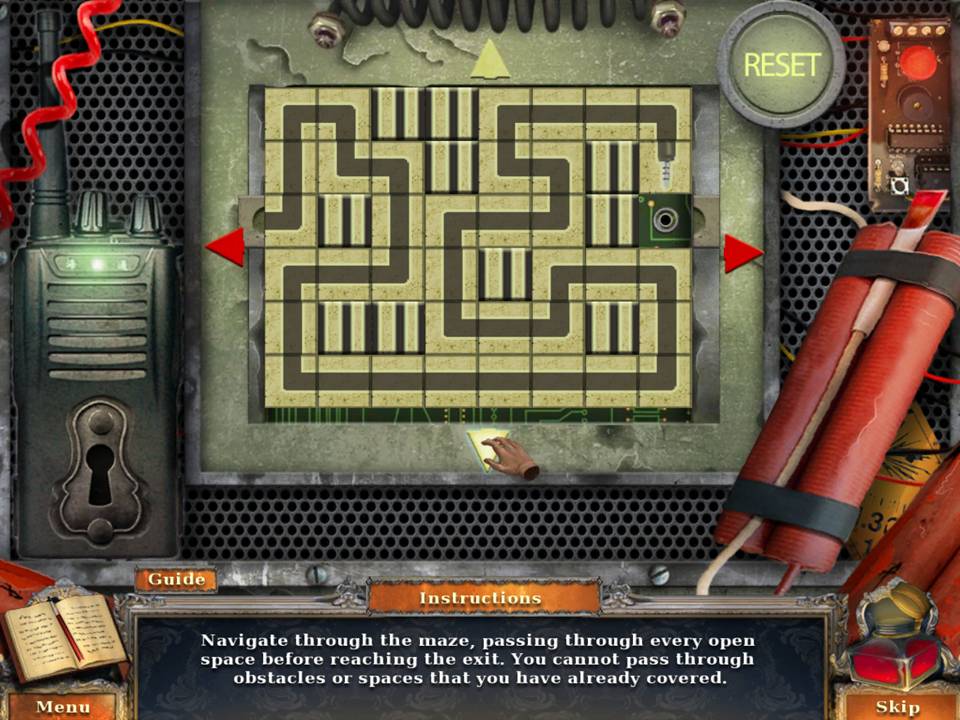
- Zoom into the bomb.
- Put the radio next to the puzzle.
- Using the arrows, follow the path shown in the screenshot to solve the puzzle.
- Collect the first BOMB KEYCARD.
- Leave the lighthouse.
- Zoom into the stone.
- CROWBAR the stone.
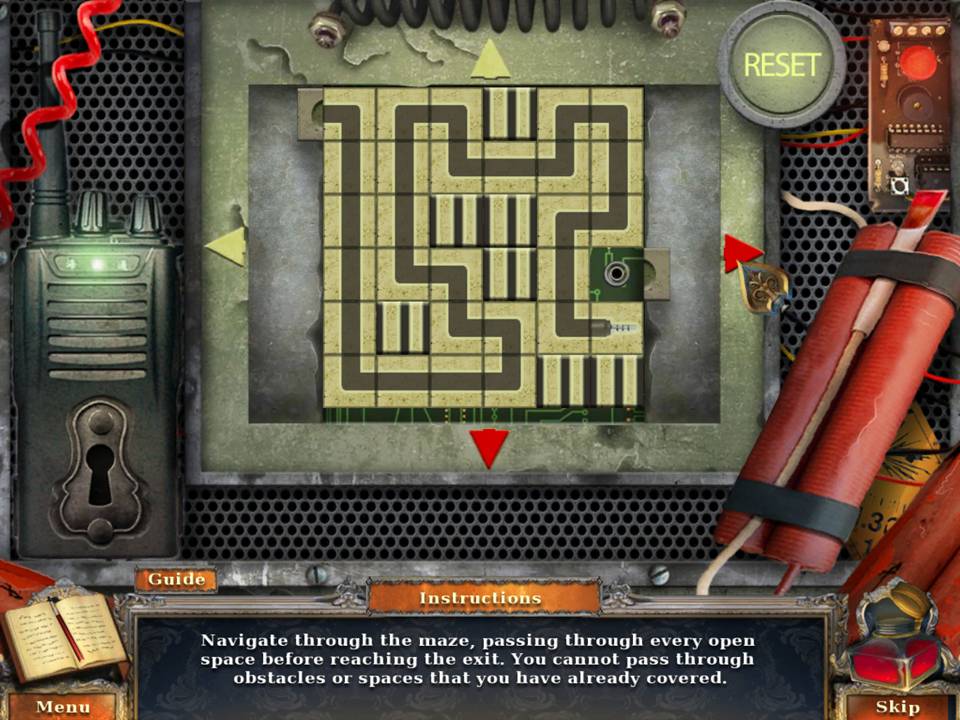
- Zoom into the bomb.
- Put the radio next to the puzzle.
- Using the arrows, follow the path shown in the screenshot to solve the puzzle.
- Take the second BOMB KEYCARD.
- Go back to the lighthouse loft and play the HOA.
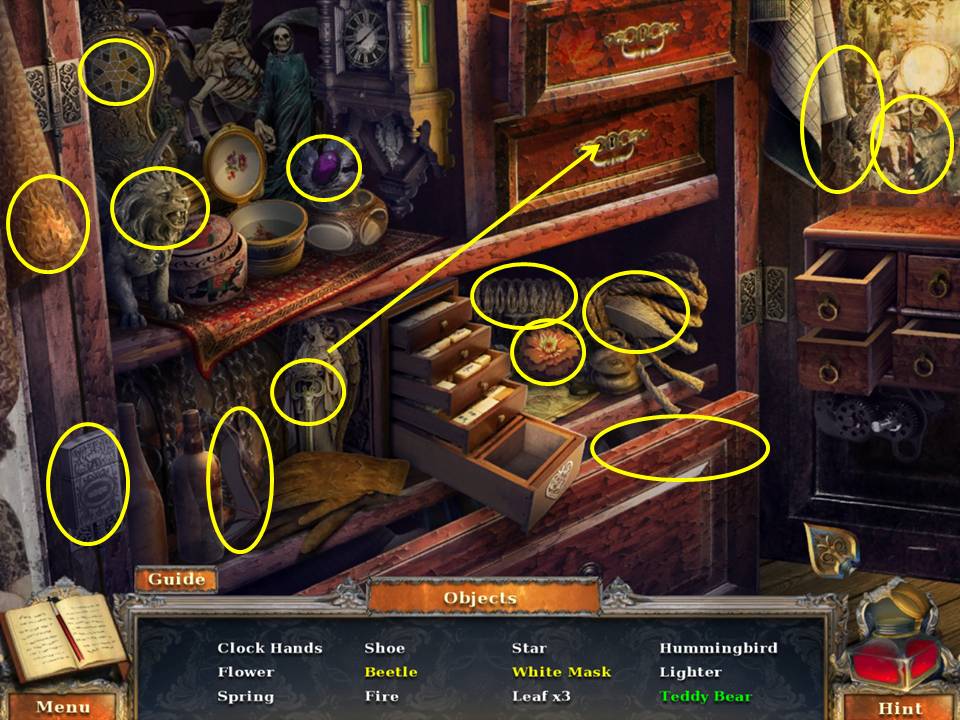
- Find the items listed.
- Open the drawer to get the white mask.
- Use the key to open the box and get the teddy bear.
- Click the lion head to get the beetle.
- Receive the CLOCK HANDS.
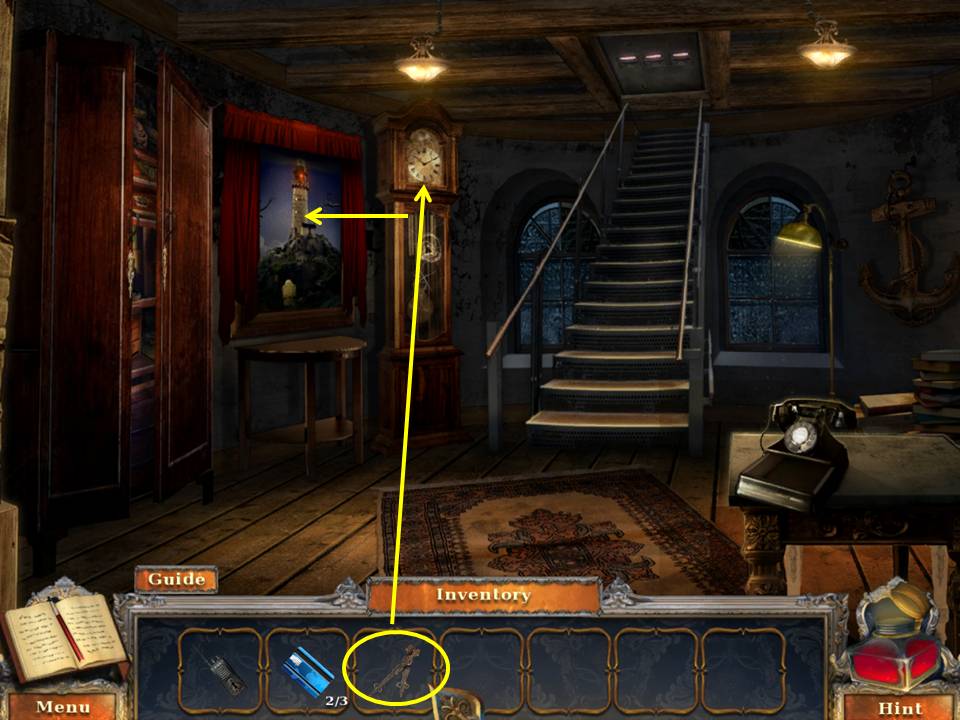
- Zoom into the clock.
- Put the CLOCK HANDS on the face.
- Take the SHARP PENDULUM.
- Zoom into the painting.
- Slice the canvas with the SHARP PENDULUM to see the bomb.
- Zoom into the bomb.
- Put the radio next to the puzzle.
- Using the arrows, follow the path shown in the screenshot to solve the puzzle.
- Take the third BOMB KEYCARD.
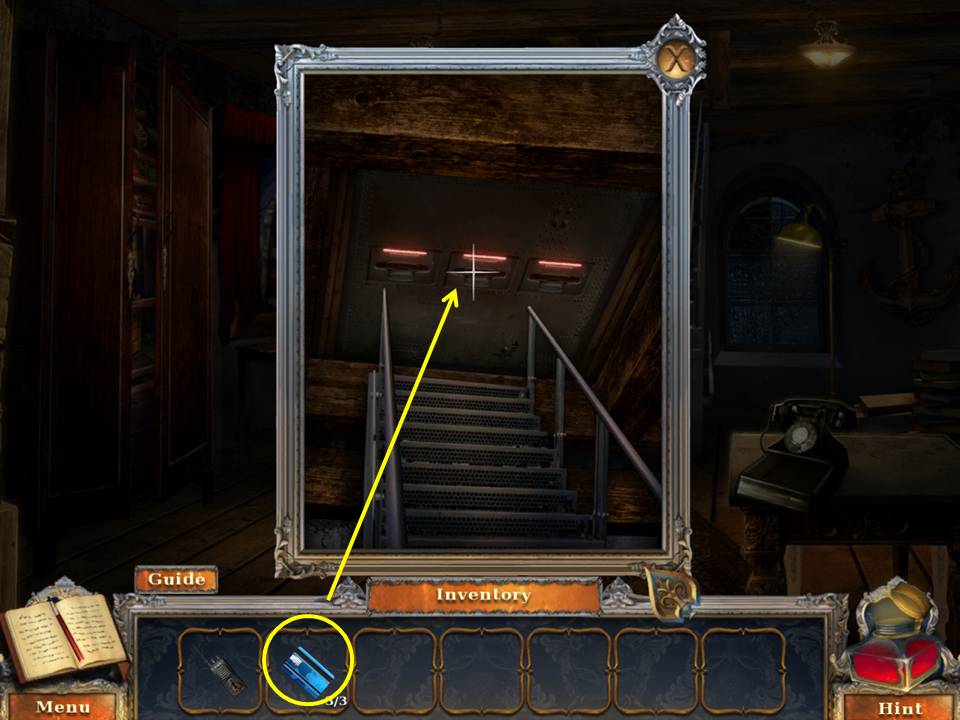
- Zoom into the stairs insert the three BOMB KEYCARDS into the slots.
- Throw the RADIO at the red button.
- Release the captives.
- Congratulations! You've completed Dark Canvas A Brush with Death!
Comments will load when you reach this part of the walkthrough.