
Chapter One: The Art Gallery
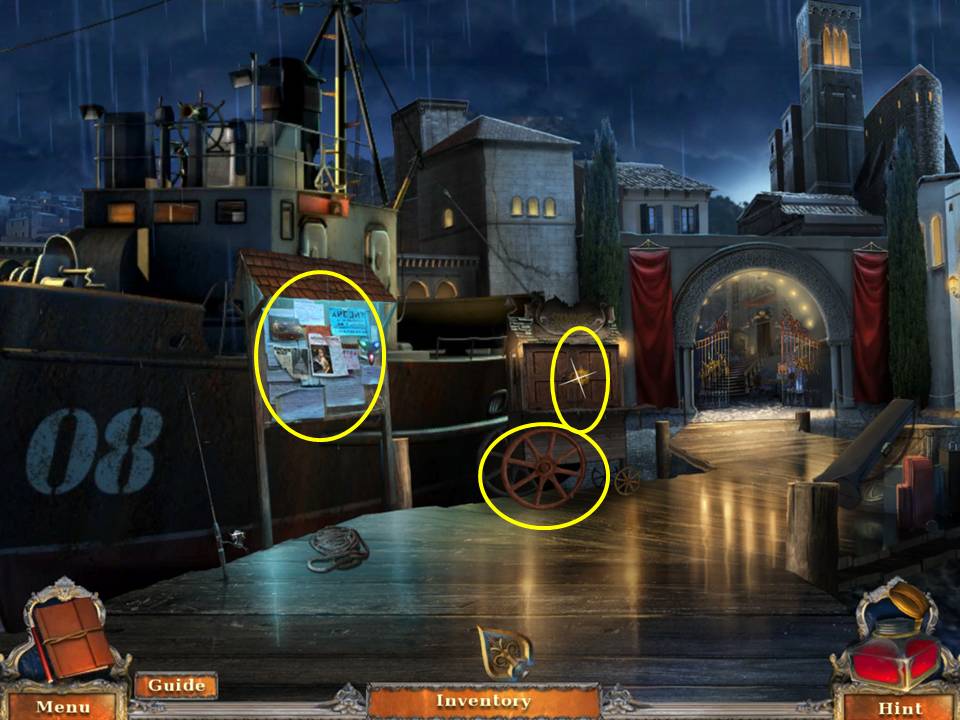
- Zoom into the message board.
- Take the JEWEL and MATCHES.
- Read and take the two clues.
- Zoom into the cart wheel.
- Take the BRUSH TOKEN.
- Zoom into the cart. Insert the JEWEL in the lock.
- Play the HOA.
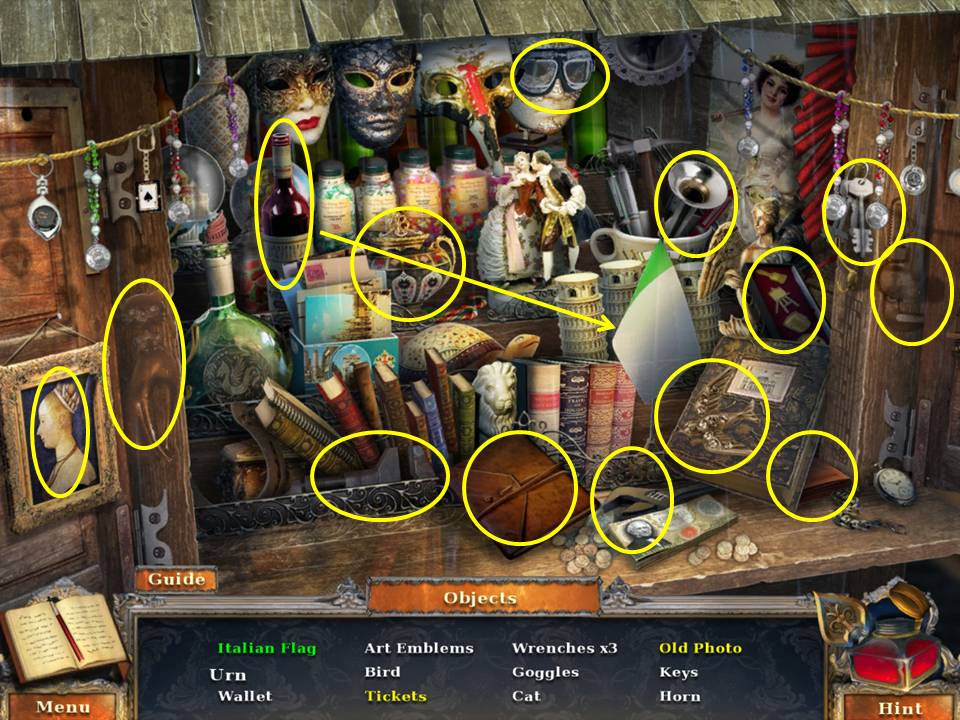
- Find the items listed.
- Pour the wine on the flag to get the Italian flag.
- Click the portfolio to get the tickets.
- Click the painting to take it out of its frame and get the old photo.
- Receive the ART EMBLEMS.
- Zoom into the lock on the gate.
- Insert the ART EMBLEMS to initiate a puzzle.
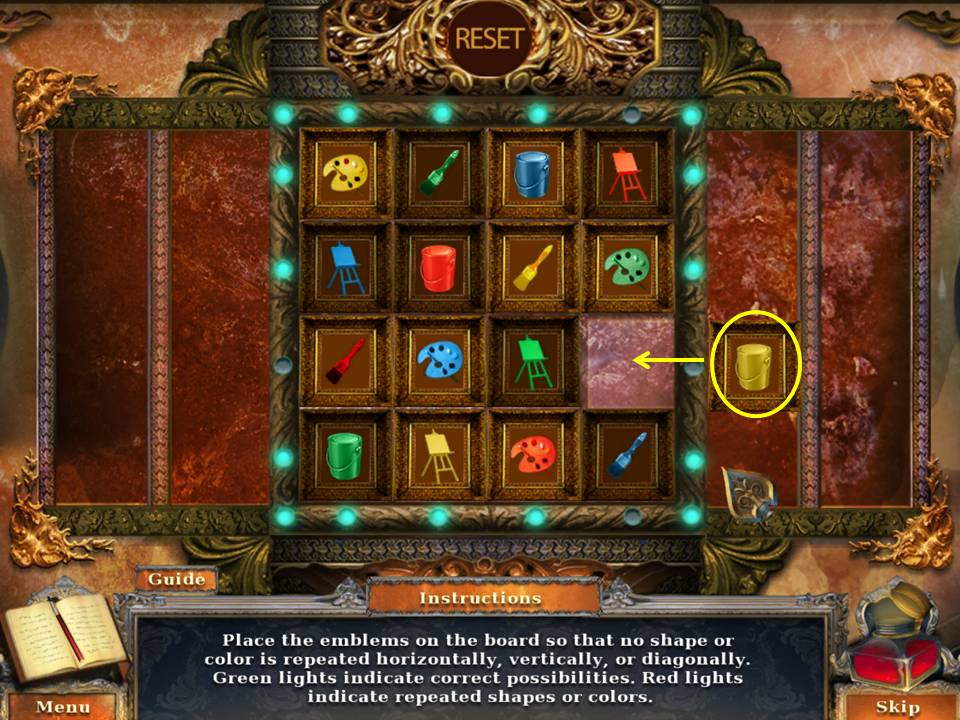
- The object of the puzzle is to position the emblems so that no color or symbol repeats in the same line vertically, diagonally, or horizontally.
- Screenshot shows the final move required.
- When finished, go forward to the art gallery entrance.
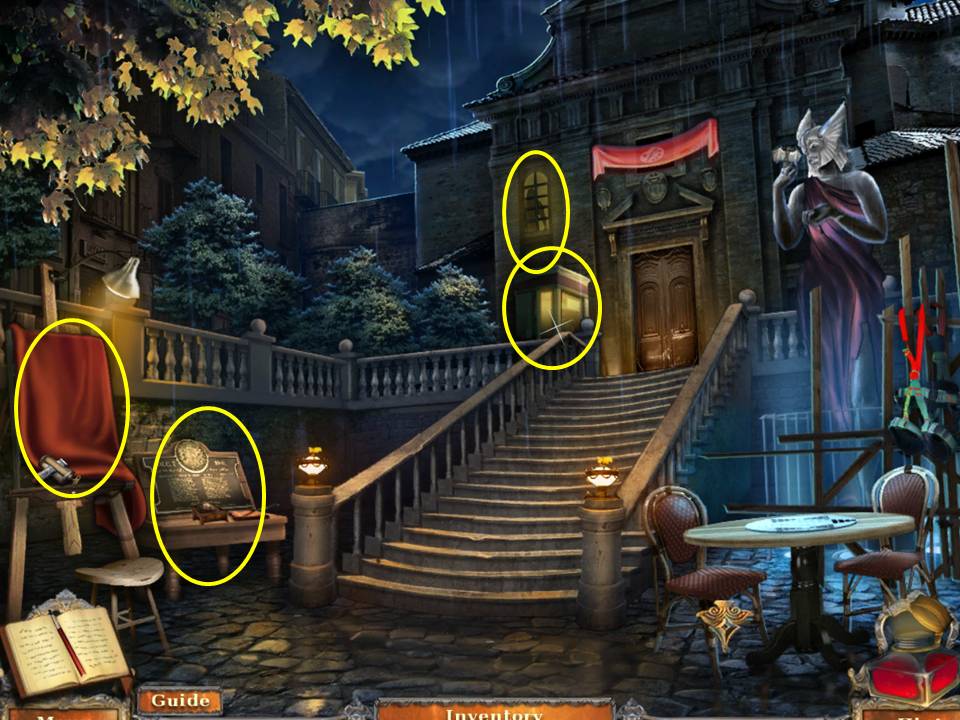
- Zoom into the easel.
- Click the drape to move it.
- Take the TUBE SQUEEZER.
- Zoom into the small table to the left of the staircase.
- Click the latches on the lion box.
- Take the LION EMBLEM. Insert the BRUSH TOKEN in the slot. Click to turn.
- Take the WIDE PAINTBRUSH and the CANDLEWICKS.
- Put the WIDE PAINTBRUSH on the cutting board. Click the handle.
- Receive the WIDE HANDLE.
- Zoom into the window.
- Zoom into the ticket booth. Insert the LION EMBLEM in the niche. Return to the dock.
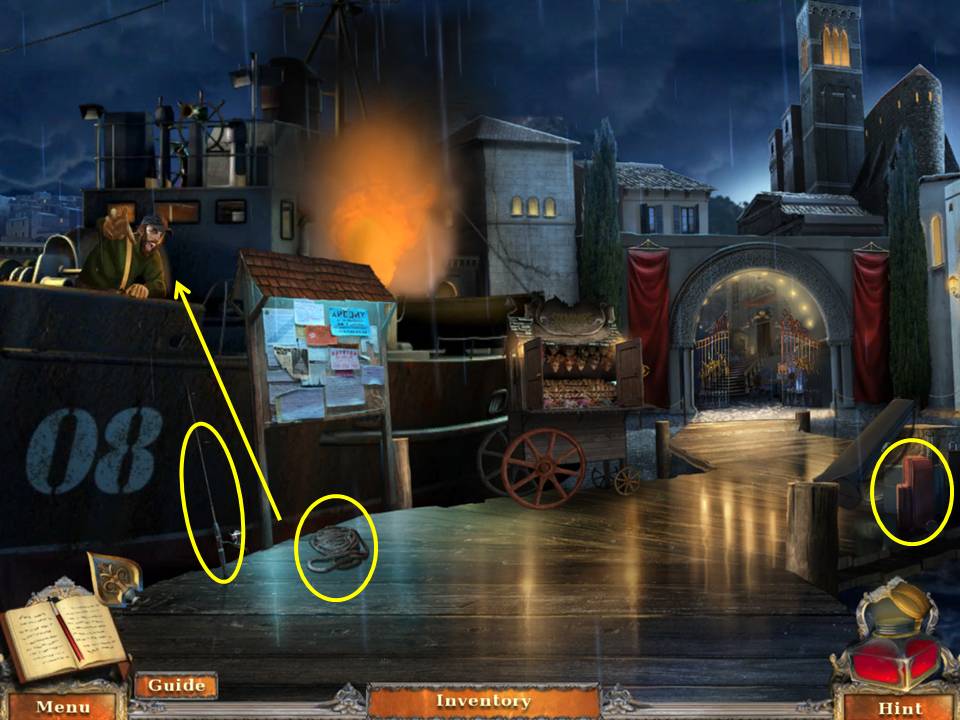
- Toss the ROPE to the captain.
- Take the KNIFE the captain drops and the FISHING POLE.
- Zoom into the luggage.
- Cut the BELT with the KNIFE.
-
Return to the art gallery entrance.
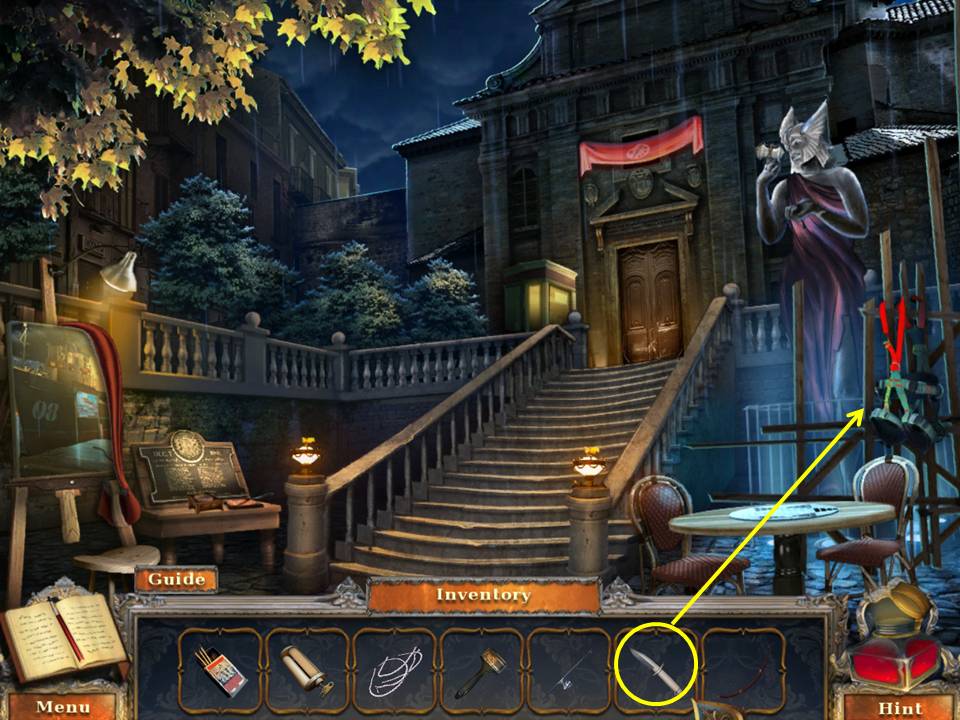
- Cut the HARNESS at right near the statue with the KNIFE.
- Return to the dock.
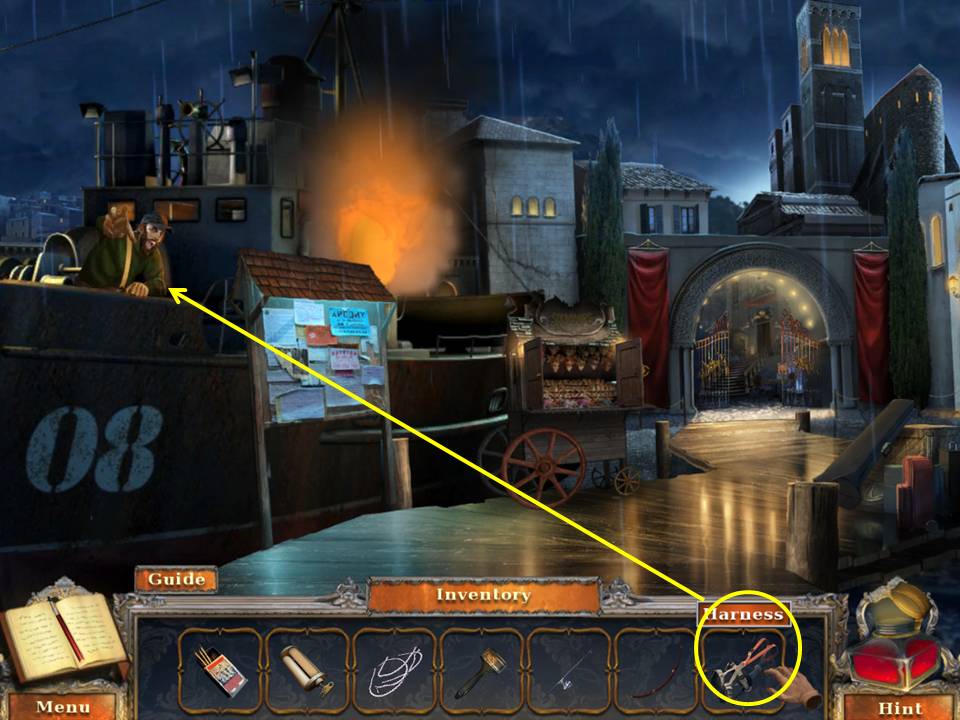
- Give the captain the harness.
- Talk to the captain.
- Take the GALLERY TICKET from the captain.
- Go forward.
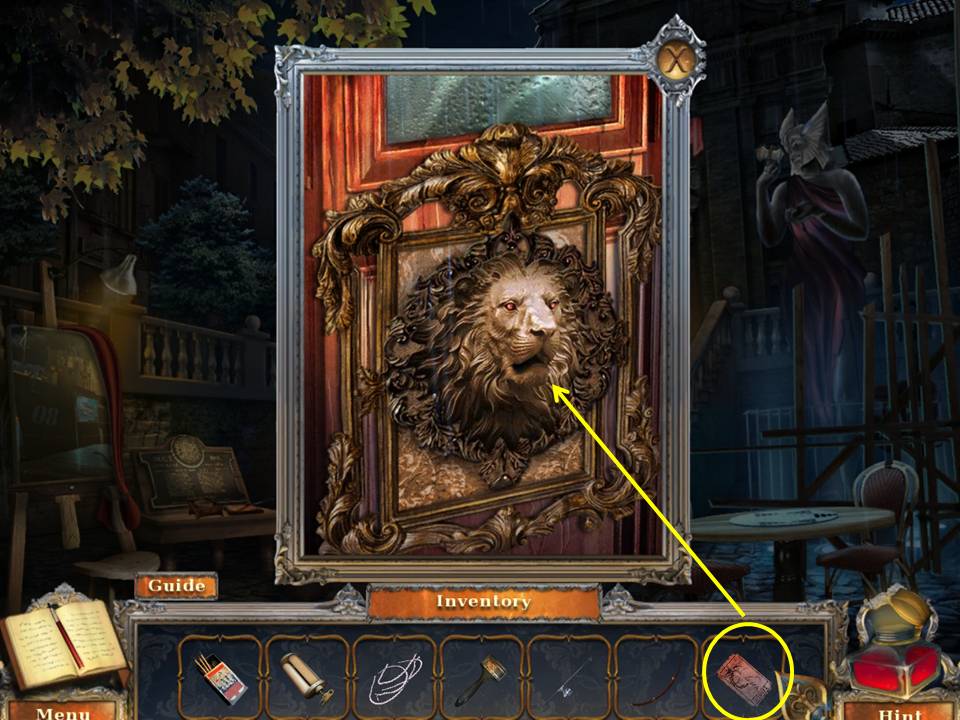
- Zoom into the ticket booth.
- Insert the GALLERY TICKET into the lion’s mouth.
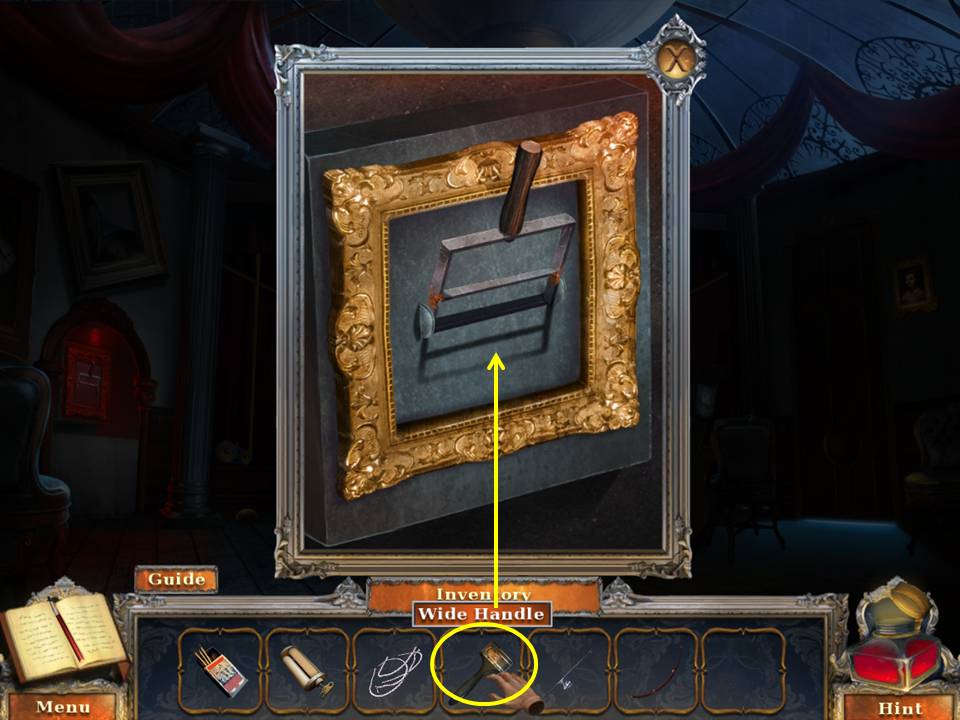
- Enter the art gallery.
- Zoom into the switch and click it.
- Replace the broken switch with the WIDE HANDLE.
- Click the switch.
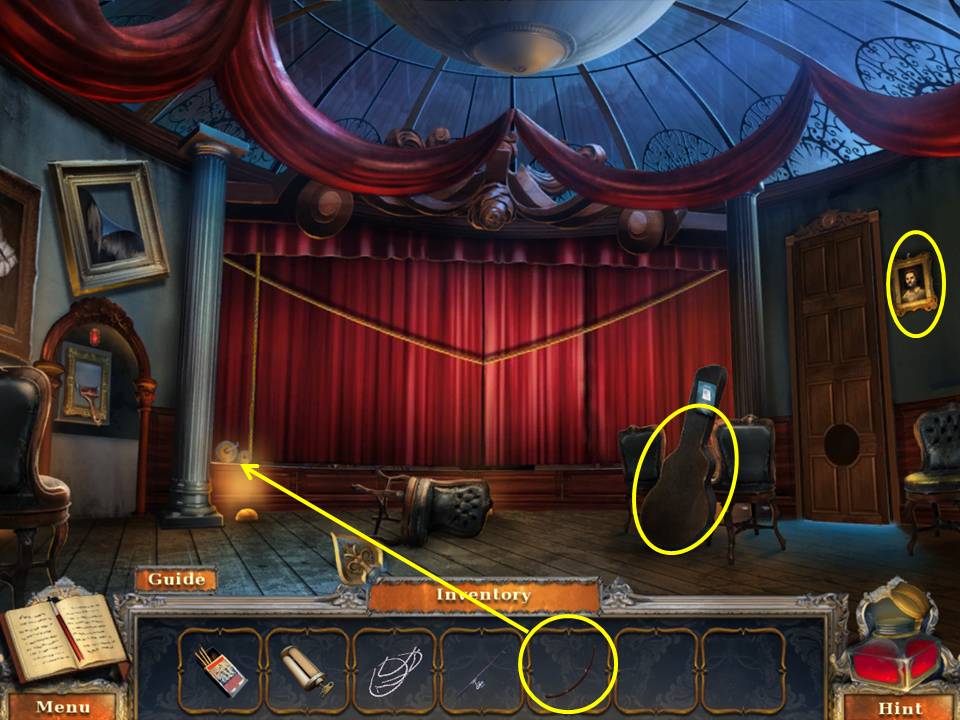
- Zoom into the crank.
- Wrap the BELT around the gears.
- Zoom into the guitar case.
- Take the clue.
- Click to open the case.
- Take the GUITAR STRING.
- Zoom into the painting at left.
- Click the portrait at right.
- Take the HOOK.
- Zoom into the stage.
- Click the frame at the bottom left corner.
- Click the metronome to stop it.
- Take the SMALL RED LIGHTBULB.
- Try to click and move the paper from the trombone.
- Leave the art gallery and zoom into the statue at right.
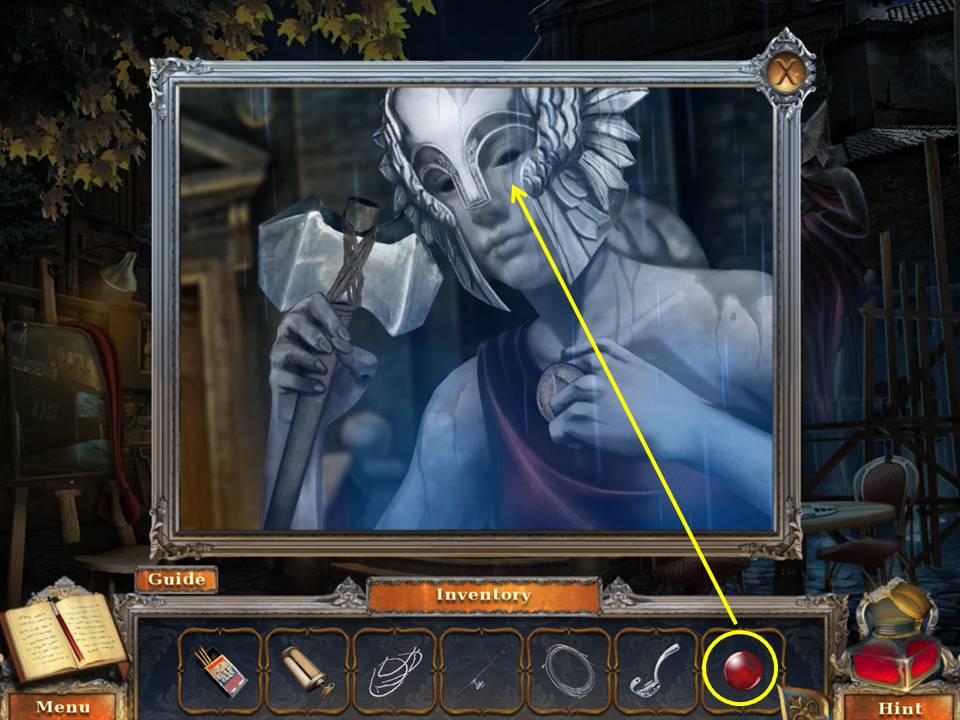
- Insert the SMALL RED LIGHTBULB in the statue’s eye socket.
- Take the STONE HAMMER.
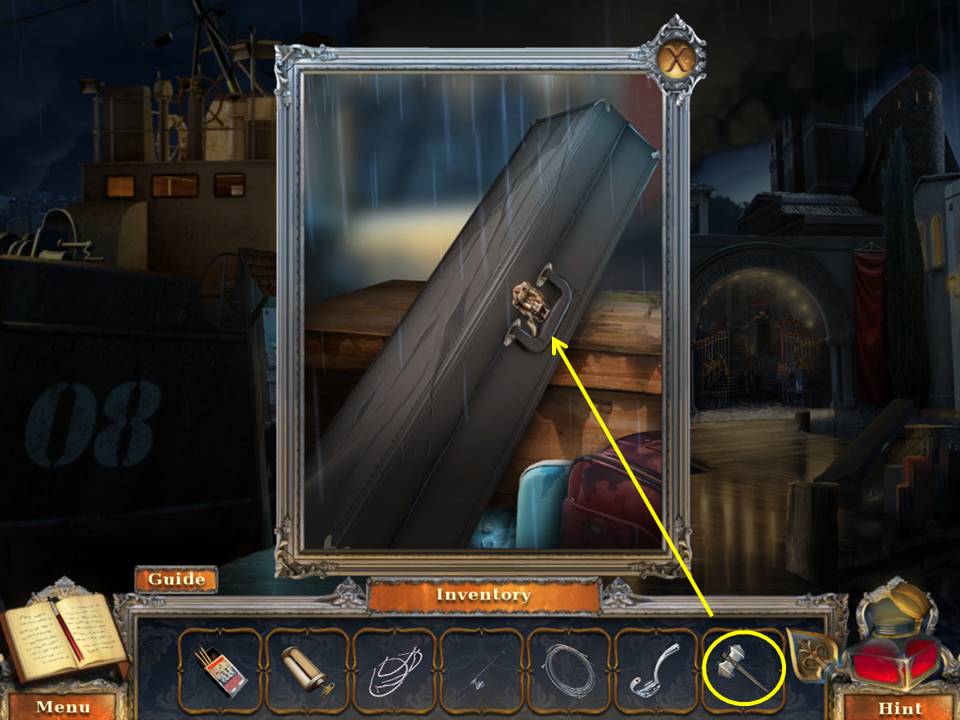
- Go to the dock.
- Zoom into the luggage.
- Smash the trombone case’s lock with the STONE HAMMER.
- Take the VITRUVIAN DISC and the TROMBONE SLIDE.
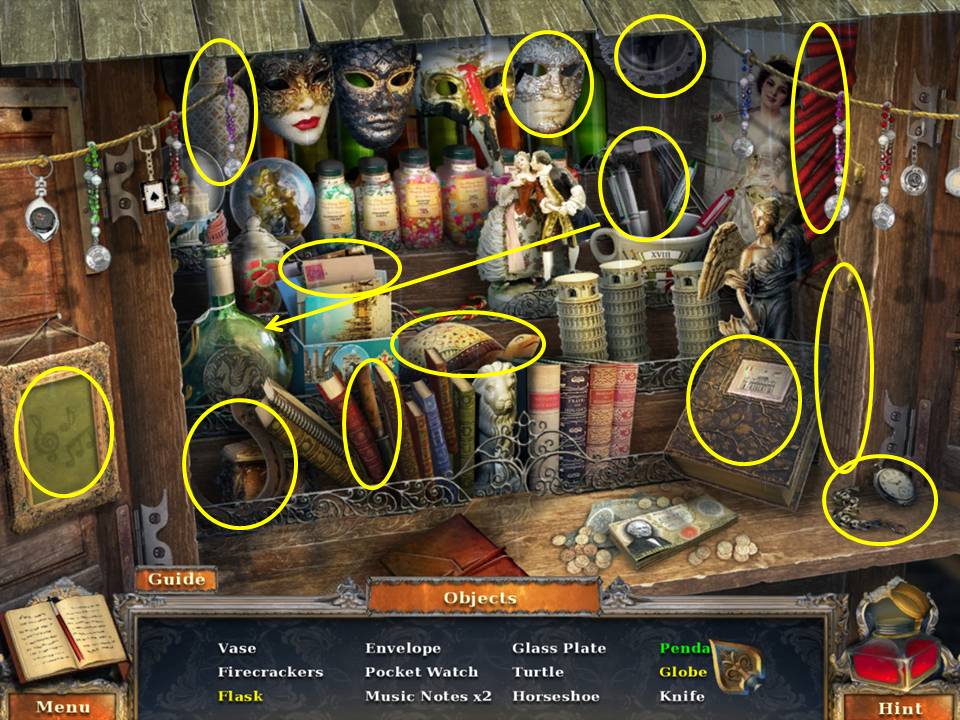
- Play the HOA.
- Find the items listed.
- Click the book to get the flask.
- Click the mask to get the globe.
- Break the bottle with the hammer to get the pendant.
- Receive the DECORATIVE GLASS PLATE.
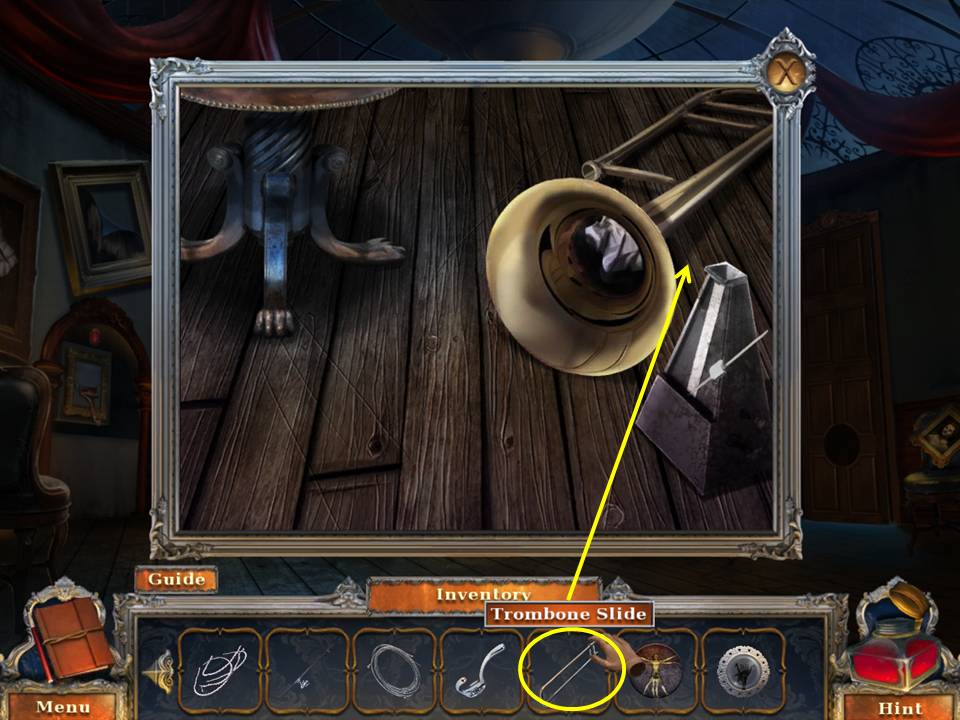
- Go back to the art gallery.
- Zoom into the stage.
- Put the TROMBONE SLIDE on the trombone.
- Take the clue and the TRICK CANDLES.
- Zoom into the door. Insert the VITRUVIAN DISC into the space.
- Enter the vitruvian room.
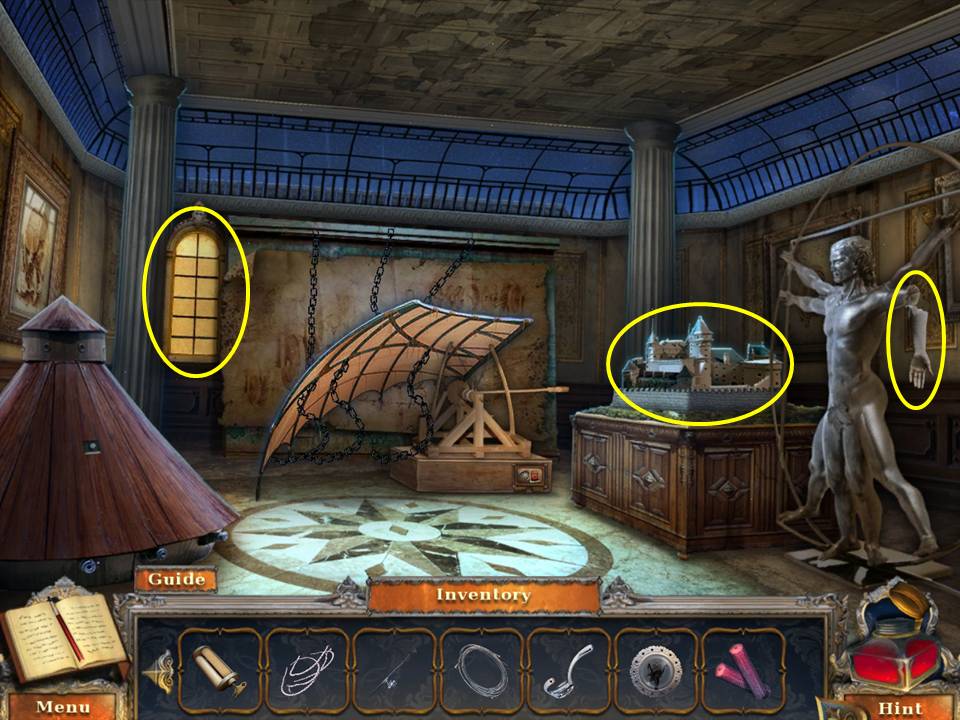
- Take the vitruvian man’s MANNEQUIN ARM.
- Zoom into the castle.
- Take the GUITAR PEG and MINIATURE CANNONBALLS.
- Click to look out the window.
- Click down once.
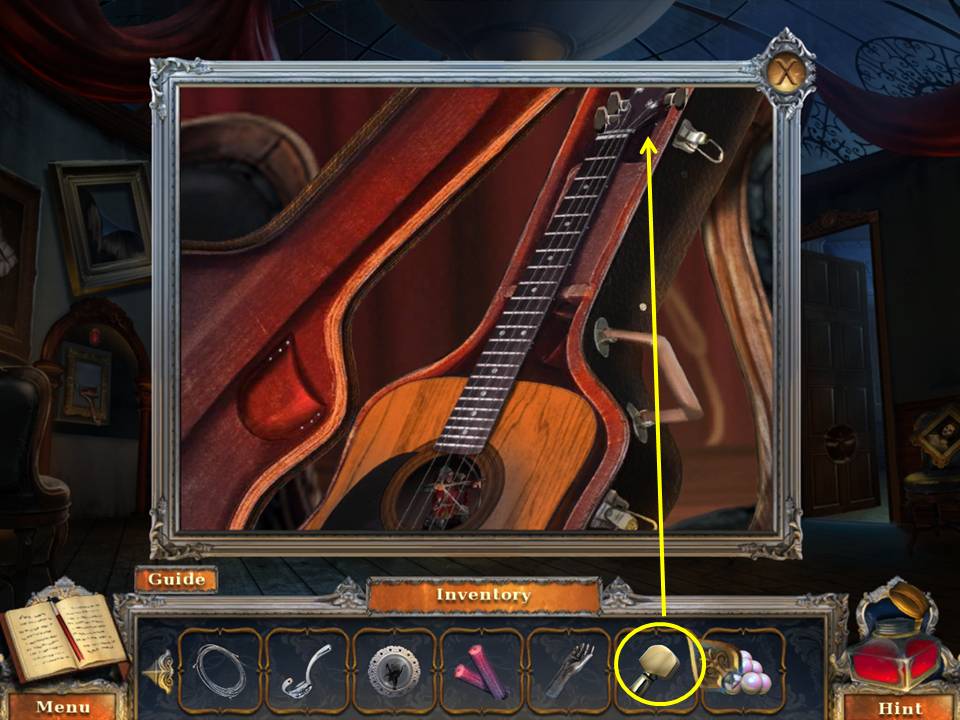
- Zoom into the guitar. Insert the GUITAR PEG.
- Click to turn until the strings break.
- Take the TOY ARCHER.
- Go to the art gallery entrance.
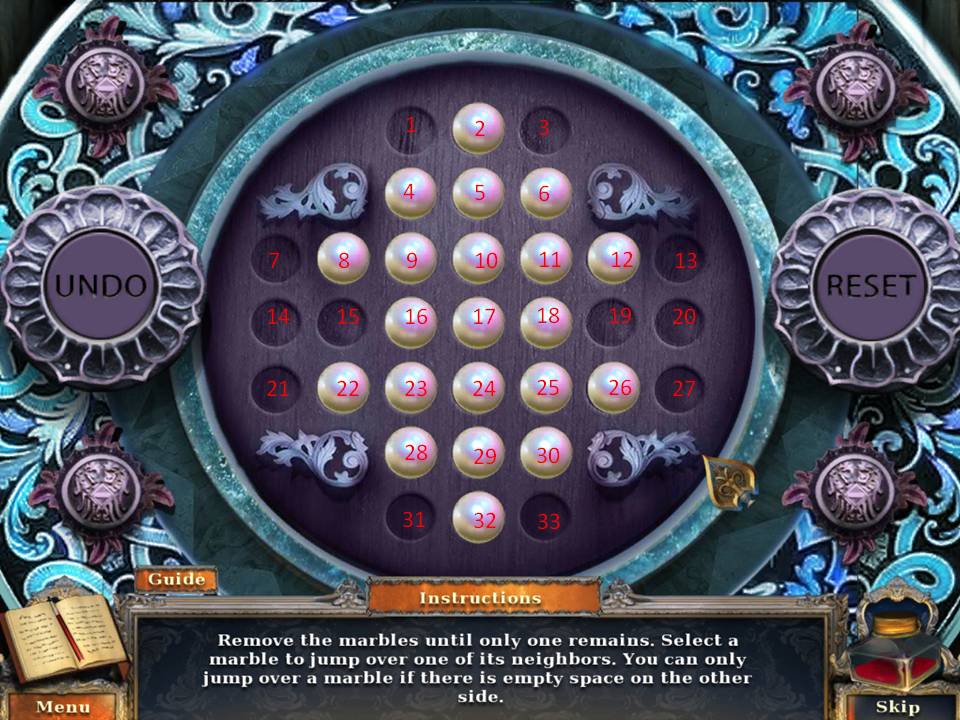
- Zoom into the table at right.
- Put the miniature cannonballs in the scene to initiate a puzzle.
- The object of the game is to “jump” over the cannonballs to remove them, thus clearing the board.
- Assuming the spaces are numbered one to 33, going left to right and beginning at the top.
-
Make these moves.
- 9-1
- 1-3
- 11-9
- 3-11
- 12-10
- 25-33
- 33-31
- 23-25
- 26-24
- 17-15
- 5-17
- 18-16
- 31-23
- 29-17
- 22-24
- 17-29
- 15-17
- 8-10
- 10-24
- 29-17
- When finished, take the second TOY ARCHER.
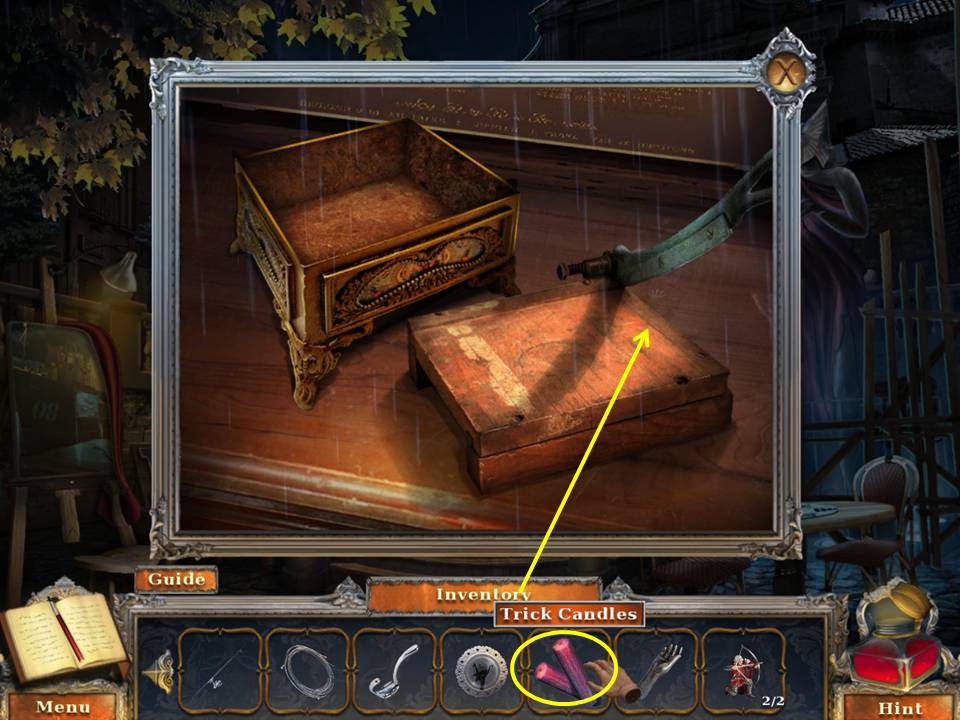
- Zoom into the cutting board and put the TRICK CANDLES on it.
- Click the handle to cut them.
- Take the SMALL TRICK CANDLES.
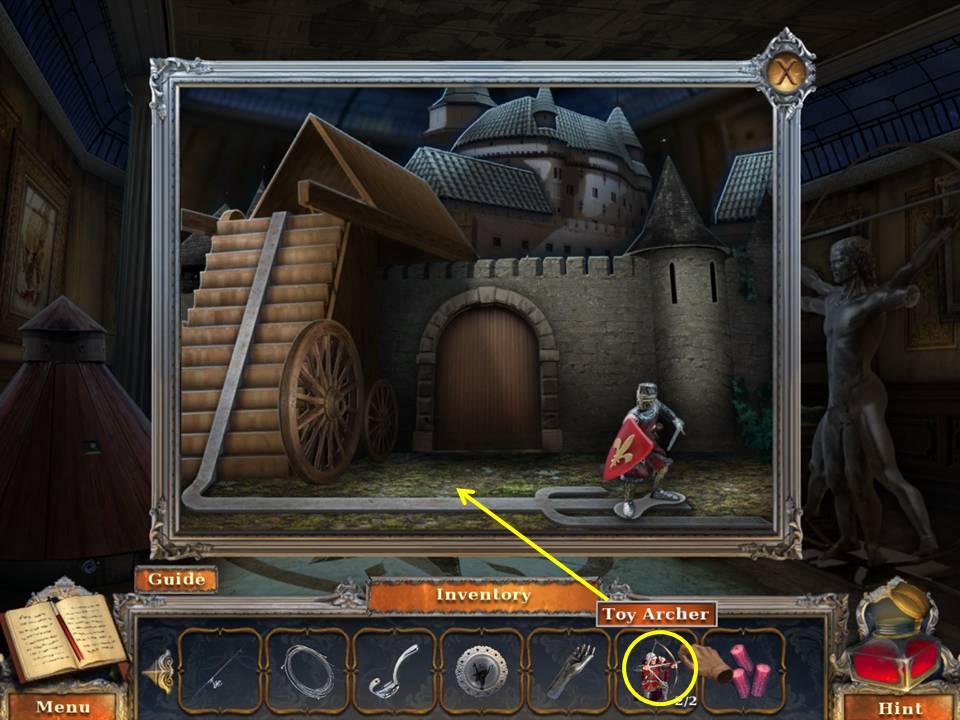
- Go to the vitruvian man room.
- Zoom into the castle and put the TOY ARCHERS in the scene.
- Take the PANEL KEY.
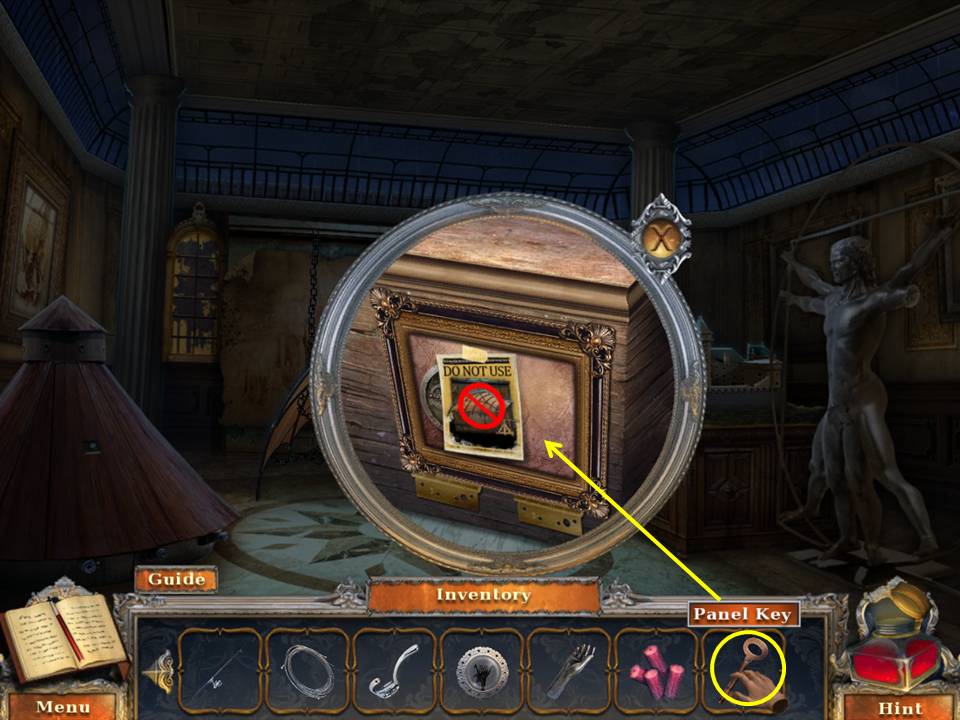
- Zoom into the base of the wing.
- Take the clue.
- Place the PANEL KEY in the keyhole.
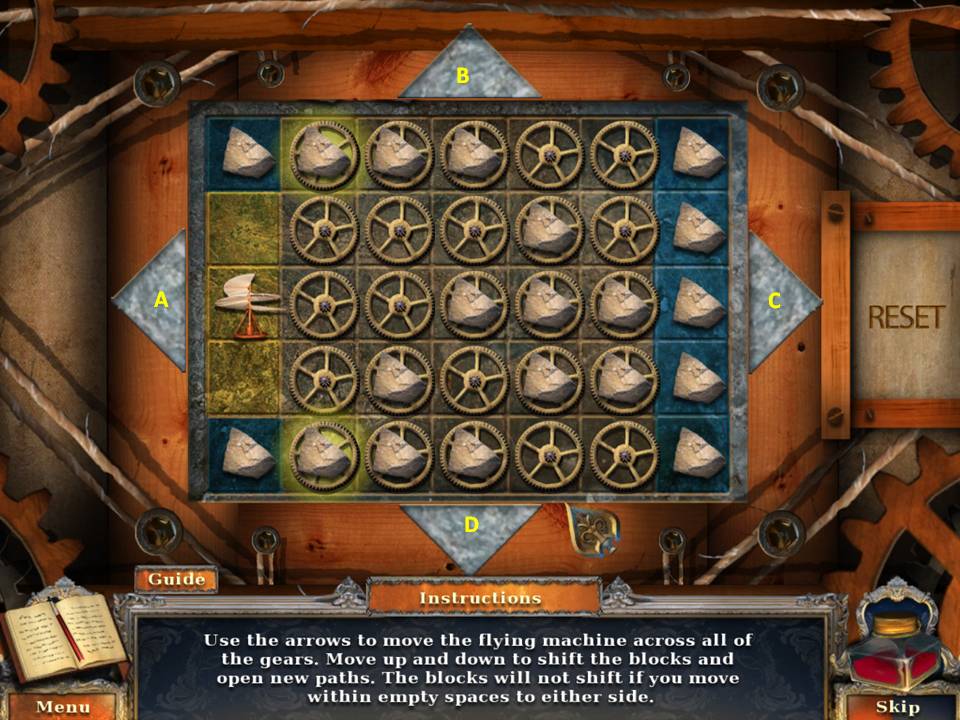
- Zoom into the base of the wing again to initiate a puzzle.
- The object of the puzzle is to use the arrows to move the flying machine over each gear.
- Moving up and down will shift the blocks and open new paths.
- The blocks will not shift if you move within the three yellow spaces on the left.
- Assuming the left arrow is “A,” the top is “B,” the right is “C,” and the bottom is “D,” click in this order: B, C, D, D, D, C, B, B, B, B, C, D, D, D, D, B, C, D, B, B, B, B, D, C, B, C, C, C, C.
- When finished, enter the back room.
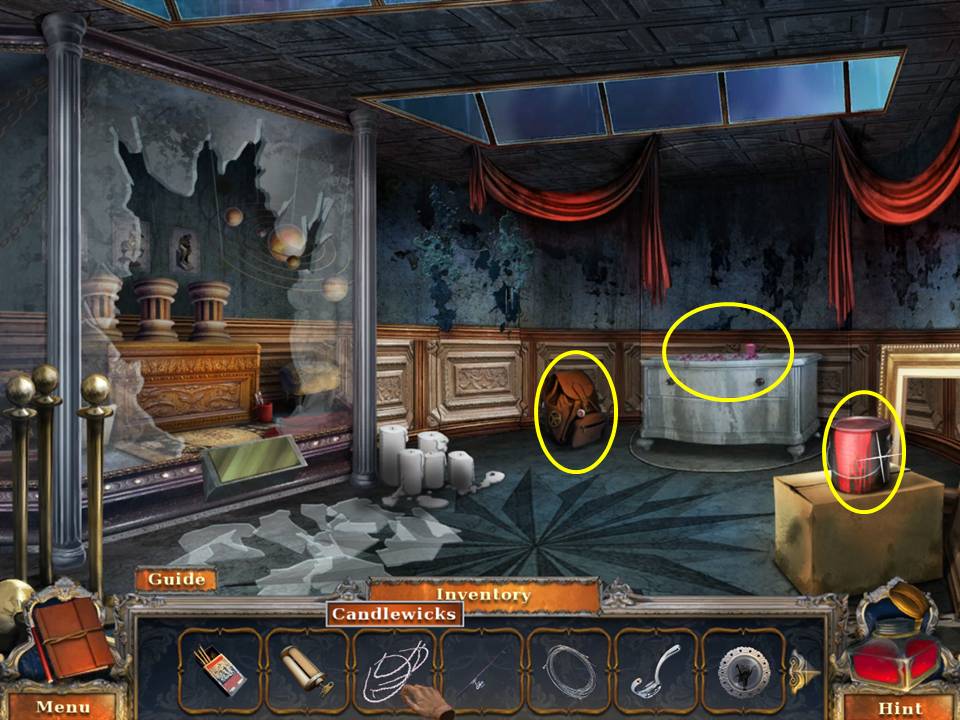
- Take the PAINT CAN.
- Zoom into the bag.
- Click to open.
- Take the COMPUTER DISC and the clue. Zoom into the dresser.
- Put the SMALL TRICK CANDLES into the scene.
- Put the CANDLEWICKS on the candles.
- Light the wicks with the MATCHES.
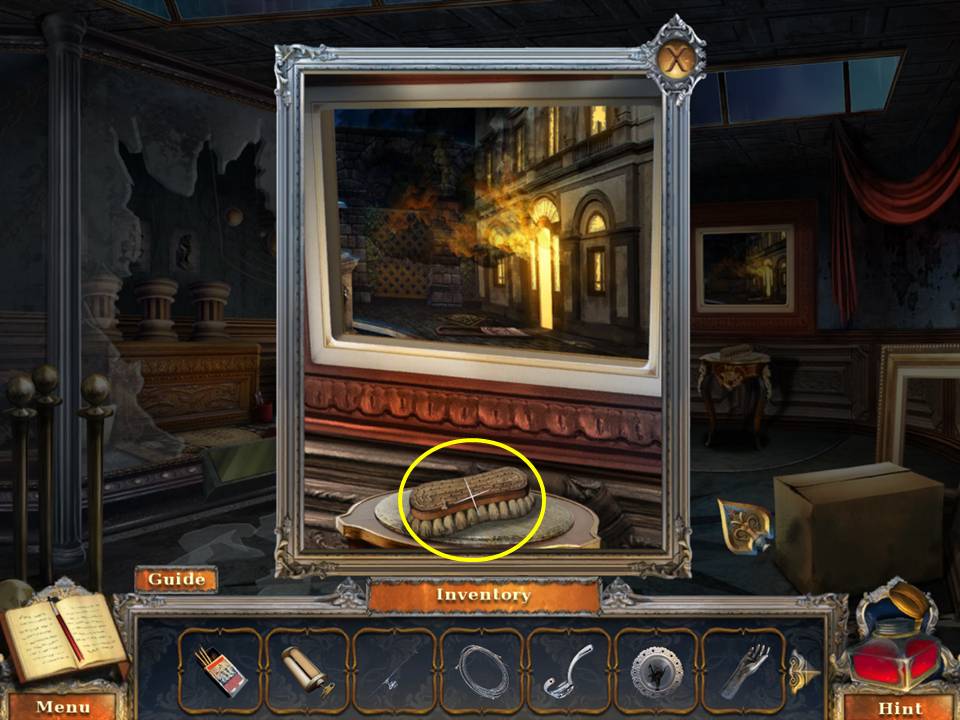
- When the wall turns, zoom into the table.
- Take the SCRUBBING BRUSH.
- Use the MATCHES to light the candles on the floor.
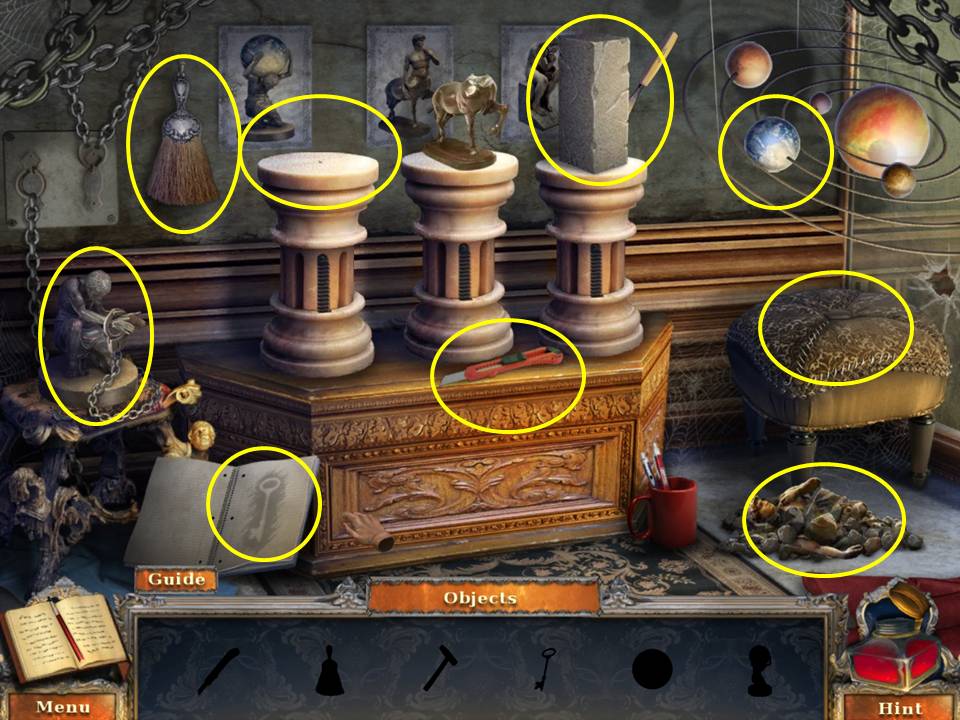
- Play the HOA. Find the silhouetted items at the bottom of the page.
- Click the notebook to get the key.
- Cut the footstool with the retractable knife to get the hammer.
- Zoom into the statue of Atlas.
- Unlock the handcuffs with the key.
- Put the earth in the Atlas’ hands.
- Brush the debris to get the statue torso.
- Put the statue torso on the horse.
- Put Atlas on the pedestal.
- Zoom into and hammer the block.
- Receive the MAGNET. Go to the dock.
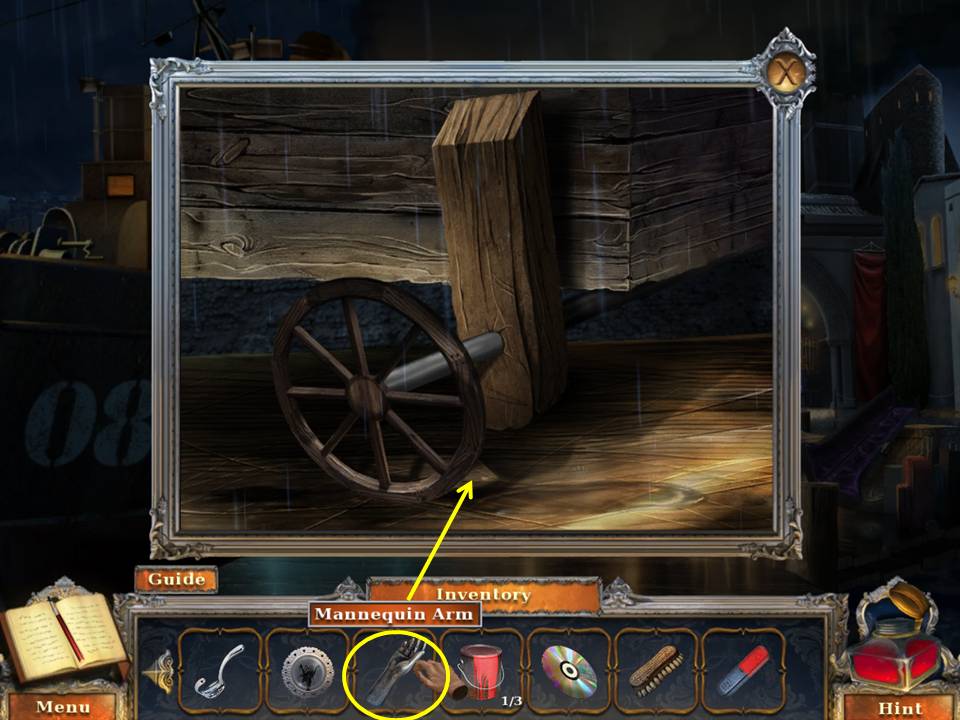
- Zoom into the cart’s wheel.
- Lever it up with the MANNEQUIN ARM.
- Take the WHEEL.
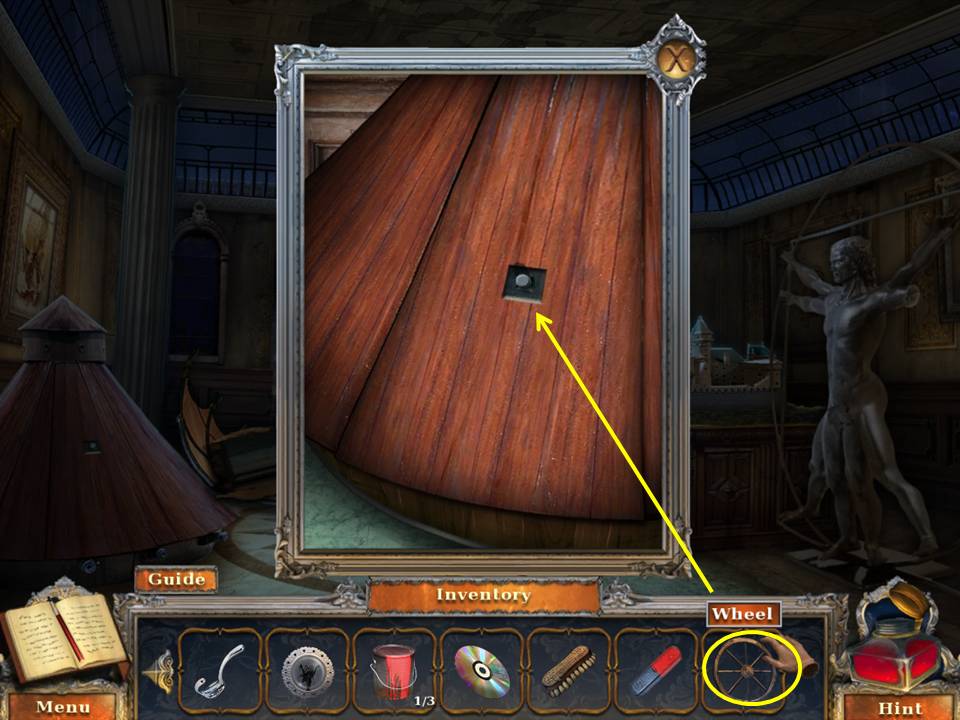
- Go to the vitruvian room.
- Zoom into the cone.
- Use the wheel on the latch to open the panel.
- Take the TURPENTINE BOTTLE and the SMALL GREEN LIGHTBULB.
- Go into the back room.
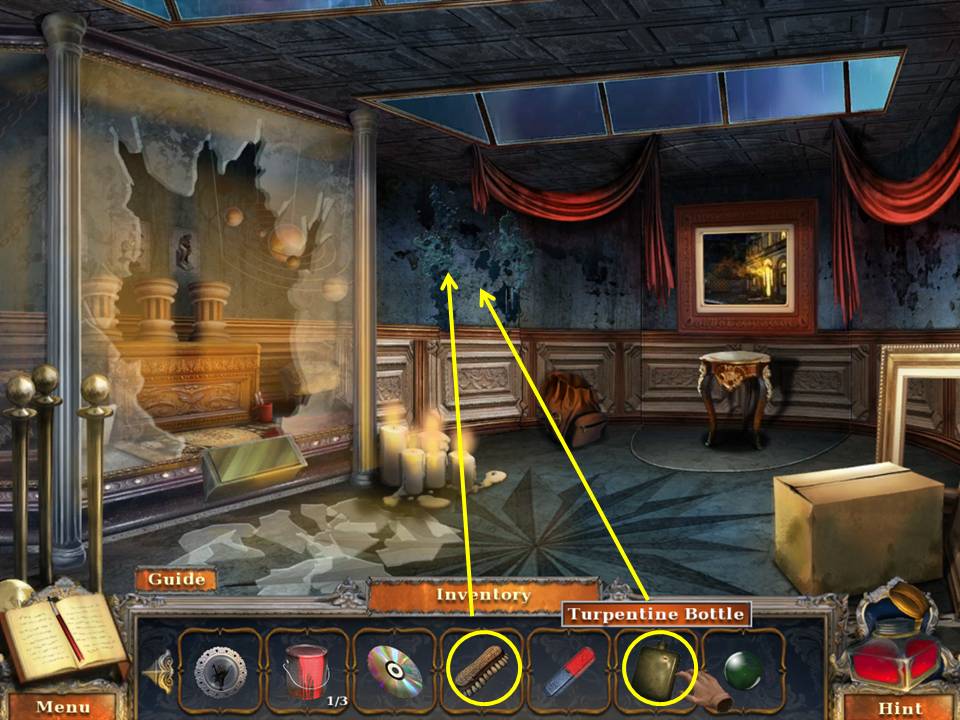
- Pour the contents of the TURPENTINE BOTTLE on the wall.
- Scrub the paint from the wall with the SCRUBBING BRUSH.
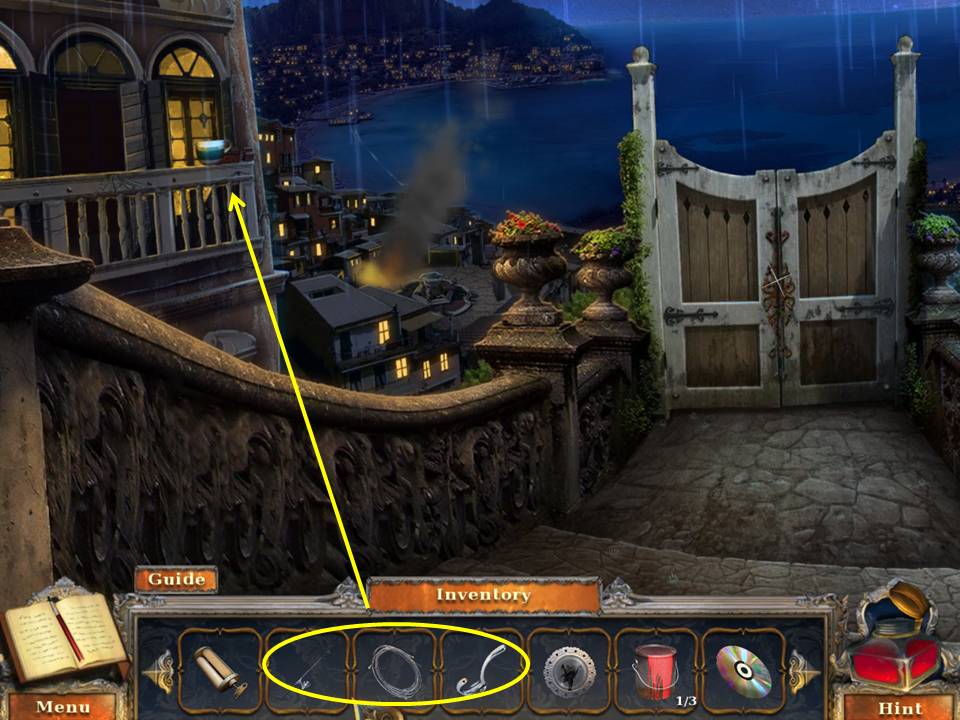
- Go out the door to the gate.
- Cast the FISHING POLE over the EMPTY CREAMER.
- Put the GUITAR STRING on the pole and add the HOOK.
- Receive the EMPTY CREAMER.
- Go to the vitruvian room.
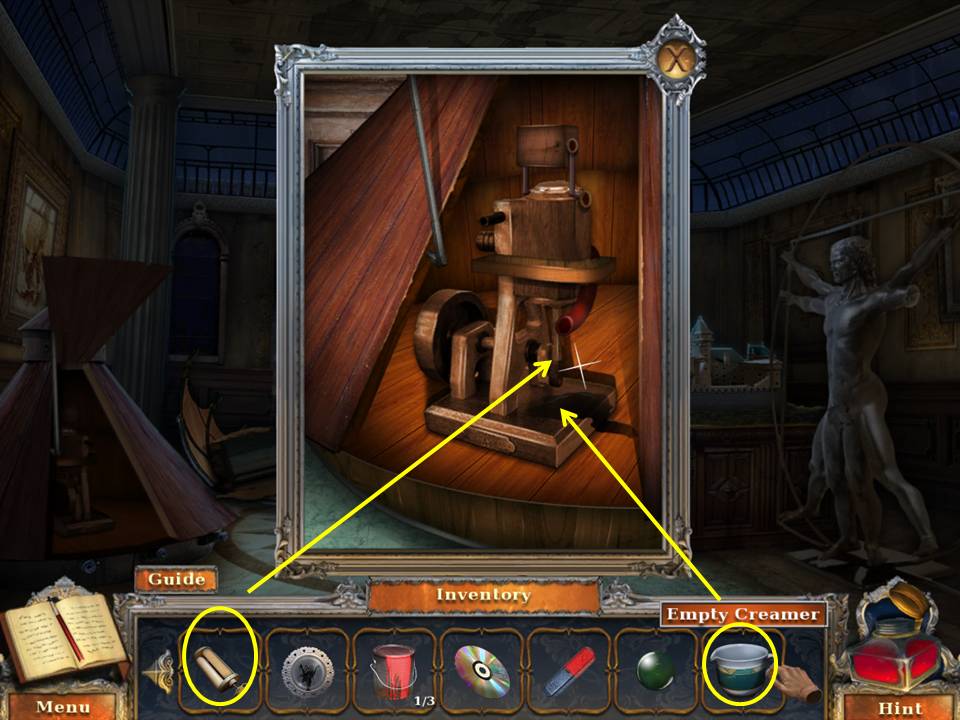
- Zoom into the cone.
- Put the EMPTY CREAMER under the tube.
- Use the TUBE SQUEEZER to fill it with oil.
- Take the CREAMER WITH OIL.
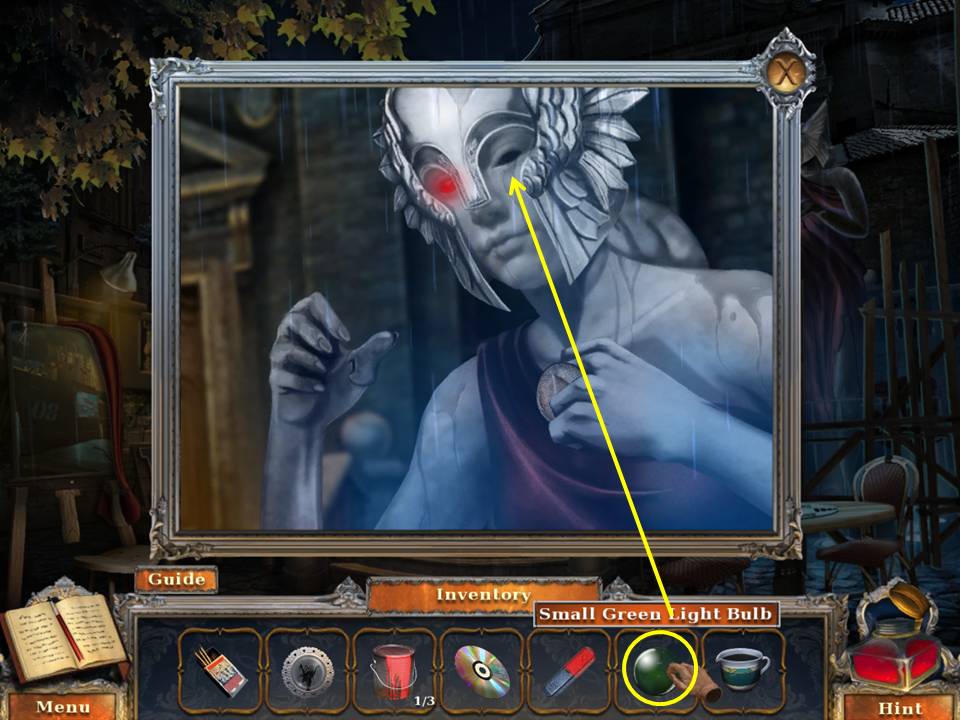
- Go back to the art gallery entrance.
- Zoom into the statue.
- Insert the SMALL GREEN LIGHTBULB in the statue’s eye.
- Take the TOKEN.
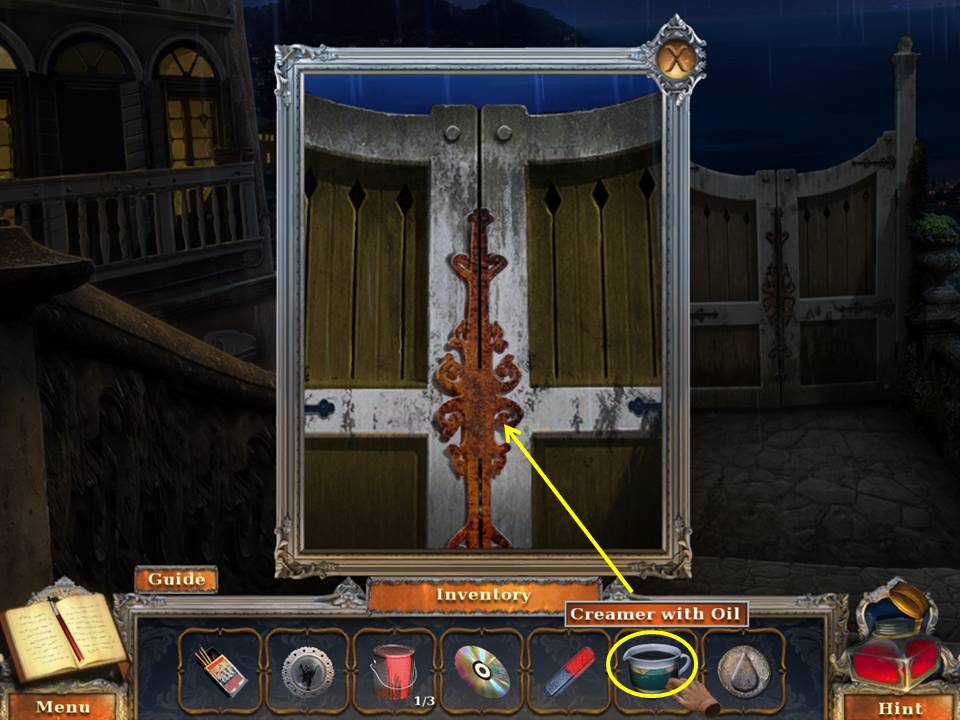
- Go back to the gate.
- Zoom in and pour the contents of the CREAMER WITH OIL on the rusty hinge.
- Go to the fountain.
- Zoom into the bakery.
- Take the ART STORE KEY from the baker.
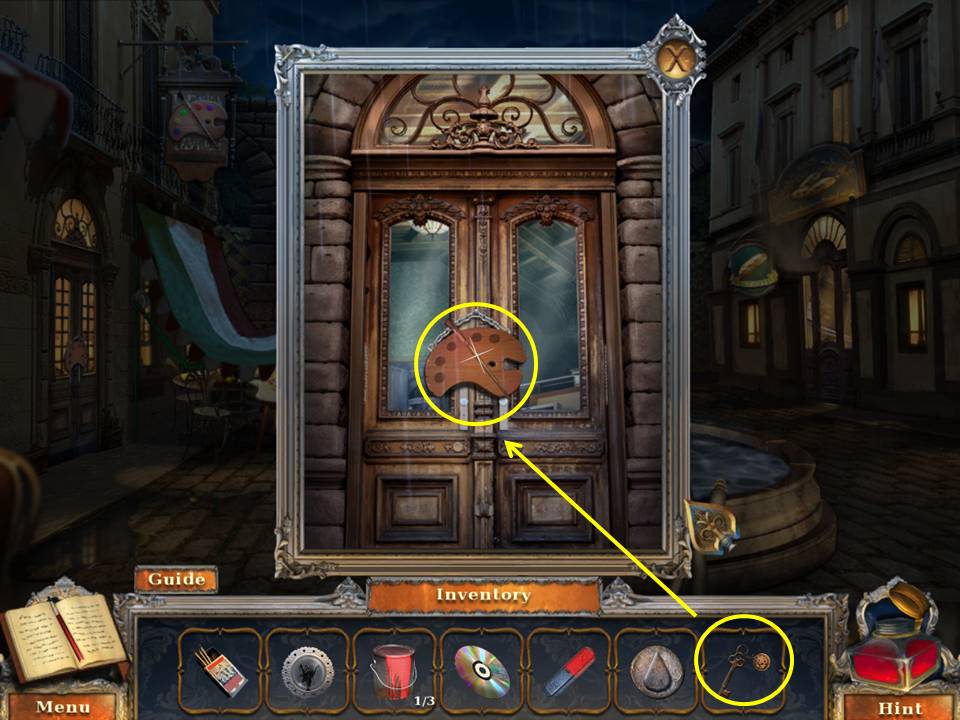
- Zoom into the art store door.
- Take the HANGING ORNAMENT.
- Zoom into the lock.
- Open the door with the ART STORE KEY. Go in.
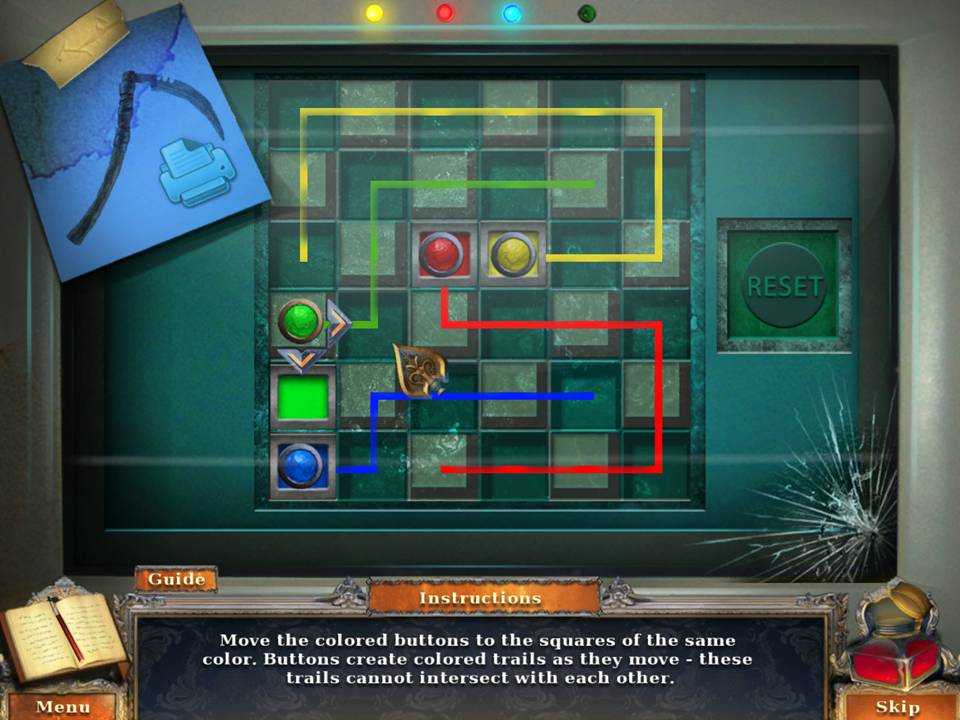
- Zoom into the computer.
- Insert the COMPUTER DISK.
- Zoom into the computer screen.
- Move the disks per the screenshot.
- Take the SCYTHE REPLICA.
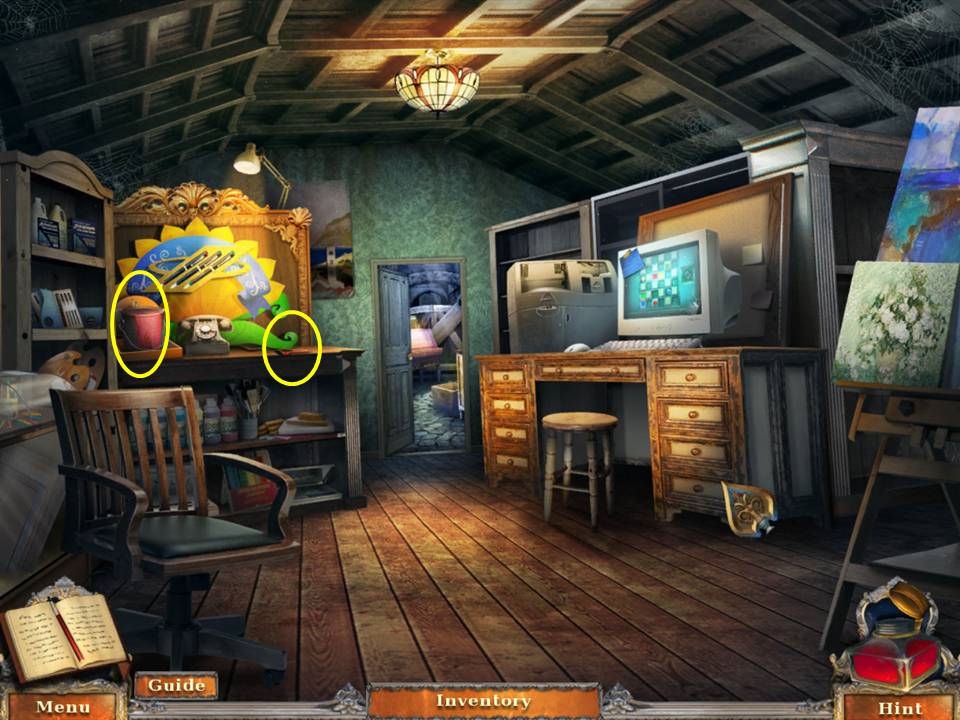
- Zoom into the shelf.
- Take the PAPER CUTTER and second PAINT CAN.
- Leave the art store.
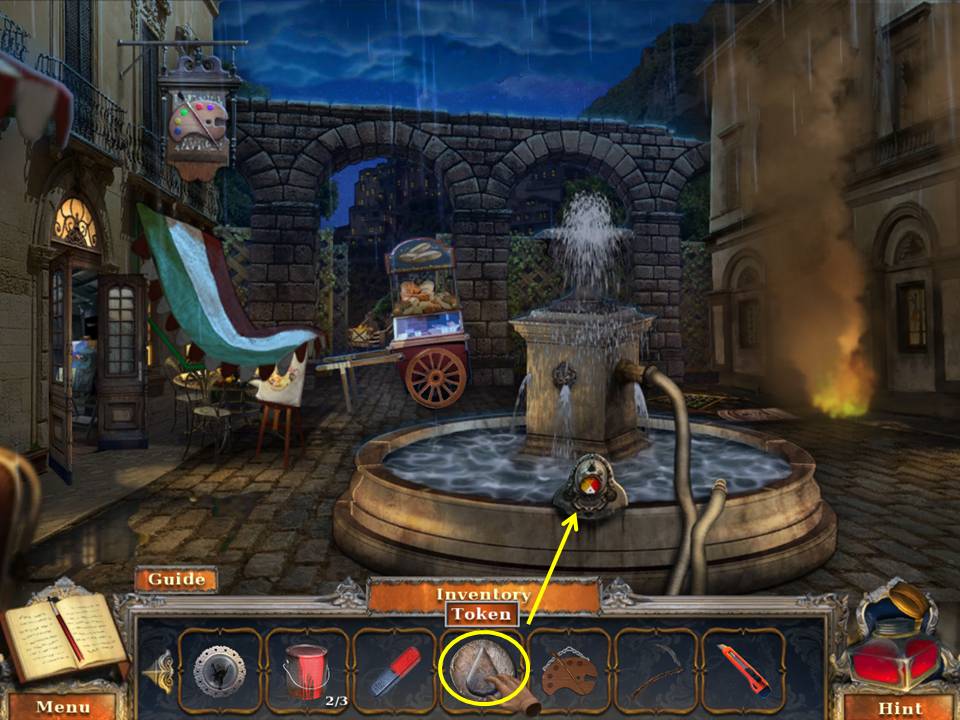
- Zoom into the fountain.
- Insert the TOKEN in the slot.
- Use the hose to extinguish the fire.
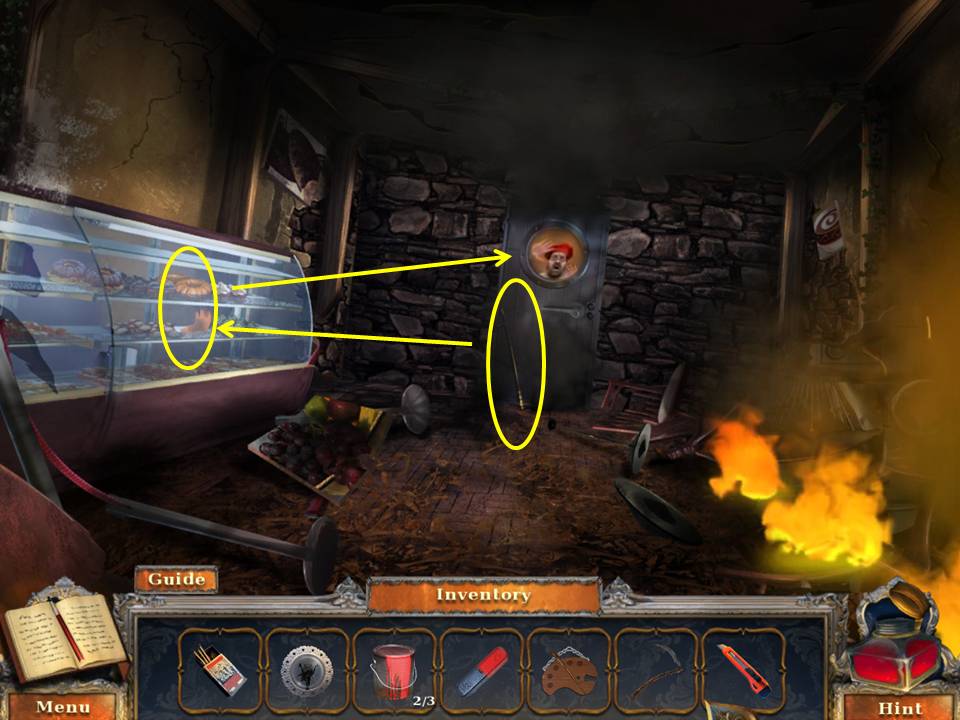
- Go into the bakery.
- Zoom into the freezer door.
- Take the FIREPLACE IRON.
- Zoom into the pastry case.
- Smash the glass with the FIREPLACE IRON.
- Take the OVEN MITT.
- Open the freezer door with the OVEN MITT.
- Go outside. Take the path to the bridge.
- Talk to Rosaria.
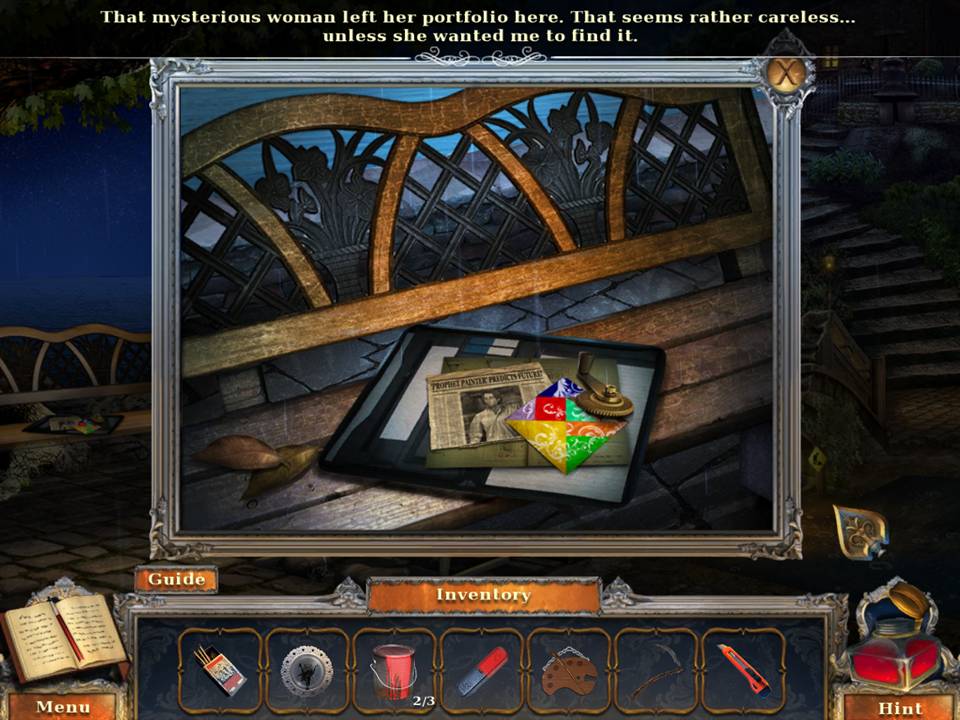
- Zoom into the bench.
- Take the CRAFT PAPER, TURNING HANDLE, and clue.
- Go back to the fountain.
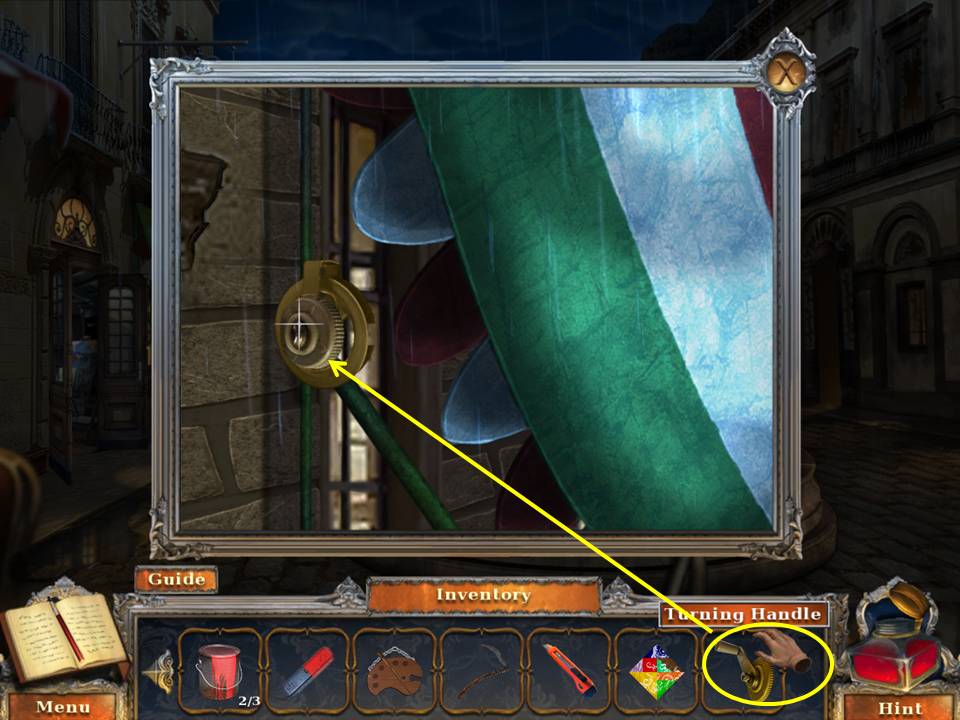
- Zoom into the awning.
- Put the TURNING HANDLE on the crank.
- Click to turn.
- Play the HOA.
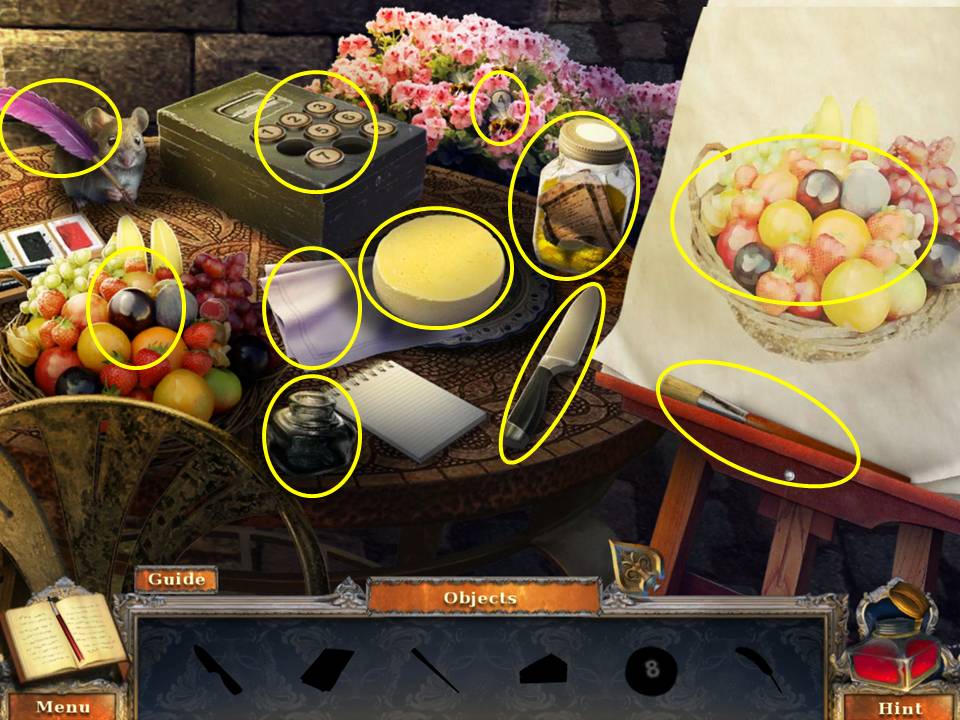
- Find the silhouetted items shown.
- Turn the page on the easel.
- Click the honey jar.
- Use the paintbrush in the honey and paint honey roses on the easel page.
- Slice the cheese with the knife.
- Give the mouse a bit of cheese.
- Take the quill and dip it into the ink.
- Zoom into the fruit basket.
- Wipe the number eight button with the napkin.
- Put the number four and number eight buttons in the box.
- Zoom into the box. Click 4682.
- Take the CAMERA LENS.
- Go back to the art store and exit to the back alley.
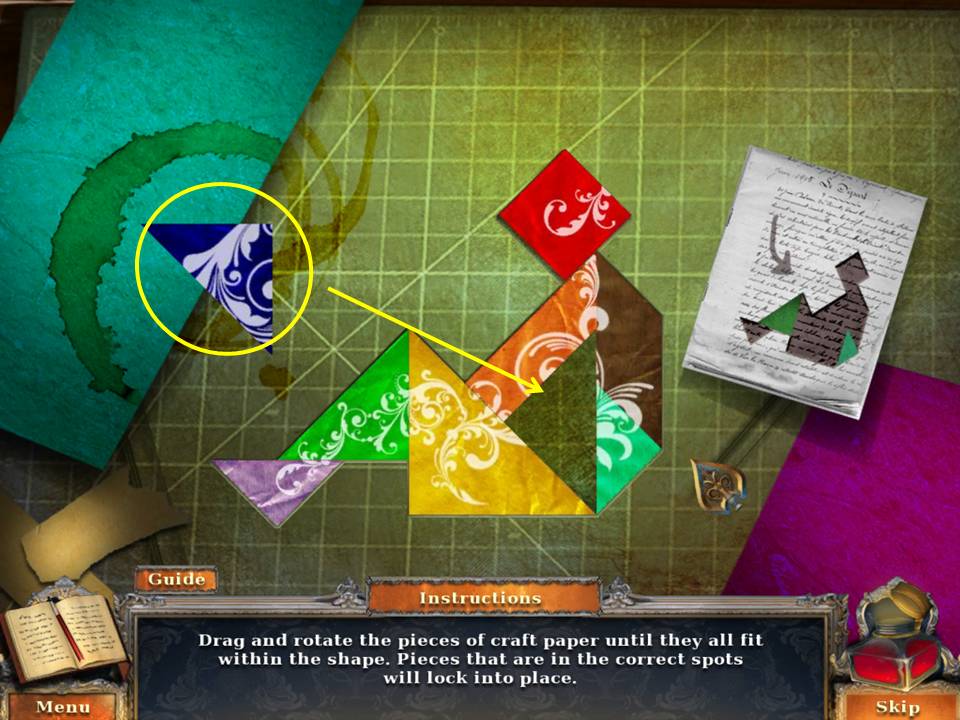
- Zoom into the easel.
- Put the CRAFT PAPER and PAPER CUTTER on the board.
- Assemble the paper pieces as shown in the screen shot.
- Some may need to be rotated.
- Take the GATE EMBLEM.
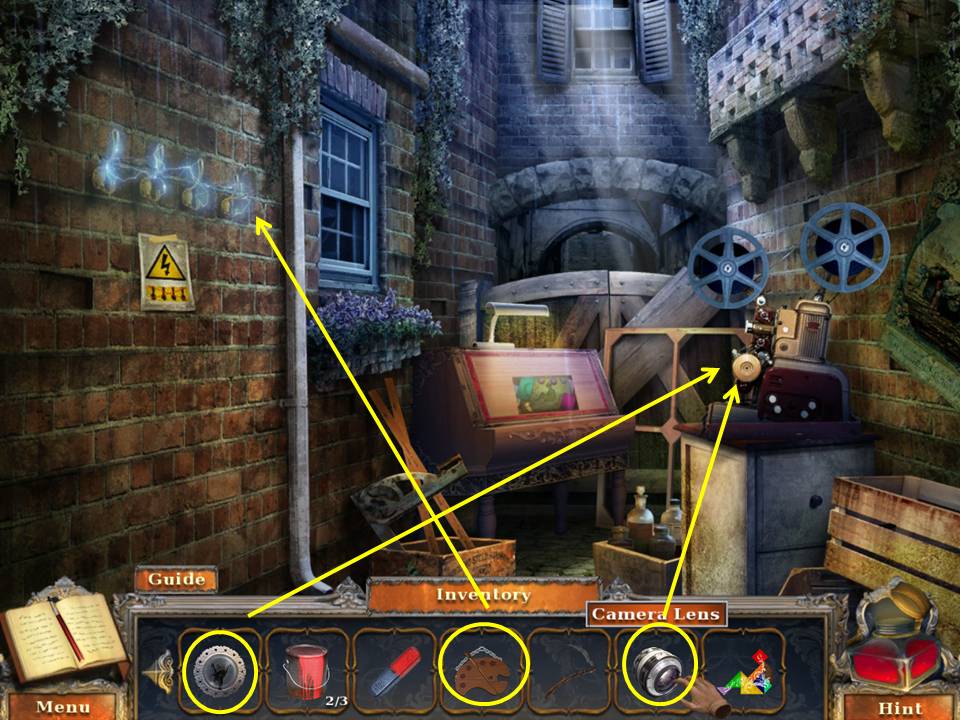
- Zoom into the projector.
- Put the CAMERA LENS and DECORATIVE GLASS PLATE on the projector.
- Zoom into the left wall.
- Take the clue.
- Place the HANGING ORNAMENT on the far right.
- When the wall opens, take the WOODEN GEAR, the third PAINT CAN, and the clue.
- Go back to the bridge.
- Zoom into the water.
- Put the three PAINT CANS into the water.
- Play the HOA.
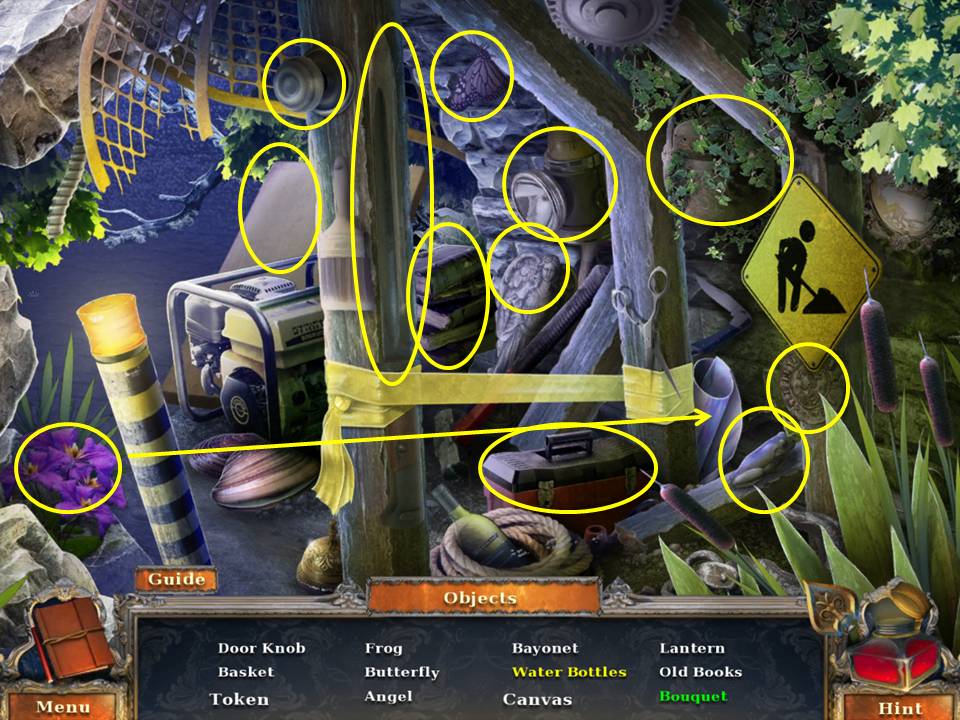
- Find the items listed.
- Open the toolbox to get the water bottle.
- Put the flowers in the paper to get the bouquet.
- Receive the first CANVAS.
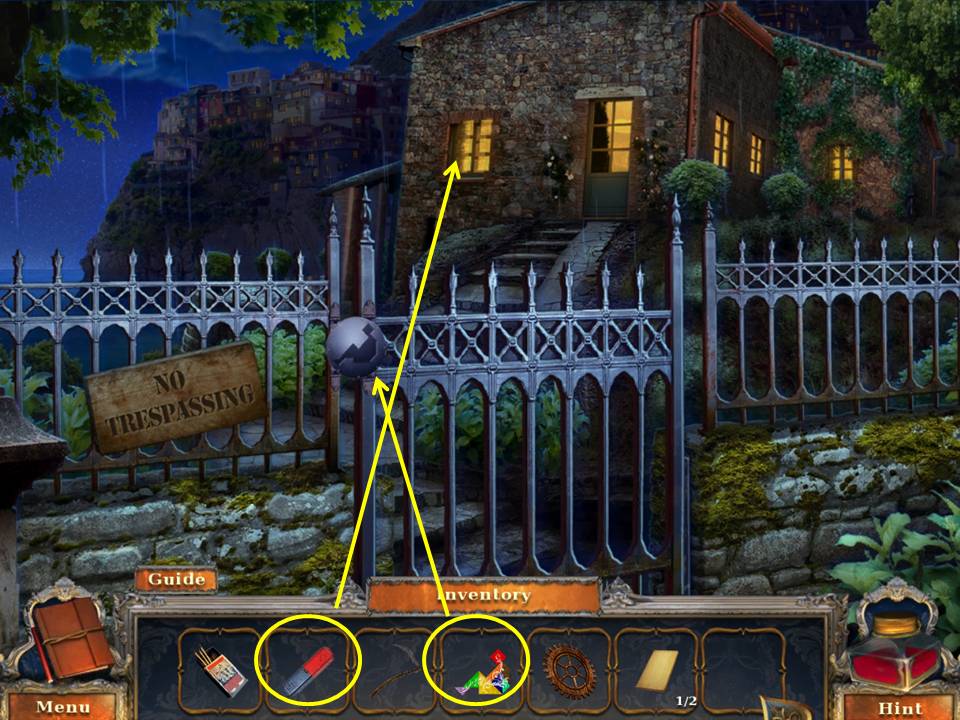
- Climb the steps.
- Zoom into the gate.
- Insert the GATE EMBLEM in the space.
- Zoom into the window.
- Use the MAGNET on the latch.
- Go into the art studio.
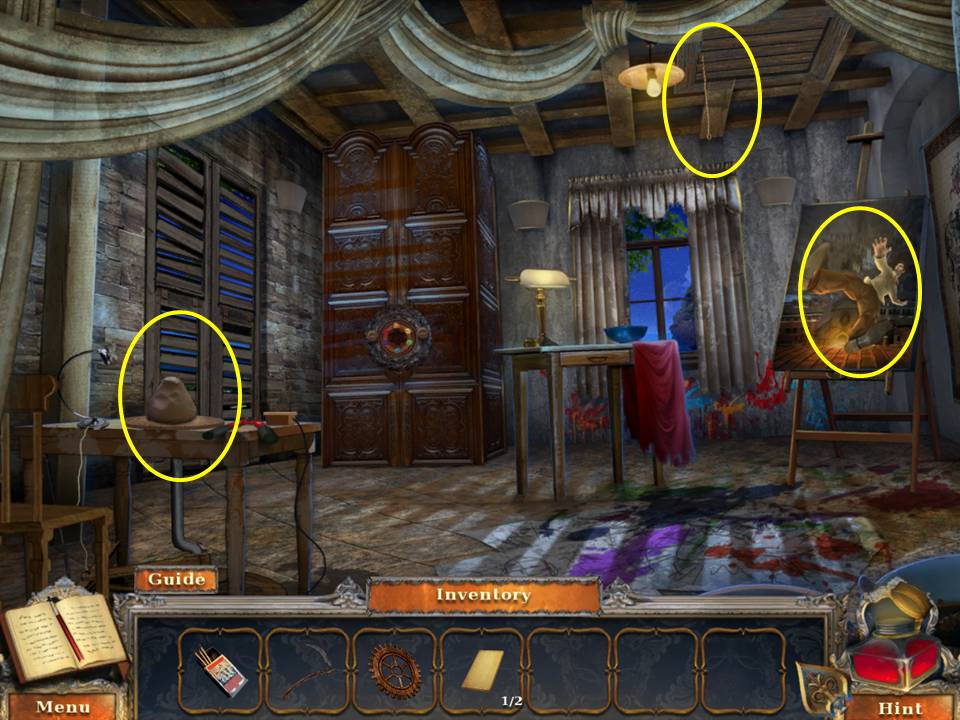
- Zoom into the painting.
- Zoom into the pottery wheel.
- Take the DRY CLAY and the BOLT CUTTERS.
- Zoom into the hatch.
- Pull the string.
- Cut the chain with the BOLT CUTTERS.
- Use the ladder to reach the roof.
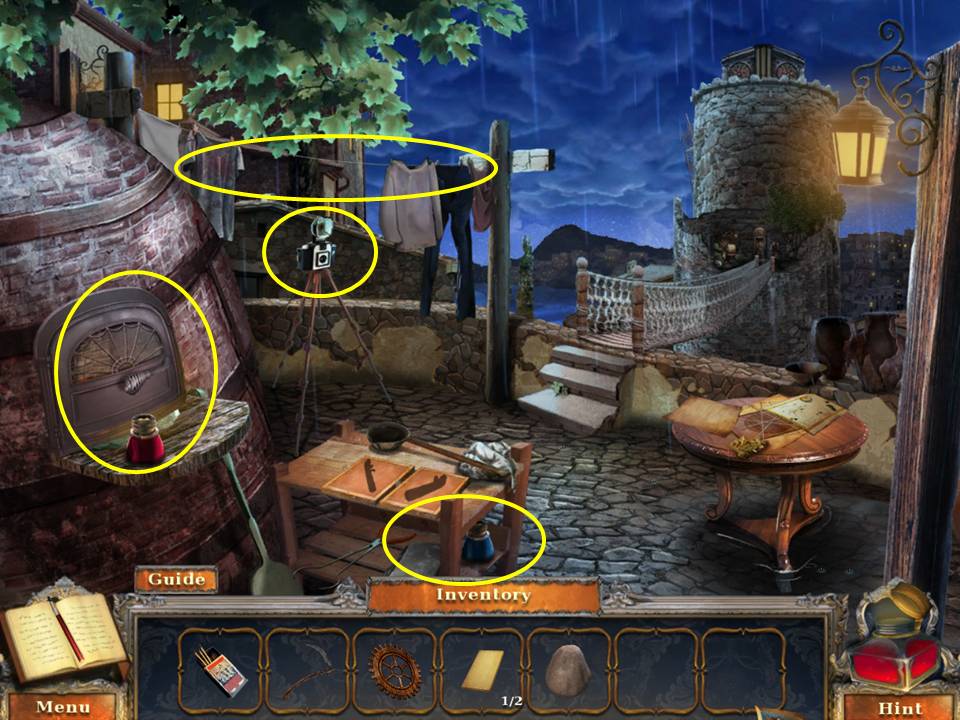
- Zoom into the oven.
- Take the RED PAINT.
- Click to open the oven door.
- Zoom into the shelf.
- Take the BLUE PAINT and the HEAT RESISTANT GLOVES.
- Click to close the oven door.
- Zoom into the clothesline.
- Take the CLOTHESPINS and VIRGIL’s DESK KEY.
- Zoom into the tripod.
- Take the CAMERA.
- Go back to the art studio.
Comments will load when you reach this part of the walkthrough.