
Chapter Two: The Roof
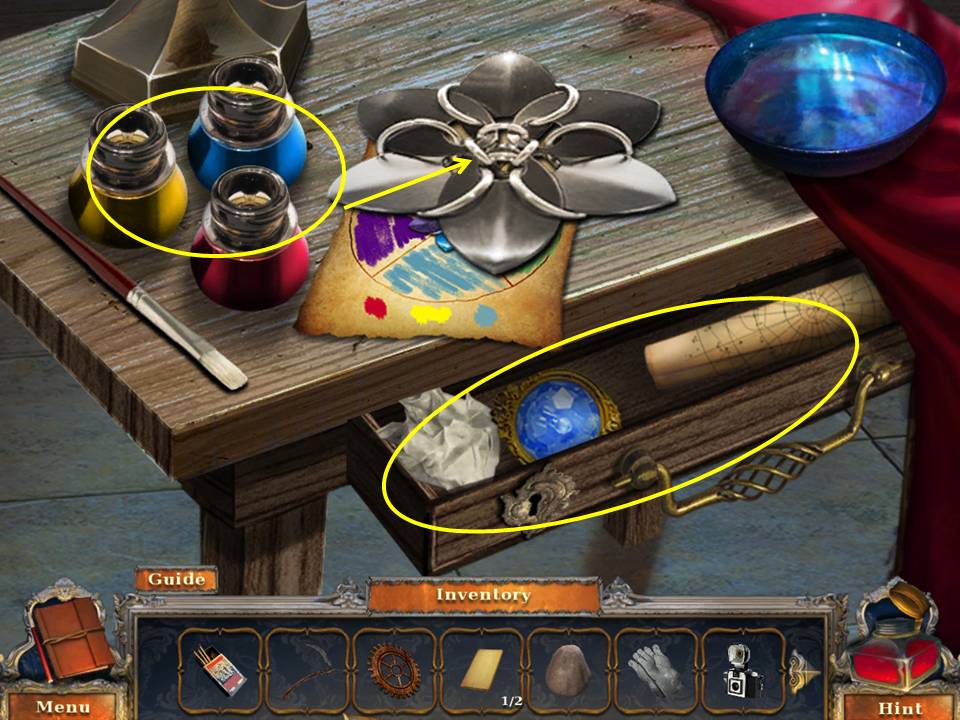
- Use VIRGIL’s DESK KEY to unlock the drawer. Take the BLUE BEAD, the STAR CHART, and the clue.
- Zoom into the table. Add the RED PAINT and BLUE PAINT to the scene.
- Put the brush in the red paint. Paint the emblem.
- Then put the brush in the blue paint and paint the emblem.
- Clean the brush in the water.
- Use blue and yellow to paint the emblem green.
- Use yellow and red to paint the emblem orange.
- Receive the STRANGE EMBLEM.
- Take the paper.
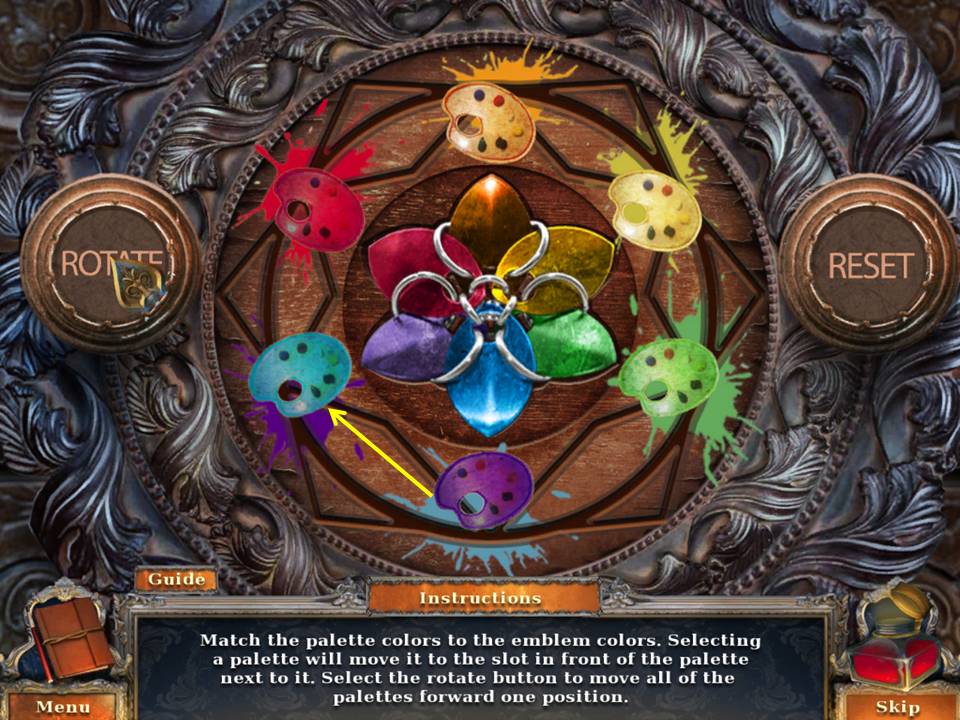
- Zoom into the cabinet.
- Place the STRANGE EMBLEM in the space to initiate a puzzle.
- The object of the puzzle is to match the palette colors with the emblem colors.
- Selecting a palette will move it to the slot in front of the palette next to it.
- Select the rotate button to move all of the palettes forward one position.
- Rotate the board until the palettes line up with their matching colors on the emblem.
- Screenshot shows the last move.
- When finished, take the second CANVAS and ELK-SHAPED SPOUT.
- Go back to the roof.
- Zoom into the table.
- Put the STAR CHART on the board.
- Arrange the lines in the shape of a five-pointed star.
- Take the TELESCOPE.
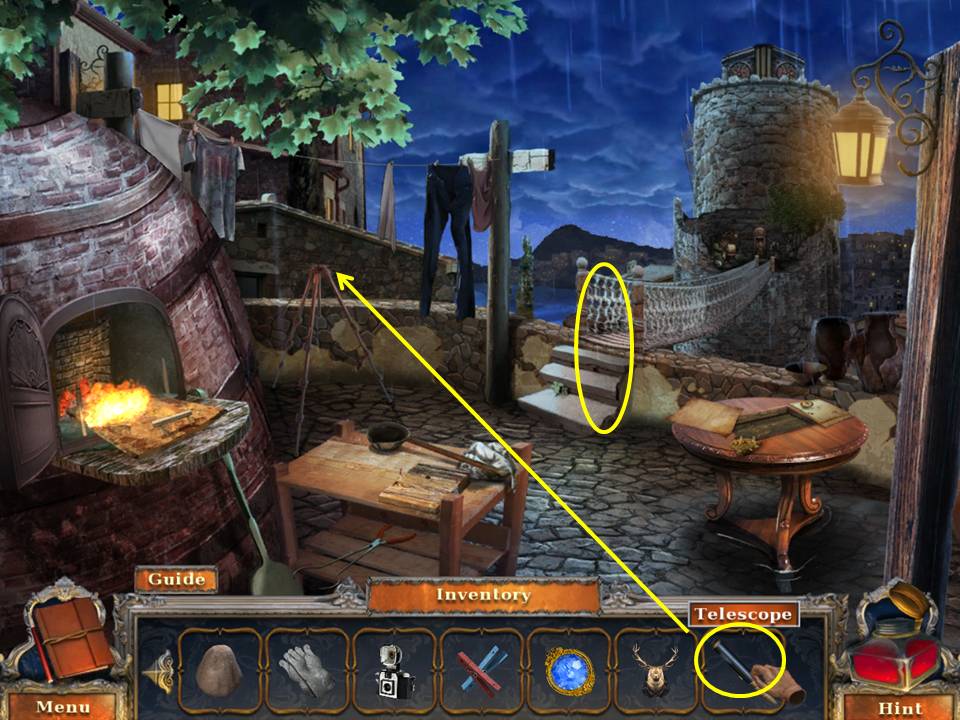
- Zoom into the tripod.
- Put the TELESCOPE on it.
- Zoom into the bridge.
- Use the two CANVASES to cover the gaps in the bridge.
- Go to the tower entrance.
- Play the HOA.
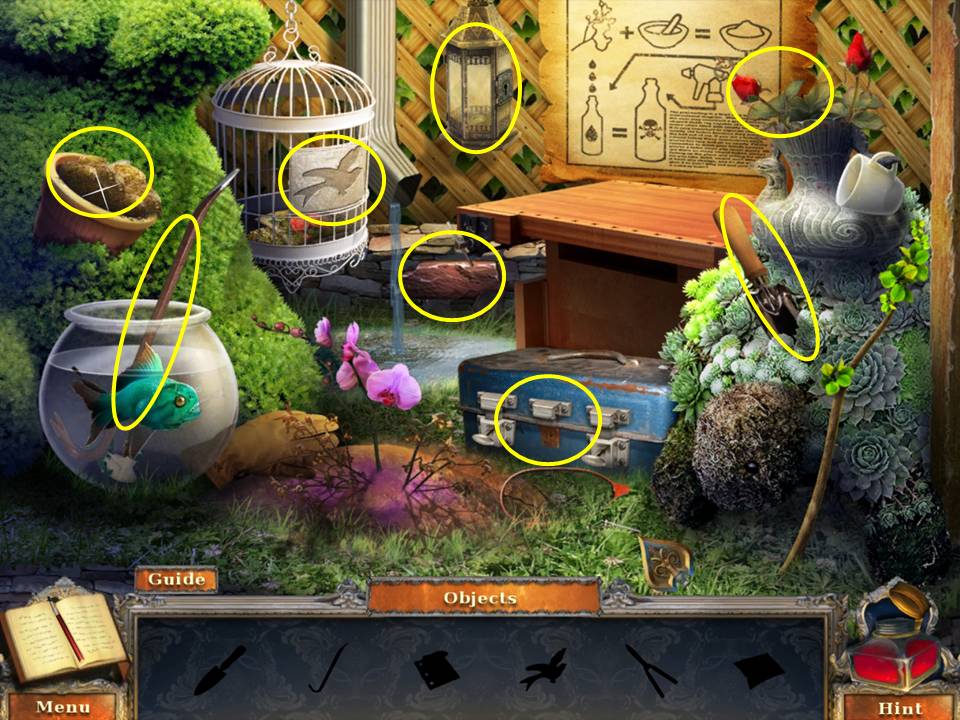
- Use the SPADE to dig the dirt in the pot.
- Take the latch.
- Zoom into the case and put the latch on it.
- Click the three latches to get the shears.
- Crowbar the brick to get the bird emblem.
- Put the bird emblem on the cage to get the seeds.
- Plant the seeds in the pot.
- Prune the roses with the shears to get the rose.
- Put the rose in the vase to get the key.
- Zoom into the lantern.
- Use the key to open the door. Receive the DRYING BULB.
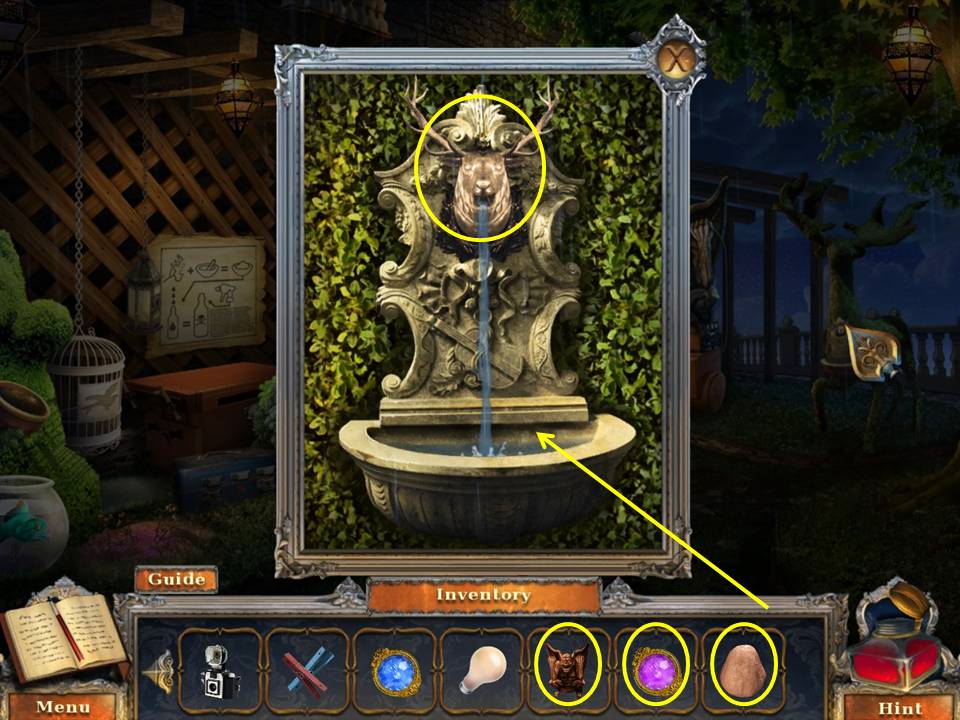
- Zoom into the elk shrub.
- Take the COPPER FIGURE.
- Put the ELK-SHAPED SPOUT on the fountain.
- Take the VIOLET BEAD.
- Wet the DRY CLAY in the fountain to get the WET CLAY.
- Go back to the art studio.
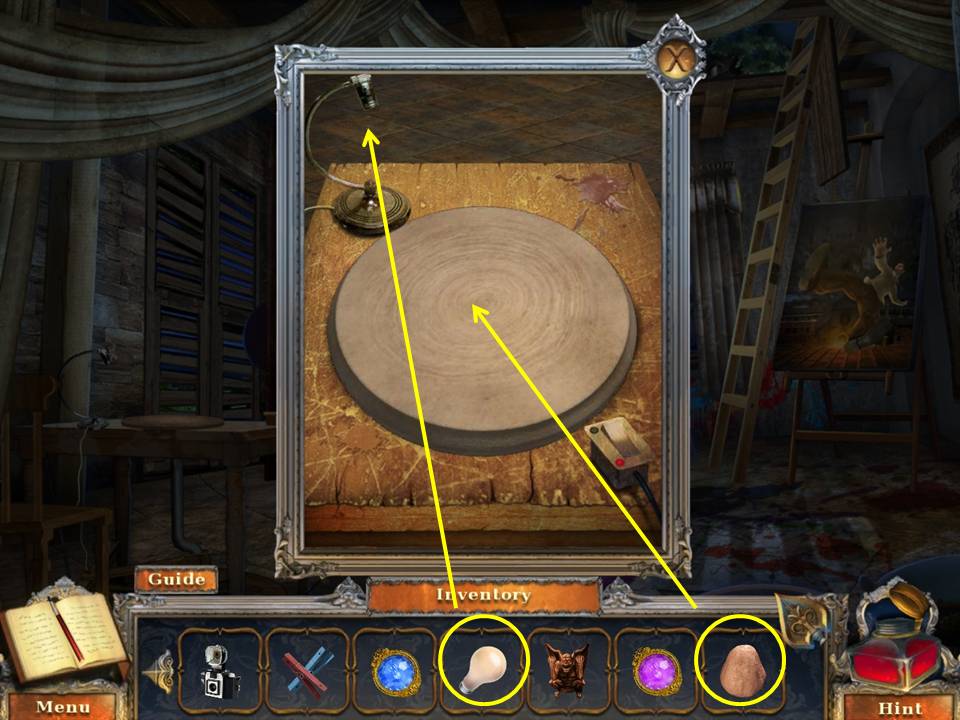
- Zoom into the pottery wheel.
- Place the DRYING BULB in the lamp.
- Put the WET CLAY on the wheel.
- Click the switch. Spin they clay.
- Take the EMPTY BOWL.
- Go back to the roof.
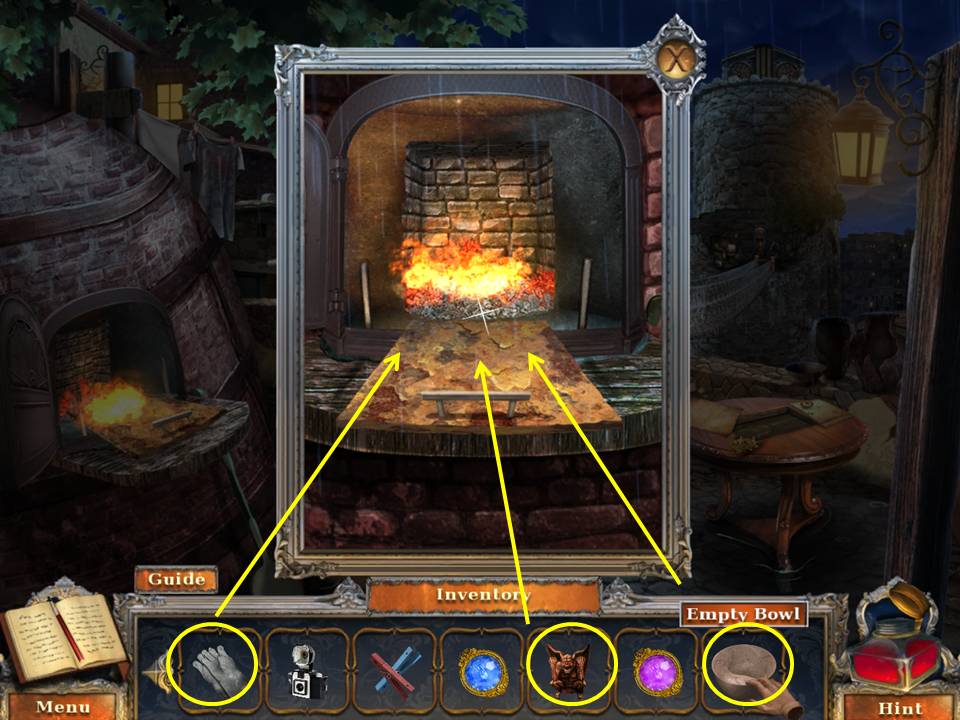
- Zoom into the oven.
- Put the EMPTY BOWL on the tray.
- Put the COPPER STATUE in the bowl.
- Push the tray into the oven.
- Remove the BOWL OF MELTED COPPER with the HEAT RESISTANT GLOVES.
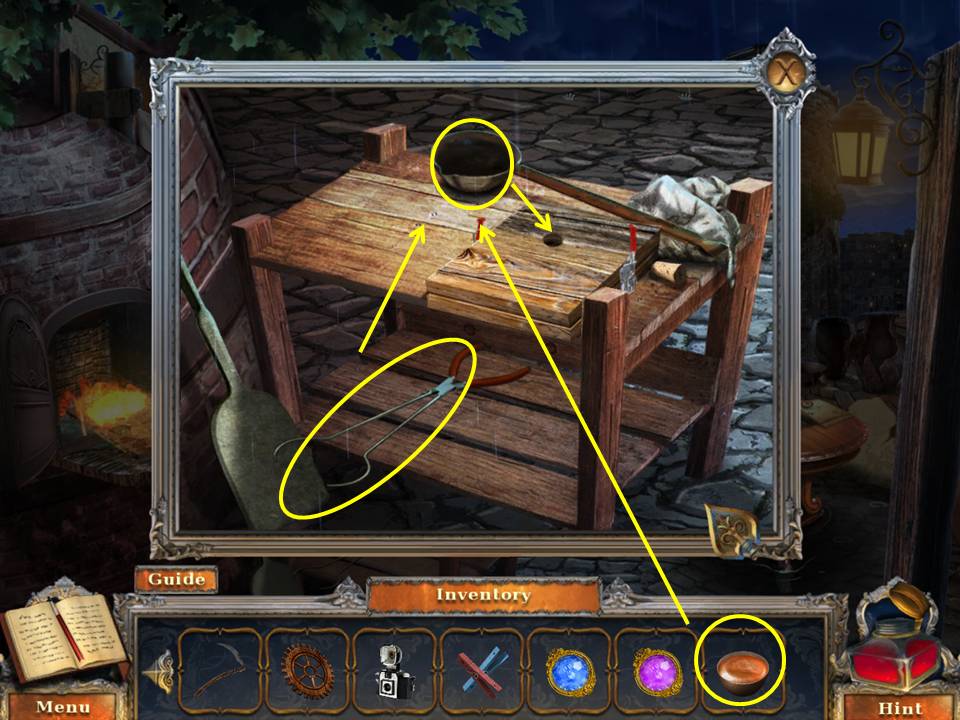
- Zoom into the shelf. Put the BOWL OF MELTED COPPER on the shelf.
- Use the tongs to put the melted copper into the cup.
- Pour the cup into the mold.
- Collect the HOT MOLD.
- Go to the tower entrance.
- Play the HOA.
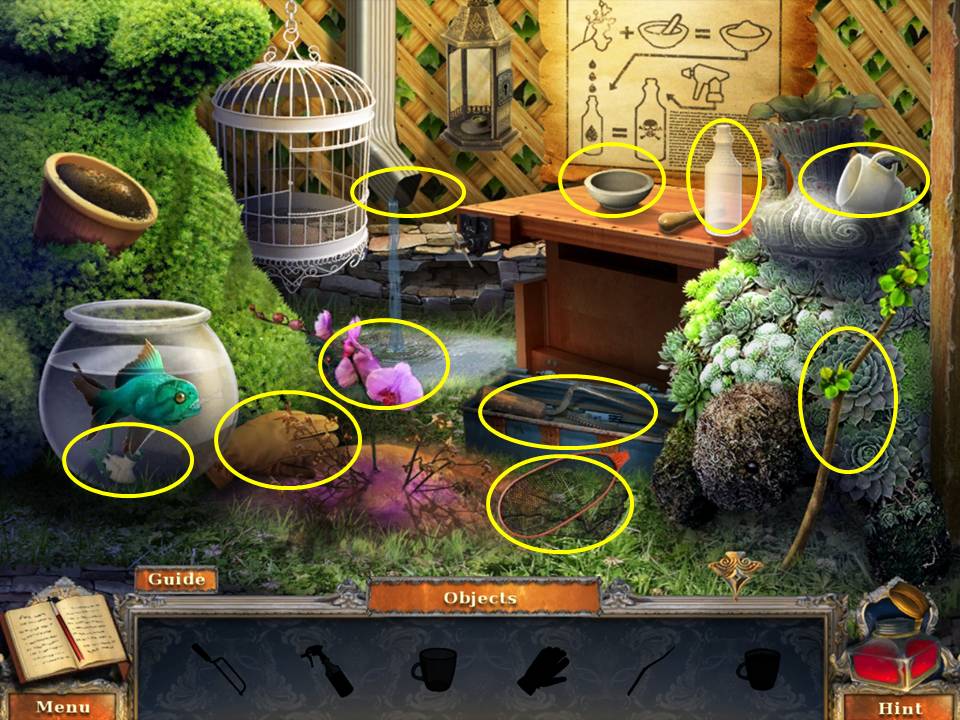
- Find the silhouetted items.
- Use the handsaw to cut the branch.
- Use the branch on the net as a handle.
- Scoop out the spray bottle lid from the fishbowl with the net.
- Scoop water into the empty cup from the downspout.
- Grab the poison plant with the gardening glove.
- Zoom into the table.
- Put the poison plant in the mortar to make the poison powder.
- Pour the water then poison powder into the bottle.
- Affix the lid to the spray bottle.
- Receive the HERBICIDE.
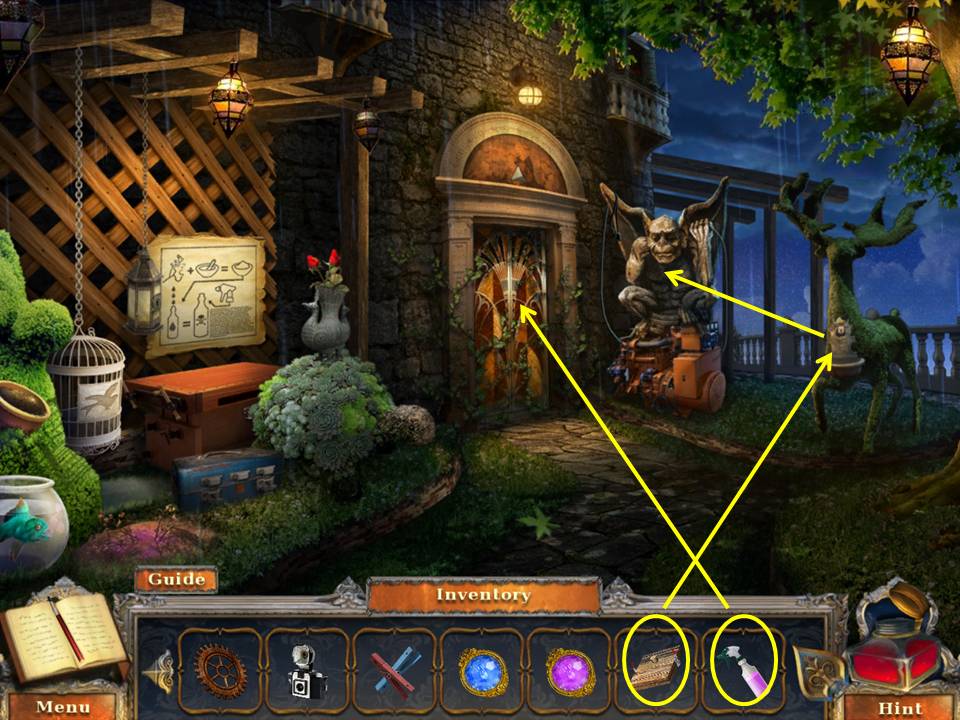
- Zoom into the elk shrub.
- Put the HOT MOLD in the fountain.
- Receive the COPPER ARM. Zoom into the statue.
- Put the COPPER ARM on the statue.
- Spray HERBICIDE on the elevator door.
- Go into the elevator.
- Press the 4 button.
- Leave the elevator to the tower top.
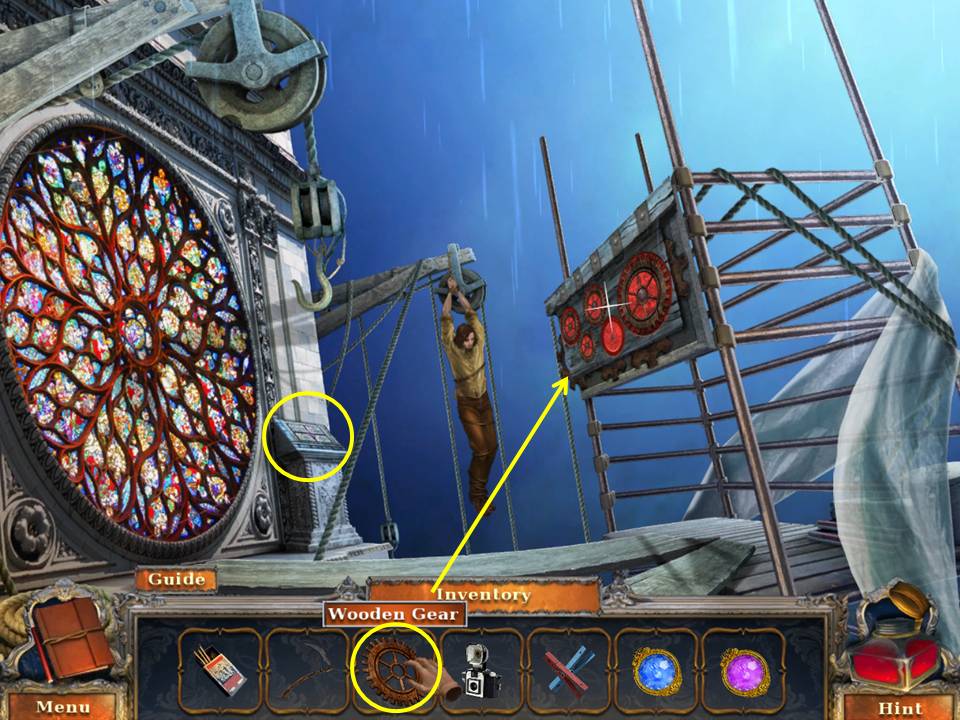
- Zoom into the gears.
- Insert the WOODEN GEAR in the slot to raise the lift.
- Zoom into the lift.
- Dump the pail and take the YELLOW BEAD.
- Zoom into the panel.
- Put the YELLOW BEAD, VIOLET BEAD and BLUE BEAD in the scene to initiate a puzzle.
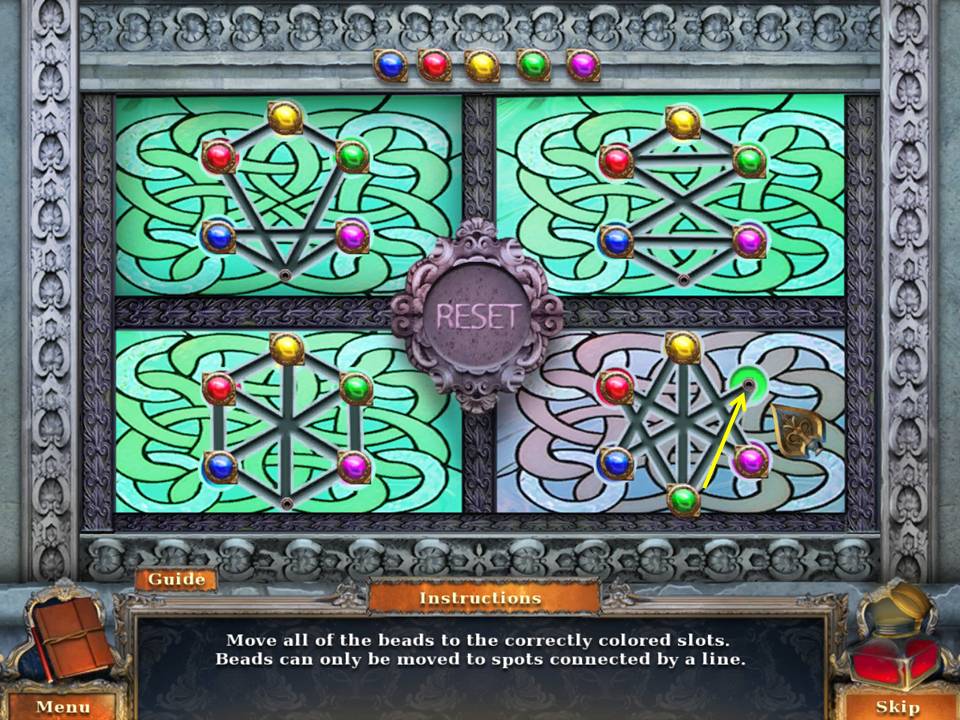
- The object of the puzzle is to move all of the beads to the correctly colored slots.
- Beads can only be moved to spots connected by a straight line.
- The slot color can be difficult to discern.
- The colors move and arc from left to right in the order of the beads along the top of the screen.
- This puzzle requires some trial and error.
- The best tactic is to focus on the one or two possible paths that become available with each move.
- The screenshot shows the last move on the final game board.
-
Turn the handle.
Comments will load when you reach this part of the walkthrough.