

Chapter Four
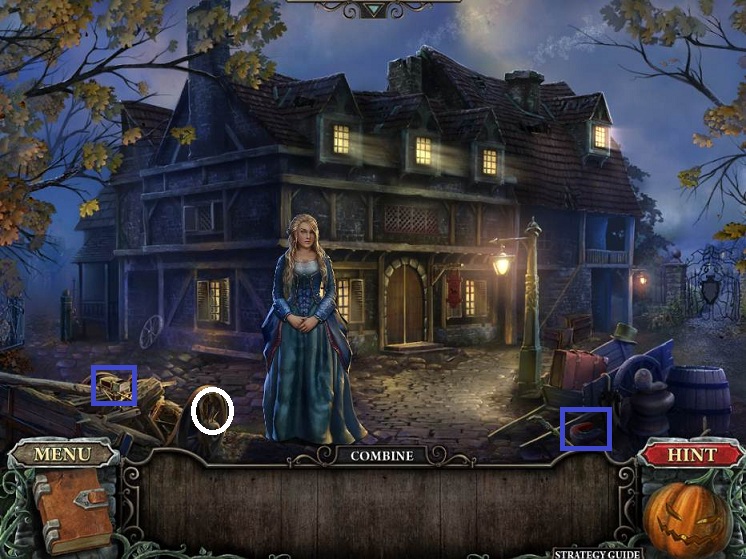
- Go forward
- Talk to the woman who wants her ring
- Pick up MAGNET and MATCHES

- Go right
- Pick up SKULL and CLOCK HAND

- Back up and go left to take you back to the town square
- Pick up ROPE and CORK SCREW

- Go back to the gate
- Examine the barrel
- Use the CORKSCREW on the cork
- Combine the ROPE and MAGNET and use it to get the RING
- Back up and give the RING to the woman
- Receive COAT OF ARM FRAGMENTS

- Do the Hidden Object Scene on the cart
- Receive 2nd COAT OF ARM FRAGMENTS

- Go forward to gate
- Place the FRAGMENTS
- Examine for minipuzzle
- Place the fragments in their appropriate spots

- Go forward
- Pick up the BROOM
- Note the sack blocking the cellar door

- Go forward to the left
- Talk to Pieter's wife
- She wants his portrait from the mansion
- Pick up STICK and RAZOR BLADE
- Examine the crypt door and place the SKULL
- Back up
- Use the RAZOR BLADE on the sack over the cell door
- Open the door

- Do the Hidden Object Scene
- Receive the VALVE
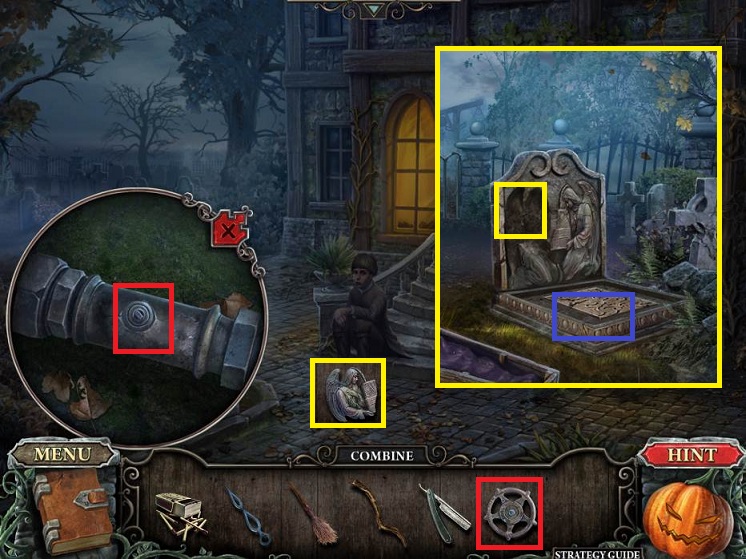
- Examine the fountain pipes
- Place the VALVE
- Click twice
- Pick up the ANGEL
- Go forward
- Examine the gravestone
- Place the ANGEL
- Pick up the KEY

- Back up twice to the gate
- Examine the tree stump
- Use the STICK
- Receive the DOOR KNOCKER
- Back up
- Do the Hidden Object Scene
- Receive the NAIL PULLER

- Go to the left to the town square
- Use the BROOM on the leaves several times
- Pick up the STATUE PART

- Go forward to the pier
- The door will collapse
- All you can do is pick up a horseshoe

- Return to the mansion entrance
- Examine the door
- Place the DOOR KNOCKER
- Click on it

- Enter the mansion
- Examine the 2 candelabras
- Use the MATCHES 3 times

- Examine the coat on the right
- Use the RAZOR BLADE
- Pick up the DRAWER KNOB
- Examine the door to the right
- Use the KEY to open it

- Head right
- Pick up the LADDER
- Examine the floor
- Use the NAIL PULLER
- Pick up the STRANGE SYMBOL
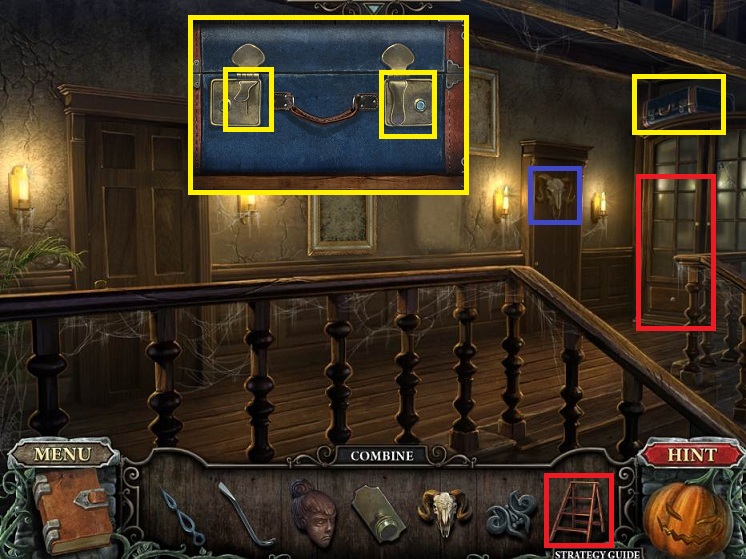
- Head up the stairs
- Pick up the SKULL
- Use the LADDER to reach the suitcase
- Click the latches
- Pick up the RED STONE

- Go outside
- Do the Hidden Object Scene in the cellar
- Receive the SHOVEL

- Go to the graveyard
- Use the SHOVEL on the grave
- Use the NAILPULLER on the coffin
- Pick up the LENS

- Examine the crypt door
- Place the SKULLS
- Rotate the skulls so they are facing in
- Bottom left moves alone
- Top left moves 2 left skulls
- Bottom right moves 2 bottom skulls
- Top right moves all but bottom right skull
- So...
- Move top right skull until it is in position
- Then bottom right and top left
- Finally bottom left

- Do the Hidden Object Scene
- Receive the SHEET MUSIC
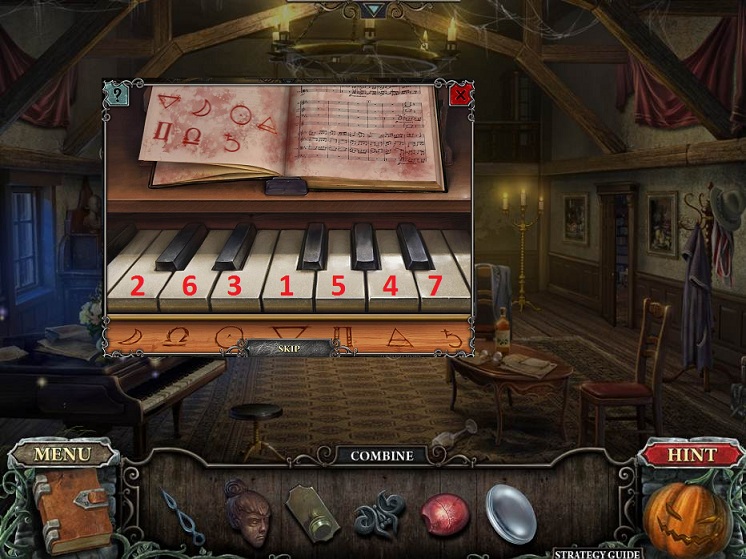
- Enter the mansion
- Examine the piano
- Place the SHEET MUSIC
- Press the piano keys in the order on the music; the keys are labelled below.
- Pick up the KEY
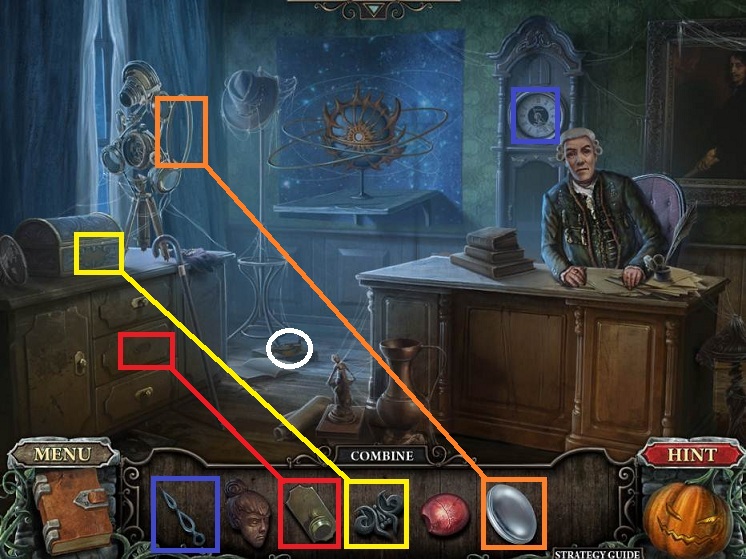
- Go upstairs
- Examine the left door
- Use the KEY
- Enter
- Talk to the man; he wants his letters
- Examine the clock and place the CLOCK HAND
- Place the LENS on the optical device
- Examine the small chest
- Place the SYMBOL
- Pick up the BOOK
- Examine the drawers and place the DRAWER KNOB
- Top drawer has a golden horseshoe
- Middle drawer has a STATUE PART
- Bottom drawer has a CANVAS

- Return to landing
- Place the CANVAS in the empty frame

- Return to the library
- Replace the BOOK
- Examine the shelf
- Move the books from left to right

- Enter the secret room
- Pick up the PAINTING and MIRROR PIECE
- Place the STATUE HEADS
- Examine the door
- Place the RED STONE

- Do the Hidden Object Scene
- Receive the CODE

- Return to the library
- Examine the safe
- Place the CODE
- Open the safe
- Pick up the KEY
- Return to the landing
- Place the PAINTING
- Examine the right door
- Use the KEY

- Do the HOS
- Receive the STRAP

- Return to landing and room to the left
- Use the STRAP on the curtain
- Pick up the STATUE PART
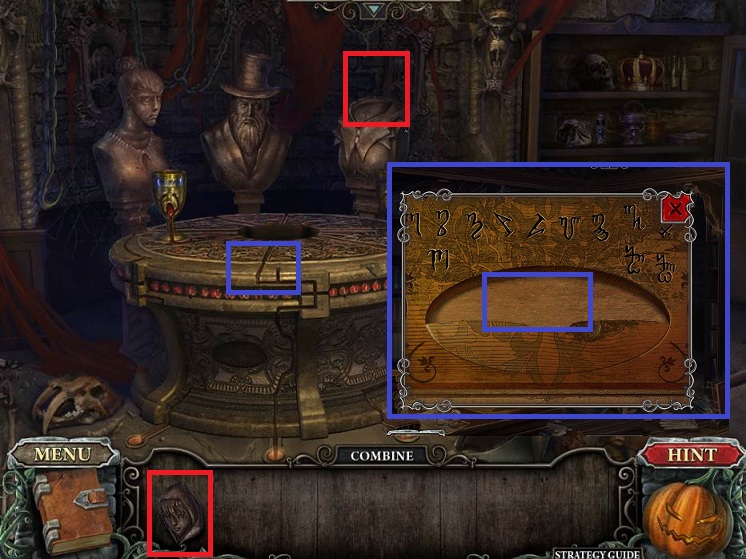
- Return to the secret room past the library
- Place the STATUE PART
- Pick up the ROUND KEY PART
- Return to the library
- Examine the board on the table
- Place the ROUND KEY PART
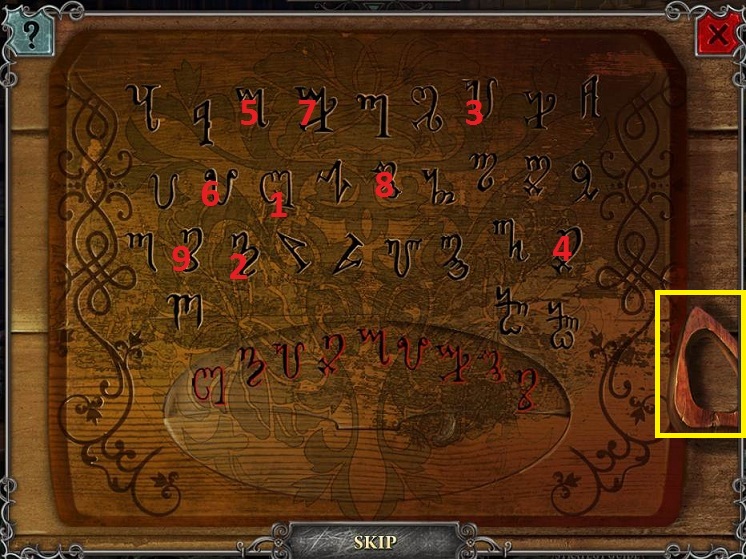
- Click on the symbols in order using the ouija planchette
- Receive the ROUND KEY
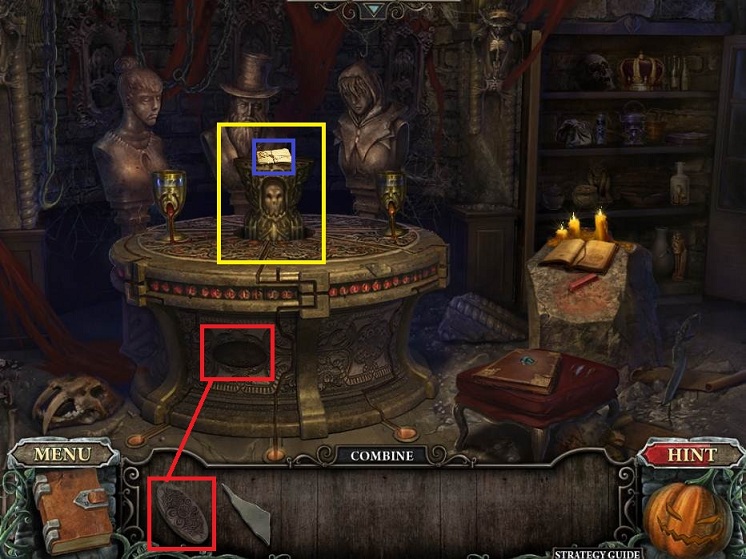
- Return to the secret room
- Place the ROUND KEY
- Pick up the LETTERS

- Return to the landing
- Do the HOS
- Receive MIRROR PIECE

- Return to the library
- Place the MIRROR PIECES
- Get the time code

- Return to the graveyard
- Do the HOS in the crypt
- Receive the CLOCK HAND
- Return to office

- Return to the office
- Give the man his LETTERS
- Receive a PORTRAIT FRAGMENT
- Place the CLOCK HAND
- Enter the time (7:15)
- The cuckoo bird will knock a BRUSH on to the desk; pick it up.

- Return to the landing and use the BRUSH on all the paintings
- Note the different outfits

- Return to the secret room through the library
- Do the HOS
- Receive a WIG

- Return to entrance
- Examine the mannequin to the left
- Place the WIG
- Do the mini-puzzle by placing the right accessories and hair on the mannequins
- Receive the PORTRAIT PIECE
- Combine the pieces together

- Return to the graveyard
- Give the PORTRAIT to the woman ghost
- Receive STAR-SHAPED KEY
- Examine the gate
- Place the KEY
- Go through
Comments will load when you reach this part of the walkthrough.