
Chapter 3: Pirate's Pier
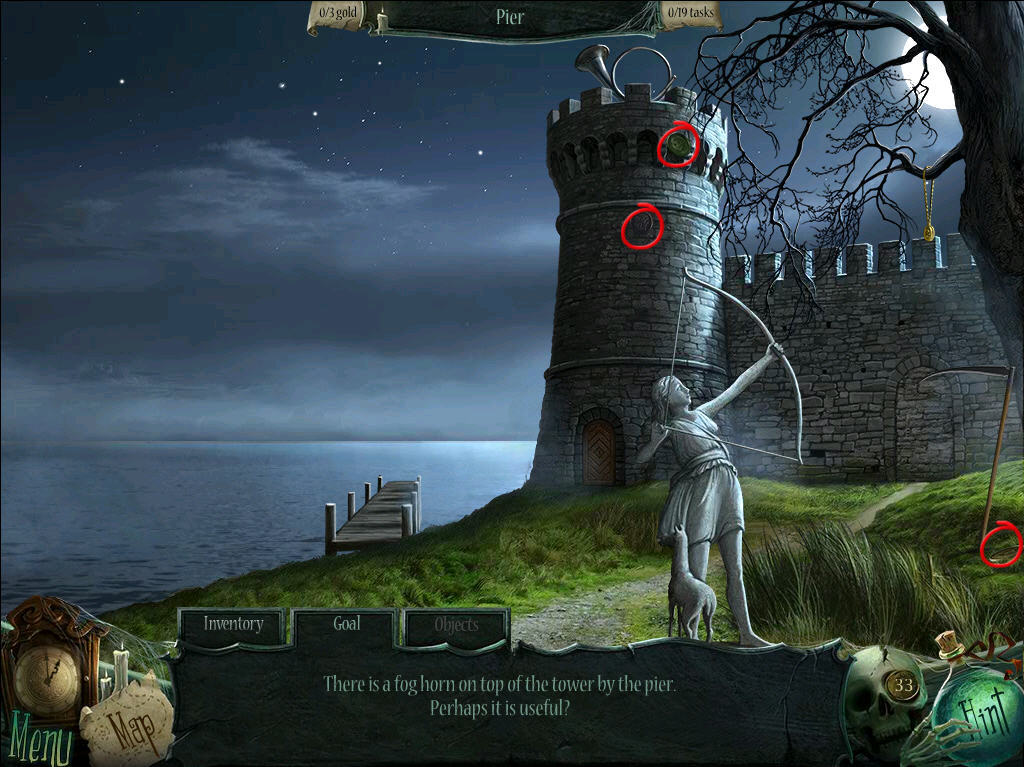
- Collect the GOLD COINS and receive the MAP PIECE.
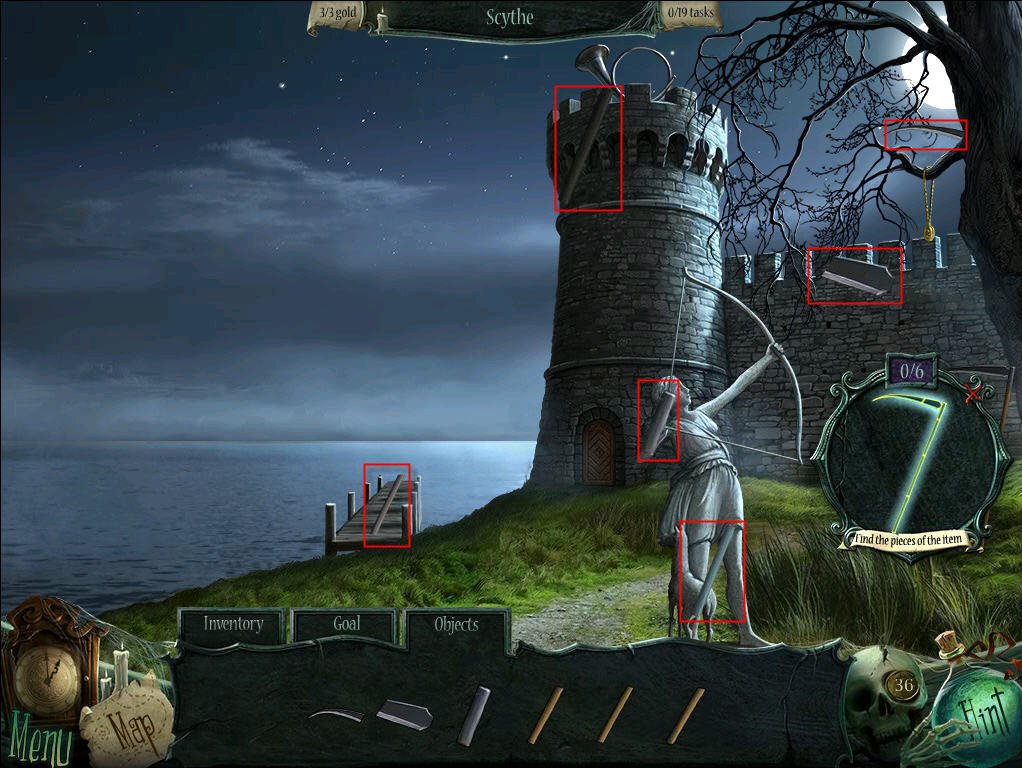
- Click on the SCYTHE.
- Find its fragments and add to your inventory.
- Take the MAGIC SYMBOL.
- Return to the Secret Cavern.
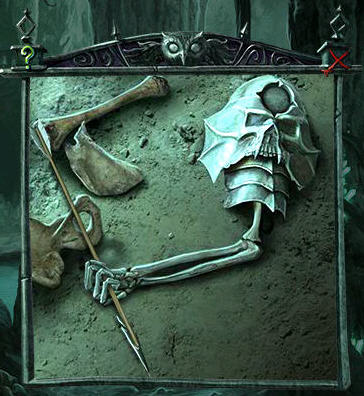
- Zoom in on the skeleton.
- Place the MAGIC SYMBOL in the slot.
- Take the ARROW.
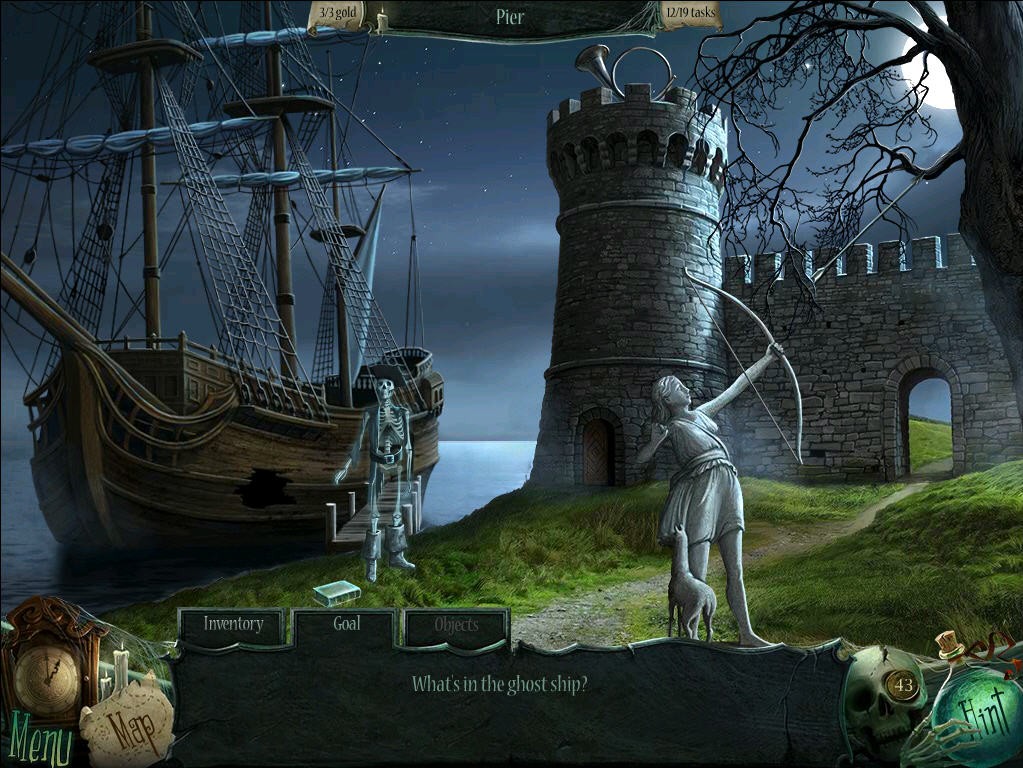
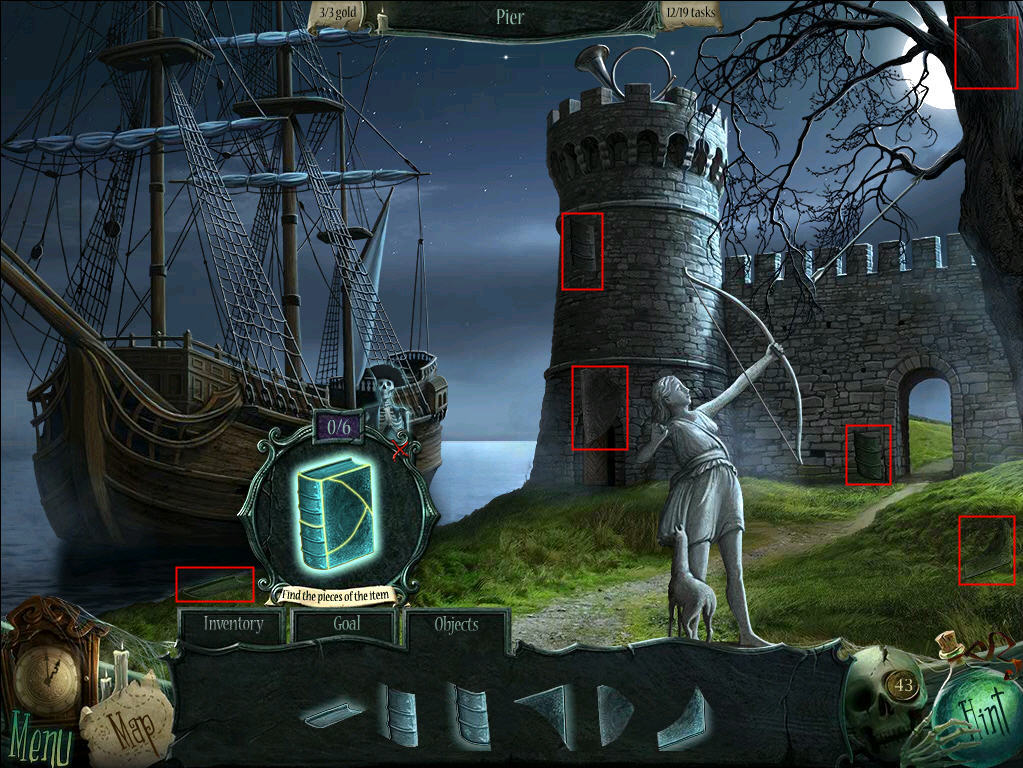
- Return to the Pier.
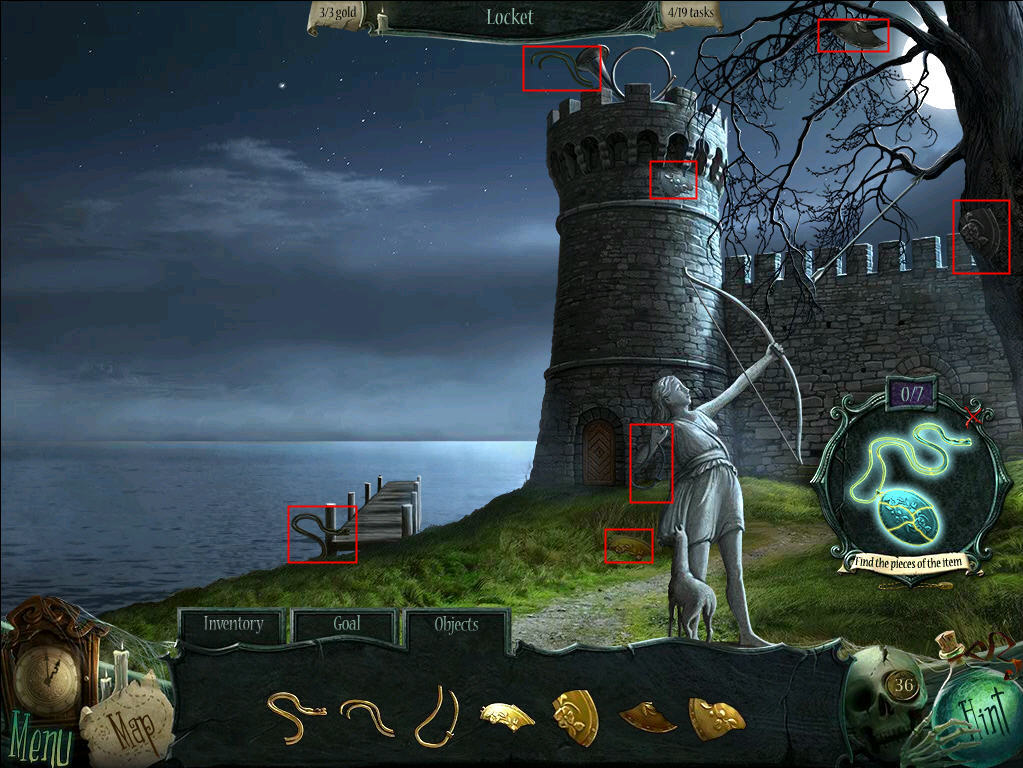
- Use the ARROW with the archer statue; shoot down the LOCKET.
- Click on the LOCKET to find it fragments.
- Add the LOCKET to your inventory.
- Zoom in on the Tower Door.
- Use the LOCKET in the indentation.
- Zoom in on the Tower.
- Take the HAMMER and NAILS.
- Remove the lid from the barrel.
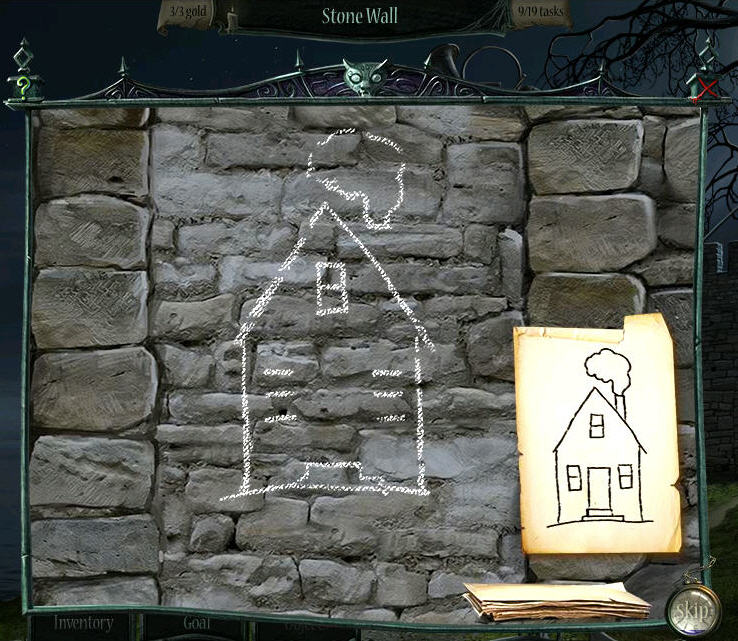
- Take the CHALK.
- Zoom in on the closed archway to trigger a mini-puzzle.
- Use the CHALK to draw a house, jack-o-lantern, boat and moon. When drawings are done, the archway will open.
- Go through the archway.
- Collect the GOLD COINS and receive the MAP PIECE.
- Click on the PILE OF WOOD and complete the HOS.
- Take the BATTERY.
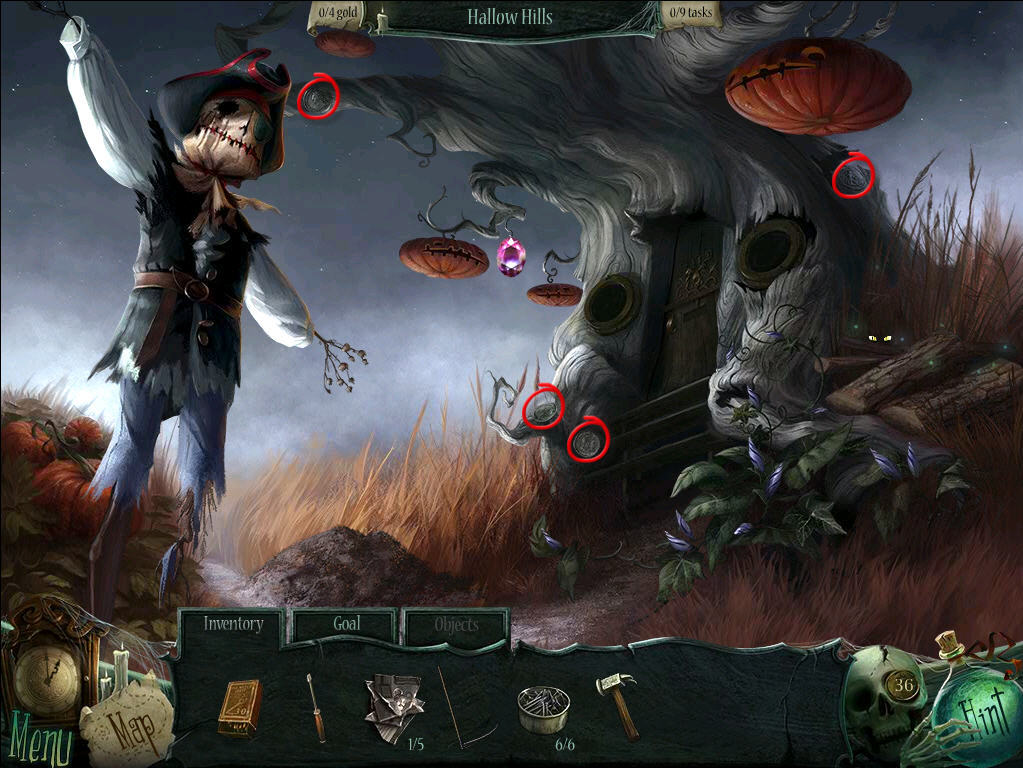
- Zoom in on the Scarecrow.
- Put the BATTERY in its place.
- Pull the lever three times and the flowers will bloom.
- Zoom in on the flowers and take the five PEARLS.
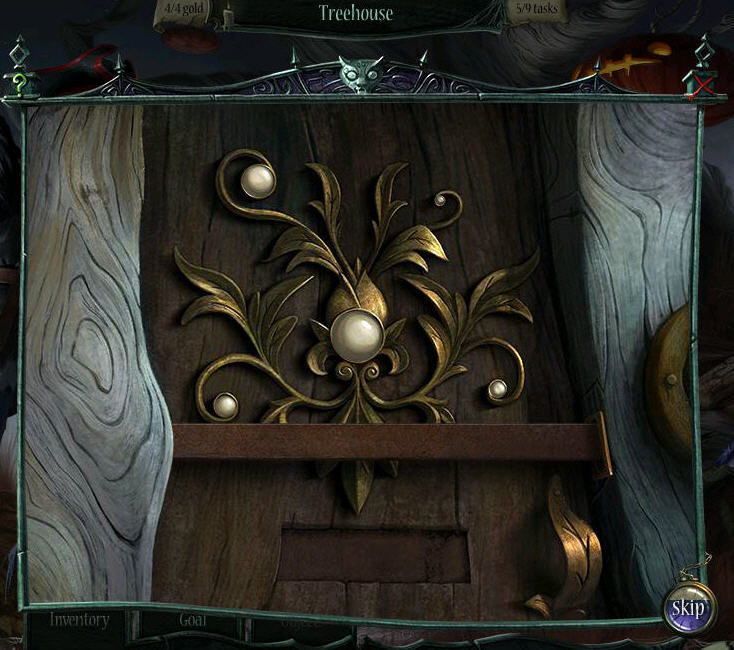
- Zoom in on the Door.
- Place the five PEARLS in the indentation to trigger a mini-puzzle.
- Place the PEARLS in the correctly sized slots.
- Enter the Tree House.
- Collect the GOLD COINS for a MAP PIECE.
- Click the wooden box on the wall to trigger a mini-puzzle.
- Place the runes in the correct slots to remove them.
- When all runes are gone, take the PHOTO FRAGMENT.
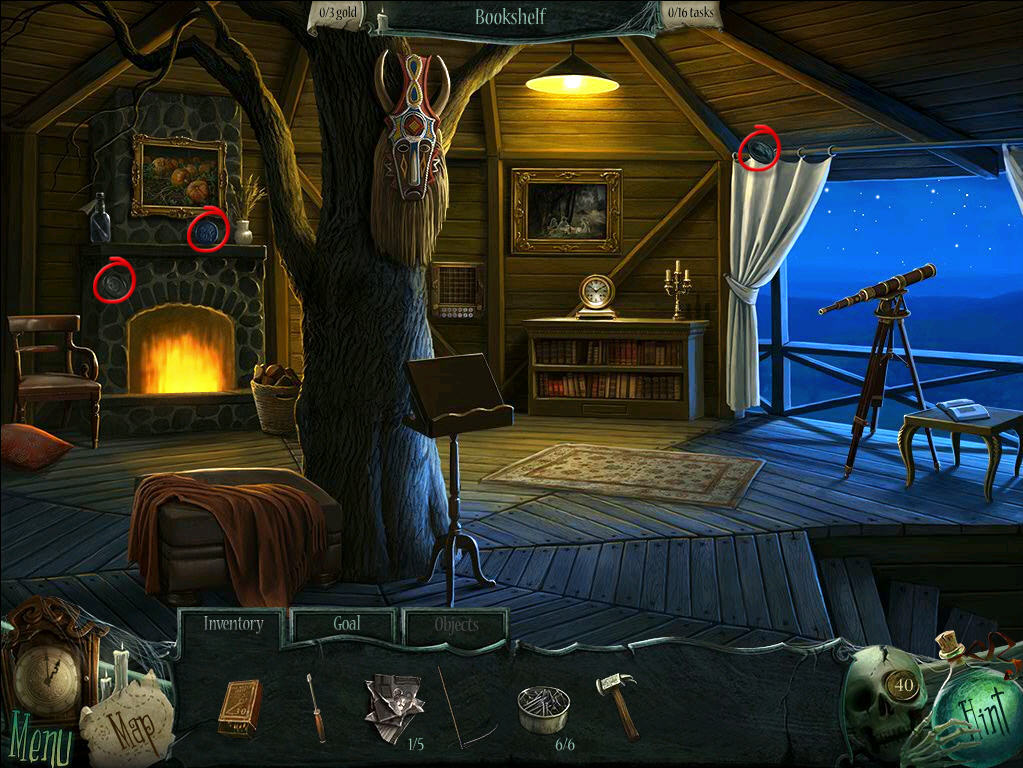
- Zoom in on the BOTTLE on the mantle.
- Use the HAMMER to break the BOTTLE.
- Take the HORN MOUTHPIECE.
- Return to the Pier.
- Zoom in on the Tower Door.
- Place the HORN MOUTHPIECE on the horn.
- Click on the HORN to blow it.
- A pirate ship will appear.
- Click on the BOOK at the pirate skeleton's feet.
- Find the fragments and obtain the GHOST BOOK.
- Return to the Tree House.
- Zoom in on the bookshelf.
- Place the GHOST BOOK in the opening.
- Take the SILVER COIN from the drawer.
- Return to the Pier.
- Give the SILVER COIN to the pirate skeleton.
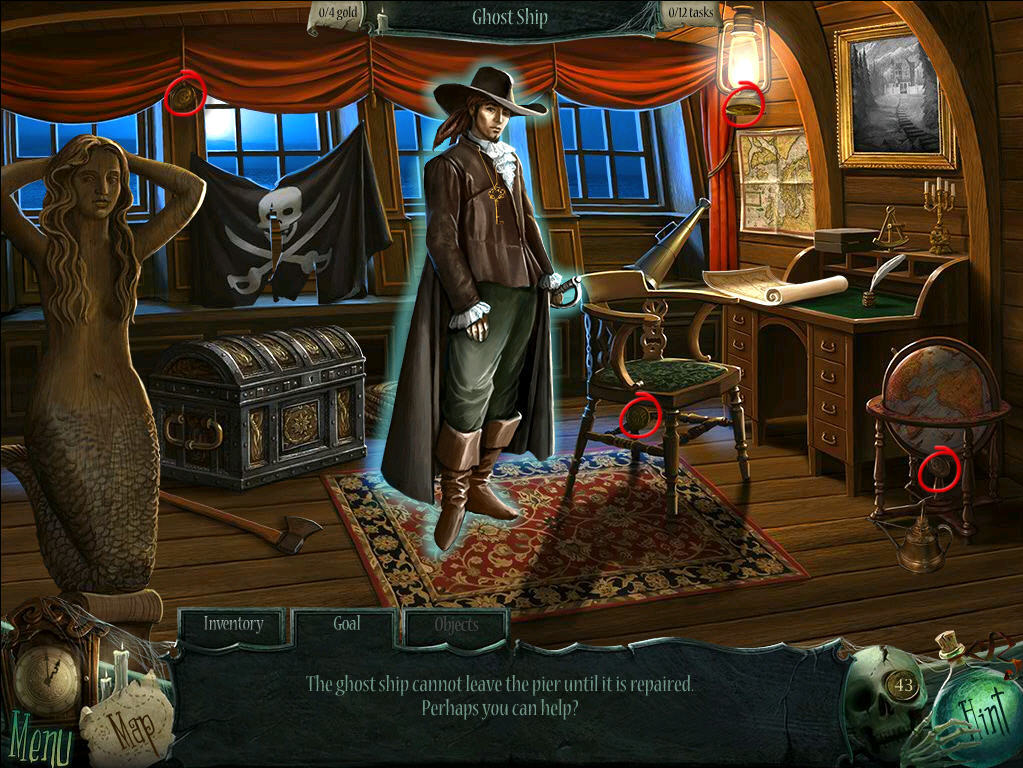
- Enter the Ghost Ship.
- Collect the GOLD COINS to receive the MAP PIECE.
- Take the MERMAID and the LAMP OIL.
- Return to the Manor Hallway.
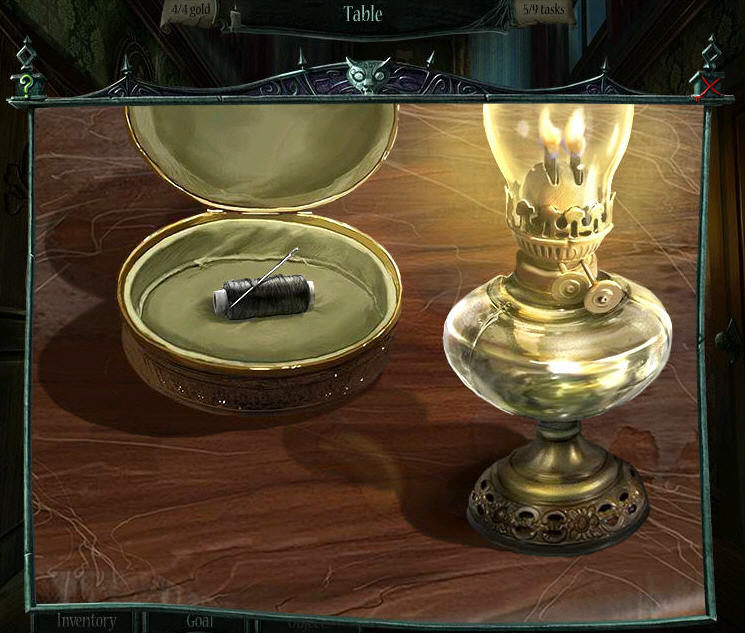
- Zoom in on the table.
- Use the LAMP OIL in the lamp.
- Use a LIT MATCH.
- Take the NEEDLE and THREAD.
- Return to the Ghost Ship.
- Use the NEEDLE and THREAD to repair the PIRATE FLAG.
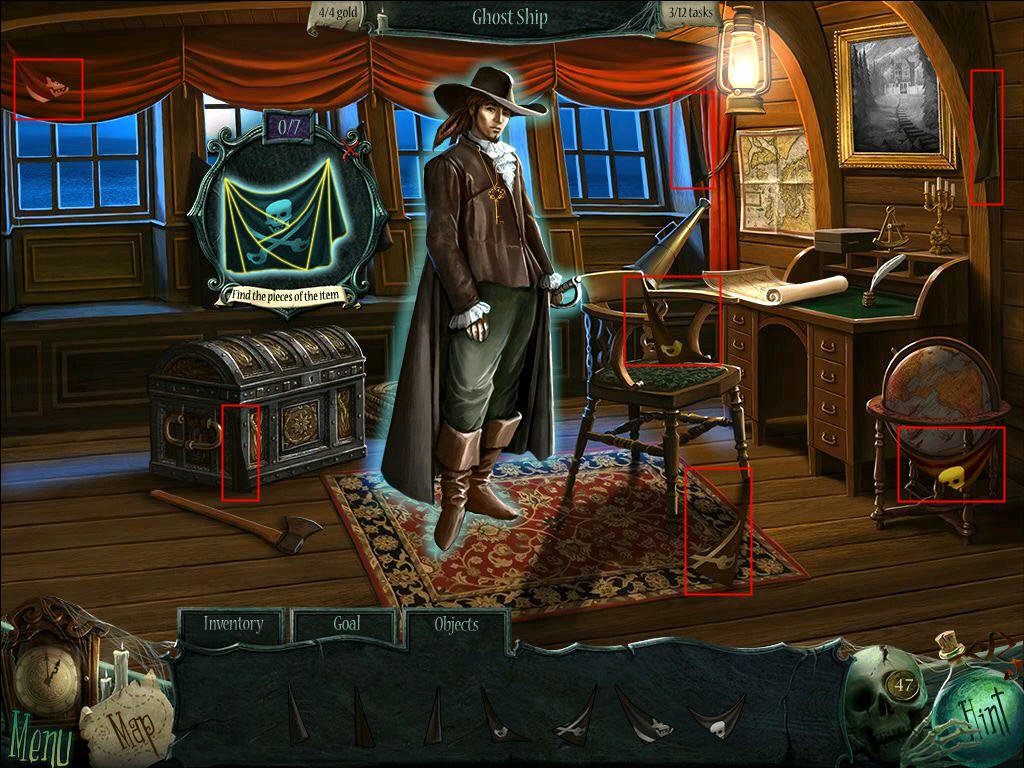
- Click on the FLAG to find its fragments.
- Add the JOLLY ROGER to your inventory.
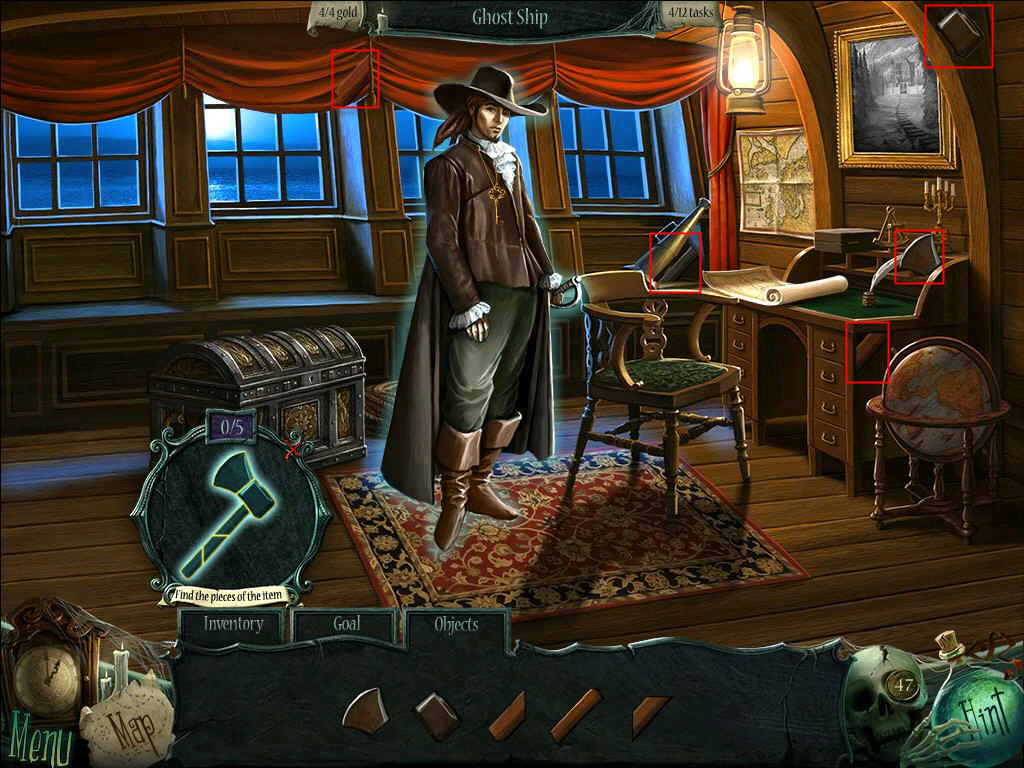
- Click on the AXE.
- Find its fragments.
- Add the AXE to your inventory.
- Take the UNMARKED STAR MAP from the desk.
- Return to the Tree House.
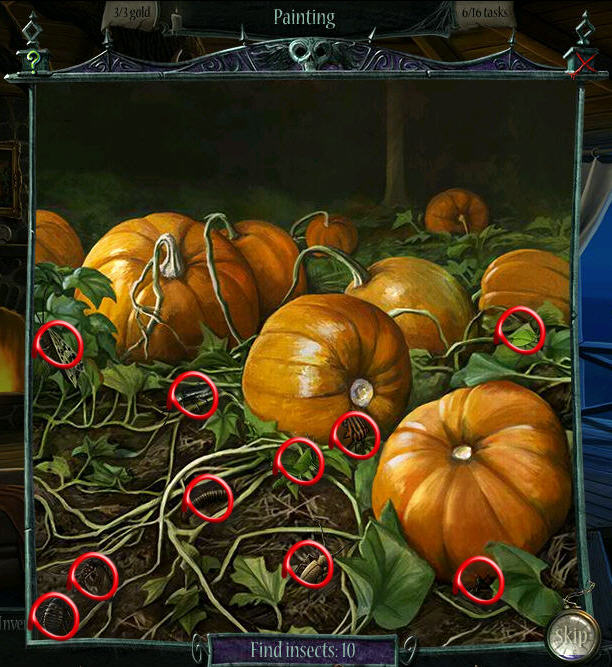
- Zoom in on the pumpkin painting to trigger a mini-puzzle.
- Find all the insects and take the TELESCOPE CRANK.
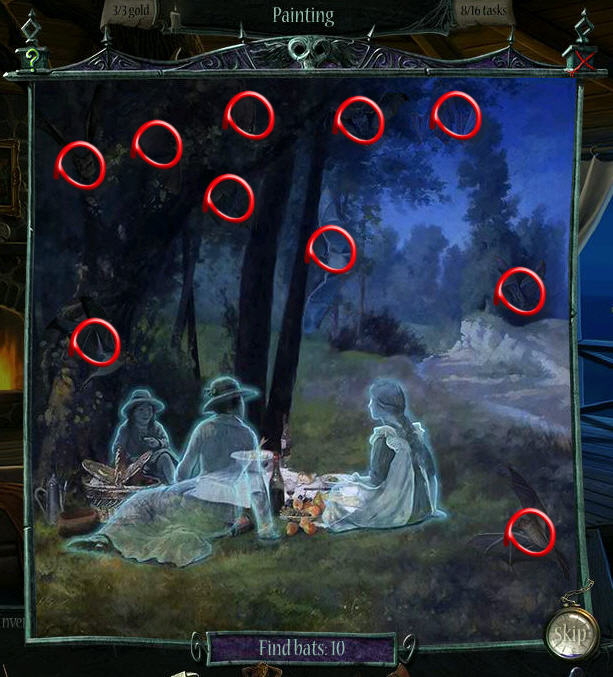
- Zoom in on the picnic painting to trigger a mini-puzzle. Find all the bats and take the TELESCOPE LENS.
- Zoom in on the telescope.
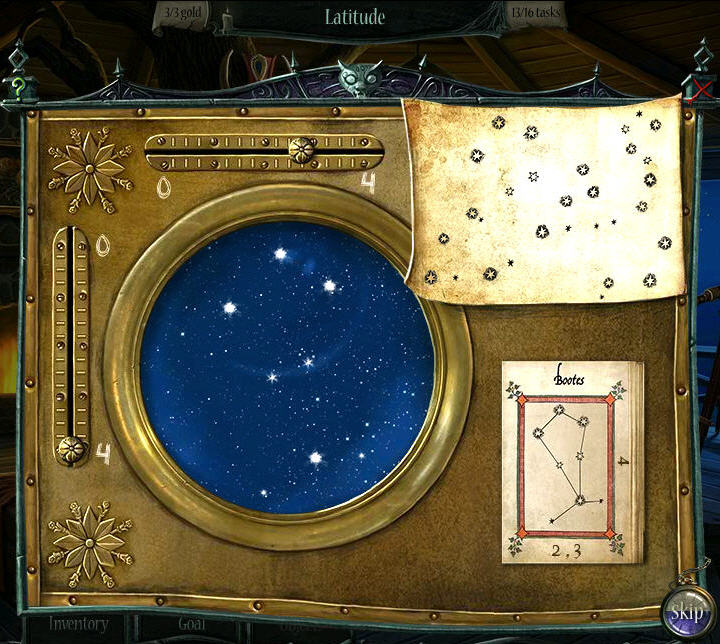
- Place the UNMARKED STAR MAP to trigger a mini-puzzle.
- Find all the stars in each constellation.
- Take the MARKED STAR MAP.
- [Curse-at-Twilight_51.jpg]
- Return to the Manor Backyard.
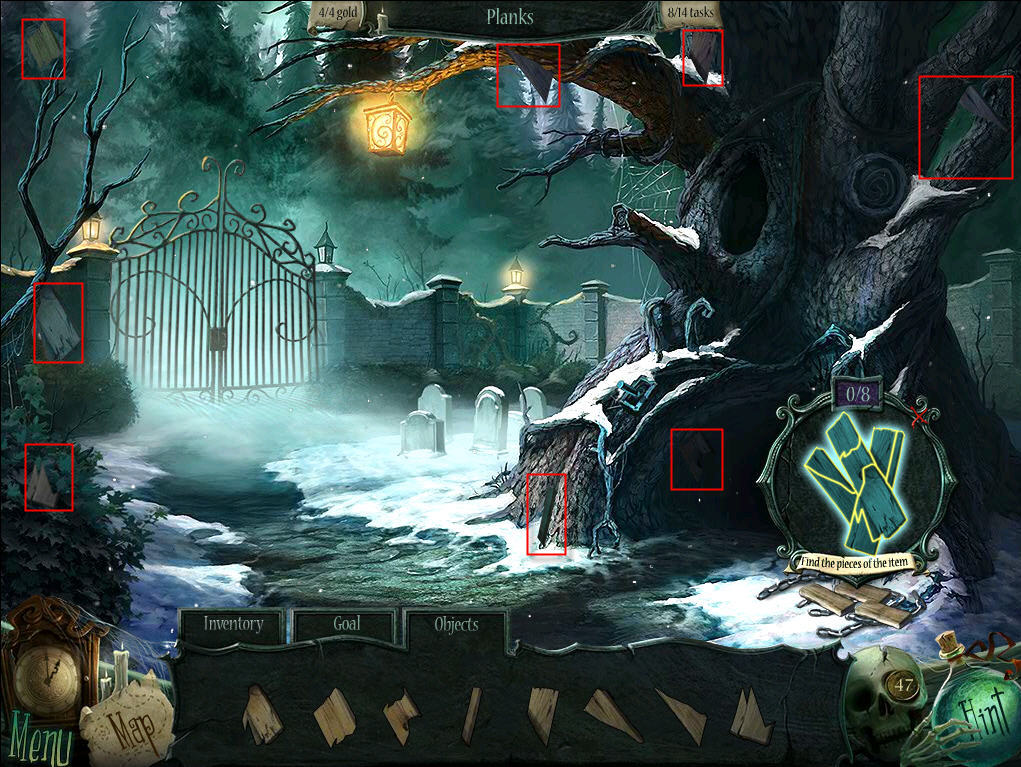
- Use the AXE to chop the pile of wood into planks.
- Click on the BOARDS to find the fragments.
- Add the PLANKS to your inventory.
- Return to the Pier.
- Place the MERMAID on the bow of the ship.
- Place the JOLLY ROGER on the flagpole.
- Zoom in on the hole in the side of the ship.
- Place the three PLANKS over the hole.
- Place the NAILS on each end of each PLANK.
- Use the HAMMER on the NAILS to repair the hole in the ship.
- Enter the Ghost Ship.
- Give the MARKED STAR MAP to the Pirate Ghost.
- He will drop a KEY and disappear.
- Click on the KEY.
- Find its fragments and add the KEY to your inventory.

- Zoom in on the Treasure Chest.
- Use the PIRATE KEY to unlock the chest.
- Take the WOODEN EYE.
- Return to the Tree House.
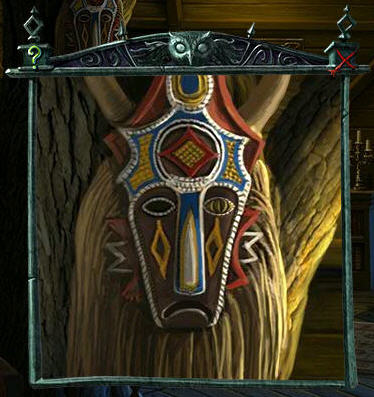
- Zoom in on the MASK.
- Place the WOODEN EYE into the empty eye socket.
- Take the PAINTBRUSH that appears on the music stand.
- Return to the Ghost Ship.
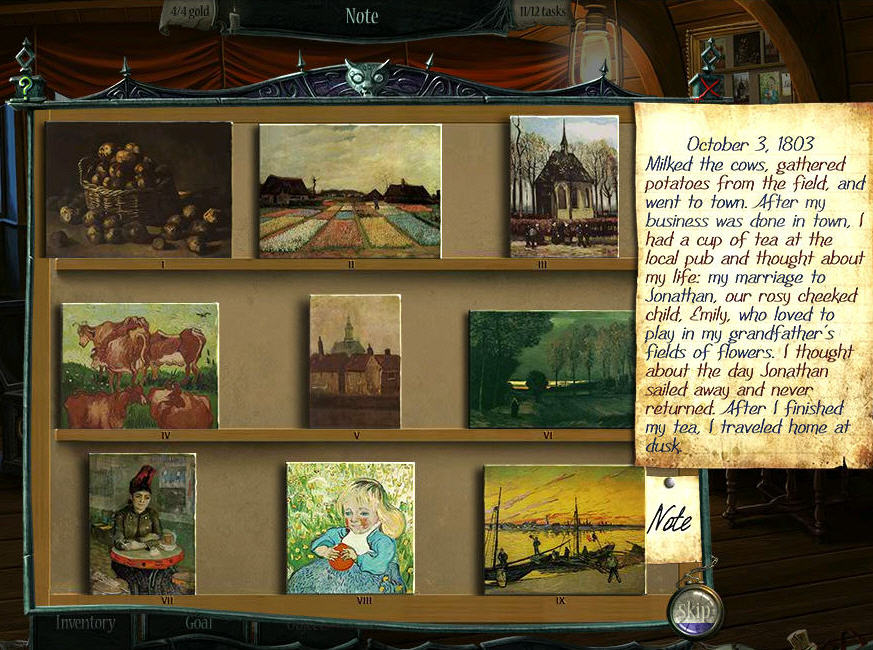
- Zoom in on the PAINTING.
- Use the PAINTBRUSH three times to trigger a mini-puzzle.
- Use the note to reorder the paintings.
- When complete, take the PAINTING.
- Return to the Grand Room.
- Zoom in on the mantle.
- Place the PAINTING on the wall.
- Zoom in on the bookshelf.
- Take the HEART SHAPE.
- Return to the Hallway.
- Zoom in on the door with the HEART-SHAPED INDENTATION.
- Use the HEART SHAPE to unlock the door.
Comments will load when you reach this part of the walkthrough.