Chapter 2: Secret Dungeon
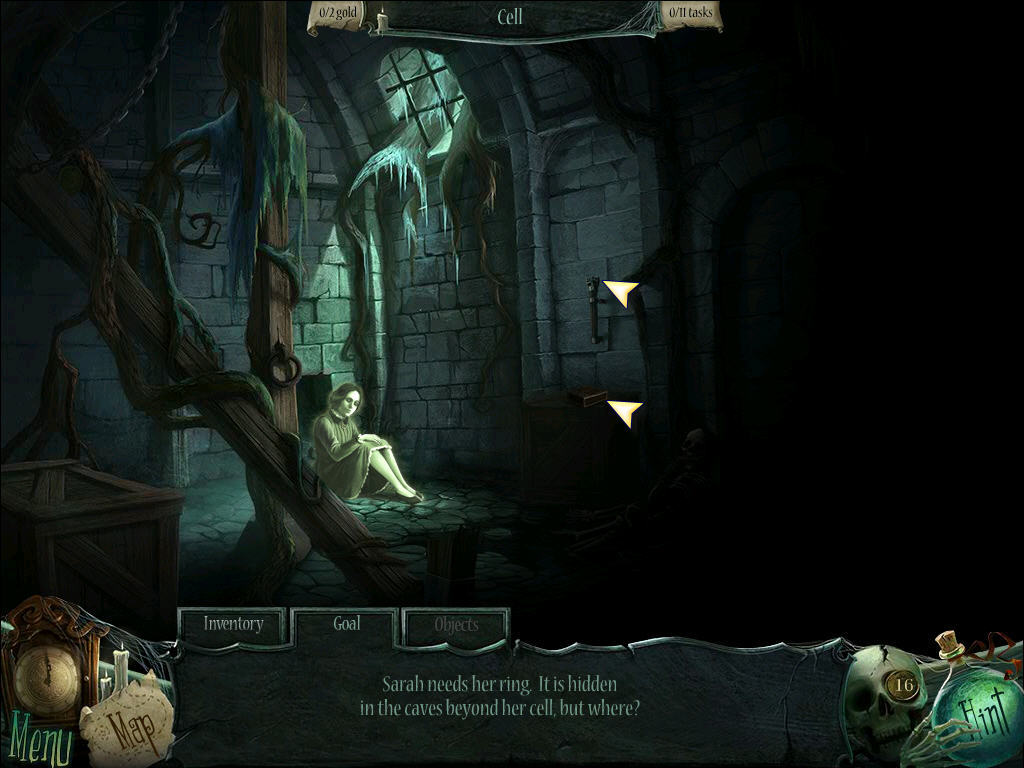
- Enter the Cell where you meet Sarah, the ghost girl.
- She tells you the story of a special ring and how to find it.
- Click on the matchbox to obtain the BOX OF MATCHES.
- Click on the BOX OF MATCHES from your inventory.
- Click the Box to release a Match.
- Click to light the Match.
- Use the LIT MATCH on the torch to light the room.
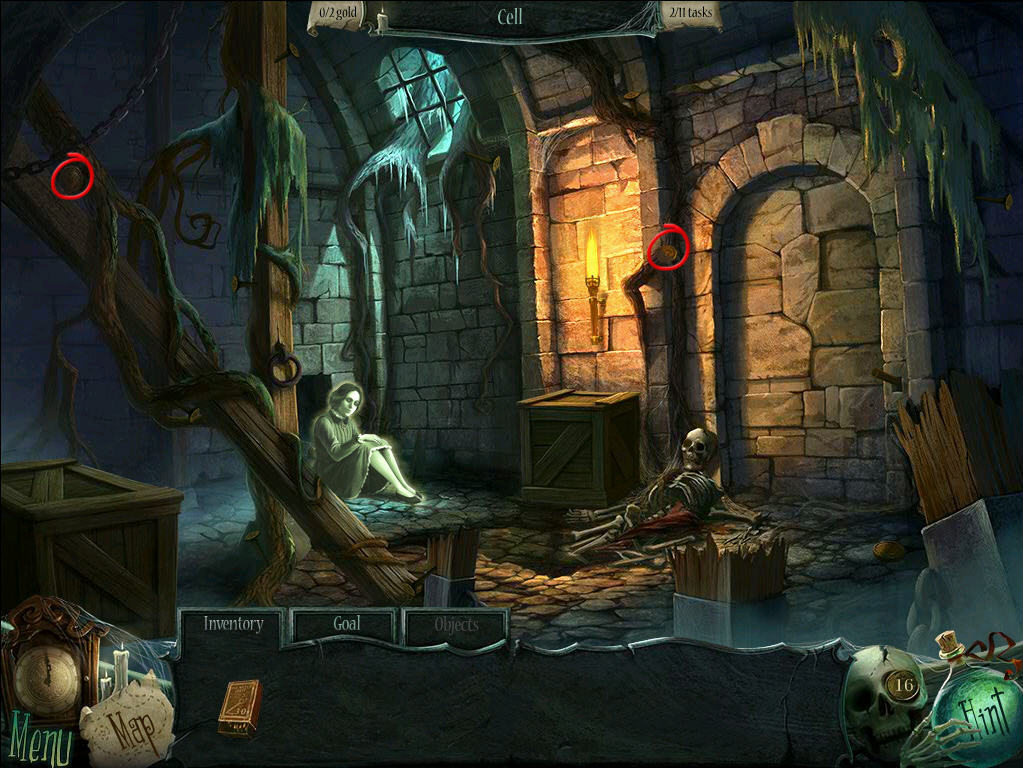
- Collect the GOLD COINS and receive the MAP PIECE.
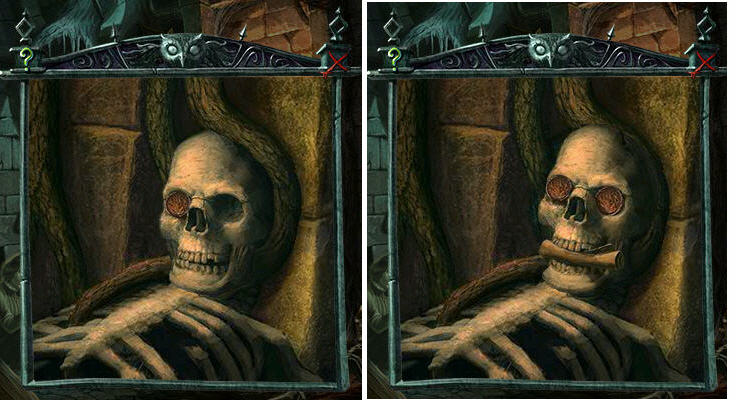
- Pick up the COPPER COIN in the archway.
- Zoom in on the Skeleton's Skull. Place the COPPER COIN in the empty eye socket.
- Take the SCROLL from the skull's jaws.
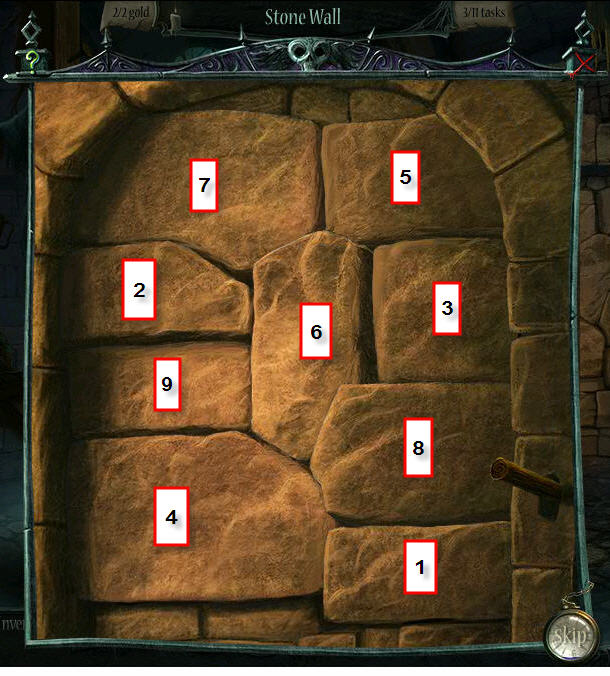
- Click on the archway to trigger a mini-puzzle.
- Press the concrete blocks in the correct order on the scroll.
- Click the lever.
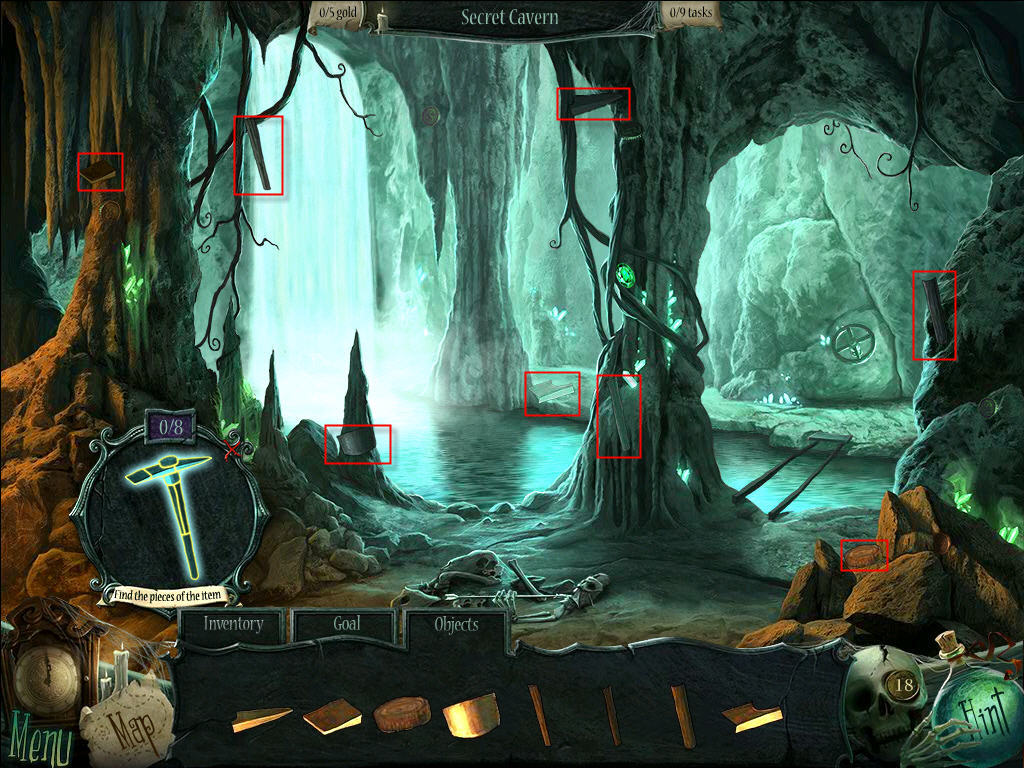
- Enter the door into the Secret Cavern.
- Click on the PICK AXE.
- Find the fragments and add the PICK AXE to your inventory.

- Go back to the Cell.
- Use the PICK AXE on the two crates.
- Take the CHAIN CUTTER and the HAMMER from the crates.
- Gather the 8 NAILS.
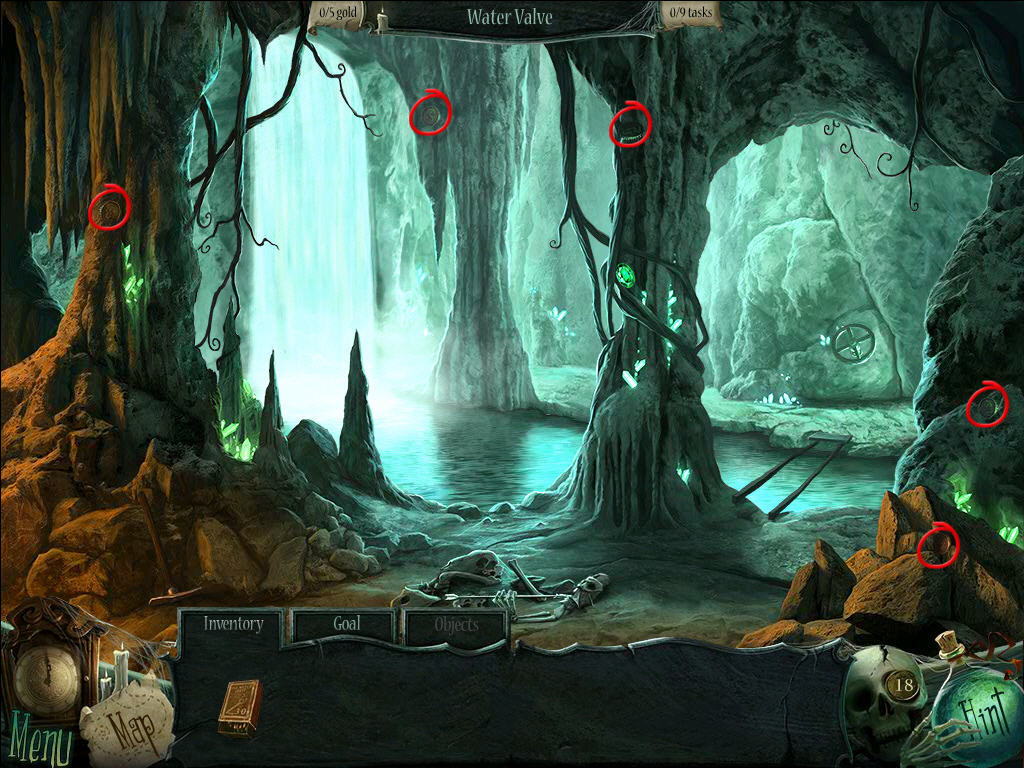
- Use your MAP PIECE to return to the Manor Backyard.
- Use the CHAIN CUTTER on the pile of wood chained together by the tree trunk.
- Take the WOODEN PLANKS into your inventory.
- Return to the Secret Cavern.
- Collect the GOLD COINS for your MAP PIECE.
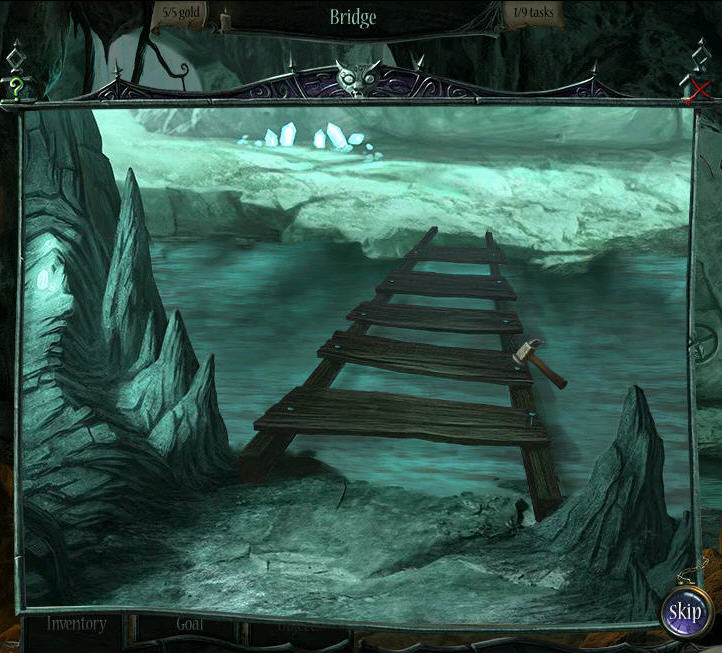
- Zoom in to the partial bridge over the water.
- Place four WOODEN PLANKS to repair the bridge.
- Place one NAIL on each end (use all 8 NAILS).
- Use the HAMMER to secure each NAIL and the bridge is repaired.
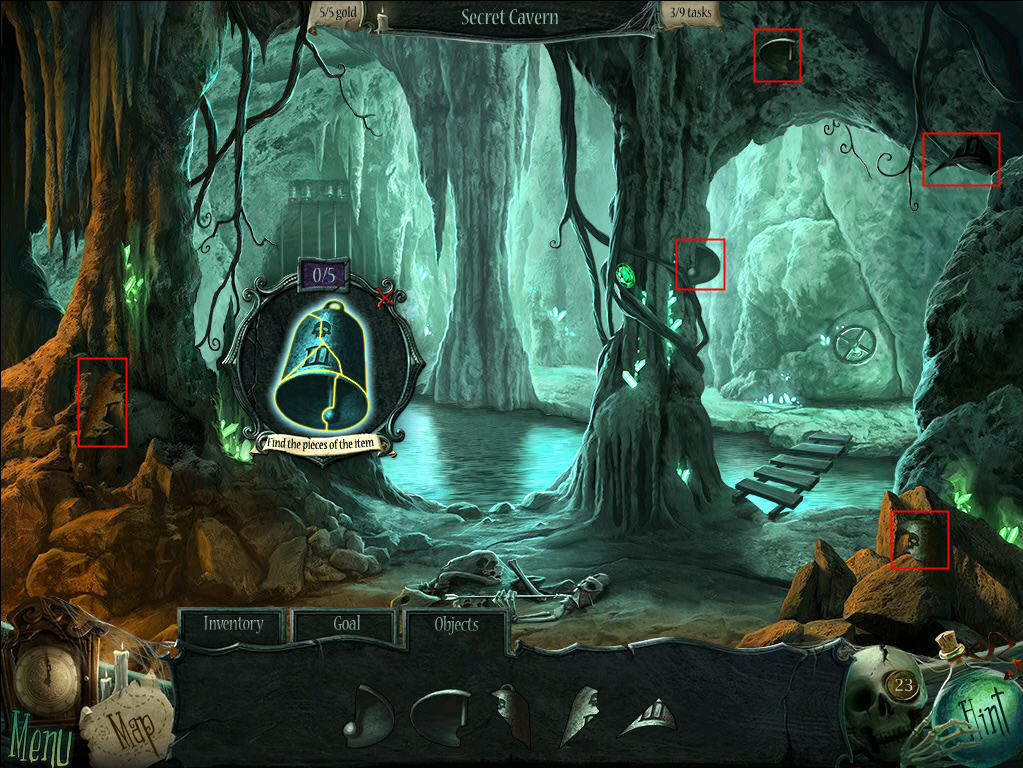
- On the other side of the bridge, turn off the waterfall with the valve.
- Click the BELL.
- Find its fragments to add the BELL to your inventory.
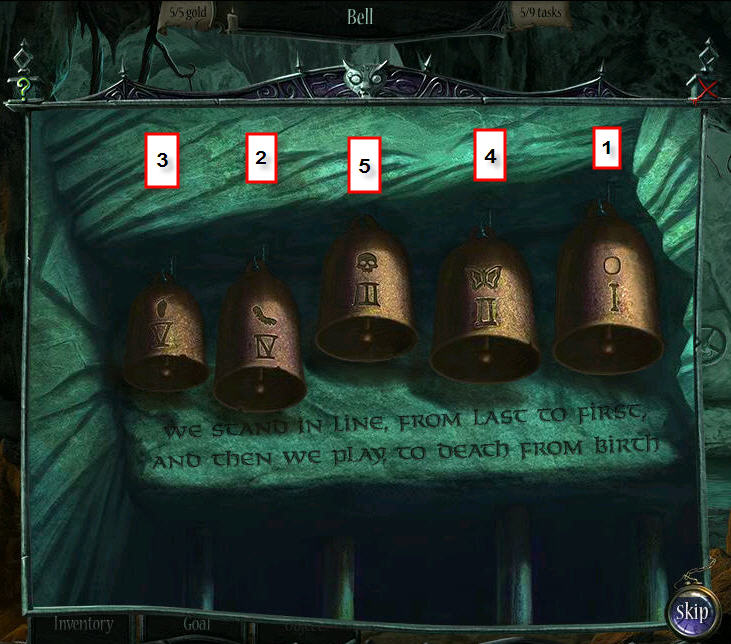
- Zoom into the bells.
- Place the BELL on the empty hook.
- Arrange the bells in reverse numerical order (V, IV, III, II, I).
- The bells will become a copper color when placed in the correct order.
- Ring the bells in order of the life cycle. Start with the egg, then caterpillar, chrysalis, butterfly, and skull.
- When in the correct order, the portcullis will open.
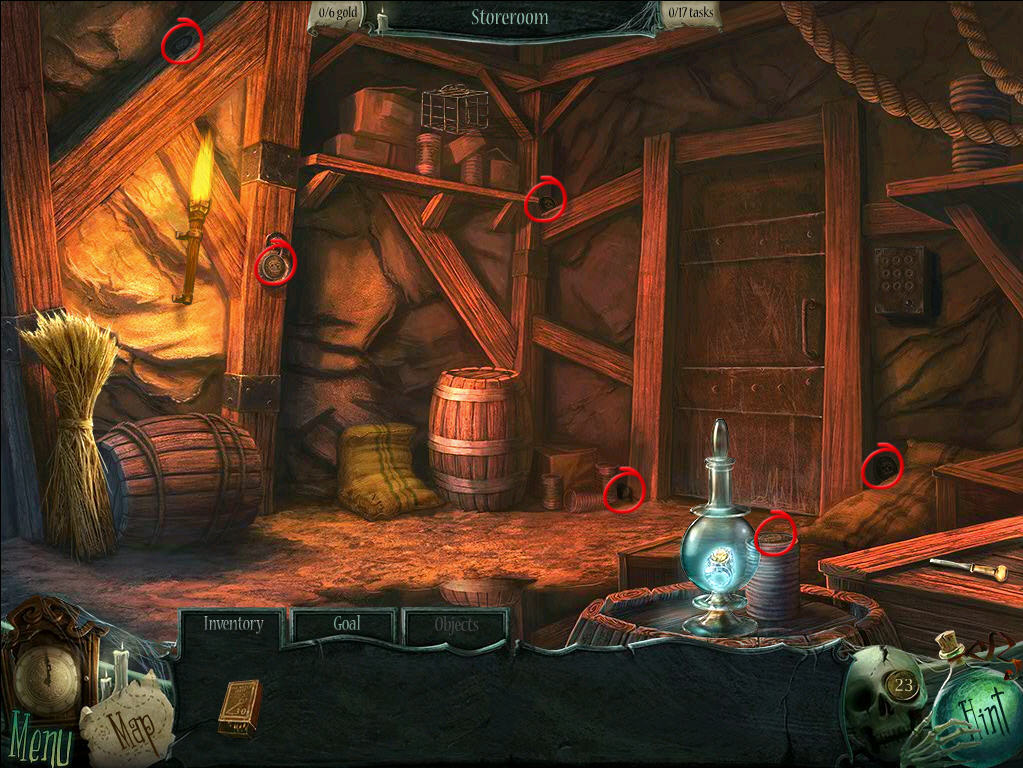
- Enter the Store Room.
- Collect the GOLD COINS to receive the MAP PIECE.
- Click on the sack to uncover the mouse hold. Add the CHISEL to your inventory.
- Go to the Manor Front Yard.
- Use the CHISEL on the ice.
- Add the SCREWDRIVER to your inventory.
- Return to the Store Room.
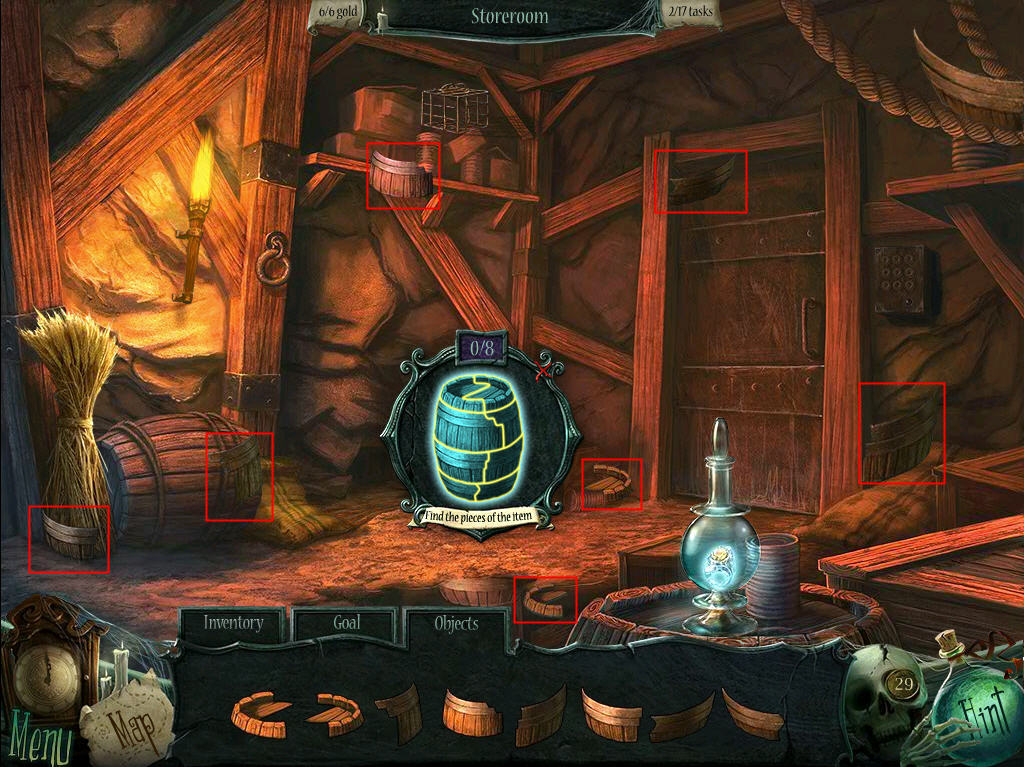
- Click on the BARREL and find its fragments.
- Zoom in on the barrel and take the CHEESE.
- Click on the mousetrap and move it to the ground in front of the mouse hole.
- Use the SCREWDRIVER to pry open the mousetrap door.
- Place the CHEESE into the mousetrap to catch the mouse.
- Remove the MOUSE from the mousetrap.
- The SCREWDRIVER will automatically return to your inventory.
- Click on the mouse hole and complete the HOS.
- The vase without a stopper contains the ENERGY CRYSTAL. Be sure to add that to your inventory after finding all the hidden objects.
- Zoom in on the panel beside the door.
- Use the SCREWDRIVER to remove each of the four screws.
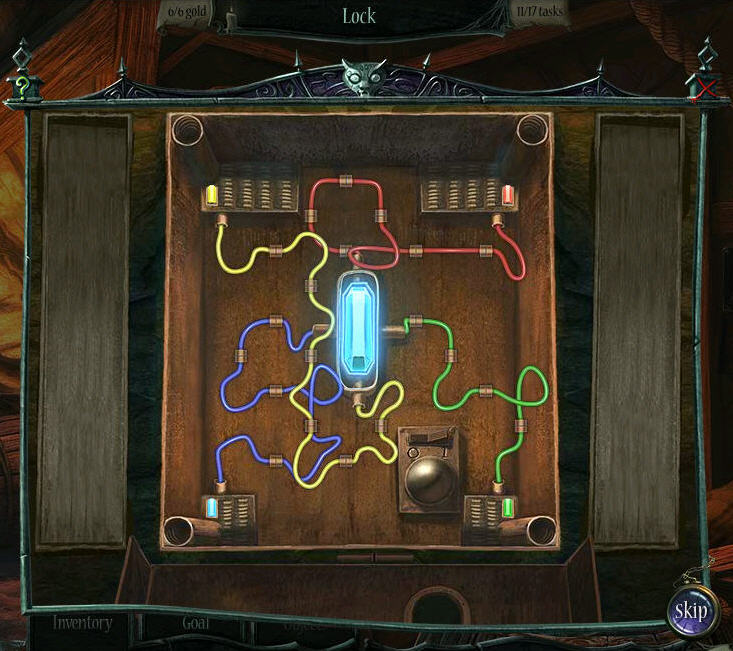
- Place the ENERGY CRYSTAL in the panel and trigger a mini-puzzle.
- In the puzzle, you must connect the wires so that the colors connect all the way to the ENERGY CRYSTAL.
- When electricity is restored, press the buttons until the green number equals 90. One possible solution is 9, 5, 2, 1.
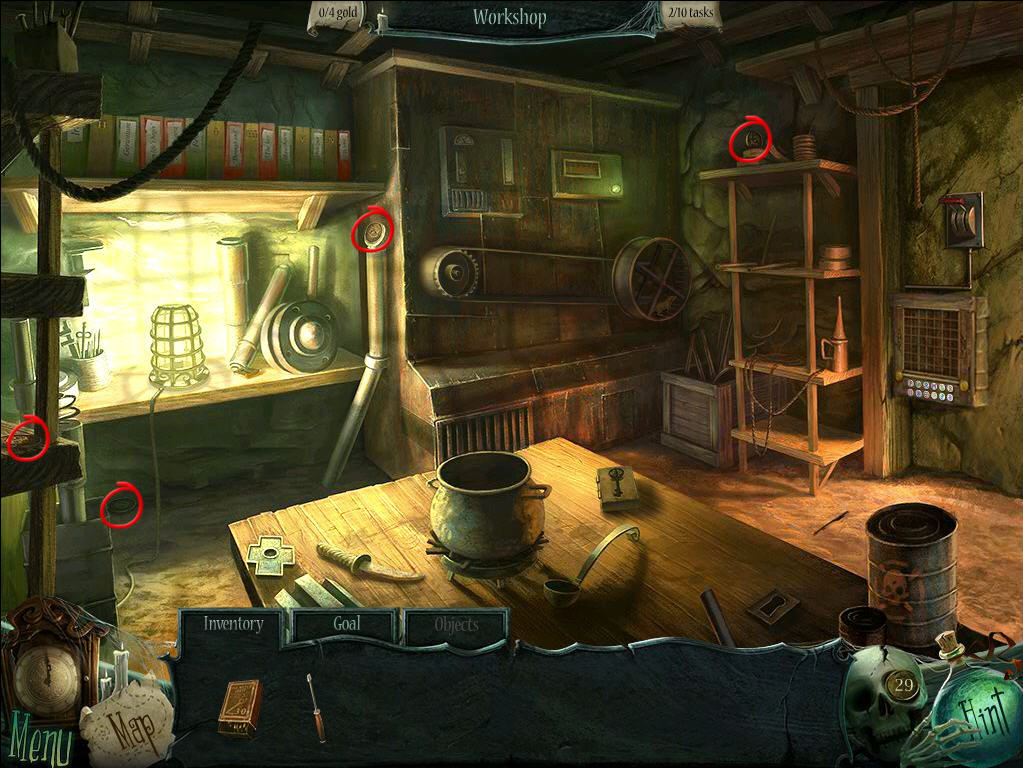
- Enter the Workshop.
- Put the Mouse on the wheel and click the switch on the wall.
- When the lights come on, collect the GOLD COINS and receive the MAP PIECE.
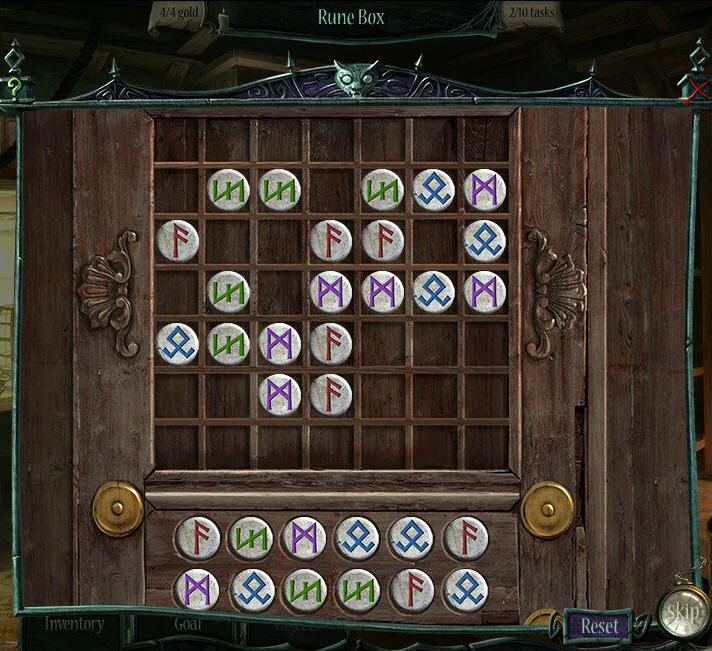
- Click on the wooden box to open a mini-puzzle.
- Place the runes in the correct spaces by lining them up in groups of 3 or more. When lined up correctly, the runes will disappear.
- When all the runes are gone, a secret drawer will open.
- Take the PHOTO FRAGMENT that is revealed.
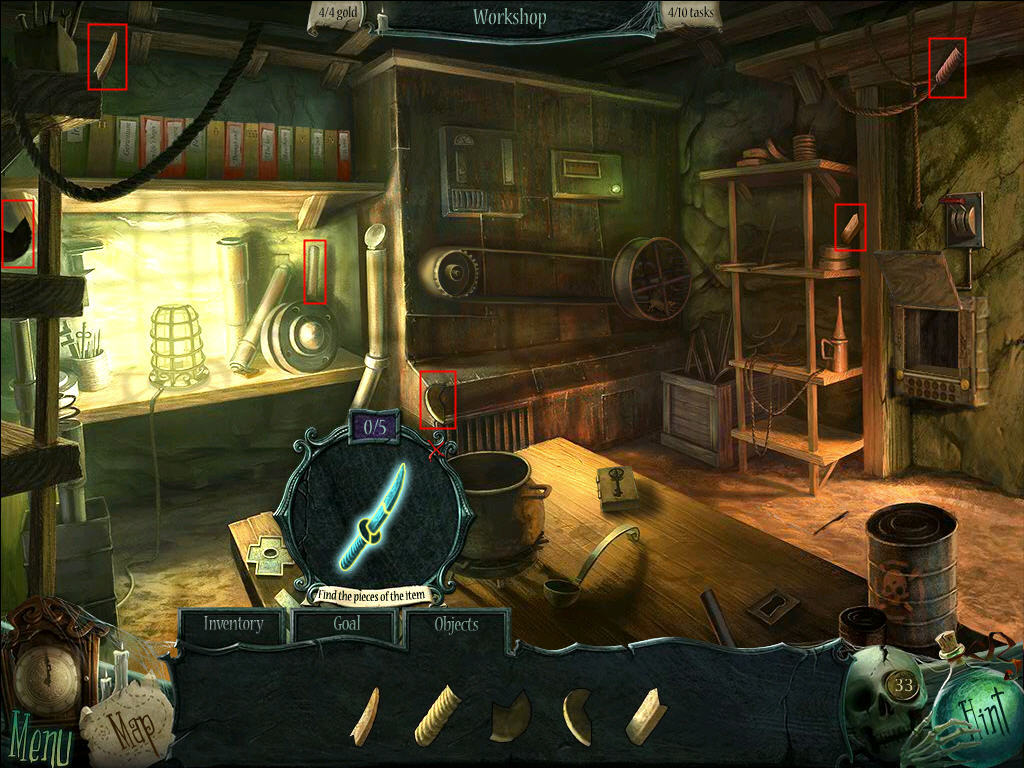
- Click on the KNIFE.
- Find its fragments and obtain the KNIFE.
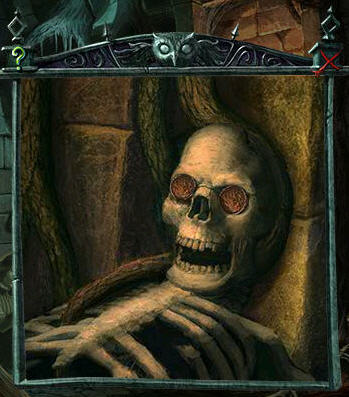
- Go back to the Cell.
- Zoom in on the skeleton.
- Use the KNIFE to remove both COPPER COINS from the skeleton's eyes.
- Return to the Workshop.
- Click on the shelf with all the key molds.
- Put the molds in order: I, II, III, IV, V, Fennel, Geranium, Hawthorn, Iris, Juniper, From life's begin, Through end, The key, To happiness, Is love.
- When the floor opens, it reveals a KEY MOLD HALF.
- Zoom in on the worktable. Place the KEY MOLD HALF on the table.
- Click the KEY MOLD HALF to stand it up.
- Light a MATCH and use it on the wood.
- Place the COPPER COINS in the cauldron.
- Use the ladle to scoop out the liquid into the KEY MOLD.
- Click the KEY MOLD to open it.
- Remove the COPPER KEY.
- Return to the Storeroom.
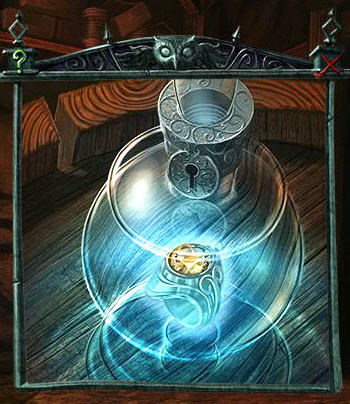
- Zoom in on the CRYSTAL VASE.
- Use the COPPER KEY to unlock the CRYSTAL VASE.
- Take the GHOST RING.
- Go back to the Cell to give Sarah the GHOST RING.
- Return to the Grand Room.
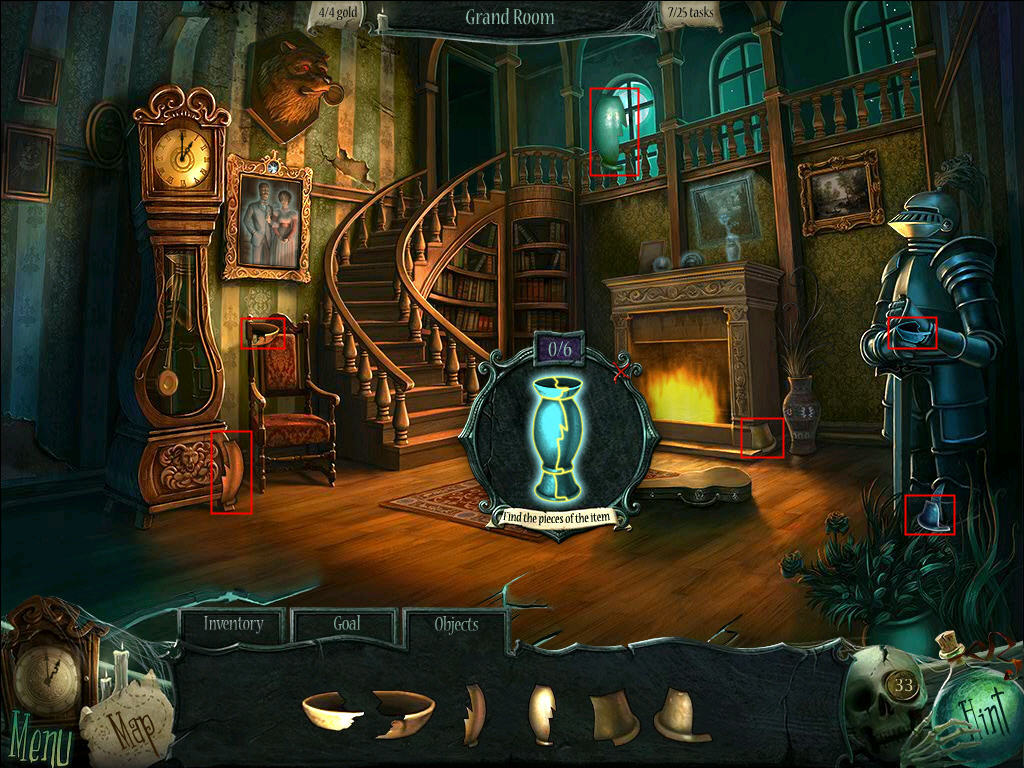
- Click on the VASE on the floor near the fireplace.
- Find its fragments to obtain the VASE.
- Zoom in on the mantle.
- Replace the GHOST VASE with the real VASE.
- Zoom in on the knight's hand.
- Remove the WOODEN SKULL SHAPE.
- Go back to the Hallway.
- Zoom in on the door with the SKULL indentation.
- Use the WOODEN SKULL SHAPE to unlock the door.
