
Chapter Five: The Rescue
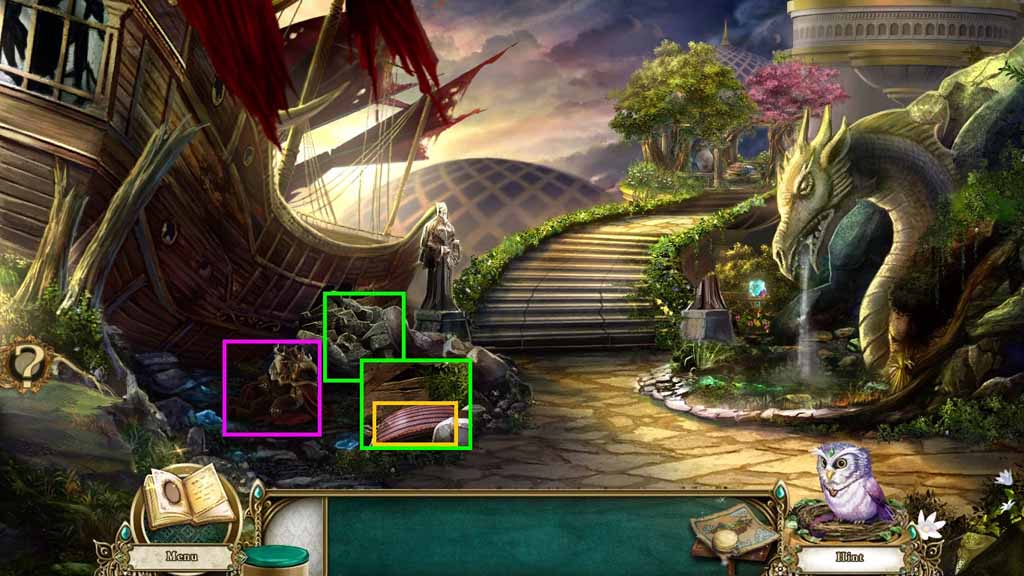
- Speak to the Captain.
- Zoom into the rubble and click it aside; collect the 1 / 3 large light pillows.
- Move ahead toward the Rotunda Balcony.
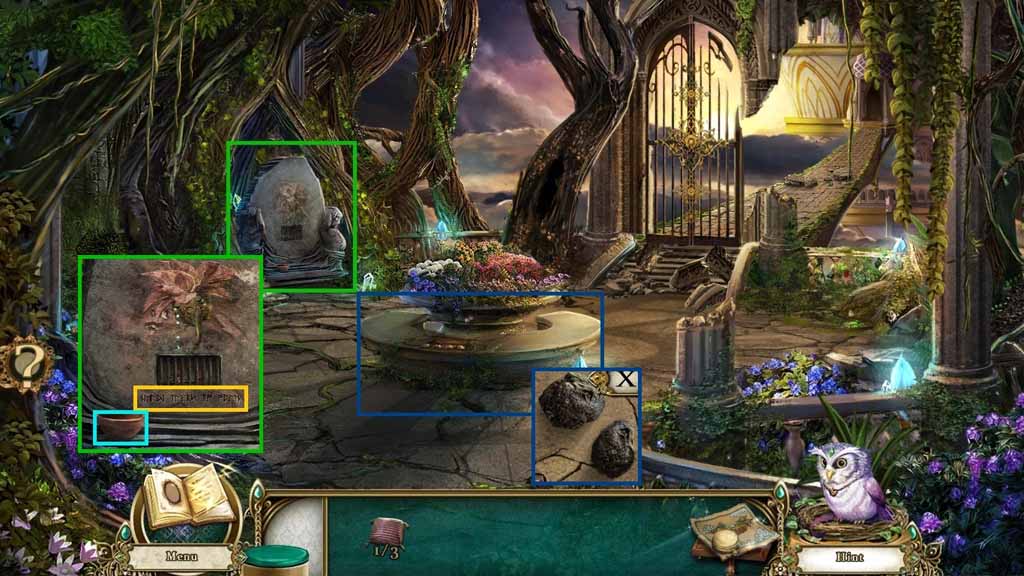
- Zoom into the mural of the oath; collect the bowl for water.
- Read the Oath.
- Zoom into the garden bench and collect the flint.
- Move down once.
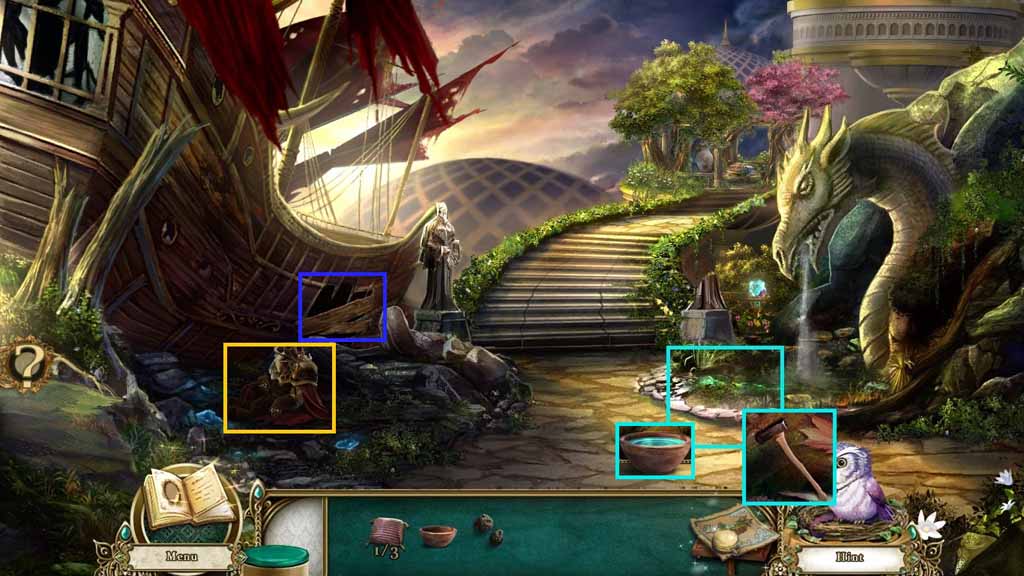
- Zoom into the water pond.
- Select the dull axe and use the flint on it; collect the axe.
- Dip the bowl for water into the water; collect the bowl of water.
- Give the bowl of water to the Captain.
- Zoom into the wood and use the axe to chop it.
- Move into the Ships’ Interior.
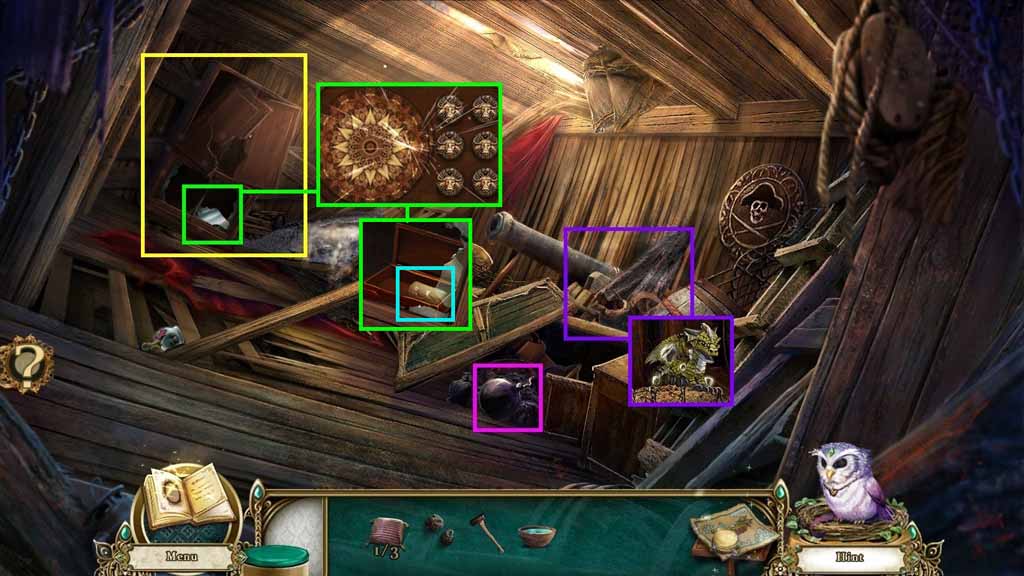
- Collect the bomb.
- Zoom into the debris and click it away.
- Select the bowl of water and pour it onto the frame.
- Click the frame and collect the stone dragon.
- Zoom into the cabinet; collect the mirror.
- Examine the medicine box under the mirror to access a mini-game.
- Click the buttons to recreate the pattern to solve the game.
- Collect the bandage.
- Move down once.
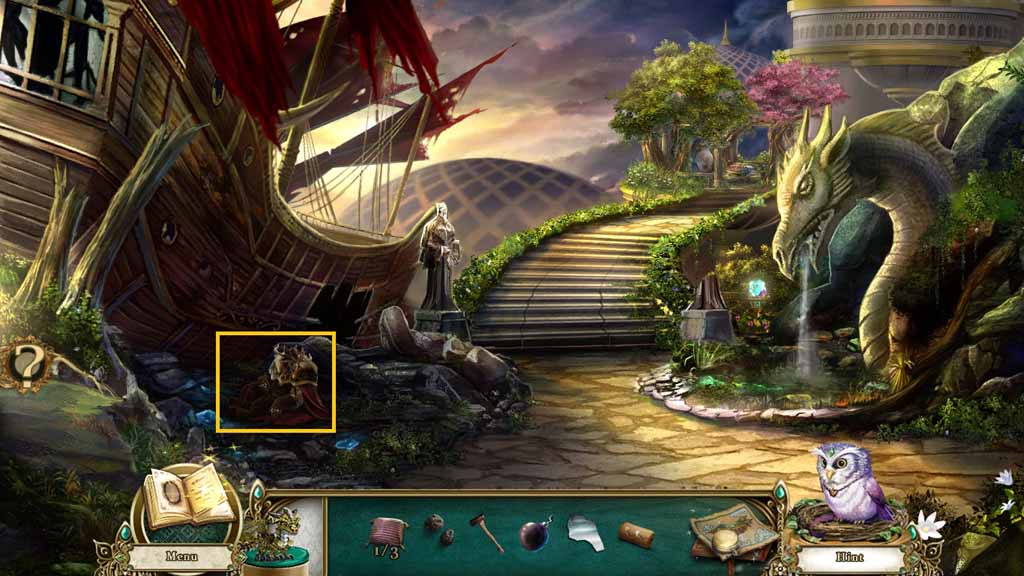
- Select the bandages and use them on the Captain; collect the gate key.
- Move ahead.
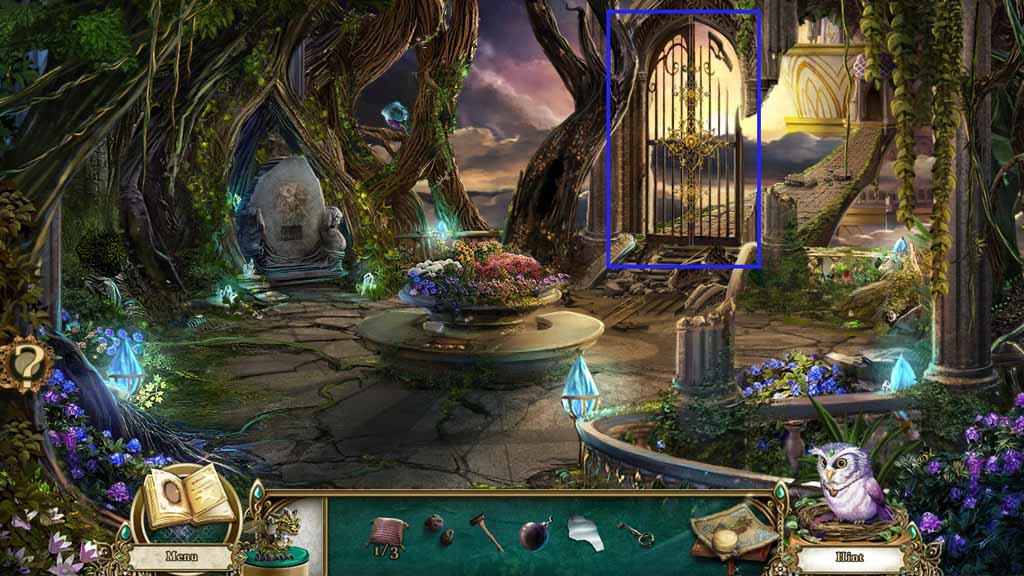
- Zoom into the gate.
- Insert the gate key into the gate.
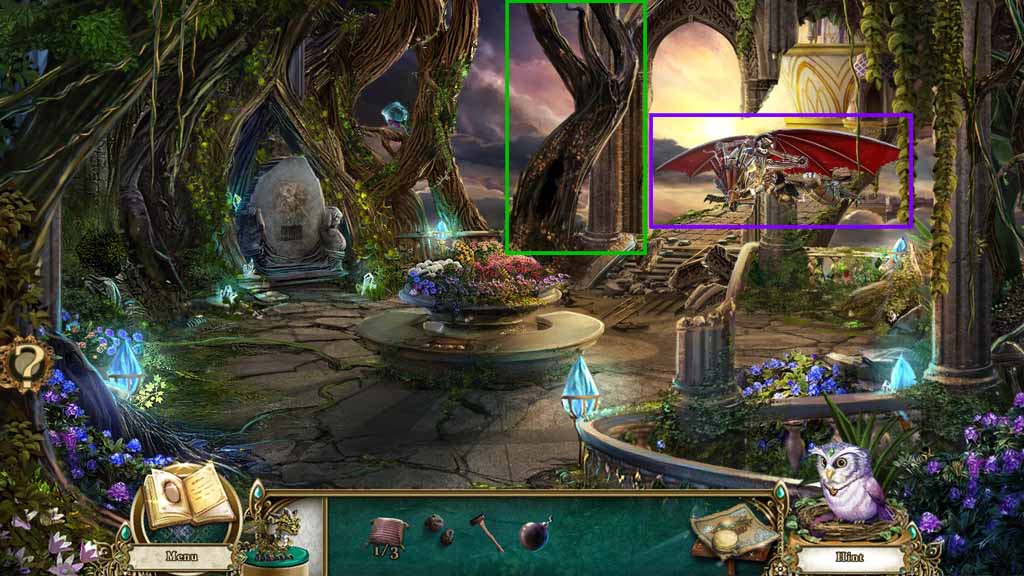
- Select the mirror to use on the Clockwork Dragon.
- Select the bomb and the flint to use on the Clockwork Dragon.
- Select the axe and use it on the dead tree; collect the slender twig.
- Select the stone dragon to use on the fallen tree.
- Move ahead.
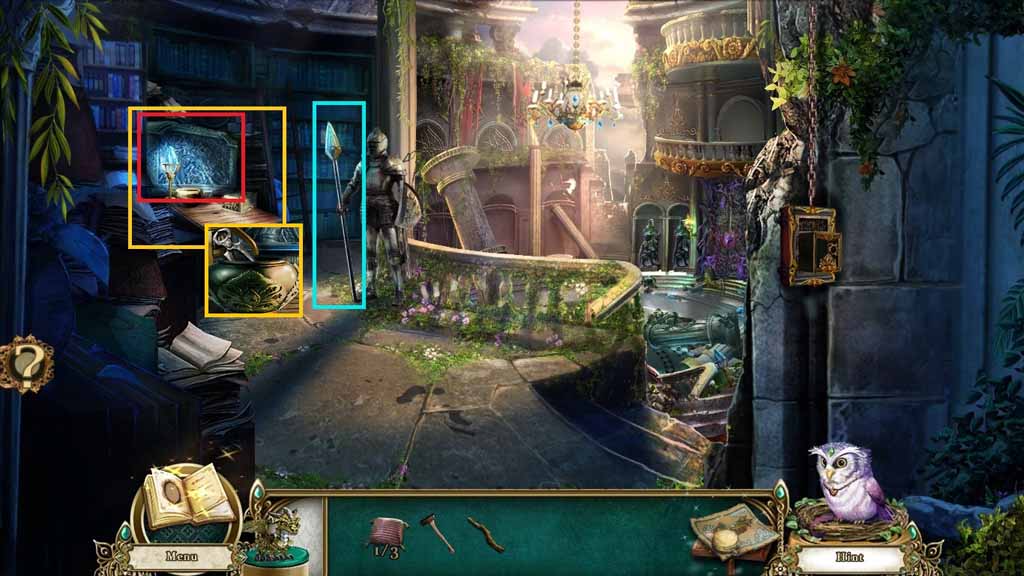
- Collect the spear.
- Zoom into the desk; collect the wire cutters.
- Click the soldier carving to trigger a hidden objects area.
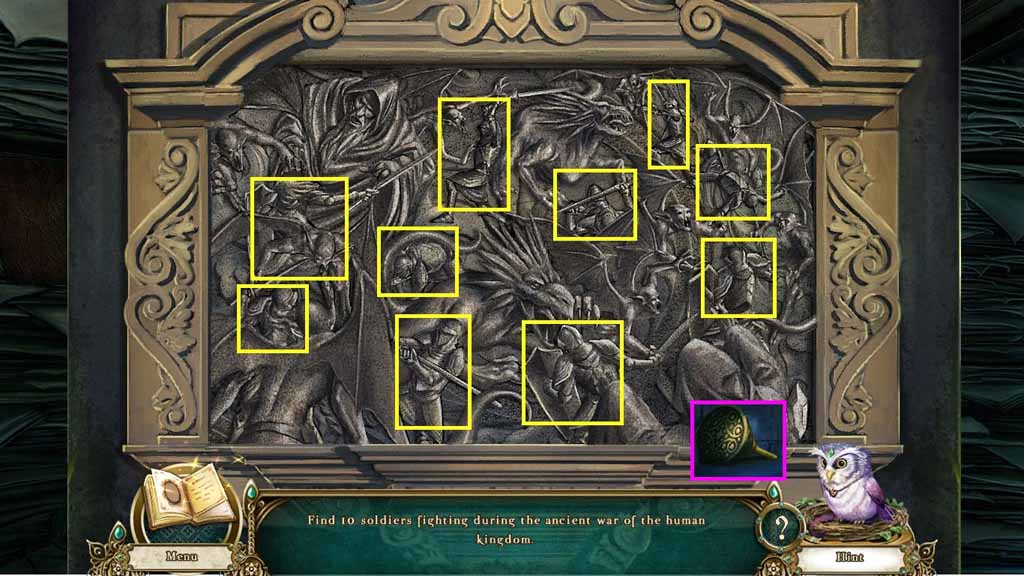
- Find the battling soldiers.
- Collect the golden knob.
- Move to the Ships’ Interior.
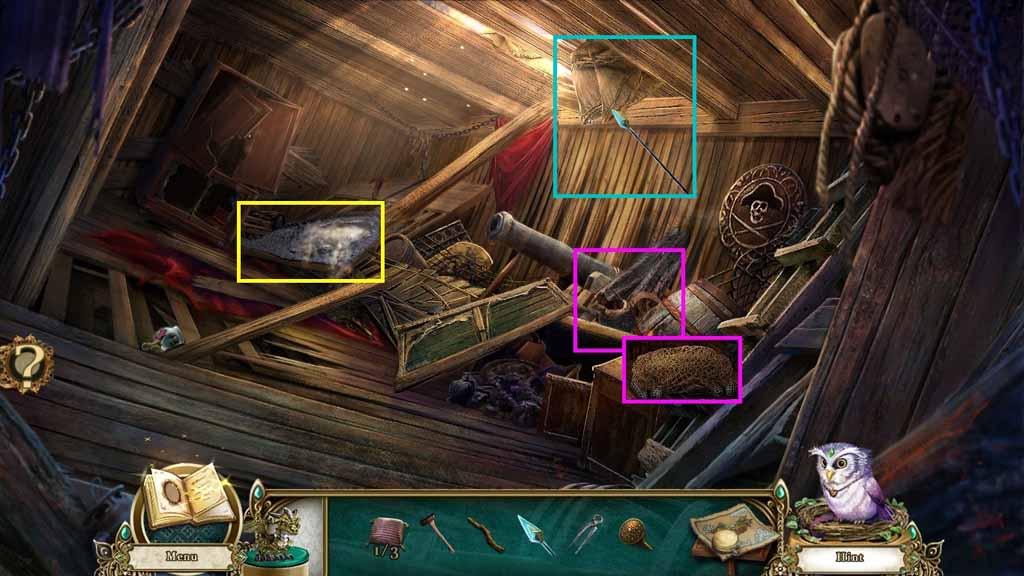
- Zoom into the debris.
- Select the wire cutters and use them on the straps; collect the large fishing net.
- Select the spear and use it to collect the sack.
- Select the sack and use it on the mattress; collect the 2 /3 large light pillows.
- Move down once.
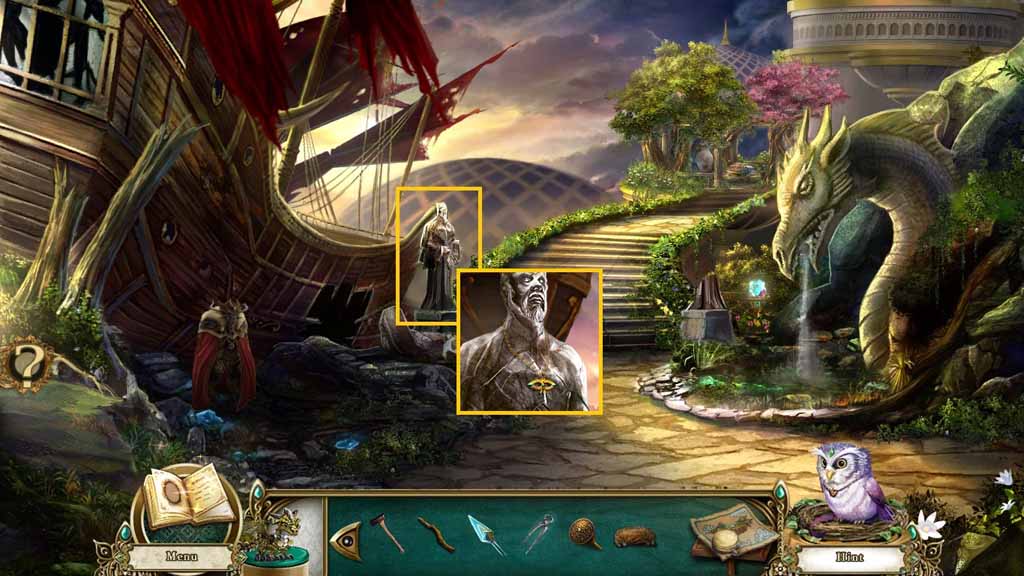
- Zoom into the statue.
- Select the wire cutters to collect the pendant.
- Move to the Rotunda Loft.
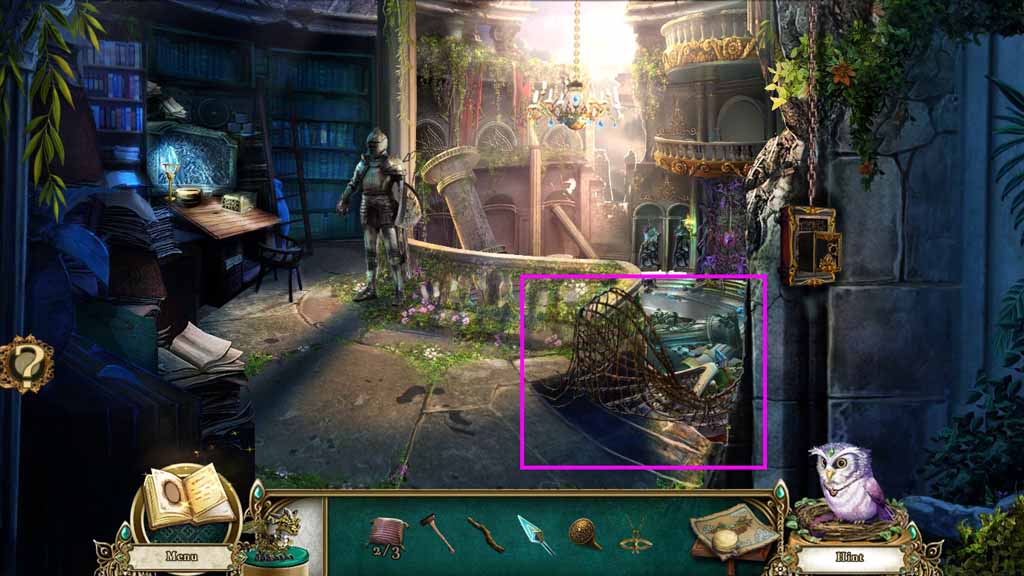
- Zoom into the broken stairs; attach the large fishing net.
- Move ahead to the Rotunda Foyer.
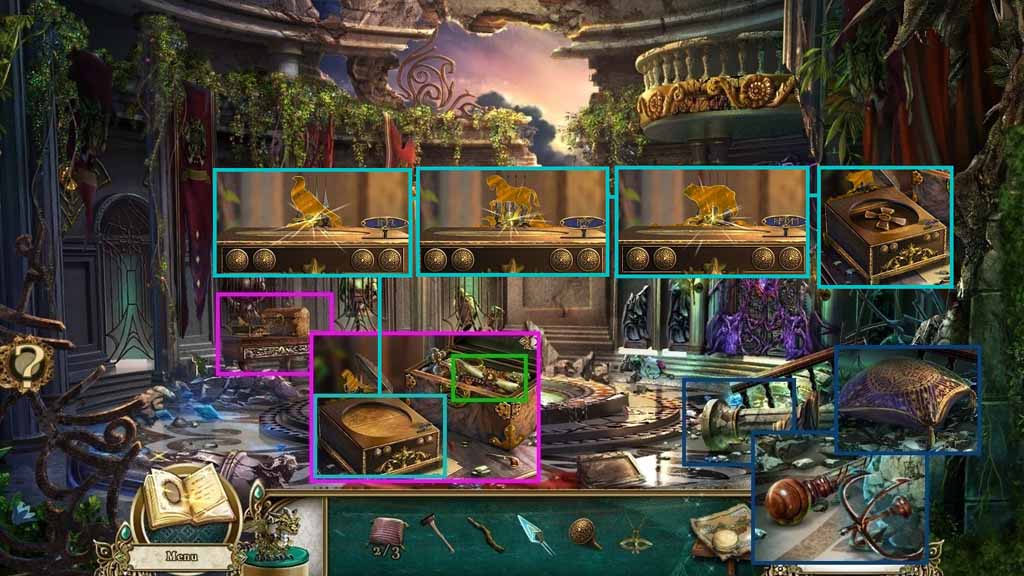
- Zoom into the rubble.
- Select the axe; use it 2 times on the shaft to collect the hook and the wooden sphere.
- Select the spear and use it to move the large chunks; collect the 3 / 3 large light pillows.
- Zoom into the box of treasures.
- Insert the pendant into the box on the right; collect the menagerie scroll.
- Attach the golden knob to the box on the left to trigger a mini-game.
- Solve the game by reading the clues and clicking the dials to create the solutions.
- Collect the chandelier control pieces.
- Move down once.
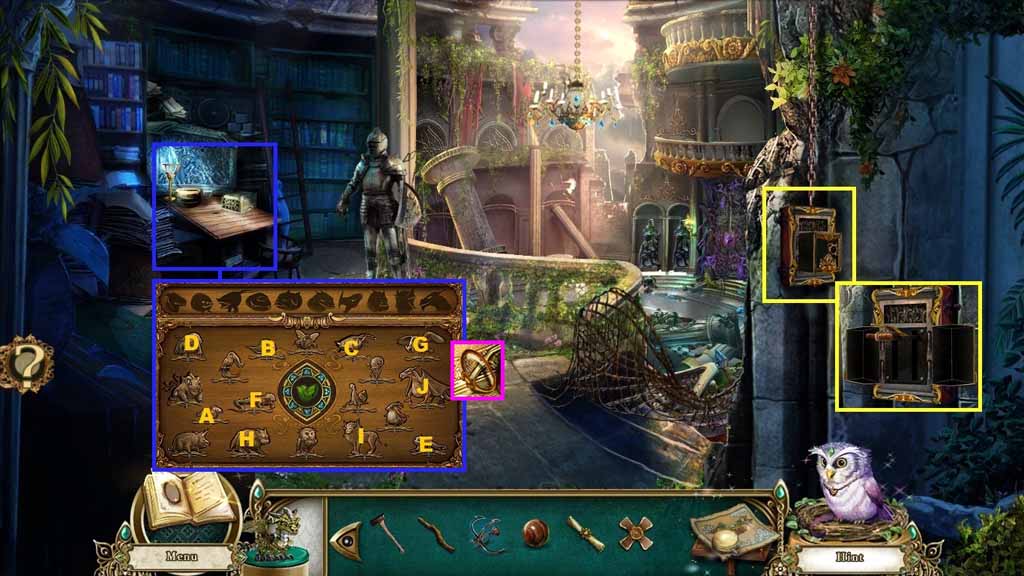
- Zoom into the chandelier control box; insert the chandelier control piece to open the cover.
- Insert the slender twig using it as a lever; clicking it once.
- Zoom into the hobby desk.
- Place the menagerie scroll onto the box to trigger a mini-game.
- Solve the game by selecting the animals in ABC order.
- Collect the lens.
- Move to the Rotunda Balcony.
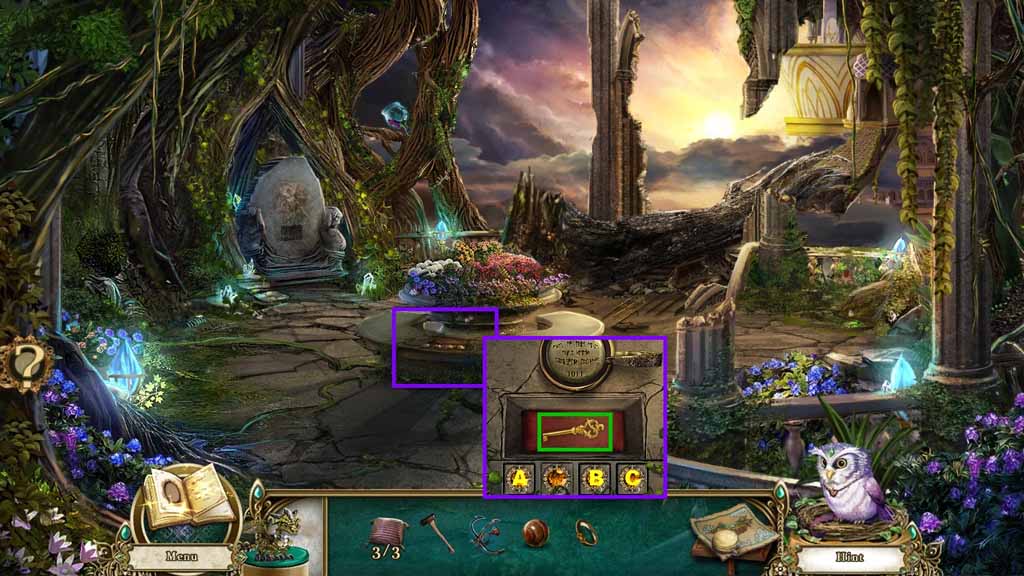
- Zoom into the bench.
- Select the lens to use on the small print.
- Click the 3 gems in ABC order; collect the golden key.
- Move to the Ships’ Interior.
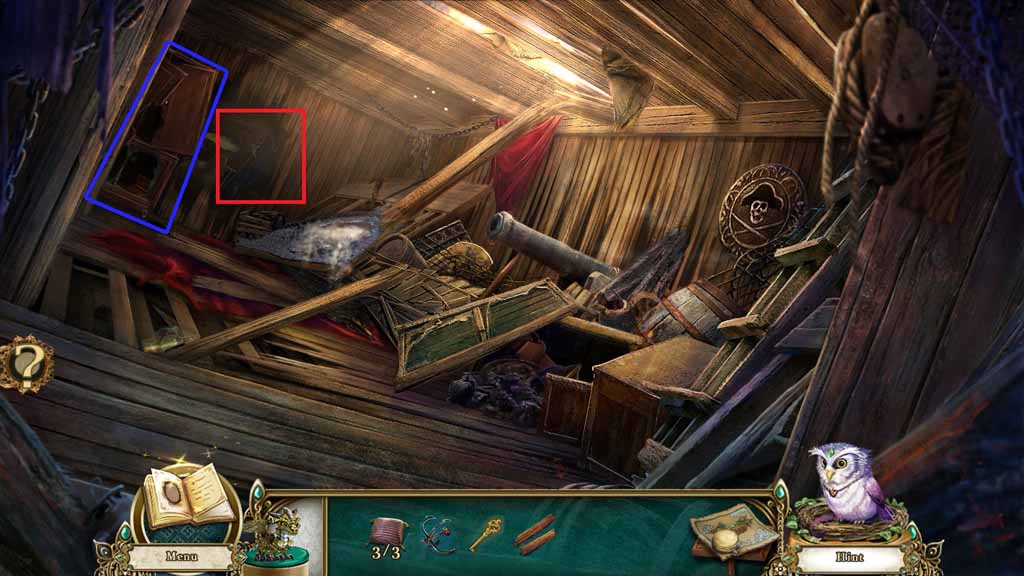
- Examine the medicine cabinet.
- Select the wooden sphere to replace the wheel.
- Select the axe to collect the sturdy pieces of wood.
- Examine the opening in the wall to access a hidden objects area.
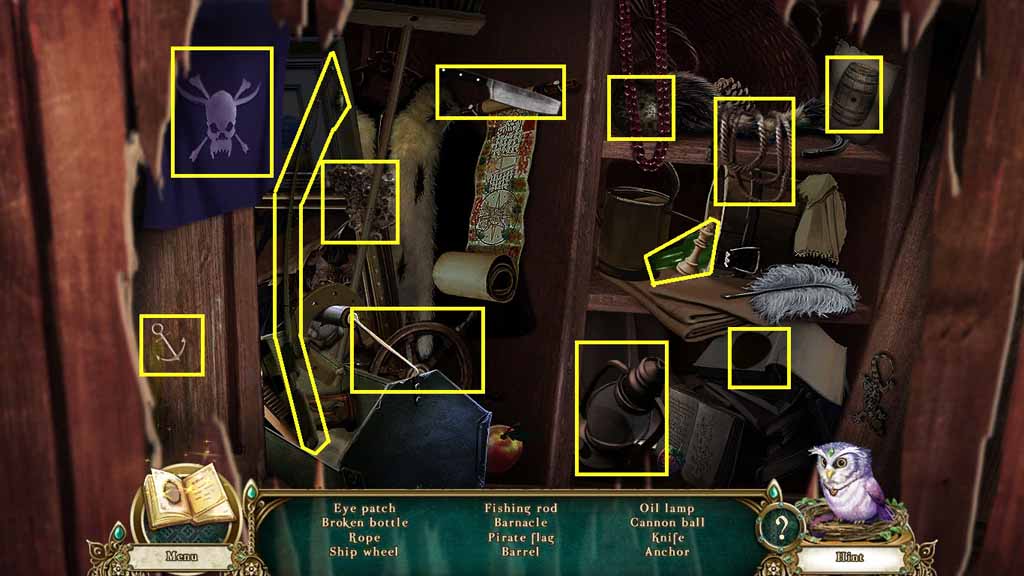
- Find the listed items.
- Collect the rope.
- Move to the Rotunda Foyer.
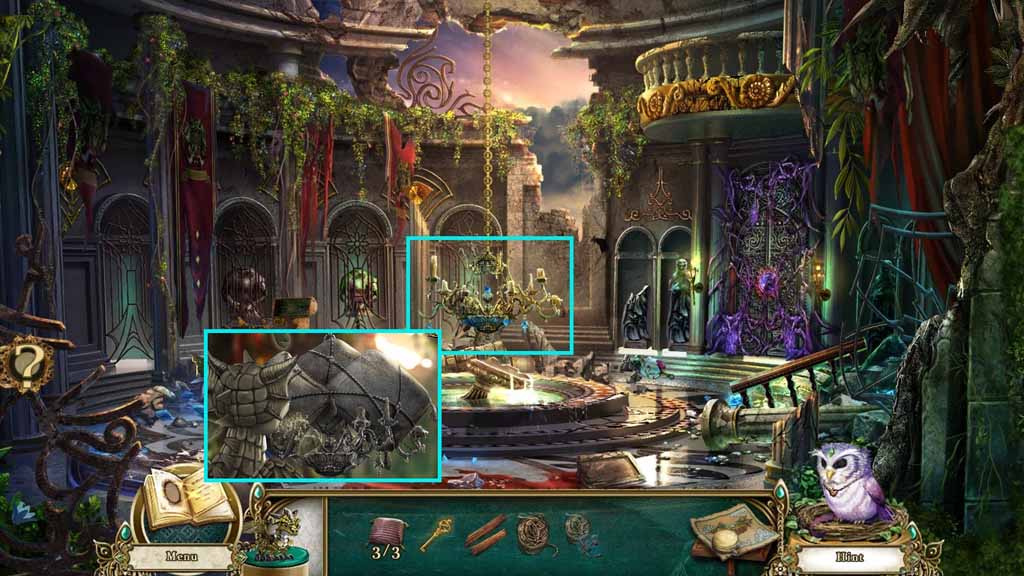
- Zoom into the chandelier.
- Place the 3 large light pillows onto it securing them using the rope.
- Select the stone dragon to use on them,
- Move into the Antechamber to access a mini-game.
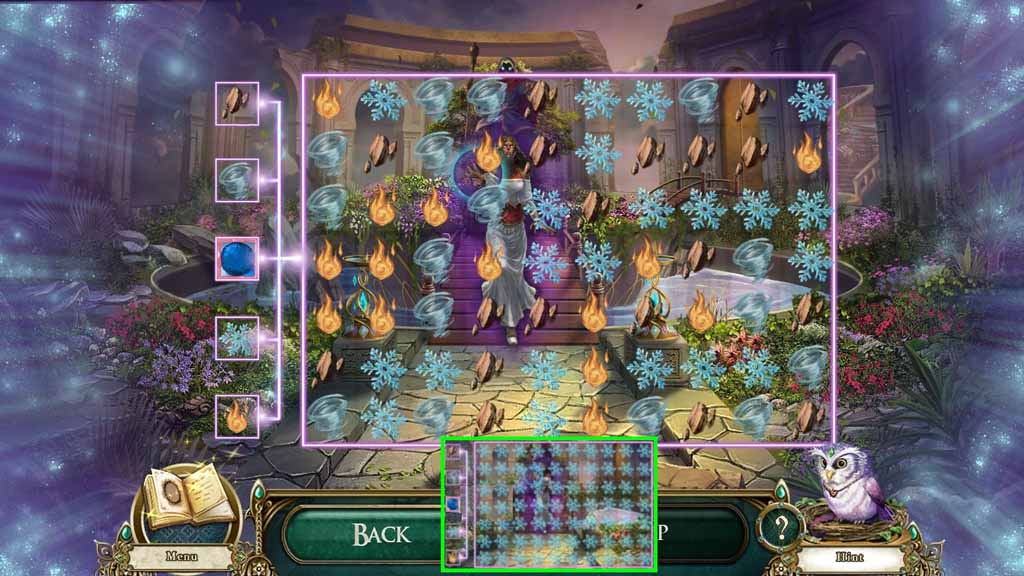
- Click the blue dots until all the symbols are the same to solve the game.
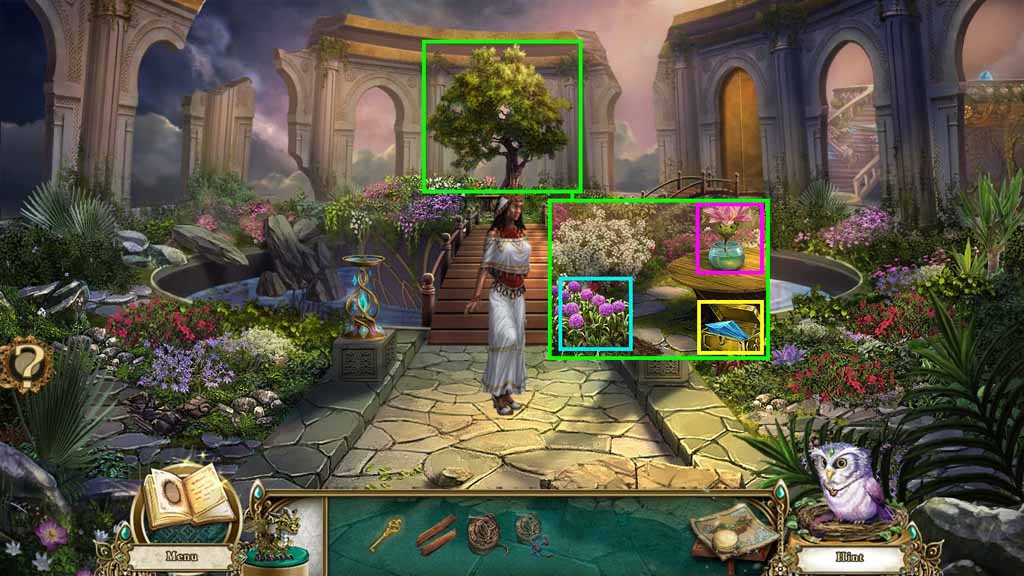
- Zoom into the tree.
- Collect the onions and the laughing lily.
- Select the golden key and use it on the box; collect the arrowhead.
- Move to the Rotunda Balcony.
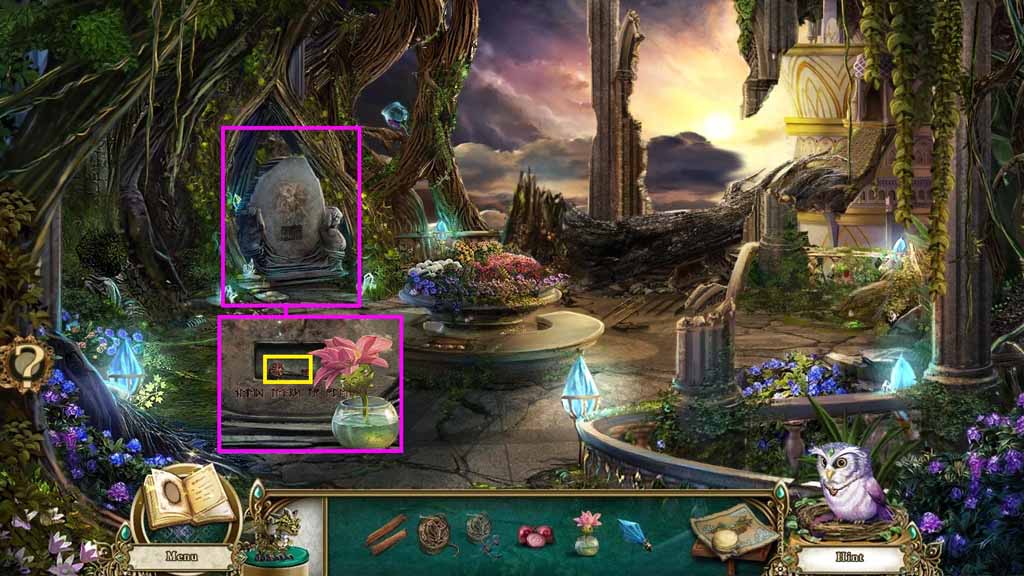
- Zoom into the mural of oath.
- Place the laughing lily onto the step.
- Select the onion to use on the lily; collect the key to the Spire Defense Tower.
- Move to the Antechamber.
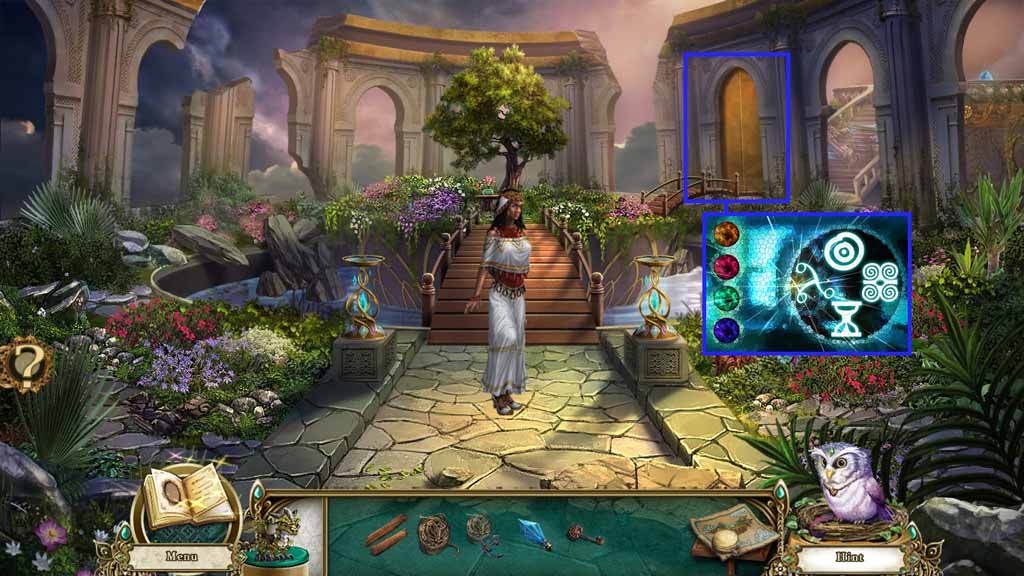
- Select the key to the Spire Defense Tower and insert it into the door.
- Examine the barrier.
- Select the jewel buttons to recreate the symbol.
- Move to the Defenses Tower.
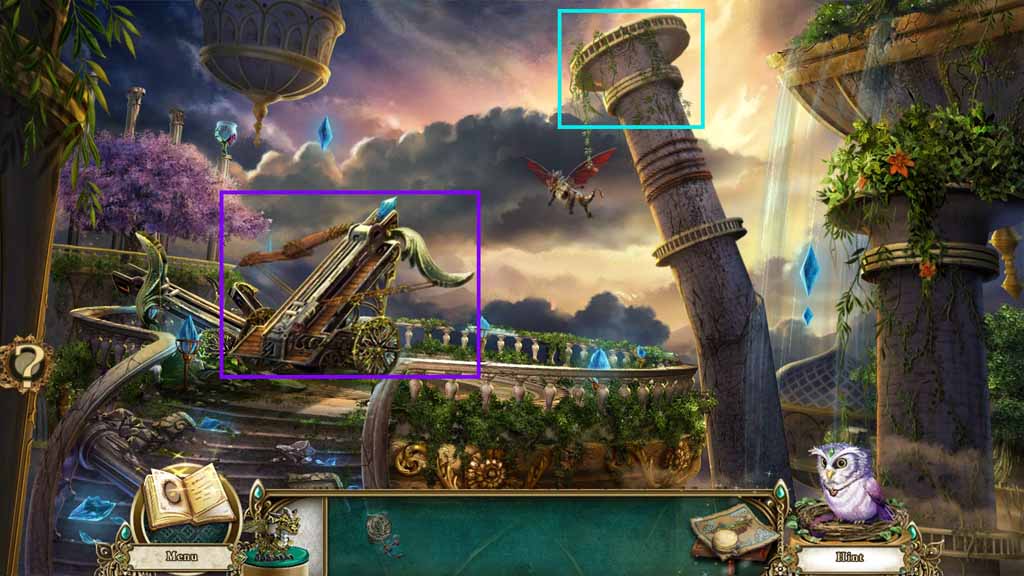
- Zoom into the ballista.
- Attach the arrowhead, the sturdy pieces of wood and the rope.
- Select the grappling hook to use on the top of the pillar.
- A mini-game will trigger.
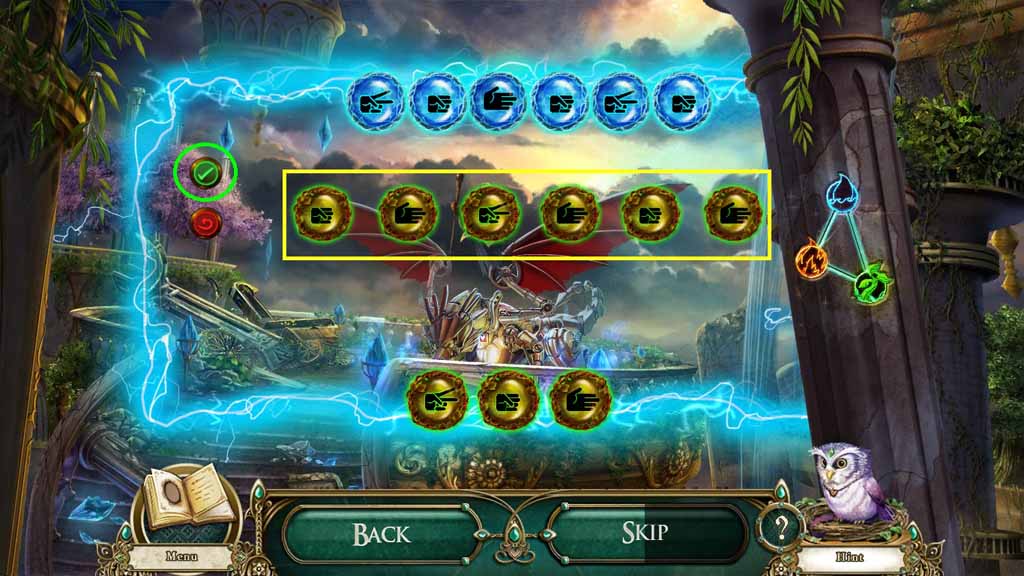
- Solve the game by choosing the rock, paper or scissor symbols to beat the ones listed at the top then clicking the green check button.
- Once the game is solved, speak to the Clockwork Dragon and move down once.
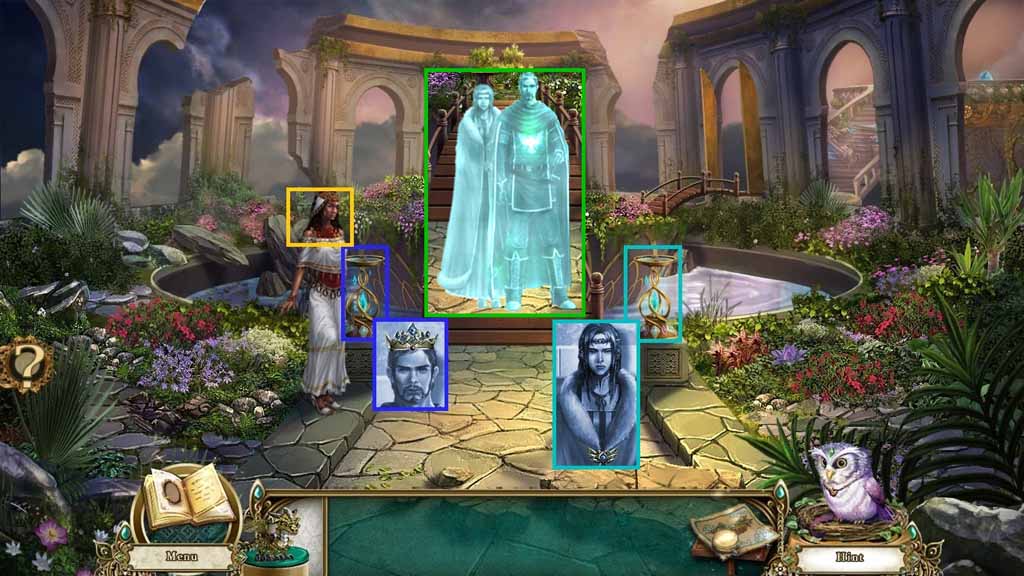
- Zoom into the memory fountain; collect the crown.
- Zoom into the memory fountain; collect the brooch.
- Speak to the Enchantress.
- Speak to your parents.
- Congratulations! You have successfully completed Awakening: The Sunhook Spire.
Comments will load when you reach this part of the walkthrough.