

Chapter One: Welcome to the Sunhook Spire
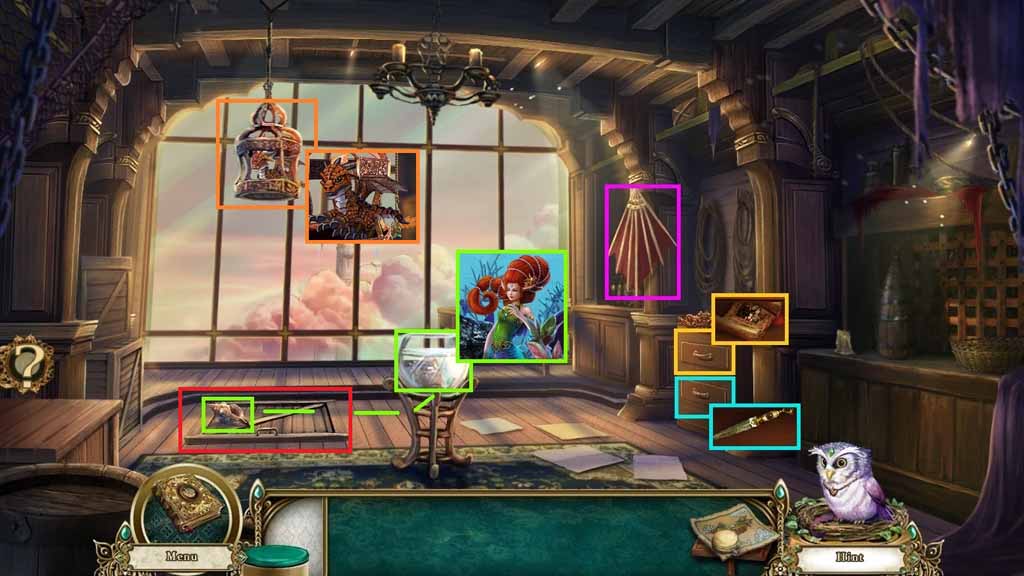
- Click the top drawer; read the note and collect the cloth.
- Click the bottom drawer; collect the blade.
- Collect the glider.
- Collect the conch shell.
- Give the conch shell to Shelsea.
- Collect the pin and use it to open the lock and collect the dragon.
- Click the trap door and move down stairs to access a hidden objects area.
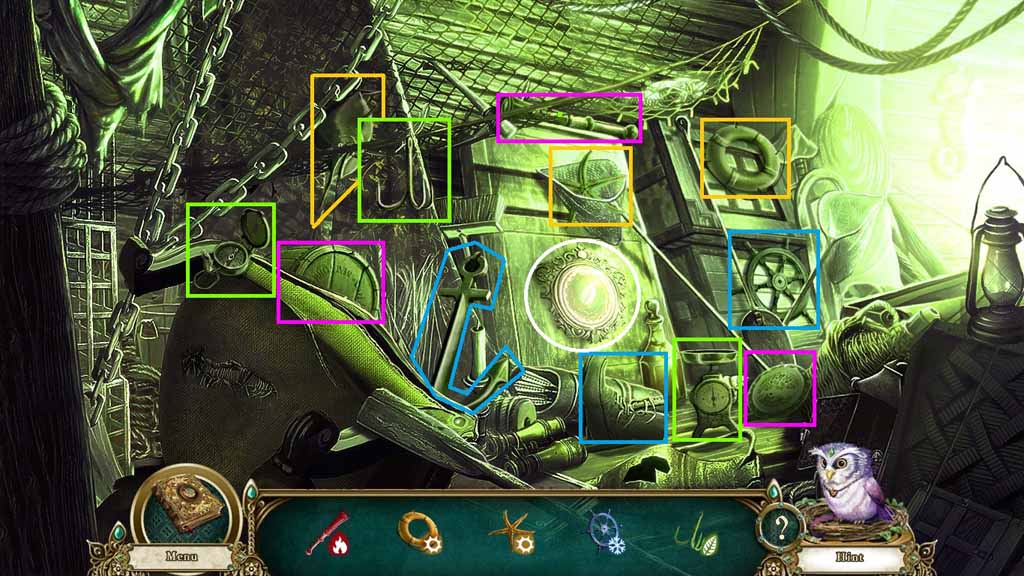
- Click the mirror to adjust the color of the lighting.
- Find the items when the light is of the same color.
- Collect the keg of gunpowder.
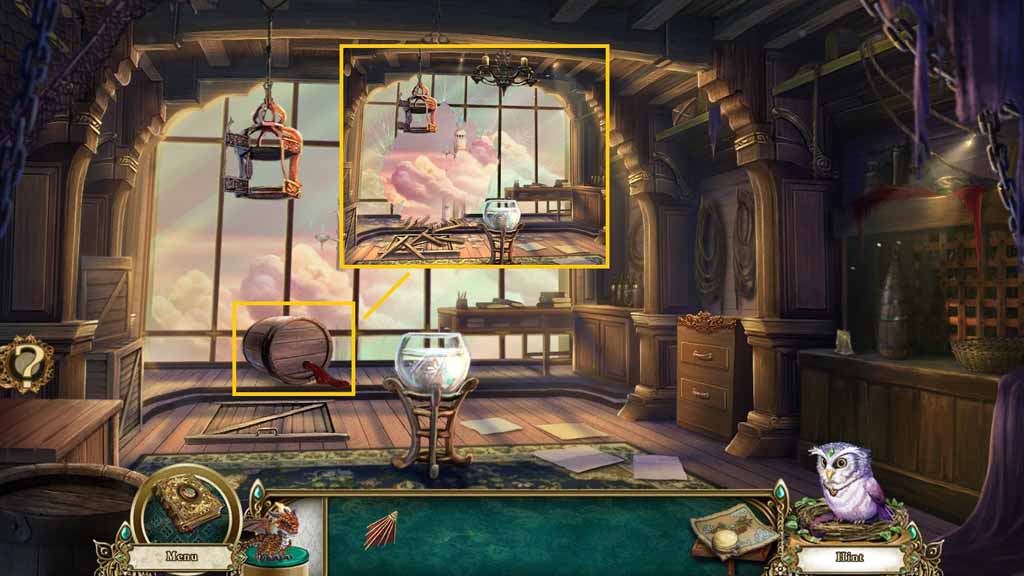
- Place the gunpowder keg near the window.
- Select the blade to remove the pug and insert the cloth.
- Select the dragon to ignite the cloth.
- Select the glider to move through the broken window.
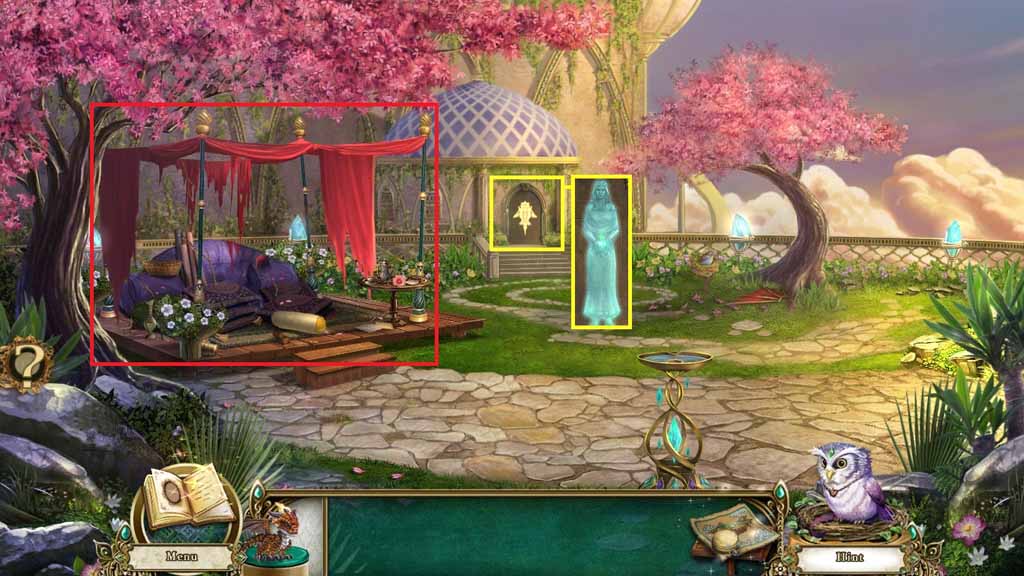
- Examine the door and click the symbol.
- Speak to the Enchantress.
- Notice the mini-game.
- Click the Outdoor Haven to access a hidden objects area.
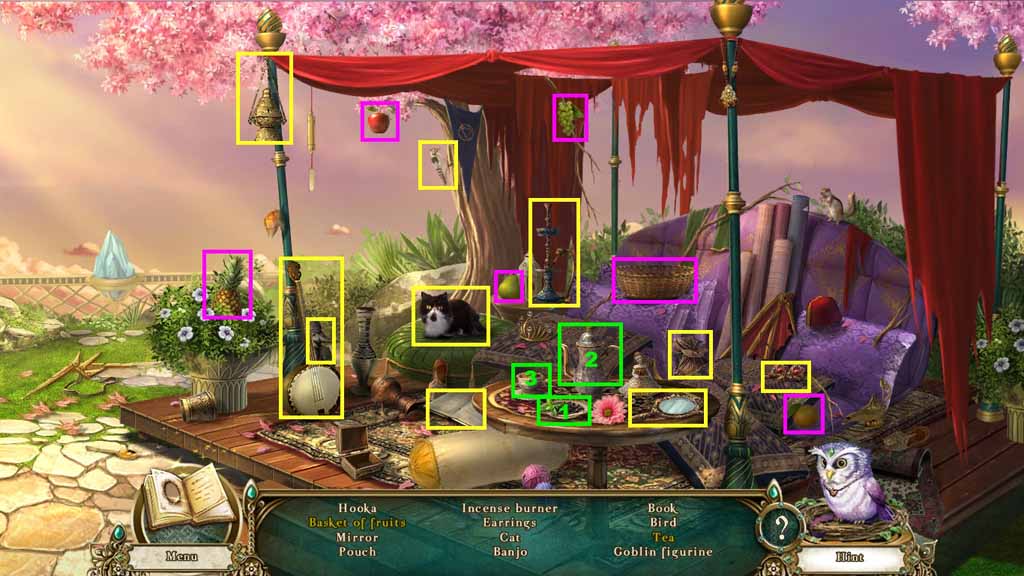
- Find the listed items.
- Collect the individual fruits and place them into the basket; collect the basket of fruit.
- Select the tea leaves and place them into the teapot; pour the tea into the cup and collect the tea.
- Collect the figurine.
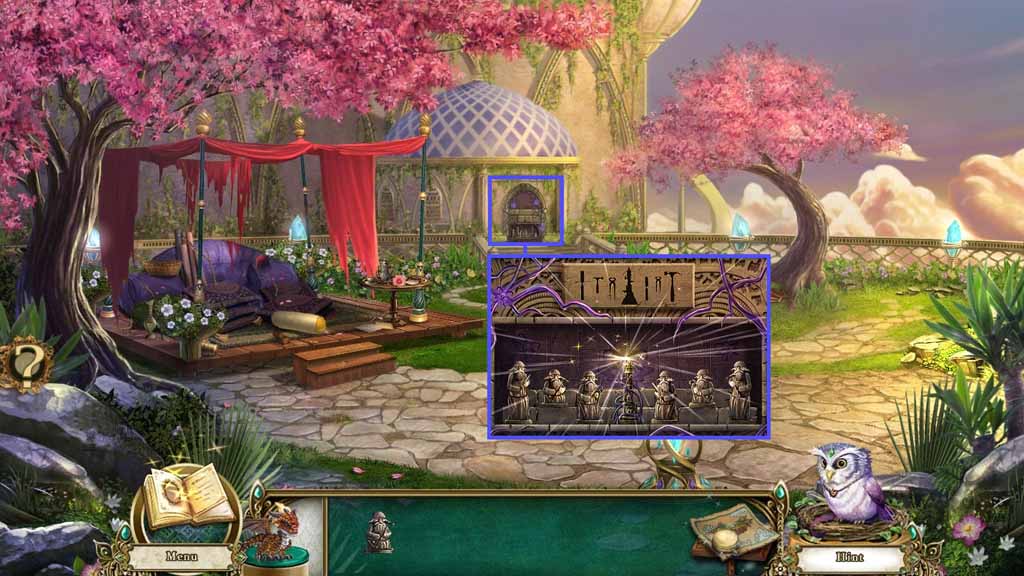
- Zoom into the mini-game on the wall.
- Place the figurine along with the others.
- Align the figurines to match the carving.
- Move ahead 2 times.
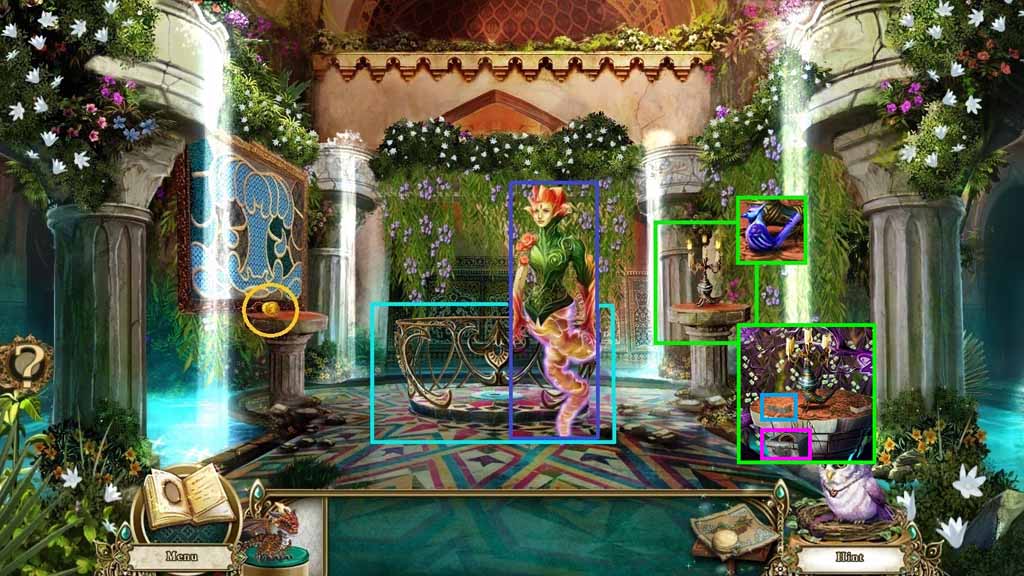
- Collect the sun gem.
- Zoom into the pedestal; collect the bird whistle.
- Click the lift.
- Speak to the Djinn of Change.
- Zoom into the pedestal again and click the button on the left; collect the slot piece.
- Move down once.
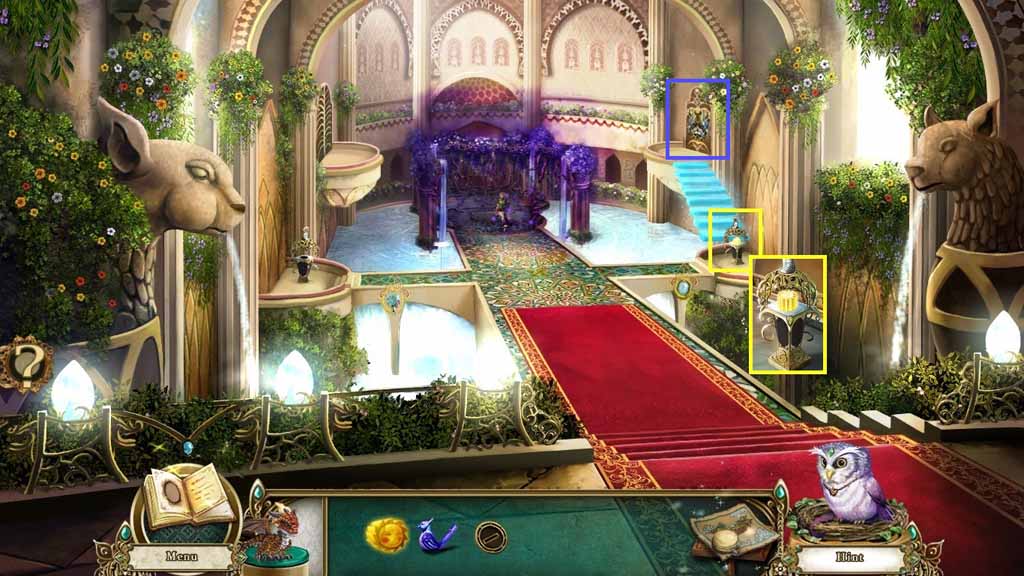
- Select the sun gem and insert it into the device.
- Examine the door on the right.
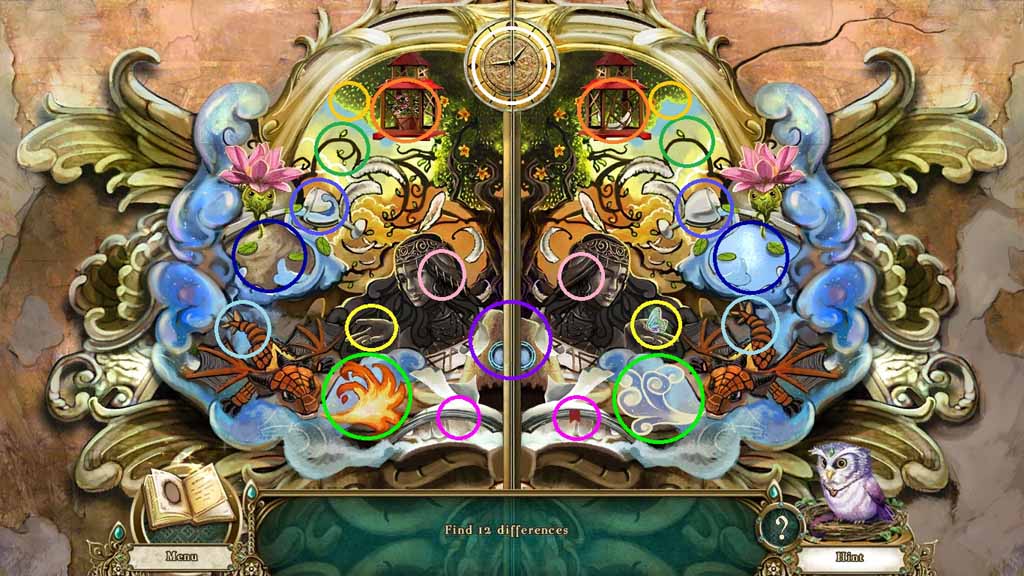
- Find the 12 differences.
- Enter the doorway.
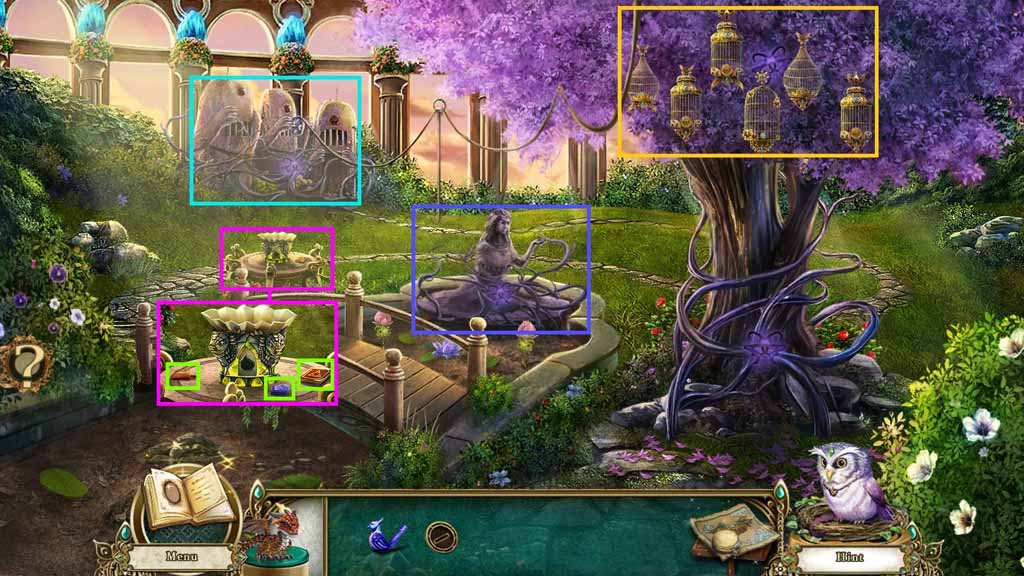
- Notice the Pinwheel Machine, the Pond, and the Cages.
- Zoom into the small pedestal and examine the book; collect the wooden wedge and the 1st memory prism.
- Exit the close-up, move down once and move ahead.
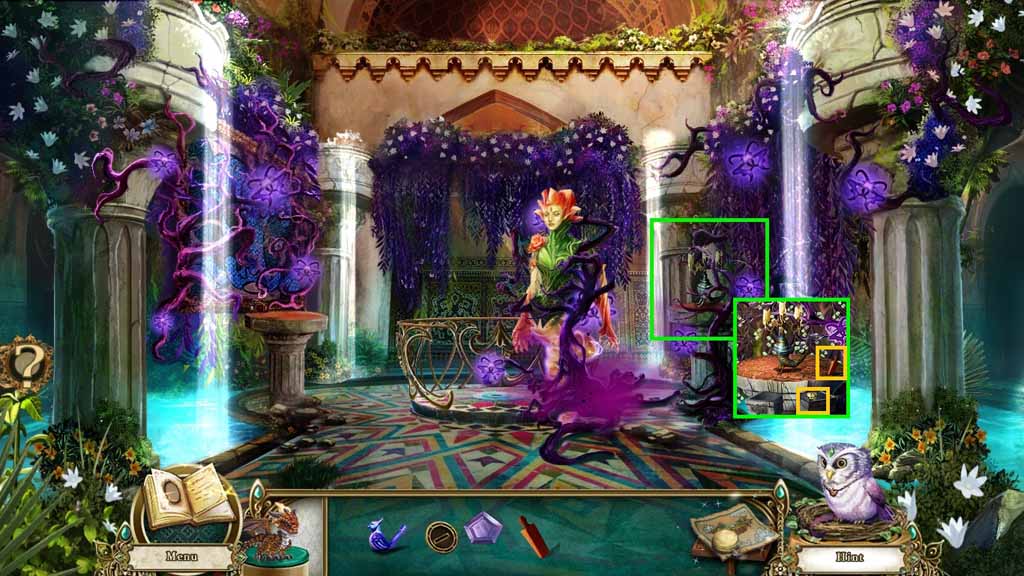
- Zoom into the pedestal.
- Select the wooden wedge and use it on the button; collect the magic ink.
- Move down two times.
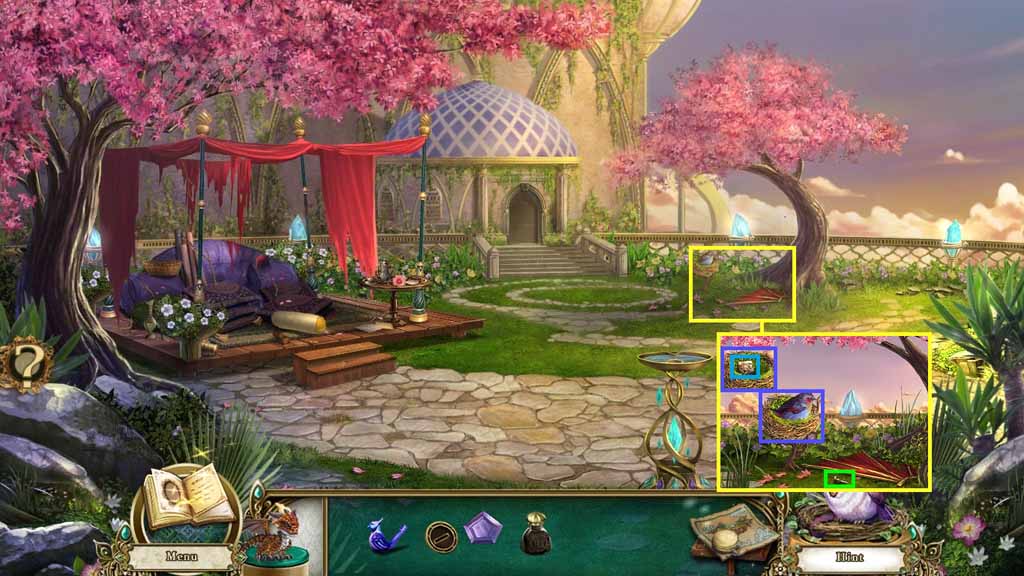
- Click the glider; collect the 1 / 3 screws.
- Select the bird whistle to use on the bird.
- Collect the 1 / 3 tiles and the 2 / 3 screws.
- Move ahead through the doorway, go to the right into the meditation retreat and examine the book.
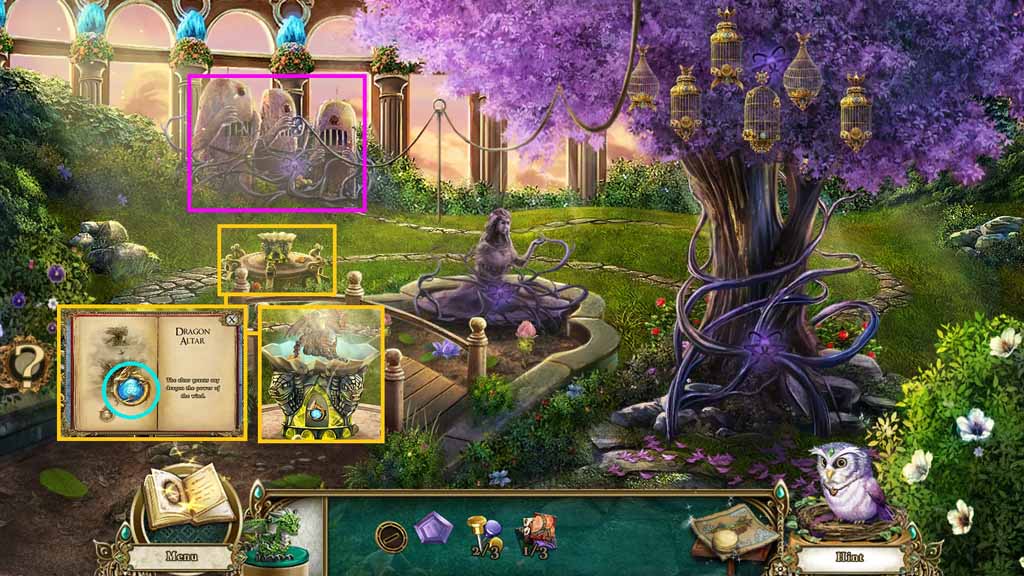
- Pour the magic ink onto the pages of the blank book.
- Click the pages; collect the dragon emblem.
- Insert the dragon emblem into the altar.
- Select the dragon and place him onto the altar; collect the wind pocket dragon.
- Exit the close up.
- Zoom into the pinwheel.
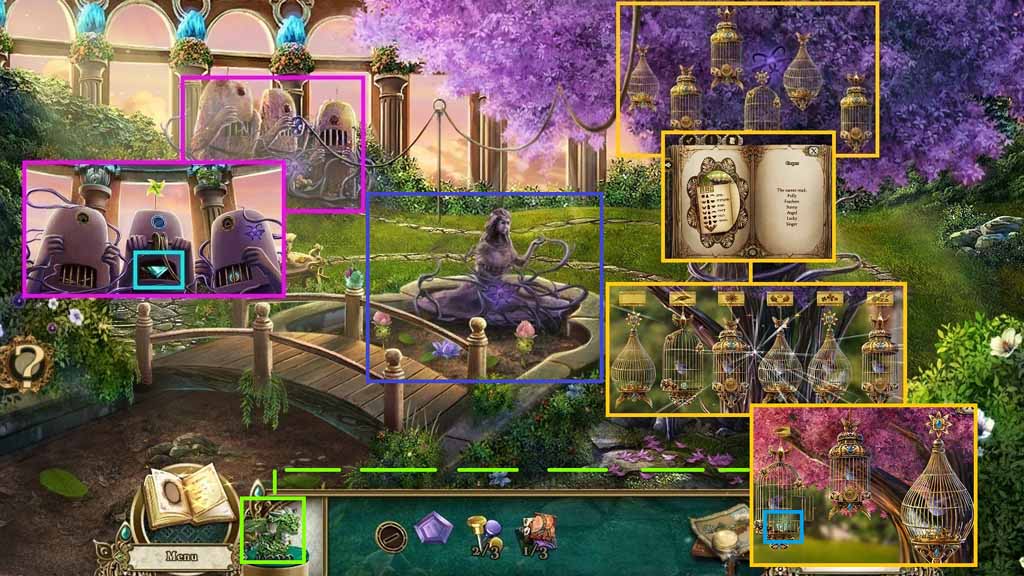
- Insert the slot piece into the middle of the pinwheel.
- Select the wind pocket dragon to use on the pinwheel.
- Collect the 2nd memory prism and click the lever.
- Exit the close –up and click the cages to access a mini-game.
- Solve the mini-game by adjusting the top and bottom cage decorations to match what is shown in the journal.
- Collect the 1 / 7 core pieces.
- Select the wind pocket dragon to collect the feather.
- Examine the Pond.
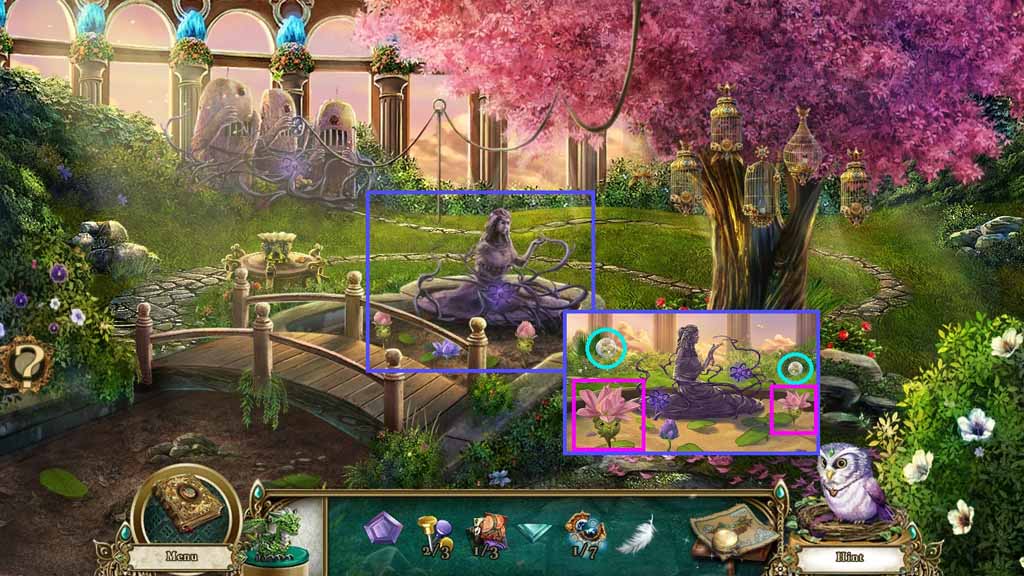
- Select the feather to use on the 2 water lilies.
- Collect the 2 water spheres.
- Exit the pond and move down 2 times.
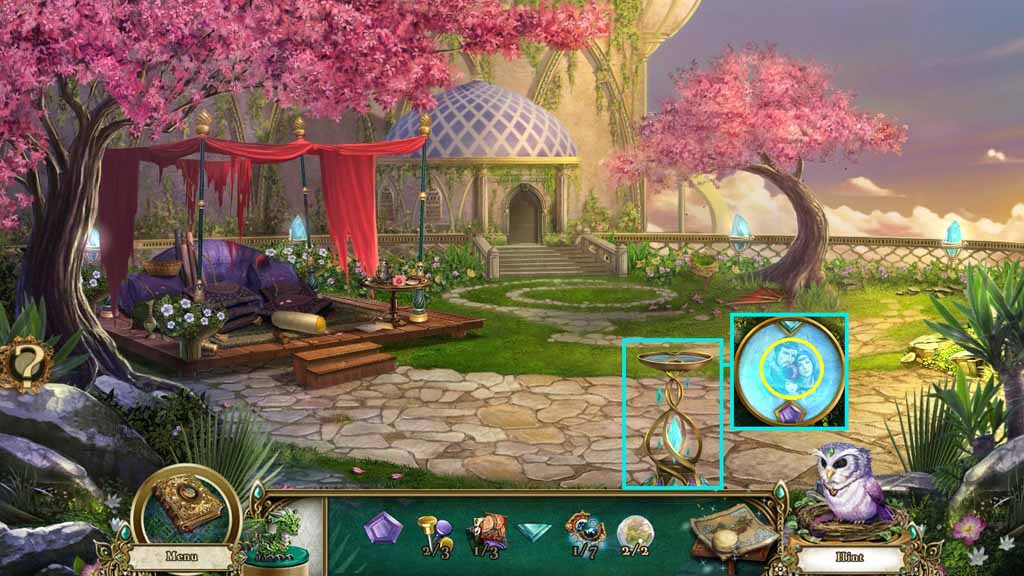
- Zoom into the memory fountain.
- Insert the 1st memory prism into the bottom opening and the 2nd memory prism into the upper opening.
- Collect the moon gem.
- Move ahead.
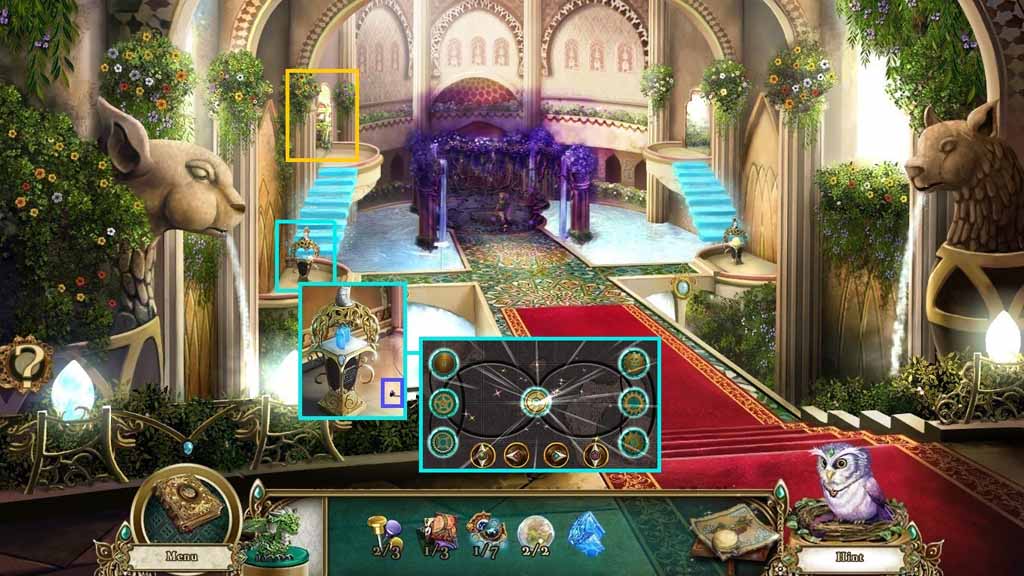
- Collect the 3/ 3 screws.
- Insert the moon gem into the device to trigger a mini-game.
- Select the buttons to adjust the gears into the correct alignment.
- Move to the left.
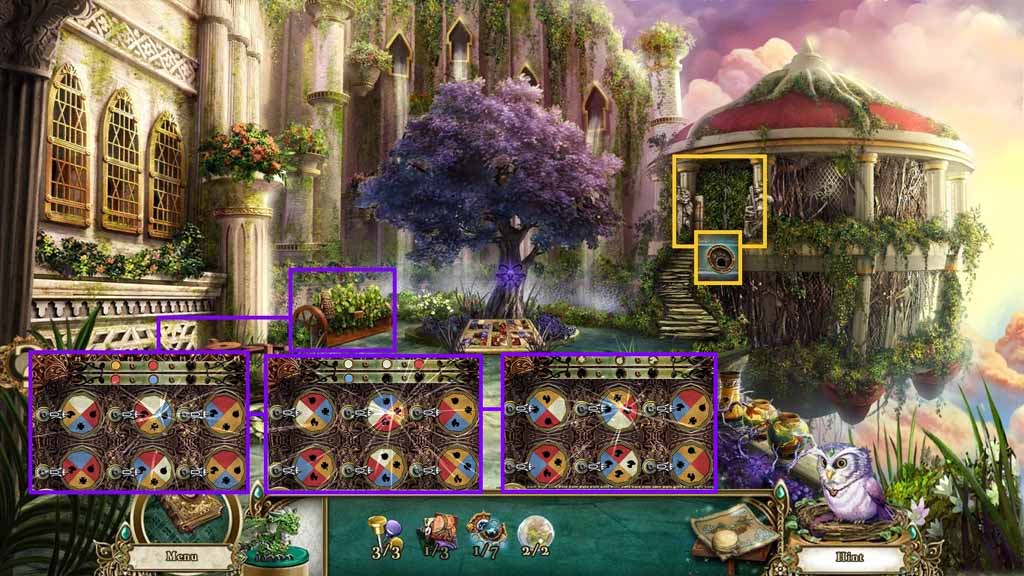
- Zoom into the butterfly sanctuary; collect the slot piece.
- Insert the 3 screws into the regulators to trigger a mini-game.
- To solve the mini-game, examine the clues and click the wheels to match.
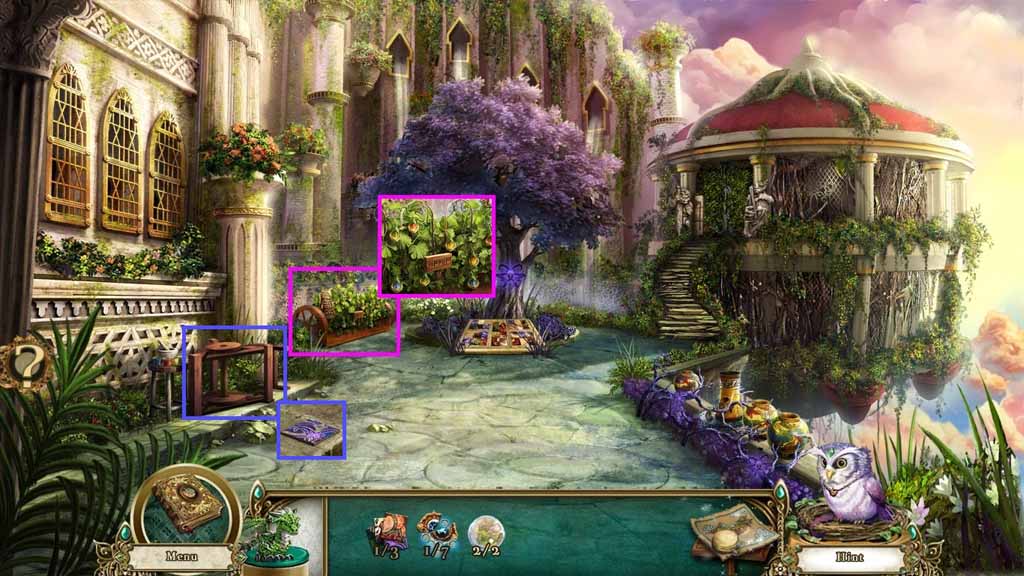
- Collect the berried.
- Zoom into the potters’ wheel; collect the 2 / 3 tiles.
- Move to the Pinwheel Machine.
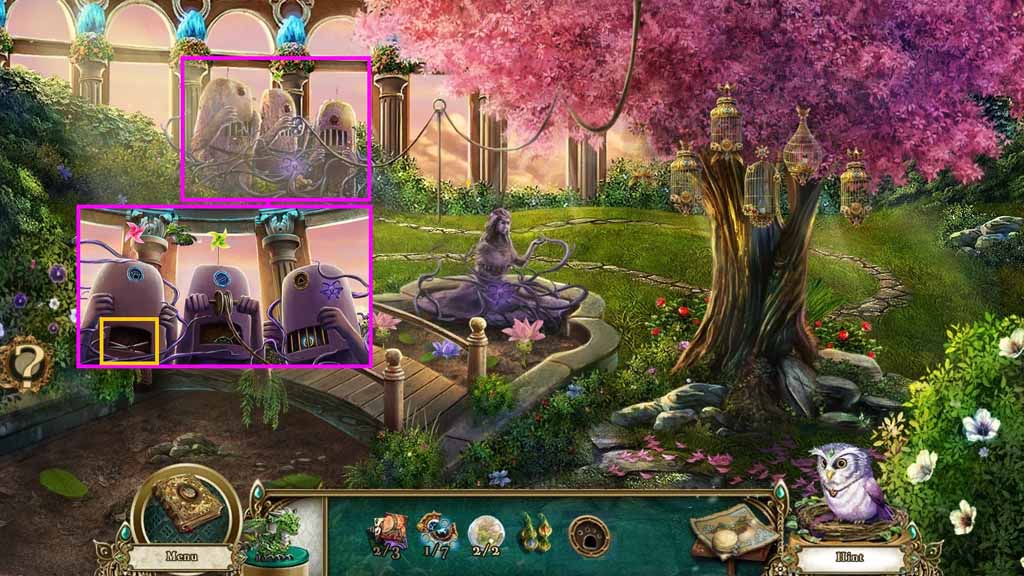
- Insert the slot piece into the left mechanism.
- Select the wind pocket dragon to use on the pinwheel.
- Collect the shears.
- Move to the Hanging Gardens.
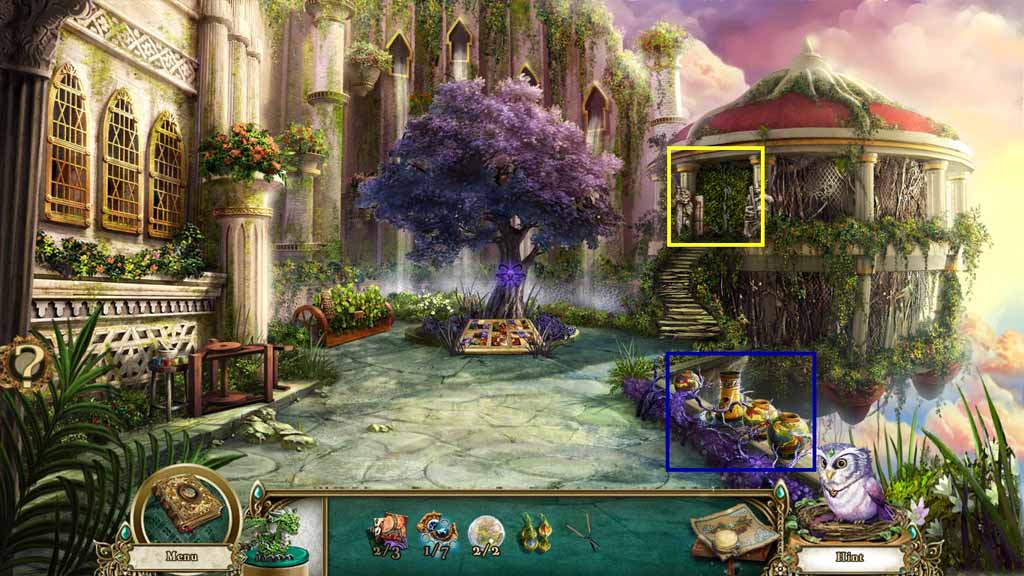
- Notice the vase display.
- Select the shears to clear the doors.
- Move ahead into the Butterfly Sanctuary.
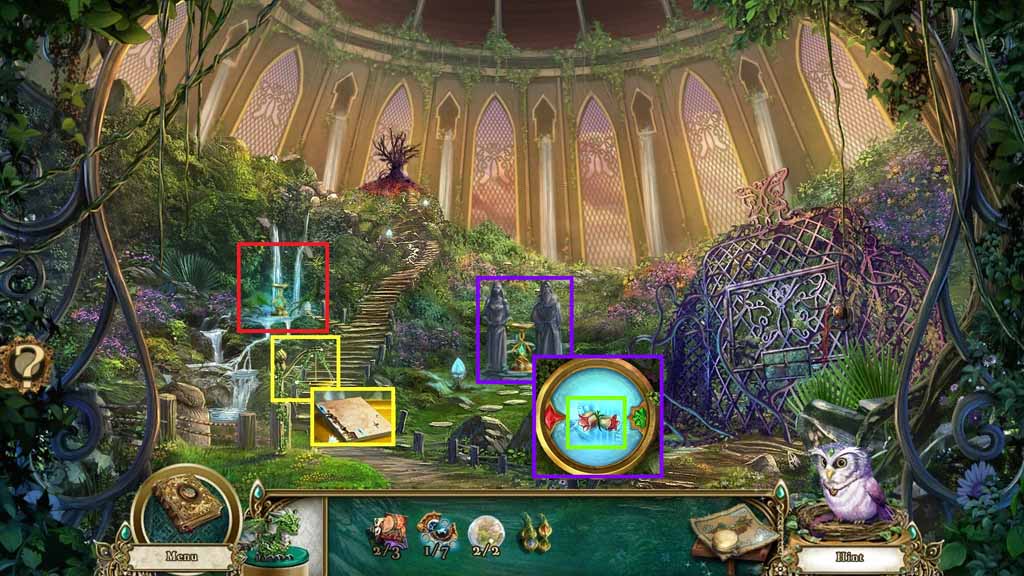
- Click the scale; collect the 3 / 3 tiles.
- Zoom into the memory fountain and click the water; collect the midday bells.
- Zoom into the Garden Pond to access a hidden objects area.
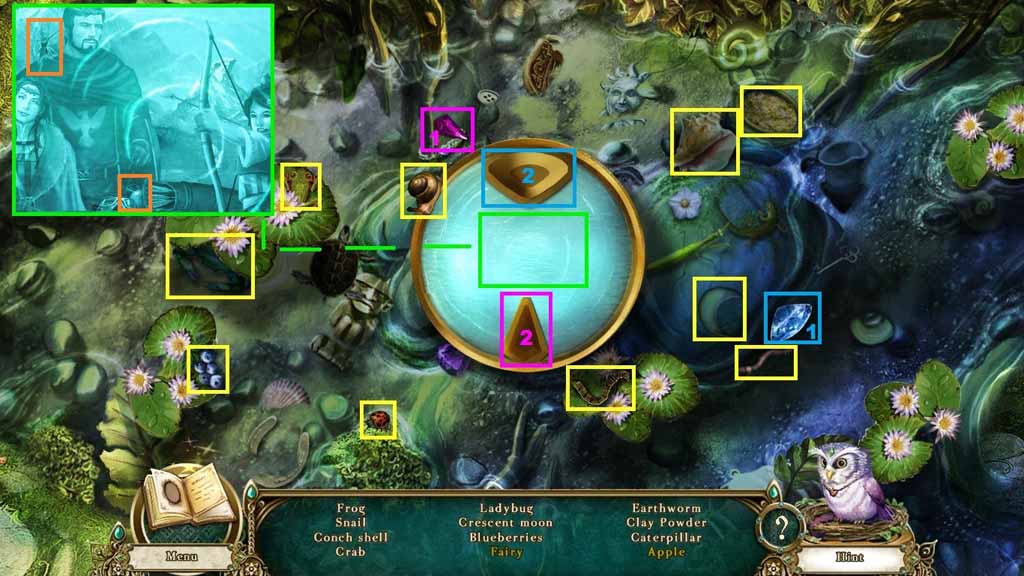
- Find the listed items.
- Select the gem stones and insert them into the pool of water; collect the fairy and the apple.
- Collect the clay powder.
- Walk down once.
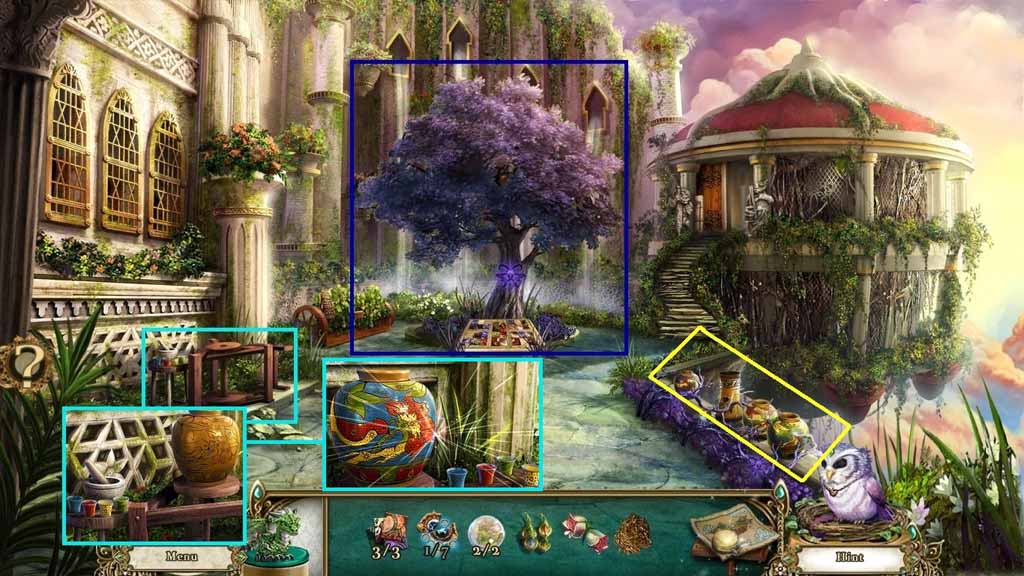
- Notice the tree.
- Zoom into the wheel.
- Place the clay powder and a water sphere onto the circle.
- Click the wheel until you create a vase.
- Insert the berries into the mortar; collect the dye.
- Use the dye on the vase to trigger a puzzle.
- Using the symbols for guidance color the vase; collect the vase.
- Zoom into the vases.
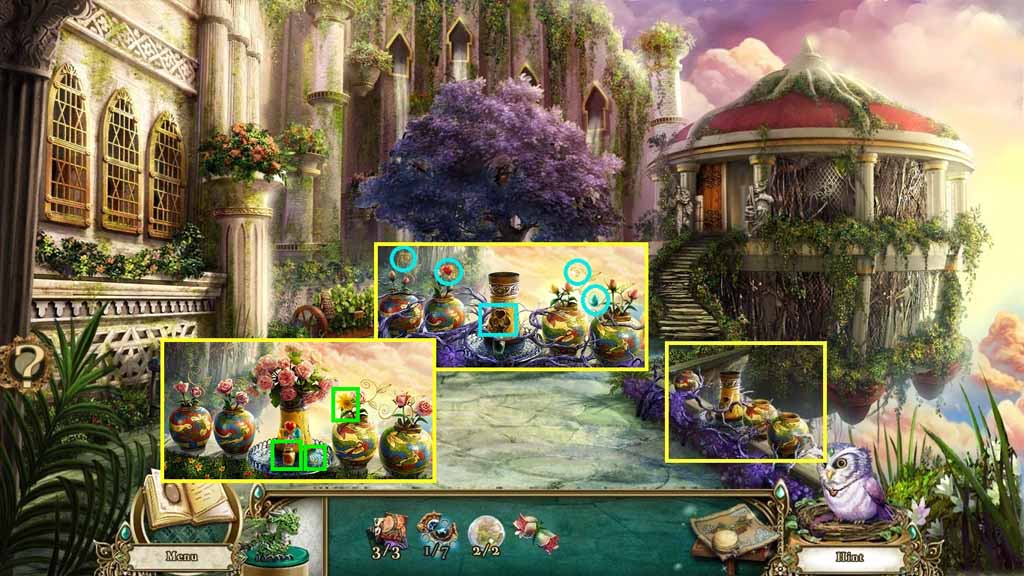
- Insert the vase into the vase.
- Insert the vase fragments into the center vase.
- Select the water sphere to use on the wilted flowers.
- Collect the nectar, dawn light flower and the 2 / 7 core pieces.
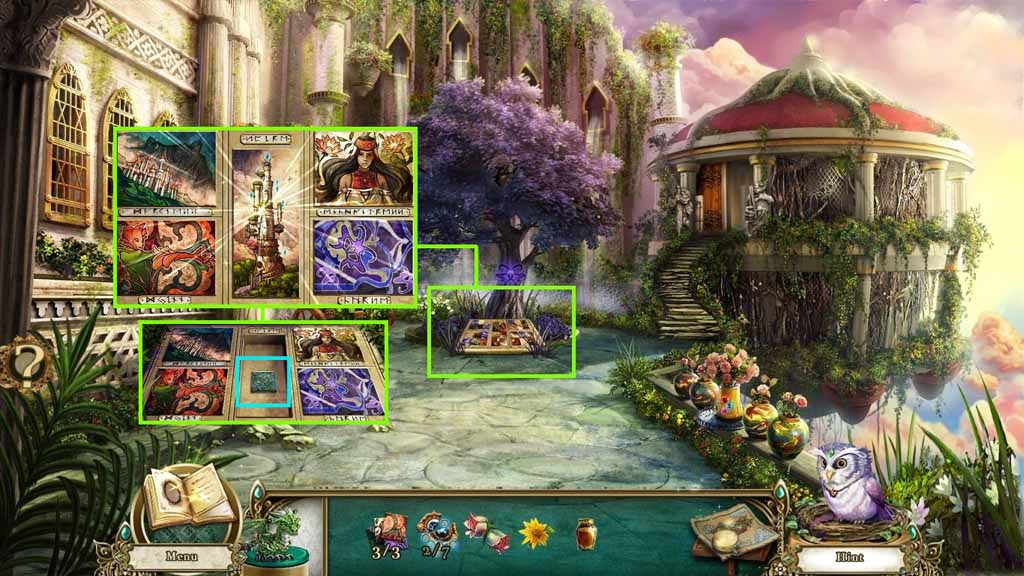
- Zoom into the tree.
- Place the 3 tiles onto the board.
- Switch the tiles to create a completed picture.
- Collect the metal plate and the 3 / 7 core pieces.
- Move into the Butterfly Sanctuary.
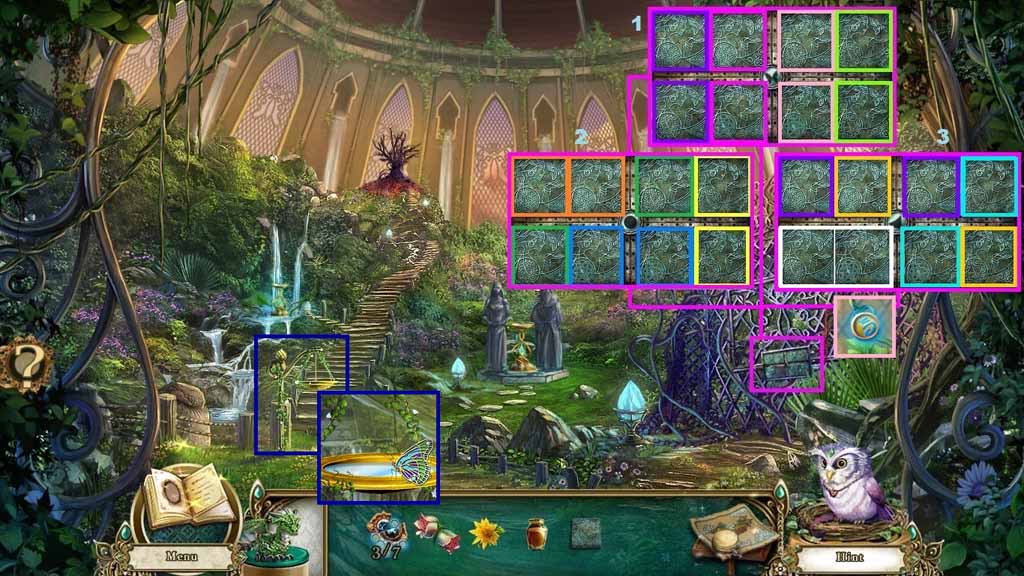
- Zoom into the gate.
- Insert the metal plate to trigger a mini-game.
- Solve the game by finding the matching pairs.
- Collect the 4 / 7 core pieces.
- Zoom into the scale.
- Select the nectar and pour it into the bowl; collect the butterfly.
- Move down 2 times, move to the Meditation Retreat and examine the Pond.
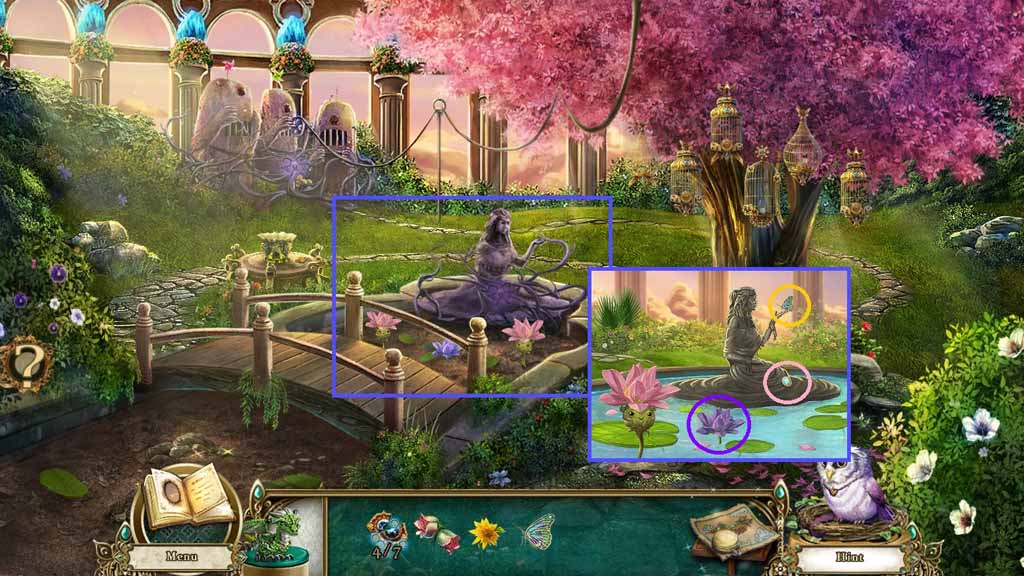
- Insert the butterfly into the statues hand.
- Collect the 5 / 7 core pieces and the night lily.
- Move to the Butterfly Sanctuary.
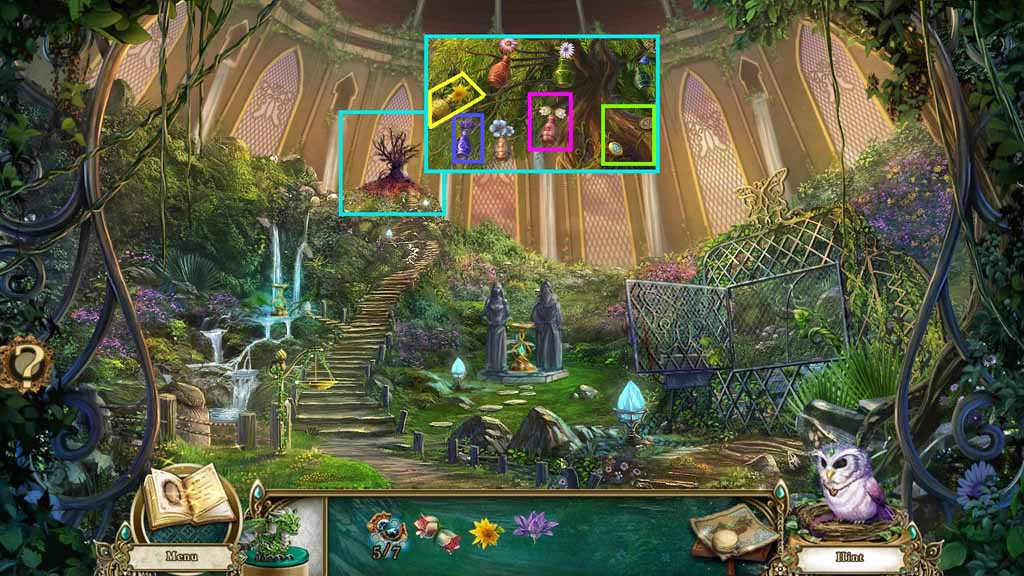
- Zoom into the tree.
- Place the dawn light flower into the yellow jar, the midday bells into the pink jar and the night lily into the blue jar.
- Collect the 6 /7 core pieces and slot piece.
- Move to the Meditation Retreat and zoom into the Pinwheel Machine.
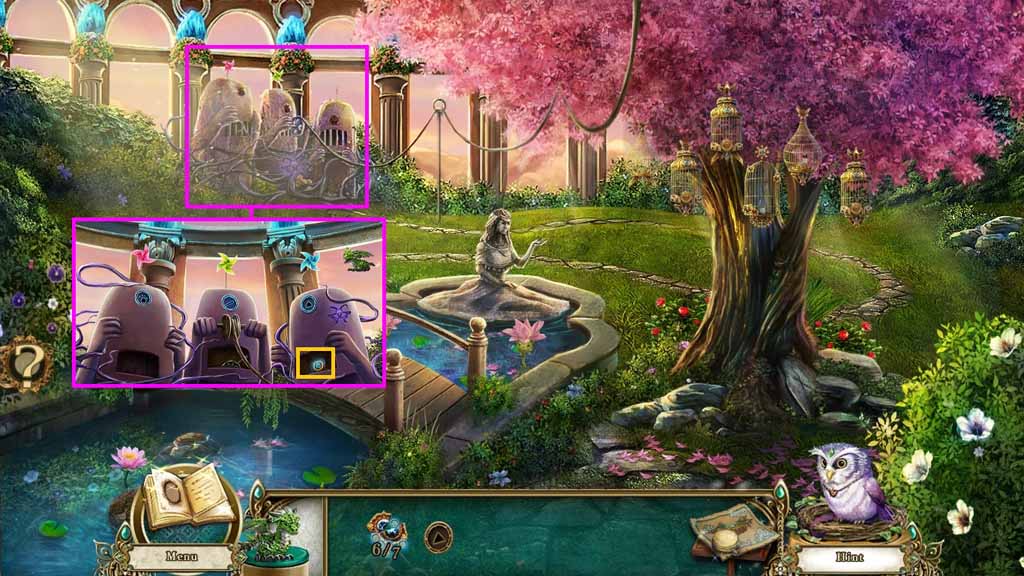
- Insert the slot piece into the right mechanism.
- Select the wind pocket dragon to use on the pinwheel.
- Collect the 7 / 7 core pieces.
- Move down then move forward and zoom into the Artifact of Change.
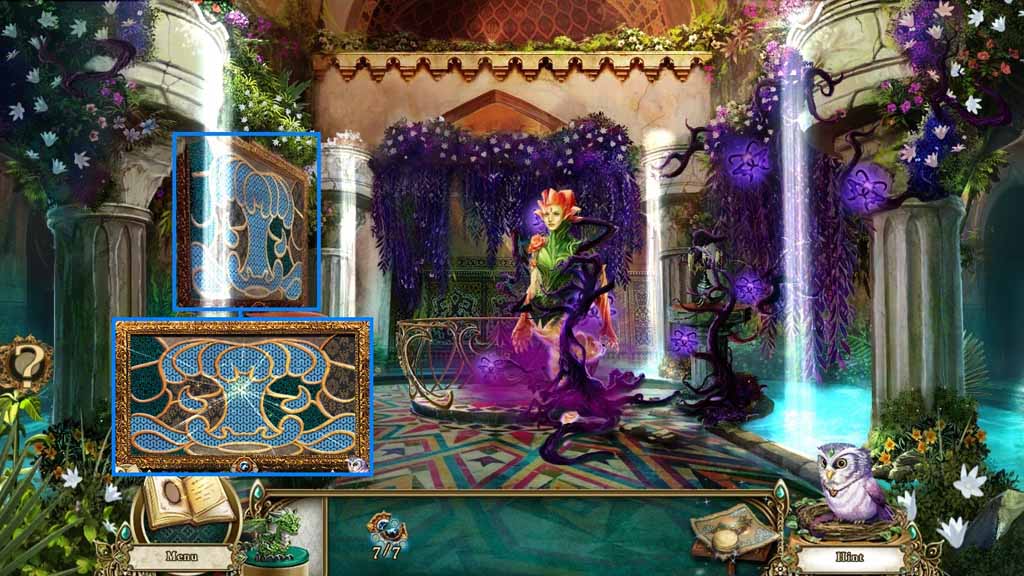
- Insert the 7 core pieces into the tapestry.
- Click and drag the pieces into place to complete the tapestry.
Comments will load when you reach this part of the walkthrough.