

Chapter 4: Freeze Frame
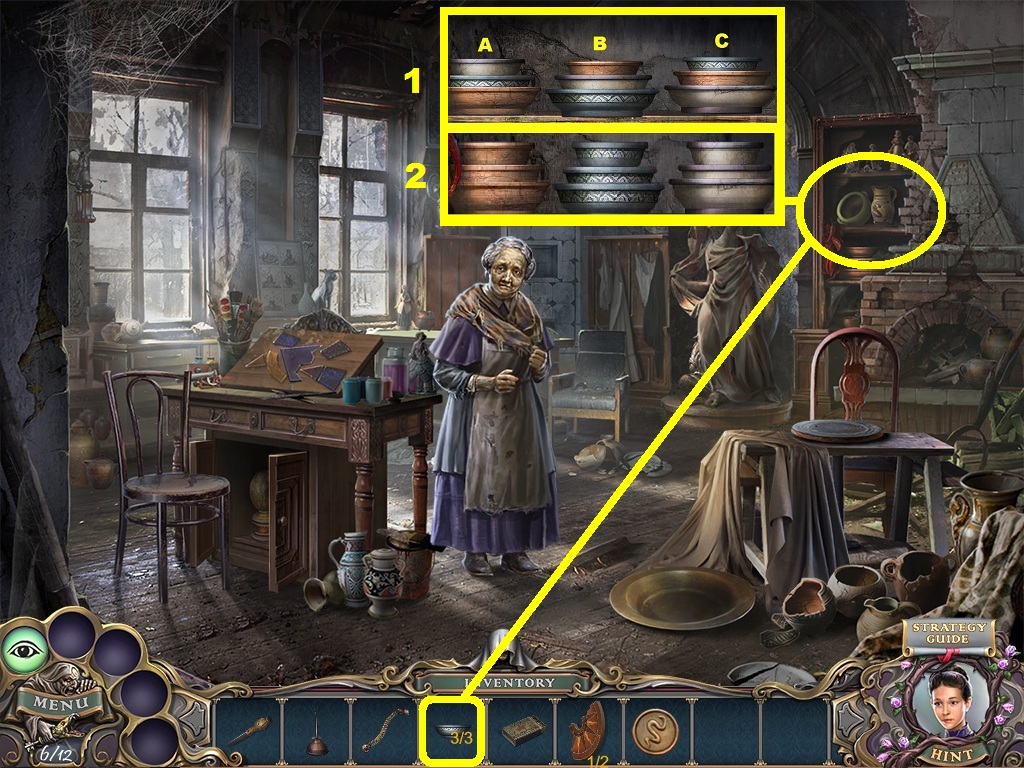
- Zoom into the shelf (yellow circle).
- Pick the 3 plates (yellow square) from the inventory; place them into the shelf space.
- A puzzle will trigger.
- Click the plates to arrange them to appear as they do in row 2.
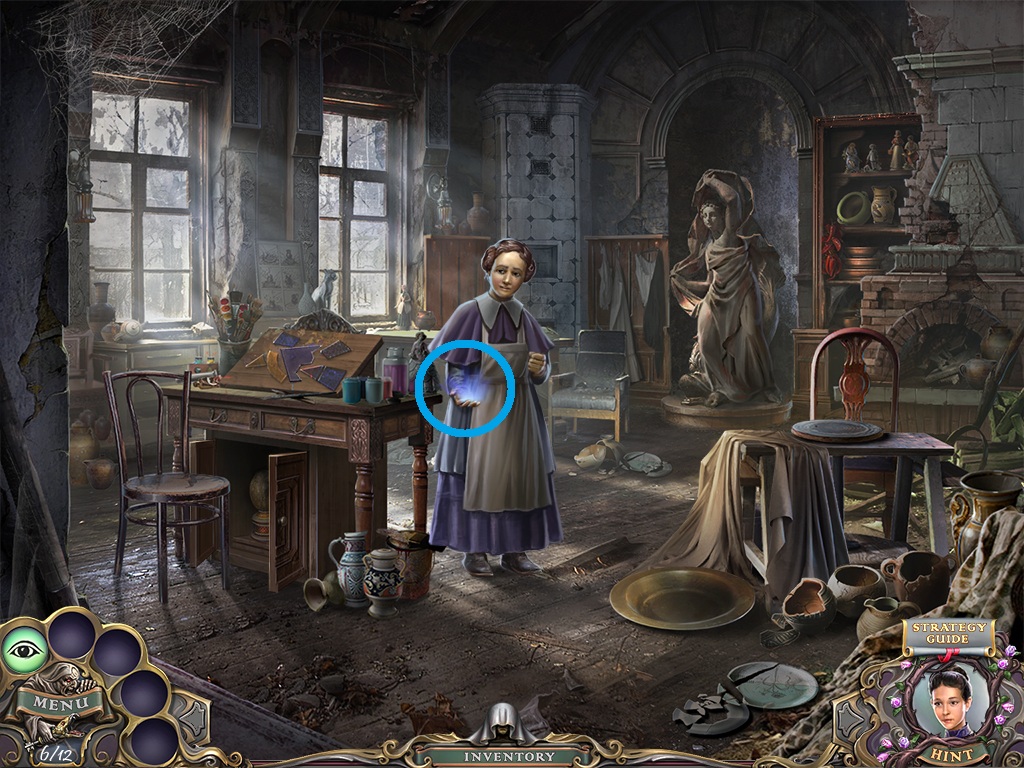
- Collect the freezing power (blue circle) from the woman.
- Go to the kitchen.
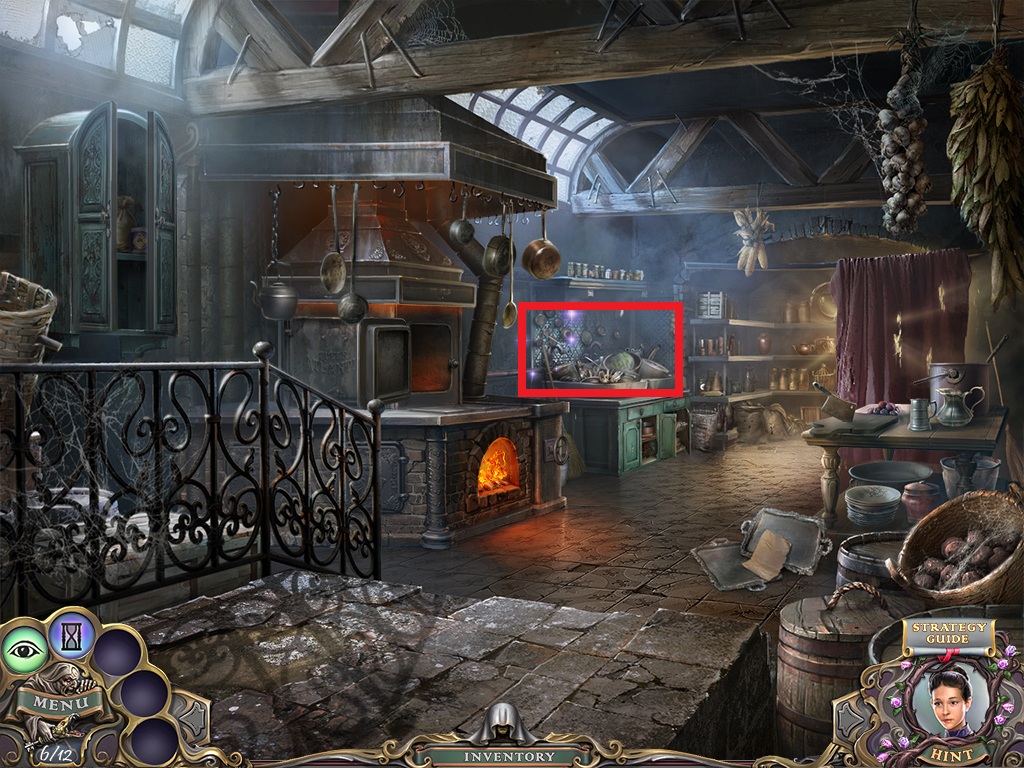
- Zoom into the hidden object area (red square).
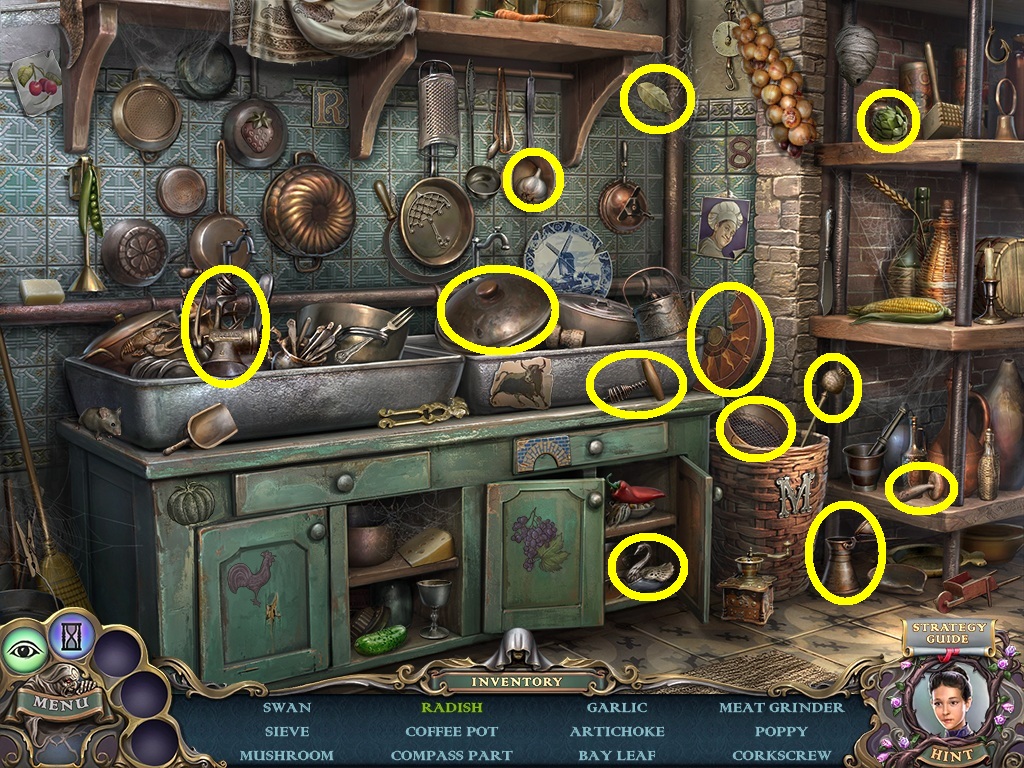
- Find all the listed items (yellow circles).
- Collect the compass part.
- Go upstairs and take a left.
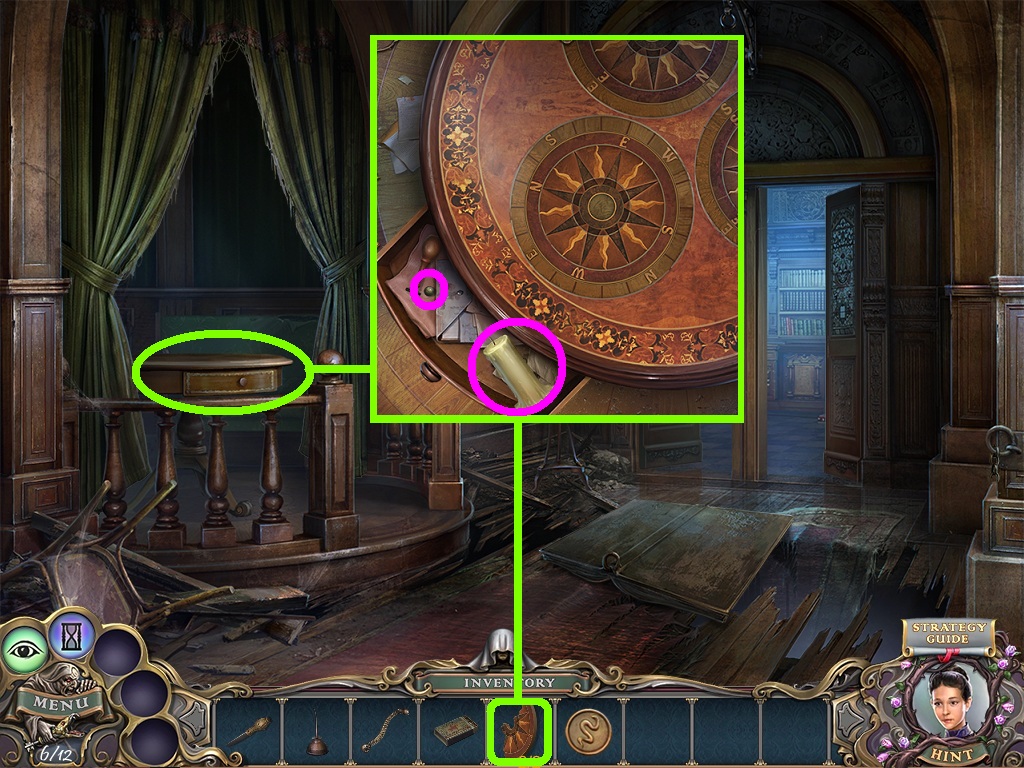
- Click the curtain.
- Zoom into the table (green circle).
- Pick compass parts (green squares) from the inventory; insert them into the tabletop.
- Collect the candle and the pea (pink circles).
- Go to the dining room.
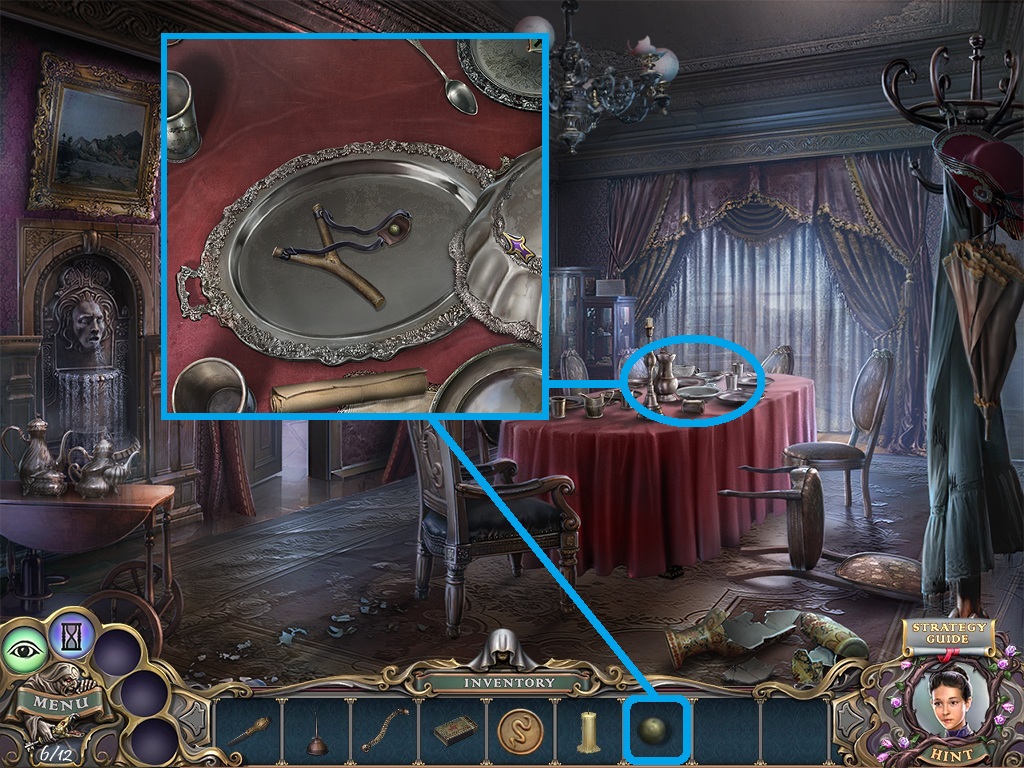
- Zoom into the table (blue circle).
- Pick the pea (blue square) from the inventory; place it onto the plate and collect the slingshot.
- Go to the bridge.
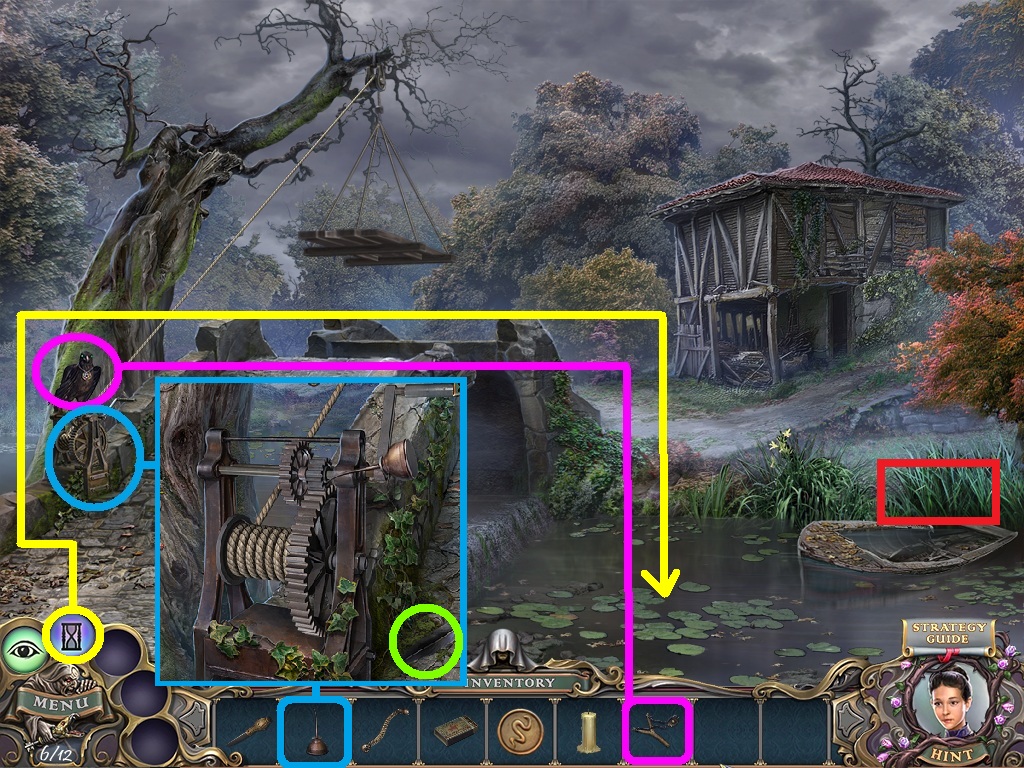
- Pick the slingshot (pink square) from the inventory; use it to scare the bird (pink circle).
- Zoom into the crank (blue circle).
- Remove the stick.
- Pick the oil can (blue square) from the inventory and use it to oil the crank.
- Collect the feather (green circle).
- Select the freezing power (yellow circle); use it to stop the motion of the water.
- Zoom into the hidden object area (red square).
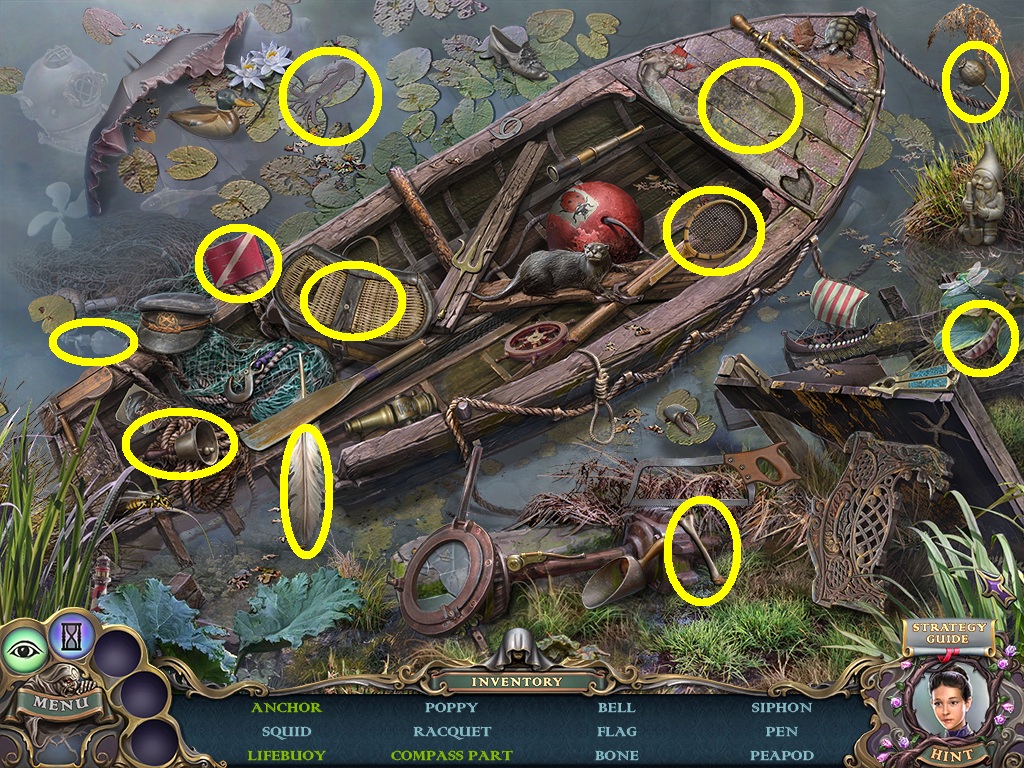
- Find all the listed items (yellow circles).
- Collect the feather.
- Go over the bridge to the shack.
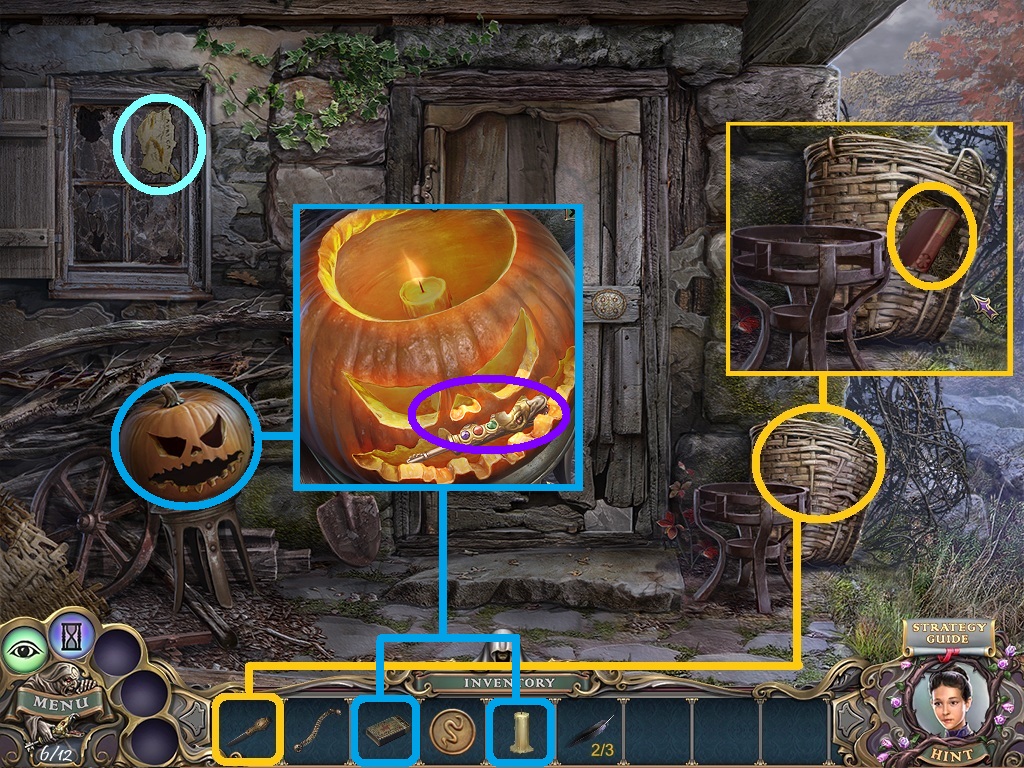
- Zoom into the basket (orange circle).
- Pick the knife (orange square) from the inventory to cut it open and reveal a book.
- Collect the book (orange circle).
- Zoom into the pumpkin (blue circle).
- Click the top and pick the candle (blue square) from the inventory to place inside.
- Pick the matches (blue square) from the inventory to light the candle.
- Collect the snake key (purple circle).
- Zoom into the window; collect the globe piece (aqua circle).
- Go to the school grounds.
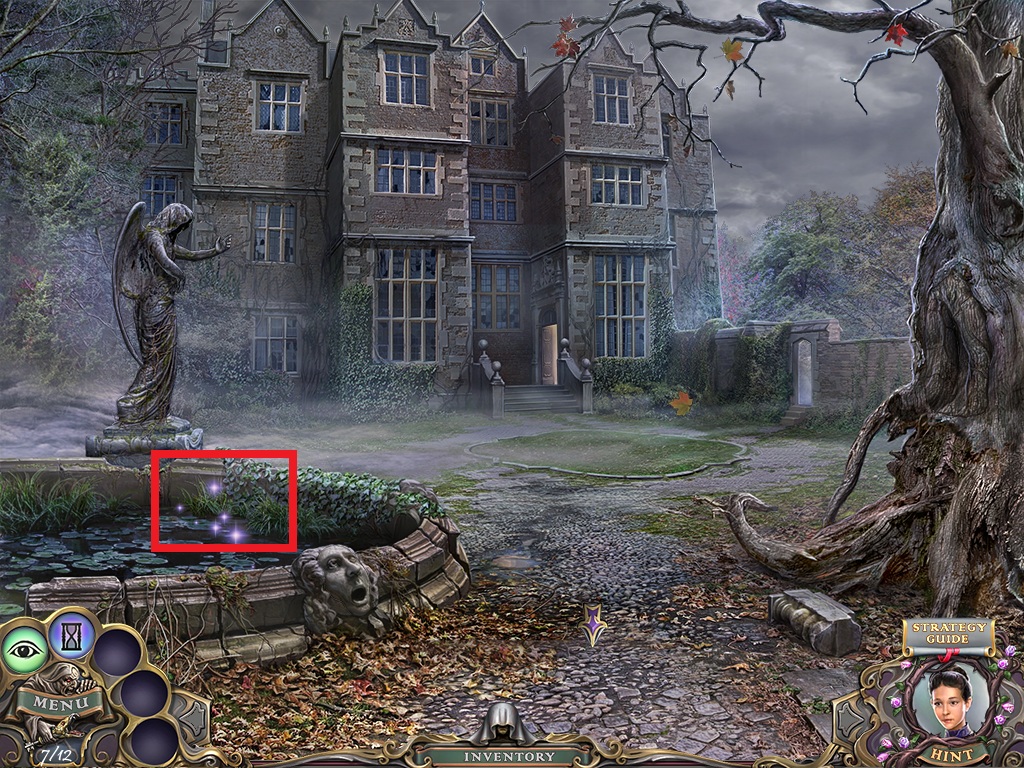
- Zoom into the hidden object area (red square).
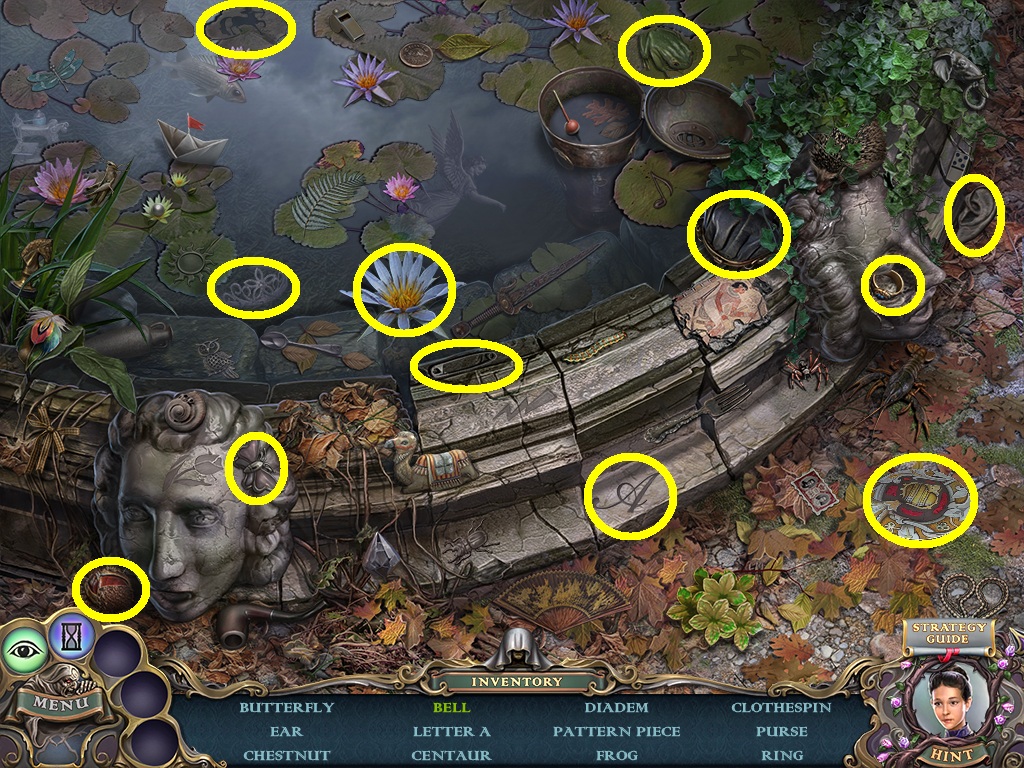
- Find all the listed items (yellow circles).
- Collect the pattern piece.
- Go back to the shack.
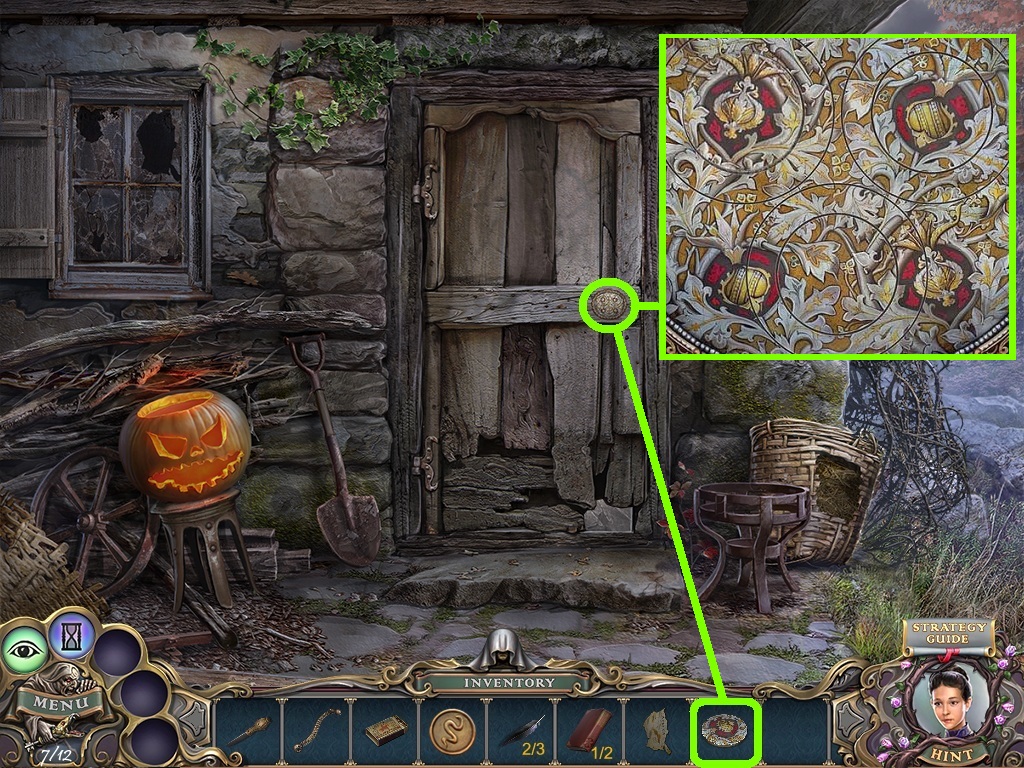
- Zoom into the door lock (green circle).
- Pick the pattern piece (green square) from the inventory; place it into the missing area.
- Spin the pieces as shown above.
- Go into the shack.
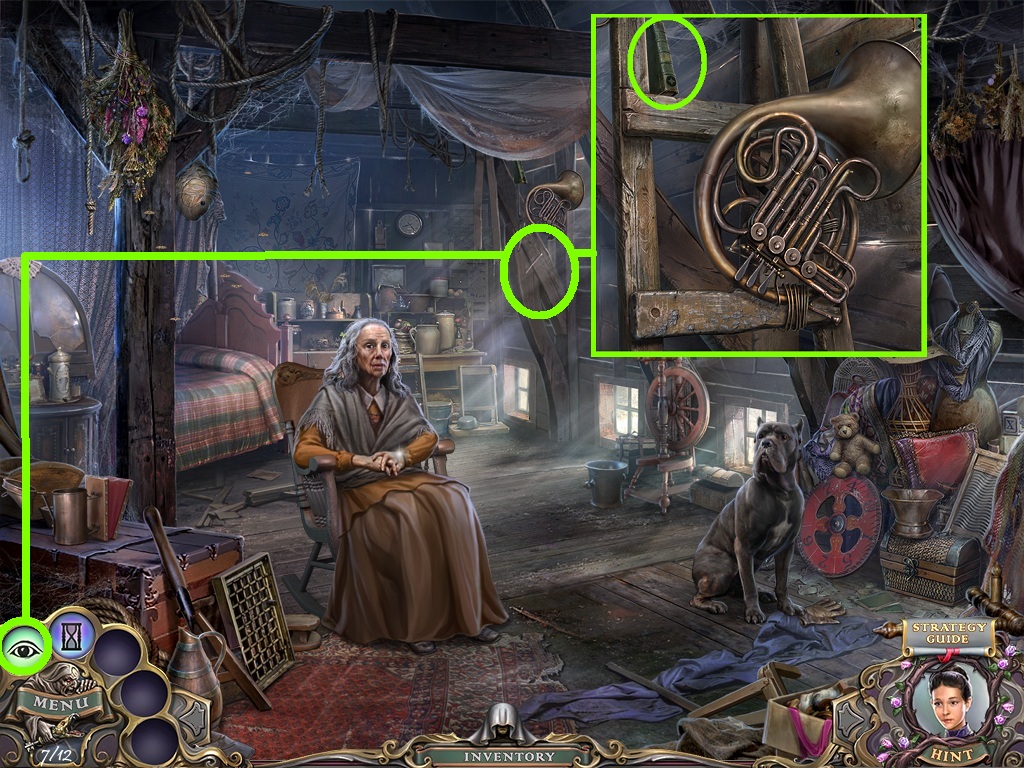
- Pick the reveal power (green circle); use it on the wooden beam (green circle).
- A ladder will appear; zoom into the ladder and collect the book (green circle).
- Go to the library.
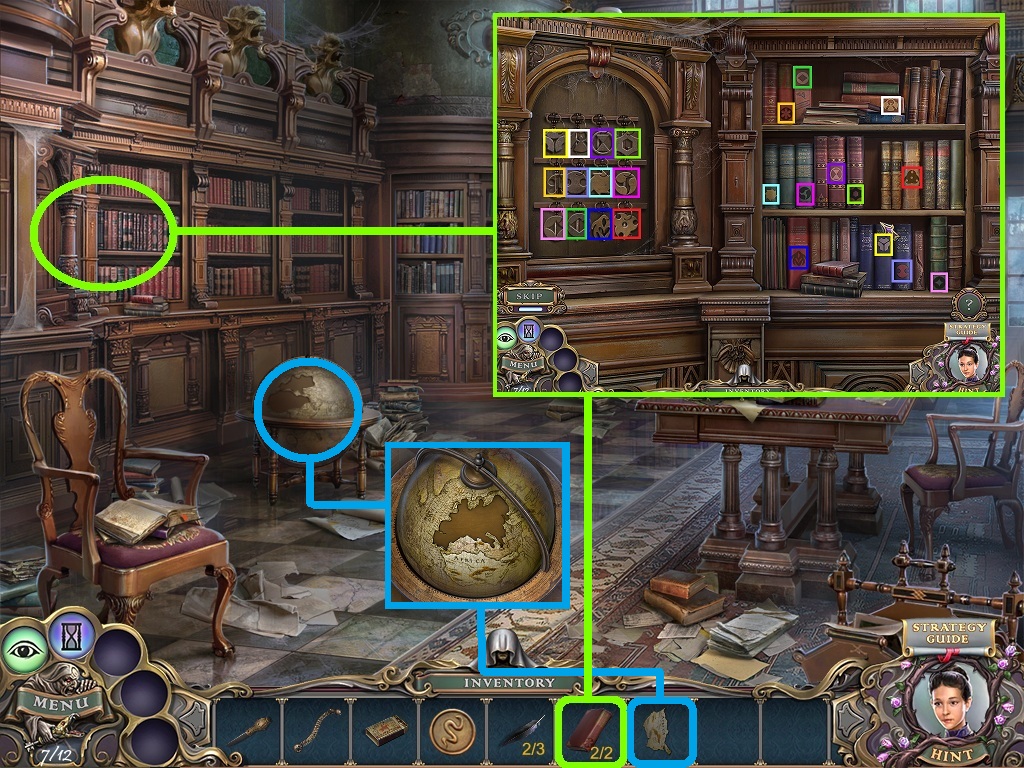
- Insert the piece of the globe into the missing part of the globe.
- Zoom into the book shelf (green circle).
- Pick the books (green square) from the inventory; place them into the book shelf.
- A puzzle will trigger.
- Match the keys to their book mates.
- Follow the color coded pattern to solve.
- Go into the attic.
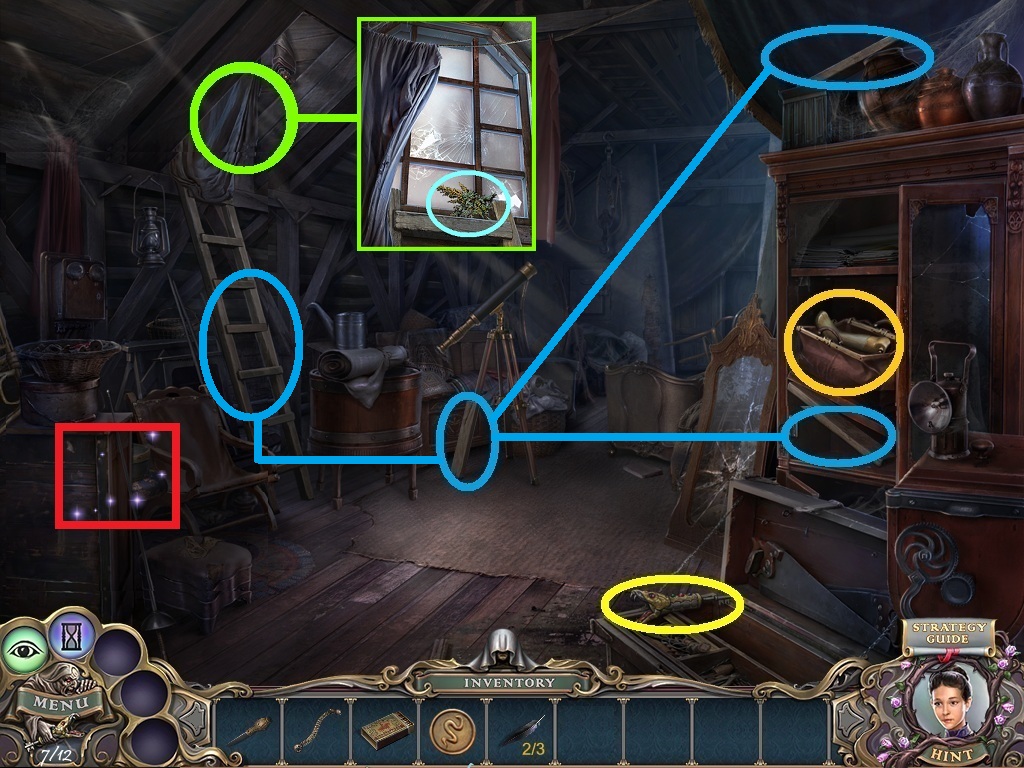
- Click the bag (orange circle).
- Collect the puppet leg.
- Collect the 3 steps (blue circles).
- Collect the snake key (yellow circle).
- Pick the steps from the inventory; place them onto the ladder.
- Zoom into the window (green circle).
- Click the curtain; the bat will fly.
- Collect the sagebrush (aqua circle).
- Zoom into the hidden object area (red square).
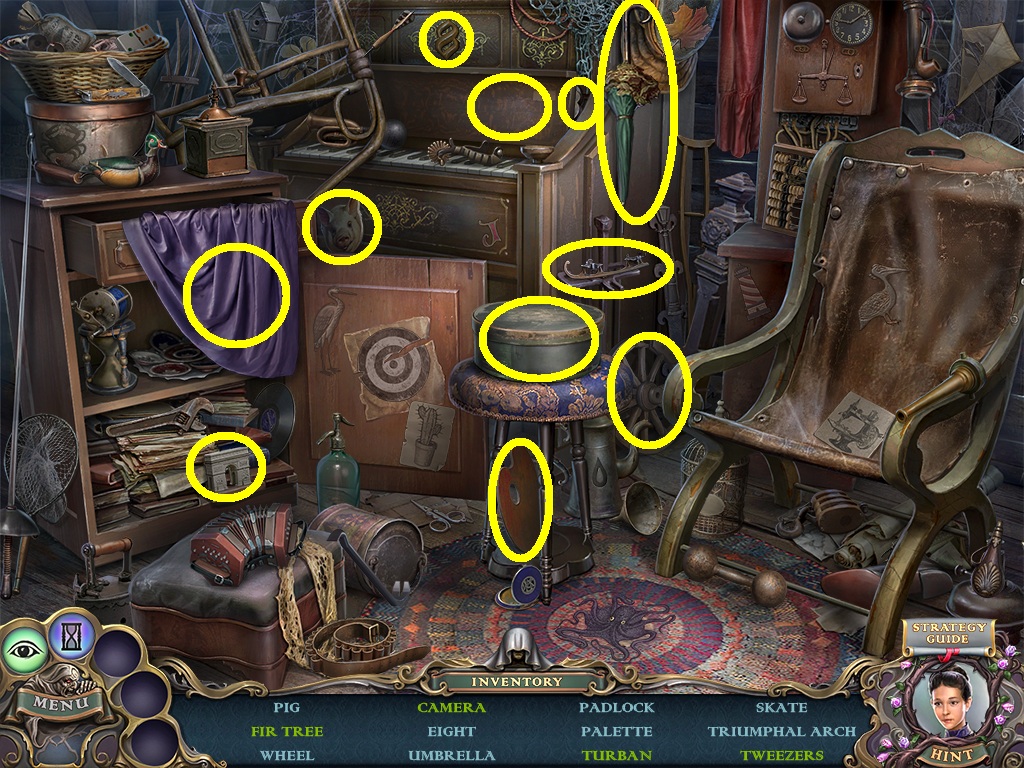
- Find the listed items (yellow circles).
- Collect the umbrella.
- Go to the foyer.
Comments will load when you reach this part of the walkthrough.