

Chapter 1: The Witch Hunt Ensues
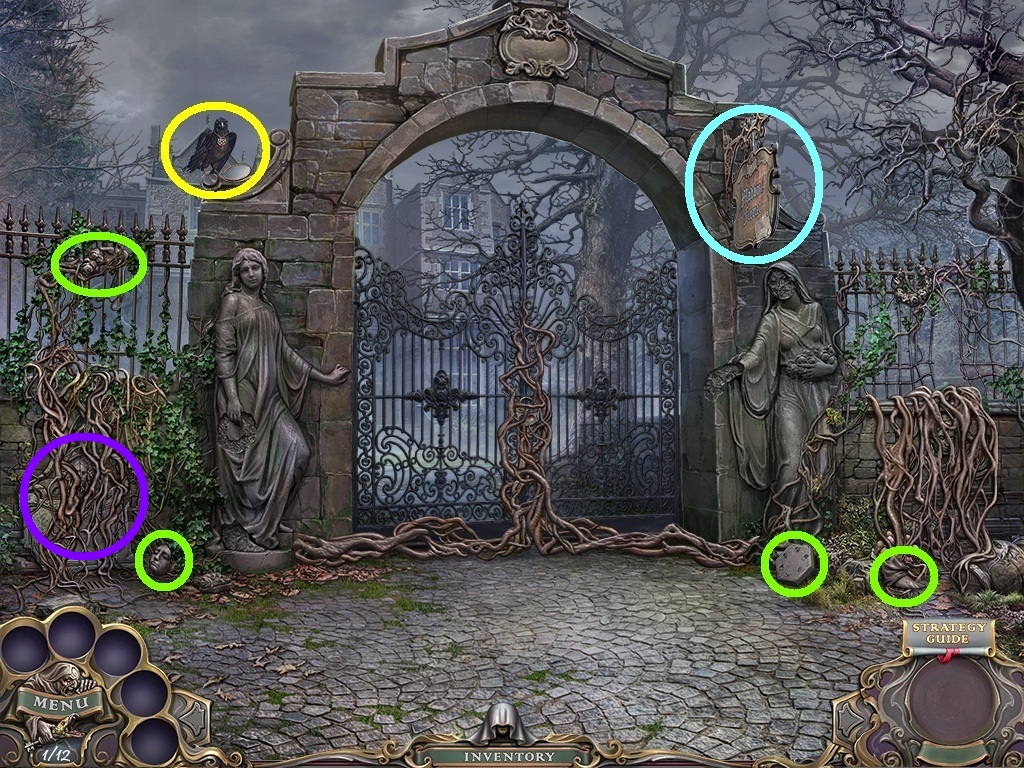
- Chase away the bird (yellow circle).
- Collect the hint button that drops.
- Collect the following items (green circles): hexagon, statue face, and statue hand and statue foot.
- Zoom into the sign (aqua circle).
- Collect the Flemets Finishing School note and the snake key.
- Zoom into the plaque (purple circle).
- Collect the red stoned ring.
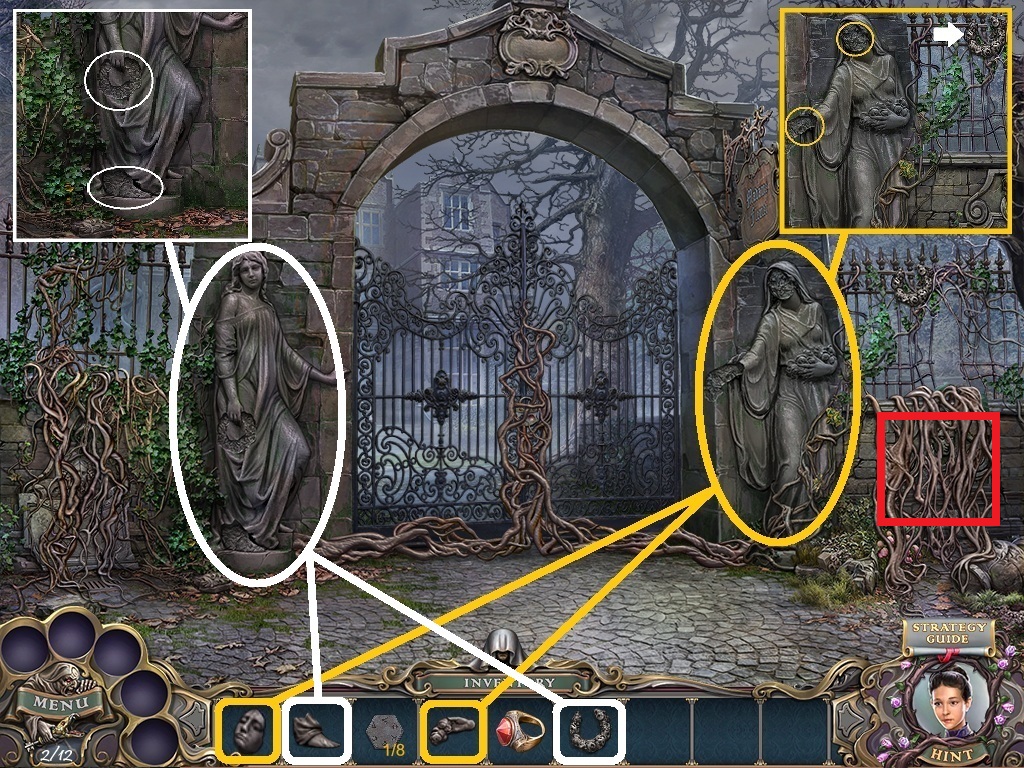
- Zoom into the statue (orange circle).
- Collect the statue wreath (white arrow).
- Pick the statue face and hand (orange squares) from the inventory and place it onto the statue.
- Zoom into the statue (white circle).
- Pick the statue foot and statue wreath (white squares) from the inventory and place it onto the statue.
- Zoom into the hidden object area (red square).
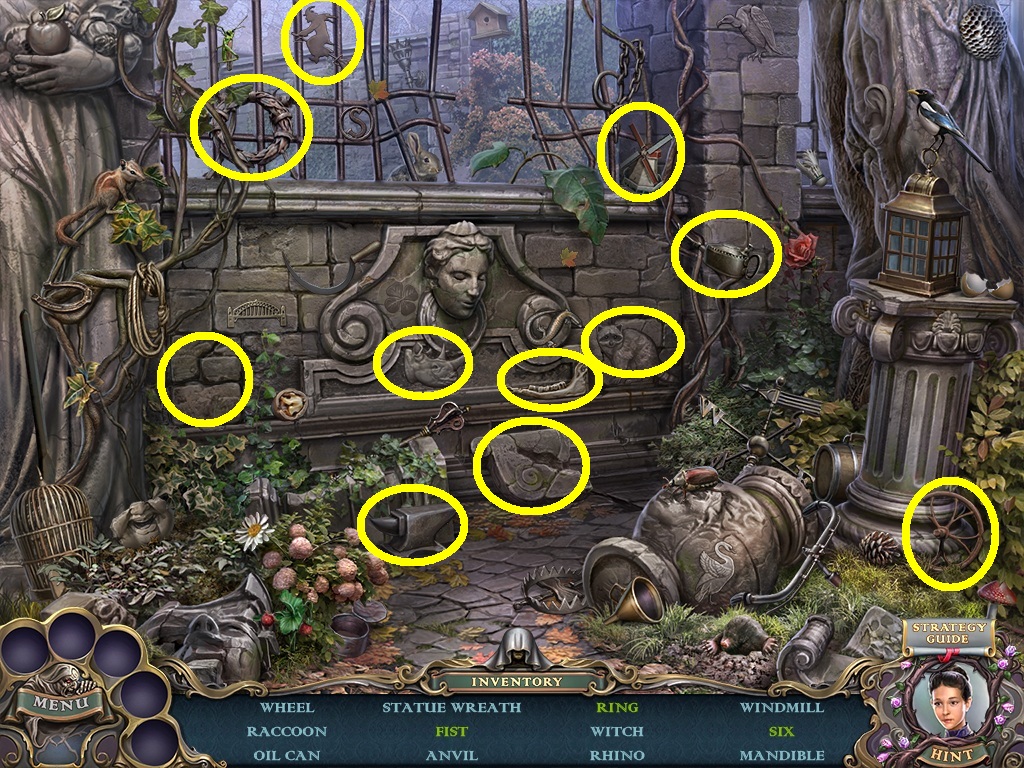
- Find all the listed items (yellow circles).
- Pick up the blue stoned ring.
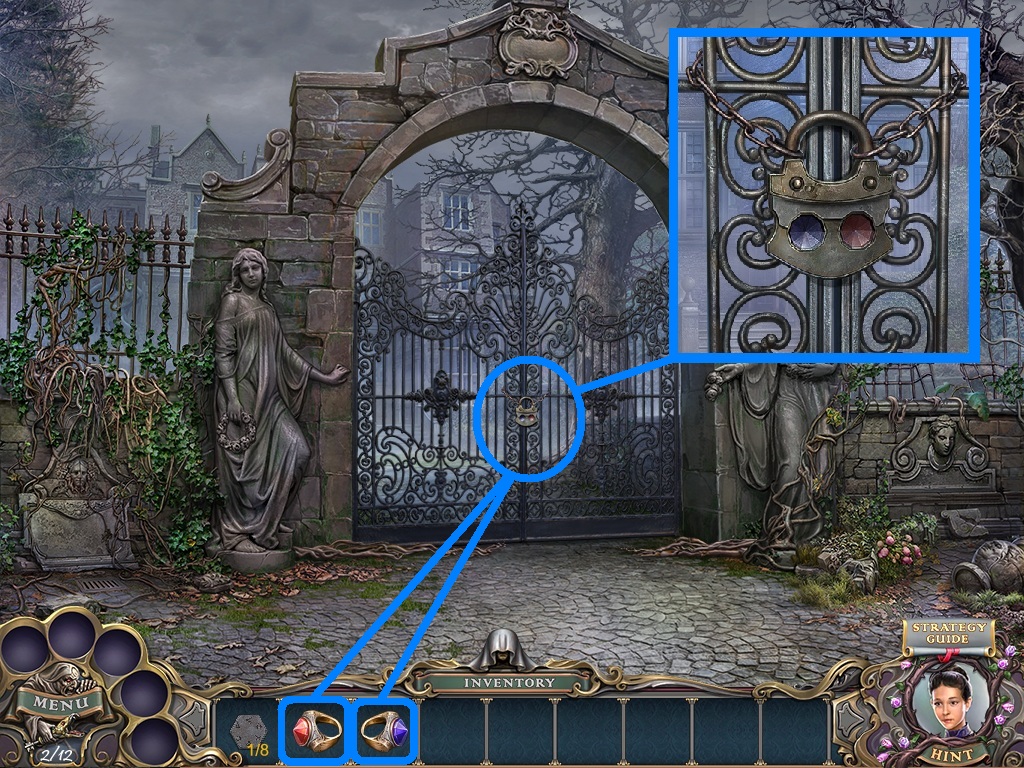
- Zoom into the gate (blue circle).
- Pick the red and blue stoned rings (blue squares) from the inventory.
- Use them to unlock the gate.
- Go onto school grounds.
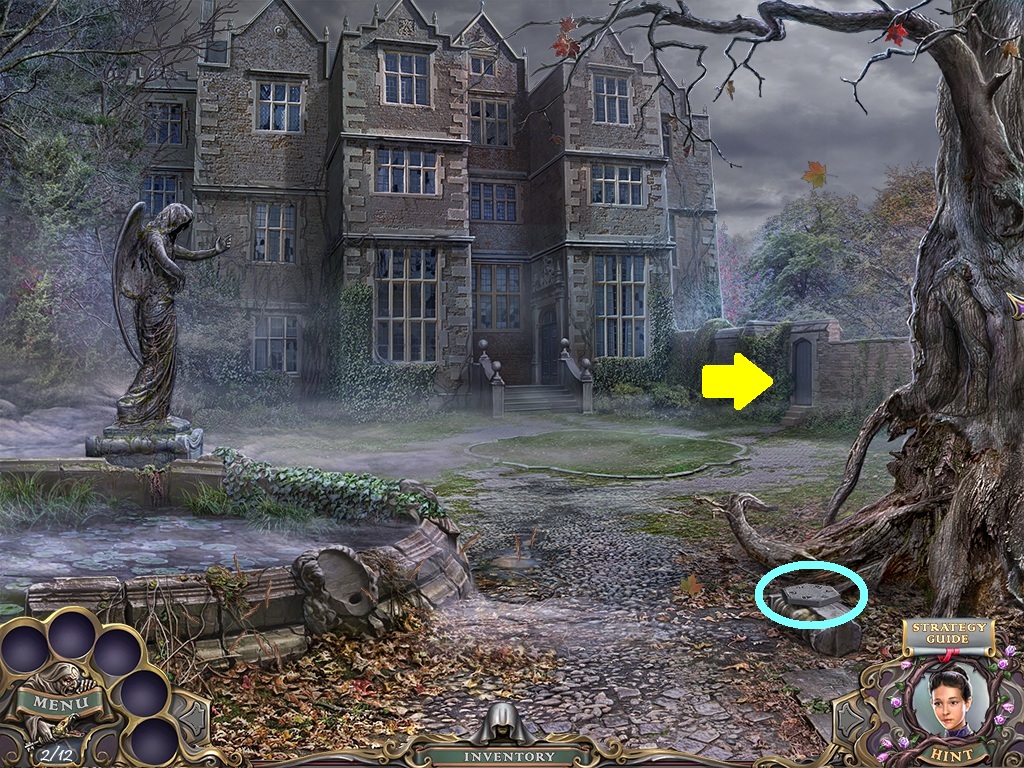
- Collect the hexagon (aqua circle).
- Go into the garden gate (yellow arrow).
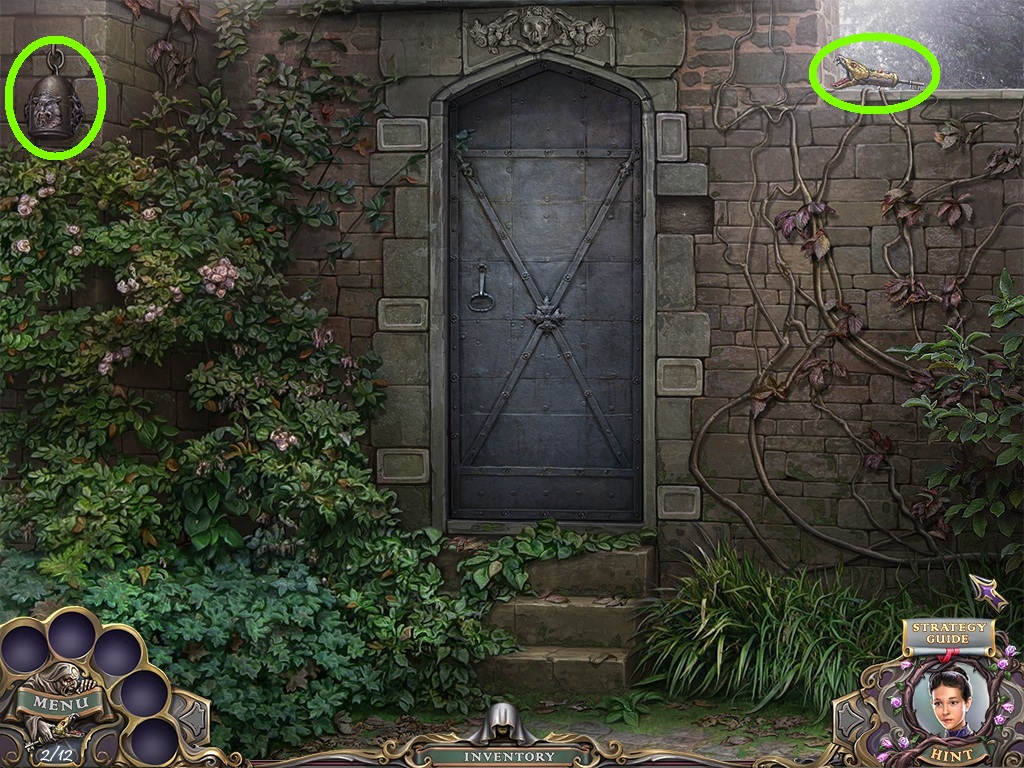
- Collect the weight and the snake key (green circles).
- Go back one scene; zoom toward the front door.
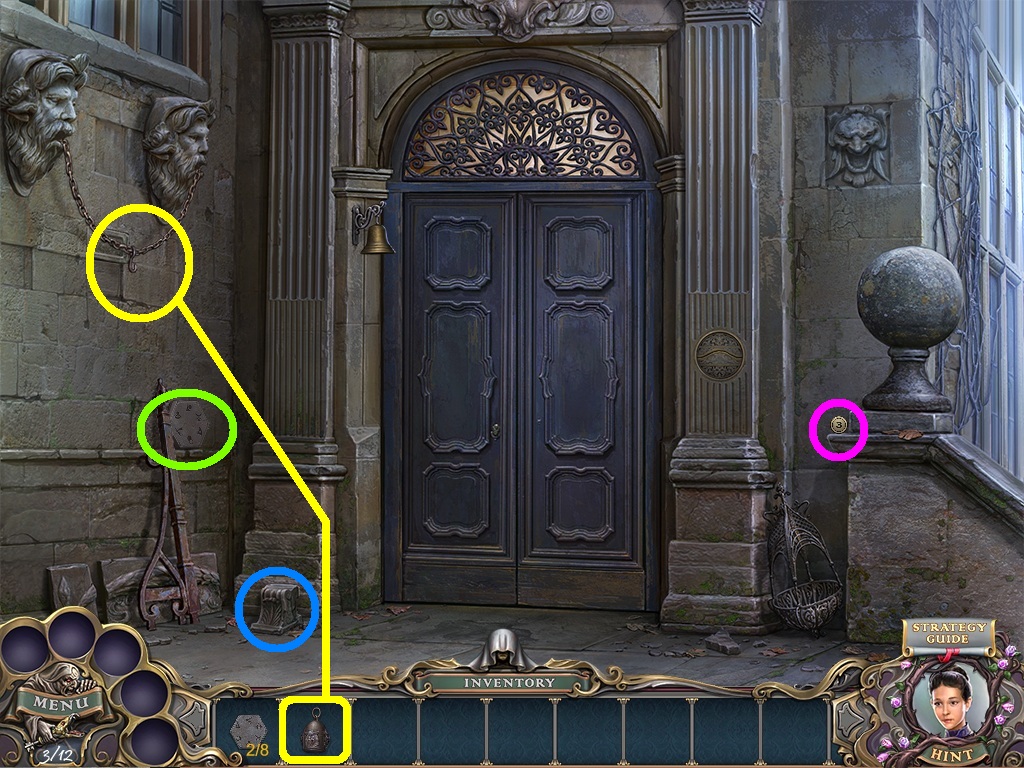
- Collect the button (pink circle).
- Collect the hexagon (green circle).
- Place the weight from the inventory onto the chain (yellow circle).
- Collect the brick that falls.
- Click the stone (blue circle); look into the hole.
- Go back to the garden gate.
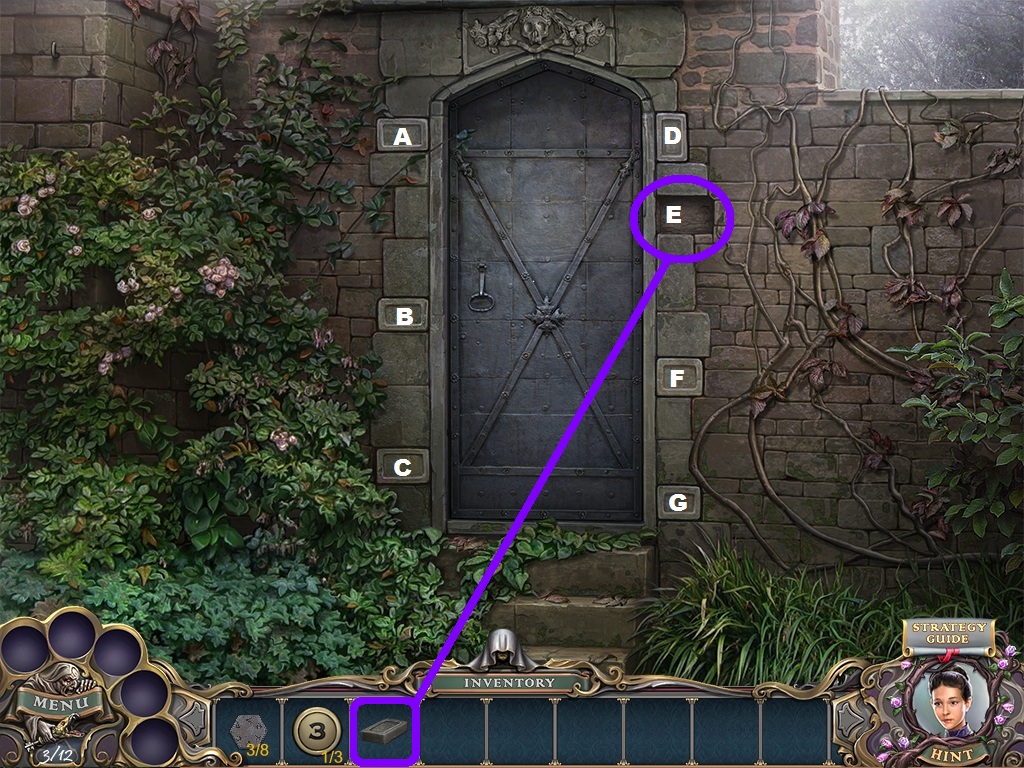
- Pick the brick (purple square) from the inventory; place it into the missing slot.
- Click the bricks in the following pattern to open the door:
- A – G – C- B – E - D – F.
- Go into the garden.
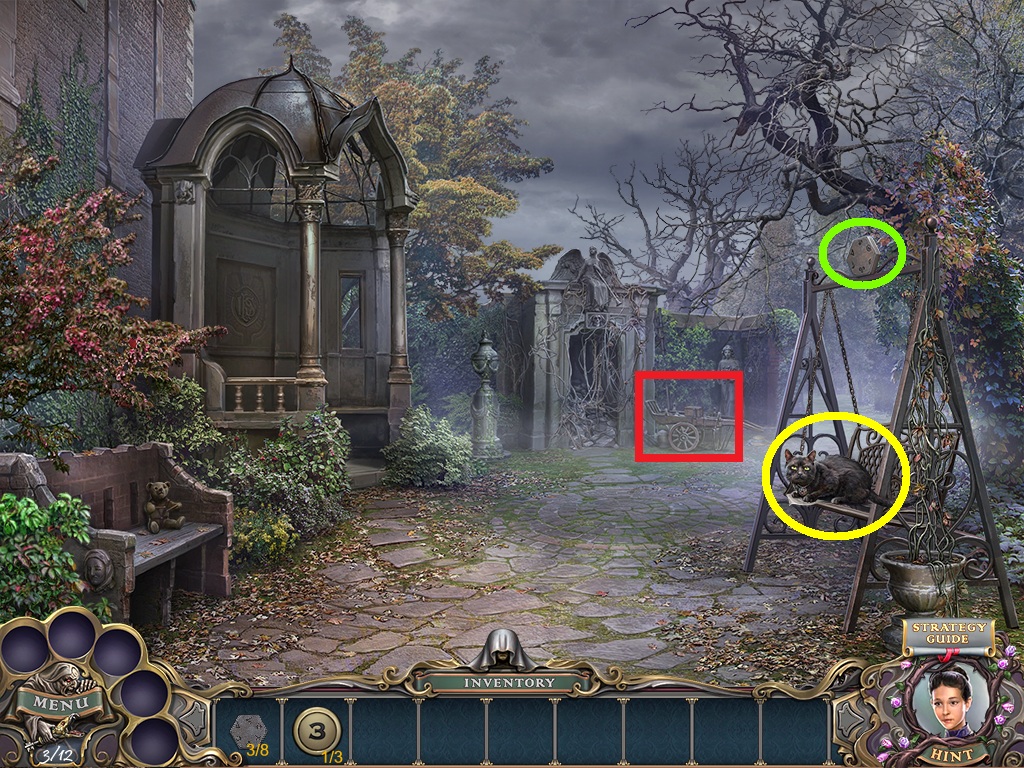
- Chase away the cat (yellow circle).
- Collect the hexagon (green circle).
- Zoom into the hidden object area (red square).
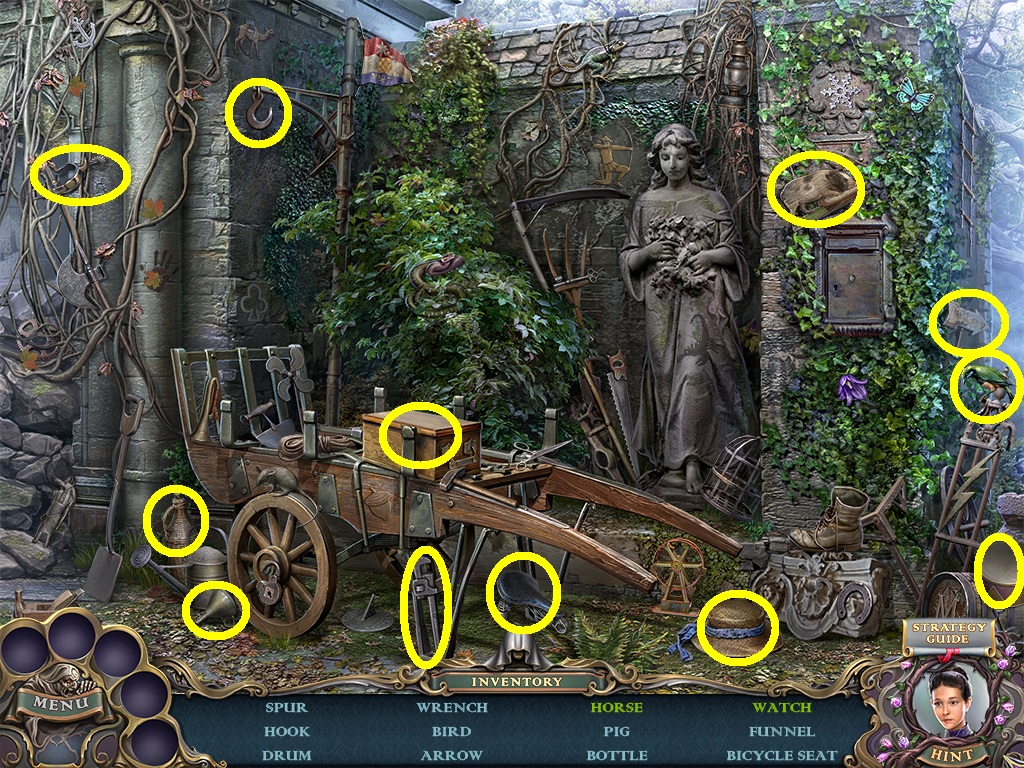
- Find all the listed items (yellow circles).
- Collect the drum.
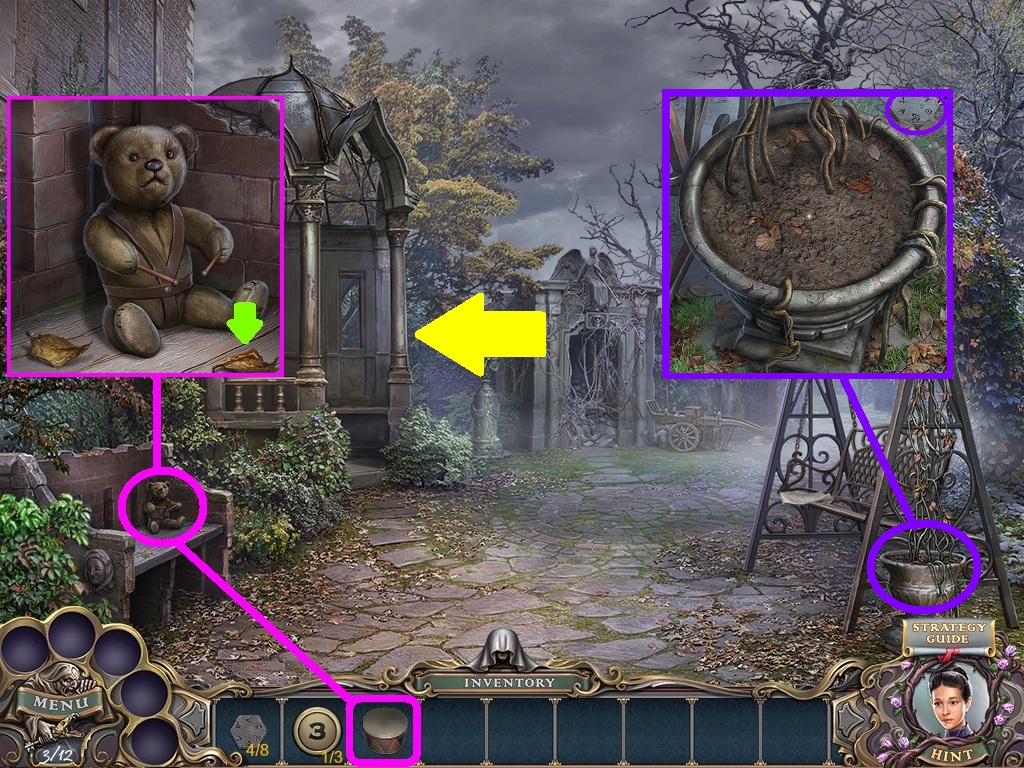
- Zoom into the teddy (pink circle).
- Select the drum (pink square) from the inventory; place it with the teddy.
- Click the leaf (green arrow).
- Collect the hexagon and the button.
- Zoom into the planter (purple circle).
- Collect the hexagon.
- Go into the gazebo (yellow arrow).
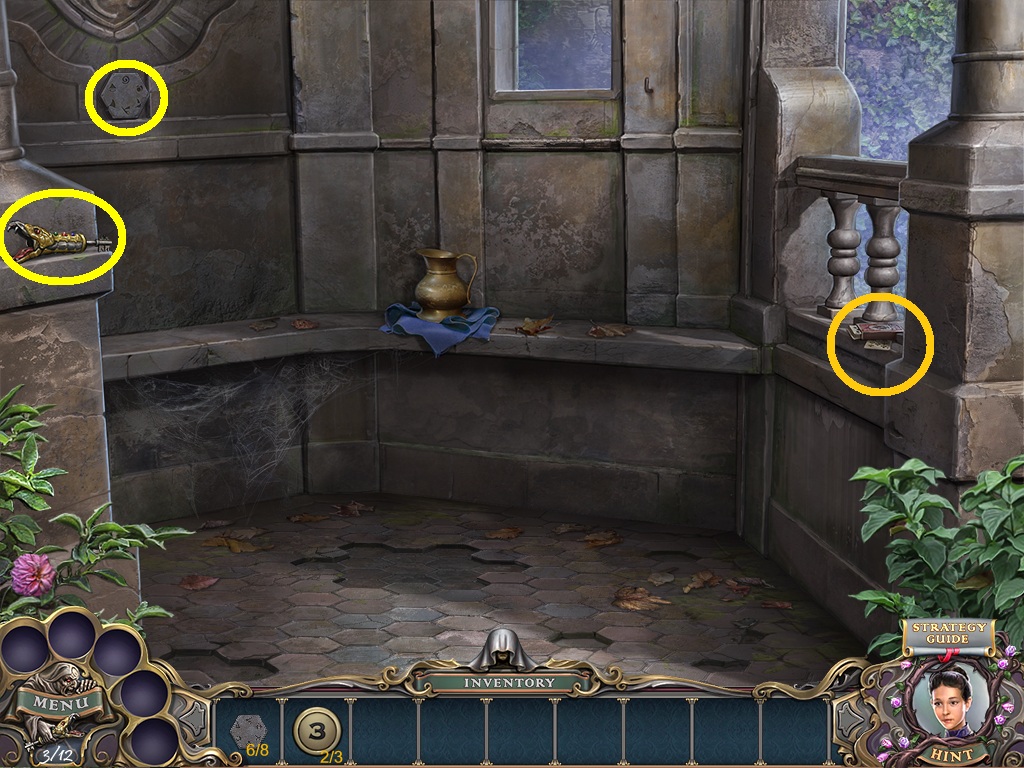
- Zoom into the card (orange circle).
- Collect the snake key and the hexagon (yellow circles).
- Go to the fountain.
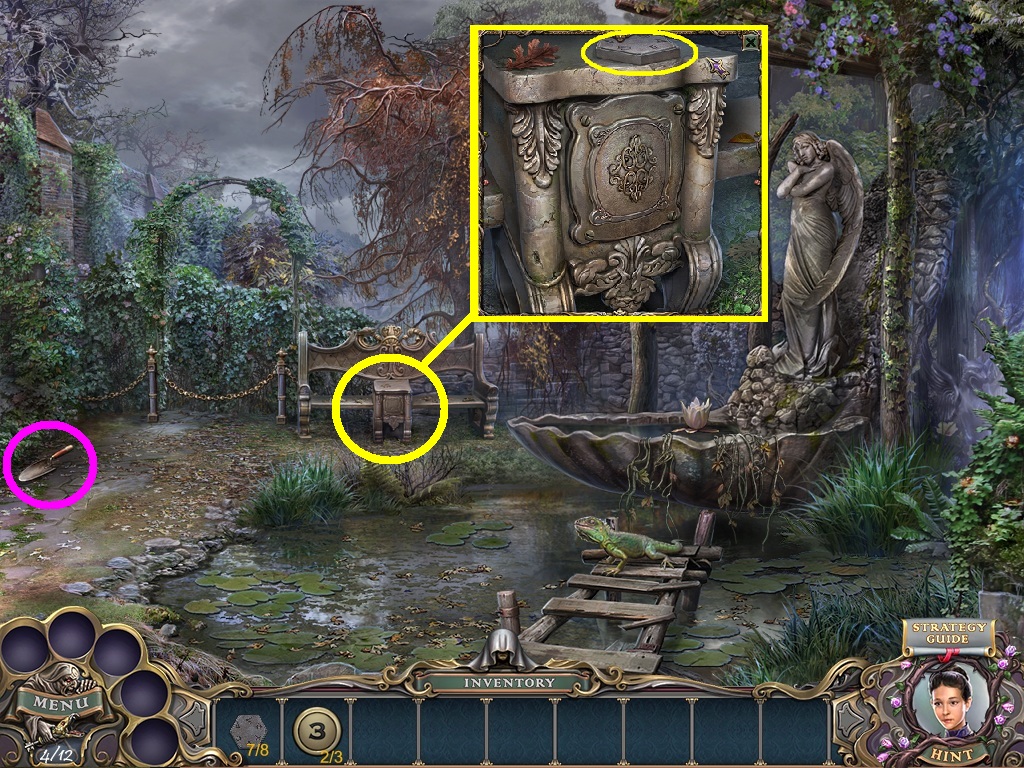
- Collect the trowel (pink circle).
- Zoom into the valve (yellow circle); collect the hexagon.
- Go back to the gazebo.
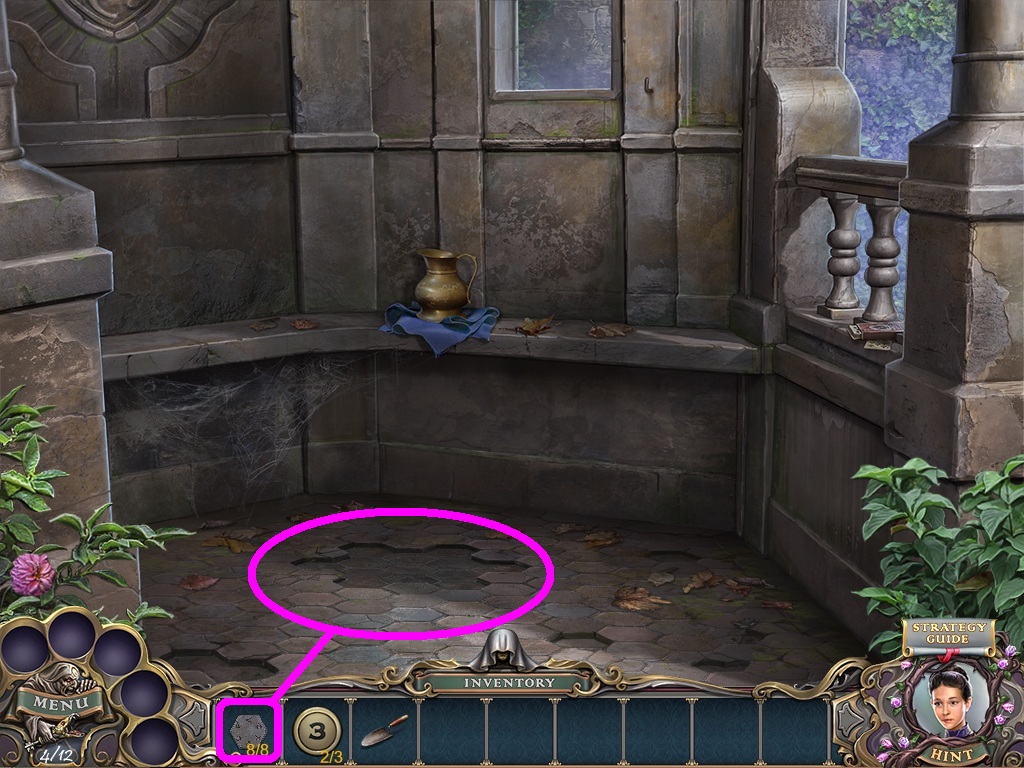
- Zoom into the missing floor pieces (pink circle).
- Pick the hexagons (pink square) from the inventory; place them into the missing area.
- A mini game will open.
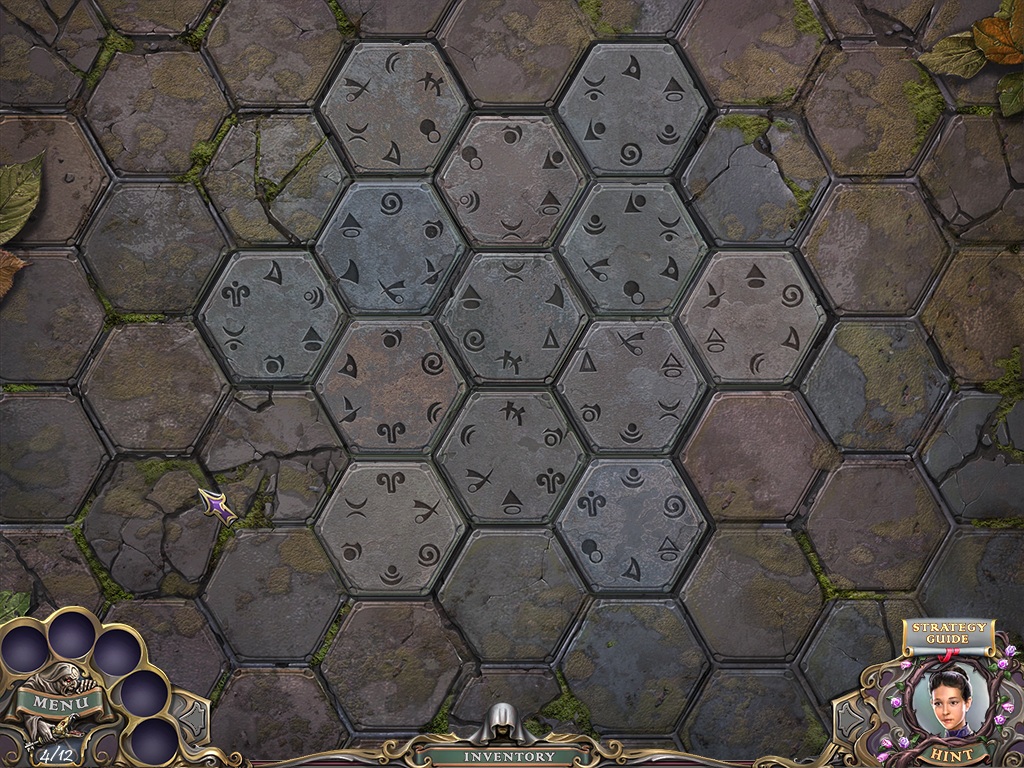
- Follow the pattern in the shot above to solve the puzzle.
- Collect the ornament.
- Exit the gazebo.
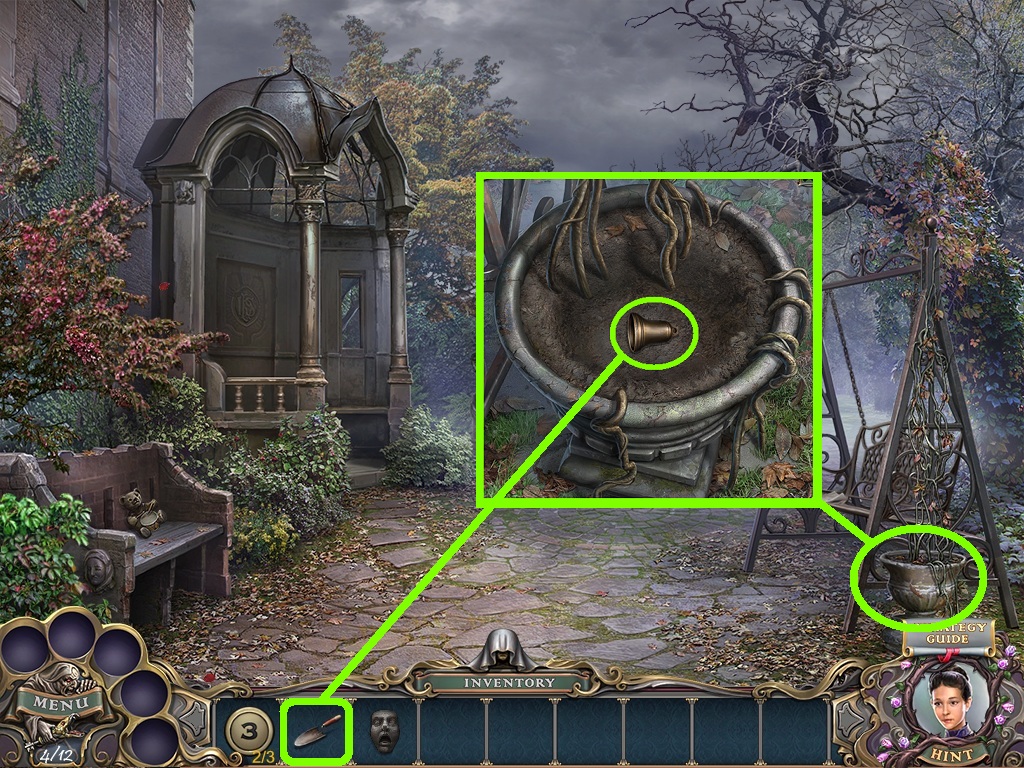
- Zoom into the planter (green circle).
- Pick the trowel (green square) from the inventory to dig the dirt.
- Collect the bell.
- Go to the school grounds.
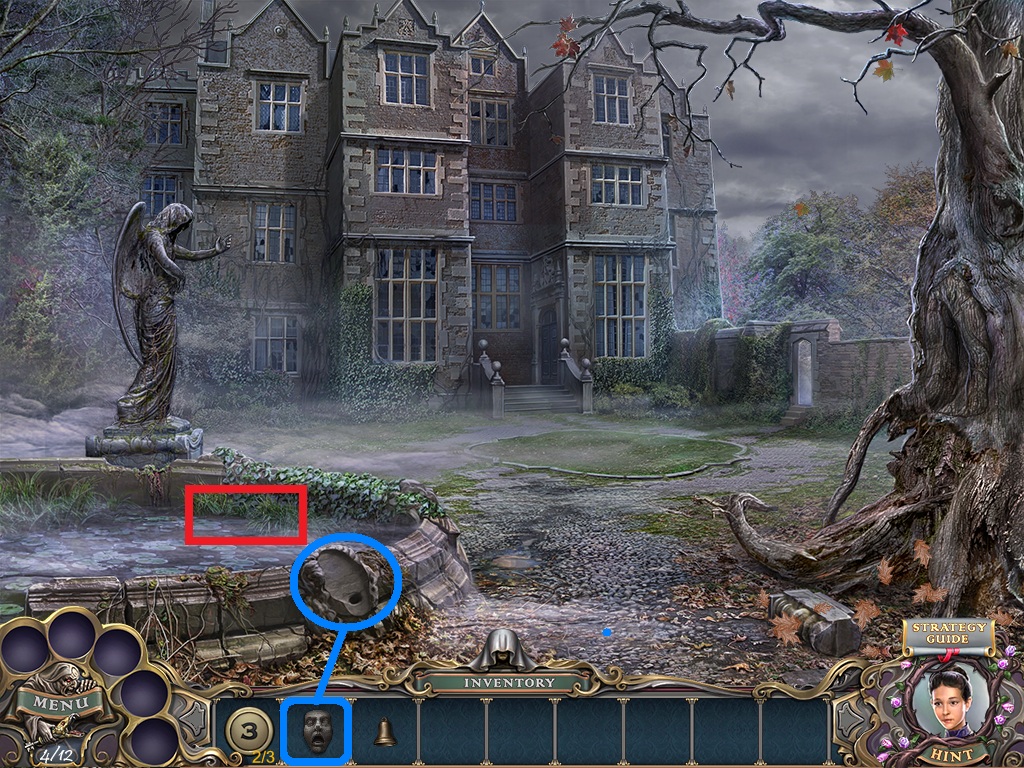
- Pick the ornament (blue square) from the inventory; place it into the pool groove.
- Zoom into the hidden object area (red square).
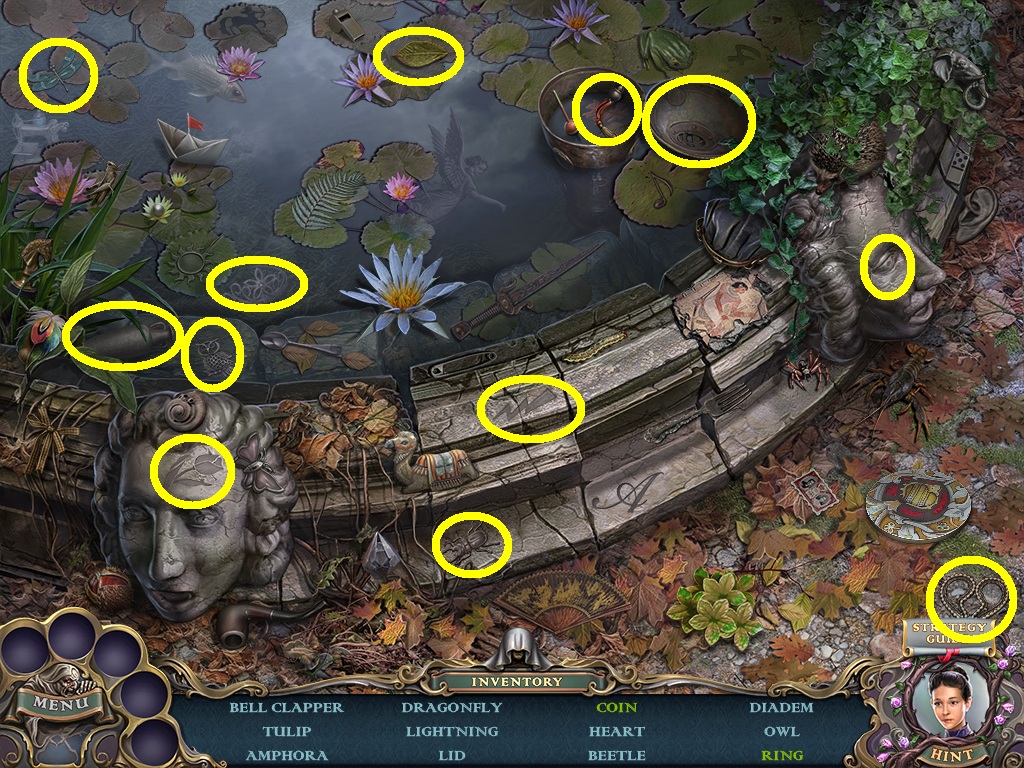
- Find all the listed items (yellow circles).
- Collect the bell clapper.
- Go to the front door.
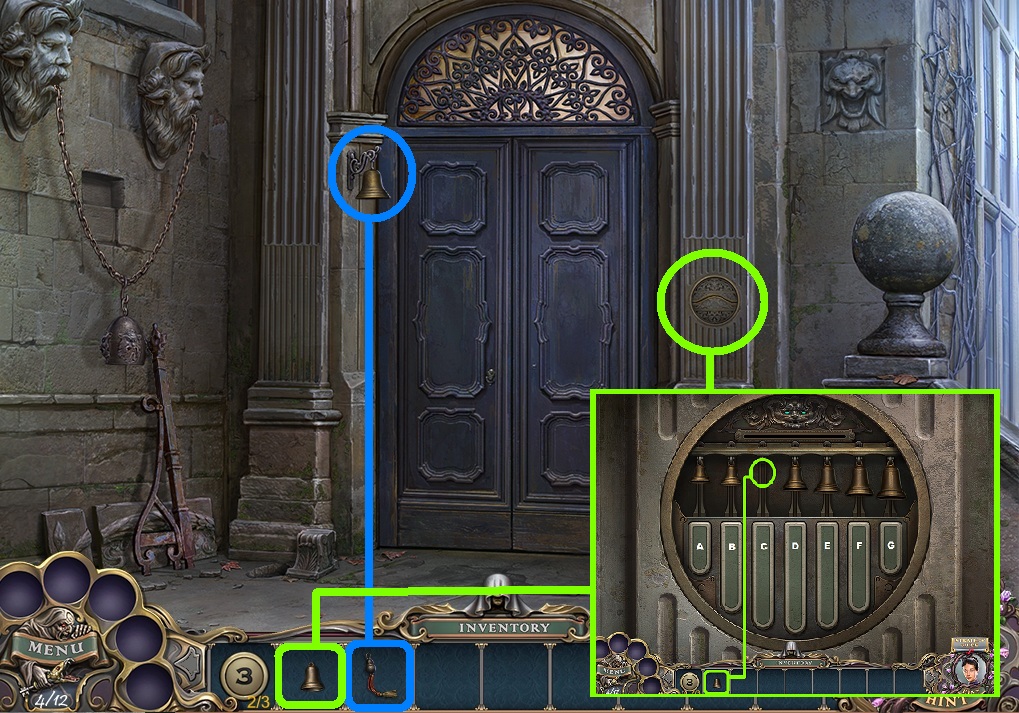
- Pick the bell clapper (blue square) from the inventory; place it in the bell.
- Ring the bell.
- Zoom into the lock (green circle).
- Insert the bell (green square) from the inventory into the slot.
- A puzzle will open.
- Follow the pattern shown to open the door:
- (C- E – B); (B –A- G –D); (D –B –C –G –A); (B –A – B –F –E – D).
- Go into the foyer.
Comments will load when you reach this part of the walkthrough.