

Chapter 2: Unleash the Dominion
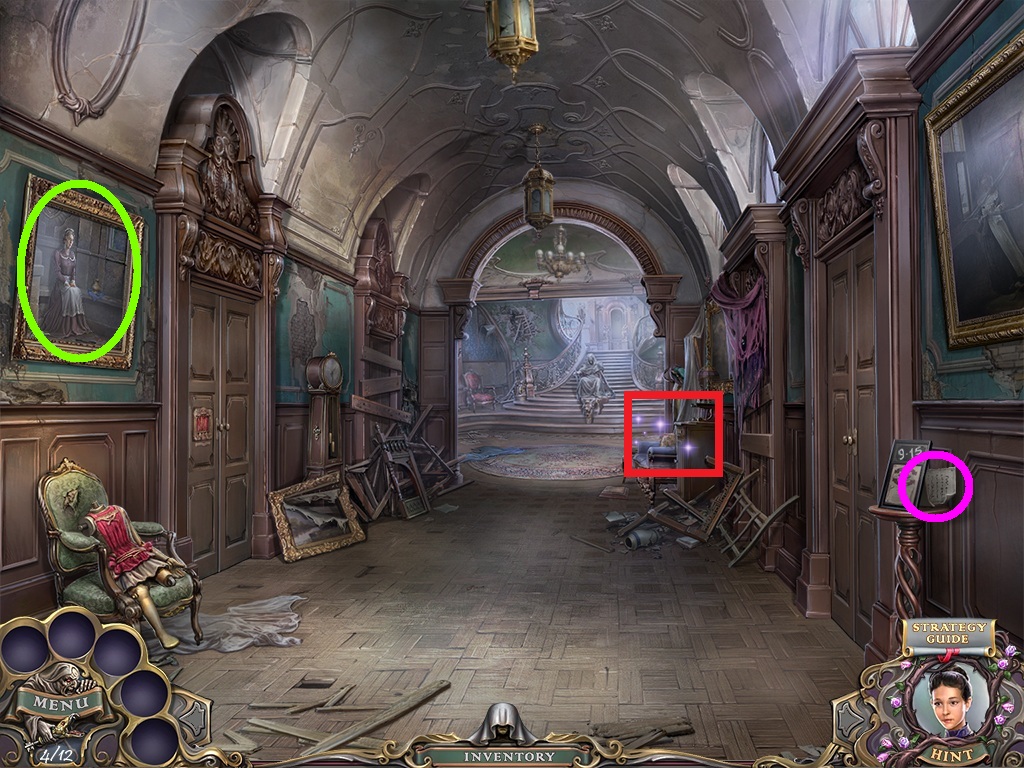
- Zoom into the note (pink circle).
- Zoom into the painting (green circle).
- Enter the hidden object area (red square).
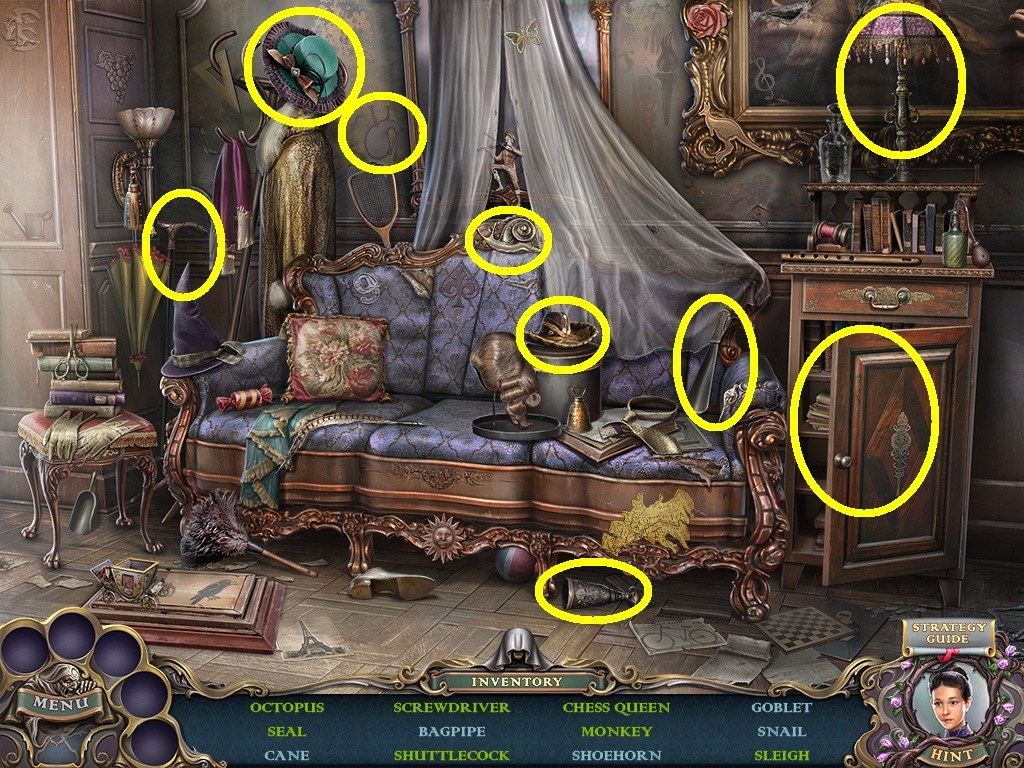
- Find the listed items (yellow circles).
- Collect the screwdriver.
- Go to the fountain.
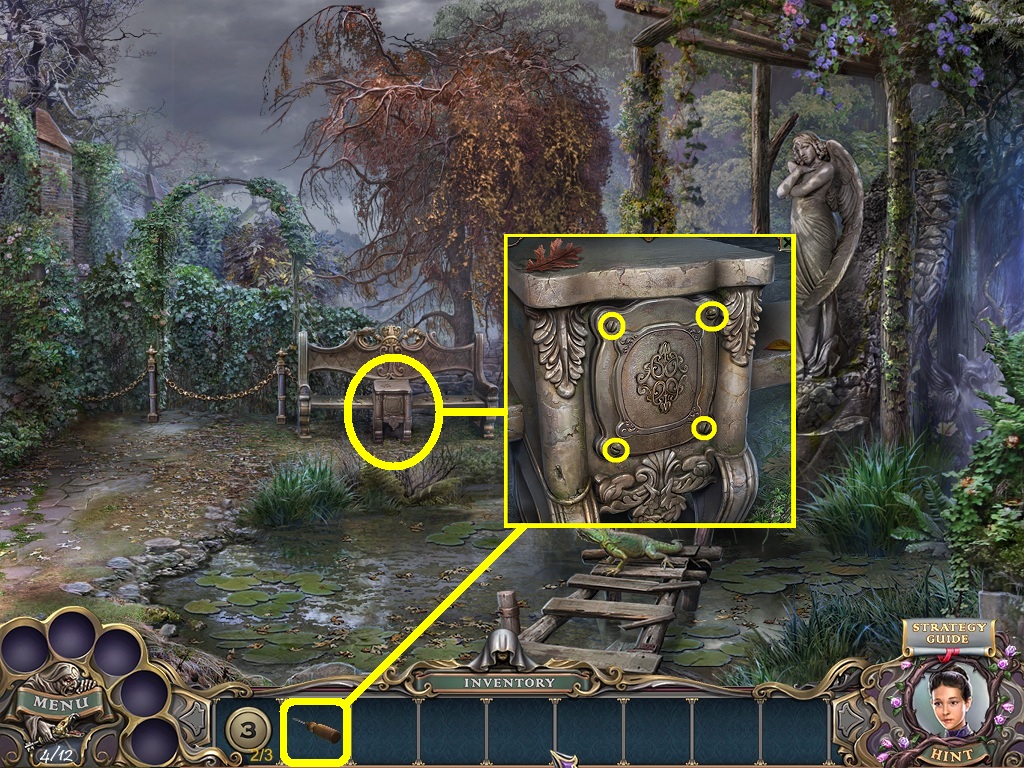
- Zoom into the valve housing unit (yellow circle).
- Pick up the screwdriver (yellow square) from the inventory; remove the screws.
- Collect the button.
- Go to the foyer; move toward the staircase.
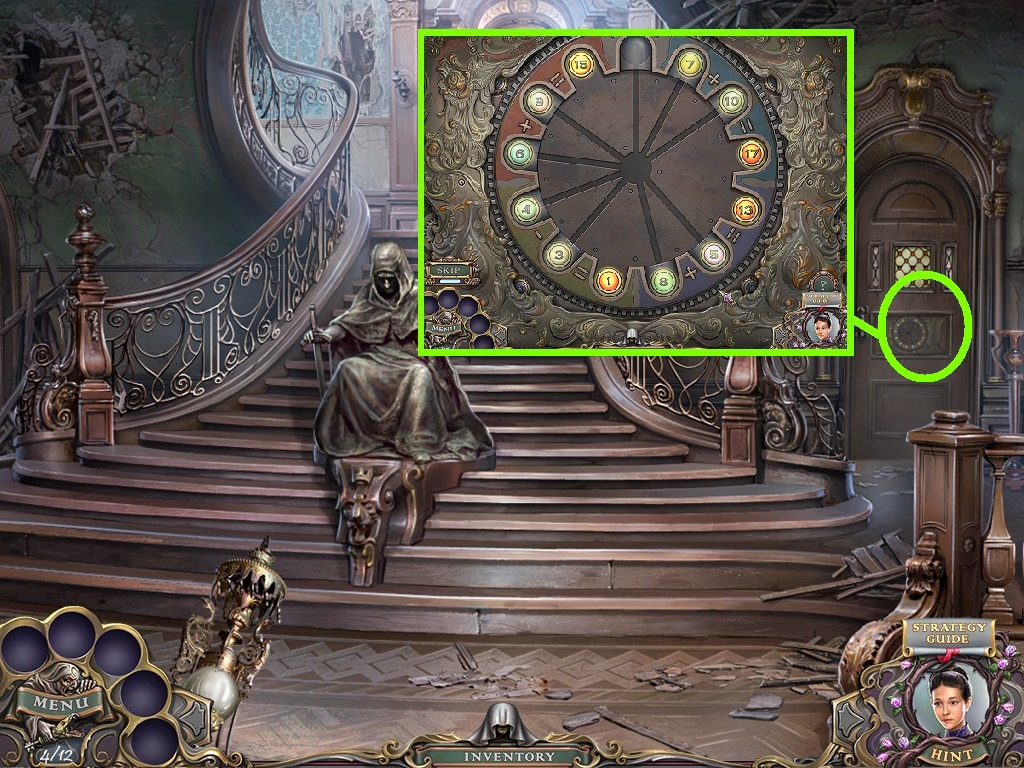
- Zoom into the staircase; attempt to go upstairs.
- Zoom into the door lock (green circle).
- Pick the coins from the inventory; place them into the puzzle trigger.
- Follow the number pattern above to solve the puzzle and unlock the door.
- Go into the classroom.
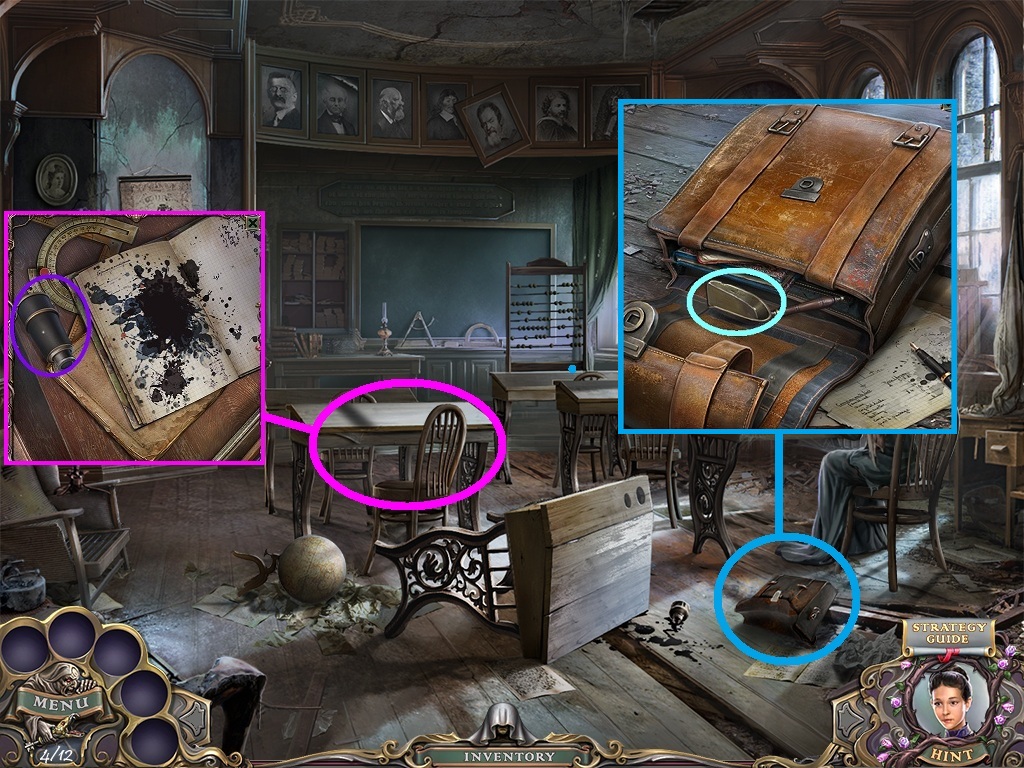
- Zoom into the briefcase (blue circle).
- Click the key; collect the clock key.
- Click the briefcase; collect the scoop (aqua circle).
- Zoom into the desk (pink circle).
- Collect the spyglass (purple circle) and look at the notebook.
- Go back to the foyer.
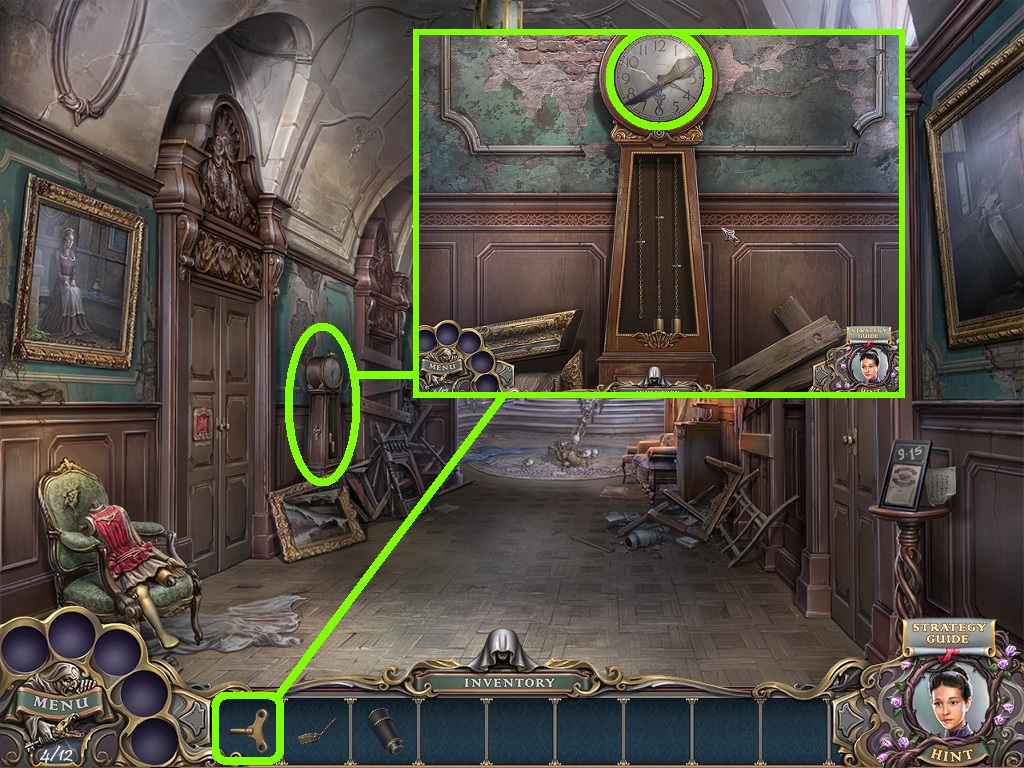
- Zoom into the clock (green circle).
- Pick the clock key (green square) from the inventory; use it to open the clock face.
- Collect the knife.
- Go back to the classroom.
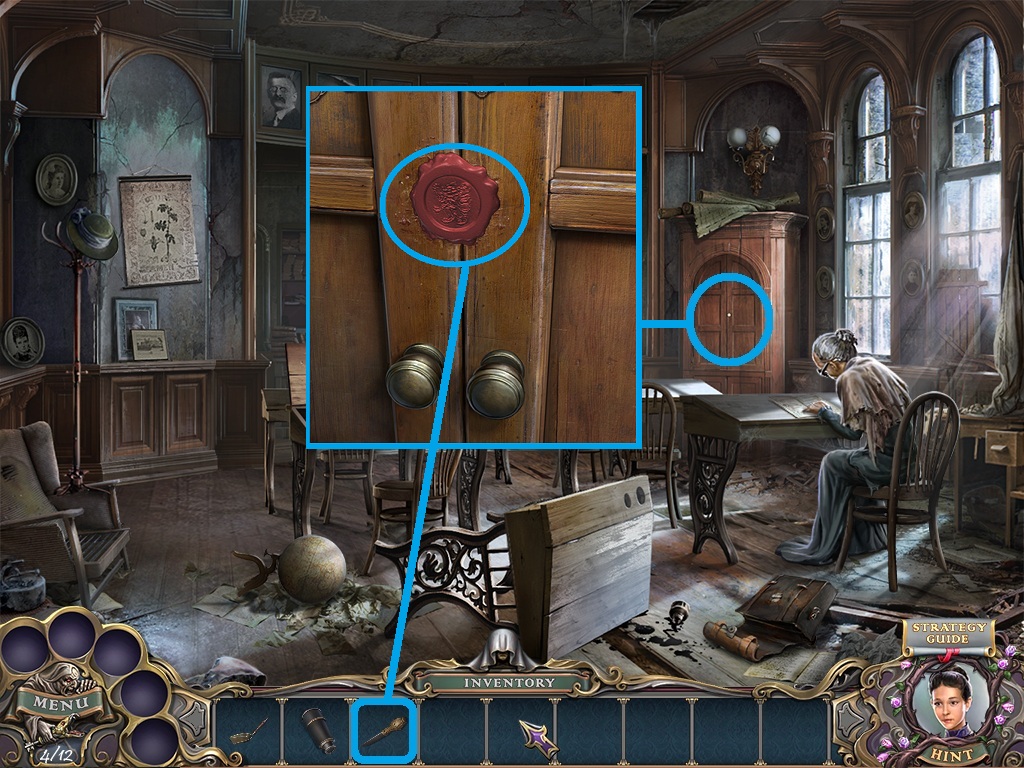
- Zoom into the cabinet (blue circle).
- Pick the knife (blue square) from the inventory; use it to cut the seal.
- Collect the clock weight.
- Go to the foyer.
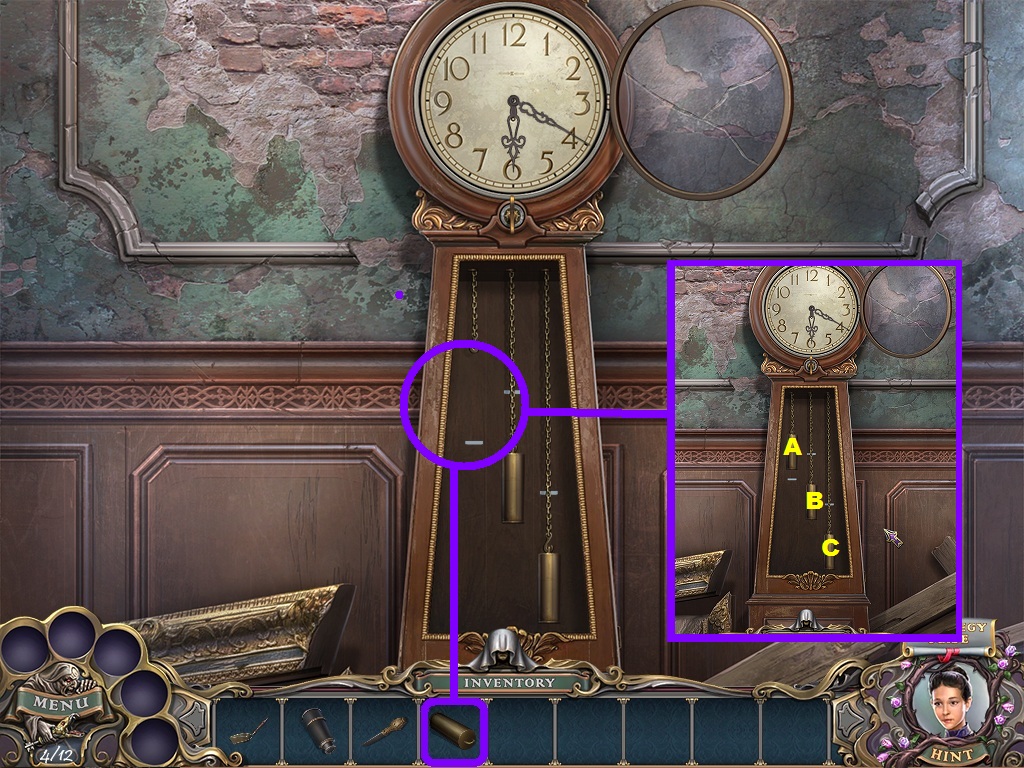
- Pick the clock weight (purple square) from the inventory; insert it into the clock.
- To set the weights follow this pattern: A, A, C.
- Go to the dining room.
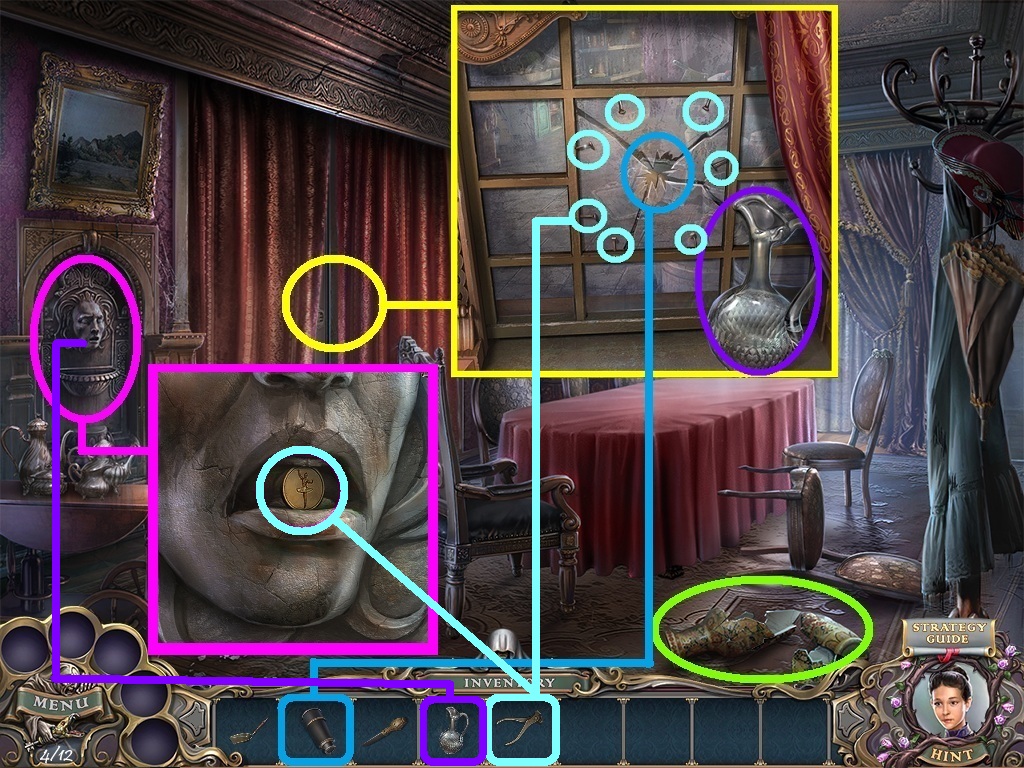
- Collect the nippers (green circle).
- Click the curtain (yellow circle); zoom into the window.
- Collect the pitcher (purple circle).
- Pick the spyglass (blue square) from the inventory; place it into the window.
- Pick the nippers (aqua square) from the inventory; use them to remove the nails (aqua circles).
- Zoom into the spyglass.
- Zoom into the fountain (pink circle).
- Pick the nippers (aqua square) from the inventory; use it to get the coin (aqua circle) out of the fountain.
- Pick the pitcher (purple square) from the inventory and put it into the fountain.
- Collect the water filled pitcher.
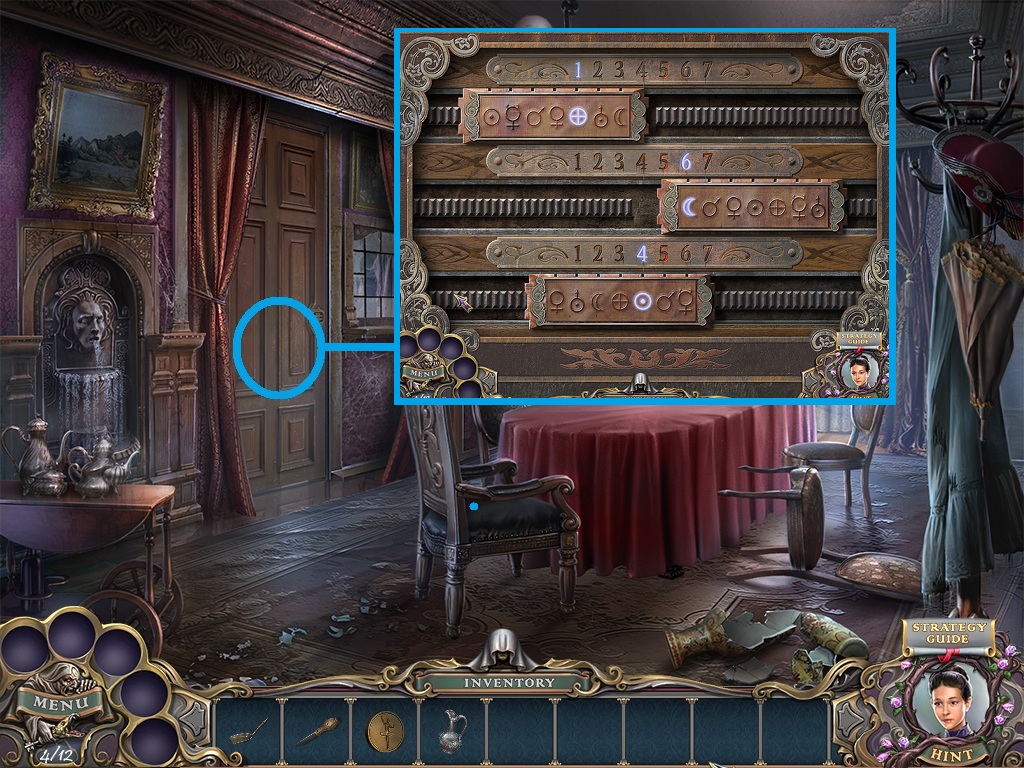
- Zoom into the door lock (blue circle).
- Follow the pattern shown above to unlock the door.
- Go into the kitchen.
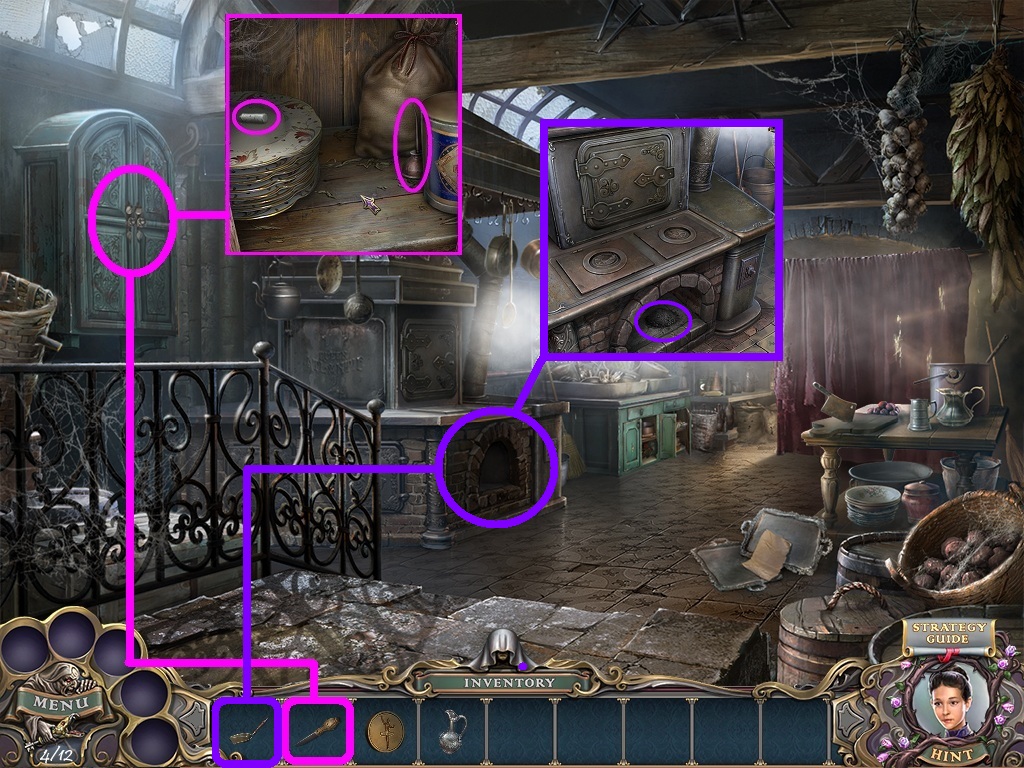
- Zoom into the cupboard (pink circle).
- Pick the knife (pink square) from the inventory; use it to open the cupboard.
- Collect the chalk and the oil can.
- Zoom into the oven (purple circle).
- Pick up the scoop (purple square) from the inventory; use it to collect the ashes.
- Collect the ash filled scoop.
- Go to the foyer.
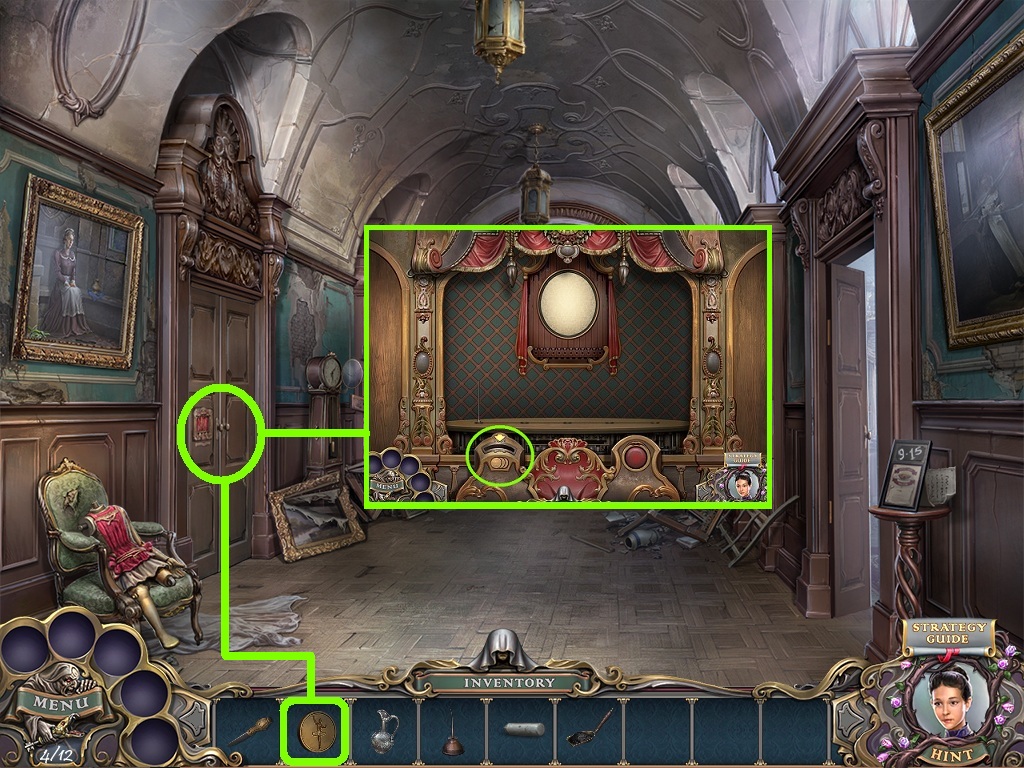
- Zoom into the door lock (green circle).
- Pick the coin (green square) from the inventory; slip it into the coin slot.
- Go to the fountain.
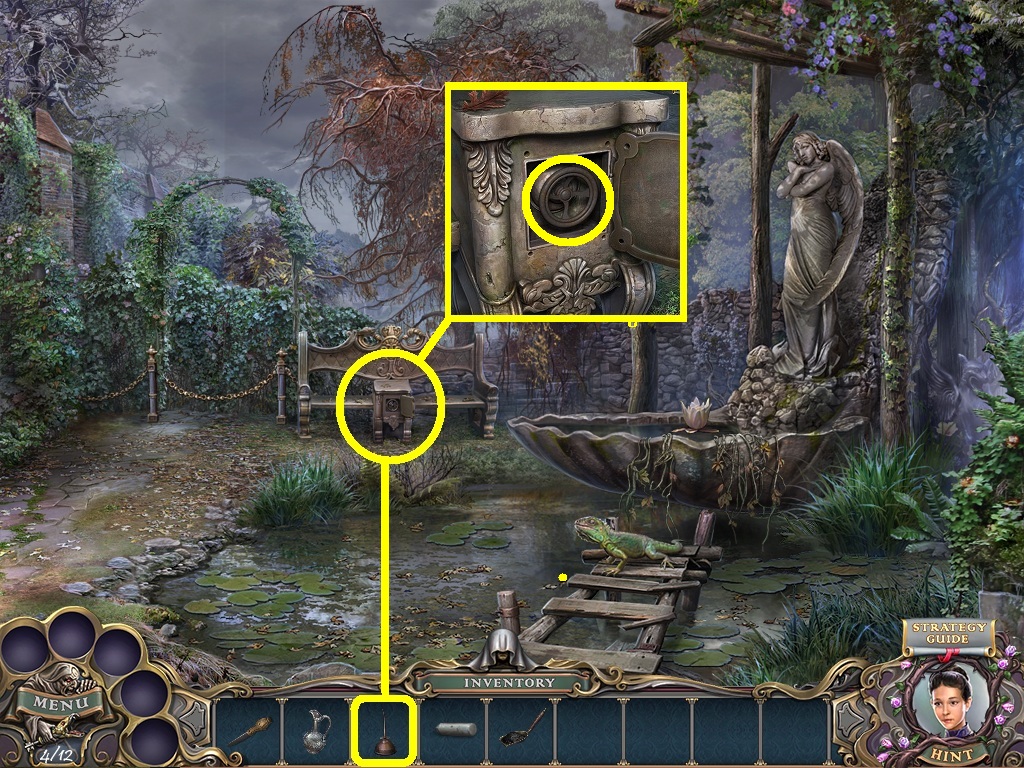
- Zoom into the fountain valve casing (yellow circle).
- Pick the oil can (yellow square) from the inventory; use it on the valve.
- Collect the valve.
- Go back to the kitchen.
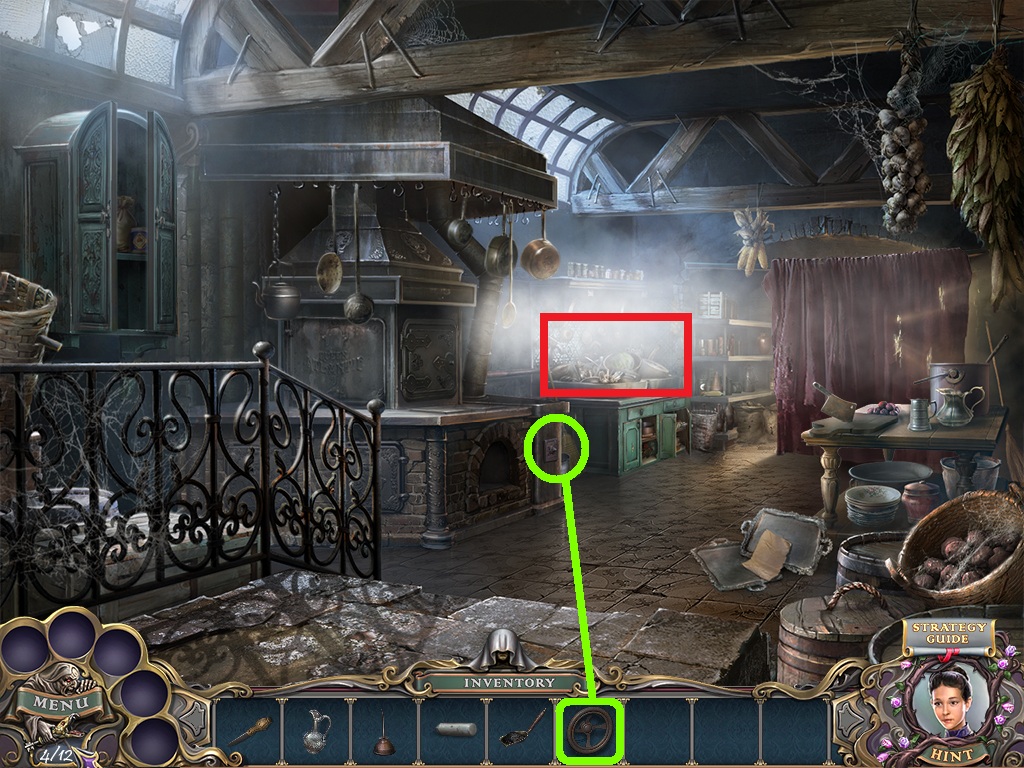
- Zoom into the oven (green circle).
- Pick the valve (green square) from the inventory; insert the valve.
- Go into the hidden object area (red square).
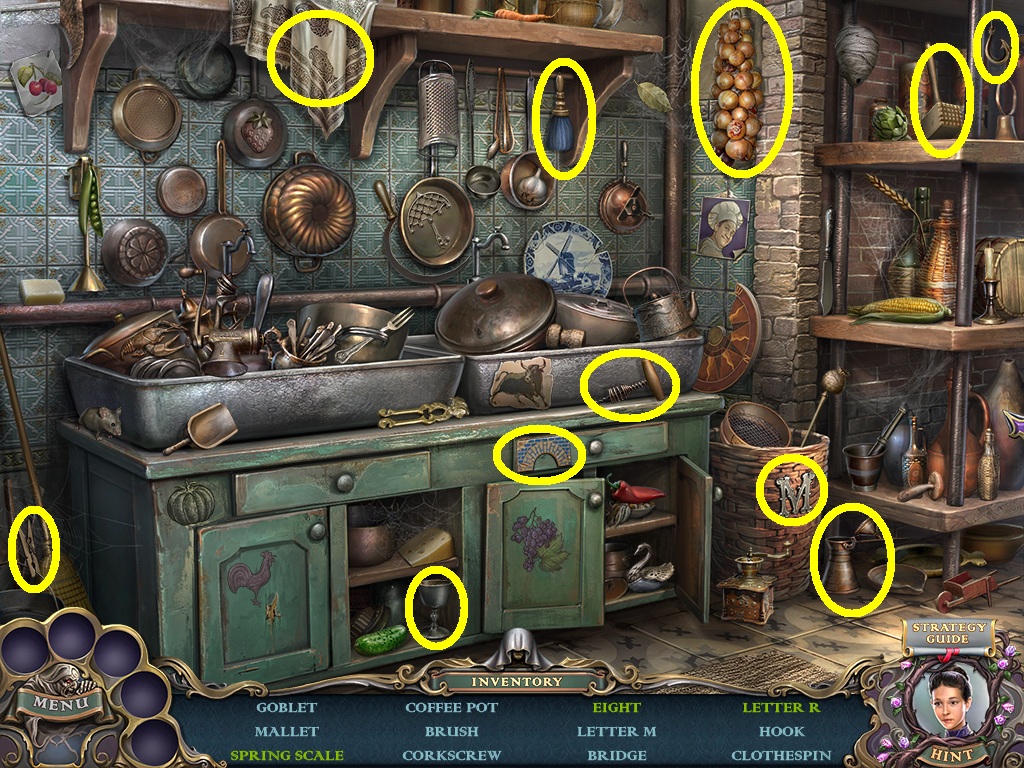
- Find all the listed items (yellow circles).
- Collect the brush.
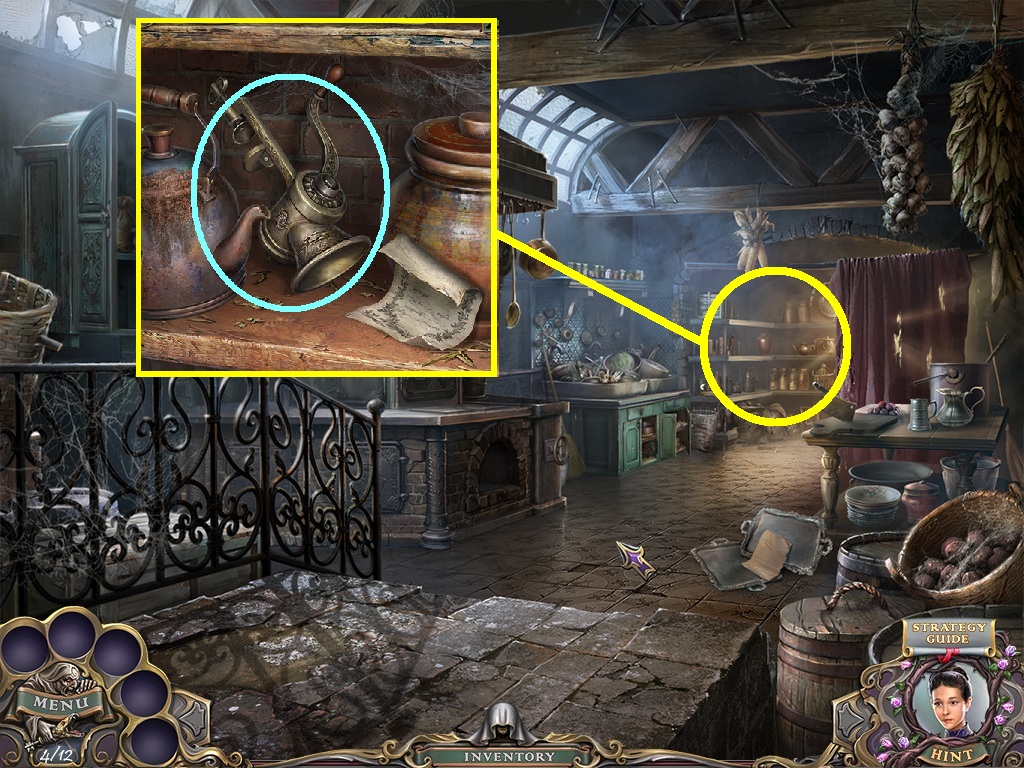
- Zoom into the shelf (yellow circle).
- Collect the handle (aqua circle) and read the note.
- Go to the classroom.
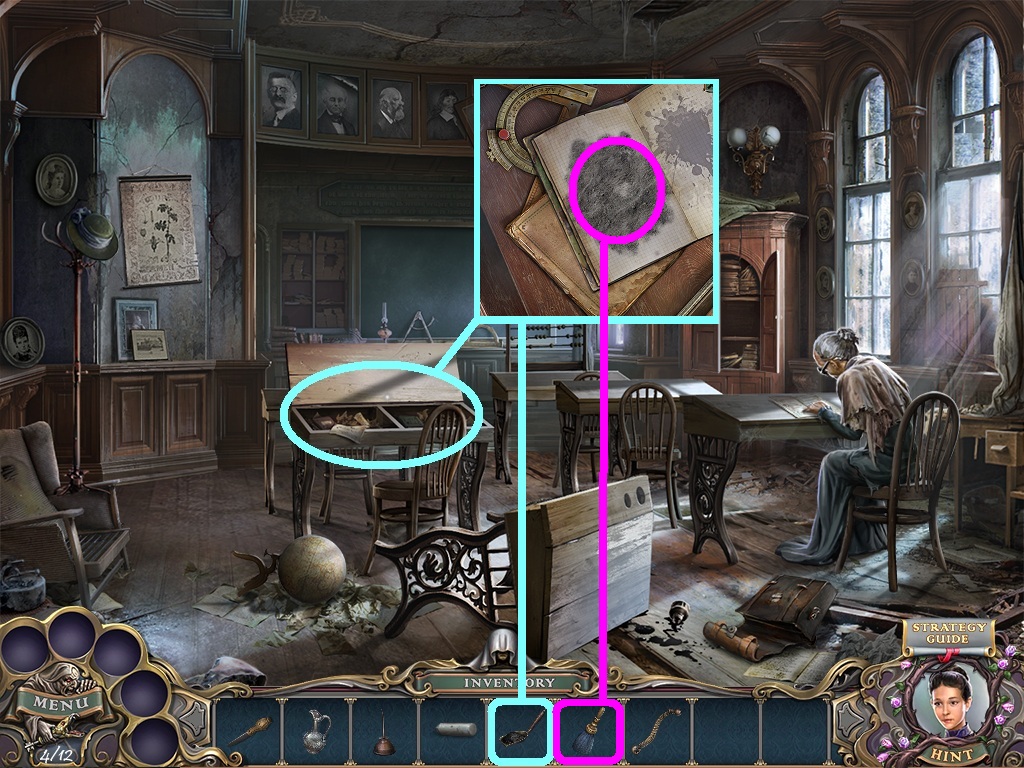
- Zoom into the desk (aqua circle).
- Pick the ash (aqua square) from the inventory; place it on the paper.
- Pick the brush (pink square) from the inventory; use it to brush away the ash.
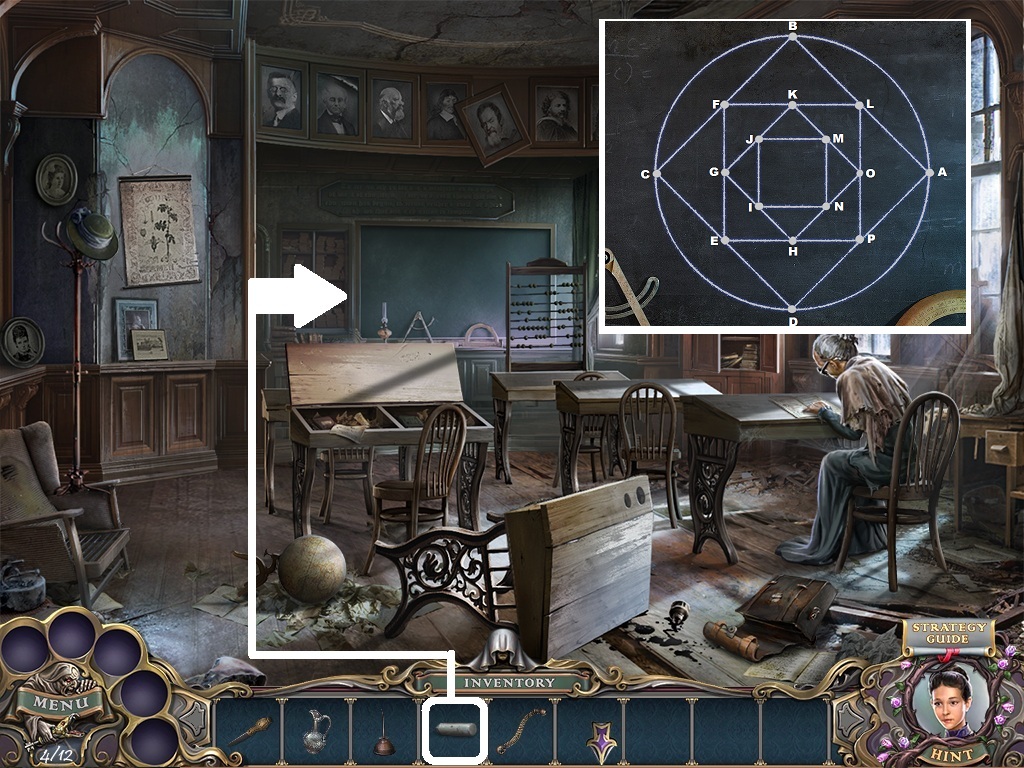
- Zoom into the chalkboard (white arrow).
- A puzzle will trigger.
- Pick the chalk (white square) from the inventory; use it to trace a pattern in the following sequence:
- A – B – C- D –E- C – F- G- E- H – I –G-J-K-F- B – L –K – M –J- I- N- M-O- N – H –P – O- L – A – P –D.
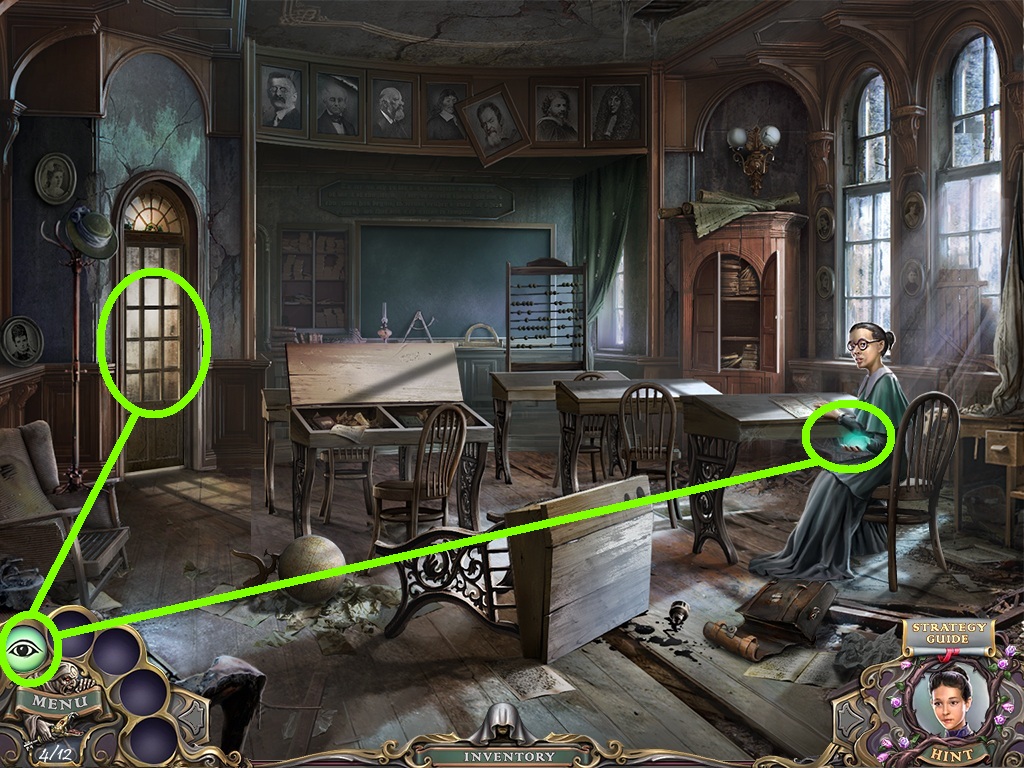
- Collect the power of revelation (green circle) from the woman.
- Click the reveal power button (green circle); use it on the wall to open up a hidden door (green circle).
- Go to the gazebo.
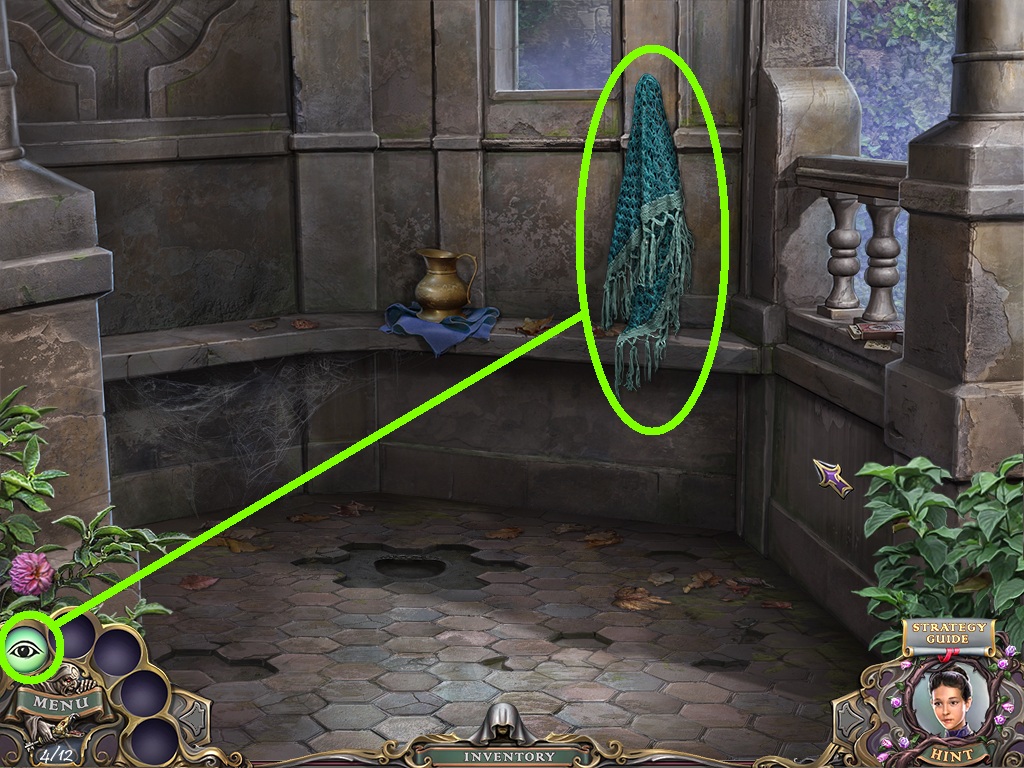
- Pick the power of revelation (green circle); use it to find the shawl (green circle).
- Collect the shawl.
- Go to the fountain.
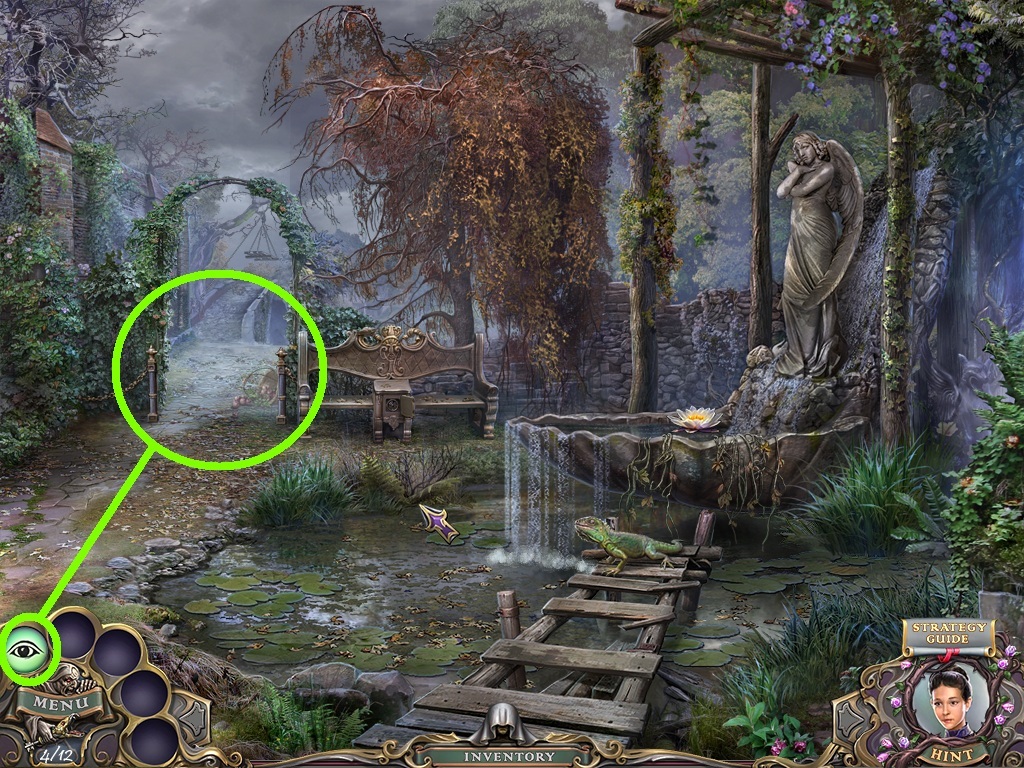
- Pick the power of revelation (green circle); use it on the overgrown path (green circle).
- Go to the bridge.
Comments will load when you reach this part of the walkthrough.