Chapter Seven: The Cursed Medallion
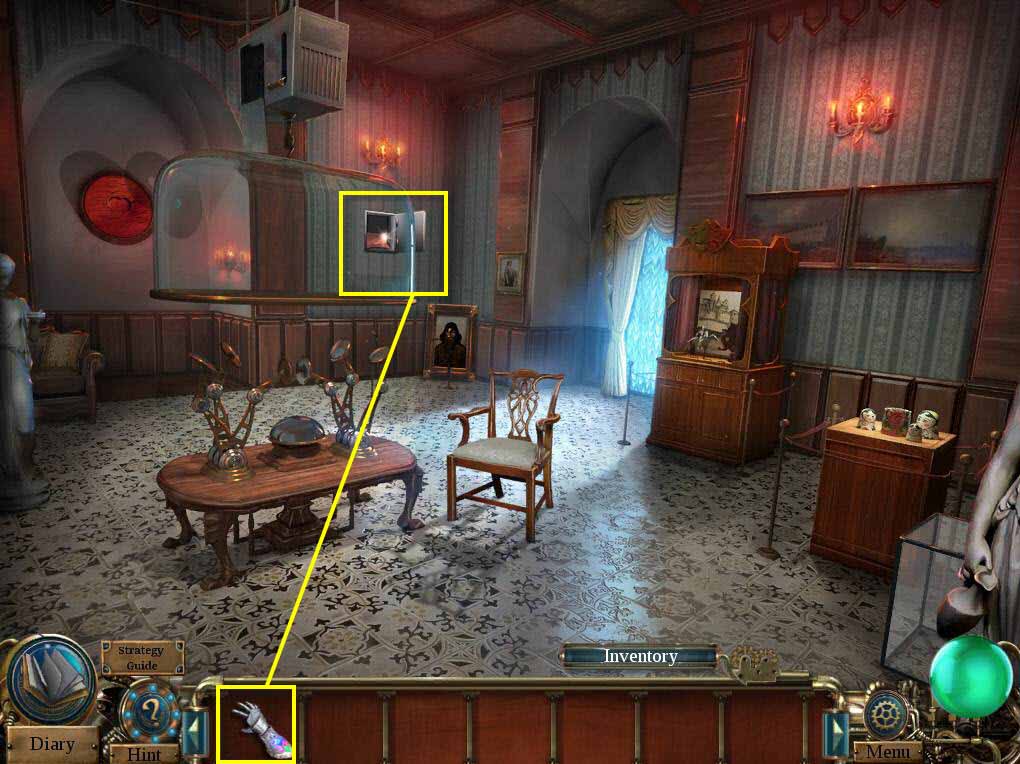
- Click on Michael to zoom in.
- Click on his pocket to open it.
- Take MICHAEL'S KNIFE.
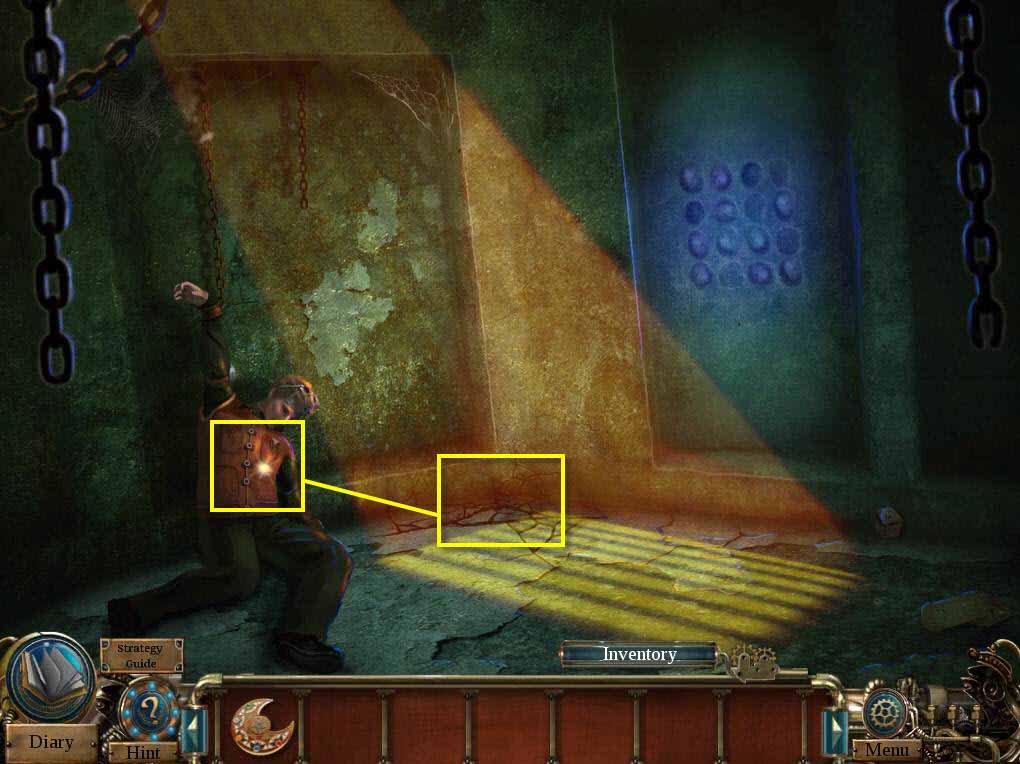
- Click on the floor to zoom in.
- Use MICHAEL'S KNIFE to break the crack.
- Click to move the rocks.
-
Take the LODESTONE.
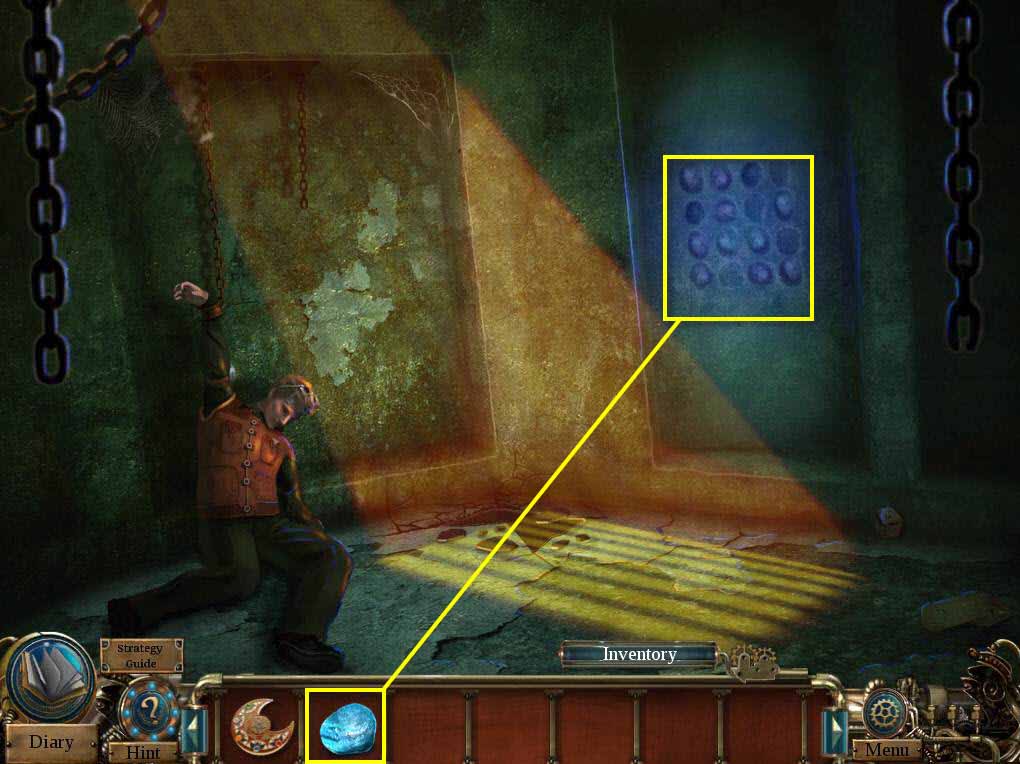
- Click to zoom in on the wall.
- Use the LODESTONE on the empty niche.
-
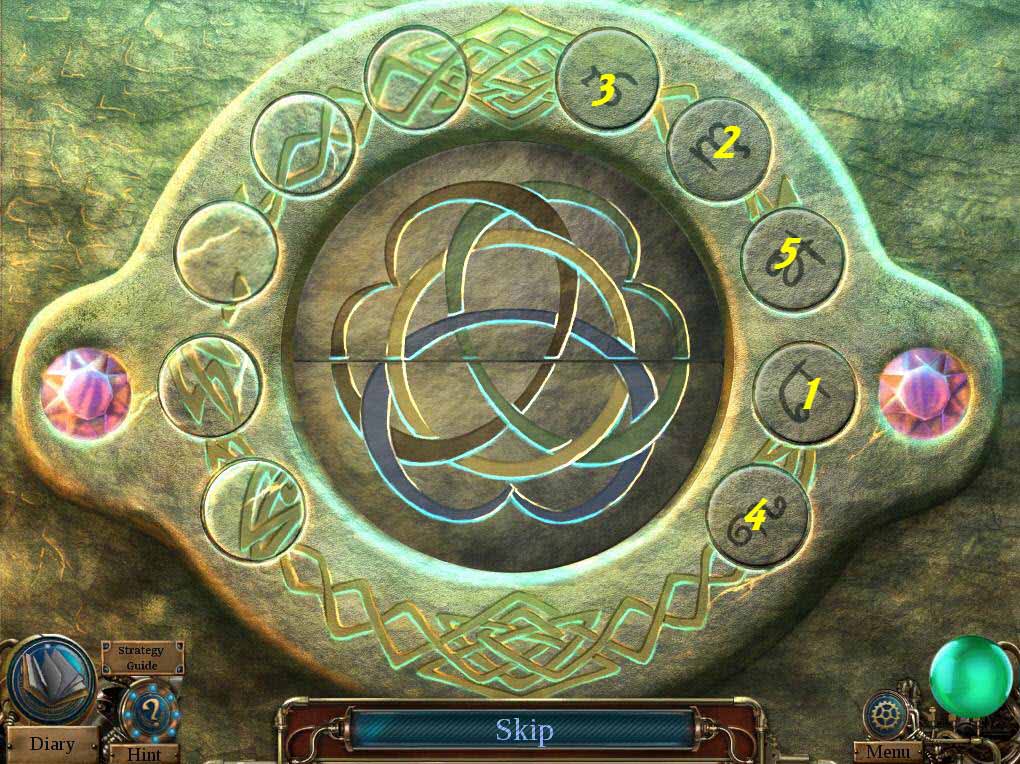
This will start a mini-game.
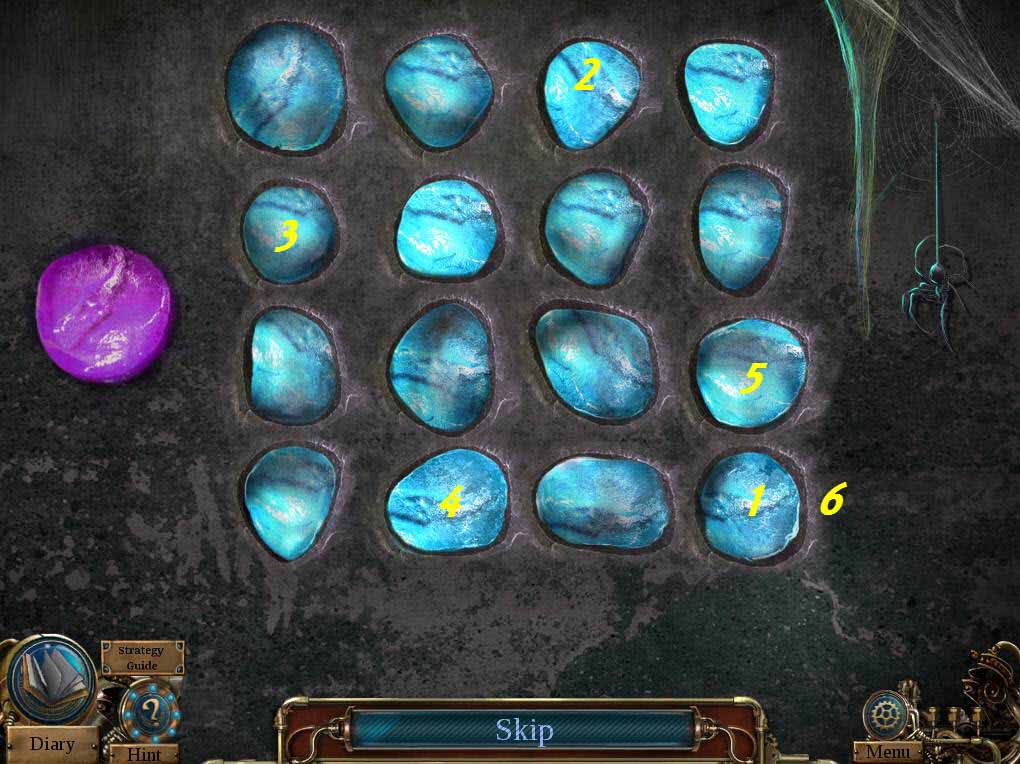
- The goal of the game is to click the stones in the right order.
- See the screenshot for the solution.
- When you're done, go forward.
- Watch the cut scene and then head to the right.
-
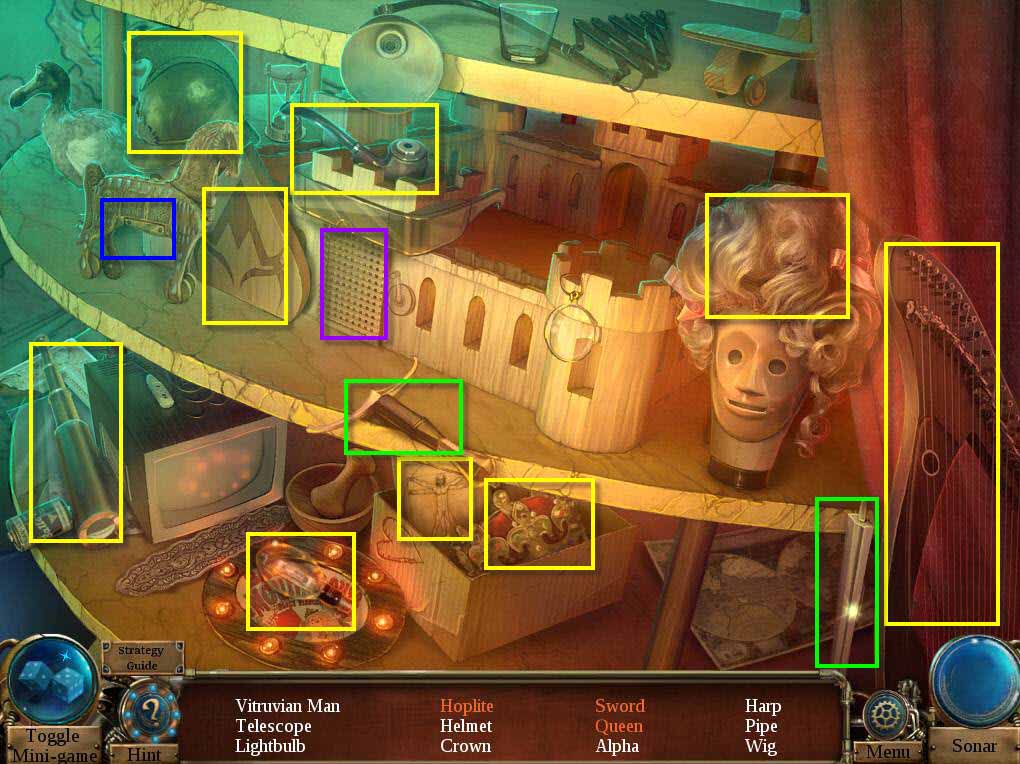
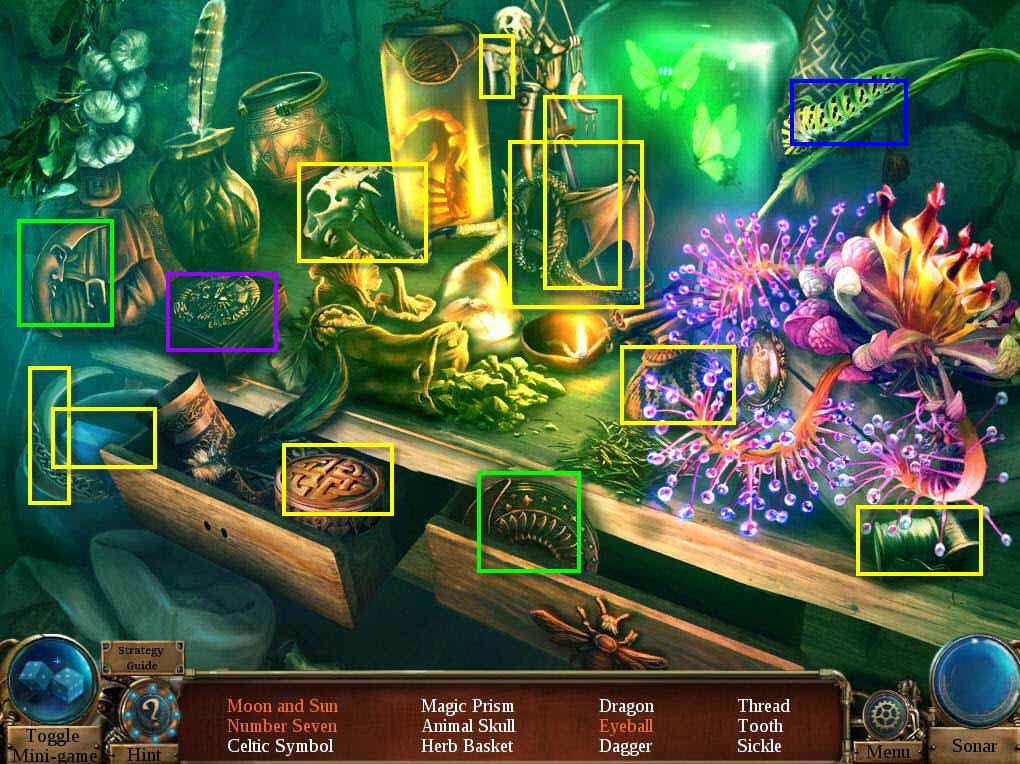
Click on the sparkles to play the HOS.
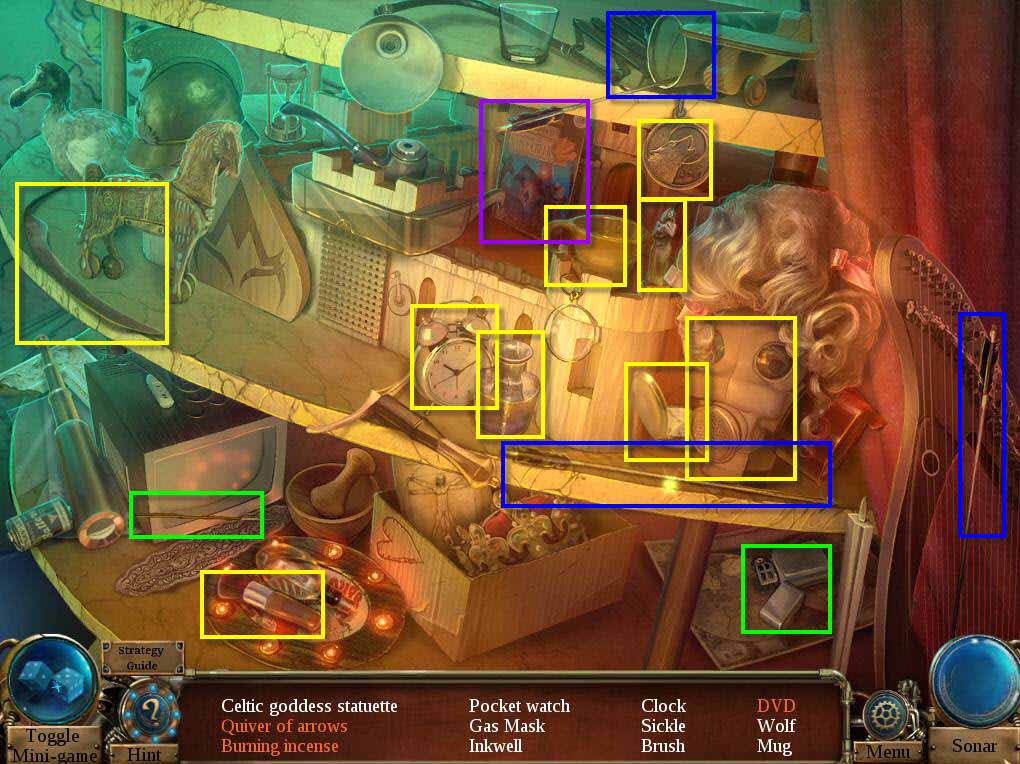
- Find all the items on the list.
- You will receive a CELTIC GODDESS STATUETTE.
-
Go back one screen.
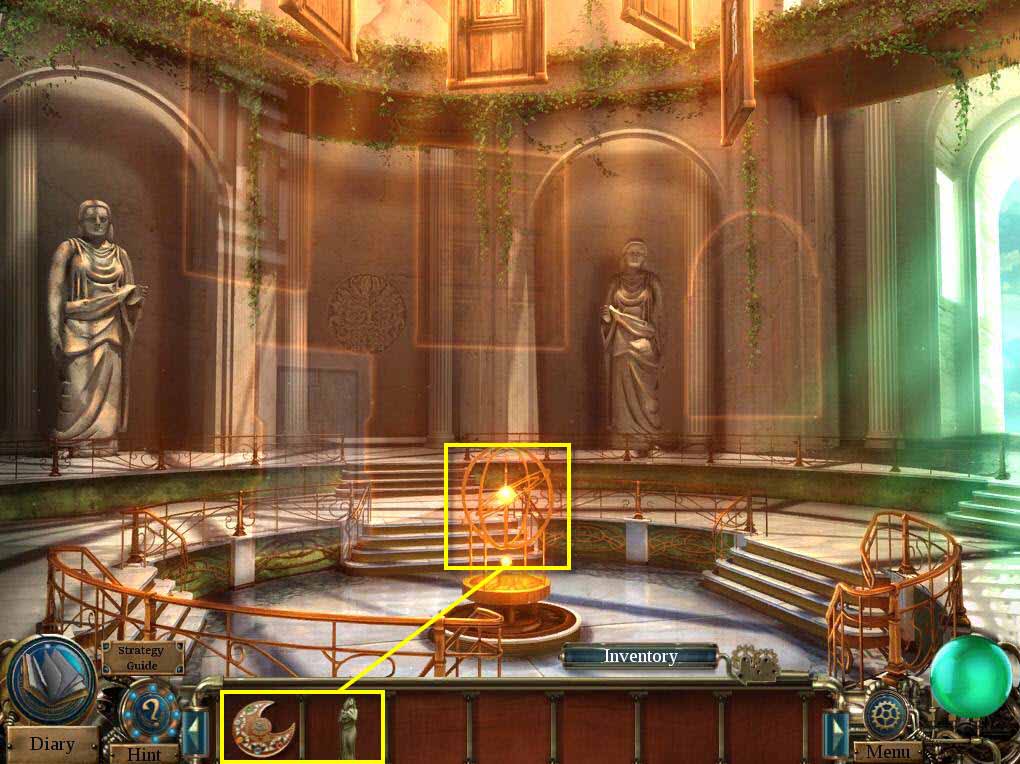
- Click on the globe to zoom in.
- Use the MEDALLION on the empty slot.
- Use the CELTIC GODDESS STATUETTE.
- Go through the door to the Celtic Times.
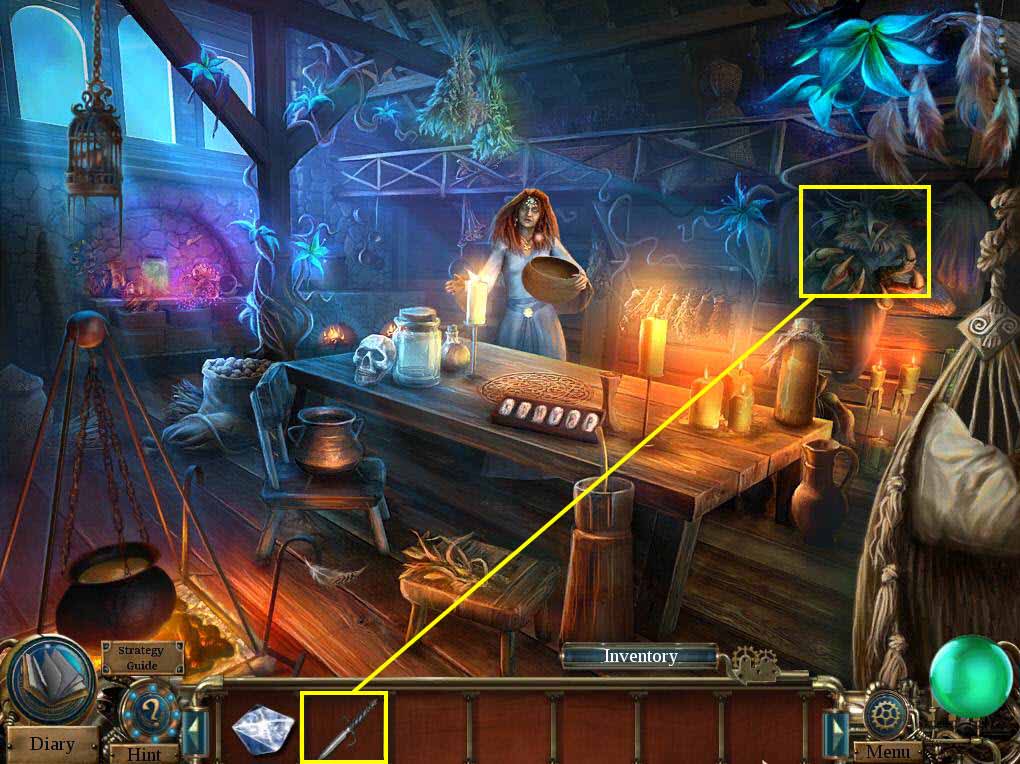
- Enter Merlin's Hut.
- Click on Nimue to talk to her.
-
Click on the sparkles to play the HOS.
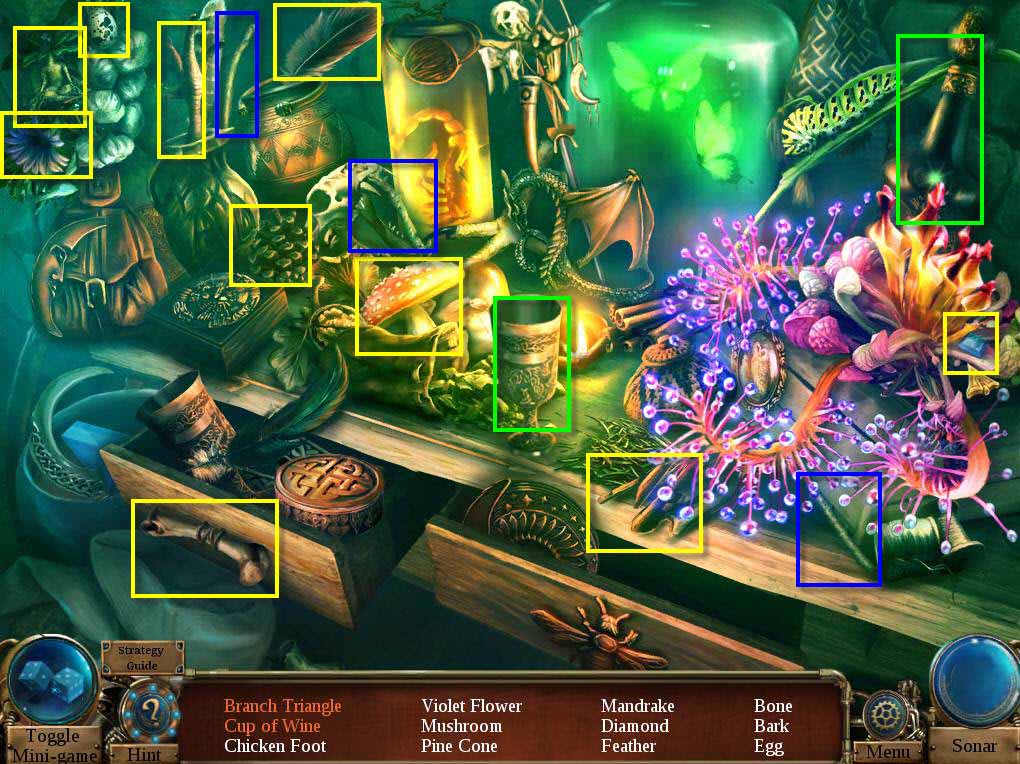
- Find all the items on the list.
- You will receive the DIAMOND.
- Click on Merlin's Crystal Ball.
-
Go back to the Time Museum Chamber.
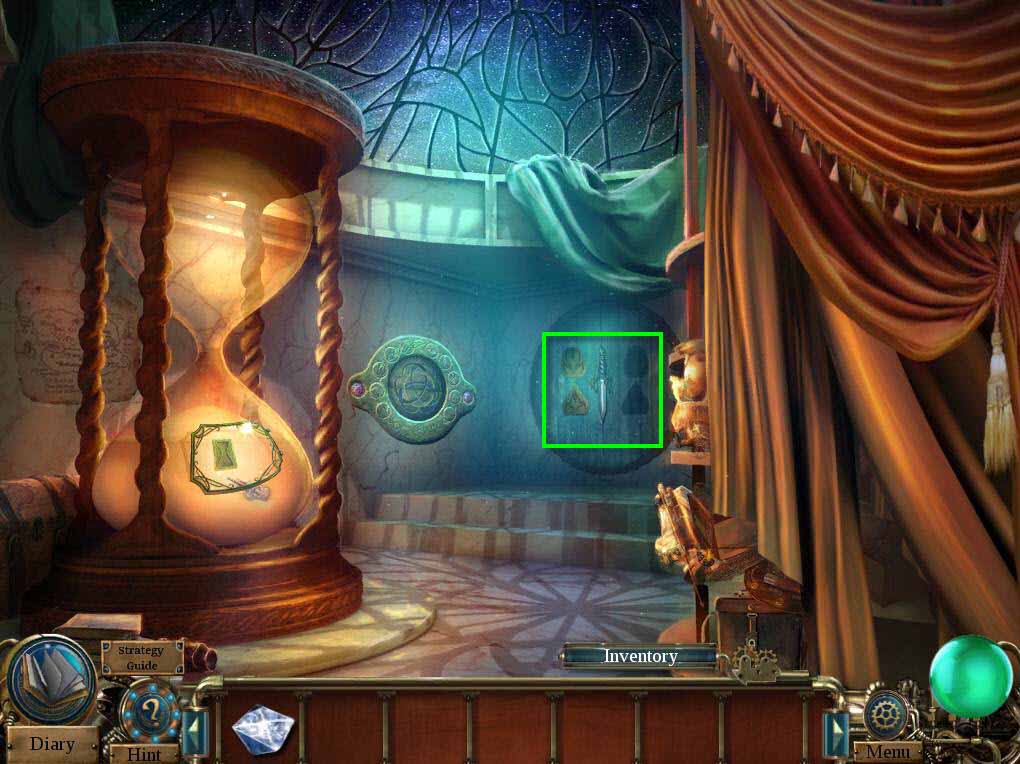
- Click on the wall to zoom in.
- Take the CELTIC DAGGER.
- Go back one screen.
- Go to the Celtic Times.
-
Enter the hut.
- Click on the creature on the right to zoom in.
- Use the CELTIC DAGGER on the container.
- Take the CHEST TOKEN.
- Go back to the Time Museum Chamber.
-
Click on the sparkles to play the HOS.
- Find all the items on the list.
-
You will receive the ALPHA.
- Click on the token panel to zoom in.
- Use the CHEST TOKEN on the slot.
-
This will start a mini-game.
- This puzzle has three sections to it.
-
In the first part, you need to click the buttons on the right in the correct order.
- In the second part, you need to move the times to the correct places.
- And finally, you need to rotate the parts to create the picture.
-
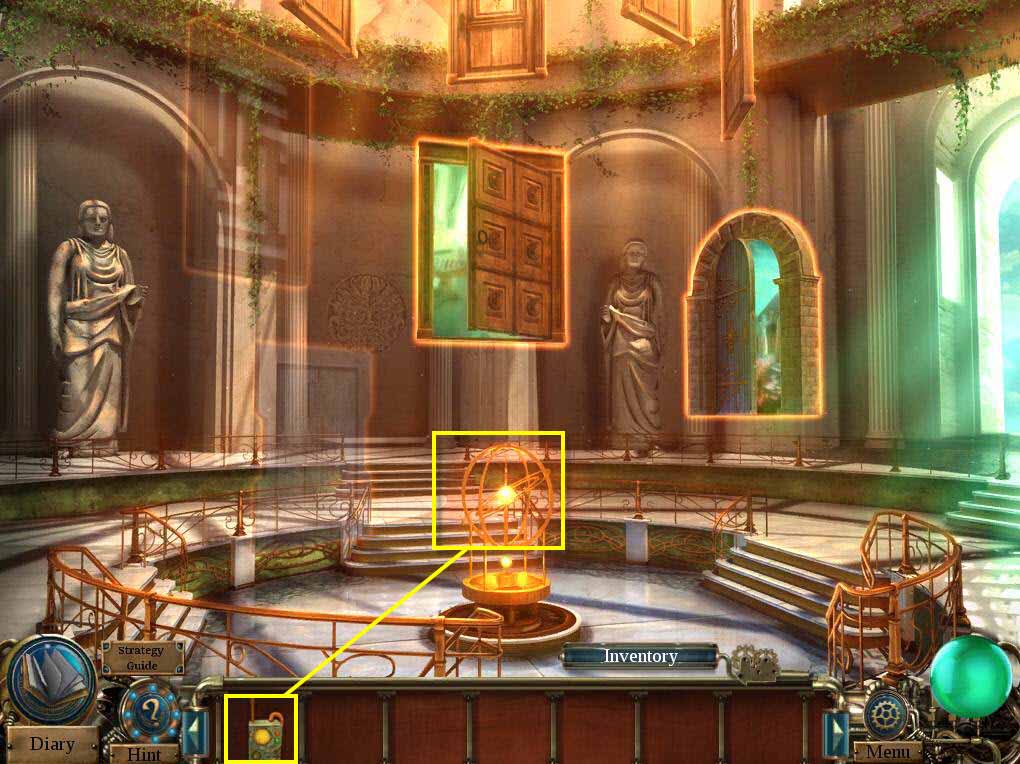
Take the OMEGA.
- Click on the wall to zoom in.
- Use the ALPHA and the OMEGA on the slots.
- Click on the box on the top shelf to open it.
- Take the handle and use i ton the box on the bottom shelf.
- Click to turn the handle.
- Take the sword from the jack-in-the-box.
- Use it on the slot in the stone.
- Take the key and use it on the box on the middle shelf.
-
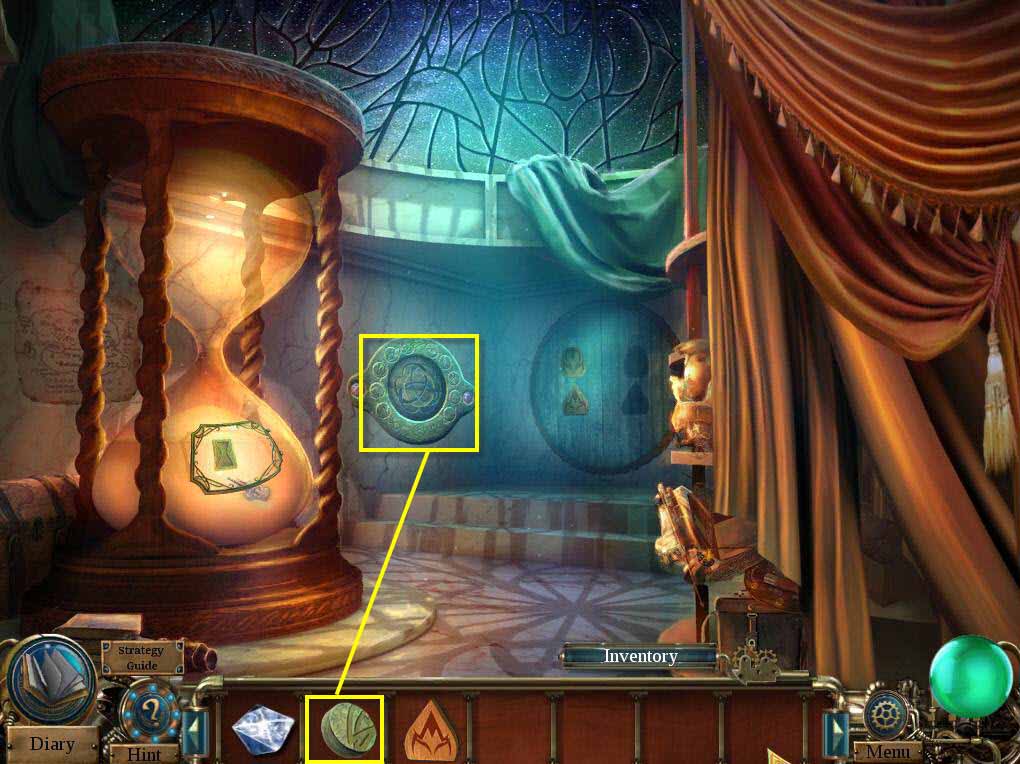
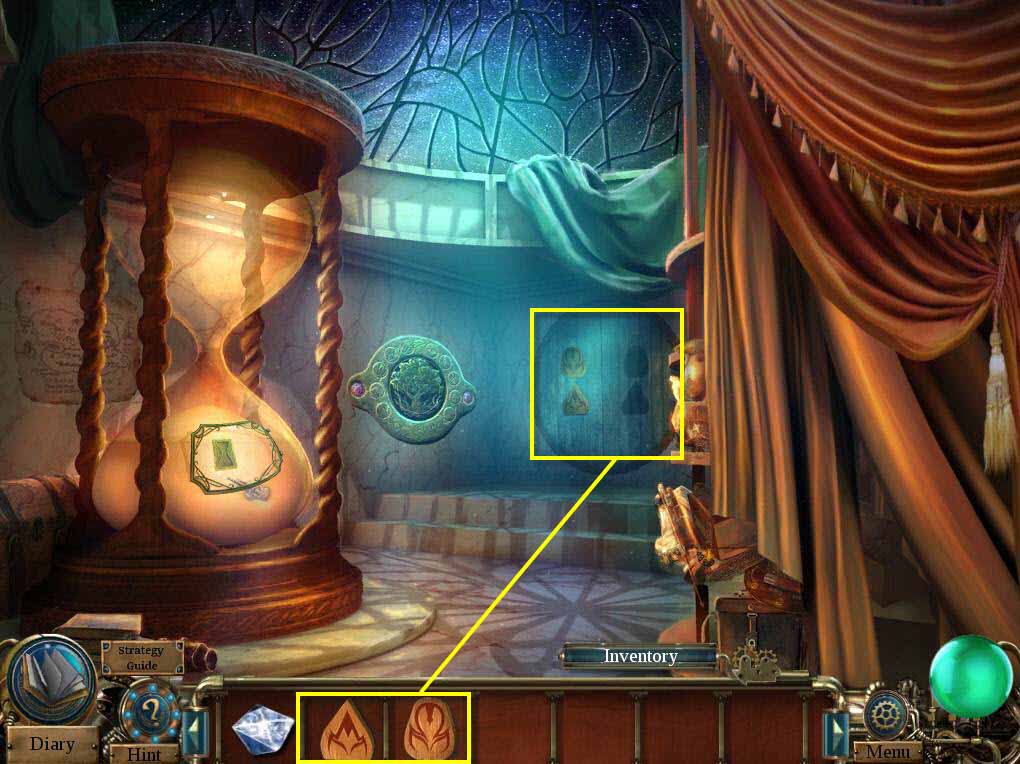
Take the HOURGLASS TOKEN.

- Click on the hourglass to zoom in.
- Use the HOURGLASS TOKEN on the empty slot.
- Click to open the panel.
- Take the MOSCOW CHURCH FIGURINE.
-
Go back one screen.
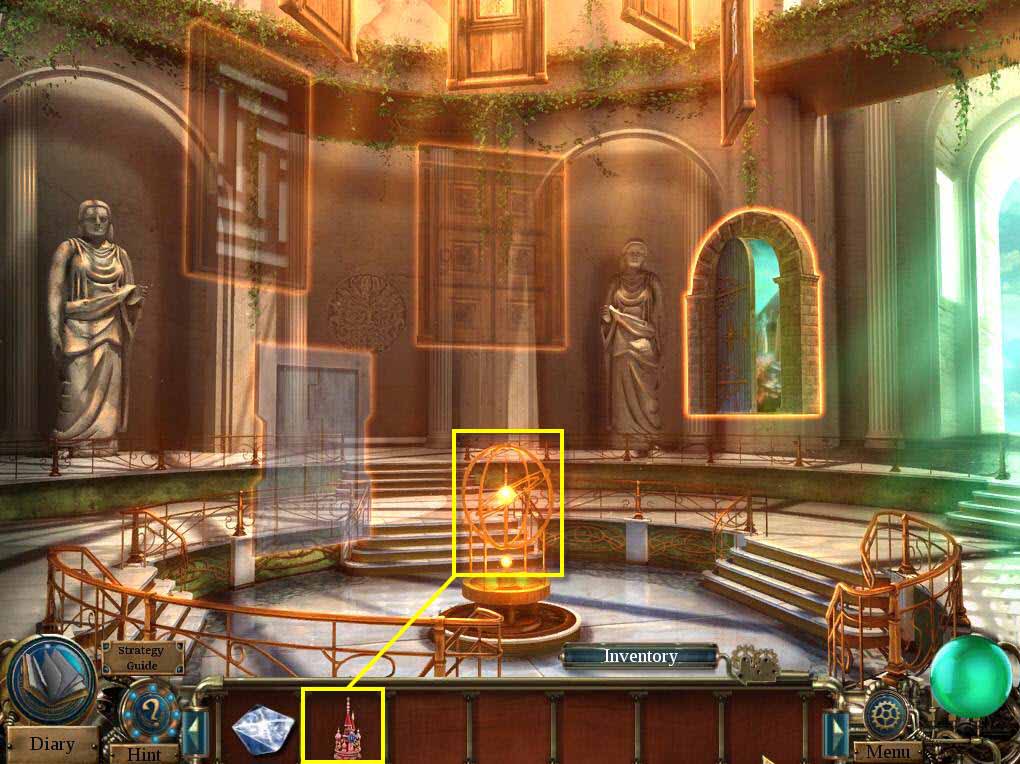
- Click to zoom into the globe.
- Use the MOSCOW CHURCH FIGURINE.
-
Go to Moscow 1913.
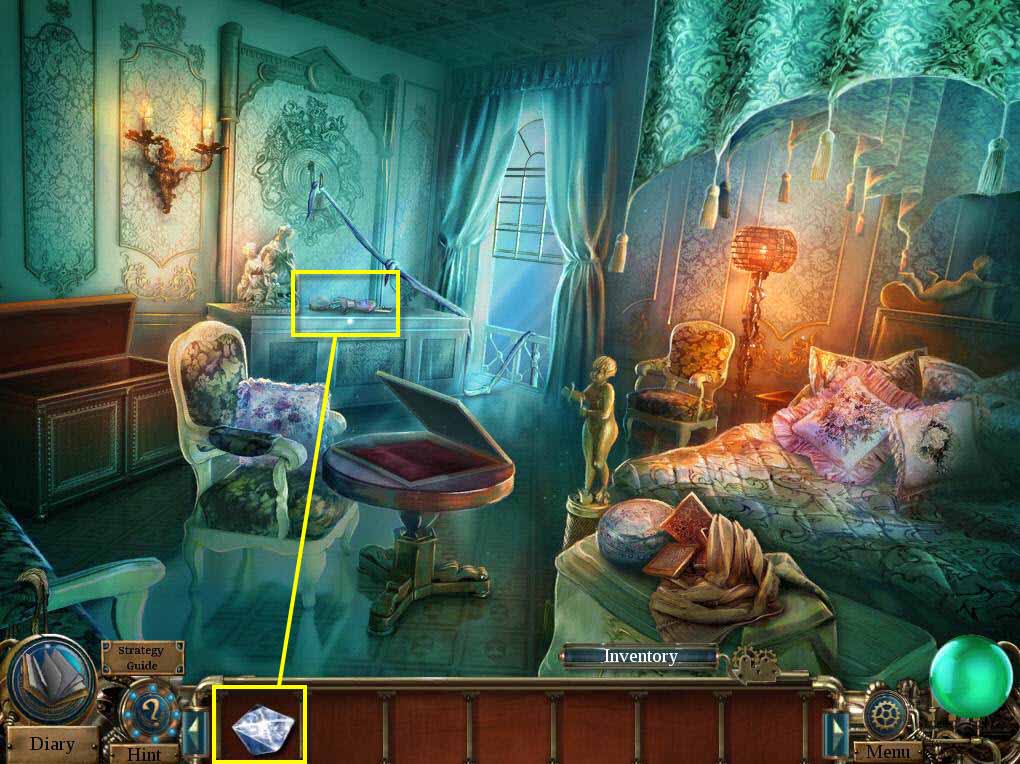
- Click to zoom in on the dresser.
- Use the DIAMOND on the slot.
- Take the MAGIC GLOVE.
-
Go back one screen and then go to the showroom.
- Click to zoom in on the safe.
- Use the MAGIC GLOVE to take the CURSED MEDALLION.
- Go back to the Time Museum.
-
Go to the Celtic Times and enter the hut.

- Click on the table to zoom in.
- Use the CURSED MEDALLION on the table.
-
Zoom out and then click on the sparkles to play the HOS.
- Find all the items on the list.
-
You will receive the PRISM.

- Click on the table to zoom in.
- Use the PRISM on the table.
-
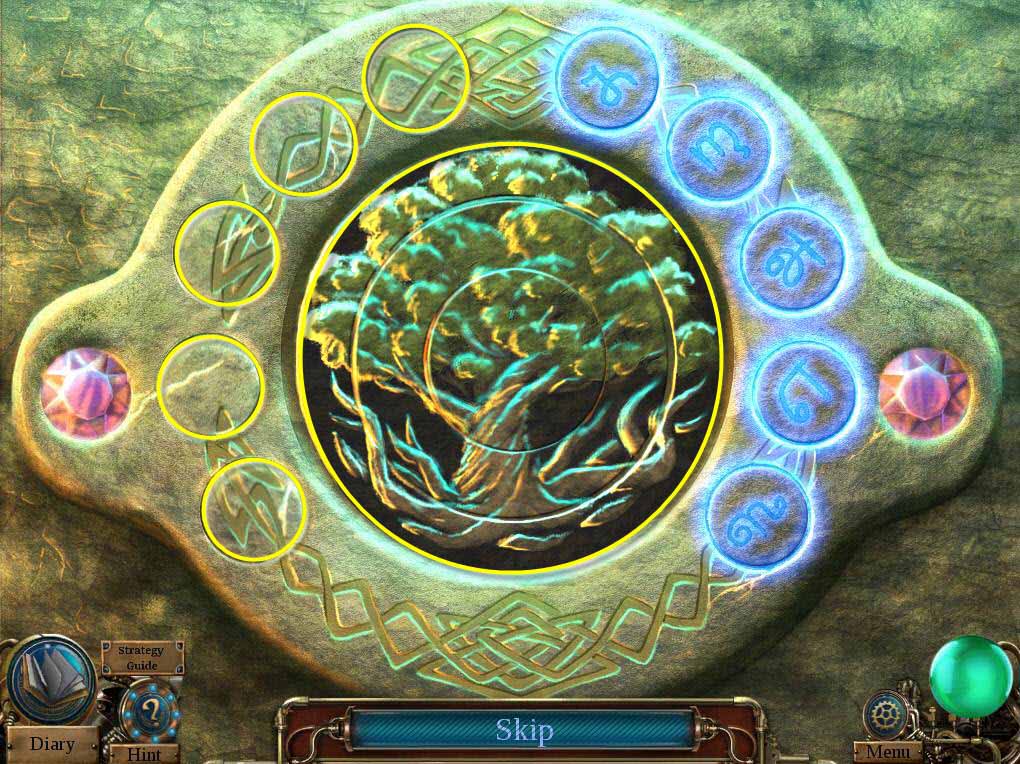
This will start a mini-game.
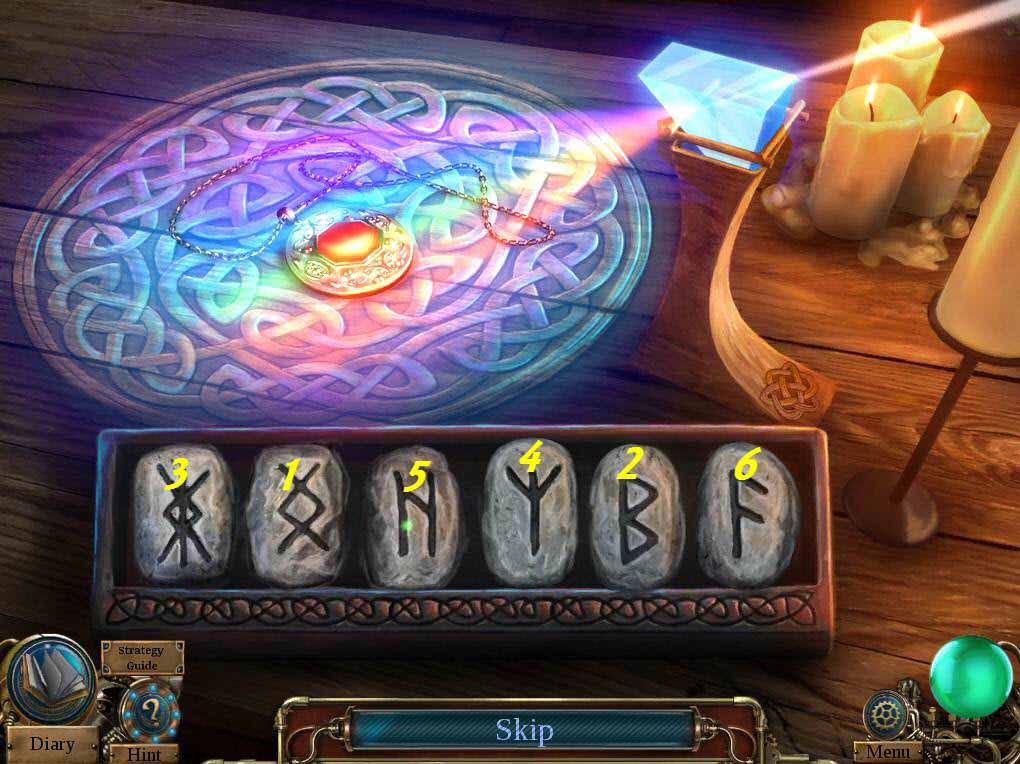
- The goal of the game is to click on the stones in the right order.
- See the screenshot for the solution.
- Click on Nimue to talk to her.
- Return to the Time Museum.
- Go to Moscow in 1913.
-
Click on the sparkles to play the HOS.

- Find all the items on the list.
- You will receive the COMMUNICATOR.
-
Return to the Time Museum Hall.
- Click on the globe to zoom in.
- Use the COMMUNICATOR.
-
Go to the future.
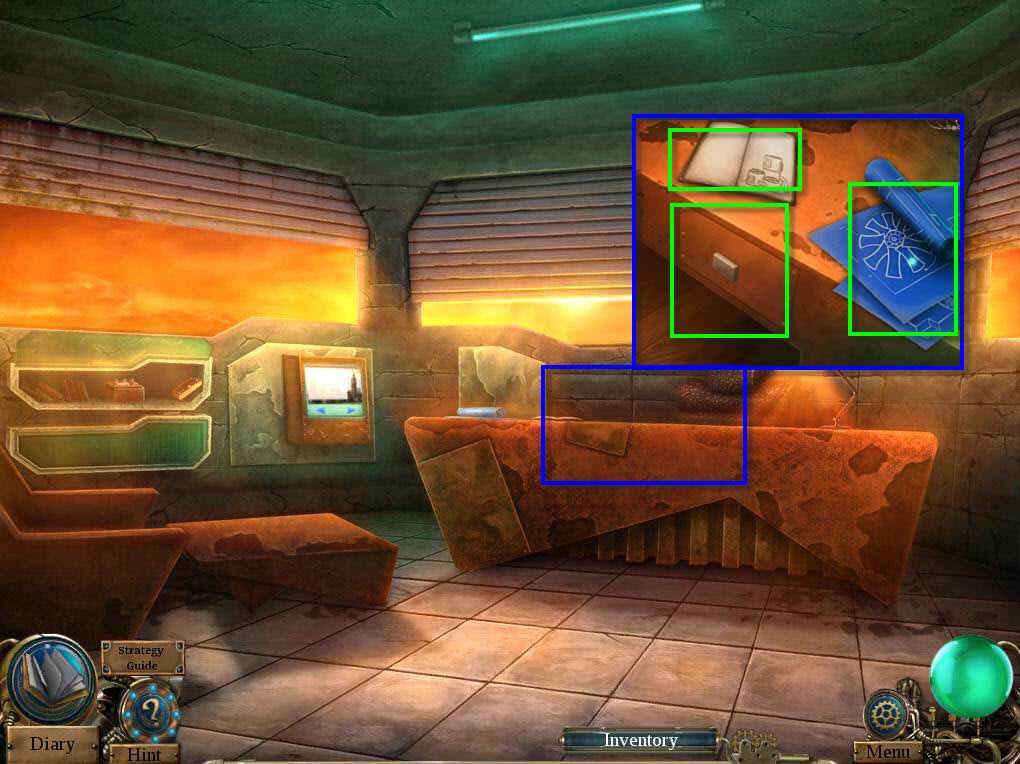
- Click on the desk to zoom in.
- Click to open the drawer.
- Read the note and take the BLUEPRINTS and the OLD BOOK.
-
Return to the Time Museum.
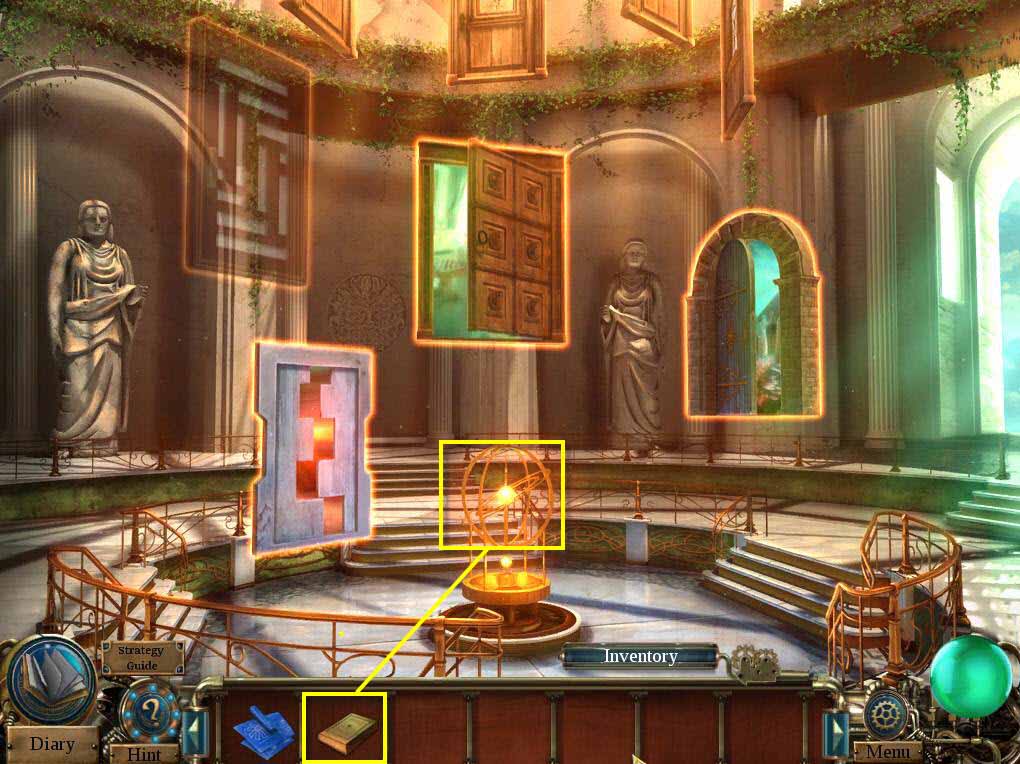
- Click on the globe to zoom in.
- Use the OLD BOOK.
-
Go to the Unknown Times.
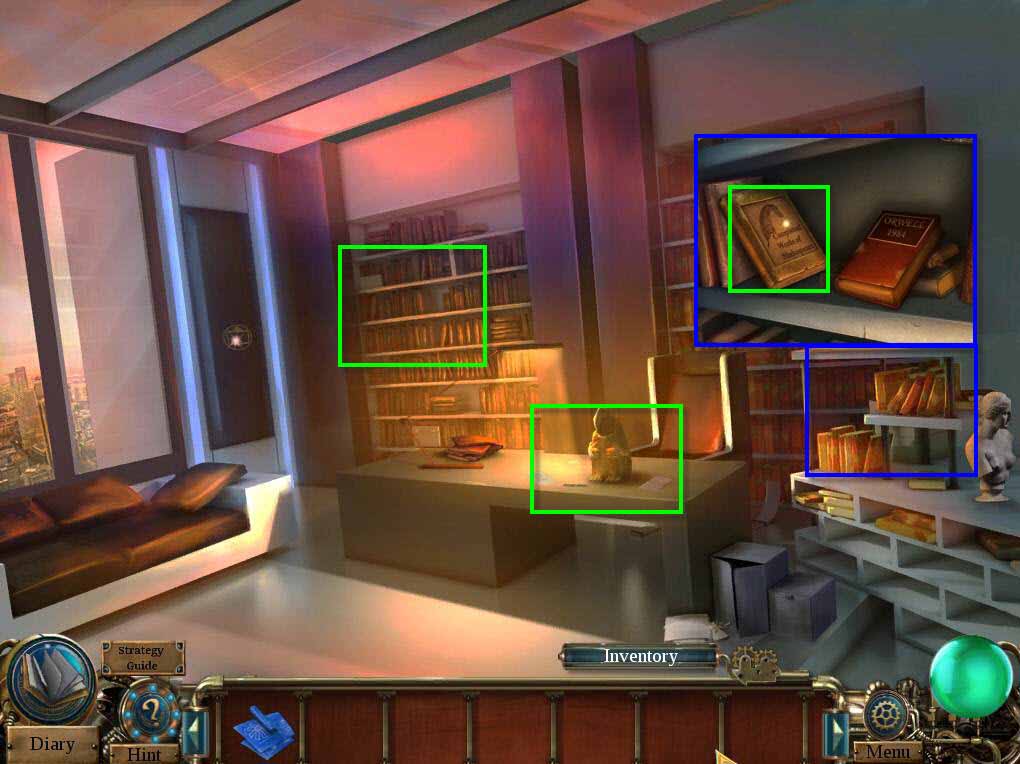
- Click on the desk to zoom in.
- Read the notes.
- Click on the bookshelf on the right to zoom in.
- Click on the Shakespeare book.
- Take the GARGOYLE HEAD.
- Click on the bookshelf on the left to zoom in.
-
This will start a mini-game.
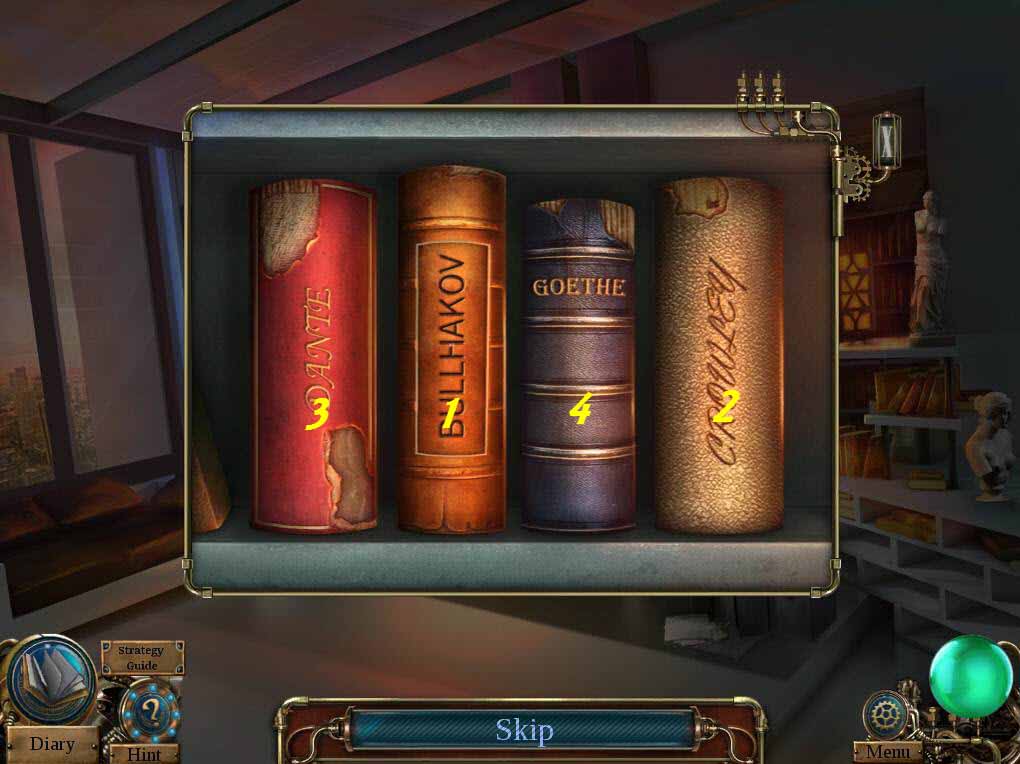
- The goal of the game is to click on the books in the right order.
-
See the screenshot for the solution.
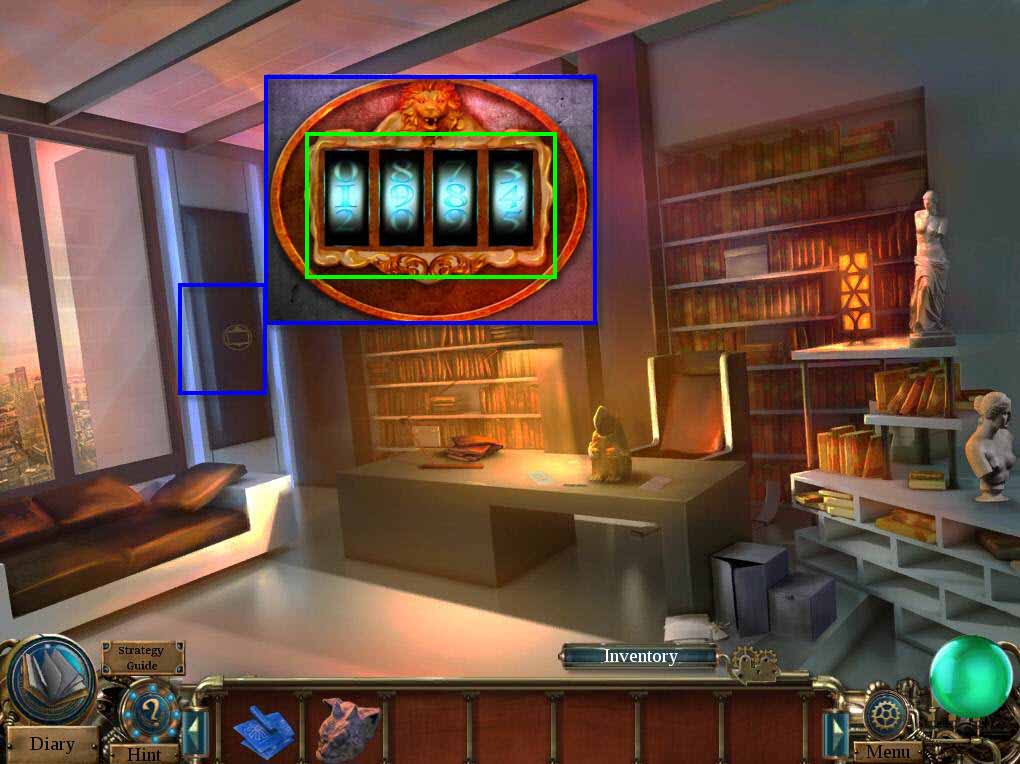
- Click to zoom in on the door.
- Use the code 1984.
-
Click on the sparkles to play the HOS.
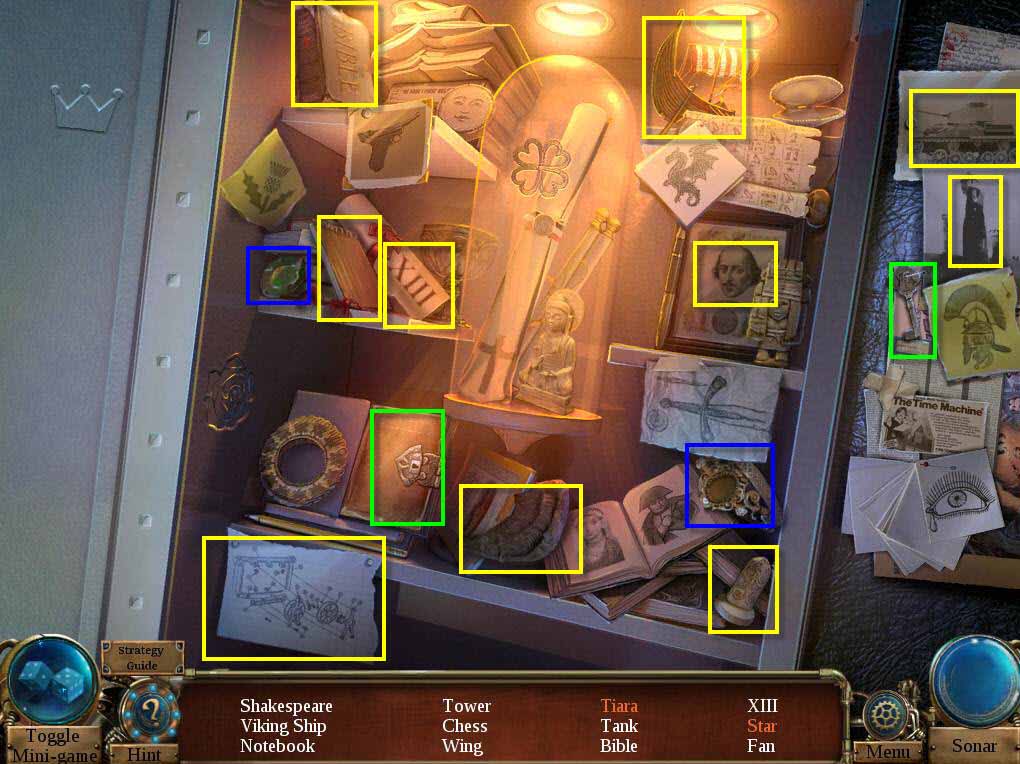
- Find all the items on the list.
-
You will receive the GARGOYLE WING.
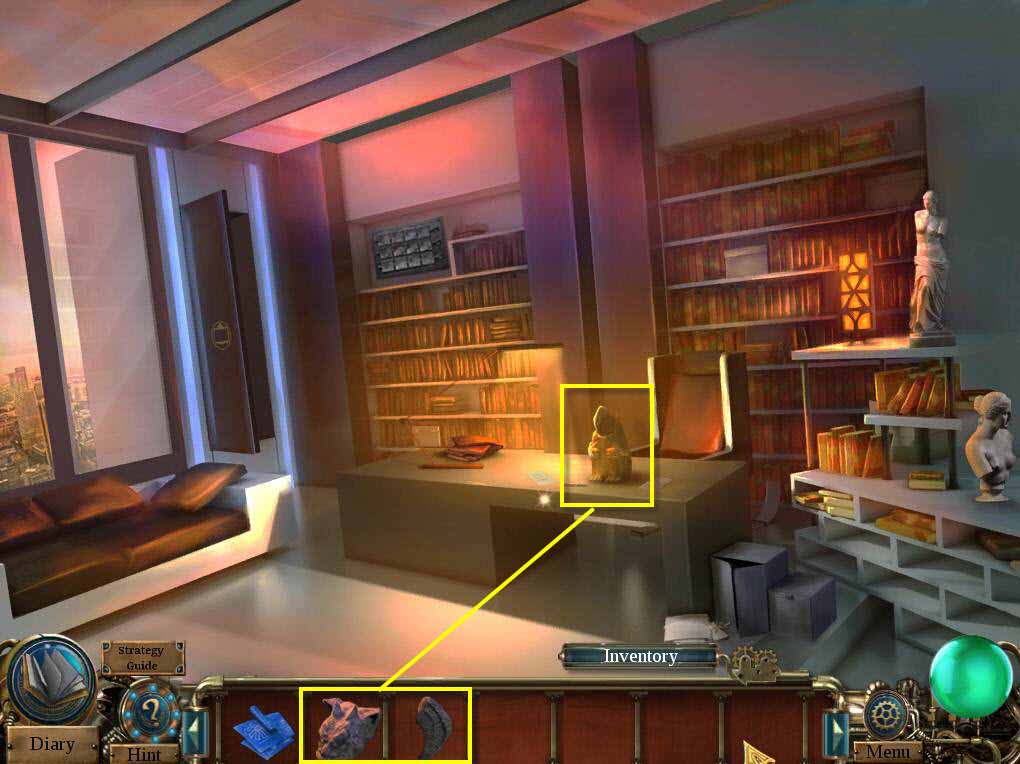
- Click to zoom in on the desk.
- Use the GARGOYLE HEAD and the GARGOYLE WING.
-
Take the STORY PUZZLE.
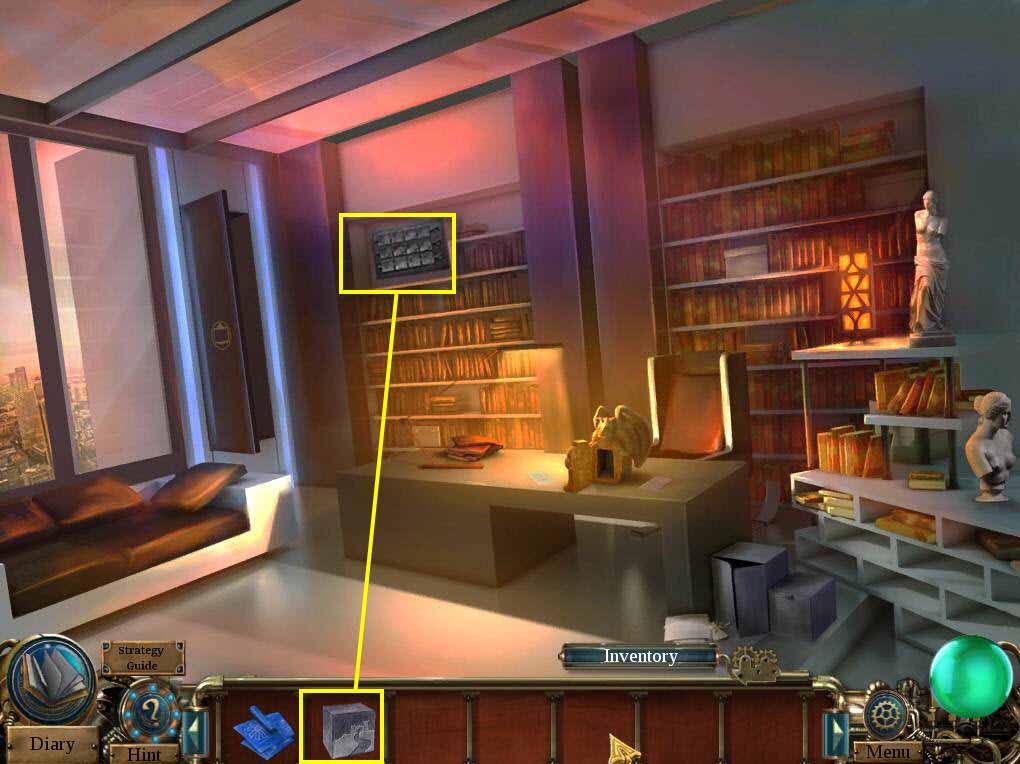
- Click on the wall to zoom in.
- Use the STORY PUZZLE on the board.
-
This will start a mini-game.
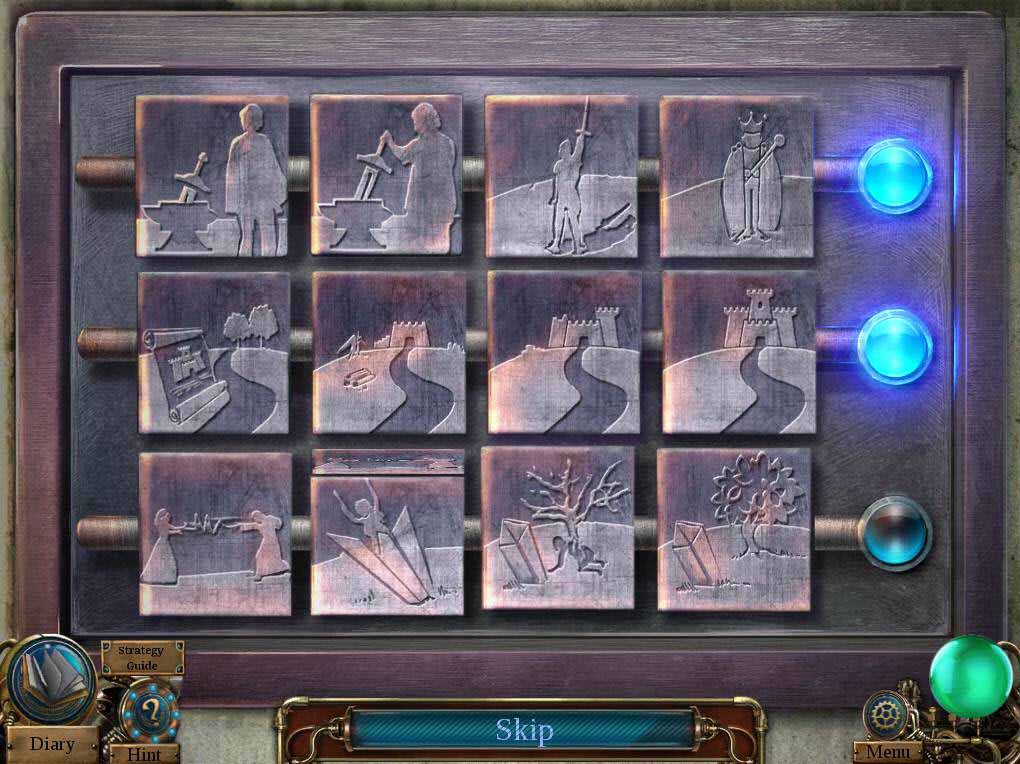
- The goal of the game is to turn the cubes to recreate the story.
-
See the screenshot for the solution.
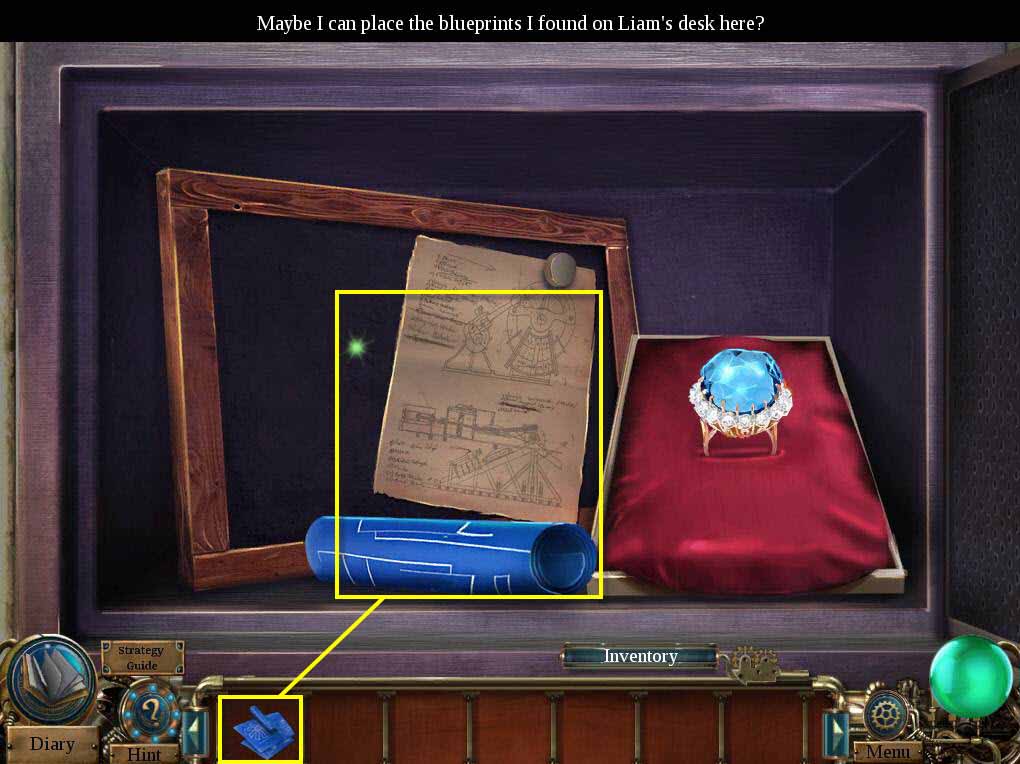
- Use the BLUEPRINTS on the diagram.
Congratulations! You've completed Time Mysteries: The Final Enigma!
Comments will load when you reach this part of the walkthrough.