

Chapter Six: The Garden
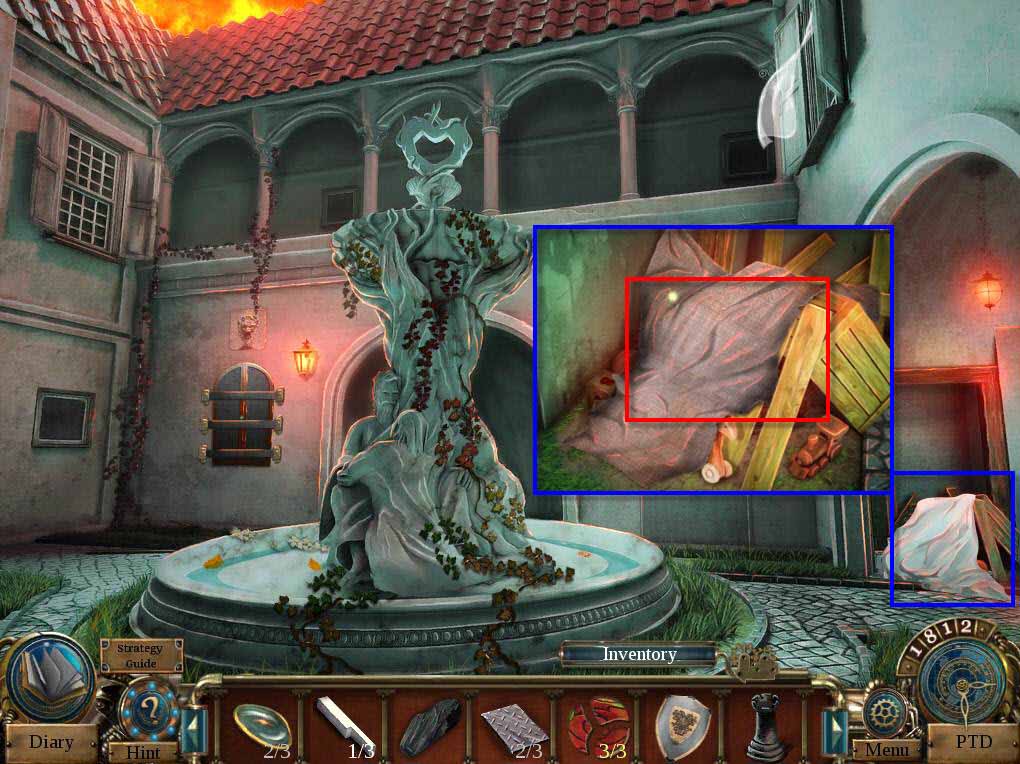
- Click on the blanket to zoom in.
- Click to remove the blanket.
- Click to move the planks.
-
Take the 2/3 PIANO KEY.
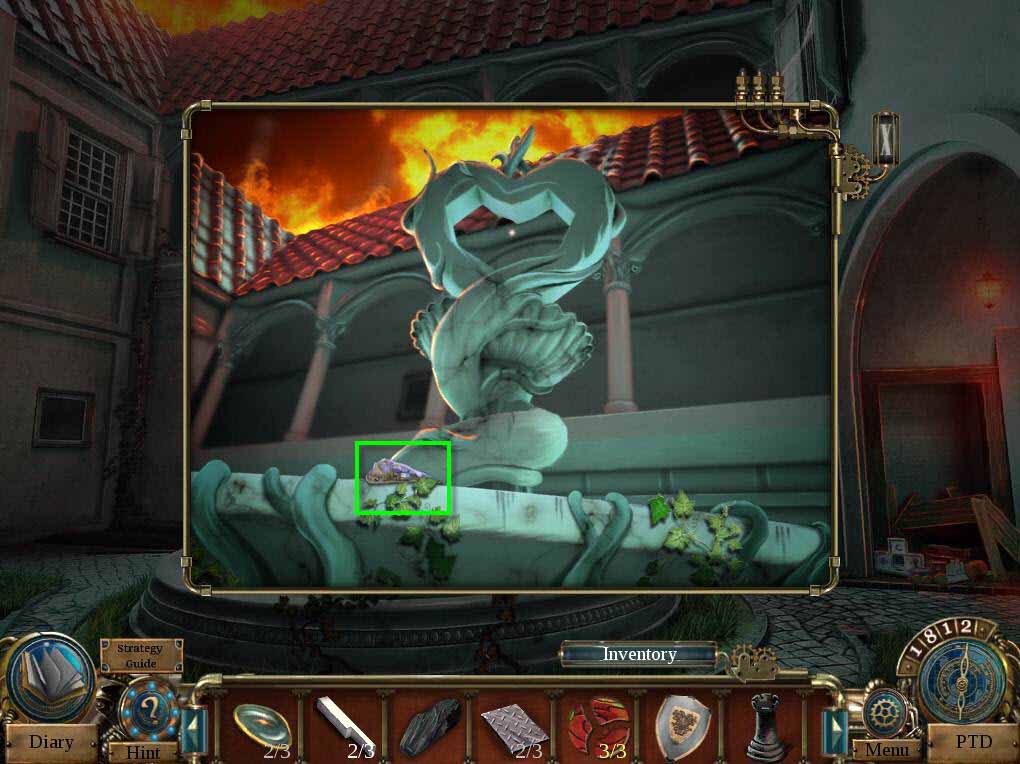
- Click on the fountain to zoom in.
- Take the GUARD PLATE.
- Click on the niche with the statues to zoom in.
-
This will start a mini-game.
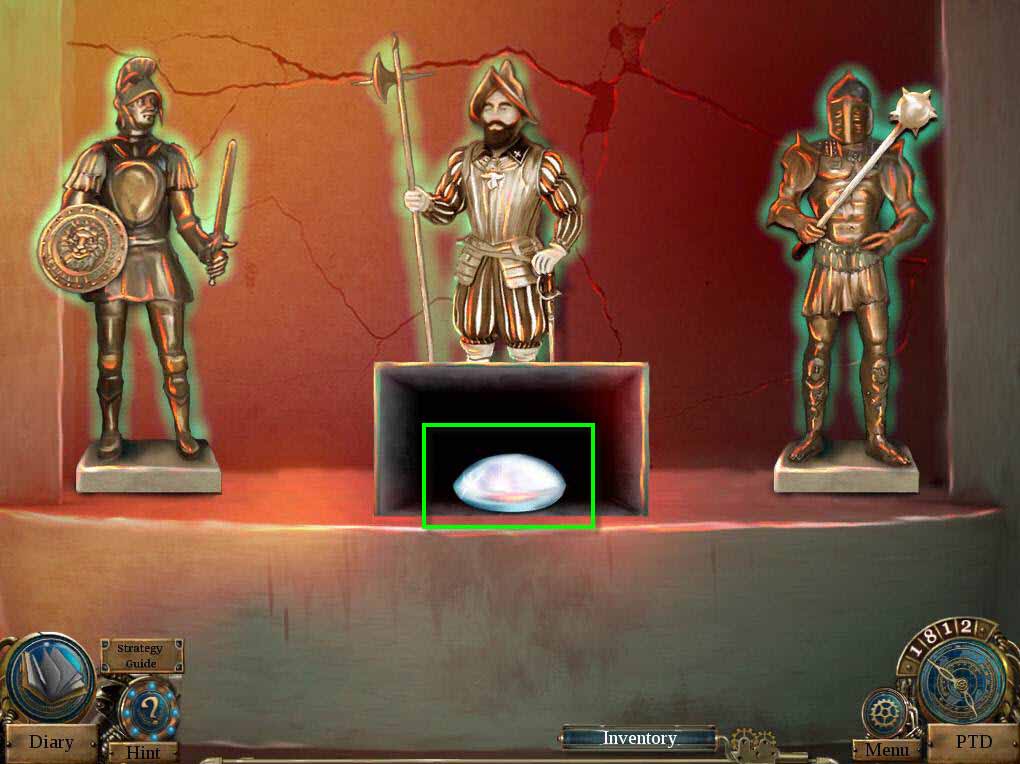
- The goal of the game is to move the weapons and the heads of the statues to find the correct poses.
- See the screenshot for the solution.
- Take the LENS.
-
Go back two screens.
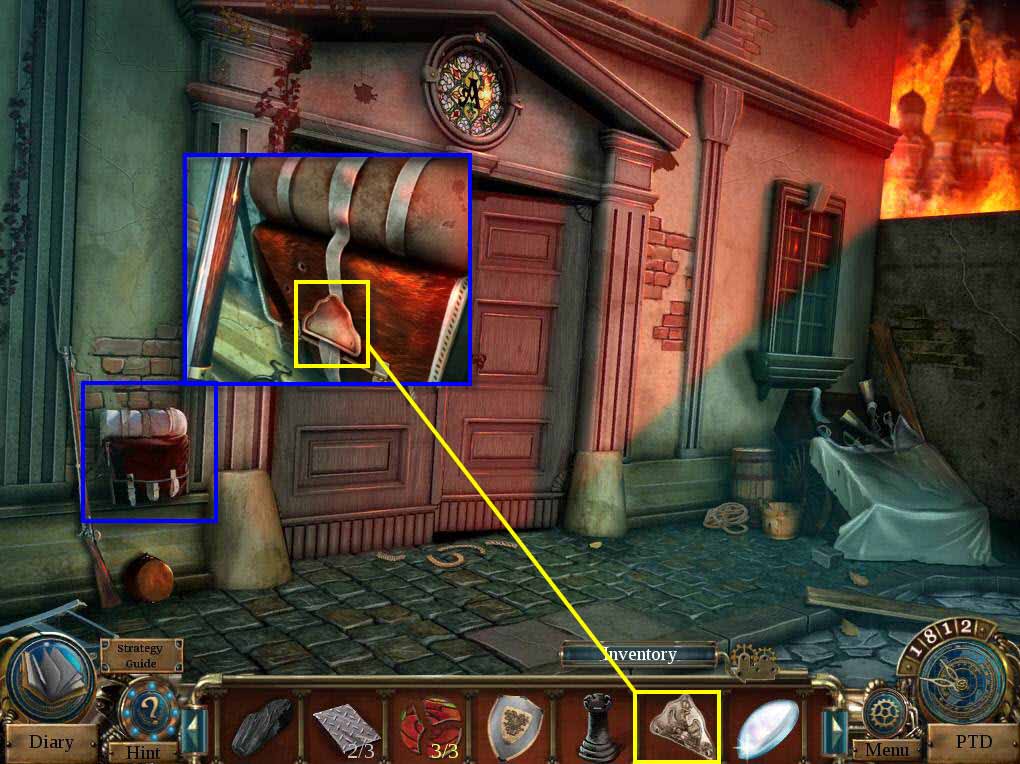
- Click on the bag to zoom in.
- Use the GUARD PLATE on the empty niche.
- Click to open the bag.
- Take the WINDER.
-
Go forward two screens to the garden.
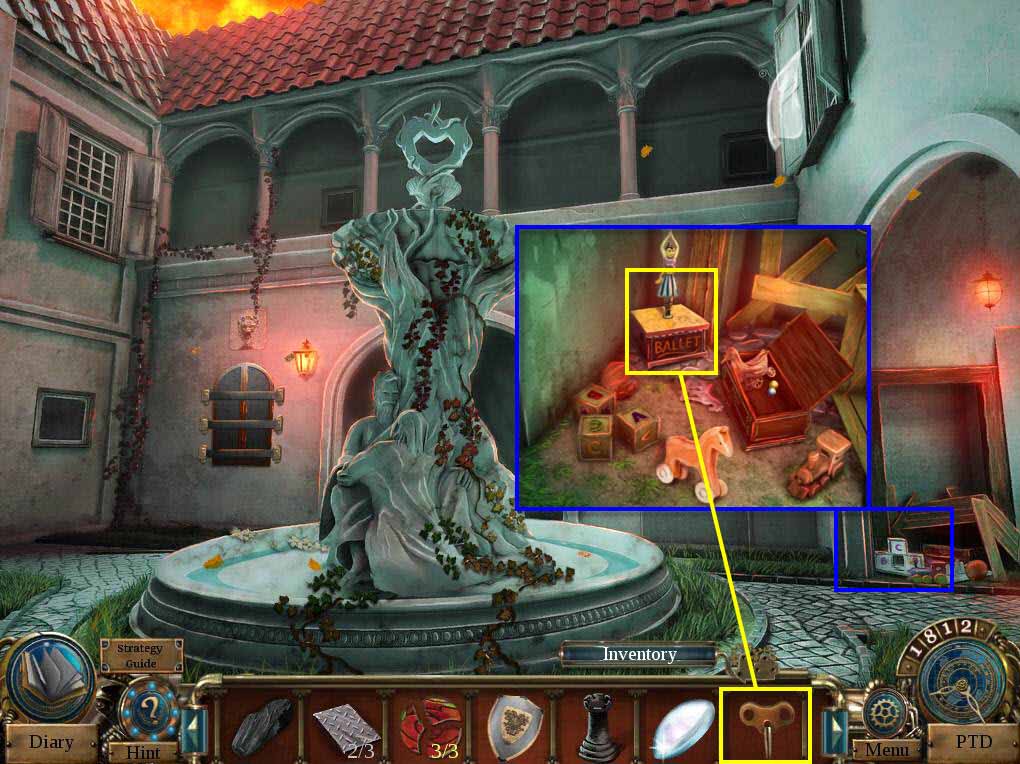
- Click on the toys to zoom in.
- Use the WINDER on the ballerina.
- Click on the winder twice.
- Take the 3/3 PIANO KEY.
- Take the 3/3 SMALL MIRROR.
-
Go back one screen.
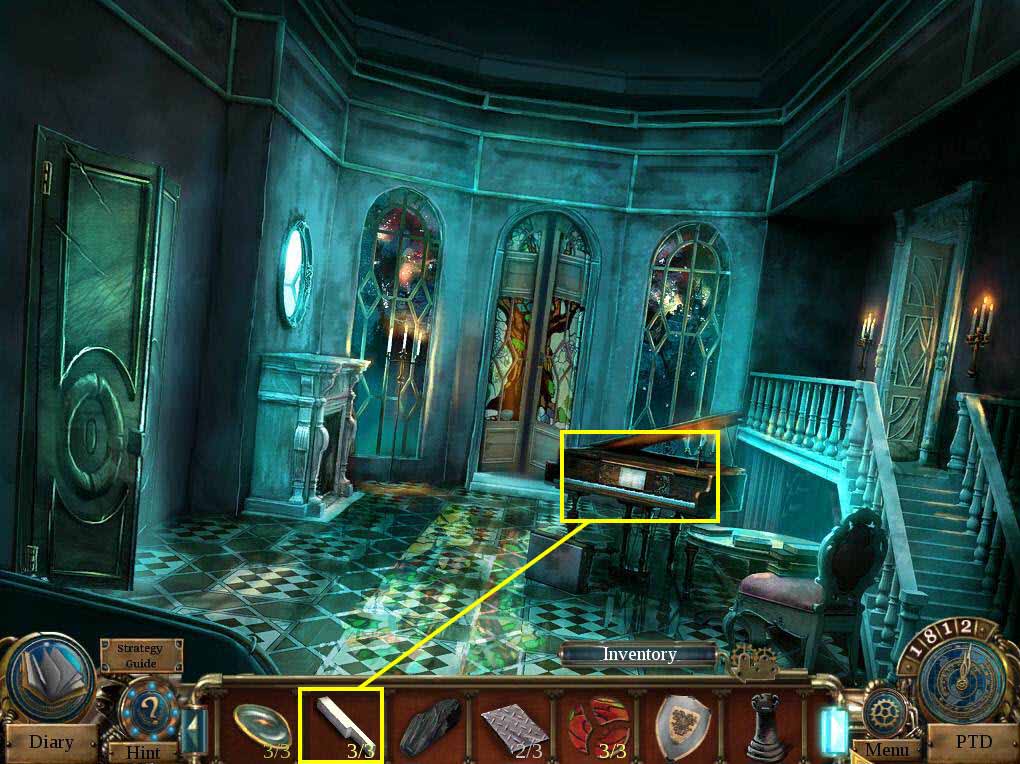
- Click on the piano to zoom in.
- Use the 3/3 PIANO KEYS on the piano.
-
This will start a mini-game.
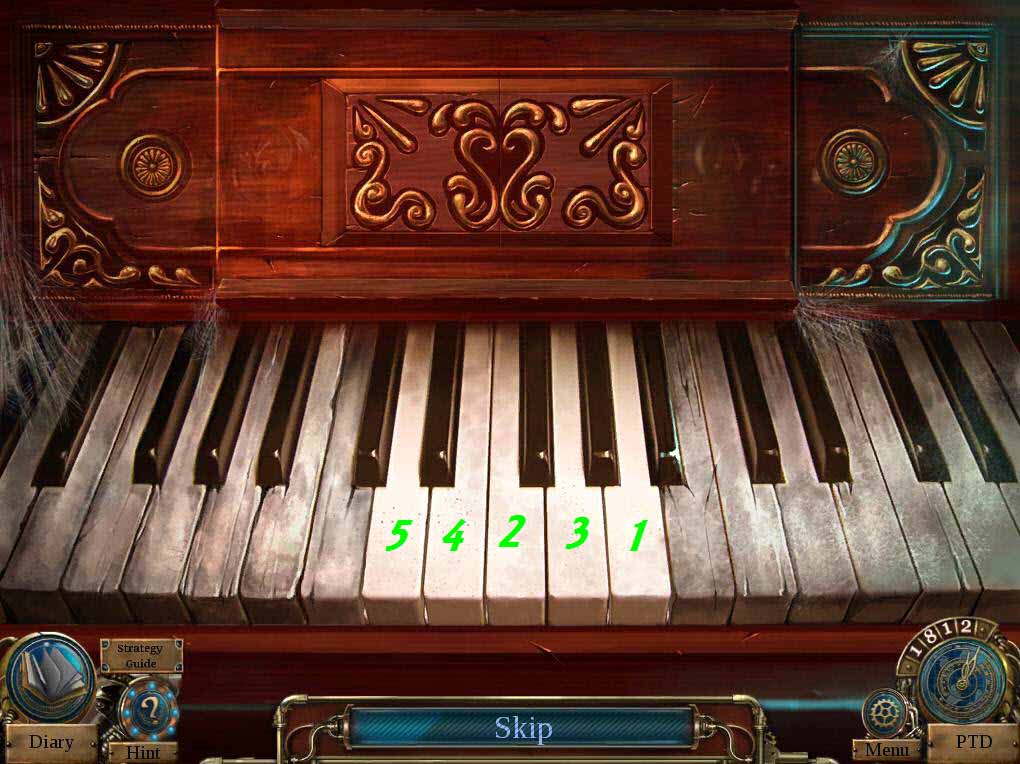
- The goal of the game is to play the correct sequence on the keys.
- Click on the compartment.
- Take the GEM PIECE.
-
Time travel to 1913 to the showroom.
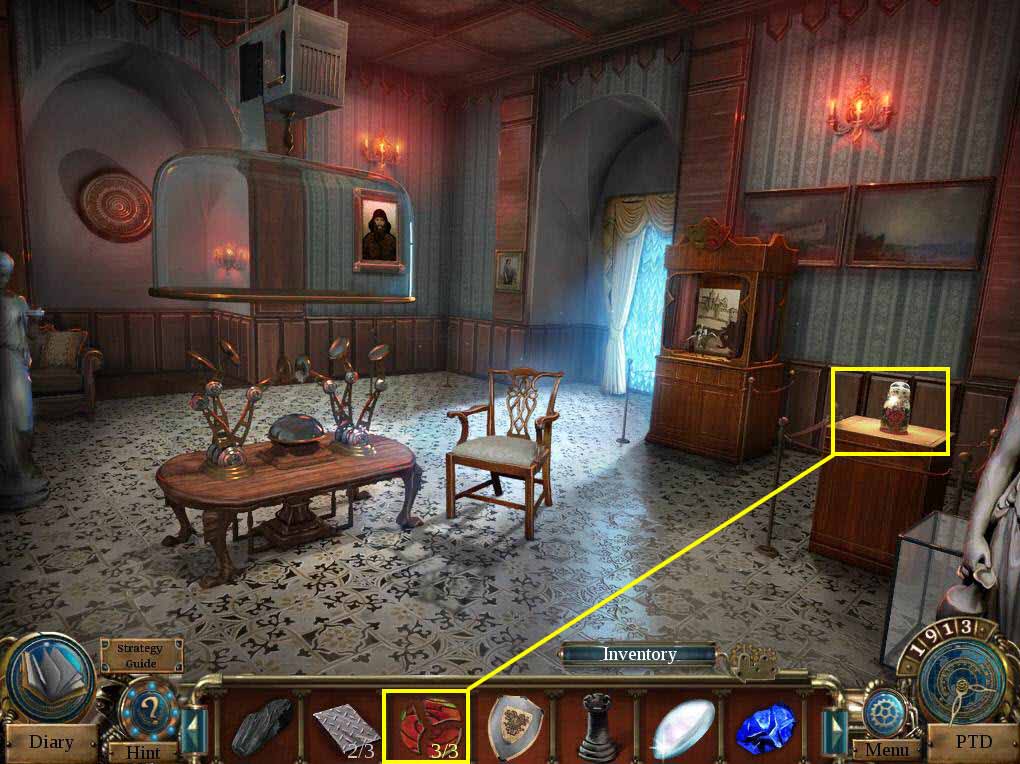
- Click on the doll to zoom in.
- Use the 3/3 RUSSIAN DOLL LOCKS on the doll.
- Click three times to remove the doll heads.
-
Take the BLACK BISHOP.
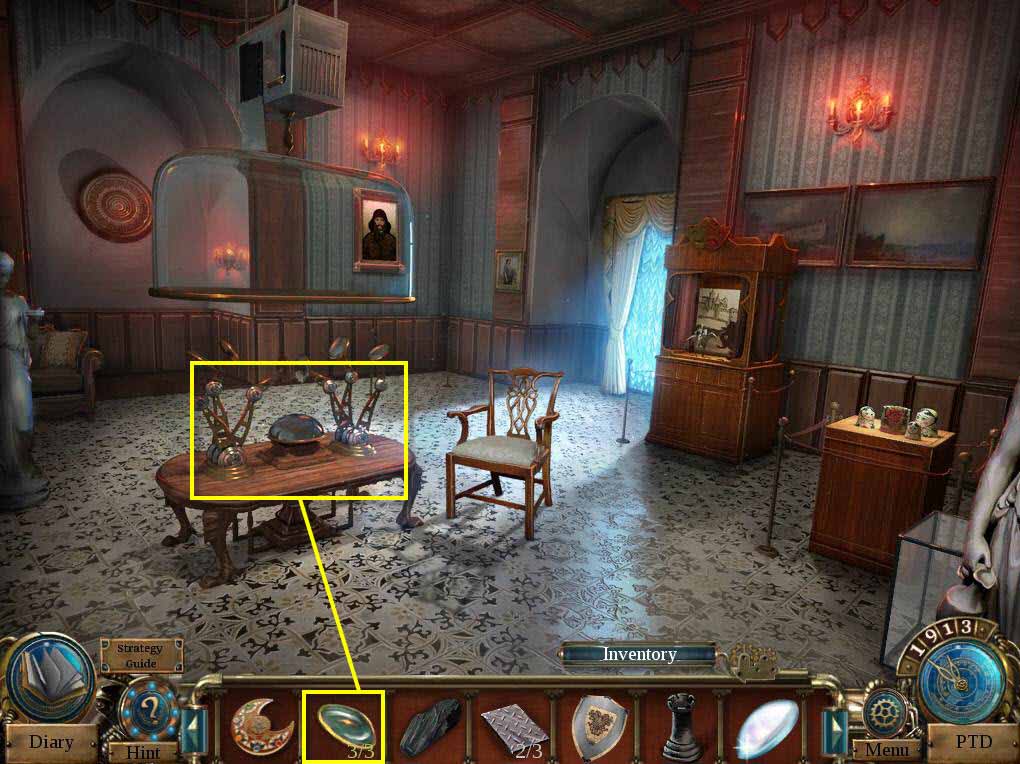
- Click to zoom in on the device.
- Use the 3/3 SMALL MIRRORS on the device.
-
This will start a mini-game.
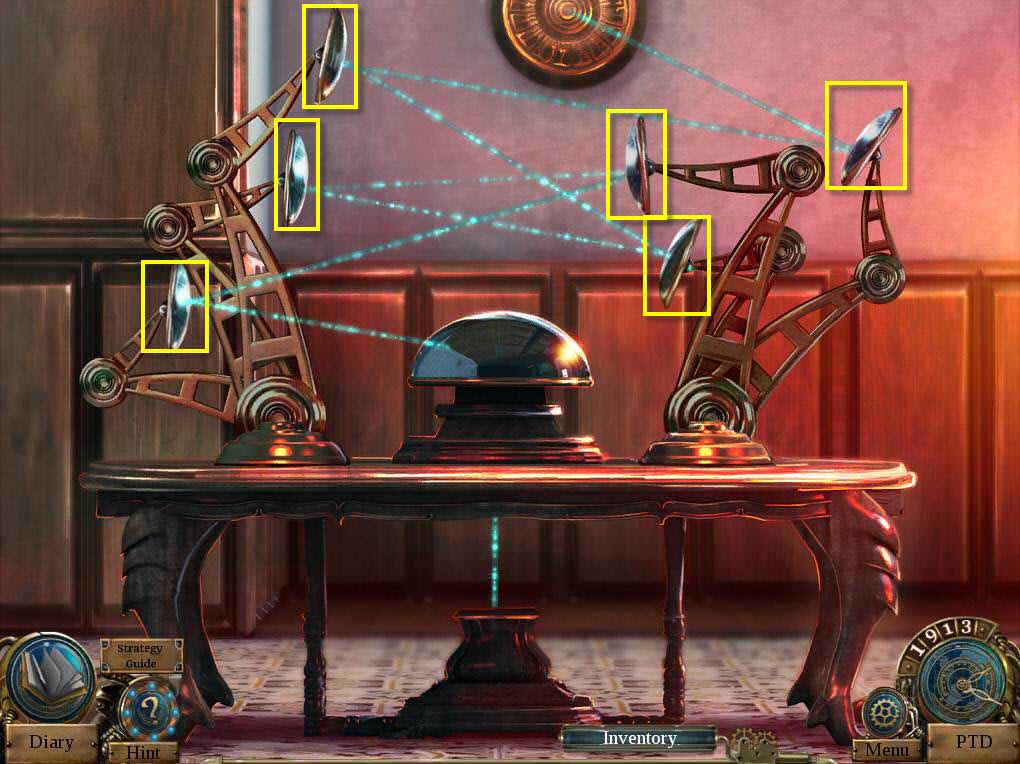
- To goal of the game is to move the mirrors so the light can reach the spot on the wall.
- See the screenshot for the solution.
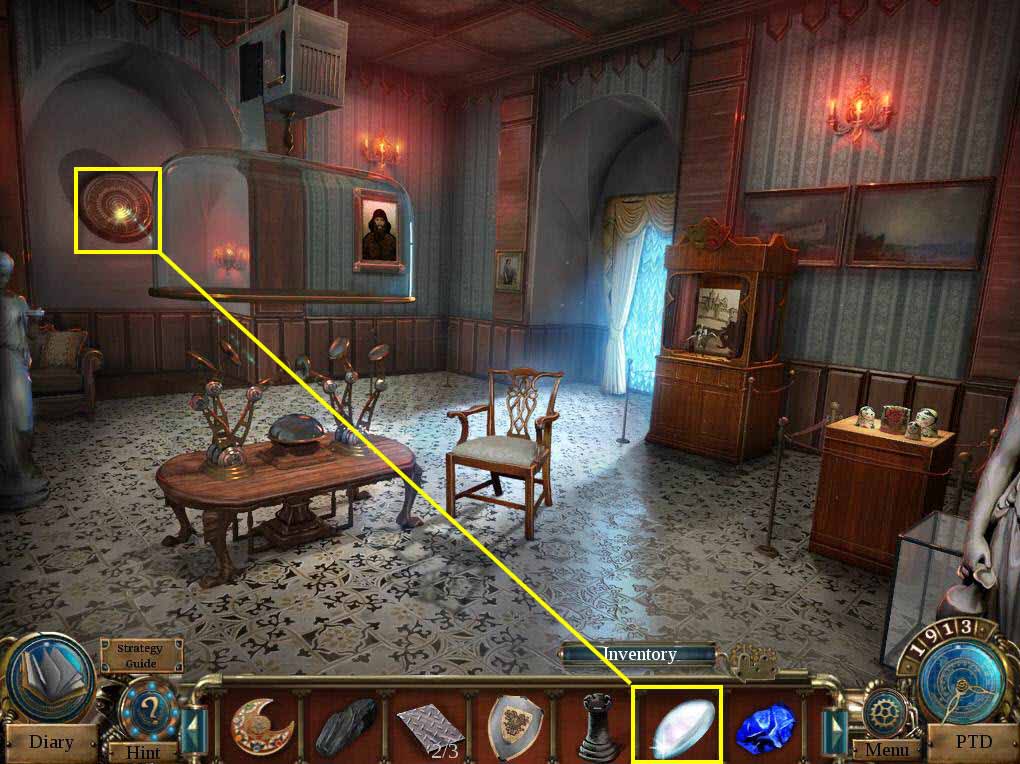
- Click on the wall to zoom in.
- Use the LENS on the spot.
- Take the FOUNTAIN HEART.
-
Time travel to 1812 to the garden.
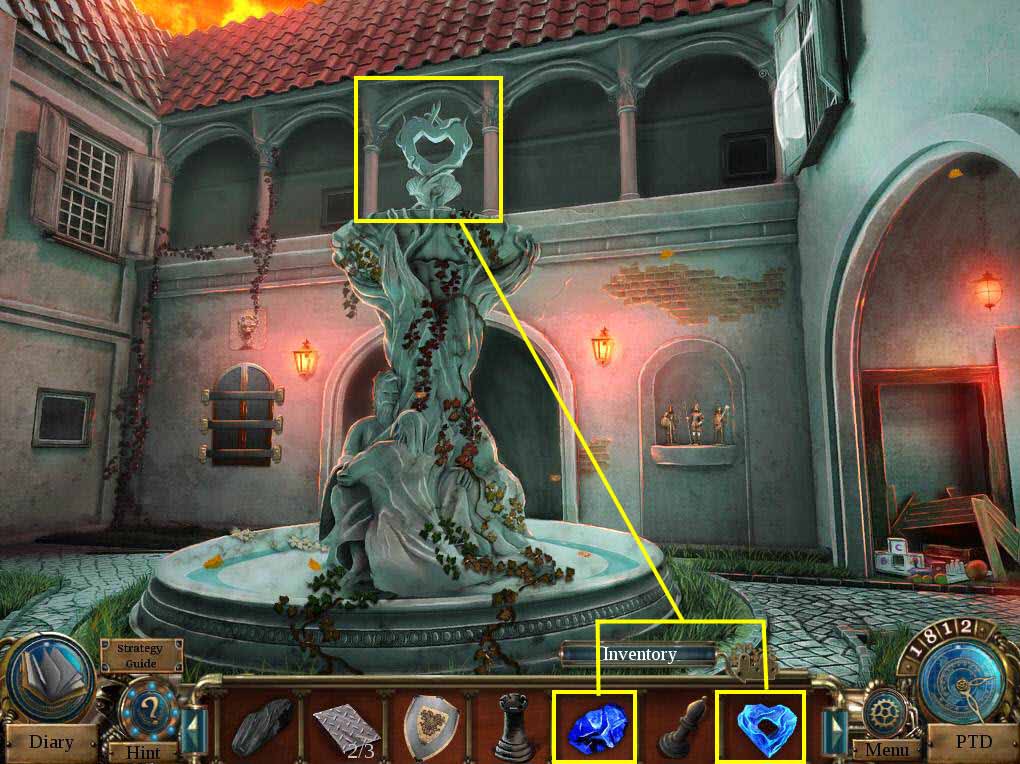
- Click on the fountain to zoom in.
- Use the FOUNTAIN HEART and the GEM PIECE on the fountain.
-
Time travel to 1913 to the garden.
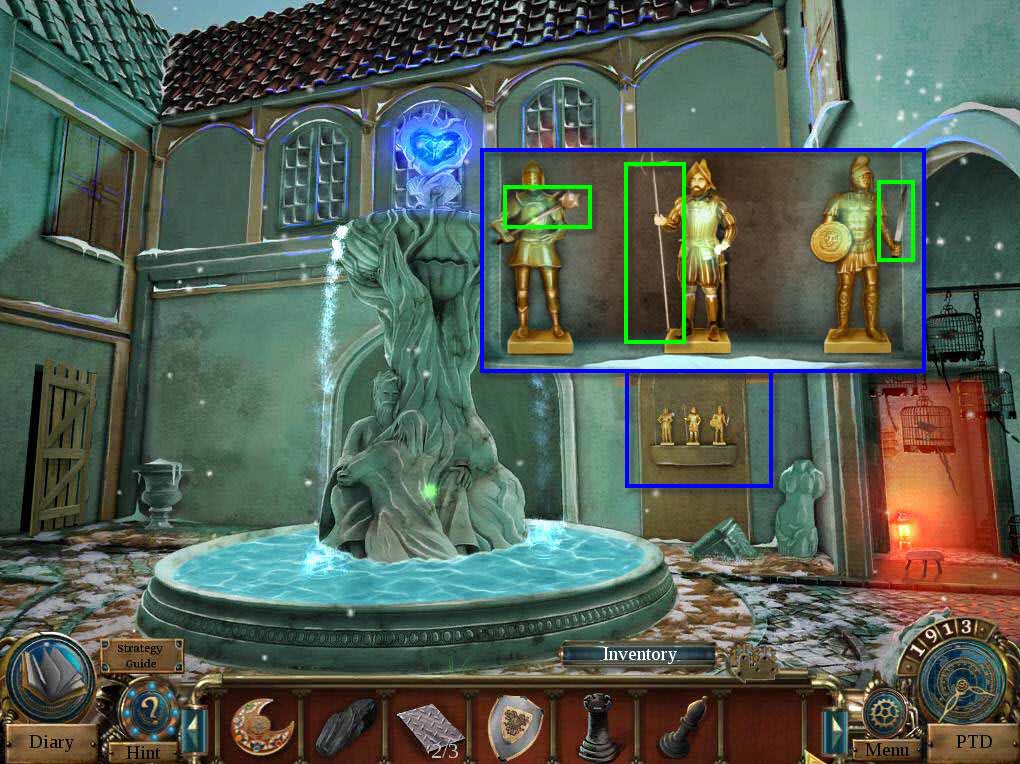
- Click on the figures to zoom in.
-
Take the MACE, the SWORD, and the SPEAR.
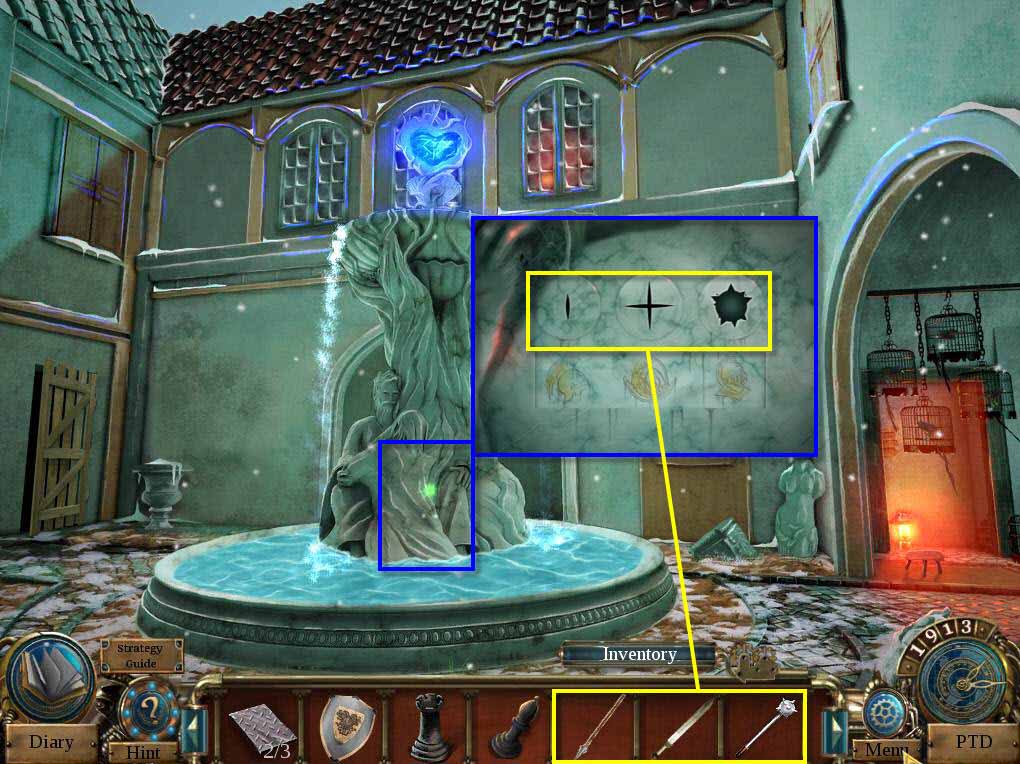
- Click on the fountain to zoom in.
- Use the SWORD, the SPEAR, and the MACE in the empty slots.
- Take the WHITE KING.
-
Go back one screen.
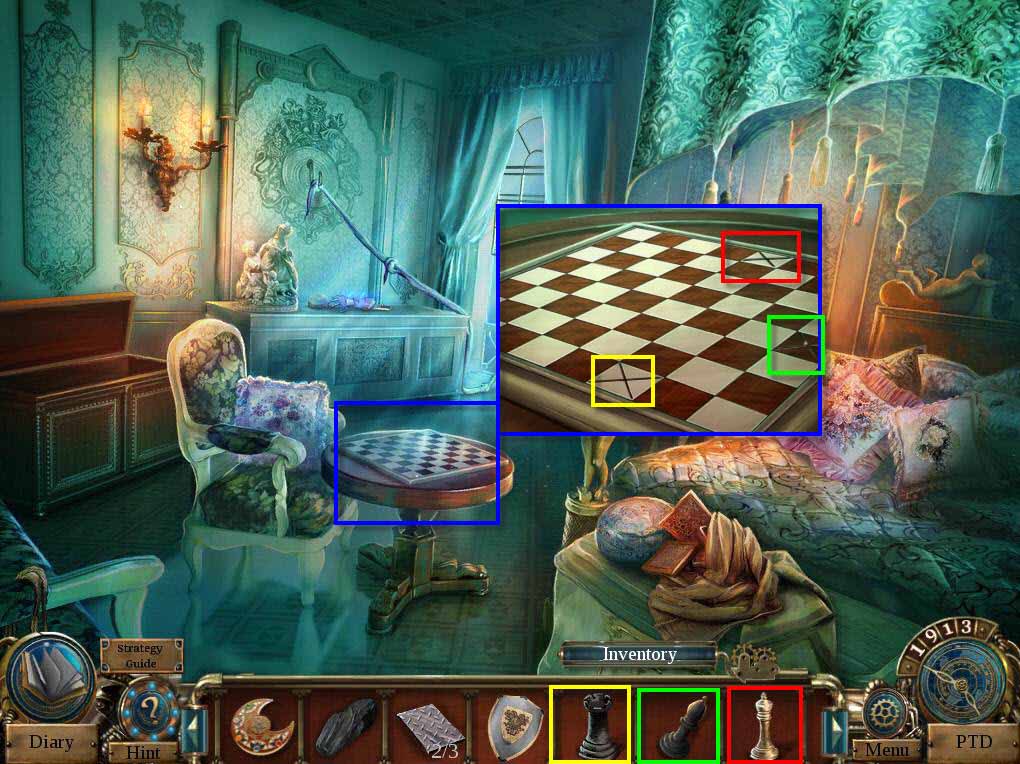
- Click on the chessboard to zoom in.
- Use the BLACK ROOK and the BLACK BISHOP on the board.
- Use the WHITE KING on the board.
- Take the DEMON SEAL.
-
Go back one screen and then go to the left to the showroom.
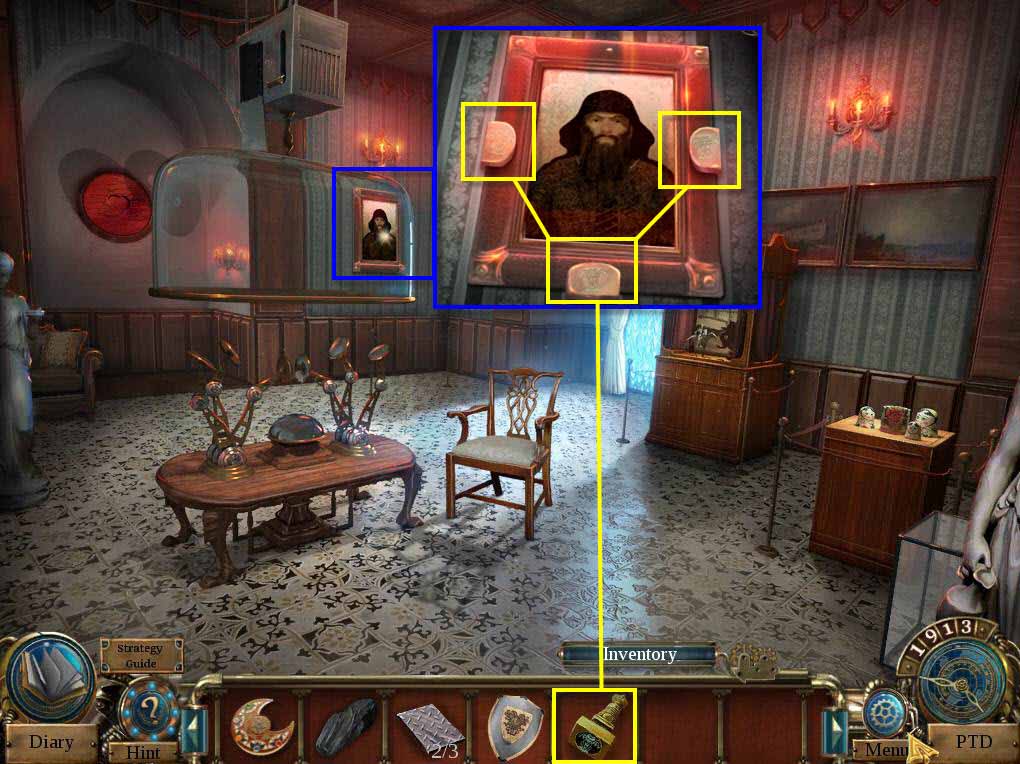
- Click on the picture to zoom in.
-
Use the DEMON SEAL on the plates marked above.
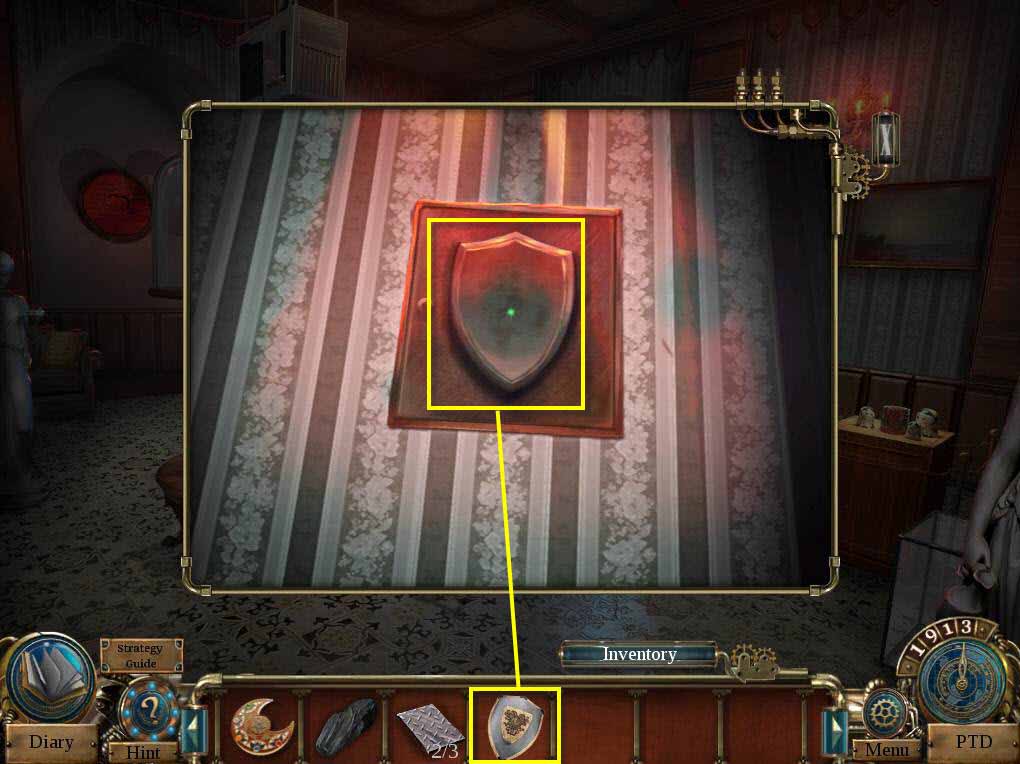
- Use the SHIELD on the slot.
- Click to open the door.
- Click to read the note in the door.
- Go to the garden.
-
Click on the sparkles to play the HOS.
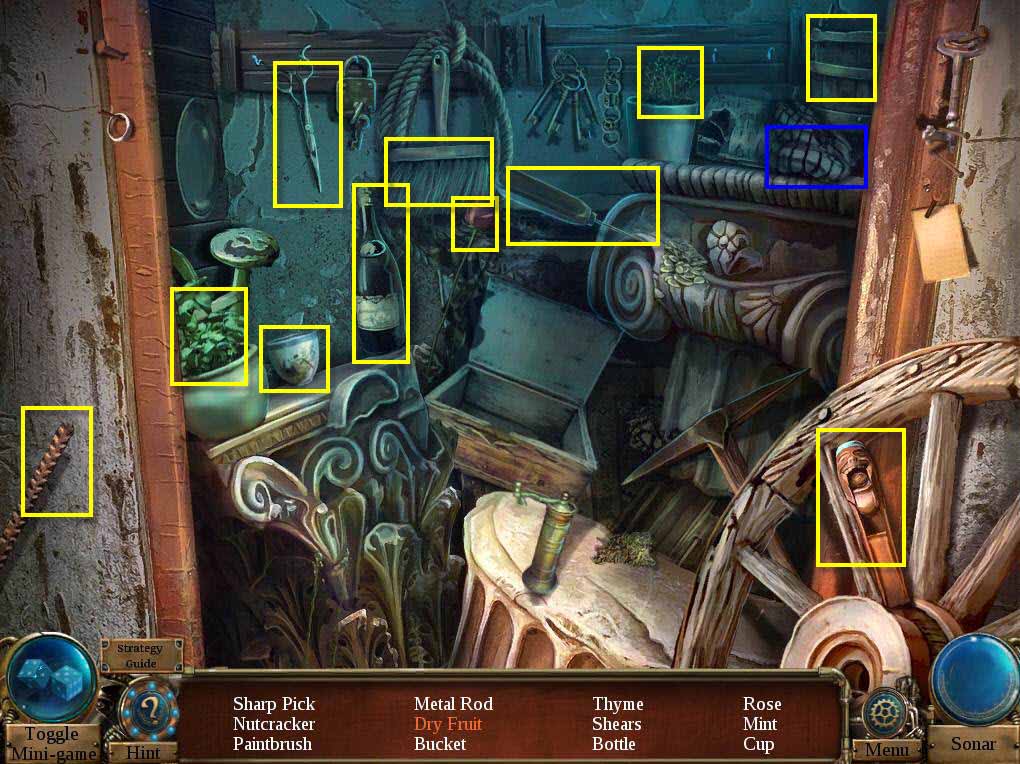
- Find all the items on the list.
- You will receive the SHARP PICK.
-
Time travel to 502 to Merlin's Hut.
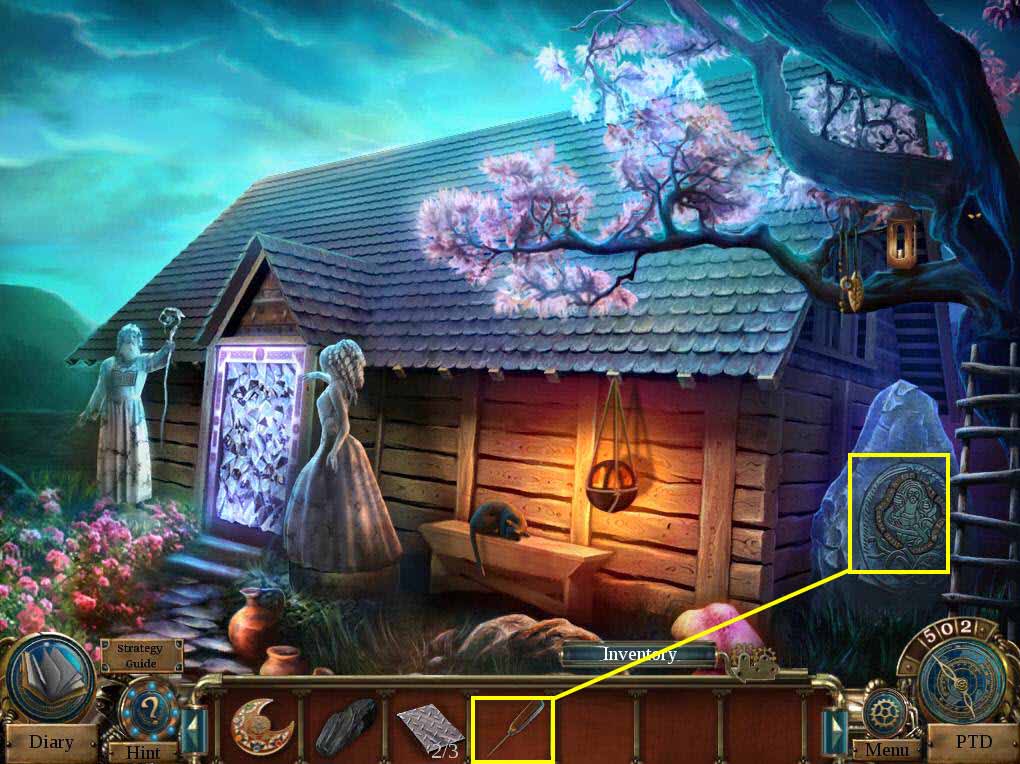
- Click on the rune stone to zoom in.
- Use the SHARP PICK on the rune.
-
This will start a mini-game.
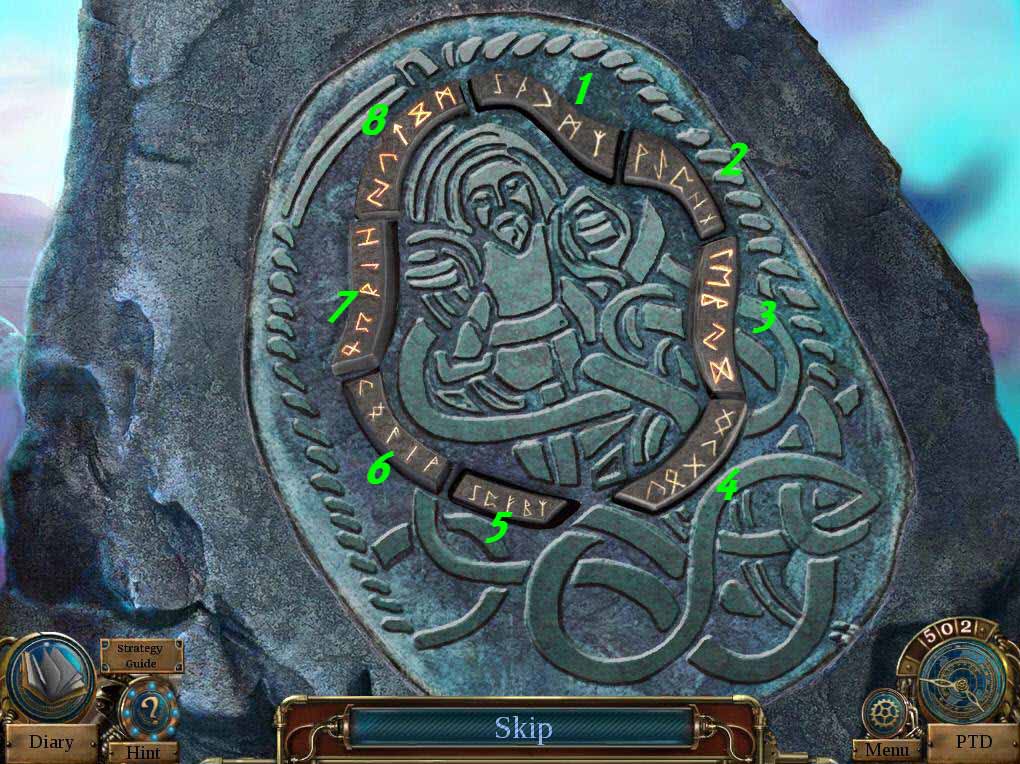
- The goal of the game is to activate all the runes.
- Click on the runes in the following order: 5, 1, 7, 4, 2, 4, 2, 8, 6, 8, 4, 8, 6, 1, 4, 8, 1, 5, 3, 4, 2, 8, 7, 4, 6.
-
Take the TRISKELE SYMBOL.
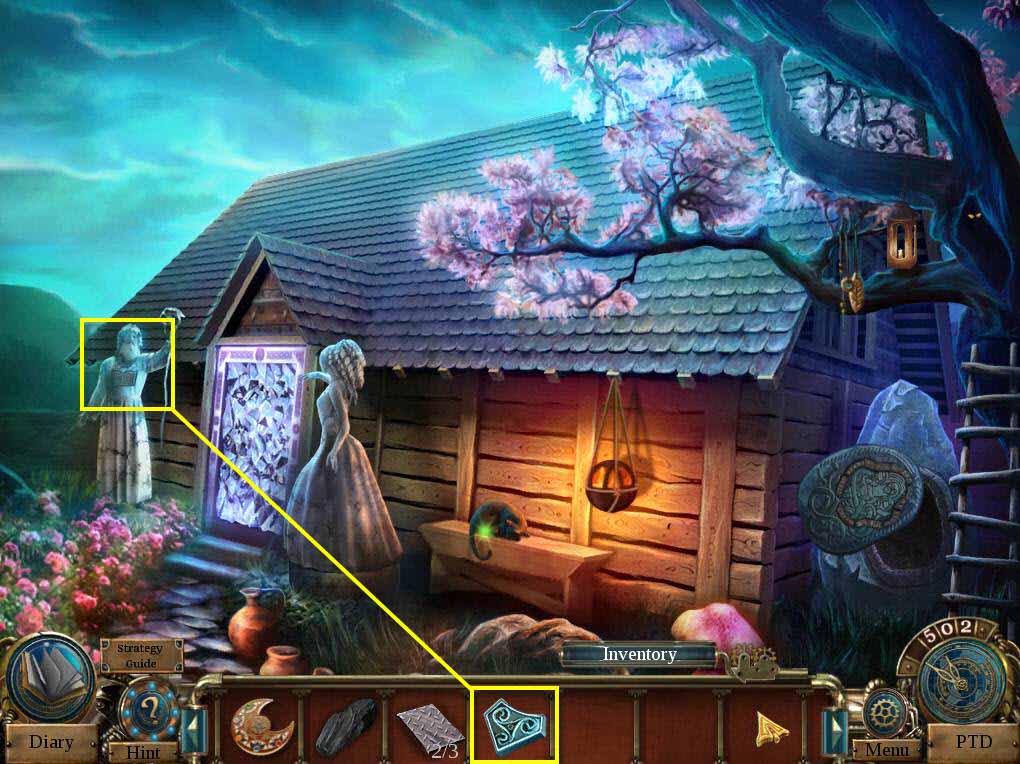
- Click on the statue of Merlin to zoom in.
- Use the TRISKELE SYMBOL on the empty slot.
-
Take the RING.
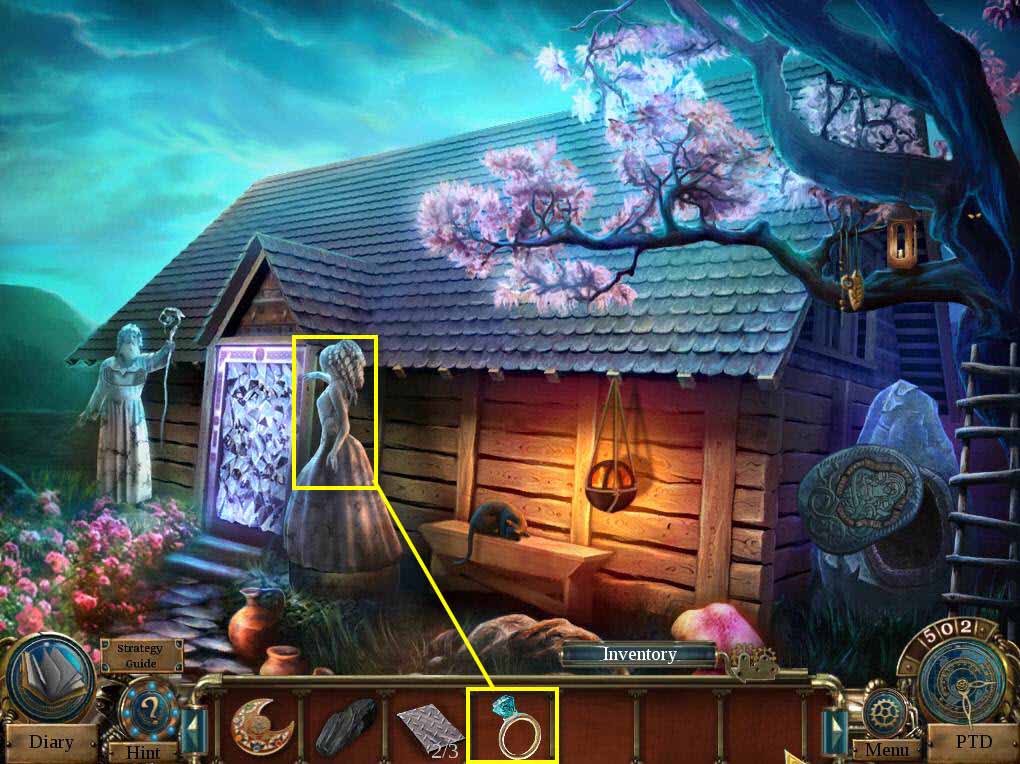
- Click on the statue of Viviane to zoom in.
- Use the RING on her finger.
- Click to zoom in on the door.
- Click on the gem.
-
Enter the hut.
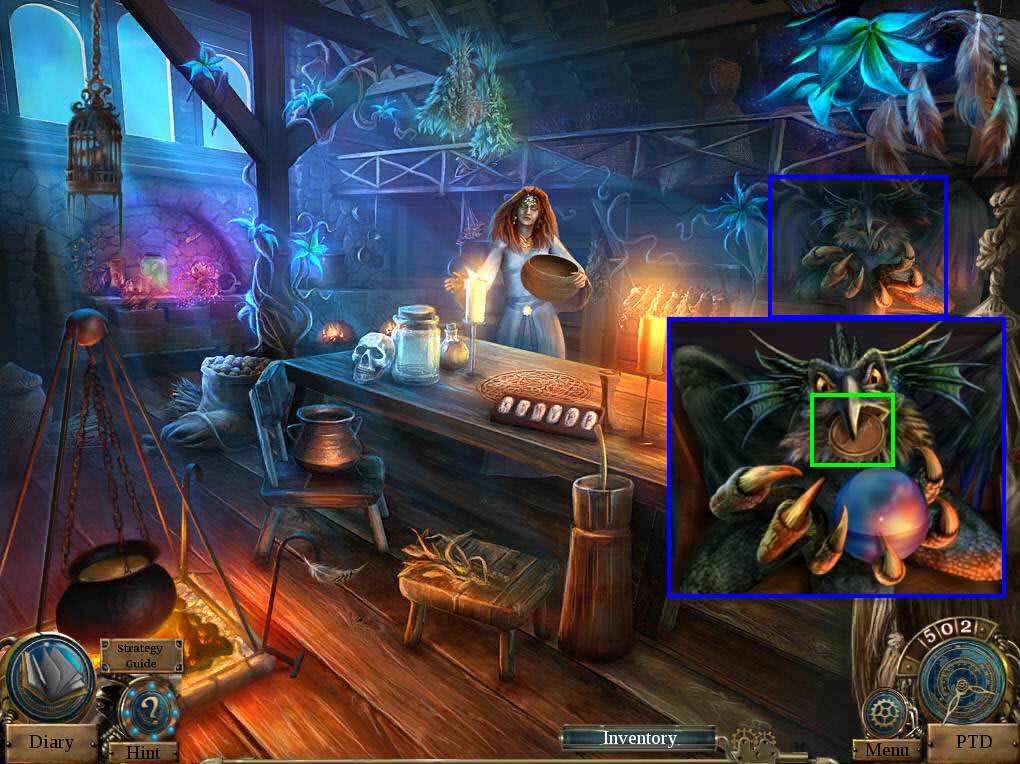
- Talk to Nimue.
- Click on the creature on the right to zoom in.
- Take the MAGIC SEAL.
- Time travel to 1812 to the bedroom.
-
Click on the sparkles to play the HOS.
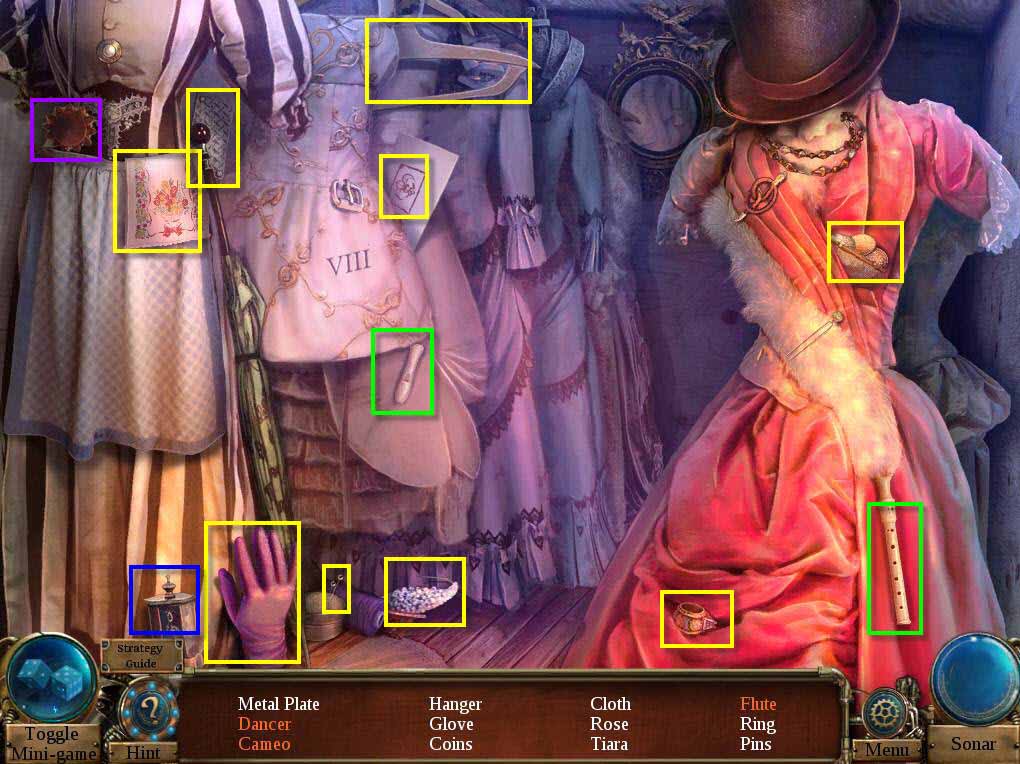
- Find all the items on the list.
- You will receive the 3/3 METAL PLATE.
- Go back two screens.
-
Click on the sparkles to play the HOS.
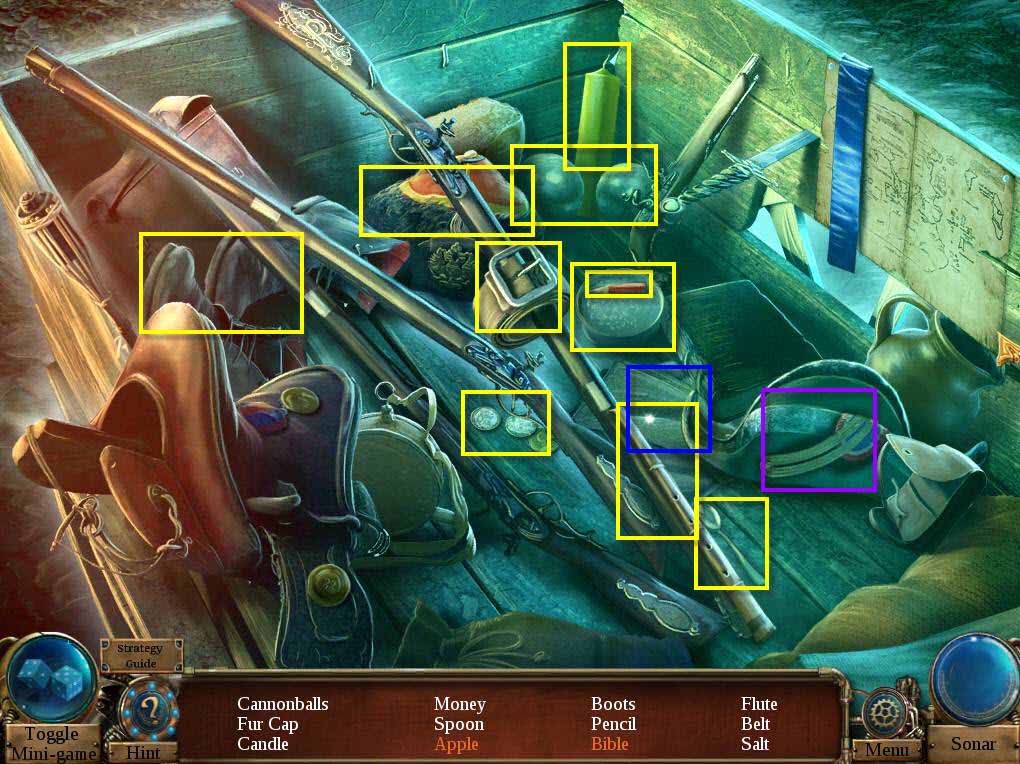
- Find all the items on the list.
- You will receive the CANDLE.
-
Go to the workshop.
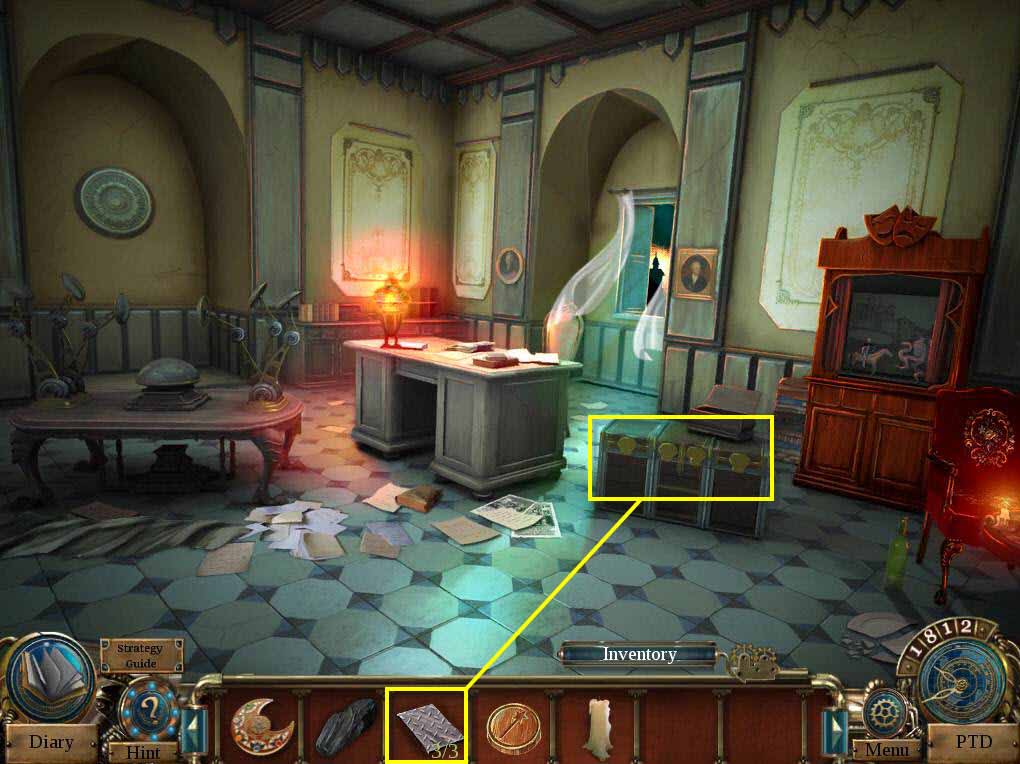
- Click on the chest to zoom in.
- Use the 3/3 METAL PLATES on the chest.
- Click to open and take the CIRCULAR SAW.
-
Time travel to 1796 to Uncle Sean's Lab.
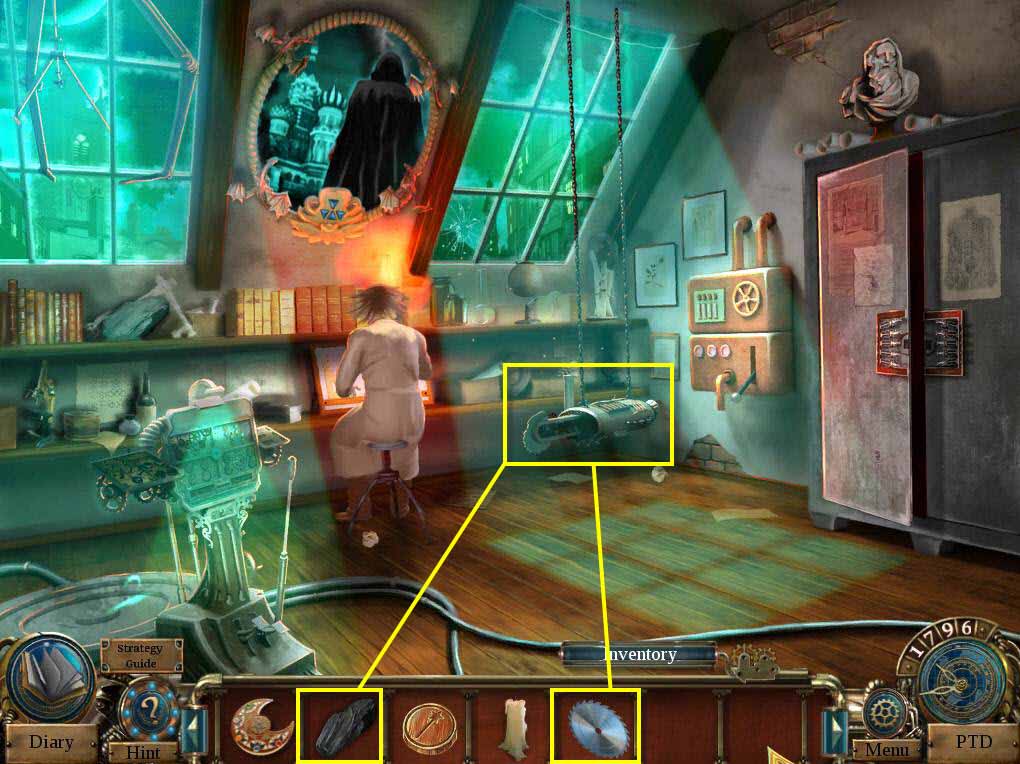
- Click on the saw to zoom in.
- Use the COAL on the empty slot.
- Use the CIRCULAR SAW to replace the old saw.
- Take the SAW PROTOTYPE.
-
Time travel to 487 to the meadow.
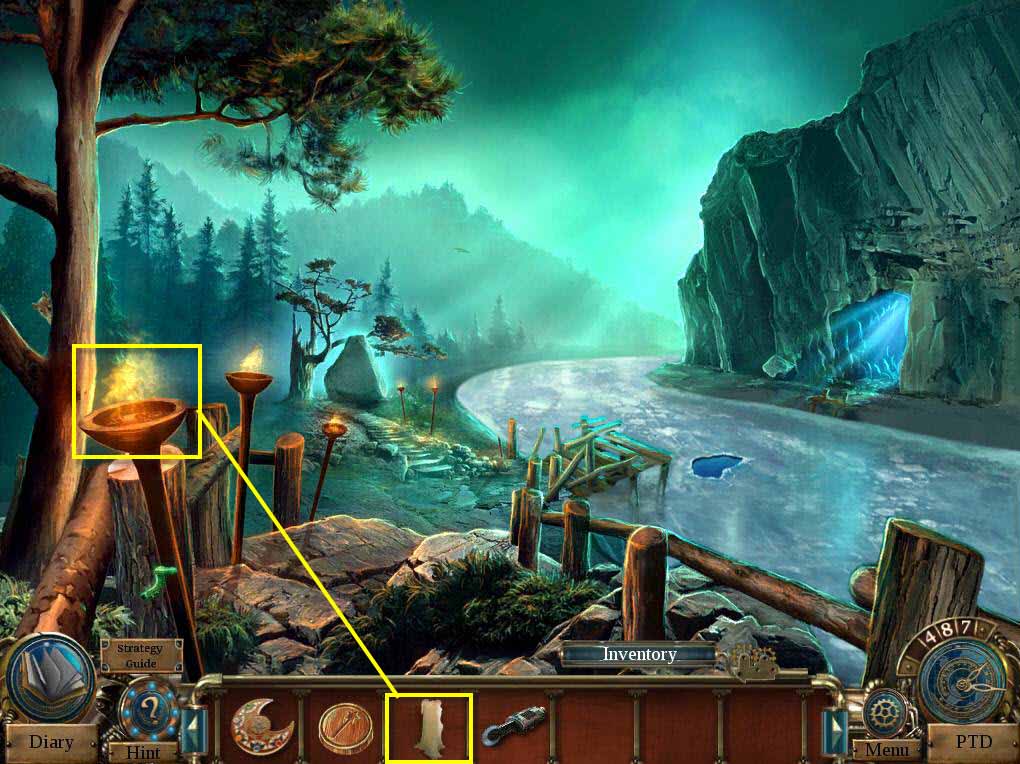
- Use the CANDLE on the torch.
- You will receive the BURNING CANDLE.
-
Time travel to 1812 to the garden.
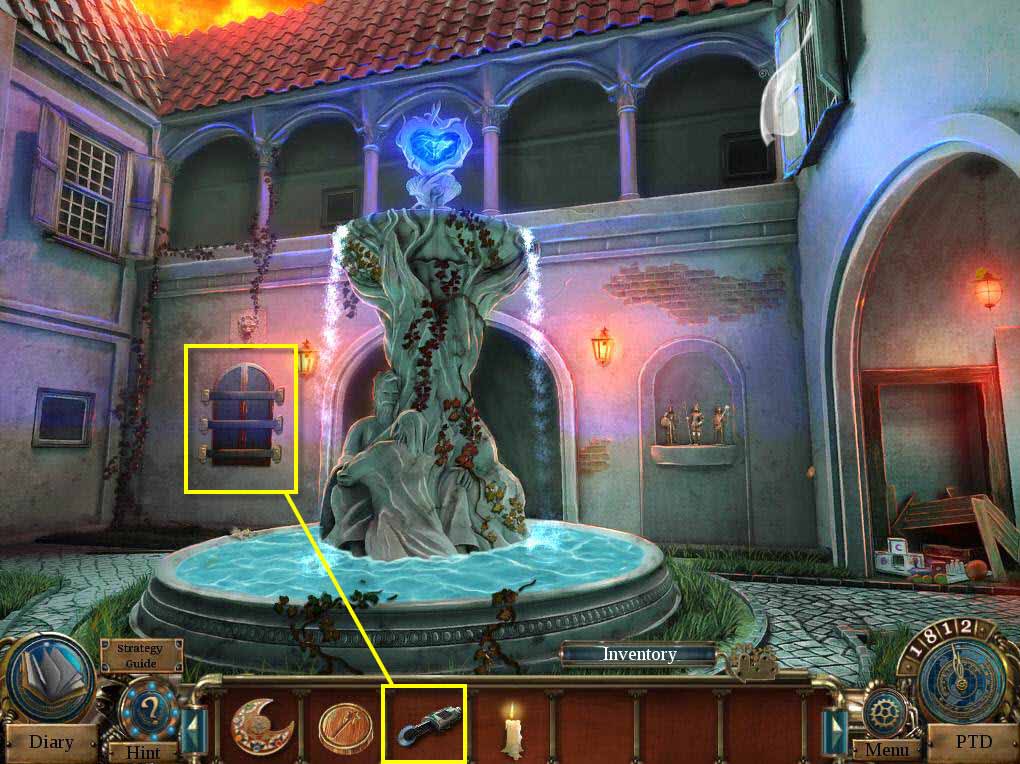
- Click on the window that's boarded up to zoom in.
- Use the SAW PROTOTYPE on the boards to cut them.
- Click to open the window.
- Click to move the cloth.
- Take the CRYSTAL BALL.
-
Time travel to 502 to Merlin's Hut.
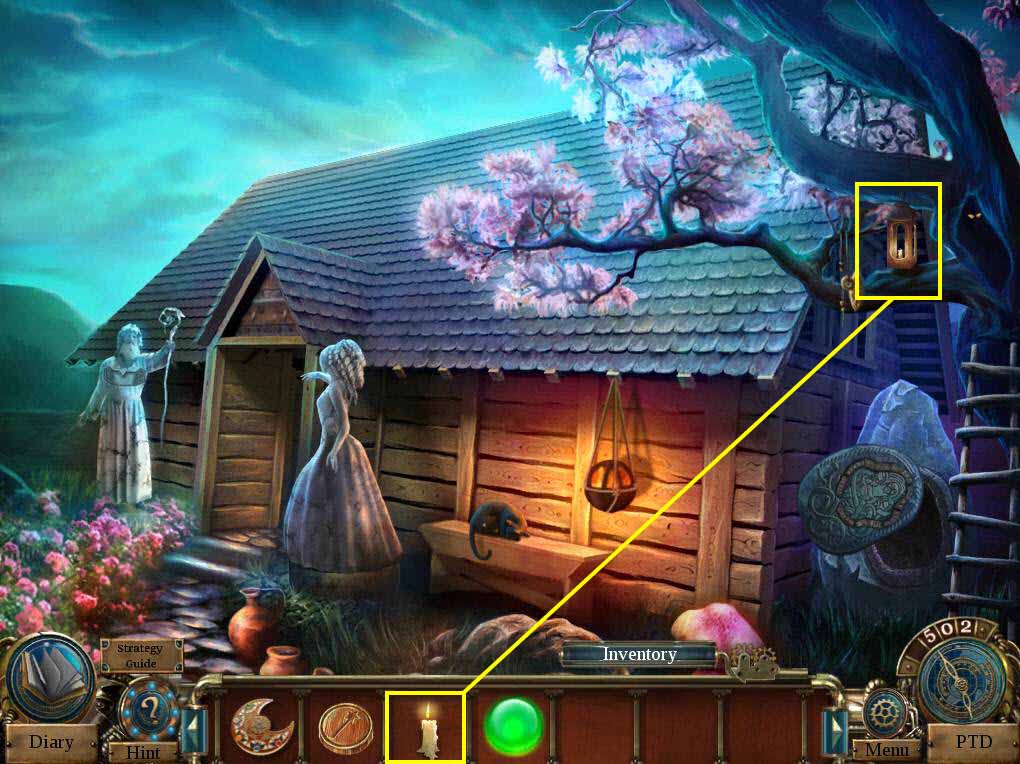
- Click on the tree to zoom in.
- Use the BURNING CANDLE on the lantern to light it.
- Take the EARTH SEAL.
-
Go back one screen.
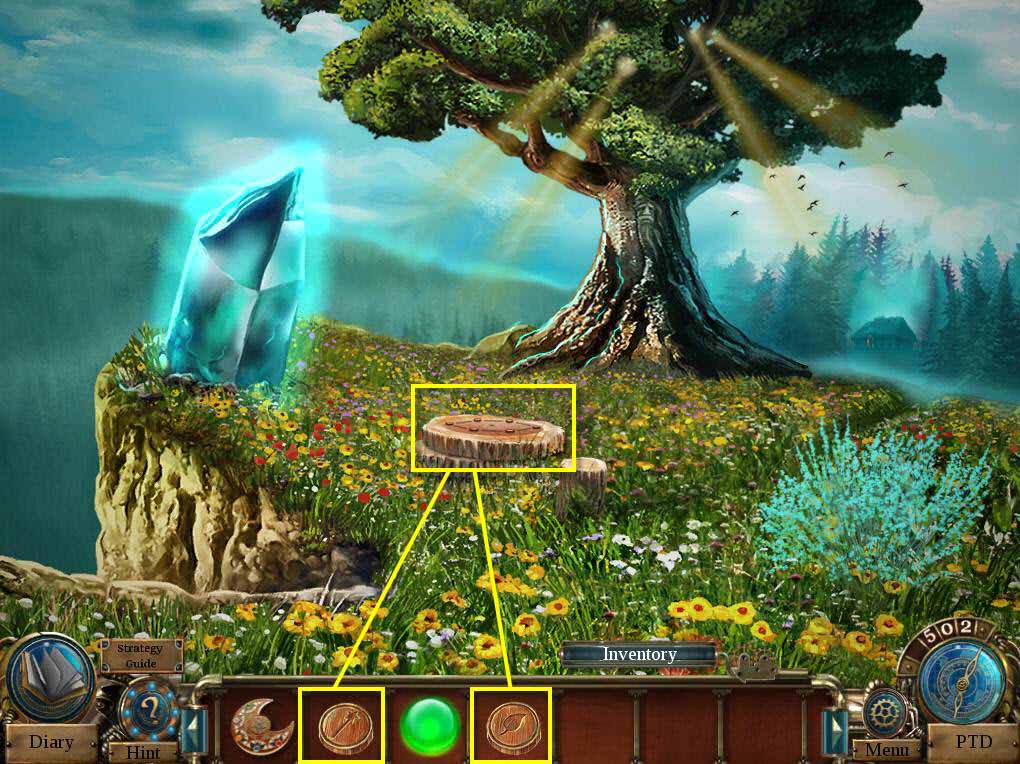
- Click on the wooden plate to zoom in.
- Use the MAGIC SEAL on the plate.
- Use the EARTH SEAL on the plate.
-
This will start a mini-game.
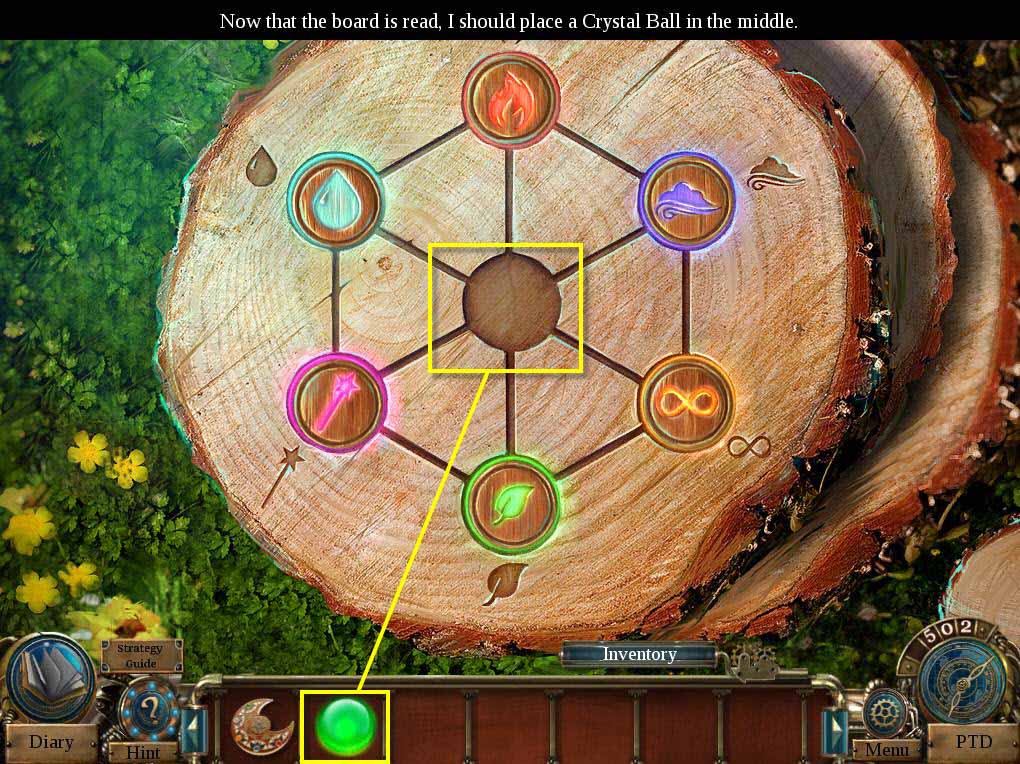
- The goal of the game is to move the seals to the correct position based on the symbols next to the spot.
- When you're done, use the CRYSTAL BALL on the middle area.
- You will receive MERLIN IN A CRYSTAL BALL.
-
Time travel to 1913 to the bedroom.
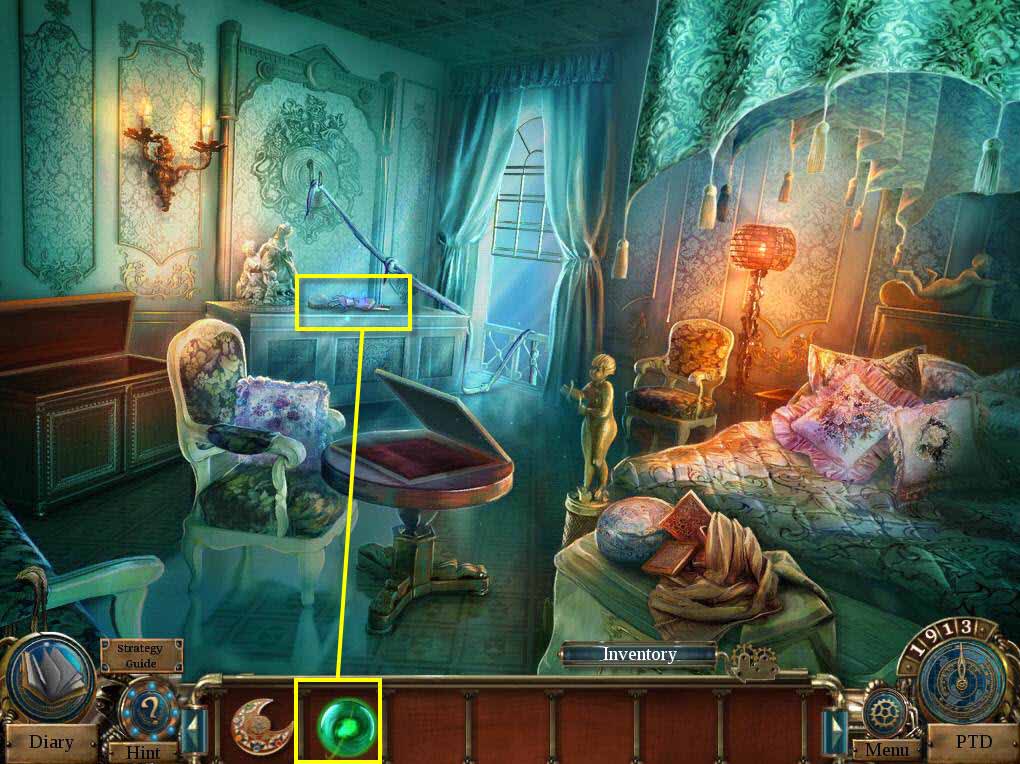
- Click on the dresser to zoom in.
- Use MERLIN IN A CRYSTAL BALL on the glove.
Comments will load when you reach this part of the walkthrough.