

Chapter Two: Church Exploration
- Go downstairs to the annex.
- Collect your glasses.
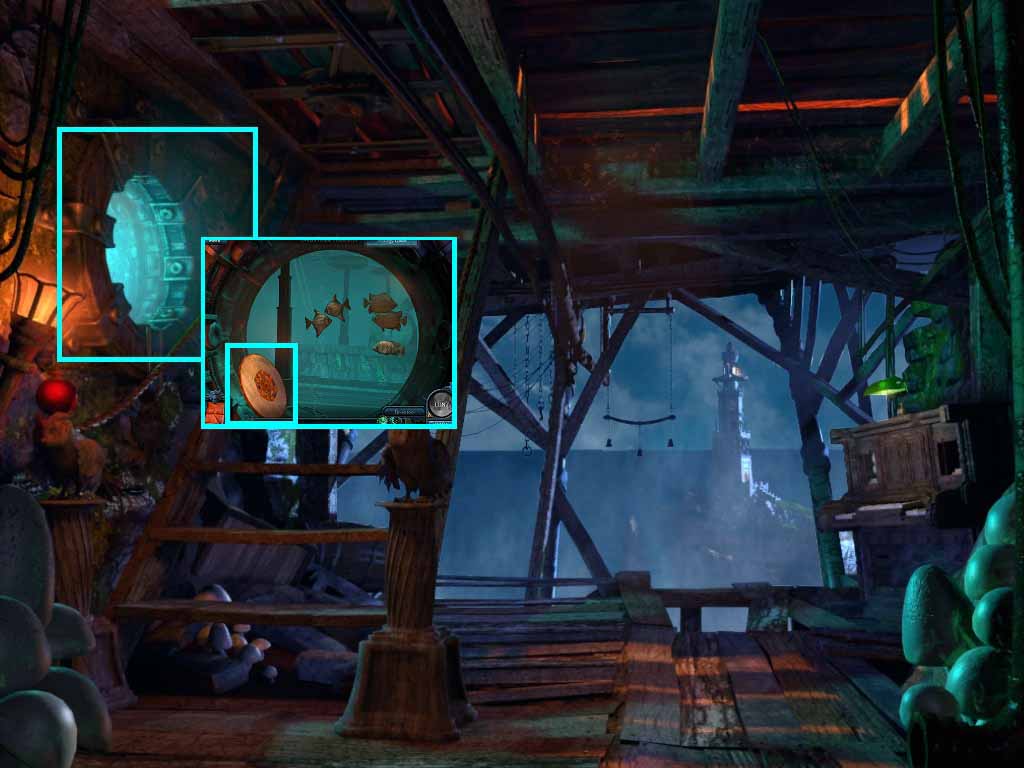
- Zoom into the porthole and collect the disk.
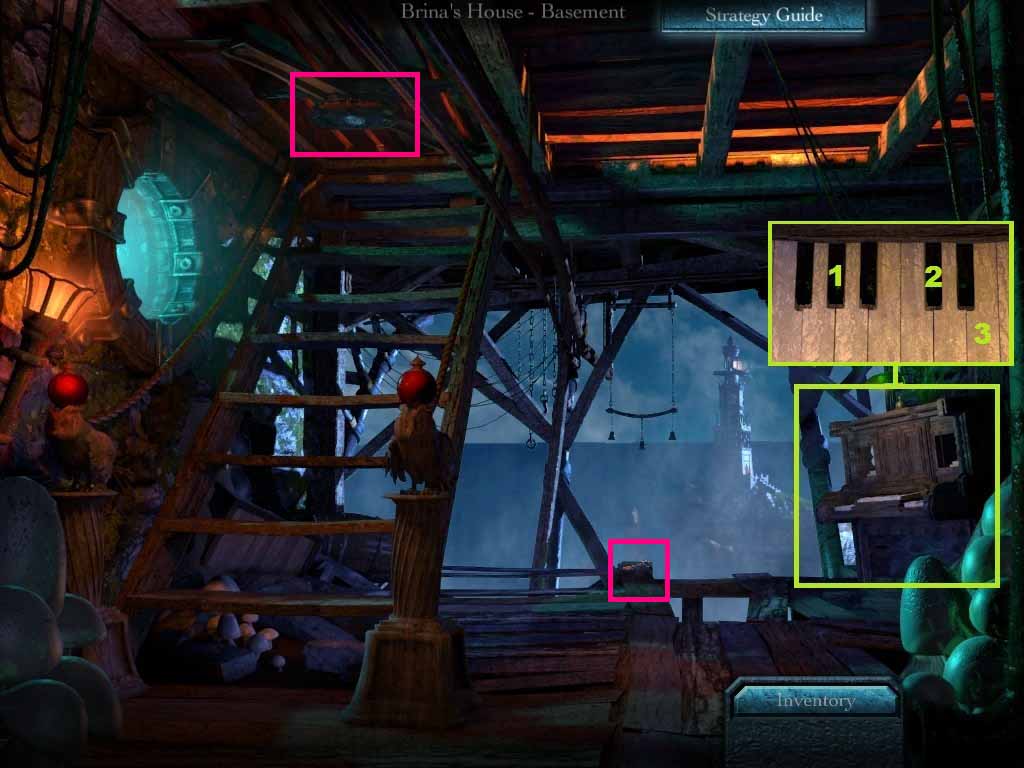
- Zoom into the piano.
- Press the keys as follows: 1 – 2 – 3.
- Examine the item that the owl dropped.
- Collect the hatch key.
- Examine the door and insert the hatch key into its lock.
- Turn the key.
- Go back to the annex.
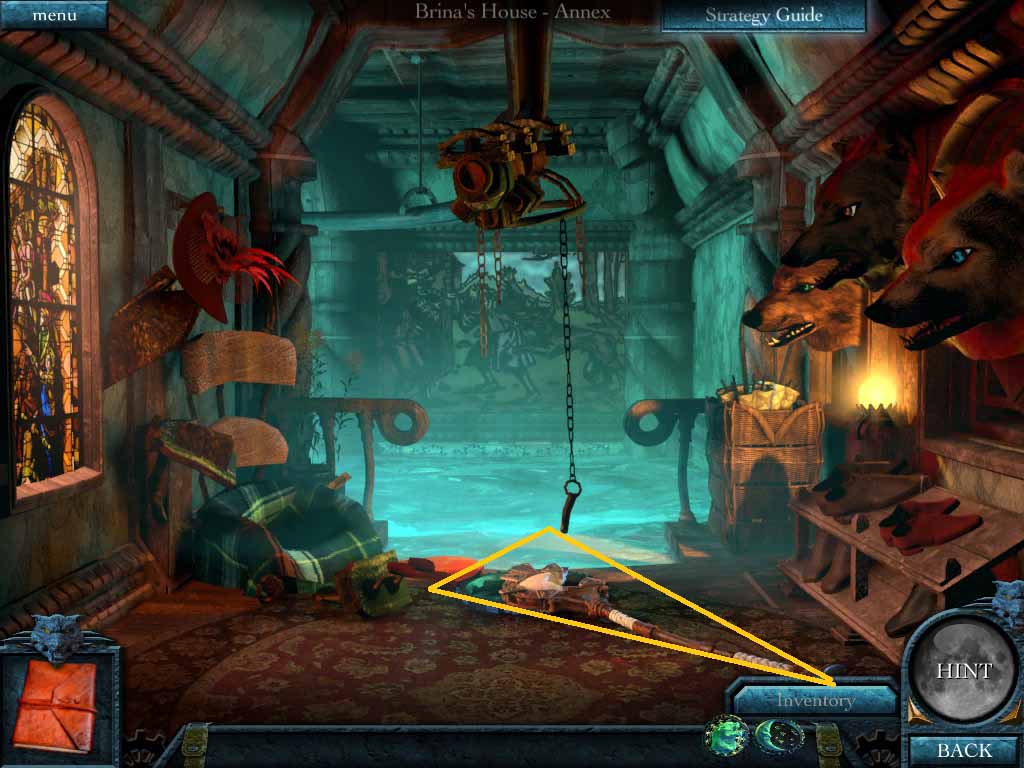
- Collect the broken staff and the lighthouse disk.
- Go to the church and zoom into the church door.
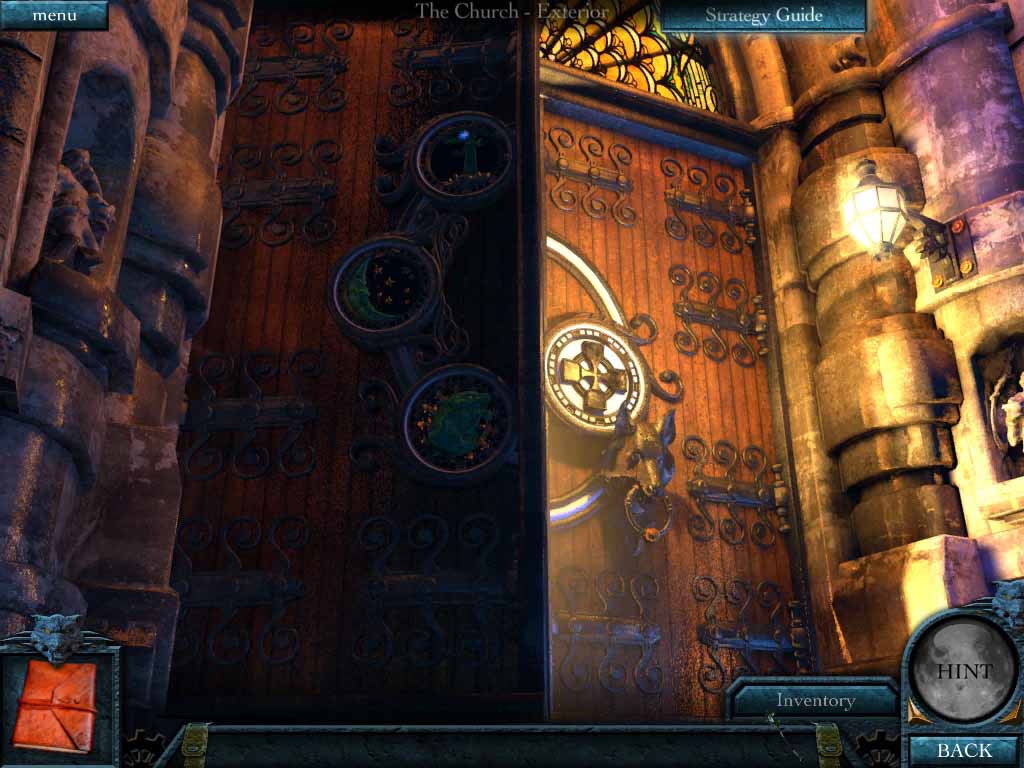
- Insert the lighthouse, moon and wolf disks into the door slots.
- Enter.
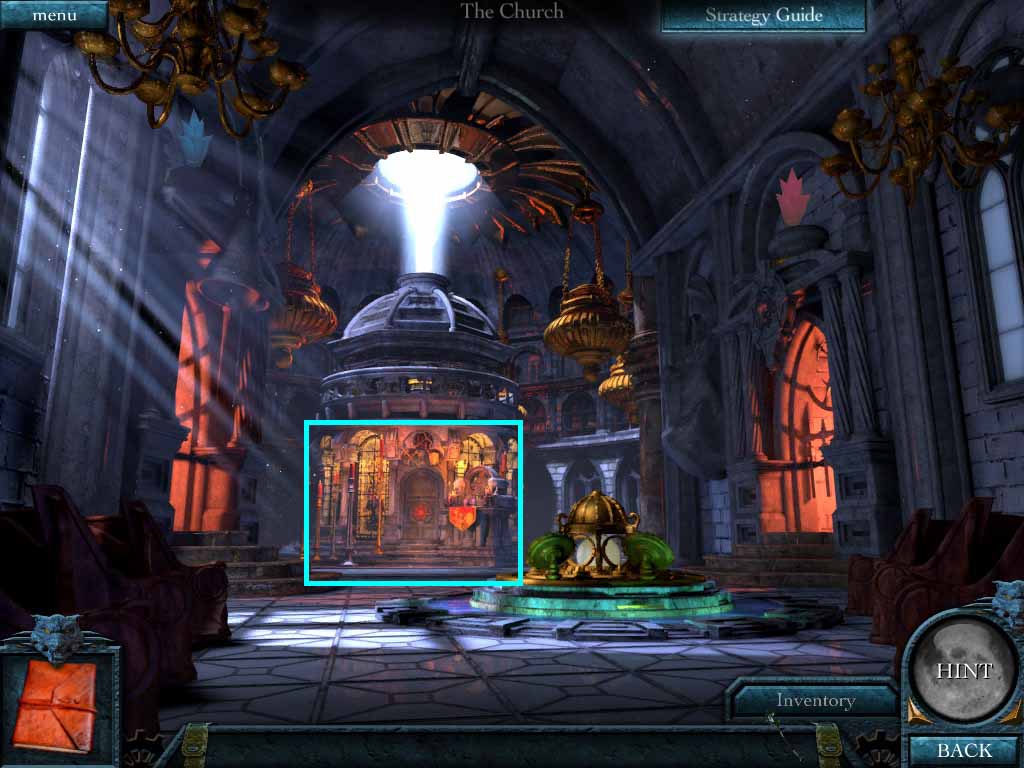
- Move to the rear of the church.
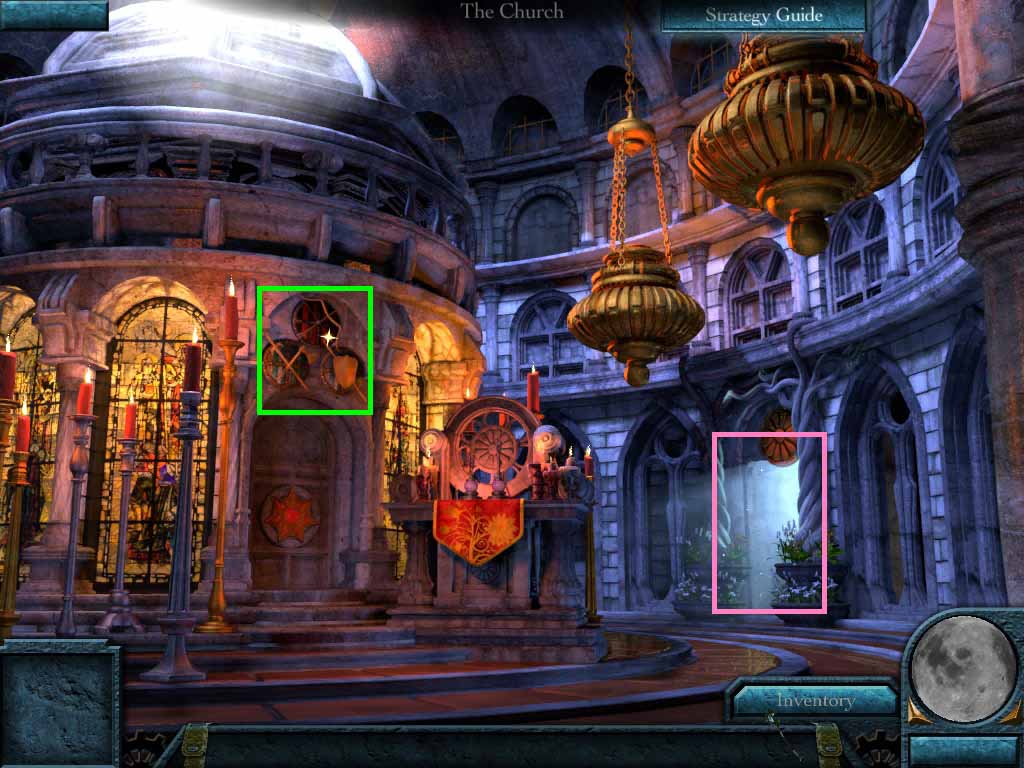
- Examine the shields and the sepulture.
- Open the sword and axe shield.
- Collect the lens filter.
- Leave through the door.
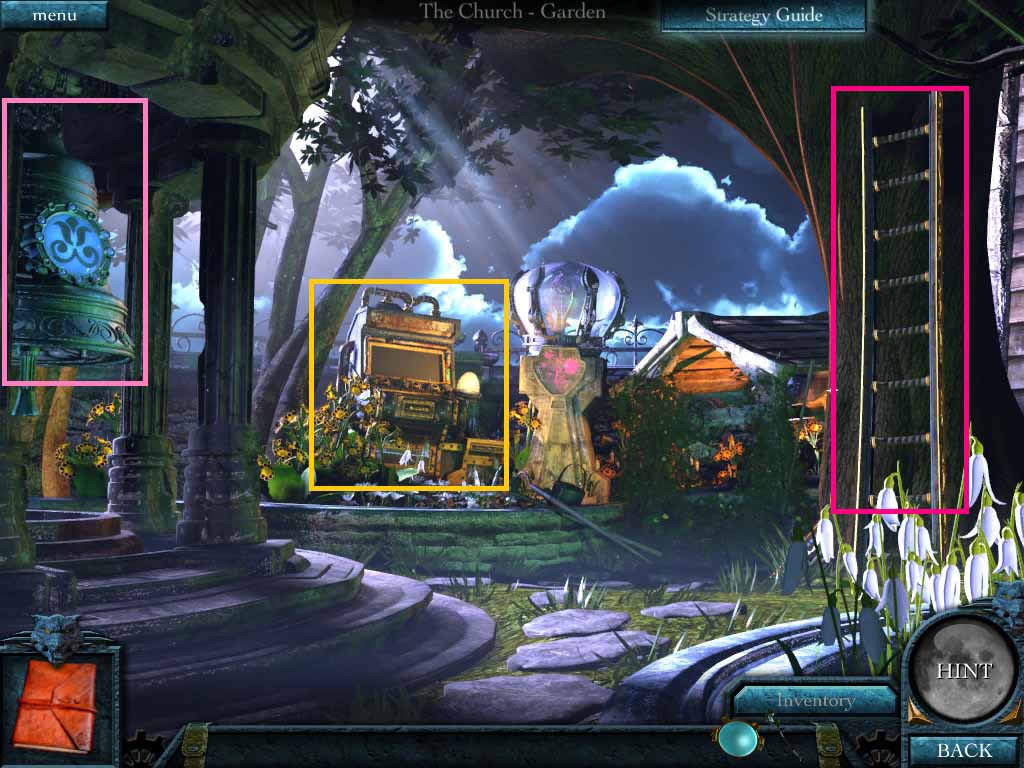
- Collect the bell and the ladder.
- Move forward and examine the machine.
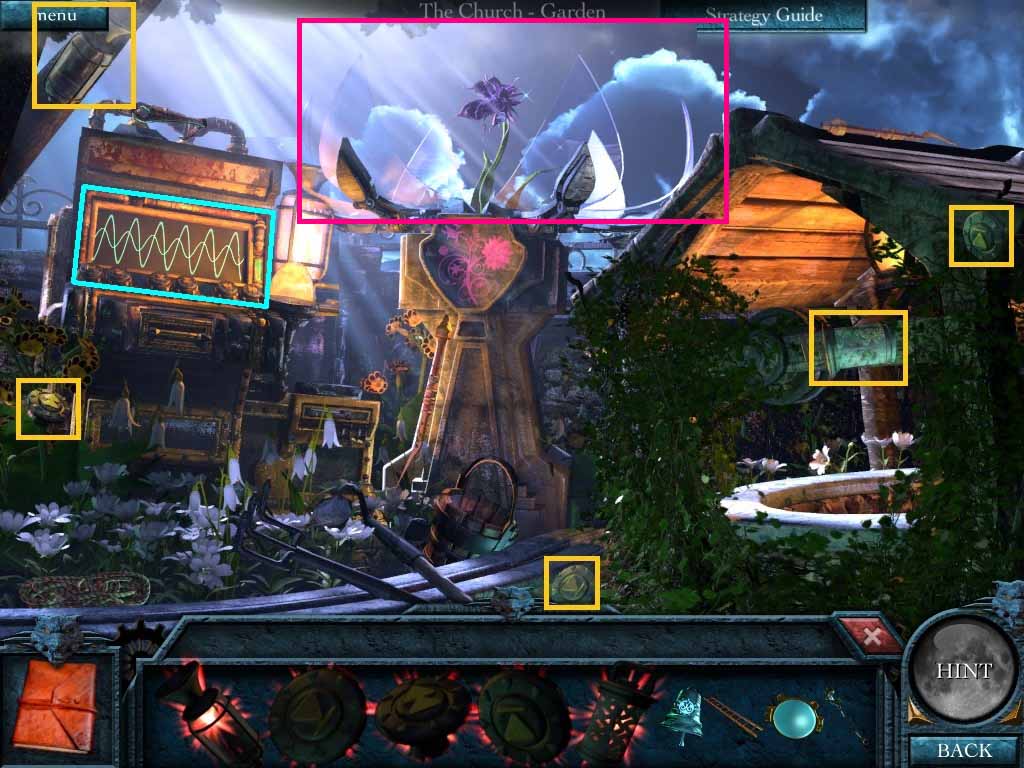
- Find the machines missing parts.
- Assemble the parts to activate the machine.
- Match the bottom and top wave to open the flower pod.
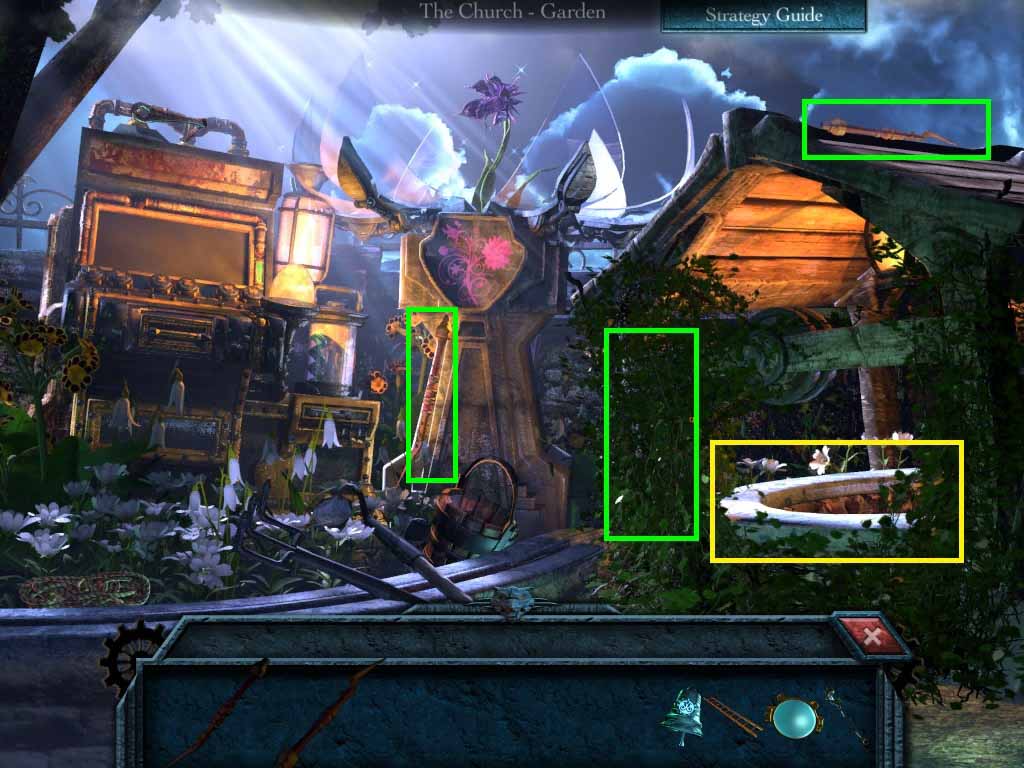
- Zoom into the well.
- Collect the pieces of the hedge clippers.
- Use them to remove the vines.
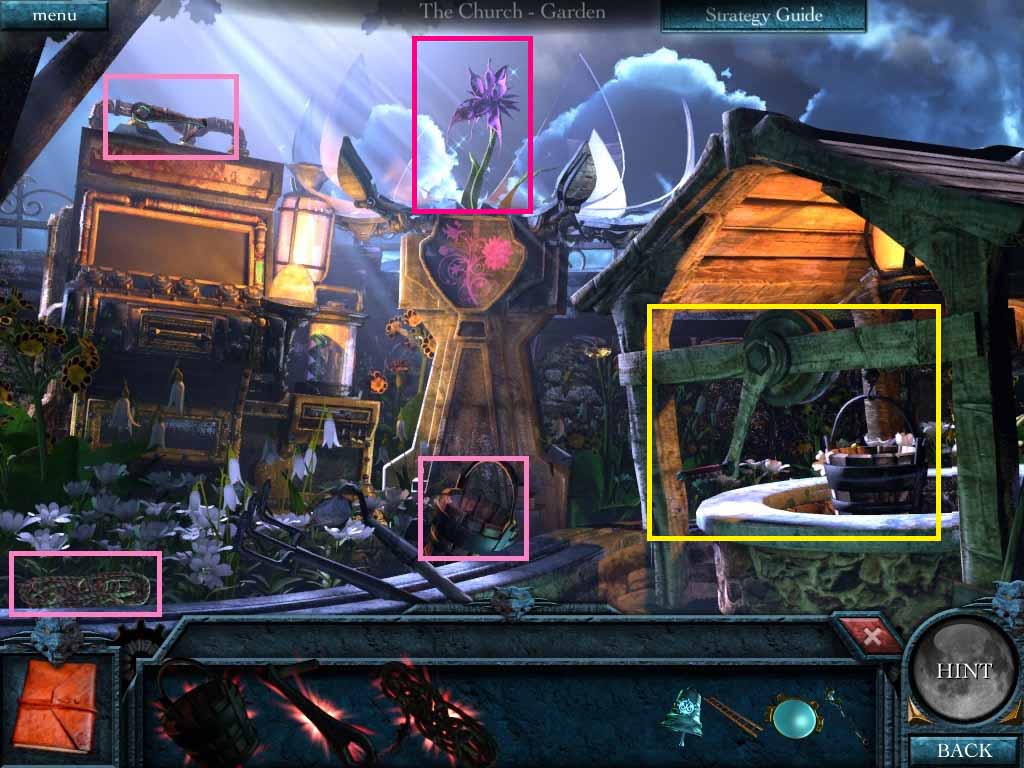
- Zoom into the well again.
- Collect the pieces for the well.
- Assemble the pieces and collect the water.
- Collect the full bucket and use it on the flower.
- Collect the queen of the night orchid.
- Go into the church.
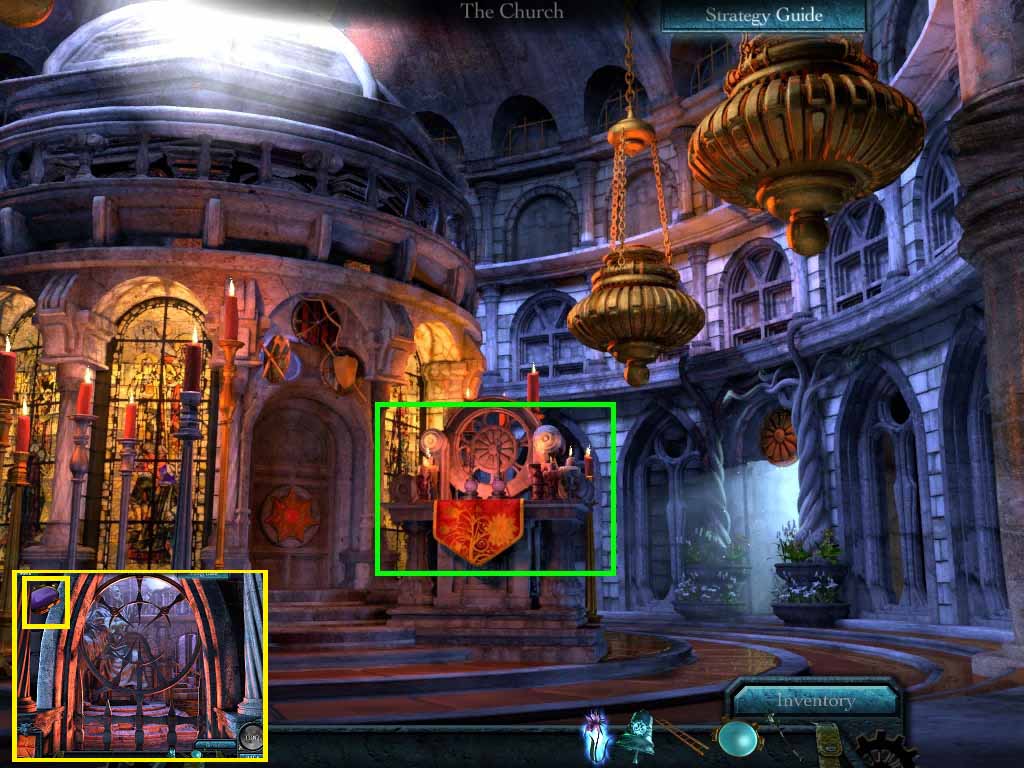
- Examine the altar.
- Collect Tara’s earrings.
- Put the queen of the night orchid onto the prongs.
- Move back one scene, go to the left and collect the lens filter.
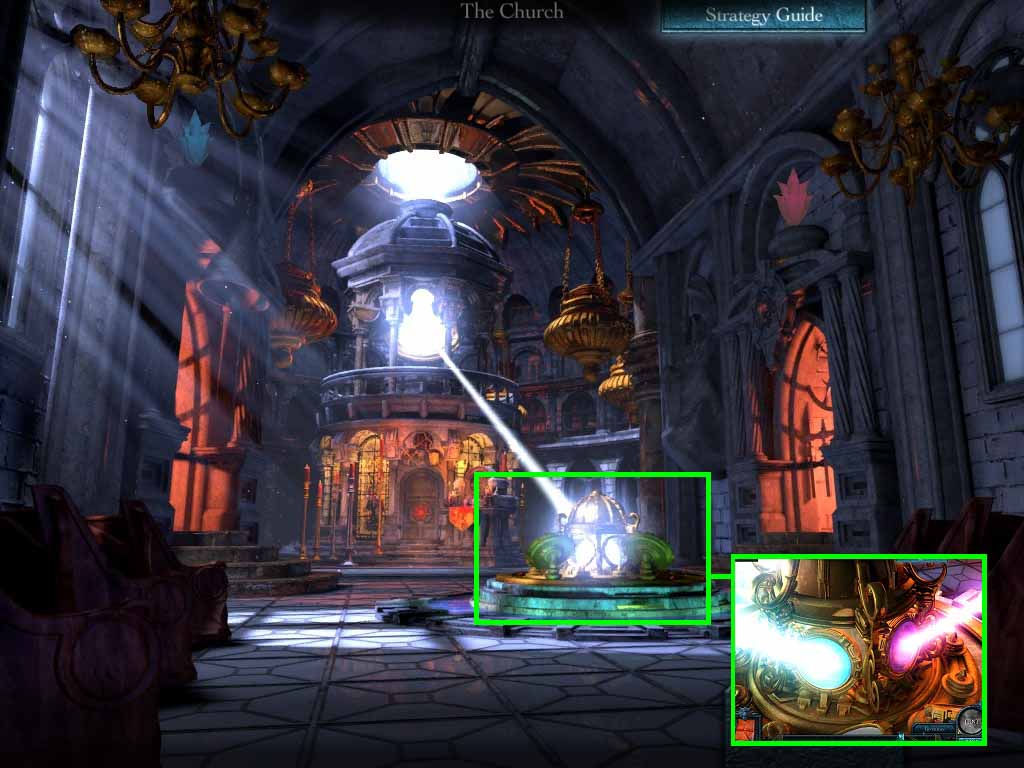
- Go back and examine the light reflector.
- Insert the 2 lens filters into the slots.
- Move to the right passage.
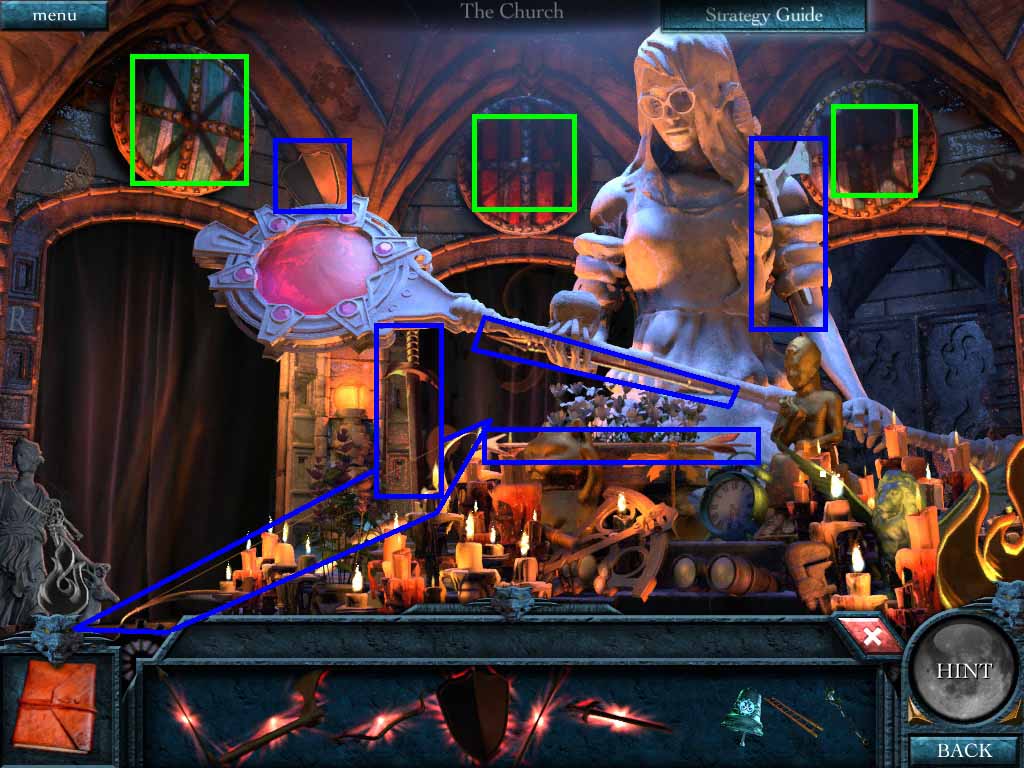
- Collect the missing weapons.
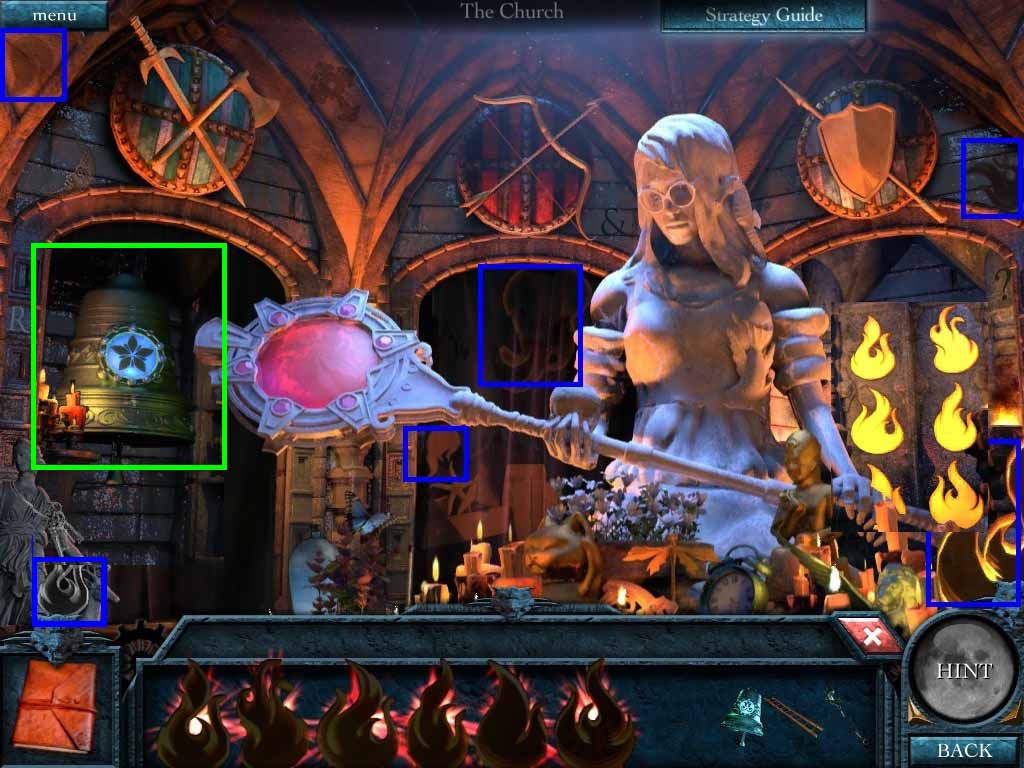
- Collect the flame emblems and place them into the slots.
- Collect the bell.
- Move to the left passage.
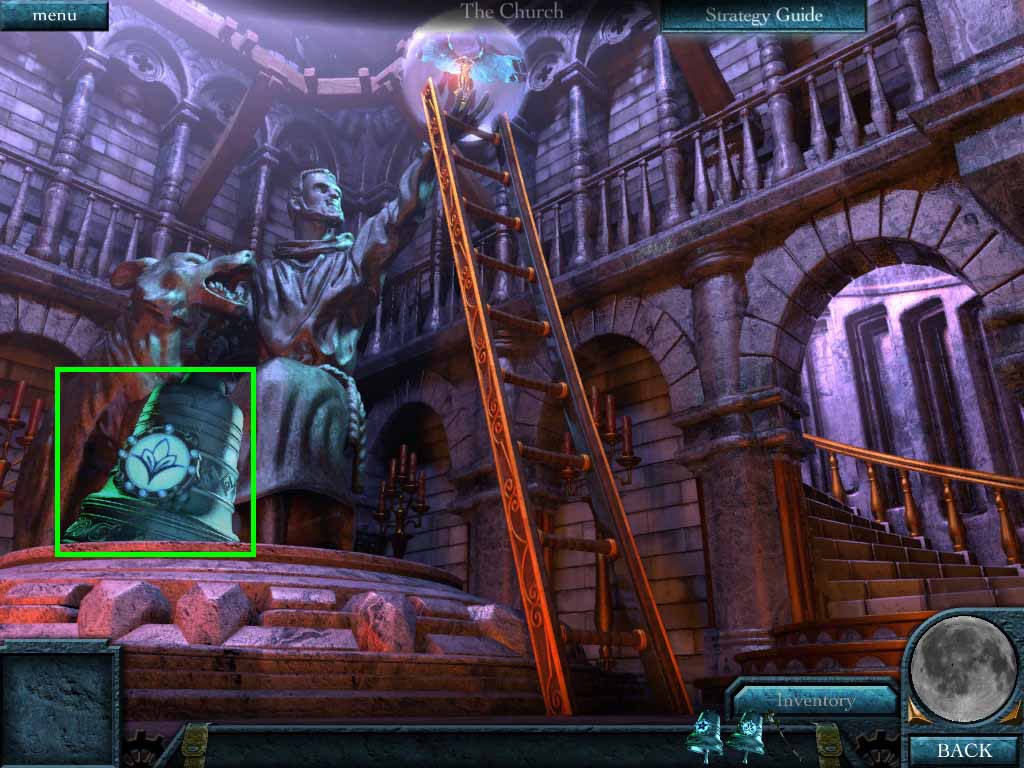
- Collect the bell.
- Place the ladder.
- Move upstairs.
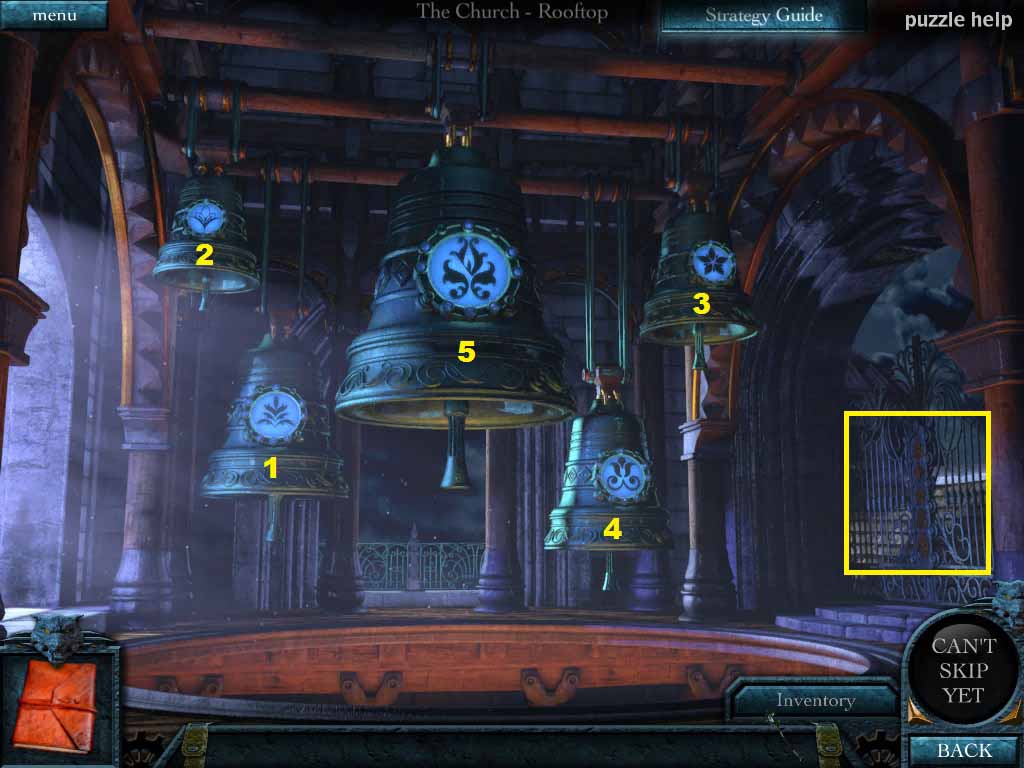
- Place the bells; play them according to the order on the gate (1-5).
- Enter the gate and up to the lens.
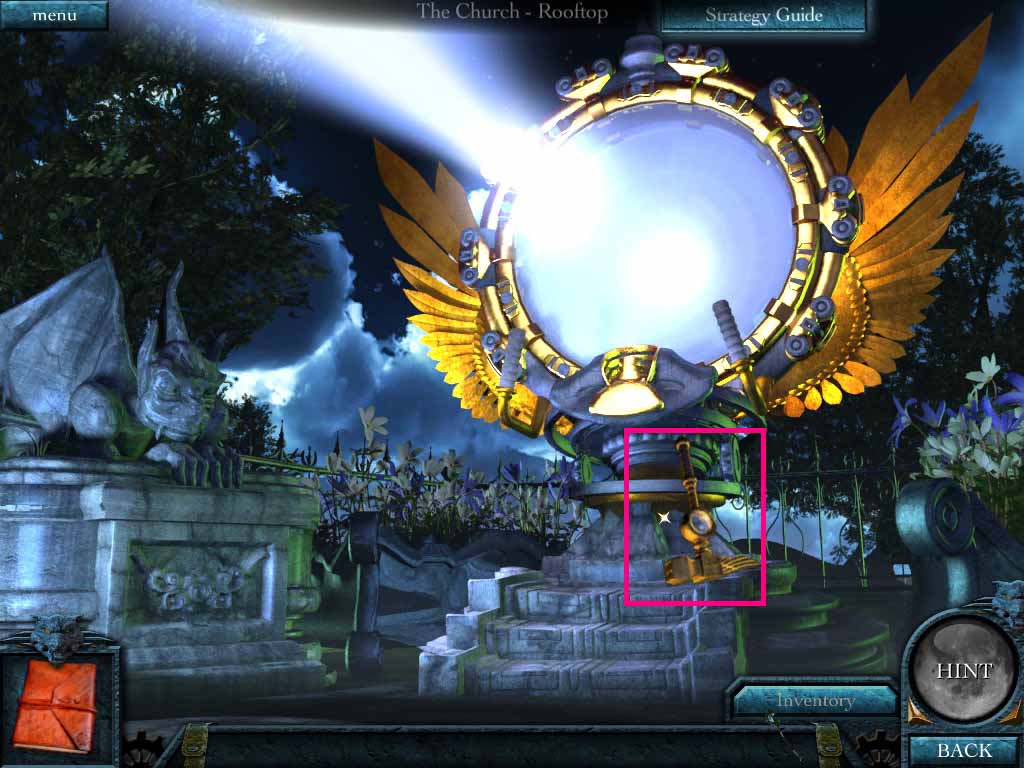
- Collect the moon hammer.
- Go downstairs.
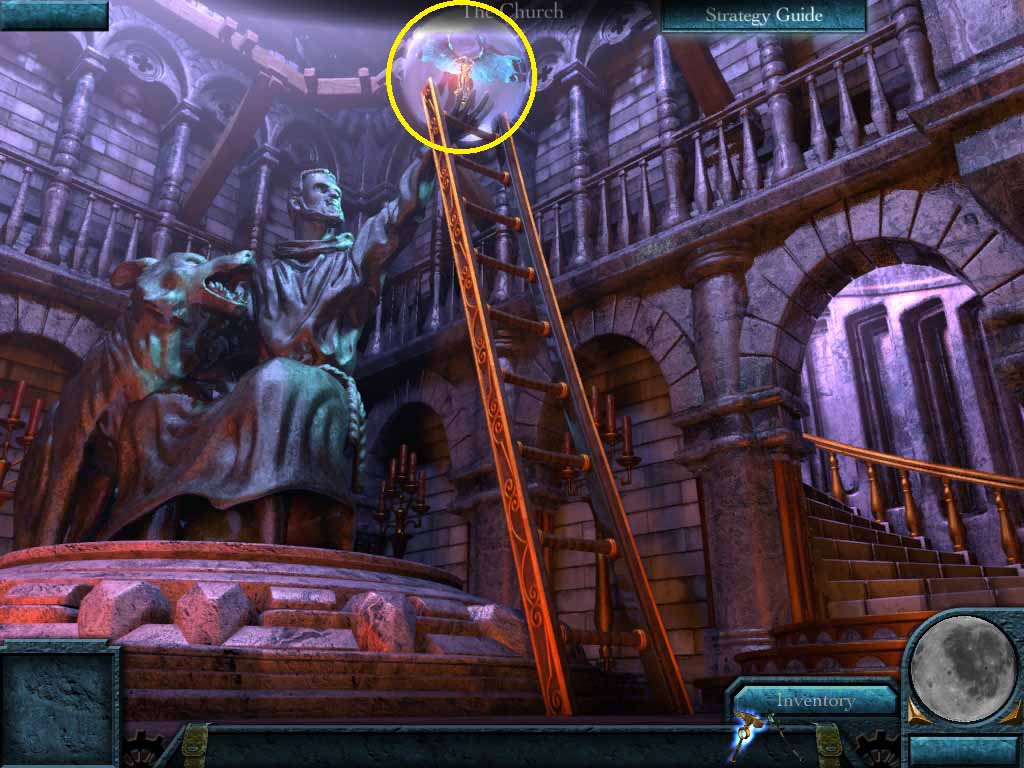
- Use the moon hammer on the statue orb.
- Collect the angel key.
- Go upstairs.
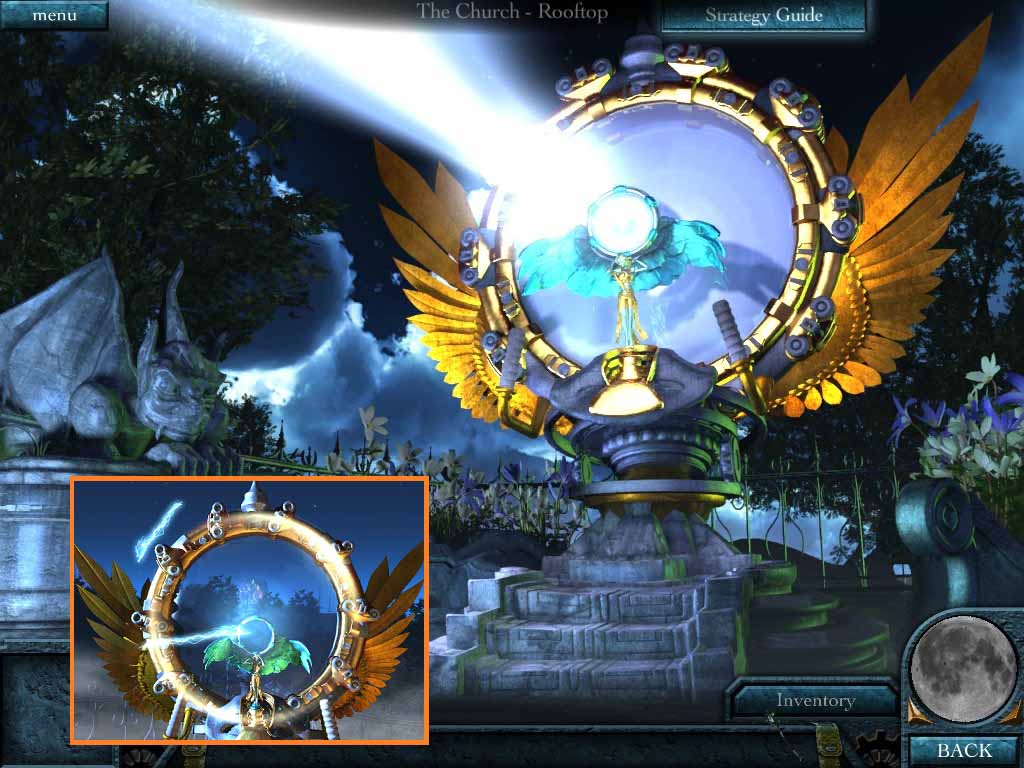
- Place the angel key on the crystal lens.
- Move the lens until Lake Banshee comes into focus.
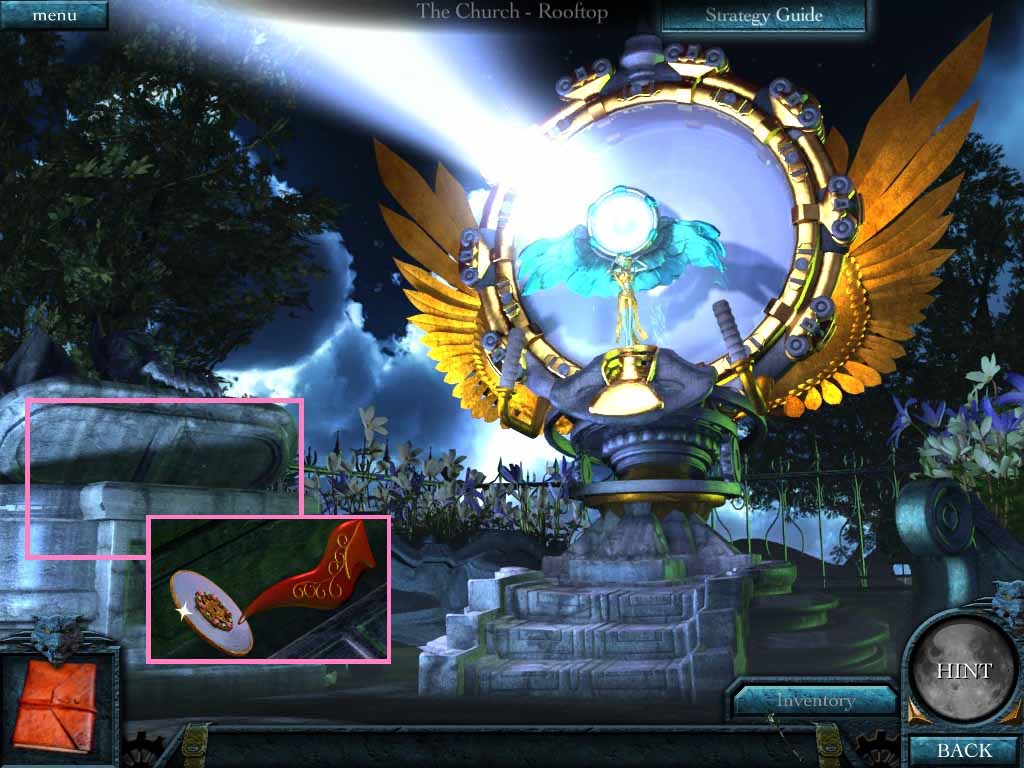
- Examine the chest.
- Collect the disk and the sun piece.
- Go downstairs and to the rear of the church.
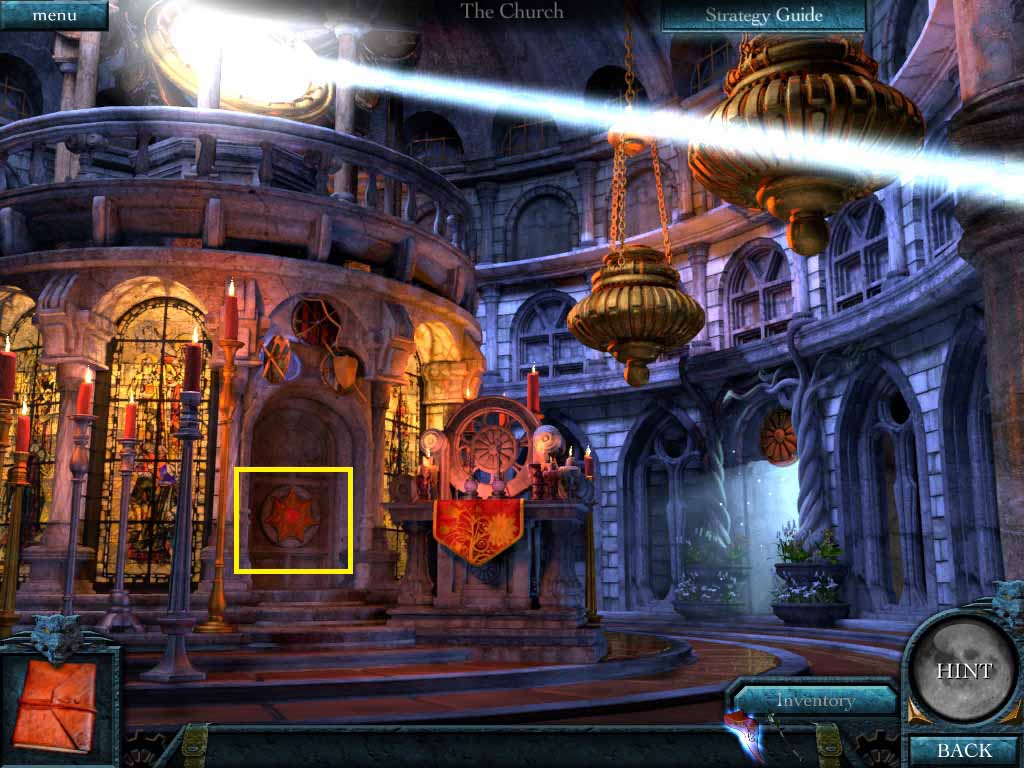
- Examine the door on the sepulture.
- Insert the sun piece into the empty slot.
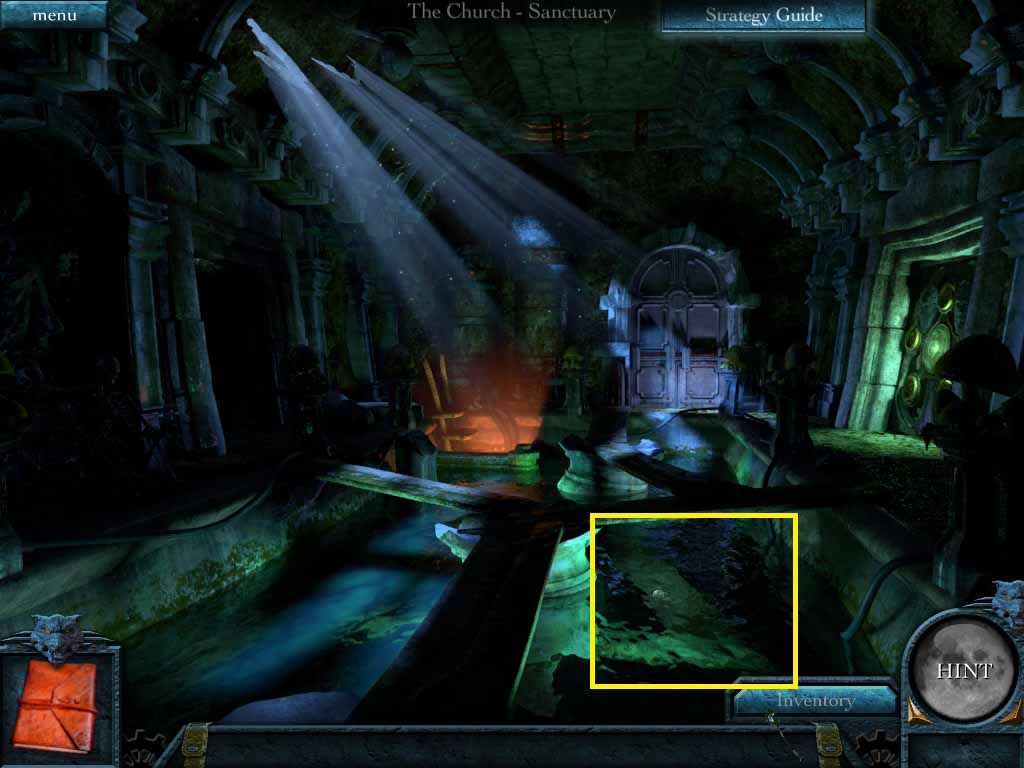
- Examine the bubbling area of water; collect the crowbar.
- Move to the left side of the room.
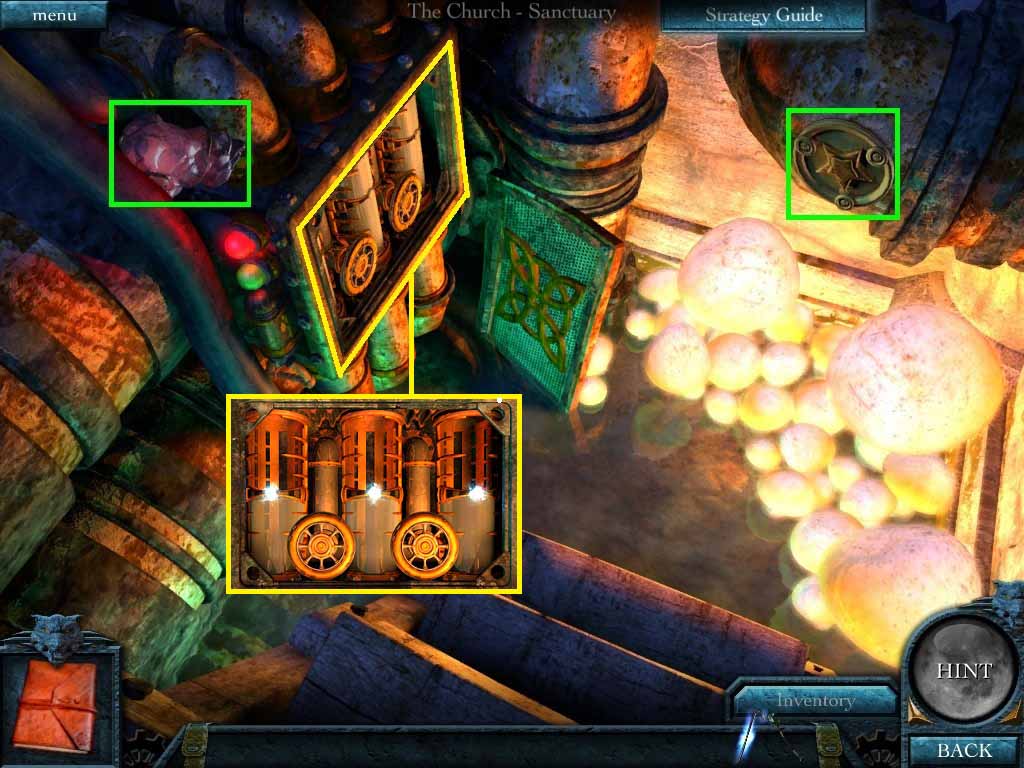
- Collect the star disk and the bloodstone.
- Open the panel with the crowbar.
- Zoom into the panel.
- To solve the mini-game rotate the left wheel two times and the right wheel two times also.
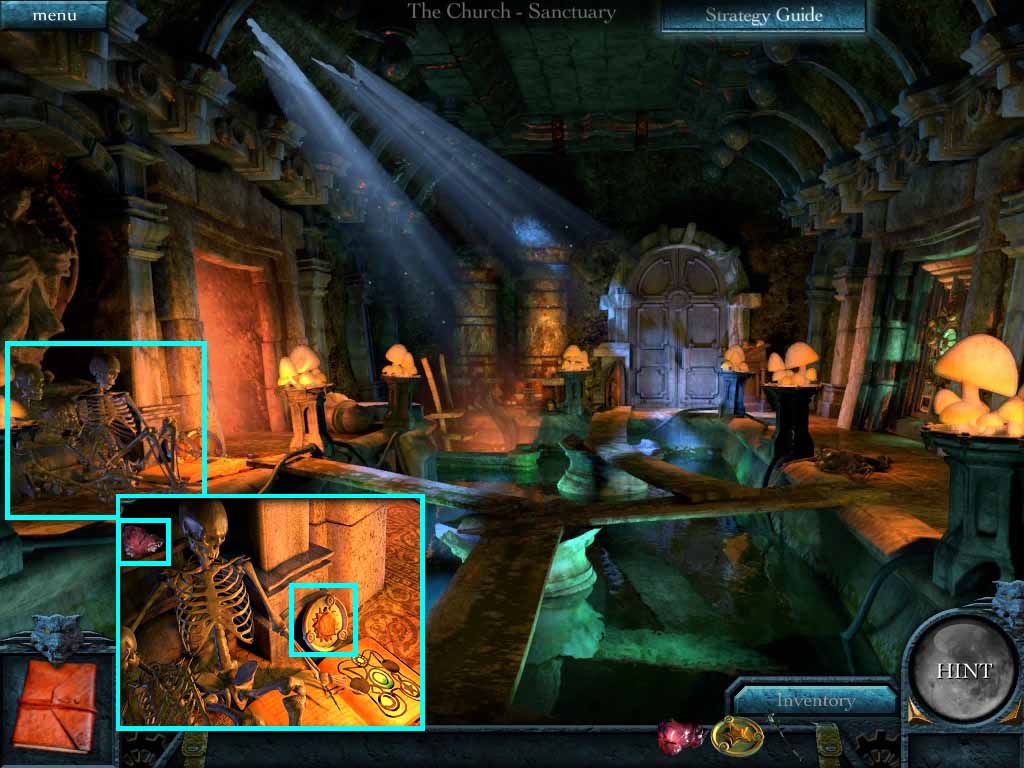
- Examine the skeletons.
- Collect the blood stone and the sun disk.
- Examine the image on the book.
- Move into the left room.
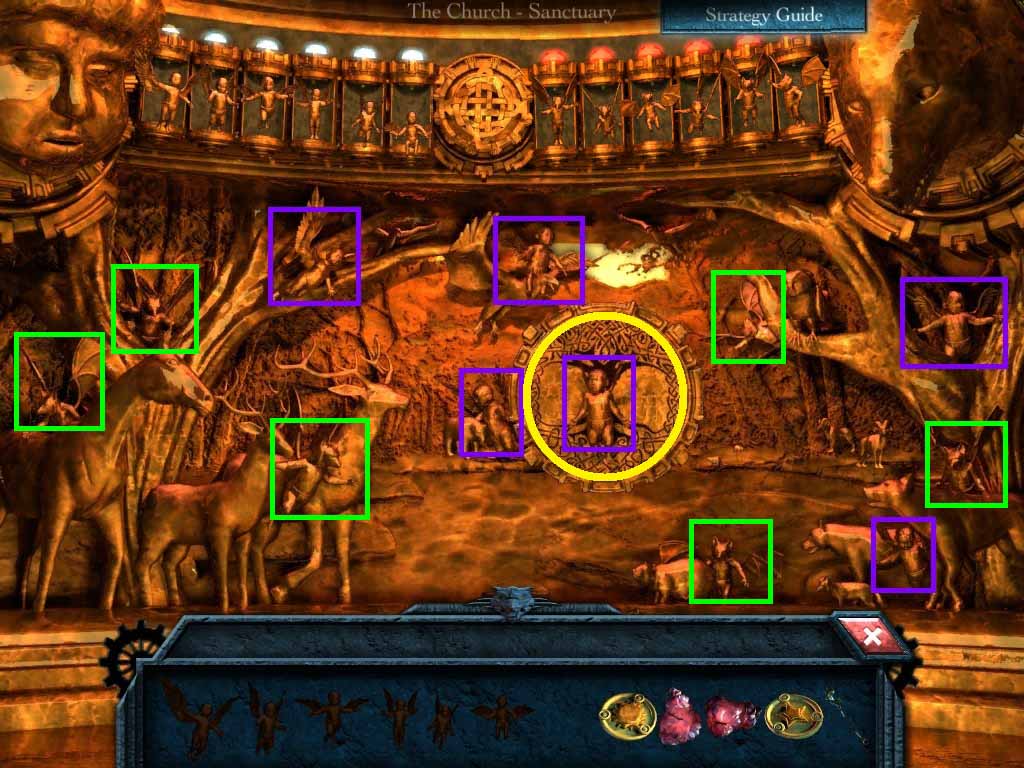
- Examine the disk.
- Collect the missing angels and put them into the correct spots.
- Collect the missing demons and put them in the correct spots.
- Collect the tree disk.
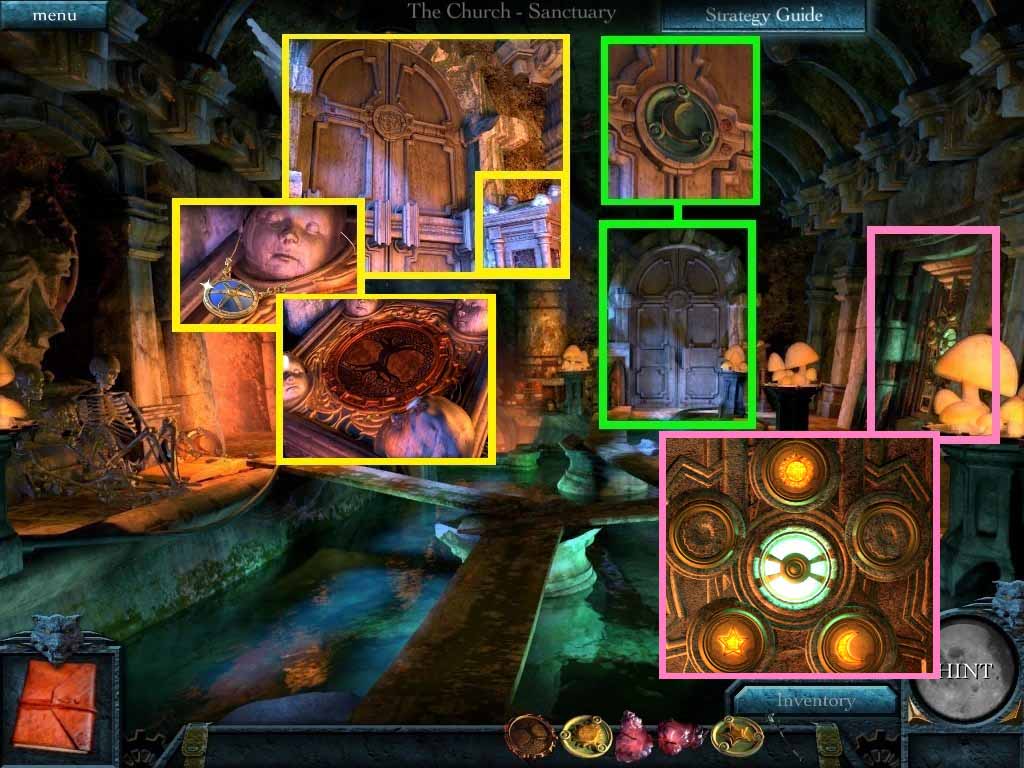
- Move to the door.
- Collect the moon disk.
- Examine the pedestal.
- Collect Tara’s necklace.
- Insert the tree disk into the slot.
- Back up and move to the right door.
- Insert the sun disk on the top slot.
- Insert the moon disk on the lower right slot and the star disk on the lower left slot.
- Go through the door and to the crypt.
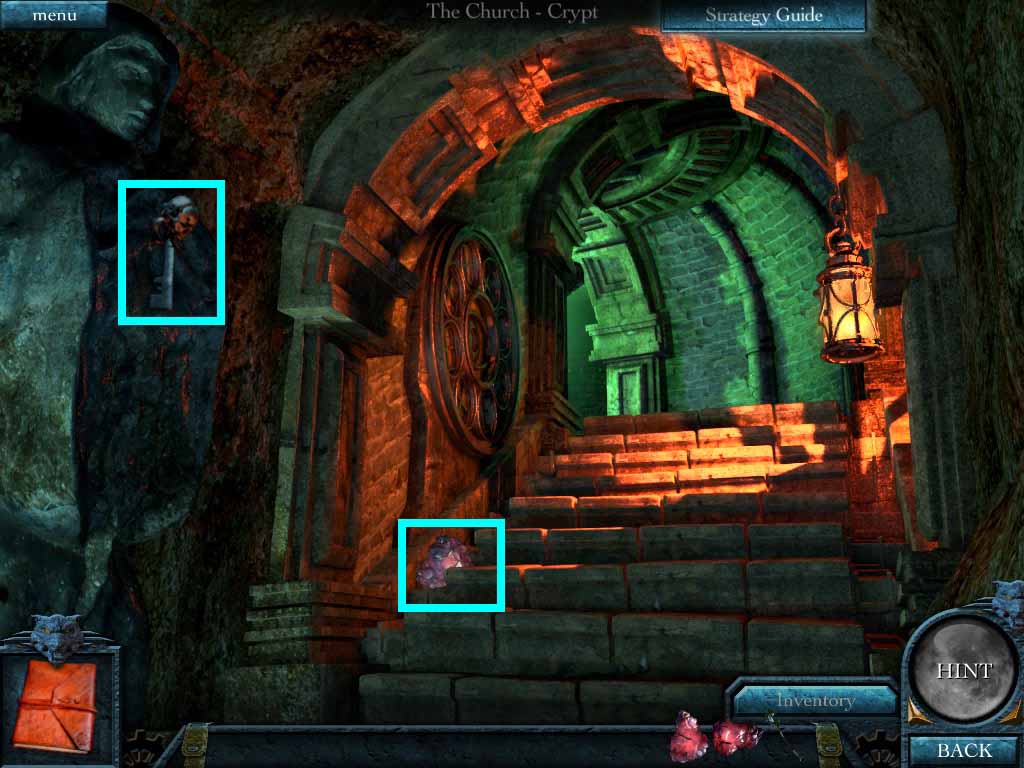
- Collect the graveyard key and the bloodstone.
- Go upstairs.
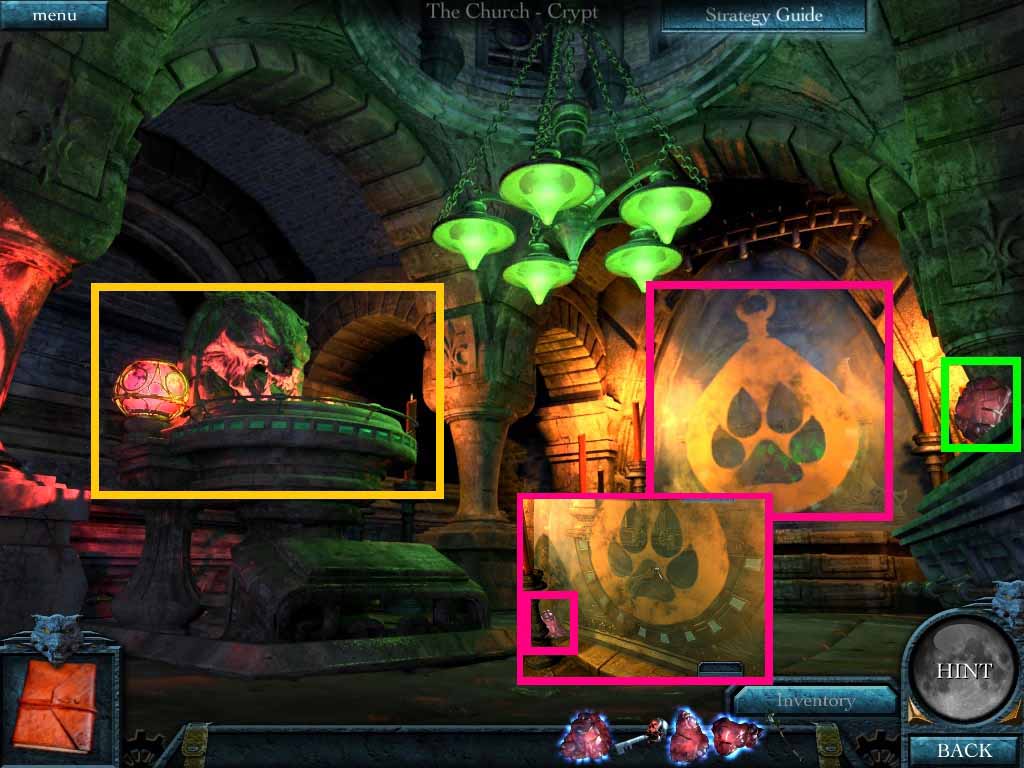
- Collect the bloodstone.
- Examine the wall with the amulet symbol.
- Collect the bloodstone.
- Back up and examine the shrine.
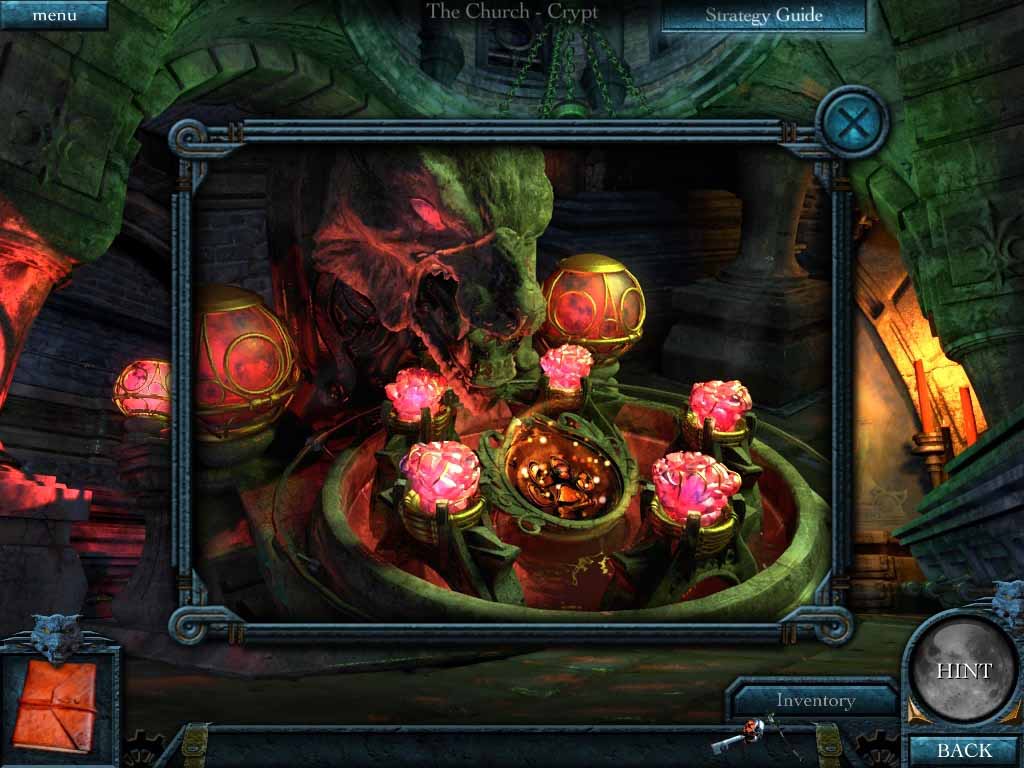
- Insert the bloodstones into the slots.
- Touch the amulet slot to charge the amulet.
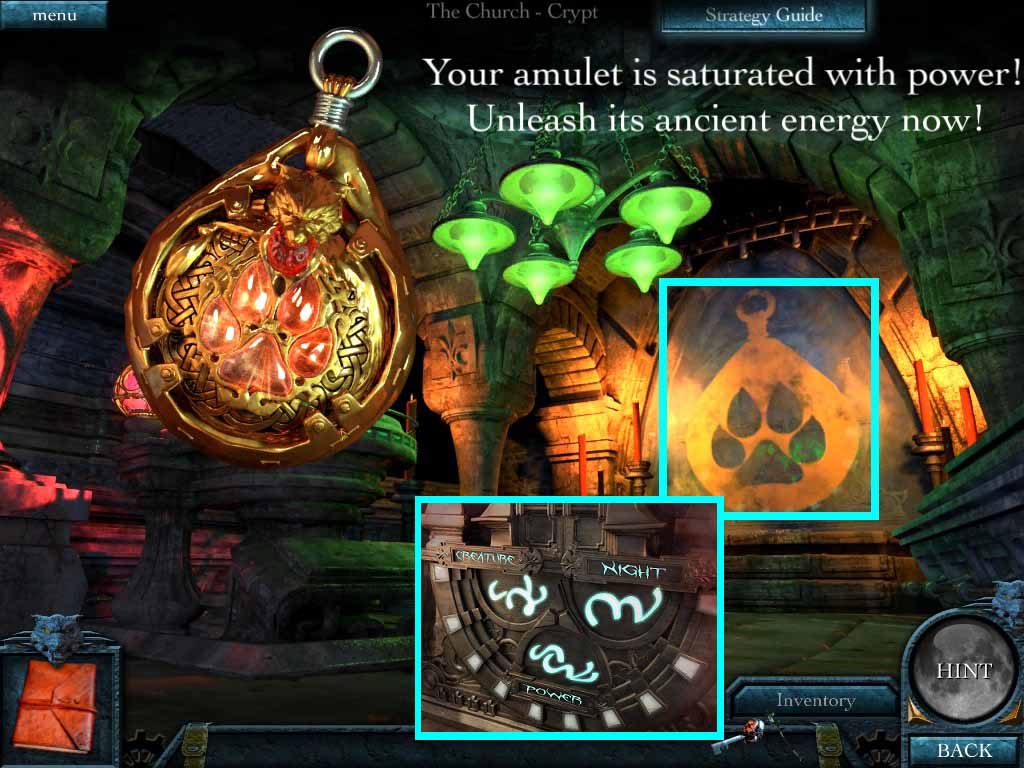
- Unleash the amulet’s power.
- Move back to the wall with the amulet symbol.
- Break the thick glass to see the symbols.
- Back up to the sanctuary and go to the main door.
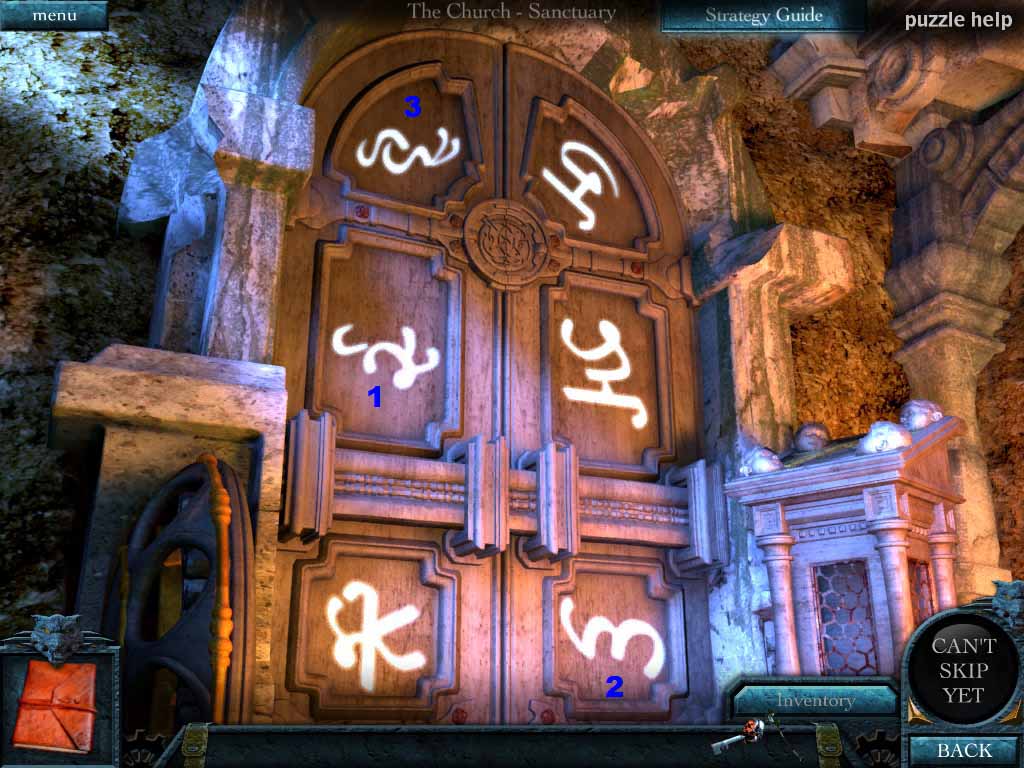
- Click the symbols as follows: creature, night and power.
- Go upstairs to the graveyard.
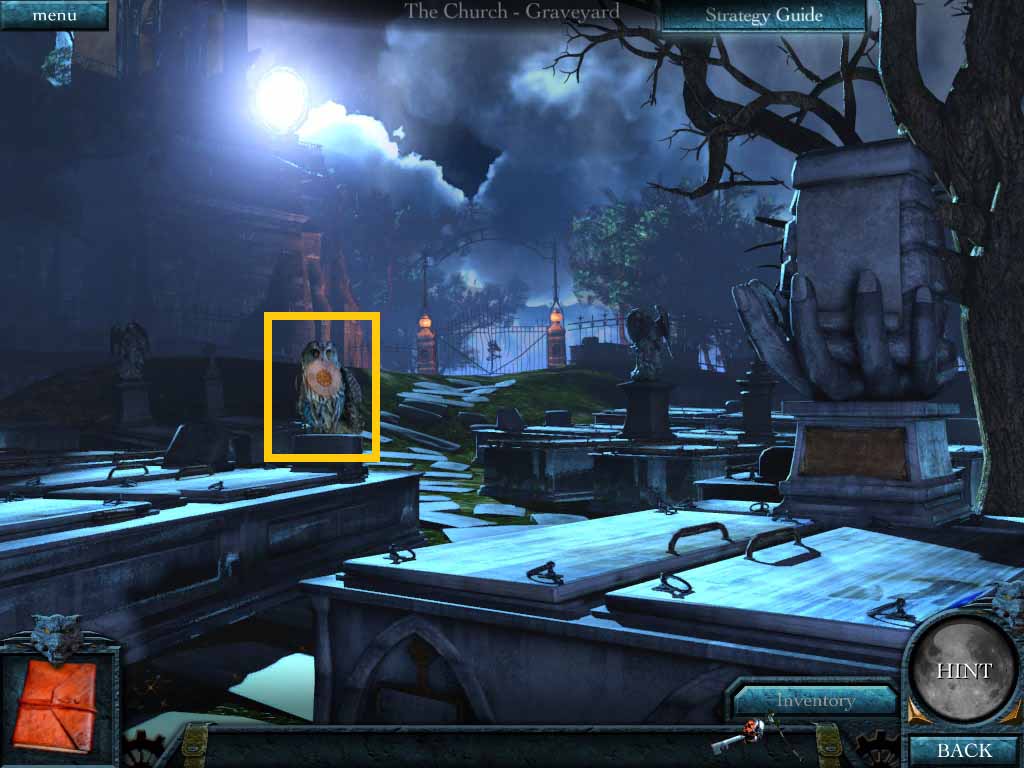
- Collect the disk from the owl.
- Move to the graveyard gate.
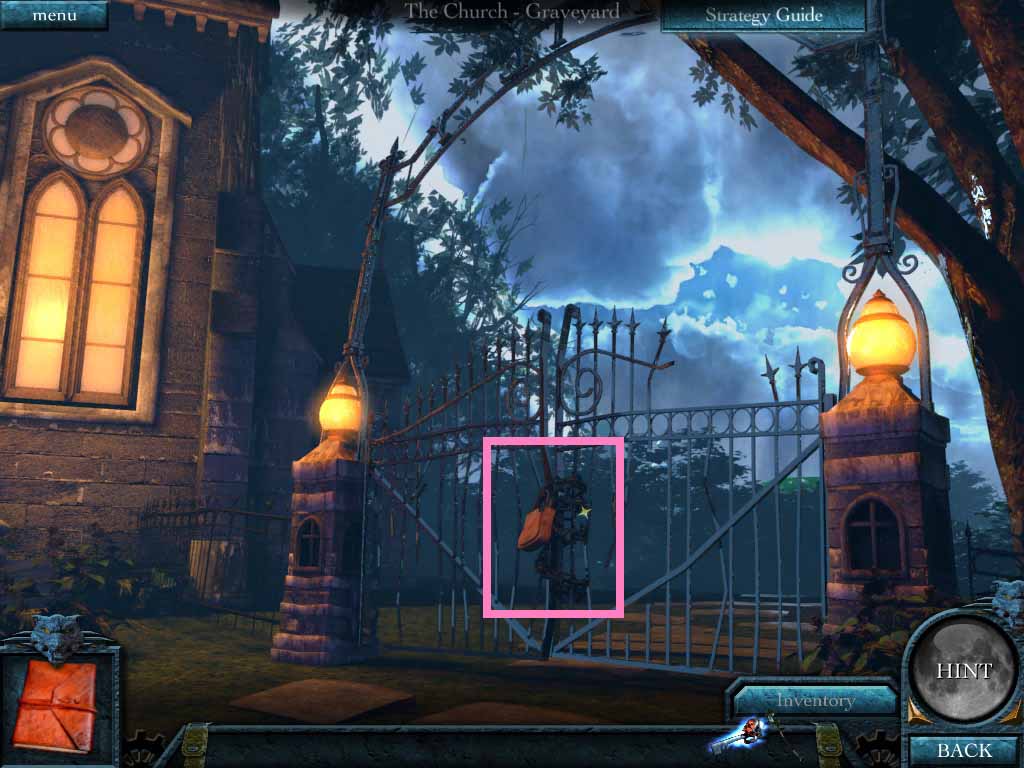
- Open the gate lock using the graveyard key.
- Go back to the village and go to the police station.
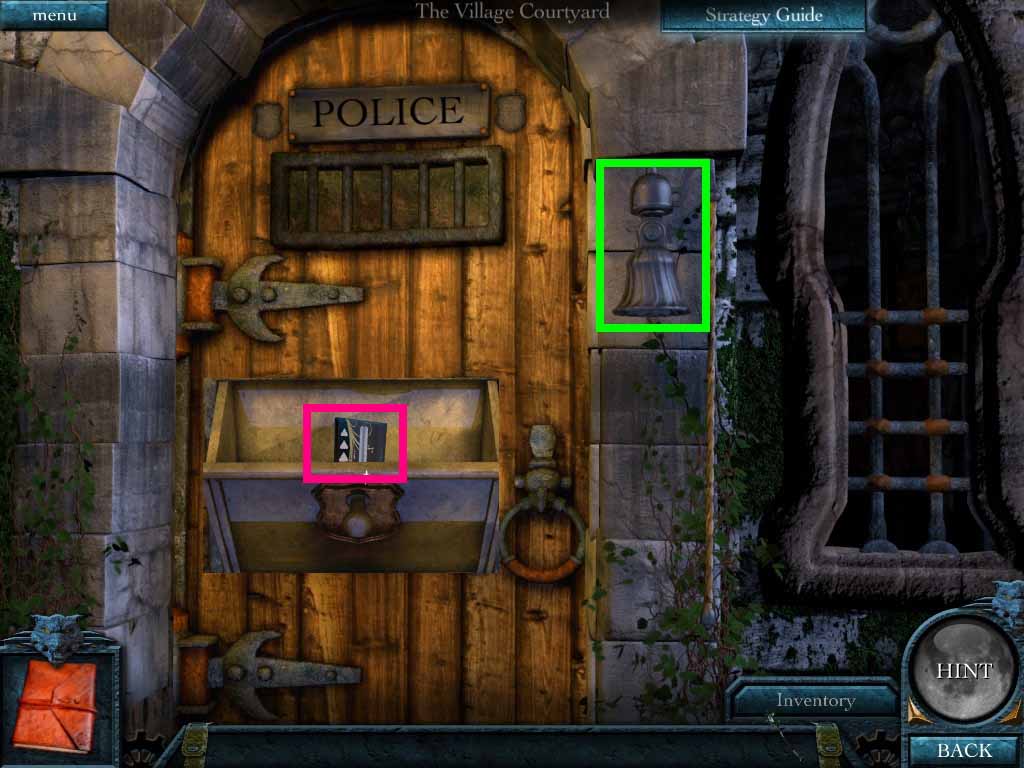
- Ring the bell; a cut scene will trigger.
- Collect the general store key card.
- Go to the general store.
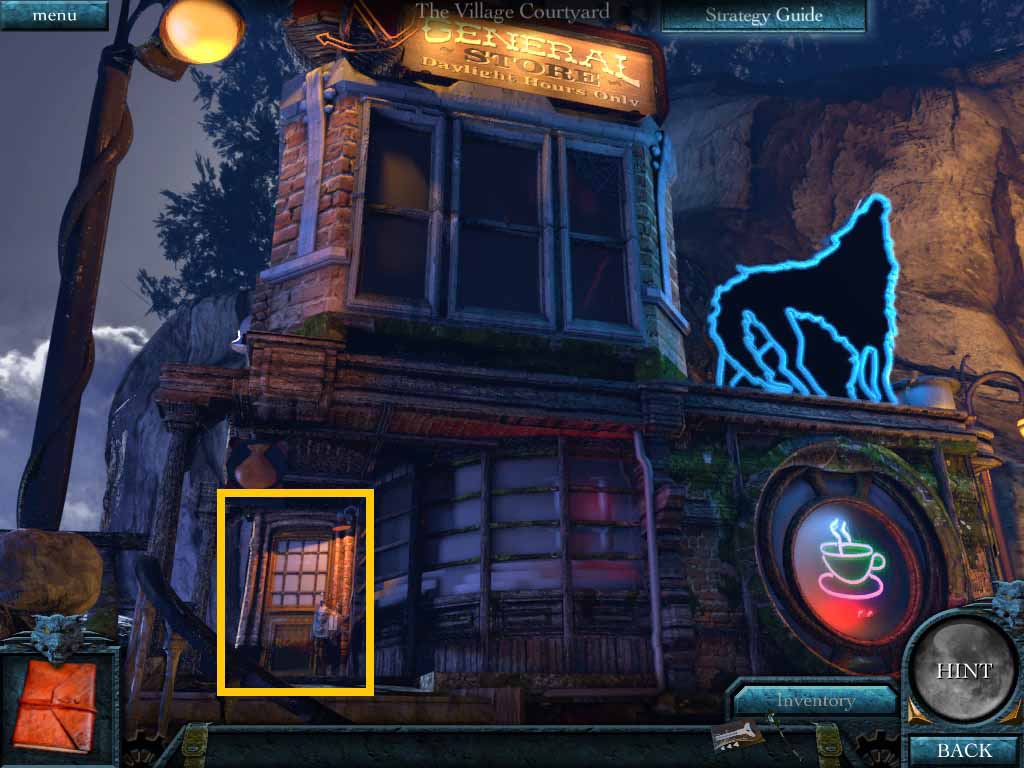
- Examine the door.
- Use the general store key card on the reader.
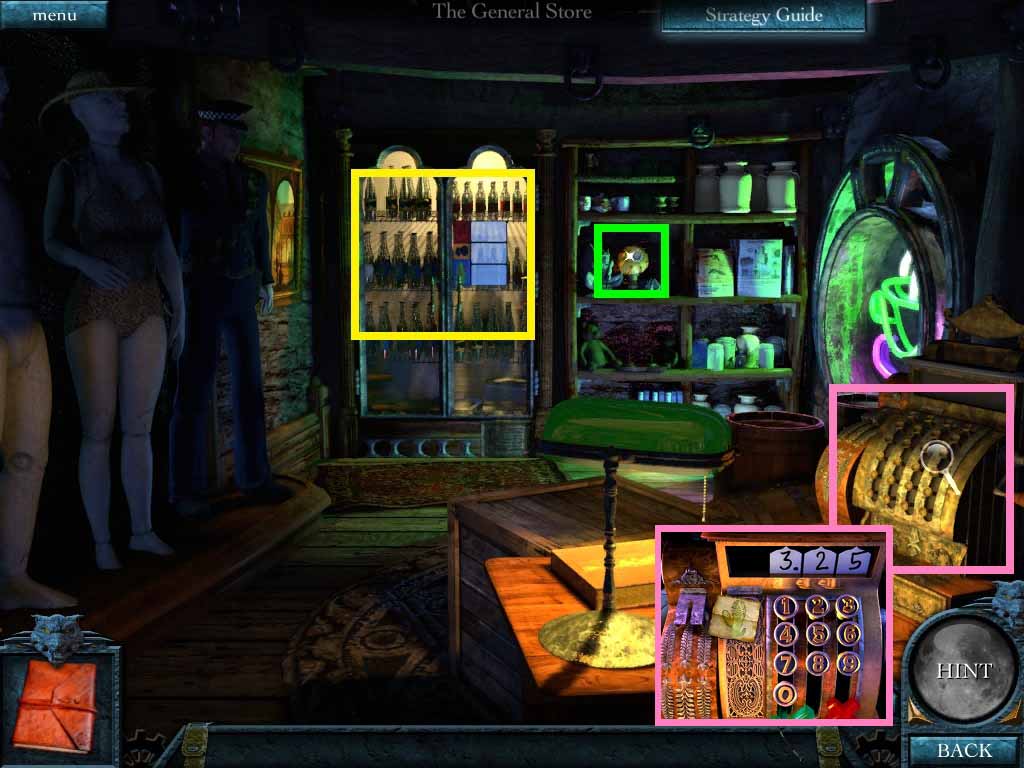
- Collect the mechanical eye.
- Examine the drink cooler.
- Examine the cash register.
- Click 3 – 2 – 5.
- Move up the secret passage stairs.
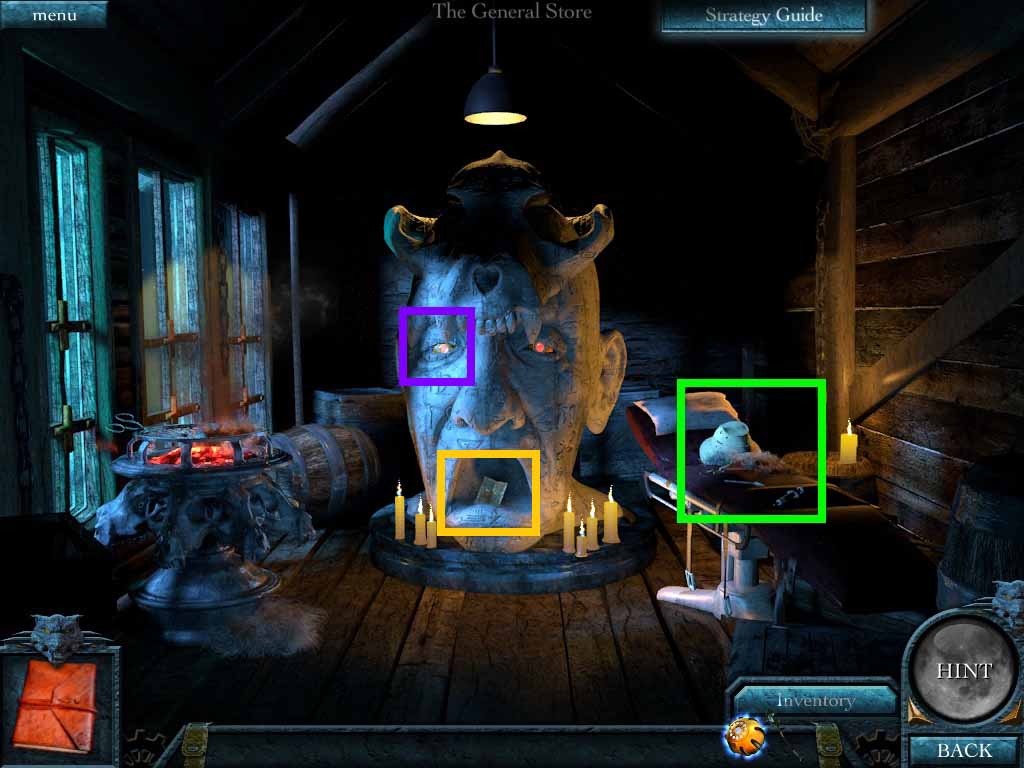
- Examine the surgical bed.
- Collect Tara’s hat.
- Insert the mechanical eye onto the eye socket to open the statue’s mouth.
- Collect the ancient manuscript page.
- Go to the village gate.
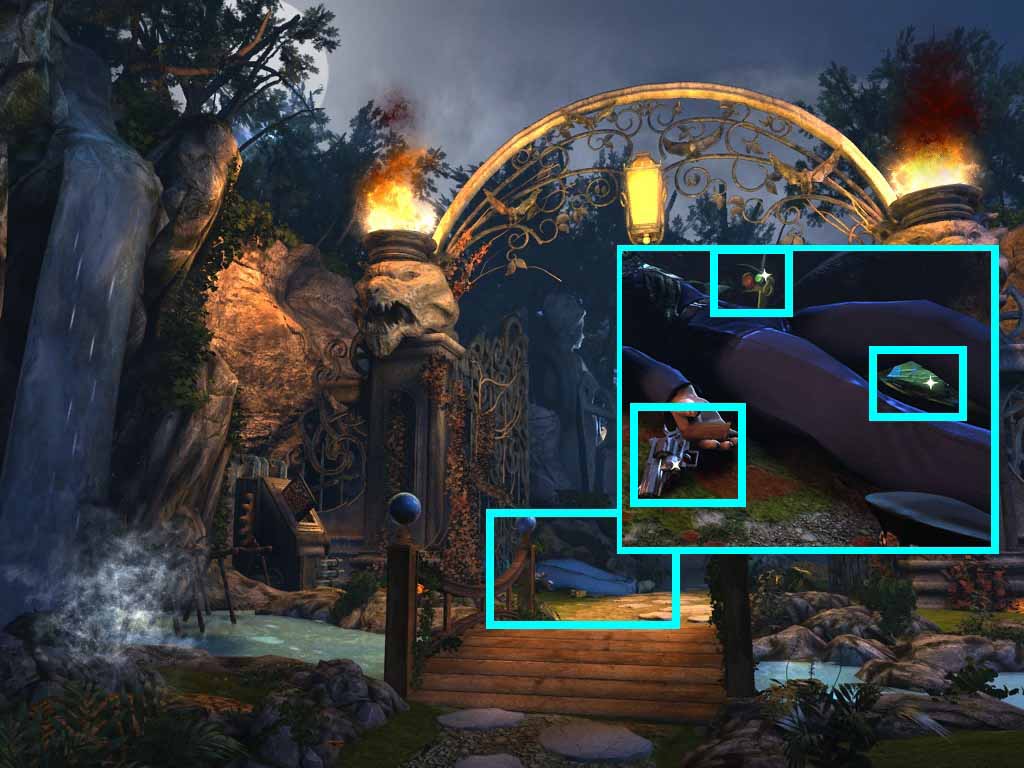
- Examine the cop.
- Collect the loaded gun, the map piece and the remote control.
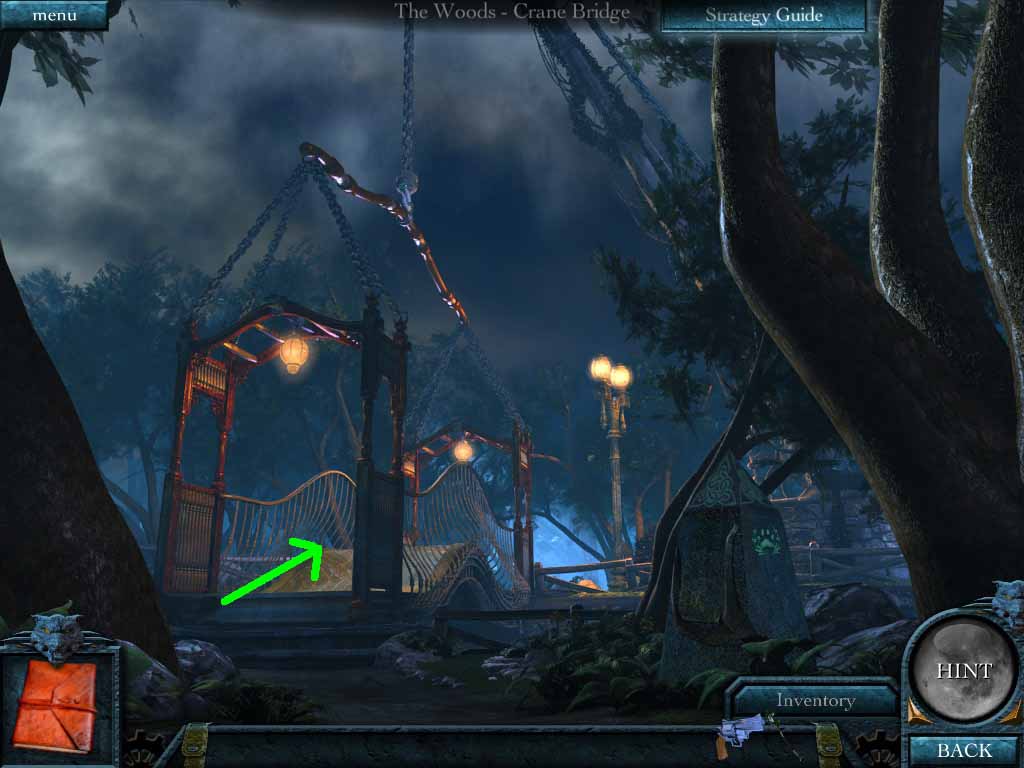
- Follow the cultist to the Crane Bridge.
- Lower the bridge using the remote control.
- Go over the bridge and move left.
Comments will load when you reach this part of the walkthrough.