
Chapter 3
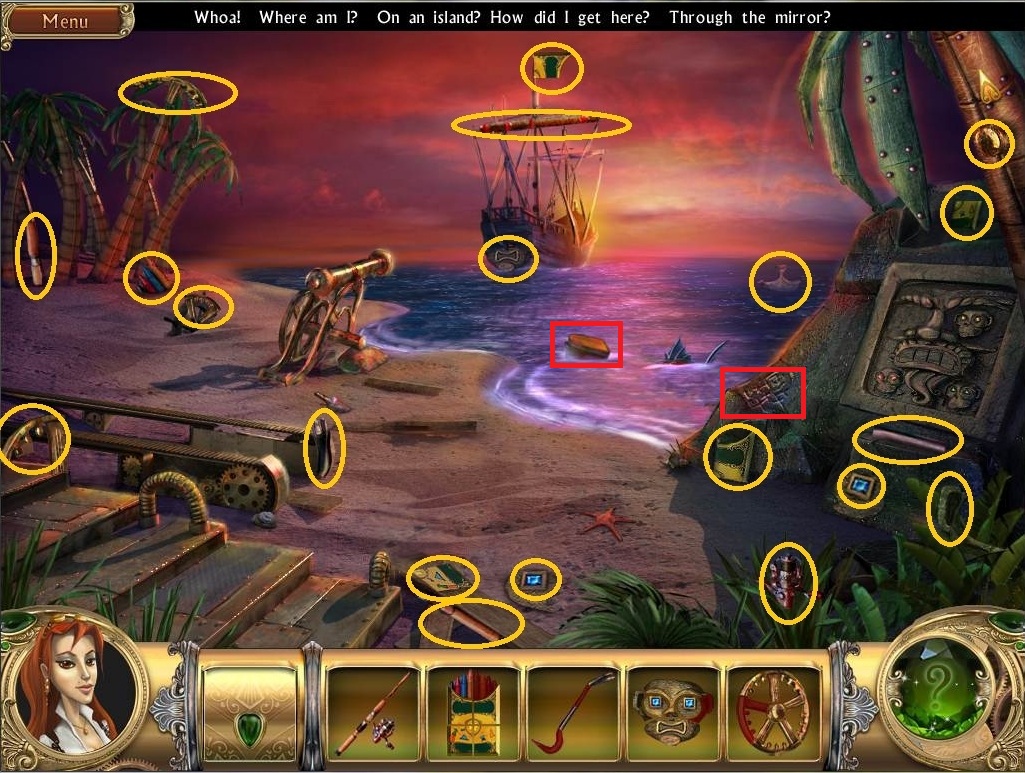
- Locate the hidden objects to complete FISHING ROD, CRAYONS, and MASK and begin to assemble CROWBAR and WHEEL.
- Fish the suitcase out of the water using the FISHING ROD and take the PIECE OF PAPER and a hidden object from the suitcase lid.
- Use the PIECE OF PAPER on the writing on the rocks to the right of the water.
- Walk up the stairs on the left.
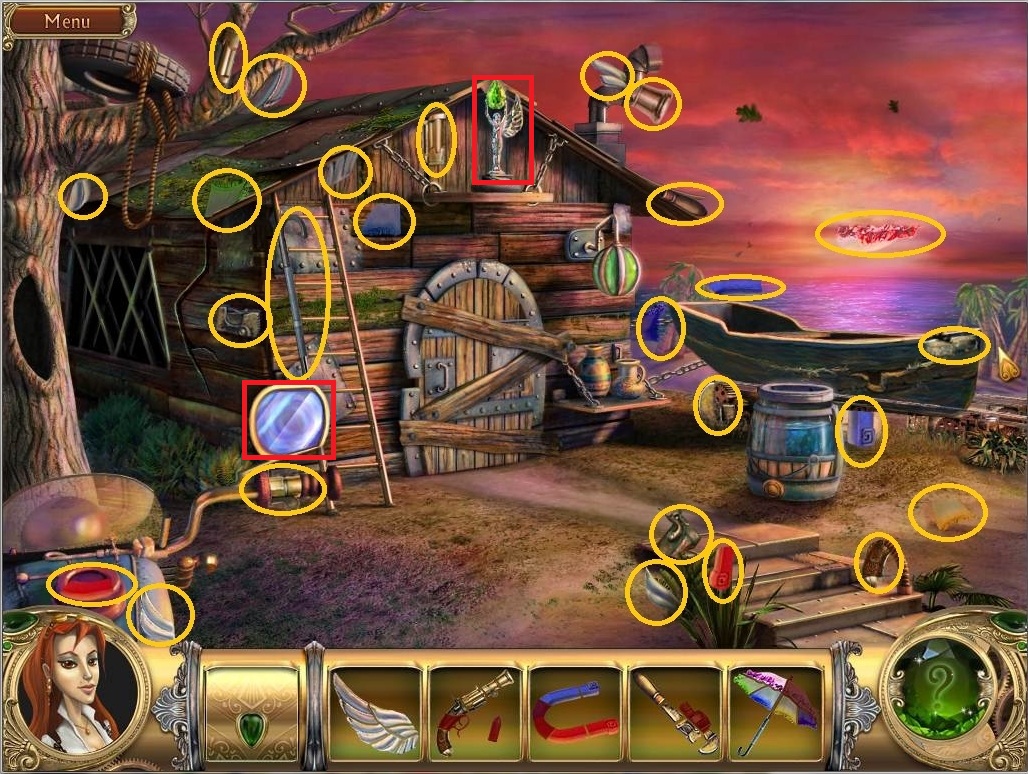
- Locate hidden objects to complete ANGEL’S WING and begin to assemble PISTOL, MAGNET, WRENCH and UMBRELLA.
- Place the ANGEL’S WING on the angel statue above the door.
- Go through the portal to the left of the door.
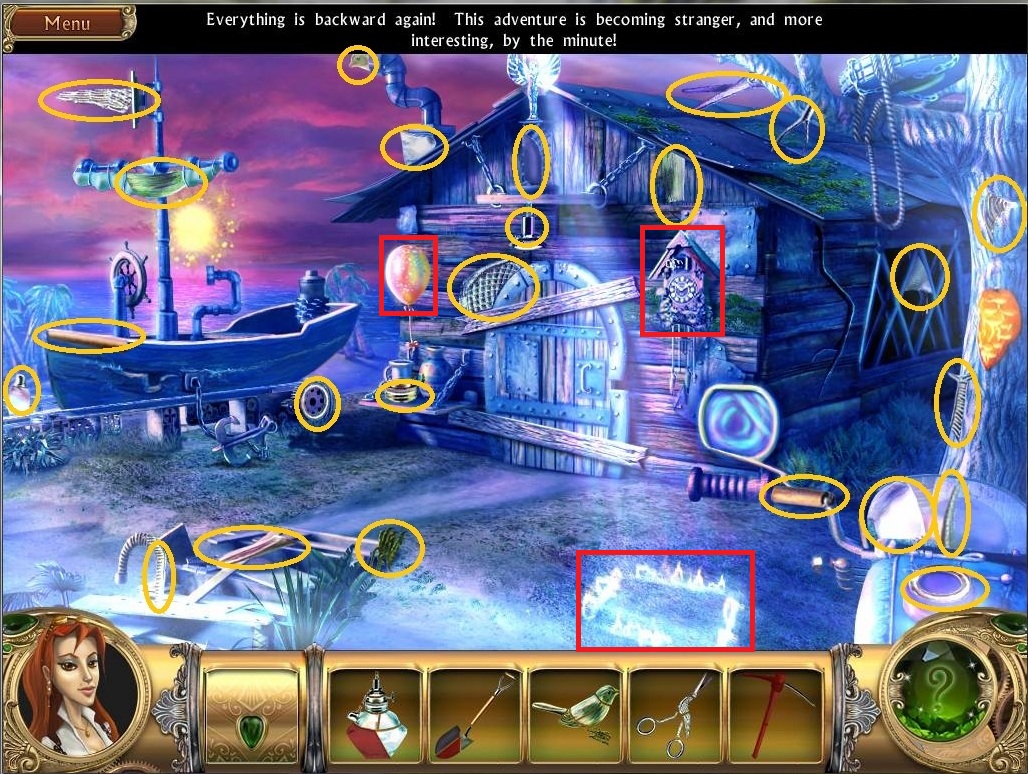
- Locate hidden objects to complete SHOVEL, CUCKOO, and SCISSORS and begin to assemble LAMP and PICKAXE.
- Cut the balloon string with the SCISSORS and take the hidden piece that is revealed.
- Place the CUCKOO on the cuckoo clock to the right of the door and take the hidden piece that falls out.
- Use the SHOVEL on the area that the angel beam is pointing at and get a locked treasure chest.
- Go back through the portal.
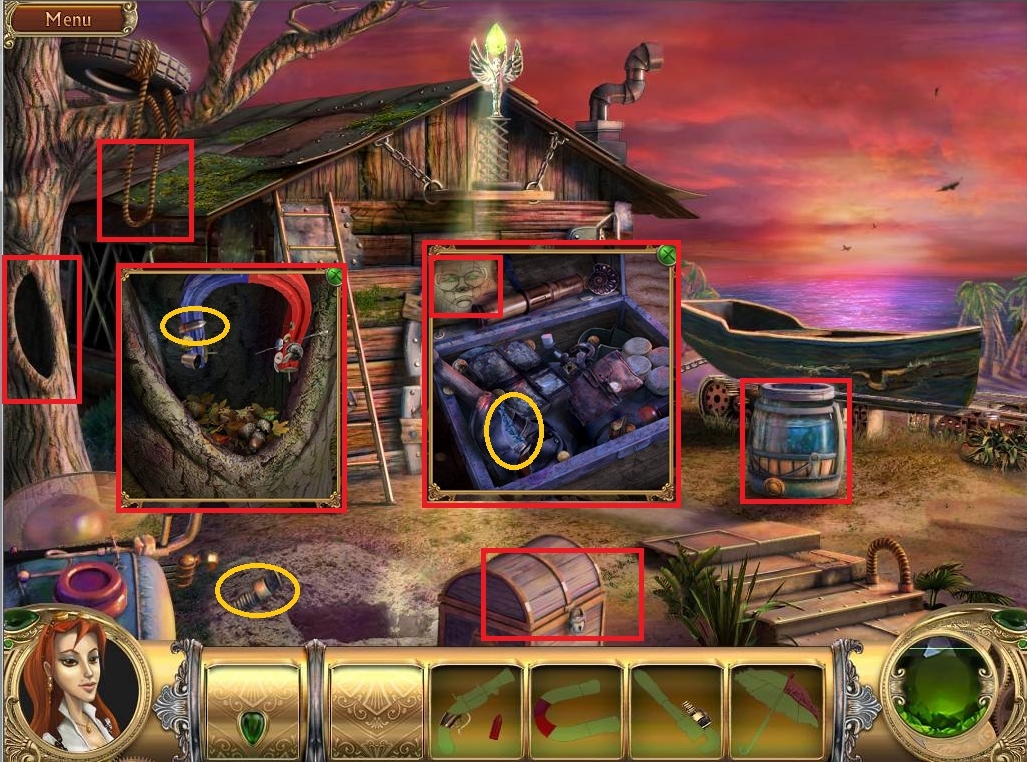
- Locate hidden objects to complete PISTOL, MAGNET, WRENCH and UMBRELLA.
- Click on the barrel and use the WRENCH to unscrew the plug.
- Click on the barrel again to take the hidden piece from the bottom of the barrel and notice the equation written on the bottom.
- Click on the hole in the tree and use the MAGNET to retrieve the BULLET.
- Use the PISTOL on the lock of the chest and to open.
- Retrieve the hidden piece from the front left corner of the trunk and notice the facial expression on the paper inside the lid..
- Use the UMBRELLA to pull the tire swing out of the tree.
- Go back through the portal.
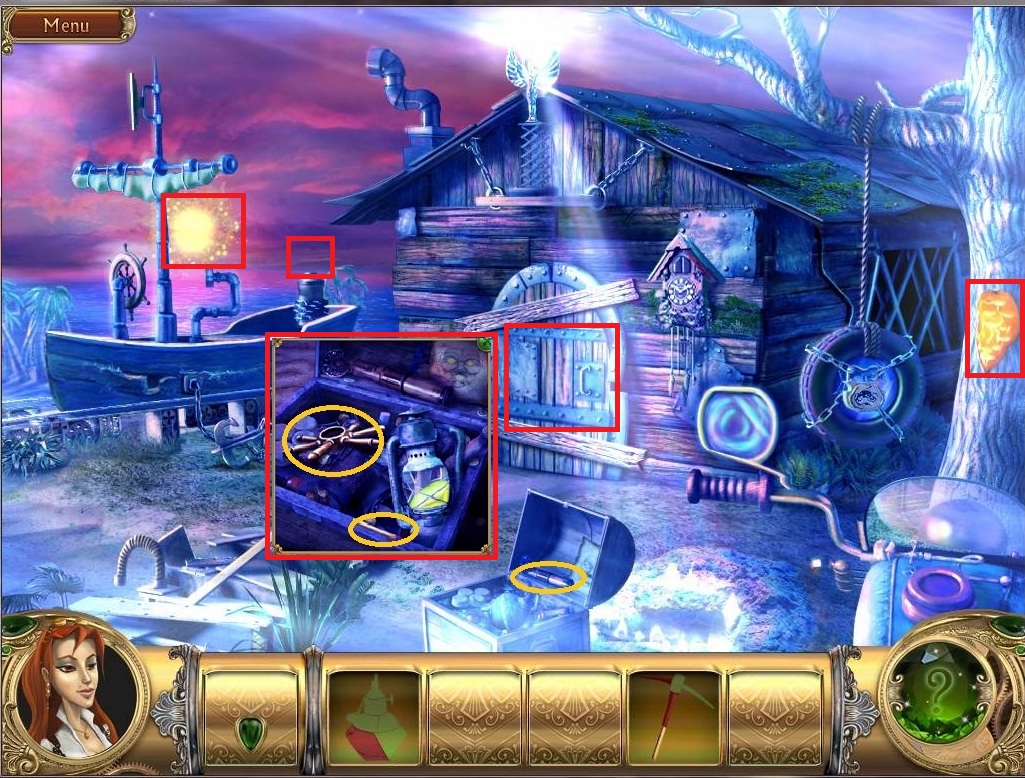
- Click on the chest and take the hidden piece and the ANCHOR LEVER.
- Notice the facial expression on the paper of the inside lid of the chest.
- Use the ANCHOR LEVER on the end of the boat nearest the shack and watch the cutscene.
- Pick up two hidden pieces revealed when the boat moves.
- Use the LAMP on the kerosene lamp in the chest to get a LAMP WITH KEROSENE.
- Use the LAMP WITH KEROSENE on the sun over the water to get a BURNING LAMP.
- Use the BURNING LAMP on the resin on the tree and take the hidden piece.
- Note the equation left behind on the tree.
- Use the PICKAXE on the boarded up door of the shack and go through the opened door.
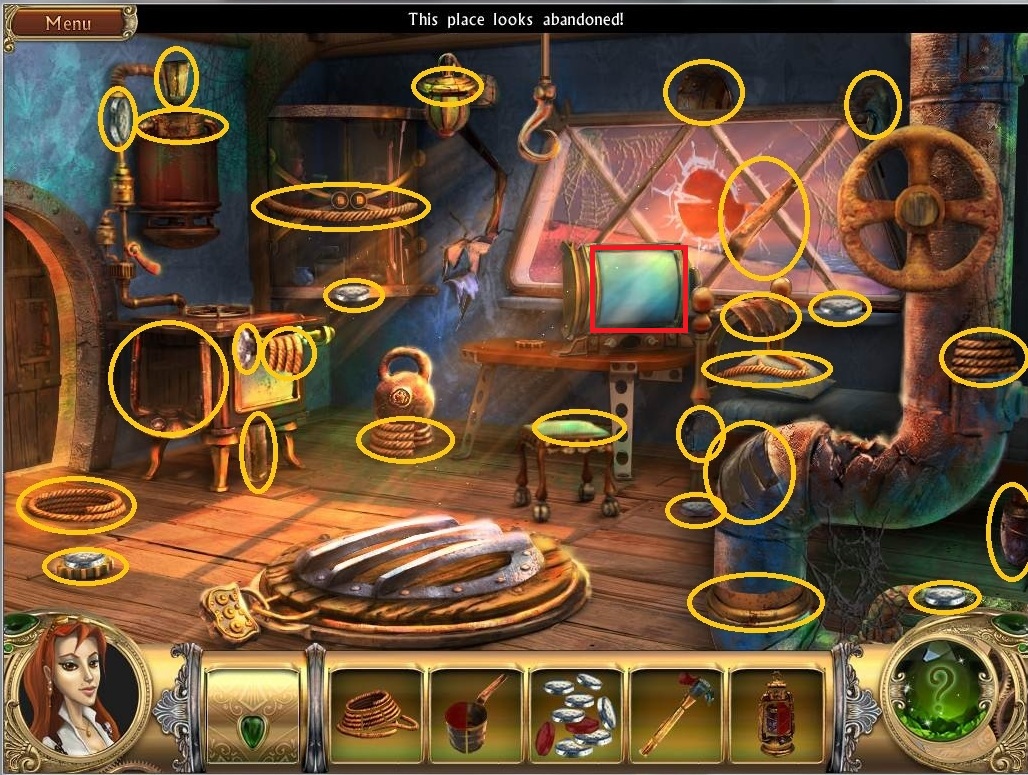
- Locate hidden objects to complete ROPE, and begin to assemble POT, SILVER, HAMMER and LAMP.
- Move the chair in front of the TV and take the hidden piece.
- Click on the TV screen to watch a news update.
- Exit the house and go back down the stairs to the beach.
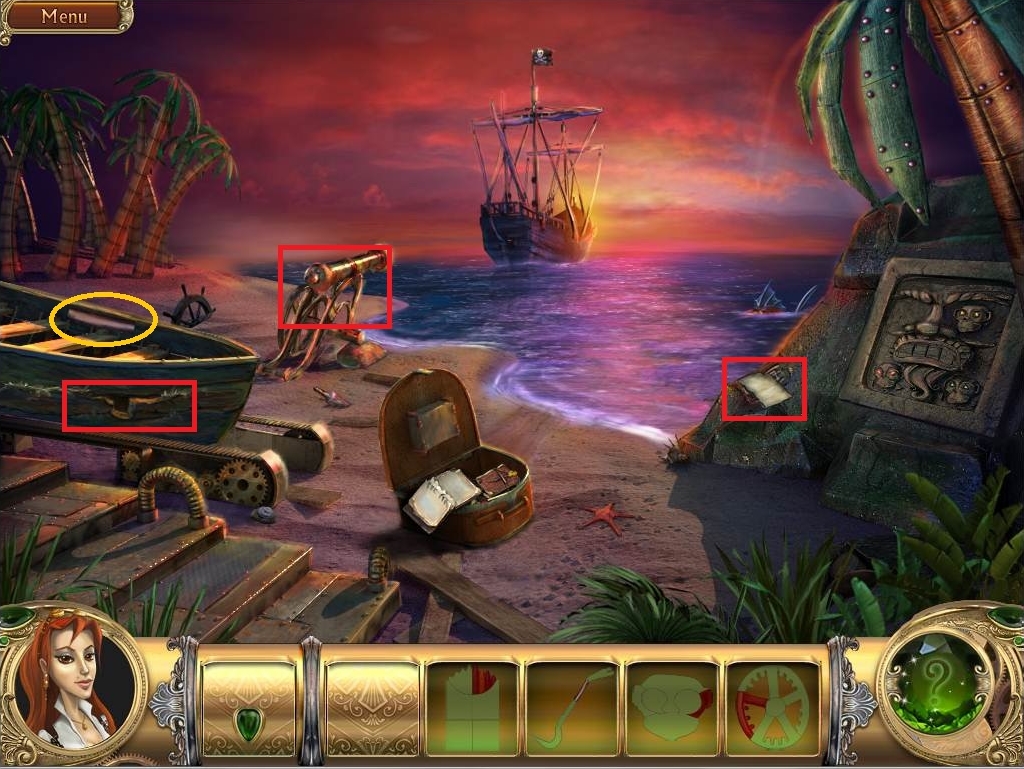
- Take the hidden piece from the boat.
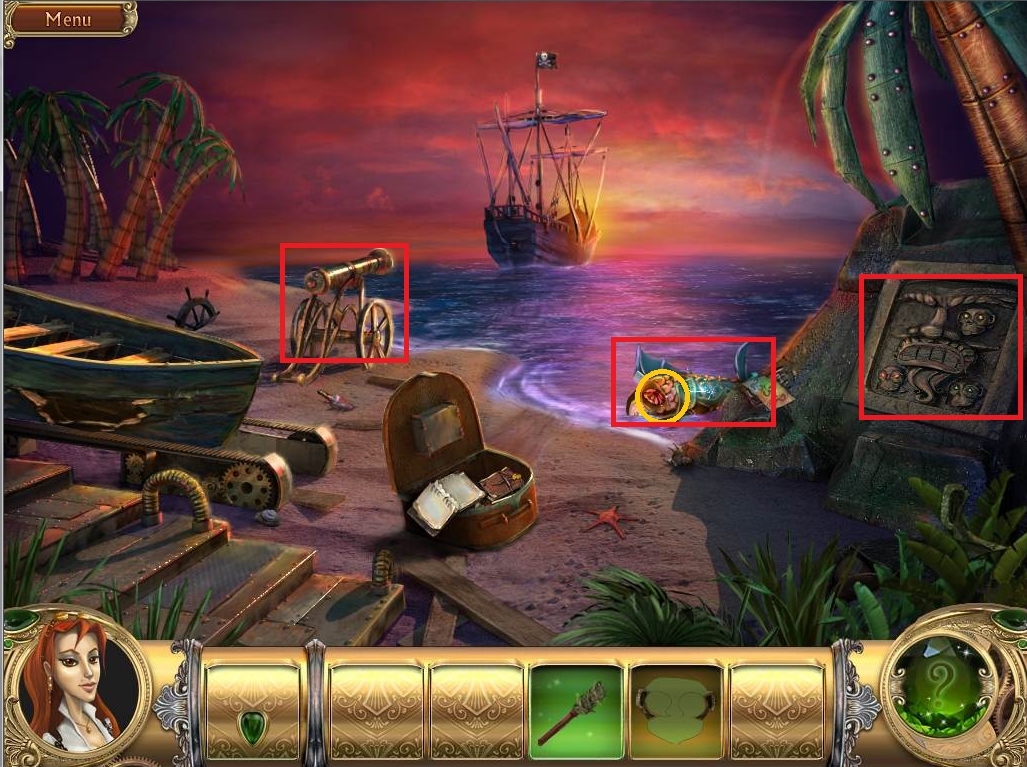
- Use the CROWBAR on the wrecked boat to get a TORCH.
- Retrieve the hidden piece from the hole in the boat.
- Place the WHEEL on the canon and take the hidden piece.
- Use the CRAYONS on the paper on the stone writing and notice the equation.
- Go back to the house by walking up the stairs on the left.
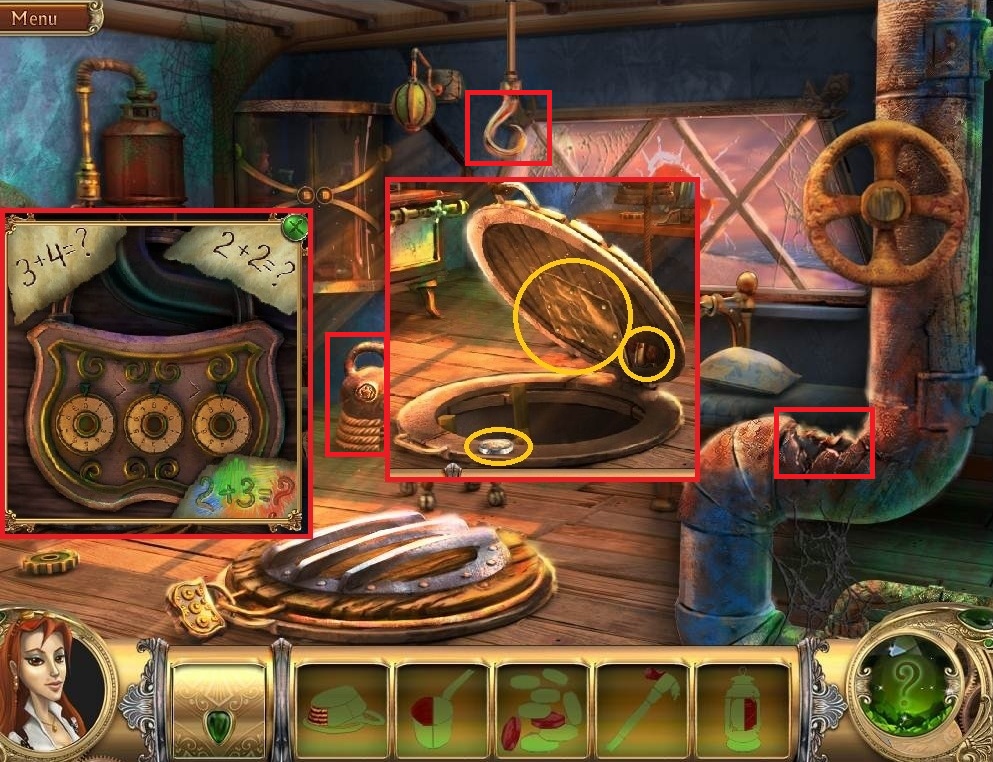
- Hang the ROPE on the hook over the TV.
- Click on the lock on the hatch and solve the equations to get the combination – the numbers must be entered with the highest number on the left dial and lowest on the right dial.
- Click on the ROPE to carry it and then on the weight to the left of the table.
- Take the 3 hidden pieces from the opened hatch, two from the inner lid and one on the bottom rim.
- Place the COPPPER PLATE on the hole in the pipe on the right.
- Use the OIL LAMP on the hatch and climb down.

- Find the 3 FUSES by using the OILLAMP to illuminate the room and place them in the fuse box on the right.
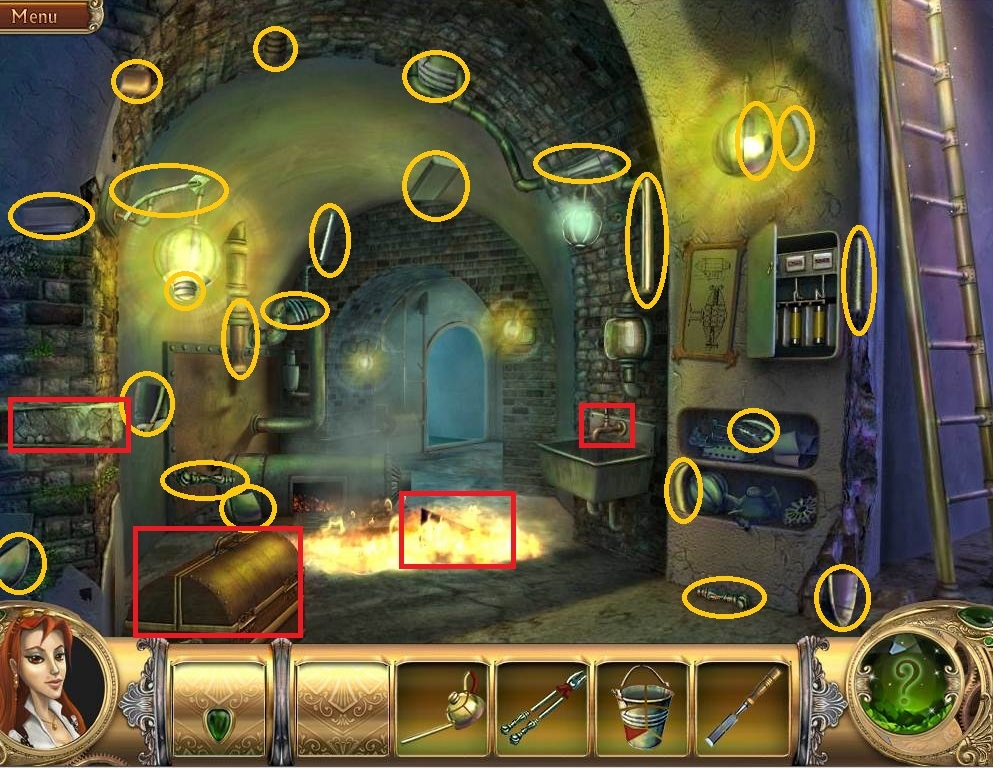
- Locate hidden objects to complete OILER, PINCERS, BUCKET and CHISEL.
- Use the CHISEL on the protruding brick on the left and take the hidden piece.
- Use the OILER on the trunk and take the VALVE and a hidden piece.
- Use the VALVE on the faucet in the sink.
- Use the PINCERS to retrieve the METAL PATCH from the flames.
- Climb up the ladder.
- Locate hidden objects to complete POT, SILVER and HAMMER.
- Use the HAMMER on the copper plate on the pipe.
- Click on the gas valve above the stove to light a flame.
- Place the POT on the flame and add the SILVER.
- Remove the MELTED SILVER from the stove.
- Pour the MELTED SILVER on the copper plate on the pipe and turn the valve.
- Climb down the hatch.
- Click on the faucet and turn on the water.
- Place the METAL PATCH on the running water and pick up the hidden piece from the sink basin.
- Use the BUCKET on the running water to get BUCKET WITH WATER.
- Use the BUCKET WITH WATER on the fire.
- It’s now safe to walk down the hallway to the back.

- Locate hidden objects to complete FIGURINES, CHEMICALS, LIGHTER and begin to assemble WIRES and DIAMOND RING.
- Click on the lever in the right corner to turn on the x-ray viewer and take the 2 hidden pieces.
- Put the FIGURINES in the slots in the table and take the 2 hidden pieces from the drawer.
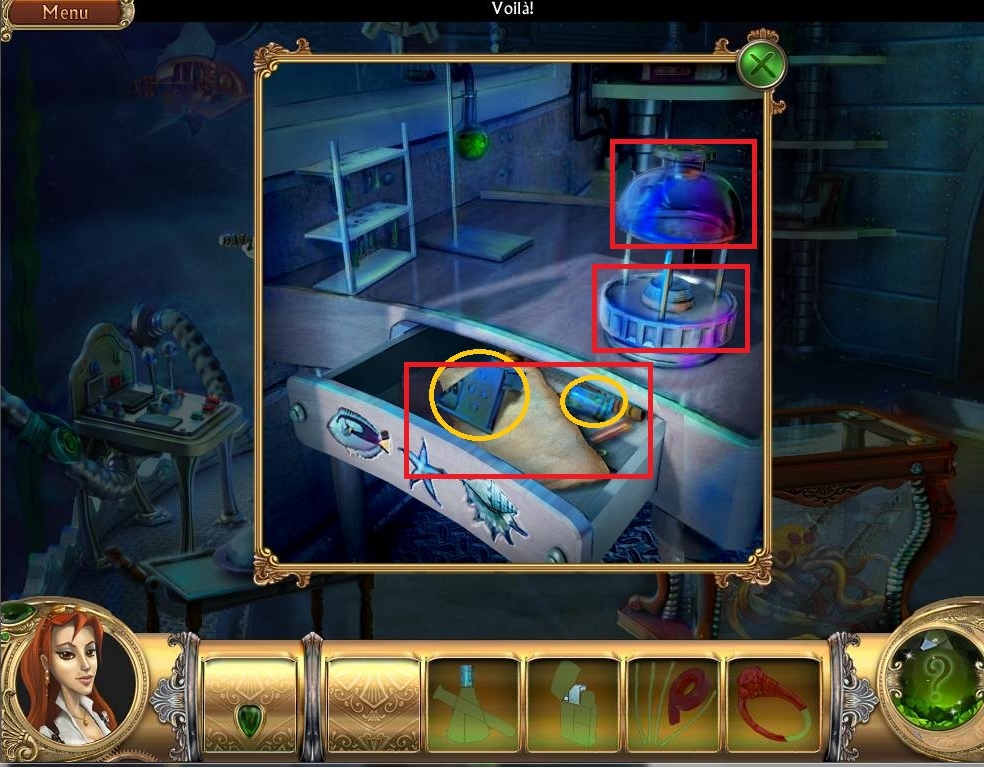
- Click on the note in the drawer and note the formula.
- Use the LIGHTER on the burner.
- Add the CHEMICALS to the beaker on top of the burner and take the REAGENT from the beaker.
- Use the REAGENT on the note in drawer to read it.
- Take the RAZOR from the drawer.
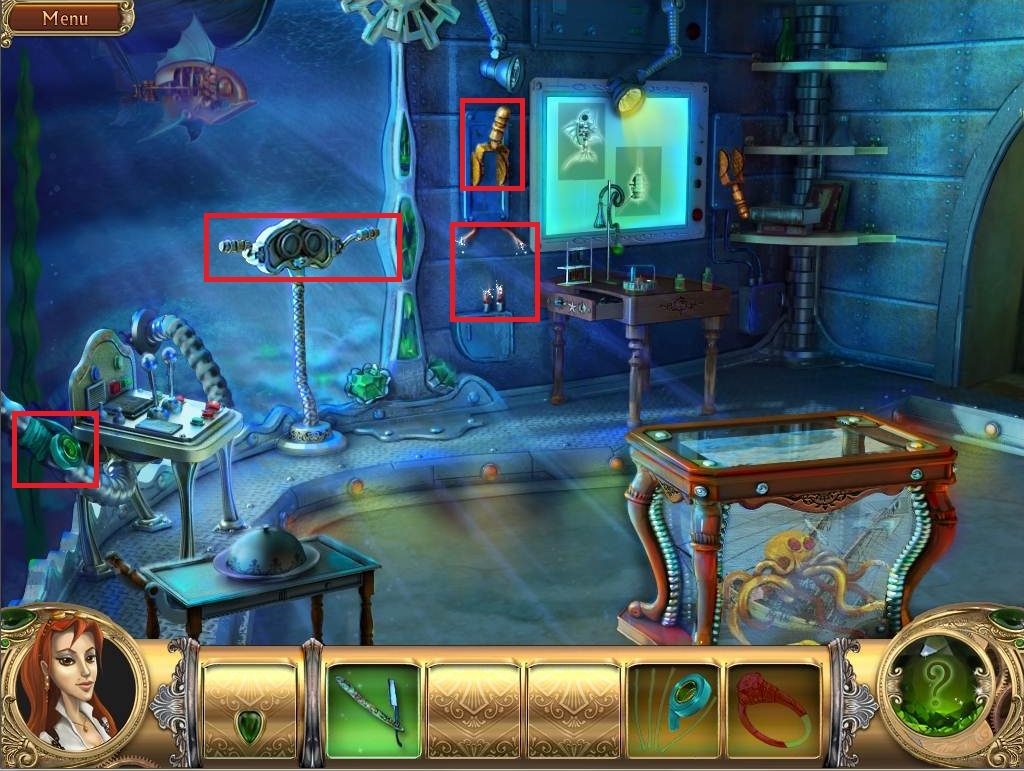
- Use the RAZOR on the tape on the left.
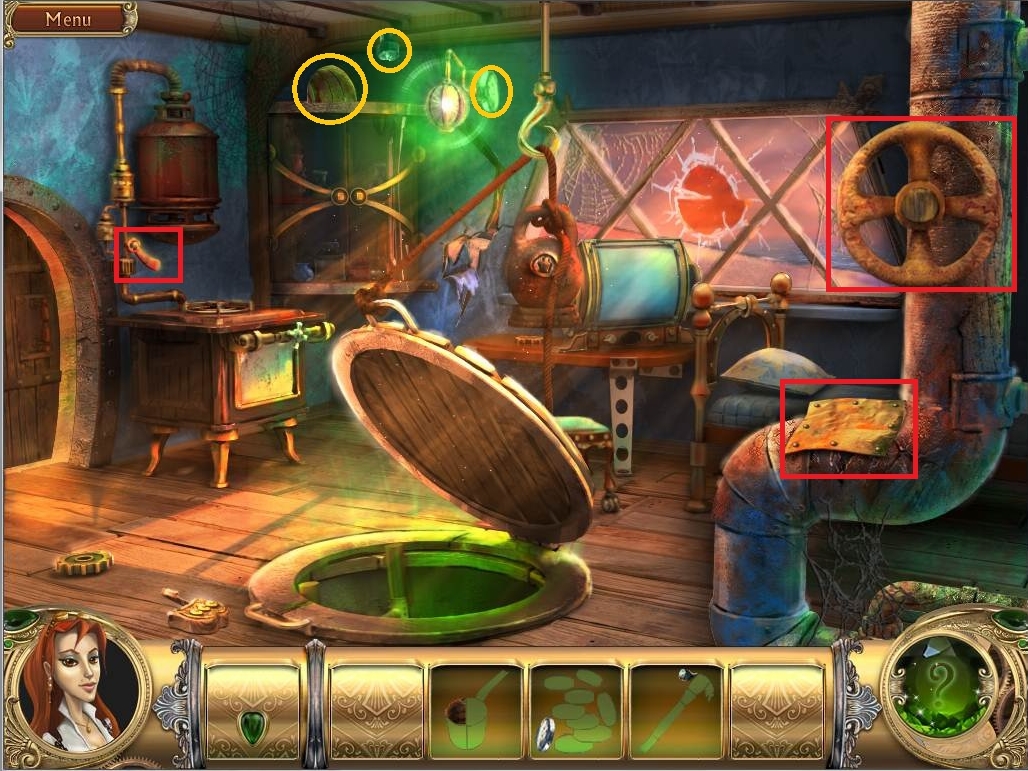
- Use the REPAIR KIT on the sparkling wires underneath the lever to the right of the window and pull the lever down.
- Click on the viewer and use the grabber to catch the mechanical fish/
- Notice the 2 facial expressions on the hull of the ship.
- Watch the cutscene and walk to the beach by following the sparkling areas back up the hatch and down the stairs.
- Take the piece from the mechanical fish.
- Use the TORCH on the mechanical fish to get a BURNING TORCH.
- Use the MASK on the stone wall to reveal a puzzle.
- Complete the mask puzzle by changing the expressions to match those that you saw in the chests and on the hull of the boat.
- Take the CANNONBALL from the mouth.
- Use the CANNONBALL on the cannon.
- Use the BURNING TORCH on the cannon and watch the cutscene.
- Go back down the hatch in the house and look through the viewer
.
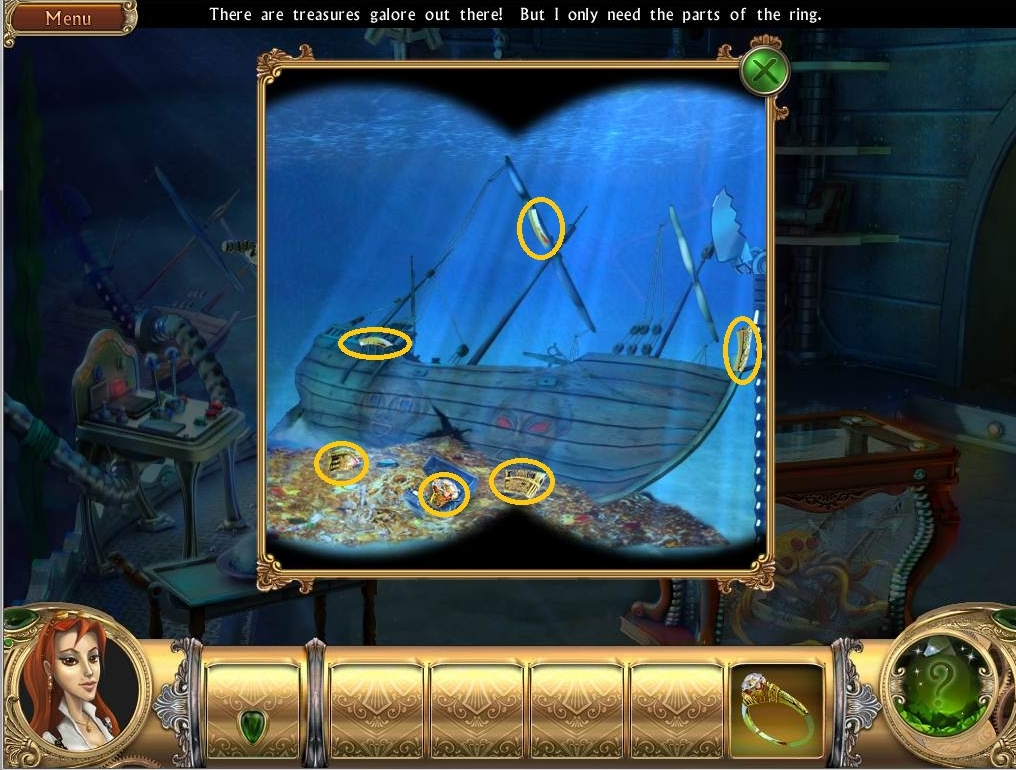
- Locate hidden objects to complete the DIAMOND RING by using the viewer and the grabber.
- Use the DIAMOND RING to cut the glass encasing the octopus in the table in the middle of the room.
- Take the OCTOPUS.
- Exit the house and go through the portal.
- Use the OCTOPUS on the tire swing padlock.
- Enter the portal to move to Chapter 4.
Comments will load when you reach this part of the walkthrough.