
Chapter 2
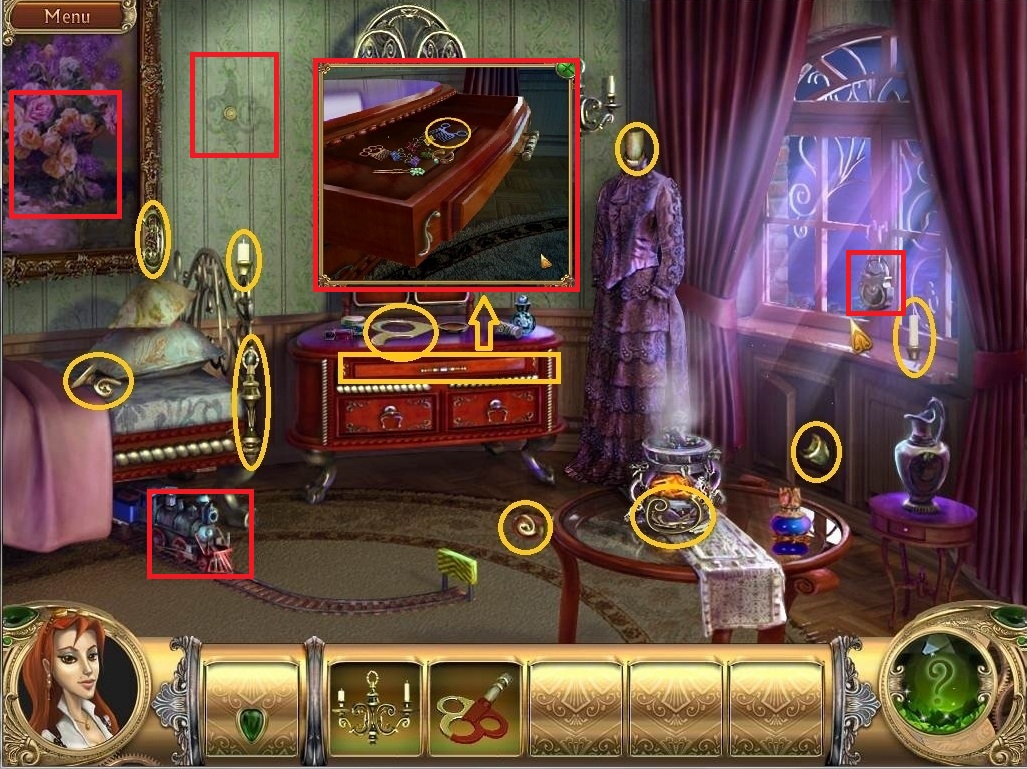
- Locate the hidden objects to complete CANDLEABRA, WIND-UP KEY.
- Open the cabinet under the window to get a hidden piece.
- Place the CANDELABRA on the wall to the left of the dresser and rotate.
- Pick up and move the bottom helmet in the cache that opens behind the photo and take the hidden piece.
- Open the dresser drawer and move all the items off to the sides in order to open the hidden compartment.
- Take the final WIND-UP KEY piece from the hidden compartment.
- Use the WIND-UP KEY in the hole on the side of the engine car of the train.
- Take the KEYS from the top of the train.
- Use the KEYS on the window lock and take the paper airplane that landed on the table.
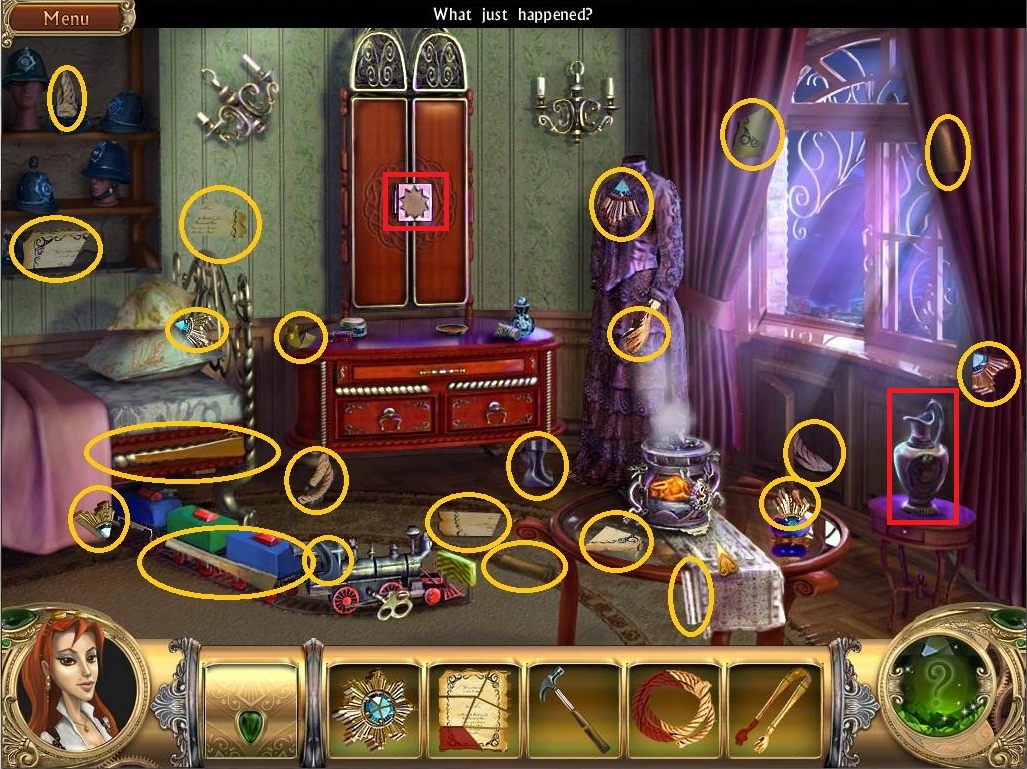
- Locate the hidden objects to complete STAR, NOTE, and HAMMER.
- Use the STAR on the dresser and take the NOTE from the mirror.
- Use the NOTE on the mirror and click each sheet to read the note.
- Return to the room by clicking on the green arrow on the bottom.
- Use the HAMMER on the vase on the table near the window and take the hidden piece.
- Click on the mirror to go through.
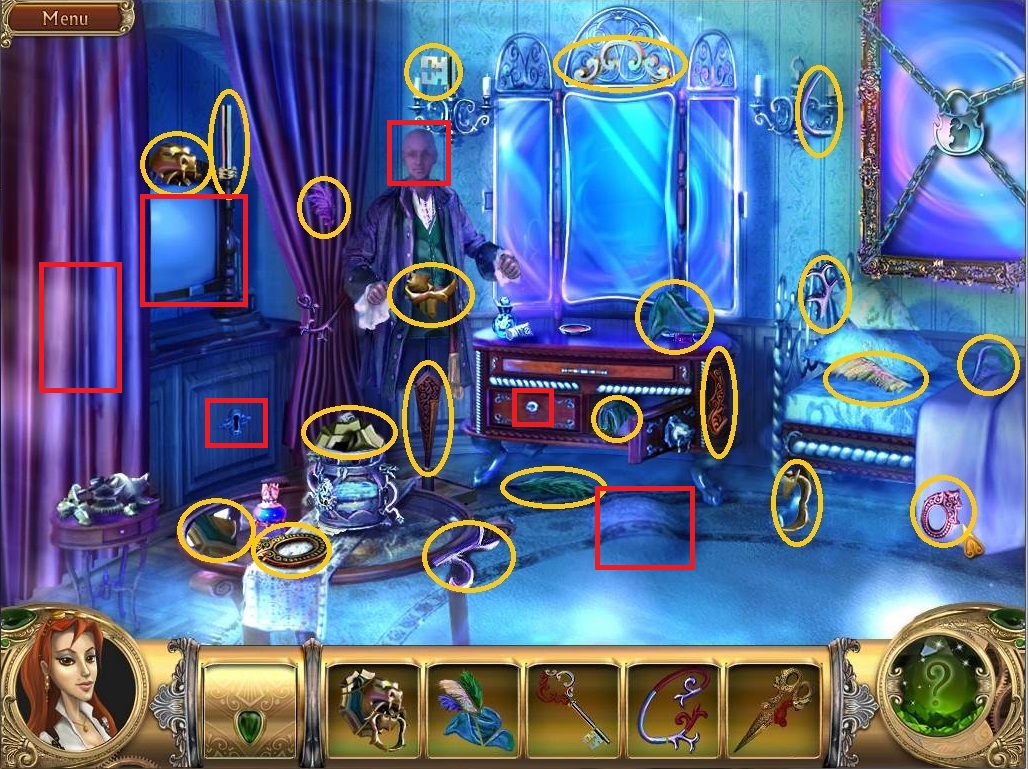
- Locate the hidden objects to complete PIRATE HAT, DRAWER HANDLE, KEY, CURTAIN CLIP and SCISSORS.
- Click on the TV screen to watch the news.
- Click on the right cabinet under the mirror to get a hidden piece.
- Put the PIRATE HAT on the mannequin to the left of the mirror and take the hidden piece in his hand.
- Use the DRAWER HANDLE on the left cabinet under the mirror and take the hidden piece.
- Use the KEY on the locked cabinet on the left underneath the TV and take the hidden piece.
- Use the CURTAIN CLIP on the left curtain to reveal a hidden piece.
- Use the SCISSORS on the moving carpet under the dresser to release butterflies and follow them back through the mirror.
- Pick up the two hidden pieces from the hole in the carpet.
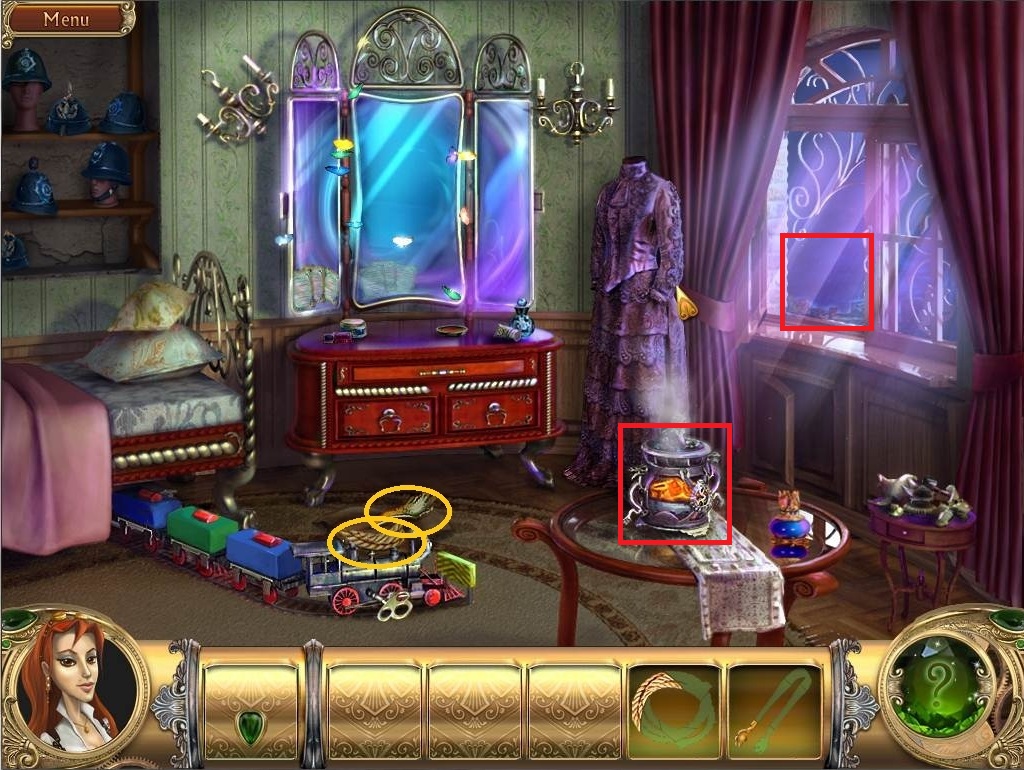
- Use the TONGS on the censer to get TONGS WITH A BURNING COAL.
- Use the ROPE on the open window to go down.
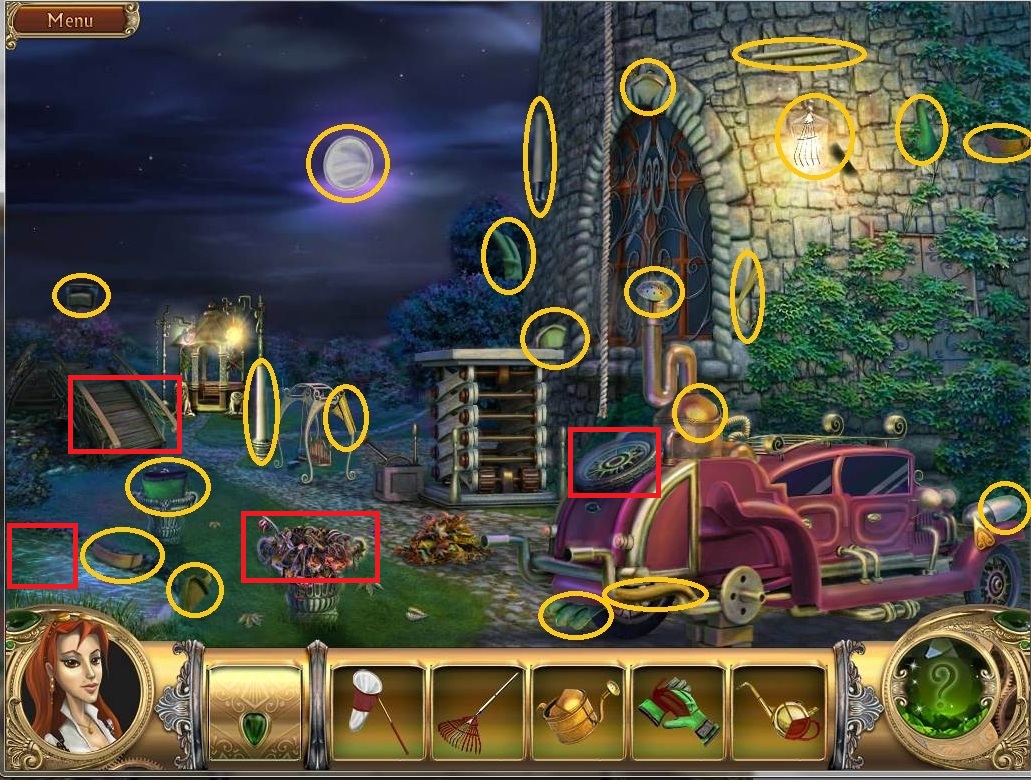
- Locate hidden objects to complete WATERING CAN and begin to assemble BUTTERFLY NET, RAKE, GLOVES and OILCAN.
- Click on the tire on the back of the car to put it on the axle.
- Use the WATERING CAN on the pond on the left to get a FULL WATERING CAN.
- Use the FULL WATERING CAN on the wilted flowers to the right of the pond to reveal a hidden piece.
- Move toward the drawbridge on the back left.
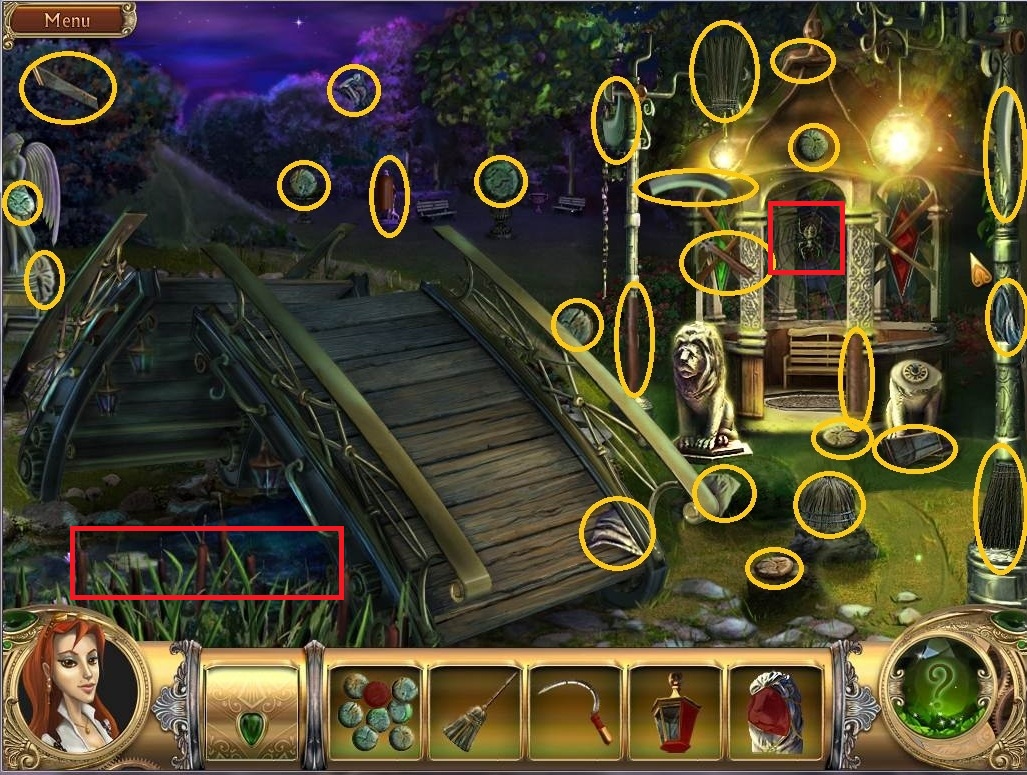
- Locate hidden objects to complete BROOM and SICKLE, and begin to assemble COINS, LANTERN and LION’S HEAD.
- Use the BROOM on the spider web in the gazebo and take the hidden piece.
- Use the SICKLE on the cattails underneath the drawbridge.
- Return to the car scene by clicking on the bottom right of the screen.
- Take the hidden object revealed in the pond on the left.
- Use the BUTTERFLY NET to reach the HAIRPIN in the pond.
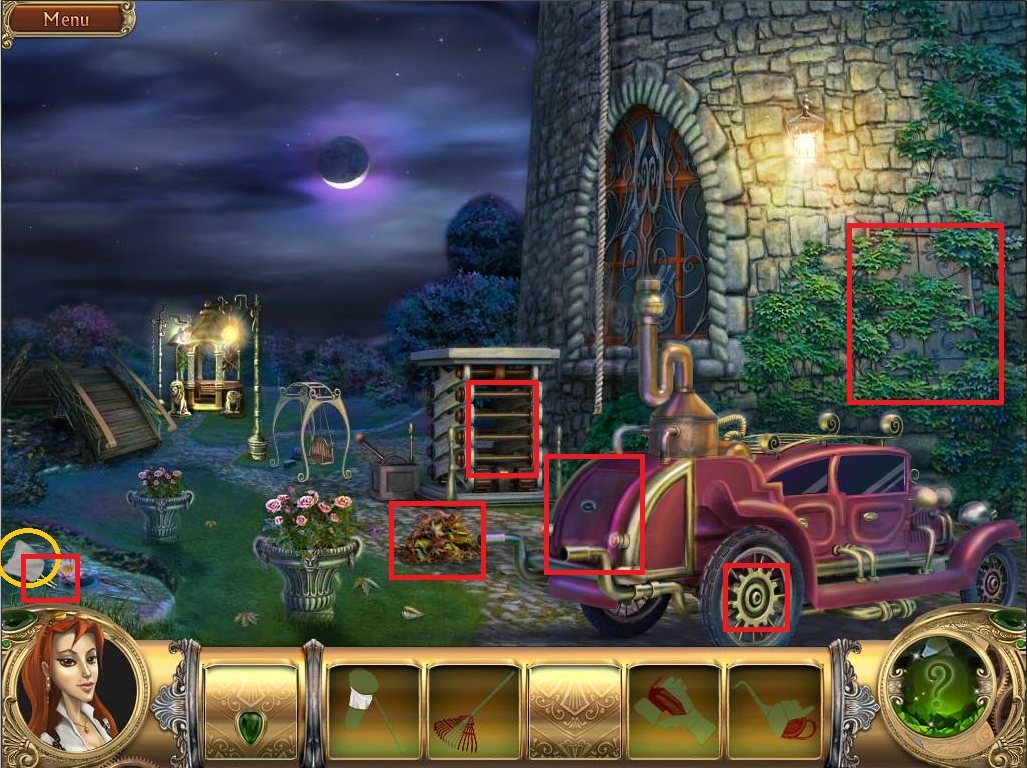
- Use the HAIRPIN on the trunk of the car and to reveal a hidden piece and a WRENCH.
- Use the WRENCH on each lug nut on the right rear wheel.
- Take the two hidden pieces revealed when the car drove away.
- Use the RAKE on the pile of leaves next to the flower pot and take the hidden piece.
- Use the OILCAN on the elevator gears.
- Use the GLOVES on the poison ivy on the side of the house to reveal a panel.
- Click the red handle to point to the drawbridge.
- Walk back to the drawbridge.
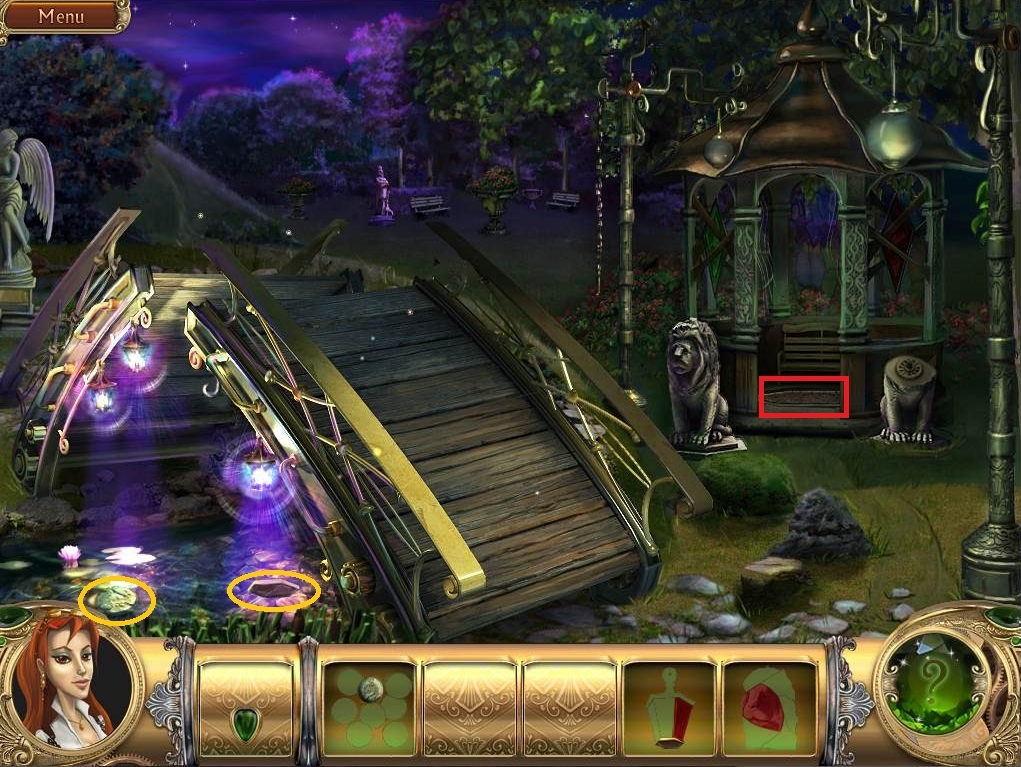
- Take the two pieces revealed under the drawbridge.
- Click in the bottom right of the screen to walk back to the lighting panel and click the handle to point to the gazebo.
- Walk back to the gazebo and click on the floor
- Complete the puzzle by aligning the objects with their corresponding element – Earth, Water, Air and Fire. Click the element symbols to rotate outer circles and the center purple circle to rotate the middle. See video for solution.
[youtube]https://www.youtube.com/embed/SF_YNbnXTyU[/youtube]
- Take the hidden piece that is revealed when puzzle is complete.
- Walk back to the lighting panel by clicking in the bottom right of the screen and click the handle to point to the drawbridge.
- Hang the LANTERN on the hook under the drawbridge.
- Take the hidden piece from the water.
- Place the LION’S HEAD on the headless lion statue.
- Click on each lion to rotate until the face one another – the drawbridge will lower.
- Cross over the drawbridge.
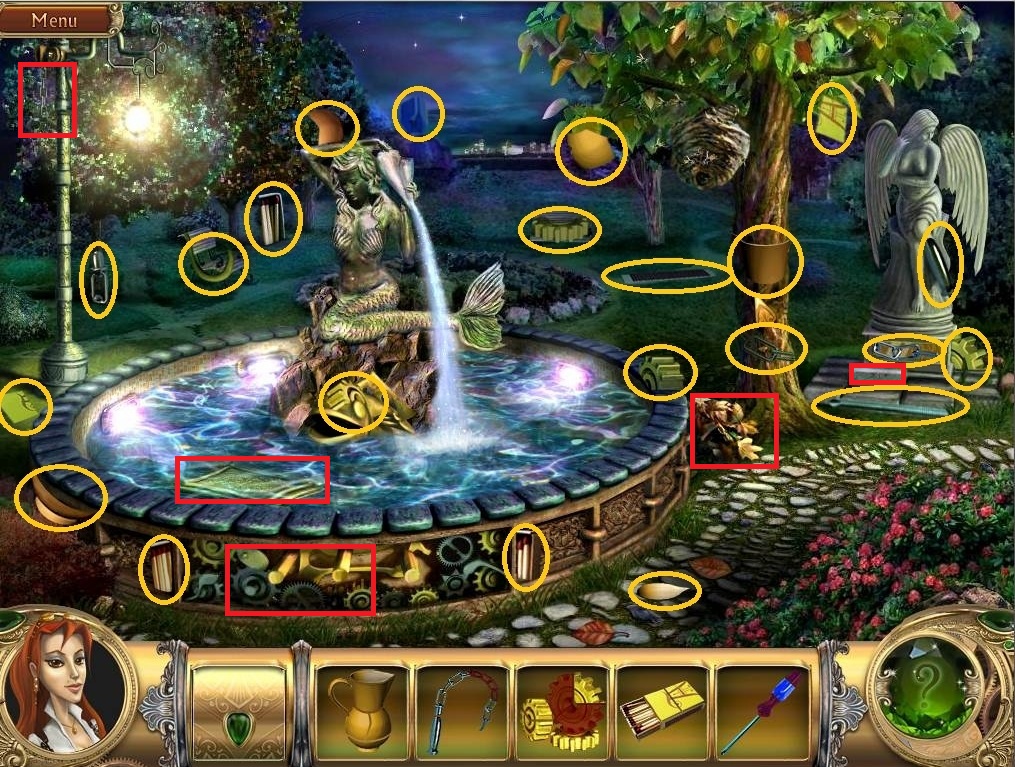
- Locate hidden objects to complete JUG and begin assembling CHAIN, GEARS, MATCHES and SCREWDRIVER.
- Dip the JUG in the fountain to get a JUG WITH WATER.
- Place JUG WITH WATER on the raised brick at the foot of the statue.
- Take the hidden piece under the left wing of the statue.
- Use the CHAIN on the broken chain on the lamp post to get a LIGHT COVER.
- Take the hidden piece from the tree where the lamp was.
- Place the LIGHT COVER in the fountain to catch the fish.
- Take the hidden piece from the light cover with the fish in it.
- Use the MATCHES on the leaves to the right of the fountain to smoke out the wasps.
- Take the hidden piece revealed when the wasp nest falls.
- Use the GEARS on the front of the fountain and take the hidden piece from the empty fountain.
- Click on the gold cover in the fountain and use the SCREWDRIVER on the 4 screws and take the DRAGON.
- Walk back to the elevator and return to Kiras’s room.
- Use the TONGS WITH A BURNING COAL on the candelabras on either side of the mirror to attract the butterflies.
- Go through the mirror and use the DRAGON on the lock on the large mirror on the right.
- Go through the mirror.
Comments will load when you reach this part of the walkthrough.