
Chapter Two: All Aboard
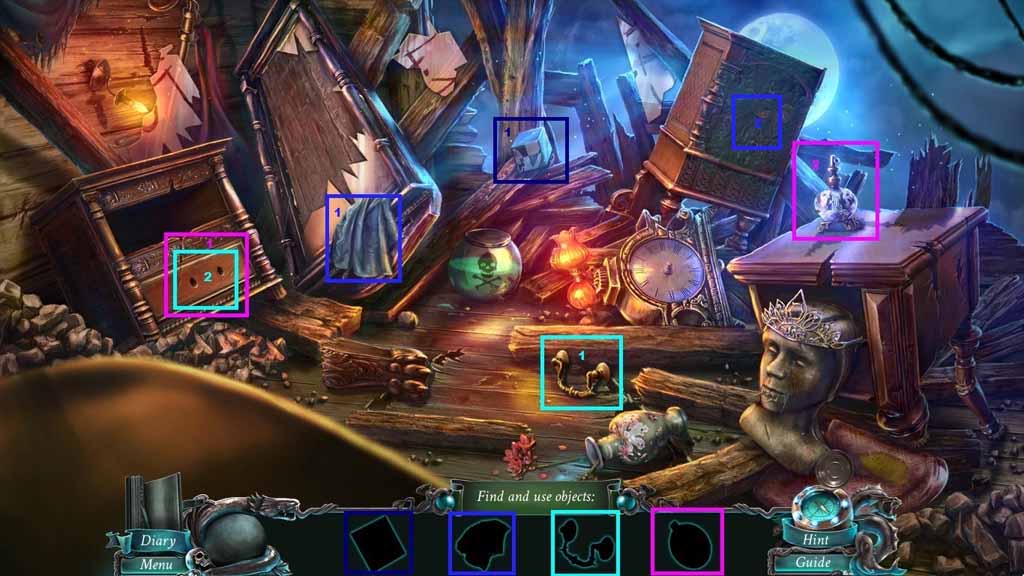
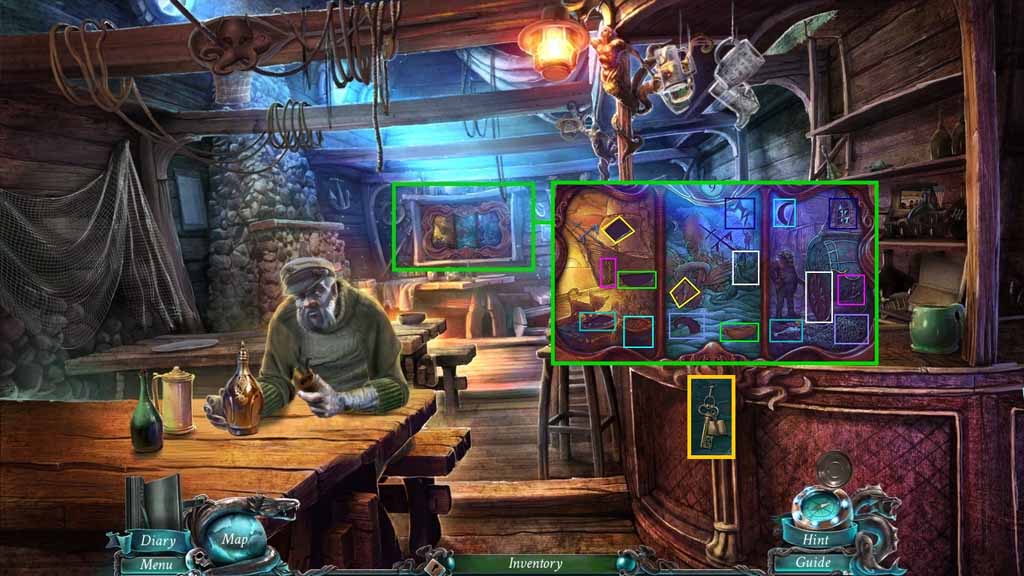
- Find the silhouetted items.
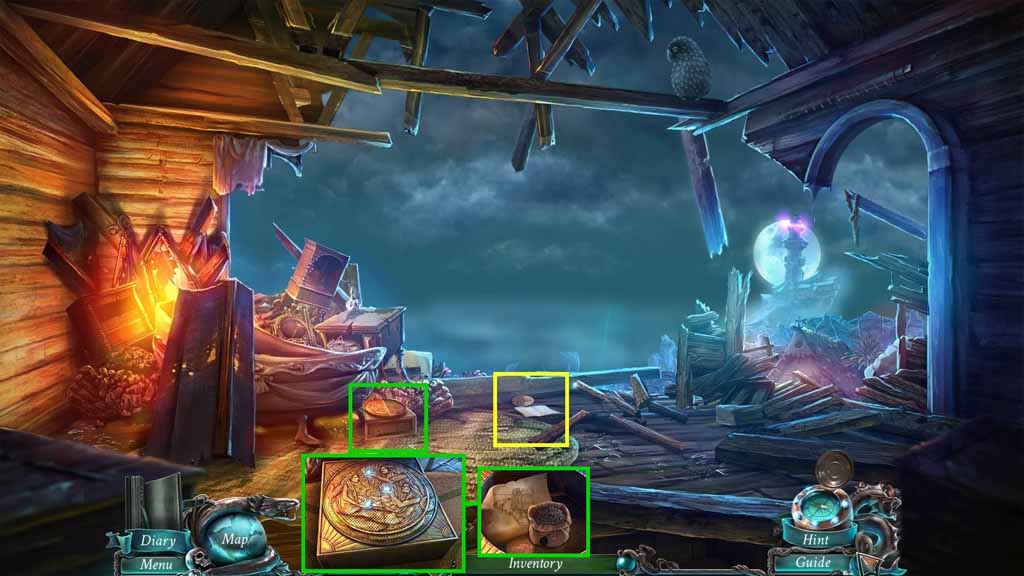
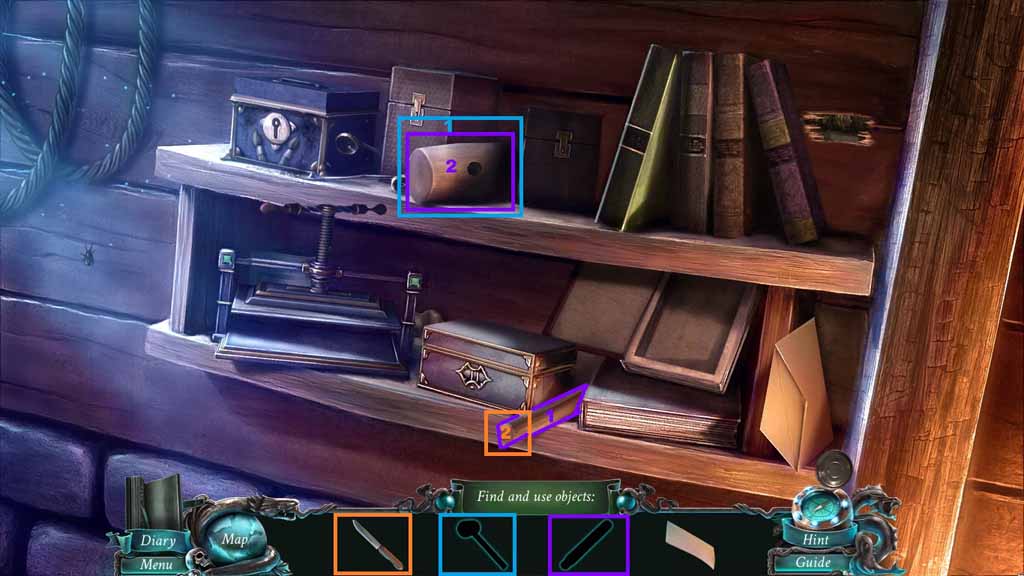
- Collect the drawer handle and attach it to the drawer; click it open.
- Select the pump and attach it to the perfume bottle; click the bottle.
- Select the cloth and use it to wipe the cupboard; click it open.
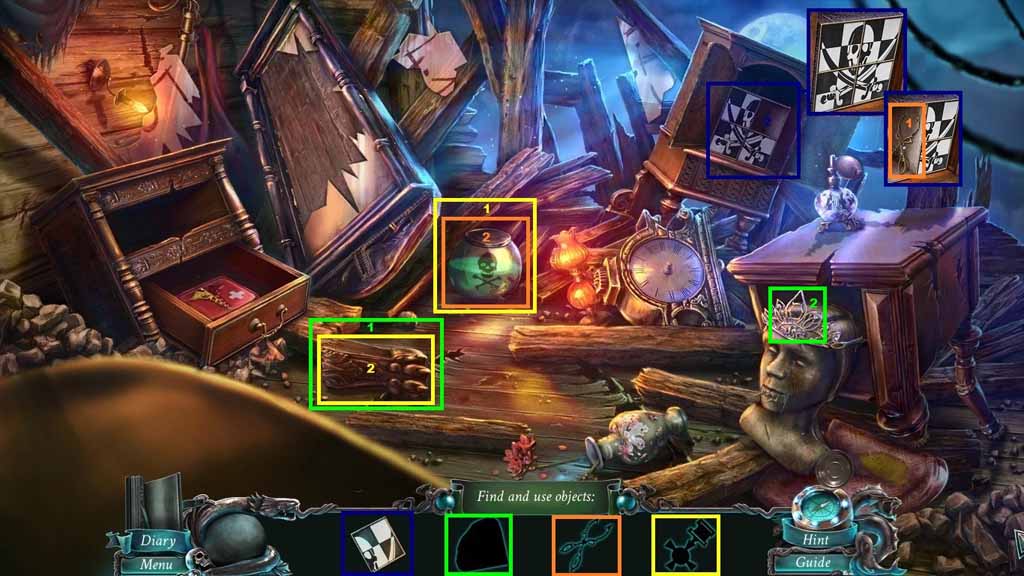
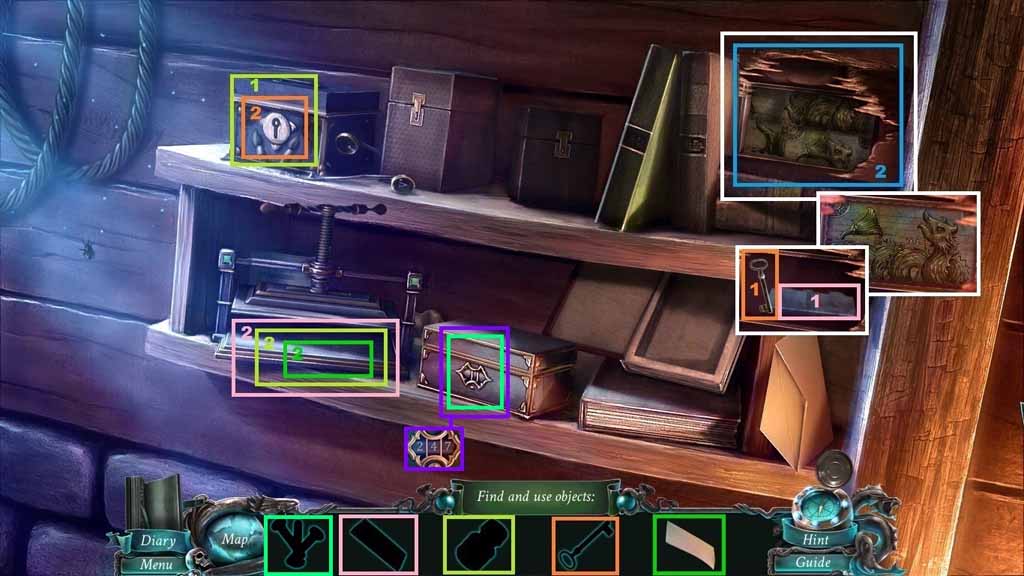
- Select the checkerboard piece and place it onto the checkerboard; switch the tiles to create a finished picture.
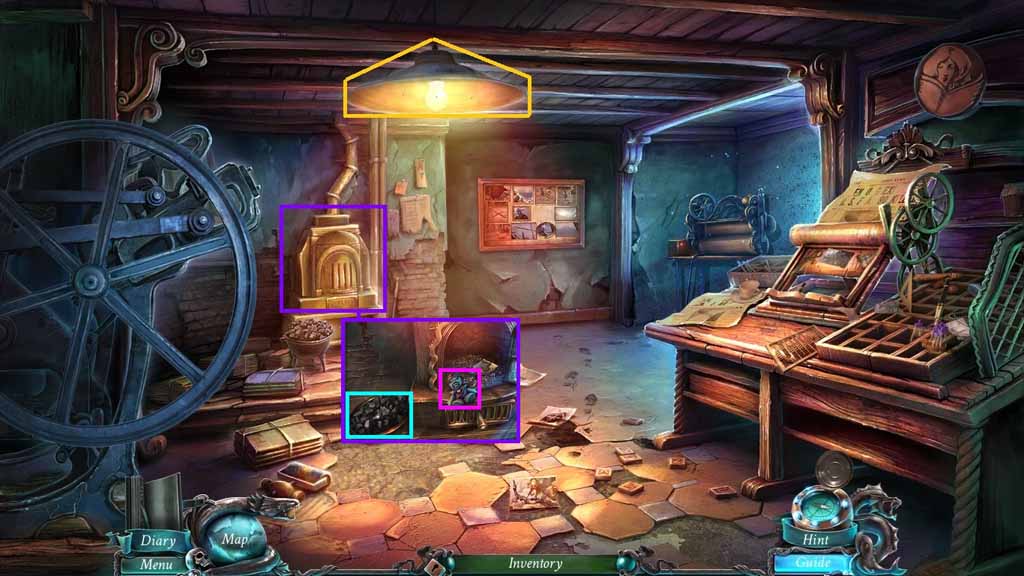
- Select the tongs and use them to collect the cross.
- Click the wood; insert the cross and collect the tiara’s jewels.
- Insert the tiara’s jewels into the crown and collect the clock hands.
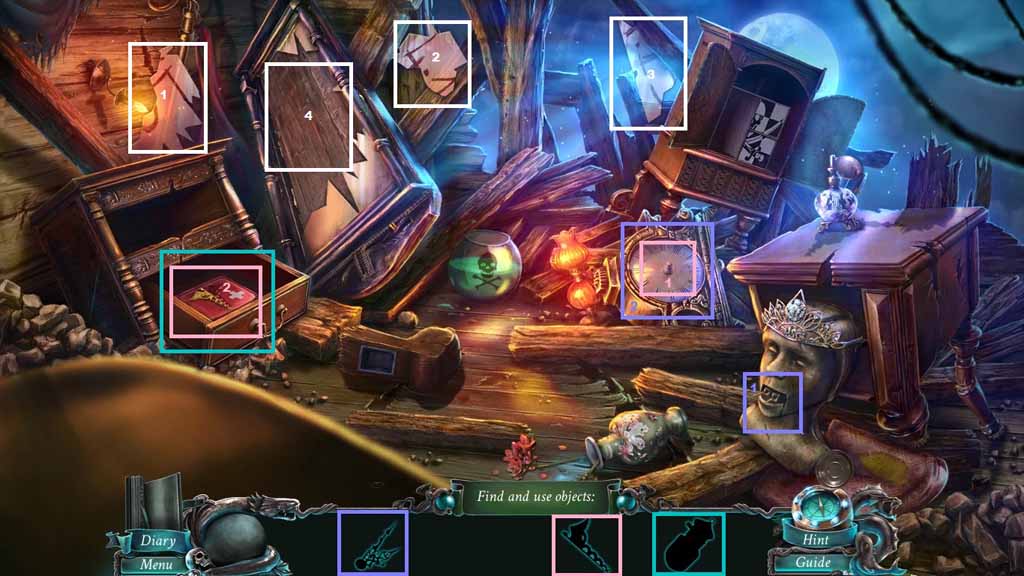
- Insert the glass shards into the mirror.
- Insert the clock hands into the clock and set the time to 4:15; collect the caduceus.
- Insert the caduceus and collect the smelling salts.
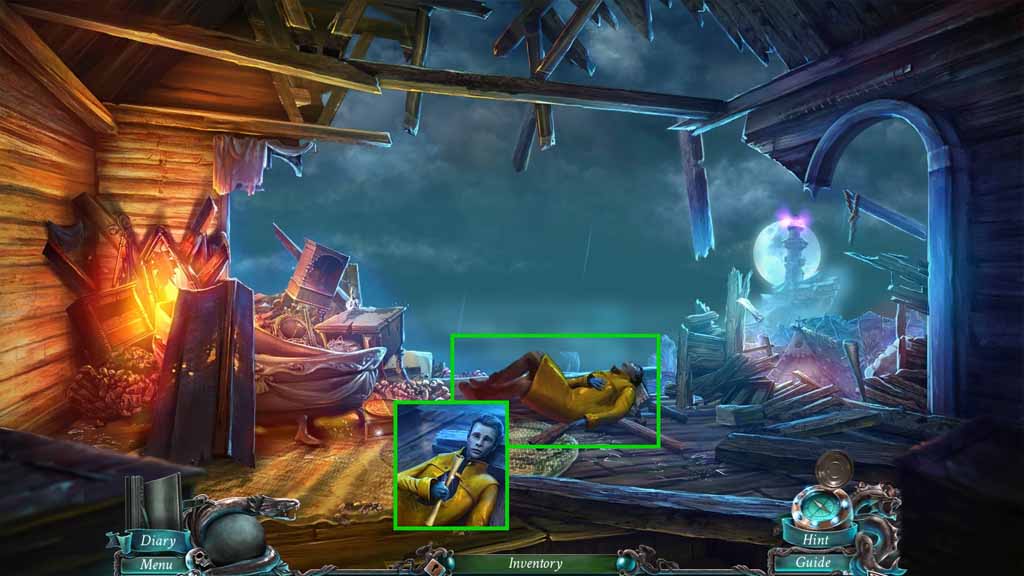
- Click the fisherman.
- Select the smelling salts to use on him; collect the Map.
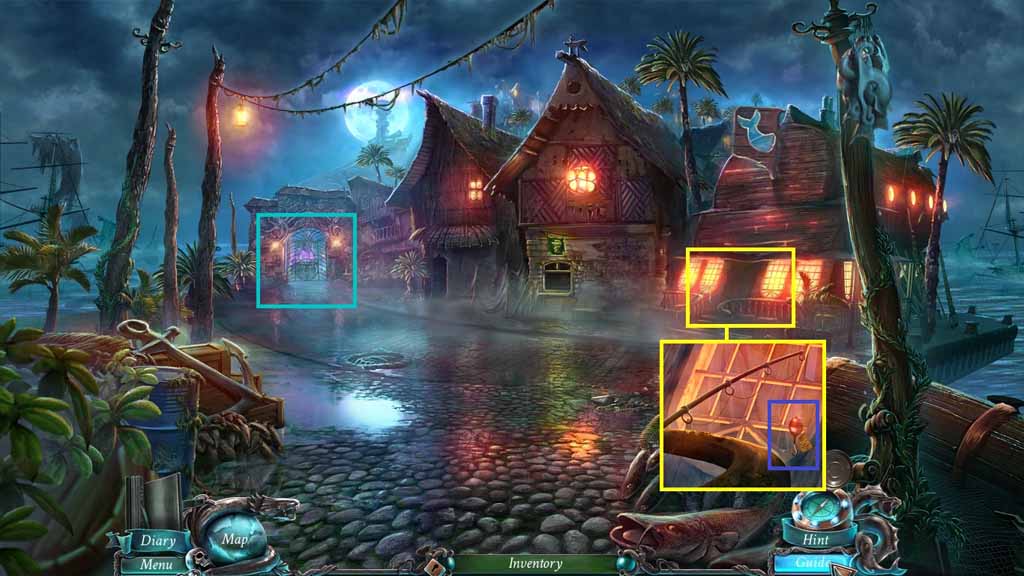
- Click the balcony.
- Attach the handle to the blade; collect the hatchet.
- Move downstairs.
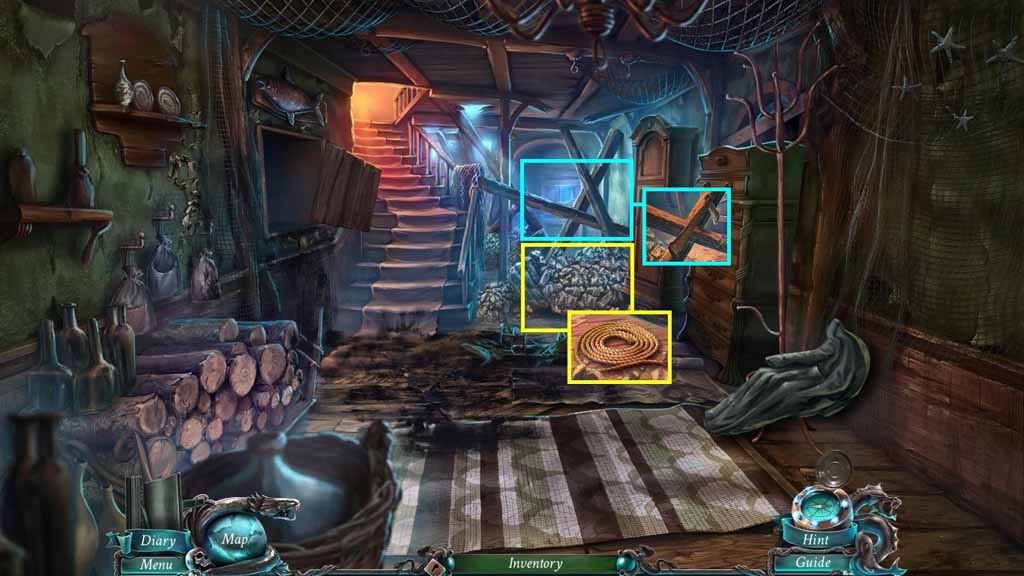
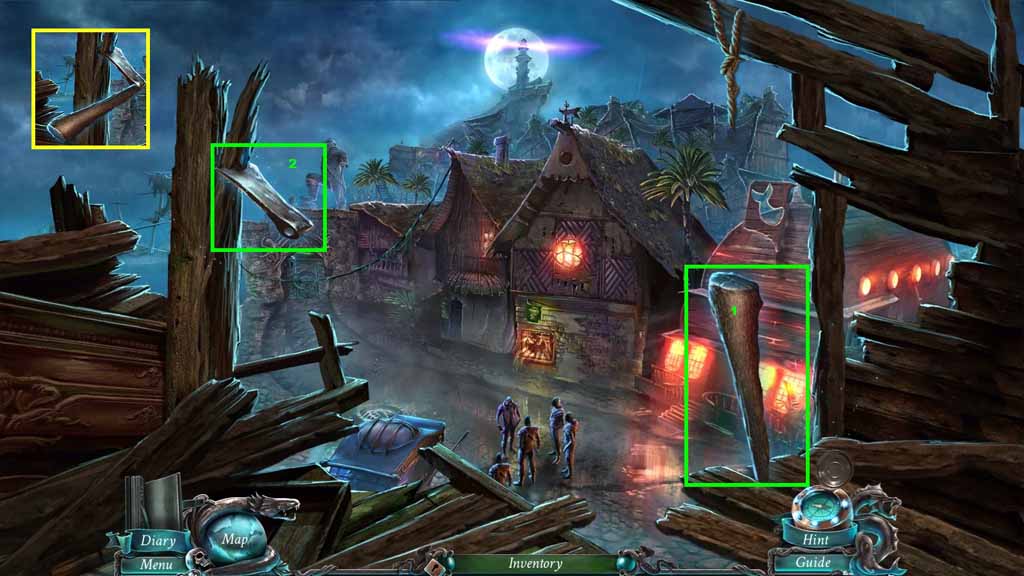
- Click the rubble 4 times; collect the rope.
- Click the beams and use the hatchet to chop them.
- Move ahead to the Front Door.
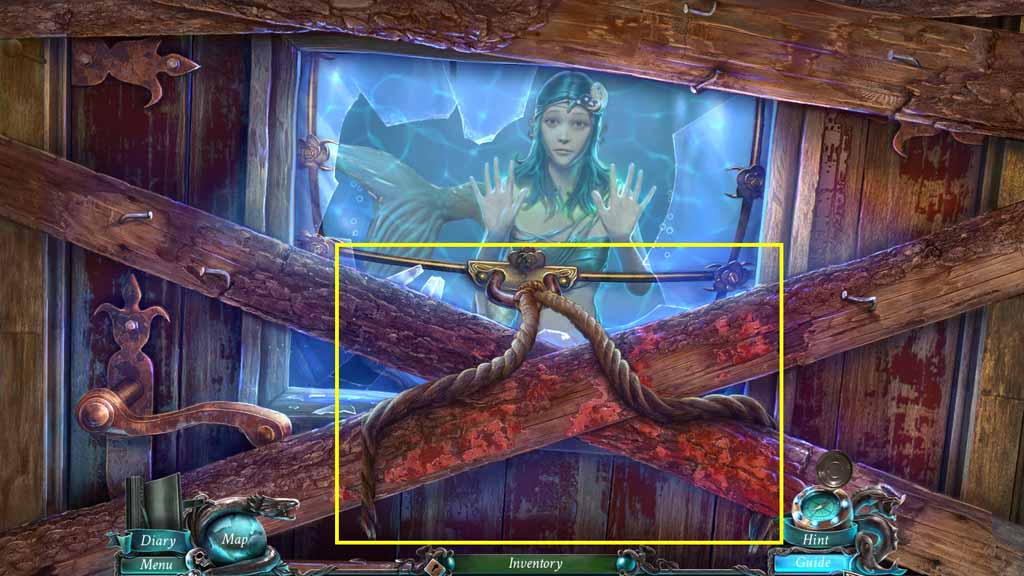
- Attach the rope onto the boards; click the rope.
- Click the window.
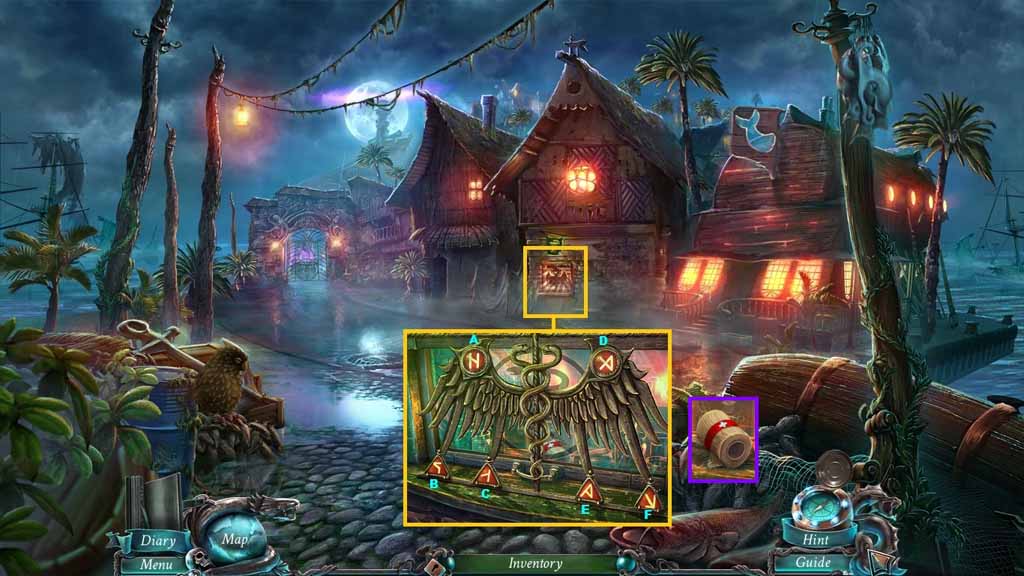
- Click the buttons as follows:
- B – B – C – C – E – F – F
- Click the window open and collect the gauze.
- Move ahead to the Archway.
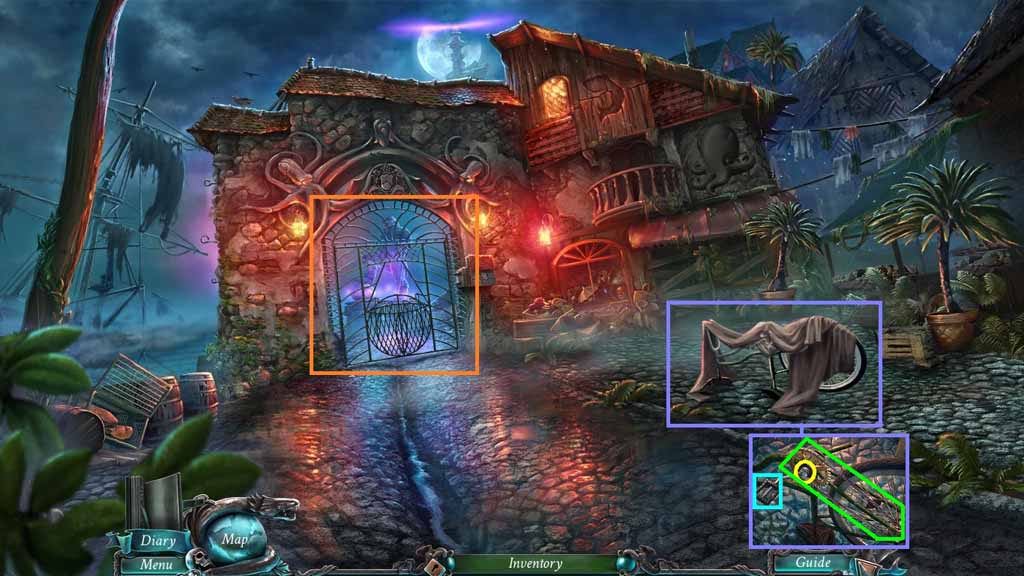
- Click the bike.
- Click the blanket.
- Click the bolt and collect the pedal and the chain.
- Zoom into the gate.
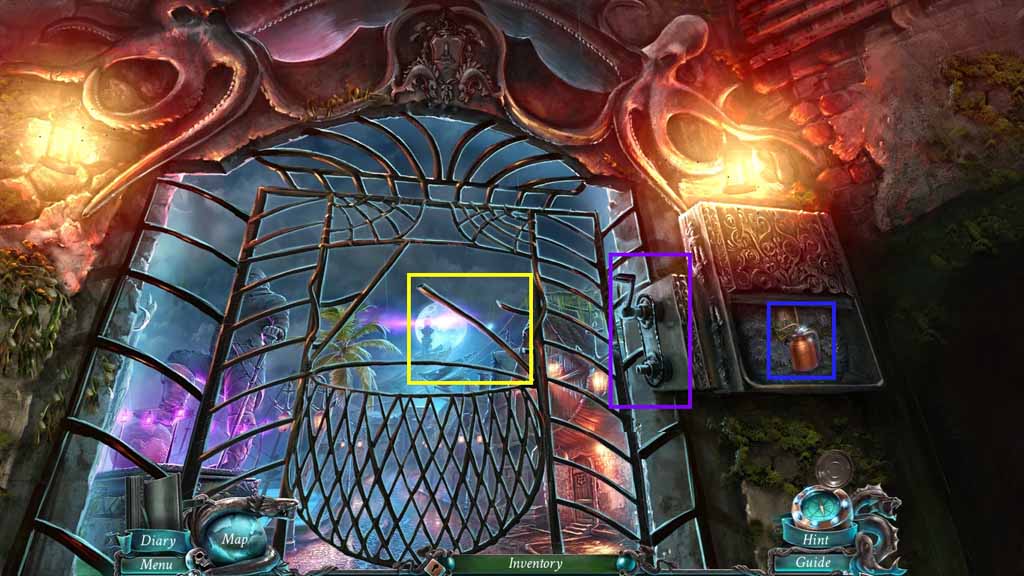
- Collect the rod.
- Click the gear and attach the pedal and the chain onto it.
- Click the pedal.
- Zoom into the mechanism and collect the oilcan.
- Move down once.
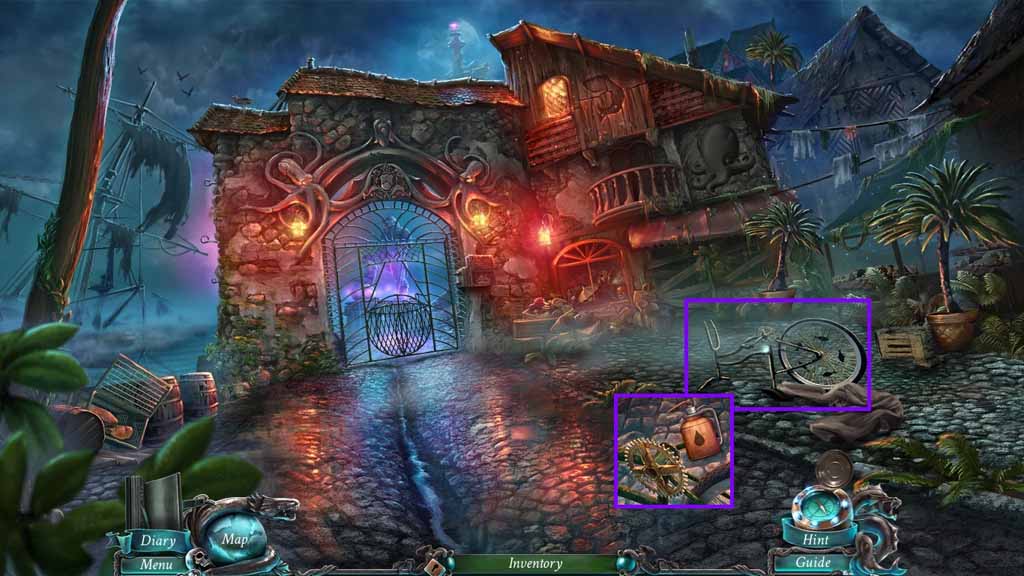
- Click the bike.
- Select the oilcan to lube the gear; collect the gear.
- Move down to the Square.

- Click the manhole cover.
- Click the leaves away.
- Select the rod to use on the manhole cover.
- Click the mouse and collect the 1 / 2 mechanism plate.
- Move to the Bedroom.
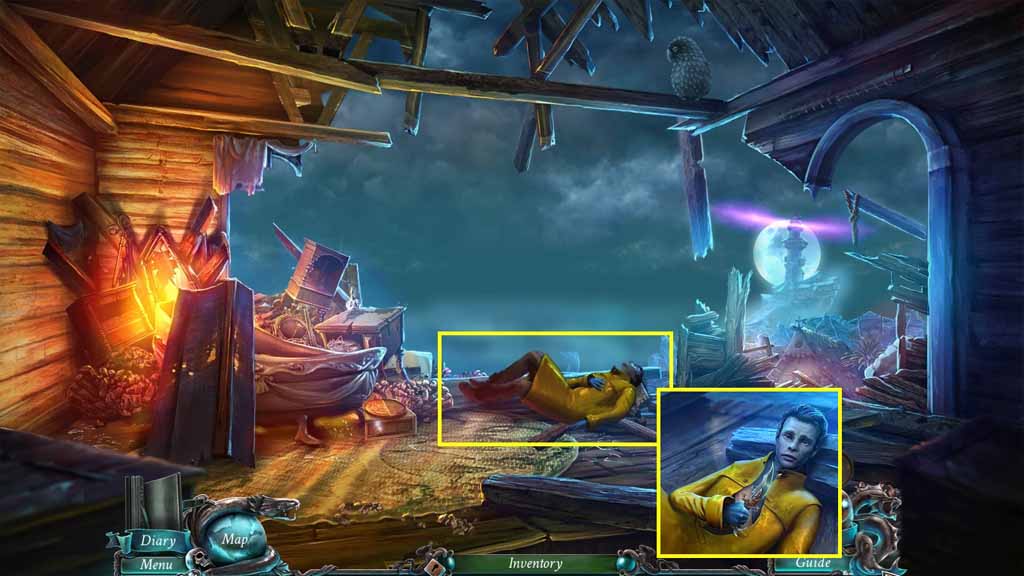
- Click the fisherman.
- Hand him the gauze and collect the dagger.
- Move to the Square.
- Click the Tavern; collect the fishing lure.
- Select the dagger to cut through the lure; collect the 2 / 2 mechanism plate.
- Move to the Archway and zoom into the gate.
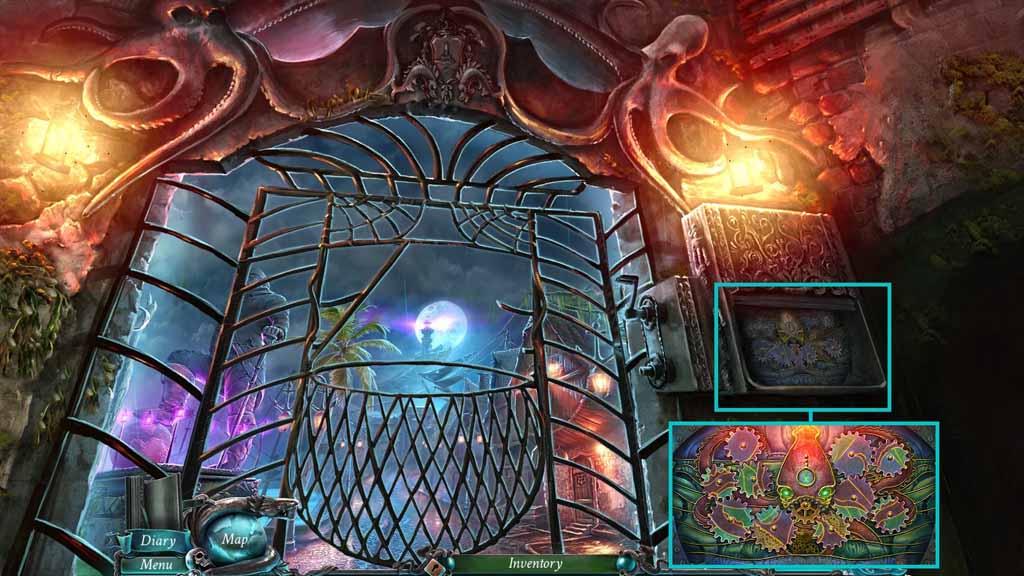
- Click the mechanism and click the button.
- Insert the 2 mechanism plates and the gear to trigger a puzzle.
- Solve the puzzle by aligning the cogs to complete the picture.
- Move into the Promenade and click the carriage.
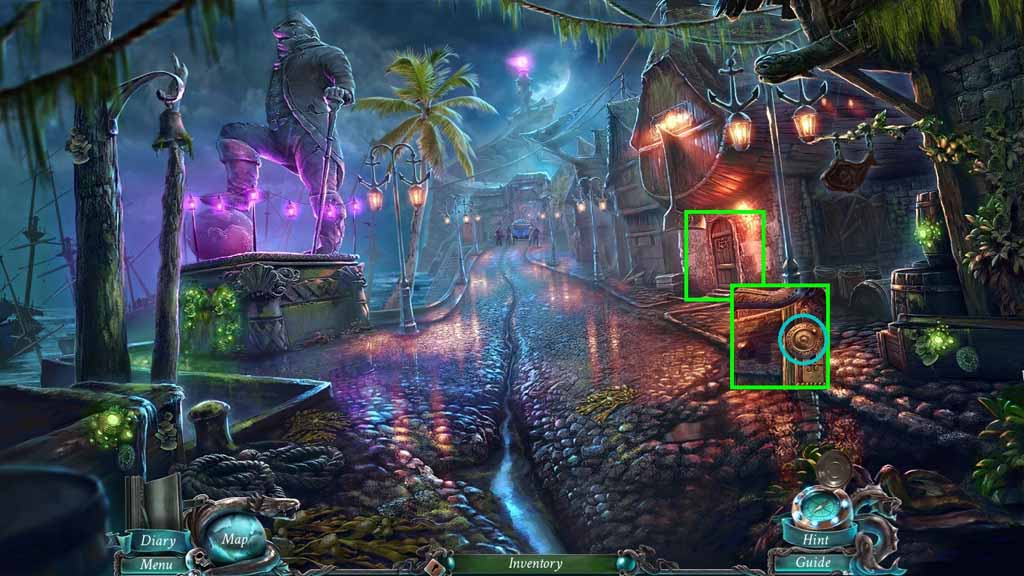
- Click the door and zoom into and click the knob.
- Collect the coin.
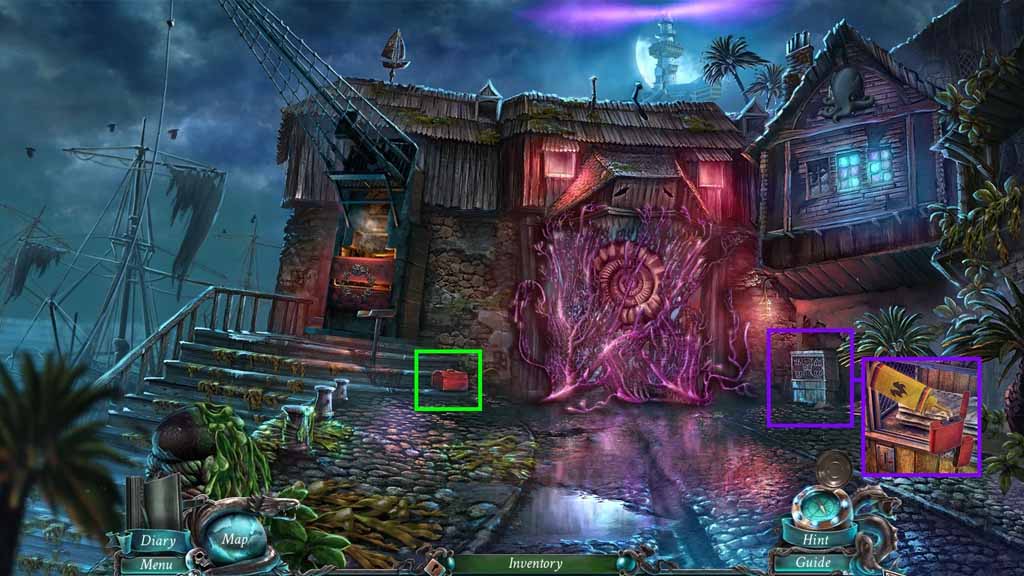
- Move ahead to the gate and move to the left toward the Dilapidated Harbor.
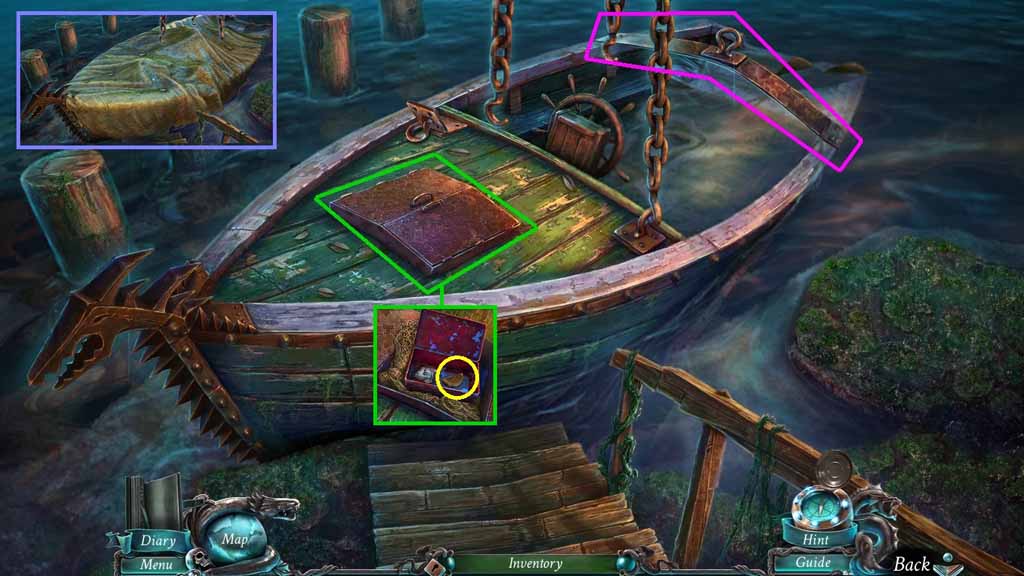
- Click the sheet 3 times and click the bar.
- Click the doors 2 times.
- Click the net then the suitcase.
- Click the fishbone and collect the circle half.
- Move to the Archway and click the stall to trigger a hidden objects area.
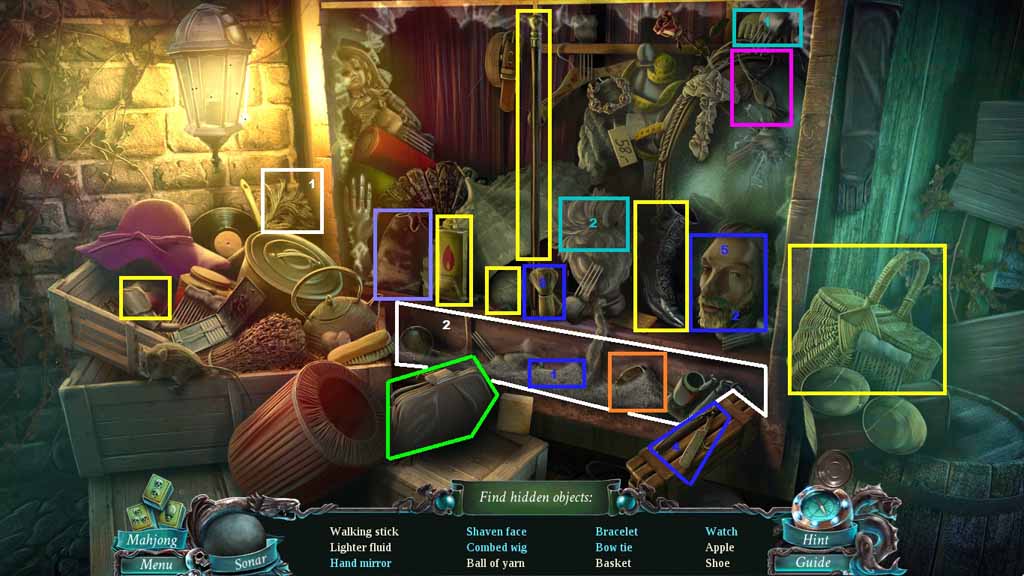
- Find the listed items.
- Click the purse; collect the hand mirror.
- Select the duster and use it to dust off the shelf.
- Select the shaving cream on the shelf and squeeze it onto the beard.
- Select the lather brush to spread the shaving cream.
- Select the razor and use it to shave the face; collect the shaven face.
- Select the comb and use it comb the wig; collect the combed wig.
- Click the shelf; collect the bracelet.
- Click the material; collect the bow tie.
- Click the sack; collect the watch.
- Collect the lighter fuel.
- Move to the Gate.
- Click the vending machine and insert the coin.
- Click the grate and pour the lighter fluid into the lighter; collect the lighter.
- Click the toolbox and read the note.
- Click the toolbox again and click the tools; collect the wrench.
- Move to the Bedroom.
- Click the floor.
- Read the note and collect the rebel symbol.
- Click the box and insert the half circle.
- Click the box open and collect the gunpowder.
- Move to the Promenade; move left to the Statue.
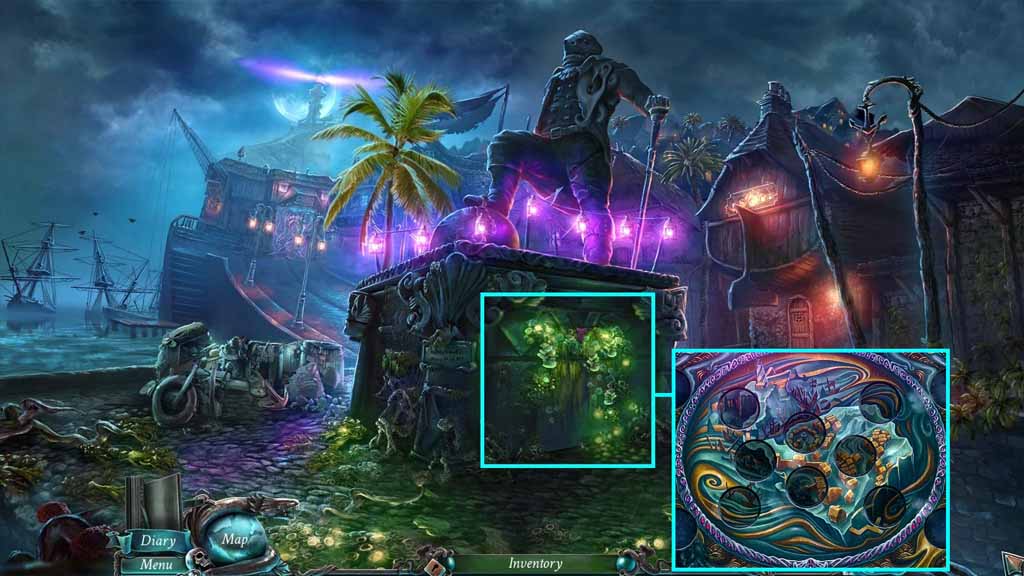
- Click the base and click the wall; use the dagger on it.
- Pour the gunpowder onto the wall and ignite it using the lighter.
- Click the wall to trigger a puzzle.
- Solve the puzzle by inserting the tokens into the correct slots to complete the picture.
- Move into the Secret Chamber.
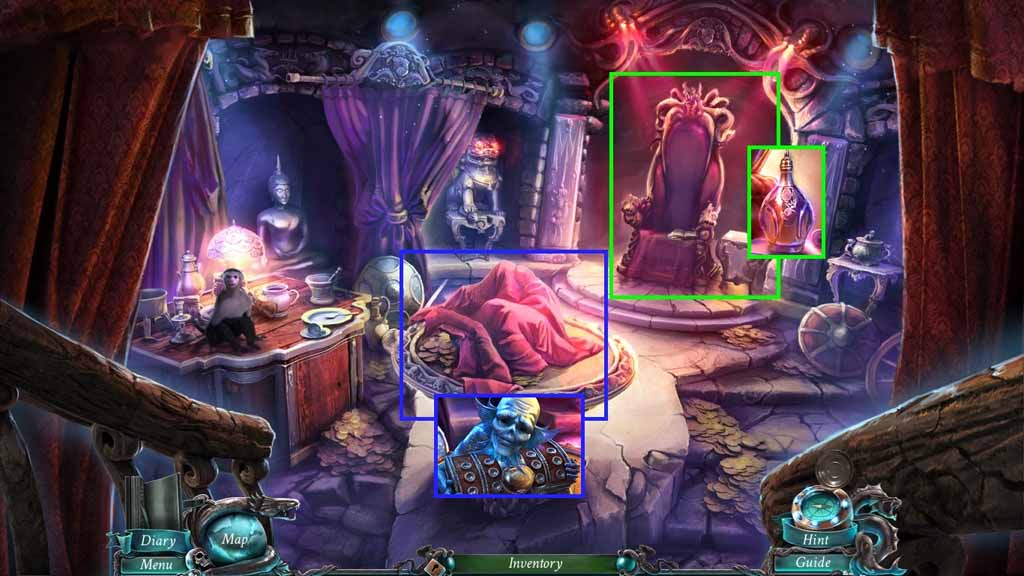
- Click the throne; collect the bottle of rum.
- Click the sheet and zoom into the chest.
- Speak to the goblin.
- Move to the Square.
- Click the Tavern door 2 times.
- Hand the sailor the bottle of rum.
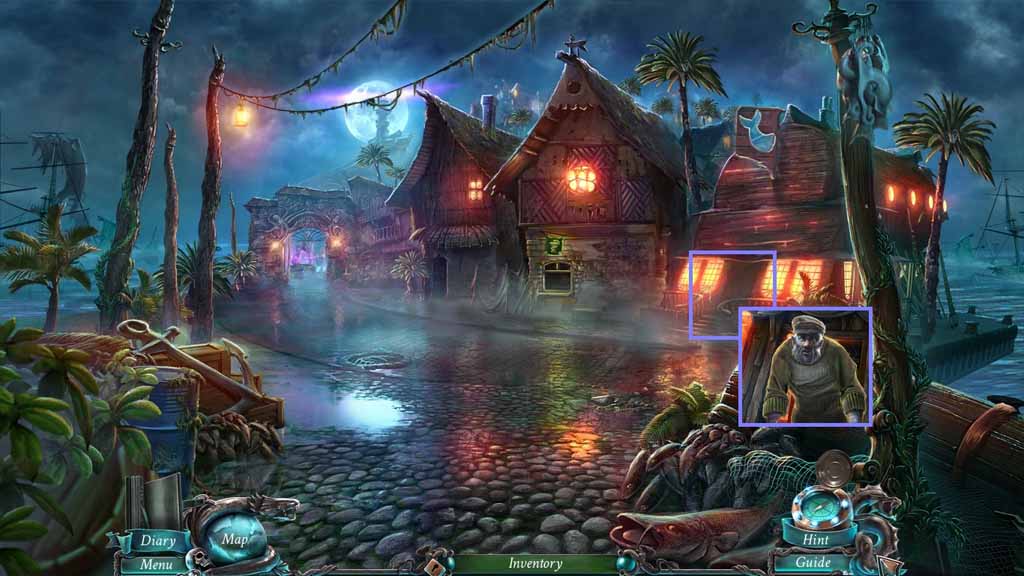
- Move into the Tavern; click the bar to trigger a hidden objects area.
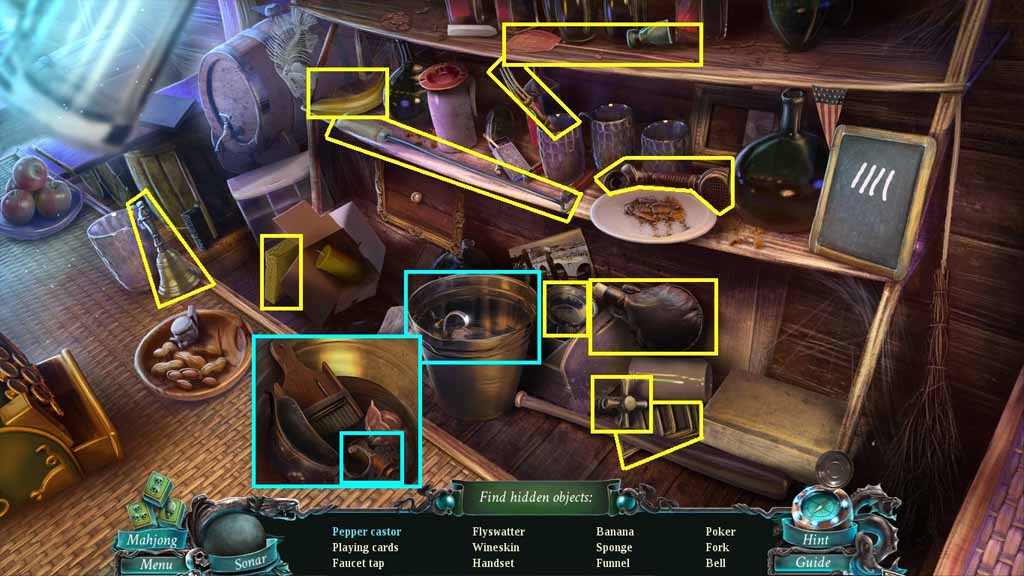
- Find the listed items.
- Zoom into the bucket; collect the pepper castor.
- Collect the banana.
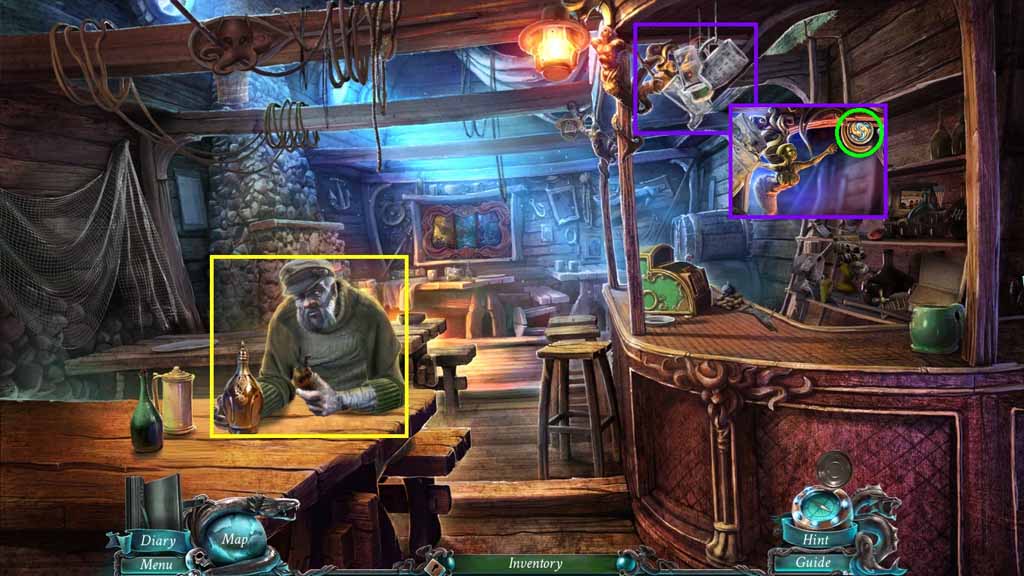
- Speak to the sailor and collect the photo.
- Click the mugs and click them aside.
- Click the statuette and collect the 2 / 12 golden fish.
- Click the mirror to trigger a mini-game.
- Solve the mini-game by placing the pieces into the correct slots.
- Collect the newspaper key.
- Move to the Promenade.
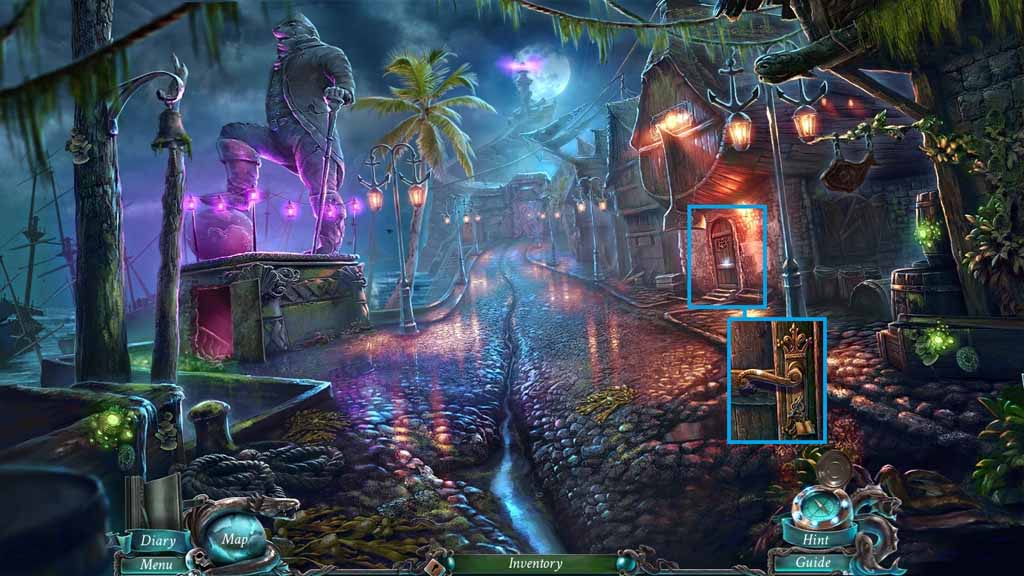
- Click the door lock 2 times and insert the newspaper key.
- Click the key and then the handle.
- Move into the Newspaper Office.
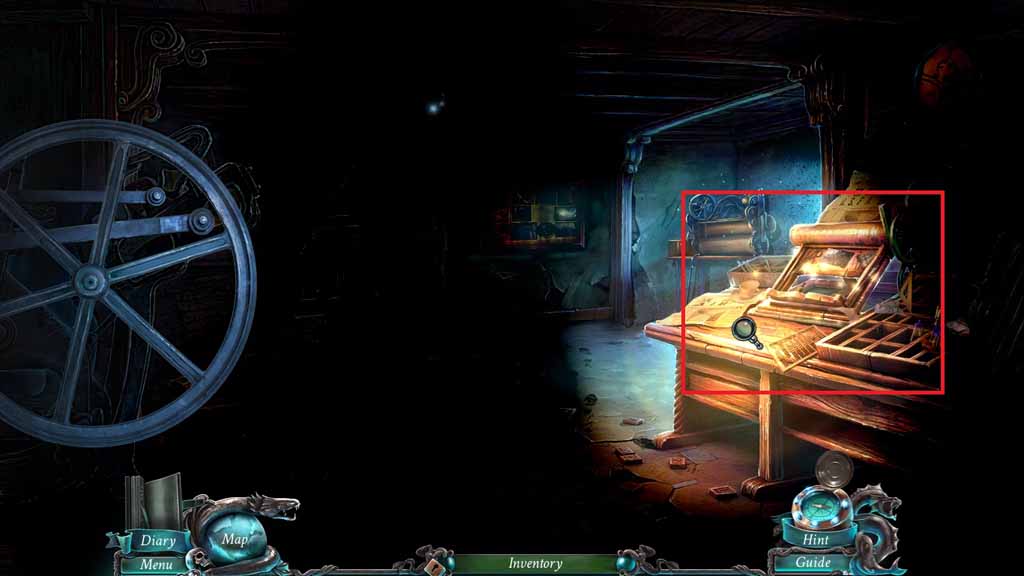
- Select the lighter to illuminate the scene.
- Click the desk to activate a hidden objects area.
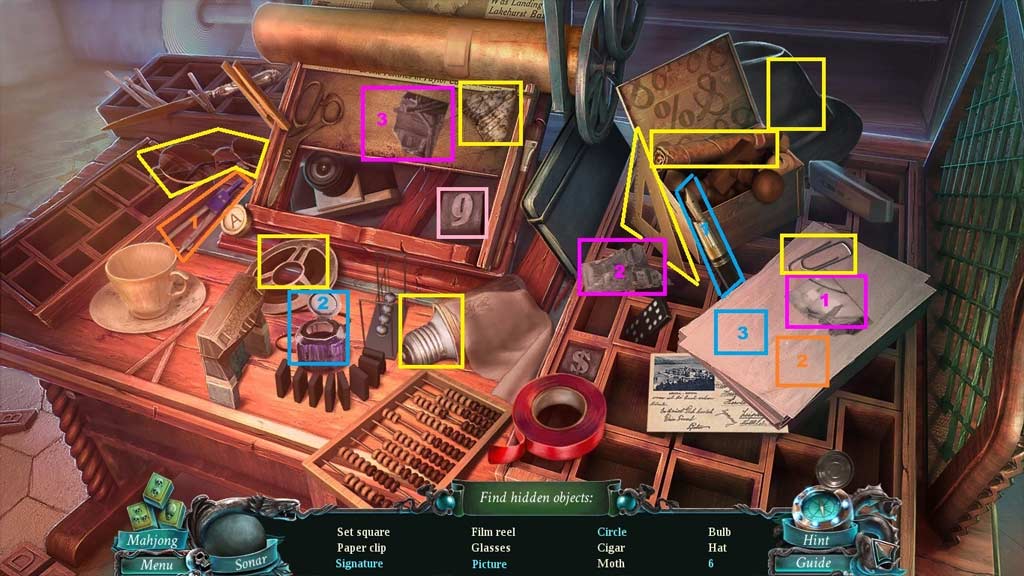
- Find the listed items.
- Select the pen and dip it into the ink; select the pen again and place it onto the paper to collect the signature.
- Select the picture pieces and place them with the others; collect the picture.
- Select the compass; use it to draw and collect the circle.
- Click the number 9 two times; collect the 6.
- Collect the light bulb.
- Click the light and remove the broken bulb; insert the light bulb.
- Click the furnace 2 times.
- Click the soot and click the toy; collect the 1 / 3 toy soldiers.
- Collect the coal.
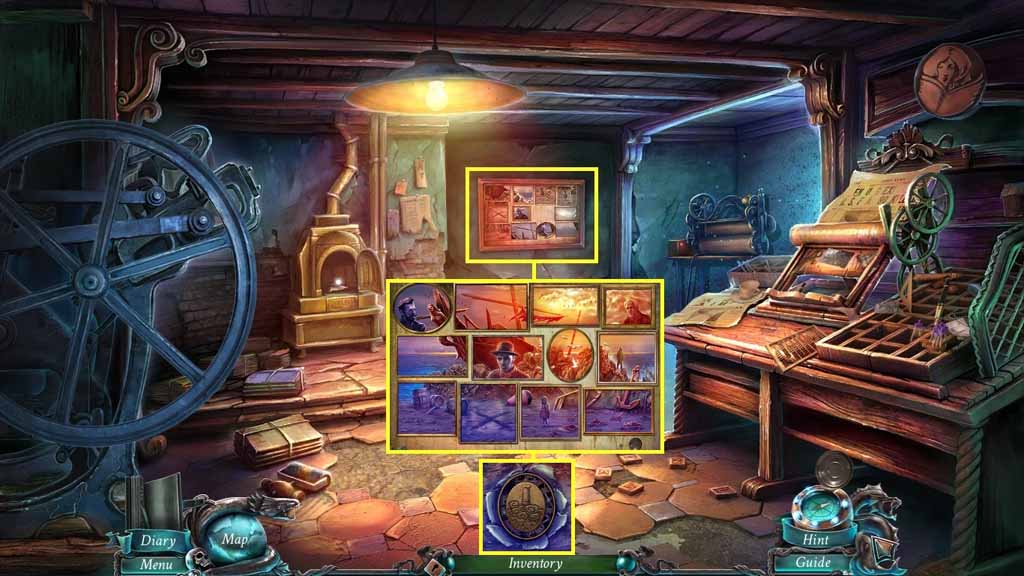
- Click the board; place the photo onto it to trigger a mini-game.
- Solve the mini-game by aligning the photos to create a completed image.
- Insert the rebel symbol into the slot.
- Move downstairs to the Hideout.
- Select the lighter to ignite the lantern.
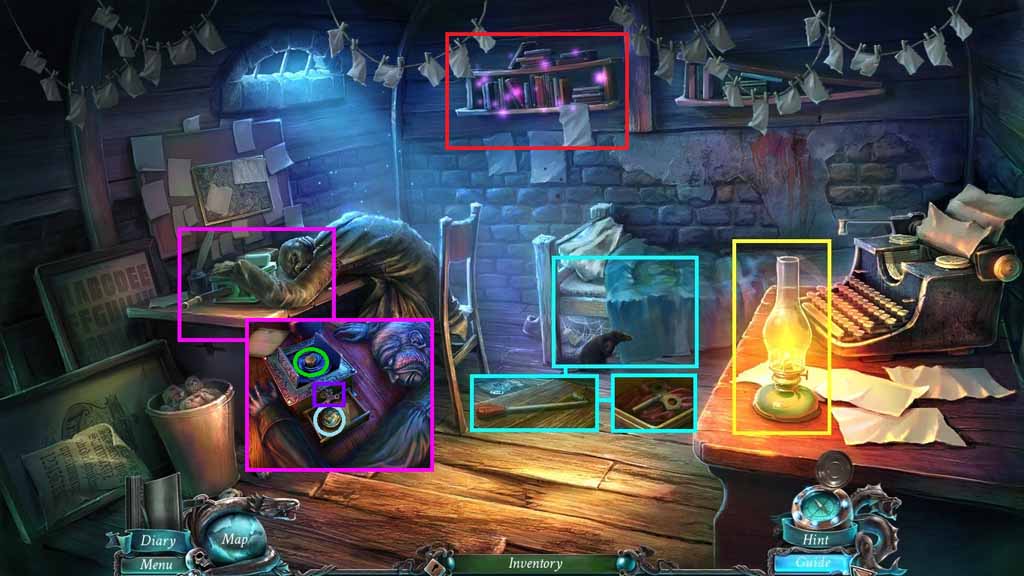
- Click the sheet and zoom under the bed.
- Click the 2 cobwebs and collect the crane lever.
- Click the 2 floorboards and the dirt.
- Click the tin; collect the wind-up key.
- Click the corpse then click its arm.
- Insert the wind-up key into the box slot and click it.
- Collect the signet ring and the 3 /12 golden fish.
- Click the shelf to access a hidden objects area.
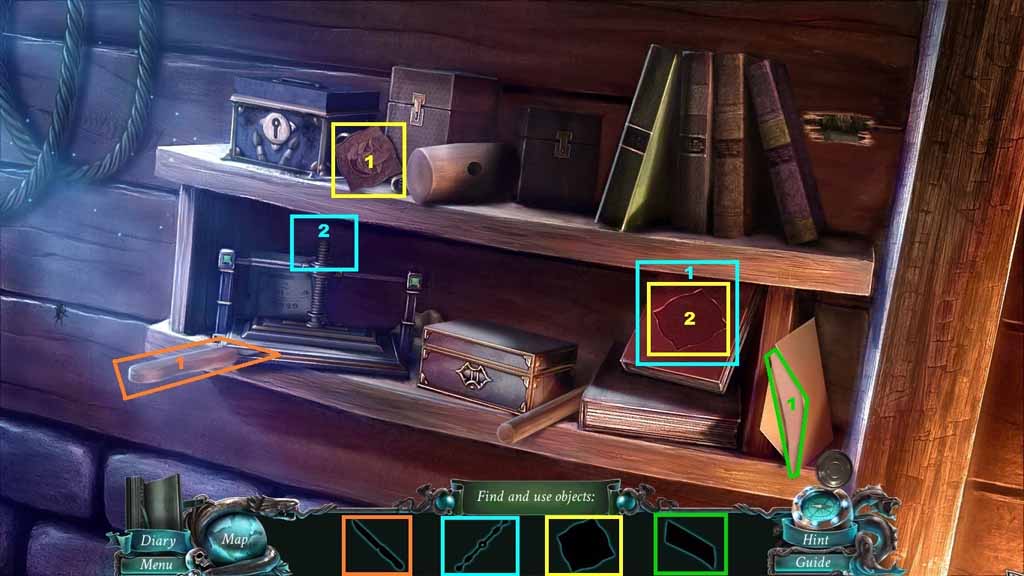
- Find the silhouetted items.
- Collect the book symbol; insert it onto the book and collect the handle.
- Attach the handle onto the letterpress; click the handle and collect the knife.
- Select the knife and use it to cut the hammer handle; collect the handle.
- Place the handle onto the hammer head; collect the hammer.
- Click the books and use the hammer on the crack.
- Solve the mini-game to collect the fonts and the paint box key.
- Insert the paint box key into the lock; collect the printing ink.
- Place the fonts, the printing ink, and the blank paper onto the letterpress.
- Enter the code 2-4-7 to collect the bolts.
- Move to the Secret Chamber.
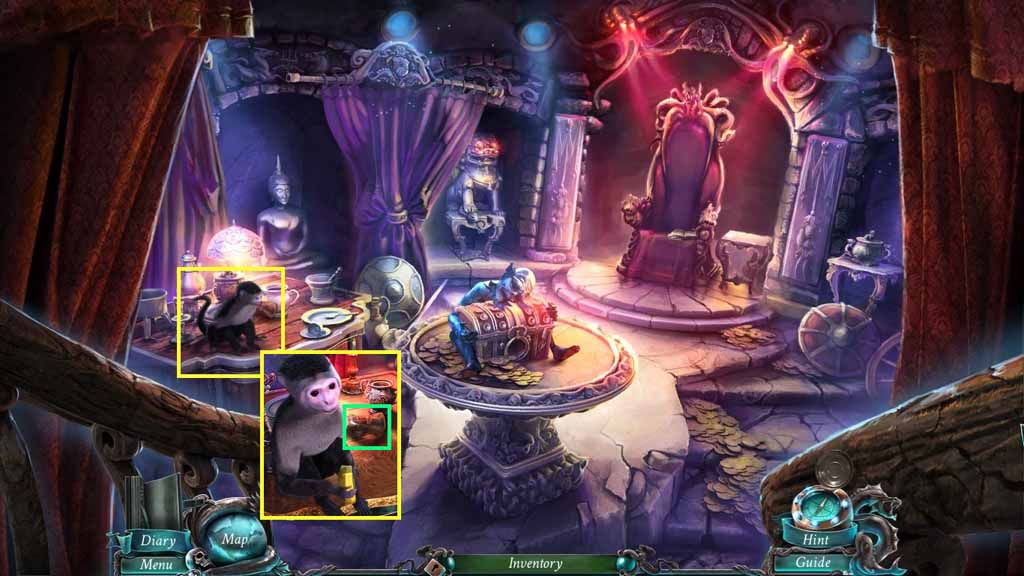
- Click the monkey; give him the banana.
- Collect the fireproof glove.
- Move to the Dilapidated Harbor.
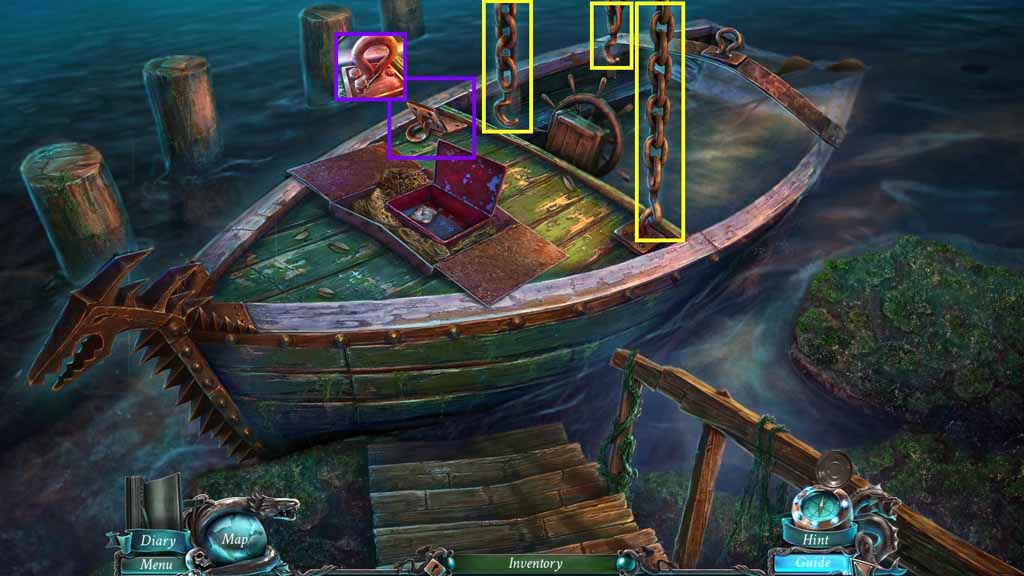
- Click the ring 2 times and place the bolts onto it.
- Select the wrench to use on the 3 bolts.
- Click the 3 chains.
- Move down.
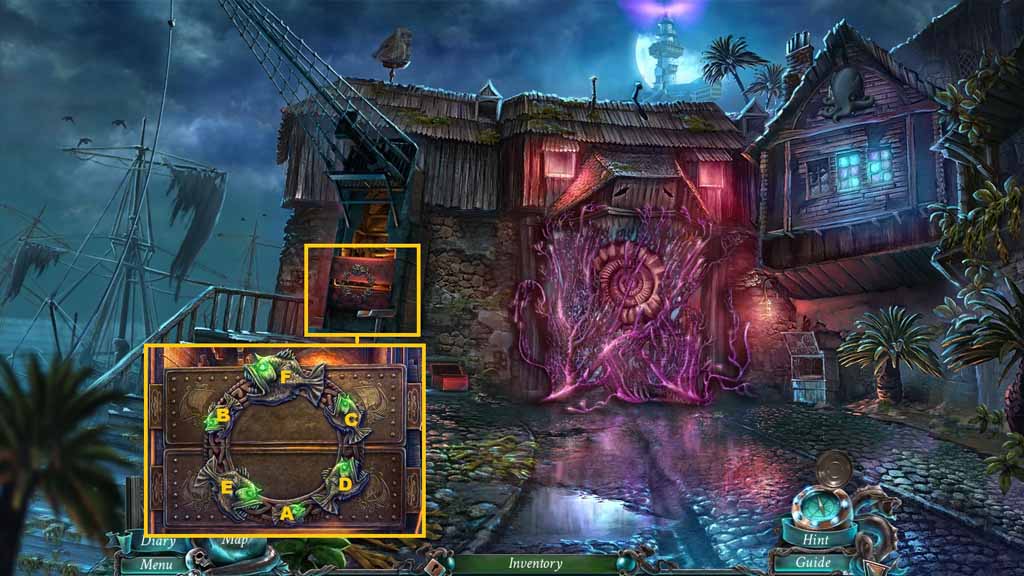
- Click the controls to trigger a mini-game.
- Click the fish in ABC order to solve the mini-game.
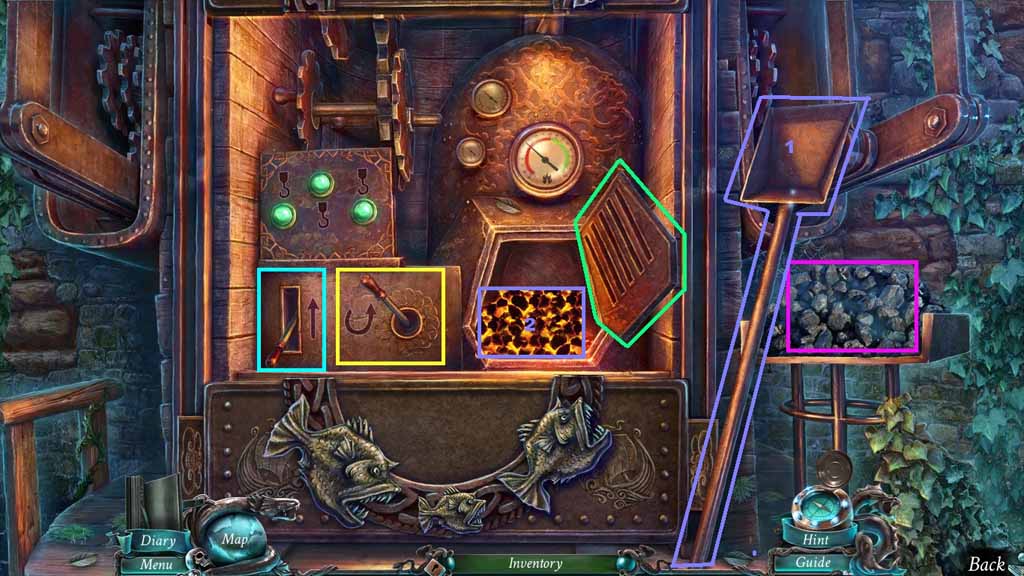
- Zoom into the controls and insert the crane lever.
- Put the coal onto the shelf.
- Select the fireproof glove to open the furnace.
- Select the shovel to scoop the coal into the furnace.
- Click the lever on the left then the lever on the right.
- Move ahead to the Street.
Comments will load when you reach this part of the walkthrough.