
Chapter Six: Town
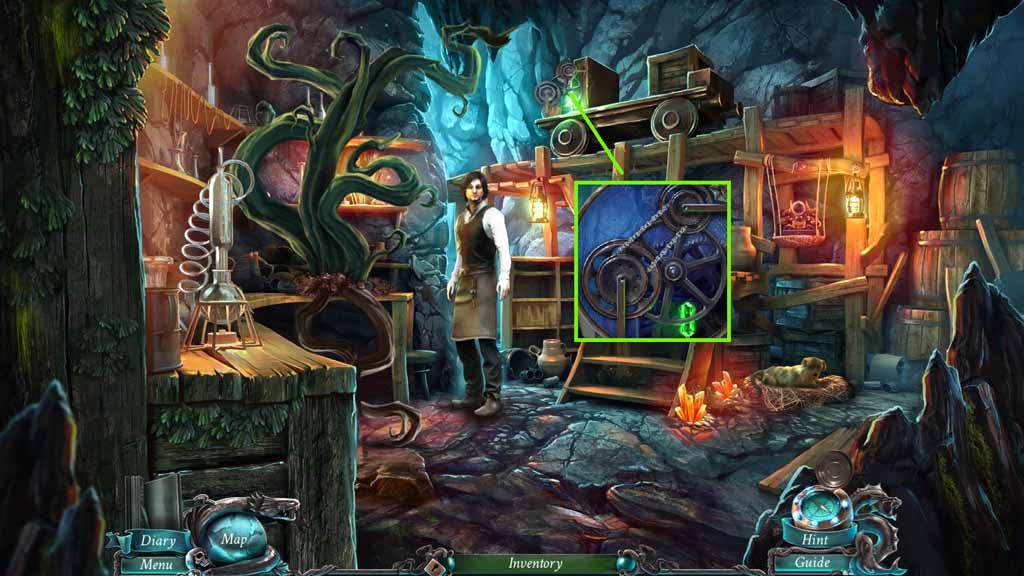
- Click the cover on the cart.
- Connect the cart belt.
- Click the cart and move to the Crossroads.
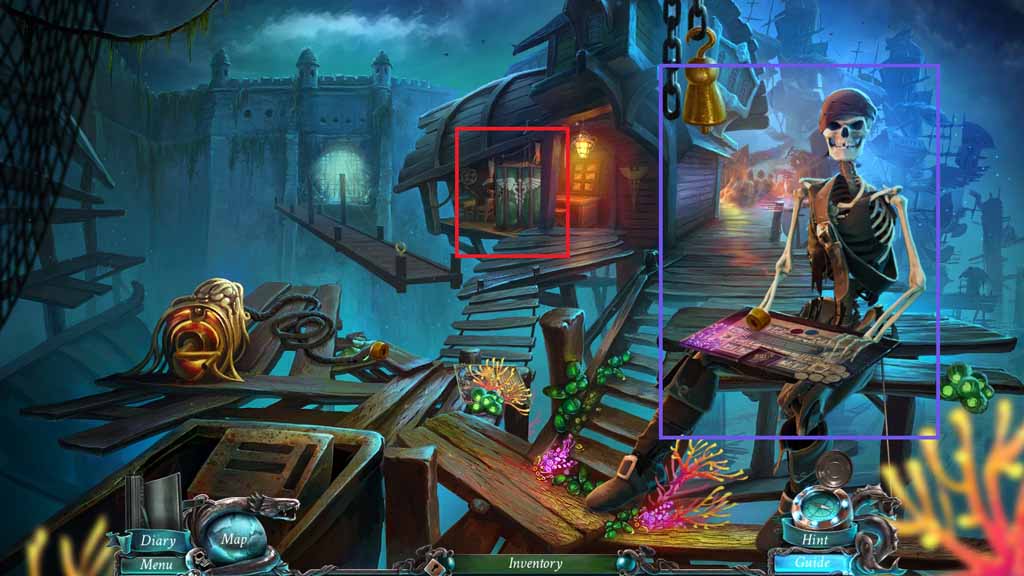
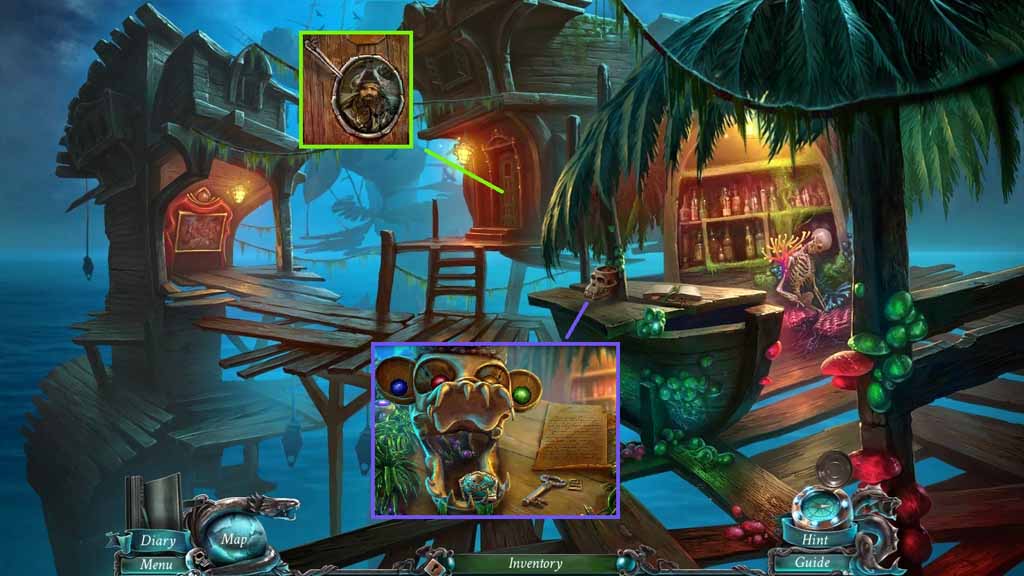
- Speak to the pirate 2 times.
- Click the curtain.
- Move into the building and click the hidden objects area.
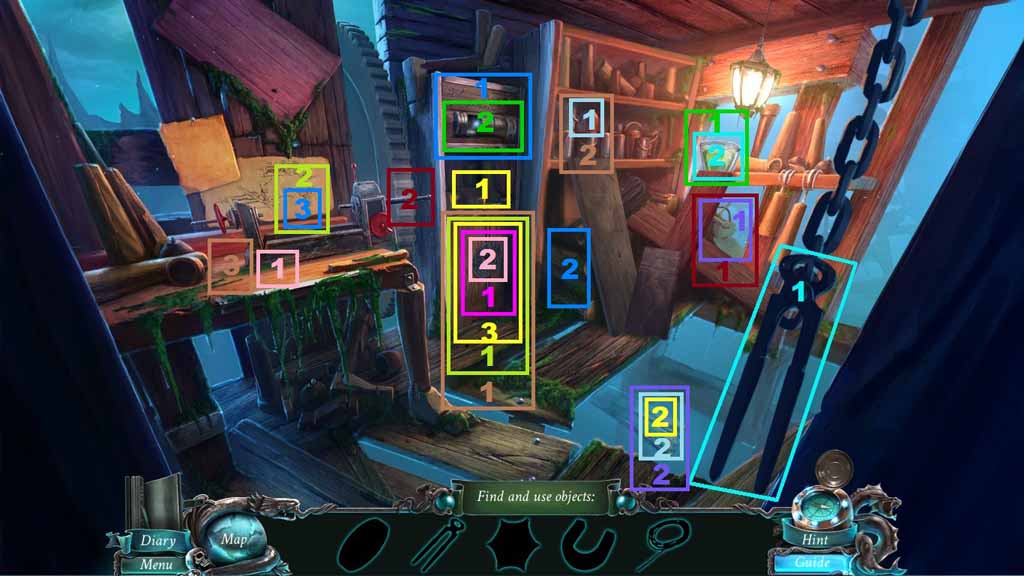
- Find the silhouetted items.
- Select the metal pincers to collect the scrollable part.
- Place the scrollable part into the slot and move them to complete the picture.
- Collect the saw.
- Zoom into the area below the saw compartment and click the screwdriver.
- Select the saw to cut the logs; collect the log.
- Zoom into the sack; click the twine 2 times to collect it.
- Collect the wheel from the sack.
- Zoom into the table and collect the star; insert it into the groove.
- Collect the brush.
- Zoom into the paint shelf and click the magnet 2 times to collect it.
- Select the brush and dip it into the paint; collect the brush with paint.
- Select the magnet and attach the twine; use it to collect the screwdriver.
- Zoom into the opened cabinet and use the screwdriver to collect the file.
- Zoom into the desk; place the wheel onto the machine.
- Place the log into the machine and click the lever.
- Select the file to create the hand.
- Select the brush with paint to paint the hand.
- Collect the prosthesis.
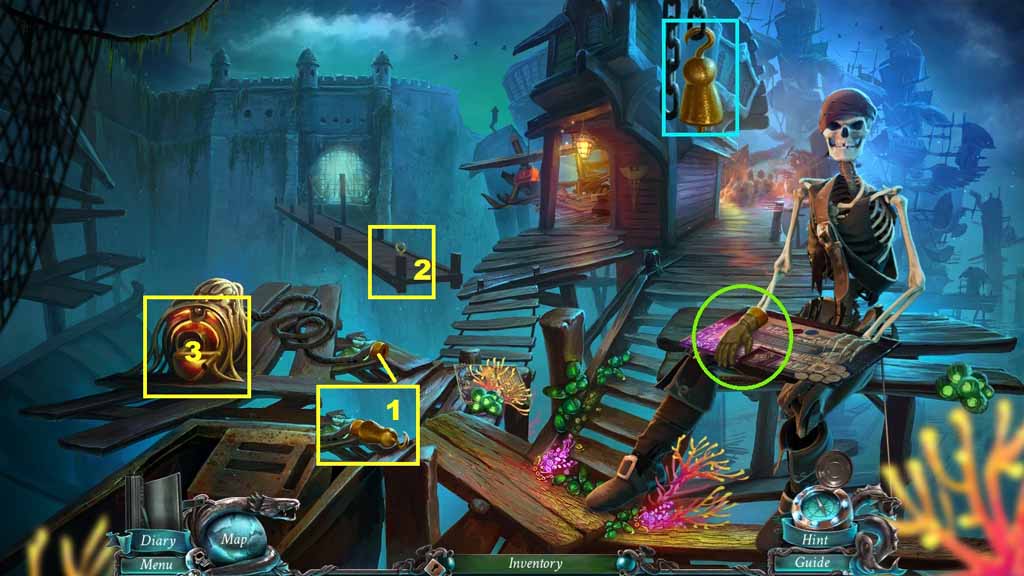
- Give the pirate the prosthesis; collect the hook.
- Place the hook onto the rope.
- Attach the hook to the loop; click the handle.
- Move ahead to the Forbidden Gate.
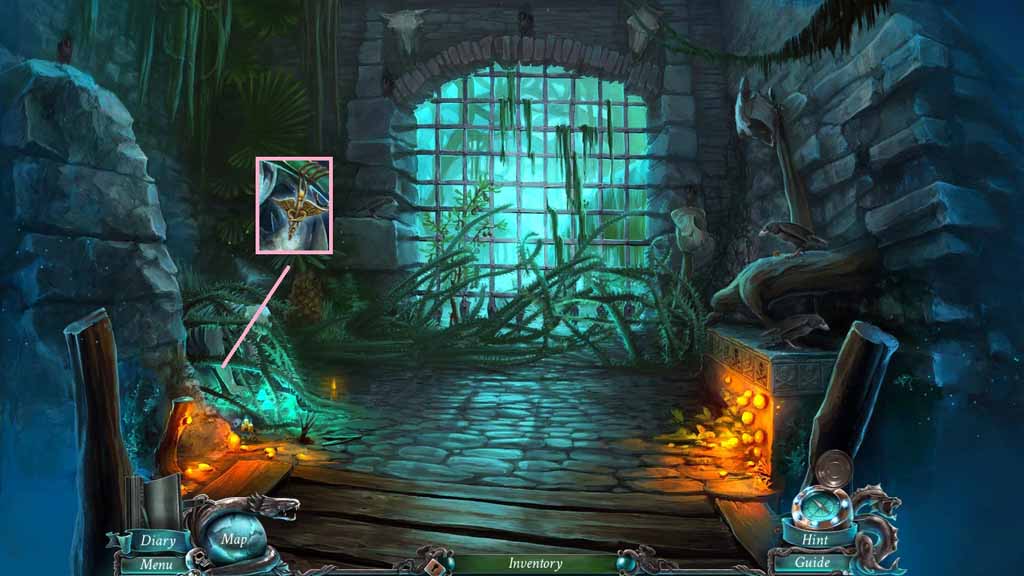
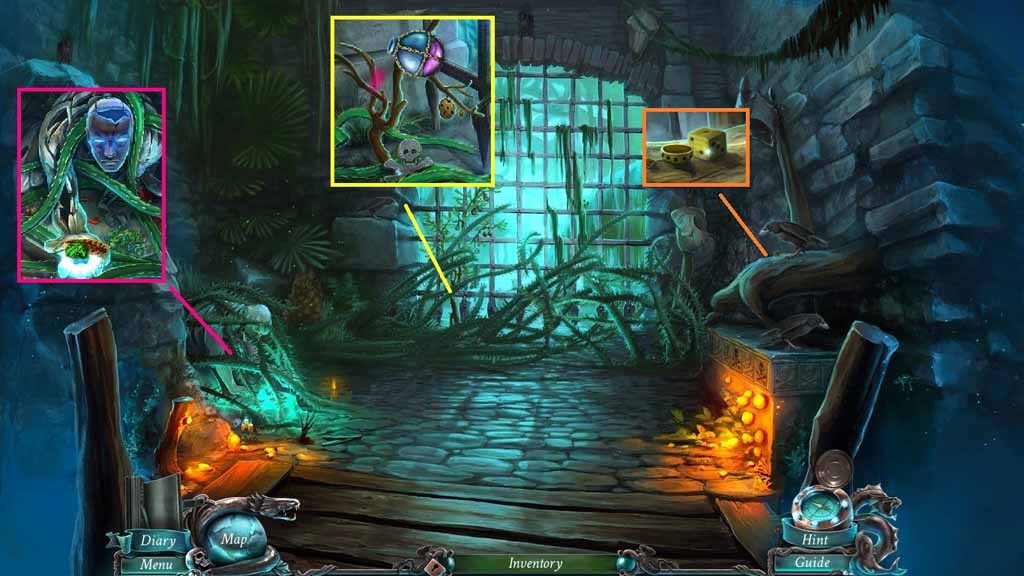
- Collect the caduceus.
- Move back once.
- Place the caduceus into the toolbox.
- Collect the doubloon and the pincers.
- Move ahead to the Forbidden Gate.
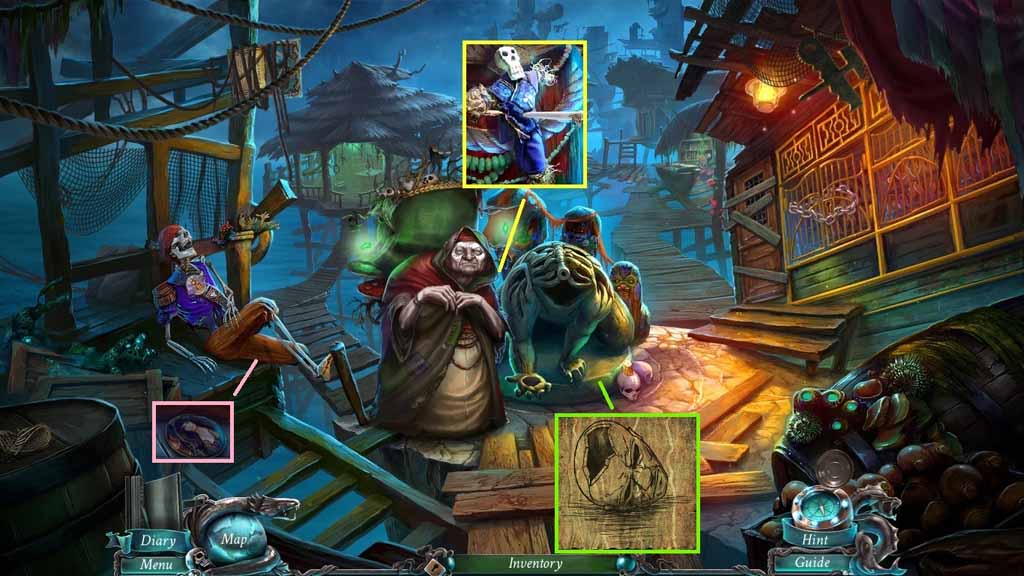
- Select the pincers to remove the overgrowth.
- Insert the doubloon into the guardian’s hand; collect 3 /4 voodoo crystals.
- Select the pincers to remove the overgrowth.
- Collect the skull ornament.
- Select the potion vial and pour it onto the tree; collect the nuts.
- Place the nuts onto the branch; collect the dice.
- Move back once.
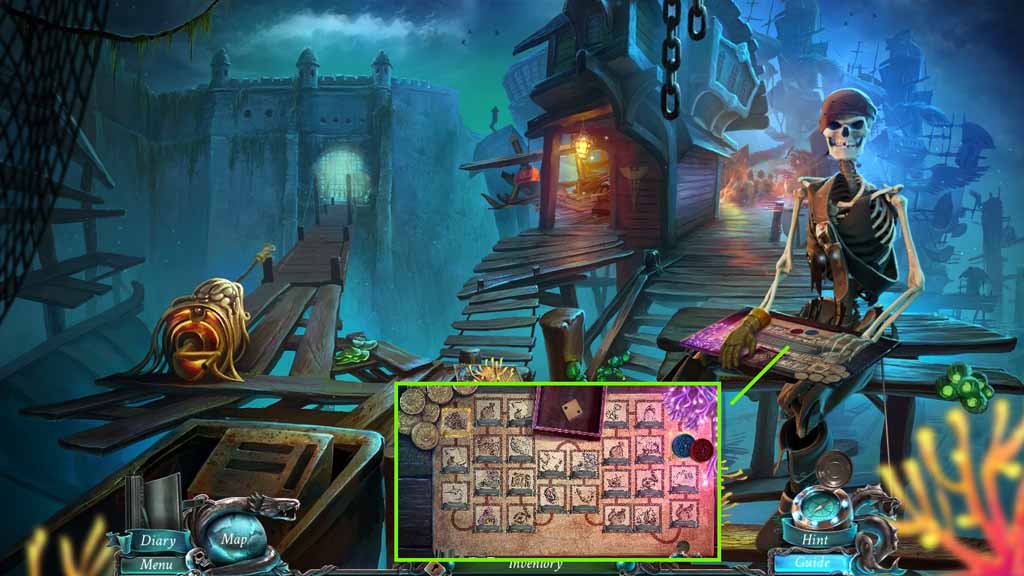
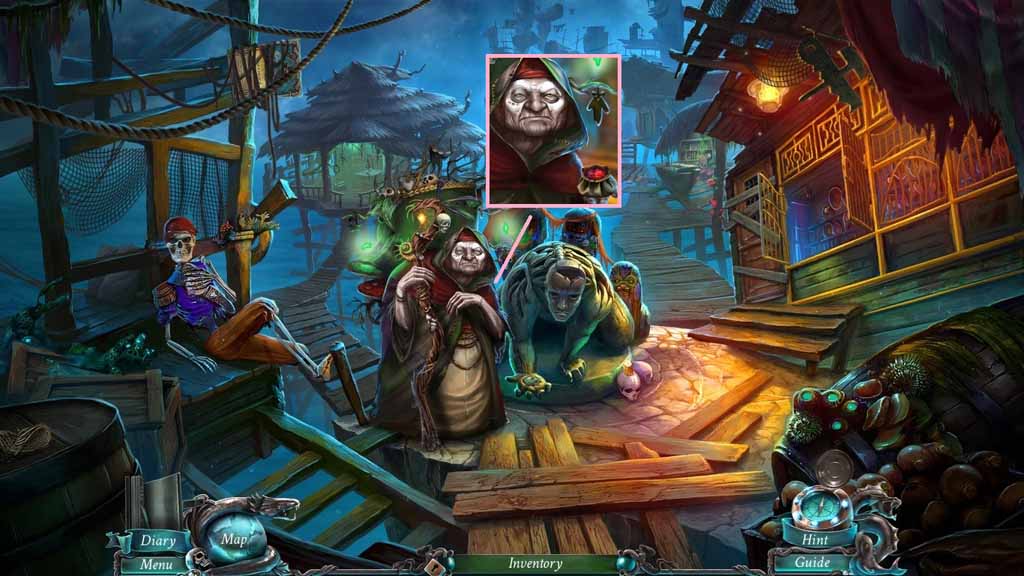
- Give the pirate the dice to trigger a puzzle.
- Solve the puzzle by tossing the dice and moving the pawns based on the number thrown on the dice.
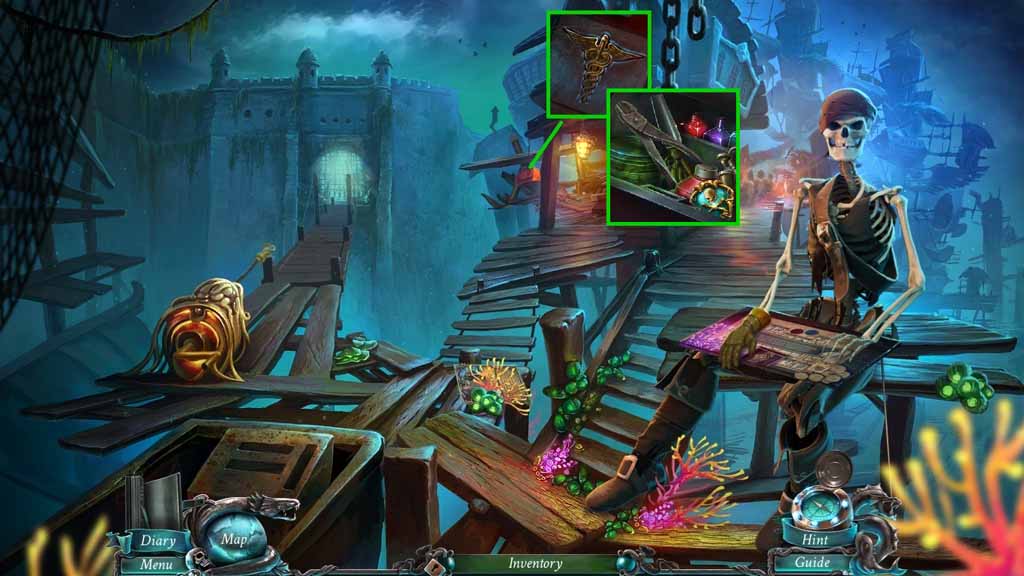
- Move ahead to the Town.
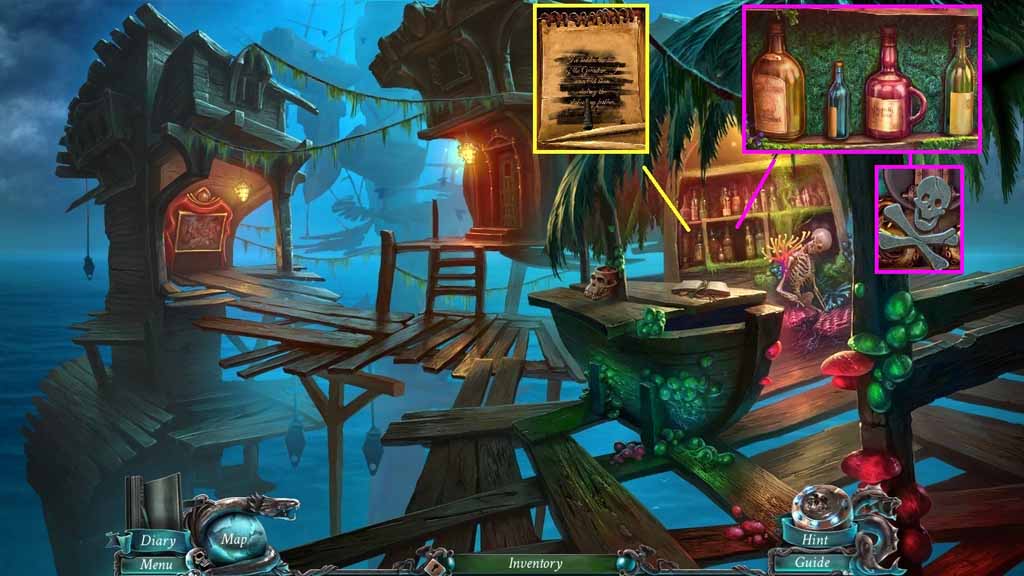
- Click the long needle 2 times to collect it.
- Re-arrange the pieces to read the note.
- Click the skeleton; collect 1 /3 folk portraits.
- Move ahead to the Town Square.
- Select the long needle to collect 2 /3 folk portraits.
- Read the note.
- Set the colors on the skulls as shown.
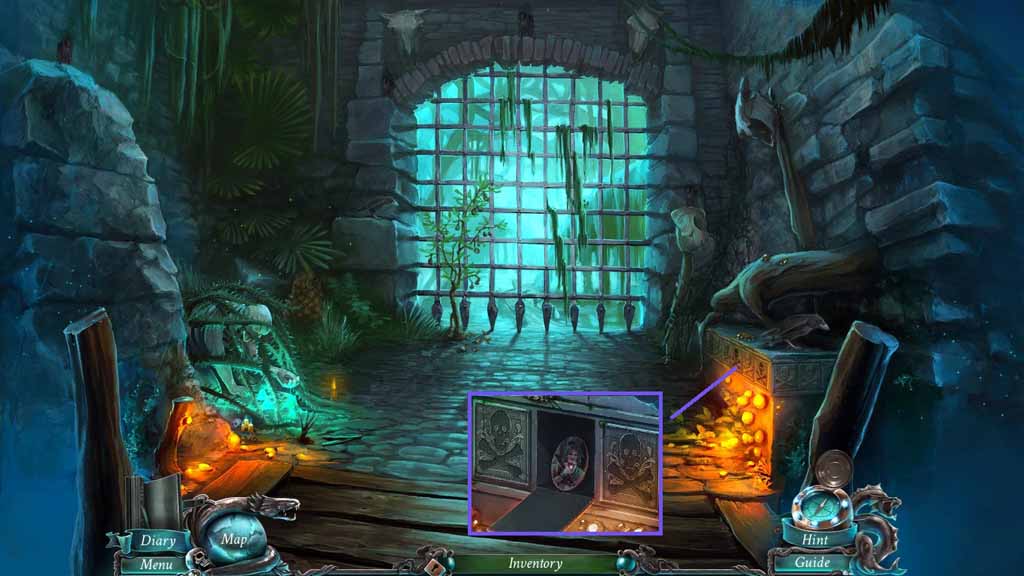
- Collect the doubloon and the shop key.
- Move back once.
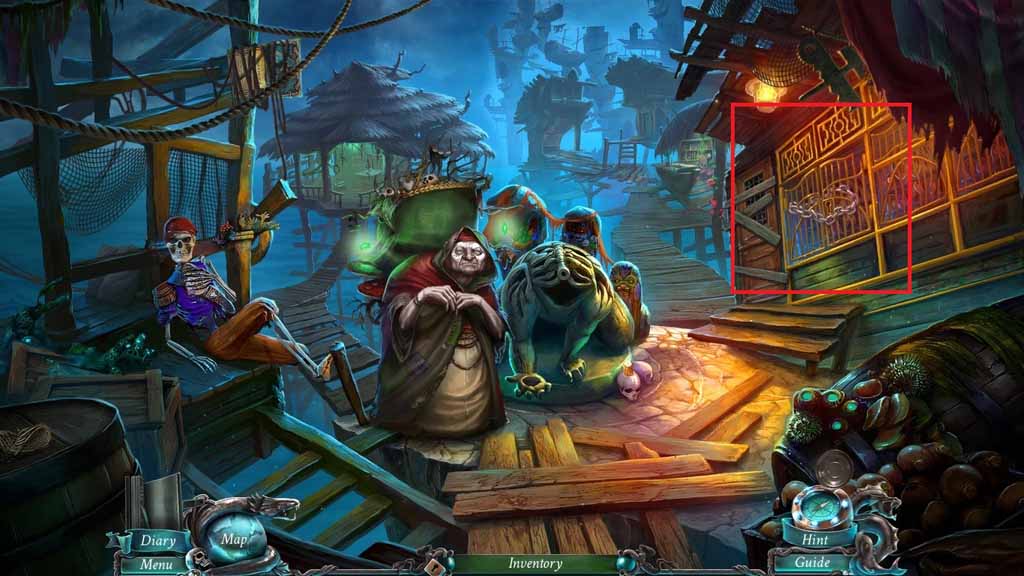
- Select the shop key to unlock the padlock.
- Click the chains to trigger a hidden objects area.
- Find the pictured items.
- Collect the rum bottle.
- Move to the Town Square.
- Select the charcoal to use on the page and uncover the note.
- Place the rum bottle onto the display and arrange the bottle correctly.
- Collect 2 /2 skull ornaments.
- Move to the Forbidden Gate.
- Insert the skull ornament into the grooves.
- Click the skulls; collect 3 /3 folk portraits.
- Move to the Town Square.
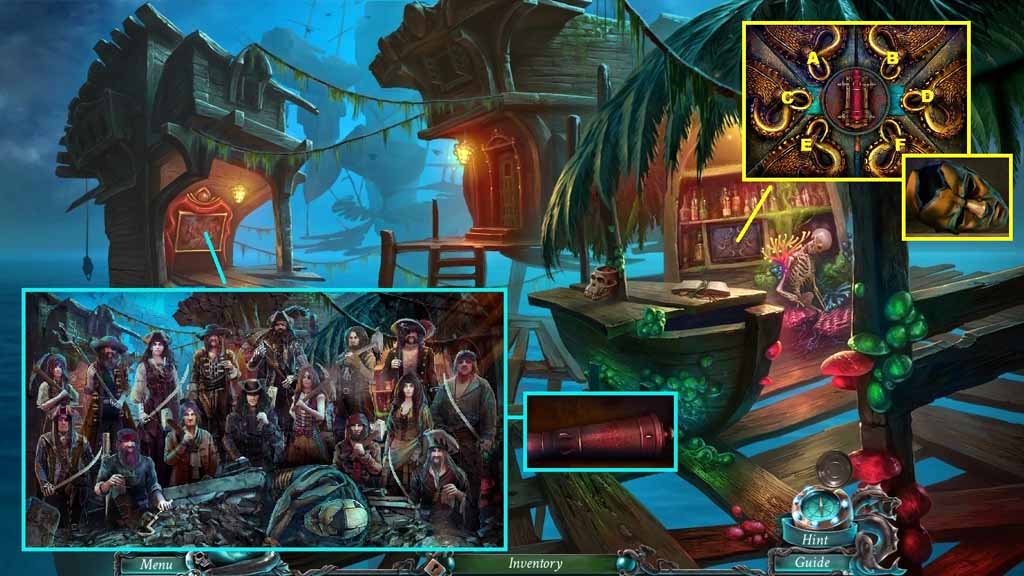
- Insert the folk portrait into the frame to trigger a puzzle.
- Solve the puzzle by matching the heads to the correct bodies.
- Collect the safe knob.
- Attach the safe knob onto the safe to trigger a puzzle.
- Solve the puzzle by rotating the knob in the correct sequence.
- Collect the guardian’s head.
- Move back once.
- Attach the head onto the guardian and insert the doubloon into his hand.
- Collect 4 /4 voodoo crystals.
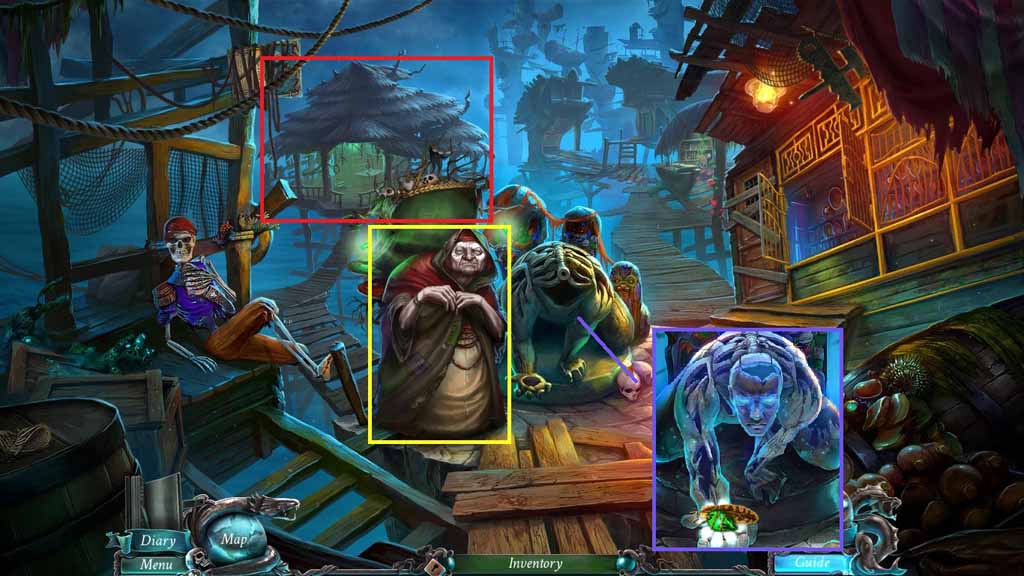
- Give the witch the voodoo crystals.
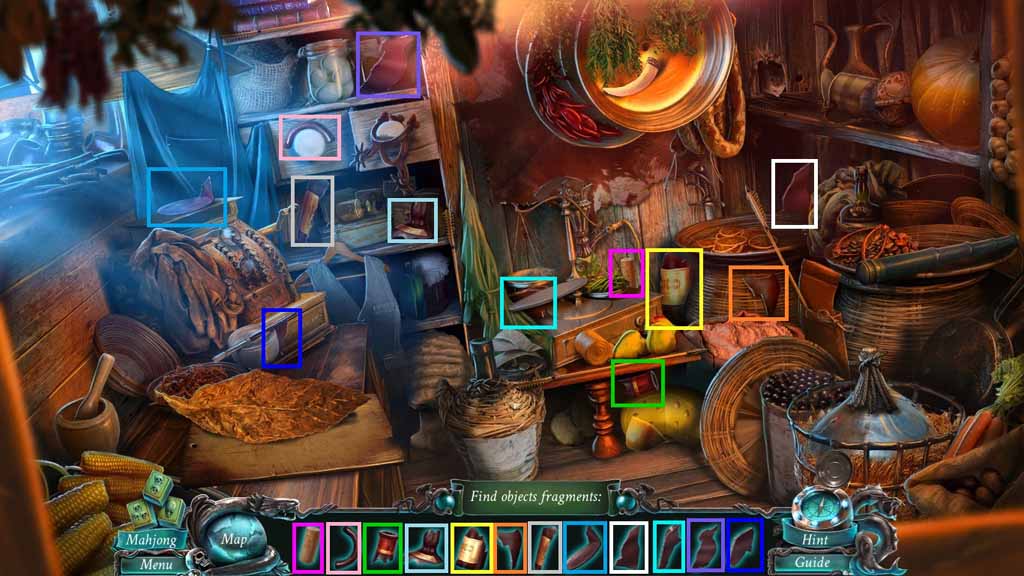
- Move into the cabin to access the hidden objects area.
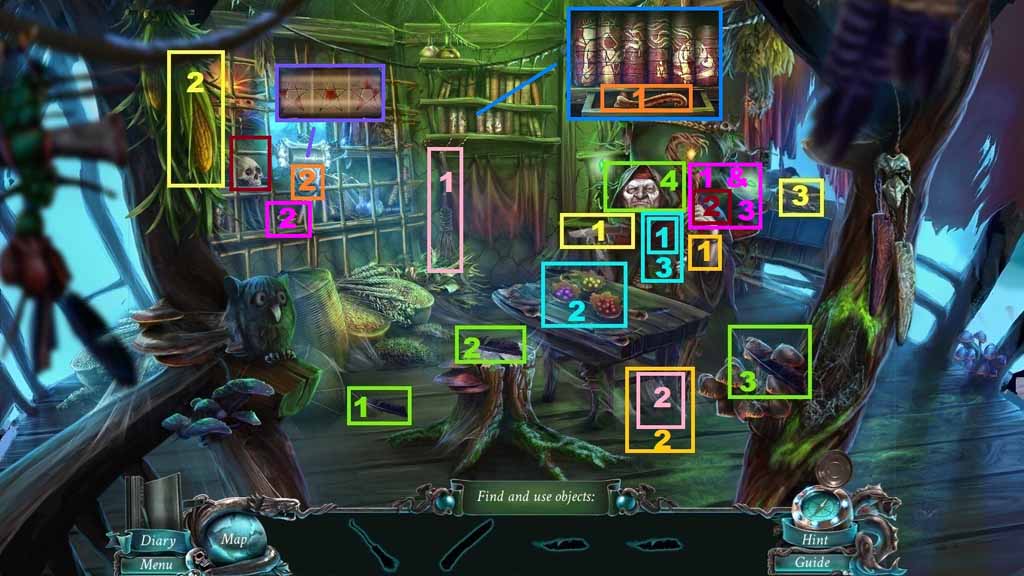
- Find the silhouetted items.
- Select the knife and use it to cut down and collect the maze.
- Place the maze into the nest and collect the fallen feathers; give them to the witch.
- Collect the wooden palette and place it onto the table to trigger a mini game.
- String the beads bases on the diagram; collect the beads.
- Give them to the witch; collect the half shell.
- Select the broom and use it to clean and collect the book.
- Insert the half shell into the shell and give it to the witch; collect the diagram.
- Place the book into the shelf to trigger a mini game.
- Solve the game by aligning the books to create the image.
- Collect the bone key and insert it into the window hole.
- Arrange the tumblers as shown in the diagram.
- Collect the skull and give it to the witch.
- Collect the stone and place it into the mortar.
- Collect the stardust and give it to the witch.
- Collect the voodoo stick.
- Give the witch the voodoo stick and the painting.
- Collect the stardust.
- Move to O’Malley.
- Collect the niche key.
- Move to the Niche.
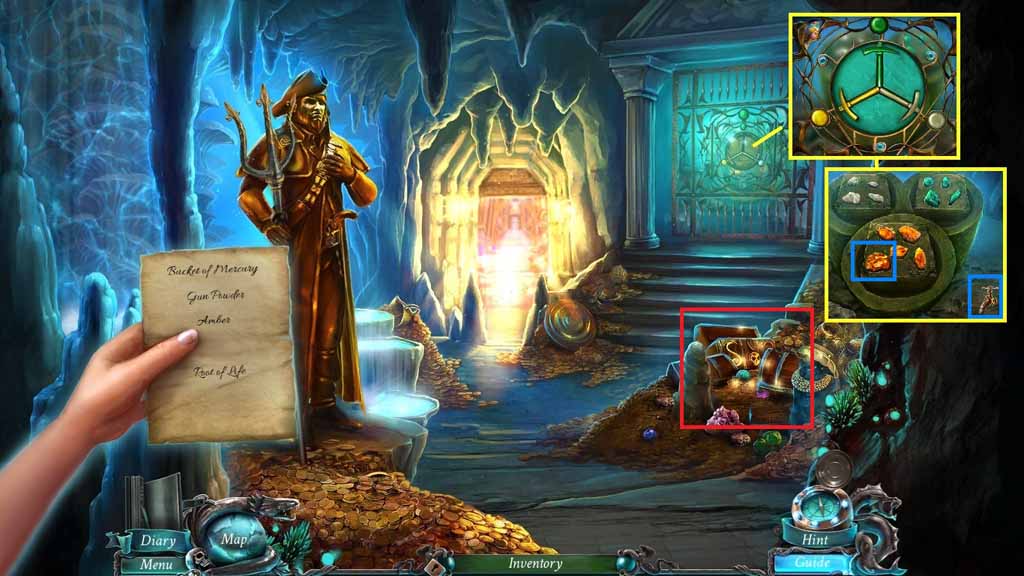
- Insert the niche key into the lock.
- Align the keys to the color matched circles.
- Collect the golden tap and the amber.
- Zoom into the treasure to trigger a hidden objects area.
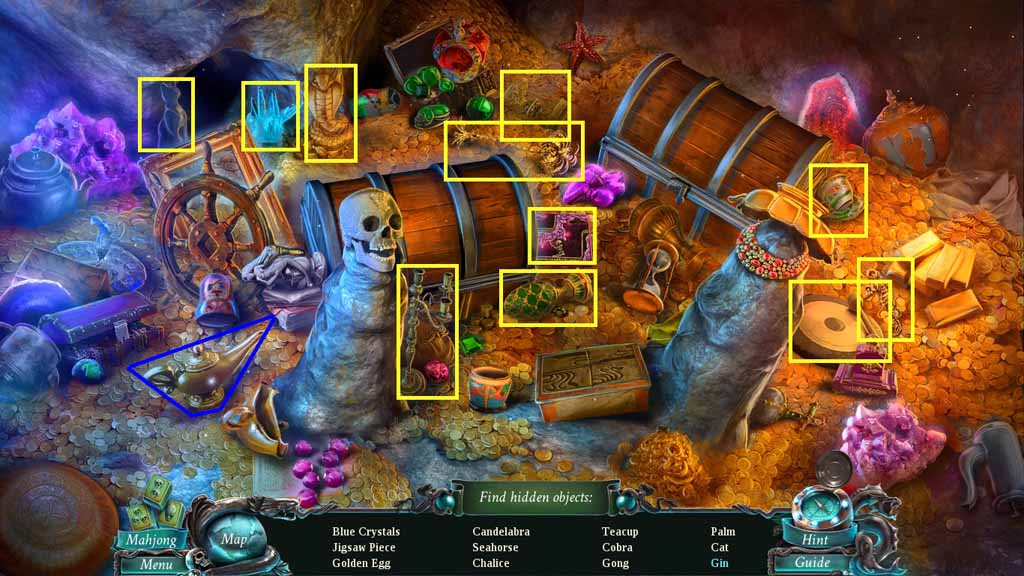
- Find the listed items.
- Click the magic lamp twice; collect the gin.
- Collect the jigsaw piece.
- Move to the Tunnels.
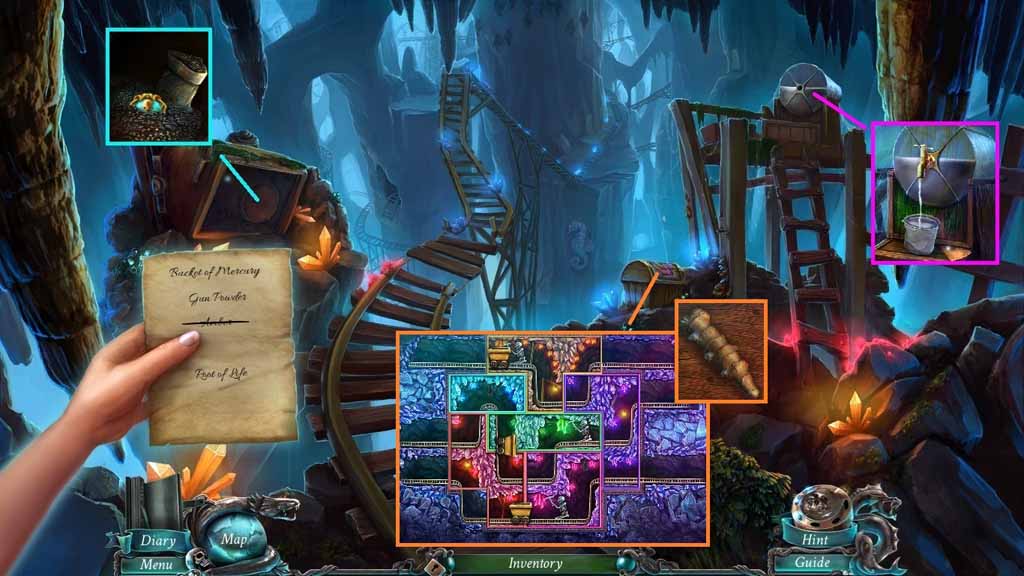
- Select the pincers to use remove barrel lid.
- Collect the doubloon and the gun powder.
- Place the bucket and the golden tap onto the container.
- Click the tap and collect the bucket of mercury.
- Insert the jigsaw piece into the chest to trigger a puzzle.
- Solve the puzzle by fitting the pieces together correctly.
- Collect the root of life.
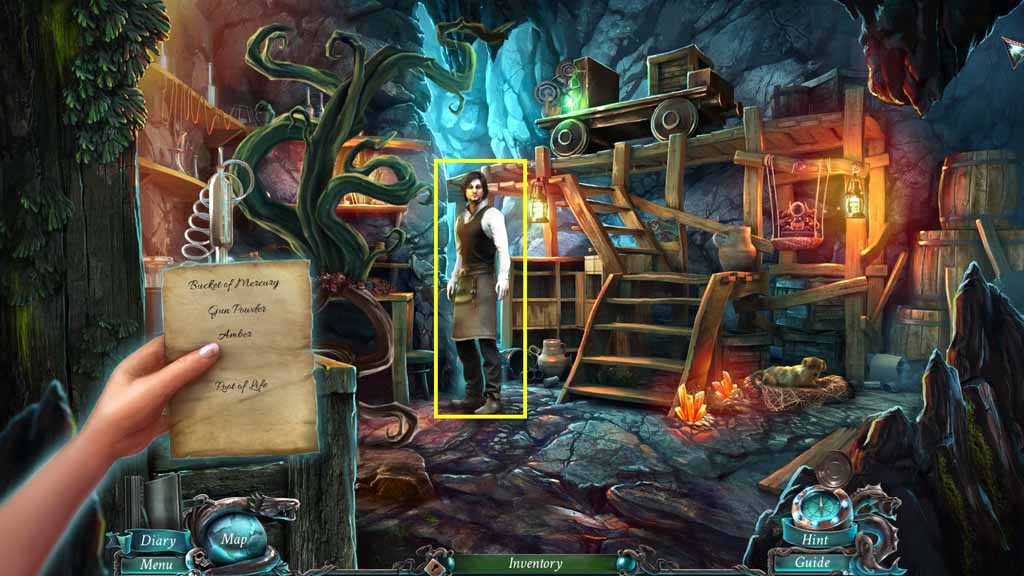
- Move to O’Malley.
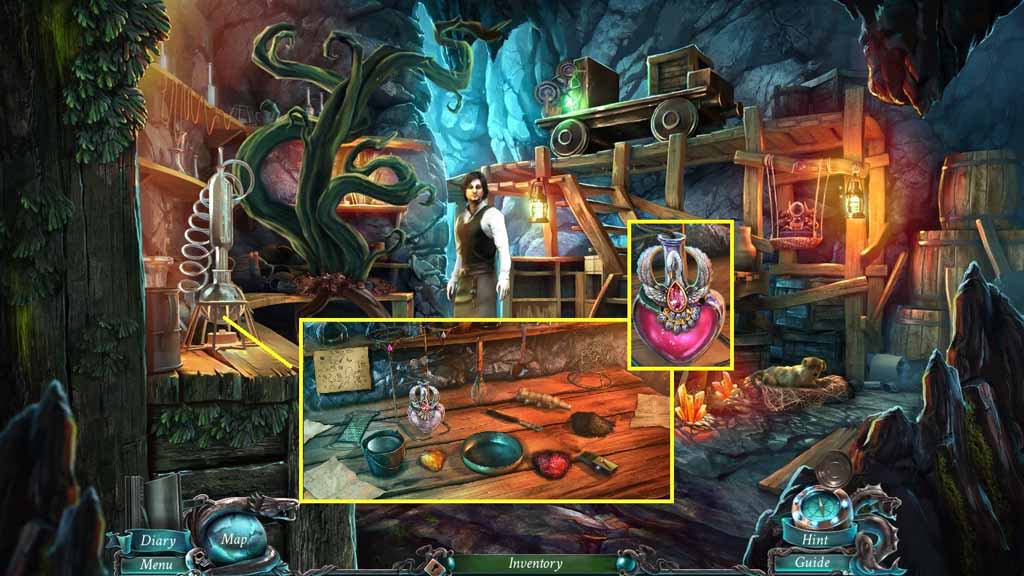
- Zoom into the table.
- Place down the root of life, the bucket of mercury, the amber, the gun powder and the stardust to trigger a puzzle.
- Solve the puzzle by creating the reviving potion per the recipe.
- Collect the reviving potion.
- Move to the Forbidden Gate.
Comments will load when you reach this part of the walkthrough.