
Chapter Five: Into the Mines
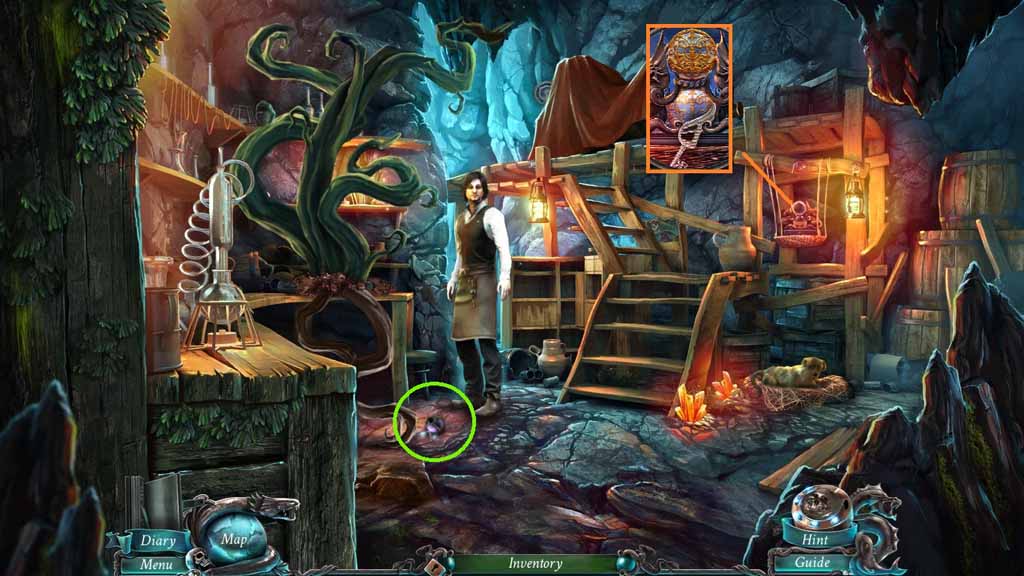
- Collect the lampshade.
- Move to the Kitchen and zoom into the trap door to access a hidden objects area.
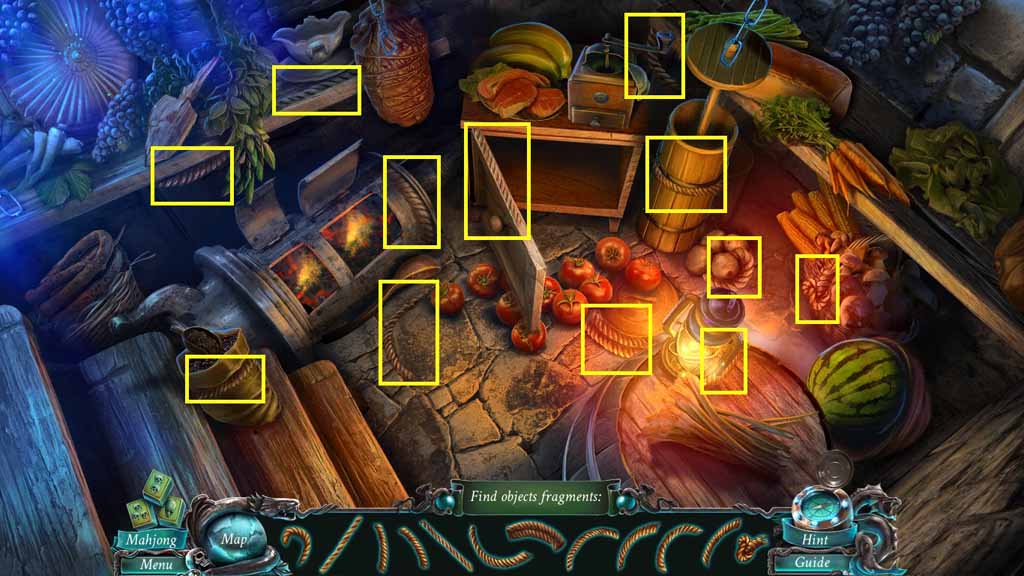
- Find the pictured items.
- Collect the looped rope.
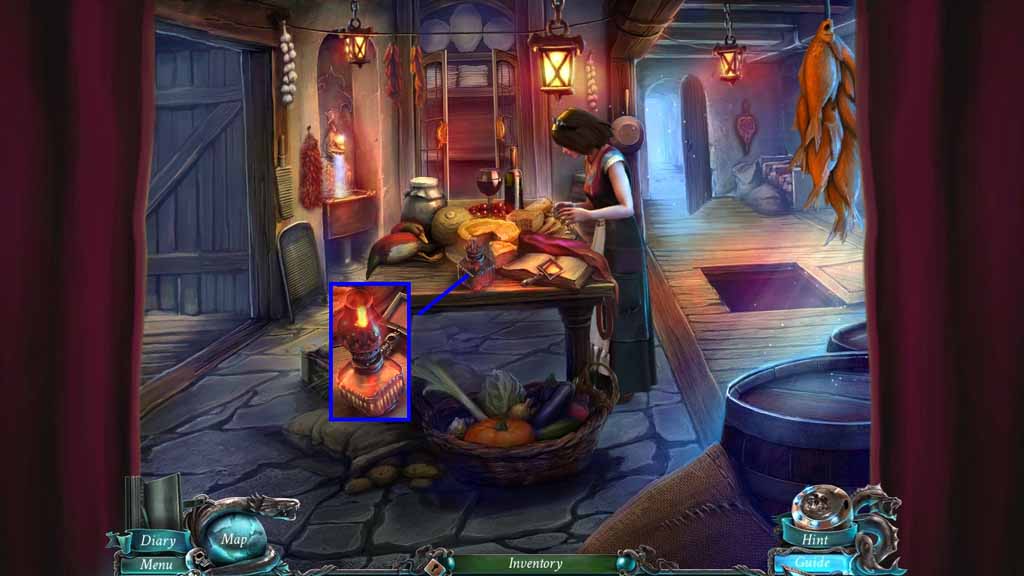
- Click the lamp lid and pour in the liquid from the oil can.
- Click the lid and use the burning splinter to light the wick.
- Attach the lampshade.
- Collect the oil lamp.
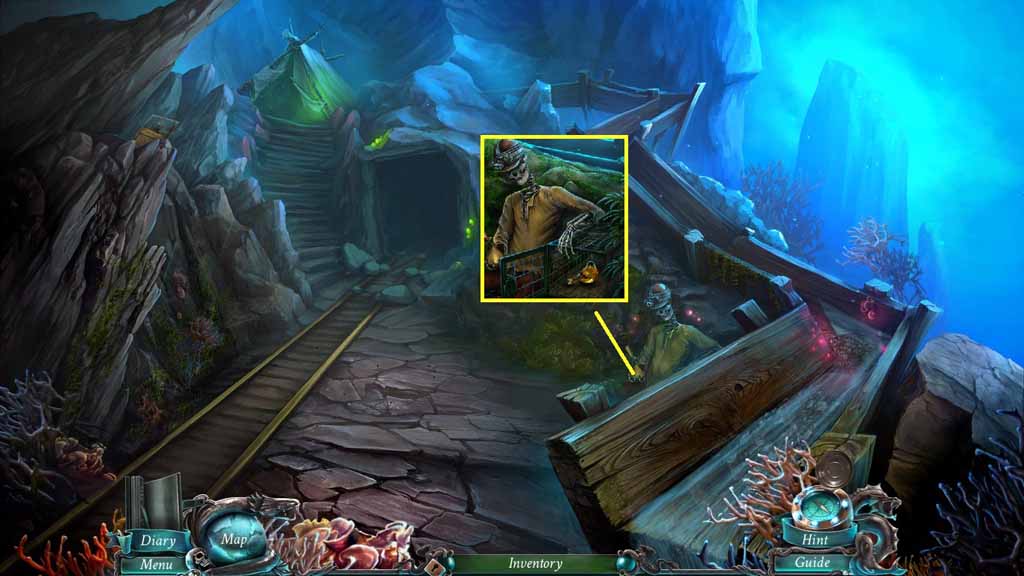
- Move to the Tunnels.
- Select the oil lamp to illuminate the darkness.
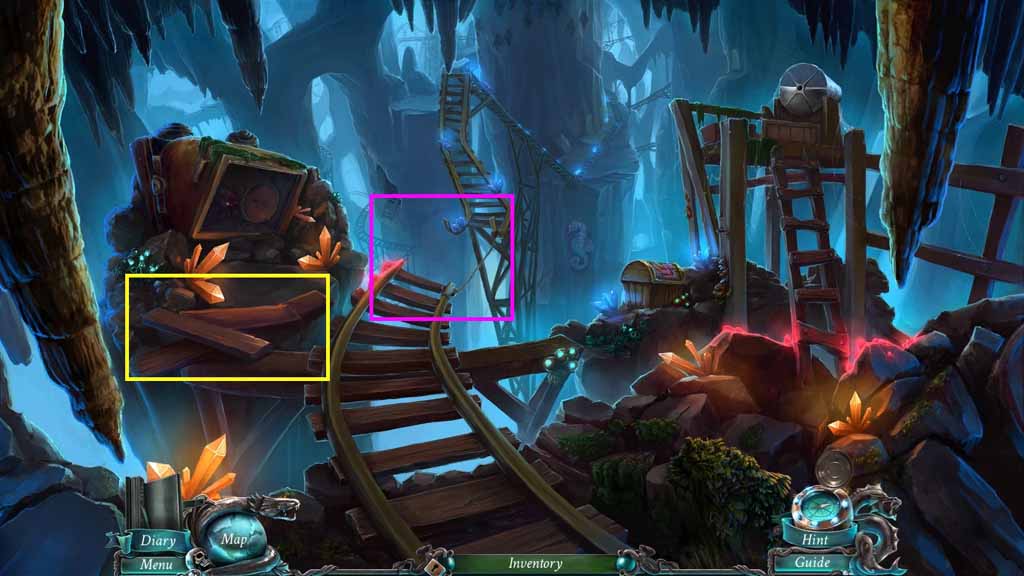
- Collect the planks.
- Place down the looped rope and the planks to fix the broken track.
- Move into the Labyrinth.
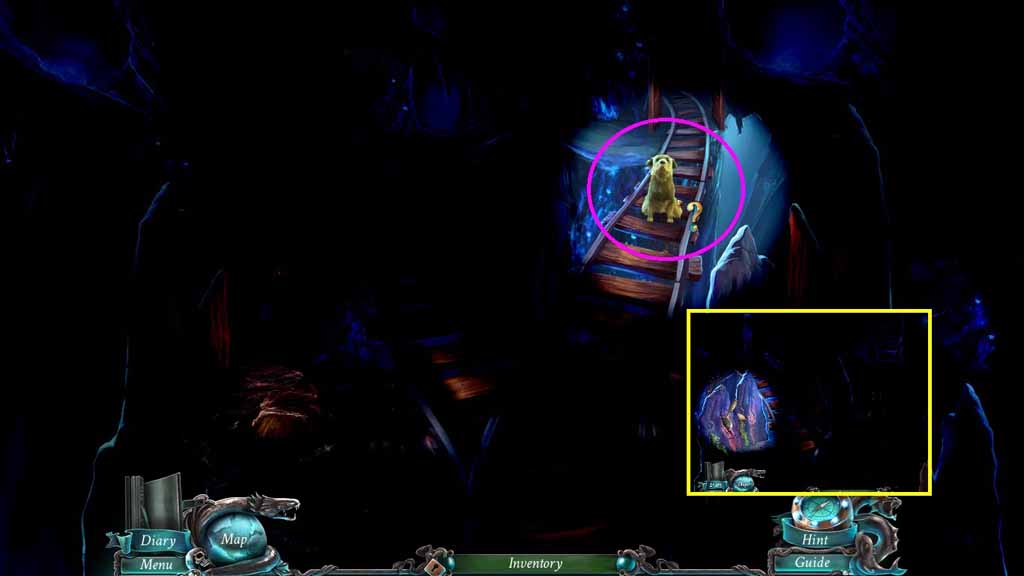
- Select the oil lamp to illuminate the darkness.
- Follow the dog to the right.
- Click the cover and click the lever.
- Move to the right and move straight ahead.
- Uncover and click the lever; move left.
- Uncover and click the lever; move straight ahead.
- Uncover and click the lever; move to the left.
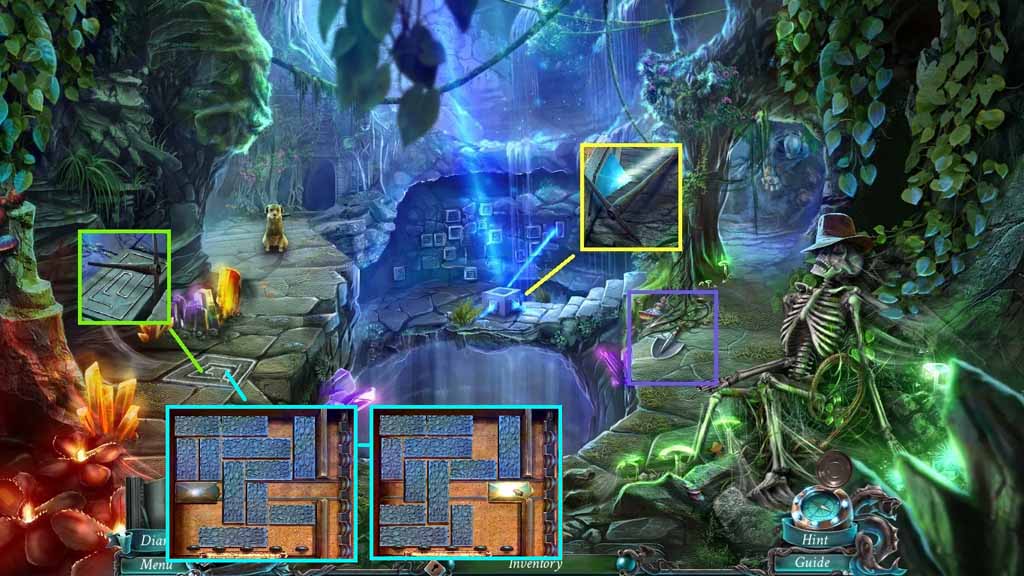
- Collect the spade and the pickaxe.
- Select the pickaxe to slide the slab.
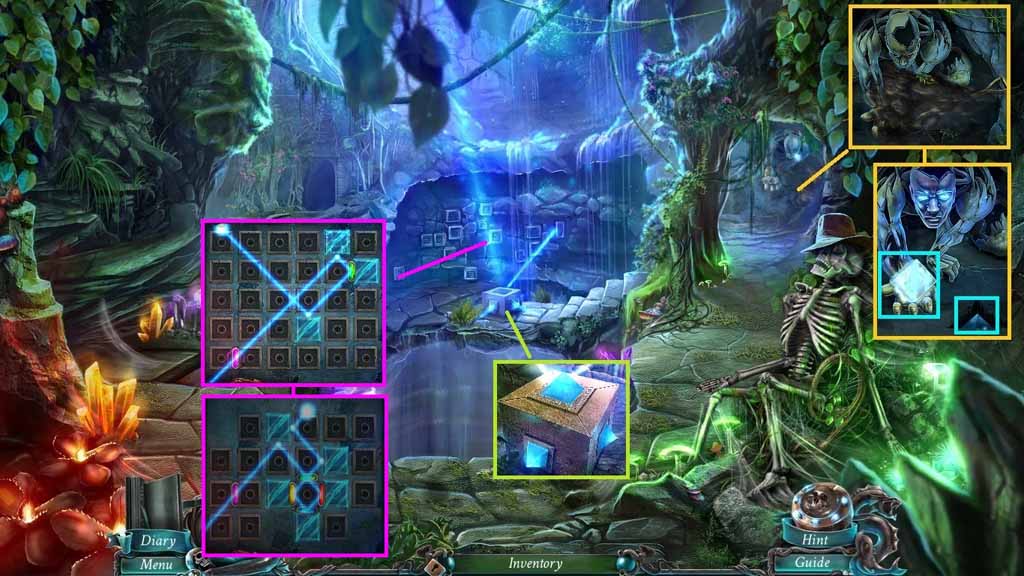
- Zoom into the hole to trigger a puzzle.
- Solve the puzzle by sliding the blocks to free the metal block.
- Move ahead to the Hideout.
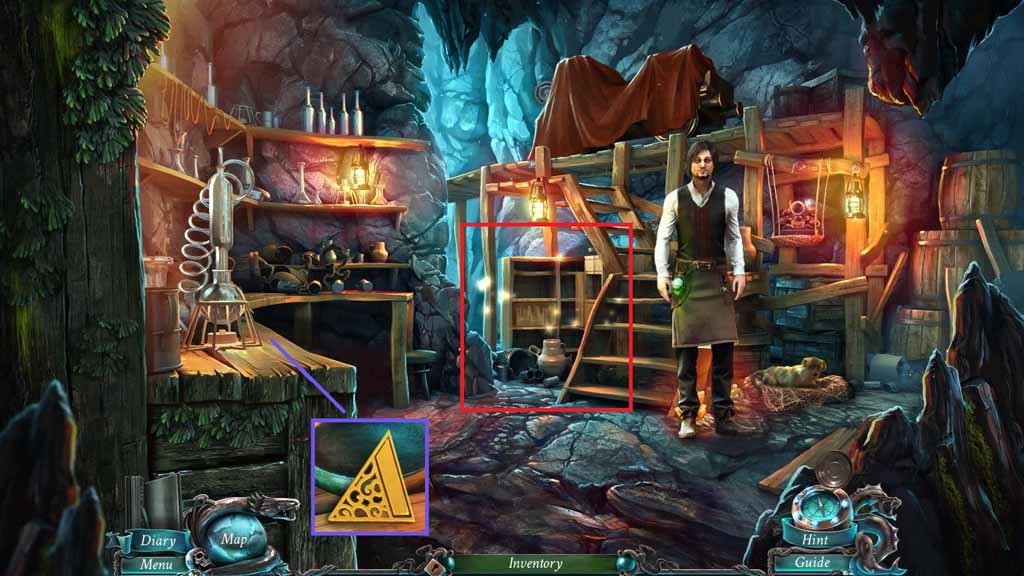
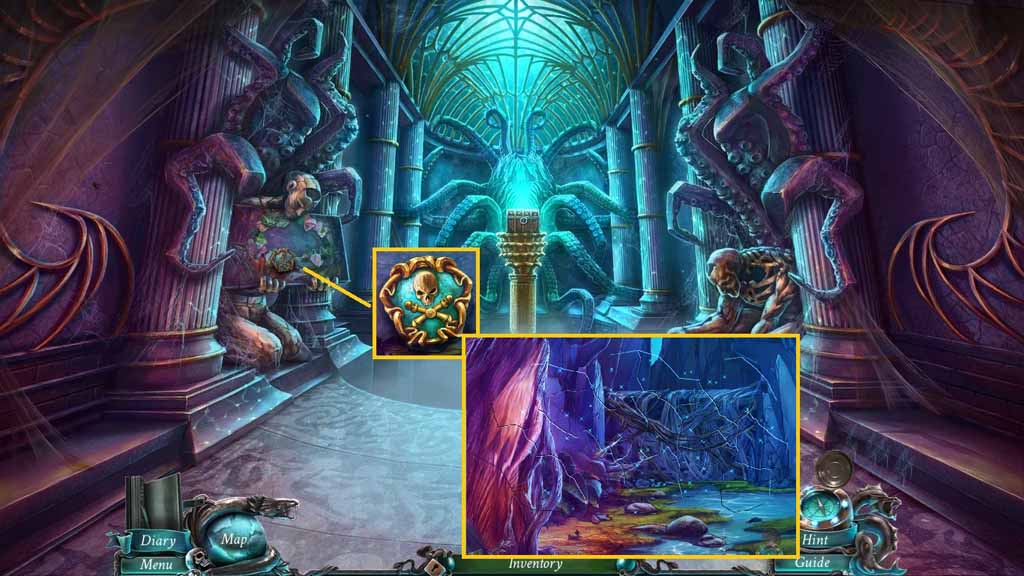
- Collect the emblem.
- Click the shelf to trigger a hidden objects area.
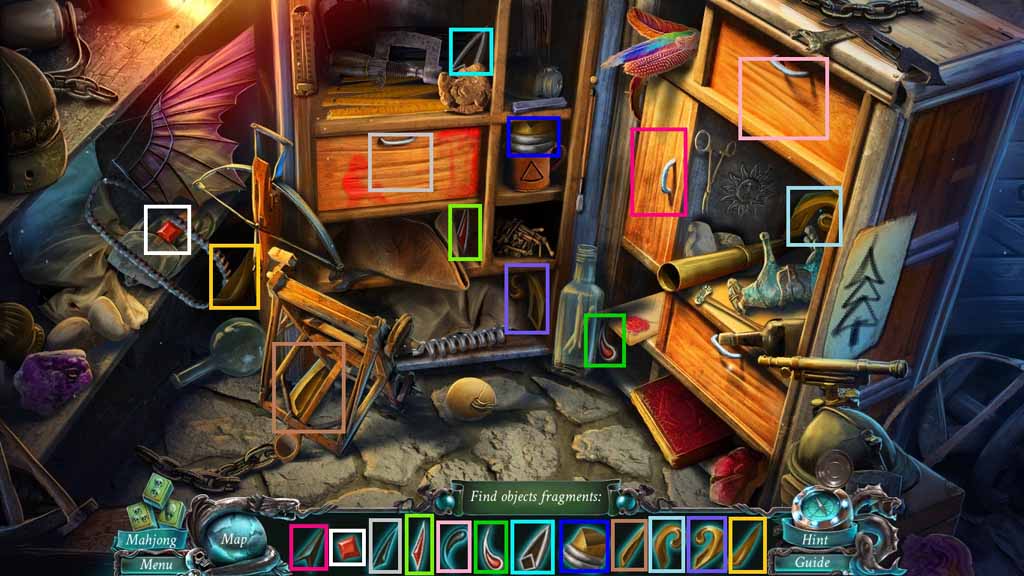
- Find the pictured items.
- Collect 1 / 2 tridents teeth.
- Move to the Tunnels.
- Select the oil lamp to illuminate the darkness.
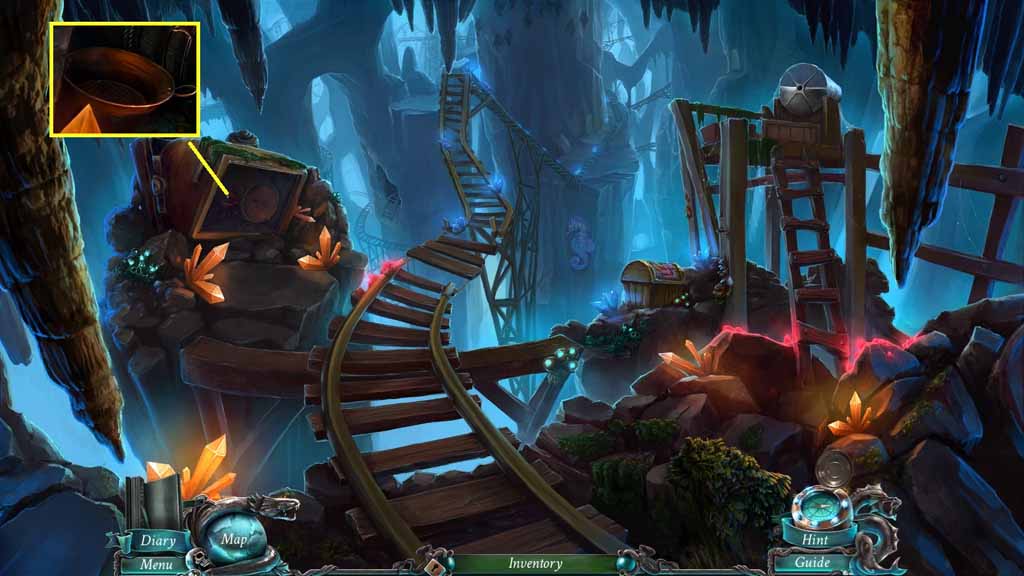
- Collect the strainer.
- Move back once.
- Select the strainer to use in the chute.
- Collect the doubloon.
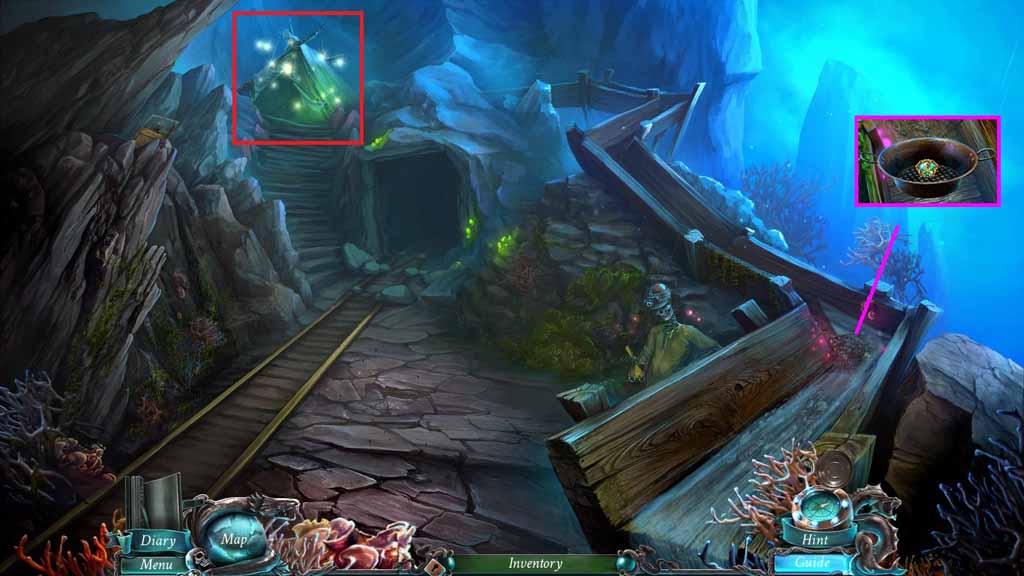
- Click the tent to trigger a hidden objects area.
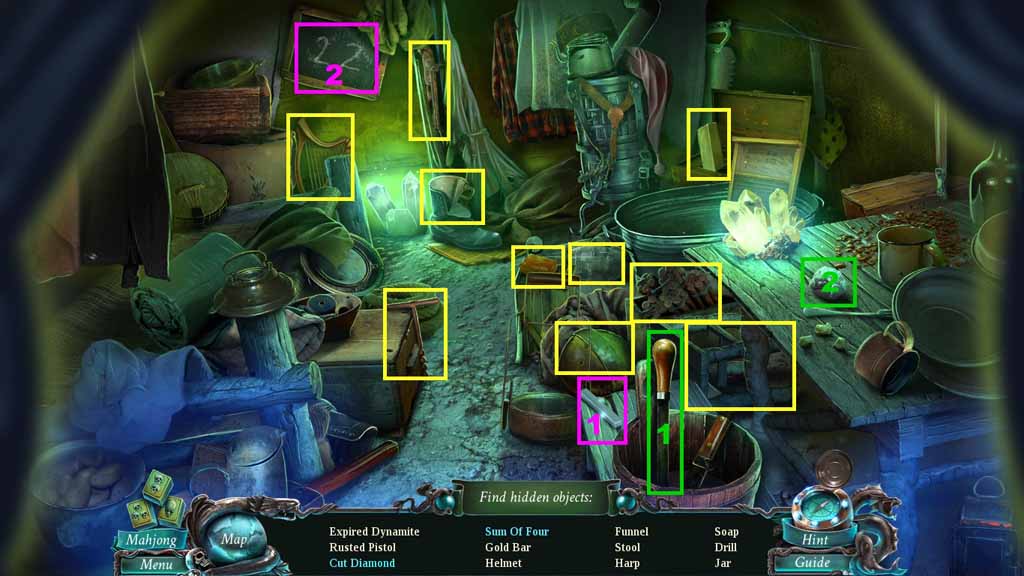
- Find the listed items.
- Select the file and use it on the stone; collect the cut diamond.
- Select the chalk to create and collect the sum of four.
- Collect the harp.
- Move to the Chamber.
- Select the spade to dig the dirt around the statue.
- Insert the emblem into the slot; collect the pyramid.
- Place the doubloon into the guardian’s hand and collect 3 /3 puzzle pieces.
- Place the pyramid into the box.
- Place the puzzle pieces into the wall to trigger a puzzle.
- Solve the puzzle by arranging the crystals correctly.
- Move into the Niche.
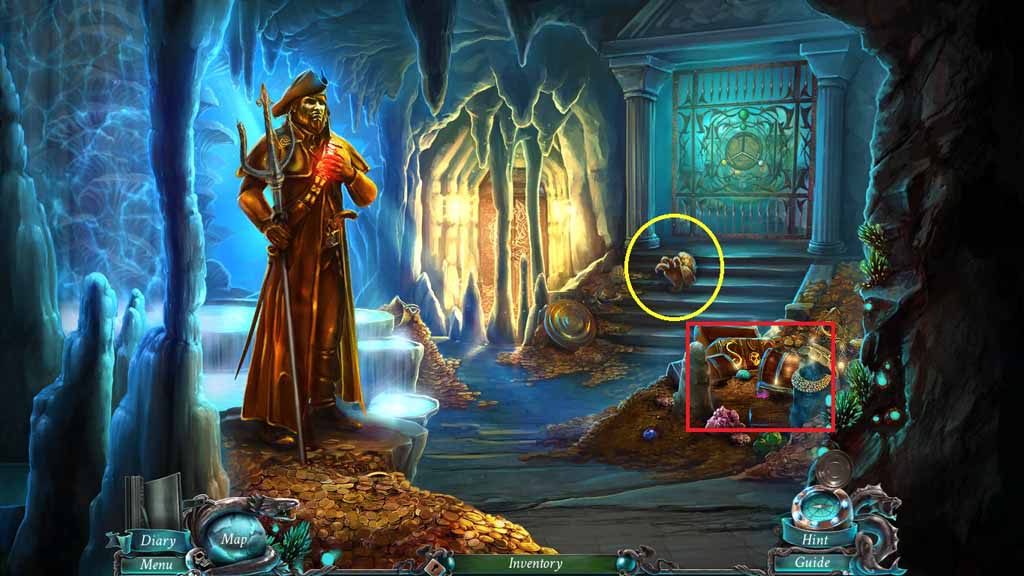
- Collect the dragon’s paw.
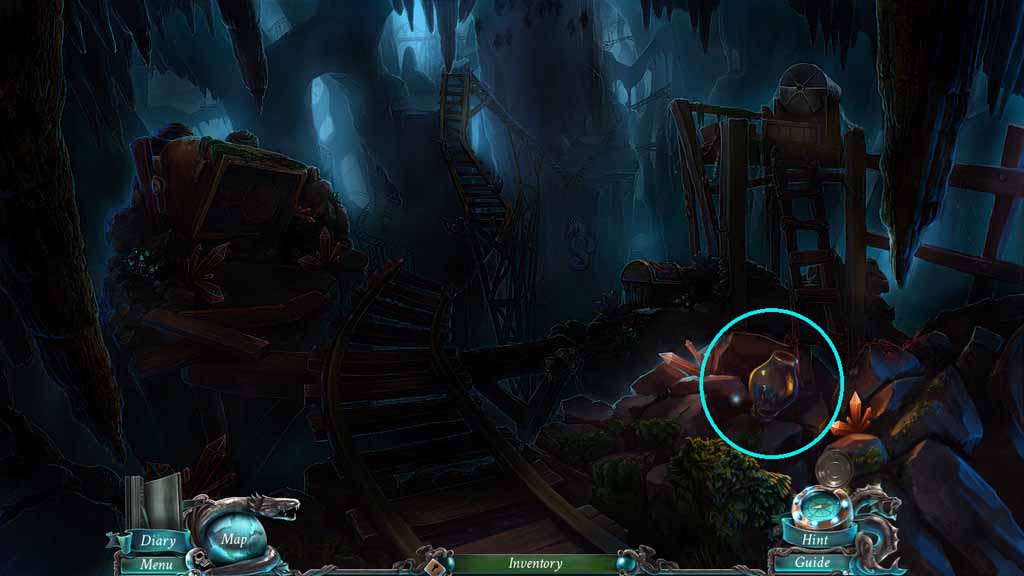
- Zoom into the treasure to trigger a hidden objects area.
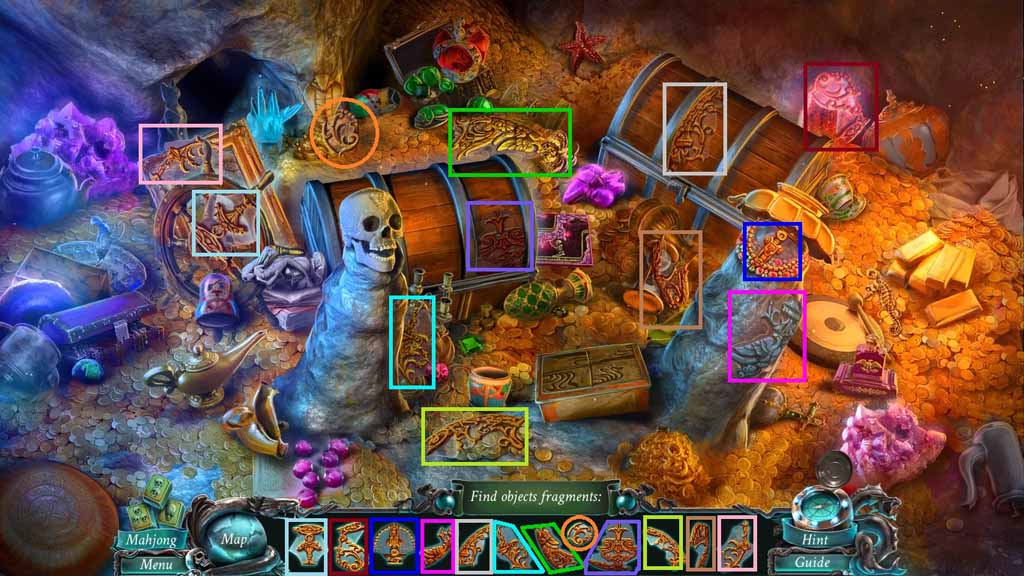
- Find the pictured items.
- Collect the hourglass bulb.
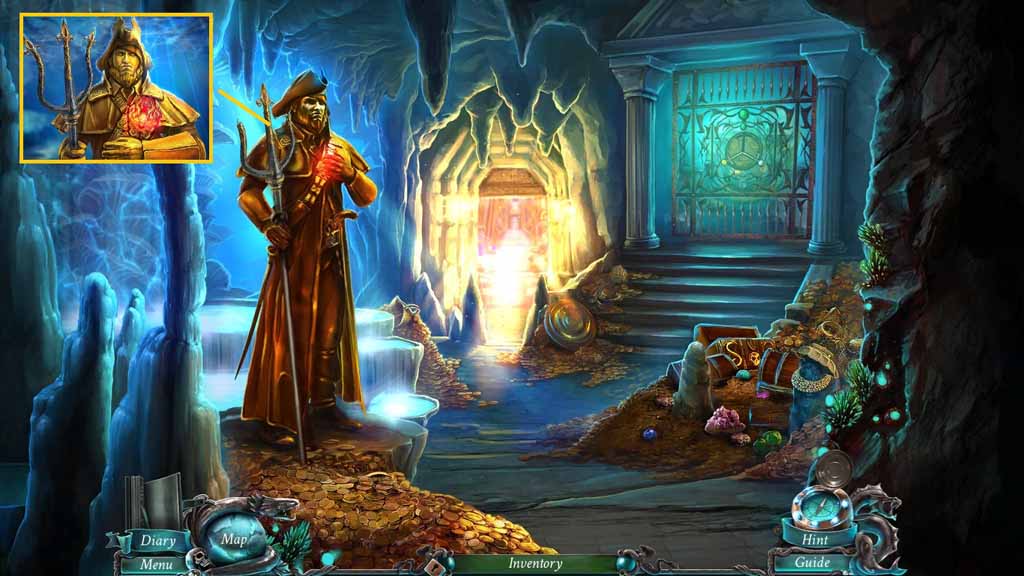
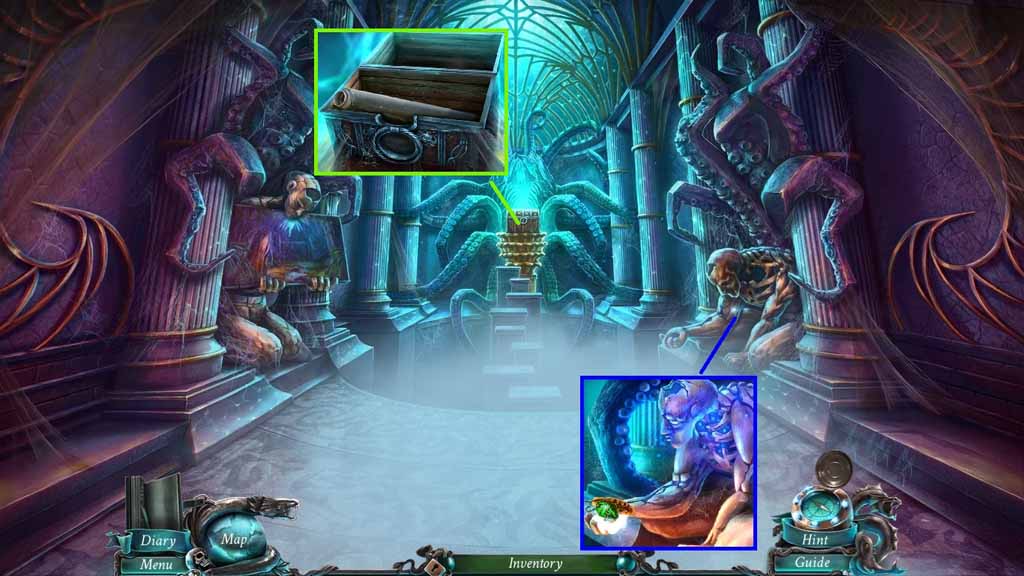
- Move to O’Malley.
- Collect the potion vial.
- Place the hourglass bulb into the hourglass.
- Collect the cage key.
- Move to the Entrance.
- Select the cage key to open the cage.
- Collect the decorative bird.
- Move to the Niche.
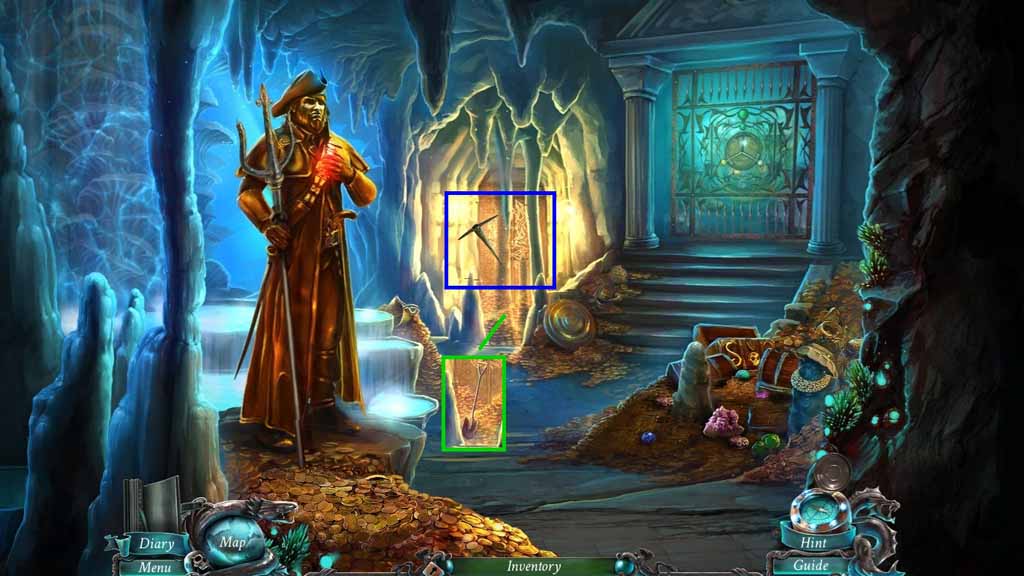
- Select the pickaxe to remove the stalagmite.
- Select the spade to remove the gold and jewels.
- Click the door open and move into the Golden Cave.
- Collect the doubloon and the trident tooth.
- Collect the tree.
- Select the pickaxe to smash the crystals into the statue’s hand.
- Place the doubloon into the statue’s hand and collect 1 /4 voodoo crystals.
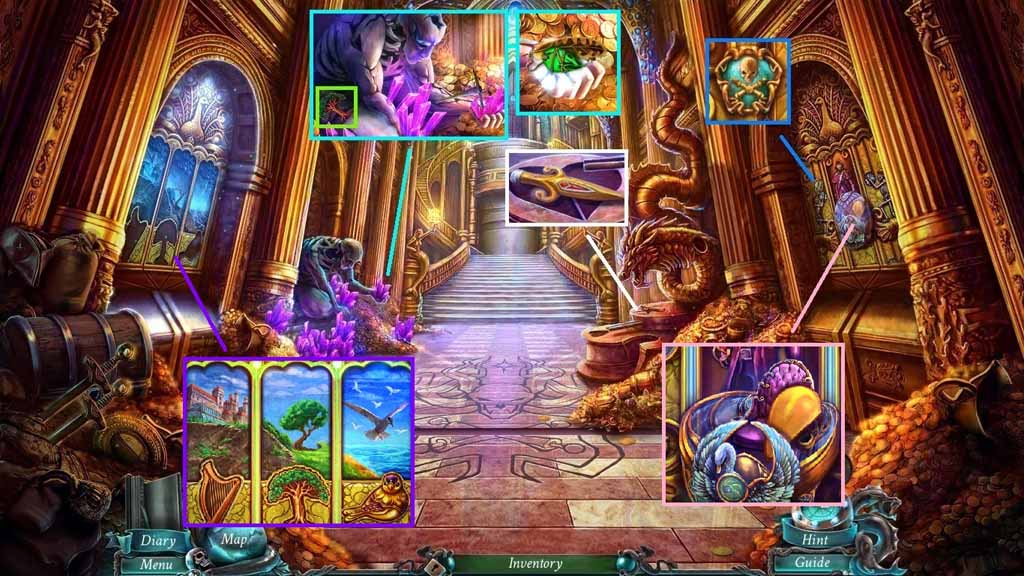
- Insert the tree, the decorative bird and the harp into the picture to trigger a mini game.
- Solve the game by switching the background tiles in the correct alignment.
- Click the sarcophagus; collect the golden heart.
- Move back once.
- Place the trident’s teeth onto the trident.
- Collect the Davy Jones’s symbol.
- Move ahead.
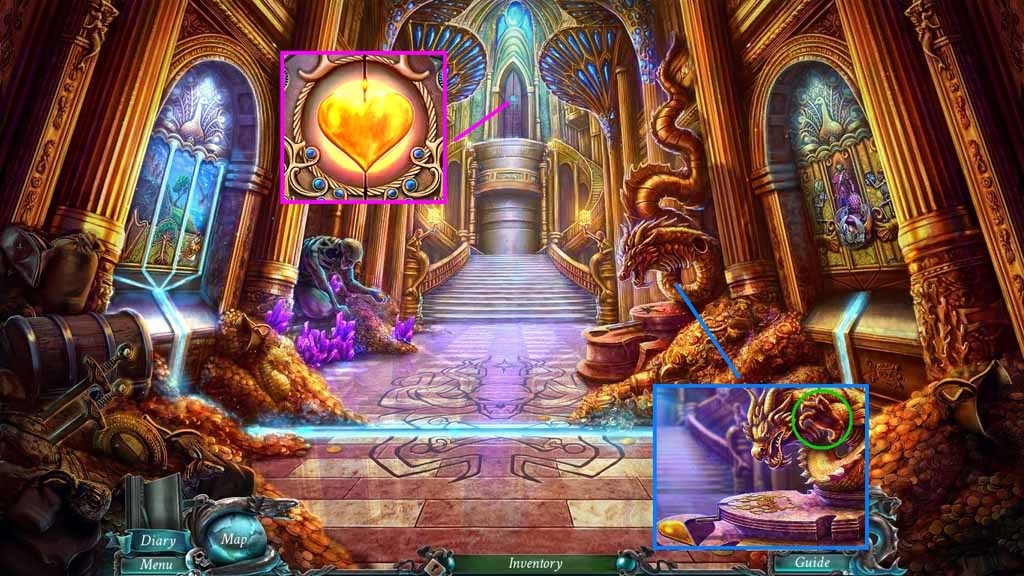
- Place the dragon’s paw, Davy Jones’s symbol and the golden hearts into their correct spaces.
- Click the dragon’s paw; collect the whole heart.
- Insert the whole heart into the slot.
- Move into the Secret Vault.
- Collect the doubloon to trigger a puzzle.
- Solve the puzzle by re-aligning the parts to create a completed image.
- Remove the cobwebs and insert the doubloon into the statue’s hand.
- Collect 2 /4 voodoo crystals.
- Click the chest and remove the cobwebs.
- Collect the painting.
- Move to O’Malley and click the shelf to trigger a hidden objects area.
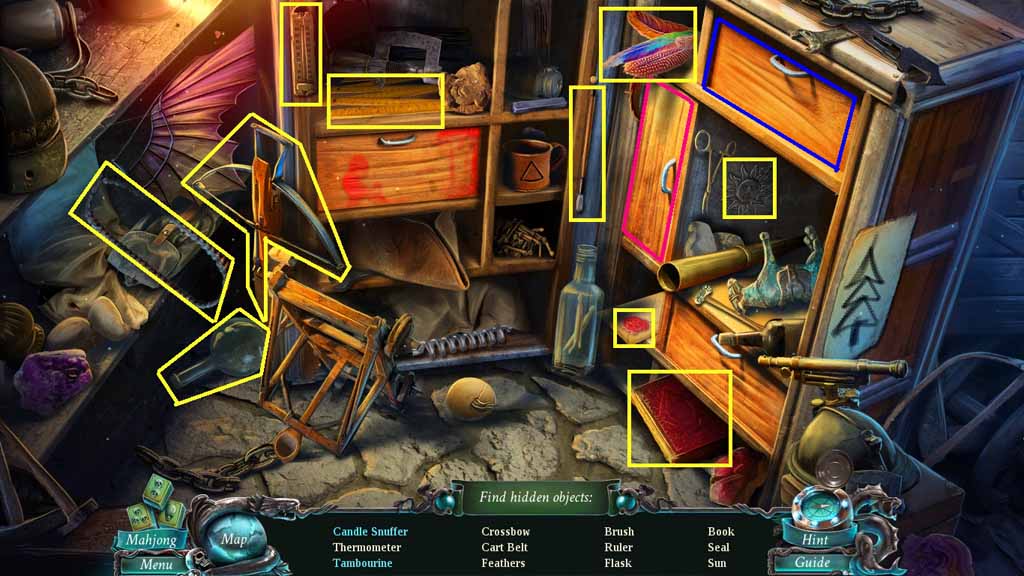
- Find the listed items.
- Click the side door; collect the candle snuffer.
- Click the top drawer; collect the tambourine.
- Collect the cart belt.
Comments will load when you reach this part of the walkthrough.