
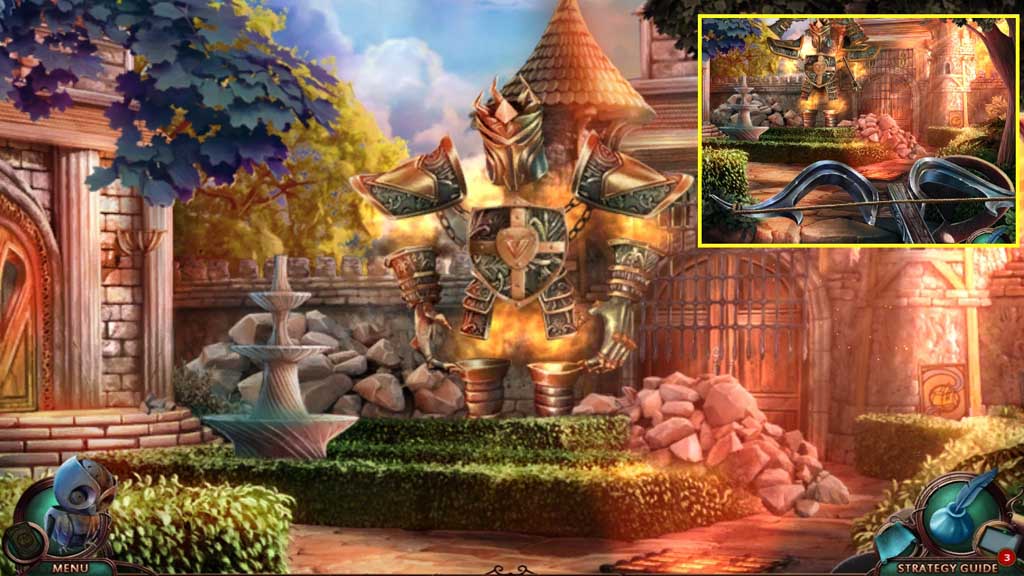
Chapter Five: Come into the Castle
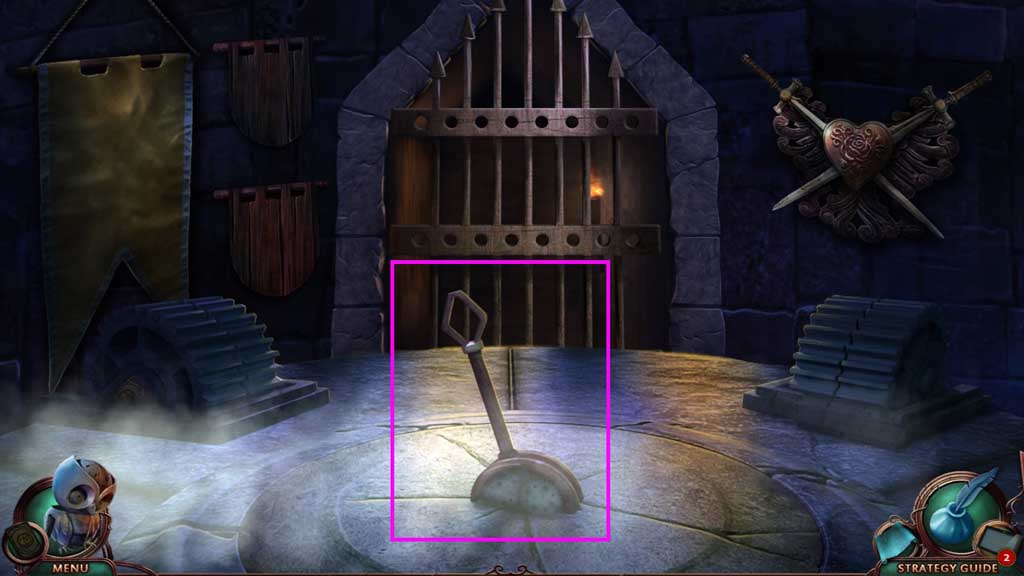
- Click the lever.
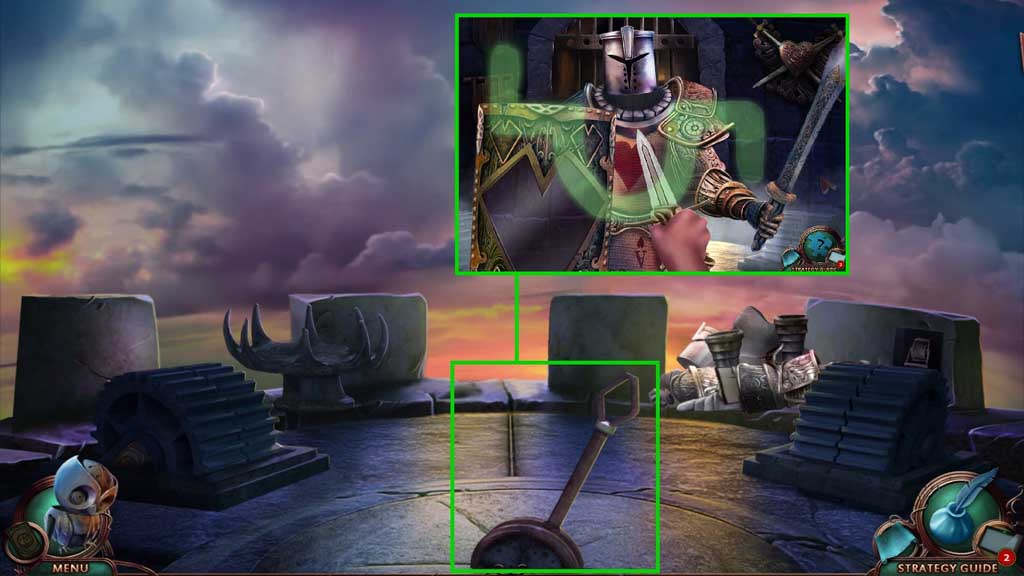
- Select the crossbow to shoot the guard.
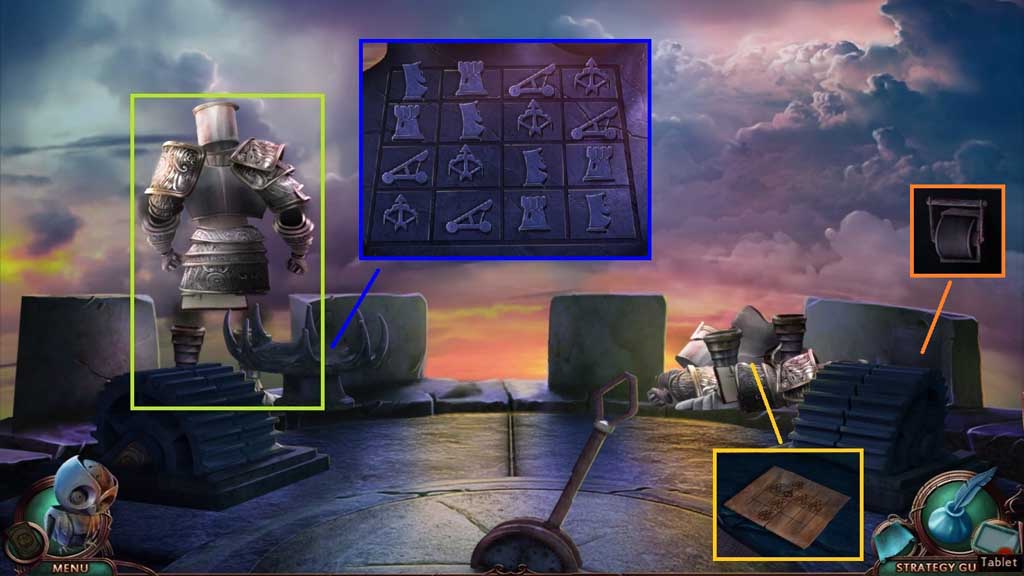
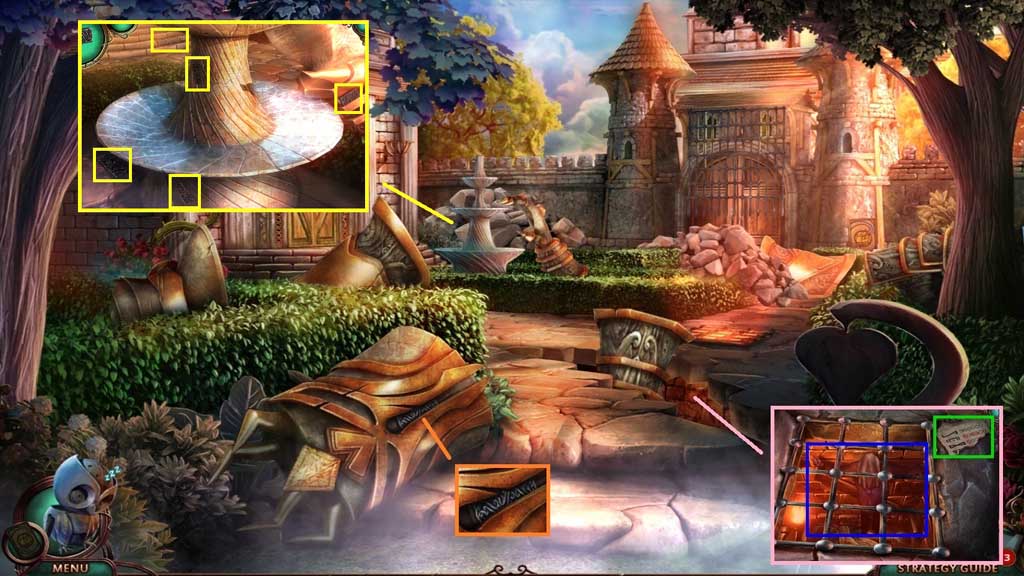
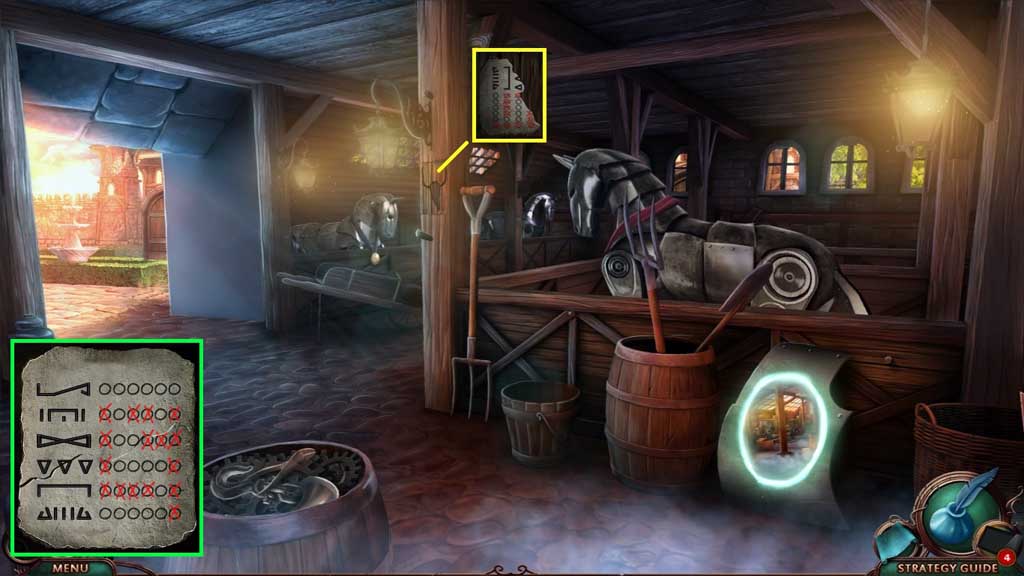
- Click the armor aside; collect the code.
- Place the miniature crossbow to trigger a mini game.
- Solve the game by aligning the icons so that they appear only once in each row and column.
- Click the switch to lower the drawbridge.
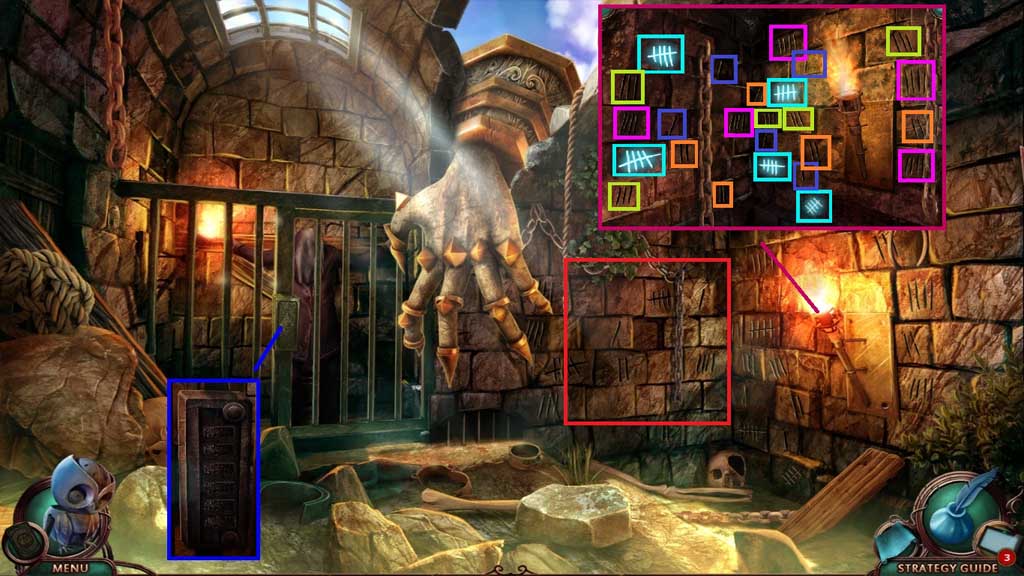
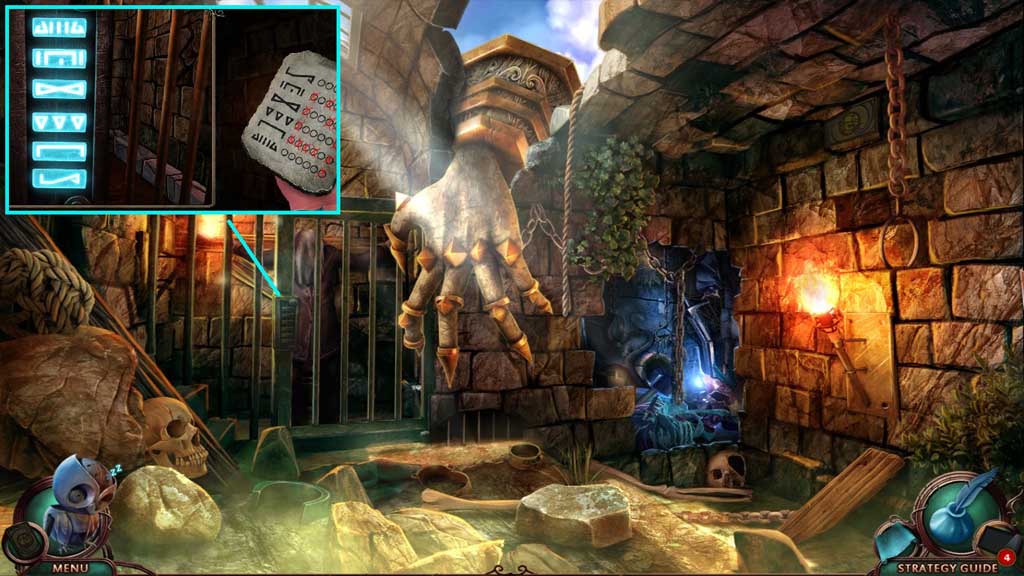
- Click the lever to trigger a mini game.
- Solve the game by recreating the symbols.
- Move ahead to Peaceful Street.

- Collect the gloves.
- Move to the left.
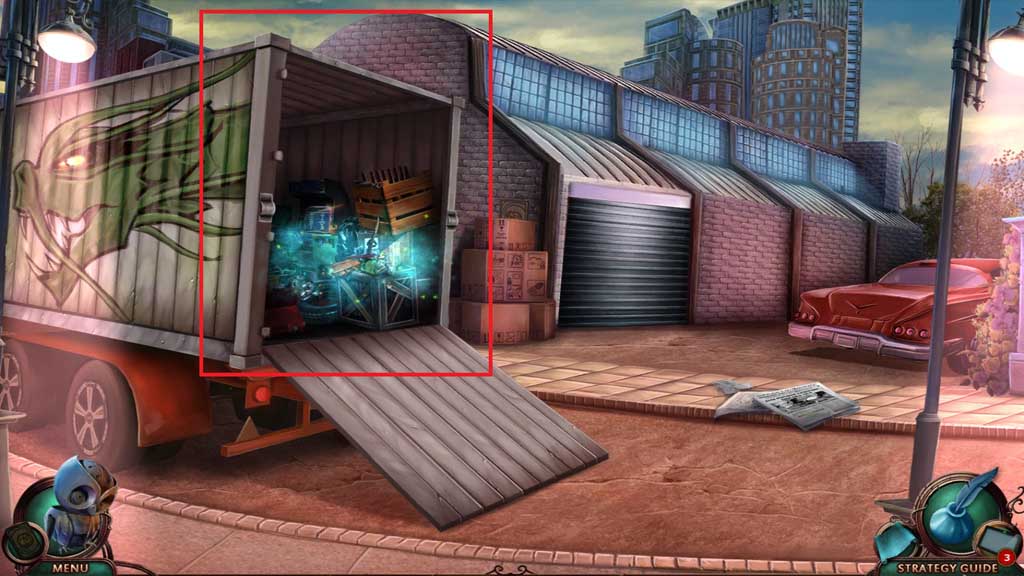
- Click the back of the truck to trigger a hidden objects area.
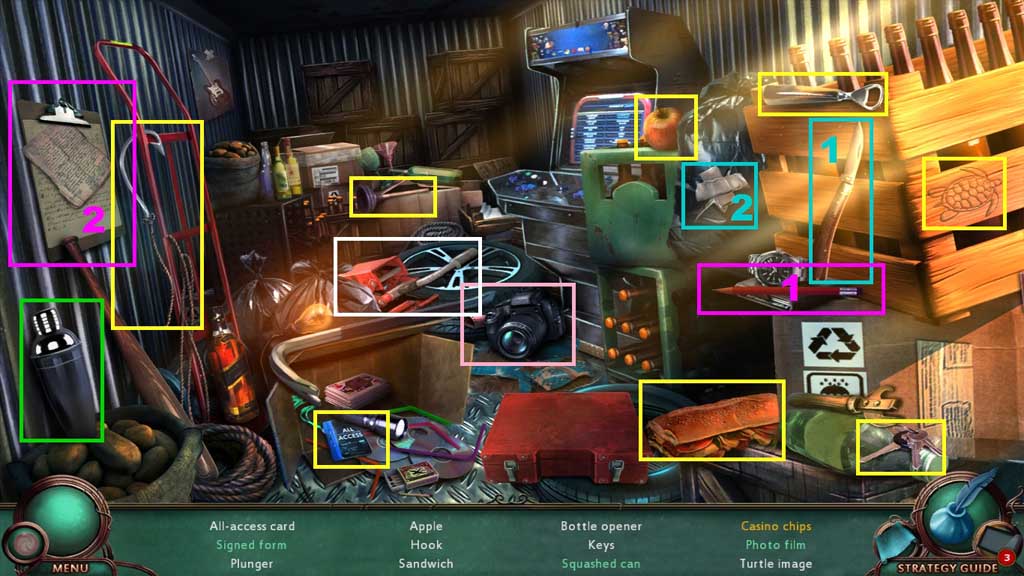
- Find the items.
- Select the pencil to sign the form; collect the signed form.
- Select the knife to slice the bag; collect the squashed can.
- Click the shaker; collect the casino chips.
- Click the camera; collect the photo film.
- Collect the car jack.
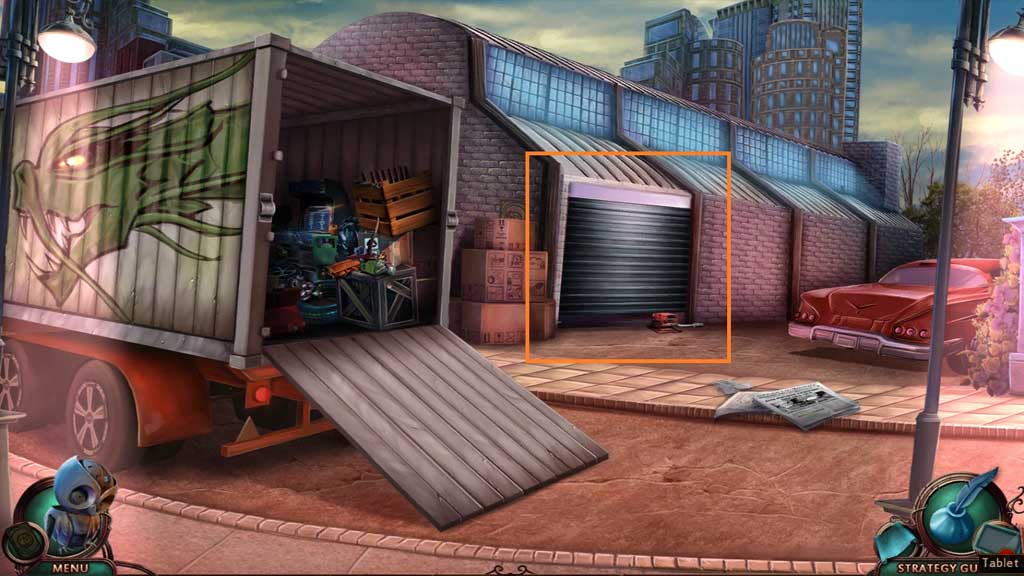
- Attempt to lift the warehouse door.
- Select the car jack to lift the warehouse door.
![]()
- Collect the badge.
- Collect the security case and insert the badge; collect the guard keys.
- Click the guard keys and click through them; collect the locker key.
- Move to the left.

- Click the car jack.
- Move into the Casino Warehouse.
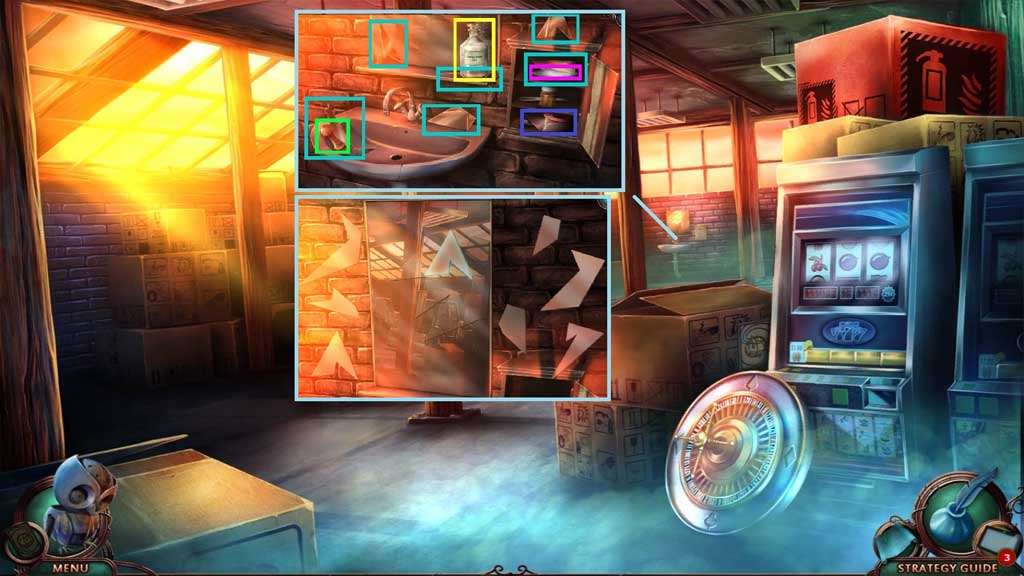
- Collect the handle and the isopropyl alcohol.
- Place the gloves on; collect the 5 mirror pieces.
- Insert the locker key; collect the bandage, the gauze and the 2 mirror pieces.
- Place the 7 mirror pieces to reassemble the mirror.
- Move to the right side of Peaceful Street.
- Zoom into the gauze.
- Pour the isopropyl alcohol and attach the bandage.
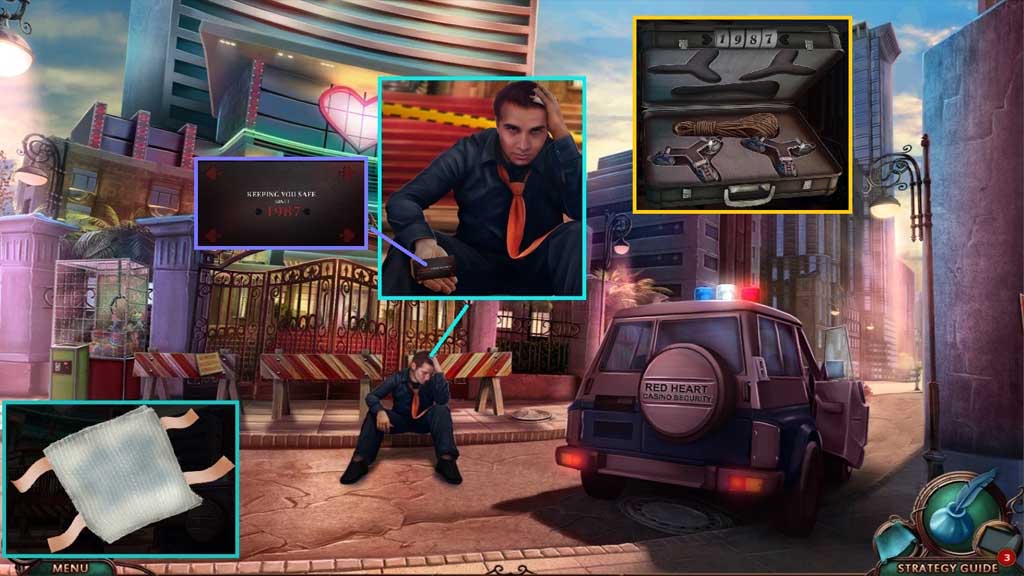
- Receive the first aid supplies; offer them to the man.
- Collect the access card and click it 2x’s; notice the code 1987.
- Click the security case and enter the code 1987.
- Collect the climbing gear and the climbing rope.
- Move to the Casino Warehouse and move ahead toward the Stables.
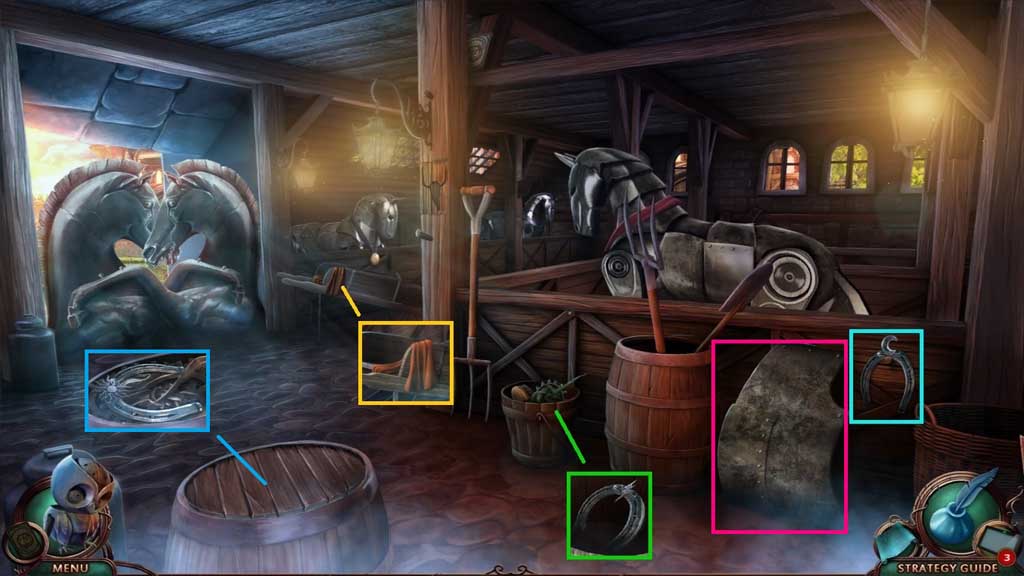
- Collect 2/4 horseshoes.
- Collect the oil can; click the items aside to collect 3 /4 horseshoes.
- Click the barrel; collect 4 /4 horseshoes.
- Collect the rag and use it to clean the armor.
- Move to the Casino Warehouse.
- Insert the handle and select the oil can to lubricate the panel.
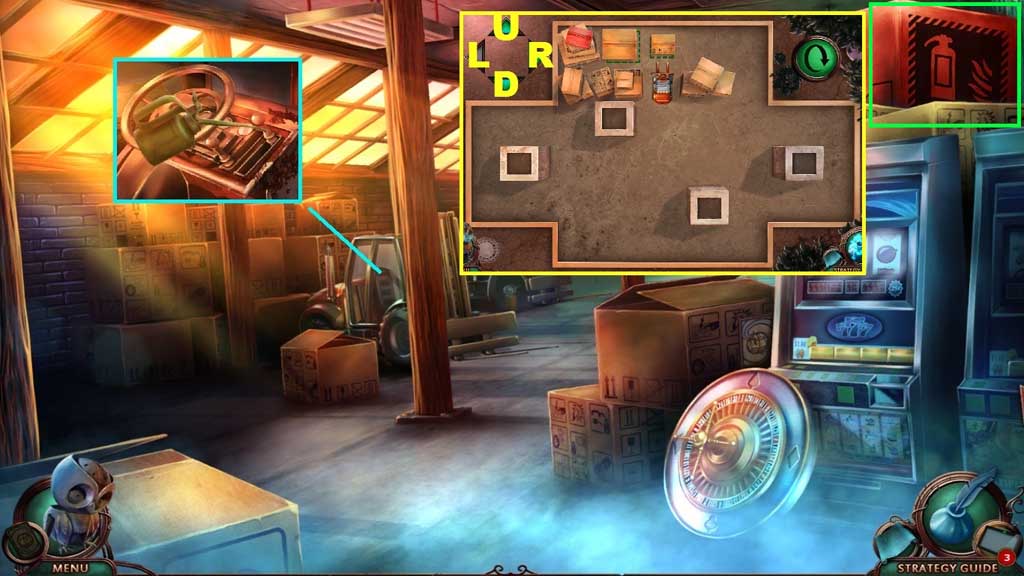
- Click the handle to trigger a mini game.
- Solve the game by moving the boxes.
- Use the following solution to solve: L x 2 – U – L x 2 – U x 2 – R x 2 - D – U – L x 2 – D x 2 – R x 3 – D – R – U x 4 – D – R x 2 – U x 2 – L x 2 – D x 2 – R x 4 – D x 2 – L – R – U x 2 – L x 4 – D x 3 – R x 2 – U x 2 – D – R x 2 – U x 2 – L x 3 – D – L – U x 2
- Move towards the Warehouse Boxes.
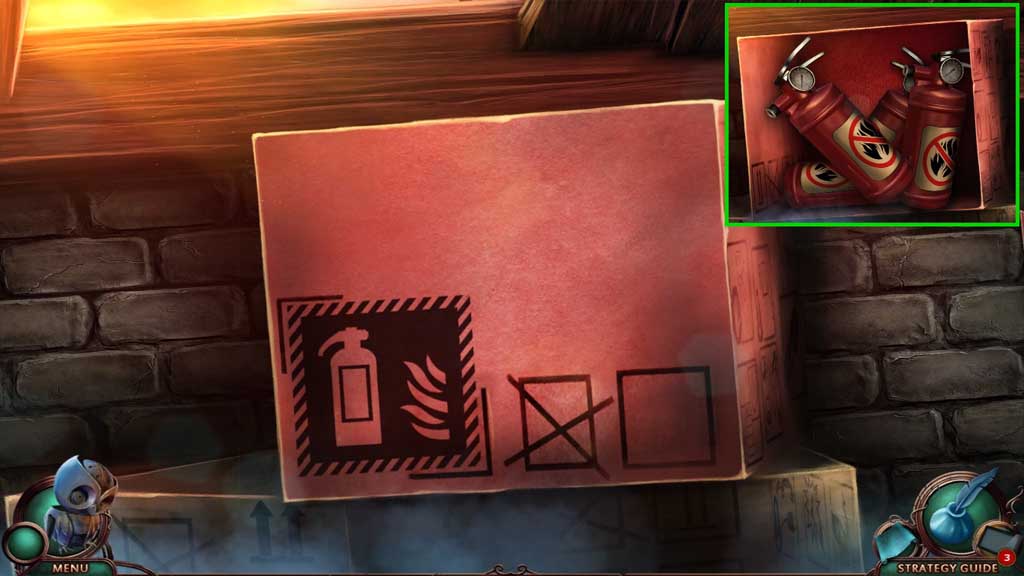
- Select the swords to slice the box open; collect the fire extinguisher.
- Move to the Stables.
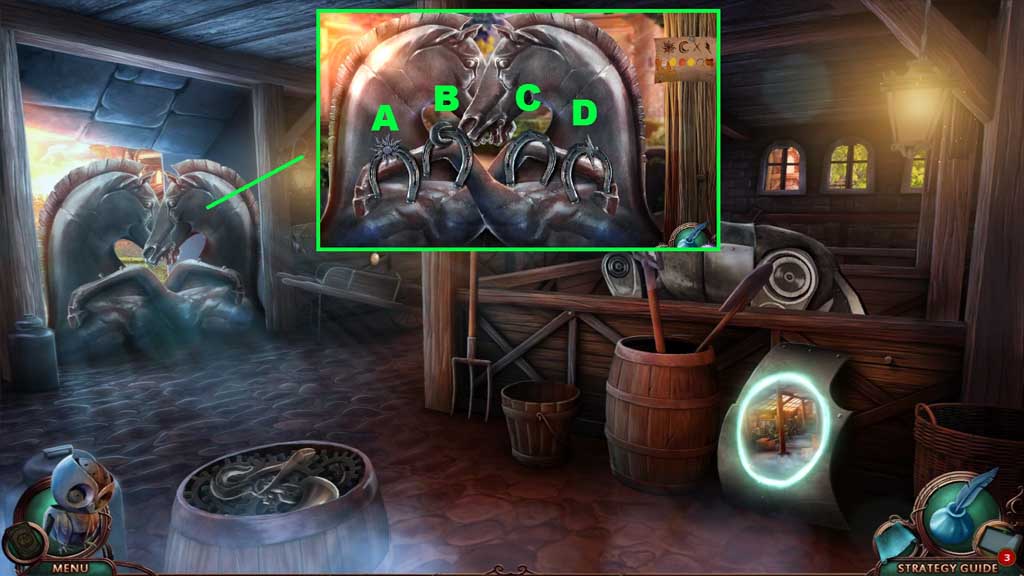
- Place the 4 horseshoes to trigger a mini game.
- Solve the game by arranging the horseshoes correctly based on the diagram.
- Use the following sequence to solve: A – D – B – D – C – D
- Move to the Castle Courtyard.
- Toss the fire extinguisher.
- Select the crossbow to shoot Golem.
- If you miss him move to the Casino Warehouse to collect another fire extinguisher.
- Speak to Pierre.
- Collect the runic plate piece.
- Collect 1/ 6 metal plates.
- Collect 5 /6 metal plates.
- Toss the climbing rope toward Pierre.
- Move down to the Dungeon.
- Select the sword to crack the cover.
- Insert the 5 runic plates.
- Zoom into the wall to trigger a mini game.
- Solve the game by clicking the matching carvings.
- Click the hidden objects area.
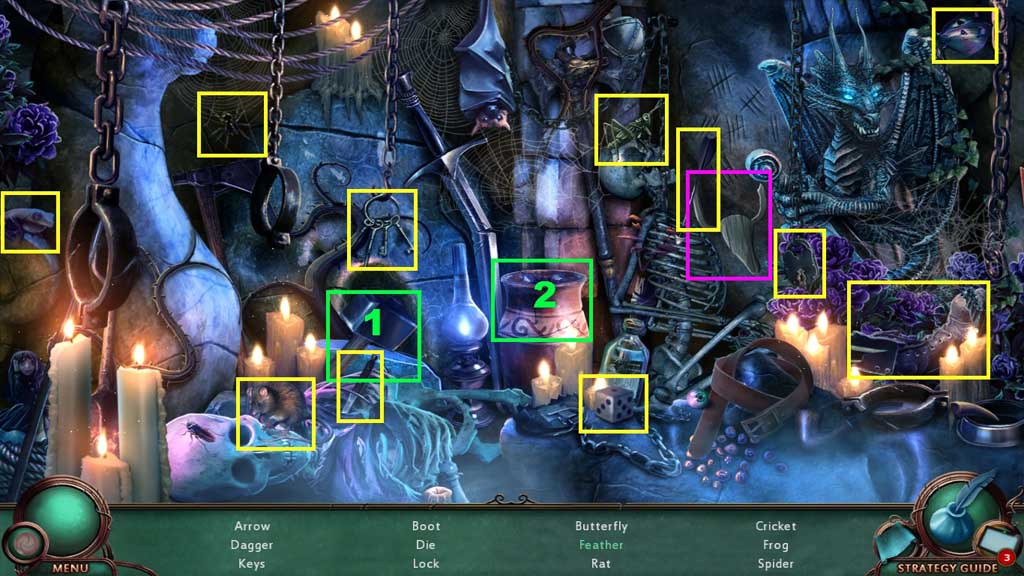
- Find the items.
- Select the hammer to crack the jar; collect the feathers.
- Collect the bull’s head.
- Move to the Stables.
- Place the bull’s head; collect the runic plate.
- Zoom into the runic plate and attach the runic piece.
- Move to the Dungeon.
- Zoom into the metal plates and click the plates.
- Place the runic plate to trigger a mini game.
- Solve the game by aligning the plates as shown.
- Move into Pierre’s cell.
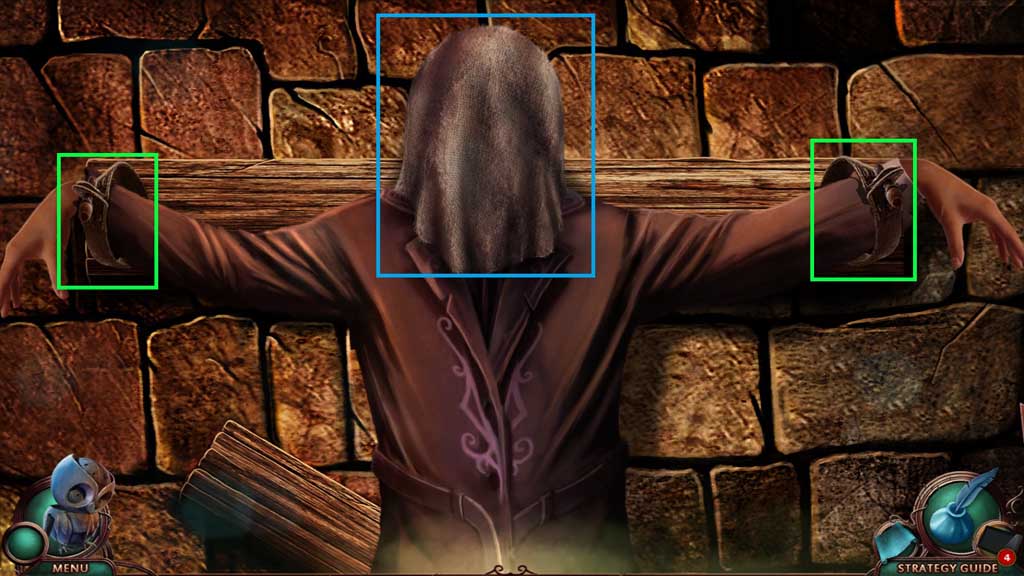
- Click the mask.
- Select the sword to remove the binds.
- Move to the Castle Courtyard.
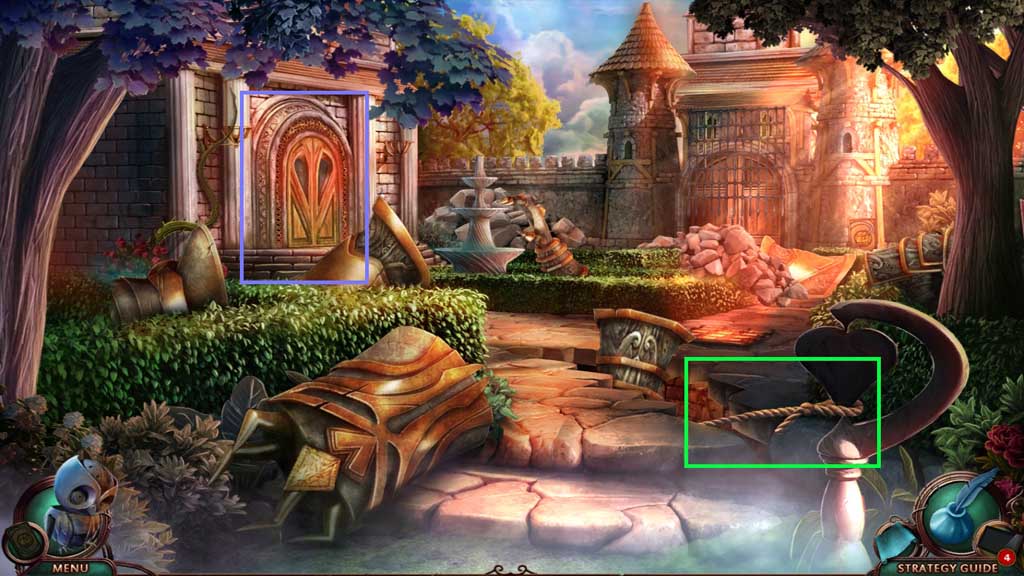
- Collect the climbing rope.
- Attempt to open the door.
- Move up the Tower Walls.
- Zoom into the wall.
- Select the climbing rope to trigger a mini game.
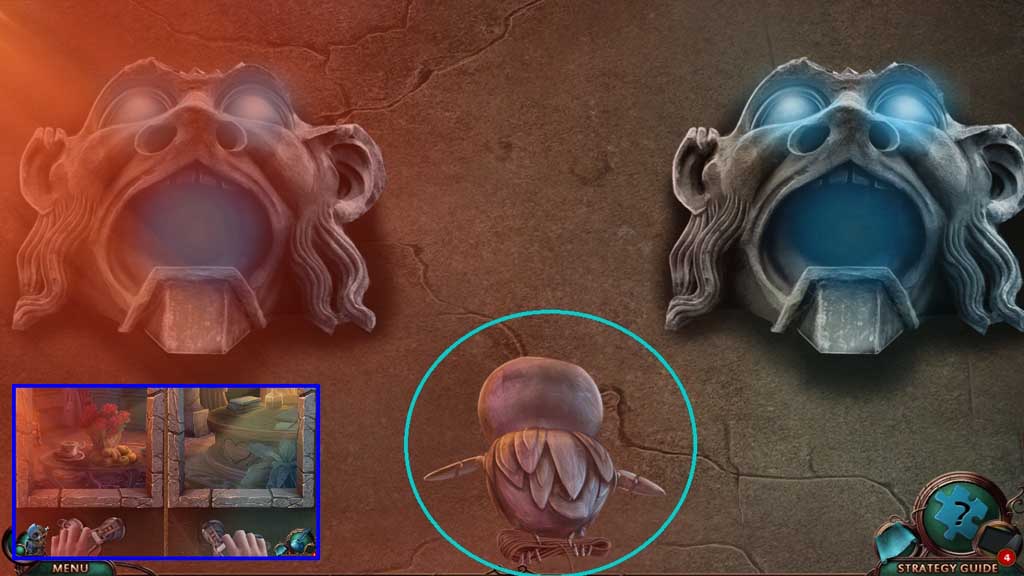
- Solve the game by moving past and avoiding the gargoyles.
- Select the climbing gear to move up the wall.
- Click the fruit plate aside; collect 1 /5 parchment pieces.
- Click the items aside; collect 2 /5 parchment pieces.
- Click the mirror.
- Move into the Queen’s Office.
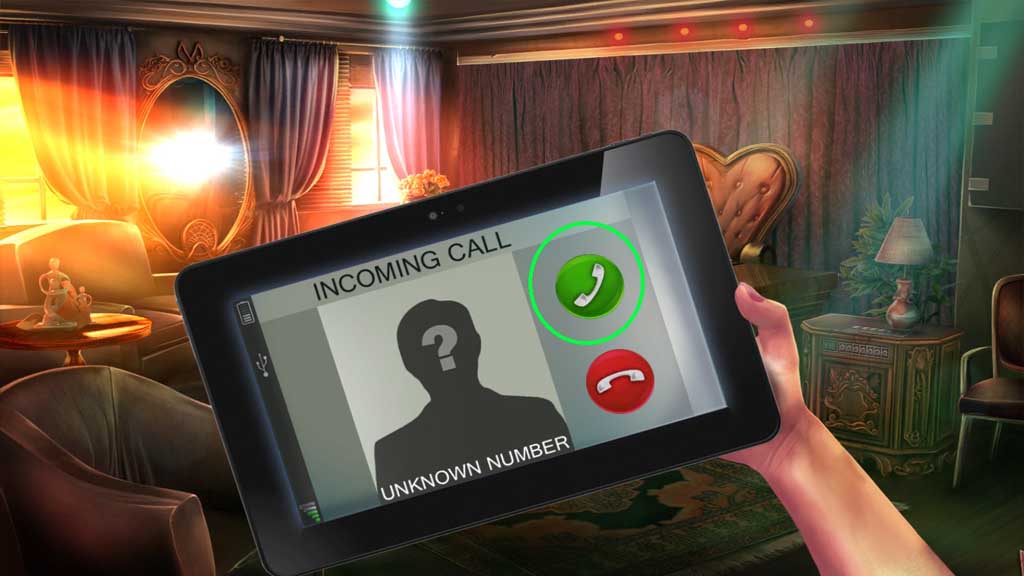
- Click the green button to answer the phone.
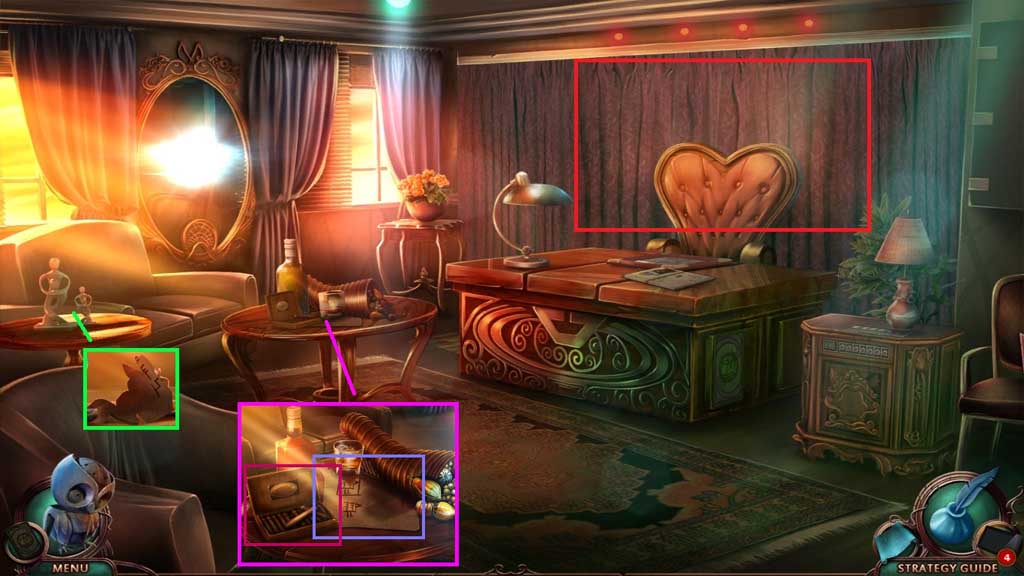
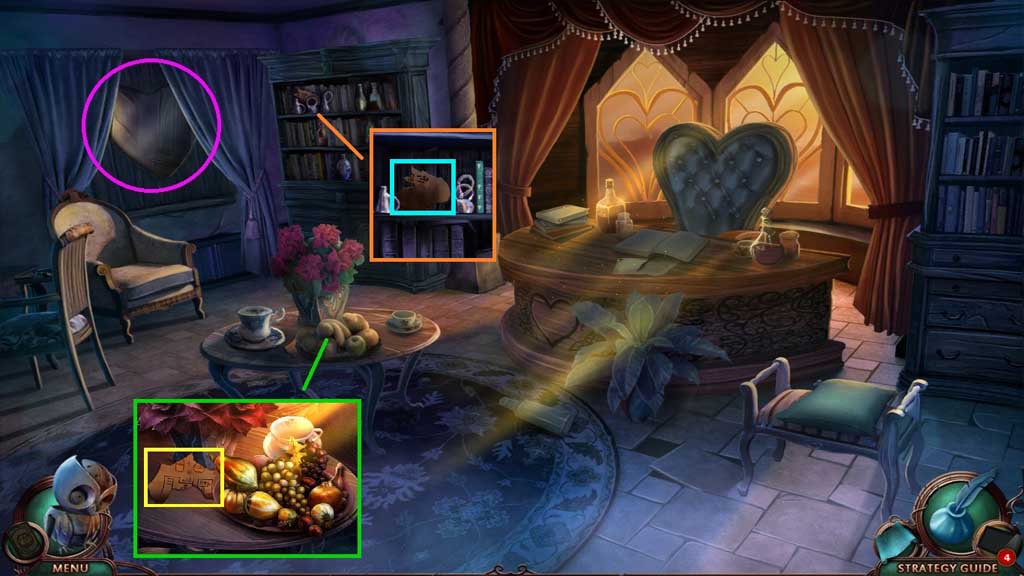
- Click the figurine aside; collect 3/5 parchment pieces.
- Collect the box of cigars.
- Click the items aside; collect 4 /5 parchment pieces.
- Click the curtain to trigger a hidden objects area.
- Find the matching items.
- Collect 5 /5 parchment pieces.

- Read the notebook.
- Zoom into the cabinet to trigger a mini game.
- Solve the game by using the correct code to open the cabinet.
- Use the following solution to solve: 64- 32 – 8 – 4 – 1
- Collect the picture fragment and the parchment.
- Zoom into the parchment and place the 5 parchment pieces; arrange the pieces.
- Move to the Queen’s Chamber.
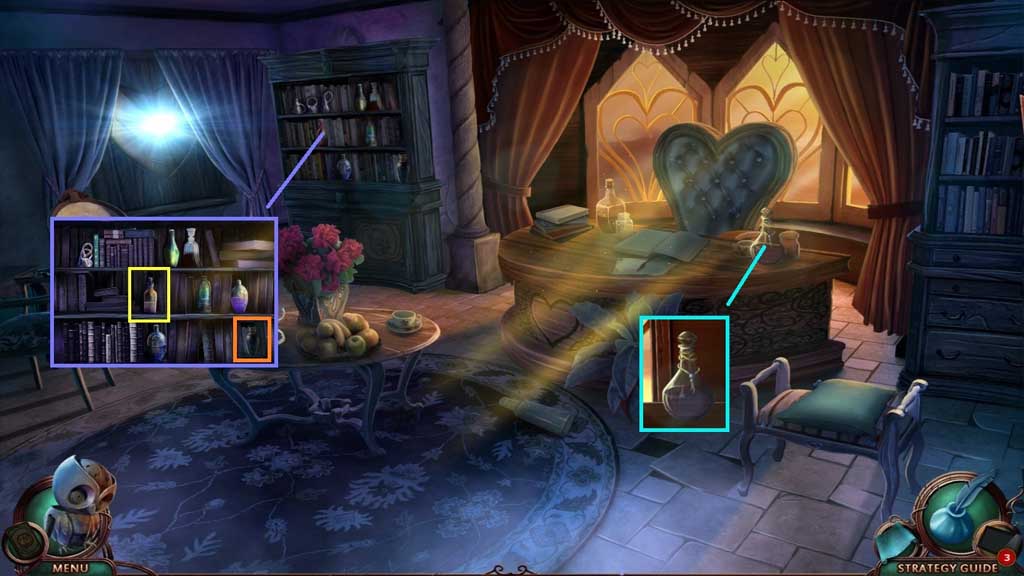
- Collect 1 /3 and 2/3 cryptology potions.
- Collect 3/3 cryptology potions.
- Move to the Queen’s Office.
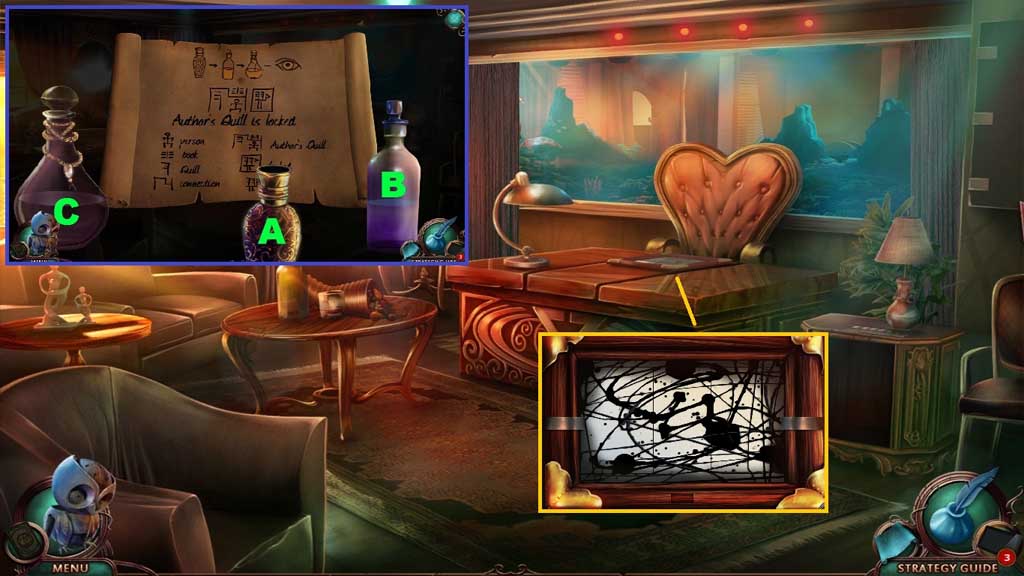
- Click the parchment and pour the 3 cryptology potions onto it to trigger a mini game.
- Solve the game by pouring the potions in the correct sequence to reveal the information.
- Collect the parchment.
- Place the picture fragment into the frame to trigger a mini game.
- Solve the game by restoring the image.
- Exit the close-up.
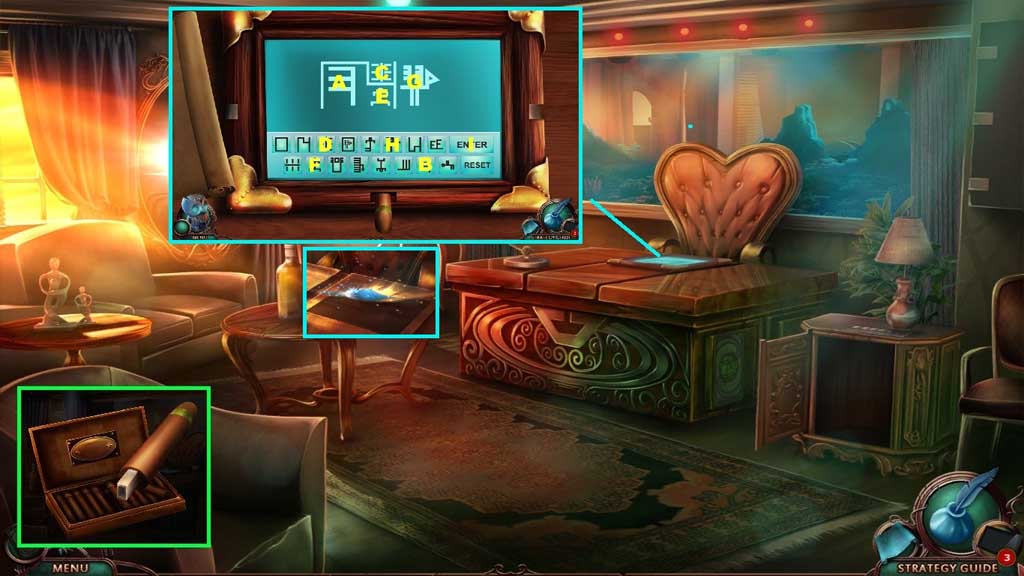
- Click the box of cigars; click the fake cigar.
- Click the cover; collect the USB dongle and insert it into the drive.
- Place the parchment to trigger a mini game.
- Solve the game by deciphering the code using the parchment.
- Click the icons in ABC order to solve.
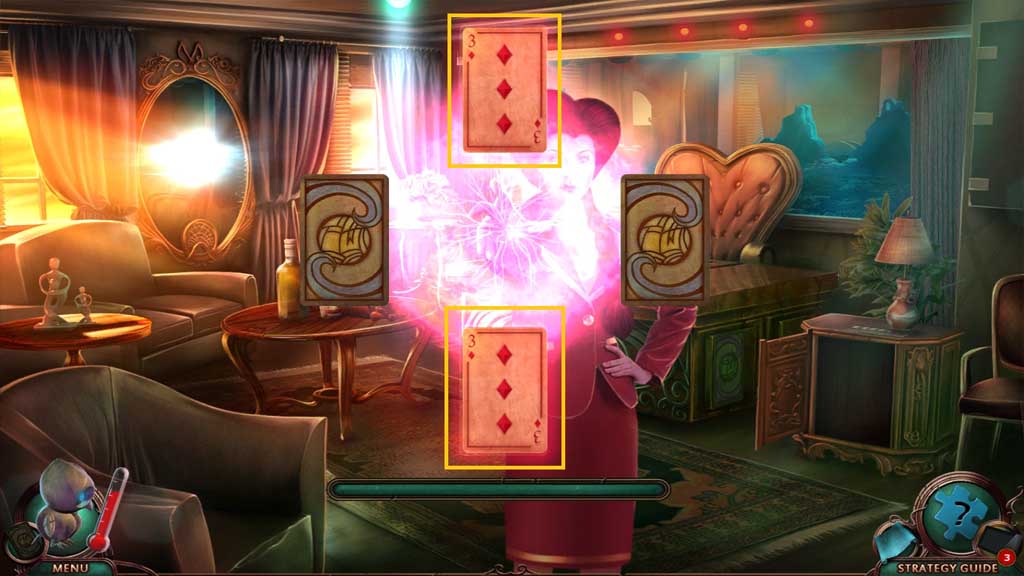
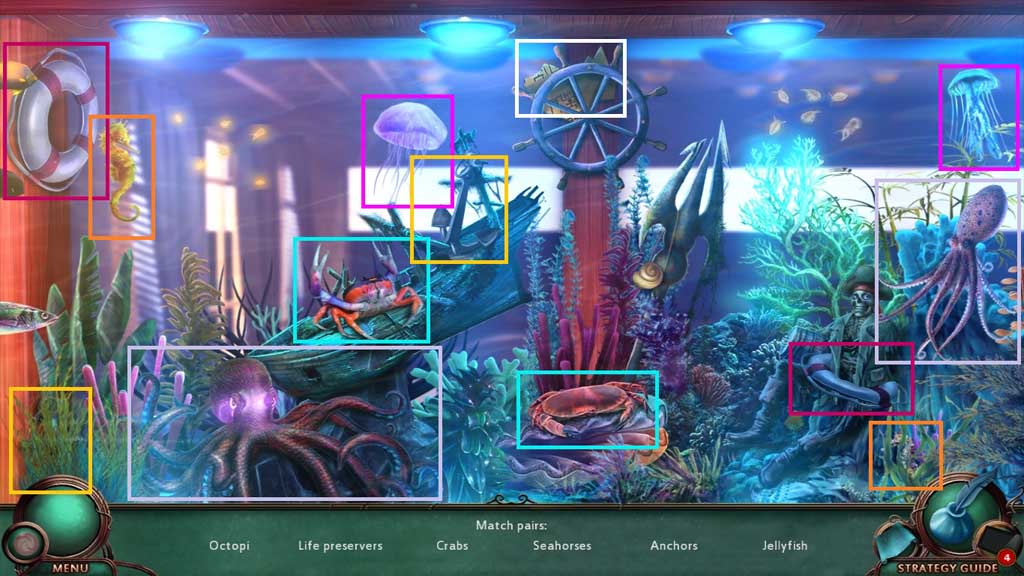
- Click the author’s quill to trigger a mini game.
- Solve the puzzle by selecting the matching pairs.
- The solution is randomized.
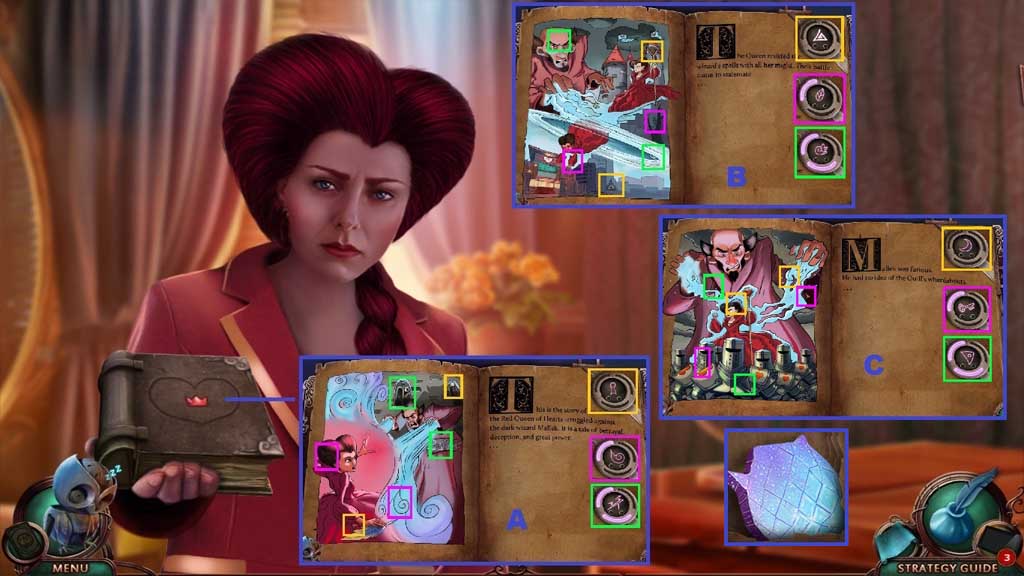
- Click the book open to trigger a mini game.
- Solve the game by finding the shapes.
- Collect the heart mirror piece.
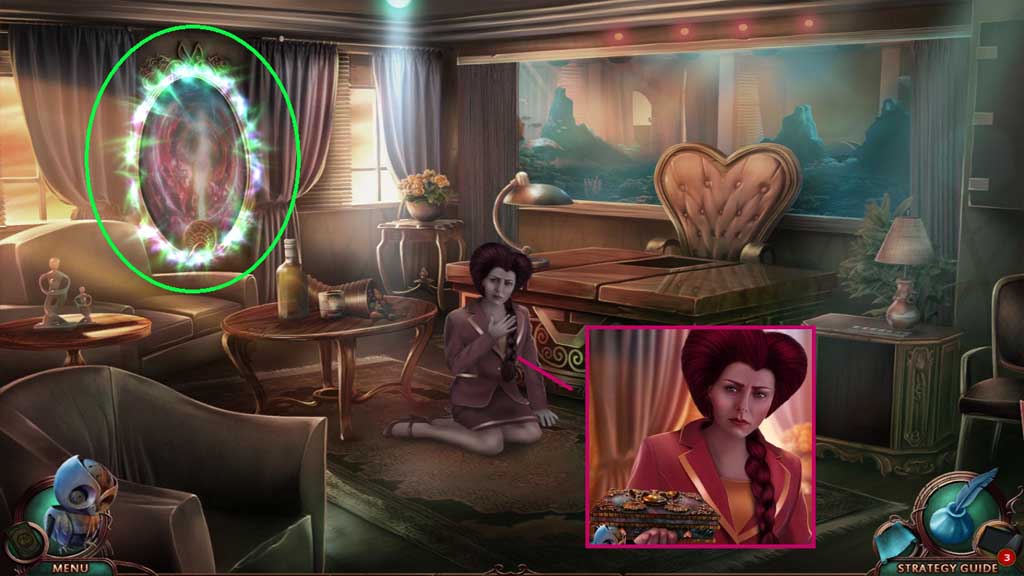
- Collect the card box.
- Click the mirror.
- Move into the Tower of Power.
Comments will load when you reach this part of the walkthrough.