
Dream One: Your Mother
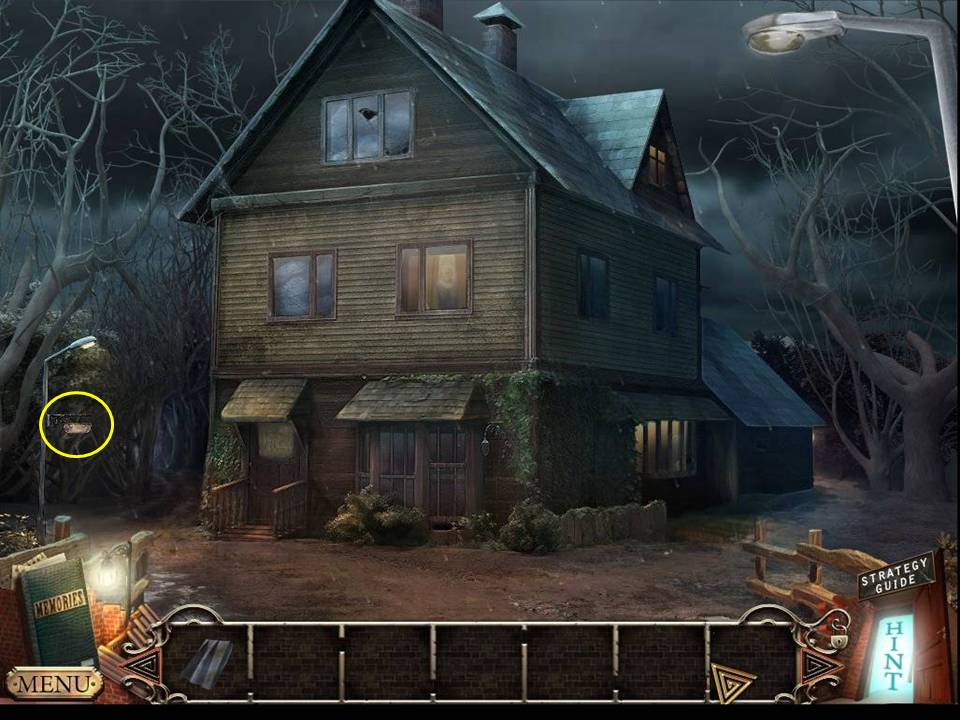
- Zoom into the street sign.
- Take the CLOTH PIECE.
- Head to the back of the house.
- Enter the playground.
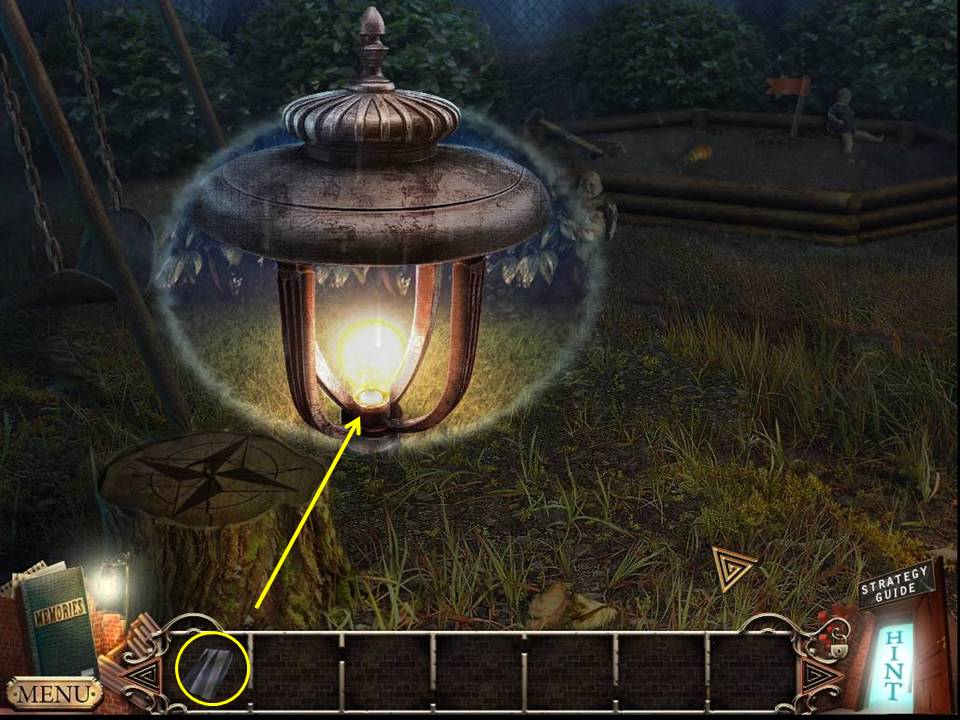
- Zoom into the light. Use the CLOTH PIECE to take the LIGHT BULB. Return to the front of the house.

- Zoom into the porch light. Insert the LIGHT BULB into the empty socket. Play the HOA that appears by the front door.
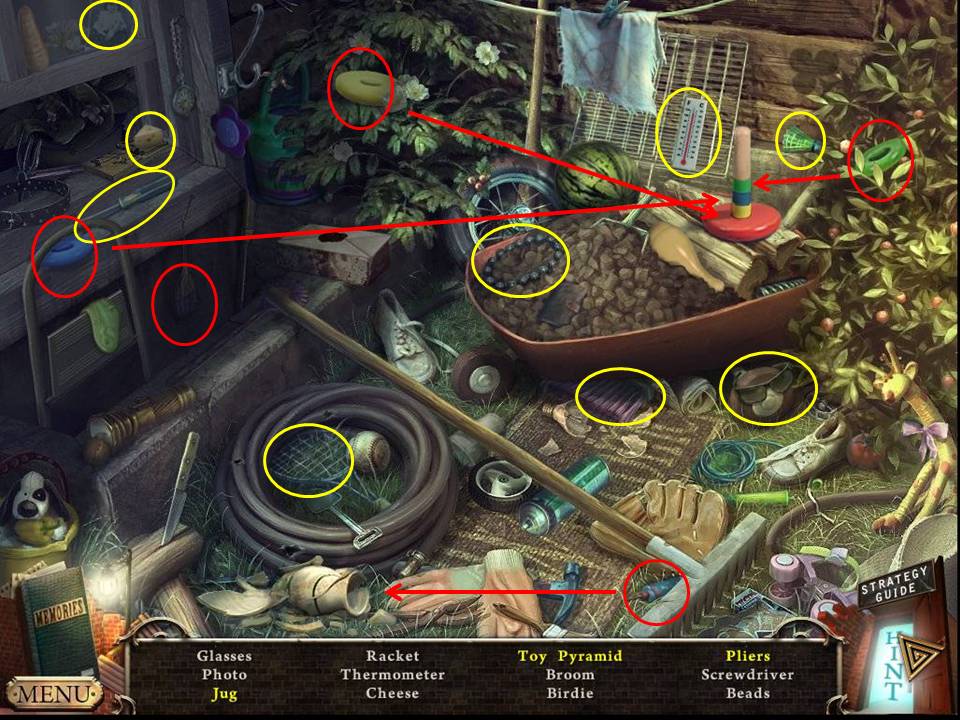
- Find the items listed. Zoom into the window well to get the pliers.
- Assemble the toy pyramid by placing the yellow ring, blue ring and green ring on the post.
- Fix the jug with the glue.
- Receive the PLIERS.
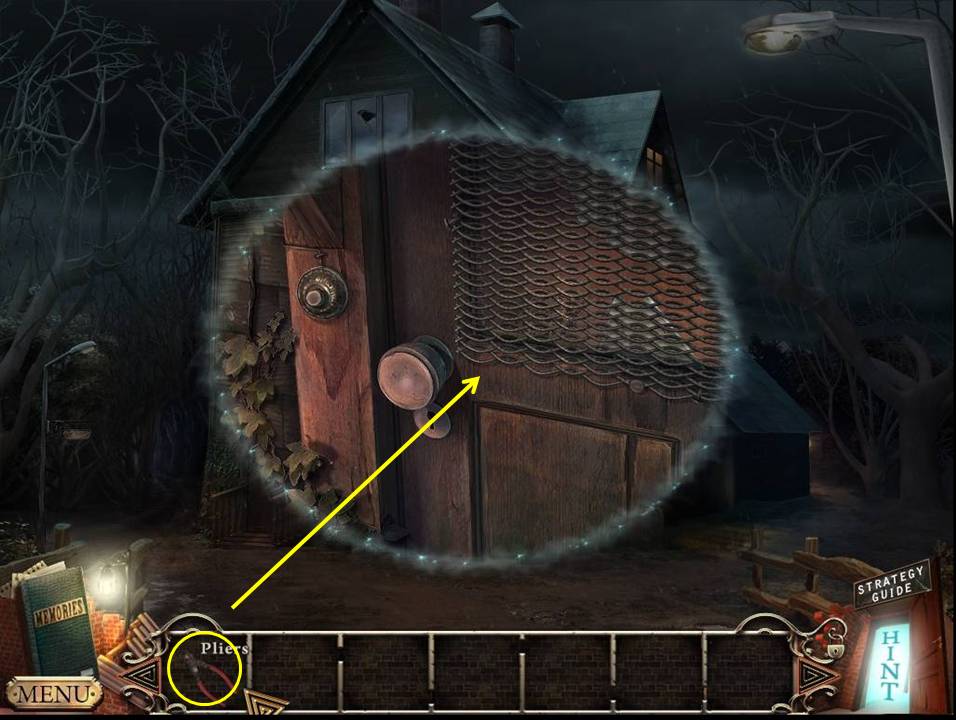
- Zoom into the front door.
- Pull the wire mesh screen back with the PLIERS.
- Open the door.
- Enter the house.
- Zoom into the desk.
- Take the CUBE.
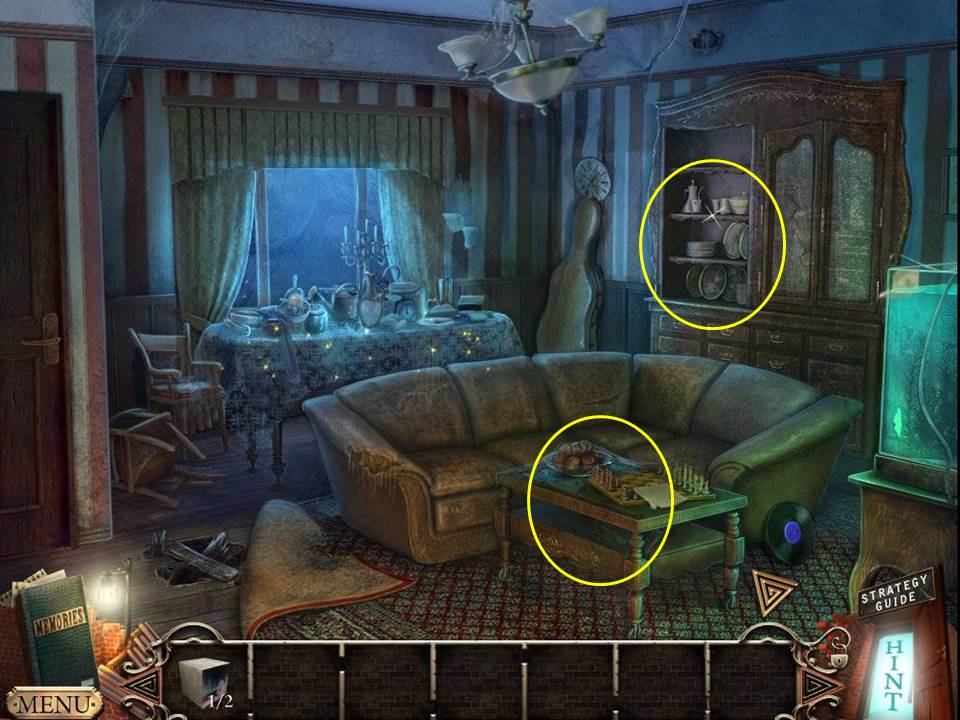
- Go to the living room.
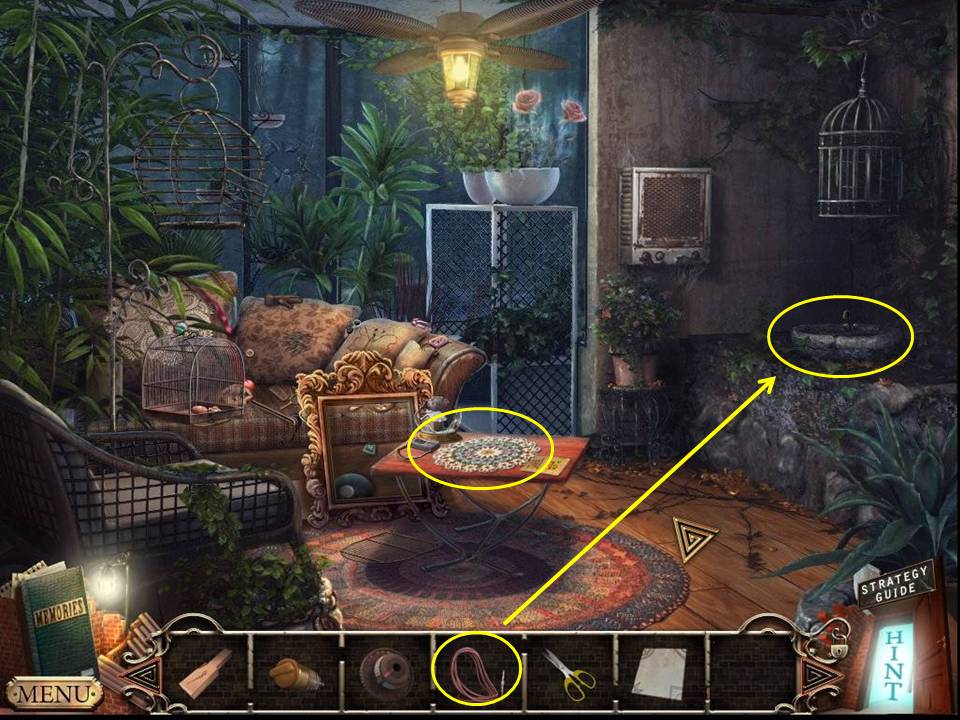
- Zoom into the table.
- Take the letter and a second CUBE.
- Zoom into the china cabinet.
- Take the HAIR PIN.
- Move the plates.
- Play the HOA by the dining table.
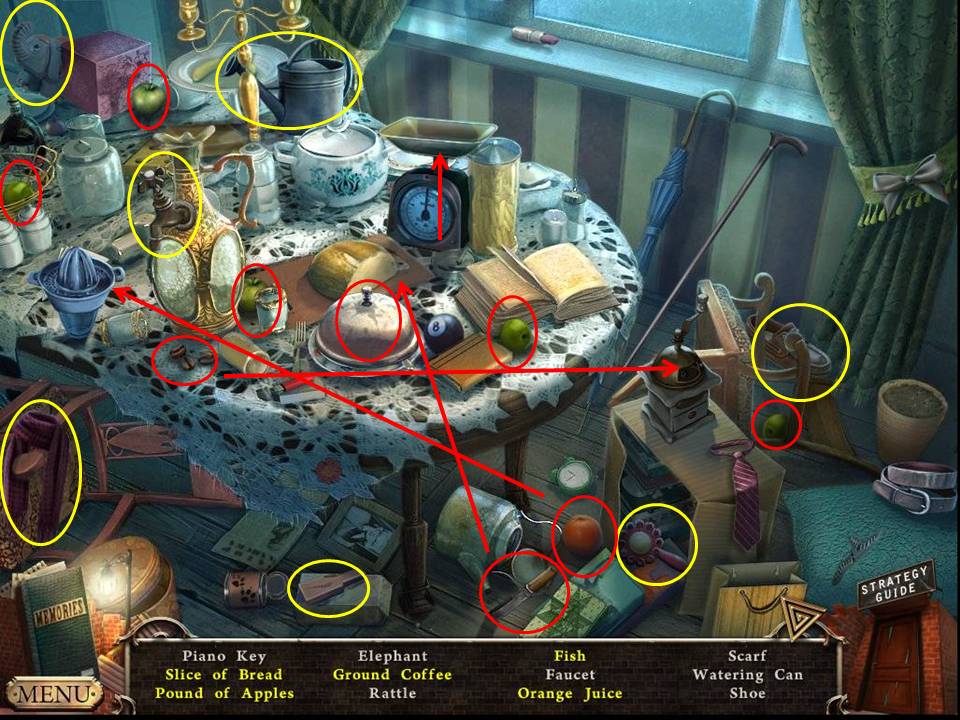
- Find the items listed.
- Cut the bread with the knife to get the slice of bread.
- Weigh five apples on the scale to get the pound of apples.
- Grind the coffee beans in the grinder to get the ground coffee.
- Juice the orange to get the orange juice.
- Open the lid to get the fish.
- Receive the PIANO KEY.
- Return to the entry and head right to the hall.
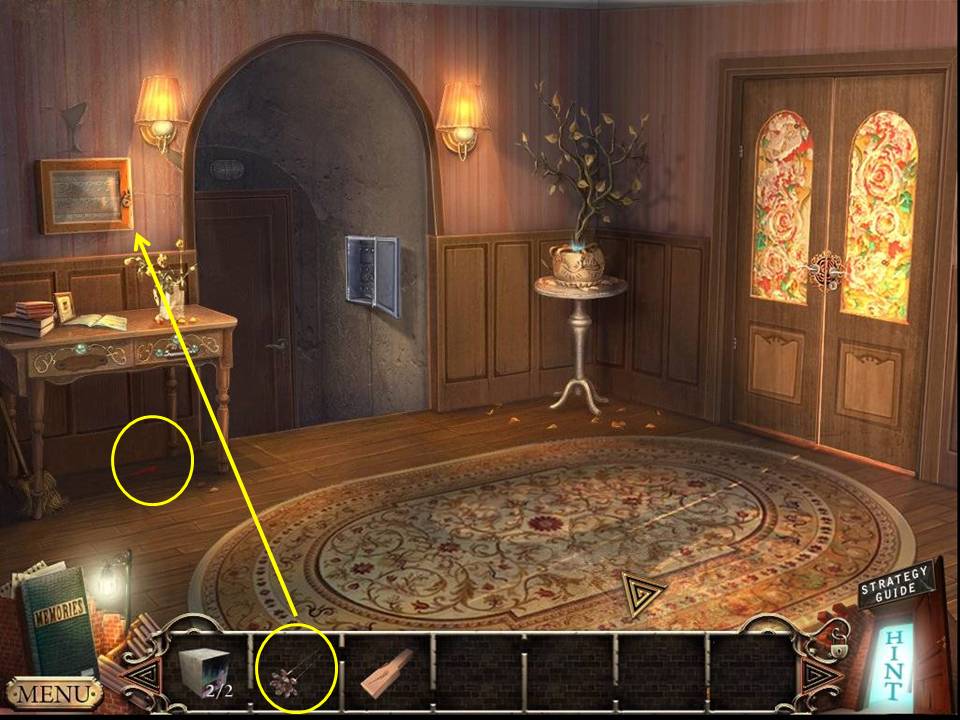
- Zoom into the desk.
- Take the SCREWDRIVER from under the desk.
- Zoom into the locked box.
- Unlock with the HAIR PIN to initiate a puzzle.
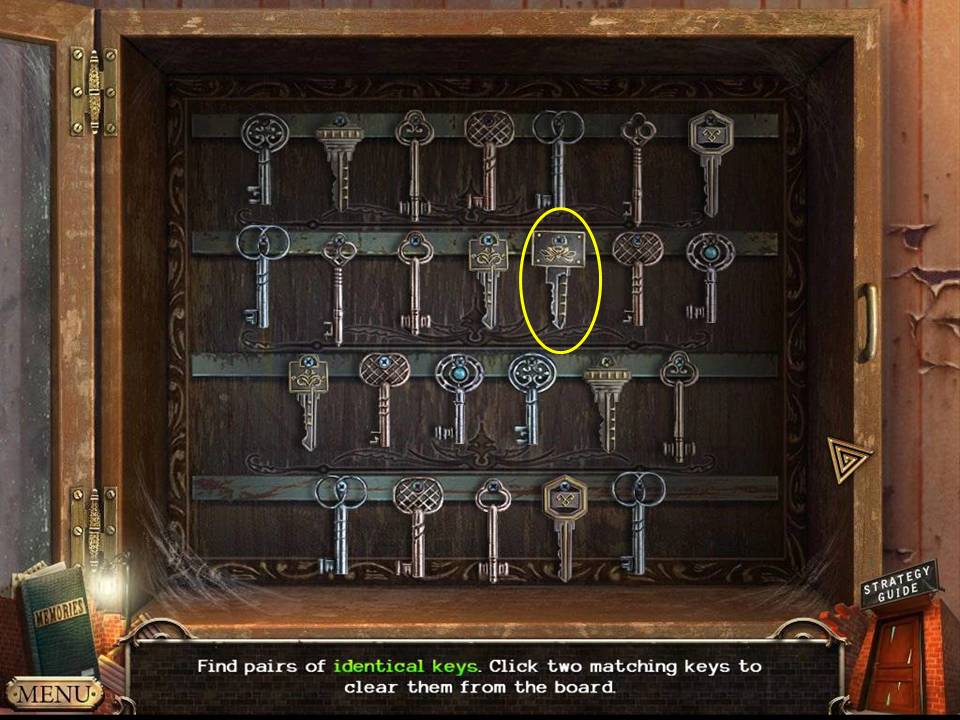
- The object of the puzzle is to match keys until only one remains.
- As this is visually quite simple, the screenshot is only marked with the one unmatched key, which you will take when finished.
- Take the WORKSHOP KEY.
- Return to the backyard.
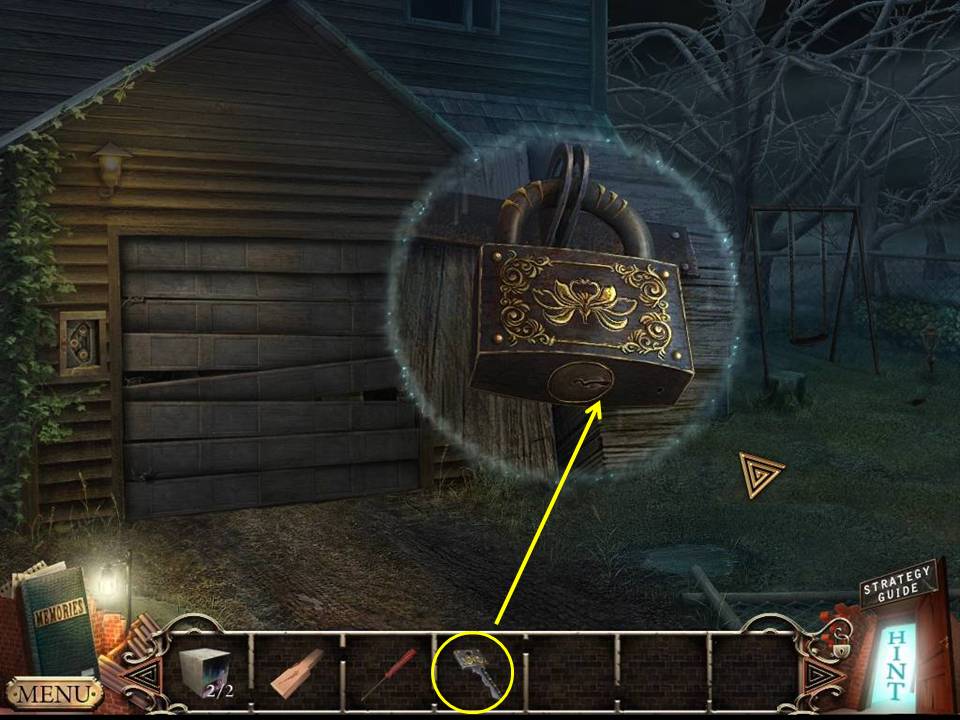
- Zoom into the workshop door.
- Unlock with the WORKSHOP KEY.
- Enter the workshop.
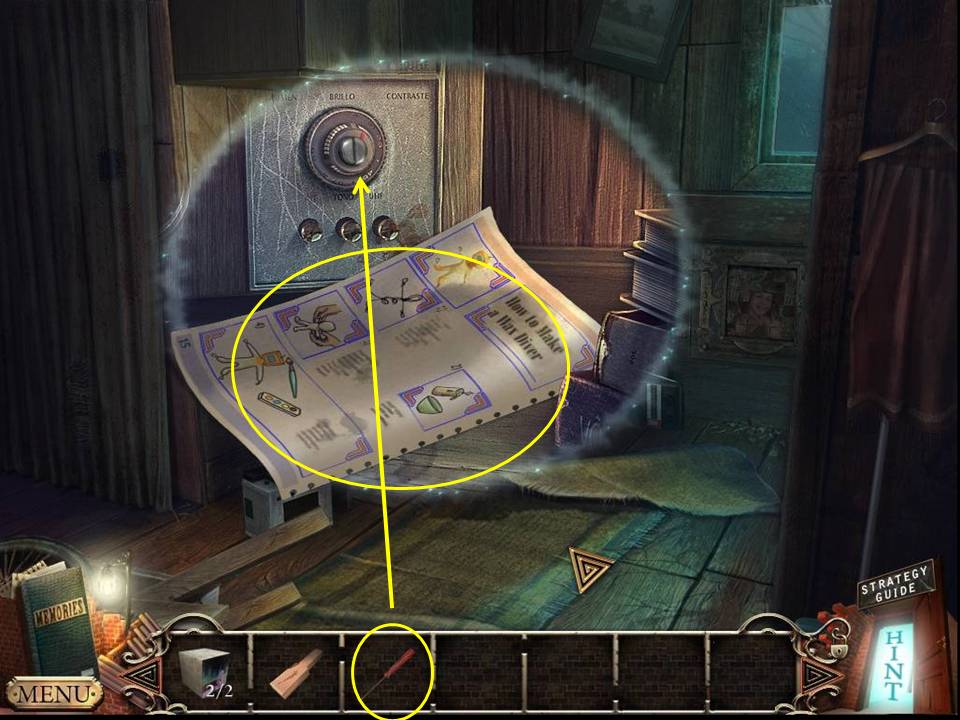
- Zoom into the desk.
- Take the instructions and the FUSE (underneath the instructions).
- Use the SCREWDRIVER to remove the SWITCH.
- Zoom out and zoom into the wall panel.
- Insert both cubes to initiate a puzzle.
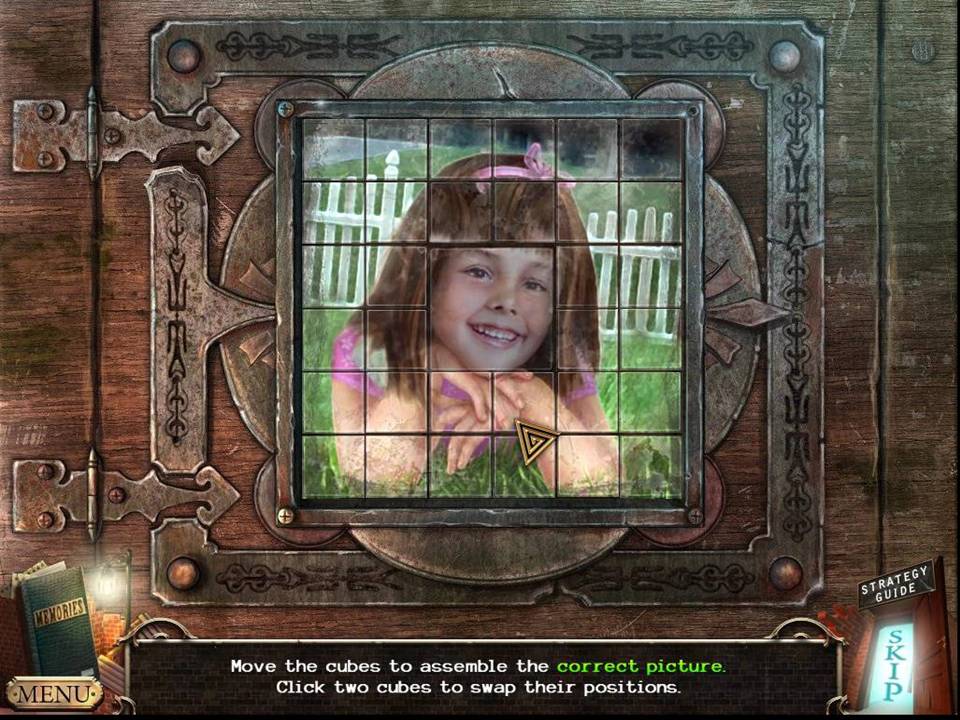
- The object of the puzzle is to assemble an image of a girl.
- Click two cubes to swap their positions.
- See screenshot for solution.
- When finished the panel will open.
- Take the HOSE and the MAGNET from inside.
- You’ll zoom back into the room.
- Open the curtain to play an HOA.
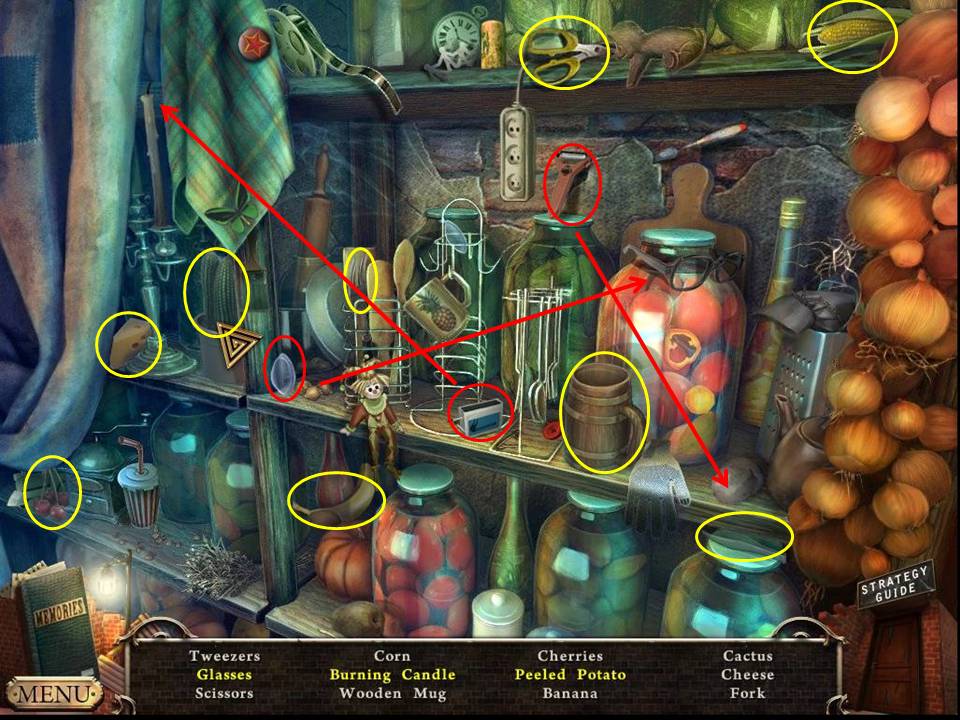
- Find the items listed.
- Insert the lenses to get the glasses.
- Light the candle with the matches to get the burning candle.
- Peel the potato with the peeler to get the peeled potato.
- Receive the SCISSORS.
- Return to the living room.
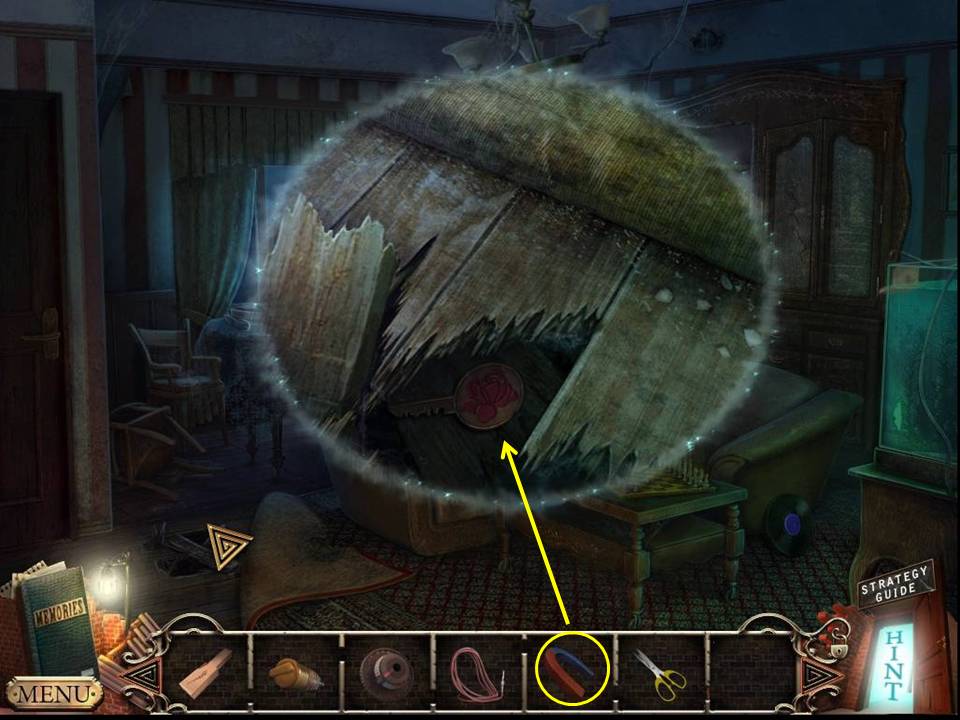
- Zoom into the floor.
- Use the MAGNET to attract the SOLARIUM KEY.
- Return to the hall.
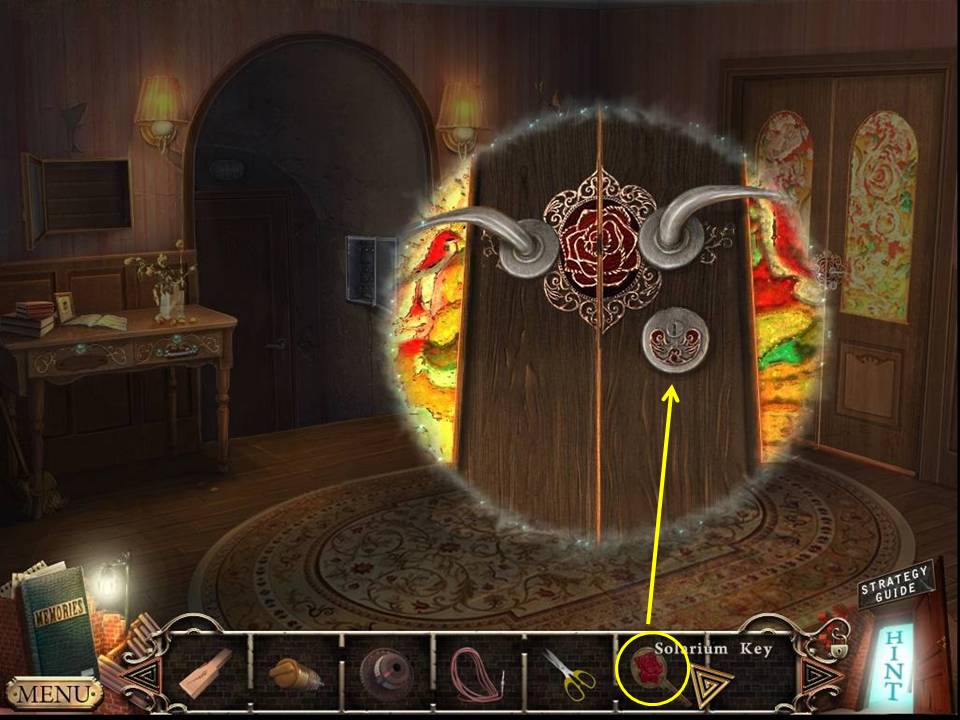
- Use the SOLARIUM KEY to unlock and enter the solarium.
- Play the HOA.
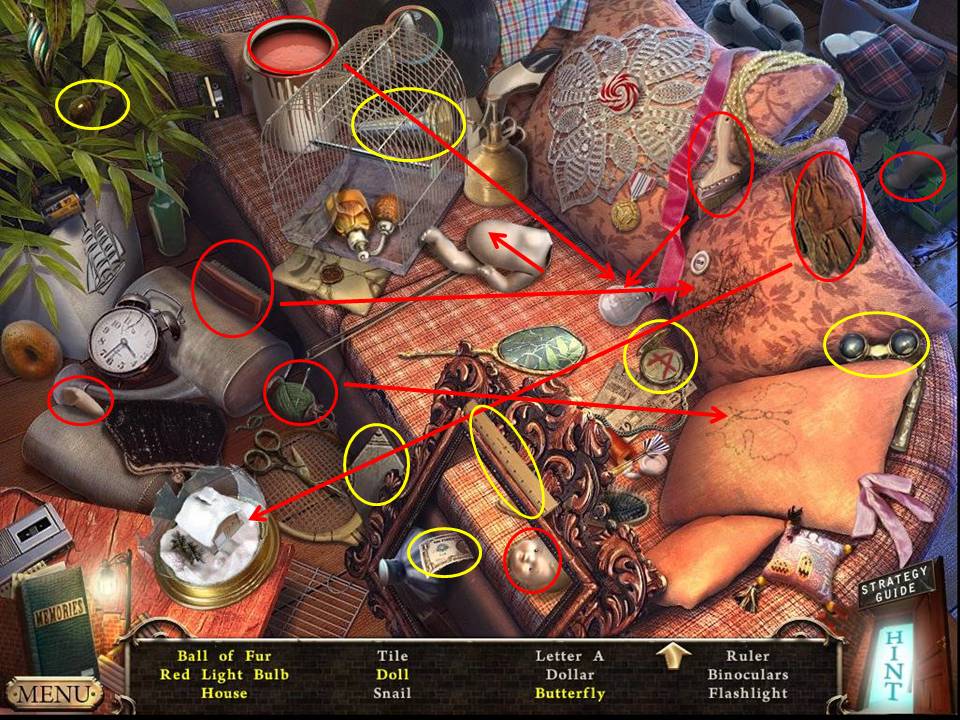
- Find the items listed.
- Paint the bulb with the brush and paint to get the red light bulb.
- Grab the house with the glove.
- Brush the pillow to get the ball of fur.
- Sew the other pillow with the thread to get the butterfly.
- Assemble three parts to get the doll.
- Receive the BLANK TILE.
- Zoom into the table.
- Take the PICTURE SAMPLE.
- Zoom into the tap.
- Take the RAKE.
- Attach the HOSE.
- Return to the playground.
- Zoom into the sandbox.
- RAKE the spiderweb.
- Brush away the leaves.
- Open the can.
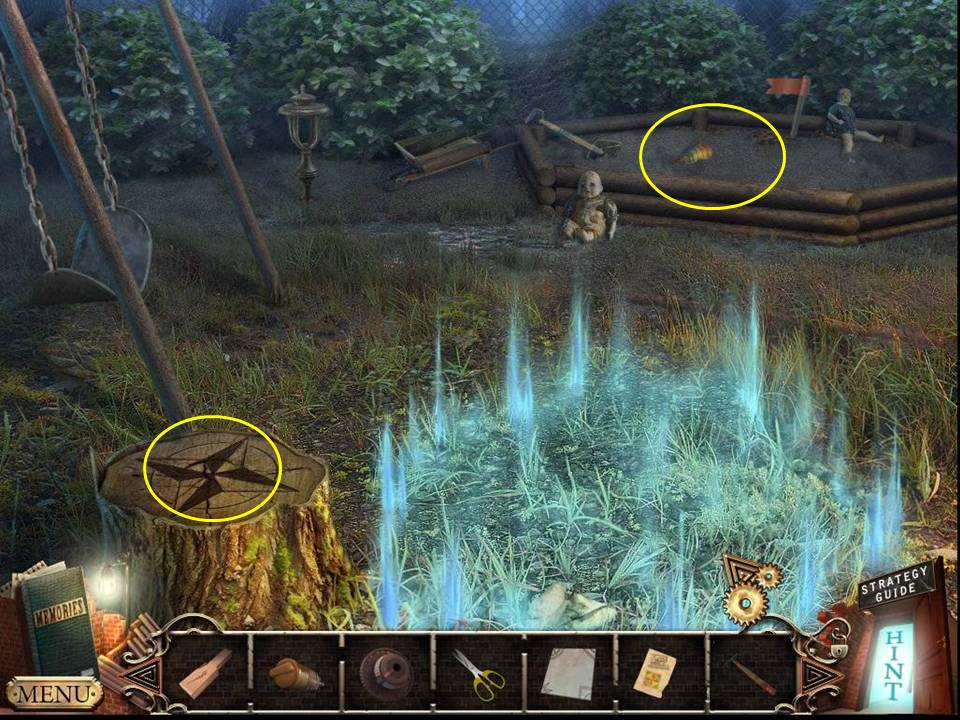
- Take the PIECE OF MAP and the COMPASS.
- Place the COMPASS on the tree stump.
- Return to the hall.
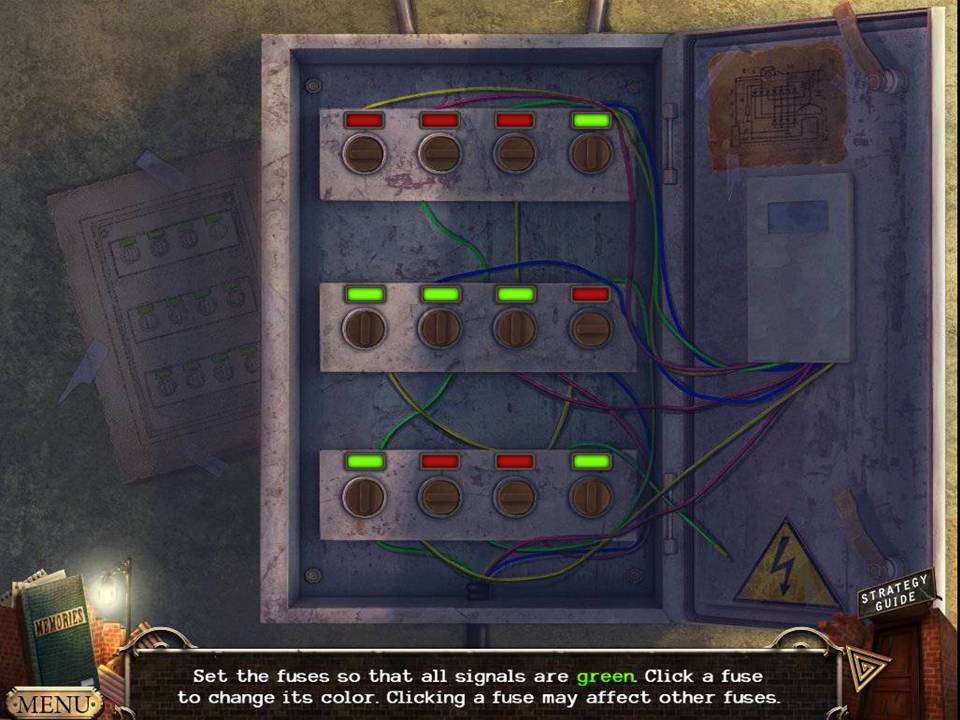
- Zoom into the fuse box.
- Insert the FUSE into the open slot to initiate a game.
- The object of the game is to turn all the lights green by clicking the switches.
- Clicking one switch may affect other switches.
- This puzzle is completely randomized.
- Enter the garage and play the HOA.
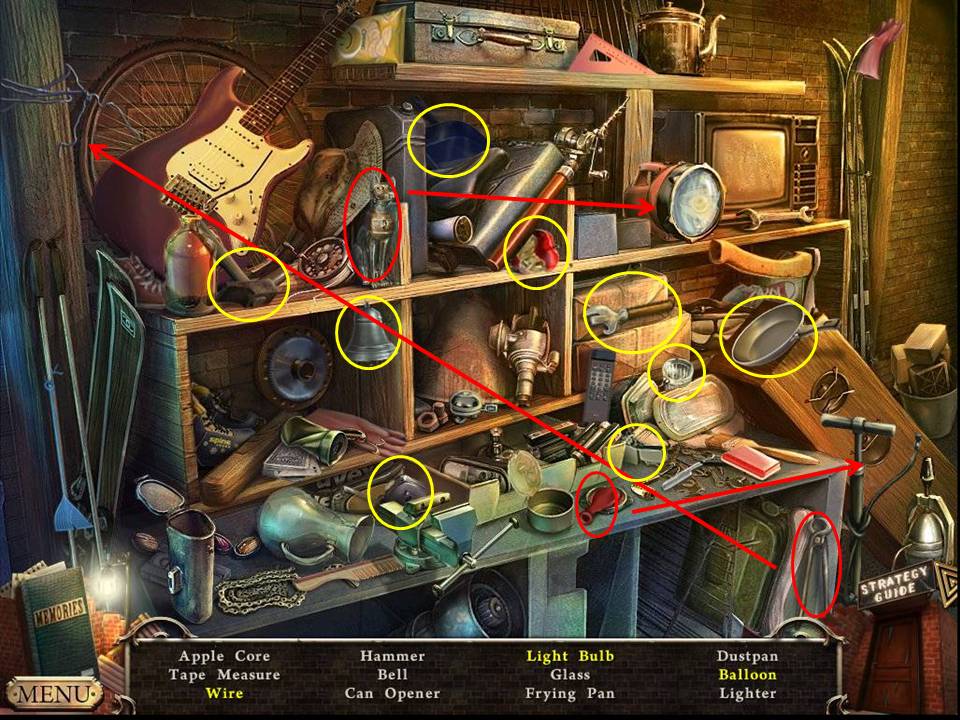
- Find the items listed.
- Snap a piece of wire with the pliers.
- Break the light with the cat statue to reveal the light bulb.
- Fill the balloon on the pump.
- Receive the HAMMER.
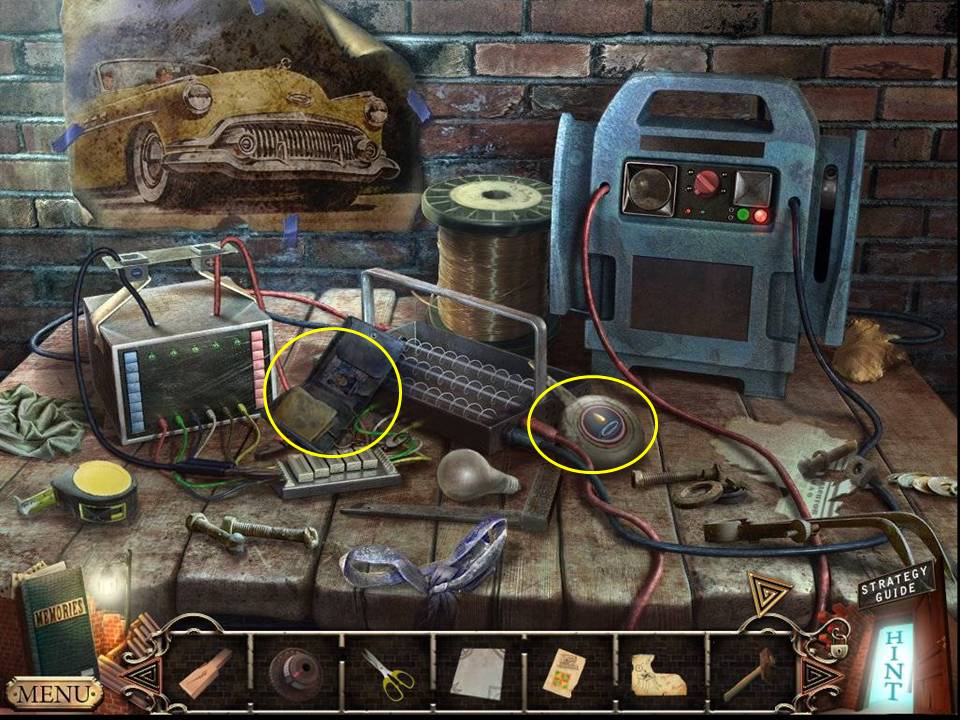
- Zoom into the workbench.
- Take the OIL CAN.
- Zoom into the wallet to search for clues.
- Return to the living room.
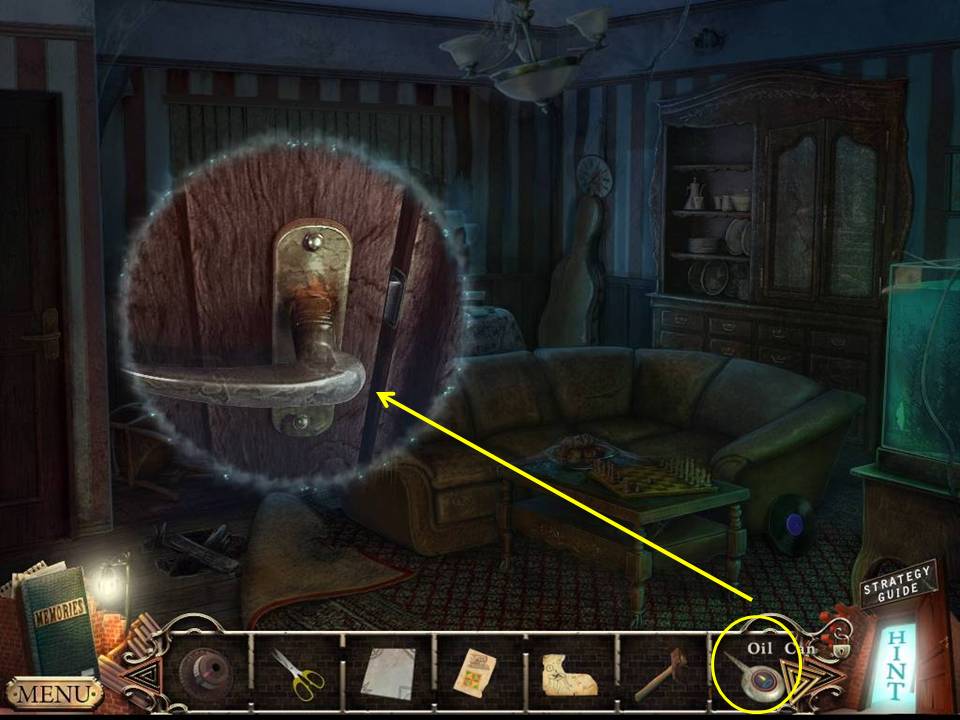
- Zoom into the kitchen door.
- Use the OIL CAN to oil the handle.
- Enter the kitchen.
- Play the HOA.
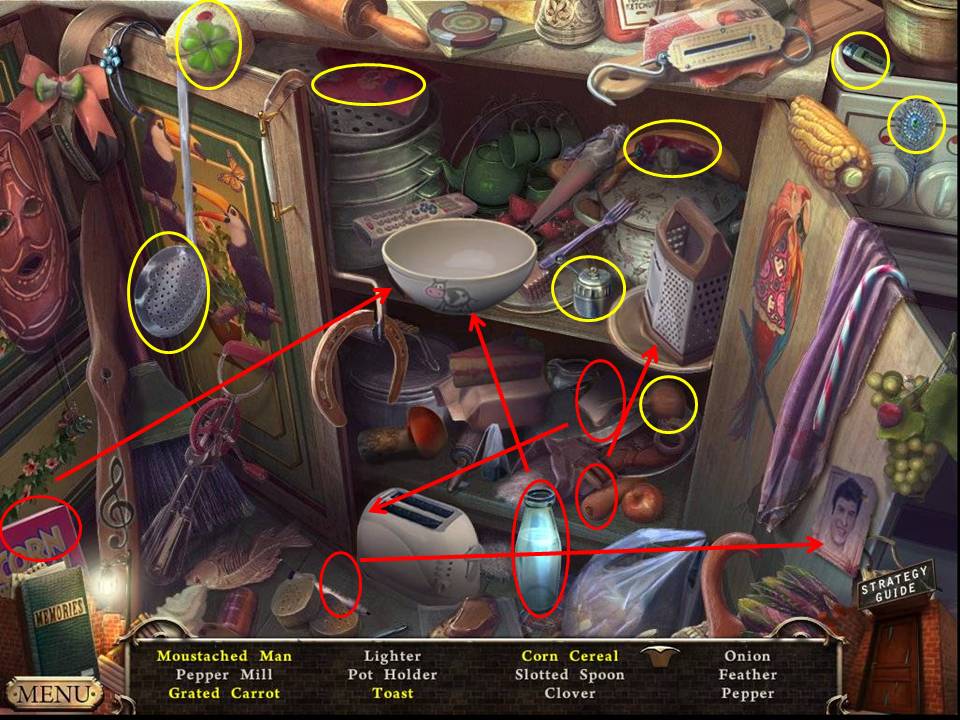
- Find the items listed.
- Draw a mustache on the photo with the pen to get the mustached man.
- Toast bread in the toaster.
- Grate the carrot on the grater to get the grated carrot.
- Pour cereal and milk in the bowl to get the cold cereal.
- Receive the POT HOLDER.
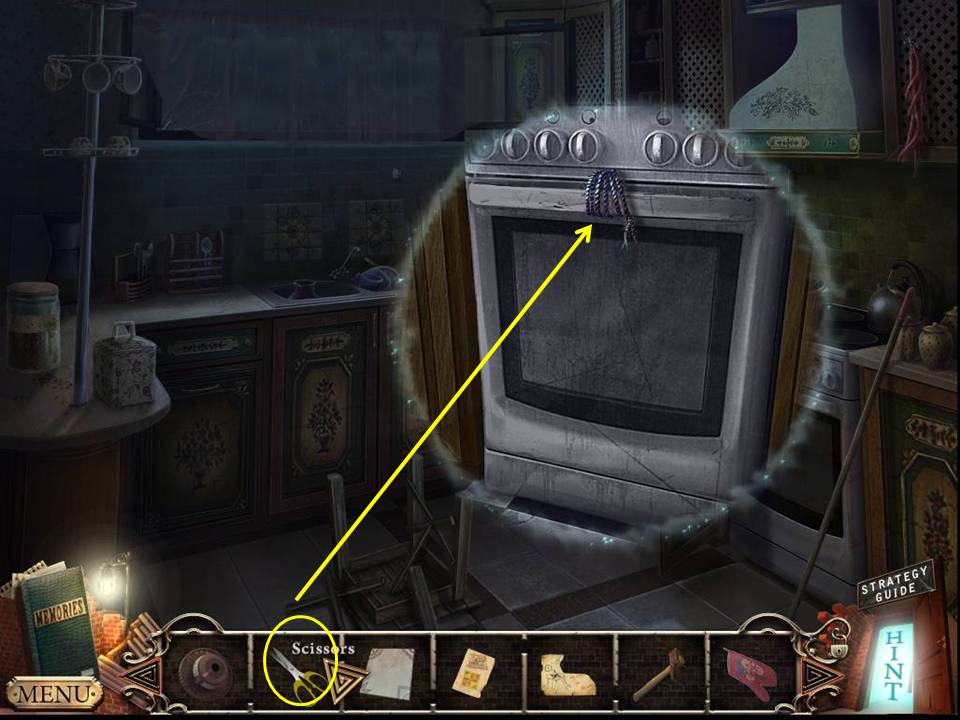
- Zoom into the oven.
- Cut the rope with the scissors.
- Collect the SCOOP NET from inside.
- Return to the living room.
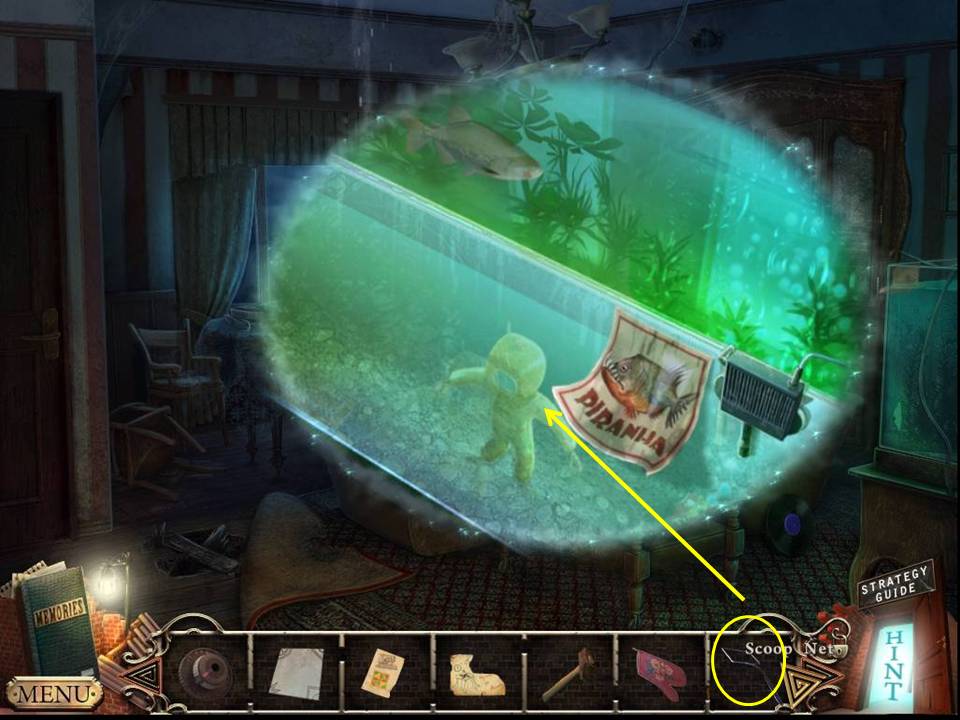
- Zoom into the fish tank.
- Scoop the WAX DIVER with the SCOOP NET.
- Return to the kitchen.
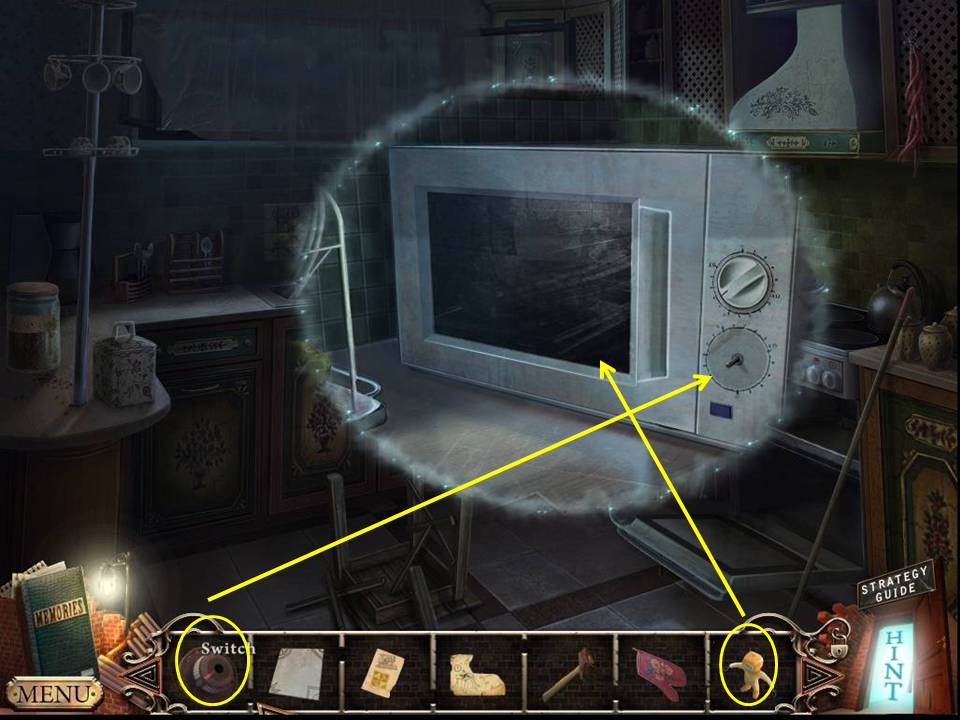
- Zoom into the microwave.
- Replace the SWITCH.
- Put the WAX DIVER inside to melt the wax.
- Take the WIRE with the POT HOLDER.
- Return to the solarium.
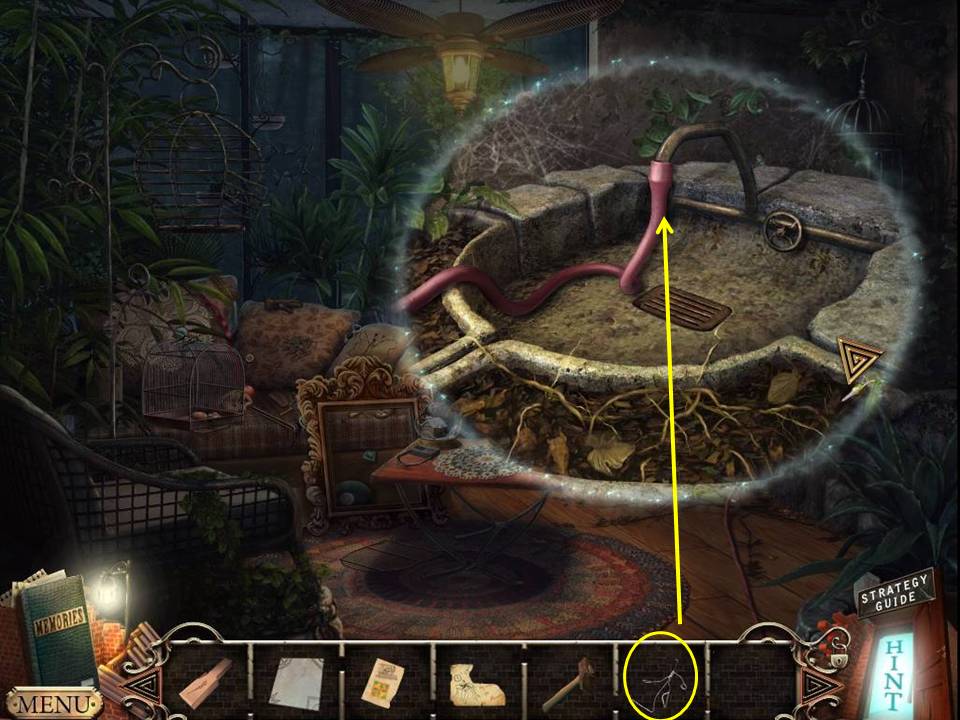
- Zoom into the tap.
- Place the WIRE on the hose.
- Return to the entry.
- Use the hose to extinguish the flames.
- Go upstairs.
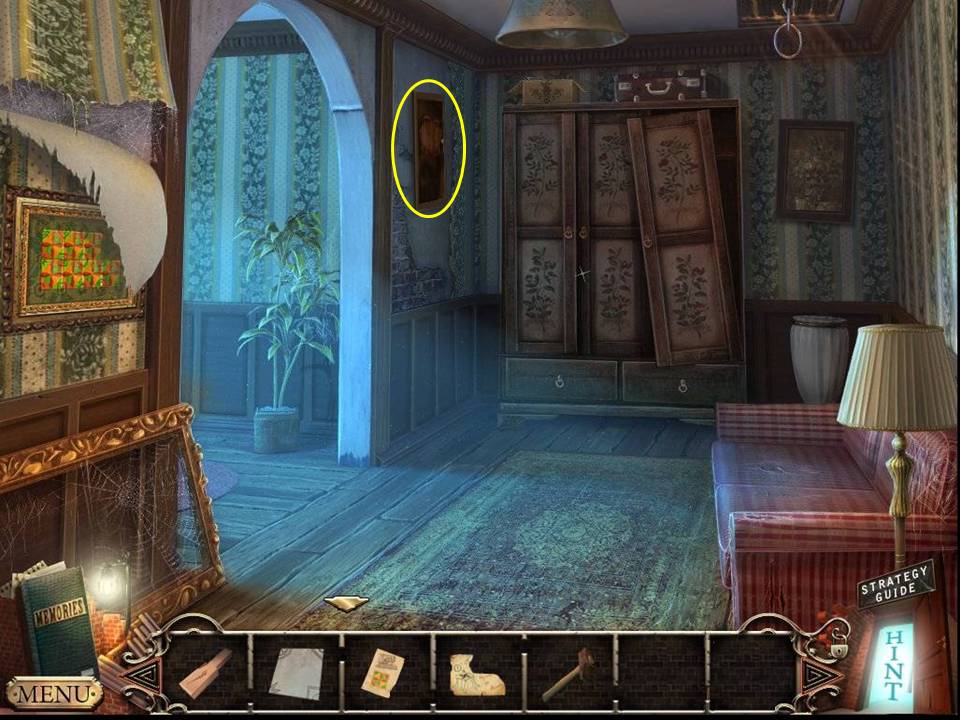
- Zoom into the photo.
- Go to the upstairs hall.
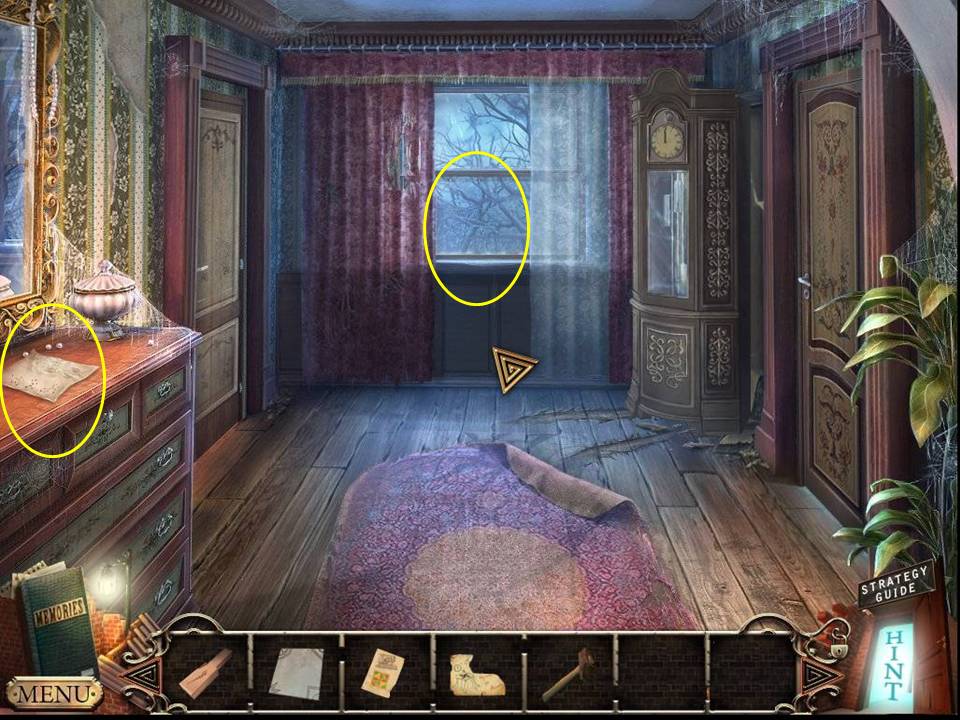
- Zoom into the window.
- Take the NAILS.
- Zoom into the chest on the left.
- Take the note.
- Enter the door to the bathroom on the left.
- Play the HOA.
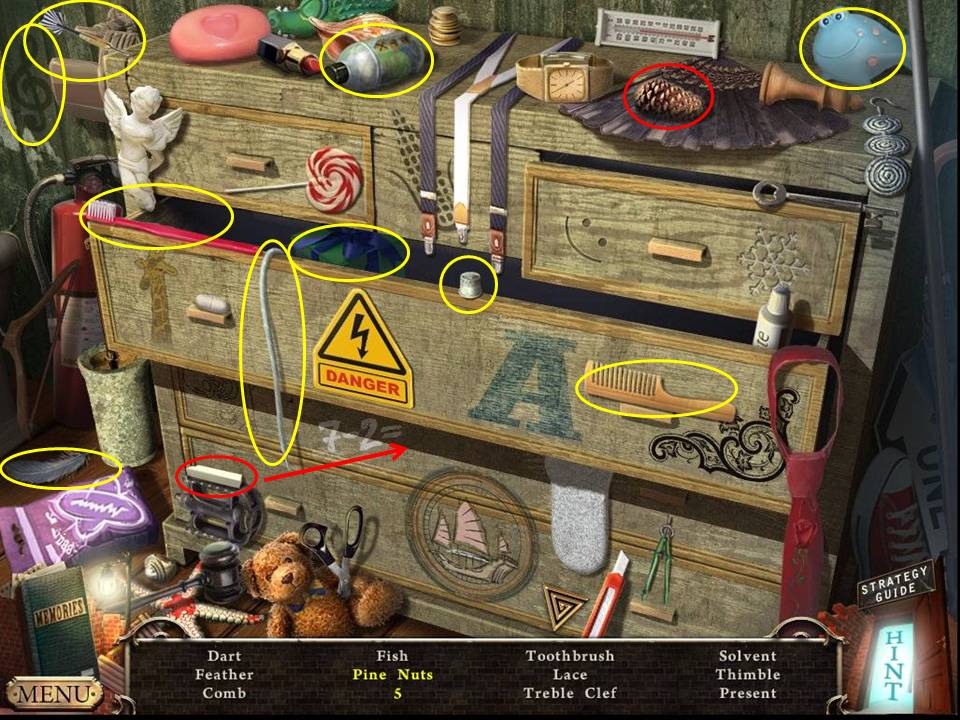
- Find the items listed.
- Draw the 5 with the chalk.
- Click the pinecone to get the pine nuts.
- Receive the SOLVENT.
- When finished, zoom into the sink.
- Turn on the tap to steam the mirror and read a message.
- Return to the living room.
- Zoom into the china cabinet to initiate a puzzle.

- The object of the puzzle is to spell EMILY with the blocks.
- Several variations exist, but the good news is that this puzzle is not difficult to figure out on your own.
- Concentrate on moving the correct letters into the middle and sliding incorrect letters out of the way.
- When finished, take the newspaper and the LENS.
- Go to the kitchen.
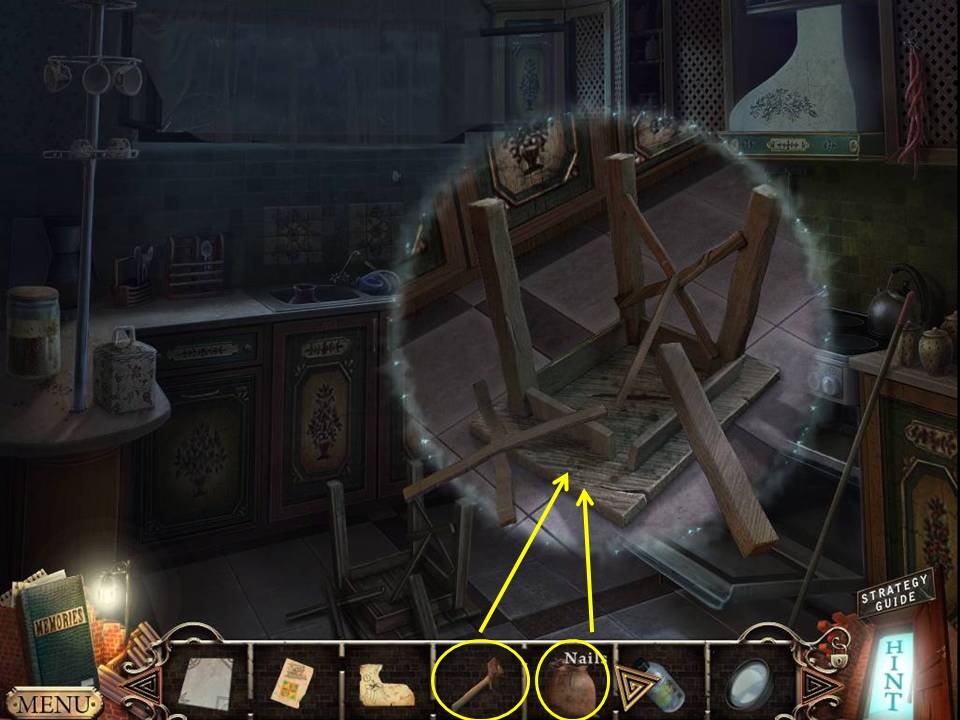
- Zoom into the broken stool.
- Use the HAMMER and NAILS to fix it.
- Take the STOOL.
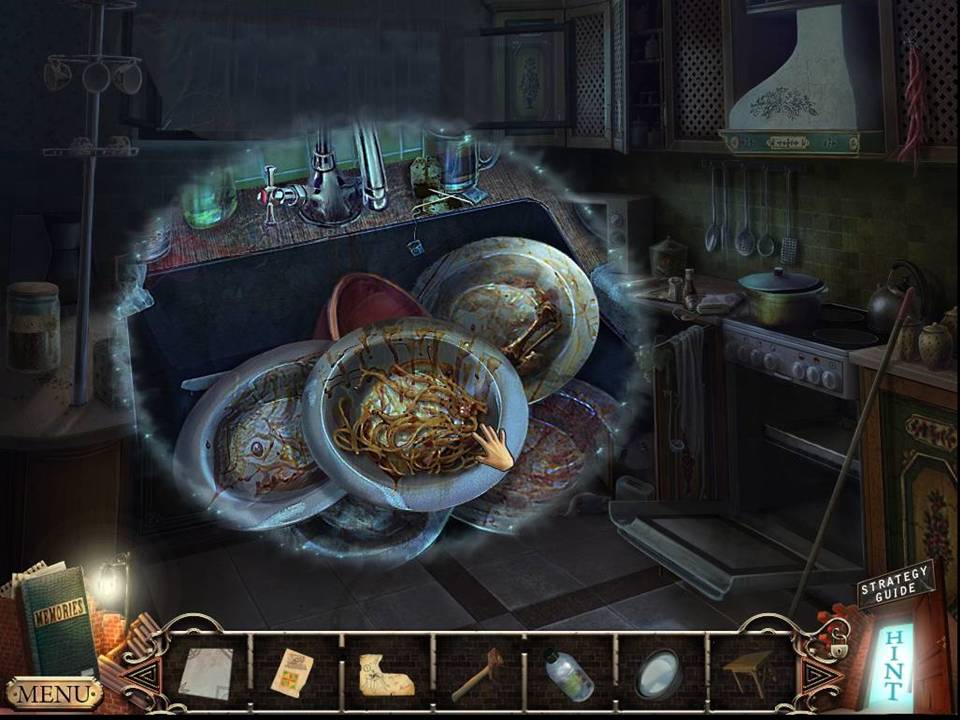
- Zoom into the sink.
- Click the dirty dishes out of the way.
- Take the GEAR.
- Go back upstairs.
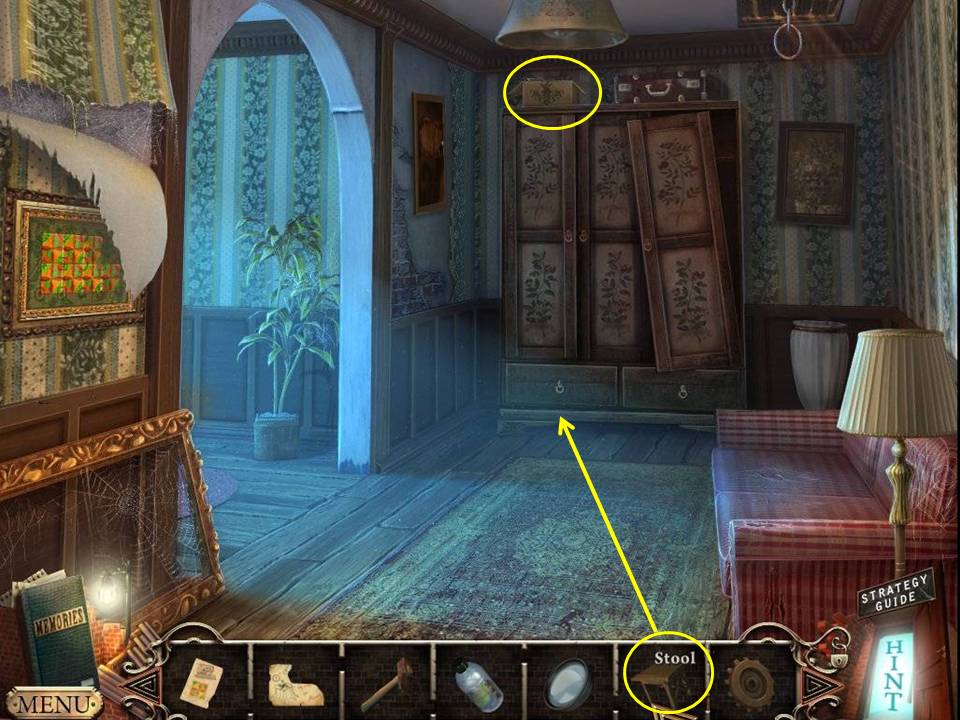
- Place the STOOL in front of the cabinet.
- Zoom into the box on top and move the drawing.
- Take the SHEARS and WINDOW HANDLE.
- Go to the hall.
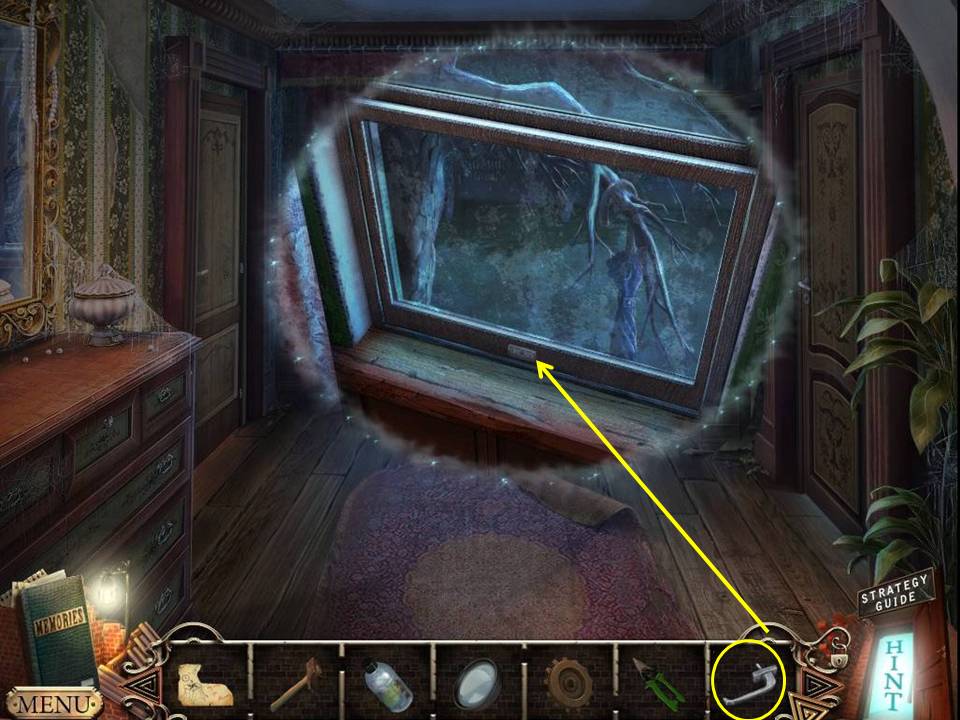
- Zoom into the window and put the WINDOW HANDLE on it.
- Take the UMBRELLA.
- Go back to the landing.
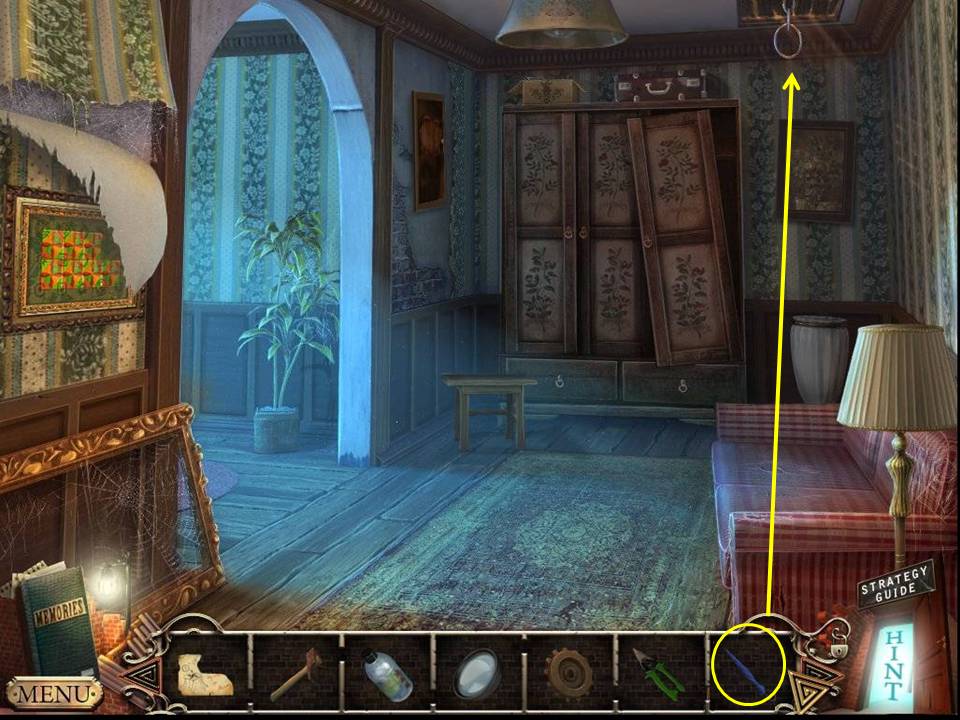
- Use the UMBRELLA handle to pull down the attic stairs.
- Enter the attic and play the HOA.
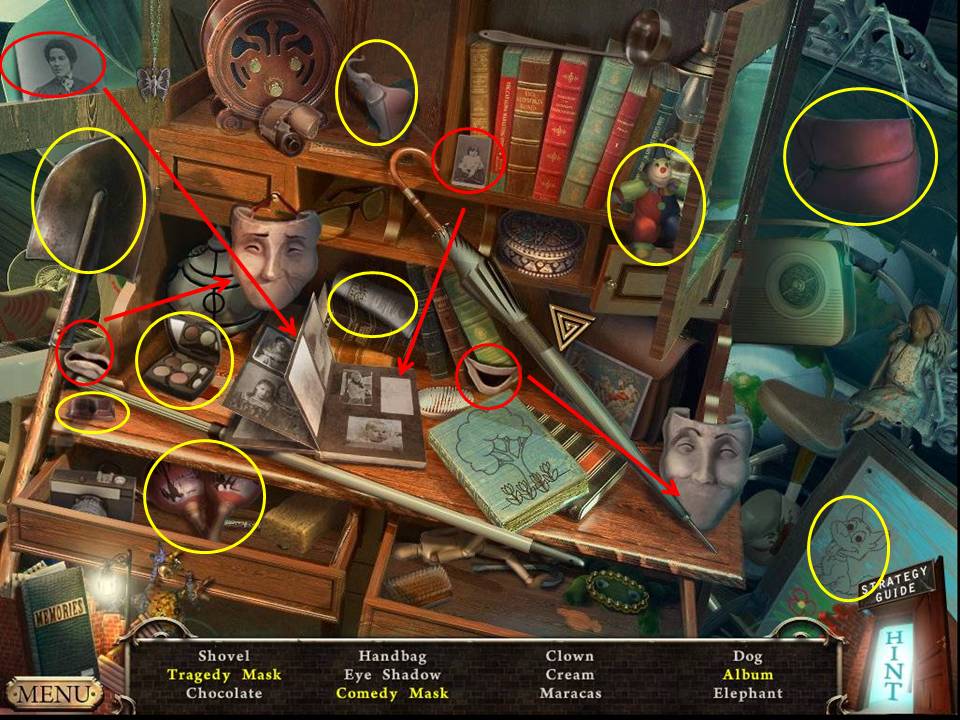
- Find the items listed.
- Put the photos in the album.
- Put the smile on the comedy mask and the frown on the tragedy mask.
- Receive the SHOVEL.
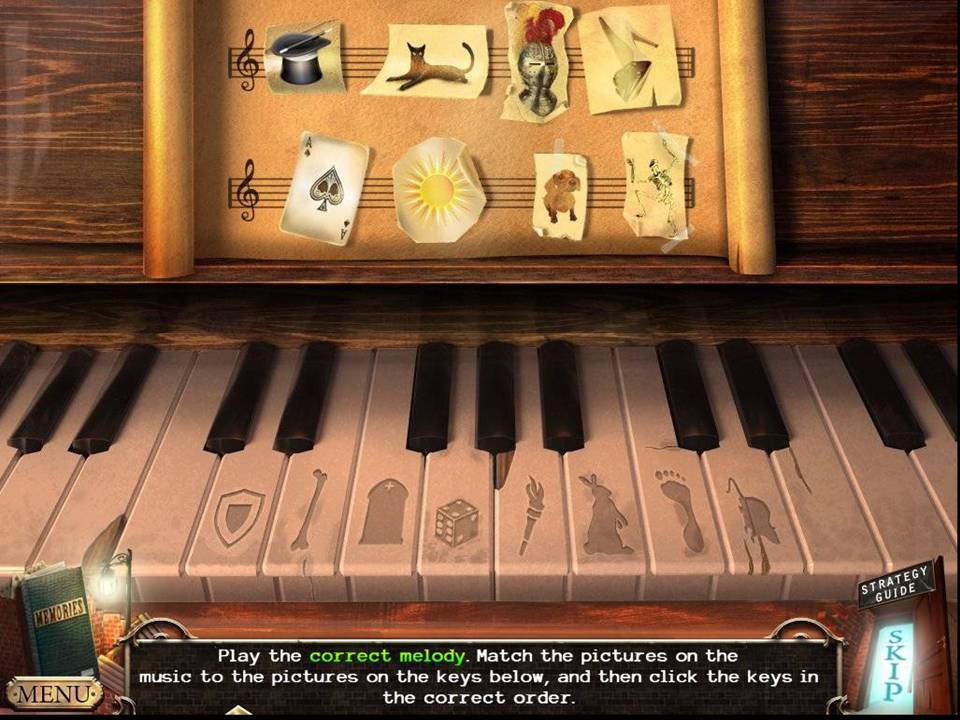
- Zoom into the piano.
- Insert the PIANO KEY in the slot to initiate a puzzle.
- The object of this puzzle is to follow the images on the sheet music and play corresponding notes on the keys.
- The images don’t match, but rather are related.
- In this example, you play rabbit, mouse, shield, foot, dice, fire, bone, grave.
- When finished a panel in the piano opens, zoom back in and take the FUEL CAN.
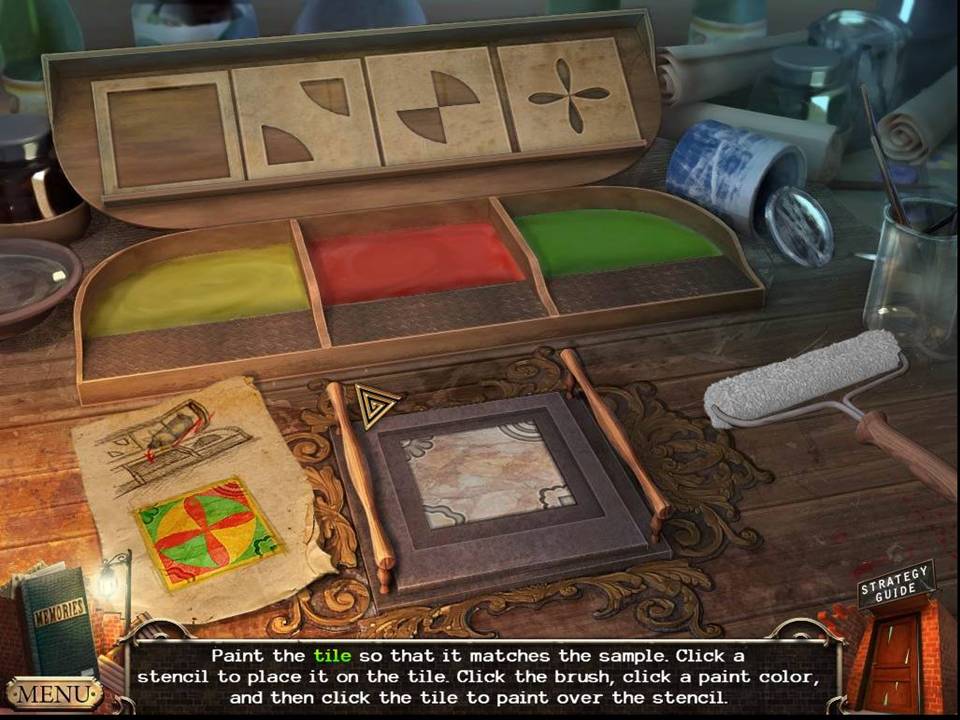
- Zoom into the shelf.
- Put the BLANK TILE and PICTURE SAMPLE on the table.
- Pour the SOLVENT into the paints. Moving from left to right, place stencil #1 over the tile.
- Roll yellow paint on it with the roller.
- Take stencil #2, rotate as necessary and paint the tile green.
- Rotate again and use red paint.
- Take stencil #3, reposition as necessary and paint it green.
- Rotate and paint it yellow.
- Take stencil #4 and paint red.
- Take the PAINTED TILE.
- Return to the landing.
- Zoom into the panel.
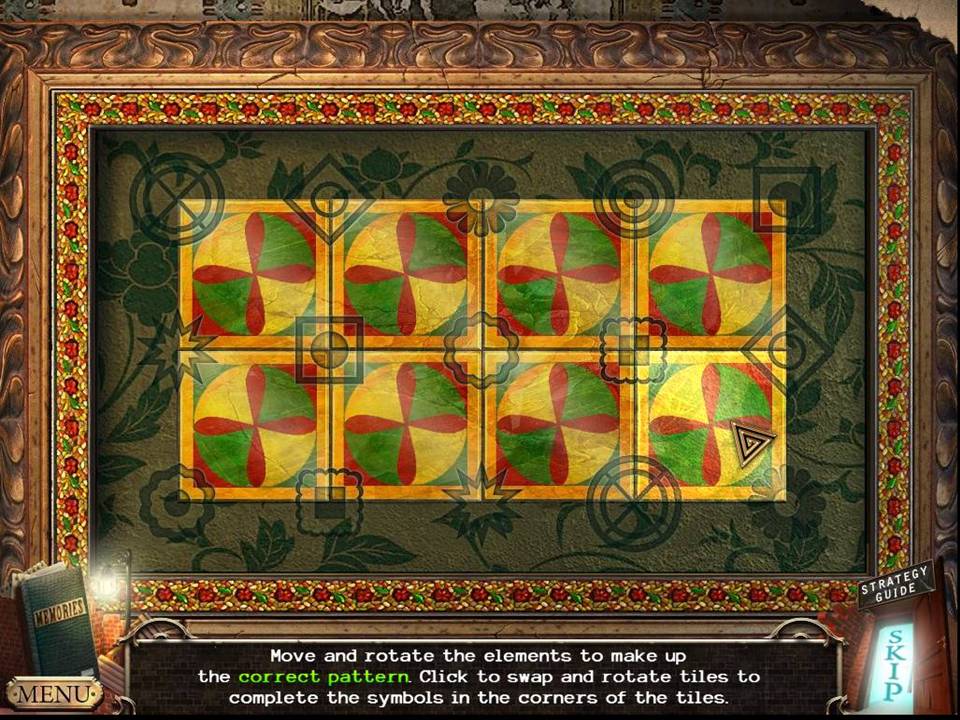
- Insert the PAINTED TILE to initiate a puzzle.
- The object of the puzzle is to move and rotate the tiles to match the patterns you see on the borders.
- This is a two step process, moving the correct tile into place and then right-click rotating into position. I began at the top left corner, testing to find the right tile and then rotating.
- When you have the correct tile in position the pattern symbol glows blue.
- See screenshot for solution.
- When finished, take the note and the INSULATING TAPE.
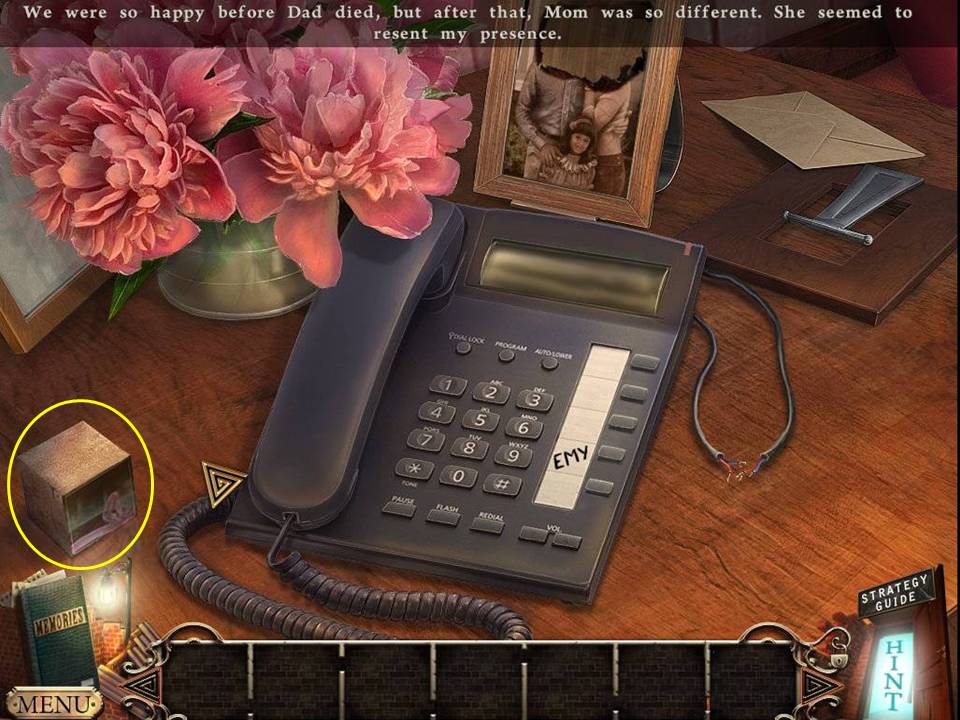
- Go back downstairs to the entry.
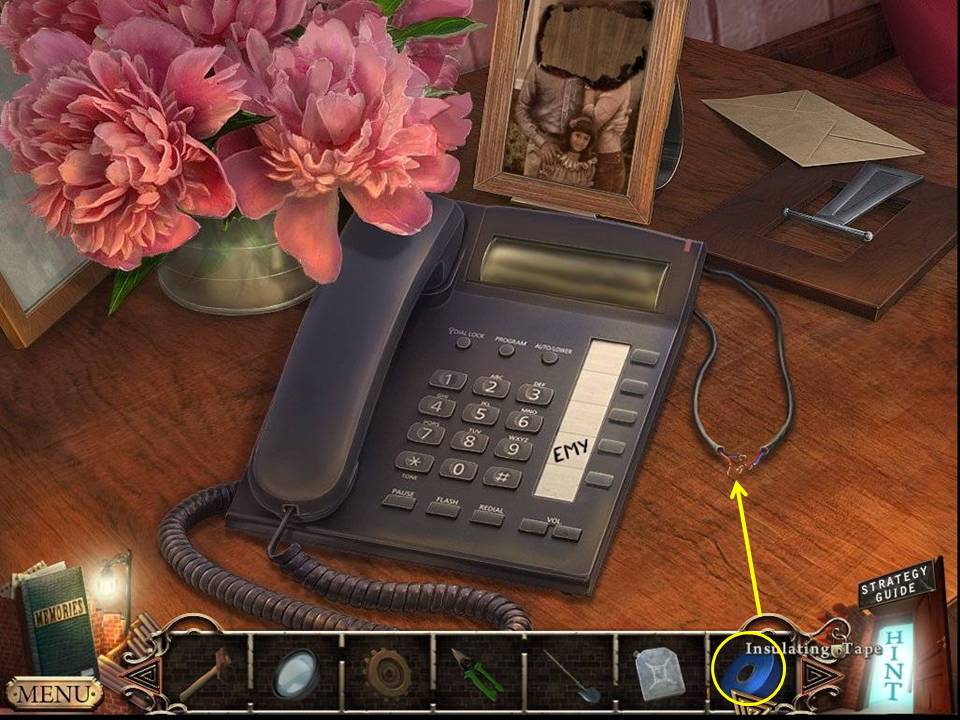
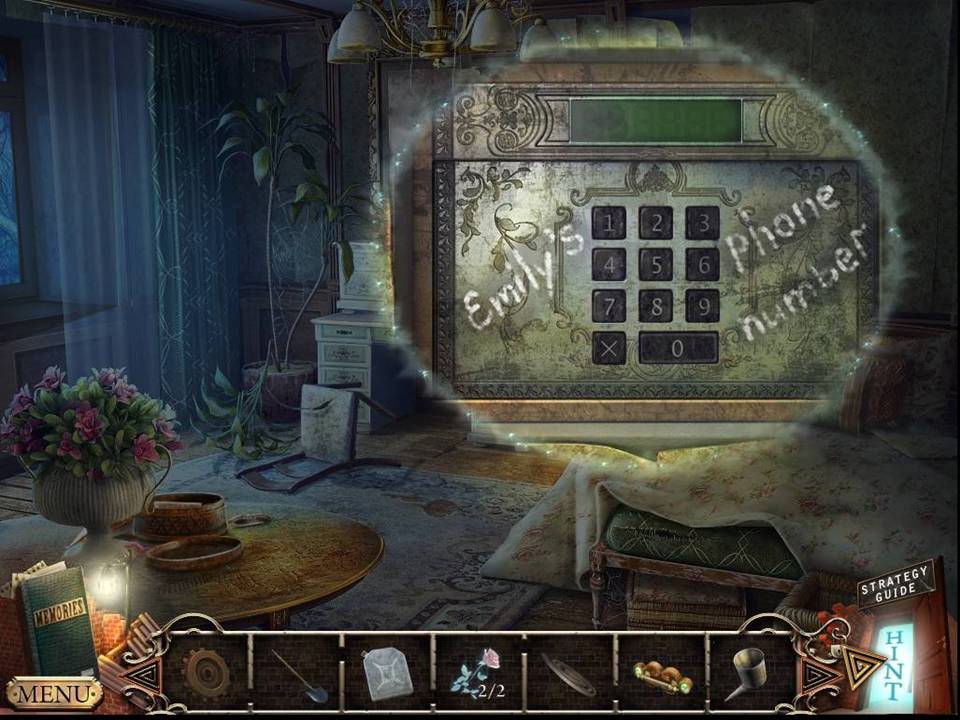
- Zoom into the phone.
- Repair the wires with the INSULATING TAPE.
- Click the speed dial button.
- Return to the solarium.
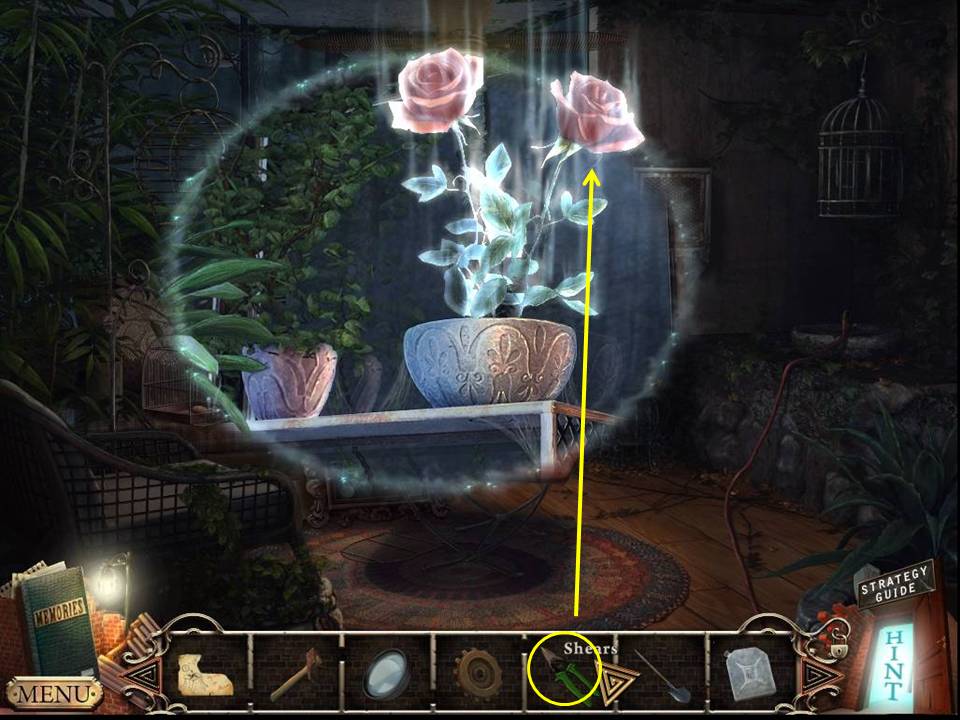
- Zoom into the planter.
- Clip two ROSES with the SHEARS.
- Return to the attic.
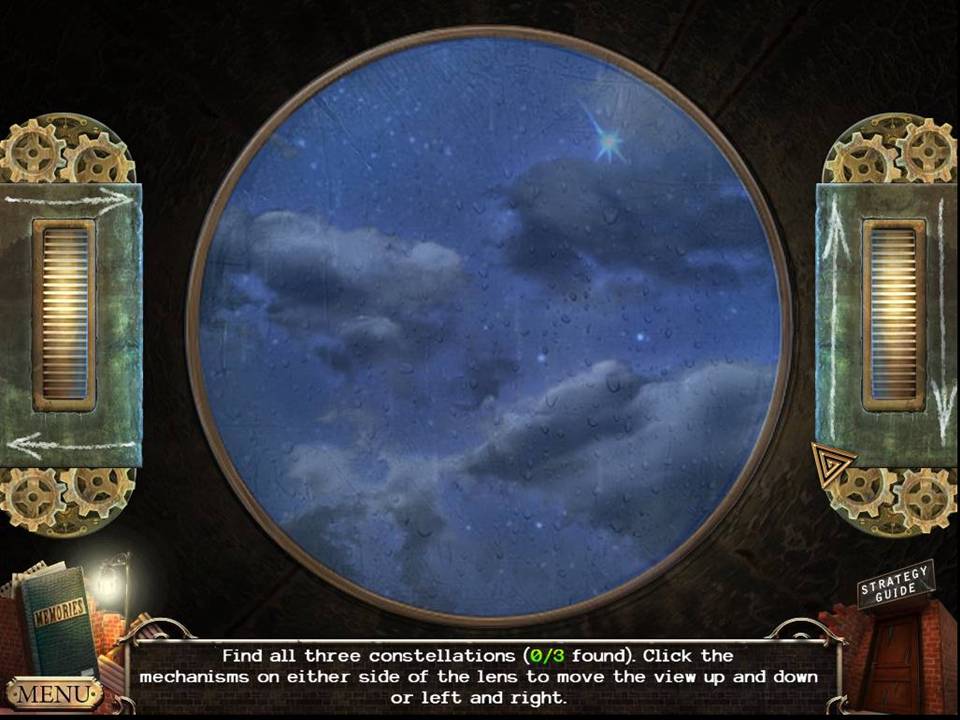
- Zoom into the telescope and insert the LENS.
- Locate the constellations.
- The first can be found by moving the dials down and left.
- The next is slightly above that position.
- Move right and down to see the third constellation.
- Return to the upstairs hall.

- Zoom into the clock.
- Use the code to match the colored constellation patterns with the appropriate times. Then, move the clock hands to match.
- In this example, 1:25 is blue, 7:45 is green and 10:10 is red.
- Only the minute hands move, so you will need to spiral around several times to hit the correct time.
- When finished, take the BELT.
- Pull the lever.
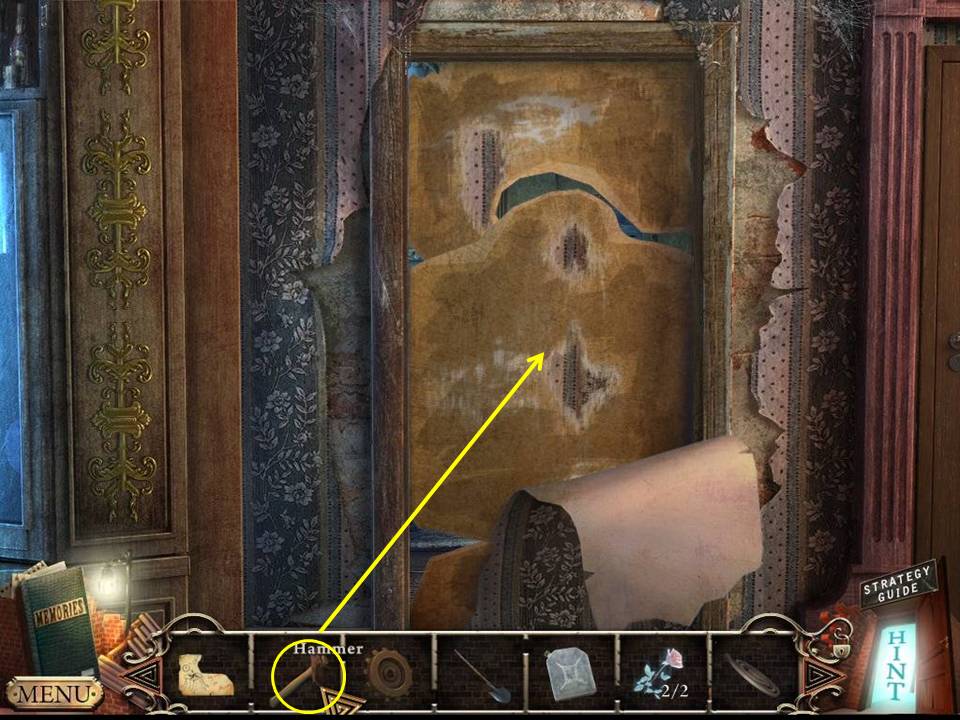
- Zoom into the wall.
- HAMMER the doorway to enter the bedroom.
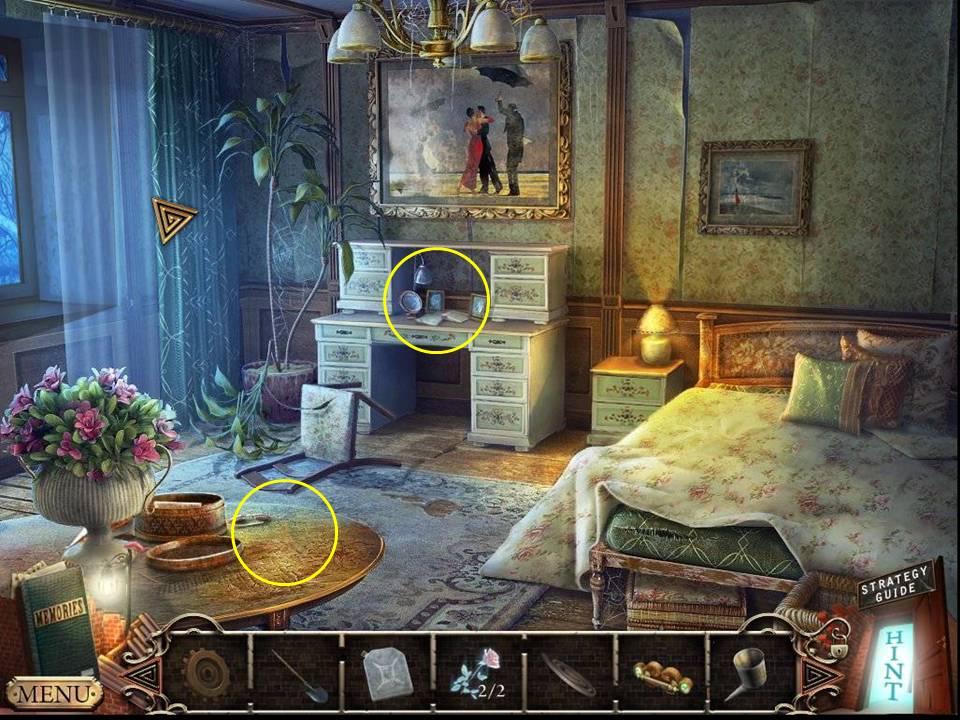
- Zoom into the table.
- Take the FUNNEL and the letter.
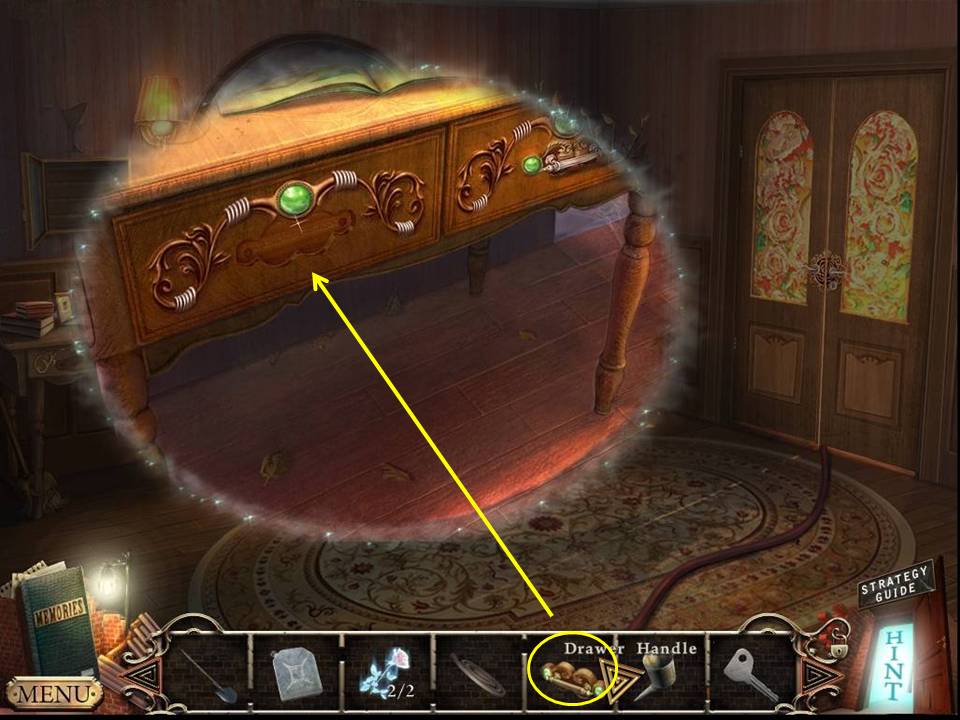
- Zoom into the dresser.
- Put the PIECE OF MAP on it and take the MAP and DRAWER HANDLE.
- Remove the painting.
- Zoom into the wall safe.
- Input 544851. Take
- the IGNITION KEY.
- Return downstairs.
- Zoom into the desk.
- Put the DRAWER handle on the drawer.
- Take the HACKSAW.
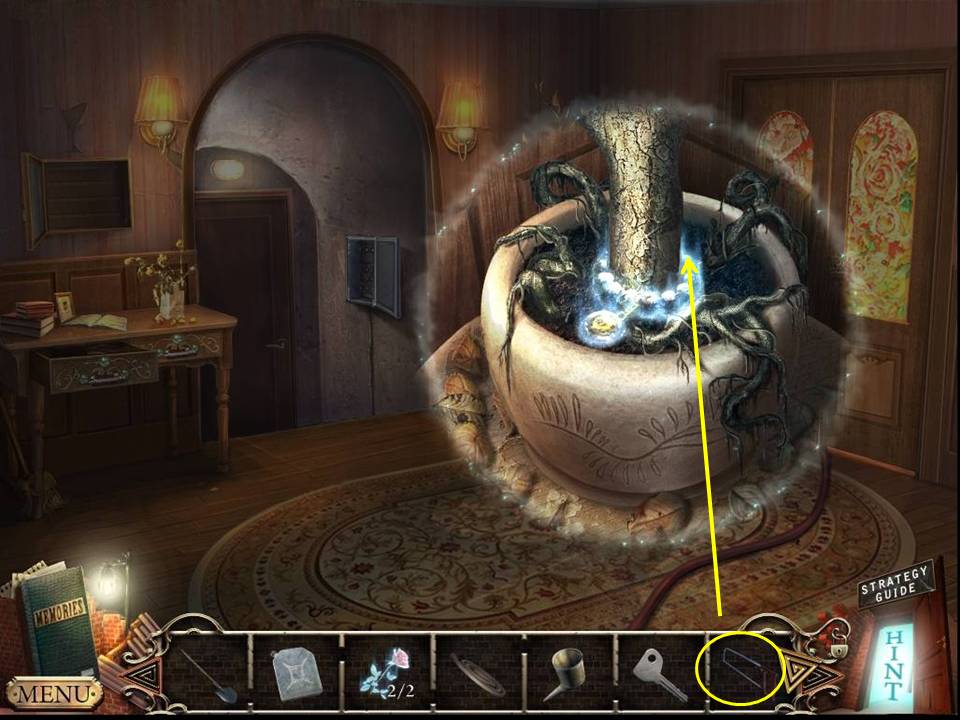
- Zoom into the plant.
- HACKSAW the trunk.
- Take the PEARL BRACELET.
- Return to the playground.
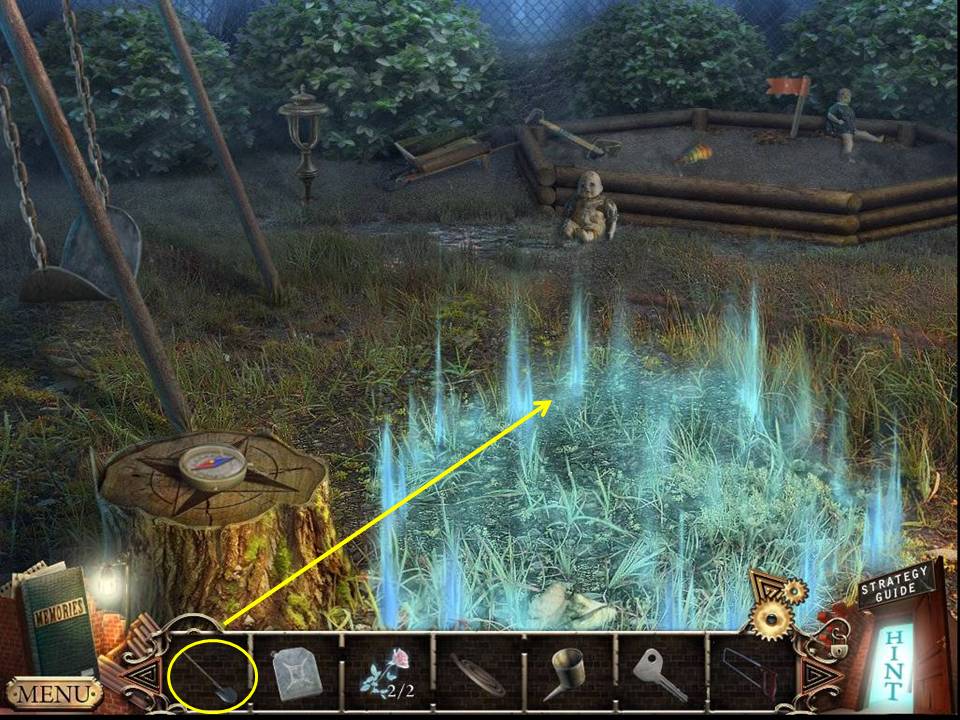
- SHOVEL the ground to reveal a jar.
- Open the jar.
- Take the CHILD'S DRAWING.
- Click down once.
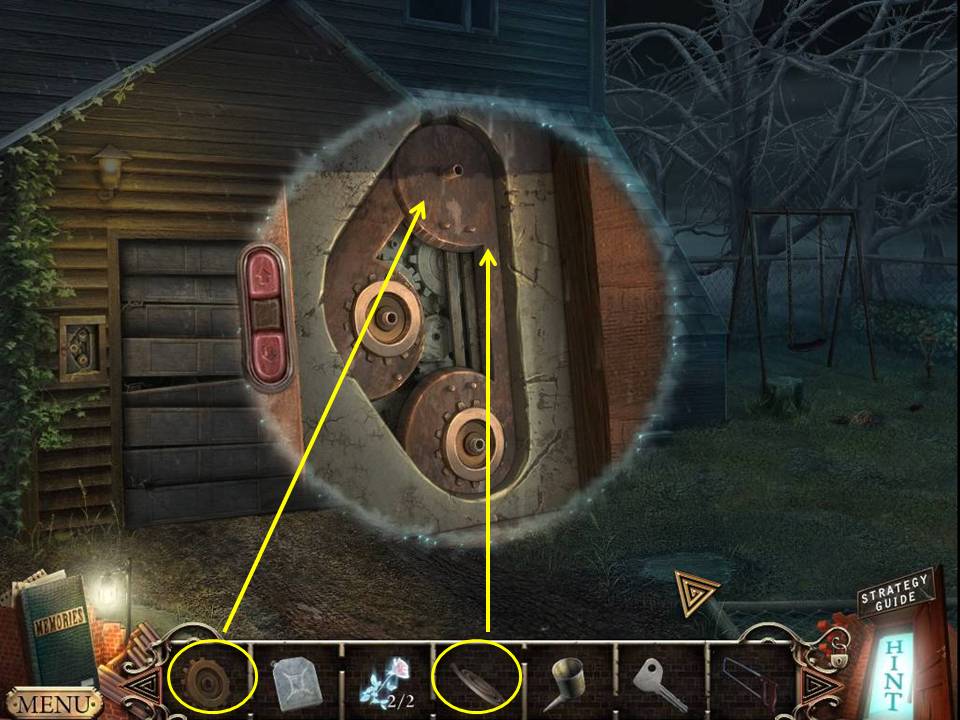
- Zoom into the panel.
- Insert the GEAR and BELT.
- Click the up button.
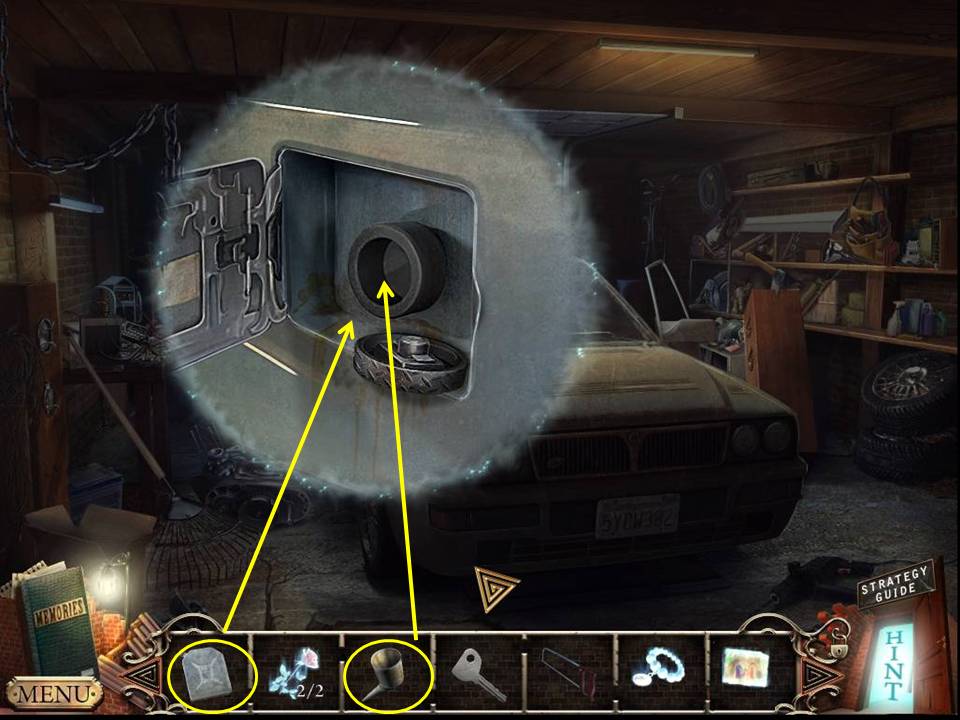
- Zoom into the gas tank.
- Insert the FUNNEL.
- Empty the FUEL CAN into the tank.
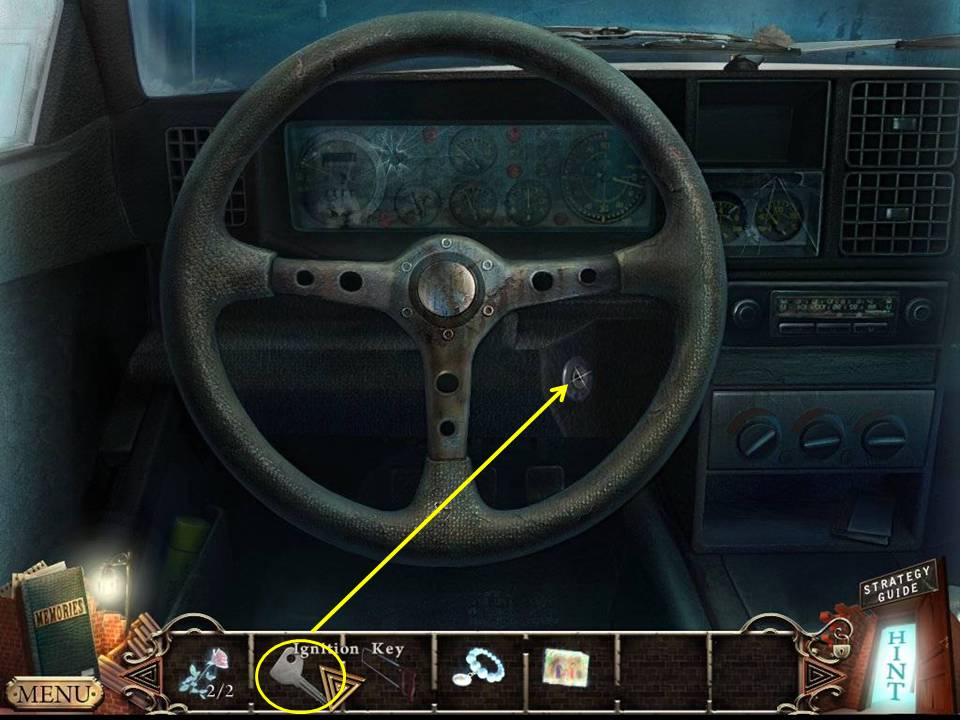
- Zoom into the car.
- Insert the IGNITION KEY.
- Start the car and proceed to the cemetery.
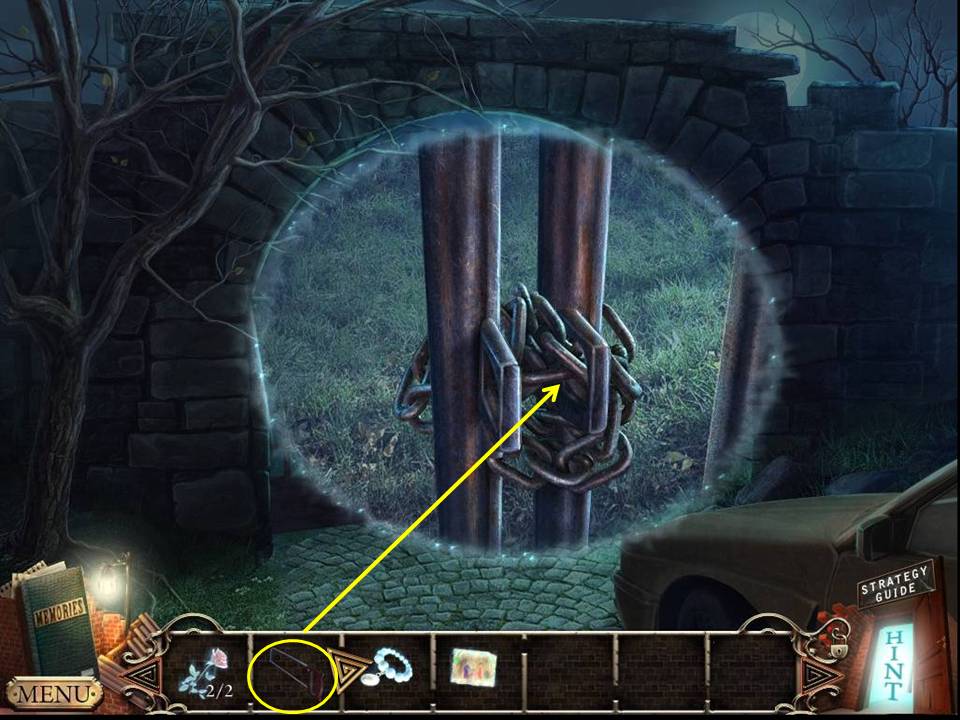
- Zoom into the gate.
- HACKSAW the chain.
- Go into the cemetery.
- Go to the barn and play the HOA.
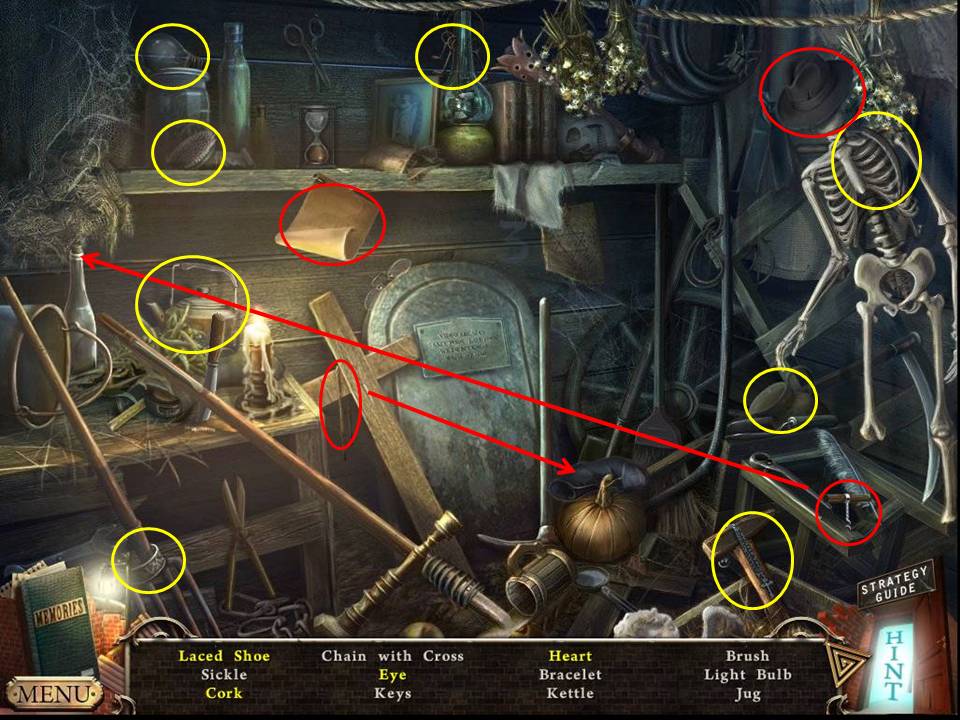
- Find the items listed.
- Lace the shoe to get the laced shoe.
- Move the hat to get the eye.
- Corkscrew the cork.
- Move the letter to get the heart.
- Receive the BRUSH.
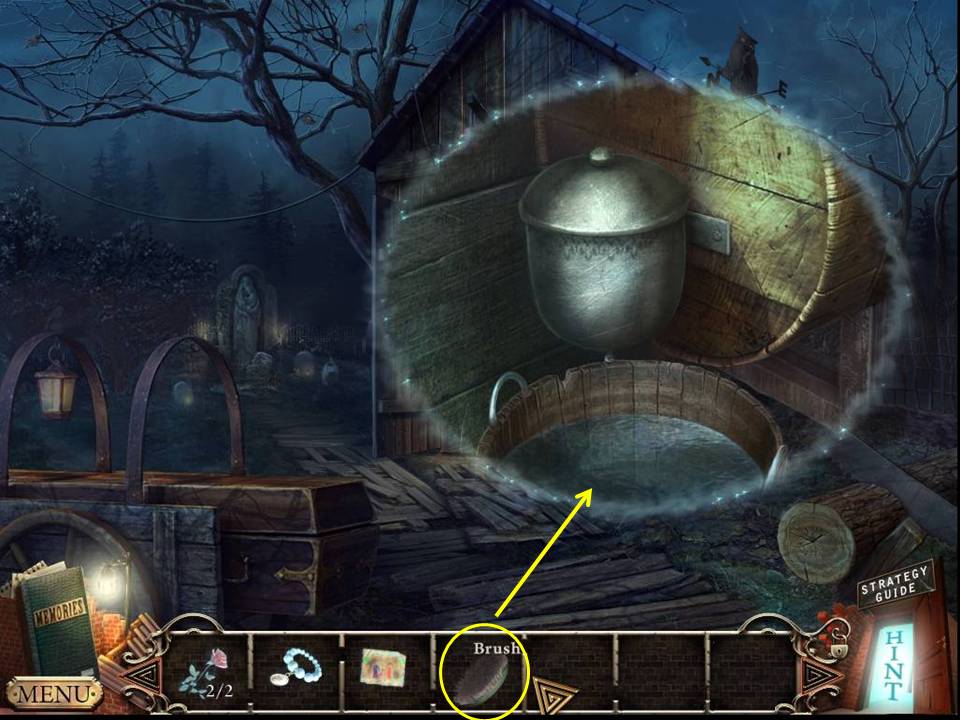
- Zoom into the barrel.
- Dip the BRUSH in the water to get the WET BRUSH.
- Move left to your mother's grave.
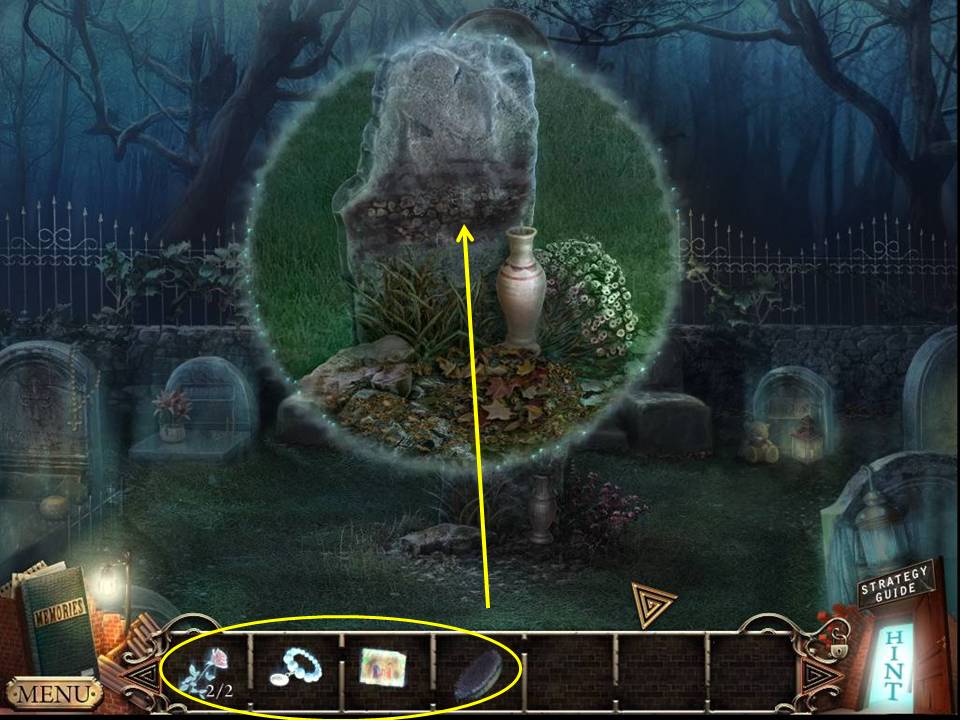
- Zoom into the headstone.
- Use the WET BRUSH to clean it.
-
Place the PEARL BRACELET, CHILD'S DRAWING and ROSES on the grave.
Comments will load when you reach this part of the walkthrough.