
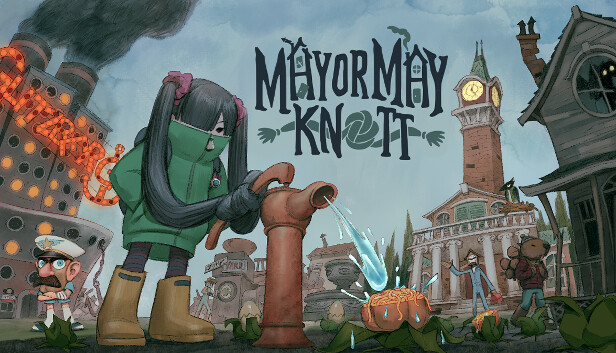
Essential Town Progression Route: First Night to Chance Mansion
Tested build: Windows version 1.1.8, starting from a fresh save before May steps off the train. This is a tested, low-backtracking order for Mayor May Knott, but it is not the only valid order. Later updates may move dialogue prompts or improve signposting.
You know the classic Mayor May Knott stall: May has three records, two broken machines, a pocket full of vegetables, and no clue which pun-powered civic emergency comes next. The cure is to follow dependencies, not task icons. Each major opening below lists the item, conversation, repair, resident, and follow-up action that moves the town forward.
This route contains progression spoilers through the opening of Chance Mansion. Optional errands and achievement work are marked so you can skip them without stalling the story.
North Side: First Night and the Hall of Records
Reach Town Hall and Claim the Town
Prerequisites: None. Time: First night. Required item: None. Destination: Town Hall, the large lit building beyond Glitzberg.
- Leave the train platform, descend the stairs, and speak to Dick Tater in the booth built into the marooned ship called Glitzberg.
- Walk toward town. After May bolts back from her first scare, speak to Dick again. His spotlight now points toward Town Hall.
- Follow the moving pool of light through the dark street and enter Town Hall.
- Take the Crank from the top of the filing cabinet beside the broken stairs.
- Interact with the front of that filing cabinet to sleep. May wakes at 3:00 p.m. with the town deed and the deeply questionable honor of being mayor.
Optional achievement detour: Glitzberg’s front door and the creature rising near the missing mailbox are two separate early scares. Let each one catch May if you are working on scare achievements; neither is required for progression.
Repair the Recycler and Town Hall Desk
Prerequisites: Town deed obtained. Required service: Grandfather Clock. Materials: Recycled scrap gathered from the glittering junk piles around North Side.
- From Town Hall, face the red Workshop. Lift its jammed door and meet Grandfather Clock.
- Inspect the broken recycler in the junkyard behind the Workshop. Return to Grandfather Clock, choose its repair topic, hand over the listed scrap, then meet him beside the machine.
- Feed loose junk into the recycler. The materials depend on what you recycle, so do not build the route around one exact haul.
- Inspect the broken desk inside Town Hall. Ask Grandfather Clock to repair it, then meet him at the desk. Name the town when prompted.
- Inspect the bell beside the Workshop, the covered bridge, and other broken machines while you are nearby. Inspecting them adds their repair topics to Grandfather Clock’s dialogue.
Open the Hall of Records
Prerequisites: About 20 displayed confidence, the repaired recycler, and access to Grandfather Clock. Required landmark: The ringing phone behind Town Hall. Required repair: The Edjukebox inside the Hall of Records.
Small hint
The phone stops being pure nightmare fuel once May has improved the town enough.
- Build confidence by cleaning junk, completing early repairs, and meeting approachable characters. Green sparkles mean May can safely start a conversation; a red aura means a requirement is still missing.
- Circle behind Town Hall and answer the ringing phone once May can handle it. Follow Gramma Phone into the Hall of Records.
- Inspect the broken Edjukebox. Ask Grandfather Clock to repair it, provide the materials shown in the repair panel, and meet him beside the machine.
- Play The Testament of Dr. Caboose. It teaches the Wires recipe and gives the password for the gate behind the Workshop.
- Trade one Metametal to Pail Rider at the covered lakeside nook for the Pasta Squash required by Wires. This trade is dependable and does not require a lucky junk drop.
- Use the record’s password at the fence behind the Workshop. Open the front shortcut and knock down the wooden ramp into the junkyard.
- Enter the caboose beyond the gate and take the broken device from the table at the far end.
- Show it to Grandfather Clock. Craft Wires, repair the device into the Ecto-Phone, and equip it. The Ecto-Phone lets May see and speak to ghosts after their homes meet the required cleanup and repair state.
If the Hall of Records event does not appear: Recheck prior conversations with Grandfather Clock and Gramma Phone; finish the recycler and desk repairs; inspect the phone again during the day; sleep once; check the Town Hall desk for mail even though none is required yet; raise confidence with nearby cleanup; and check Grandfather Clock’s house if he has already moved away from the Workshop.
North Side: Ghost Keys and the Covered Bridge
Complete the First Ghost Chain
Prerequisites: Working Ecto-Phone. Required state: Clean and repair each accessible part of a house before expecting its ghost interaction. Required rewards: Caboose, Walnut, and Oak house keys.
- Return to the caboose and speak to Dr. ChooChoo Caboose. Finishing his machine lets him move on and leaves the Caboose House Key.
- Clean the nearby Walnut House, Oak House, and Pastor House. Use the Ecto-Phone when each home’s available cleanup and repairs are finished.
- Identify the ghosts as Wally Walnut, Oak Idoki, and Pastor Prime. Tell Gramma Phone their names, then play their three records to learn Birdhouse, Mirror, and Quilt.
- After Durango moves into the caboose, Dan Shaw leaves his former tree trunk. Collect and recycle the logs inside the trunk for materials.
- Craft the Birdhouse and Mirror. Give the Birdhouse to Wally Walnut and the Mirror to Oak Idoki to receive the Walnut and Oak keys.
- The Quilt must wait until the mine chain unlocks Fabric. Leave Pastor Prime on the task list for now.
Repair the Covered Bridge
Prerequisites: Caboose House Key, 15 or more displayed confidence, Durango met at the station, and Grandfather Clock available. Required recipe: Bridgenator. How to unlock: Durango’s duplicate record after he moves into the caboose.
Small hint
The bridge recipe is packed inside a resident move-in event, not another repair inspection.
- Meet Durango Silverton while his train is parked at the station. Offer him the Caboose House Key.
- Wait until Durango enters the caboose. Follow him inside and speak to him again. He gives May a duplicate record found while unpacking.
- Play that record at the Edjukebox to learn the Bridgenator recipe.
- Craft the Bridgenator with the quantities shown on its recipe card. Its basic materials come from North Side junk and the recycler; no fishing reward is required.
- Speak to Grandfather Clock about the covered bridge, hand over the Bridgenator, and meet him at the bridge. Cross after the repair finishes.
If Durango’s record dialogue is missing: Confirm that you spoke to him at the parked train, handed him the Caboose key, and saw him move in. Check the caboose during his home hours, leave and re-enter if he has no new topic, sleep once, and raise confidence if his aura remains red. No mail is needed. If Grandfather Clock lives in Oak House, check both his house and the Workshop.
Optional achievement detour: Repairing the bridge awards Build Yourself a Bridge!. Early scare hunting and perfect house assignments can wait.
South Side: Open the Mines and Build May’s Repair Kit
Enter Venn Chance’s Mine
Prerequisites: Covered bridge repaired. Location: Cross the bridge, descend the stairs on the right, and look for the doorway marked Venn Chance’s Mine in the corner to the left. Required items: Glastic, then the Broken Flint Roller found inside.
- Meet Bea Miner outside the mine before trying to befriend her inside. If you want her scare, enter while the rhythmic mining sound is audible and collect the scare first.
- Speak to Bea inside. Give her the requested Glastic, obtained from recycled junk, to repair the passage light.
- Walk down the newly lit corridor and turn left at the bottom. Pick up the Broken Flint Roller.
- Speak to Bea again to learn mine bowling. The lane supplies later mining materials, but individual rewards may require repeat visits.
- Take the Broken Flint Roller to Grandfather Clock and repair it into the Fabricator.
- Exit the crafting screen after the Fabricator notification, reopen it, and craft Fabric. Use the Fabric to make two Quilts.
- Give one Quilt to Pastor Prime for the Pastor House Key. Place the other on Town Hall’s filing cabinet to improve May’s wake time from 3:00 p.m. to noon.
Move the Fountain Car and Reach the Crate Deflator
Prerequisites: Three clean residents willing to help May, Wires, and Grandfather Clock. Location: The fountain car is outside Town Hall; the second wreck sits by the lake and warehouse beyond the South Side garden.
- Inspect the car in the Town Hall fountain. Recruit three clean residents besides May and ask each one to help move something. Grandfather Clock is still dirty at this stage and does not count.
- Return to the fountain and move the car. Take the battery revealed beneath the wreck.
- Craft Wires, inspect the car by the lake, and speak to Grandfather Clock. Meet him beside that car with the battery and Wires.
- Enter the opened warehouse. Climb the usable staircase, look back toward the lake, and drop onto the ledge with the sparkle and ladder.
- Pick up the Crate Deflator. Deflate several crates before leaving.
- Talk to Grandfather Clock with the tool and deflated crates available. Make the requested Crate Shelf, then speak to him inside his house to receive the record that teaches Stairs.
Make the Hammer Cam and Fully Open the Mine
Prerequisites: Broken Camera from the glass factory, mine bowling unlocked, and Grandfather Clock. Required mineral: Outacite. Later power requirement: One Big Bug Battery.
- Enter the glass factory from its lakeside entrance when May has enough confidence to reach the upper floor. Unlock the shortcut toward Town Hall and take the Broken Camera.
- Show the camera to Grandfather Clock. He identifies the missing mineral as Outacite.
- Return to the mine and play mine bowling. Clear the lane, then try again after another train visit if Outacite is absent. Do not treat it as a guaranteed reward from one throw.
- Bring Outacite back and repair the camera into the Hammer Cam, May’s main building-repair tool.
- Later, after learning Big Bug Battery, climb the stairs toward the oil houses and look right for the mine’s exterior battery socket. Install one battery to power the full mine.
If Bea or a mine interaction is missing: Check whether you first spoke to Bea outside, repaired her passage light, exited and re-entered the mine, and exhausted her dialogue. Visit at another time, sleep once, and confirm May has enough confidence to stay inside. Mail is only relevant once you reach the later battery chain. Resident placement does not block Bea’s mine work, though moving her into town can change where she stands between shifts.
South Side: Oil, Time, Food, and House Keys
Reach the Oil Tank and Repair the Town Clock
Prerequisites: Stairs recipe, at least four crafted Stairs for this route, Hammer Cam, Fabric, and the Broken Clock from Jack Daw. Landmarks: The wood pile beyond the bridge, the red tank above it, Town Hall’s balcony, and the ladder on the left side of the covered bridge.
- Repair the stairs inside Town Hall. After dark, meet Jack Daw on the upper balcony and give him one soft or shiny item, such as Fabric, Floof, Glastic, Metametal, a Mirror, or a Quilt.
- Sleep and collect Jack’s gift from his nest the next morning. Take the Broken Clock.
- From the covered bridge, continue toward the wood pile. Repair the broken staircase just to its right with two Stairs.
- Climb up, follow the path left between the houses, and inspect the large red oil tank.
- Speak to Madame Pastrami during the day. Repeat the fortune about the sandwich and blocked light, then give her Fabric so she can remain at the window on sunny days.
- Ask for another fortune until she mentions a bottle. Pop Bottle interrupts from the neighboring window. Speak to him and request an Empty Bottle.
- Fill the bottle at the red tank to make an Oil Bottle.
- At the covered bridge, climb the ladder on its left side and place a crafted Bridgenator across the roof gap. Continue onto Town Hall’s roof.
- Use the Oil Bottle on the weather vane. With both the Quilt and weather-vane upgrades, May wakes at 9:00 a.m..
- Aim the Hammer Cam at the bell tower to inspect its repair state.
- Speak to Grandfather Clock twice, leaving and reopening his dialogue between new topics if needed. With the Broken Clock available, he teaches the Watch repair and supplies the gears for the town clock.
- Repair the Watch, then repair the clock tower. The Watch shows the day and time; sitting on a bench now lets May advance time one hour at a time.
- Go upstairs in Town Hall, set the bell for midnight, and meet Wilbur O. Burroughs when he emerges beneath the train station.
If Jack or the clock dialogue does not appear: Confirm Town Hall’s stairs are repaired, visit the balcony after dark, give Jack an accepted soft or shiny item, and sleep into the next morning before checking his nest. Inspect the oil tank, weather vane, and bell tower; reopen Grandfather Clock’s dialogue after each new topic; and check his current home. Mail is not required for the Watch, but confidence must be high enough for May to finish the roof interactions.
Unlock Cooking and Prepare the Required Key Route
Prerequisites: Hammer Cam and access to South Side. Food station: Taco Cat Food Truck. Reliable produce: Pail Rider trades vegetables for Metametal; later garden and Pantree deliveries renew supplies.
- Cross the bridge, descend the right stairs, and repair the front door of the first pink house on the right. Enter, turn around, and take the Cat Key hanging beside the door.
- Use the Cat Key on the Taco Cat Food Truck and clean every garbage bag. One bag contains the fixed Petrified Donut used to craft the Maple Glazer.
- Repair the Maple House beside the glass factory enough to read its note. After dark, find Mable Maple in the graveyard beside Pastor House.
- Lead Mable home slowly. If May gets too far ahead, Mable returns to the graveyard. Reaching the house completes her request and awards the Maple House Key.
- Give Mable’s name to Gramma Phone and play her record to learn Maple Glazer. Craft it with the Petrified Donut and the other ingredients on its recipe card. The Maple Glazer repairs windows.
- Fully repair the glass factory’s walls and windows. Speak to Pop Bottle, approve his bottle-growing plan, meet him inside the factory, and load glass into the upstairs growing area. Once production starts, the factory grows one bottle per in-game hour.
- Repair the large house on the left after crossing the bridge toward the garden. Inspect its stove for the Rusty Wrench. Grandfather Clock repairs it into the Stovepipe Wrench, completing the main house-repair toolkit.
- Repair the four colored houses at the foot of the mine stairs. Speak to Bobson Dugnutt in the blue house first. His record contains the clue for the other three identities.
- For the green house, answer 1904, Lumberjack, Popcorn. For the pink house, answer 1901, Cook, Salad. For the yellow house, answer 1903, Carpenter, Spaghetti.
- Play all four records and cook the requested meals. Buy missing Egg Plant, UniCorn, Pasta Squash, or salad produce from Pail Rider instead of waiting for a random pickup.
- Recruit Wilbur with an accepted spare key. When he studies the dry fountain outside Town Hall, speak to him and take the key he gives May to the room beneath the train station.
- Enter that room, collect the record, and play it to learn Pipes. Craft the Pipes. Keep giving Jack Daw nightly soft or shiny gifts until he leaves the Statue Piece, then ask Wilbur to repair the fountain.
- Inspect the broken hydrant to the left of the wood pile and speak to Wilbur again. Finish his repair so the blockage shoots out and knocks the ladder into reach beside the swamp duplex.
- Repair the duplex. The left ghost teaches Washer; make two. Use one to help the right ghost identify himself, play his record to learn Dryer, and make two. Completing both requests awards the Mentz and King keys.
- Repair the stairs on the warehouse roof and collect the record there. It teaches Craftwurst. Cook it to complete Foreman 4000 in the large Foreman House and take its key.
- Complete Elmer Elm with the Fried Chicken recipe learned from his record. Get the produce from Pail Rider or the garden, and fill an Empty Bottle at the oil tank when the recipe needs cooking oil.
If Mable or Wilbur’s service chain stalls: Reread the Maple House note, visit the graveyard after dark, and walk close enough for Mable to follow. For Wilbur, confirm he was met at midnight, given a house, and allowed to finish moving in. Recheck the fountain and hydrant inspections, play the Pipes record, collect Jack’s Statue Piece, reopen Wilbur’s dialogue, sleep once, and check his house. Mail is not required for this chain, but confidence and repair state can block May from finishing work in dark areas.
Recommended resident roster for the underpass: Durango in Caboose; Grandfather Clock in Oak; Dan Shaw in the powered Walnut House; High Plains Toaster in Pastor after giving him oil; Bea in Dustice; Timberly in Mentz; Scout in King; Wilbur in Elm; Pop Bottle’s family in Foreman; Donna in McDichael; and Reel McKoi in Maple or another house he accepts. Favorite-house placement is optional, but each resident’s acceptance conditions still apply.
Meet Reel McKoi at the fishing area with about 15 confidence while he is sitting still, then offer him an accepted key later. Give High Plains Toaster an Oil Bottle in the junkyard before offering him Pastor House. Meet Timberly in the morning before she enters the forest. Place five different cooked meals on the food-truck counter to make Scout friendly, then speak to him outside. Meet Donna only after lighting the mailbox area at midnight. Dan requires a House Battery in the Walnut House stove before he will accept it.
South Side: Generator Tower, Mail, and the Church Route
Build Ward and Cliff’s Generator Tower
Prerequisites: Ward Hogg and Cliff Fraug befriended and housed, their swamp requests completed, Washer and Dryer learned, three clean helpers, and one full in-game day after their home requests.
- Meet Ward and Cliff in the swamp and offer each one an accepted spare house key. Their home requests cannot begin until they live in town.
- Make two of each device they request in the swamp. After each has tried his own invention, give him a copy of the other resident’s device.
- Visit Ward and Cliff at home. Give the requested Washer to one and Dryer to the other.
- Wait or sleep through one full day, then visit Cliff’s house. They begin the generator project.
- Follow them to the swamp and inspect the parts on the ground. Ask three clean residents to help move the first assembly.
- Complete the second material request, recruit the helpers again, and finish the tower. This unlocks the Street Light Kit recipe.
- Craft several Street Light Kits. Install one in the gray socket beside the missing mailbox, one beneath the covered bridge, and one near the food truck before spending extras elsewhere.
If the generator project does not start: Recheck both swamp request chains, confirm Ward and Cliff have houses and finished their move-ins, deliver the Washer and Dryer at their homes, exhaust their dialogue in the swamp, and let a full day pass. Sleep once, check the current time, reopen both conversations, and make sure the three helpers are clean. Mail is not required, but resident placement is required for the home scenes.
Restore the Mailbox and Unlock House Batteries
Prerequisites: Powered streetlight beside the mailbox, repaired Watch, and a spare house key. Time: Midnight. Required resident: Donna the Dead.
- Set the Town Hall bell to wake May at midnight.
- Stand by the lit mailbox socket and wait for Donna to rise. Her aura turns green while she remains inside the electric light.
- Speak to Donna and offer her an accepted house key. Let her finish moving in.
- Sleep into the next day, then ask Grandfather Clock to make the mailbox repair permanent.
- Sleep into another morning. Read the package and letters at the Town Hall desk. The package contains the basement key.
- Enter the basement and follow the left wall to the Frankin’ Stamp. Return to the desk, write to May’s sister, stamp the letter, and place it in the outdoor mailbox.
- Deliver the incoming letter addressed to Cliff. He gives May the House Battery recipe. Install House Batteries in house stoves to power their lights; one is required for Dan Shaw’s home and another must be carried to Chance Mansion.
- Sleep again and read May’s sister’s reply to receive a Jugga seed. Give it to Pop Bottle at the glass factory.
- Each Juggard uses three bottles and takes three in-game hours to grow. Bottle production also takes time, so keep the repaired glass factory loaded with glass.
If mail does not arrive: Confirm Donna has moved in, the mailbox received its permanent repair on the following day, the letter was stamped and physically placed in the outdoor mailbox, and May slept into a new day. Recheck Town Hall desk dialogue, repair state, current time, confidence, and Donna’s resident placement. A letter left in the desk interface has not been sent.
Open and Power the Church
Prerequisites: A grown Juggard, Ward’s battery dialogue, two Big Bug Batteries, Hammer Cam, Wilbur recruited, and one Bathtub, Washer, and Dryer for the first bath stall.
- Show a grown Juggard to Ward. He teaches the Big Bug Battery recipe.
- Craft one Big Bug Battery and return it to Ward. He hands it back after the quest. Take it to Grandfather Clock.
- Grandfather Clock installs the battery on the Workshop, opening the passage from the train platform toward the church roof.
- Craft a second Big Bug Battery. Take the new route above the Workshop, install it in the church bell-tower socket, and unlock the church from inside.
- Repair the remaining church windows and fixtures. Inspect the dry basin inside, then ask Wilbur to repair it.
- When Wilbur finishes, Dick Tater enters. Bring him one Bathtub, one Washer, and one Dryer. He creates the first bath stall.
- Wait for dirty residents to use the stall. A resident must be clean before joining the underpass crew.
If Dick Tater does not enter the church: Recheck that the Workshop and church both have Big Bug Batteries, the church is fully repaired, its front door is unlocked, the basin was inspected, Wilbur was asked to fix it, and his work finished. Exhaust prior conversations, leave and re-enter, check the time, sleep once, read pending mail, and confirm Wilbur still has a town residence. Low confidence can interrupt repairs, but it does not replace any dependency.
Optional achievement detour: Build the other three bath stalls for Now You’re Just Stalling. Extra streetlights, favorite-house swaps, Jack Daw’s later gifts, and powering every house can wait.
South to West: Clear the Underpass
Move the Junked Train
Prerequisites: The overturned train inspected, 11 recruited and clean residents, the bath stall operating, and each helper asked to move something. Location: The underpass beyond South Side.
- Walk to the overturned train and inspect it. This records the eleven-person requirement.
- Open the resident list and check for dirty residents. Send anyone grimy through the church bath stall and wait for the clean state.
- Speak to eleven clean residents and ask each to help move something. Use the helper icon beside each portrait to track who has agreed.
- Return to the train and interact with it. The crew clears the underpass and opens West Side.
- Take the Big Broken Engine left by the train. Grandfather Clock can repair it into a Big Motor for the factory crane, but that factory branch is not required merely to reach Chance Mansion.
If the train will not move: Inspect it again; check every helper for the agreed-to-help icon; replace anyone who became dirty; finish pending resident conversations; confirm all eleven accepted houses and completed their move-ins; wait for residents who are asleep or working; sleep to reset schedules; read pending mail; and verify that confidence is not blocking a needed recruitment. Dan needs an electric stove, and some monsters reject unsuitable houses. Treat this as a dependency problem until every check passes, not proof of a softlock.
Story achievement: Clearing the train awards Underpassed. Repairing the Big Motor, powering the sausage and glass factories, and collecting West Side scares are separate errands.
West Side: Reach and Open Chance Mansion
Power the Mansion Entrance
Prerequisites: Underpass cleared, one crafted House Battery, and enough confidence to remain inside. Landmark: The huge mansion on the West Side hill. Follow-up action: Install the battery, then use the wall switch.
Small hint
The first mansion door is not a code puzzle. Treat the building like an unpowered house.
- Pass through the cleared underpass into West Side and follow the main road uphill toward the largest building.
- Enter Chance Mansion and inspect the locked interior door.
- Find the furnace near the entrance and install a House Battery. A Big Bug Battery is the wrong part; those power larger buildings through exterior sockets.
- Use the wall switch. The powered door opens into the Parlor, beginning Venn Chance’s mansion puzzle chain.
If the mansion switch remains dead: Confirm the furnace contains a House Battery learned from Cliff’s letter, not a Big Bug Battery. Check that the battery was installed rather than merely carried, inspect the door and switch again, finish any entrance dialogue, leave and re-enter, and sleep once if the room state does not refresh. Mail is required indirectly because it unlocks the House Battery recipe. Resident placement does not open this door, though low confidence can chase May out before the interaction finishes.
Route endpoint: This section stops when the Parlor opens. Chance Mansion’s projector, kitchen, dining room, clock, mirror, nursery, bathroom, and shell-game solutions belong to the mansion puzzle section. The mansion’s room route is fixed, but some puzzle contents—most notably the kitchen’s starting food arrangement—vary between saves.
At this point May has gone from sleeping on municipal office furniture to leading a clean eleven-creature railway crew into a haunted millionaire’s puzzle mansion. That is civic progress, even if the zoning paperwork is probably screaming.
Comments will load when you reach this part of the walkthrough.