

Chapter Three: The Tunnels
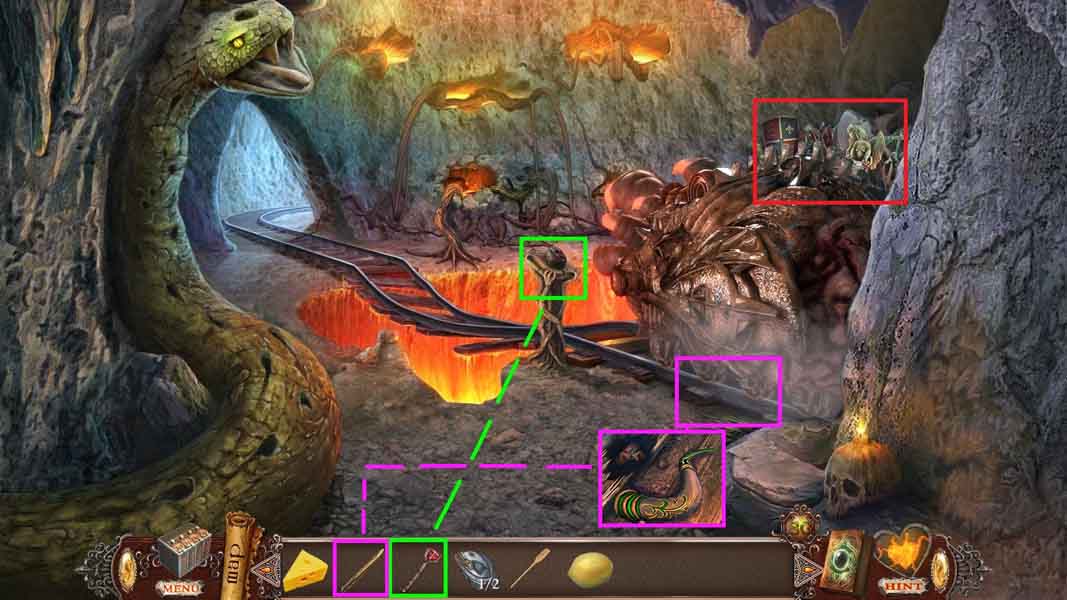
- Click the panel and insert the lever.
- Click the lever.
- Examine the tracks and collect the horn 1 /3.
- Select the tongs to collect the ring.
- Click the hidden objects area.
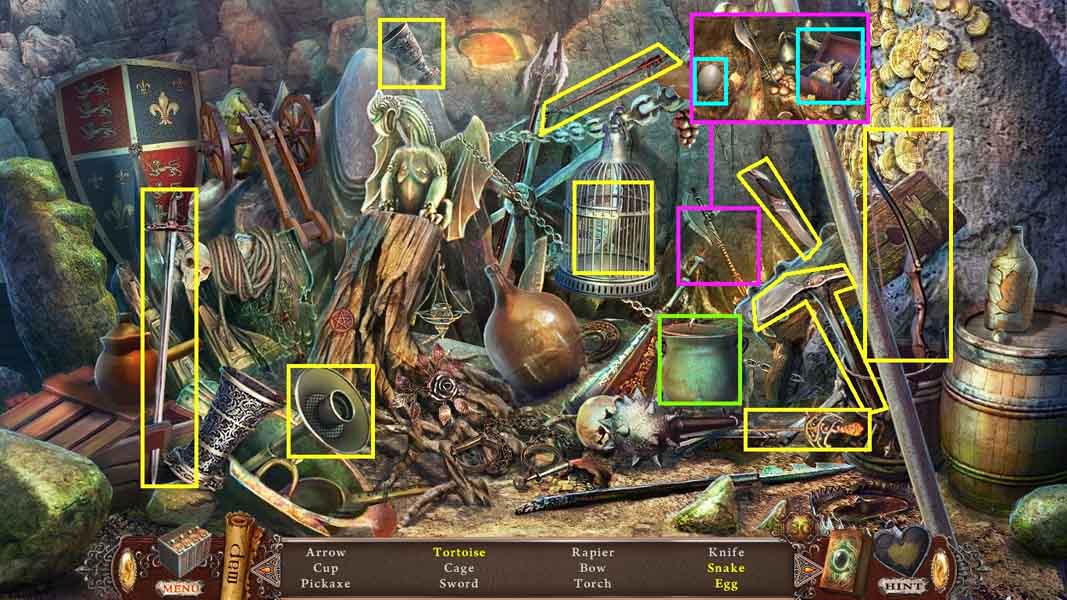
- Find the listed items.
- Click the pot cover to collect the snake.
- Zoom into the highlighted area and click the box to collect the tortoise and the egg.
- Collect the cage with trapdoor.
- Move to the Snakes.
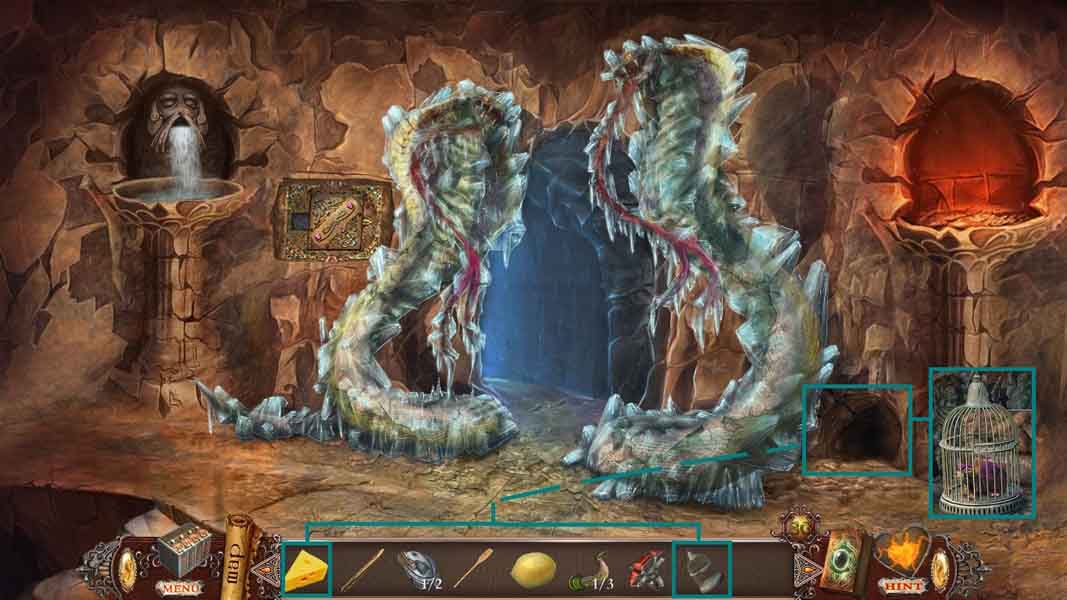
- Click the mouse hole and place down the cage with trapdoor and insert the cheese.
- Collect the mouse in cage.
- Move to the Tunnel Landslide.
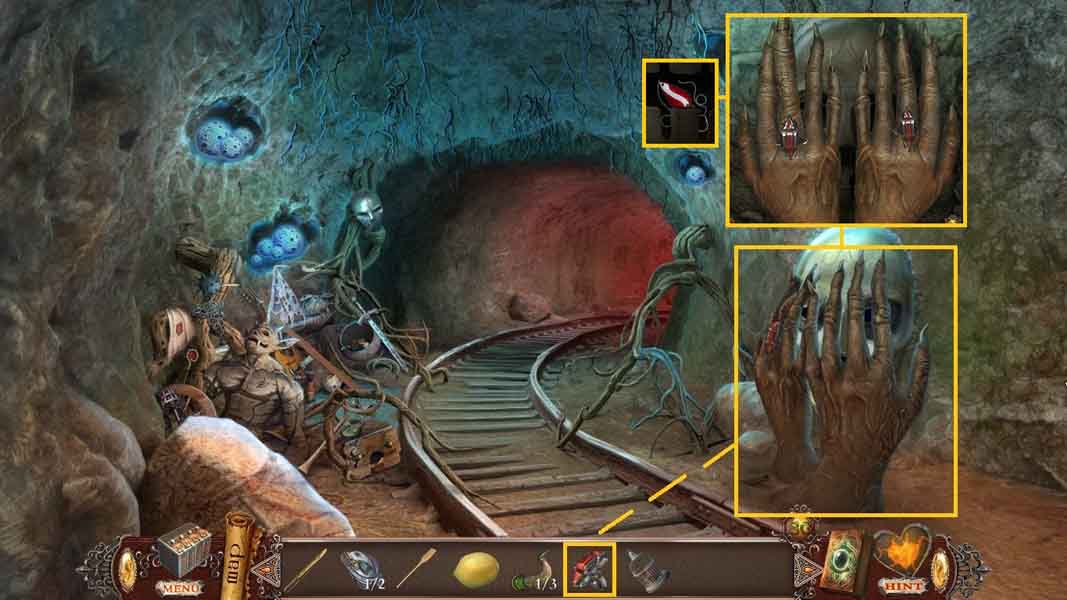
- Click the hands and place the ring onto it to trigger a puzzle.
- Solve the puzzle by repeating the pattern of the finger movement.
- Collect the hook.
- Move ahead to the Tunnel near Aquarium and move ahead again to get to the Mirror of Desires.
- Move to Alura’s cage and into the lower left cave to move into the Chasm.
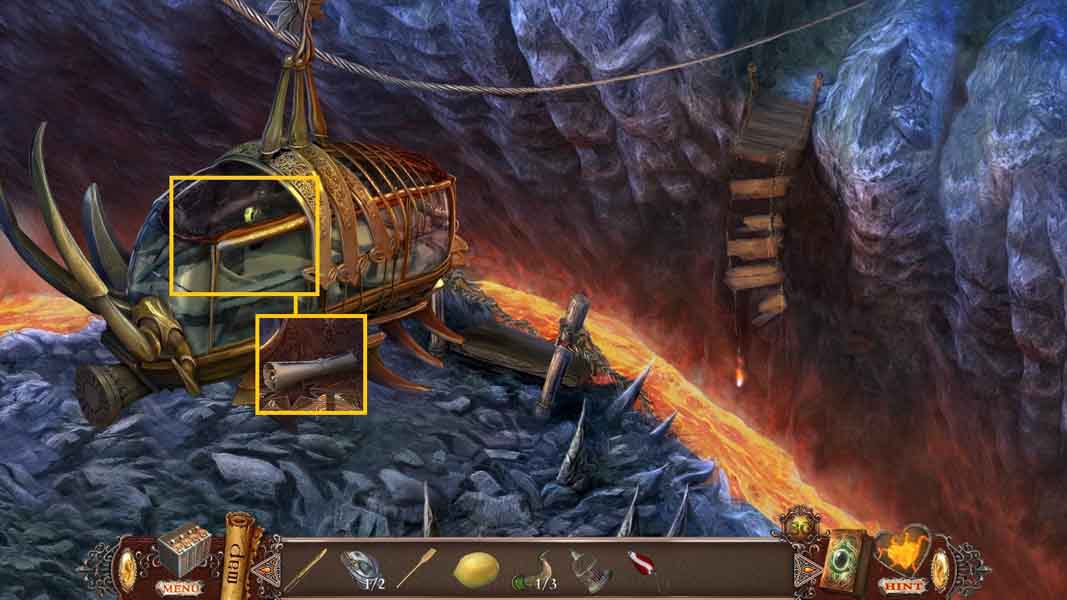
- Zoom into the tram; collect the scroll.
- Move to the Mirror of Desires.
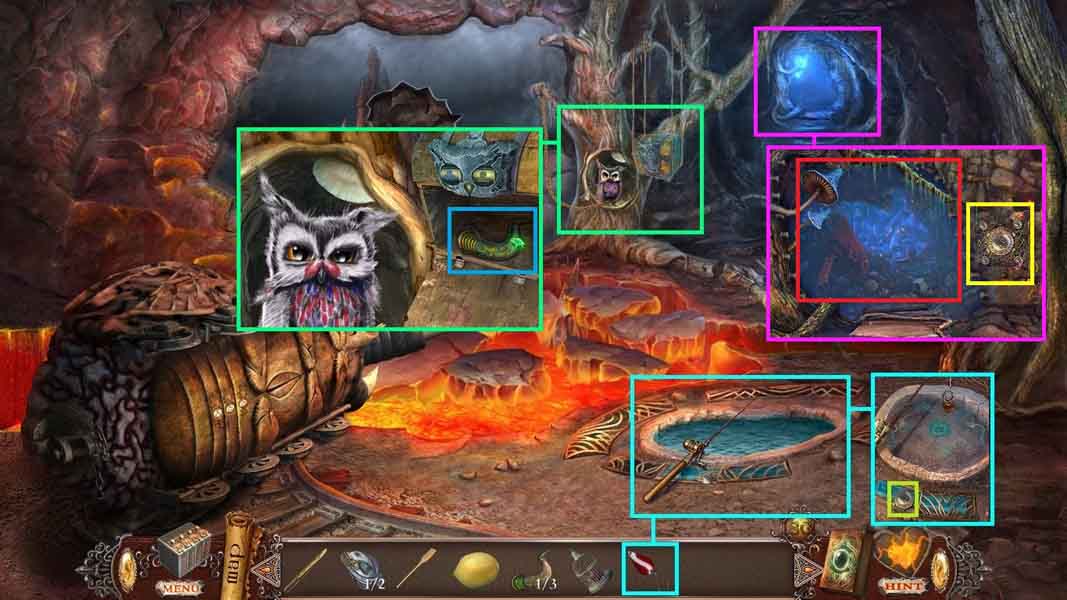
- Click the pool of water and connect the hook onto the fishing rod.
- Collect the mushroom cave key.
- Click the owl and give it the mouse in a cage.
- Click the mechanical owl’s eyes as follows:
- Click the left eye 3 times and the right eye once.
- Click the beak; collect the gem and the horn 2/3.
- Click the top of the steps.
- Zoom into the niche and insert the mushroom cave key.
- Click the hidden objects area.
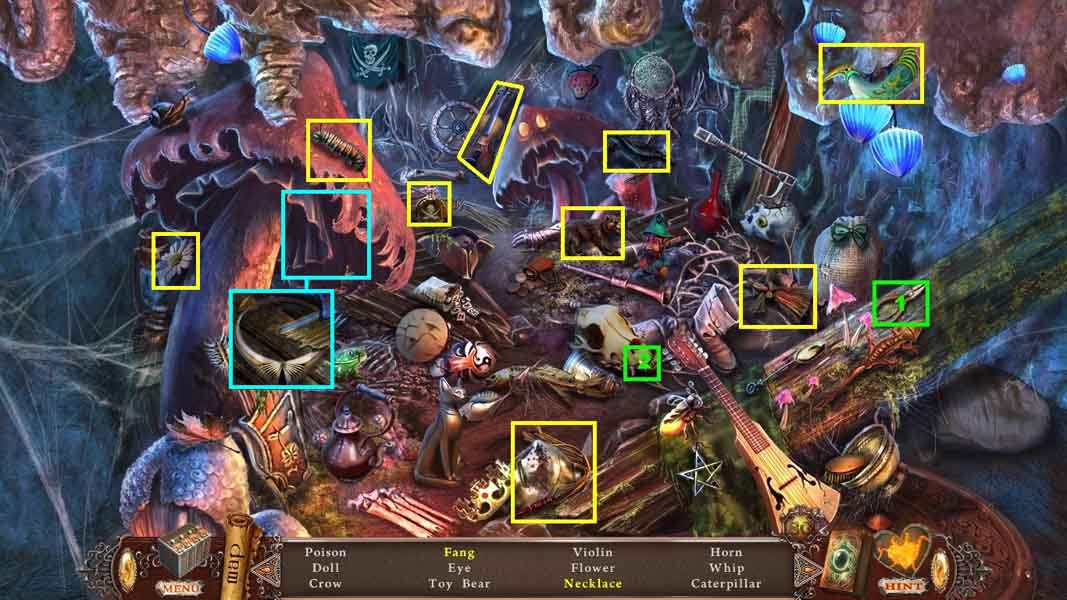
- Find the listed items.
- Select the pliers and use them to remove and collect the fang.
- Zoom under the mushroom cap; collect the necklace.
- Collect the horn 3 /3.
- Move to the Tunnel near Aquarium.
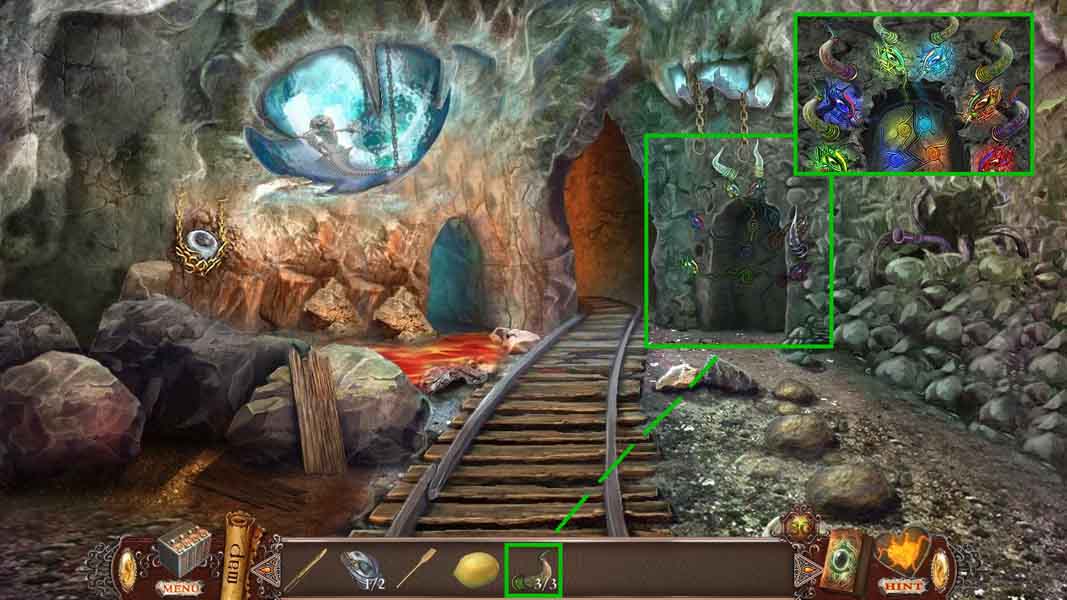
- Click the doorway and insert the 3 horns.
- Enter the doorway.
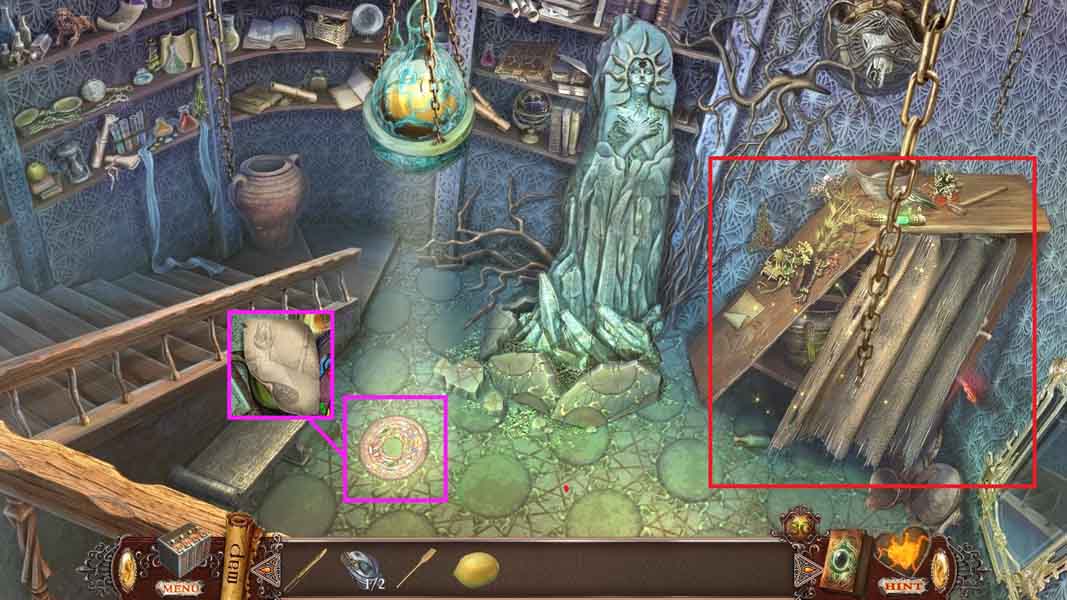
- Click the mosaic and collect the note.
- Click the hidden objects area.
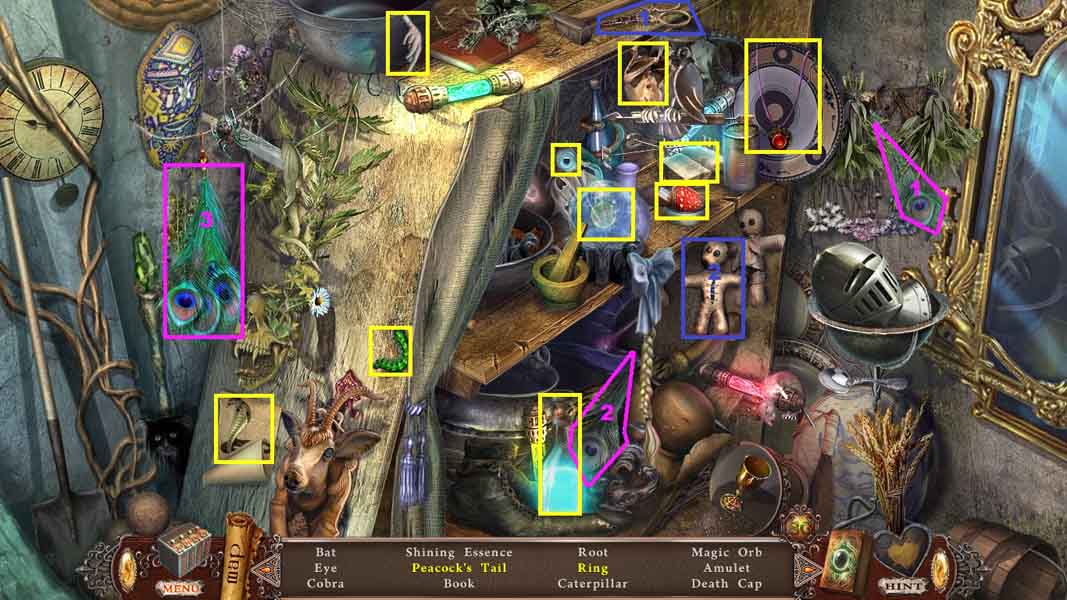
- Click the curtain.
- Find the listed items.
- Select the peacock feathers and place them with the others; collect the peacock’s tail.
- Select the scissors and use them to cut the doll; collect the ring.
- Collect the shining essence.
- Move to the Tunnel near Aquarium.
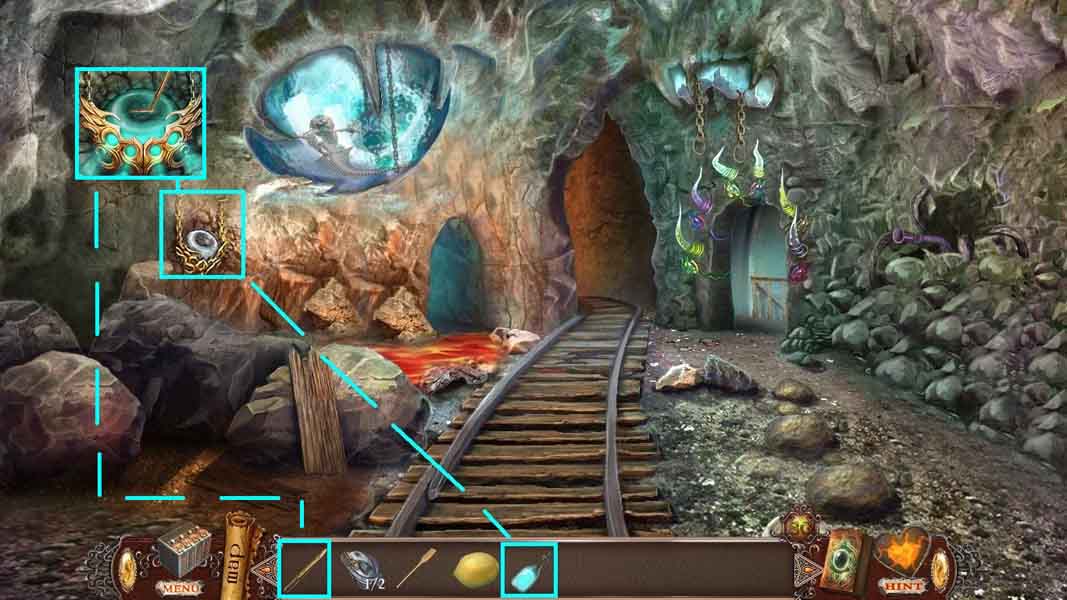
- Click the lantern and pour in the shining essence.
- Select the tongs to collect the bullet.
- Move to the rock eating machine.
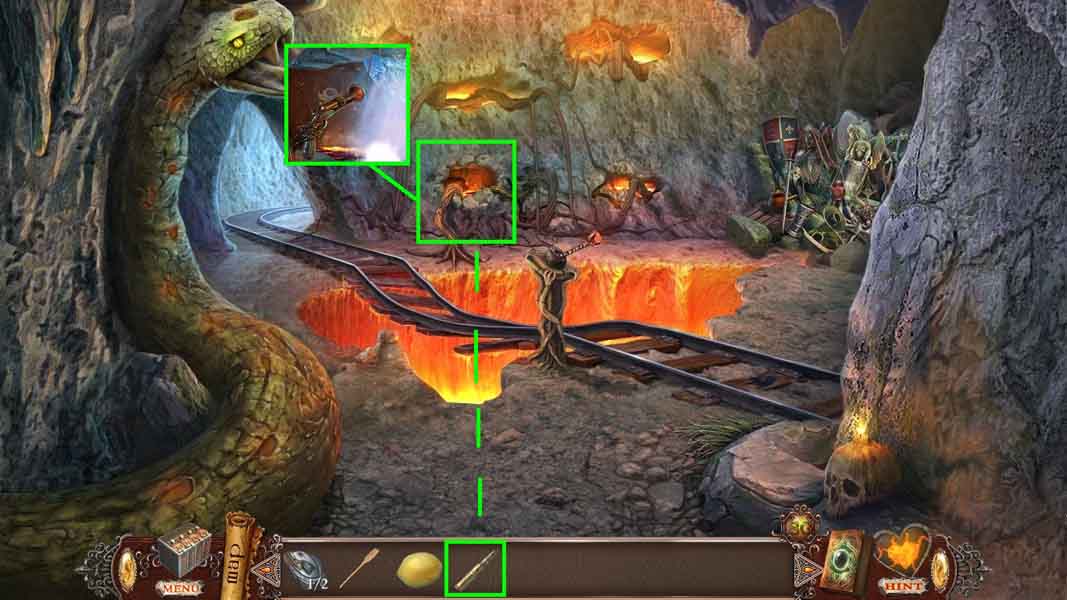
- Click the gun and insert the bullet.
- Move to the Tunnel near Aquarium.
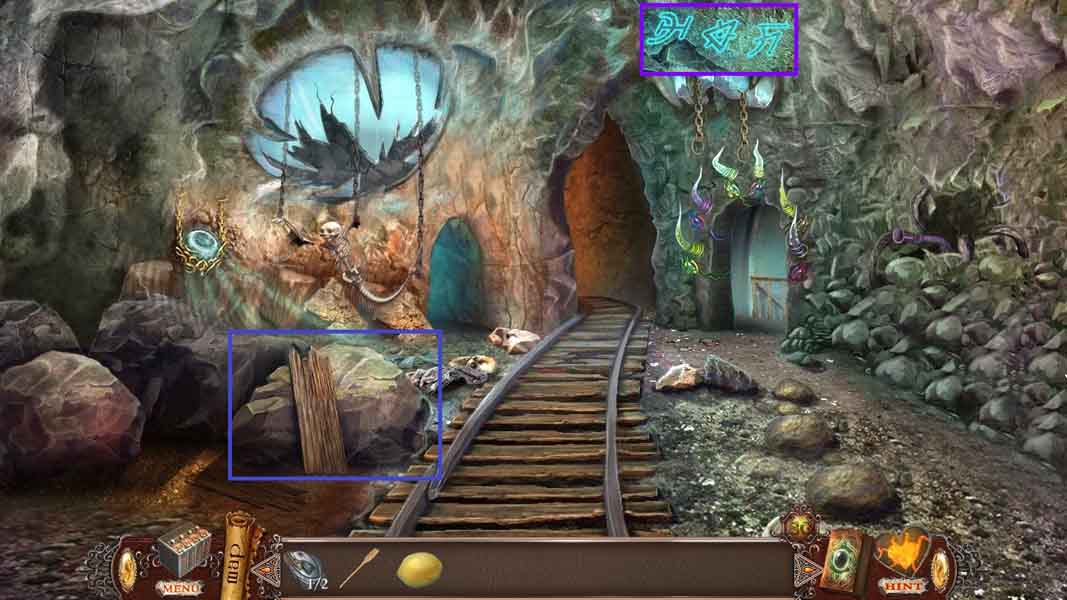
- Click the stone and notice the code.
- Move to the Mirror of Desires.
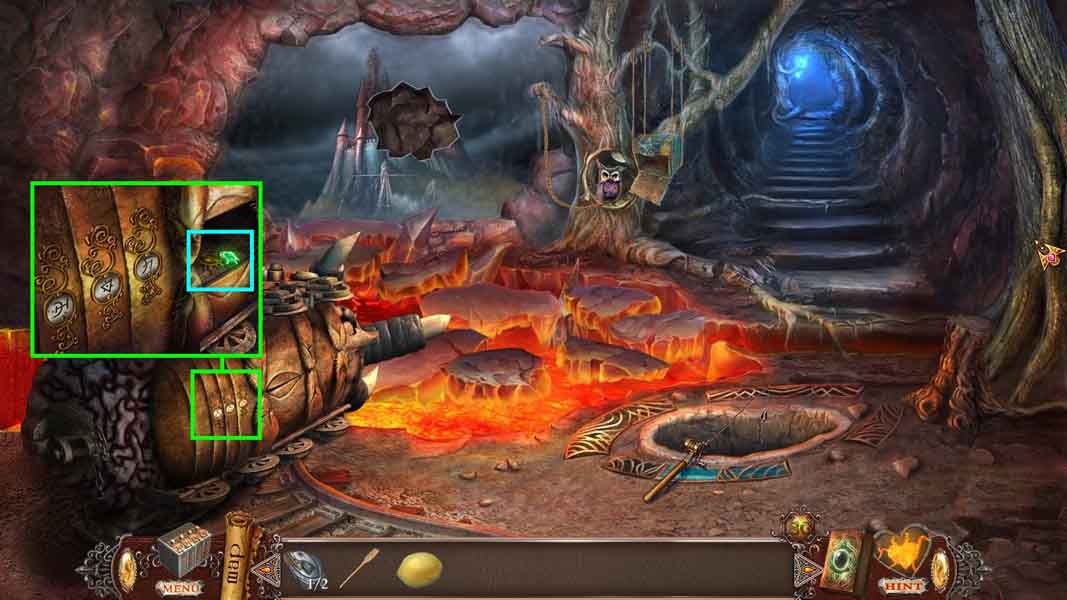
- Click the machine and adjust the symbols to match the code.
- Collect the gem and the sun.
- Move to the Wizard’s Workshop.
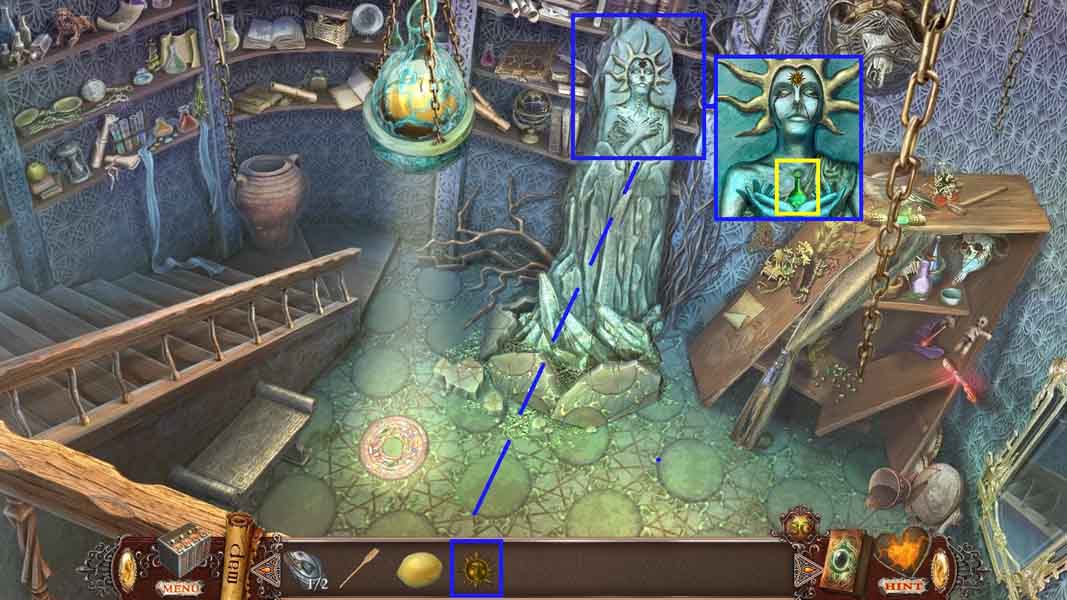
- Click the statue and insert the sun.
- Collect the gem and the acid.
- Move to the Mirror of Desires.
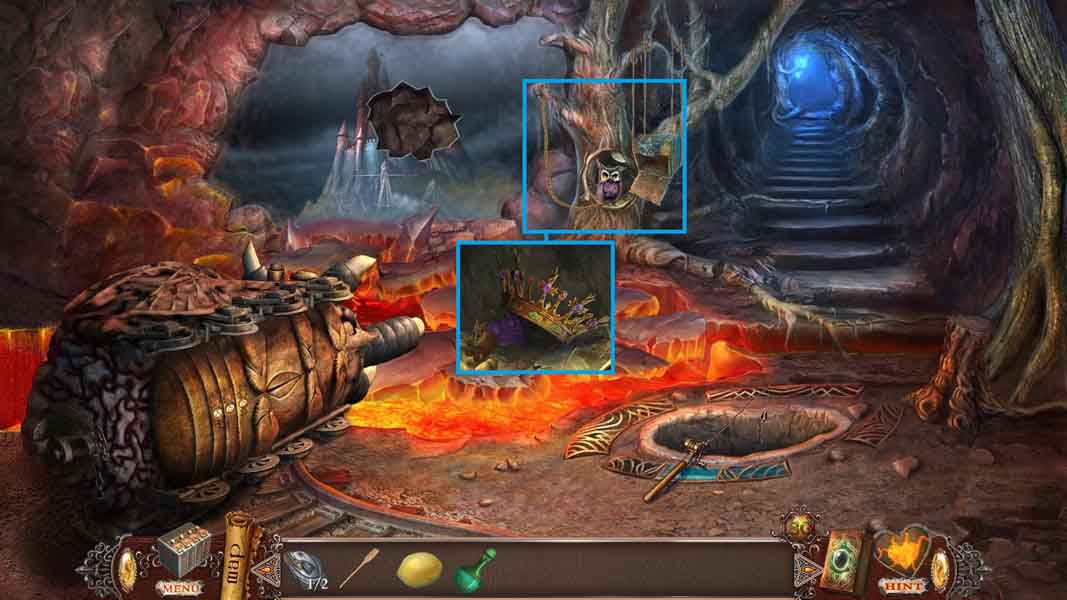
- Click the owl and pour the acid onto the chain.
- Collect the diadem and the toy bear.
- Move to the Tunnel near Aquarium.
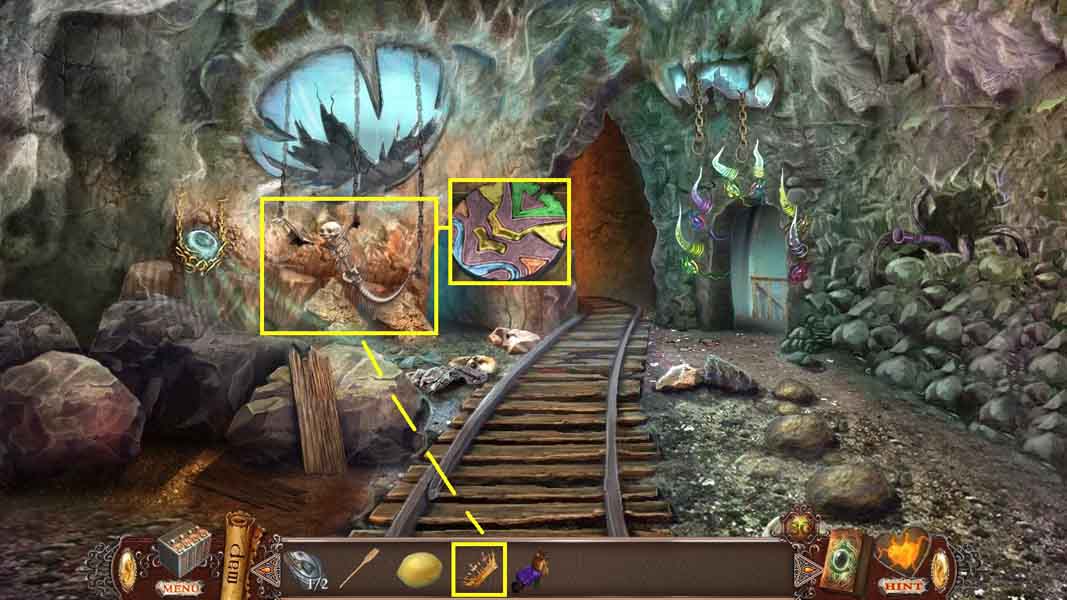
- Click the skeleton and place the diadem onto the skull; collect the disc.
- Move into the left tunnel to access the Cave with Chest.
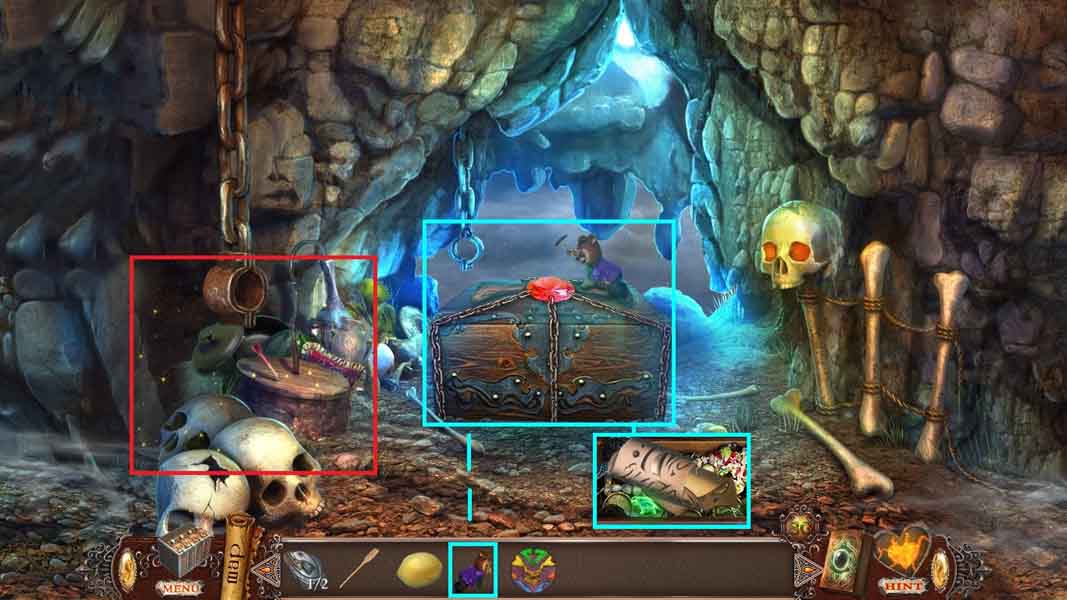
- Click the chest and place the toy bear onto it.
- Collect the gem and the stencil.
- Click the hidden objects area.
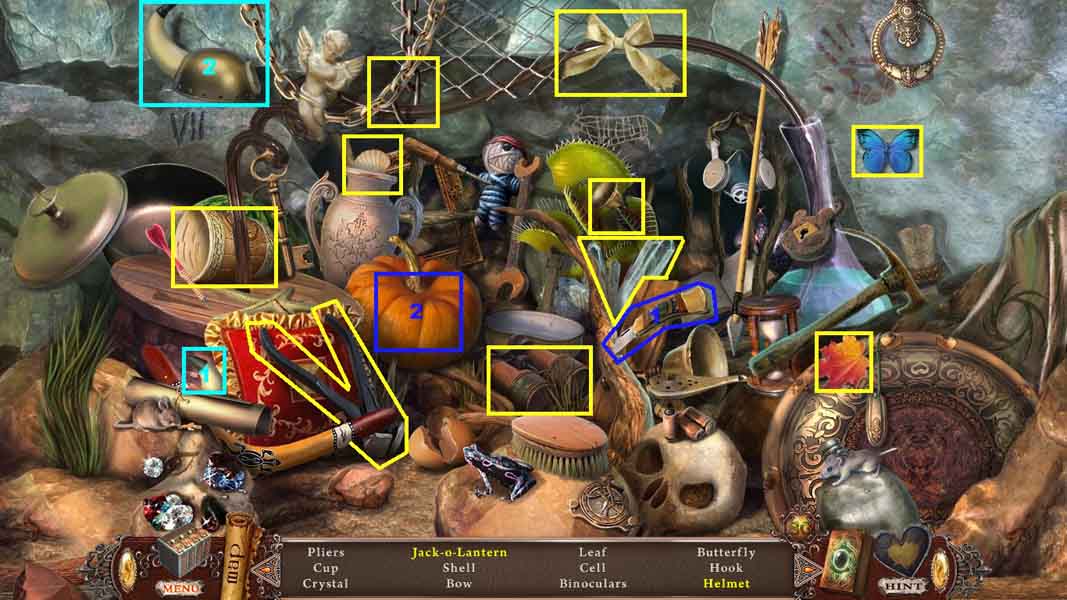
- Find the listed items.
- Select the horn and attach it to the helmet; collect the helmet.
- Select the knife and use it to carve and collect the jack-o-lantern.
- Collect the cup.
- Move to the Wizard’s Workshop.
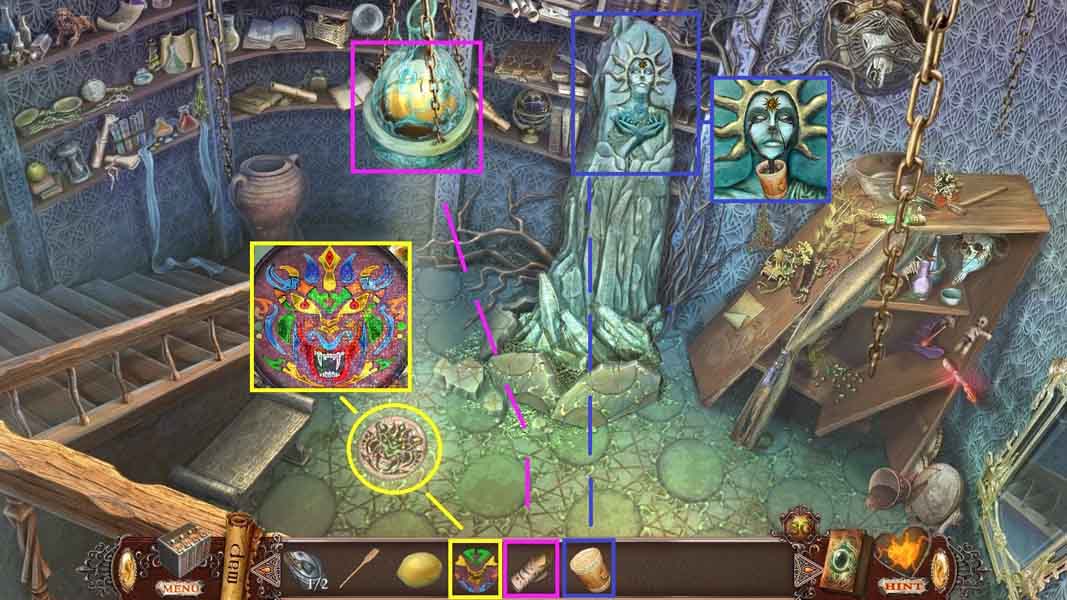
- Click the lamp and place the stencil onto it.
- Click the mosaic and insert the disc to trigger a puzzle.
- Move the discs to create the image.
- Collect the note and the mirror shard.
- Click the statue and place the cup near the face to collect the cup of tar.
- Move to the Mirror of Desire.
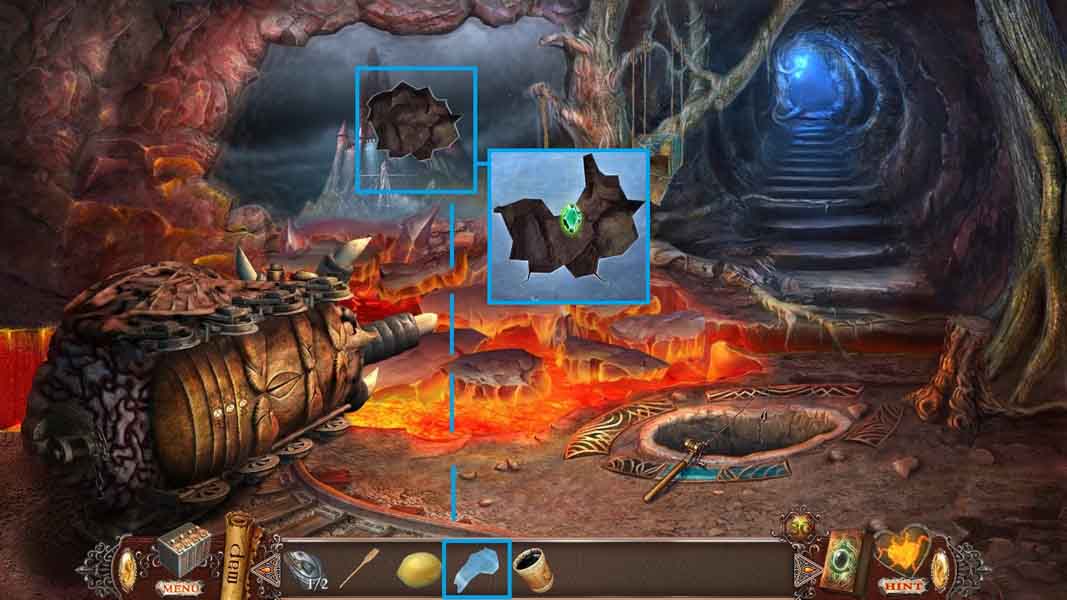
- Click the mirror and insert the mirror shard.
- Collect the gem and receive the bracelet.
- Move to Alura’s Cage.
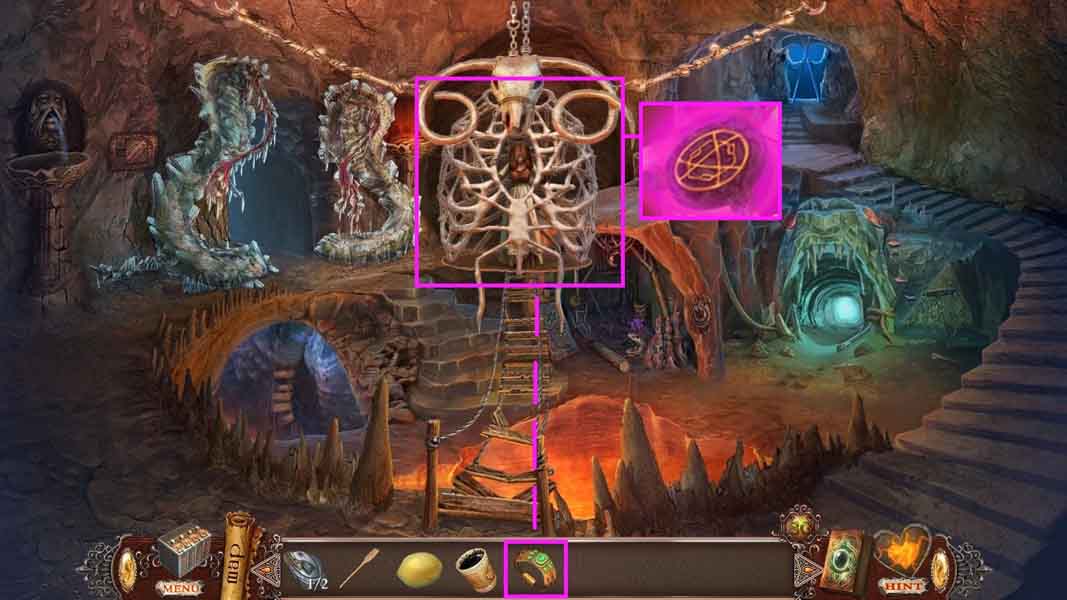
- Click the cage and give the girl the bracelet.
- Collect the Dragon’s Pupil.
- Move to the Water Dragon.
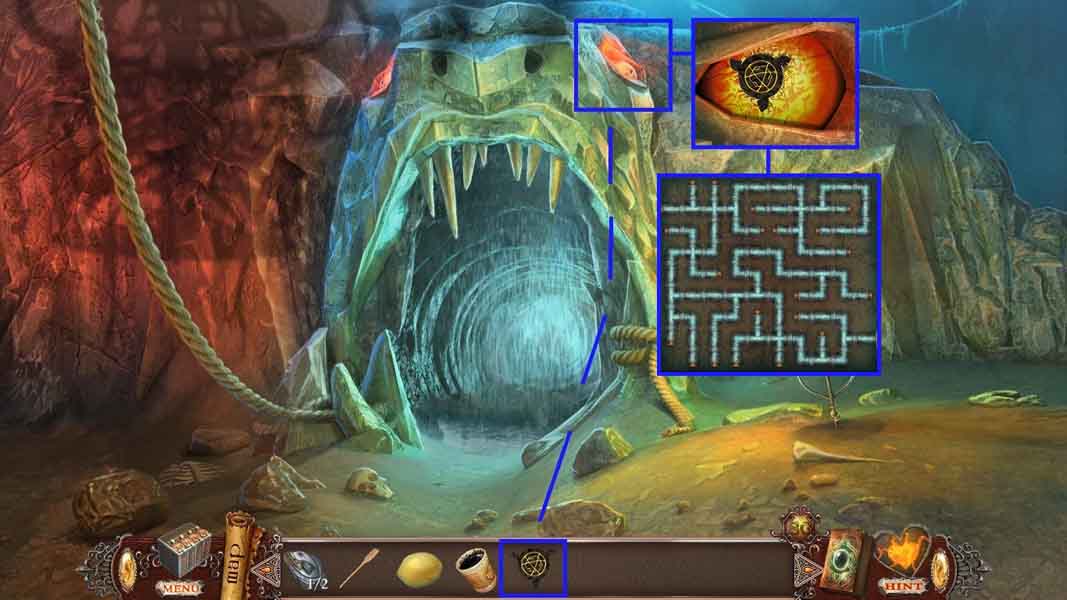
- Click the right eye and insert the Dragon’s Pupil to trigger a puzzle.
- To solve the puzzle attach the pipes without any leaks.
- Move ahead to the Statue of Neptune.
Comments will load when you reach this part of the walkthrough.