
Chapter 3: The Apartment
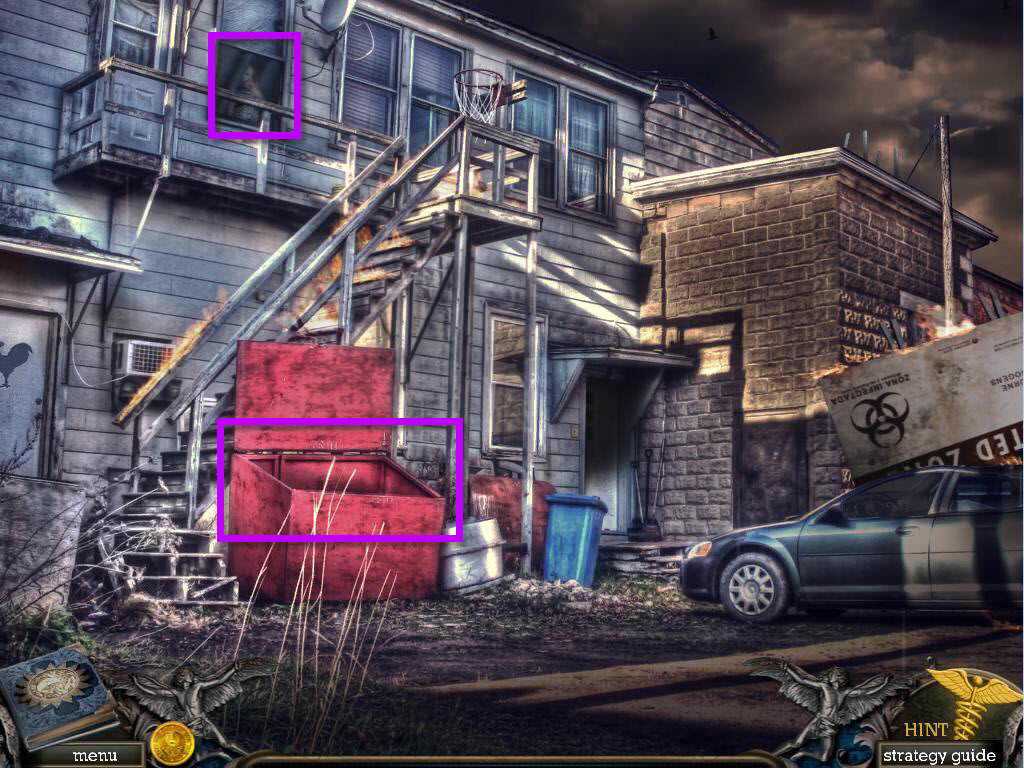
- Click on the window up above and you'll see Theresa.
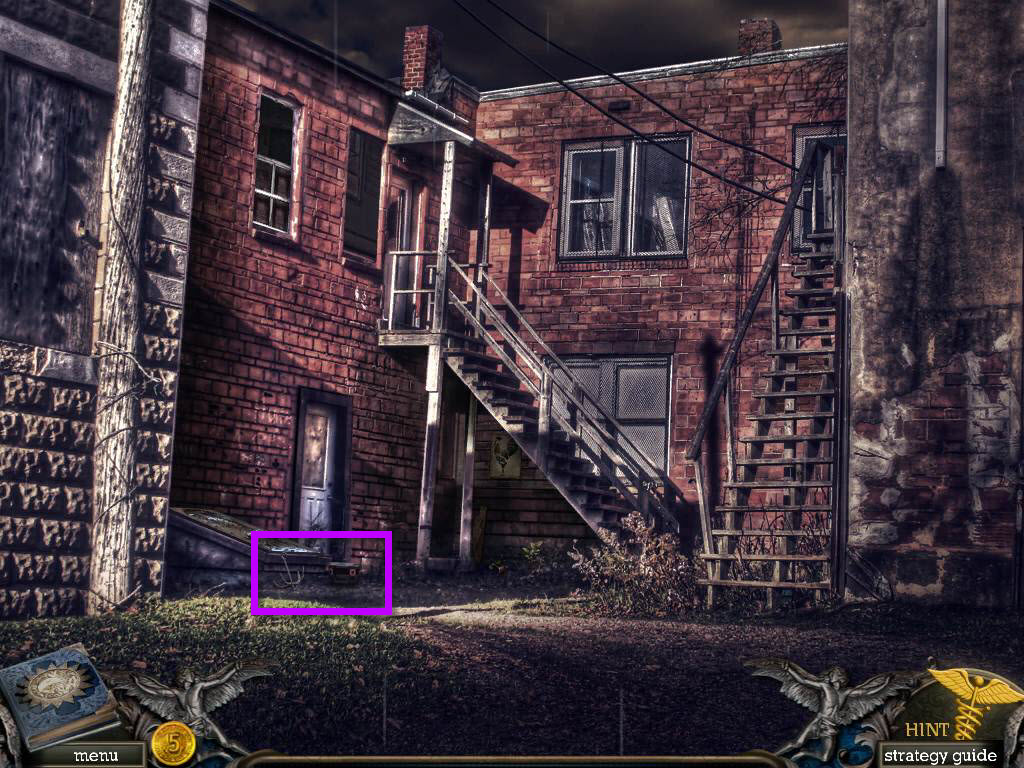
- Click on the dumpster to zoom in.
- Take the STAINED GLASS and the PLUNGER.
- Go to the left.
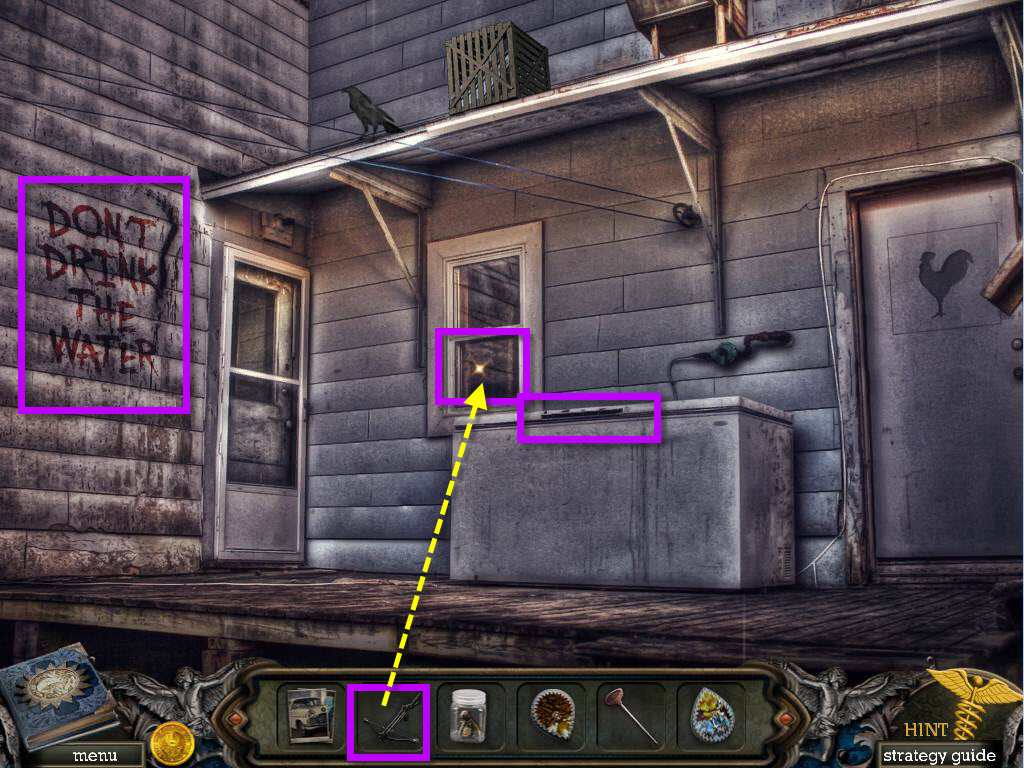
- Read the writing on the wall.
- Use the CROSSBOW on the window.
- Click on the broken window to zoom in.
- Take the FREEZER KEY.
- Click on the freezer and use the FREEZER KEY to open it.
- Take the BASKETBALL.
- Go back one screen.
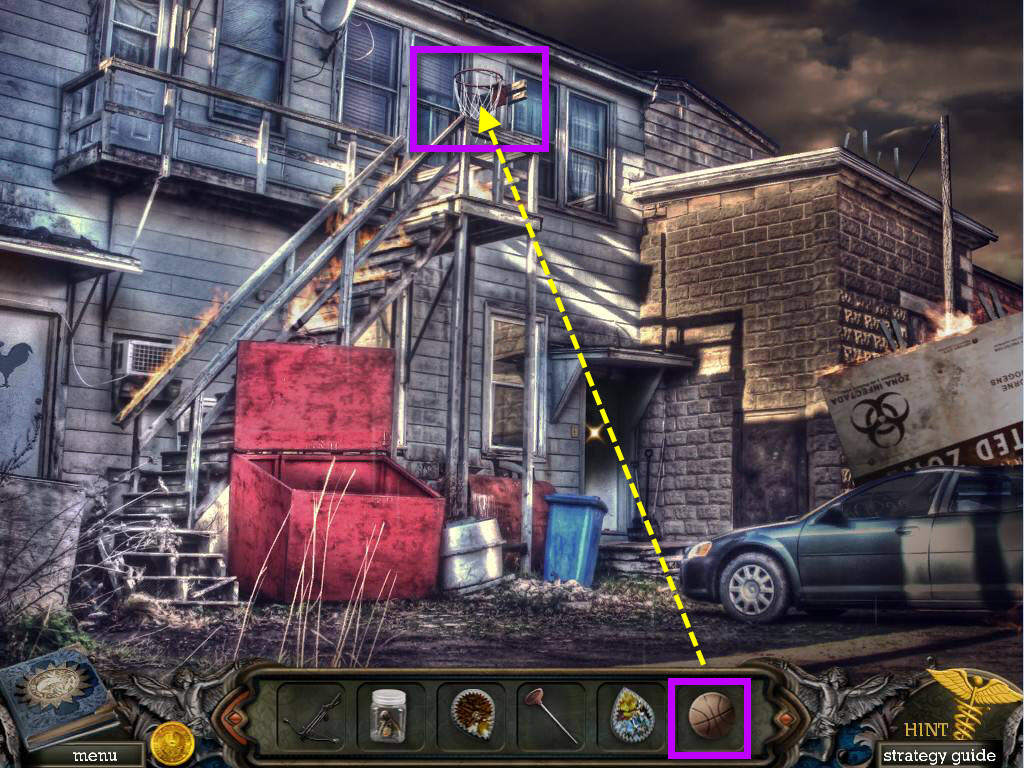
- Use the BASKETBALL on the net.
- Go back to the left.
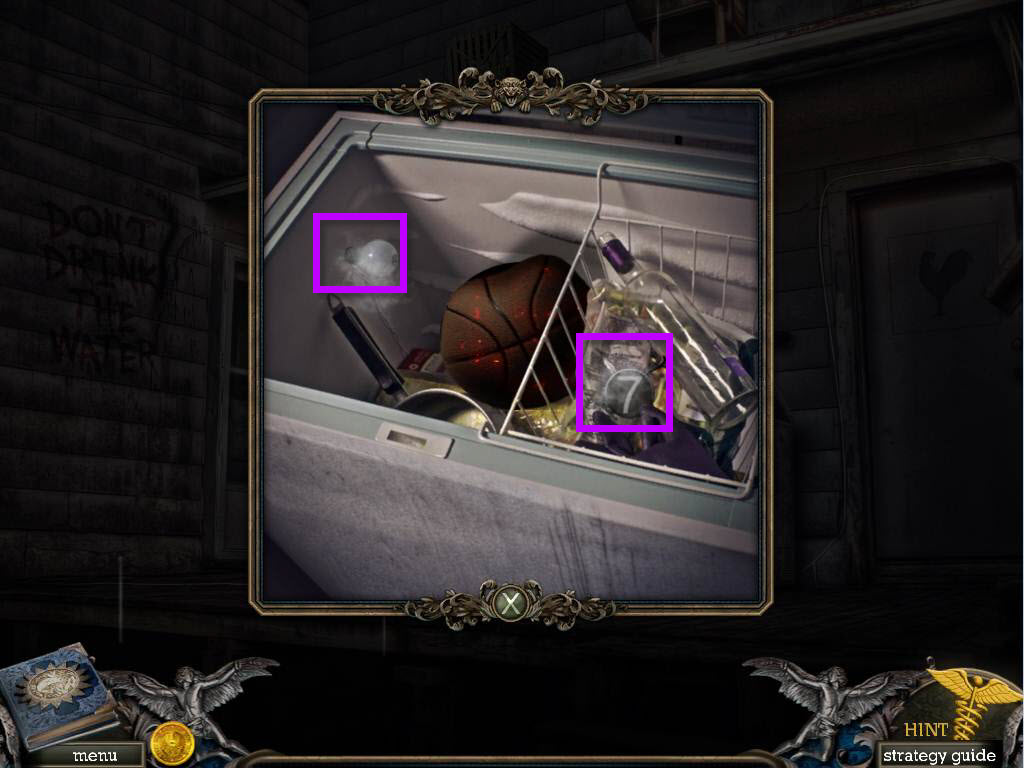
- Click on the freezer to zoom in. Take the LIGHT BULB and the 7 BUTTON.
- Go back one screen.
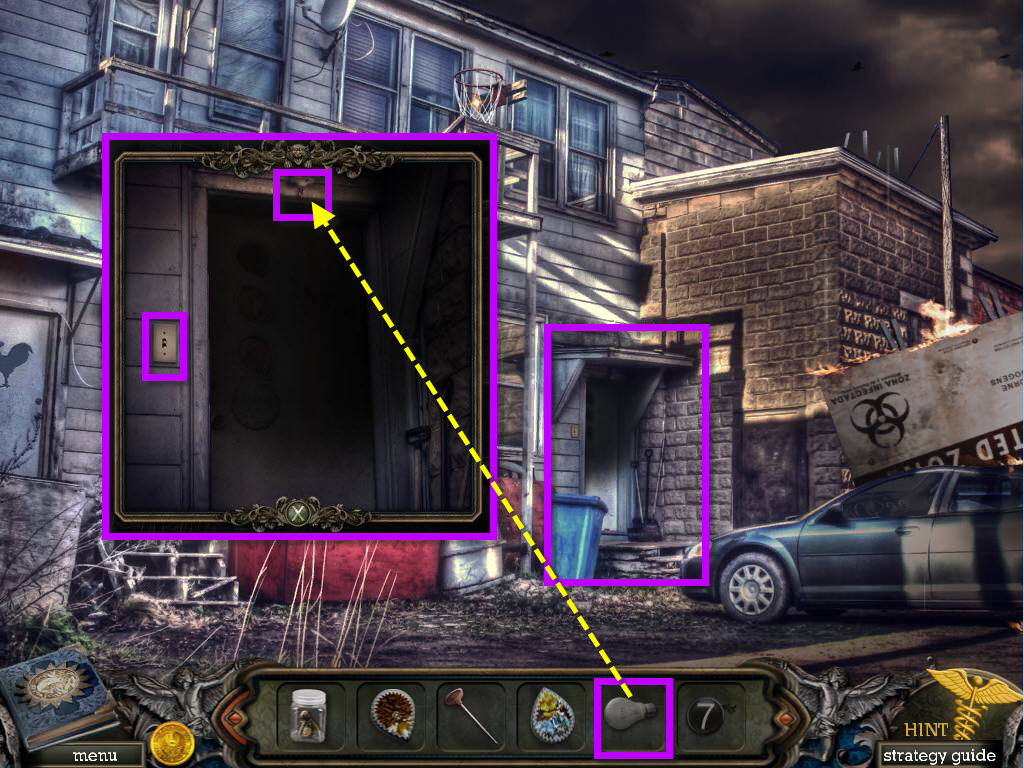
- Click on the door on the first floor to zoom in.
- Use the LIGHT BULB on the socket that's above the door.
- Click on the light switch to turn it on.
- See the combination 236926.
- Close the view and go back to the left.
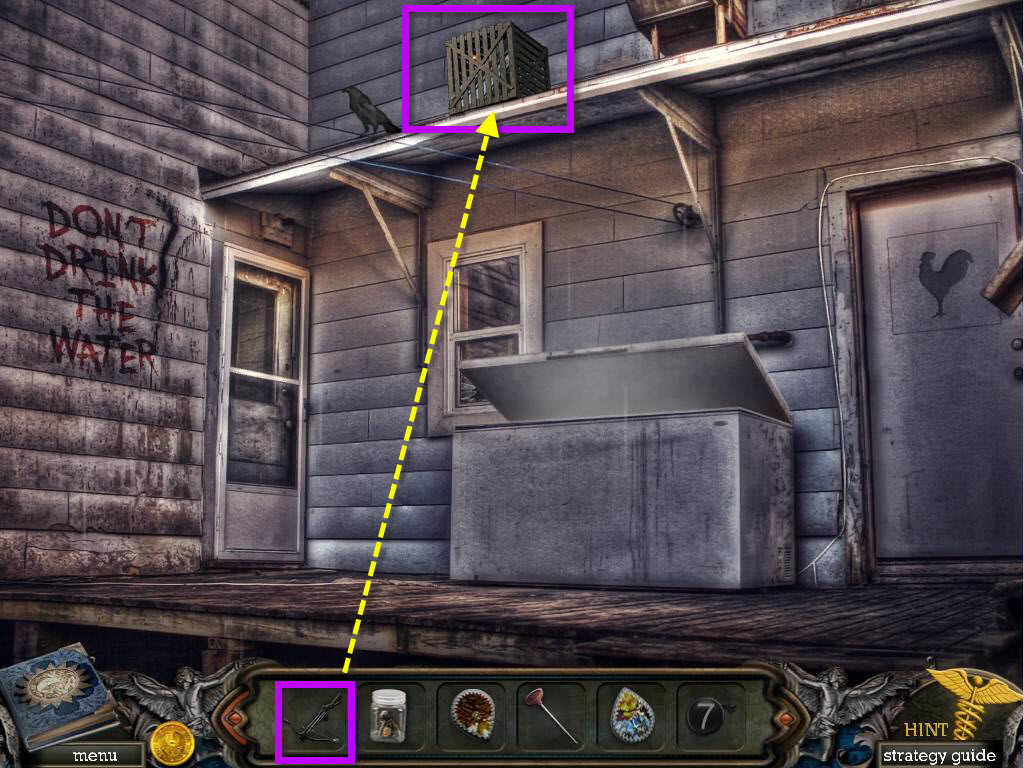
- Use the CROSSBOW on the crate above.
- Click on the suitcase and enter the combination 236926.
- Take the COIN and the STAINED GLASS.
- Go back one screen.

- Click on the door again to zoom in.
- Use the STAINED GLASS on the empty slots.
- Go inside the apartment.
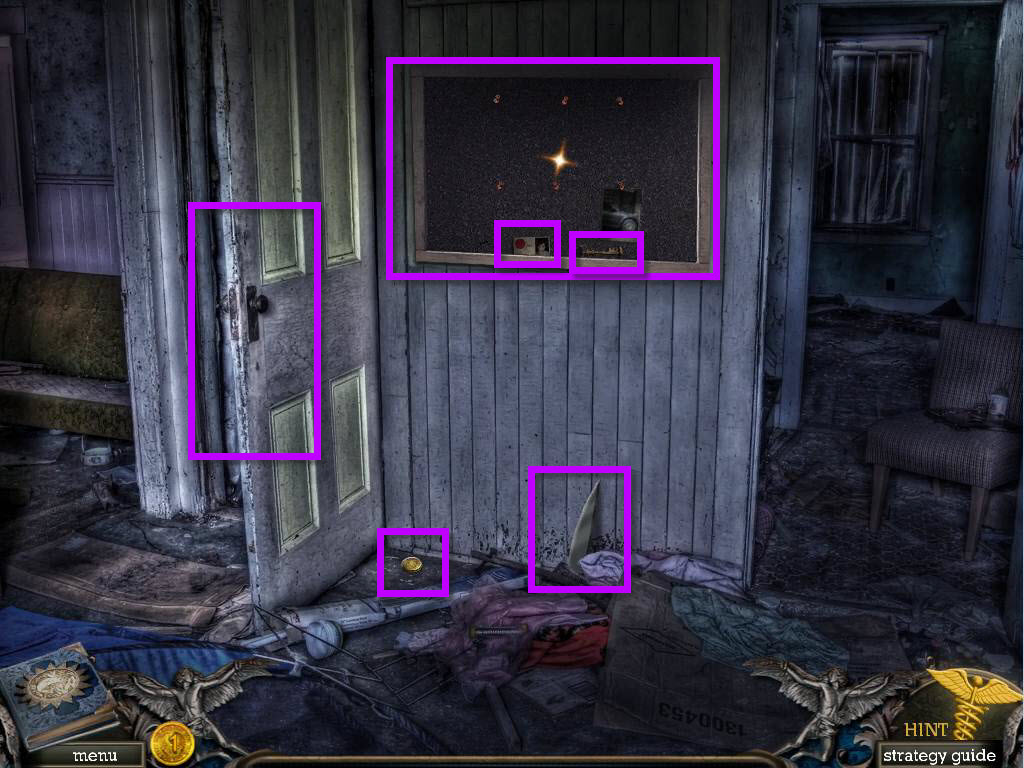
- Take the MIRROR PIECE and the COIN.
- Click on the bulletin board to zoom in.
- Take the SPADE KEY and JANES ID CARD.
- Close that view.
- Click on the door.
- Take the CAR PHOTO.
- Go to the left to start a hidden object scene.
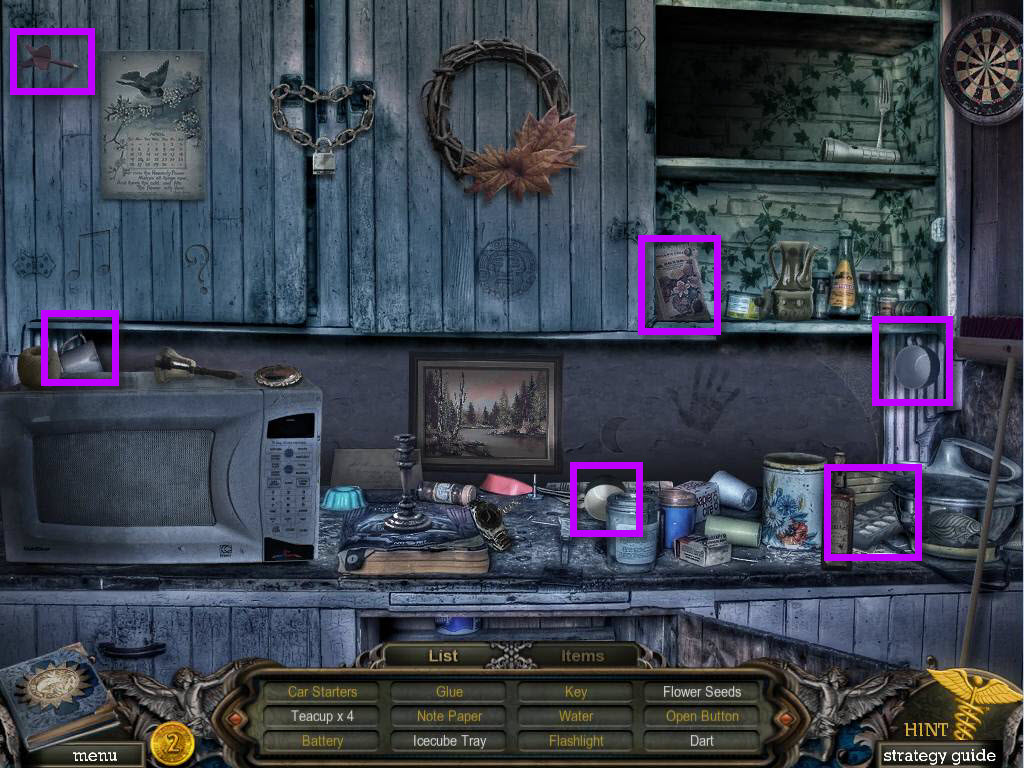
- First find all the items in the scene that are in white.
- Click on the items tab at the bottom to open it.
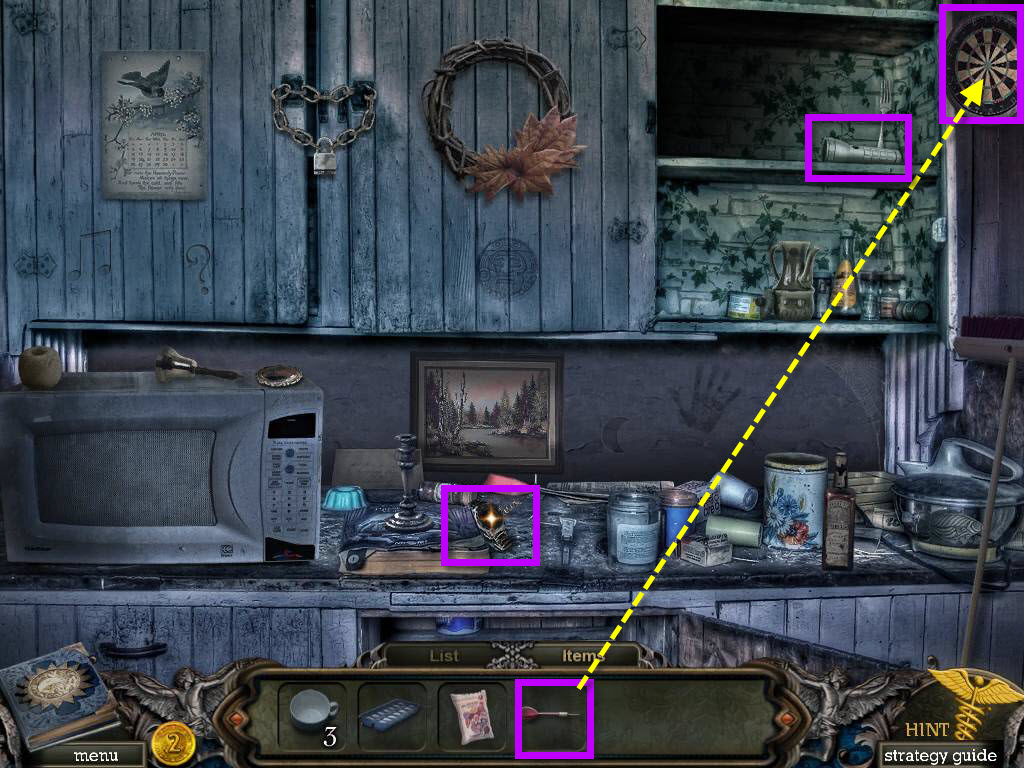
- Use the DART on the dartboard.
- Take the NOTE PAPER.
- Click on the watch and use the NOTE PAPER to set the time.
- Take the BATTERY.
- Use the BATTERY on the flashlight.
- Take the FLASHLIGHT.
- Use the FLASHLIGHT to light up the cupboard.
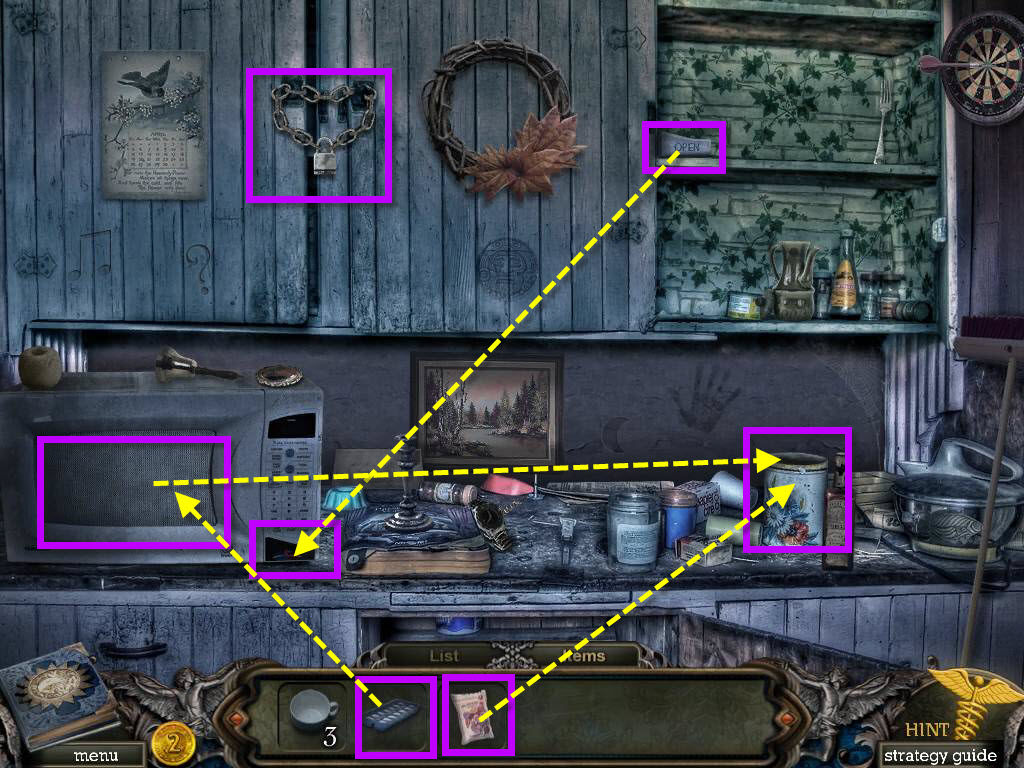
- Take the OPEN BUTTON.
- Use the OPEN BUTTON on the microwave.
- Use the ICE CUBE TRAY on the open microwave.
- As soon as the microwave opens, take the WATER.
- Use the FLOWER SEEDS in the pot.
- Use the WATER on the pot.
- Take the KEY.
- Use the KEY on the cabinet to unlock it.
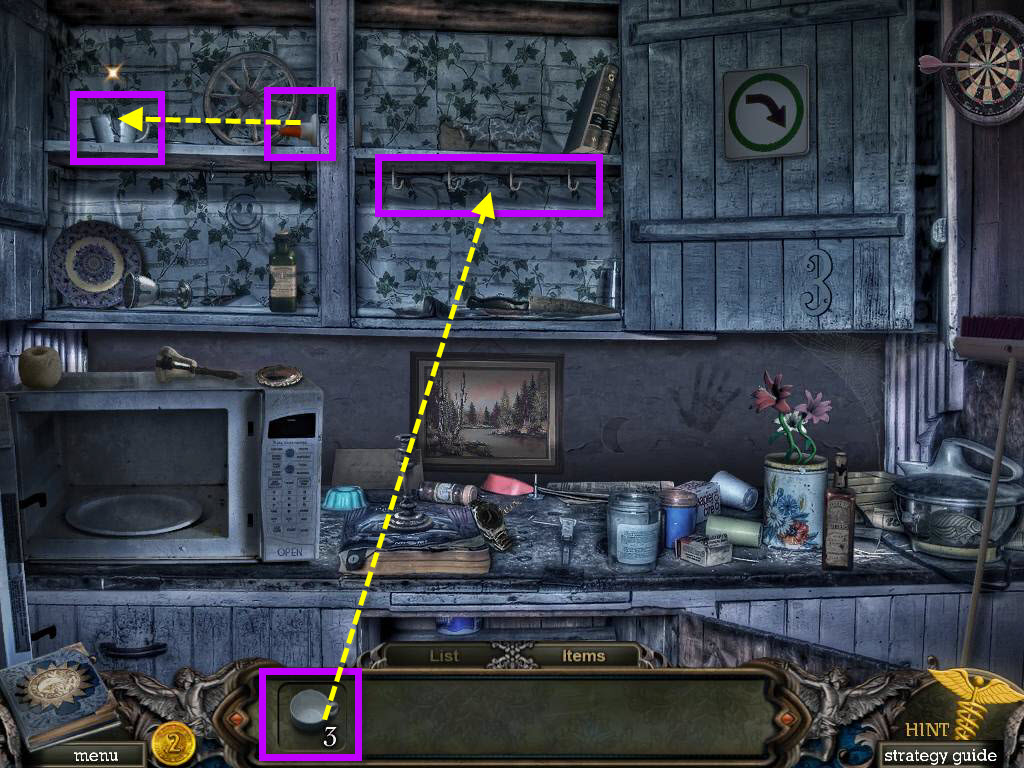
- Take the GLUE.
- Use the GLUE on the broken teacup then click to fix it.
- Place the 4 teacups on the hooks and this will break the shelf.
- Take the CAR KEYS.
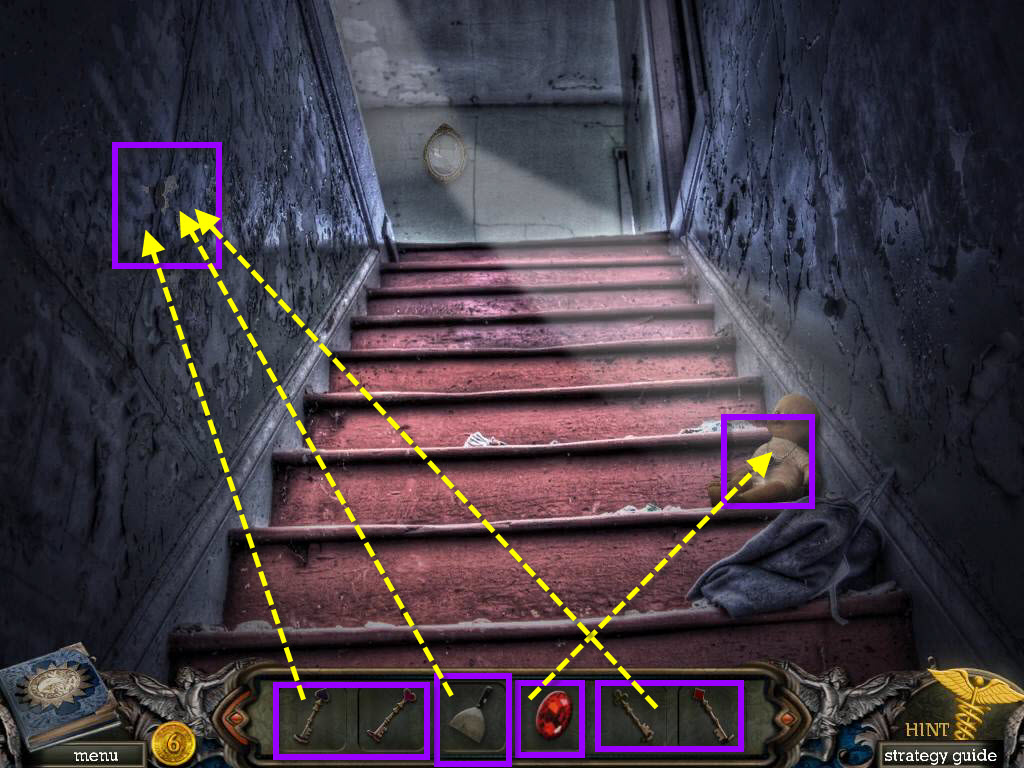
- Go up the stairs.
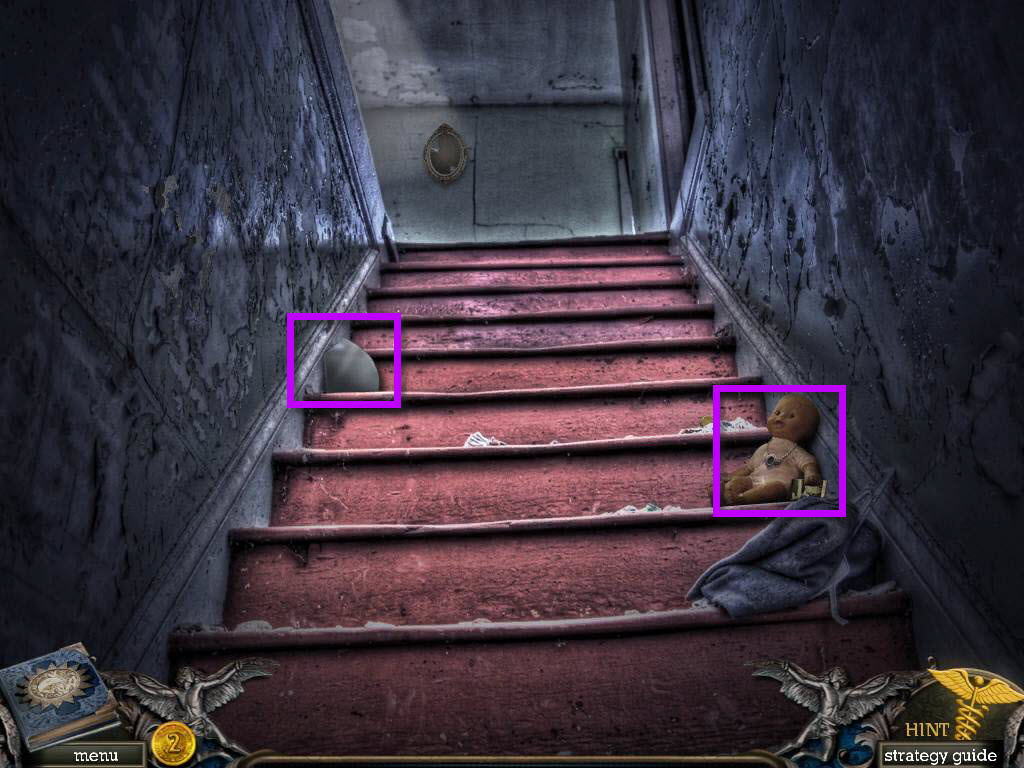
- Take the MIRROR PIECE on the stairs.
- Click on the doll on the right to zoom in.
- Take the CAR PHOTO and the COIN.
- Go up the stairs.
- Take the COIN and the MIRROR PIECE.
- Go into the door on the left to the bathroom.
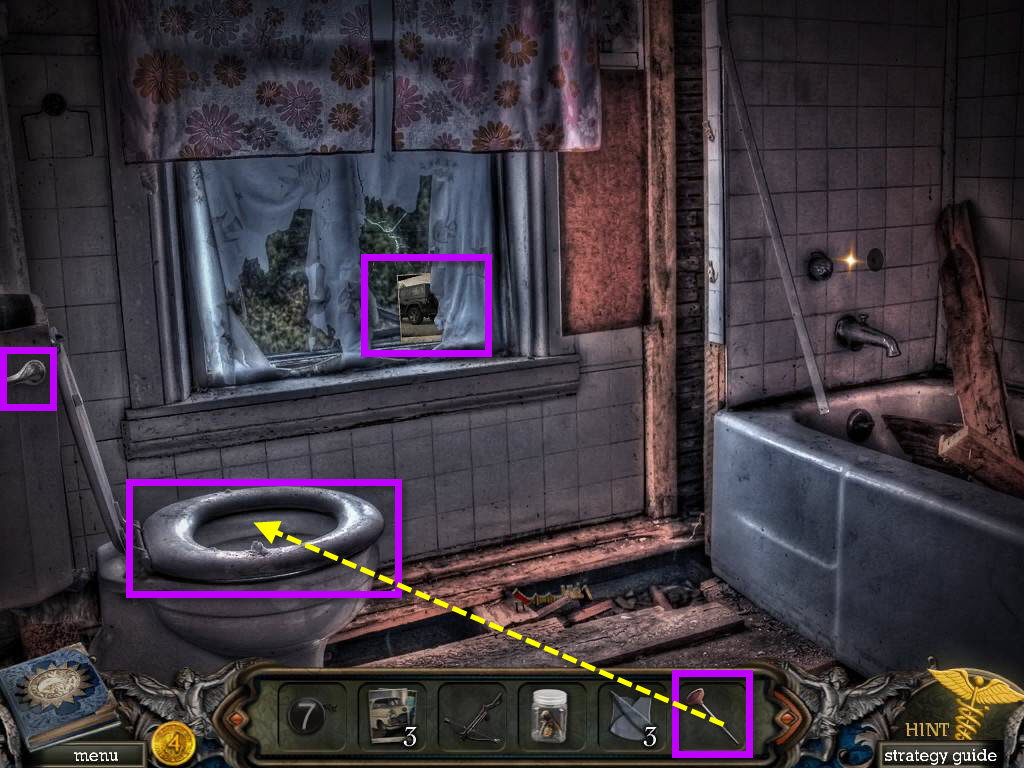
- Take the CAR PHOTO in the window.
- Click on the toilet to zoom in.
- Use the PLUNGER on the toilet.
- Click to flush the toilet.
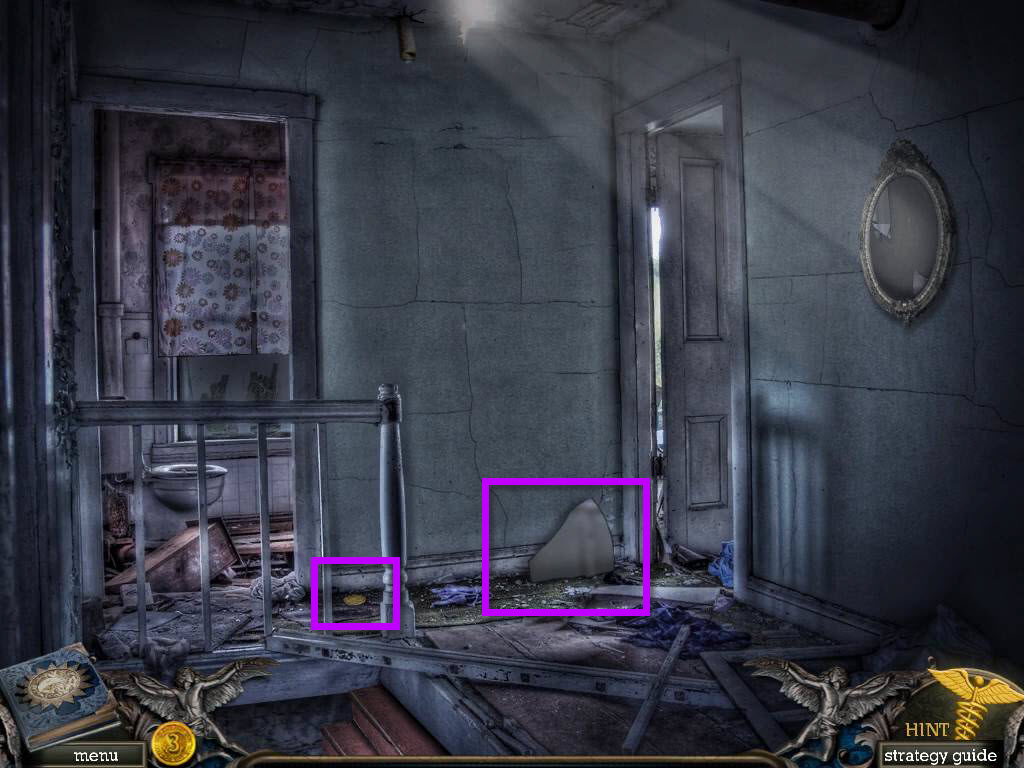
- Go back one and then go into the door on the right to the bedroom.
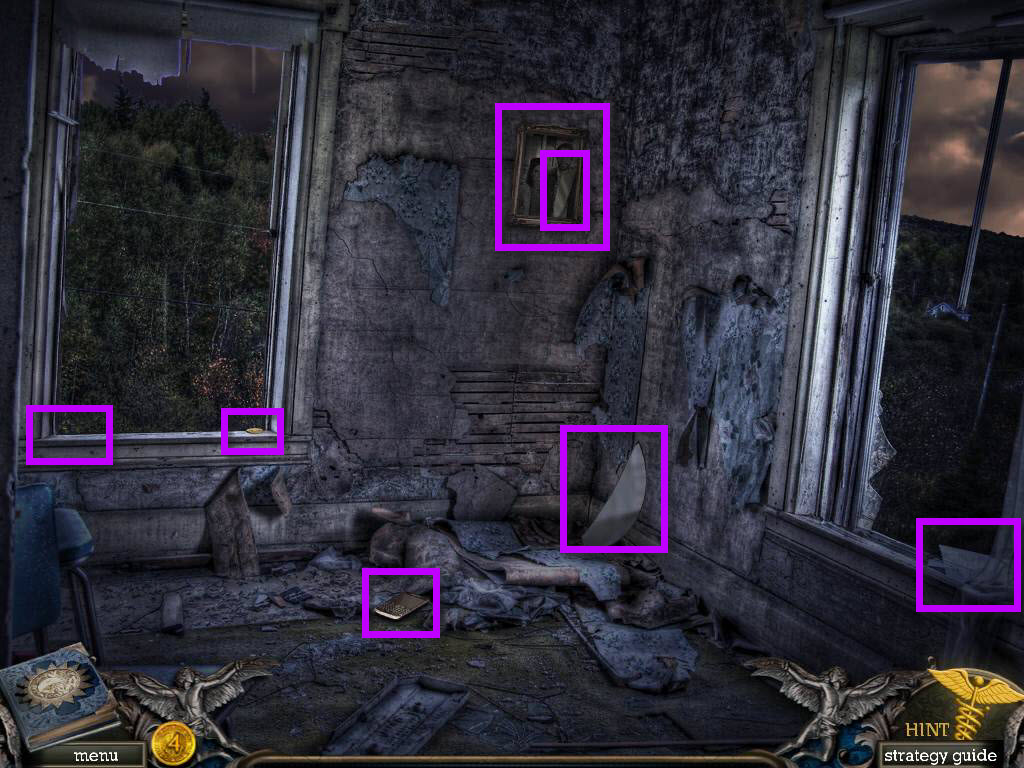
- Take the MIRROR PIECE.
- Pick up the phone and watch the video.
- Click on the photo hanging on the wall to zoom in.
- Take the MIRROR PIECE.
- Click on the window on the right and take the CAR PHOTO.
- Click on the window on the left and take the COIN and the MIRROR PIECE.
- Go back one screen.
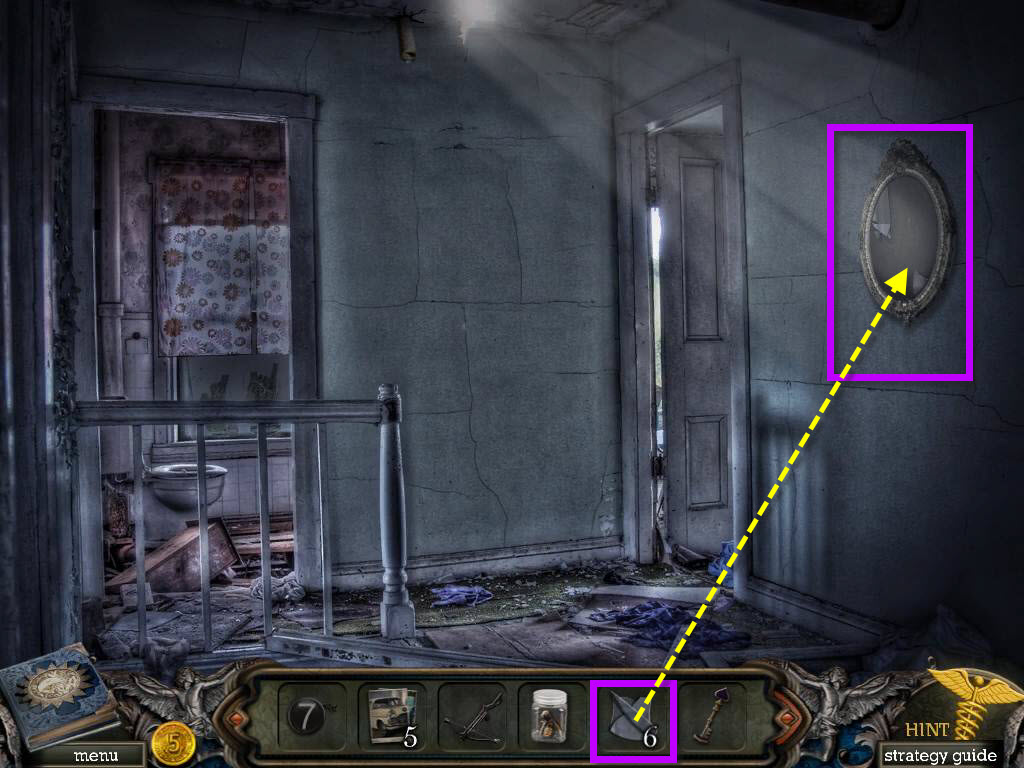
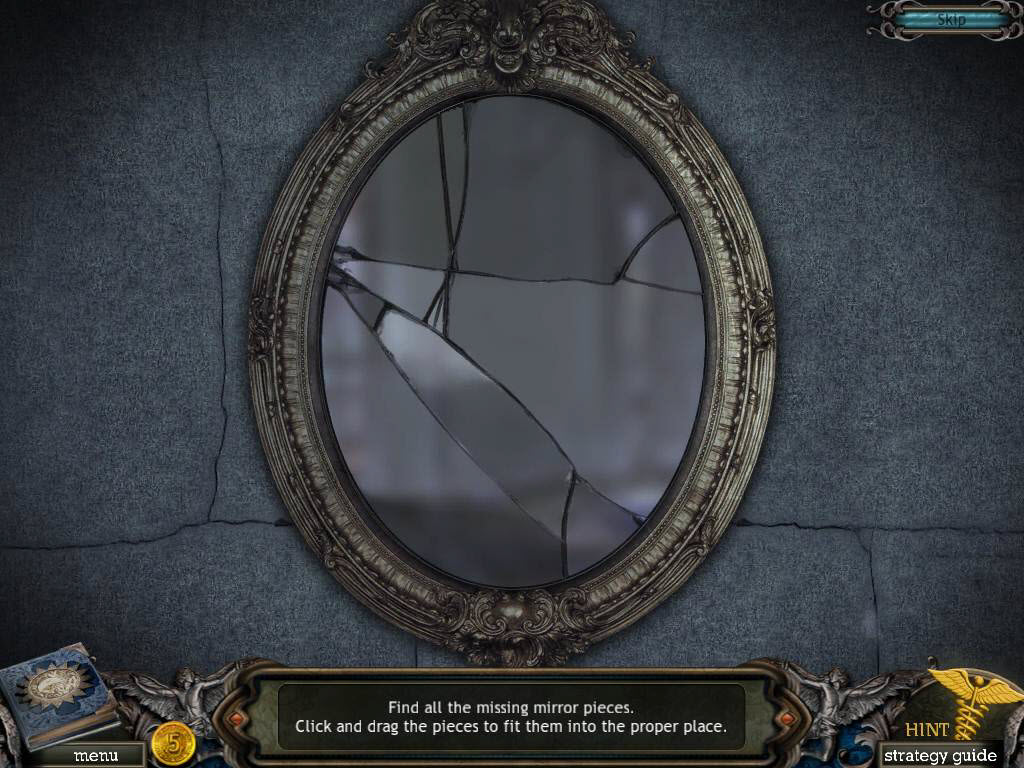
- Click on the mirror on the wall to the right.
- Use the MIRROR PIECES on it to start a mini-game.
- Put the pieces of the mirror back to complete the mirror.
- See the screenshot for the solution.
- Go back down two screens so that you are on the first floor again.

- Click on the open door to zoom in.
- Take the SHOWER HANDLE.
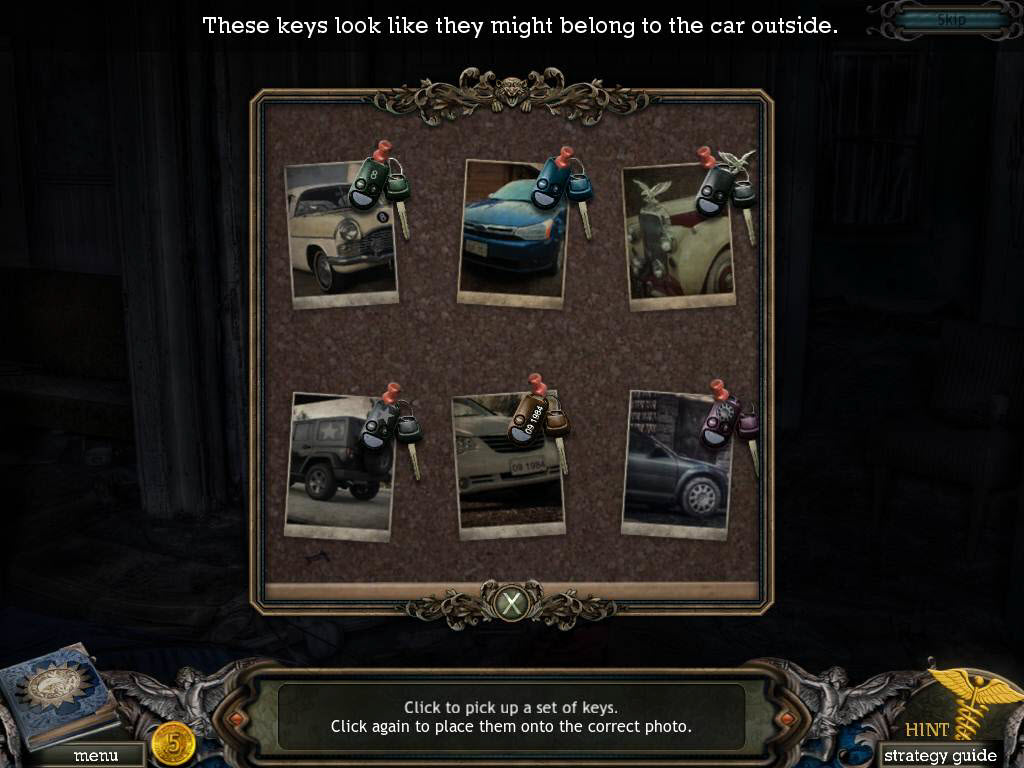
- Click on the bulletin board.
- Use the CAR PHOTOS and the CAR KEYS on the board to start a mini-game.
- You need to match the keys to the right car.
- See the screenshot for the solution.
- You will receive the CAR STARTER.
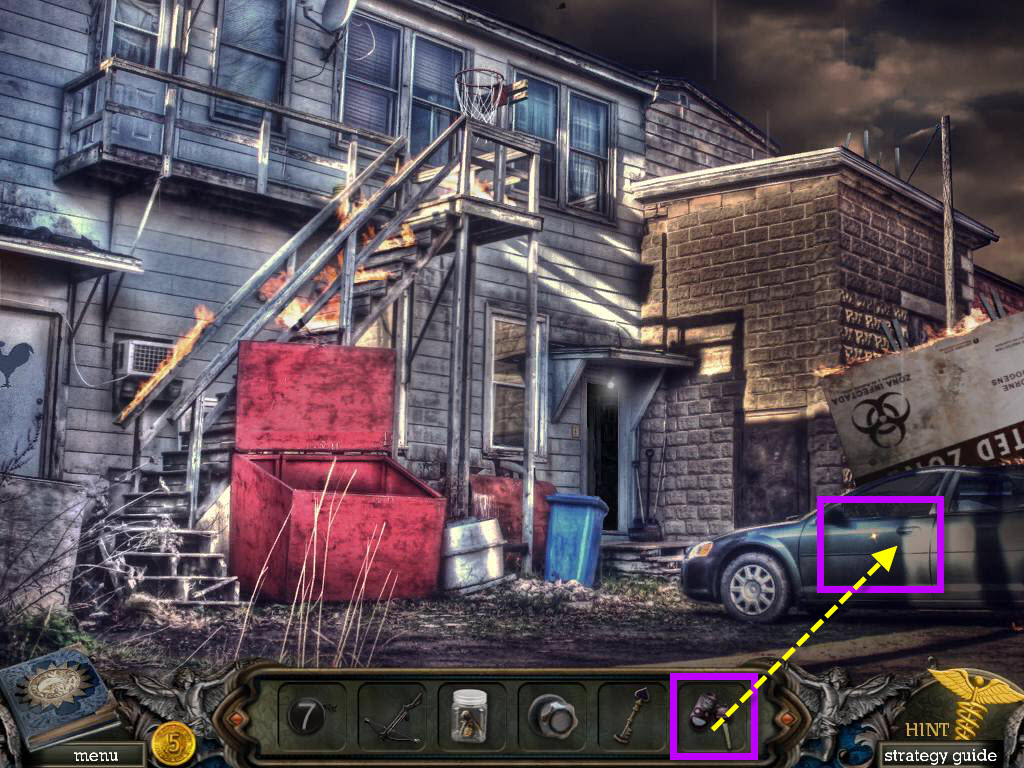
- Go back one screen so you are outside the apartment again.
- Use the CAR STARTER on the car on the right.
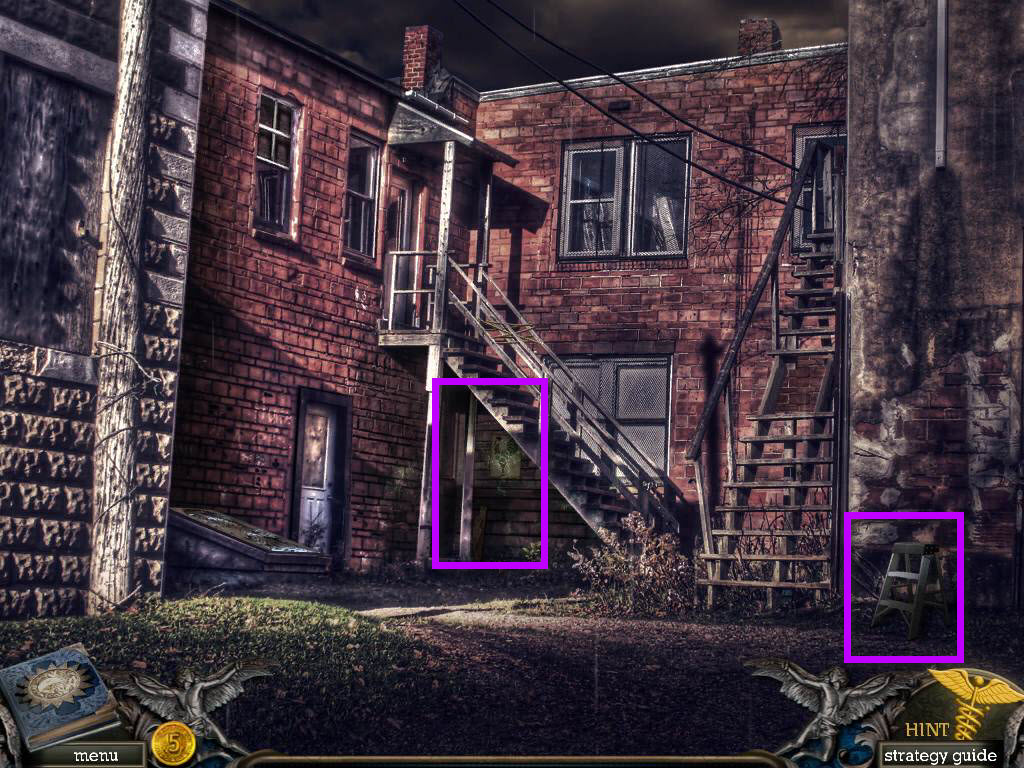
- Move through the car.
- Take the STEP LADDER on the right.
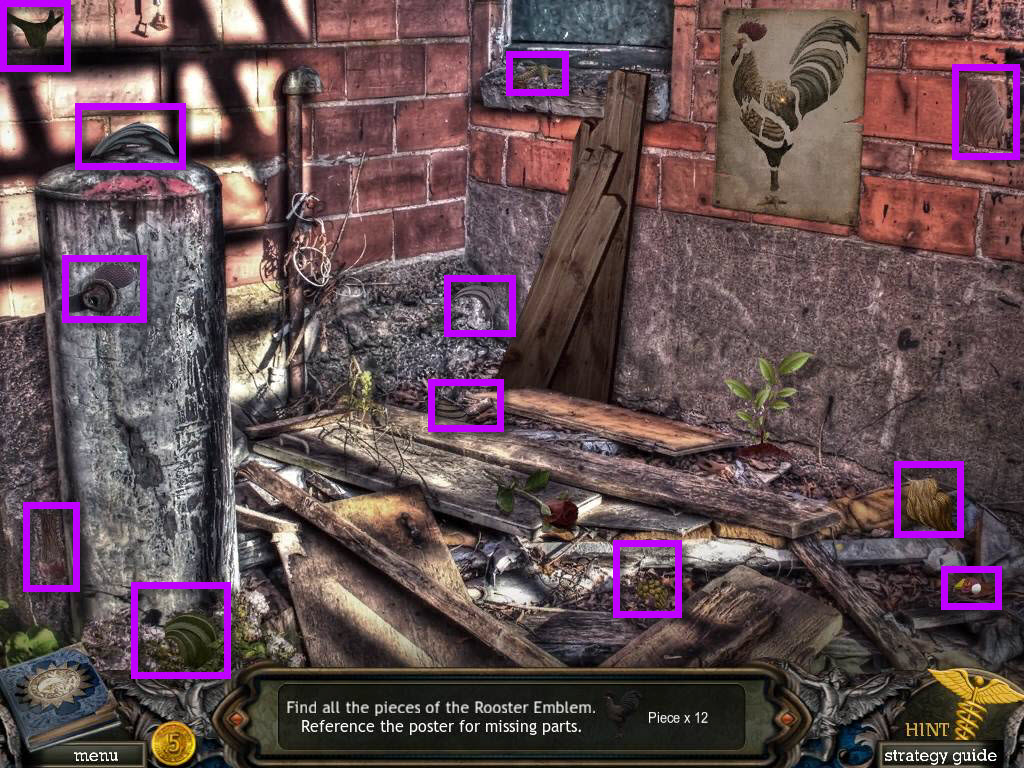
- Click under the stairs to start a hidden object scene.
- Find all the rooster emblem pieces in the scene.
- There are 12 in all.
- You will receive the ROOSTER EMBLEM.
- Go back and then to the left again.
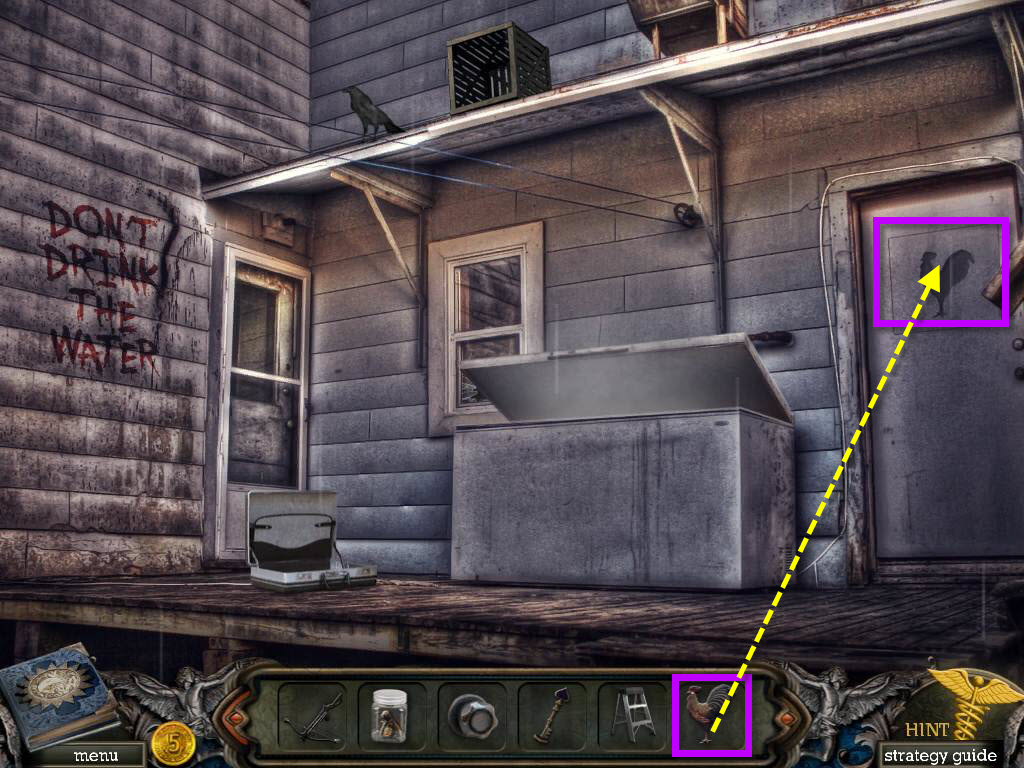
- Click on the door on the right.
- Use the ROOSTER EMBLEM on the door.
- Take the SHEARS.
- Go back one and then through the car.
- Click on the stairs to the left to zoom in.
- Use the SHEARS on the rope to cut it.
- You will receive the ROPE.
- Take the WOOD PLANKS.
- Click on the stairs on the right to zoom in.
- Use the WOODEN PLANKS.
- Go up the stairs.

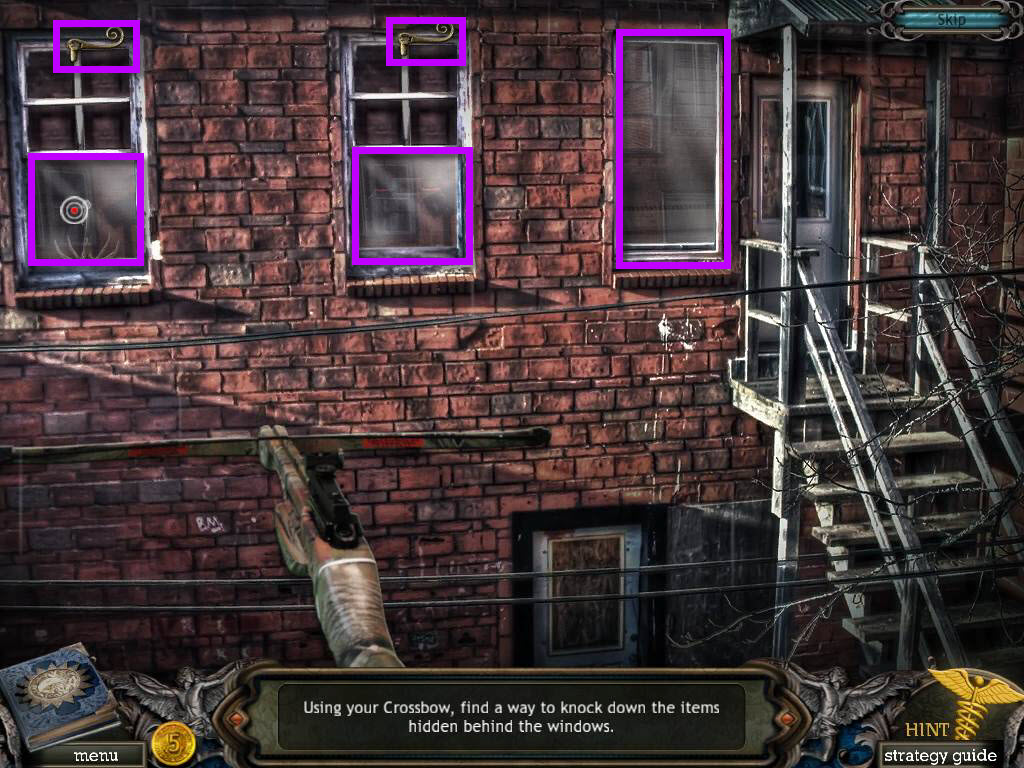
- Once you get up the stairs, you'll equip the crossbow.
- Shoot the three windows two times each to break them.
- Once you break the glass on the two smaller windows, shoot the latches on the top to knock down the items.
- Go back down the stairs.
- Click on the door to the cellar to zoom in.
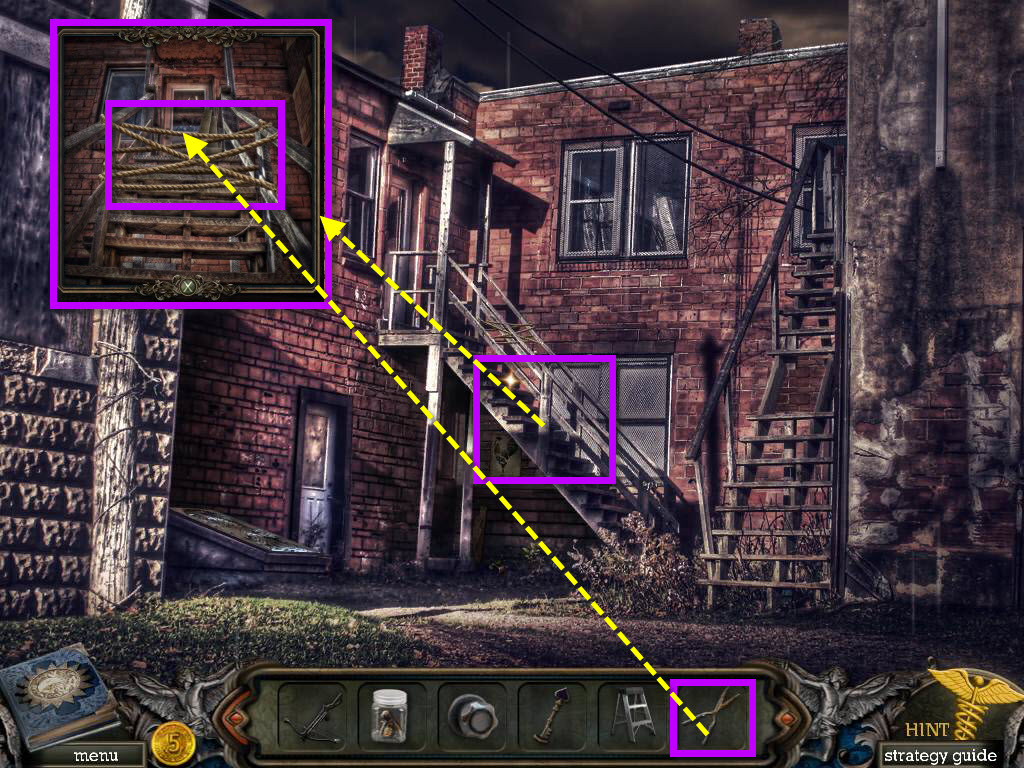
- Take the HAMMER AND CHISEL and the GRAPPLING HOOK.
- Go up the stairs on the right.
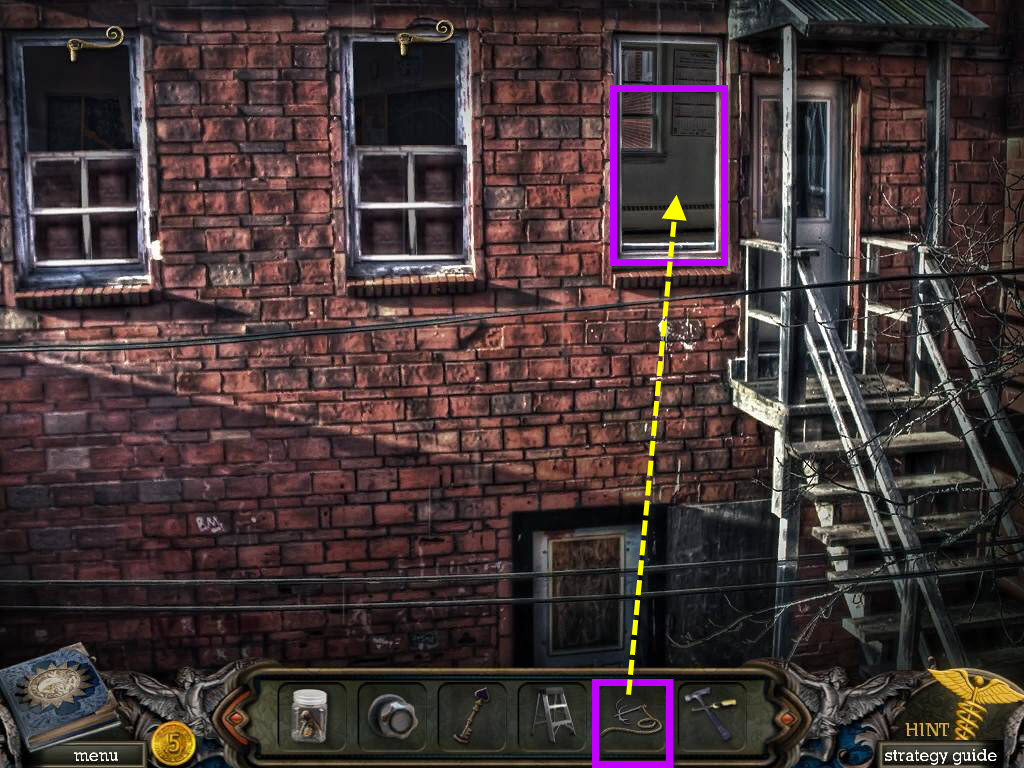
- Use the GRAPPLING HOOK on the window on the right by the door.
- Go into the room.
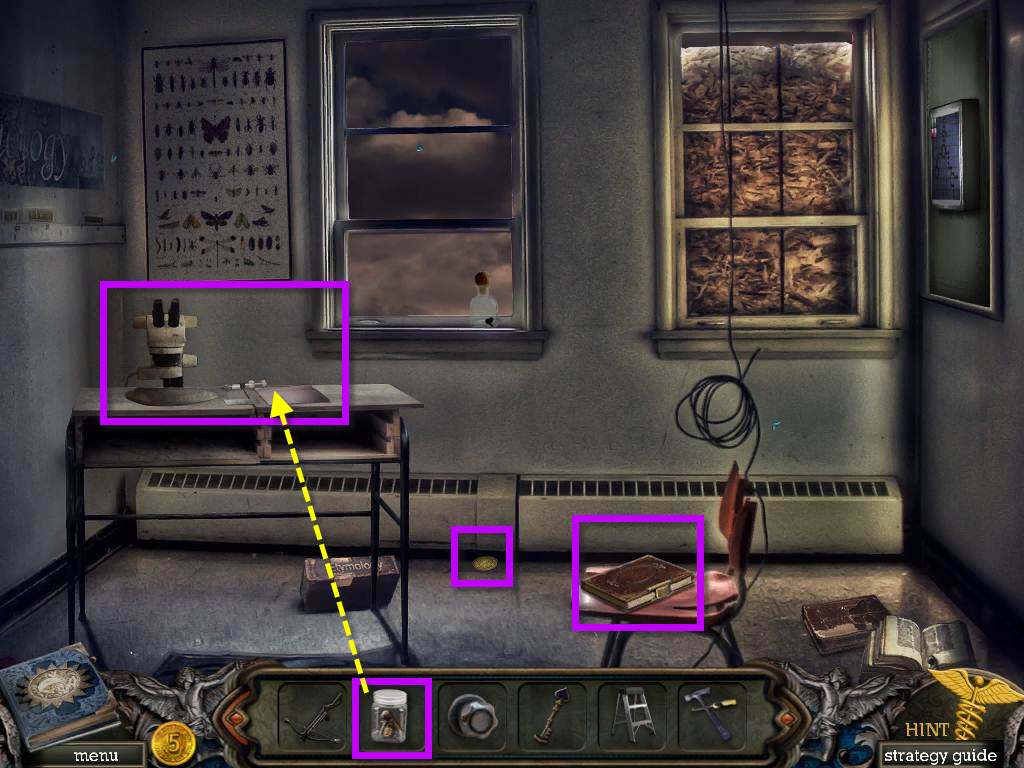
- Take the COIN and the NOTEBOOK in front of you.
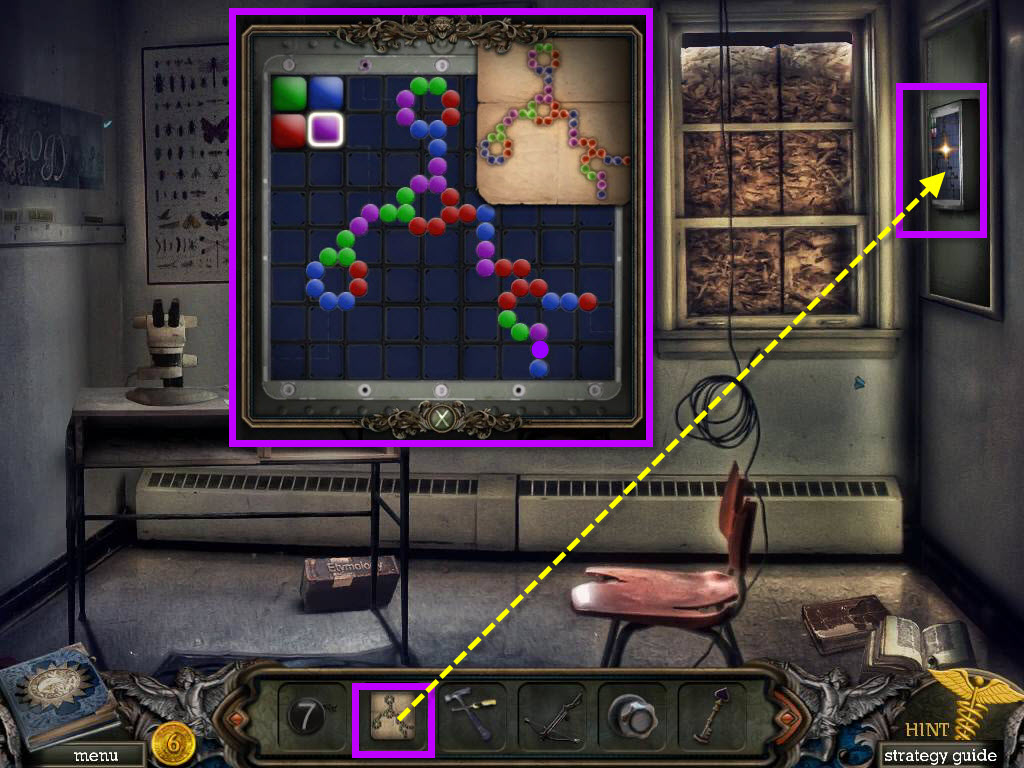
- Click on the microscope on the left to zoom in.
- Use the HORNET SAMPLE.
- Take the syringe and use it on the HORNET SAMPLE, then place it on the slide.
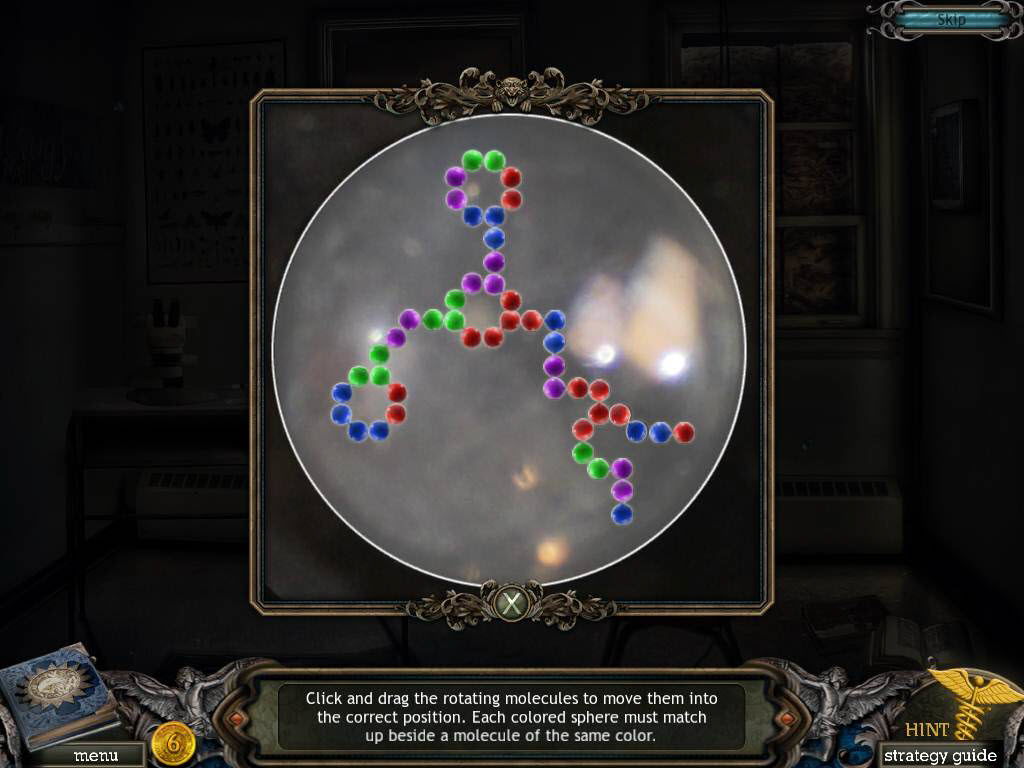
- Place the slide on the microscope to start a mini-game.
- Place the molecules in the empty areas on the board.
- They must touch at least one other molecule with a matching color.
- See the screenshot for the solution.
- You will receive the GENE PATTERN.
- Click on the panel that's on the right wall to zoom in.
- Use the GENE PATTERN on the panel.
- Click on the slots to make them match the GENE PATTERN.
- See the screenshot for the solution.
- Take the HEART KEY.
- Go back three screens and enter the apartment again.
- Go up the stairs to the landing.
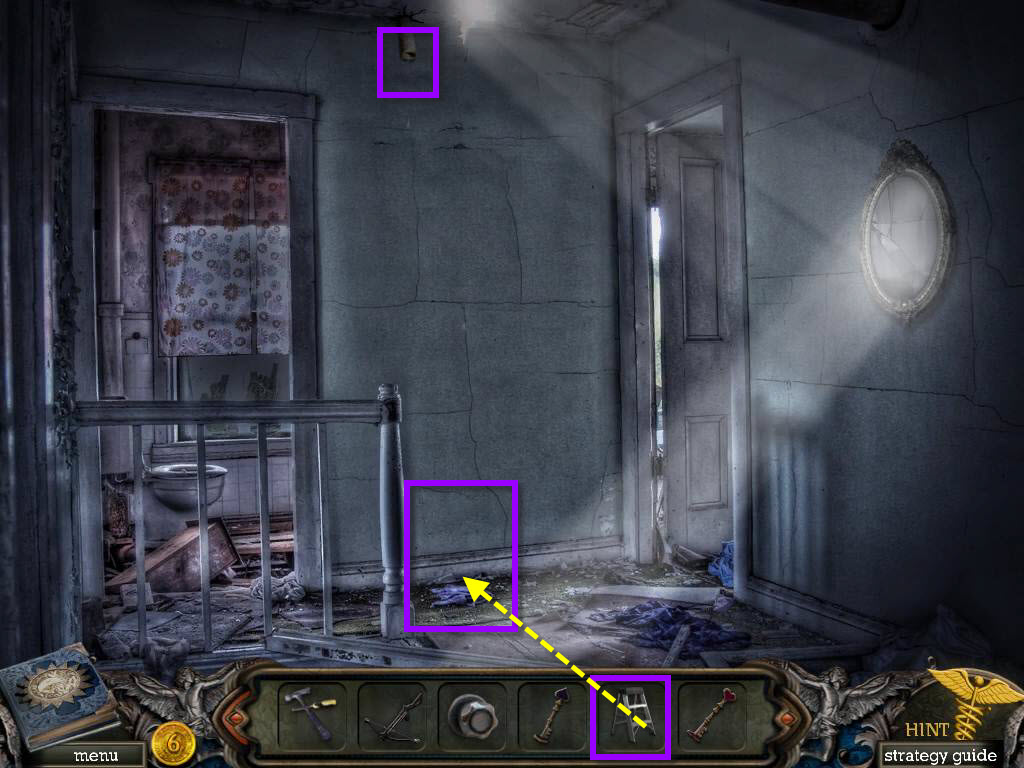
- Use the STEP LADDER on the floor beneath the pipe.
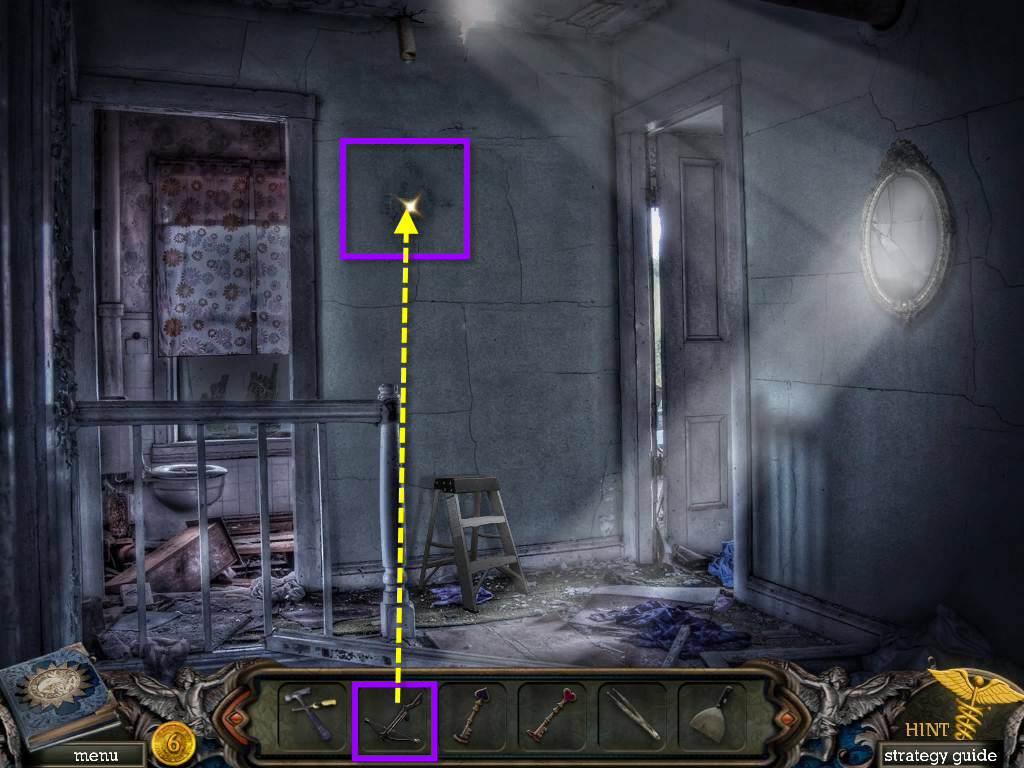
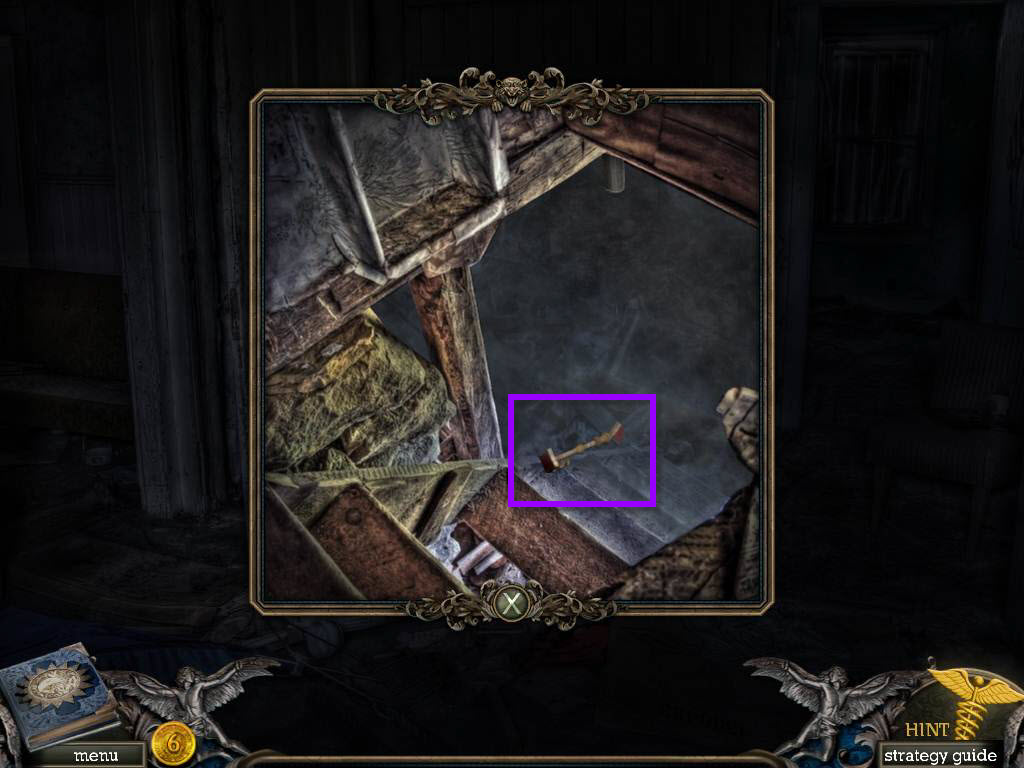
- Click on the pipe to zoom in.
- Take the TWEEZERS.
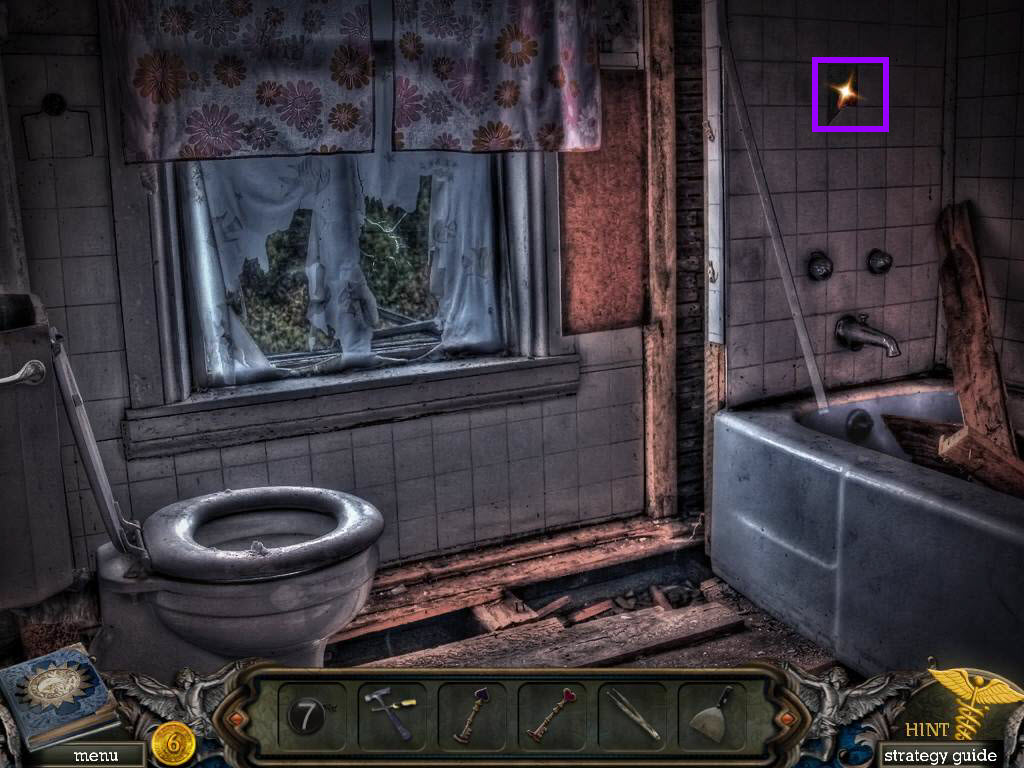
- Go into the bathroom.

- Click on the faucet.
- Use the SHOWER HANDLE.
- Take the PAINT SCRAPER from the tub.
- Go back one screen.
- Use the CROSSBOW on the spot on the wall.
- Go back to the bathroom.
- Click on the tiles that are broken.
- Take the RED GEM.
- Go to the bedroom.
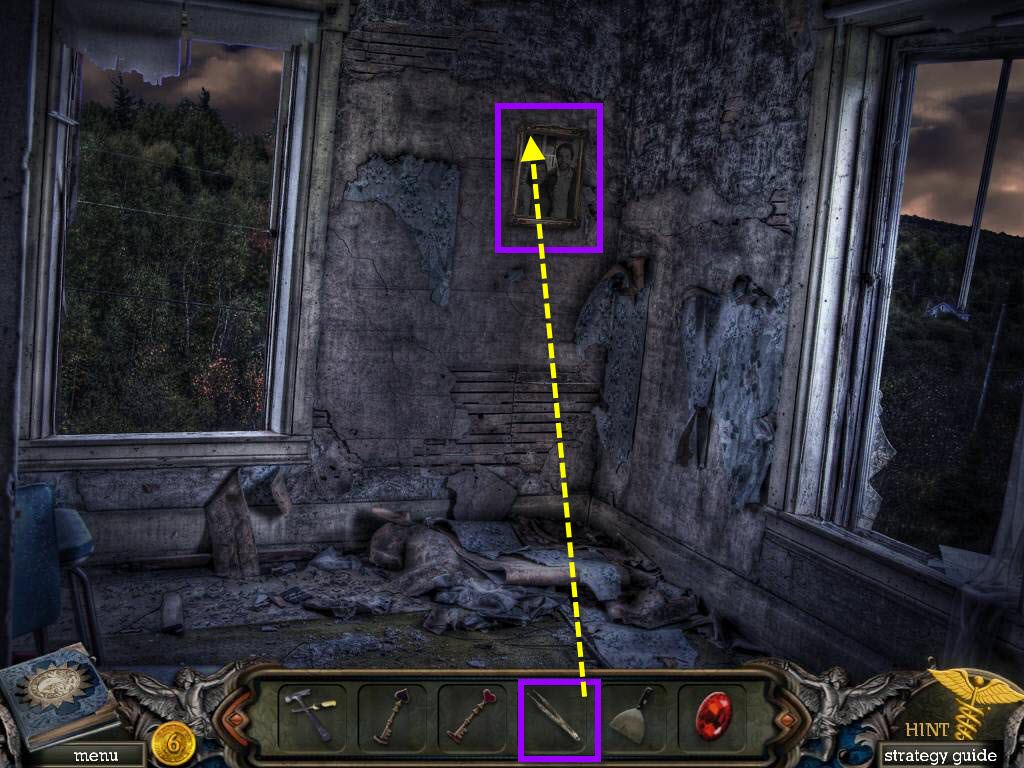
- Click on the photo on the wall to zoom in.
- Use the TWEEZERS on the top left corner.
- Take the CLUB KEY.
- Go back downstairs.
- Click on the door.
- The diamond key will float within reach.
- Take the DIAMOND KEY.
- Go back to the stairs.
- Click on the doll on the stairs to zoom in.
- Use the RED GEM on the doll.
- Click on the wall on the left to zoom in.
- Use the PAINT SCRAPER to get rid of the paint.
- Use the DIAMOND KEY, the CLUB KEY, the SPADE KEY, and the HEART KEY in the correct spots.
- Take the TILE PIECE.
- Go back two screens, through the car an to the other side.

- Click on the cellar door to zoom in.
- Use the TILE PIECE to start a mini-game.
- You need to arrange the tiles in order to complete the picture.
- Clicking two tiles will swap their positions.
- See the screenshot for the solution.
- Take the FIRE HOSE.
- Go back two screens to the alleyway.
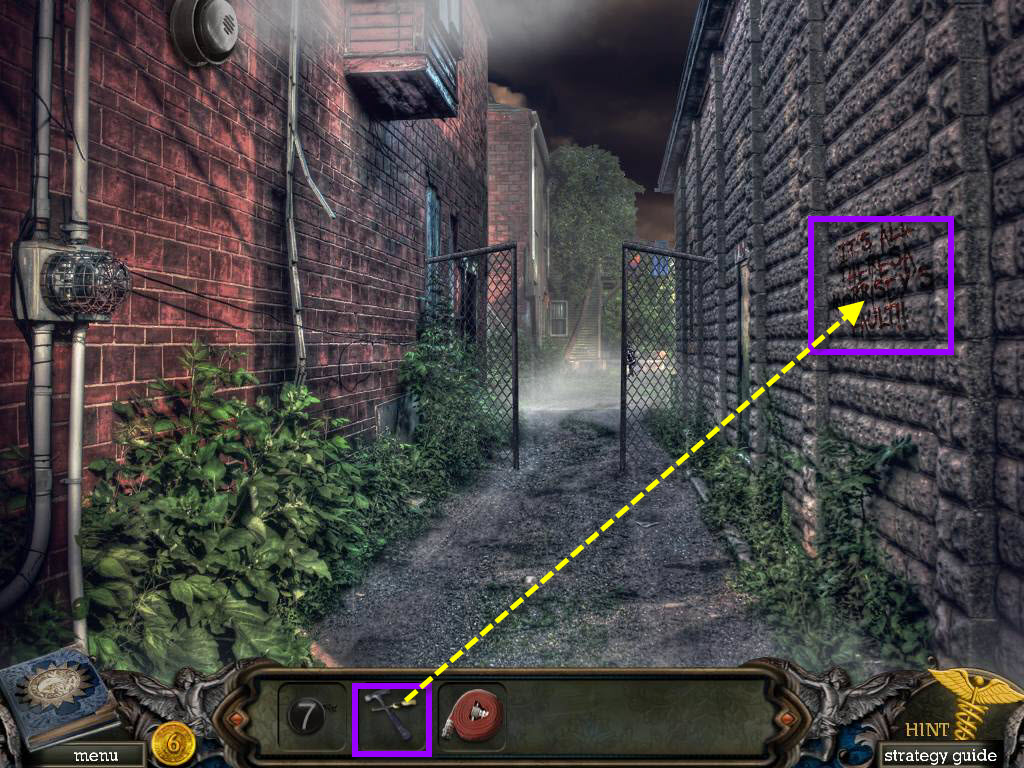
- Click on the writing on the wall on the right.
- Use the HAMMER AND CHISEL on the wall.
- Take the BIG WRENCH.
- Go back one screen, then up to the car on fire.
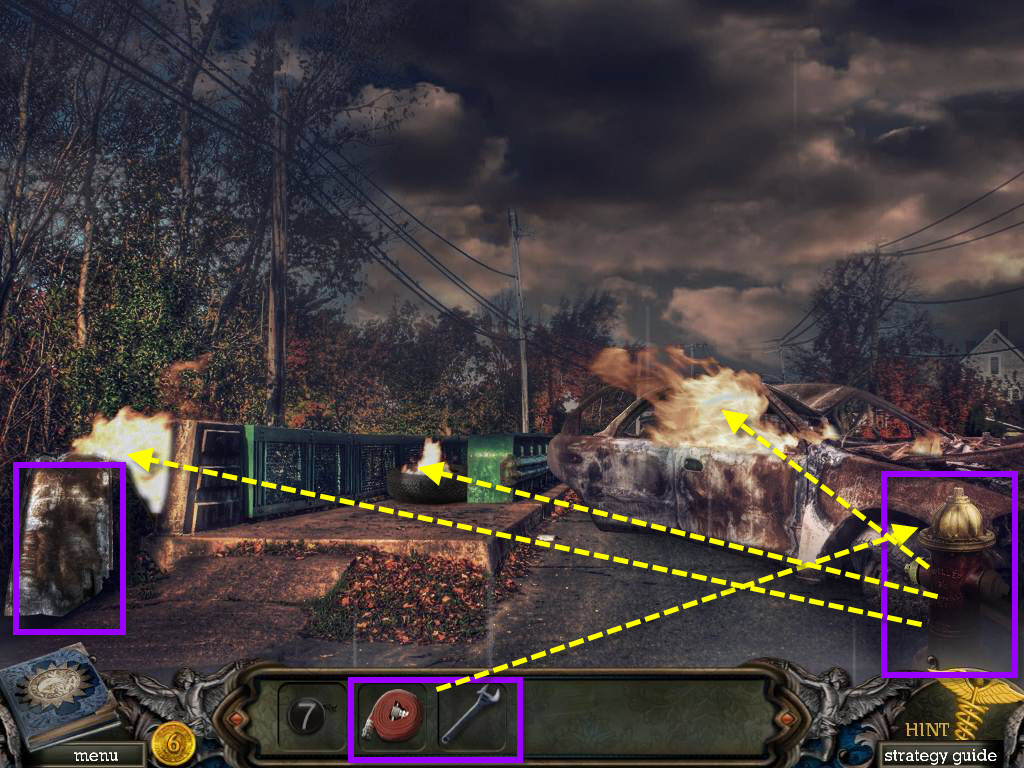
- Click on the fire hydrant on the right to zoom in.
- Use the FIRE HOSE on the hydrant.
- Use the BIG WRENCH to tighten it.
- This will start a mini-game.
- Simply point the hose at the fires and click the left mouse button to extinguish them.
- Once all three fires are extinguished, click on the car door to move it.
- Click on the left to move under the bridge.
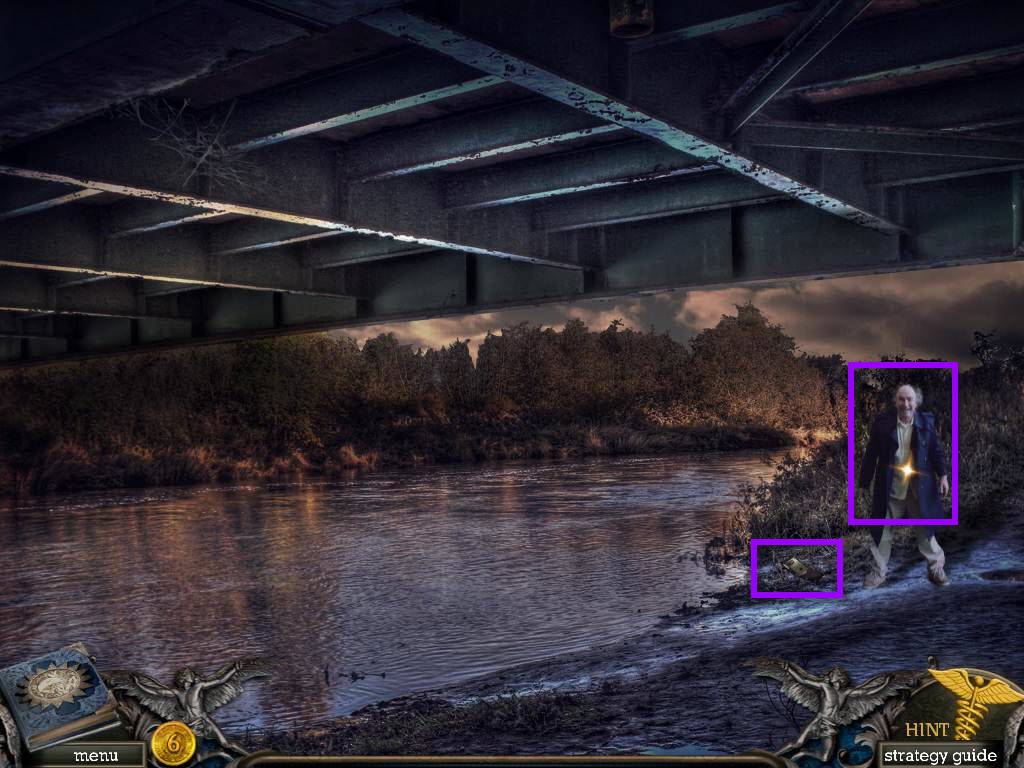
- Click on the man to talk to him.
- Click on the ground right beside him to zoom in.
- Take the DRIVER'S LICENSE, the MANHOLE X, and the COIN.
- Go back up to the bridge and move forward.
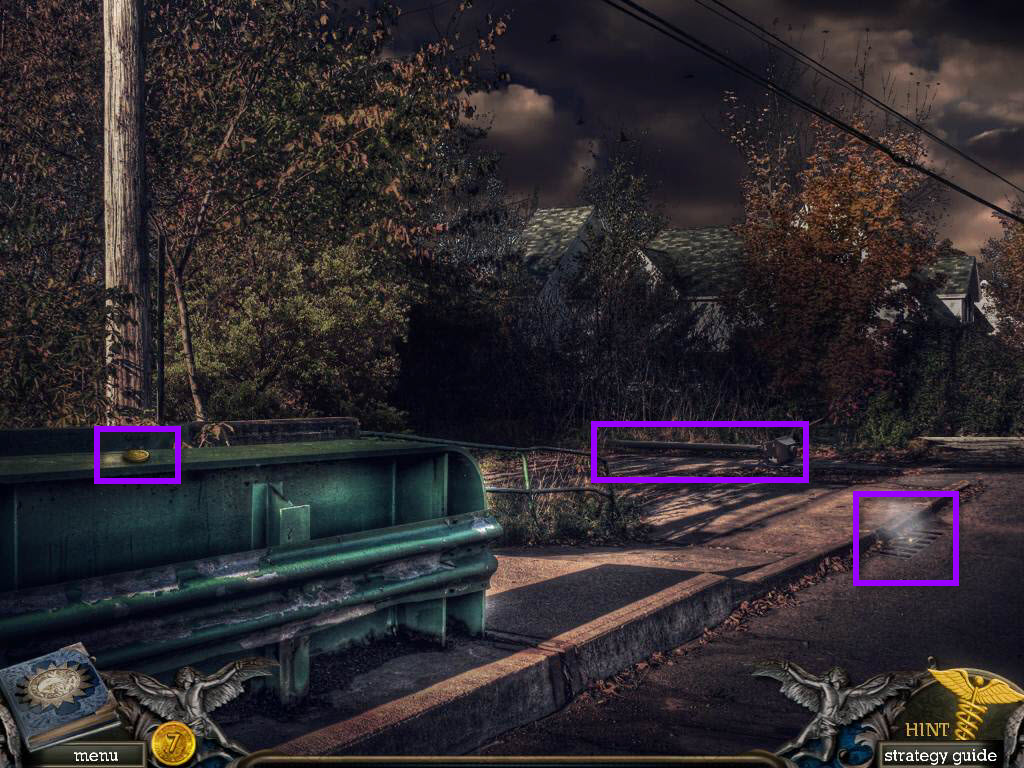
- Take the COIN.
- Click on the grate to zoom in.
- Take the TACKLE BOX KEY.
- Click on the lamppost that's on the ground.
- Take the MANHOLE R.
- Go back one screen.
- Click on the car to zoom in.
- Use the TACKLE BOX KEY on the TACKLE BOX to open it.
- Take the FISH HOOK.
- Go back one screen.
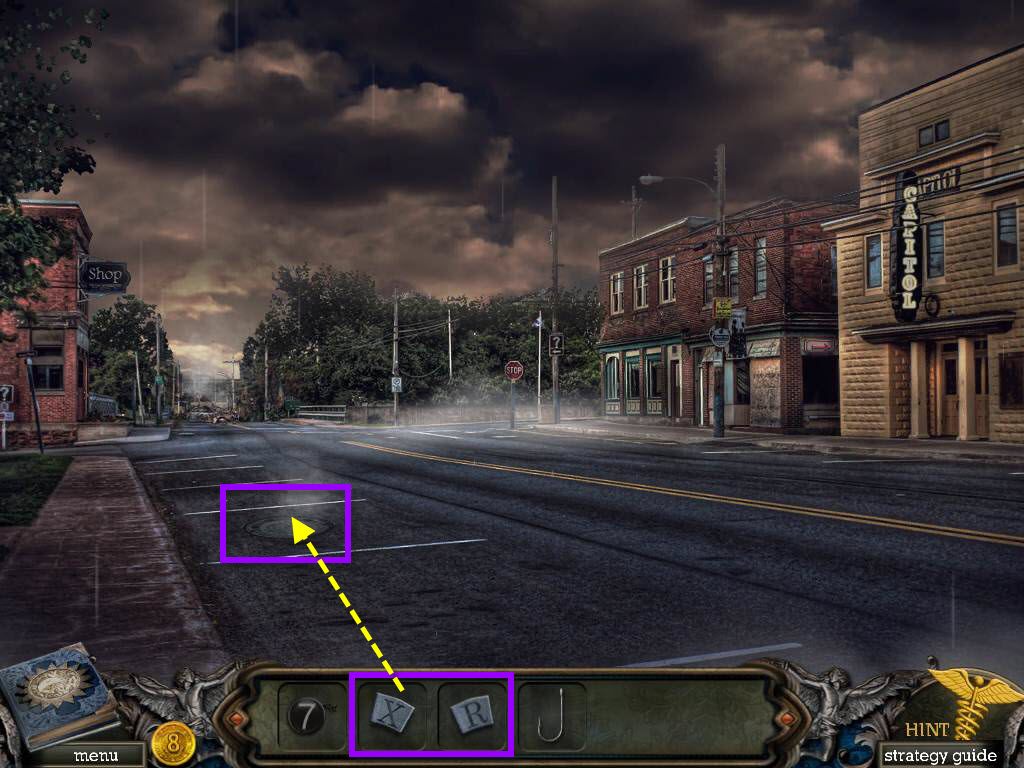
- Click on the manhole cover to zoom in.
- Use the MANHOLE R and the MANHOLE X so that it spells Oxford.
- Click to remove the manhole cover.
- Take the FISHING ROD.
- Go back one and then forward to the vending machine.
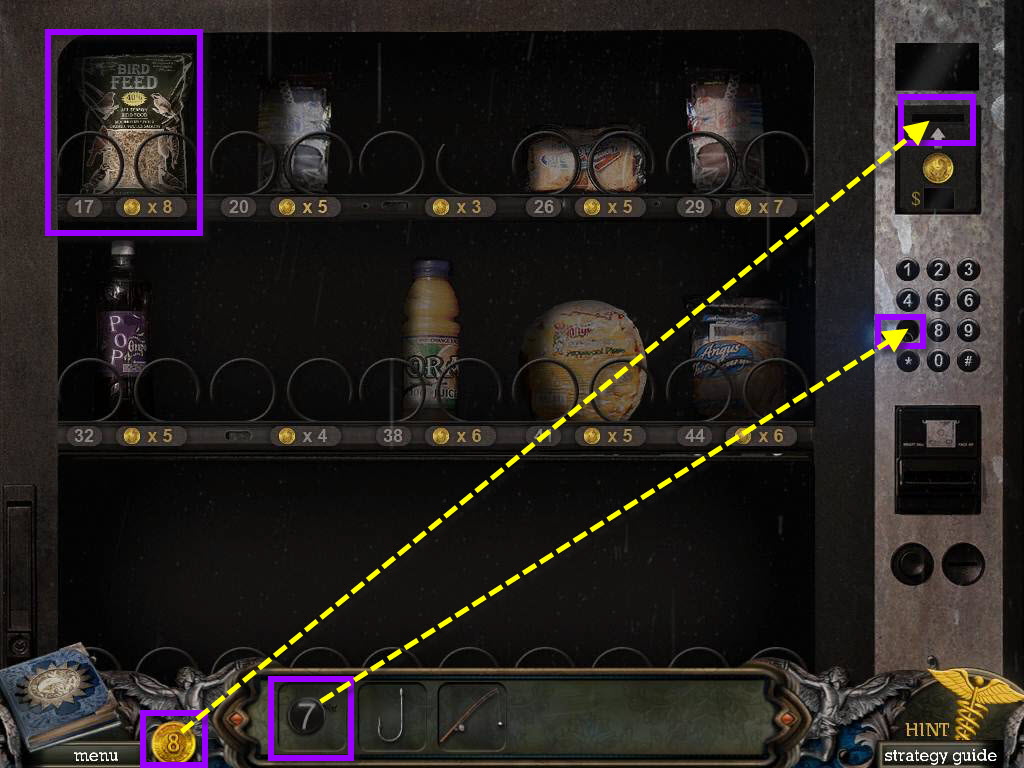
- Use the 7 BUTTON on the vending machine.
- Use the coins on the coin slot.
- Press 17 to get the BIRD SEED.
- Go back under the bridge.
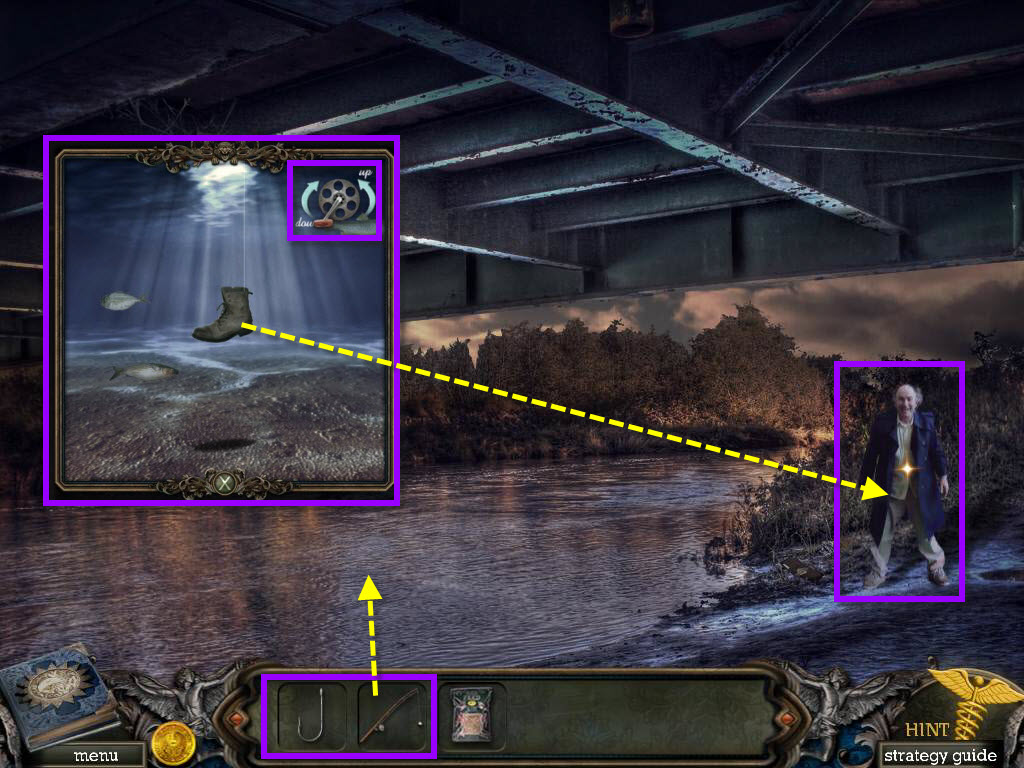
- Click on the man to talk to him.
- Use the FISHING ROD on the lake.
- Use the FISH HOOK on the FISHING ROD.
- This will start a mini-game.
- You will need to lower the hook to get the BOOT.
- Don't let the boot touch a fish.
- Use the BOOT on the man.
- You will receive a LANTERN (UNLIT).
- Go back two screens, through the alley, back to the screen in front of the apartment.
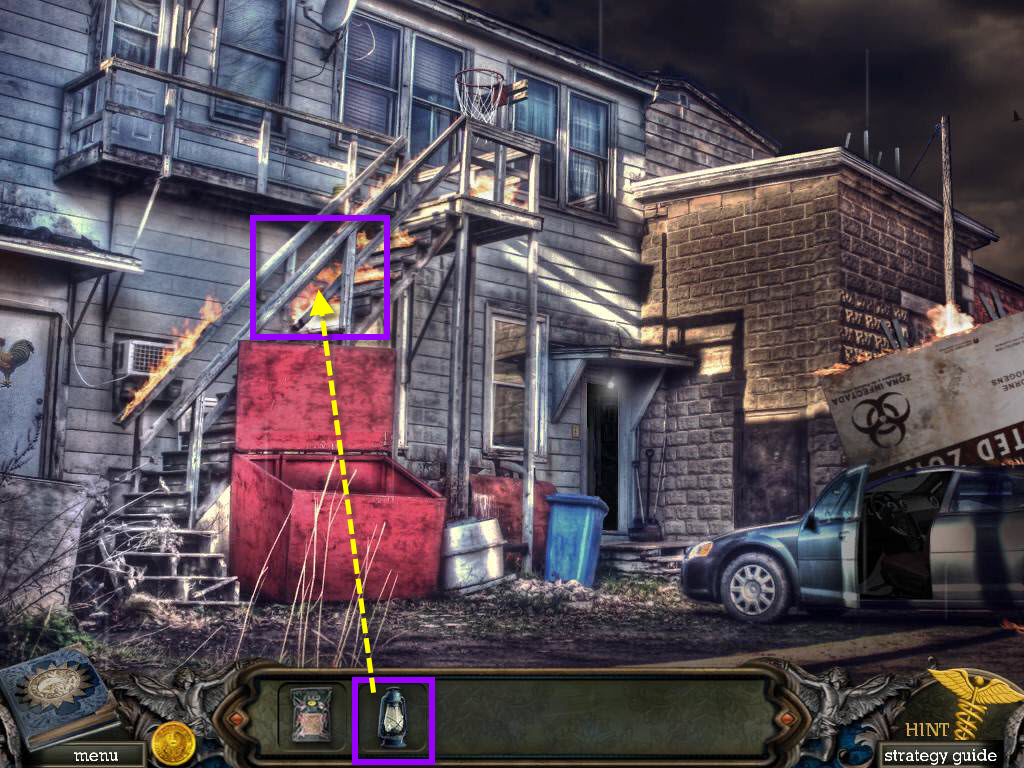
- Use the LANTERN(UNLIT) on the fire on the stairs to light it.
- You will now have the LANTERN (LIT).
- Go back two screens, then move forward two screens and watch the cut scene.
Comments will load when you reach this part of the walkthrough.