

Chapter 3: The Ghoul and the Chamber of Torture
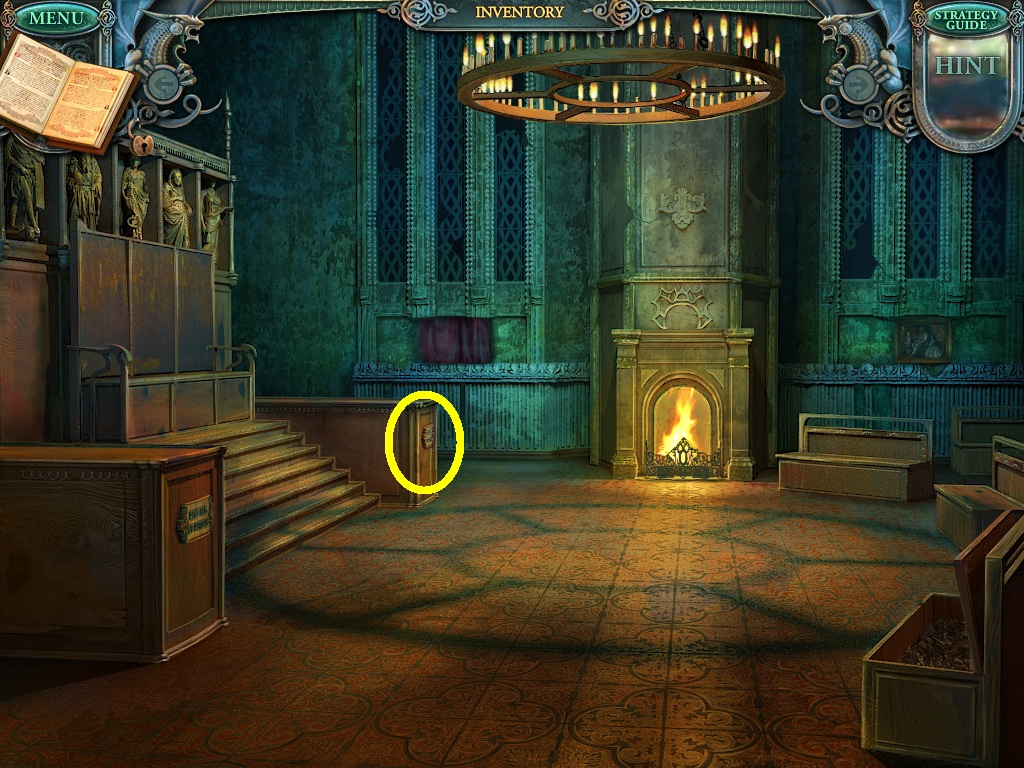
- Zoom into the box (yellow circle).
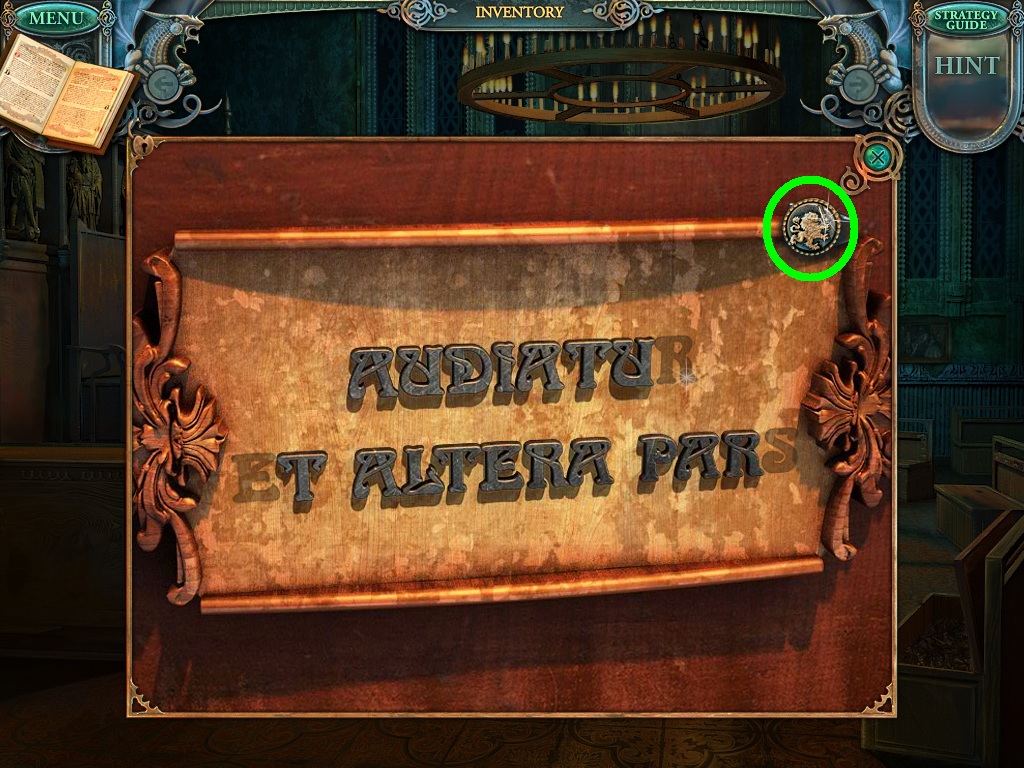
- Pick up the signet (green circle).
- Go back to the side hall.
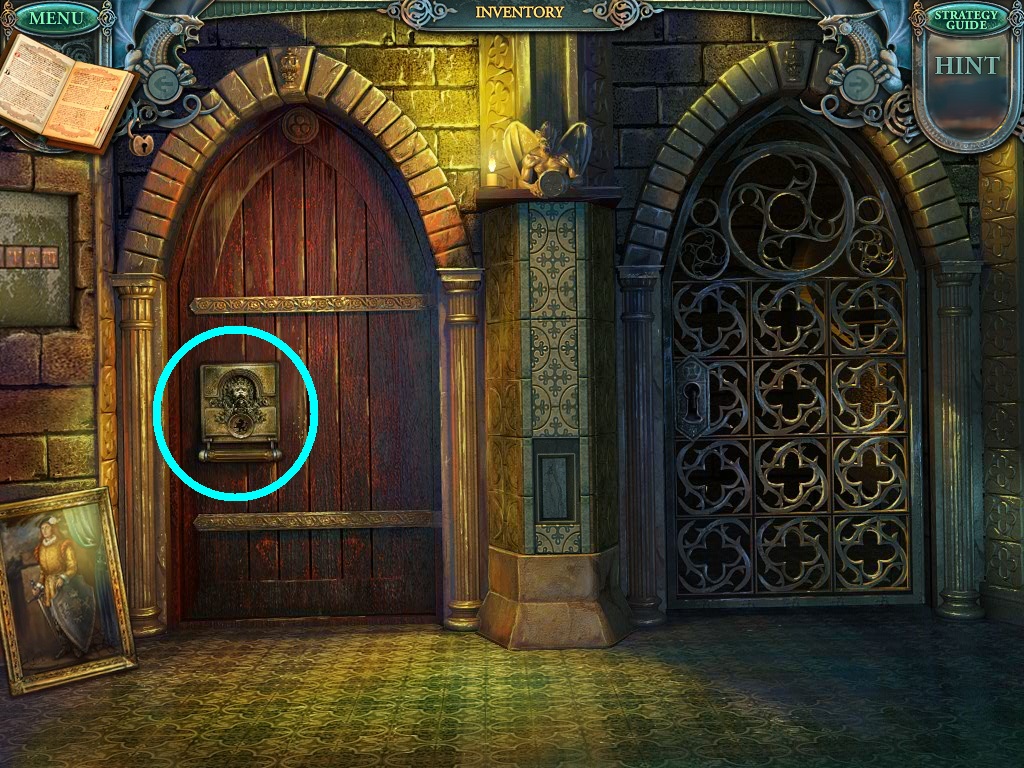
- Zoom into the door lock (aqua circle).
- Pick the signet from the inventory to open the door.
- Go through to the next scene.
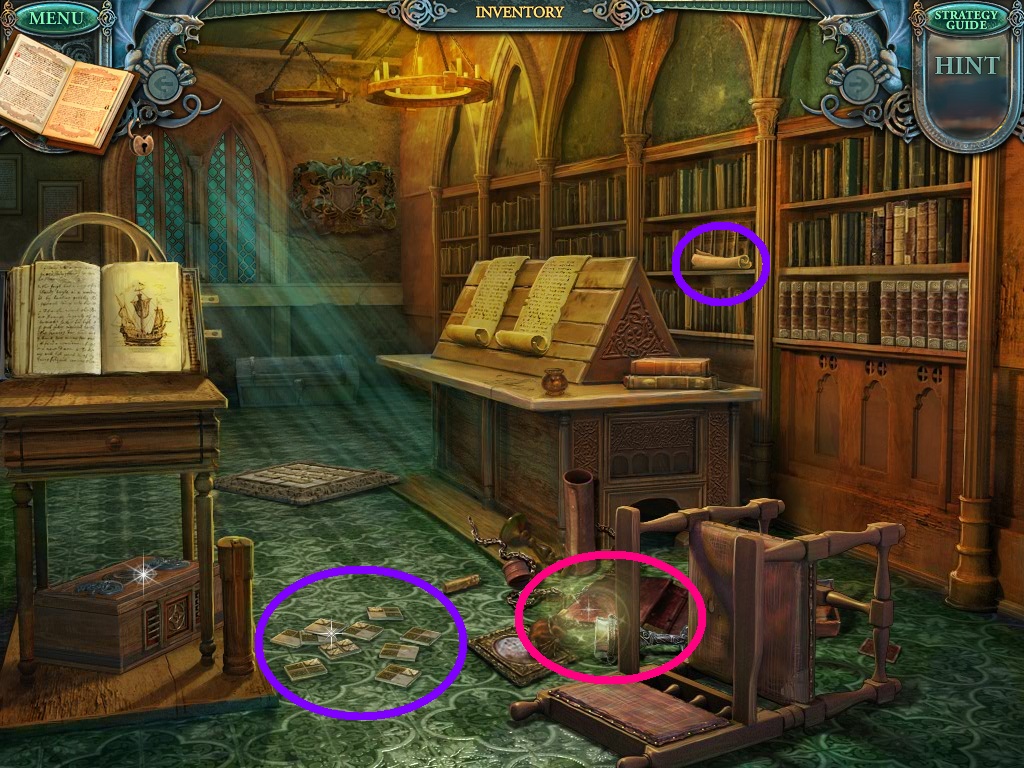
- Pick up the scroll and the decorative elements (purple circles).
- Click the floor debris (pink circle).
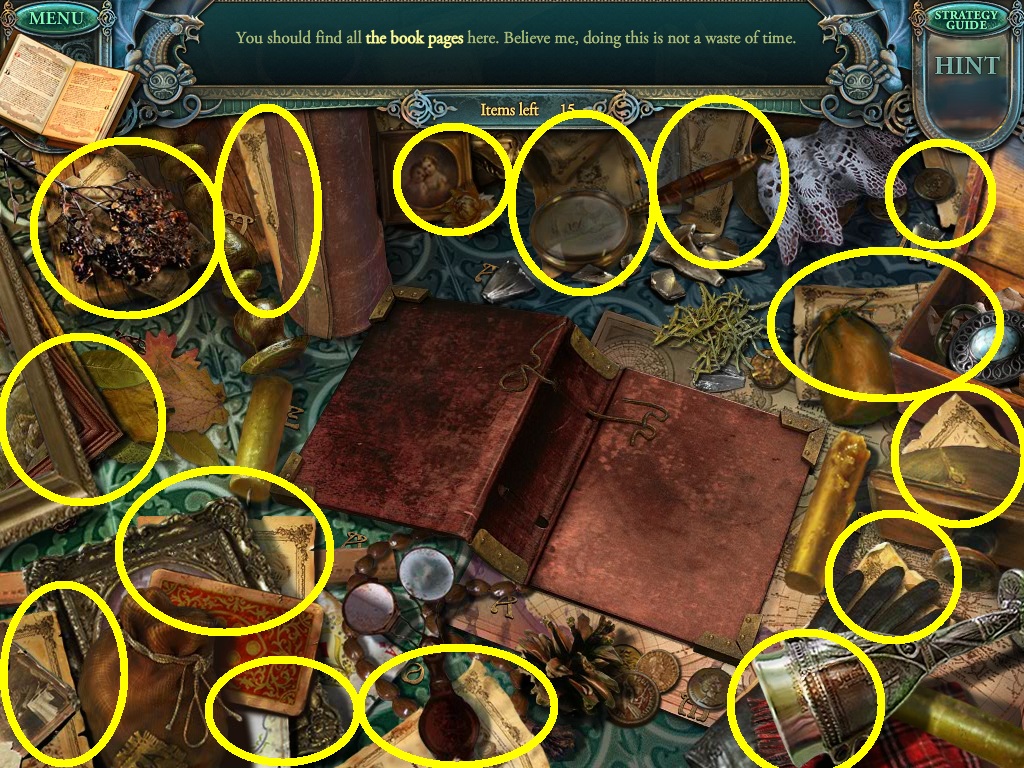
- Find the missing book pages (yellow circles).
- Go back to the side street.
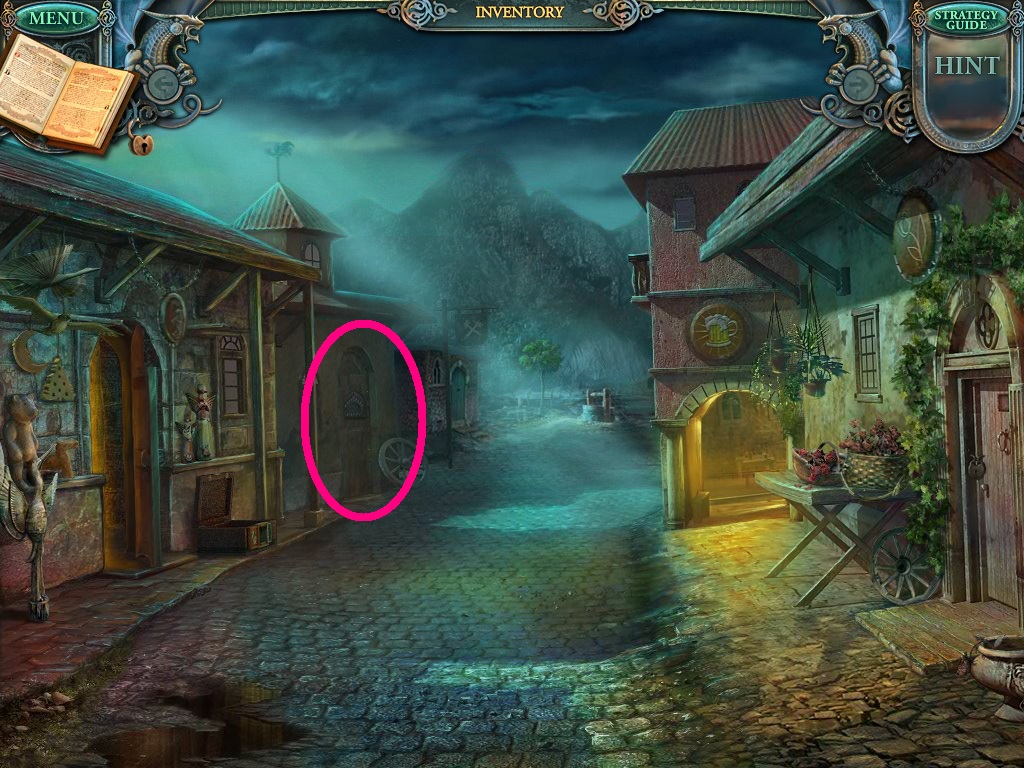
- Zoom into the side street door (pink circle).
- Use the decorative element in the inventory to open a puzzle.
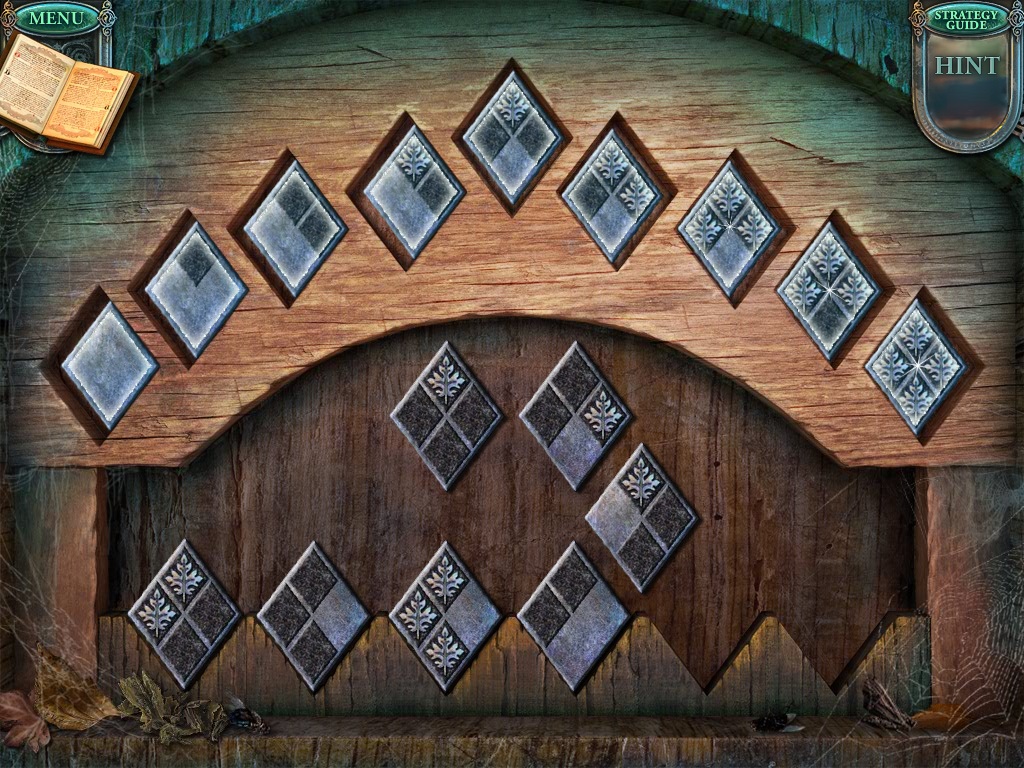
- Solve the puzzle as shown above.
- Use the metal plates from your inventory to complete the puzzle.
- Pick up the metal plates and place them into the slots.
- Every metal plate pattern must be different from the one placed before it.
- Once completed, go into the smithy.
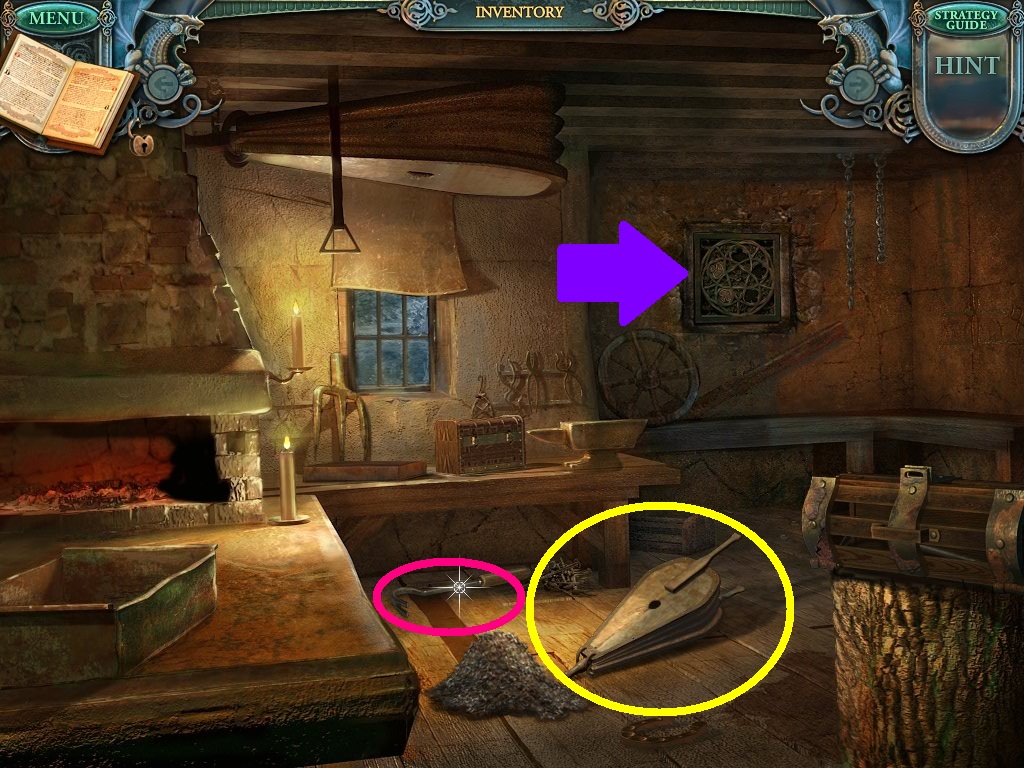
- Click the bellow (yellow circle) several times.
- Pick up the wrench under the debris.
- Pick up the nail drawer (pink circle).
- Zoom into the grate (purple arrow) in the back of the room.
- Notice the missing slots.
- Pick up the metal wedge.
- Go to the brewery.
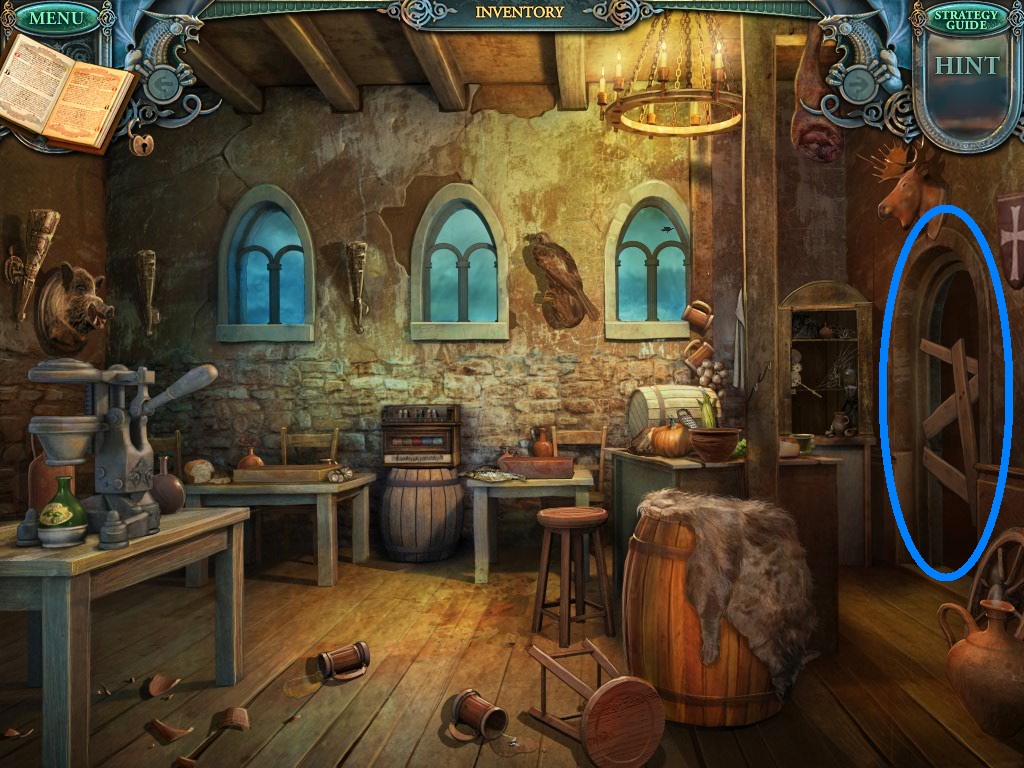
- Click onto the boarded up door (blue circle).
- Use the nail drawer from your inventory to break through the wood.
- Enter the hidden object area.
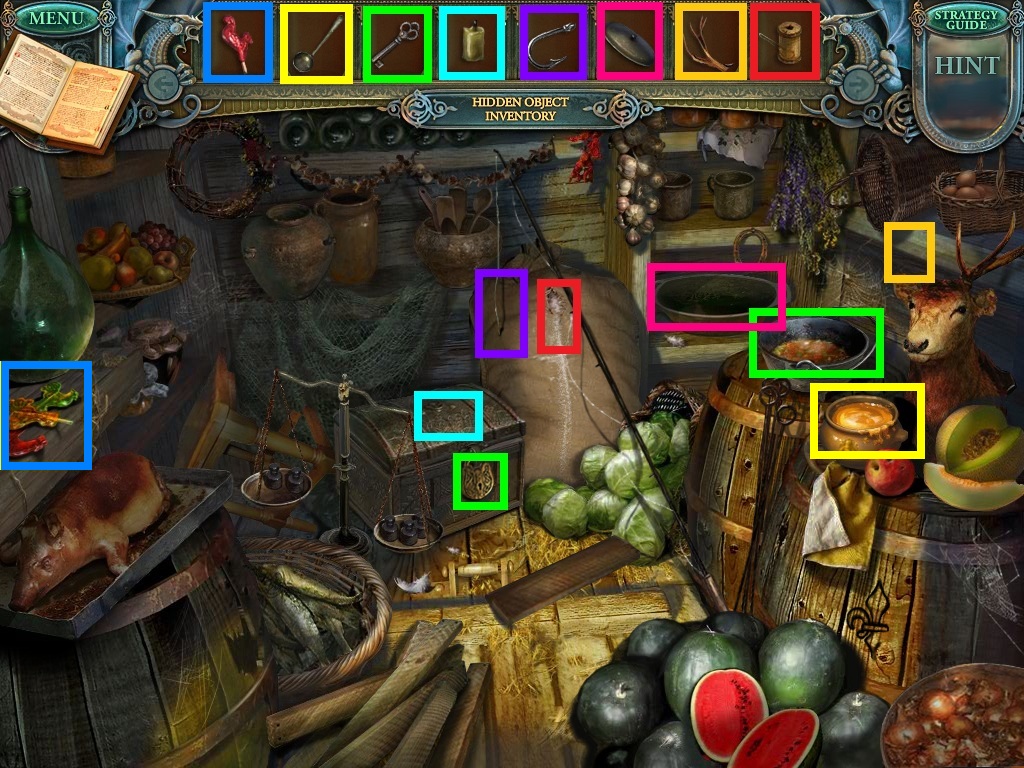
- Place the color coordinated items in their right places.
- Pick up the cheese.
- Go to the store room.
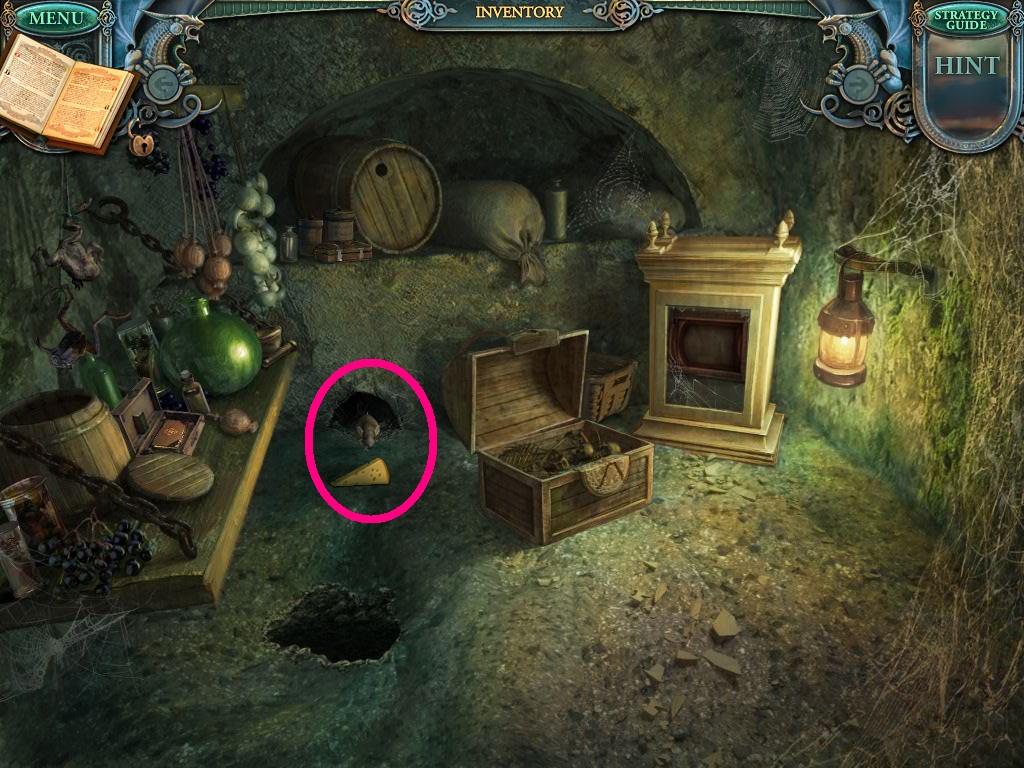
- Pick up the cheese from the inventory.
- Place it in front of the mouse hole and pick up the mouse (pink circle).
- Go to the apothecary.
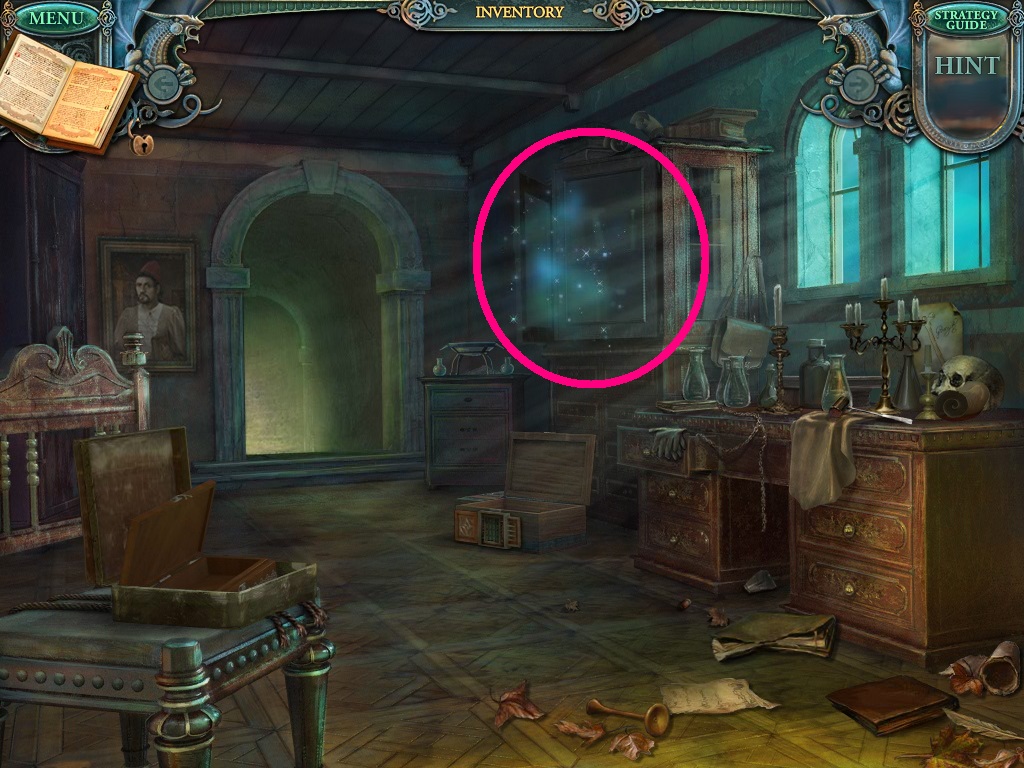
- Click on the area over the cupboard (pink circle).
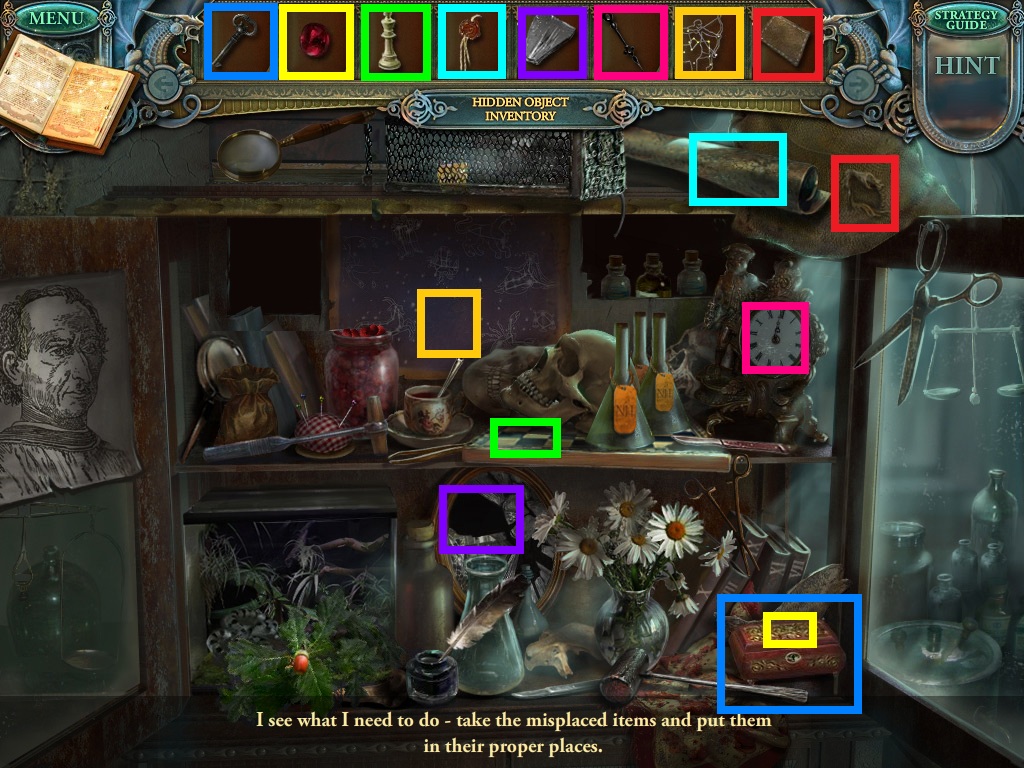
- Match the color coordinated items and put them in their right place.
- Pick up the letter "r."
- Go to the courtyard.
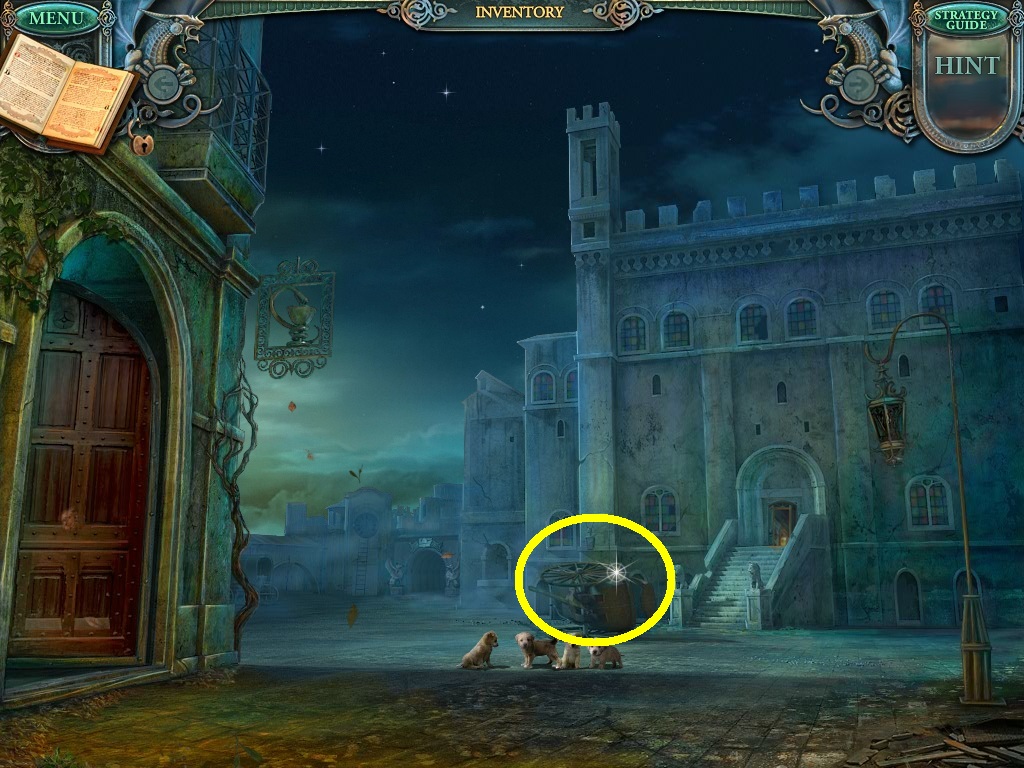
- Zoom into the crashed carriage (yellow circle).
- Pick the wrench from the inventory.
- Loosen the bolt on the metal hoop around the barrel.
- Go to the well.
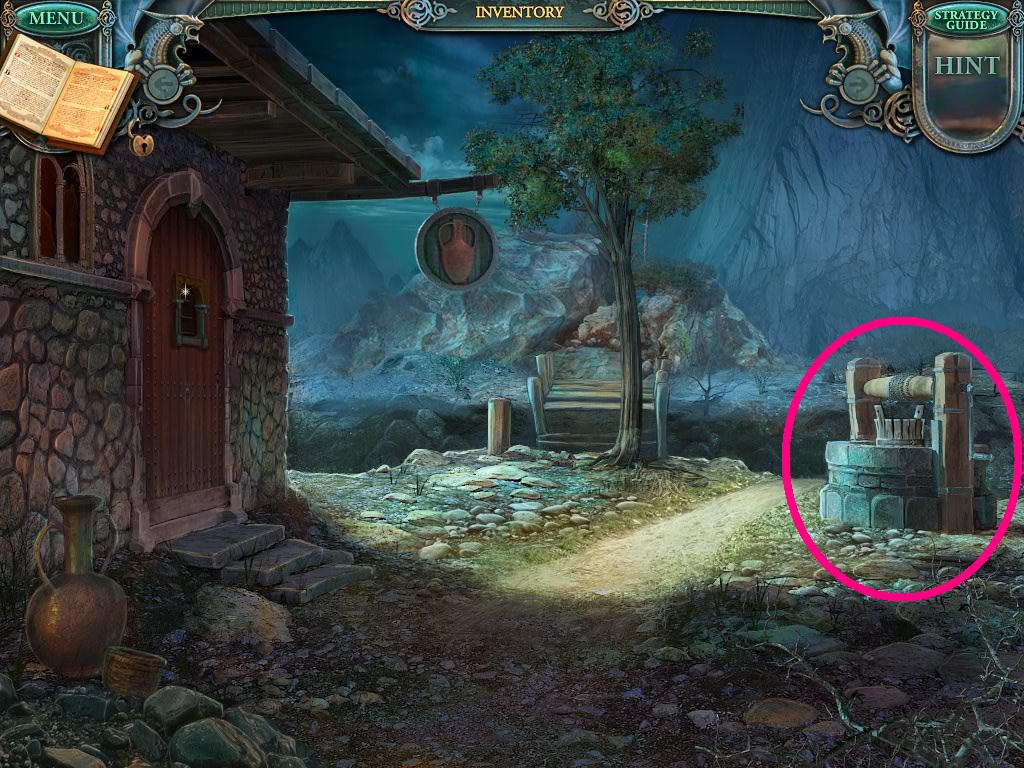
- Zoom into the well (pink circle).
- Use the metal hoop from the inventory to fix the wooden bucket.
- Use the wrench from the inventory to tighten the screws.
- Pick up the bucket.
- Go forward to the riverbank.
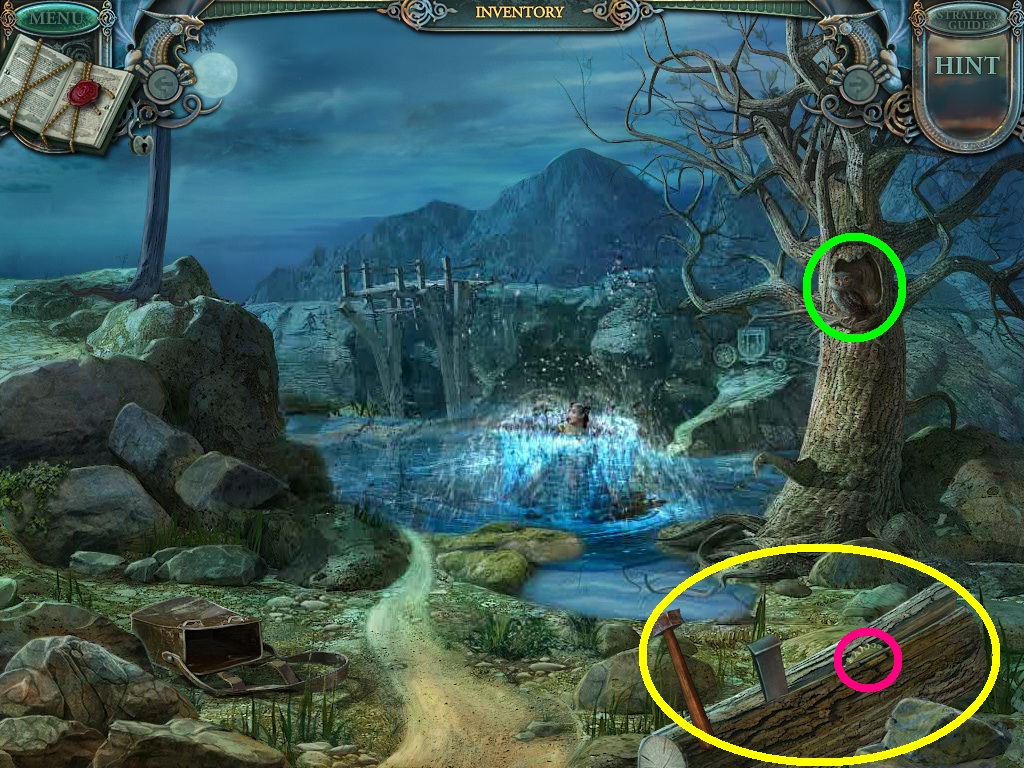
- Use the metal wedge and hammer from your inventory to split the log (yellow circle).
- Pick up the gear (pink circle).
- Zoom into the tree hole (green circle).
- Give the mouse from the inventory to the owl in the tree.
- Pick up the dominos.
- Go back to the brewery.
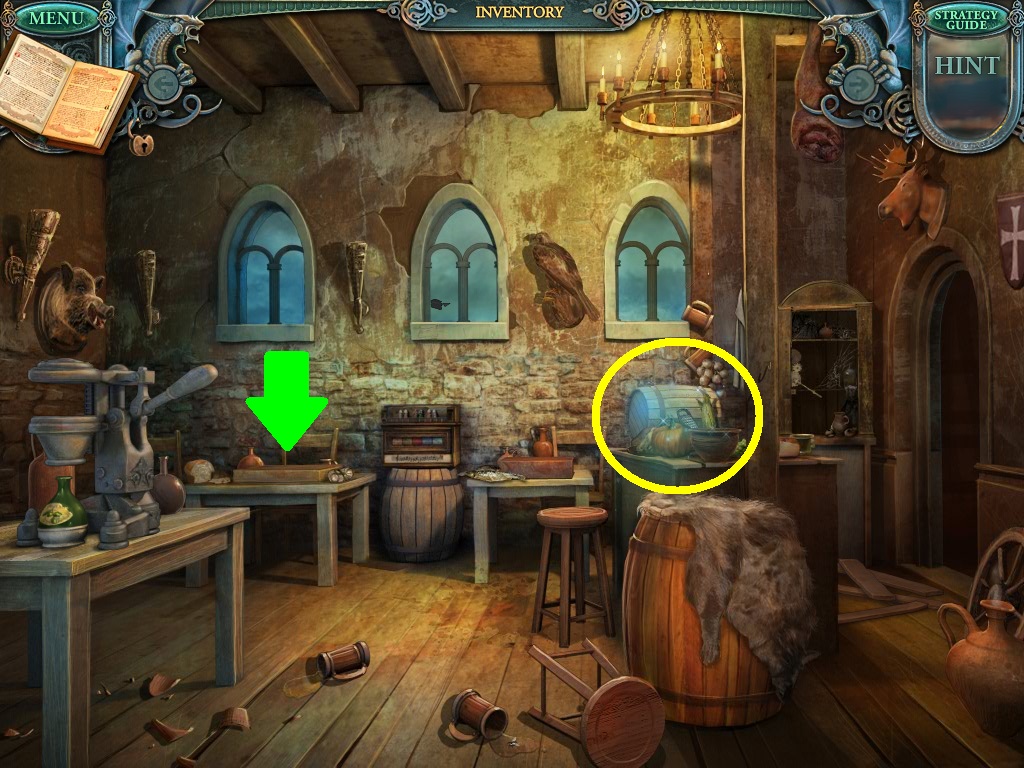
- Click on the hidden object area (yellow circle).
- Notice the table (green arrow).
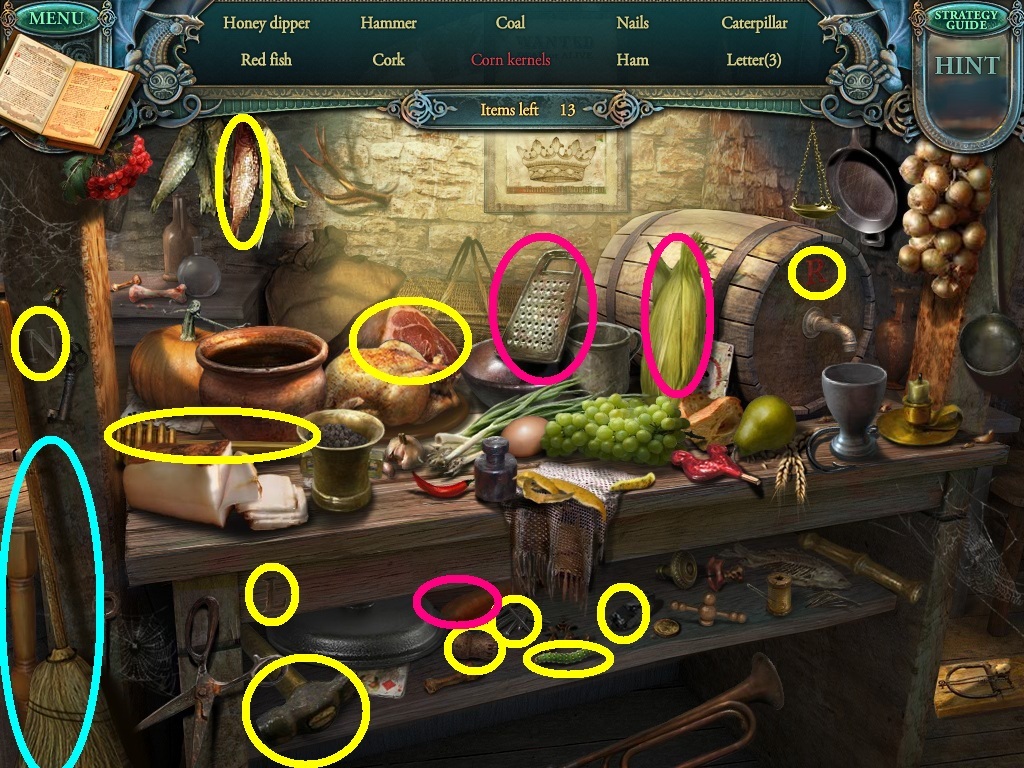
- Find the listed objects (yellow circles).
- Some objects (pink circles) need additional action to be collected.
- Pick up the broom (aqua circle).
- Zoom into and click the table in the back left corner.
- Use the dominos from your inventory to open a puzzle.
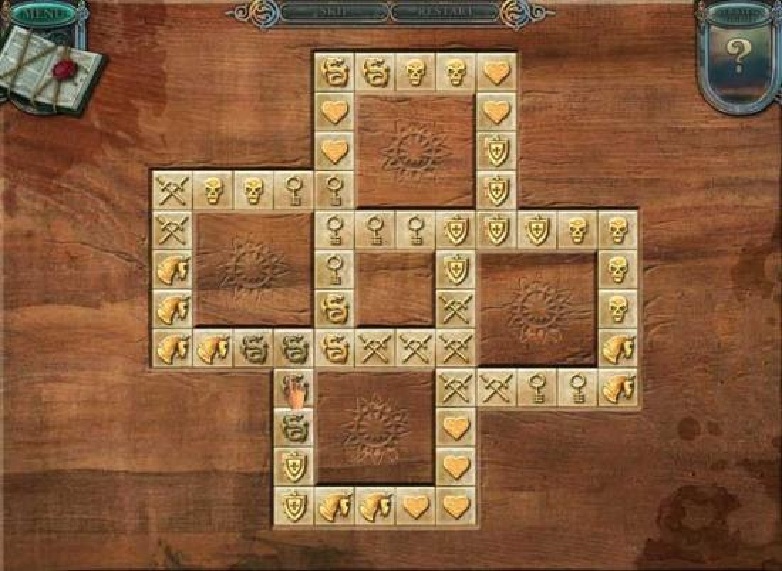
- Solve the puzzle as shown above.
- Match all the symbols.
- Pick up metal decoration after completing the puzzle.
- Go to the toy shop.
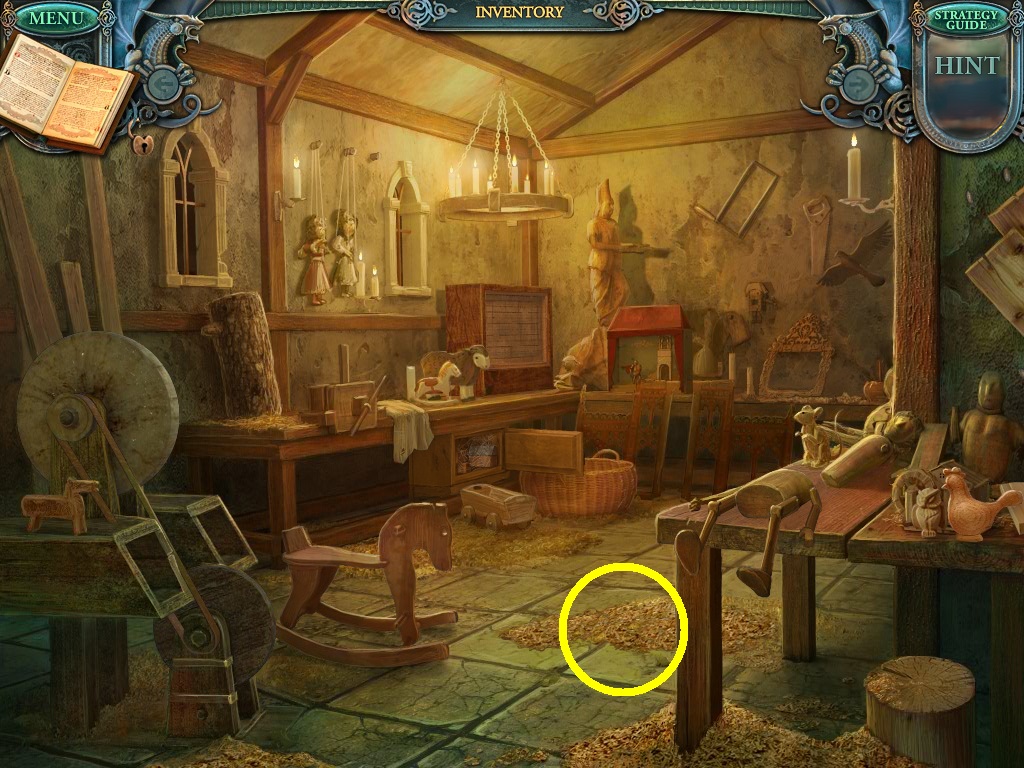
- Use the broom in the inventory to sweep away the saw dust (yellow circle).
- Pick up the rope.
- Go to the archives.
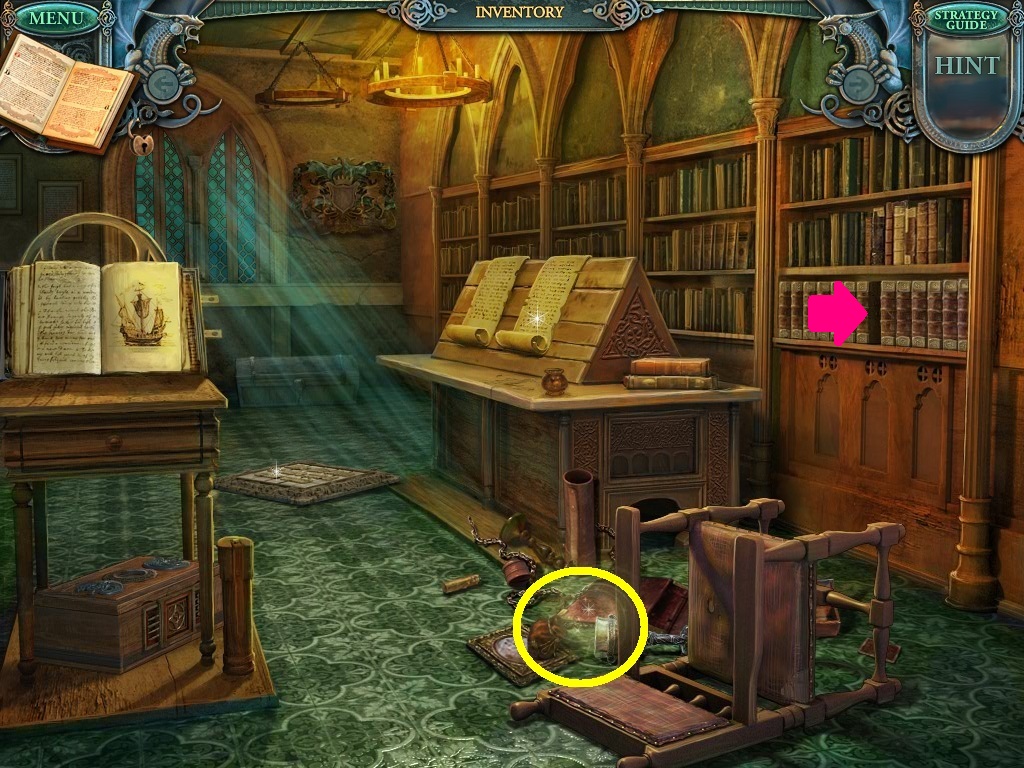
- Notice the space in the book shelf (pink arrow).
- Zoom into floor debris (yellow circle).
- Use the inventory rope to bind the book and open a puzzle.
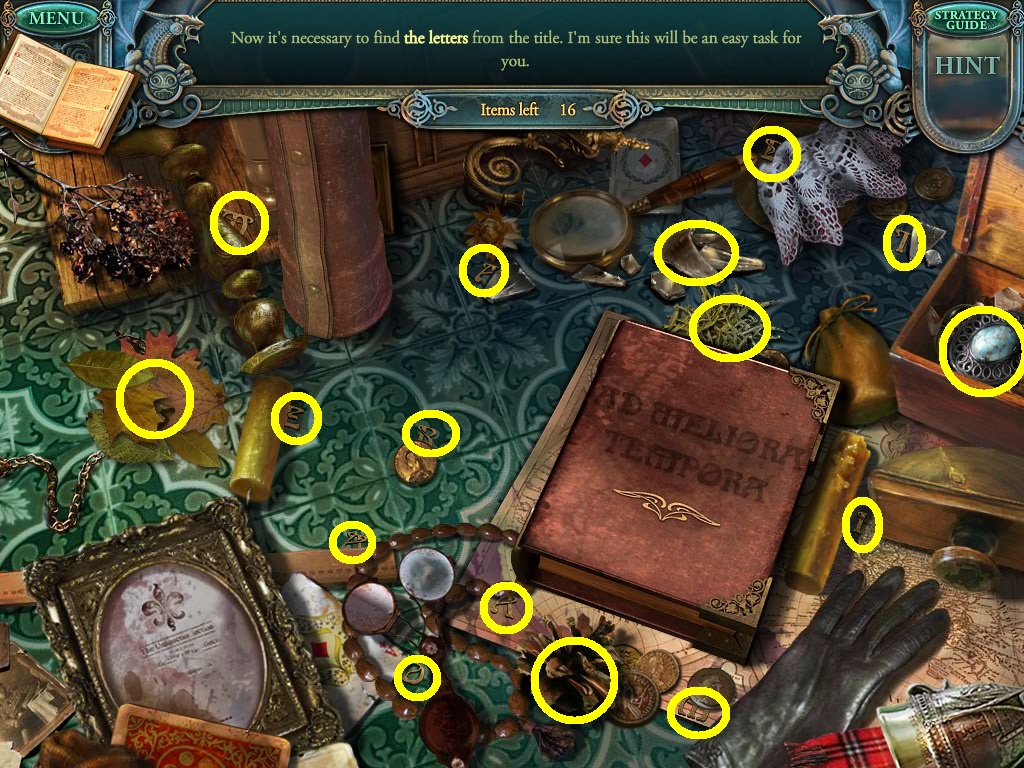
- Find all the letters (yellow circles).
- Pick up the book.
- Back in the archive; zoom into the bookshelf.
- Insert the ancient book into the empty space.
- Enter the secret passage.
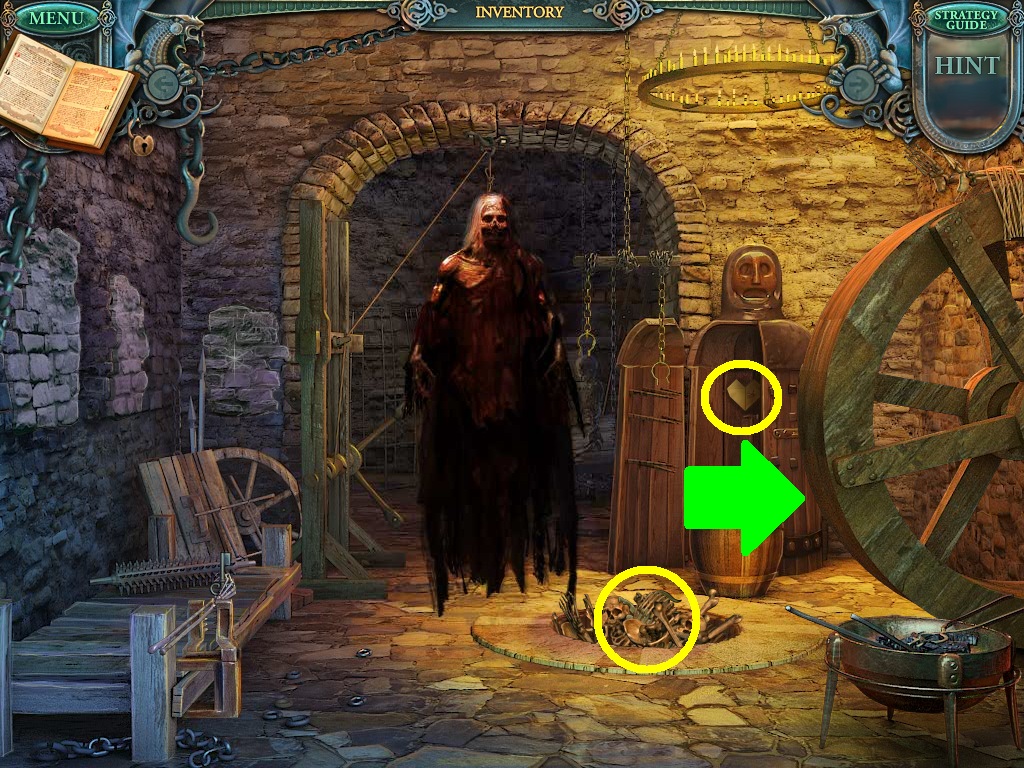
- Pick up the origami heart and the metal goat (yellow circles).
- Click the wheel (green arrow).
- Zoom into the skeleton on the wheel.
- Use the scalpel from the inventory to cut the ropes.
- Pick up the tower key between the skeleton’s arms.
- Go to the side hall.
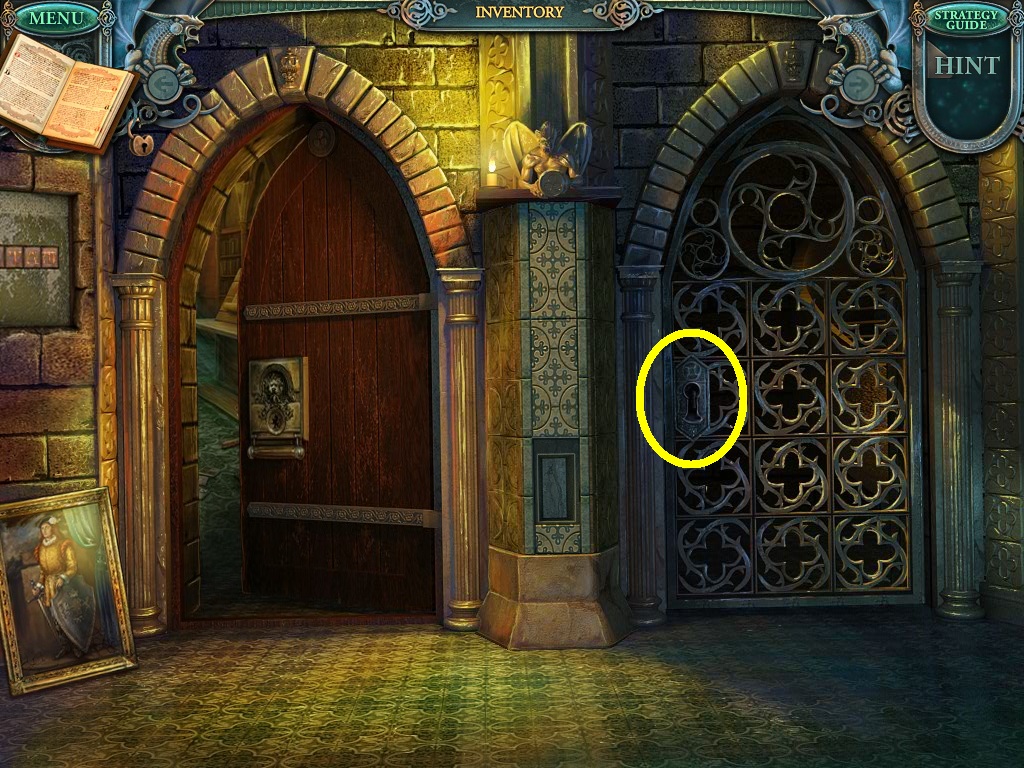
- Use the tower key from the inventory to open the door (yellow circle).
- Go through to the next scene.
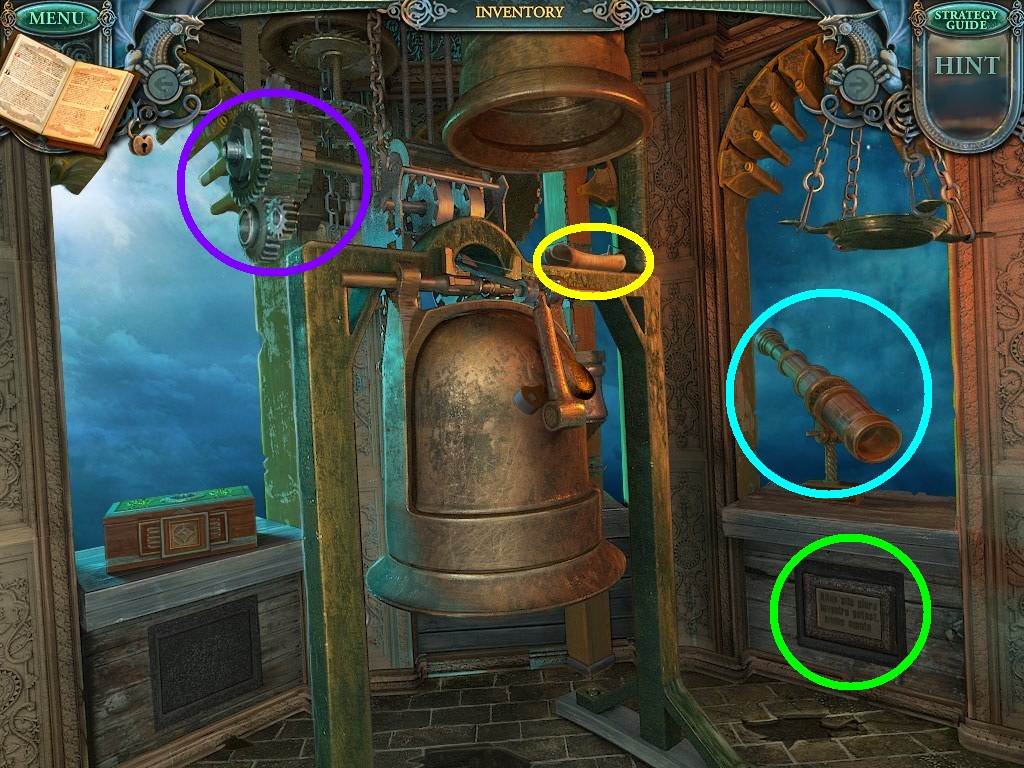
- Pick up the scroll (yellow circle).
- Click on the plaque (green circle).
- Pick up the stone ball.
- Use the lens in the inventory on the telescope (aqua circle).
- Use the gear from the inventory to insert into the bell mechanism (purple circle).
- Go to the central entrance.
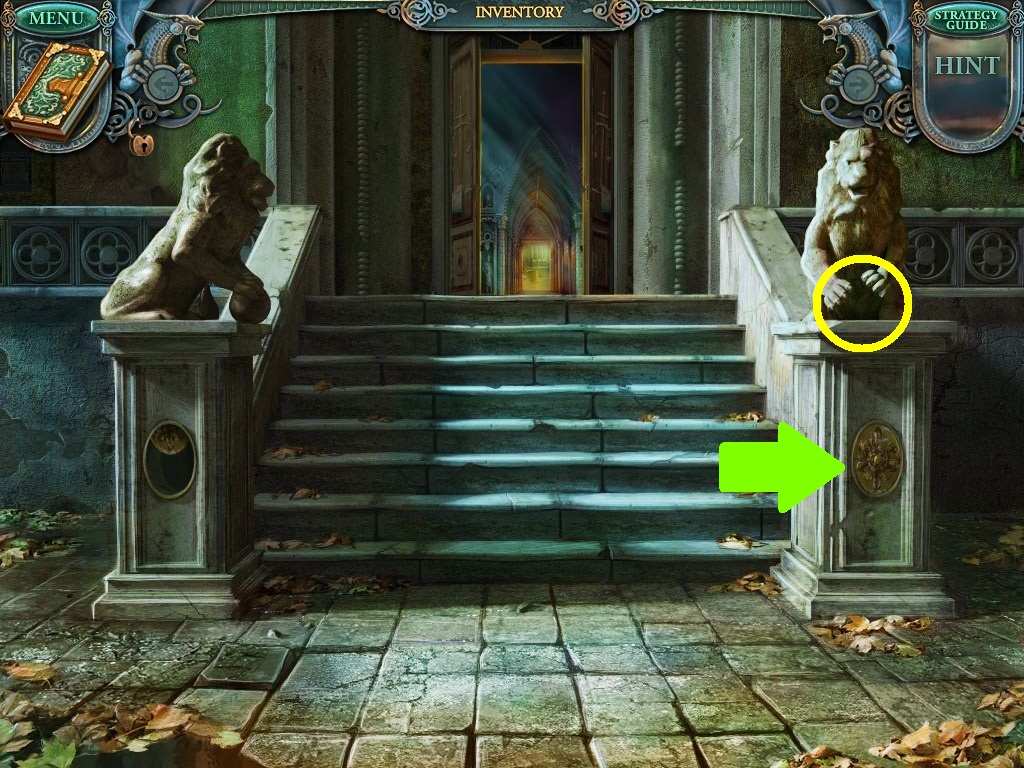
- Use the stone ball from the inventory on the lion statue (yellow circle).
- Click the medallion (green arrow).
- Pick up the water sign plate.
- Go to the archives.
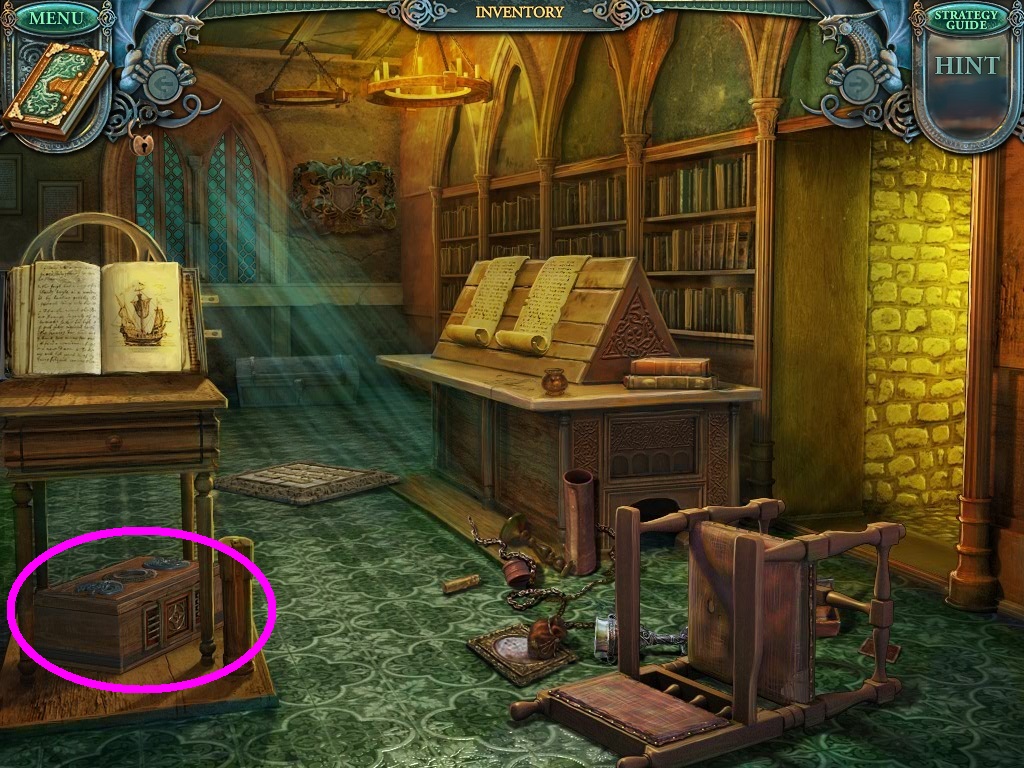
- Zoom into the box (pink circle).
- Insert the water sign plate from the inventory into the slot.
- Click the panel to open the puzzle.
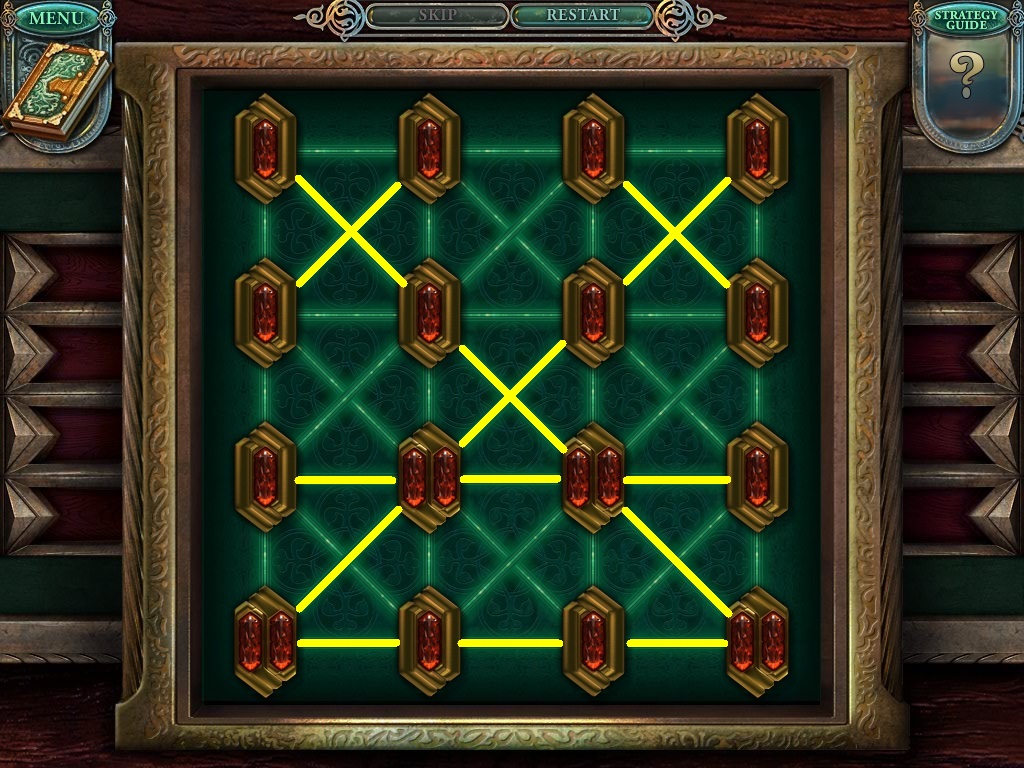
- Complete the puzzle as shown above (yellow lines).
- Pick up the scroll and magic powder.
- Go to the riverbank.
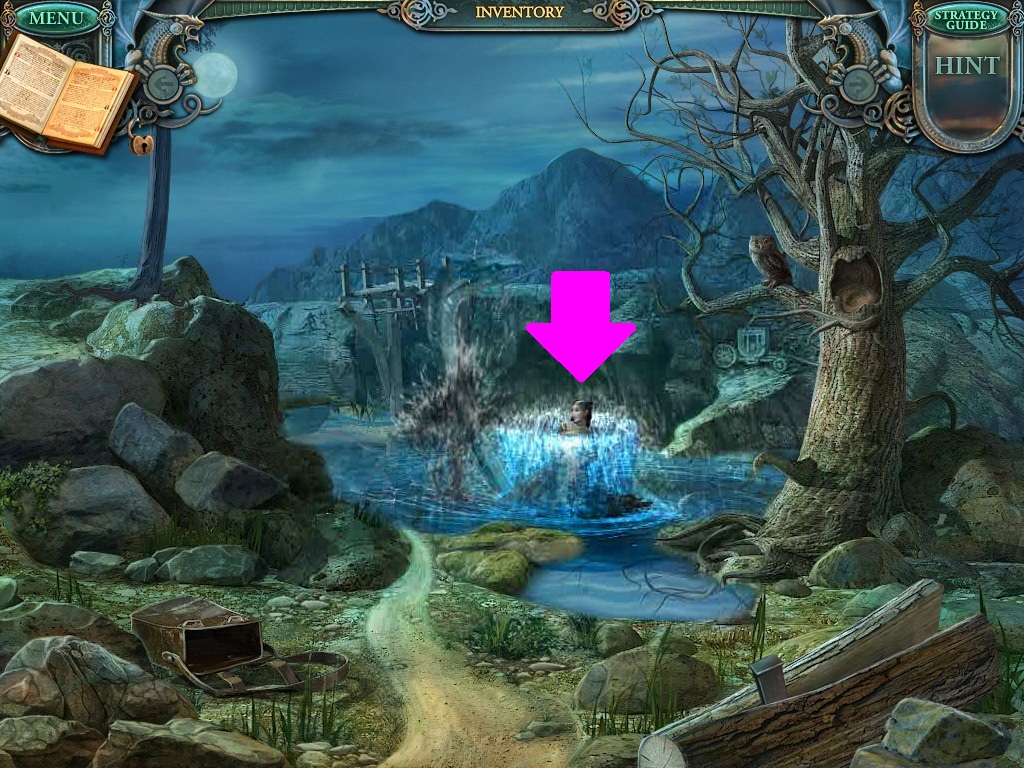
- Select the magic powder from the inventory.
- Use it on the princess (pink arrow).
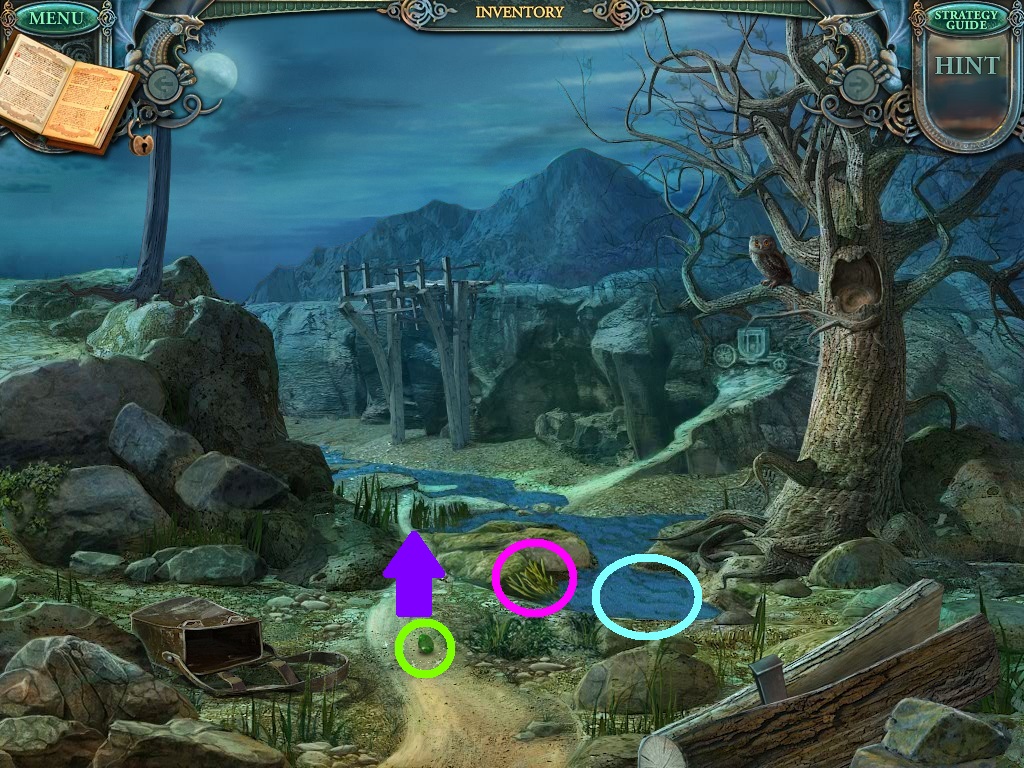
- Pick up the gem (green circle).
- Pick up the weed (pink circle).
- Select the bucket from your inventory.
- Dip it into the water (aqua circle).
- Pick it up again.
- Go along mountain path (purple arrow) to the carriage.
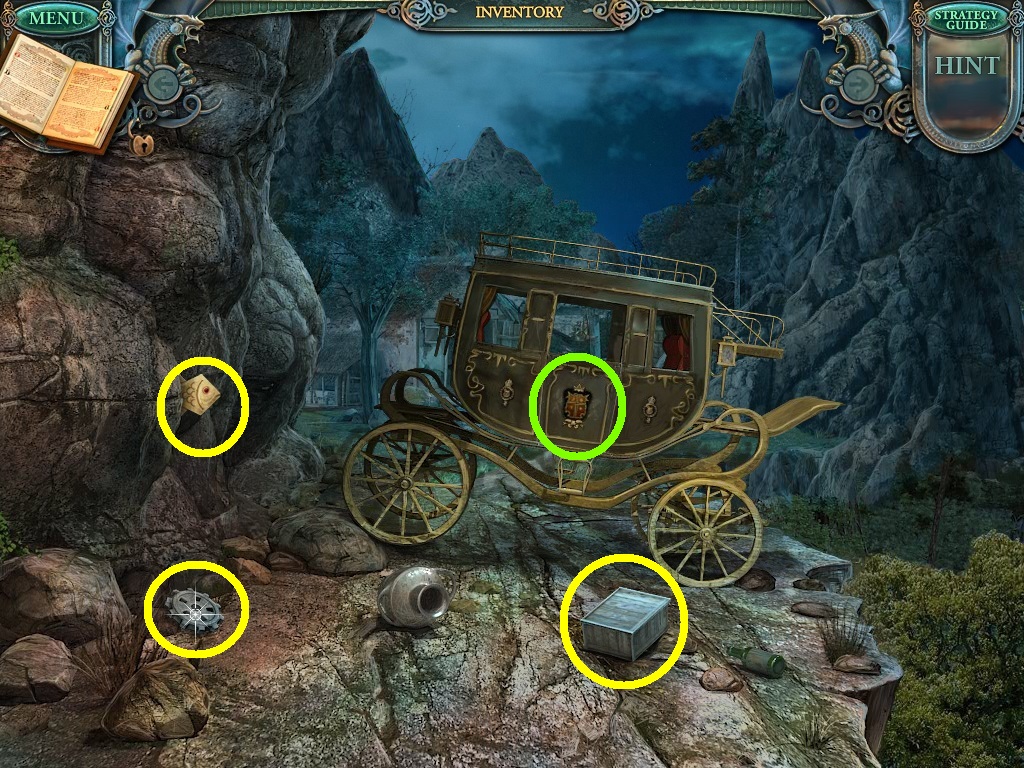
- Pick up the origami fish, gear and quill (yellow circles).
- Notice the royal emblem (green circle) on the carriage.
- Go back to the archives.
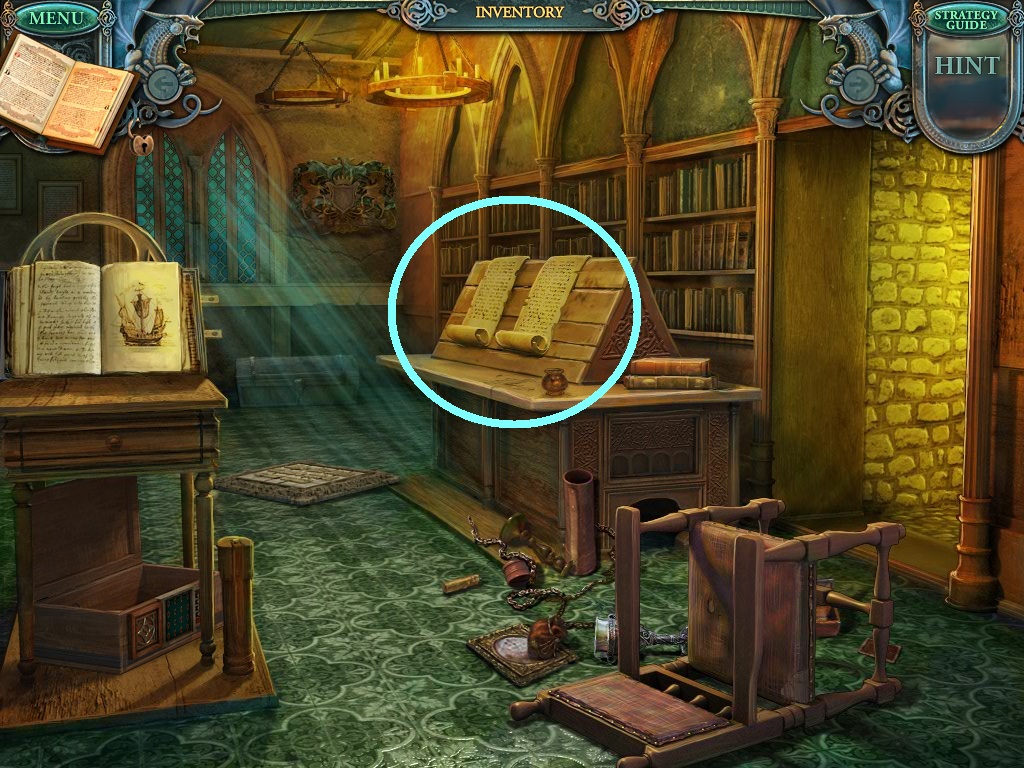
- Zoom into the archive scrolls (aqua circle).
- Select the quill from the inventory.
- Dip it into the ink pot.
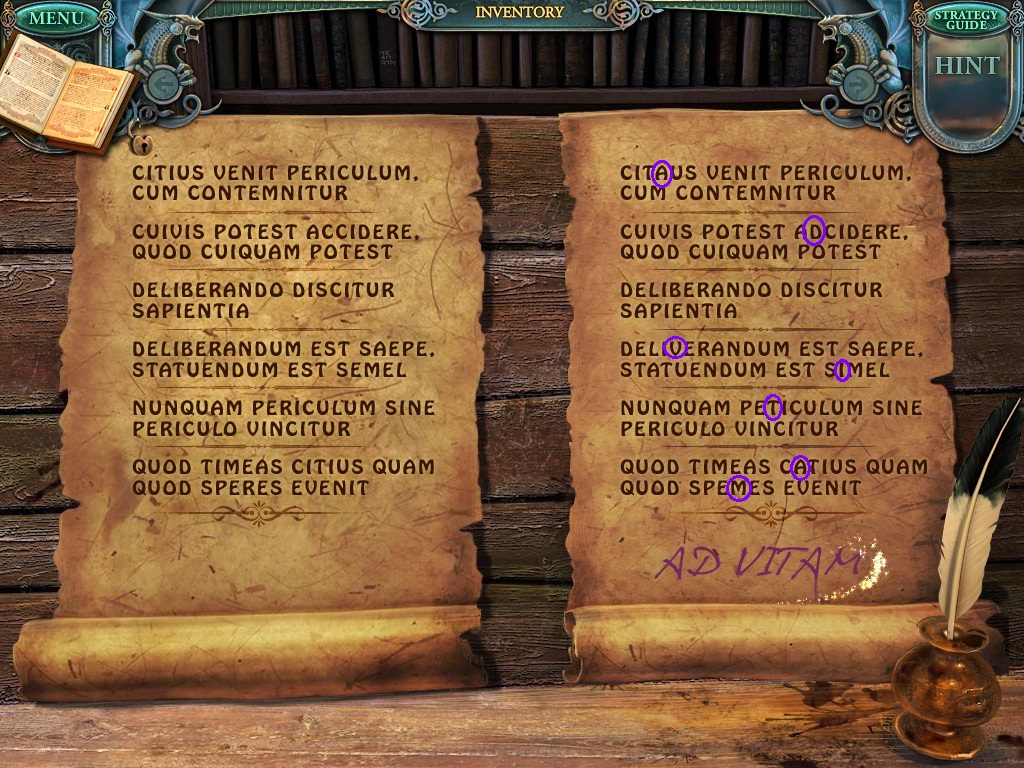
- Solve the puzzle as shown above.
- Find the differences between the texts on the scrolls.
- Use the quill to mark the differences.
- When solved, pick up the stone letter.
- Go to the side hall.
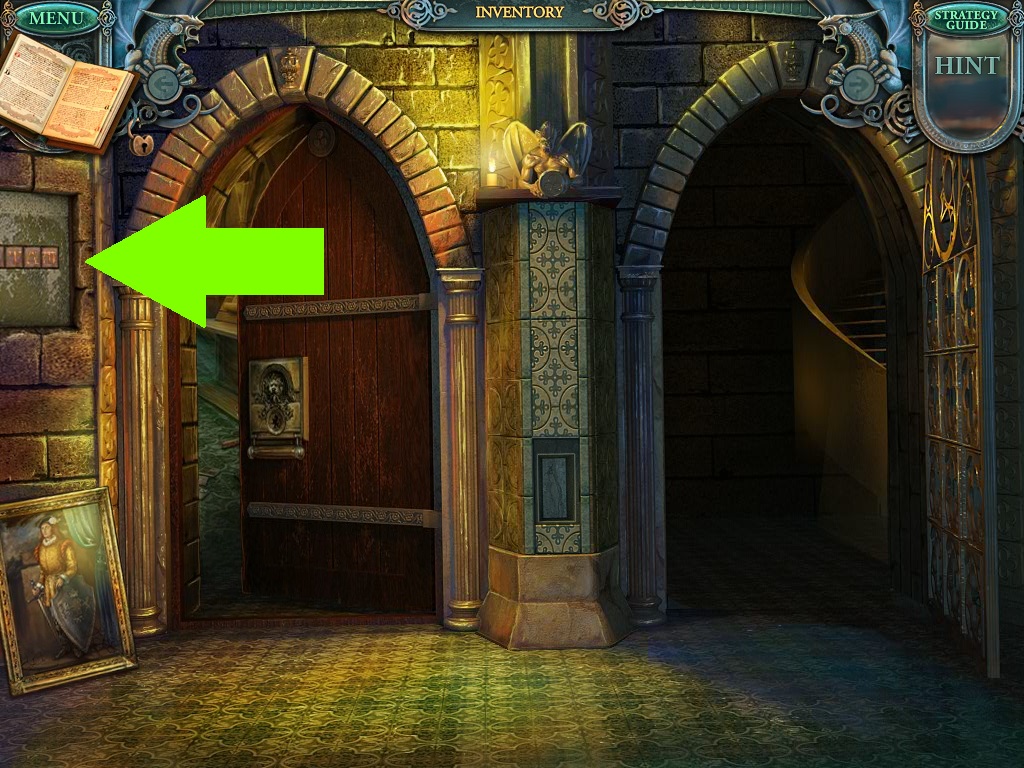
- Zoom into the wall (green arrow) behind the picture.
- Use the stone letter from your inventory to open a puzzle.
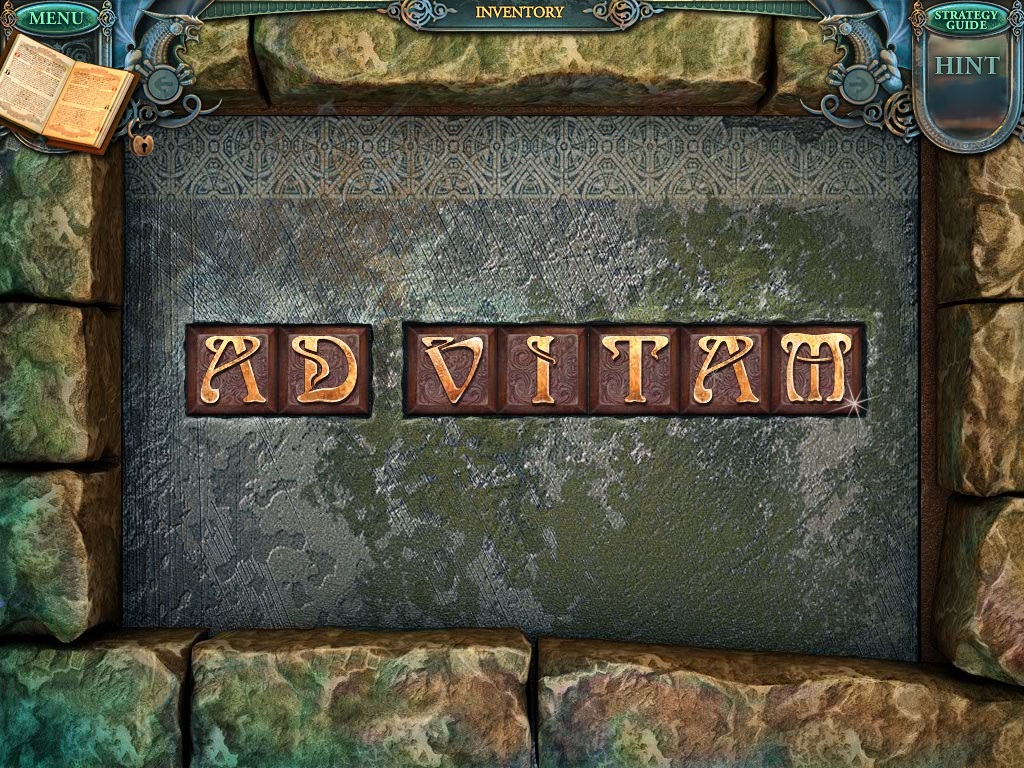
- Solve the puzzle as shown above.
- Pick up the telescope handle.
- Go to the tower.
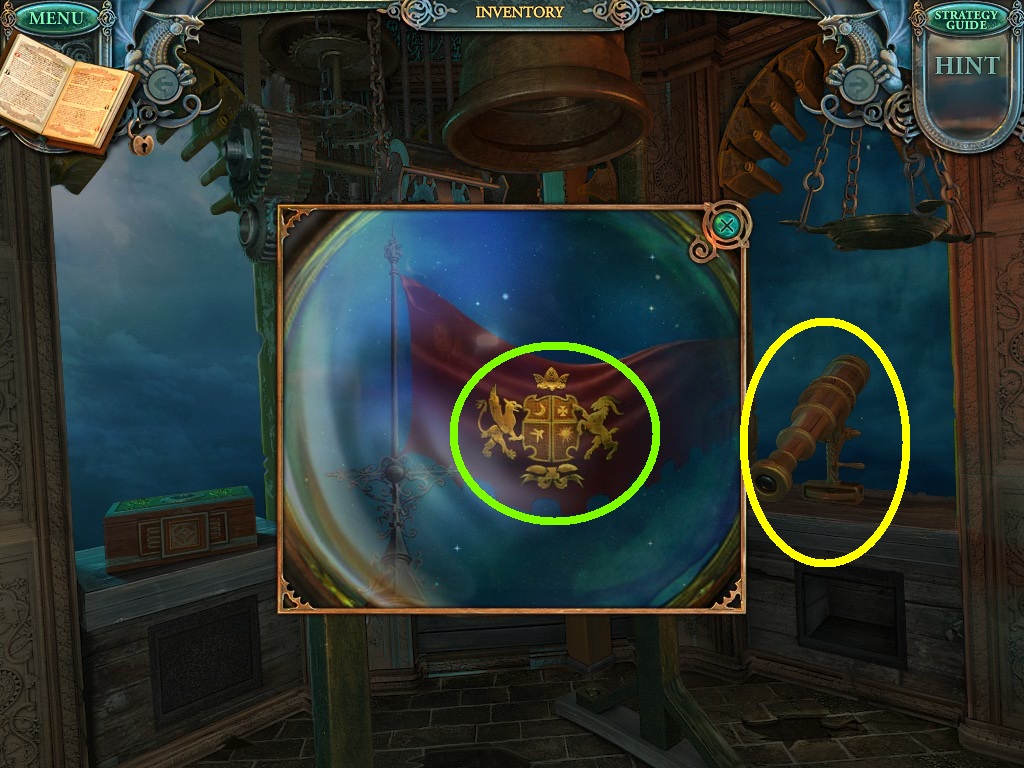
- Select the telescope handle from the inventory.
- Place it on the telescope (yellow circle).
- Zoom into the telescope.
- Notice the shape of the shield on the flag (green circle).
- Go to the clock tower plaza.
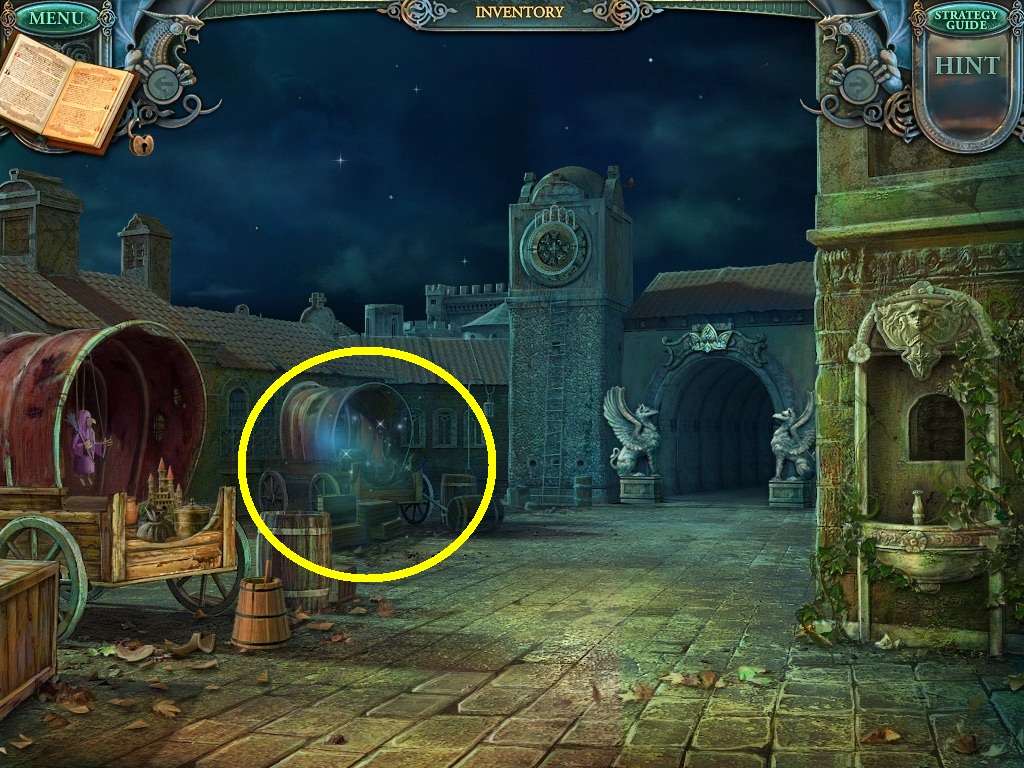
- Zoom into the caravan (yellow circle).
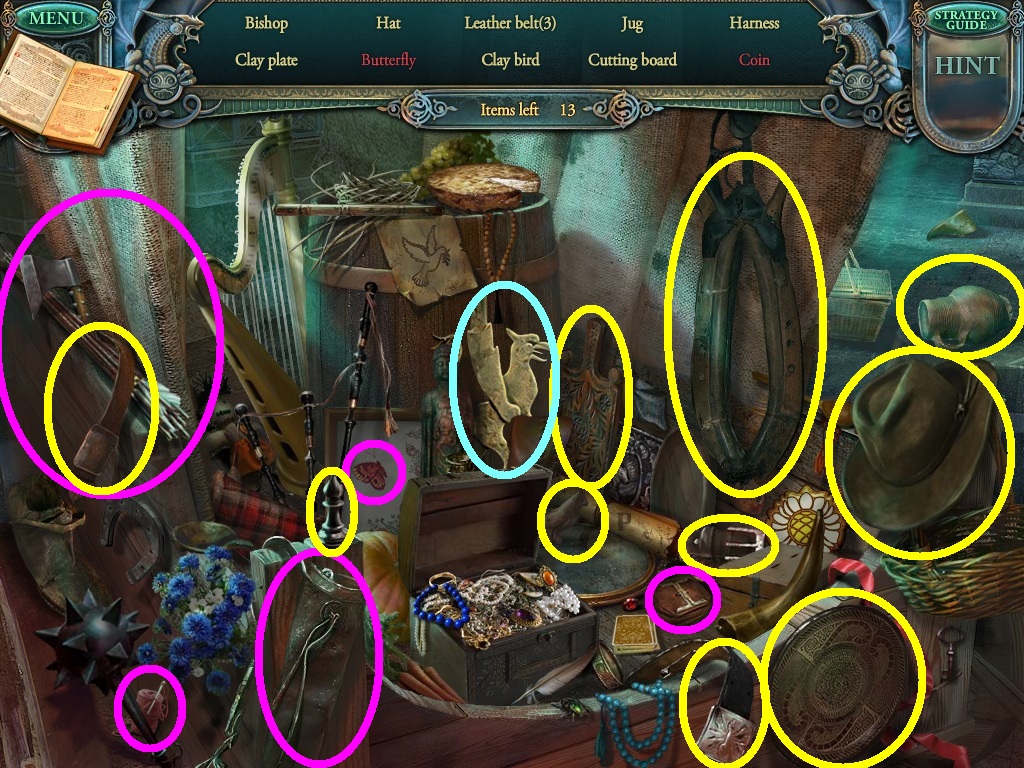
- Find all objects on the list (yellow circles).
- Some objects require additional actions (pink circles).
- Pick up the (aqua circle).
- Pick up the metal gryphon.
- Go down the mountain path.
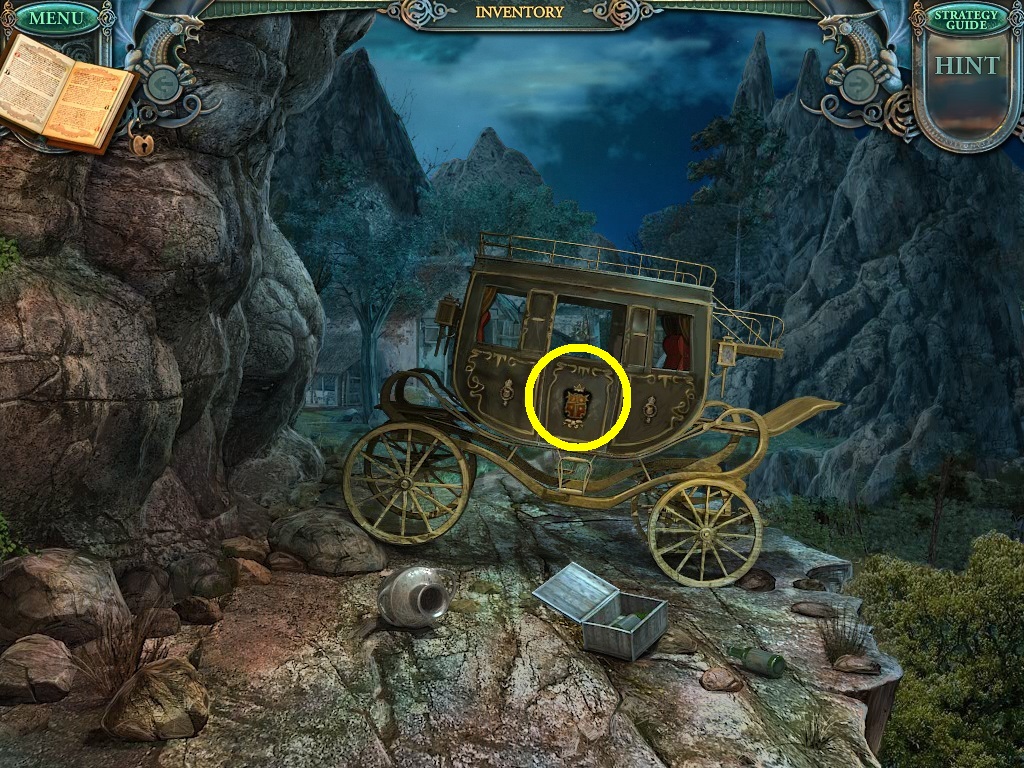
- Zoom into the carriage crest (yellow circle).
- Select the metal goat and metal gryphon from the inventory to complete the crest.
- It becomes an interchangeable puzzle.
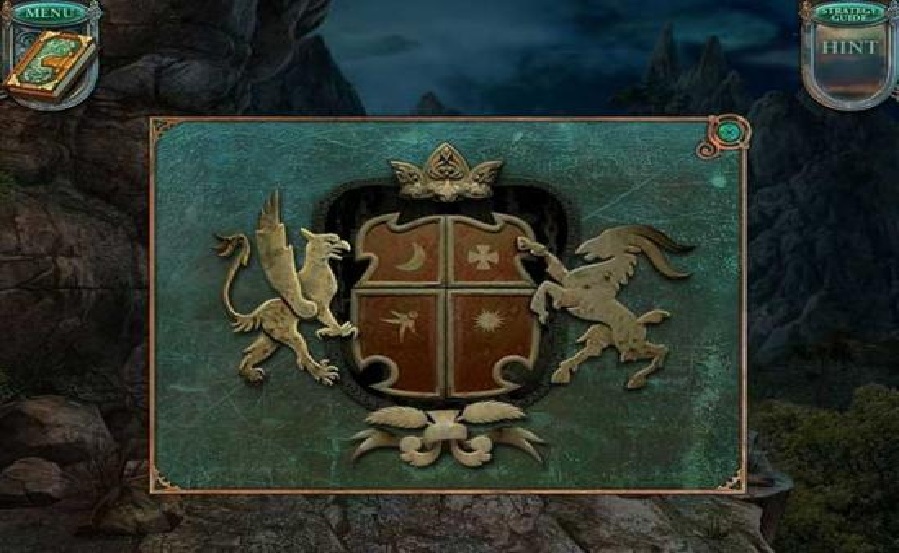
- Solve the puzzle as shown above.
- Once it opens the carriage, pick up the olives and curtain handle.
- Go to the brewery.
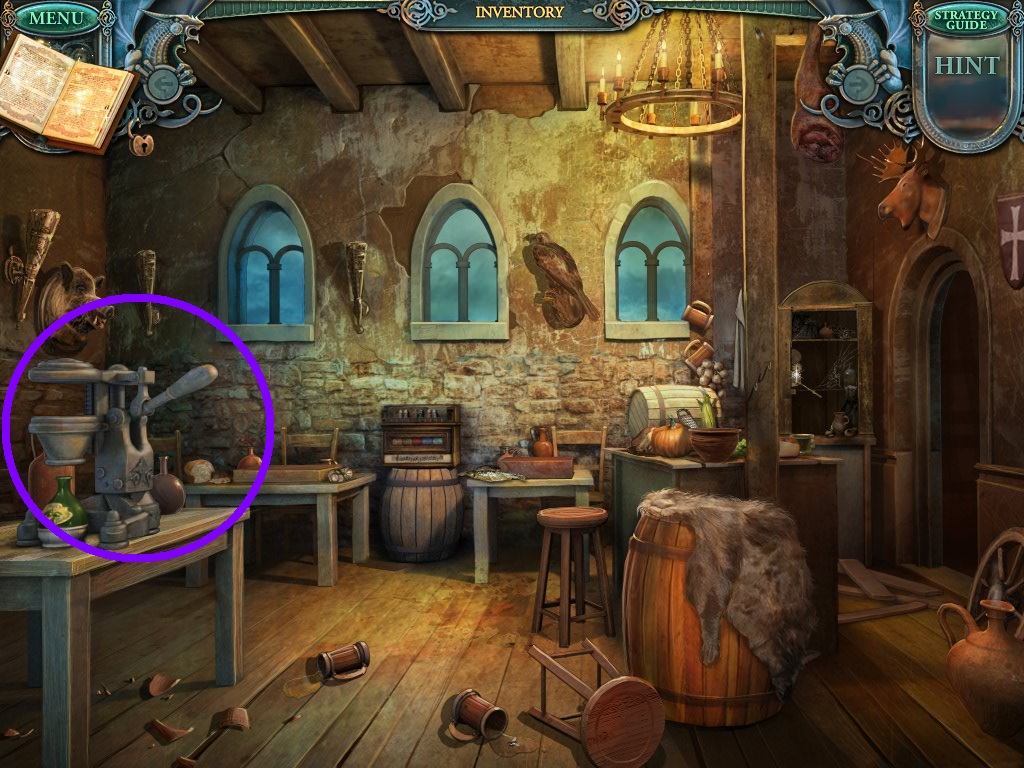
- Select the olives from the inventory.
- Place them into the press (purple circle).
- Pick up the olive oil.
- Go to the town hall.
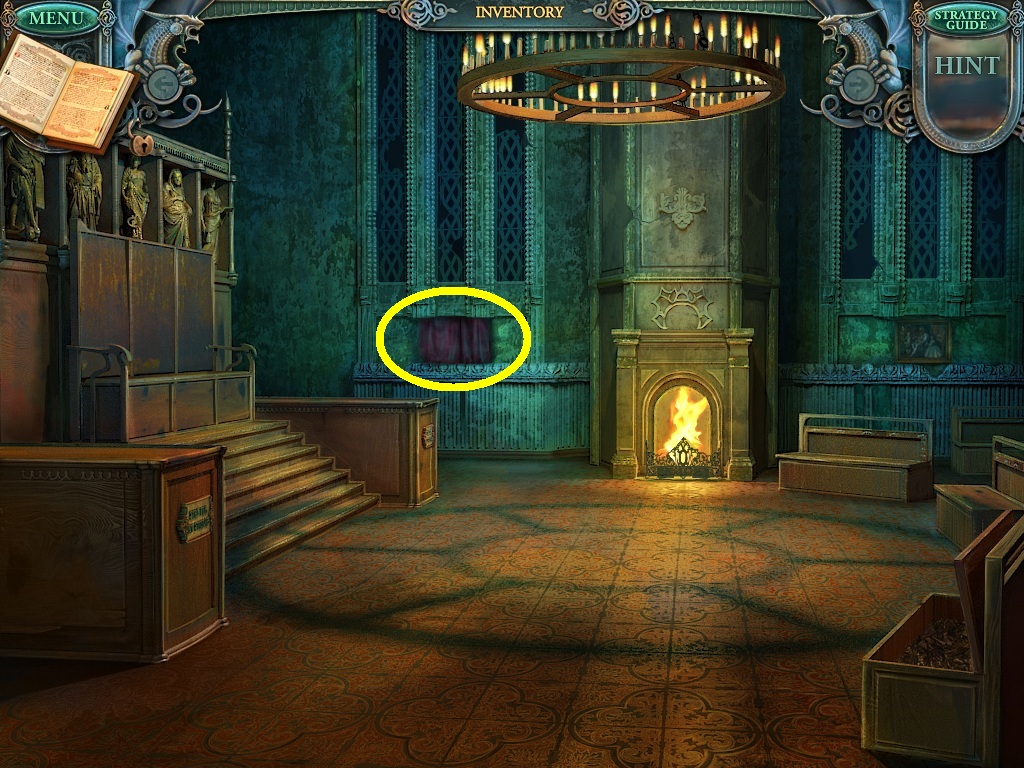
- Place the handle from the inventory onto the curtain (yellow circle).
- A puzzle will open.
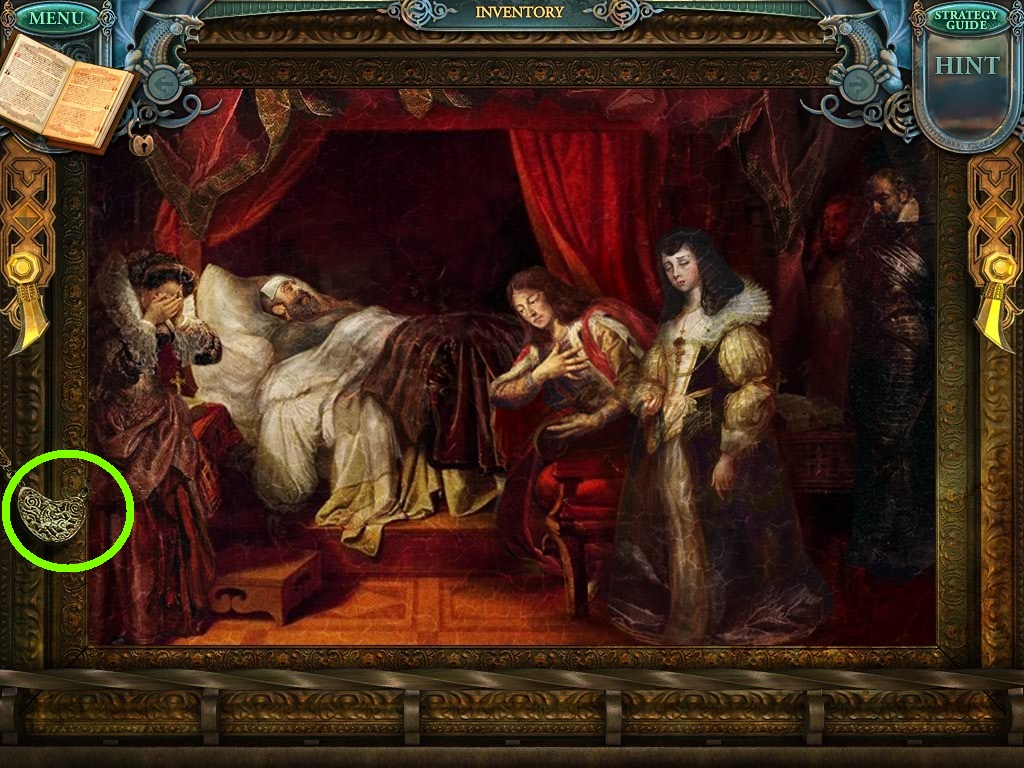
- Solve the puzzle as shown above.
- Restore the painting using the matching picture scraps to complete the puzzle.
- Once completed, pick up the metal medallion (green circle).
- Go to the smithy.
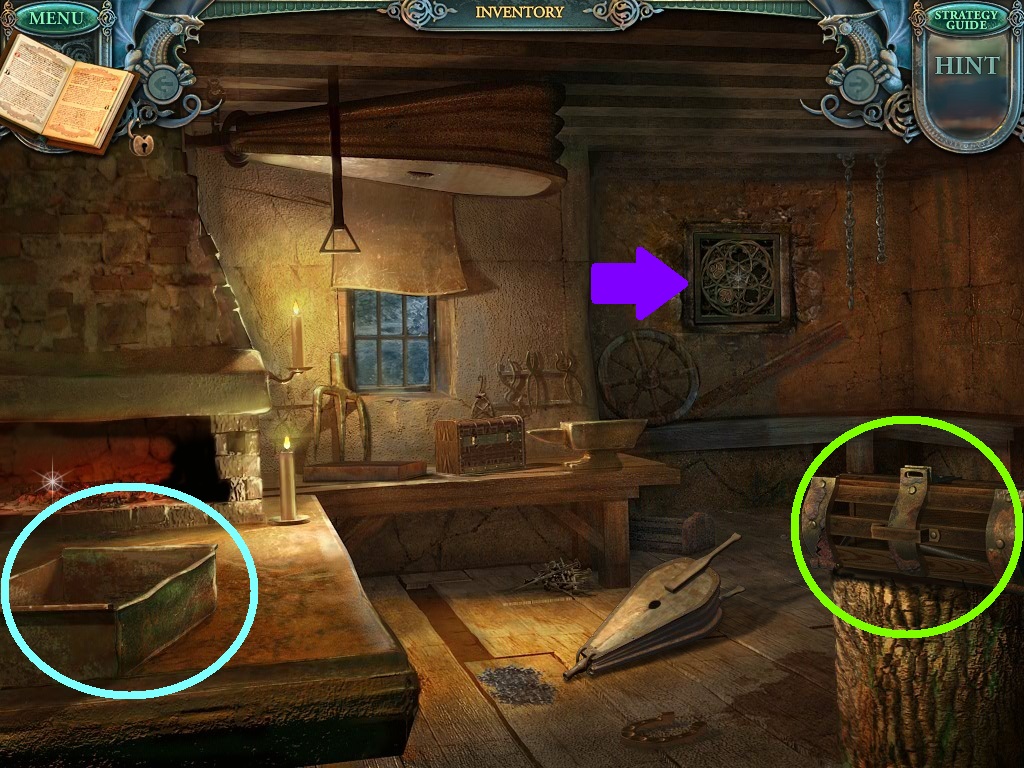
- Notice the grate on the wall (purple arrow).
- Select the olive oil from the inventory.
- Use it on the rusty wooden box (green circle).
- Pick up the crowbar inside.
- Select the bucket of water in the inventory.
- Pour it in the metal tray (aqua circle).
- Go to the riverbank.
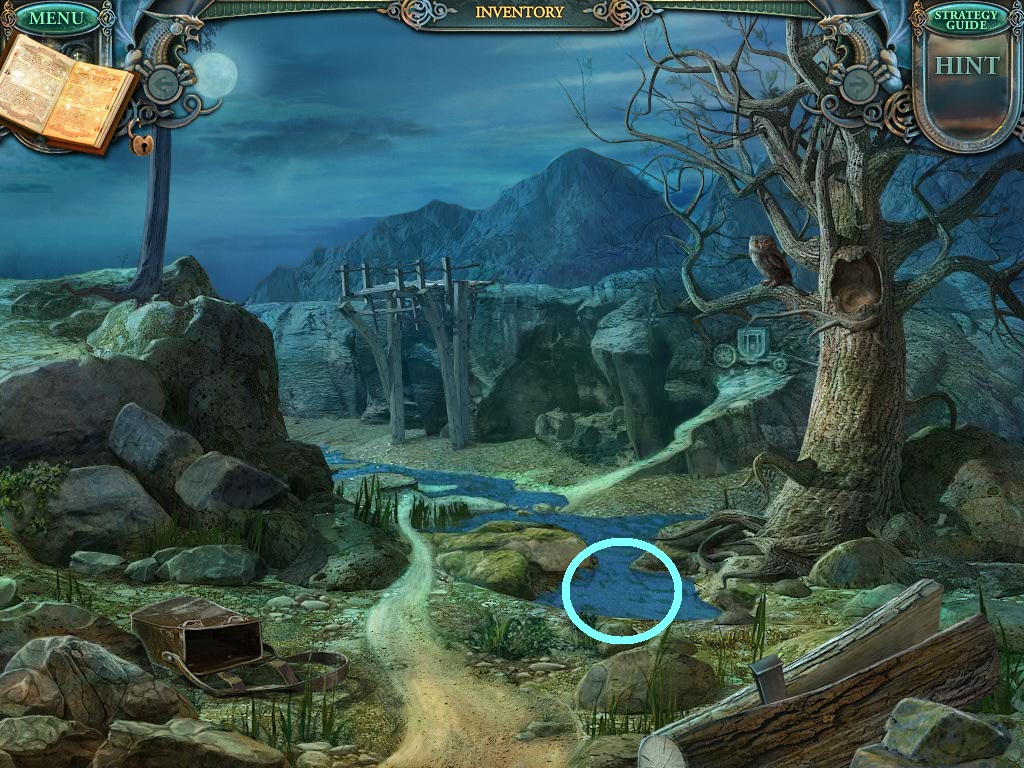
- Select the bucket from the inventory.
- Dip the bucket in the water (aqua circle).
- Pick it up again.
- Go to the central entrance.
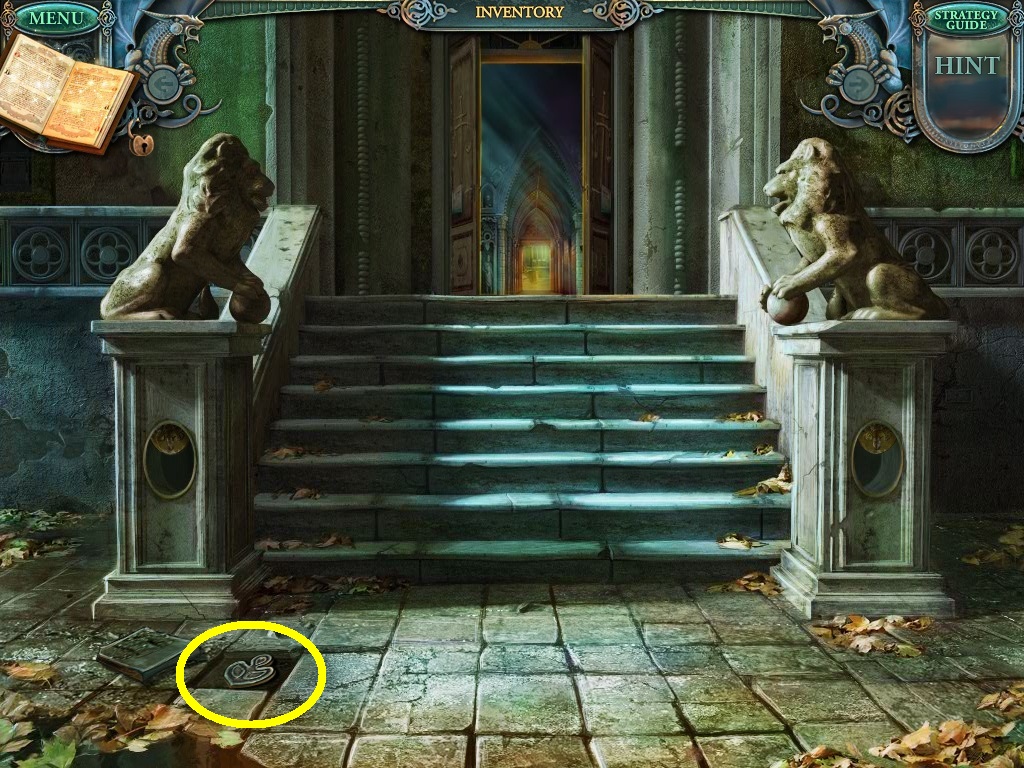
- Select the crowbar from the inventory.
- Use it on the loosened stone (yellow circle).
- Pick up the metal decoration (yellow circle).
- Go back to the smithy.
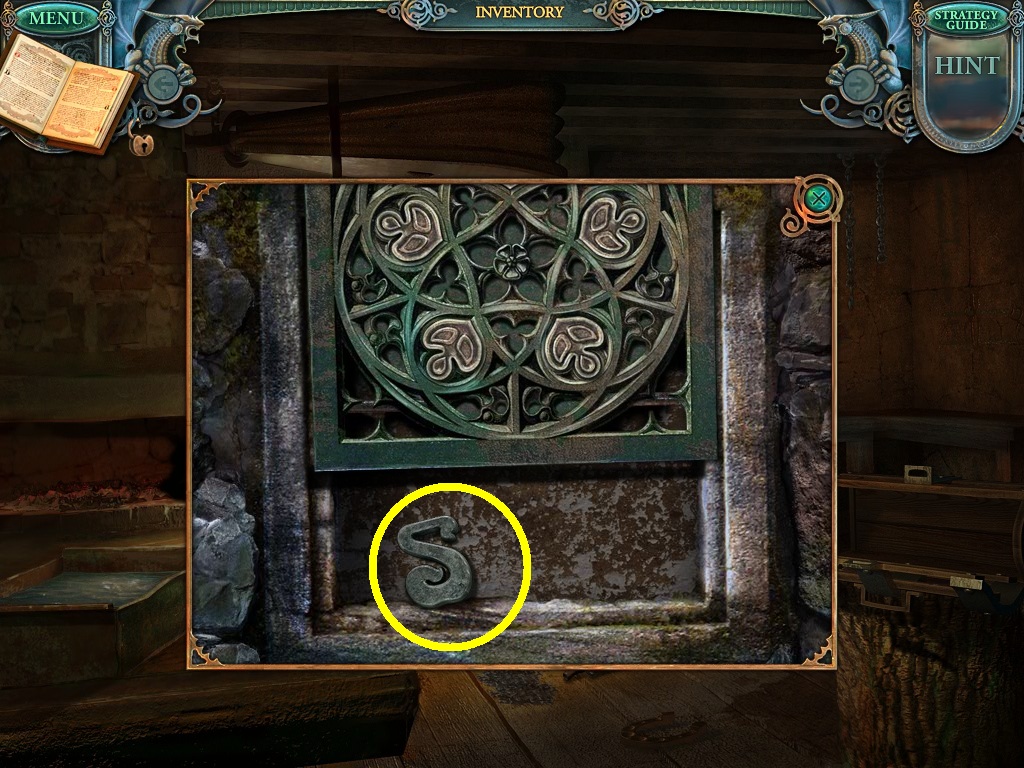
- Click on the grate on the back of the wall.
- Select the 3 metal decorations from the inventory.
- Complete the grate.
- Pick up the letter “s” (yellow circle).
- Go to the mountain path.
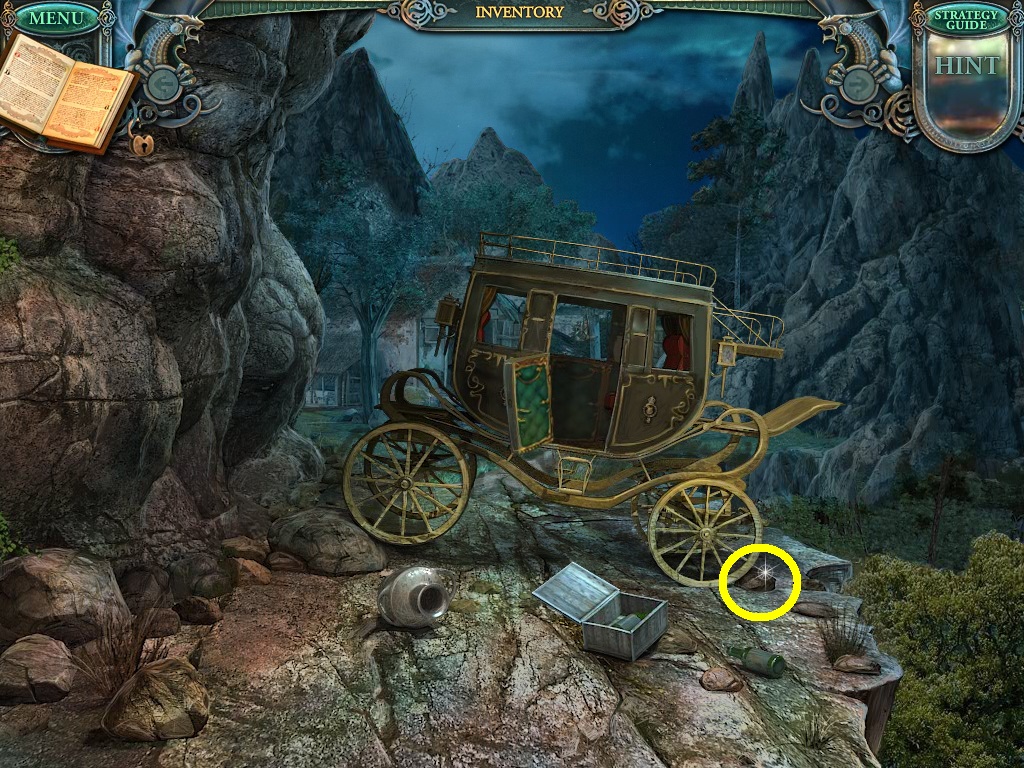
- Select the crowbar from the inventory.
- Use it on the stone (yellow circle) under the wheel.
- Go forward to the cottage.
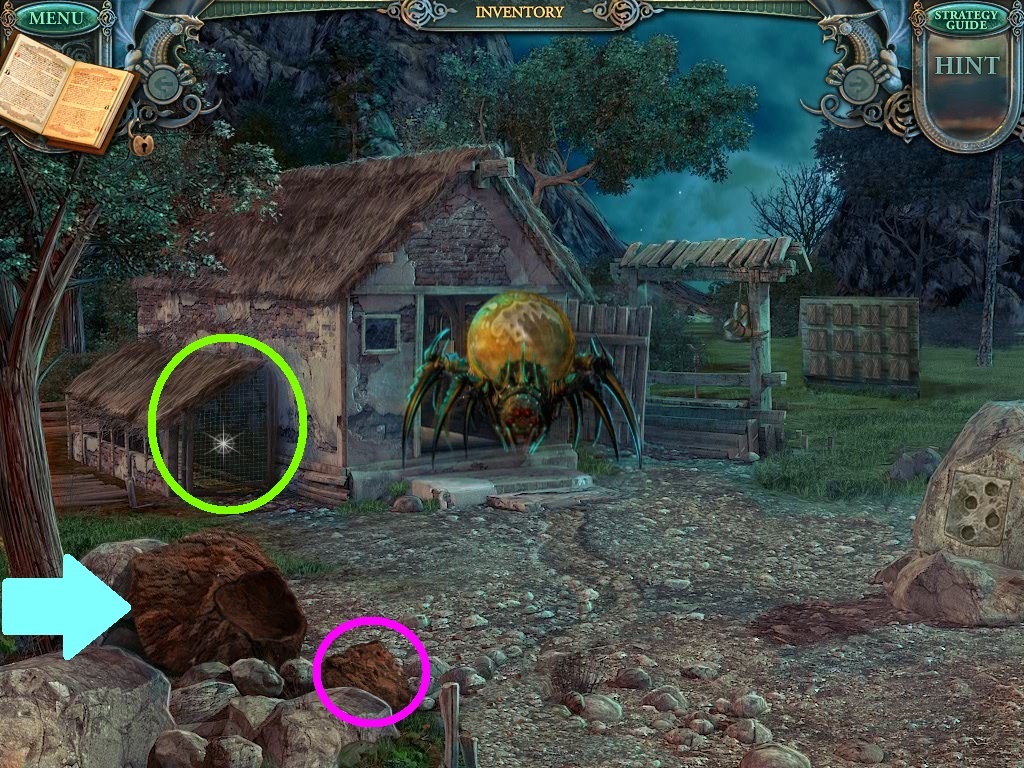
- Zoom into the grated enclosure (green circle).
- Click the traps.
- Pick up the pick.
- Click the large piece of clay (aqua arrow).
- Pick up the broken piece of clay (pink circle).
- Go back to the torture chamber.
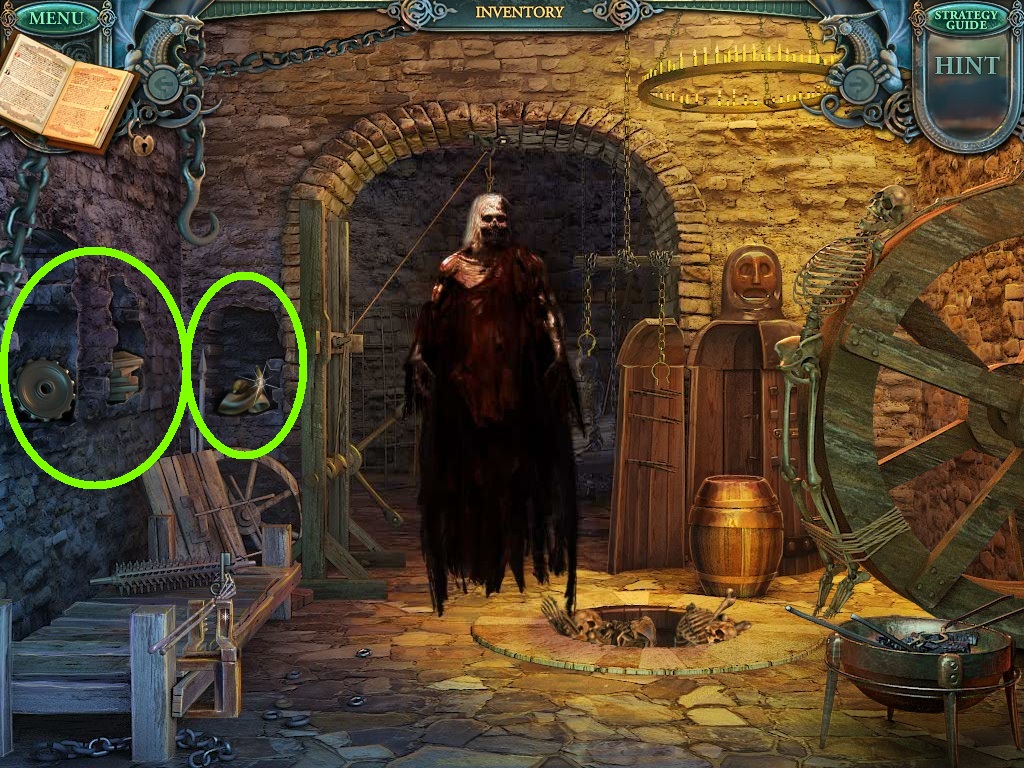
- Select the pick from the inventory.
- Click the re-bricked area (green circles) of the wall.
- Pick up the gear, decorative plates and the ram horns (green circles).
- Go to the tower.
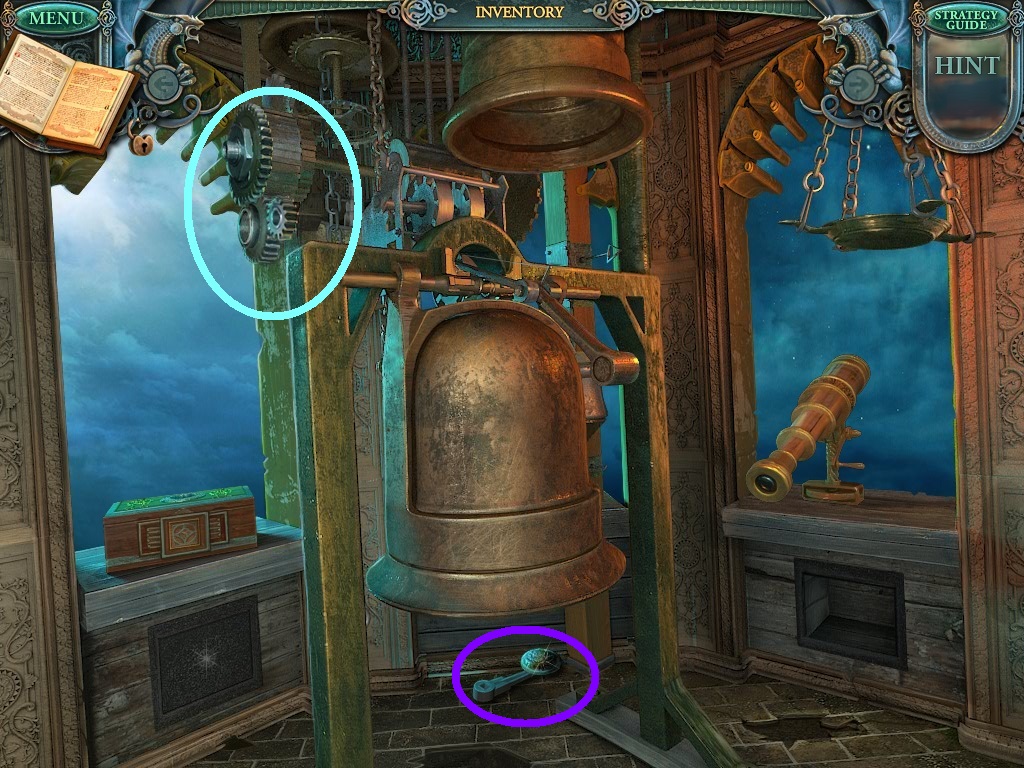
- Zoom into the gear mechanism (aqua circle).
- Insert the gears from the inventory to fix the mechanism.
- Pick up the barrel organ handle (purple circle).
- Go to the brewery.
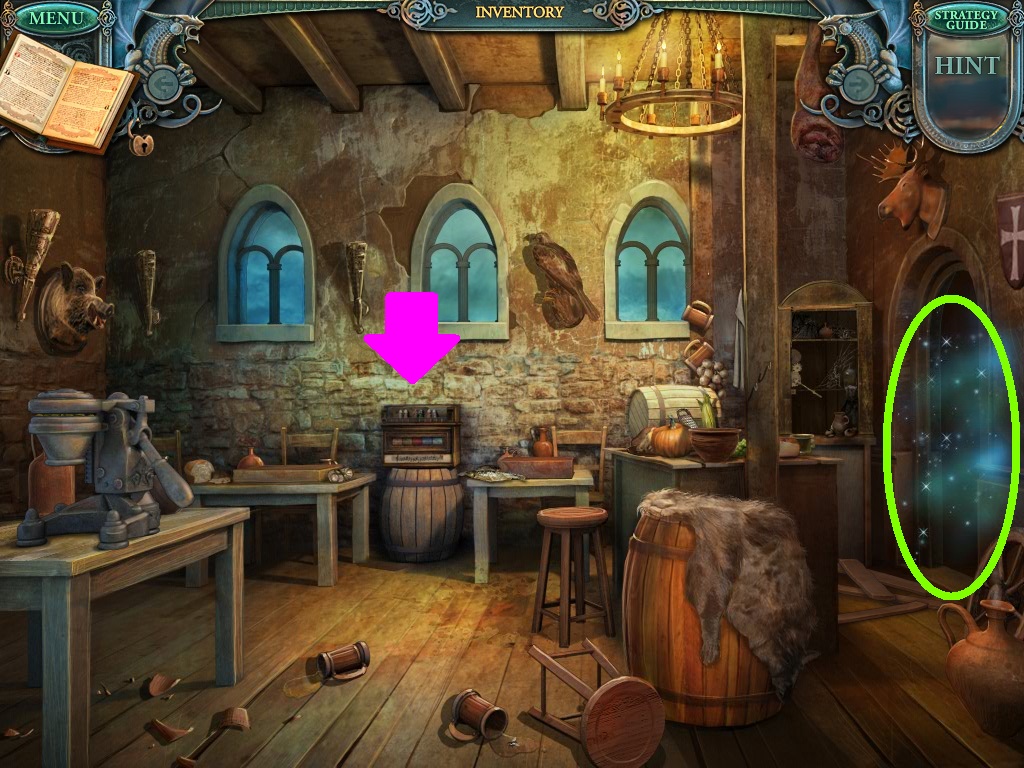
- Notice the music box (pink arrow).
- Select the hidden object area (green circle).
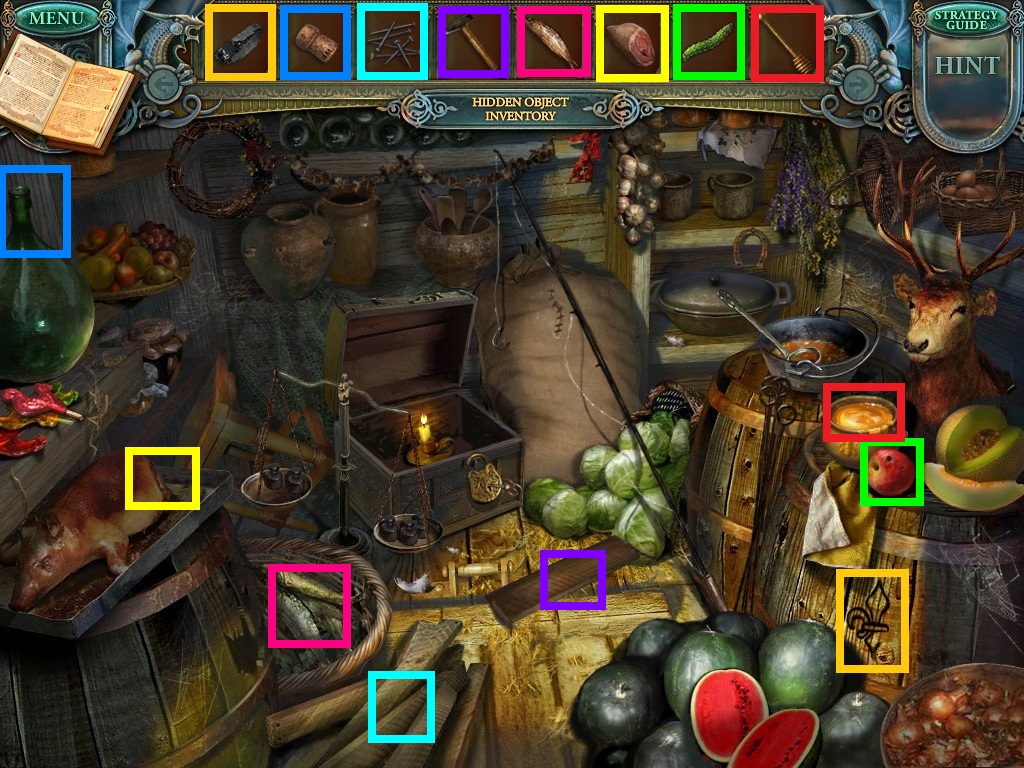
- Place the color matched items in their right places.
- Pick up the wooden flower.
- In the brewery, zoom into the music box.
- Select the barrel organ handle from the inventory and place it on the peg.
- A puzzle will open.
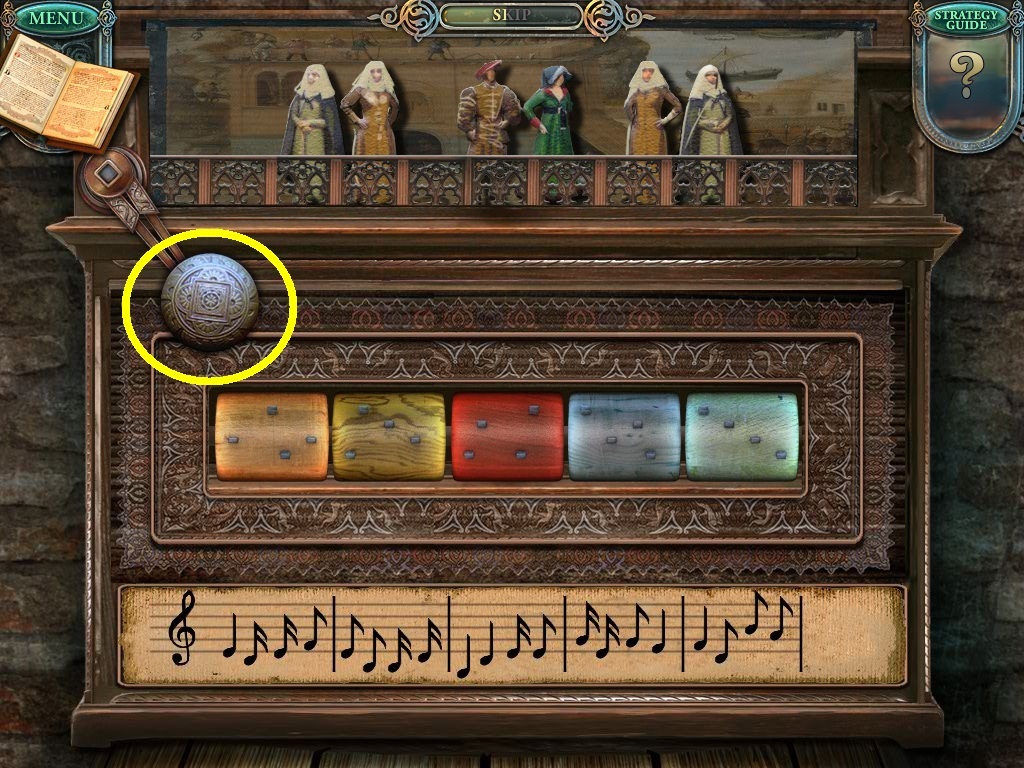
- Solve the puzzle as shown above.
- Make sure colored barrel arrangement matches what is shown above.
- Click the handle (yellow circle) once the arrangement is in place.
- Pick up the statuette when completed.
- Go to the well.
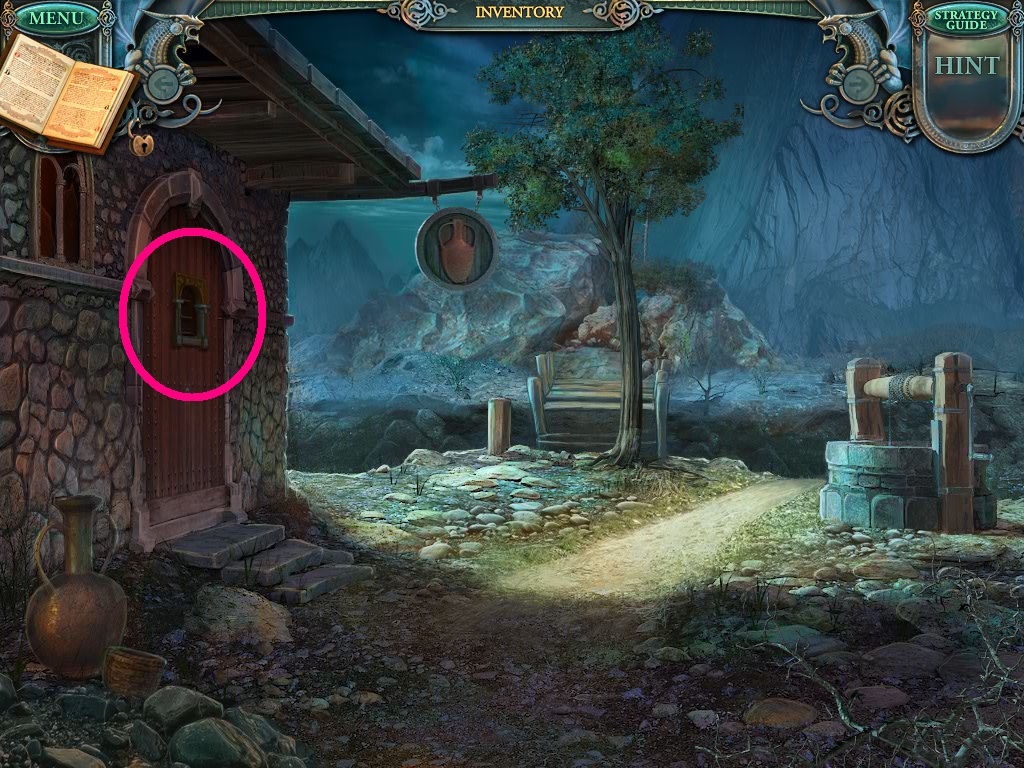
- Zoom into the door (pink circle).
- Insert the statuette into the empty space.
- A puzzle will open.
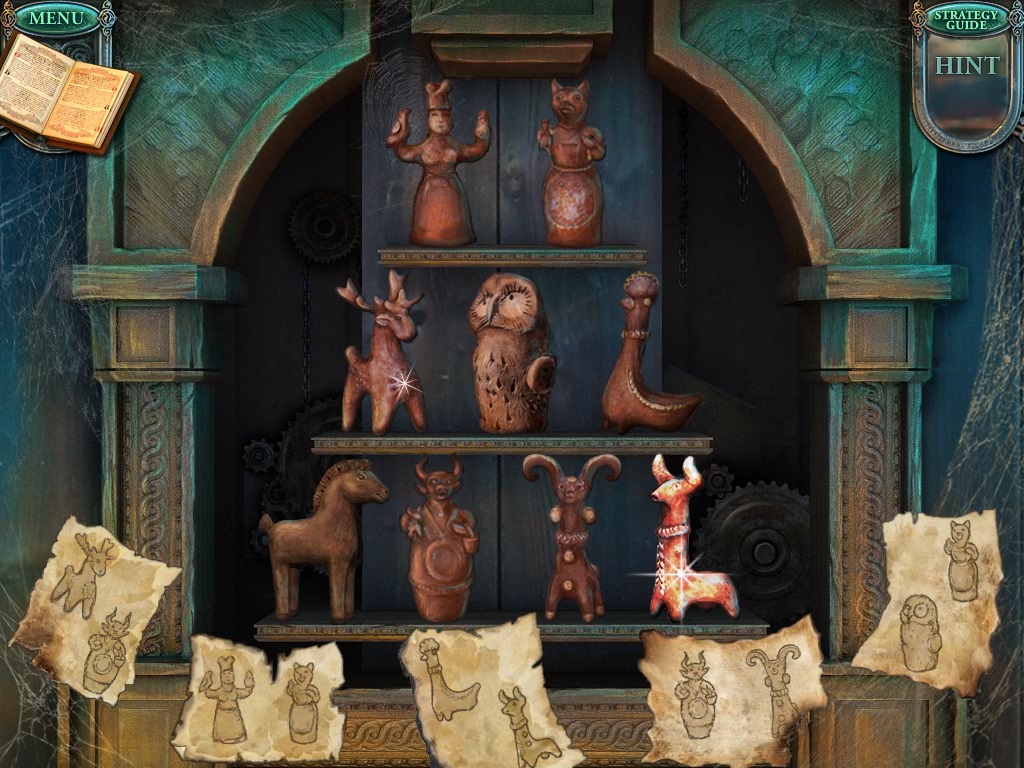
- Complete the puzzle as shown above.
- Go to the pottery studio.
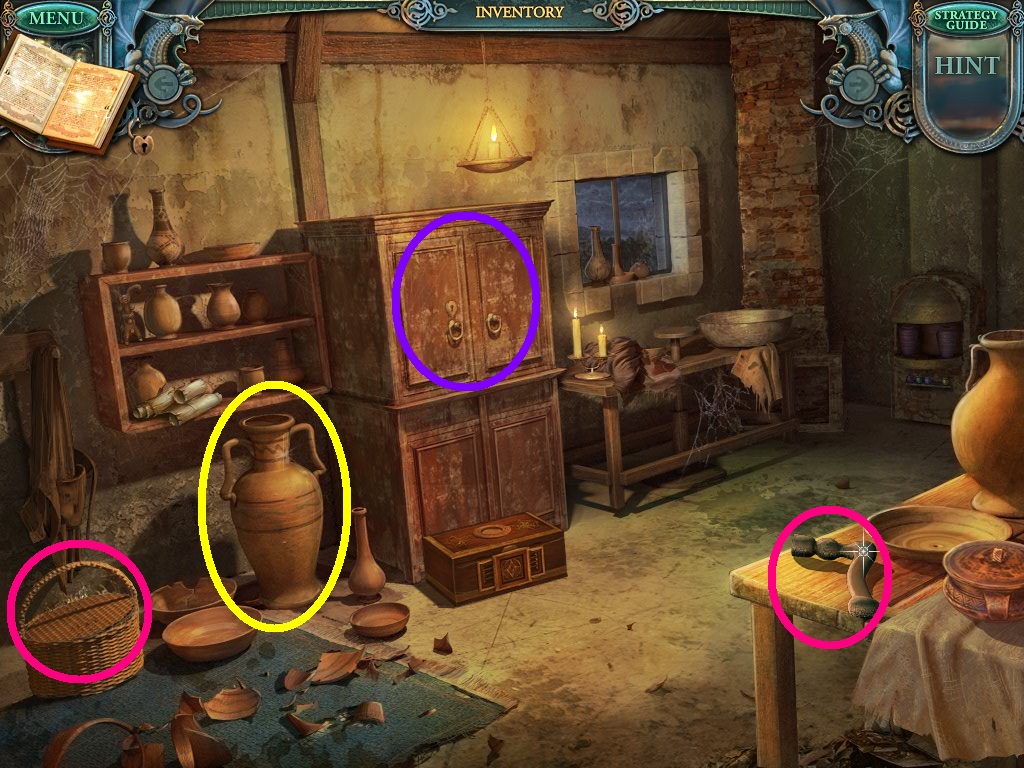
- Pick up the lever and statue hand (pink circles).
- Zoom into the big jar (yellow circle).
- Select the bucket of water from the inventory.
- Pour it into the big jar.
- Pick up the cupboard key.
- Zoom into the cupboard (purple circle).
- Select the cupboard key from the inventory to unlock the cupboard.
- Pick up the skull plate.
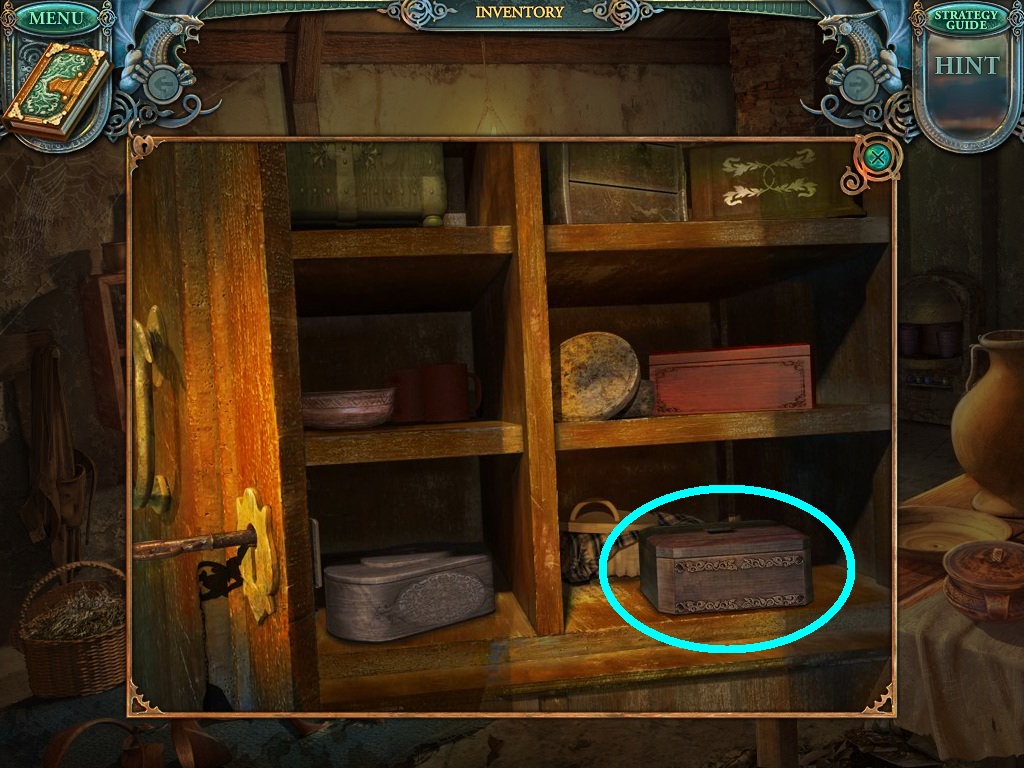
- Zoom into the small box (aqua circle).
- Select the decorative plates from the inventory and insert them into the box.
- A puzzle will open.
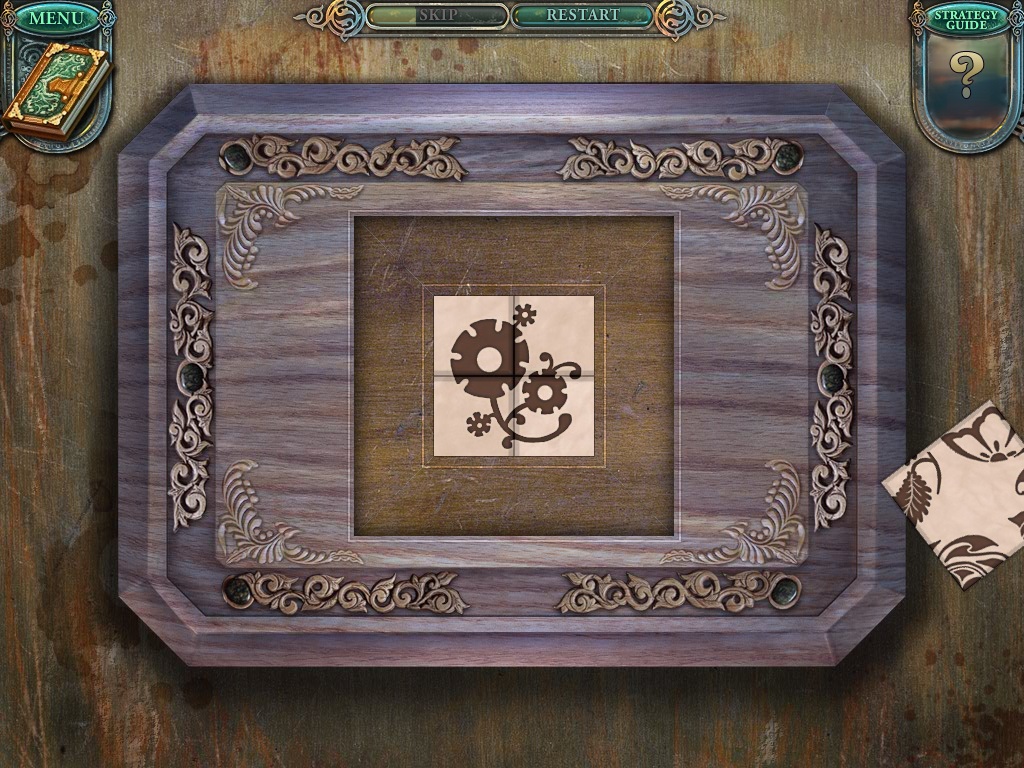
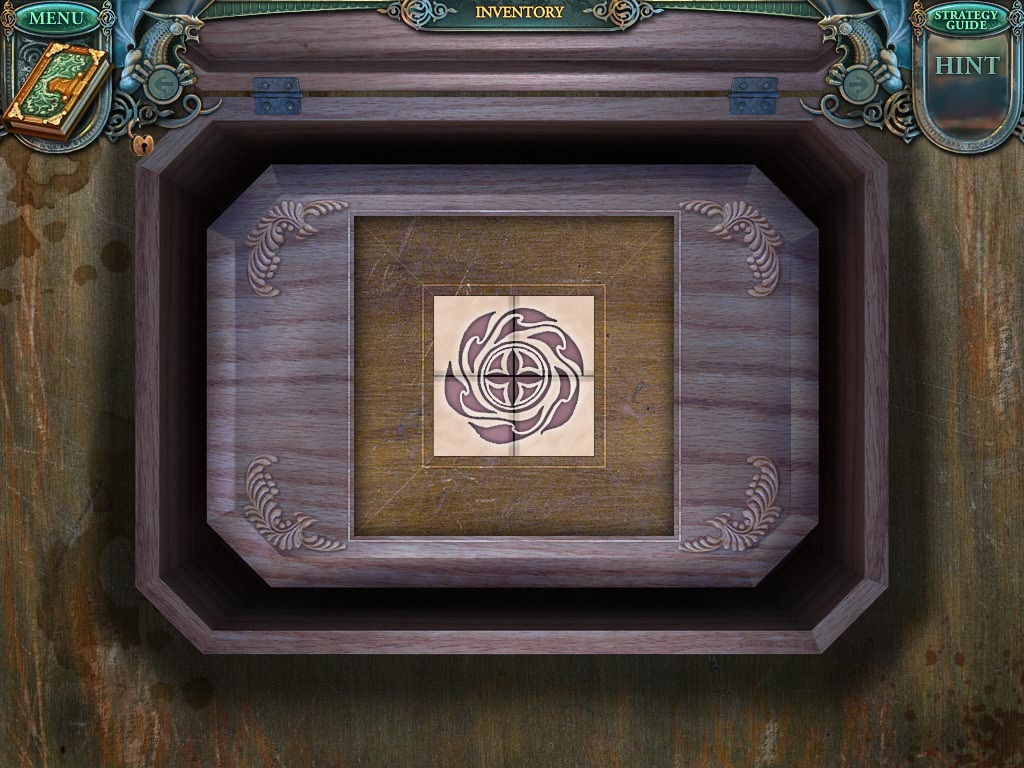
- Solve the puzzle as shown.
- Move the plates around to complete the patterns.
- Once completed, pick up the fish stone.
- Go to the riverbank.
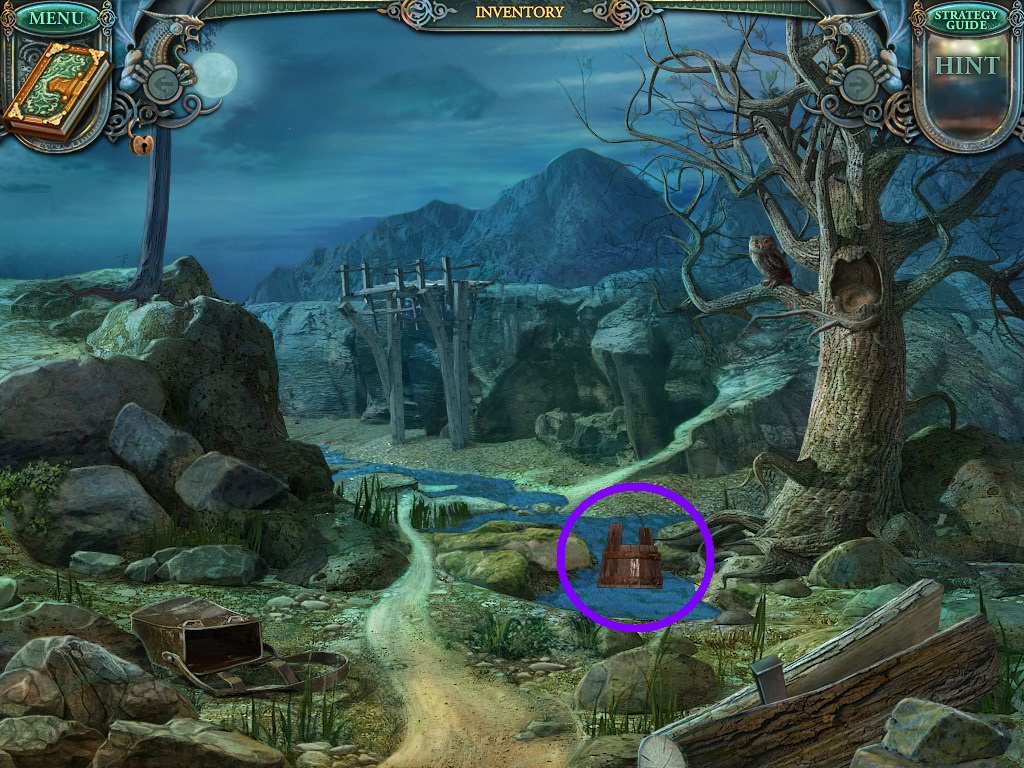
- Select the bucket from the inventory.
- Dip it into the water (purple circle).
- Pick up the bucket again.
- Go back to the pottery studio.
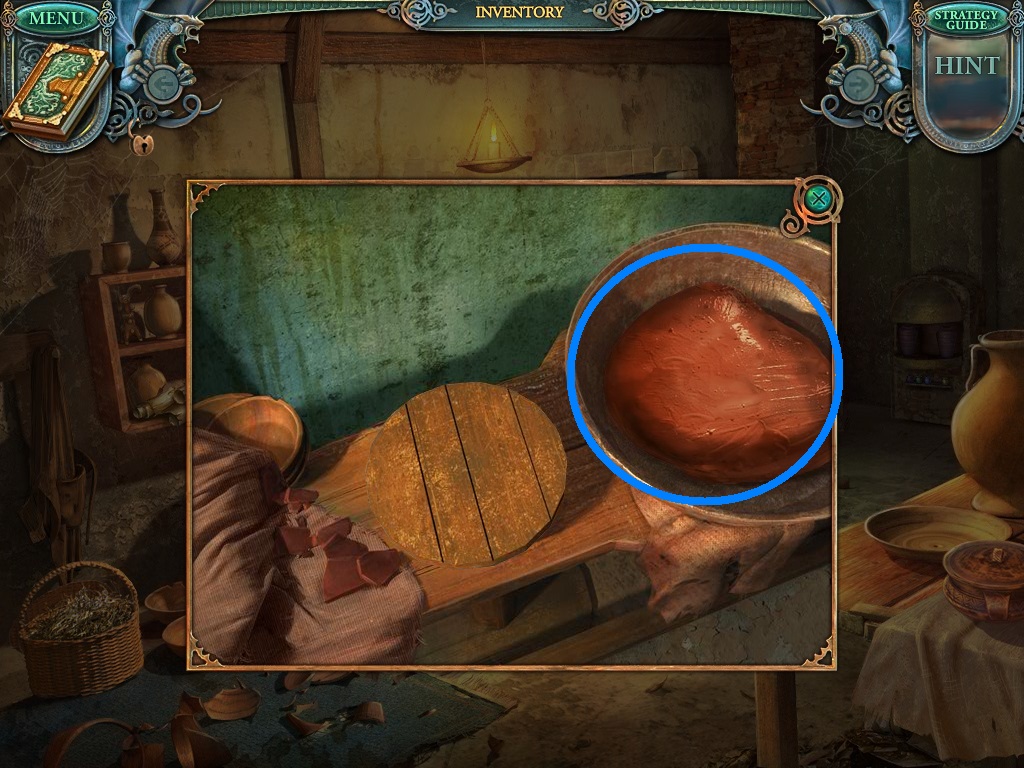
- In the pottery studio zoom into the table under the window.
- Select the water bucket from the inventory; add it to the basin.
- Select the clay (blue circle) from your inventory; add it to the water and basin.
- Move the clay over from the basin to the spinning wheel.
- Click the wheel, a jug will be made.
- Pick up the jug.
- Go to the tower.
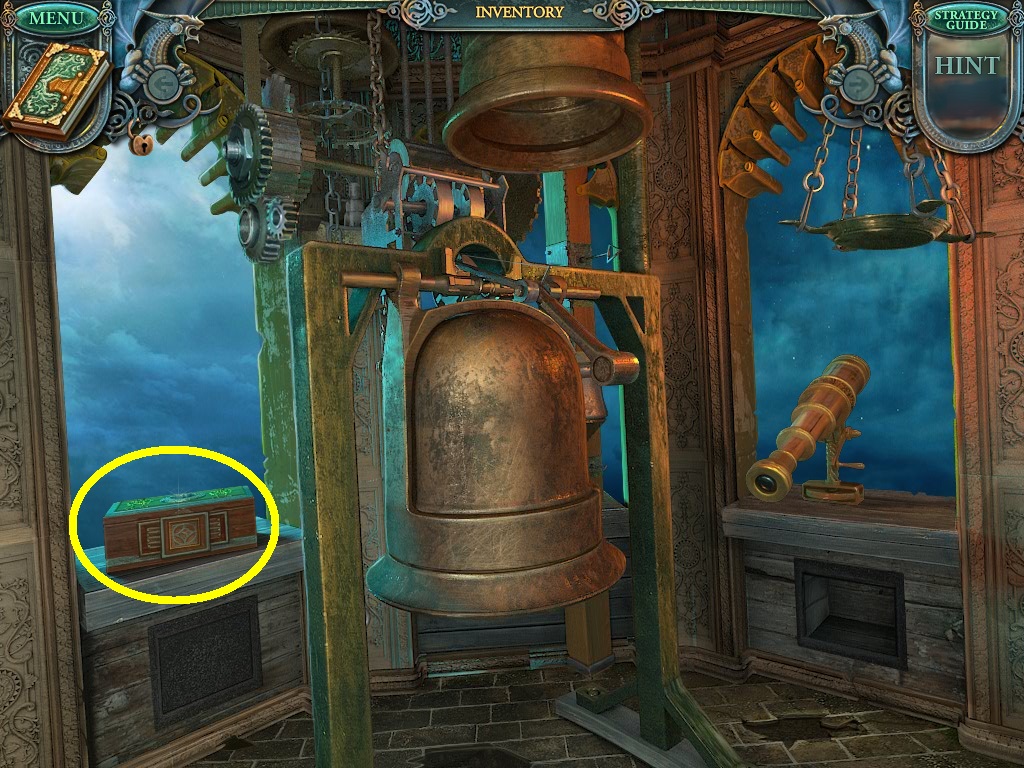
- Zoom into the box (yellow circle).
- Insert the skull plate from your inventory.
- Click the secret panel.
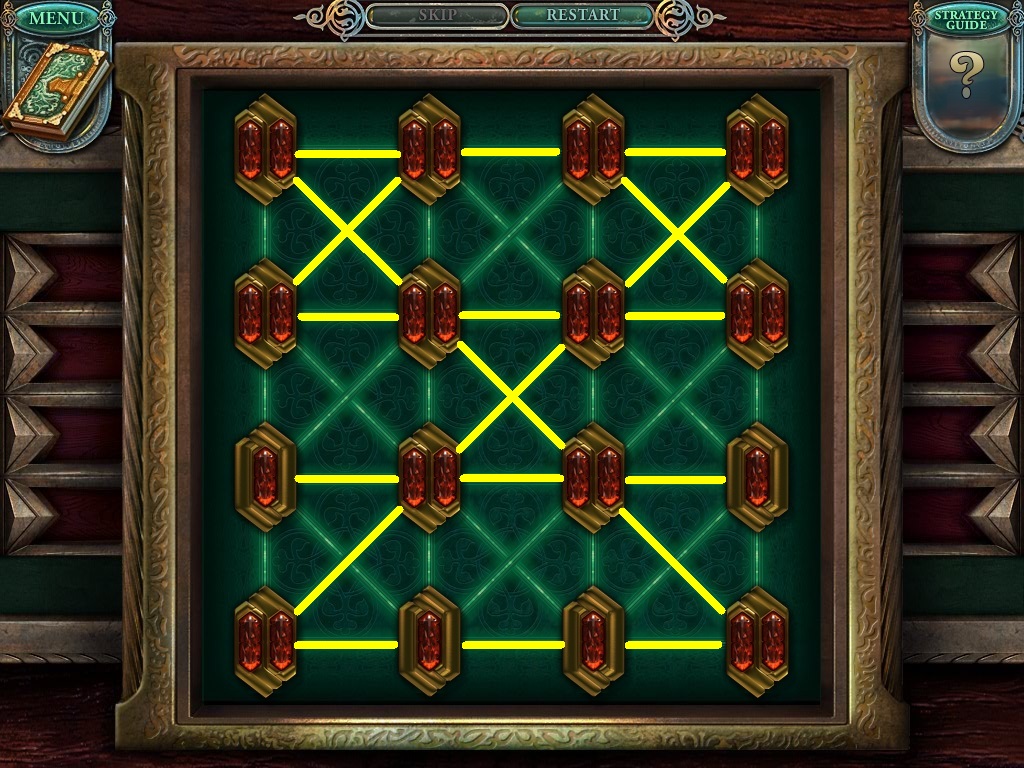
- Complete the puzzle as shown above.
- Use the pattern above (yellow lines).
- Once complete; pick up the scroll and the magic powder.
- Go to the torture chamber.
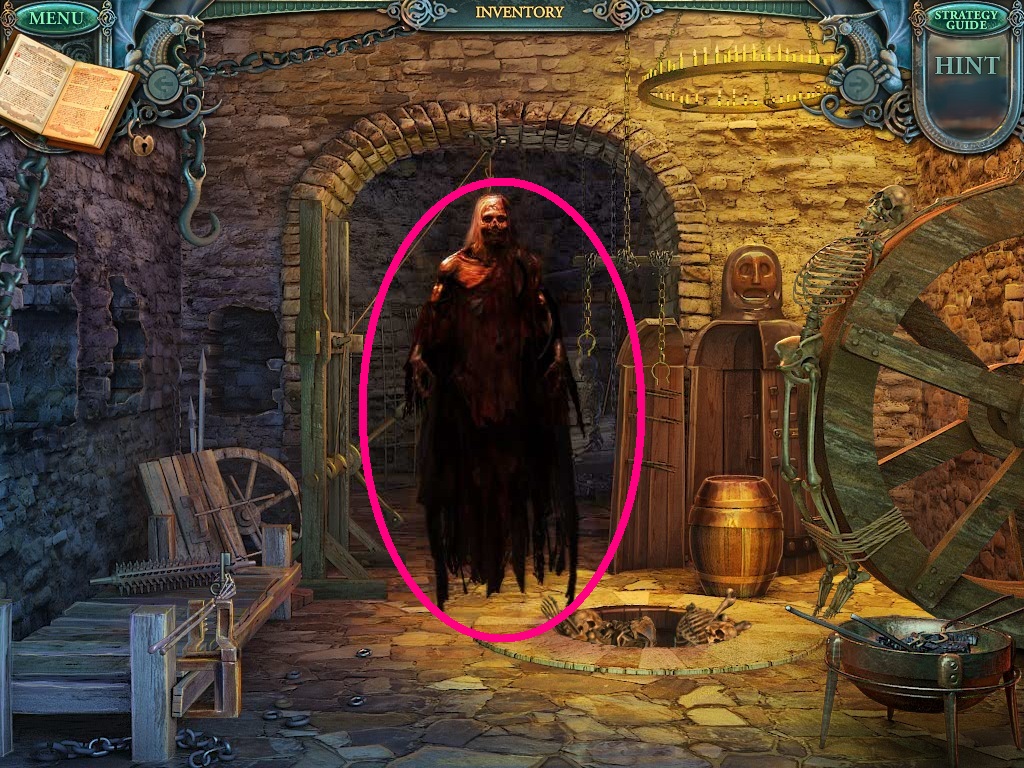
- Select the magic powder from the inventory.
- Throw it onto the ghoul (pink circle).
- Pick up the gem stone.
Comments will load when you reach this part of the walkthrough.