

Chapter 1: The Apothecary and the Aquarium
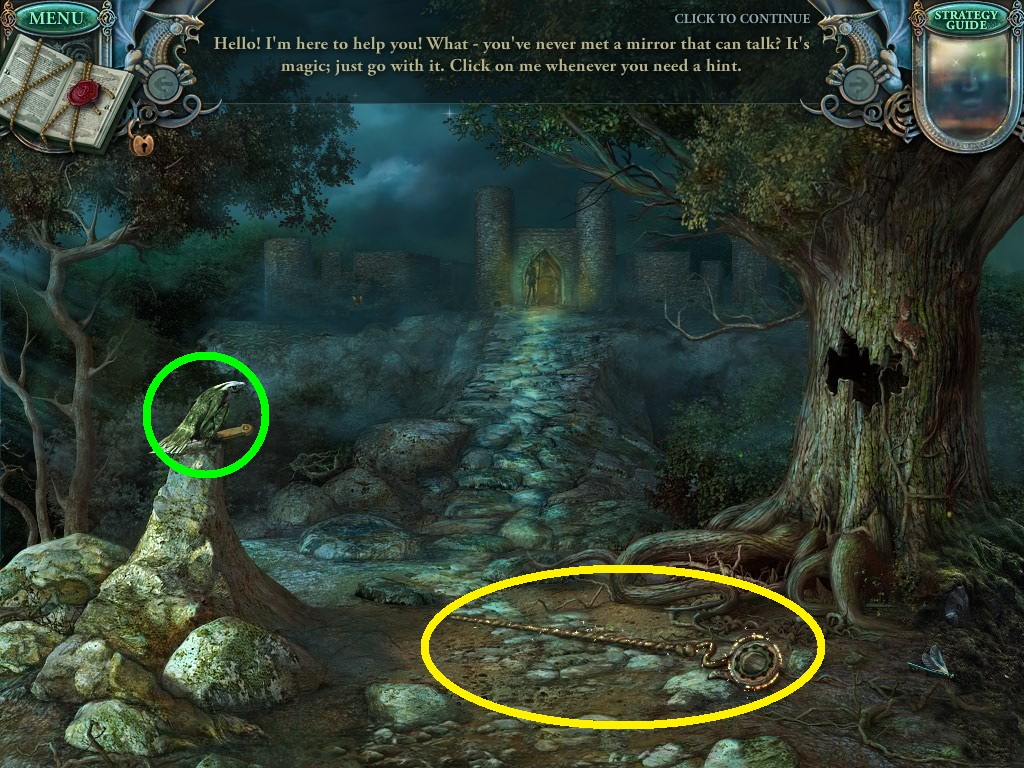
- Click the staff (yellow circle).
- Click the bird on the rock (green circle).
- Click the dagger (green circle) under the bird.
- Go onto the next scene.
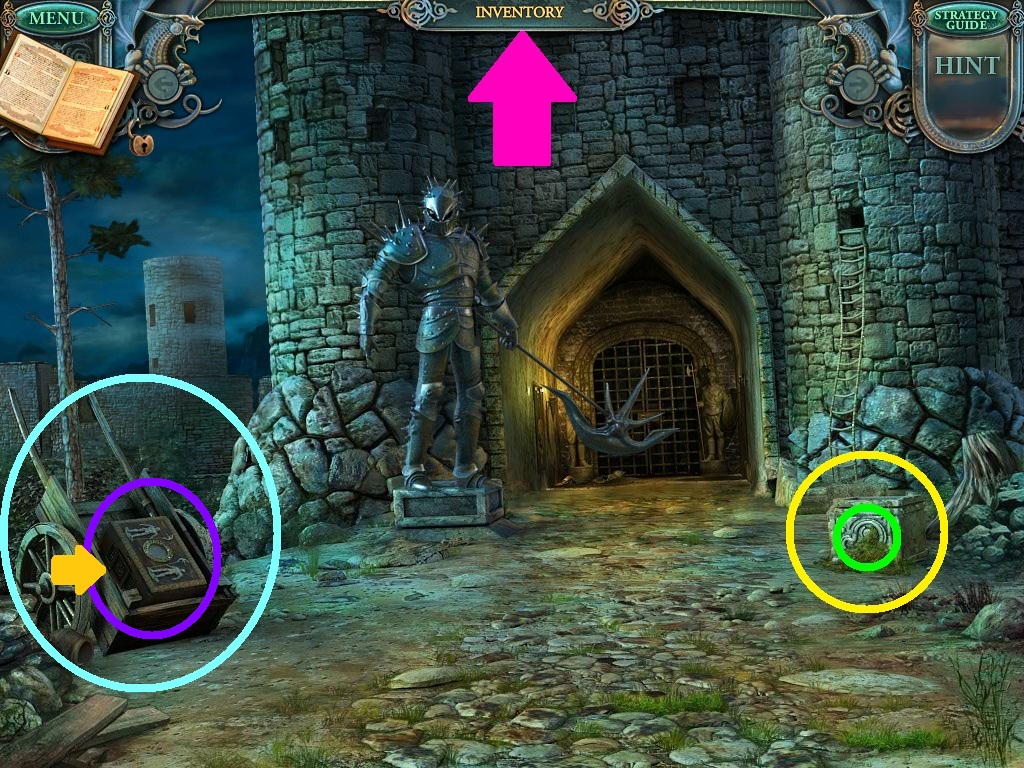
- Click the stone block (yellow circle).
- Click the dagger in your inventory (pink arrow).
- Click the plate with the dagger (green circle).
- Notice the cart (aqua circle).
- Click the box (purple circle) in the cart.
- Click plate with the sword in your inventory.
- Place it on the box (purple circle).
- Click side panel (orange arrow).
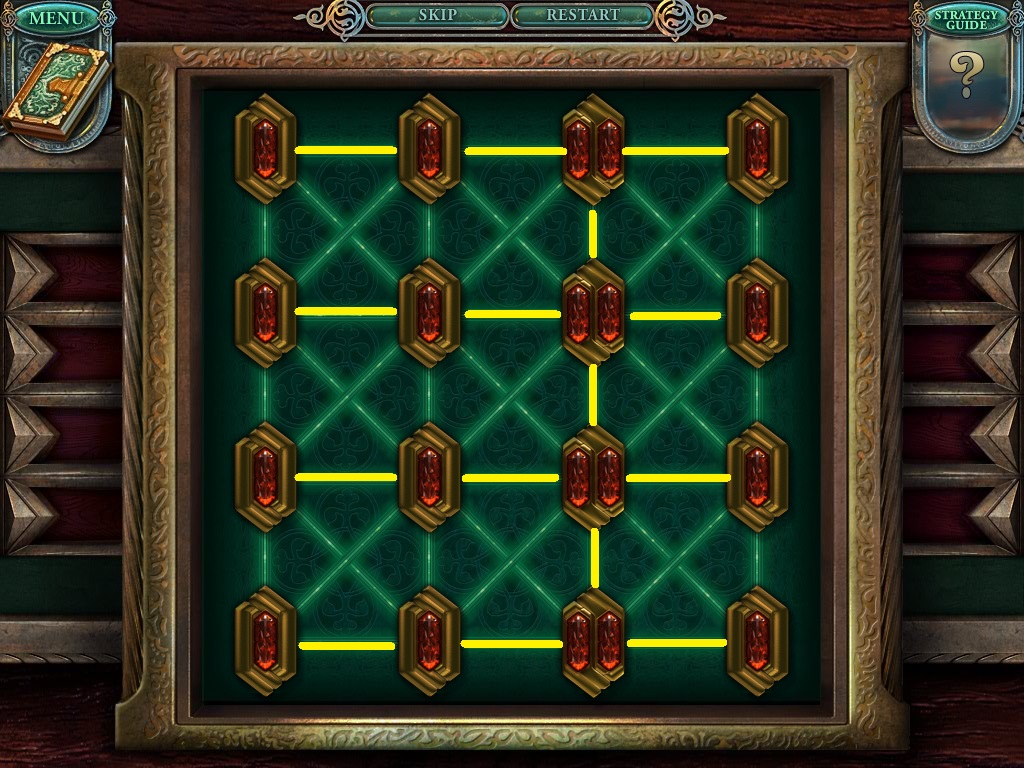
- Solve the puzzle following the pattern shown (yellow lines).
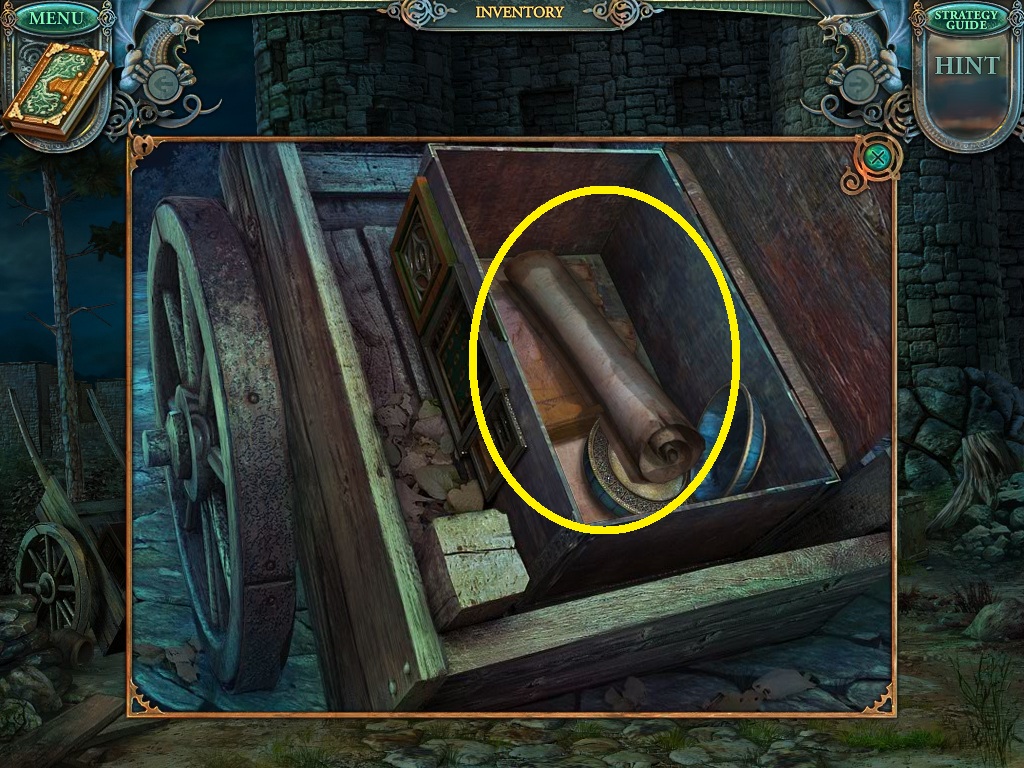
- The box will open.
- Click the scroll (yellow circle).
- Click the powder (yellow circle).
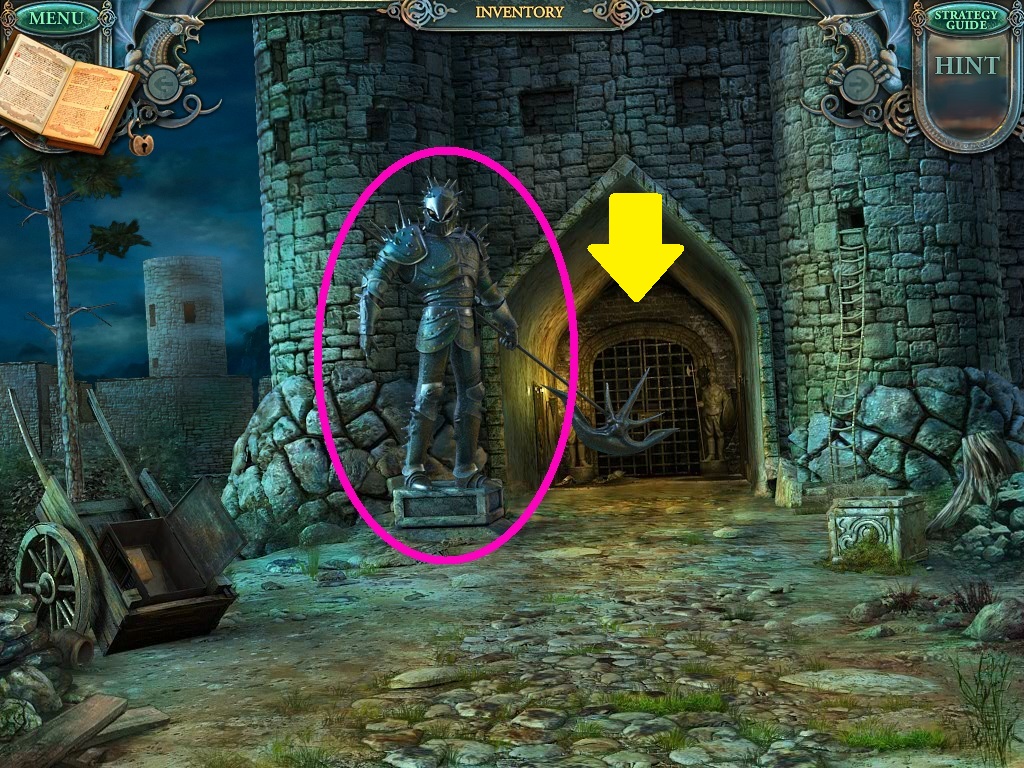
- Click the powder from your inventory.
- Click the knight (pink circle).
- He will be restored.
- Click the gem that falls.
- Place it into the staff.
- Go to next scene (yellow arrow).
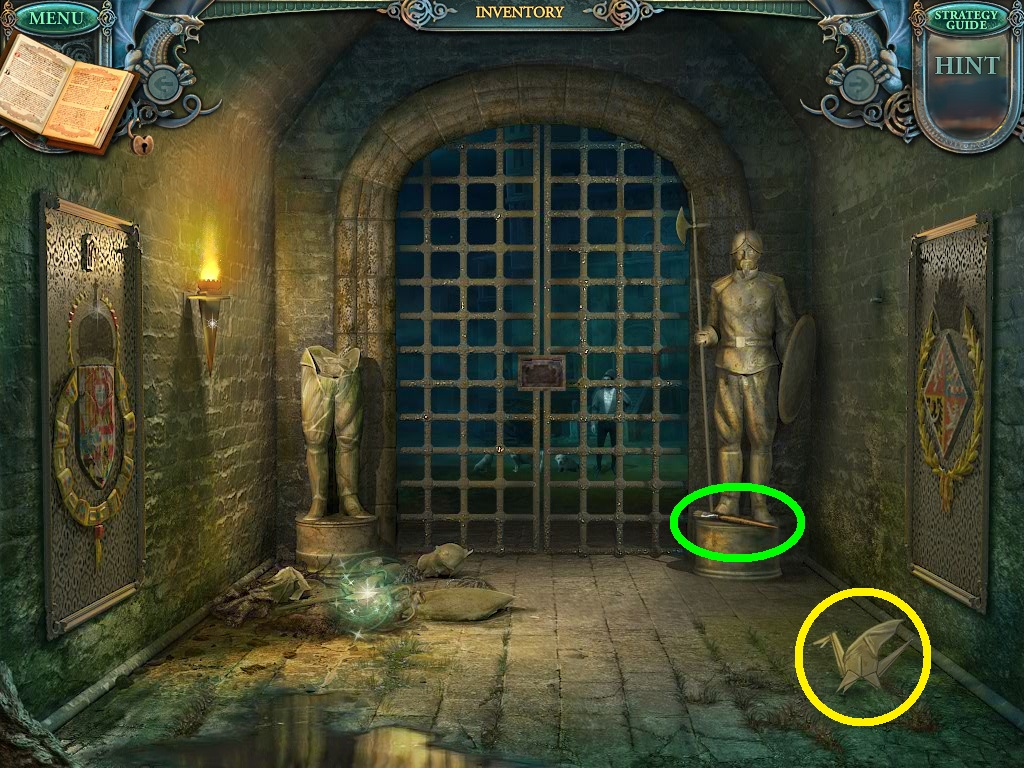
- Click on the origami dragon (yellow circle).
- Click on the brush (green circle).
- Go back to the forest.
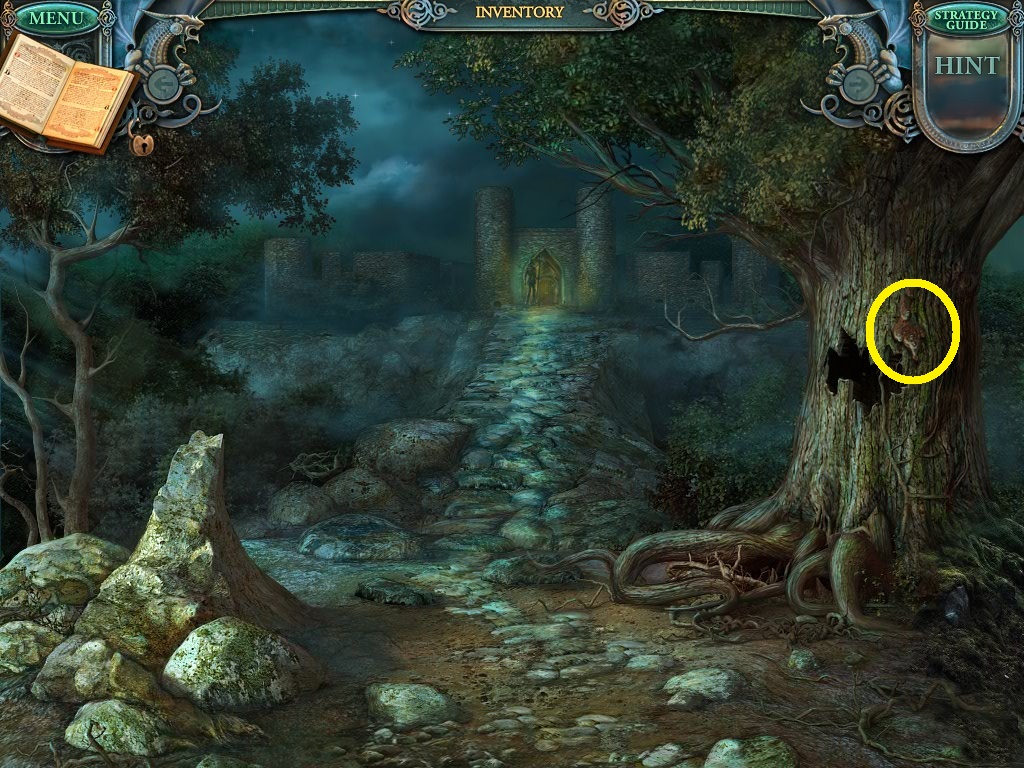
- Click the dry brush in the inventory.
- Click the sap (yellow circle) above the tree hole.
- The brush now has glue.
- Go back to the gate and go inside.
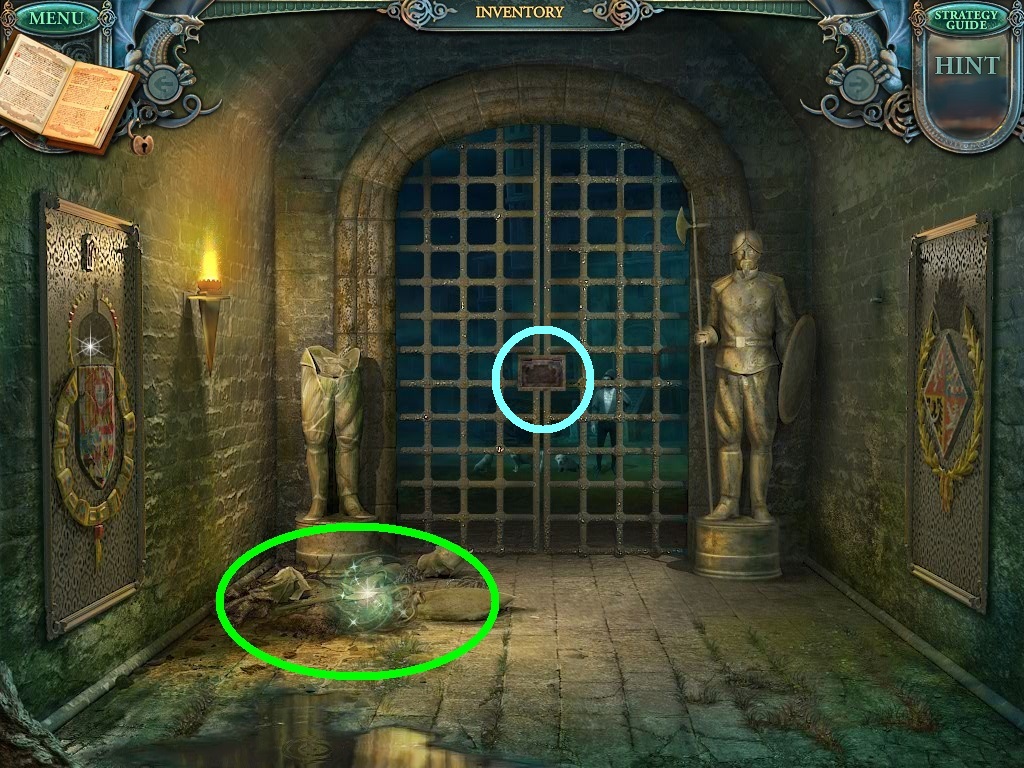
- Notice the shape on the lock (aqua circle).
- Click the debris (green circle).
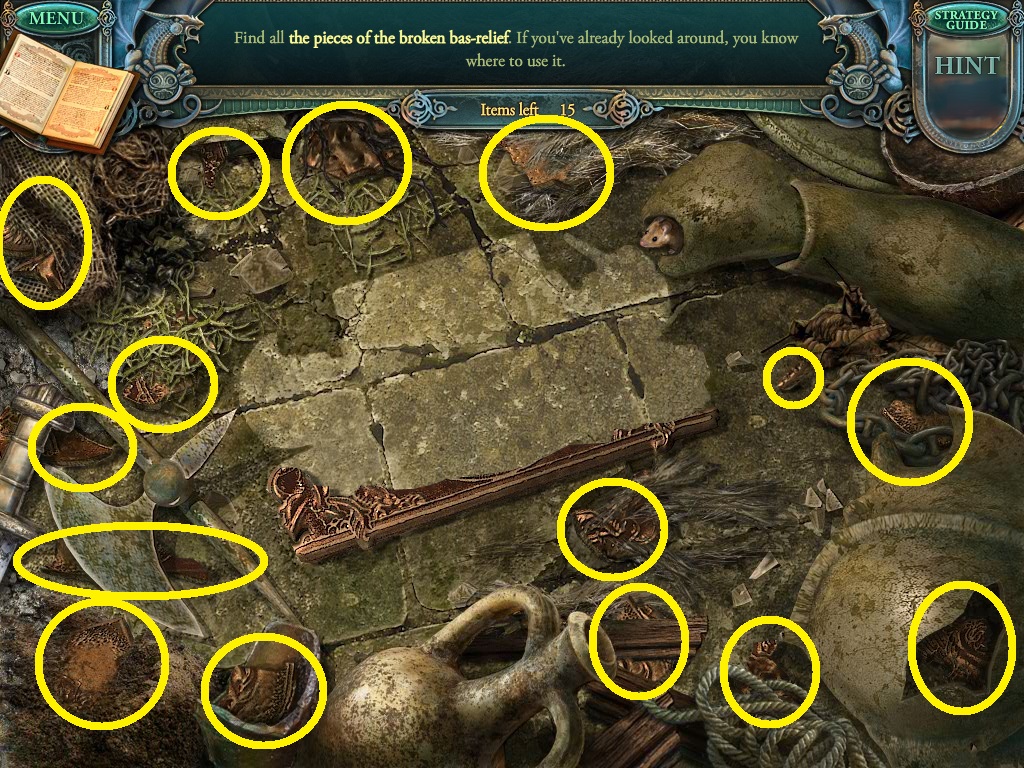
- Click the broken pieces of the bas-relief (yellow circles).
- Use the glue brush in the inventory to restore the bas-relief.
- Click the brush after it has glued the bas-relief.
- Back inside the gate place bas-relief from your inventory into the gate lock.
- A puzzle will open to be solved.
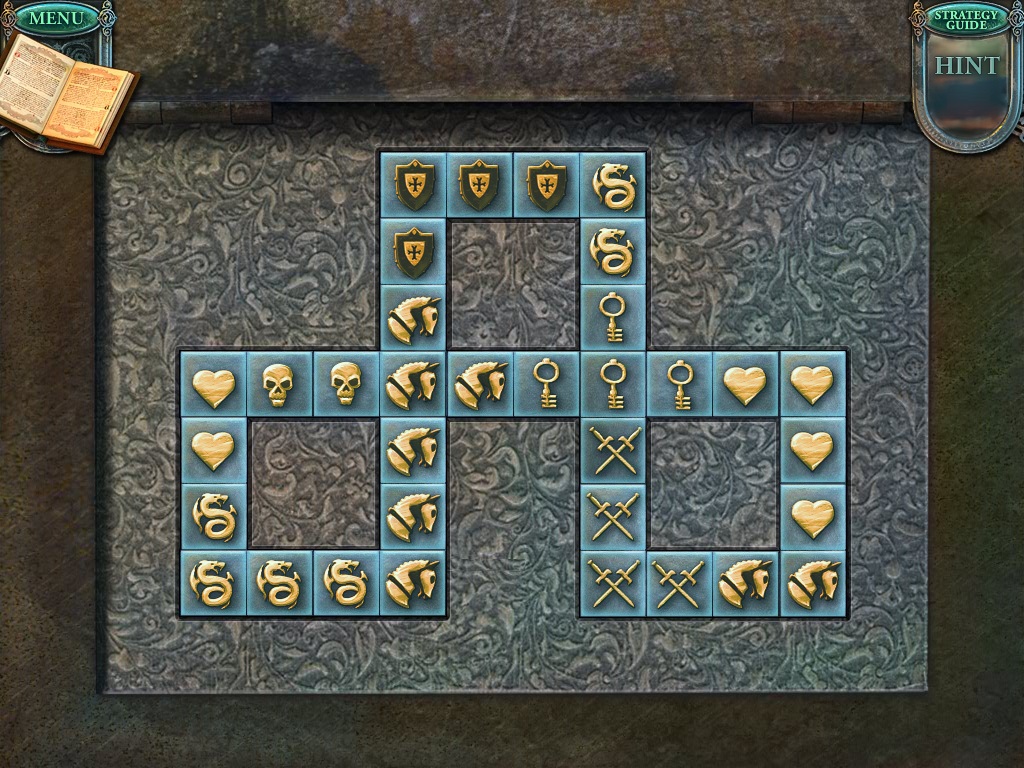
- Follow the pattern in the picture above to solve the puzzle.
- When the gate opens, walk through.
- Go to the next scene.
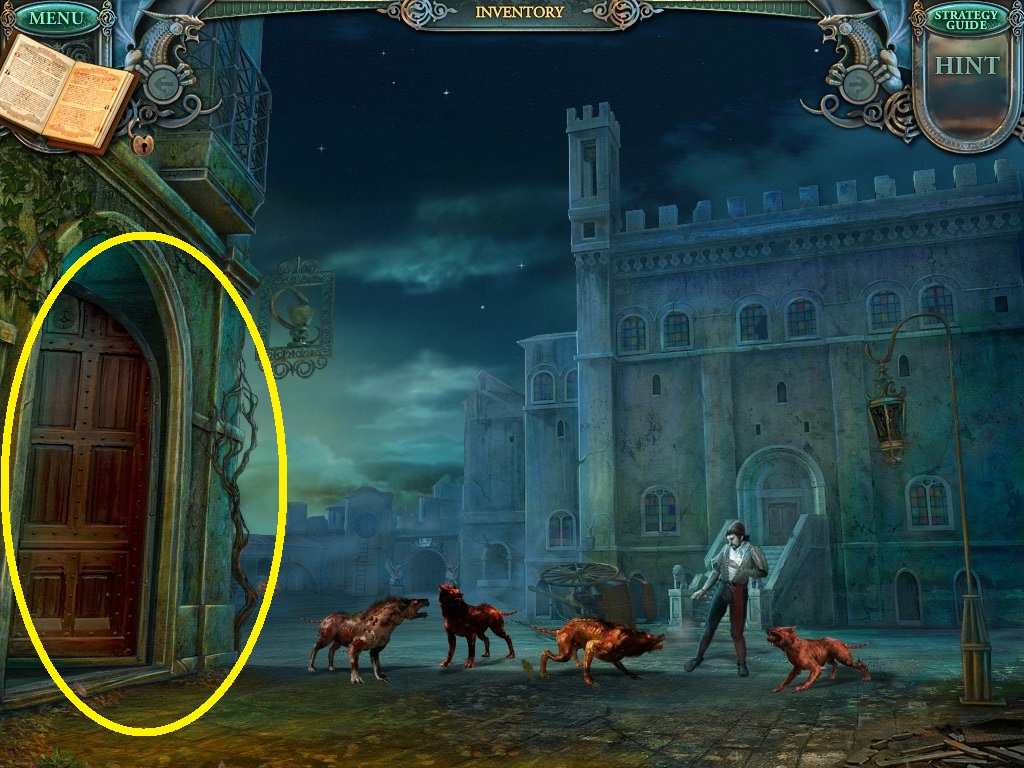
- Go through doorway (yellow circle).
- Click on the desk under the windows.
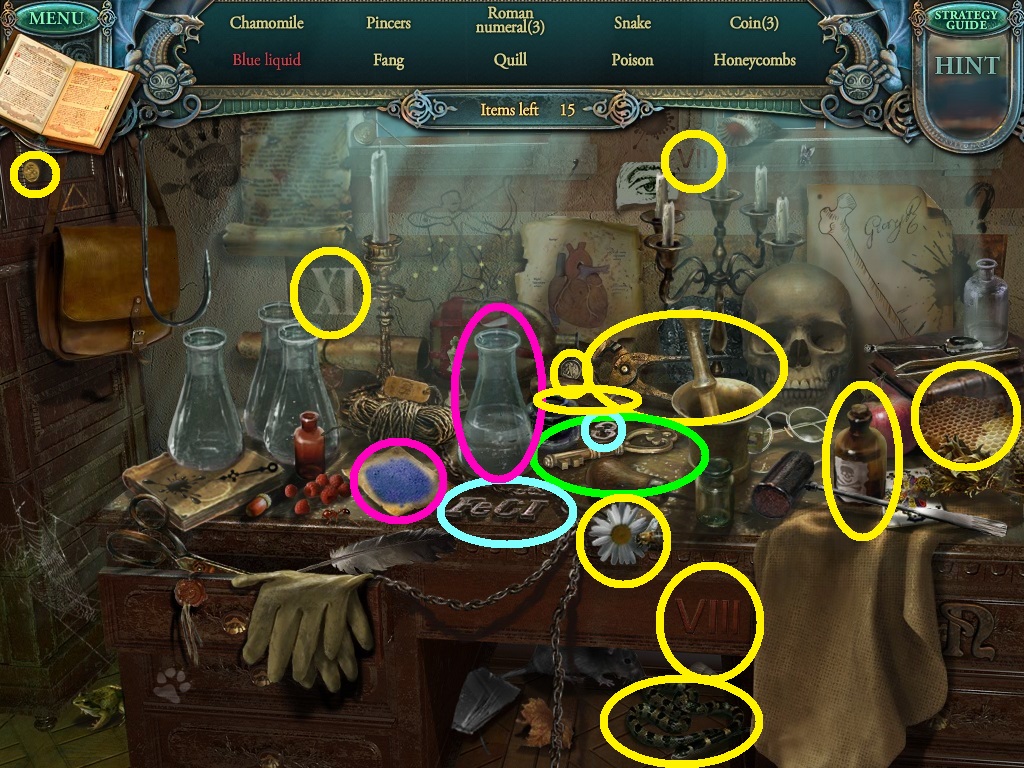
- Click on the listed items (yellow circles).
- Certain items need action before they can be collected.
- Place the blue powder onto the beaker (pink circles)
- Click the 3 and place it with FeCI (aqua circles).
- Click the key (green circle).
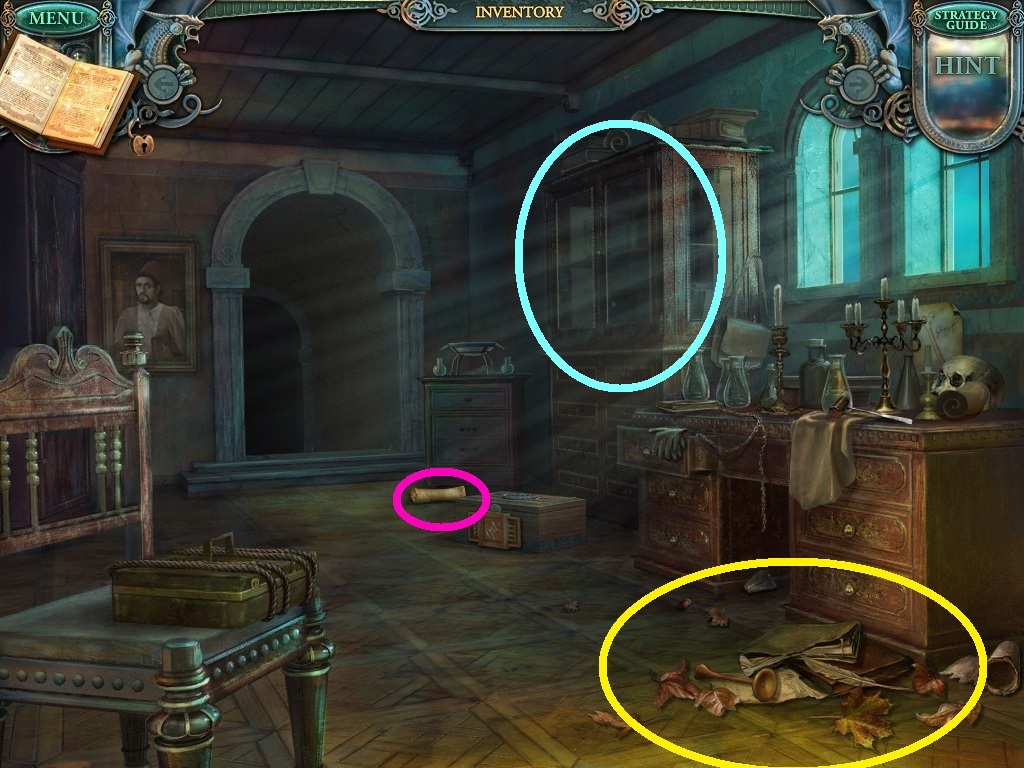
- Click debris (yellow circle).
- Click the kindling (wand) under the debris.
- Click the scroll (pink circle).
- Click the cupboard (aqua circle).
- Use the key in the inventory to open it.
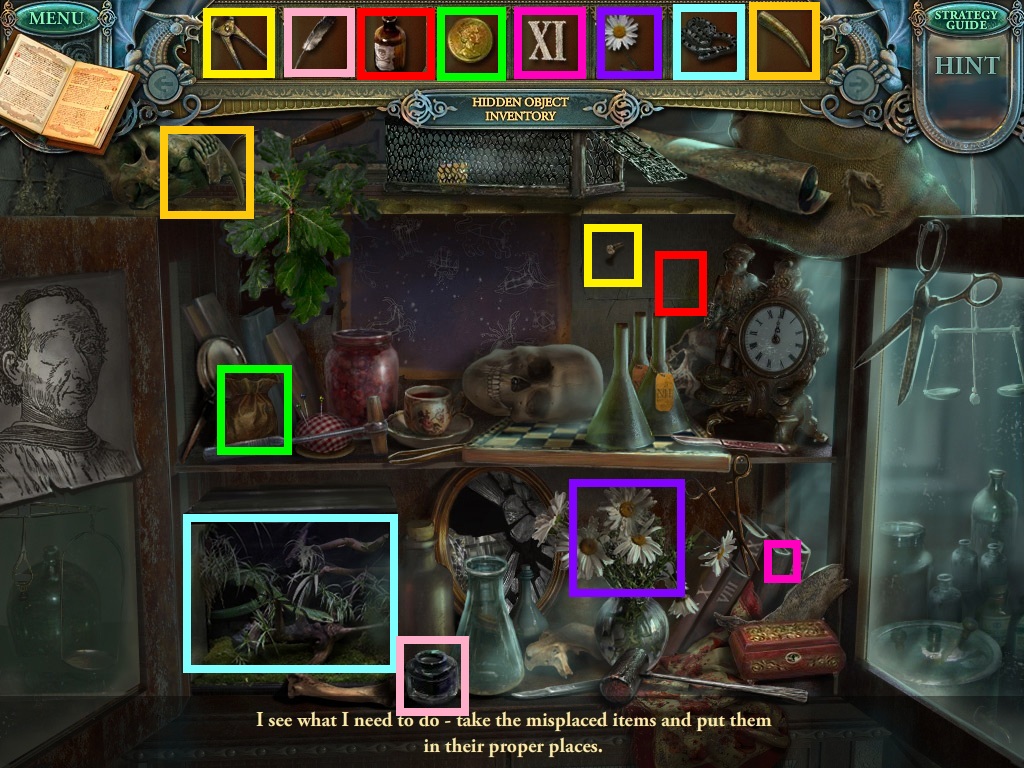
- Click each object and put them in their color matched places.
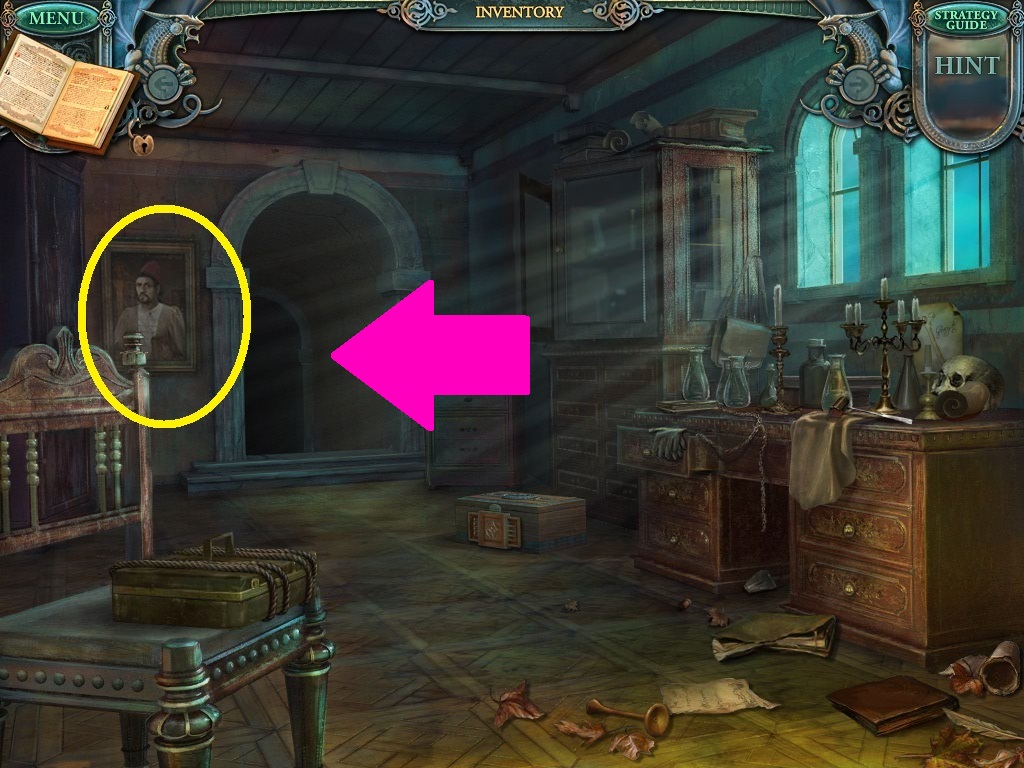
- Notice the archway (pink arrow) in the back of the apothecary.
- Click the painting (yellow circle).
- Collect the tiny skeleton arm.
- Go back to the courtyard.
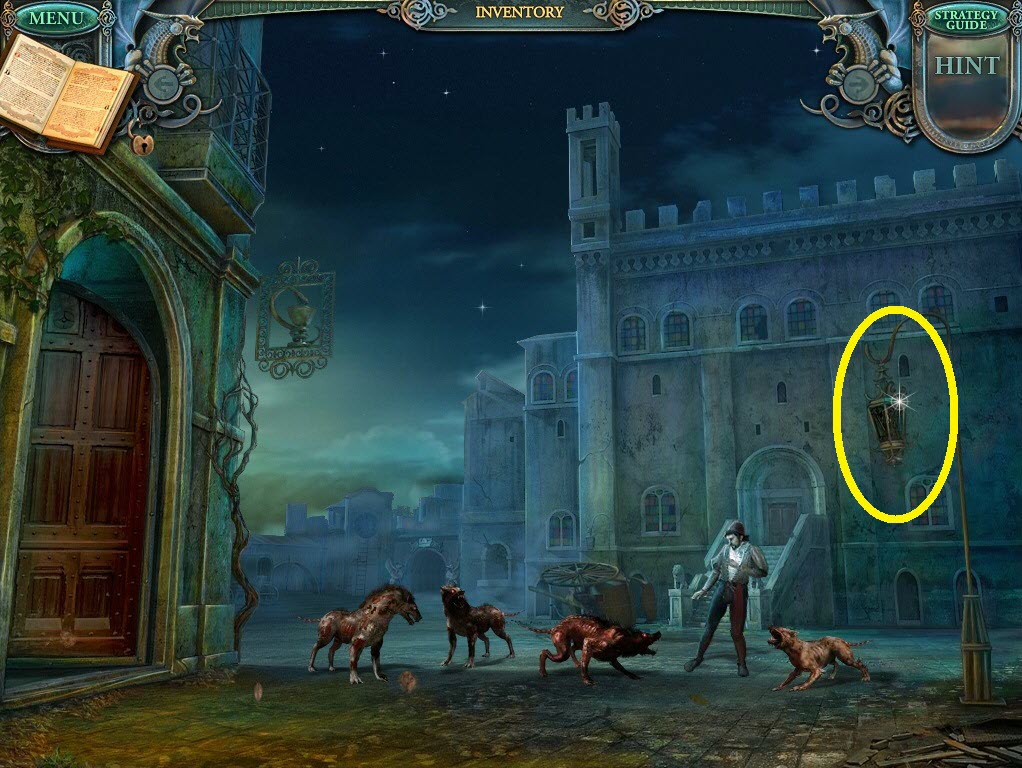
- Click the lamppost (yellow circle).
- Select the empty oil can from your inventory.
- Allow it to collect the leaking oil.
- Click the oil can once it is full.
- Go back to the gate.
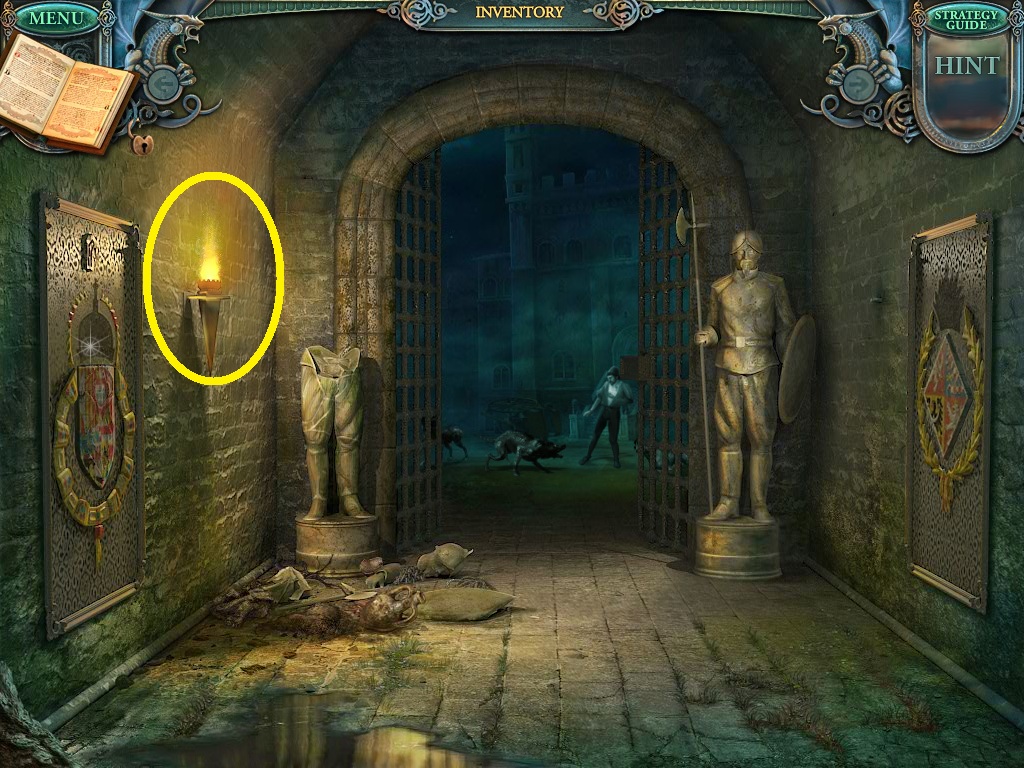
- Select the kindling in your inventory.
- Light it with the burning torch (yellow circle).
- Go back to the apothecary.
- Go through the archway in the back of the apothecary.
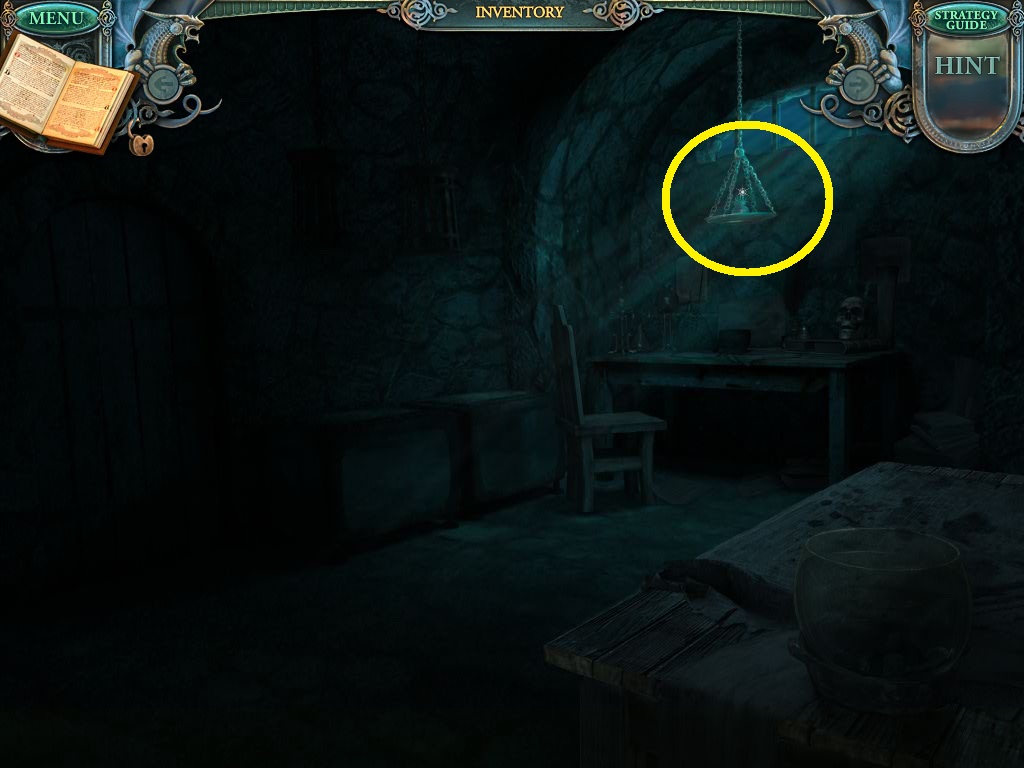
- Use the oil can in the inventory to fill chandelier.
- Light it with the lit kindling in your inventory.
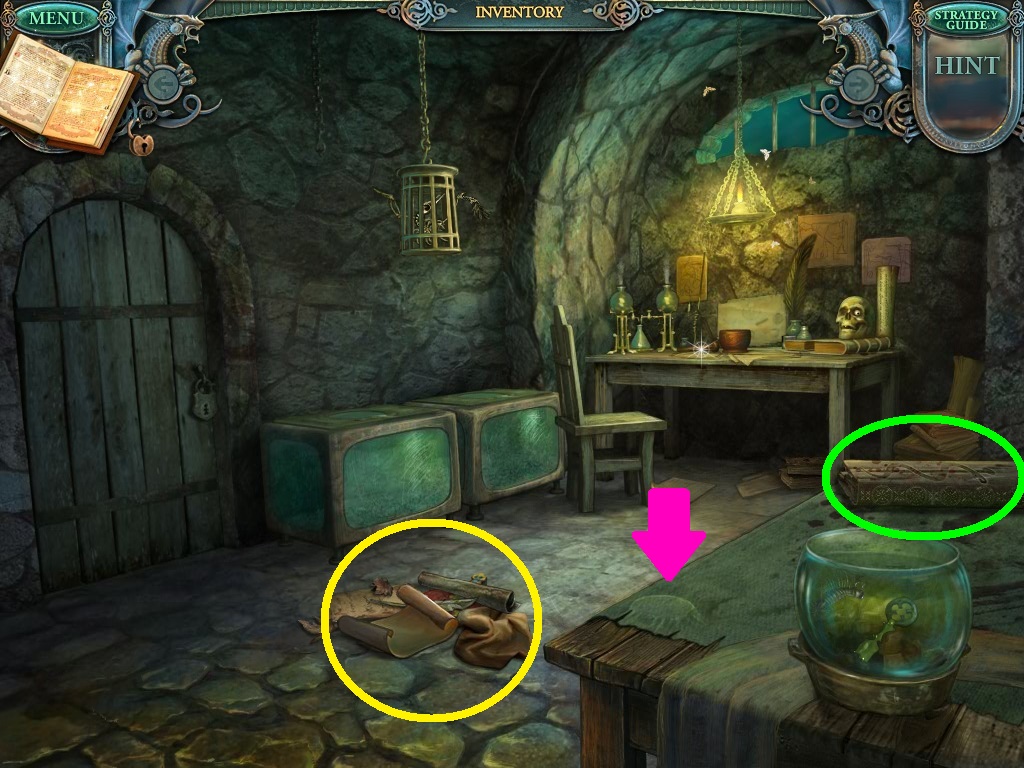
- Click on the debris (yellow circle) on the floor.
- Pick up the crown.
- Click on the table cloth (pink arrow).
- Pick up the lens.
- Click on the leather satchel (green circle).
- Pick up the scalpel.
- Go back to the apothecary.
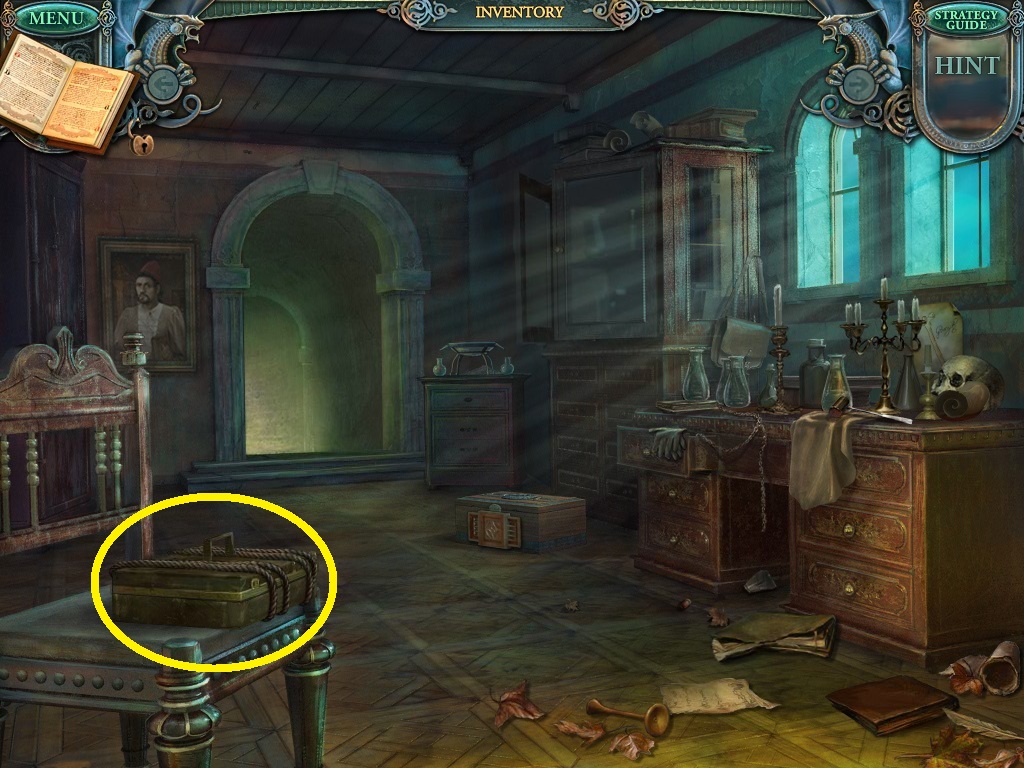
- Use the scalpel in the inventory to cut the ropes on the luggage (yellow circle).
- Click the tiny skeleton leg.
- Go back to the gate.
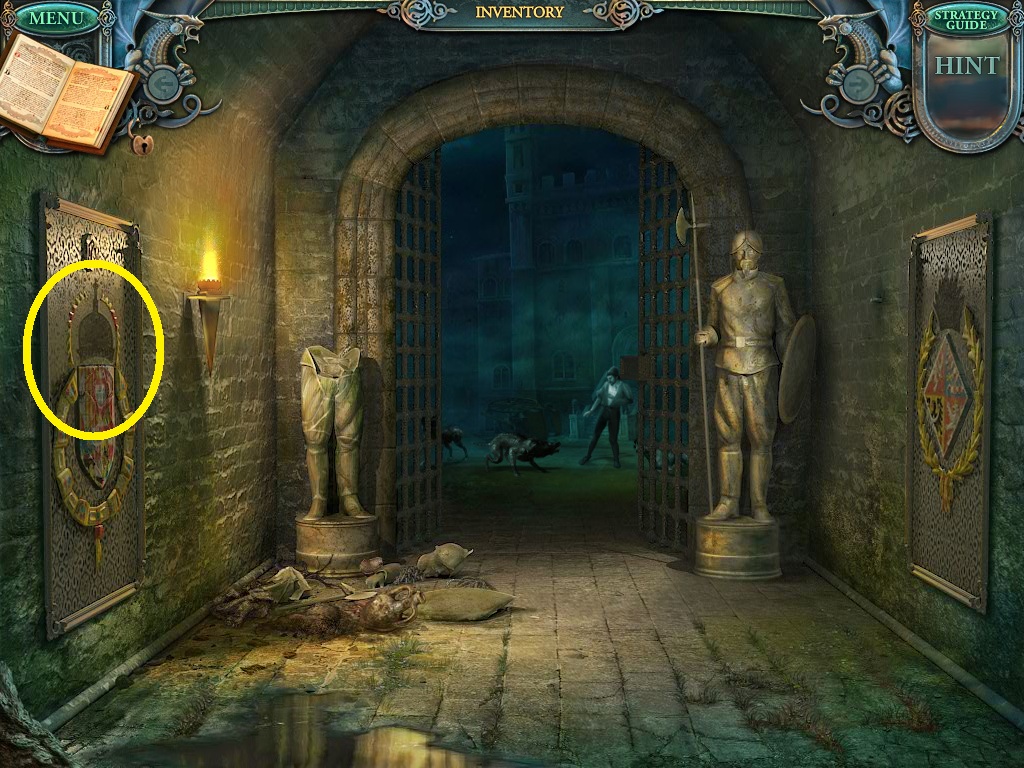
- Use the crown in your inventory to complete the shield plaque (yellow circle).
- Pick up the key.
- Go back to the aquarium.
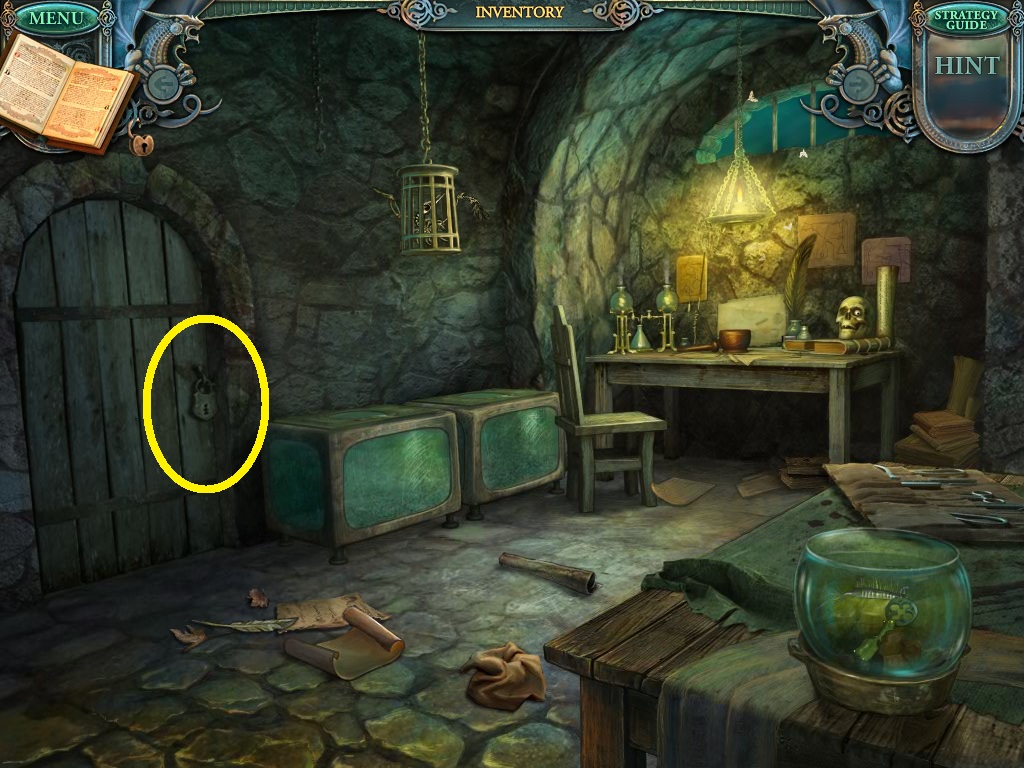
- Zoom into the door lock (yellow circle).
- Use the key in your inventory to open it.
- Go into the store room.
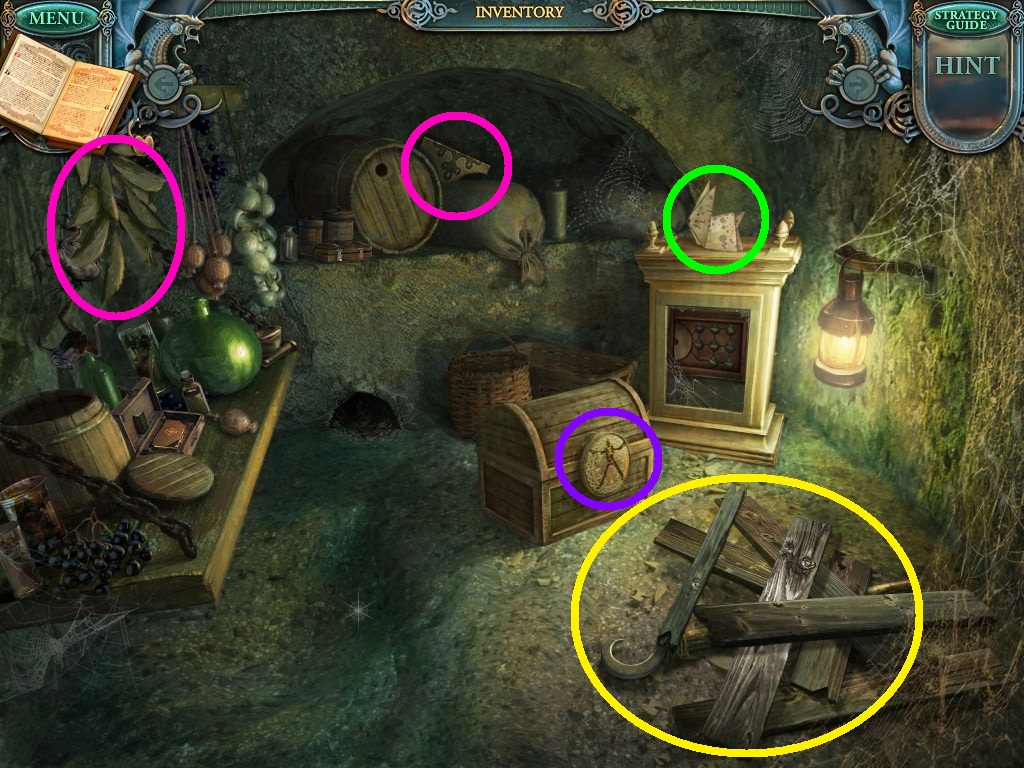
- Click on the floor debris (yellow circle).
- Pick up the hook.
- Click the elder leaves and the ceramic piece (pink circles).
- Click the origami rabbit (green circle).
- Zoom into chest lock (purple circle).
- Use the tiny skeleton parts in your inventory to add to the lock.
- Go back to the entrance of the gate.
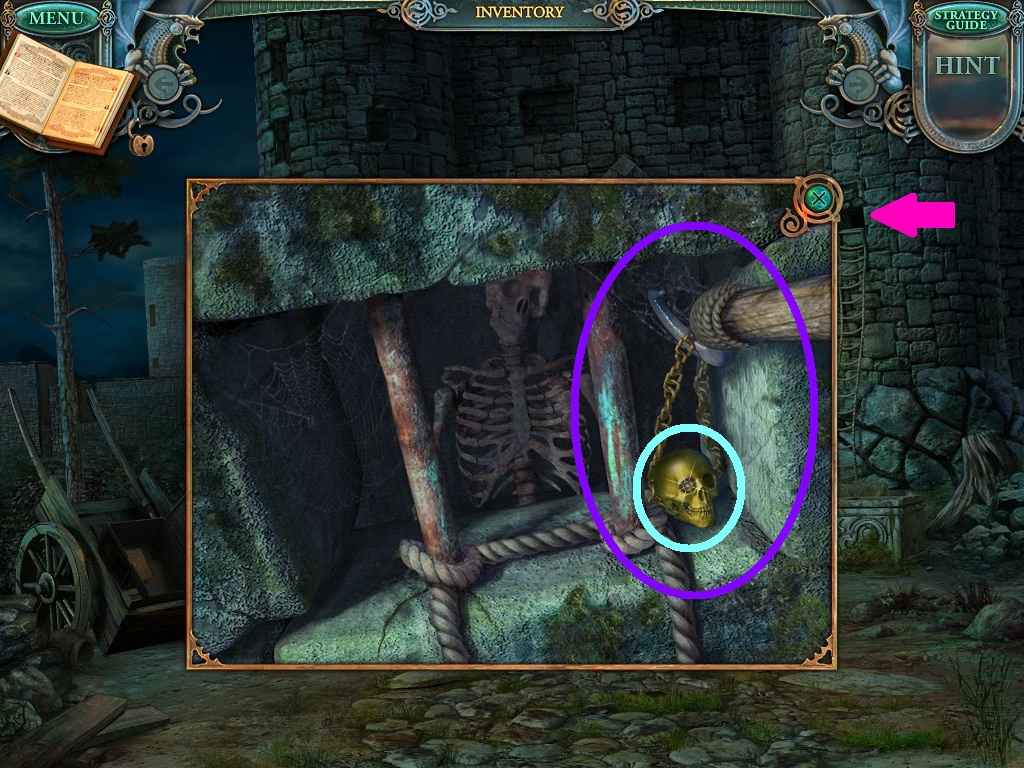
- Click the window (pink arrow) with the ladder on the right tower.
- Use the hook from your inventory to get the gold necklace (purple circle).
- Click on the tiny skull (aqua circle).
- Go back to the store room.
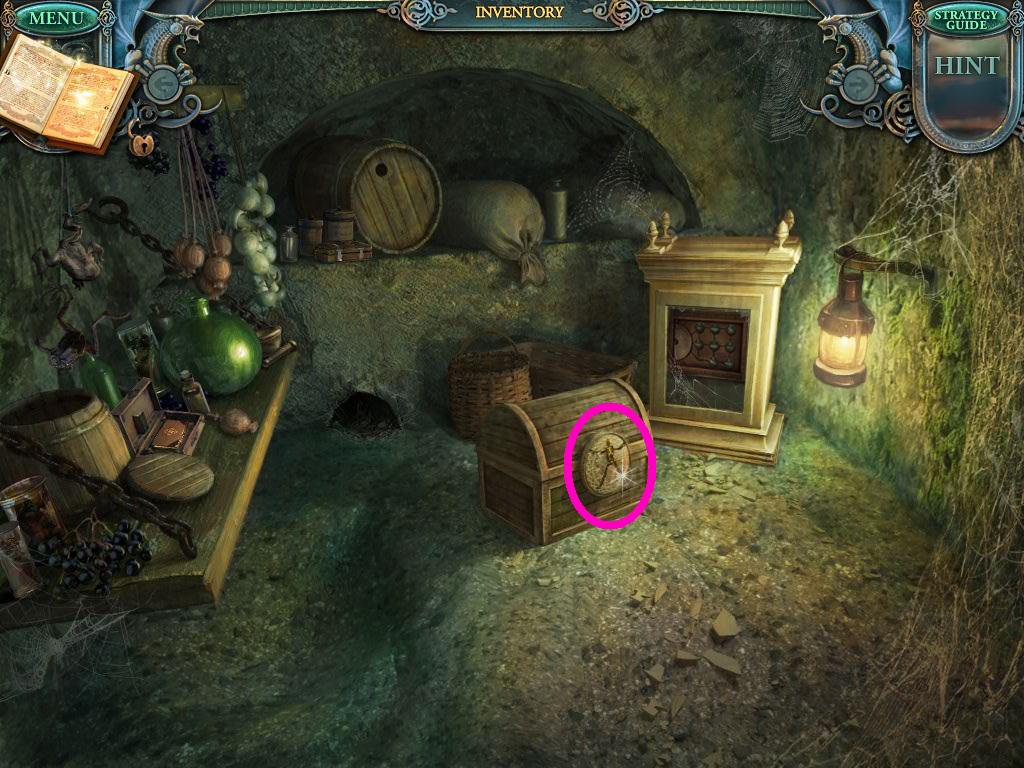
- Click on the chest lock (pink circle).
- Use the tiny skull from the inventory to complete the lock.
- Pick up the tweezers.
- Go back to the aquarium.
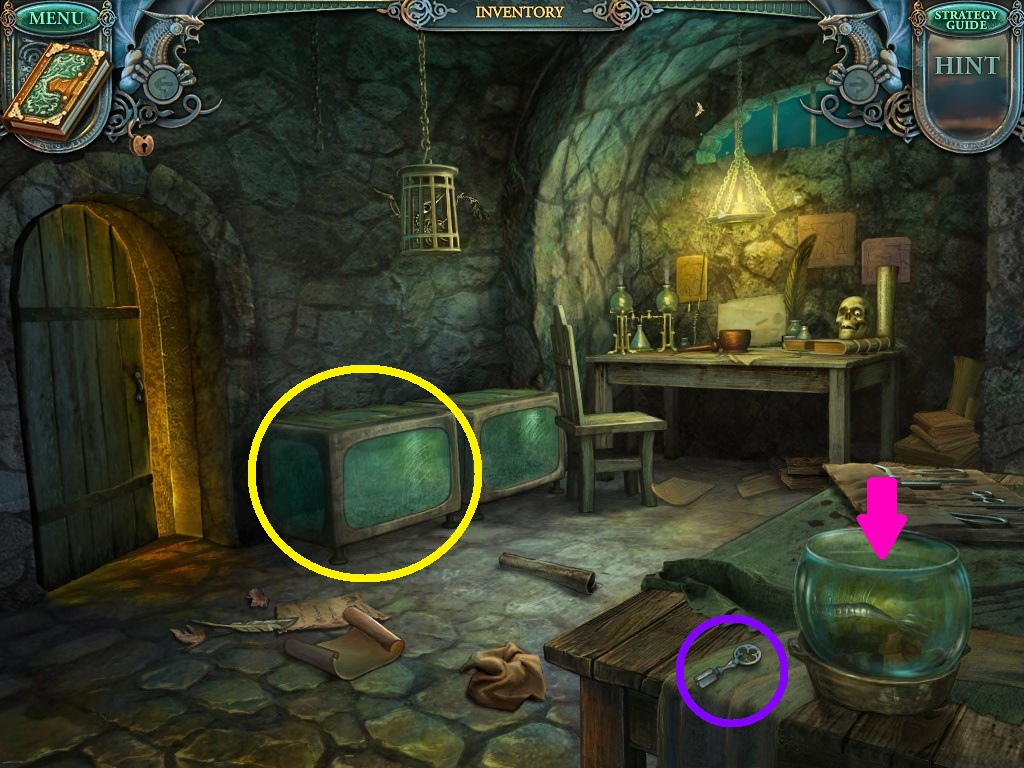
- Use the tweezers in the inventory and click the fish bowl (pink arrow).
- Pick up the key (purple circle).
- Click the aquarium (yellow circle).
- Use the key to unlock the lock.
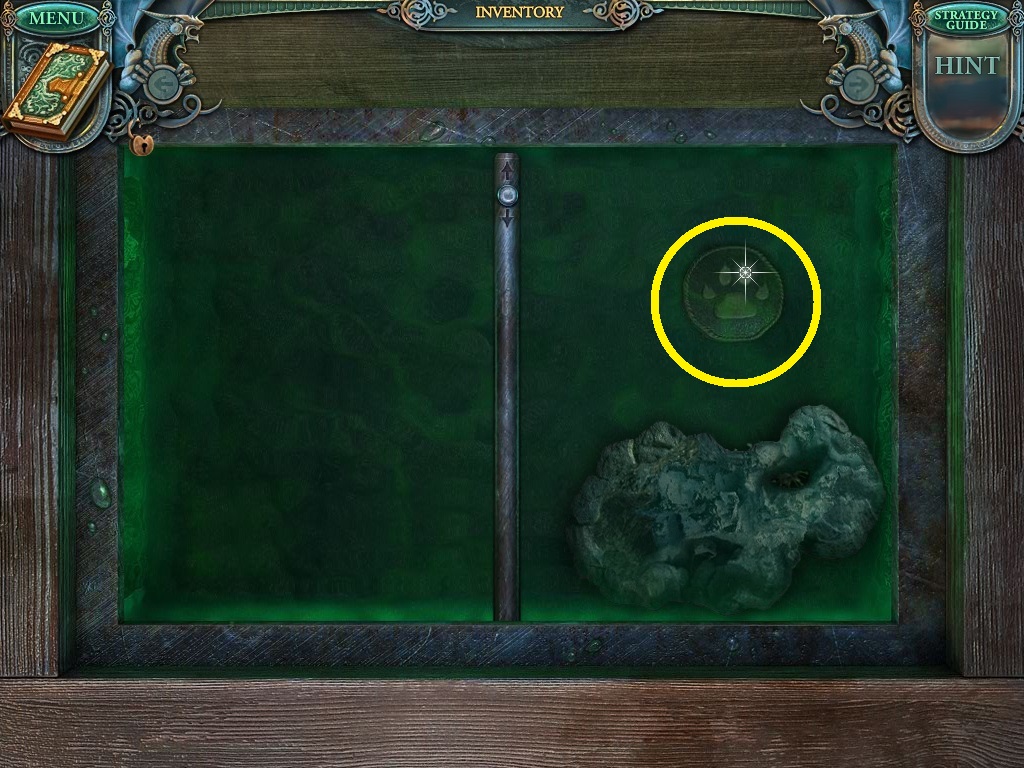
- Solve the puzzle (The solution is shown above).
- The movable barrier in the middle goes up and down.
- Allow the water creatures to move from the left side to the right side by moving the barrier up and down.
- Once they are all at the right side, they will eat the seaweed.
- Pick up the plate with the dog paw (yellow circle).
- Go back to the apothecary.
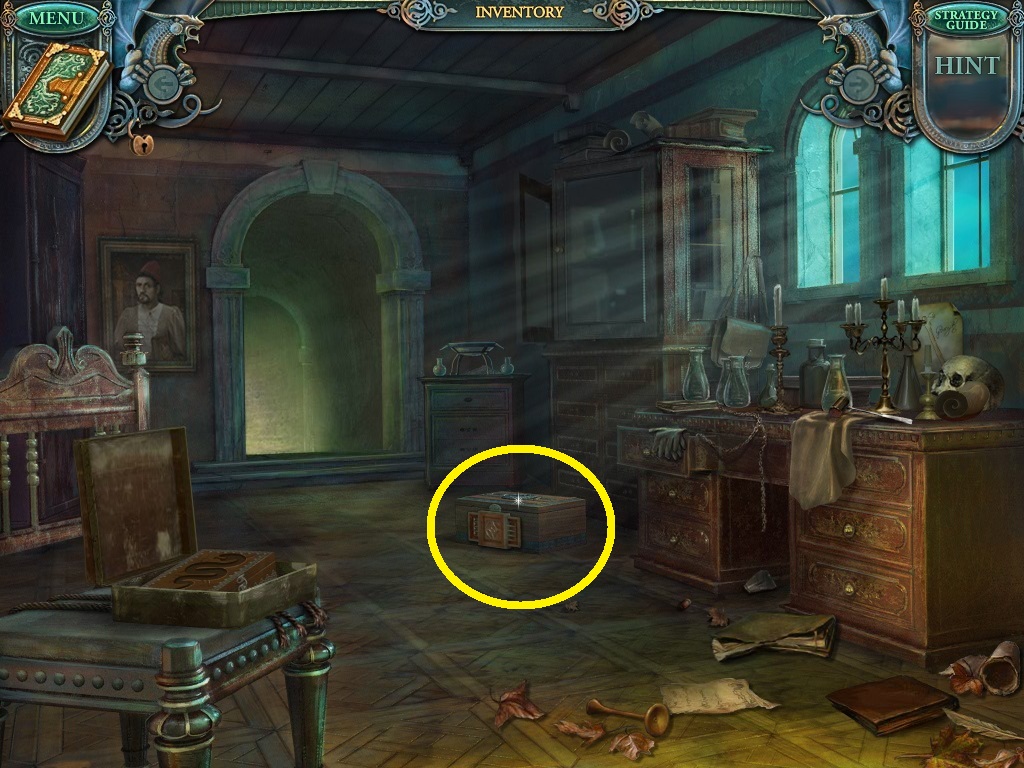
- Zoom into the box (yellow circle) on the floor.
- Use the dog paw plate to open another puzzle.
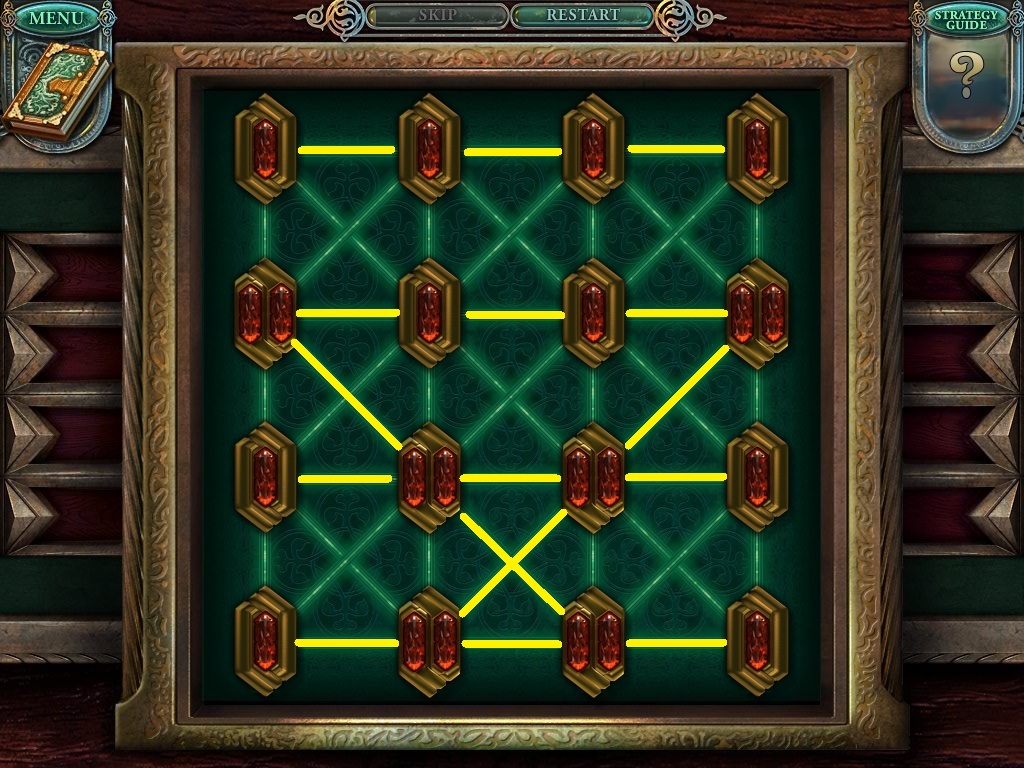
- Solve the puzzle.
- Follow the pattern above (yellow lines).
- Click the scroll and the magic powder.
- Go to the courtyard.
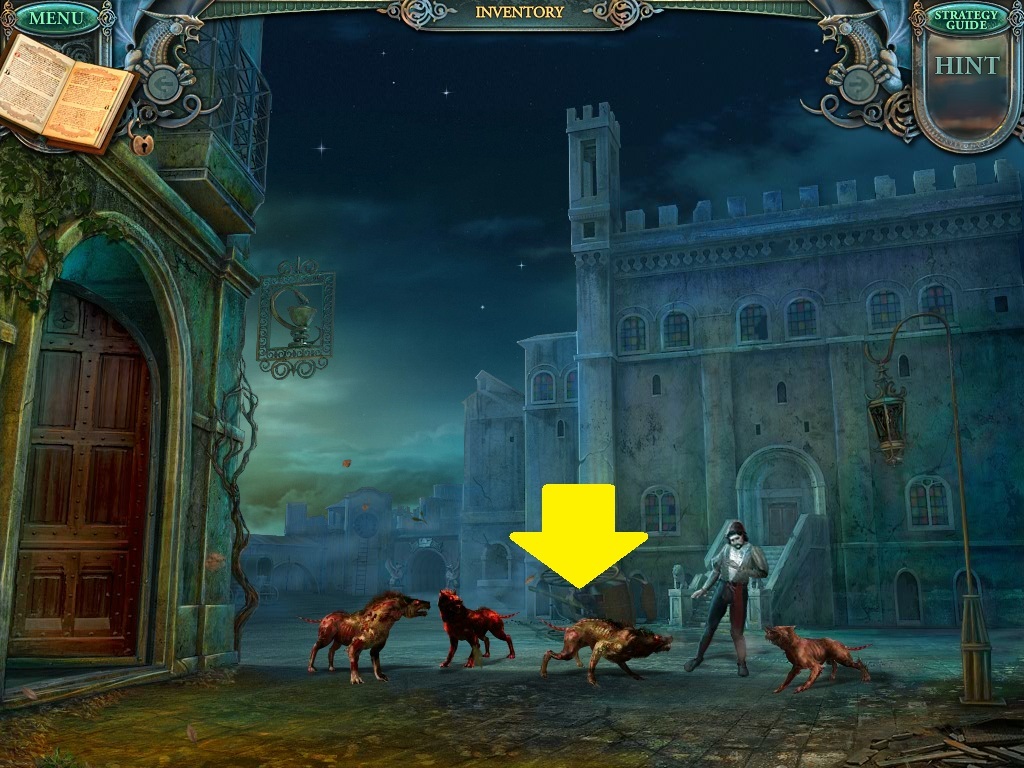
- Click the magic powder from your inventory.
- Throw it onto the dogs (yellow arrow).
- They will be restored to normal.
- Listen to the doctor.
- Collect the gem.
Comments will load when you reach this part of the walkthrough.