

Chapter Four: The Scientist
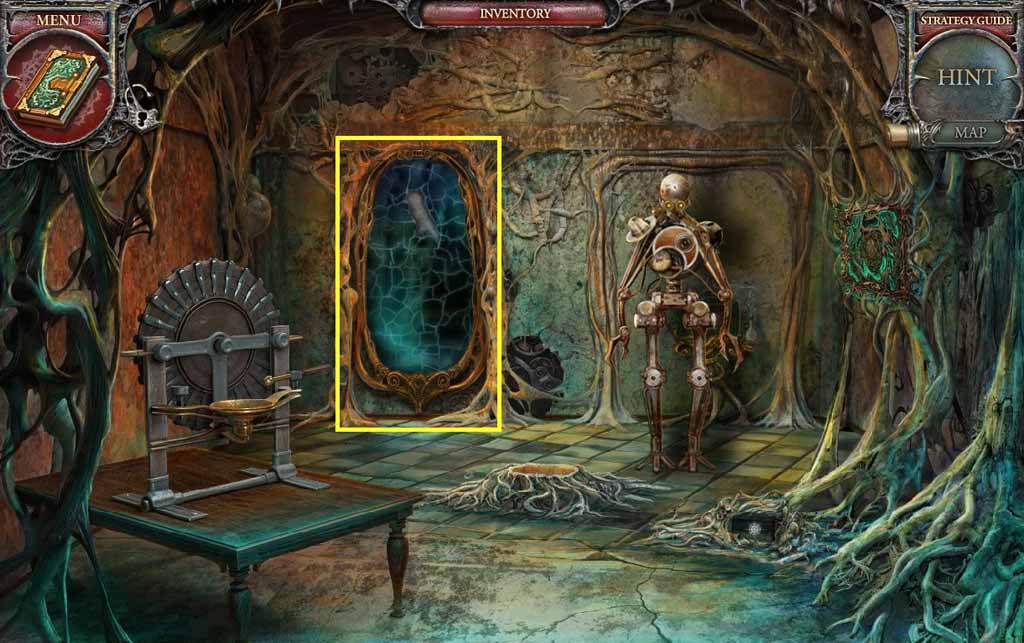
- Examine the mirror and insert the shard.
- Move ahead to the Laboratory.
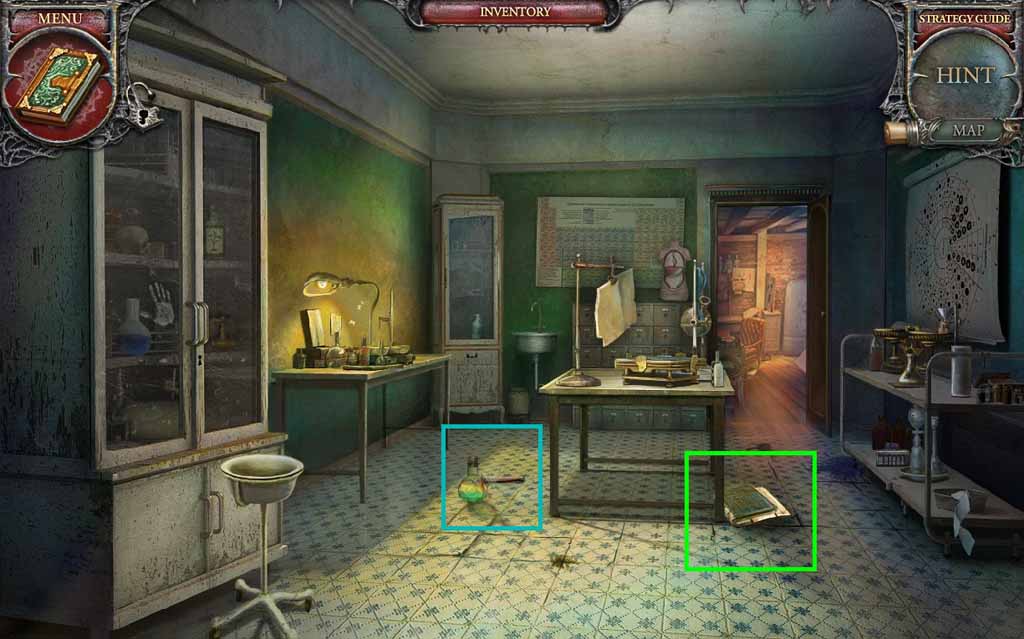
- Collect the elevator part.
- Read the note.
- Move ahead and enter the Scientist’s Office.
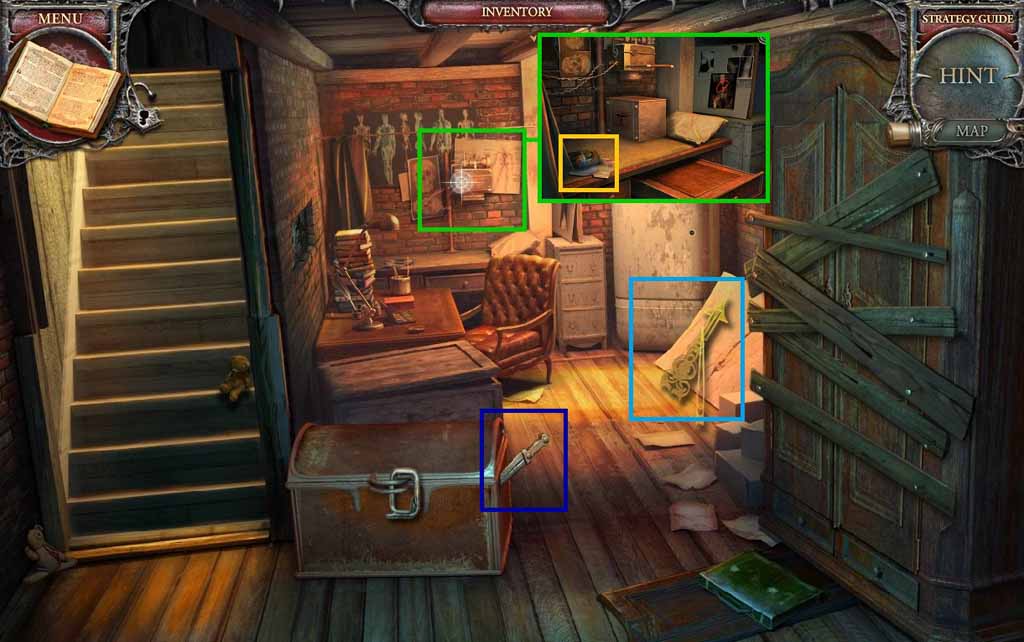
- Collect the dagger and the clock hands.
- Examine the wall and collect the storage battery.
- Move upstairs to the Landing.
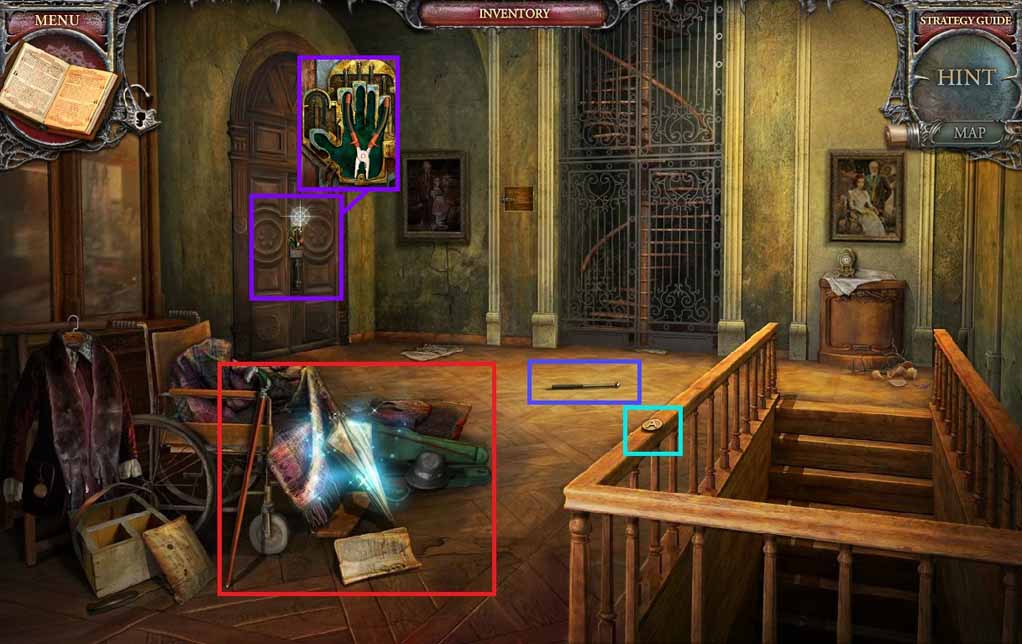
- Collect the electrode and the typewriter key.
- Examine the door and collect the pliers.
- Click the hidden objects area.
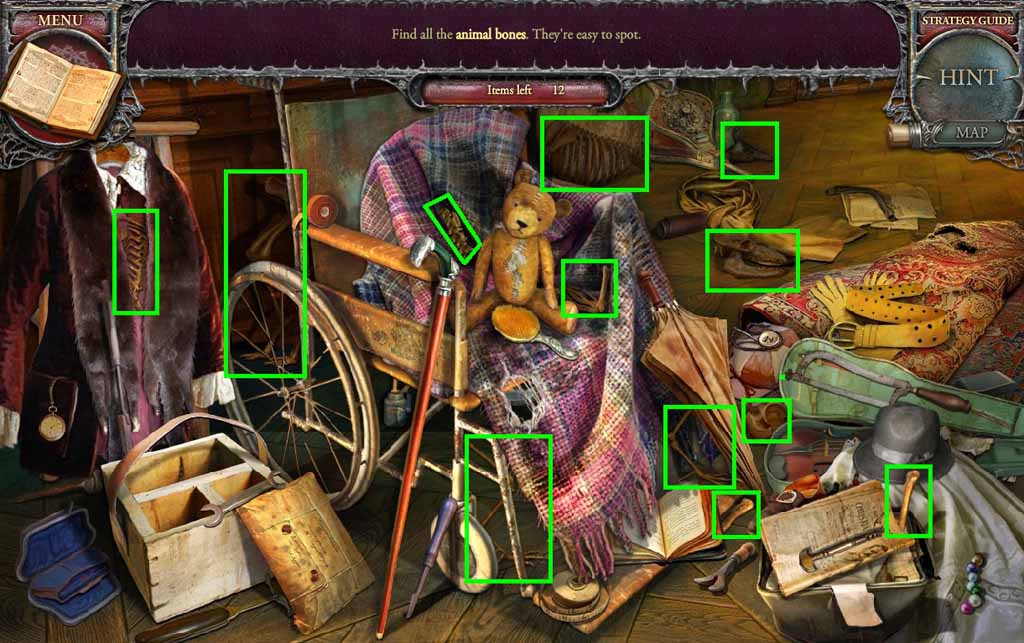
- Find the animal bones.
- Collect the bones.
- Move down once.
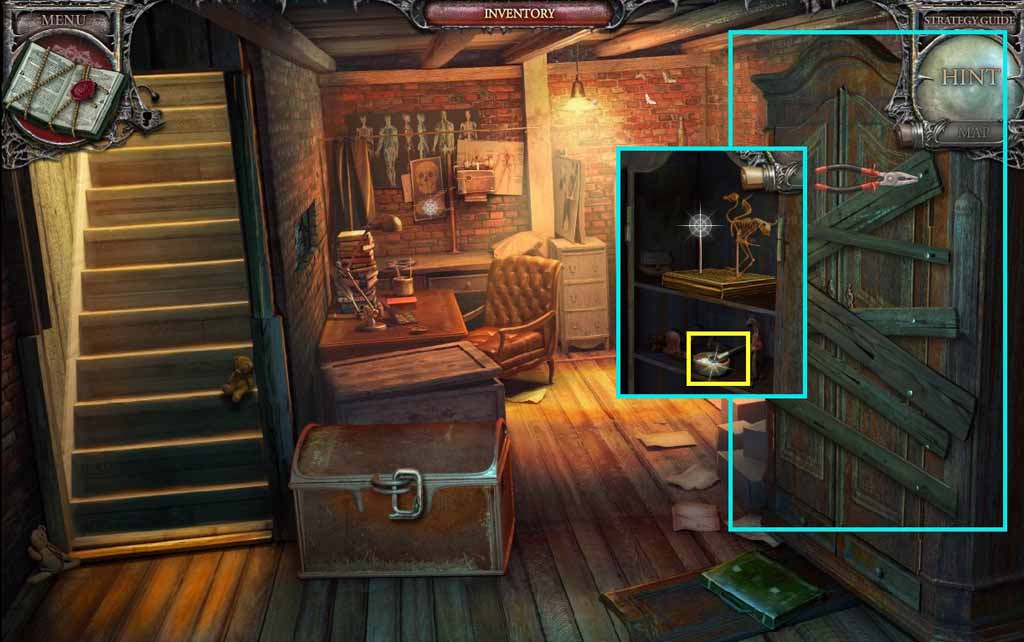
- Select the pliers and use them to remove the boards from the cupboard.
- Collect the pliers.
- Collect the powder.
- Move to and enter the Heart Doorway.
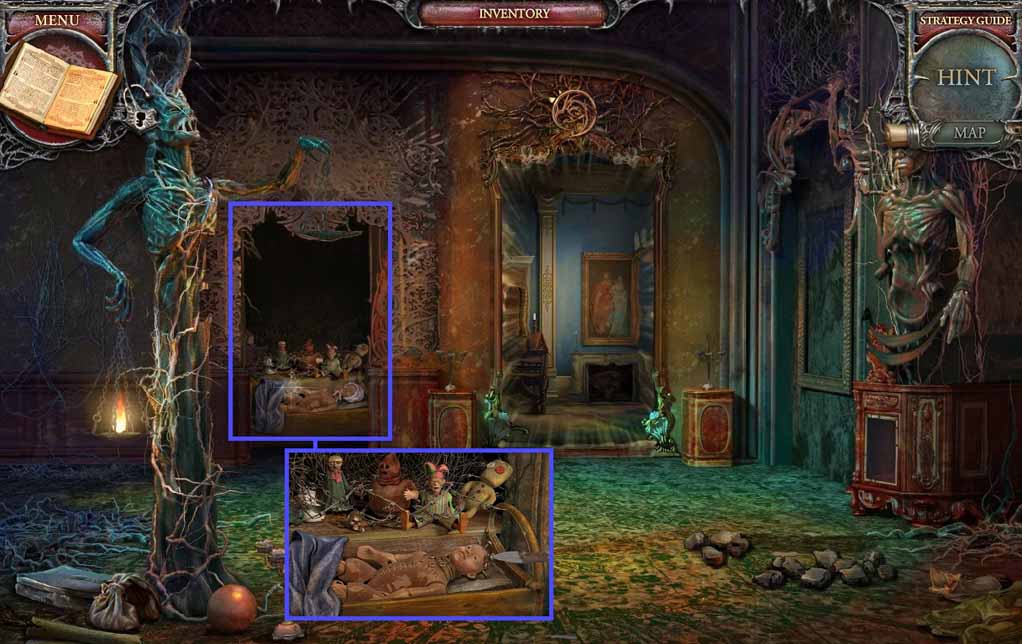
- Examine the bedroom.
- Click the doll’s bonnet.
- Select the dagger to loosen and collect the screw.
- Move to the Lake.
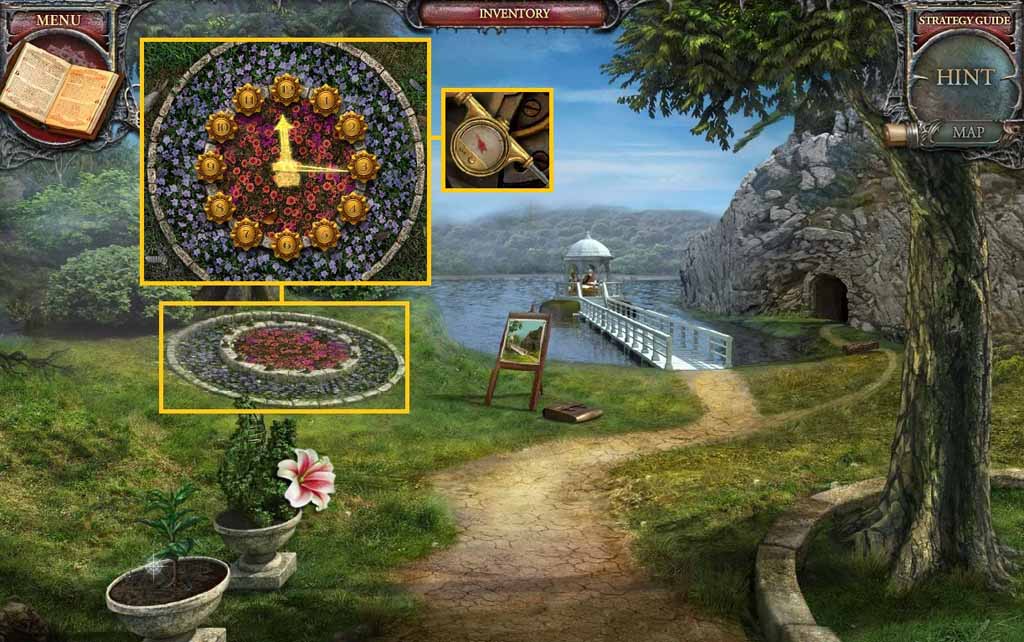
- Examine the flower bed and insert the clock hands to trigger a mini-game.
- Click the flowers and switch them around until the numbers are arranged as it is on a clock.
- Collect the manometer.
- Move to the Artist’s Studio.
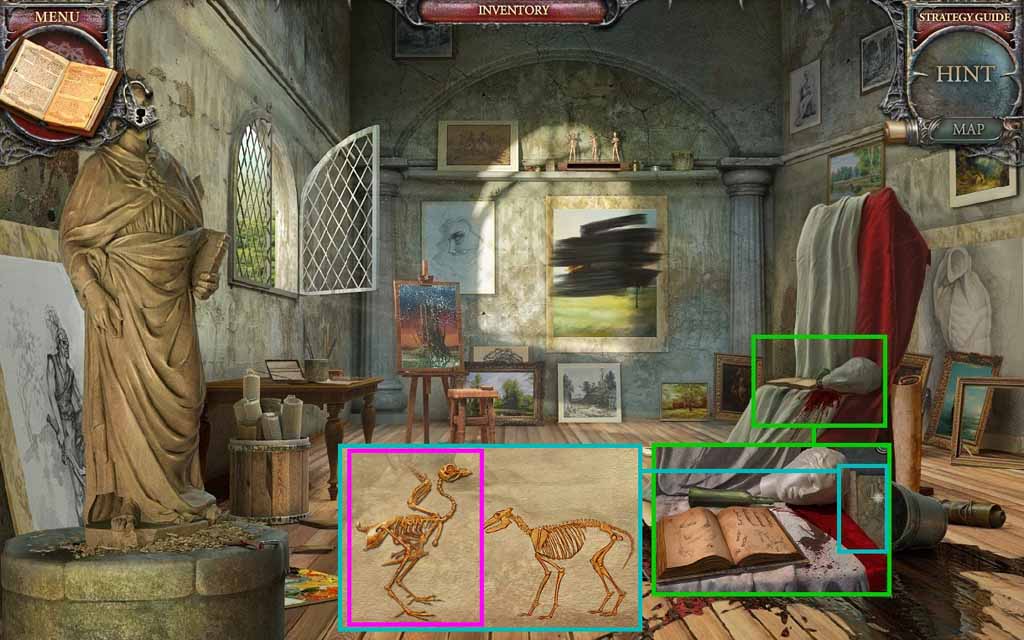
- Examine the drapes and then zoom into the sketch; insert the bones to trigger a mini-game.
- Solve the game by recreating the skeletons.
- Collect the bird skeleton.
- Move to the Mirror Room behind the Owl Doorway.
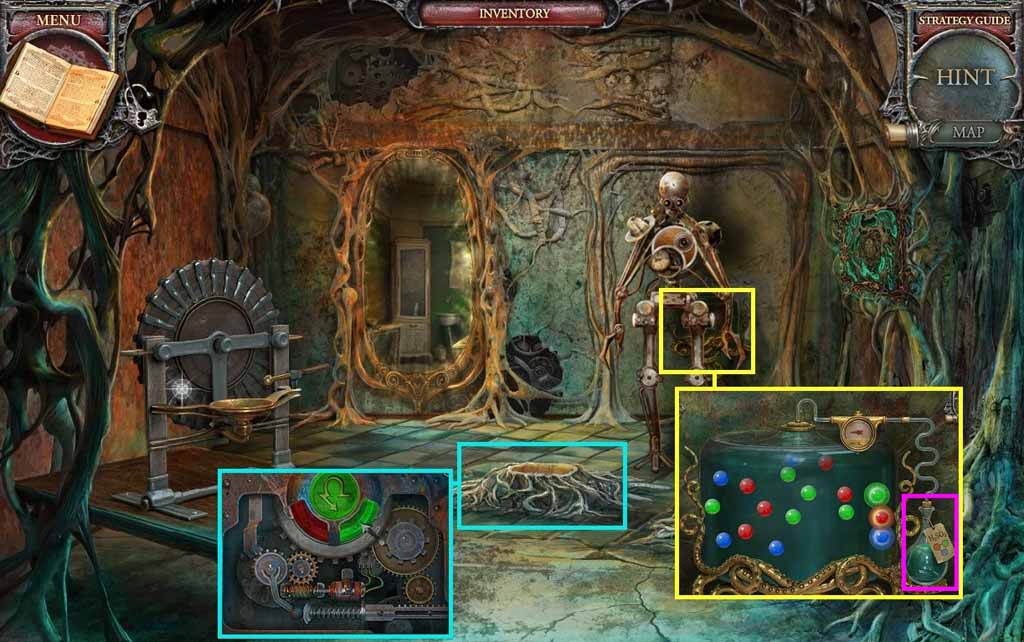
- Examine the center of the floor.
- Insert the small lever and the storage battery into the mechanism.
- Move to the tank and insert the manometer to trigger a mini-game,
- Solve the game by clicking the atoms to reveal its outer glow.
- Click the atoms when one green, one blue and one red atom lap over one another.
- Do this until the flask is filled.
- Collect the sulfuric acid.
- Move to the Laboratory and zoom into the table on the left.
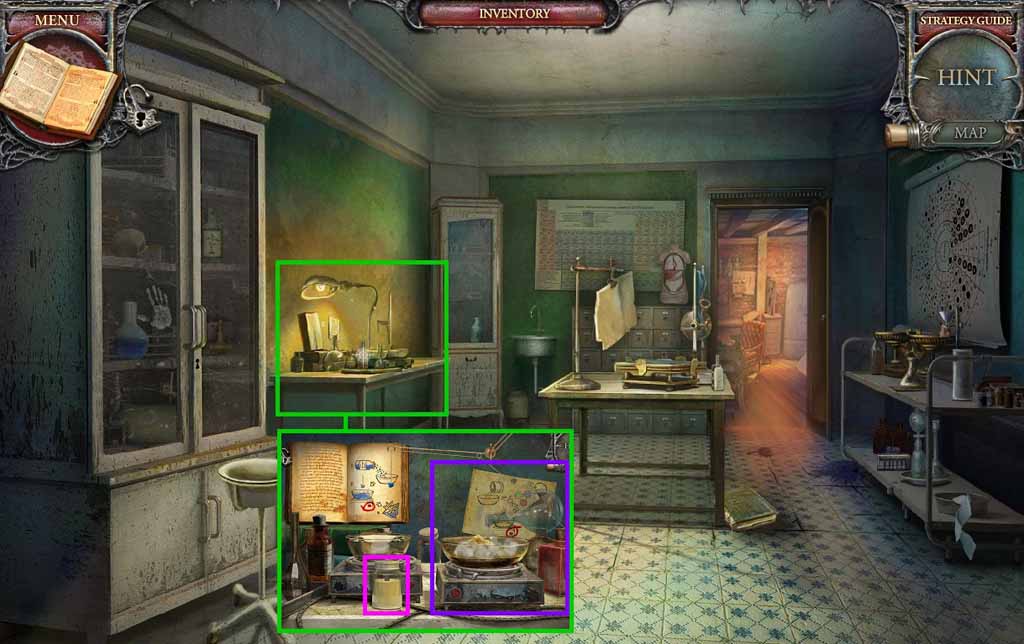
- Select the bone powder and the sulfuric acid into the bowl on the right.
- Click the heating element.
- Collect the bone glue.
- Move ahead.
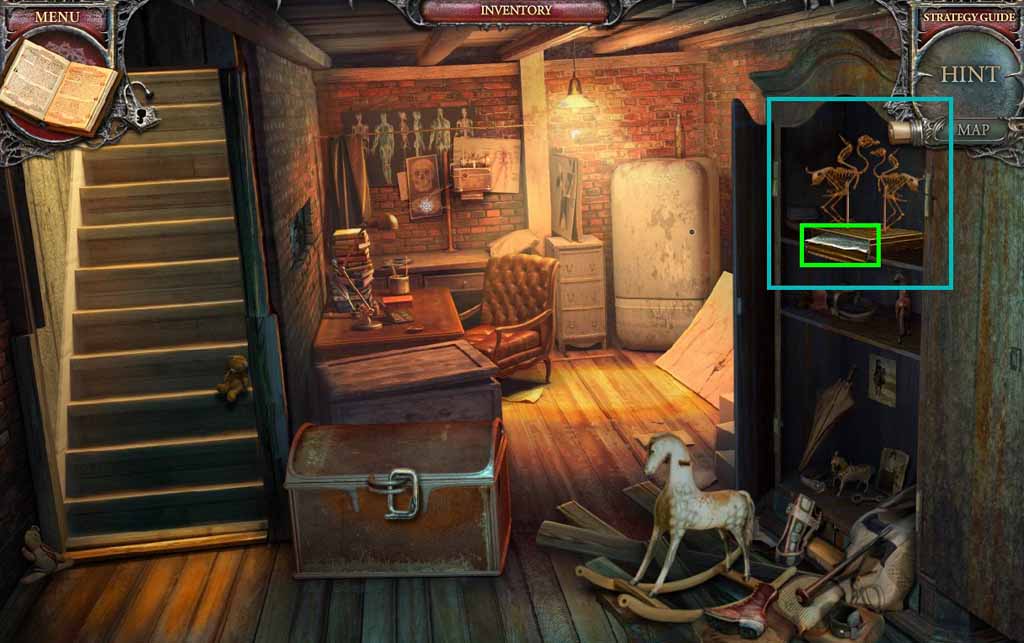
- Insert the bird skeleton into the cupboard.
- Collect the film.
- Move down once.
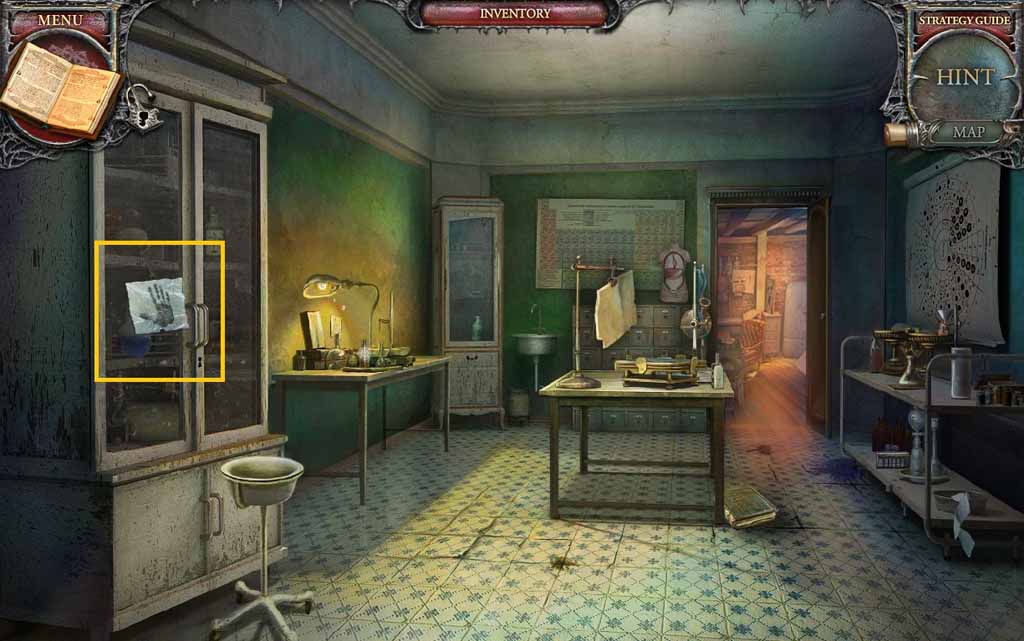
- Select the powder and use it on the glass cabinet.
- Select the film and use it on the handprint; collect the handprint.
- Move to the Landing.
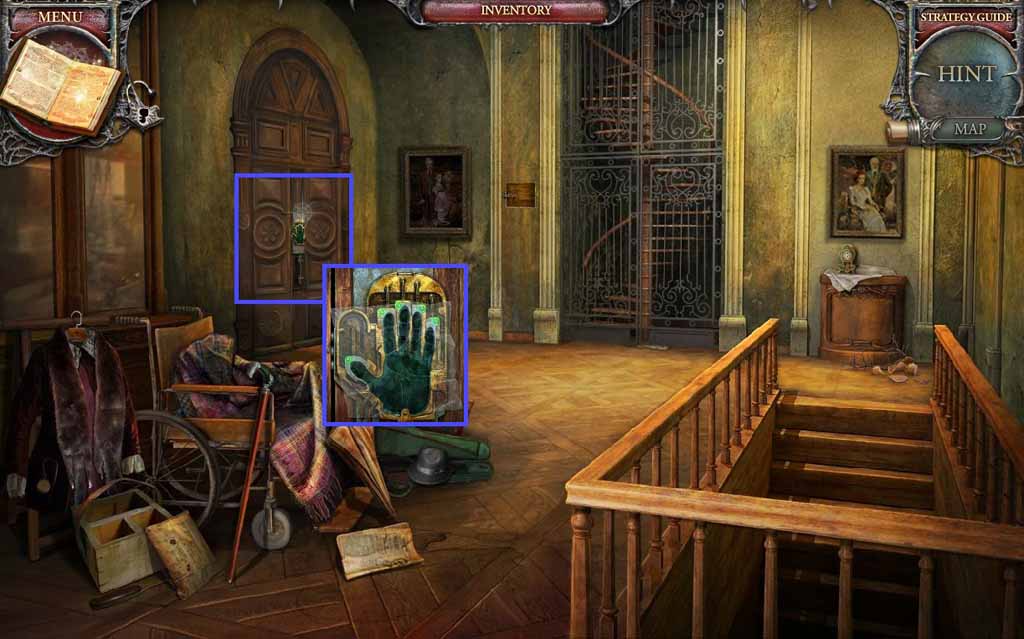
- Examine the door and place the handprint onto the sensor.
- Move through the doorway into the Hospital Room.
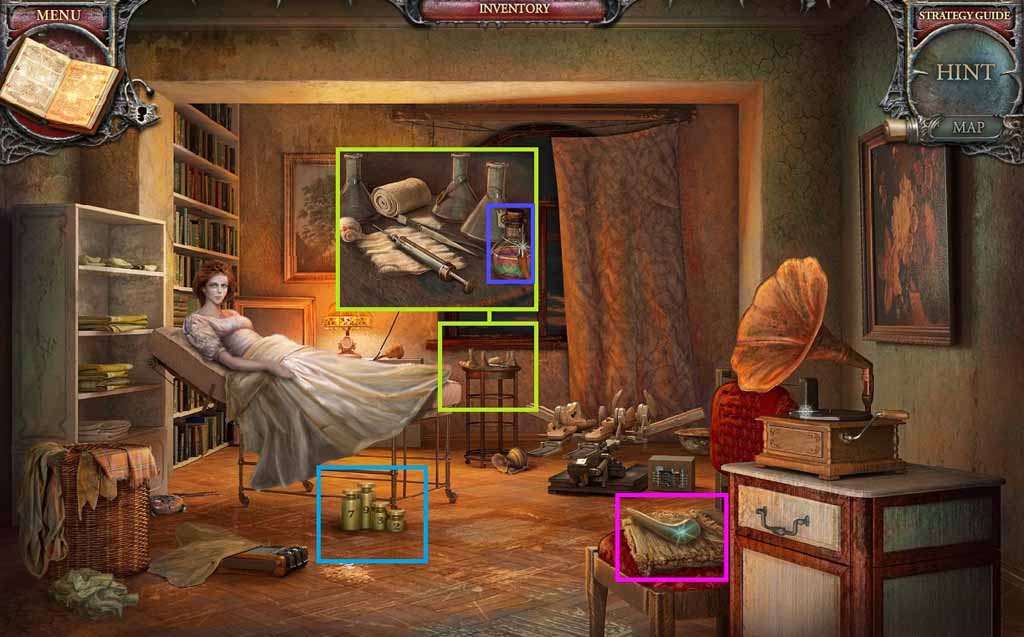
- Collect the weights and the refrigerator handle.
- Examine the table; collect the lamp.
- Move to the Scientist’s Office.
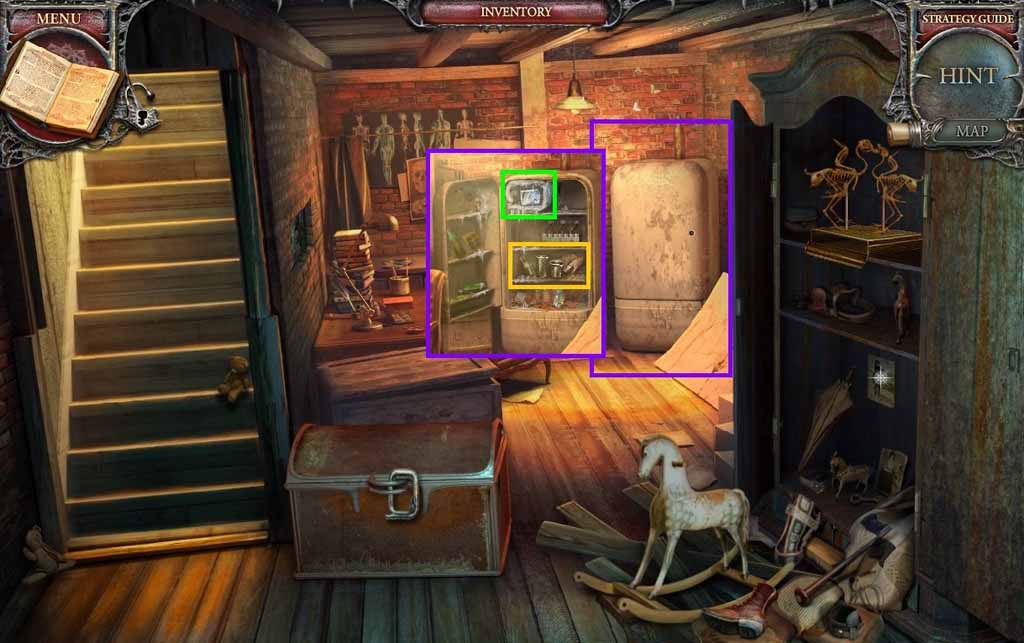
- Attach the refrigerator handle onto the fridge.
- Collect the ice cube and the beakers.
- Move to the Mirror Room.
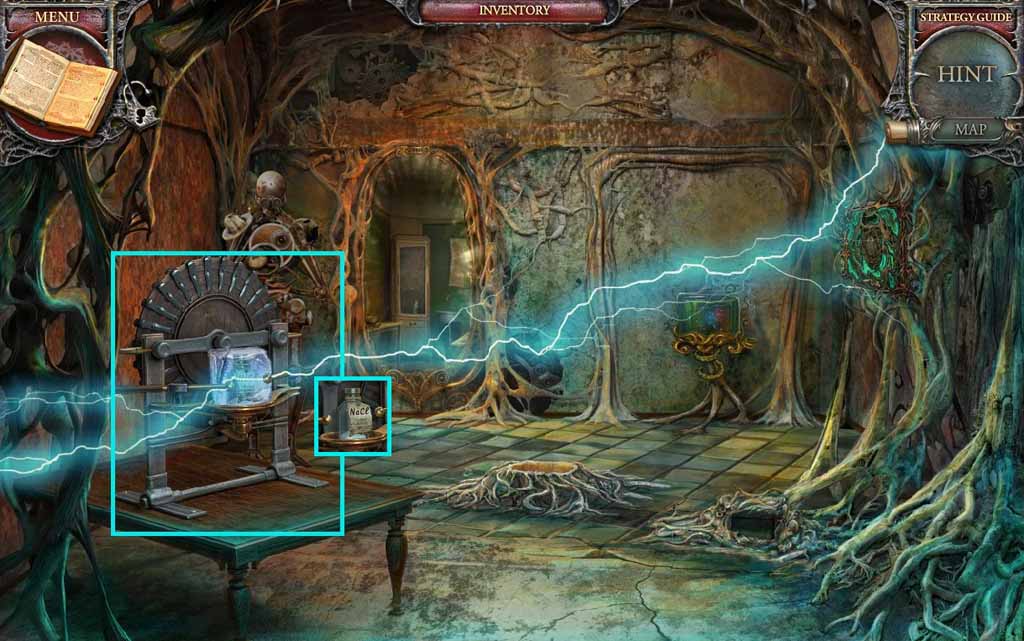
- Insert the diode and the ice cube into the generator.
- Collect the sodium chloride.
- Move to the Laboratory.
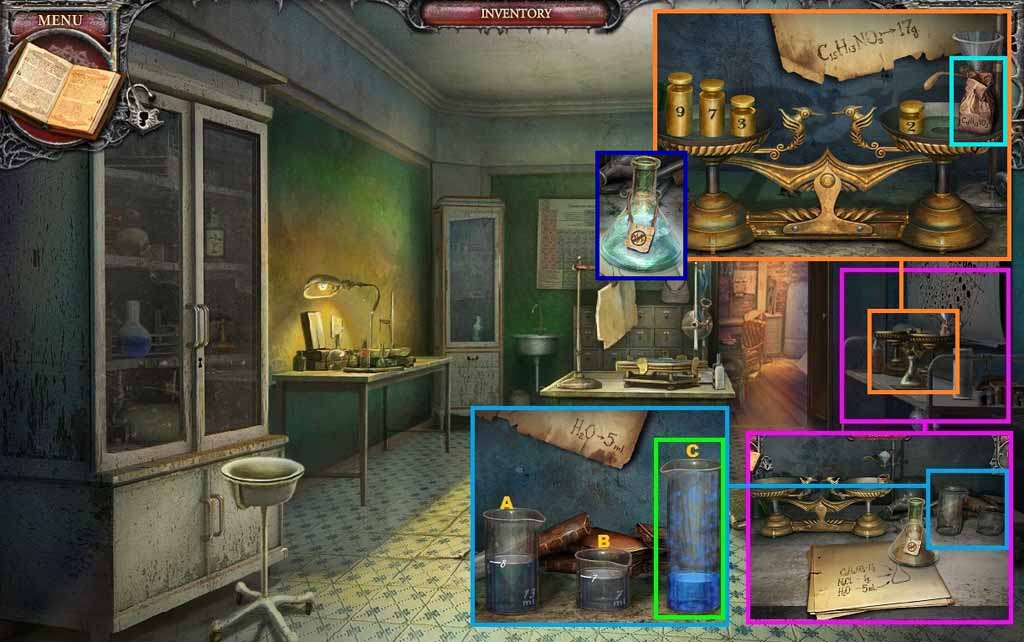
- Examine the trolley and zoom into the beaker.
- Place the beakers down to trigger a mini-game.
- Solve the game by pouring the water from one of the beakers into the other until there is 5ml in one of the beakers.
- Use the following pouring sequence to solve.
- (C – B) (B – A) (C – B) (B – A) (A – C) (B – A) (C –B) (B – A) (C – B)
- Collect the water.
- Examine the scales and place down the weights to trigger a mini-game.
- Solve the game by placing the weights onto the scales so that the scales will balance when 17g of medicine is placed onto the scale on the right.
- Arrange the weights as shown.
- Collect the ketorolac.
- Pour the water, ketorolac and sodium chloride into the beaker.
- Collect the pain killer.
- Move to the Hospital Room.
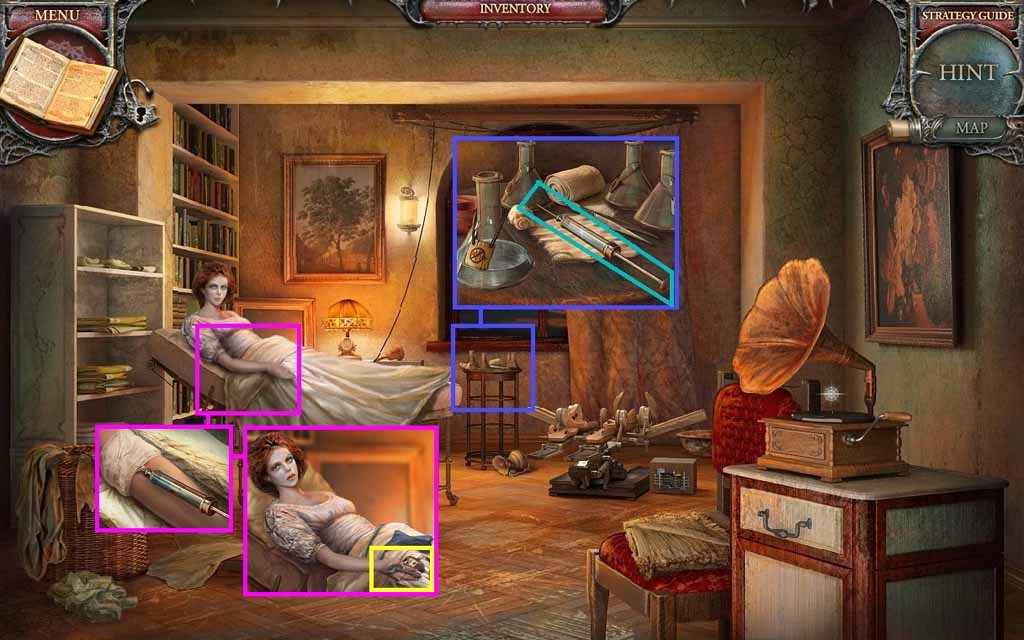
- Examine the table and place the painkiller down.
- Select the syringe to extract some of the painkiller; collect the syringe.
- Examine the woman’s arm and insert the syringe into the drip.
- Collect the cupboard key.
- Move to the Laboratory.
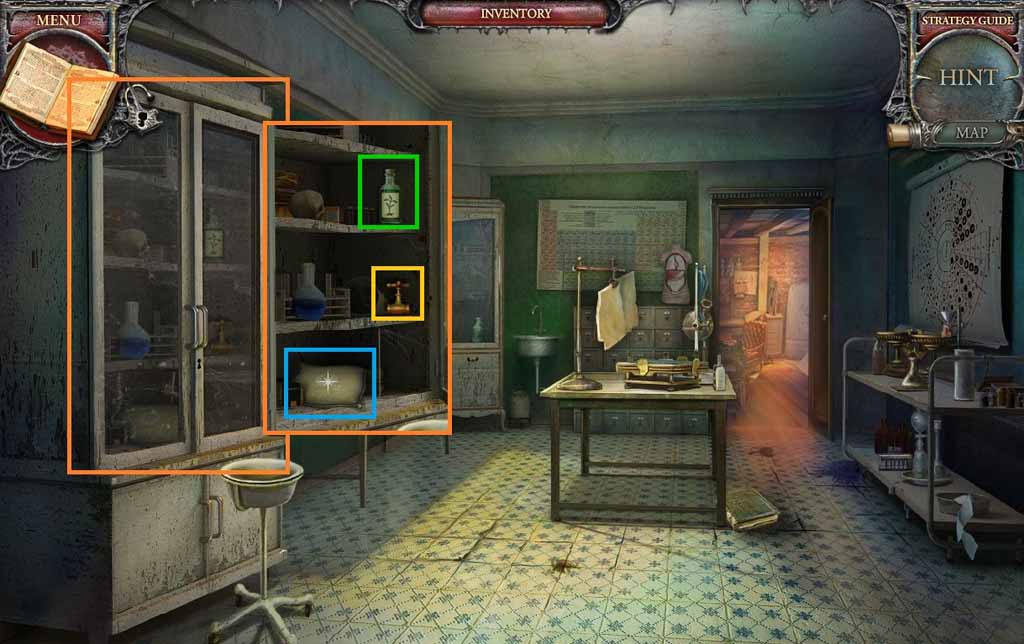
- Select the cupboard key and open the cupboard.
- Collect the empty oxygen pillow, the elevator part and the growth accelerant.
- Move to the Landing.
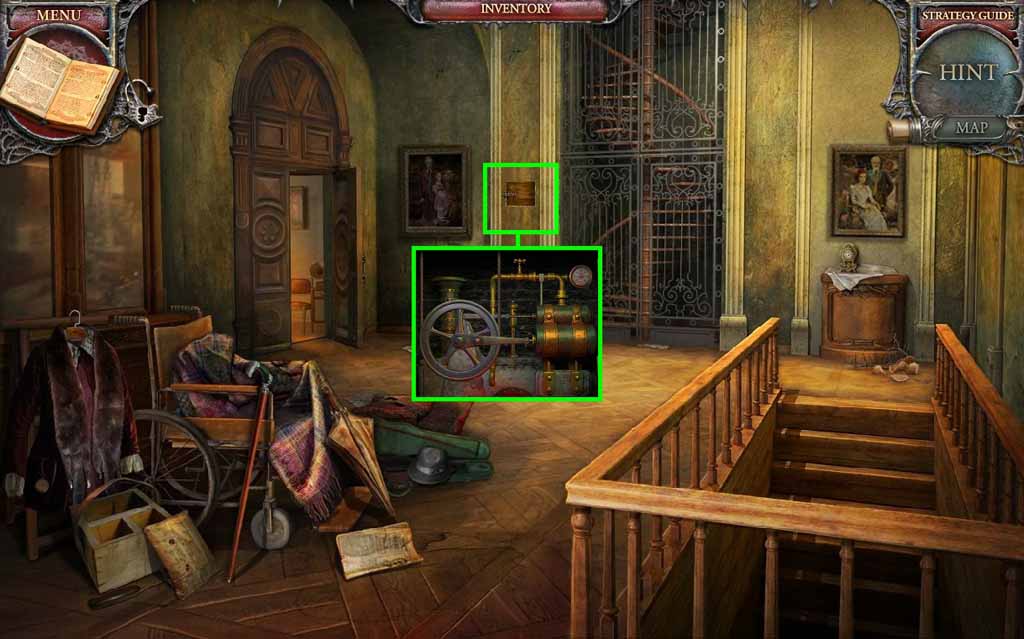
- Examine the elevator mechanism.
- Place the screw into the latch and insert the 2 elevator parts into the mechanism.
- Move upstairs to the Observatory.
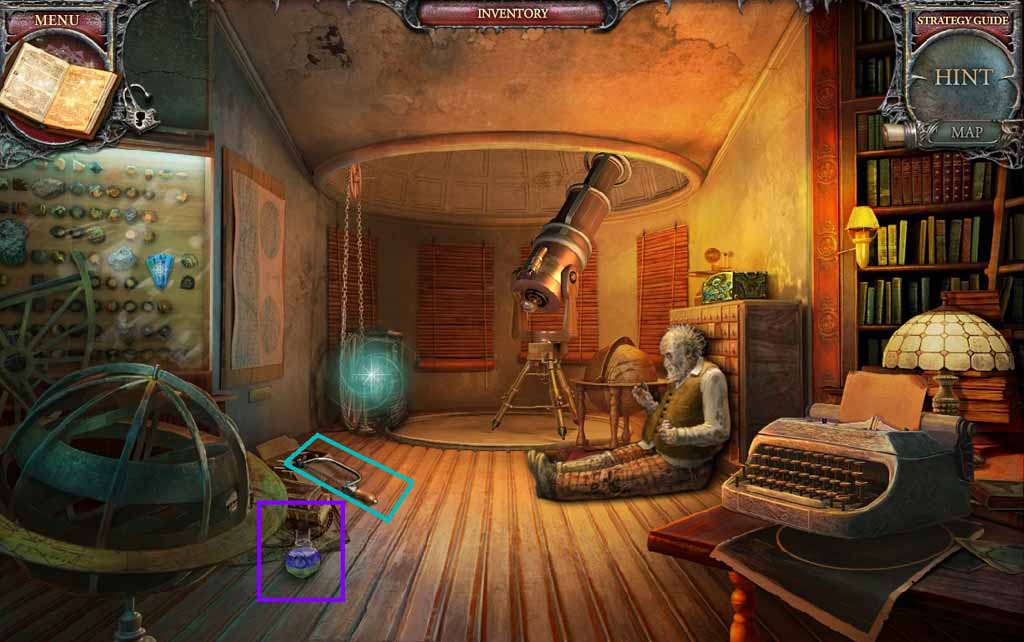
- Collect the wires and the hacksaw.
- Move to the Scientist’s Office.
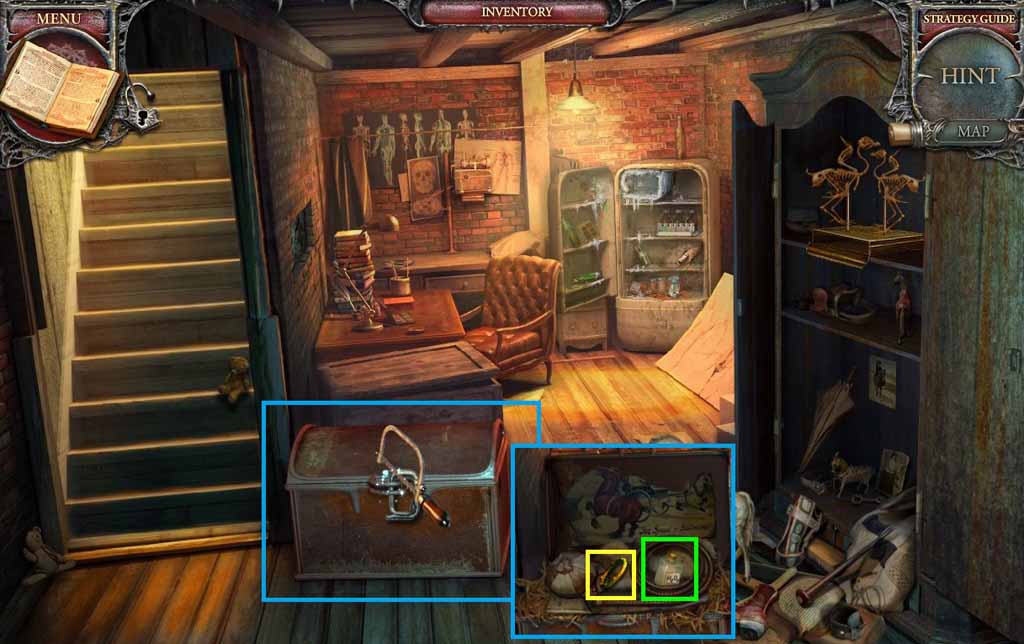
- Select the hacksaw to open the chest.
- Collect the bracelet and the hydrogen peroxide.
- Move to the Stairs.
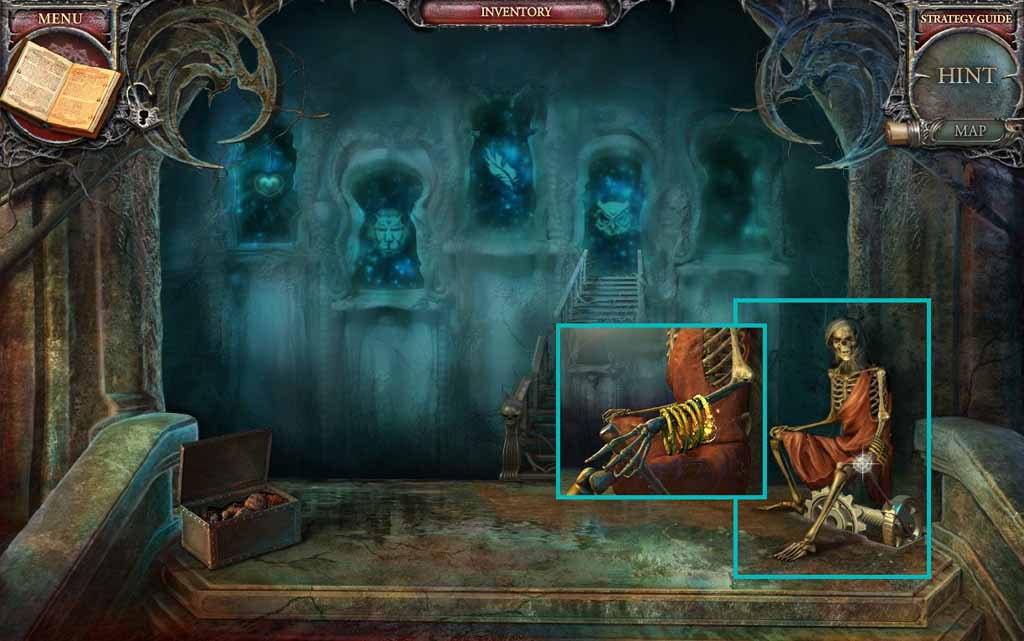
- Give the skeleton the bracelet.
- Enter the Dove Doorway.
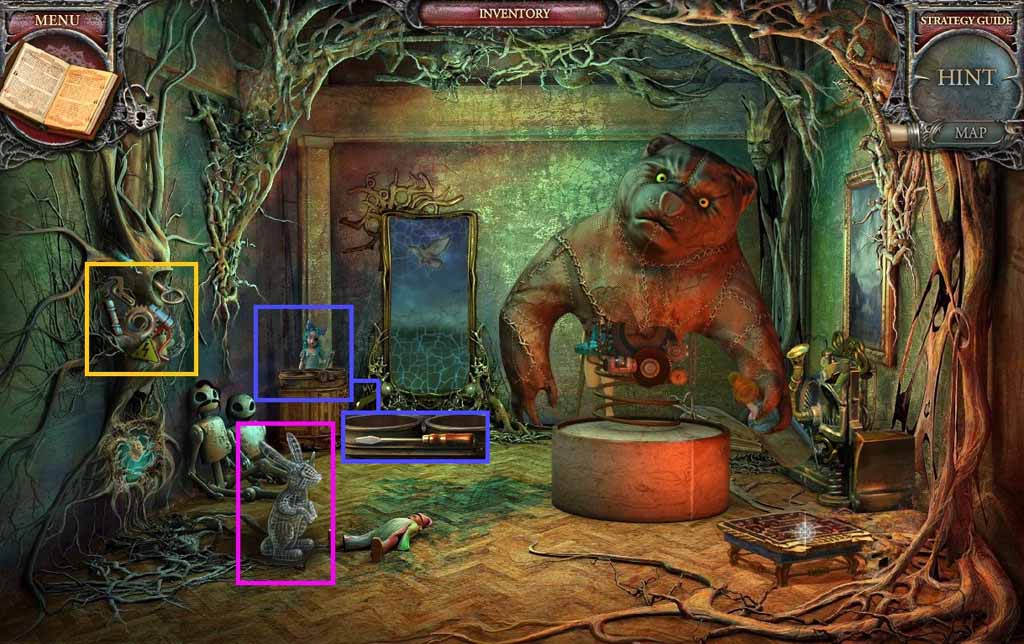
- Collect the garden decoration and the mechanism parts.
- Examine the mechanical toy and collect the screwdriver.
- Move to the Lake.
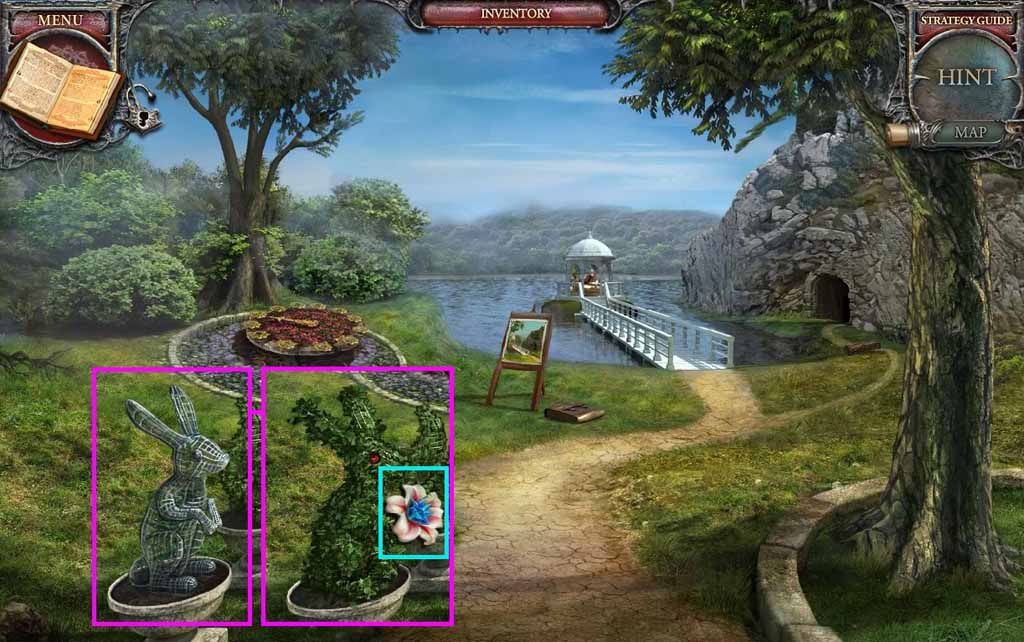
- Place the garden decoration onto the shrub; pour the growth accelerant onto it.
- Click the flower and collect the crystal.
- Move to the Gallery.
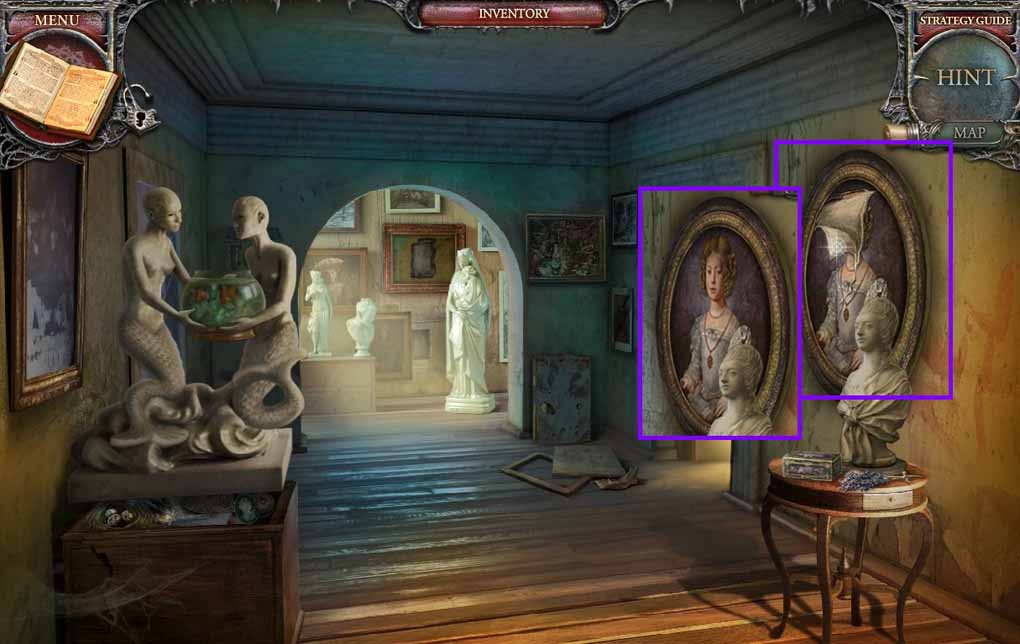
- Select the bone glue to mend the ripped painting.
- Collect the princess’s portrait.
- Move to the Nursery.
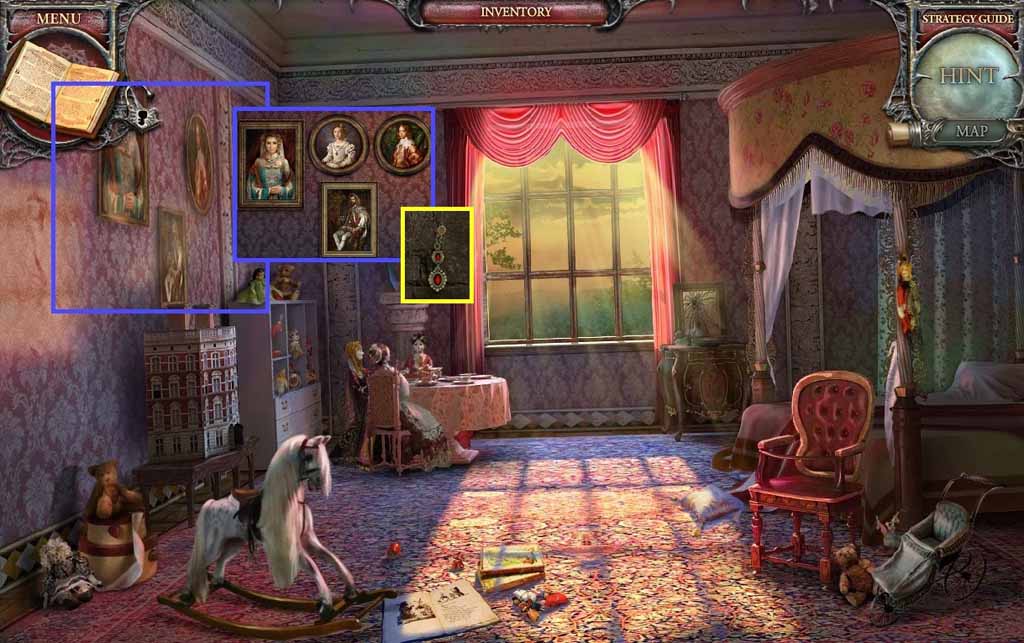
- Examine the wall and place the Princess’s portrait onto it; collect the earring.
- Move to the Gallery.
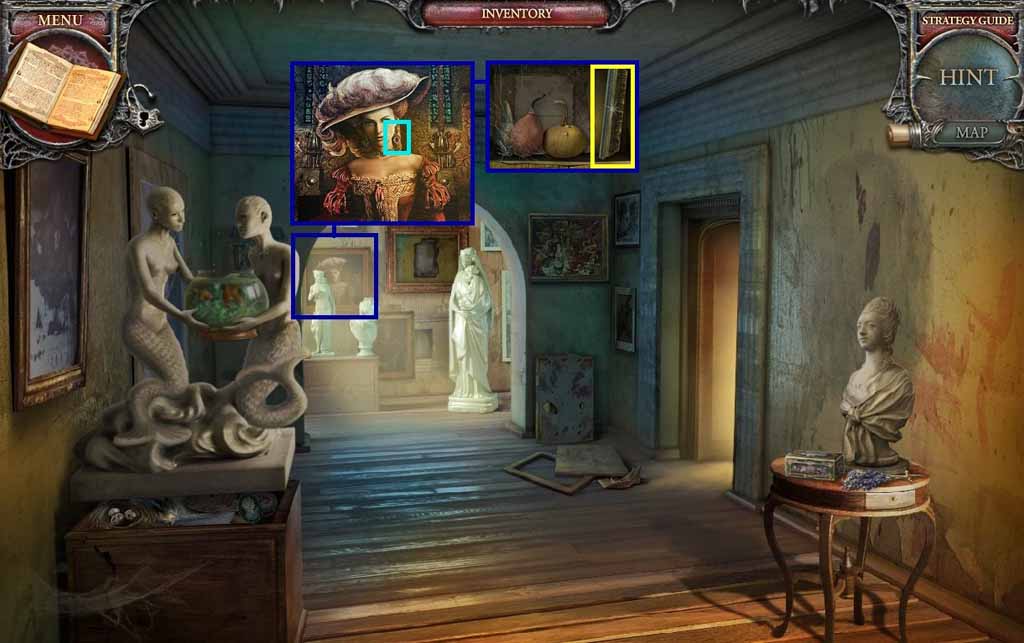
- Examine the portrait and place the earring onto it.
- Collect the frame part.
- Move down once.
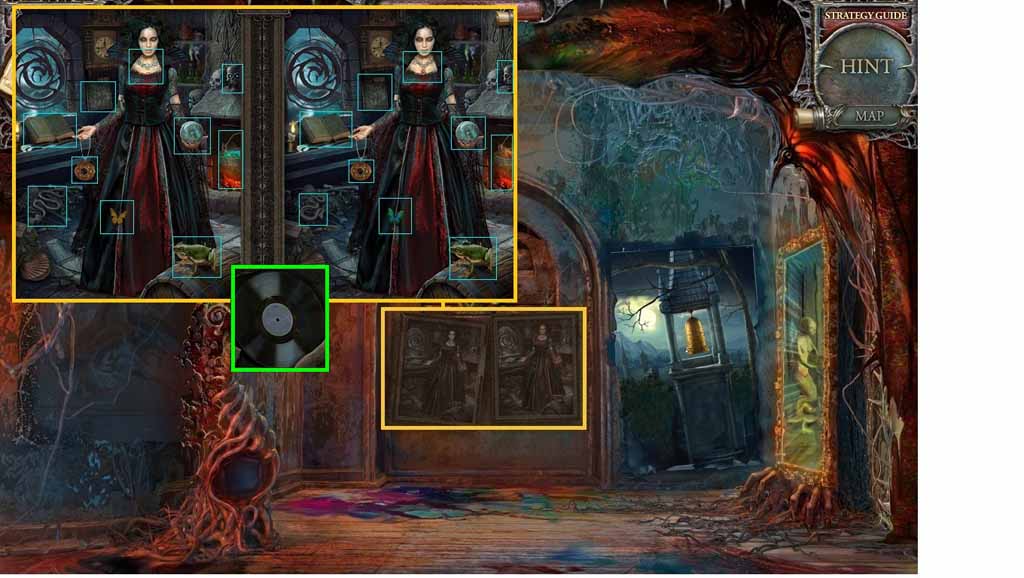
- Examine the witch portrait; insert the frame part to trigger a mini-game.
- Solve the game by finding the 10 differences.
- Collect the record.
- Move to the Scientist’s Office.
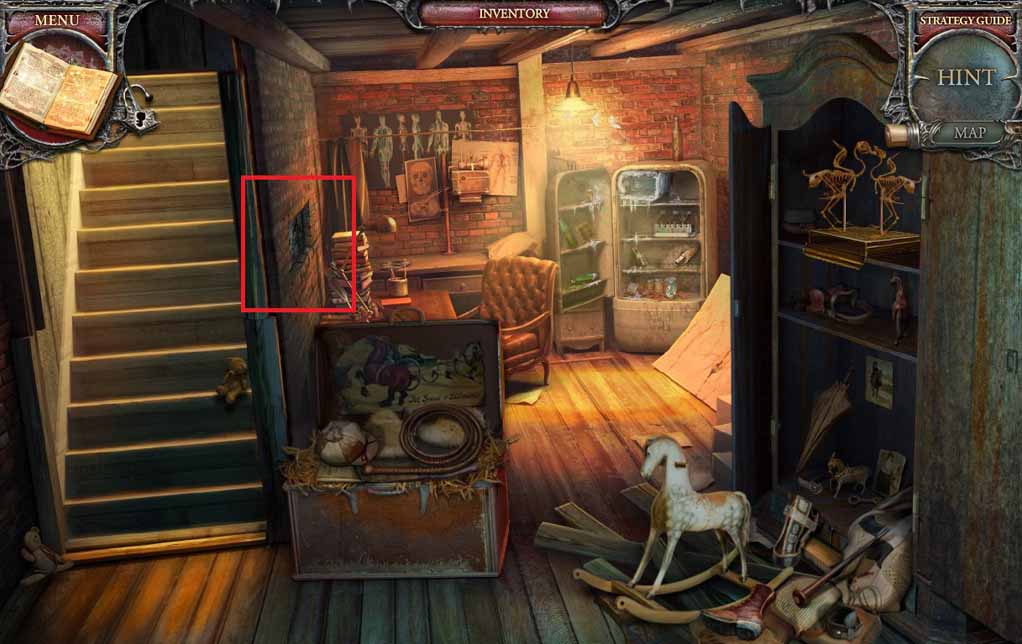
- Examine the wall and insert the mechanism parts to trigger a reverse hidden objects area.
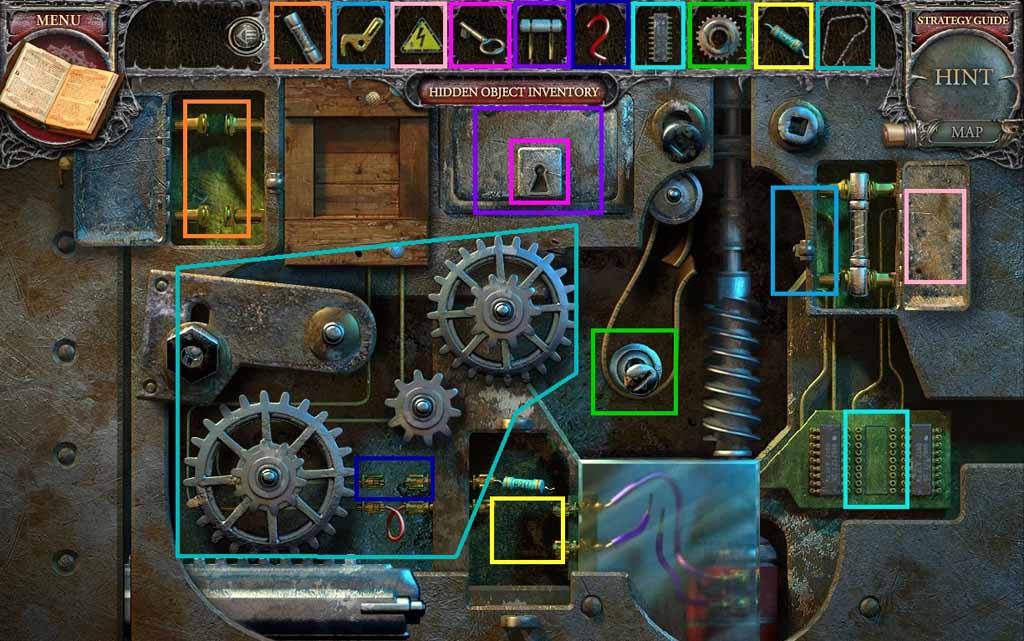
- Place the items where they belong.
- Collect the typewriter key.
- Move to the Observatory and click the hidden objects area.
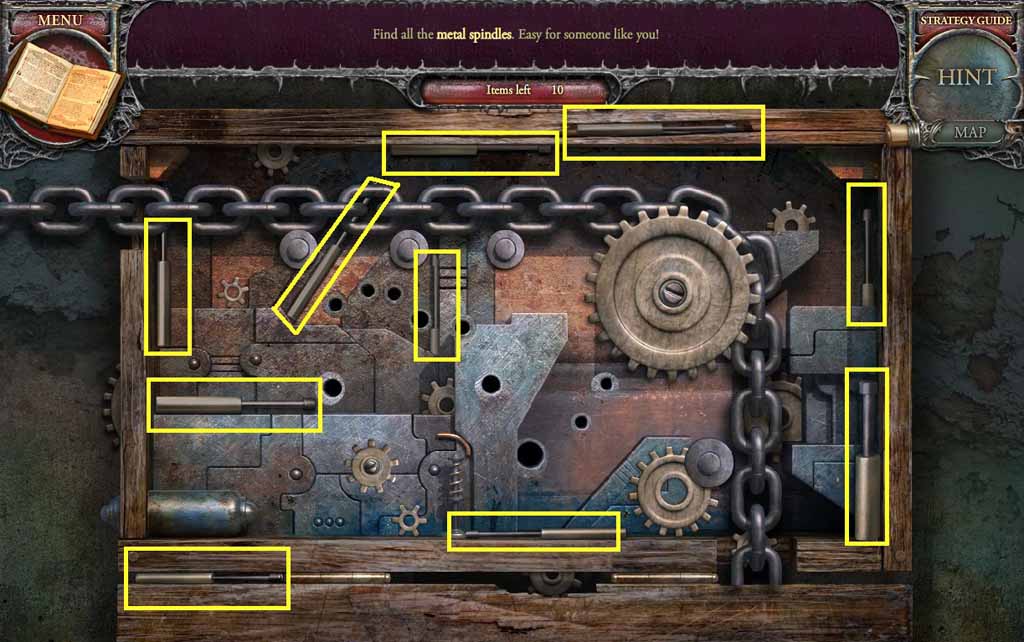
- Find the spindles.
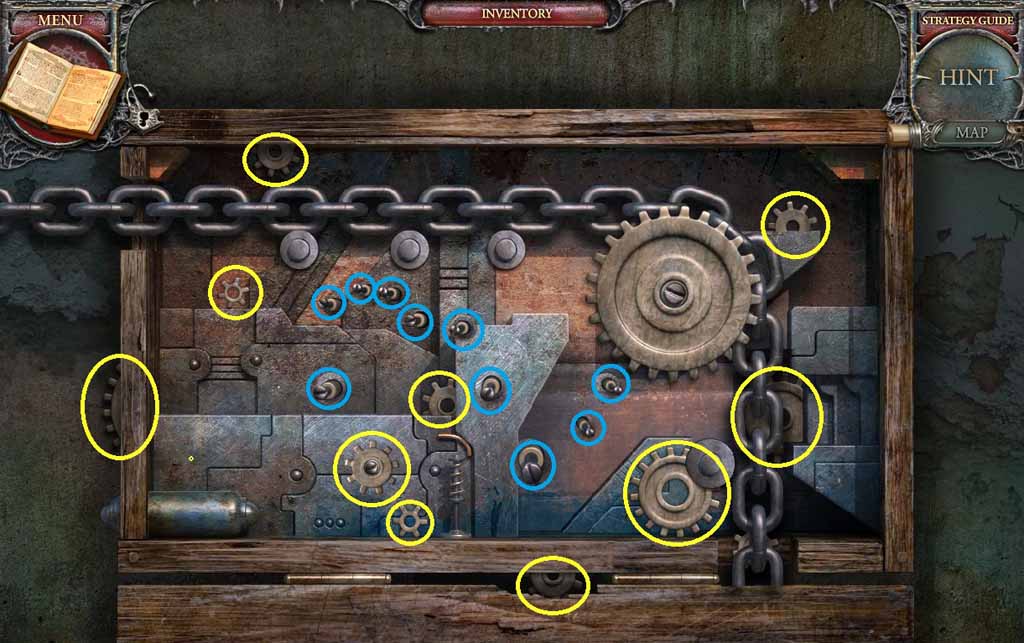
- Select the screwdriver to fasten all the spindles.
- Find the gears.
- Collect the safe part.
- Move down once.
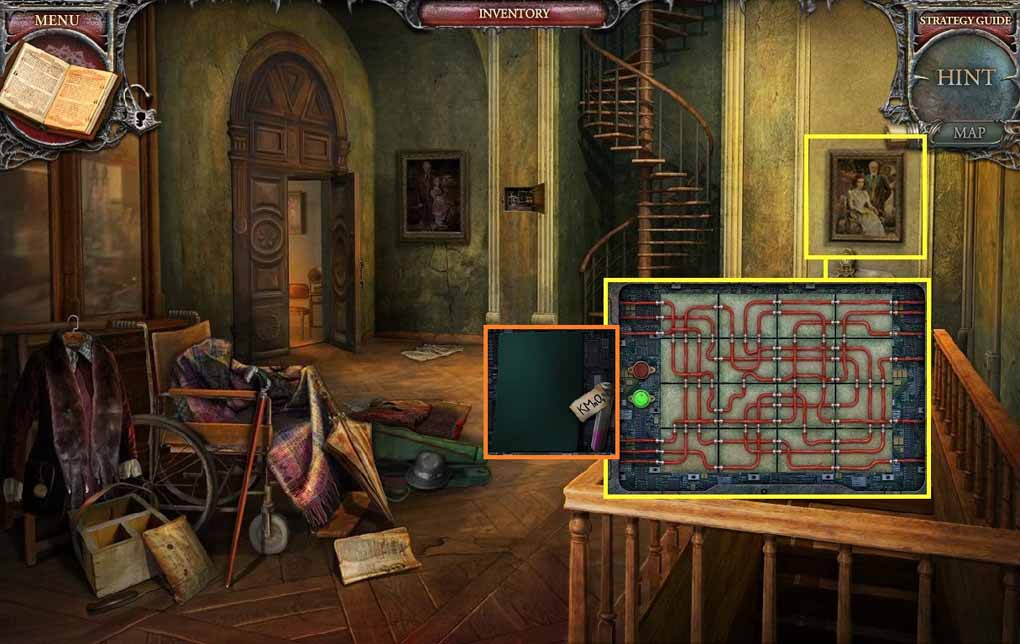
- Click the painting twice.
- Examine the safe and click the panel; attach the safe part to trigger a mini-game.
- Solve the game by switching the tiles around until the wires are connected.
- Collect the potassium permanganate and the x-ray film.
- Move down once.
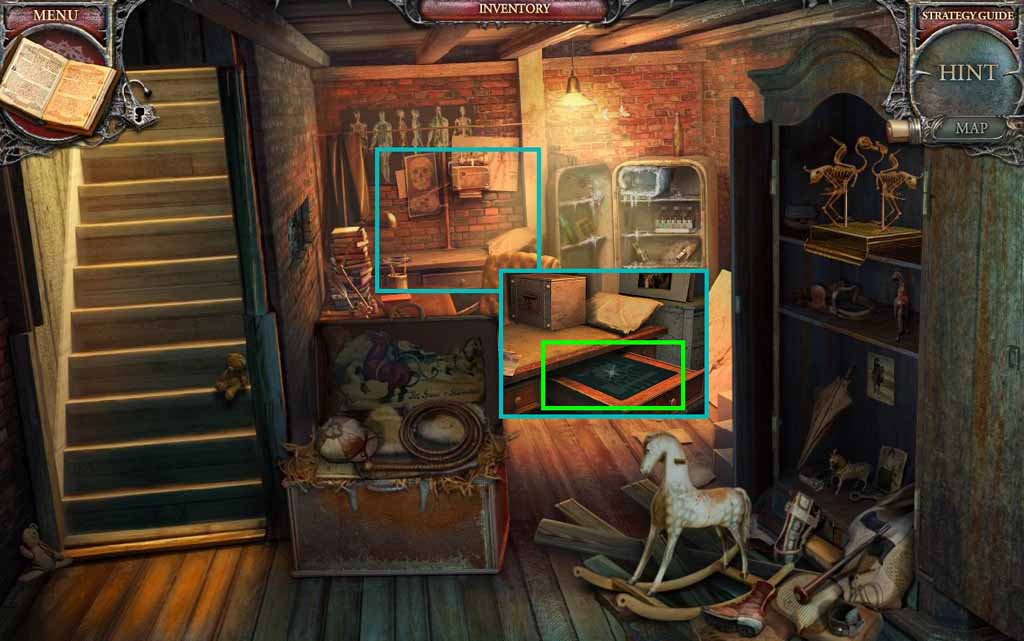
- Examine the wall and place the x-ray film into the drawer; collect the x-ray.
- Move down once.
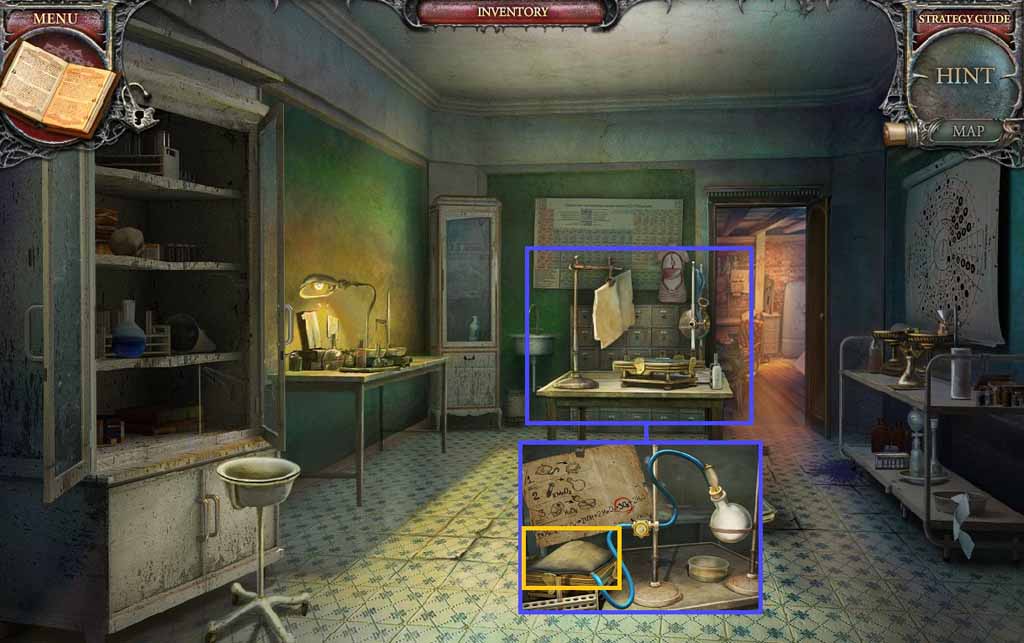
- Examine the table and place the oxygen pillow onto the pad.
- Pour the potassium permanganate into the flask and the hydrogen peroxide into the dish; collect the full oxygen pillow.
- Move to the Hospital Room.
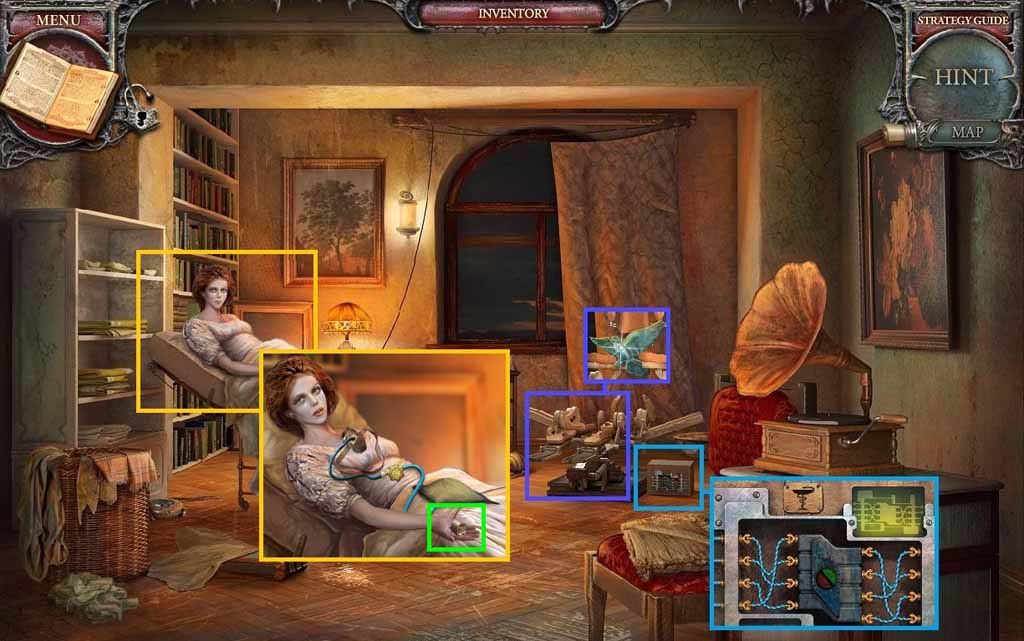
- Examine the power box and place the x-ray onto the lamp and insert the wires into the slot to trigger a mini-game.
- Solve the game by selecting a wire and then selecting 2 clamps to attach them to.
- Collect the mirror shard.
- Give the full oxygen pillow to the woman; collect the lens.
- Move to the Stairs and enter the Dove Doorway.
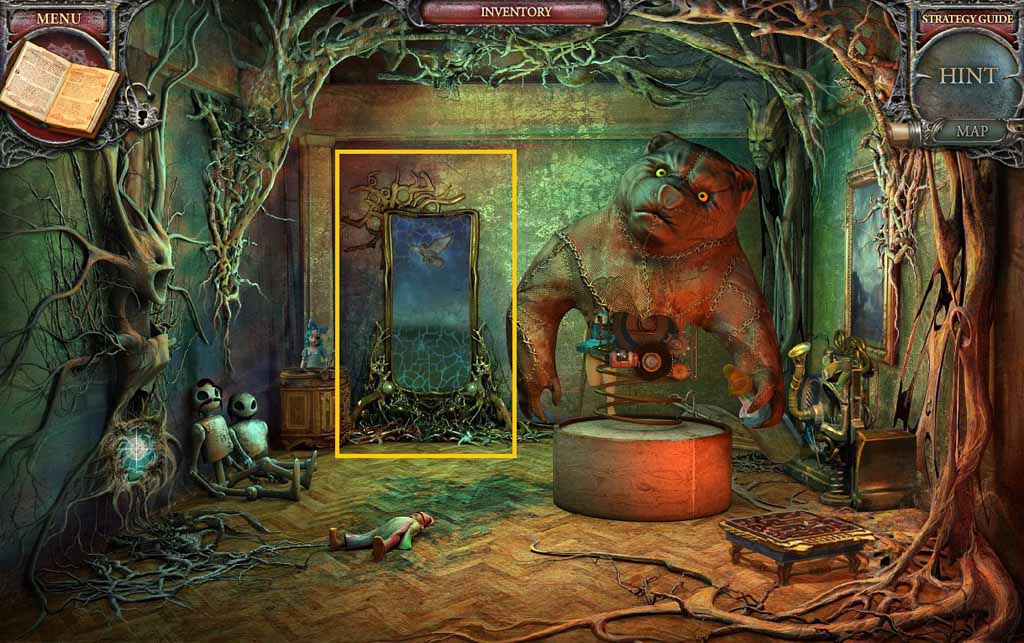
- Examine the mirror and insert the shard.
- Move ahead to the Barn.
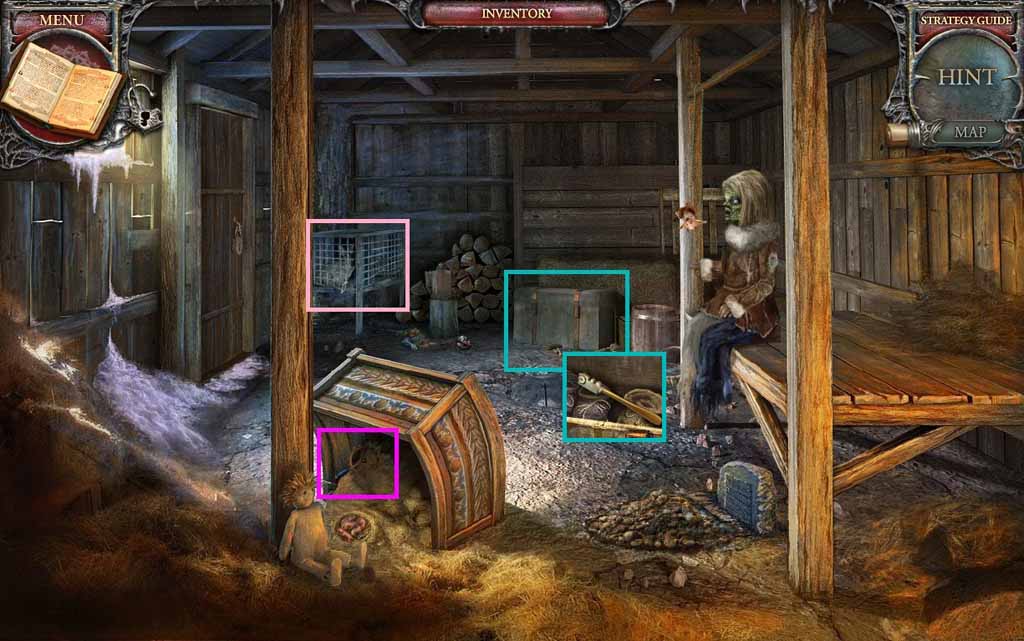
- Examine the feeding trough and collect the telescope part.
- Click the chest 2 times; collect the glass cutter.
- Click the rabbit hutch.
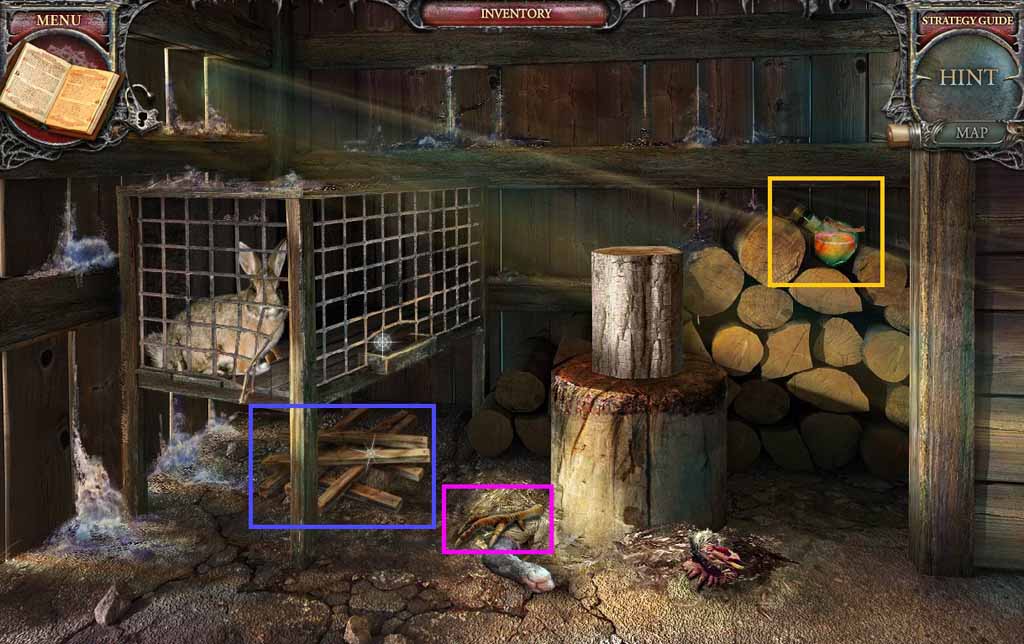
- Collect the coin, the chicken leg and the step.
- Move to the Mirror Room.
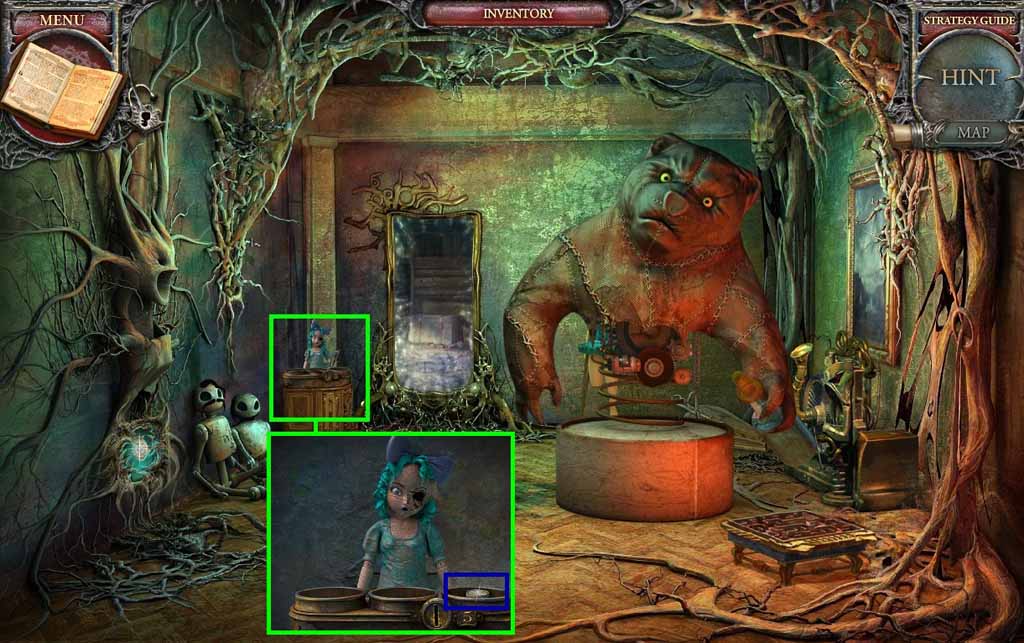
- Examine the mechanical toy; insert the coin into the slot.
- Collect the typewriter key.
- Move to the Observatory.
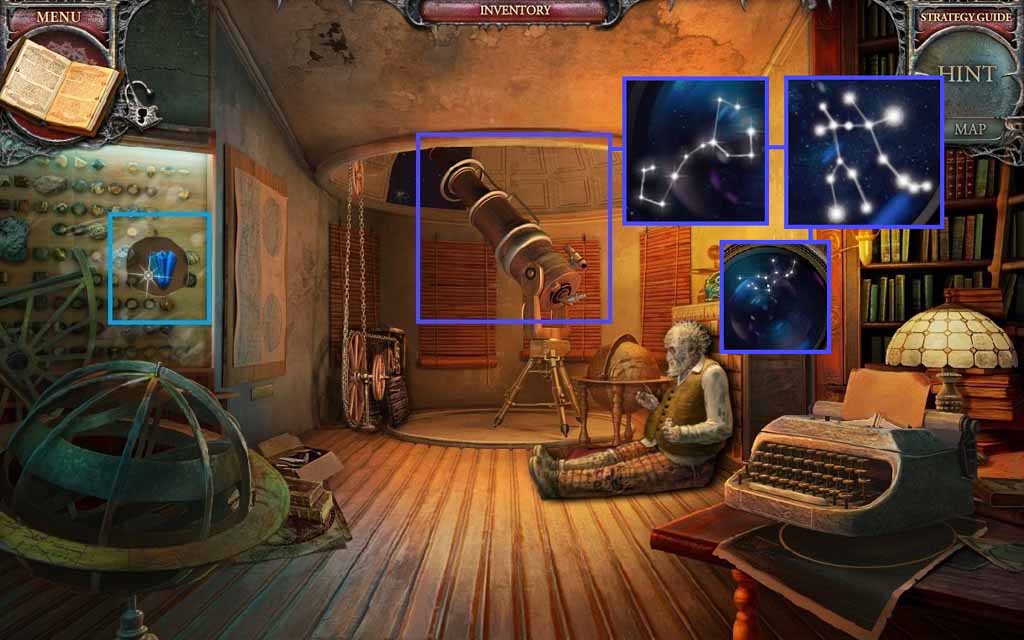
- Select the glass cutter and use it to cut the display cabinet.
- Collect the crystal.
- Examine the telescope and attach the telescope part and the lens.
- Click and drag the handle to find the following constellations: Scorpio, Gemini and Virgo.
- Move to the Landing and click the hidden objects area.
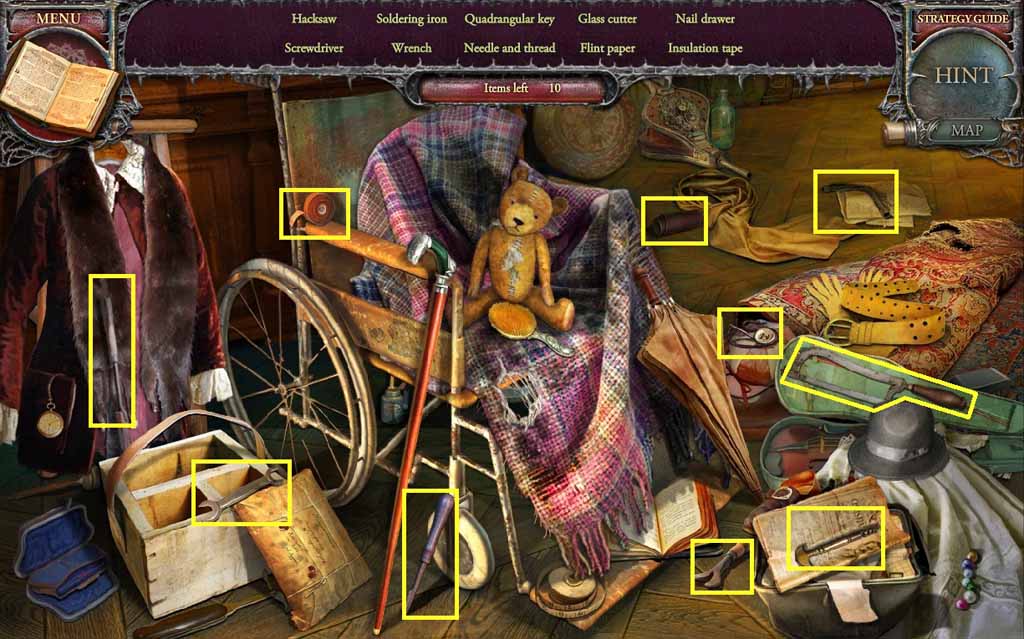
- Find the listed items.
- Collect the tools.
- Move to the Scientist’s Office.
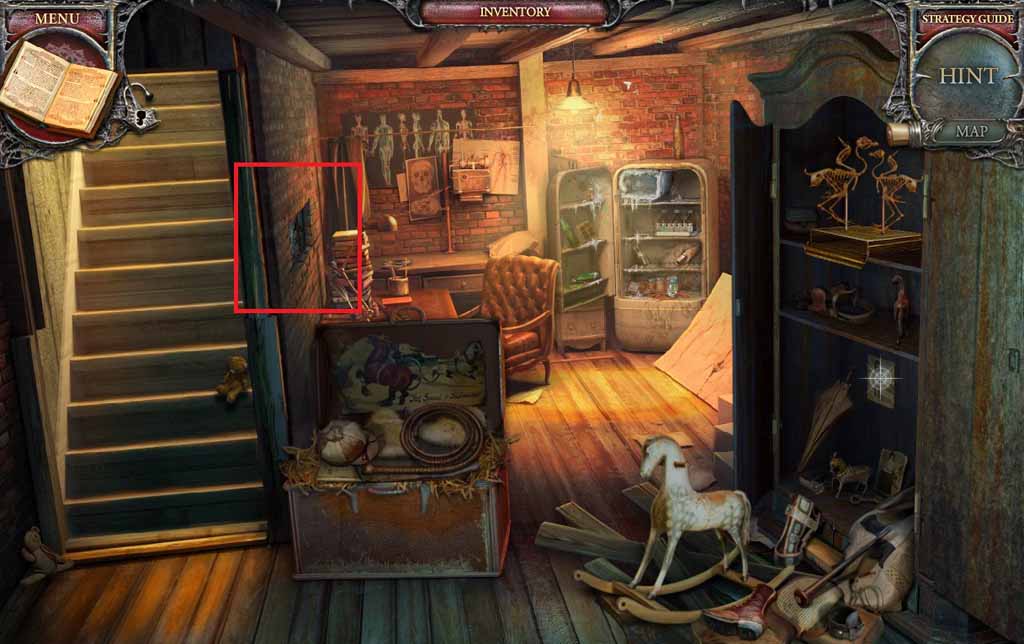
- Examine the wall and insert the tools to trigger a reverse hidden objects area.
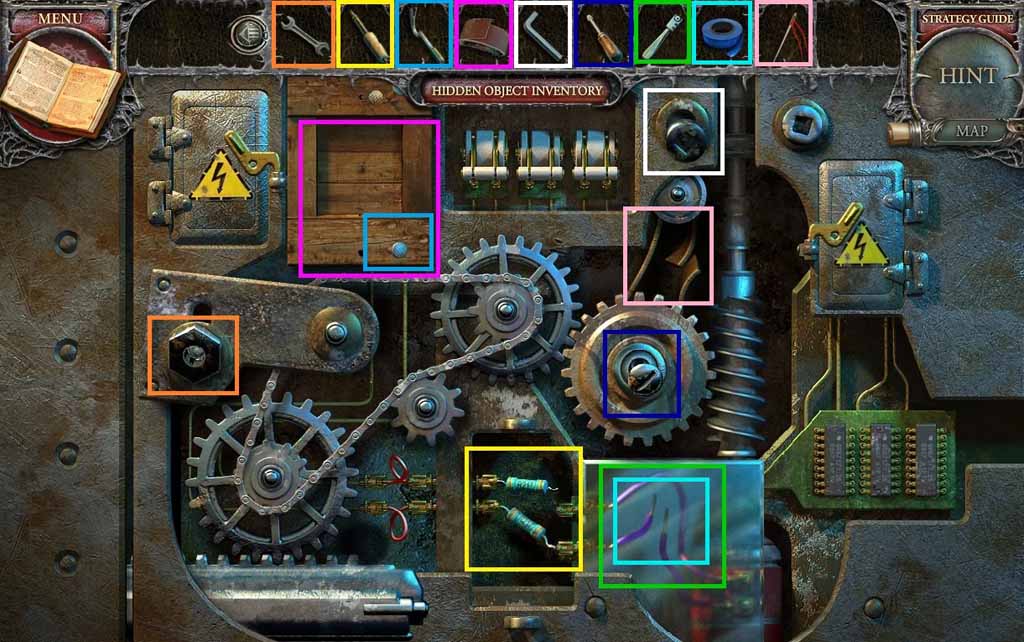
- Place the items where they belong.
- Collect the metal planet.
- Move to the Hospital Room.
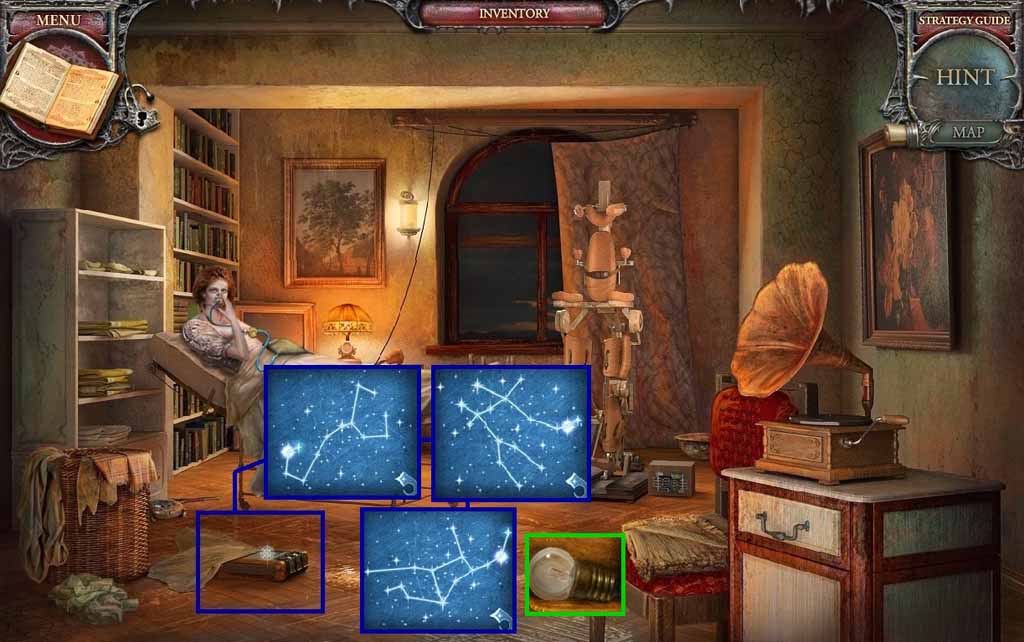
- Examine the device on the floor; insert the metal planet to trigger a mini-game.
- Draw the constellations that were shown in the telescope.
- Collect the lamp.
- Move to the Mirror Room.
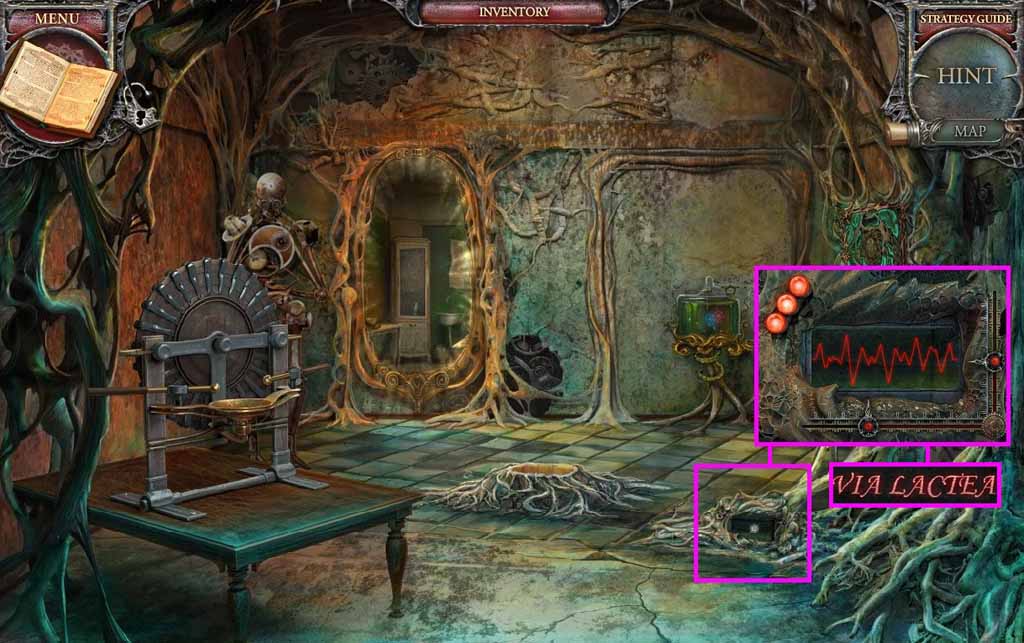
- Examine the device on the floor and insert the 2 lamps to trigger a mini-game.
- Solve the game by adjusting the slider to create a wavelength matching the drawn example.
- Notice the code.
- Move to the Observatory.
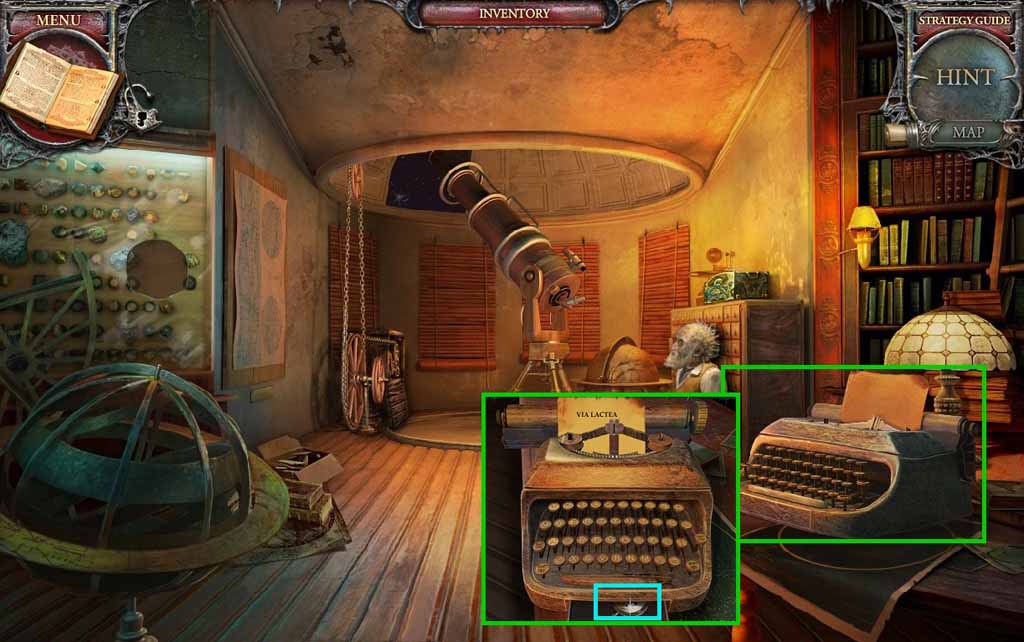
- Examine the typewriter and insert the 3 typewriter keys.
- Type: Via Lactea; collect the needle.
- Move to the Hospital Room.
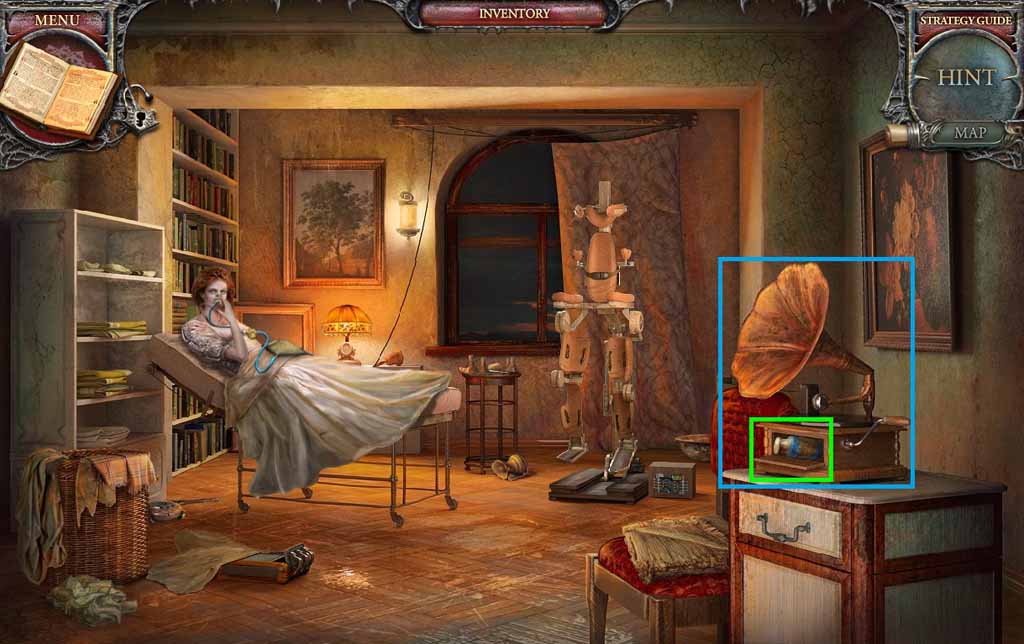
- Place the needle and the record onto the gramophone.
- Collect the blue vitriol.
- Move to the Laboratory.
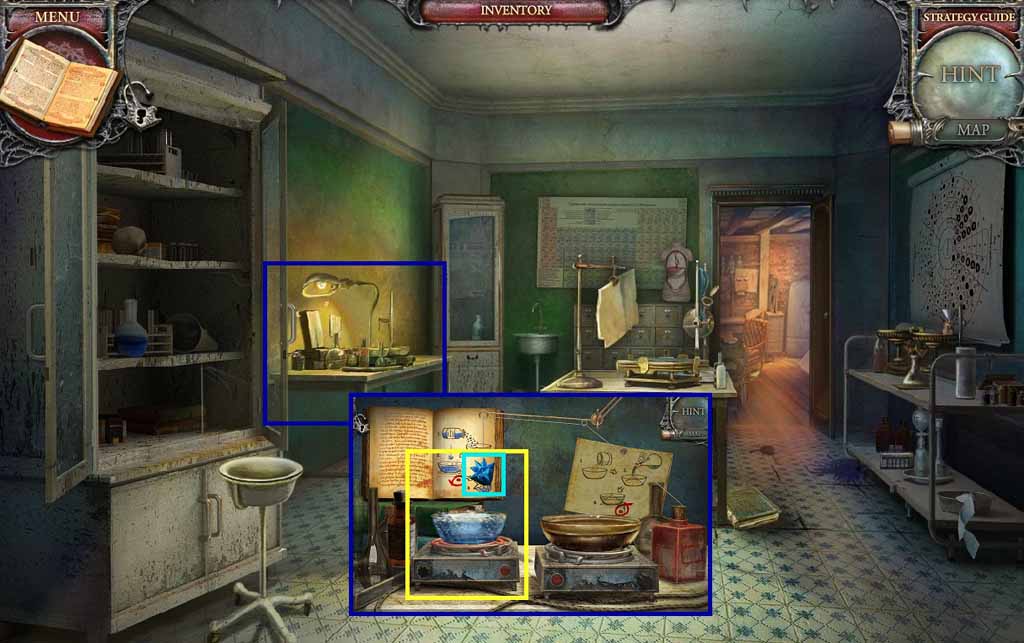
- Examine the table on the left.
- Place the blue vitriol into the dish on the left.
- Click the heating element; collect the crystal.
- Move to the Observatory.
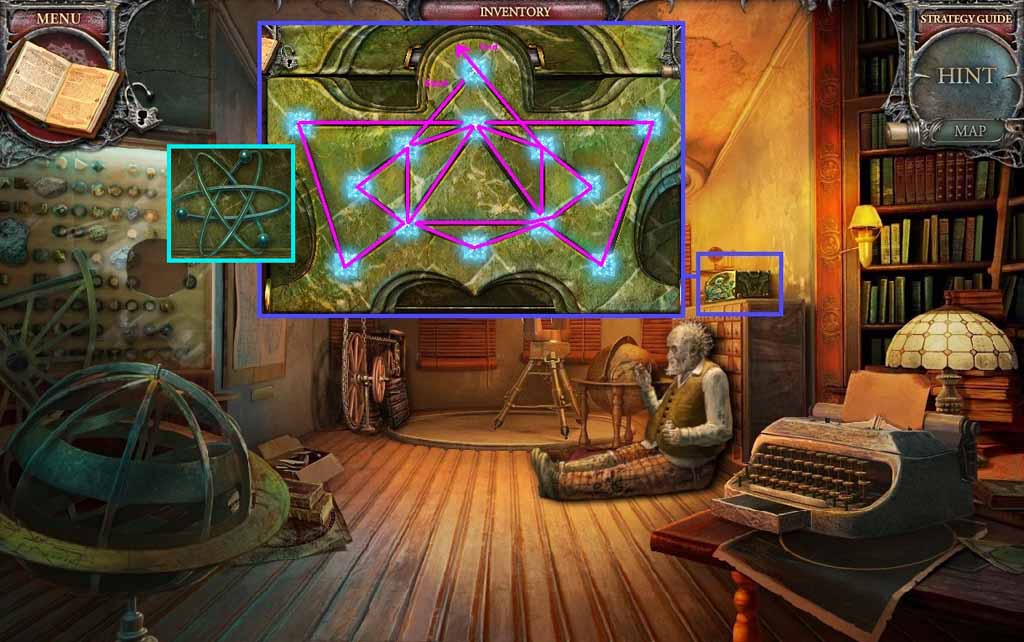
- Examine the box and insert the 4 crystals to trigger a mini-game.
- Solve the game by creating a continuous line connecting all the stars while using each line only once.
- Collect the metal balance.
- Move to the Mirror Room.
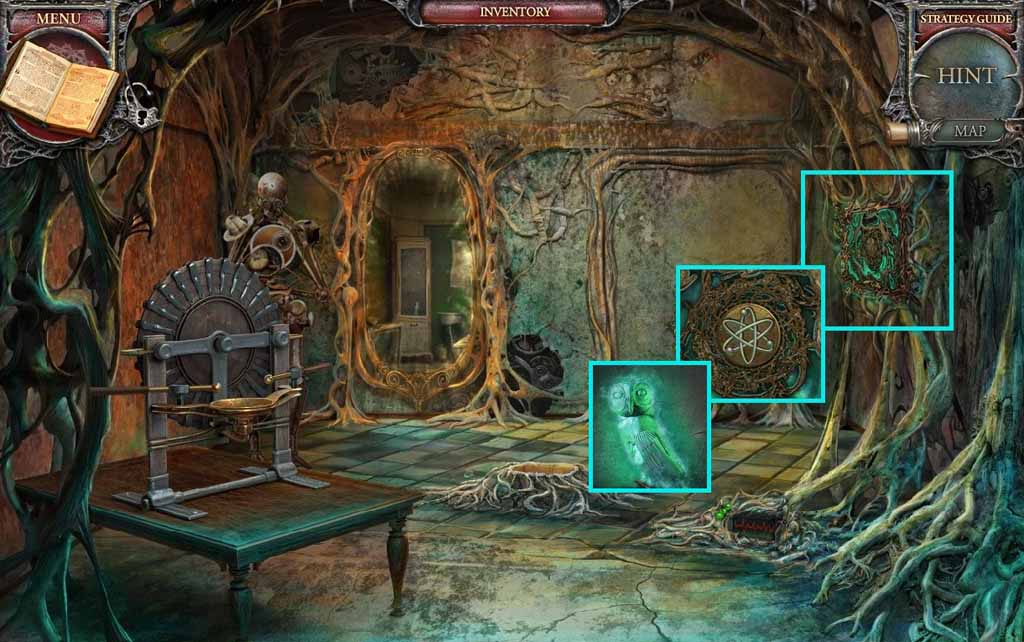
- Examine the alcove and insert the metal balance.
- Collect the Scientist’s Virtue.
- Move to the Observatory.
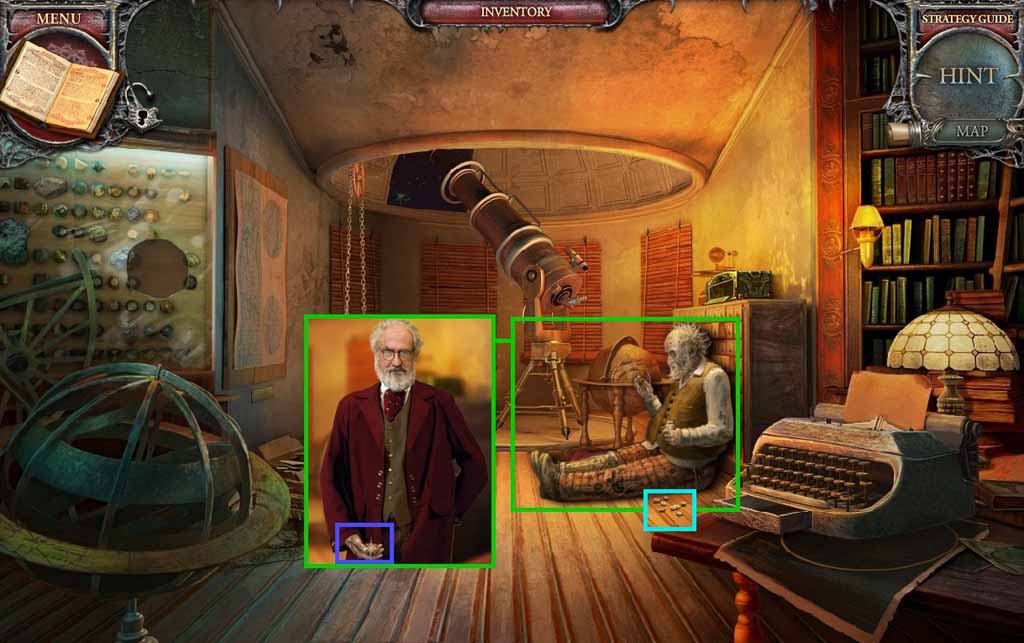
- Give the scientist the Scientist’s Virtue.
- Collect the book amulet.
- Collect the seeds.
- Move to the Book of Spells.
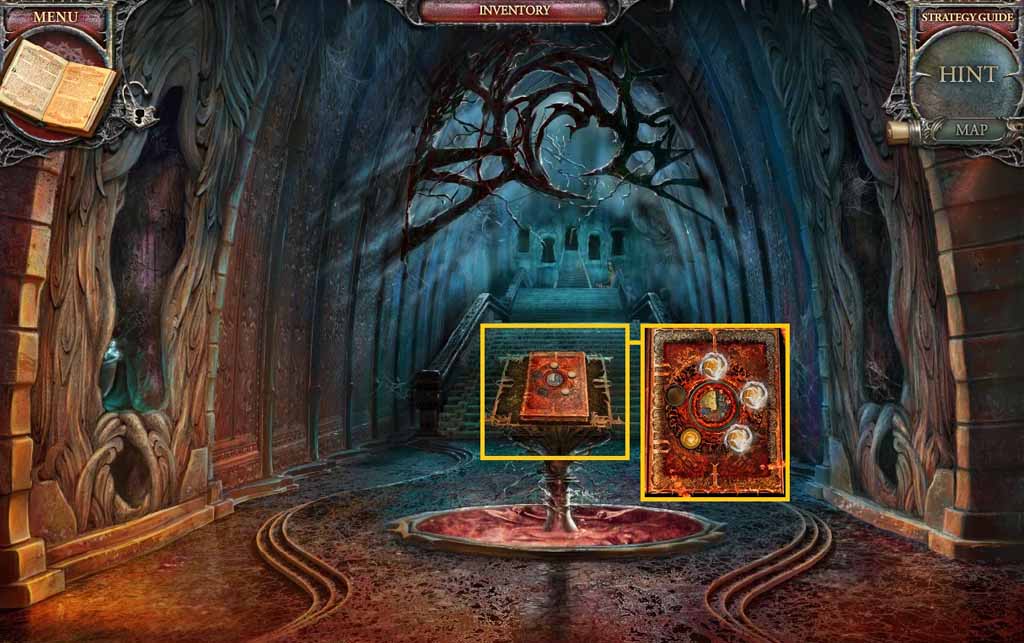
- Examine the book and insert the amulet.
- Move through the Dove Doorway.
Comments will load when you reach this part of the walkthrough.