

Chapter Three: The Artist
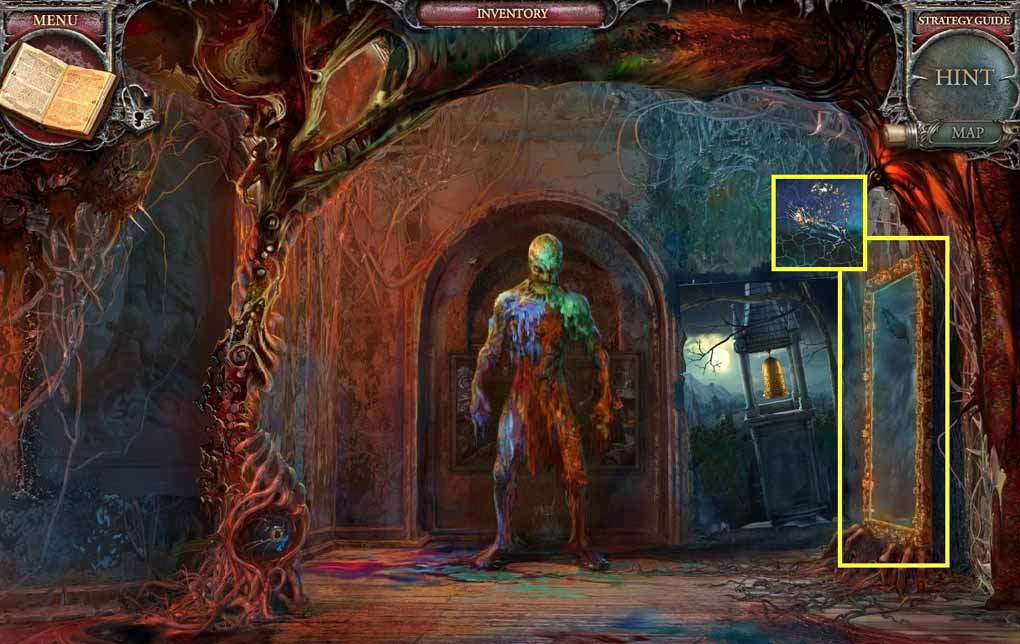
- Examine the mirror and insert the shard.
- Move to the right and enter the Gallery.
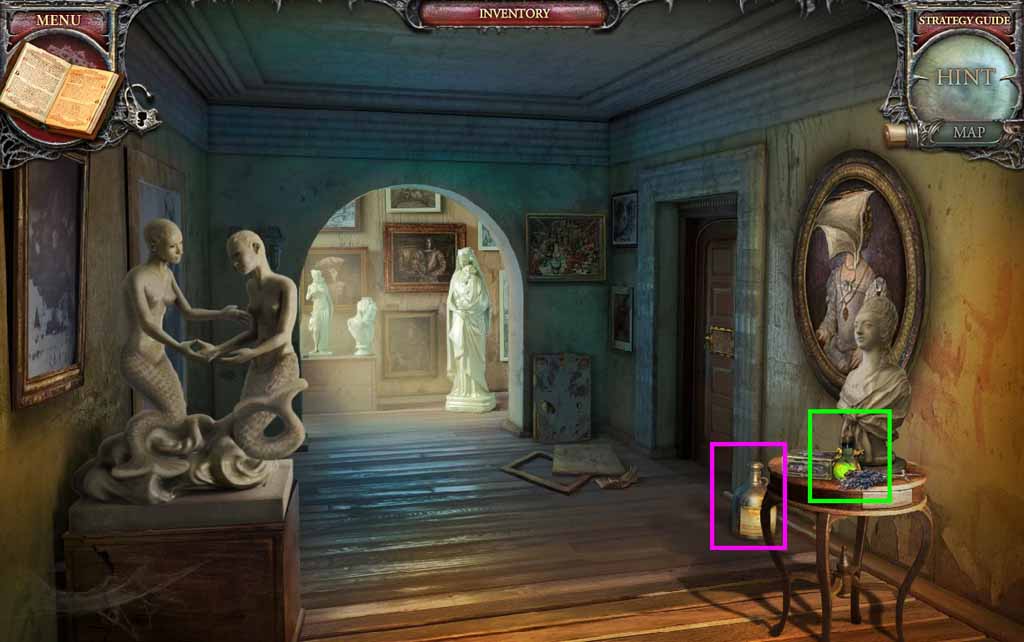
- Collect the special key and the solvent.
- Move down once.
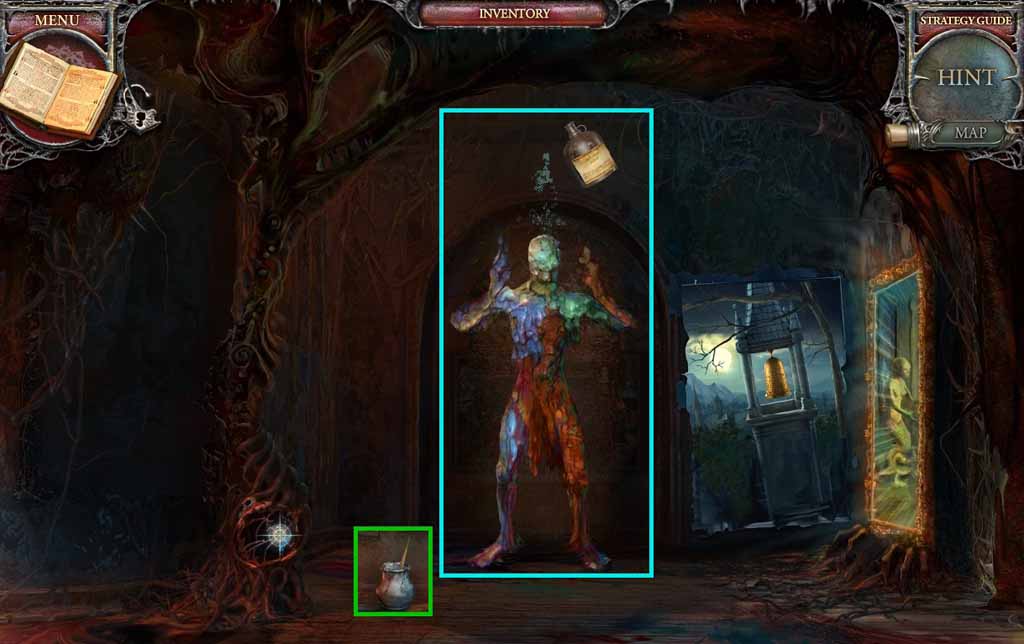
- Select the solvent to pour onto the zombie.
- Collect the grey paint.
- Move into the mirror.
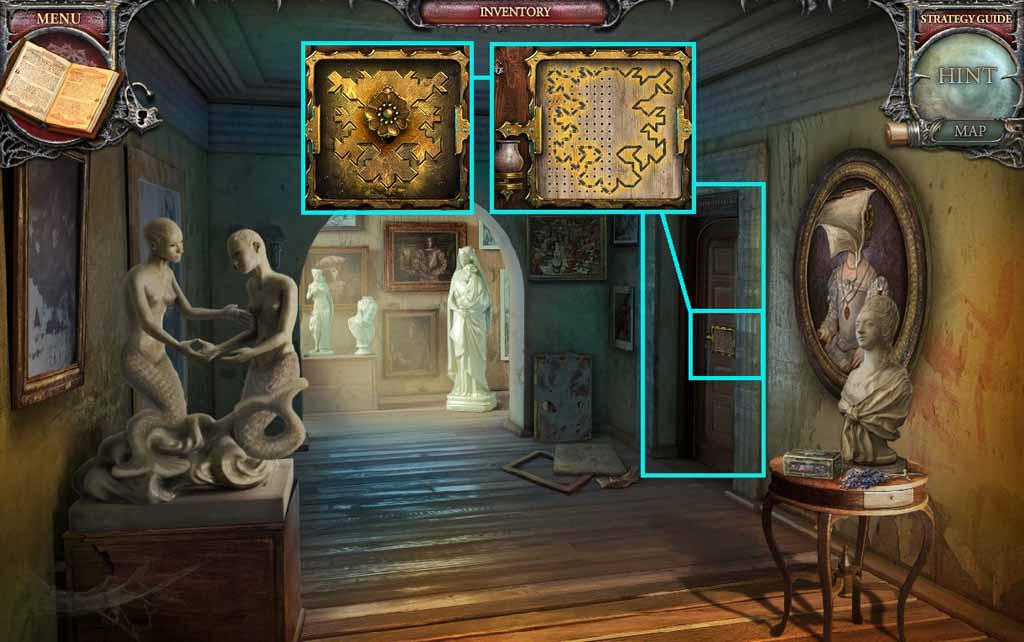
- Examine the door and paint it using the grey paint to trigger a mini-game.
- Solve the game by recreating the mirror image on the left side.
- Insert the special key into the lock.
- Enter the Conservatory.
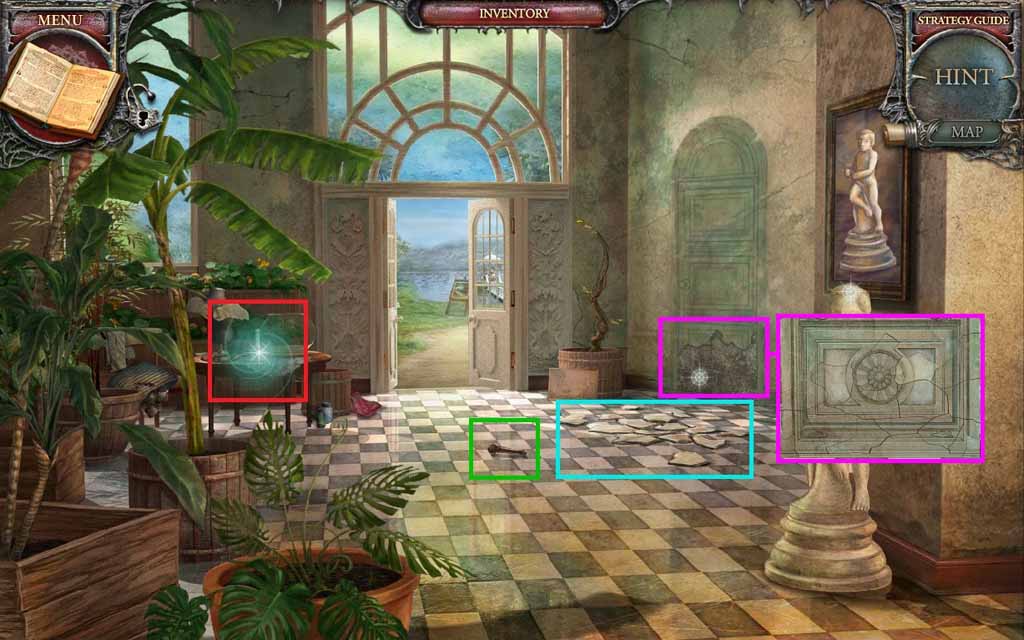
- Collect the pestle and the Picture Scraps.
- Examine the door and insert the picture scraps to trigger a mini-game.
- Solve the game by selecting the pieces and restoring the door.
- Click the hidden objects area.
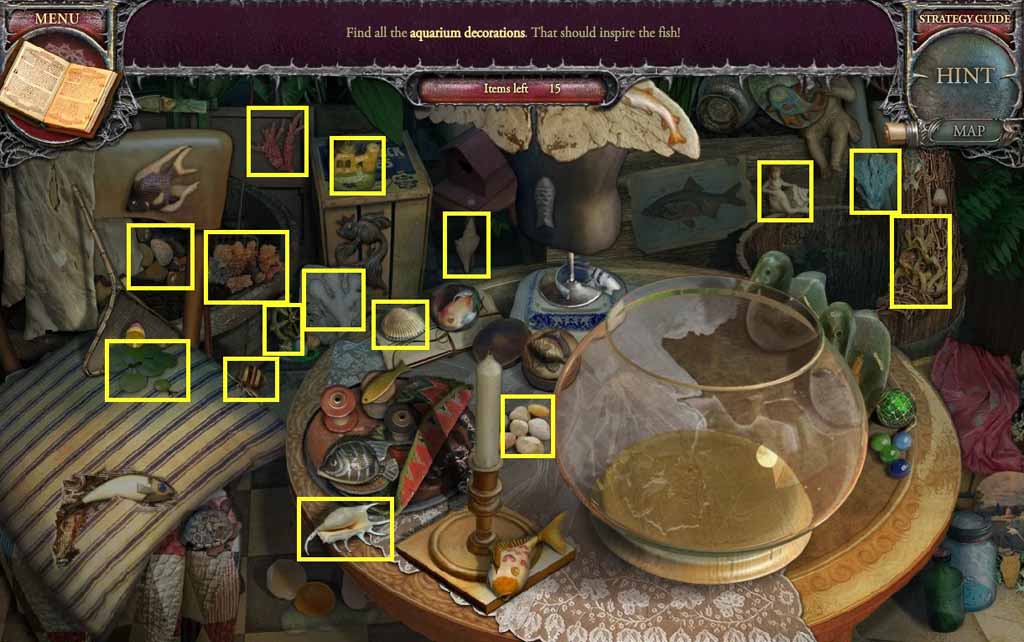
- Find the aquarium decorations.
- Collect the small hook.
- Move ahead to the Lake.
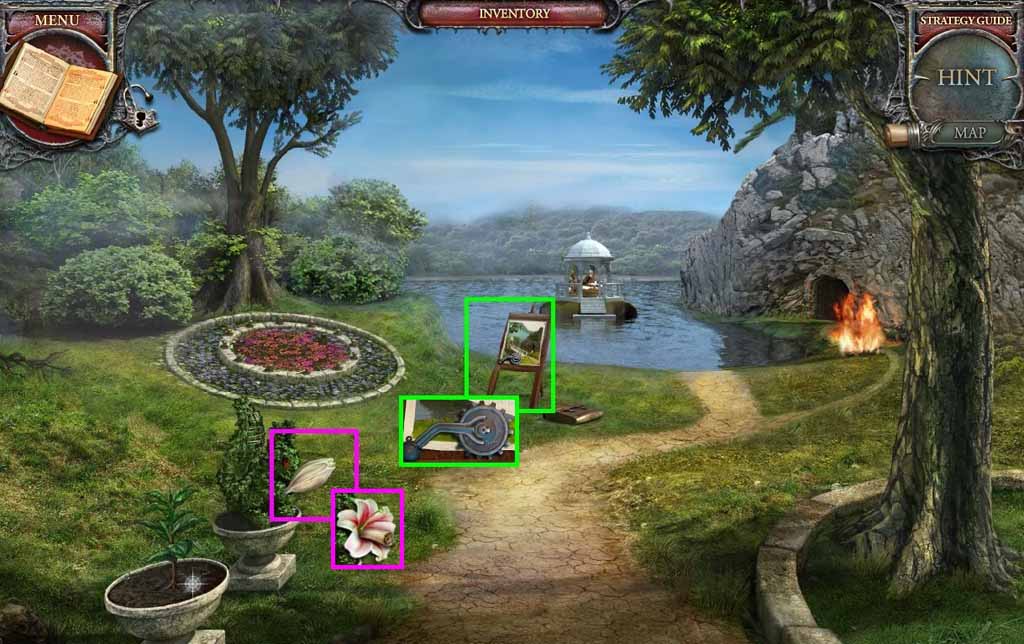
- Click the flower bud; collect the landscape part.
- Examine the easel; collect the small lever.
- Move down once go right to the Artist’s Studio.
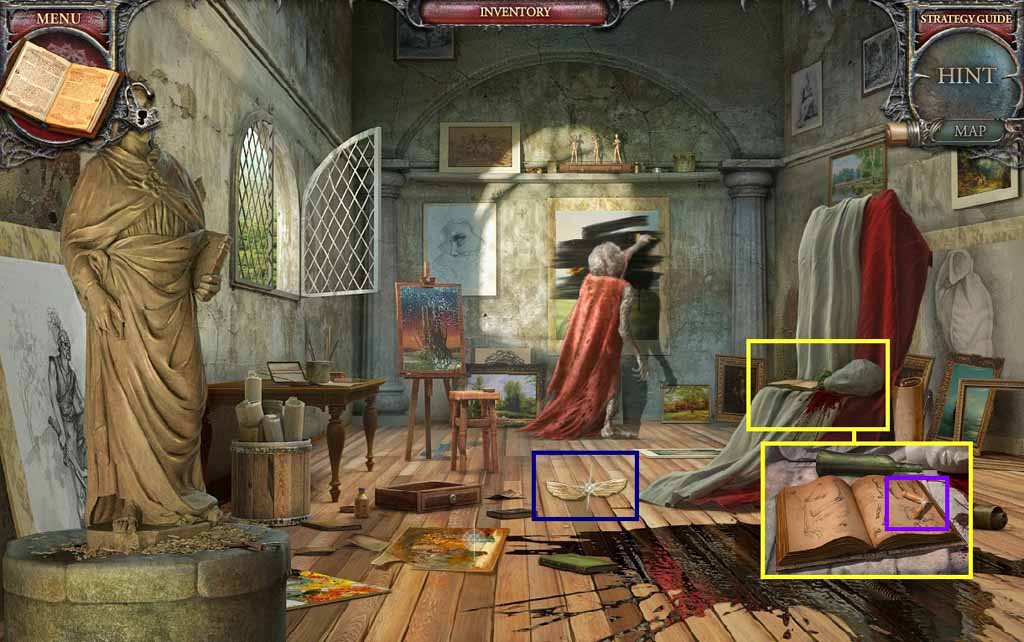
- Collect the alabaster wing.
- Examine the drapes.
- Rip the page from the book; collect the statuette part.
- Move to the Cell.
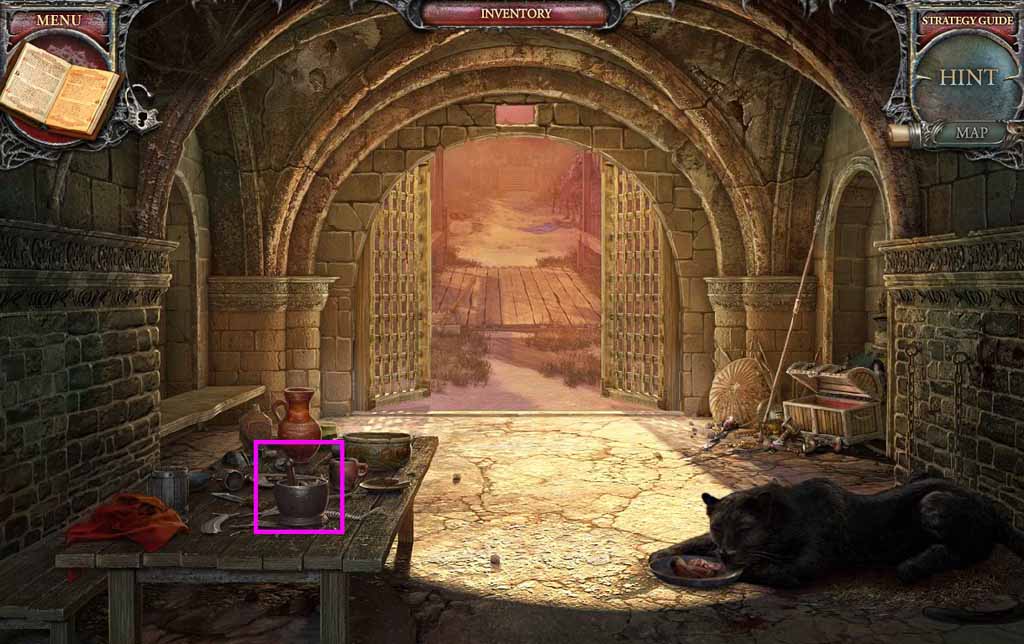
- Place the pestle into the mortar; collect the bone powder.
- Move to the Podium.
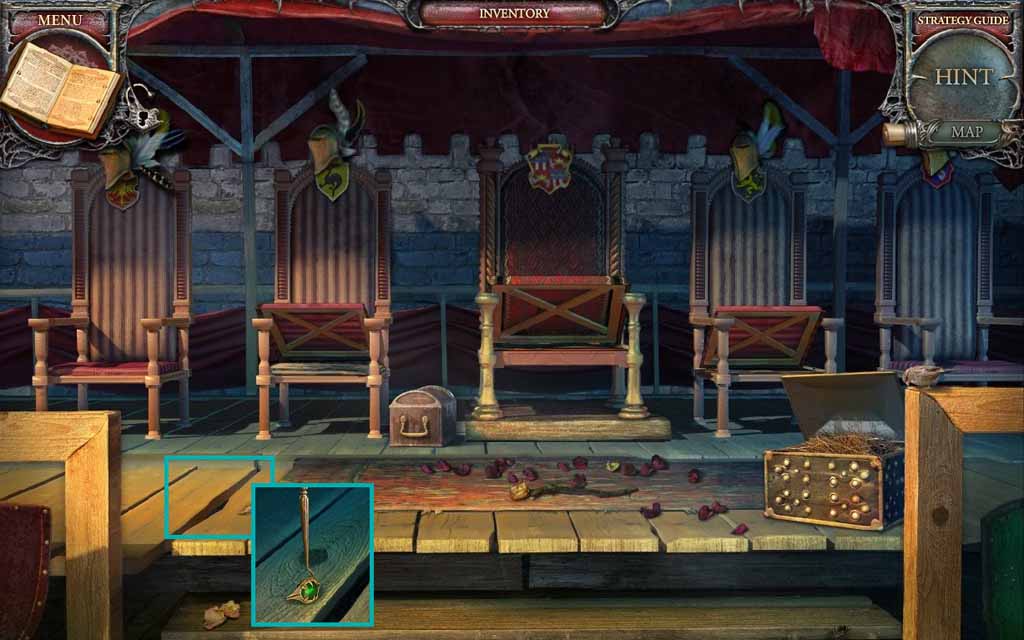
- Examine the floorboard; insert the small hook into the gap and collect the ring.
- Move to the Gallery.
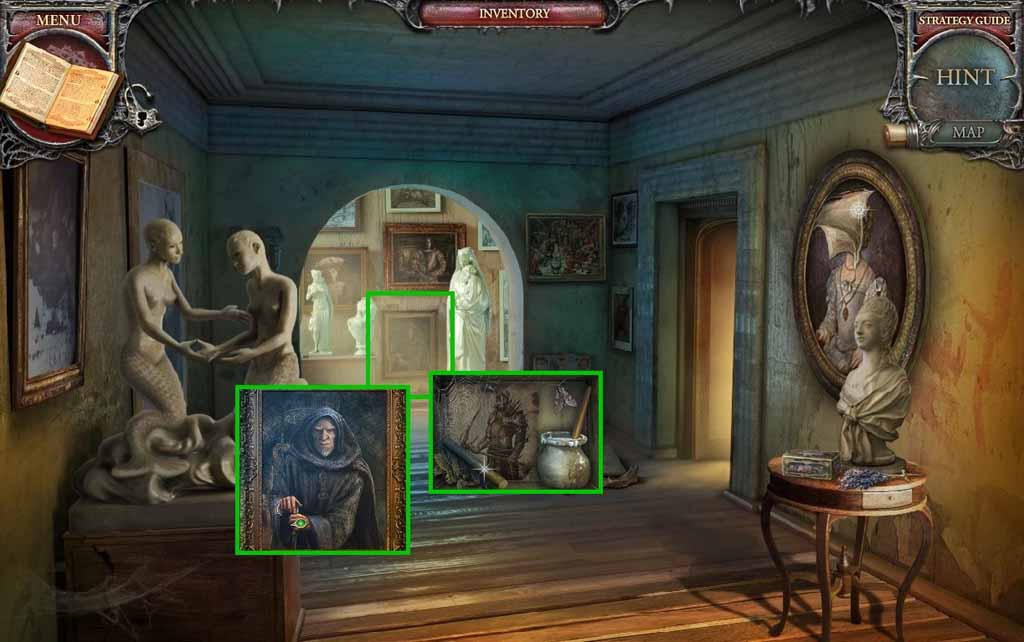
- Examine the bottom painting and place the ring onto it; collect the pencil and the white paint.
- Move down once.
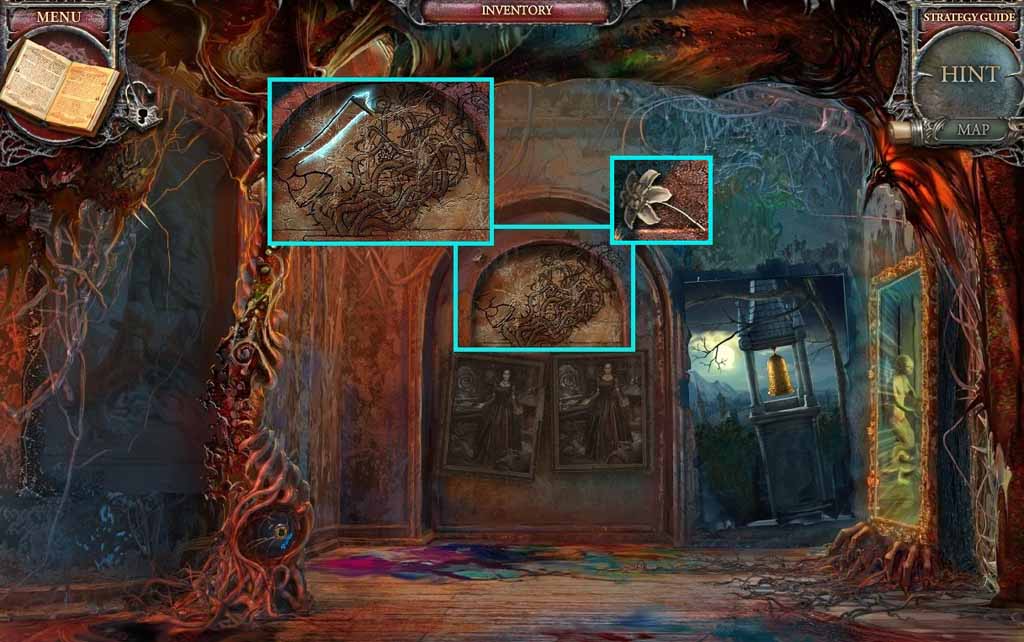
- Examine the mural and place the pencil on it.
- Use it to outline the axe; collect the alabaster flower.
- Move to the Lake.
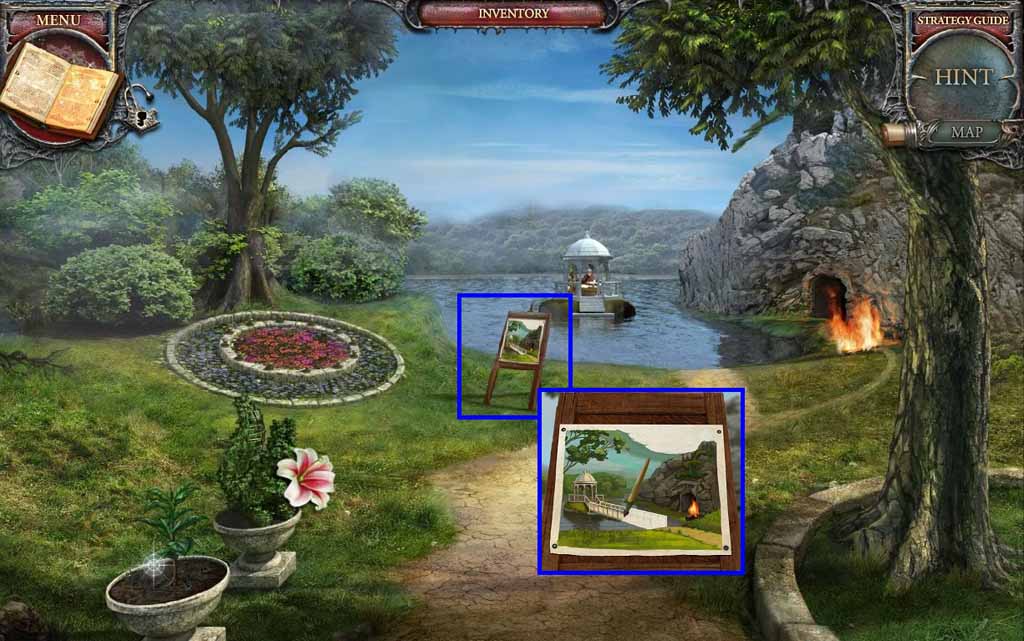
- Examine the easel.
- Select the white paint to paint the bridge.
- Move across the bridge to the Pergola.
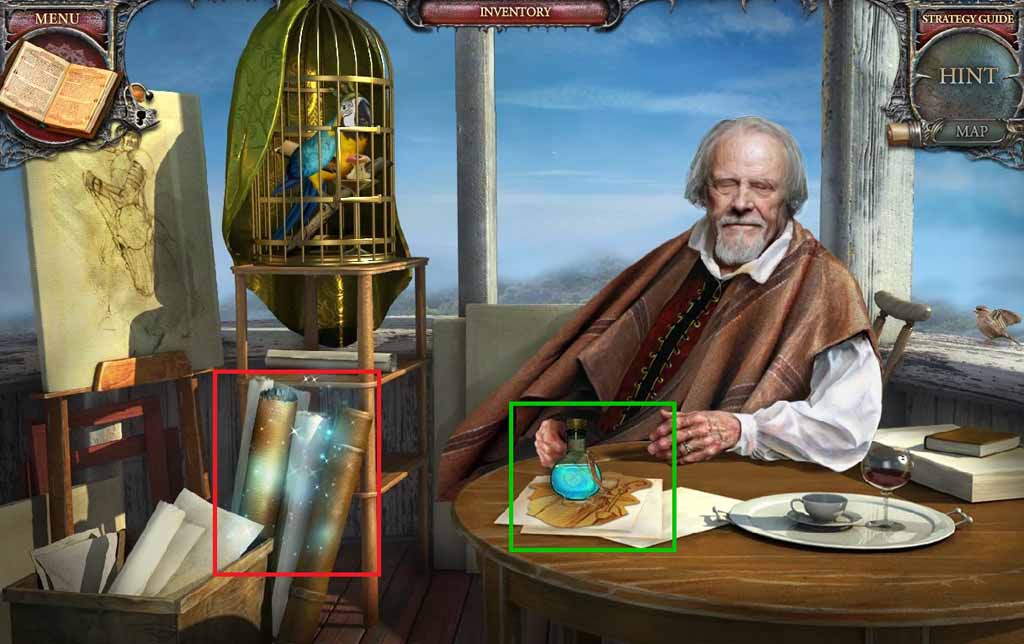
- Collect the picture of the old man.
- Click the hidden objects area.
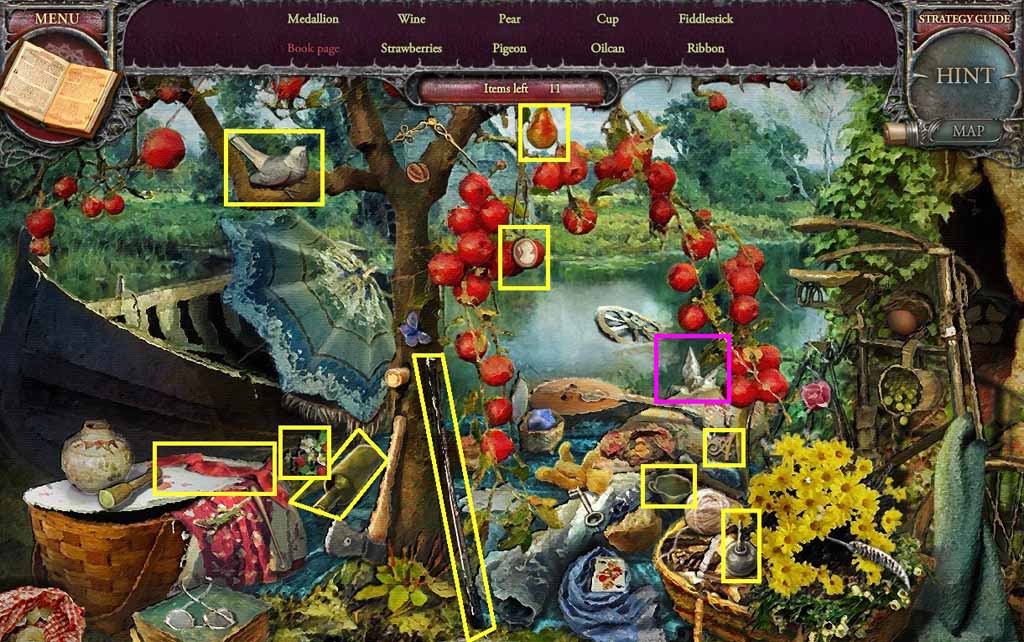
- Find the listed items.
- Click the origami; collect the book page.
- Collect the picture scraps.
- Move to the Gallery.
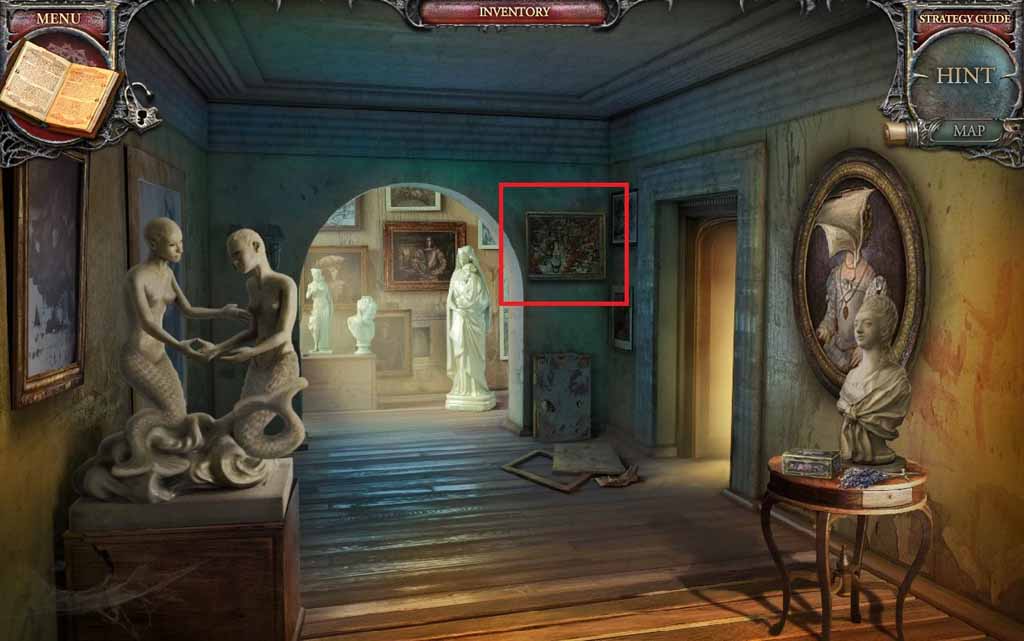
- Examine the painting and insert the picture scraps to trigger a reverse hidden objects area.
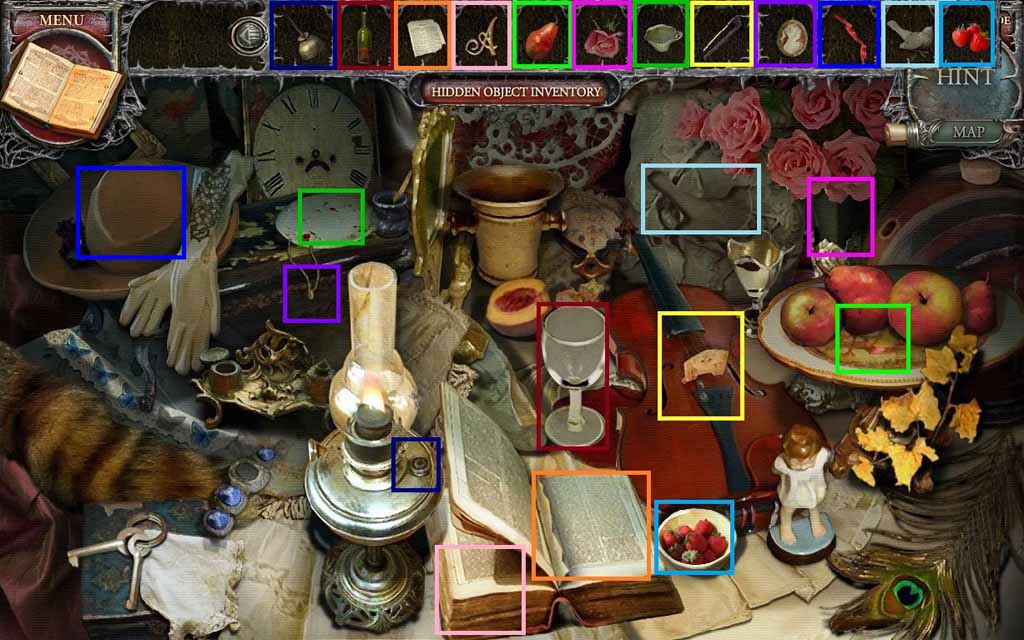
- Place the items where they belong.
- Collect the black paint.
- Move to the Lake.
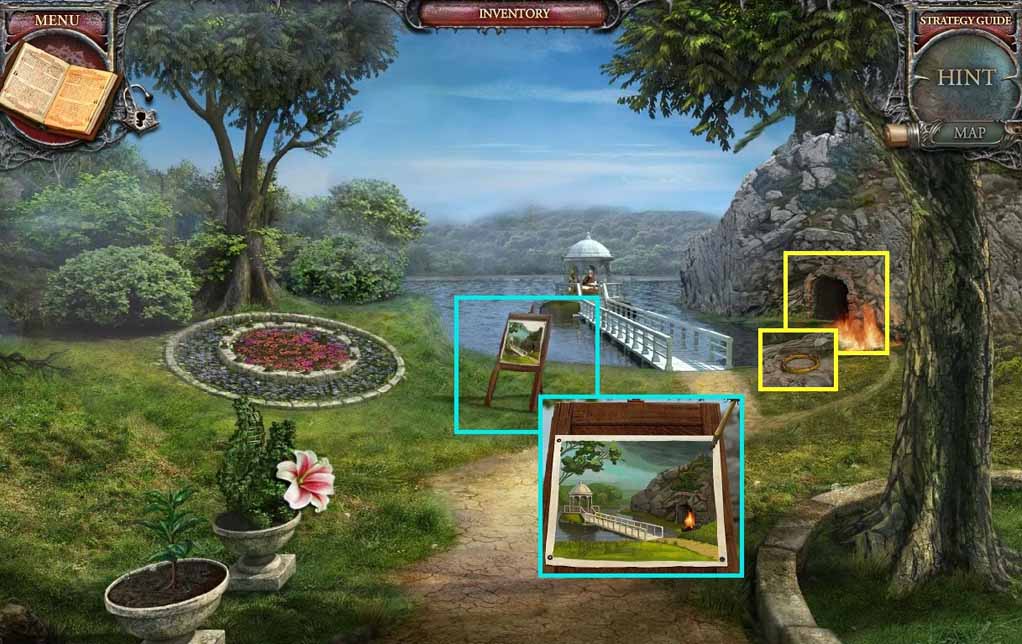
- Examine the easel.
- Select the black paint to paint the sky.
- Examine the cave; collect the bracelet.
- Move to the Stairs.
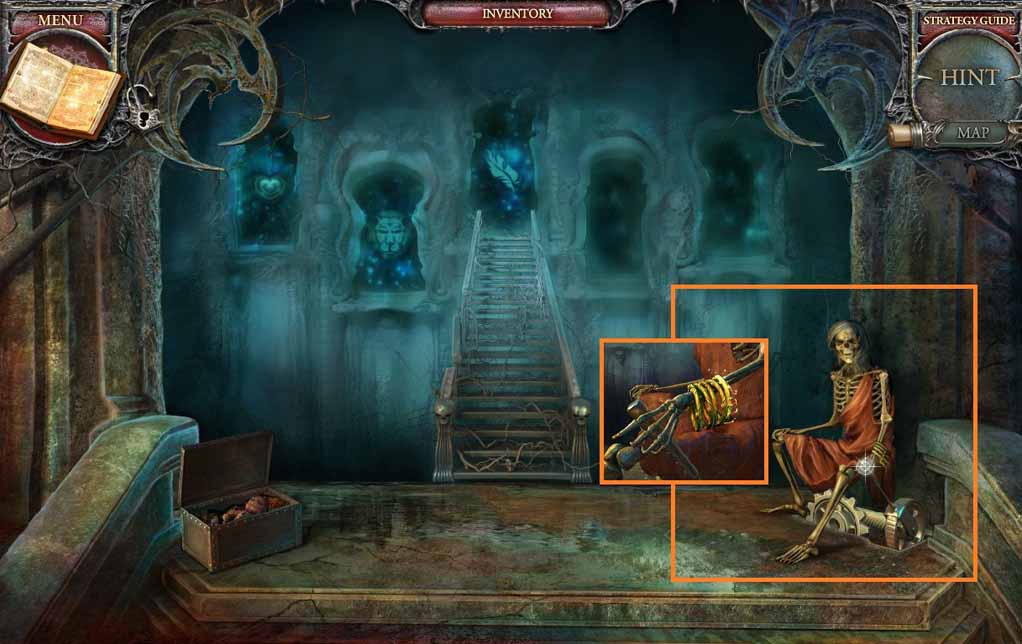
- Examine the skeleton; give it the bracelet.
- Move into the Owl Doorway.
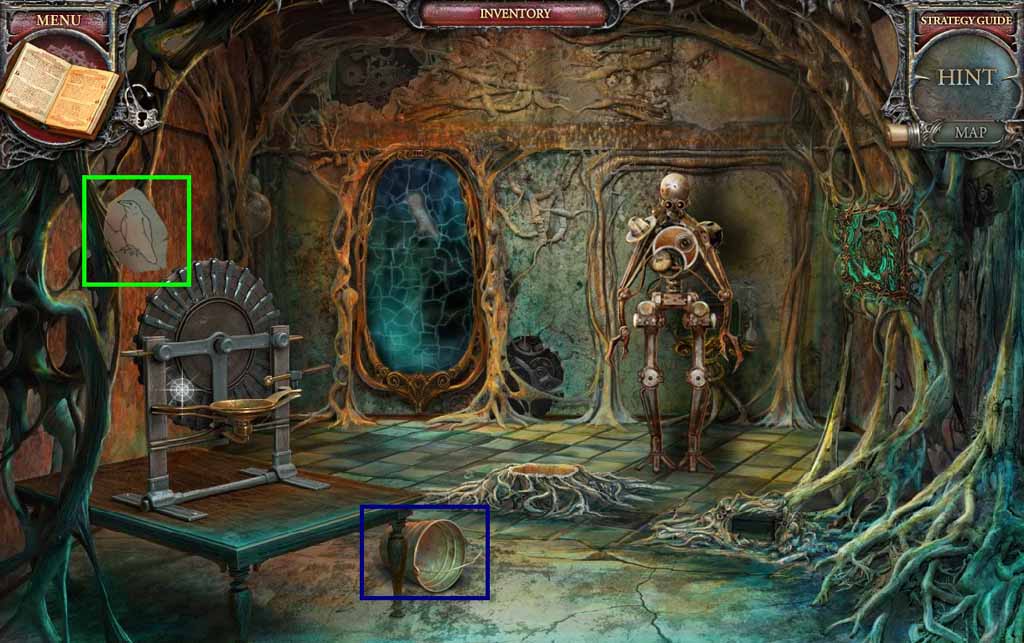
- Collect the landscape part and the bucket.
- Move to the Lake.
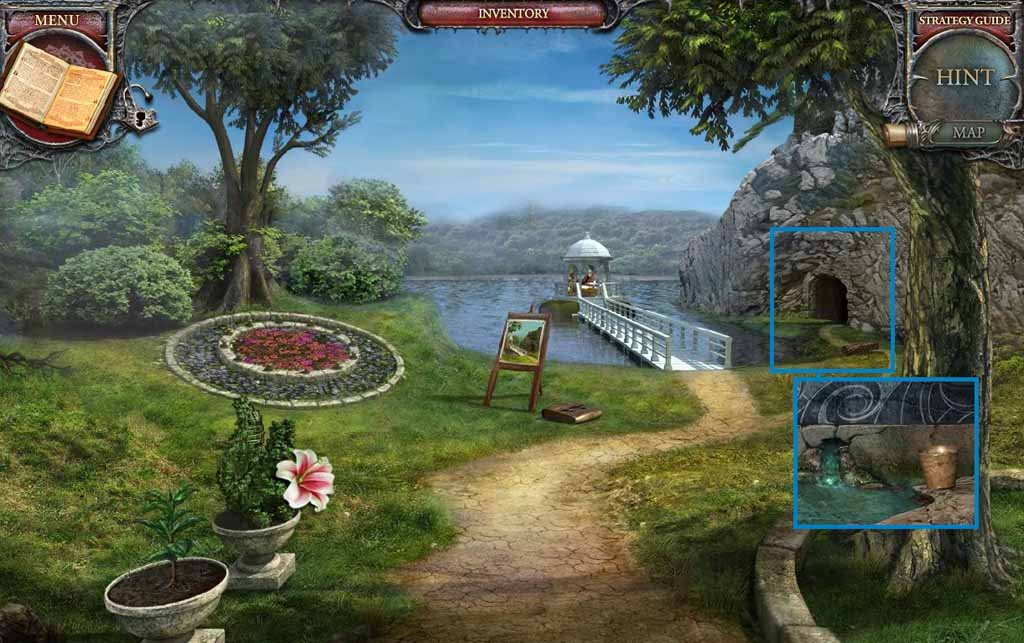
- Examine the cave.
- Select the bucket and fill it with water; collect the bucket of water.
- Move to the Conservatory.
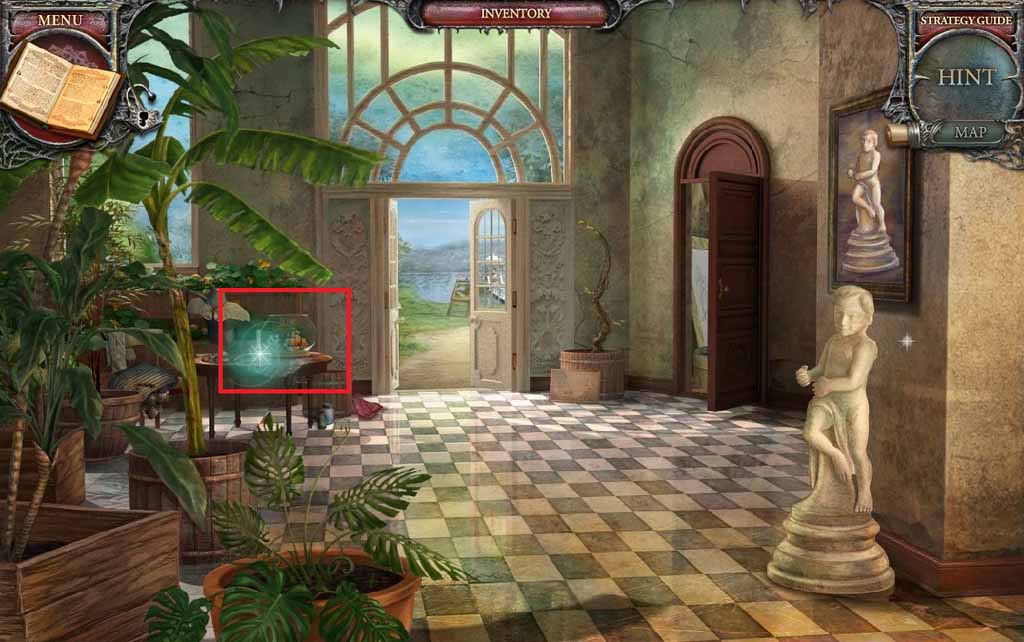
- Examine the table.
- Pour the bucket of water into the fish bowl to trigger a hidden objects area.
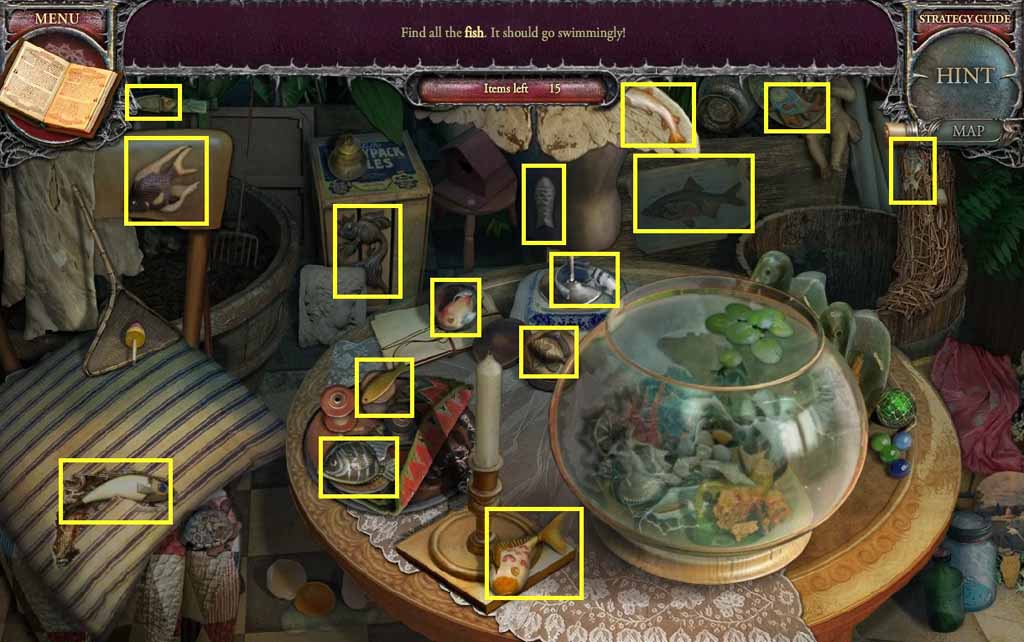
- Find the fish.
- Collect the aquarium.
- Move to the Gallery.
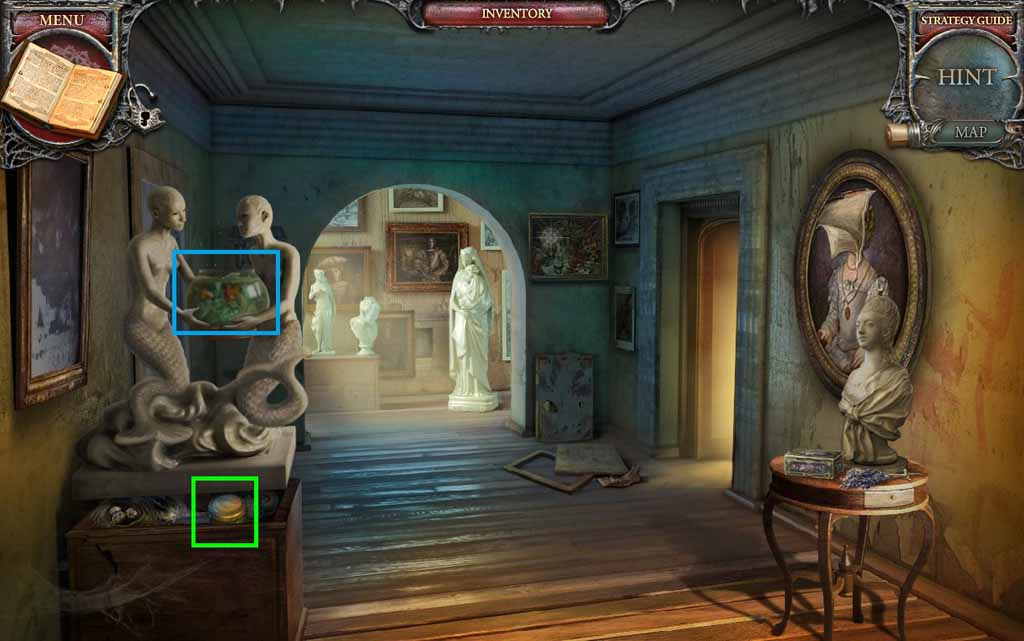
- Place the aquarium onto the statue.
- Collect the ointment.
- Move to the Pergola.
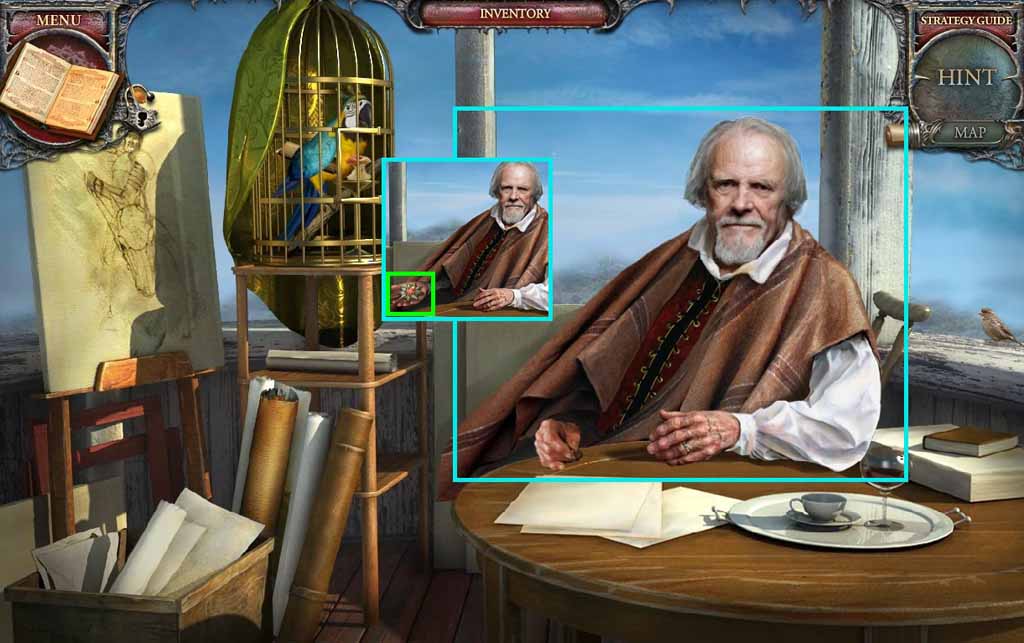
- Give the old man the ointment.
- Collect the medal.
- Move to the Gallery.
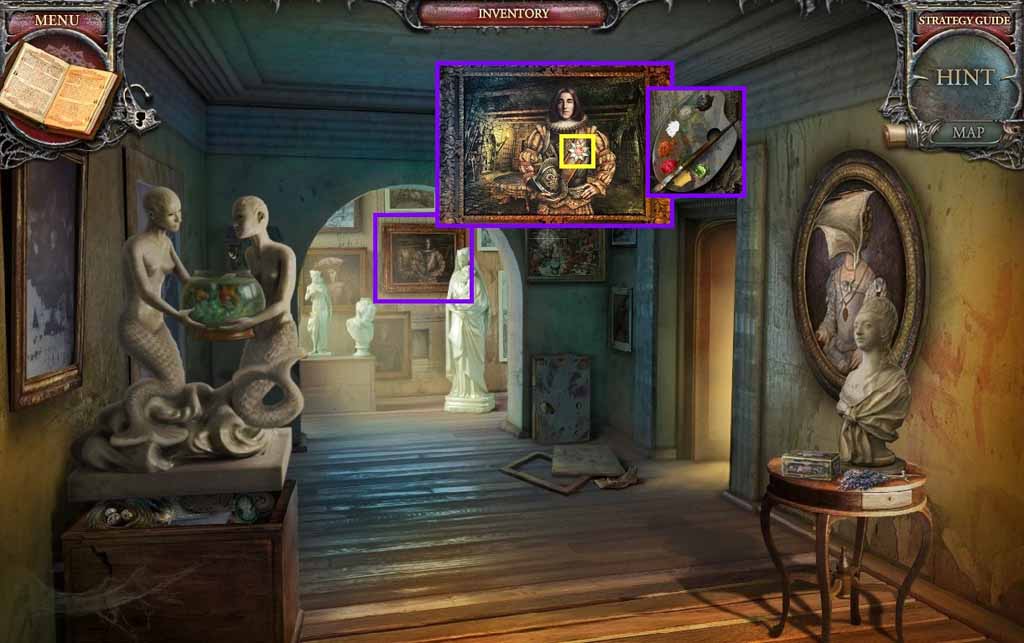
- Examine the painting on top and insert the medal.
- Collect the palette.
- Move to the Conservatory.
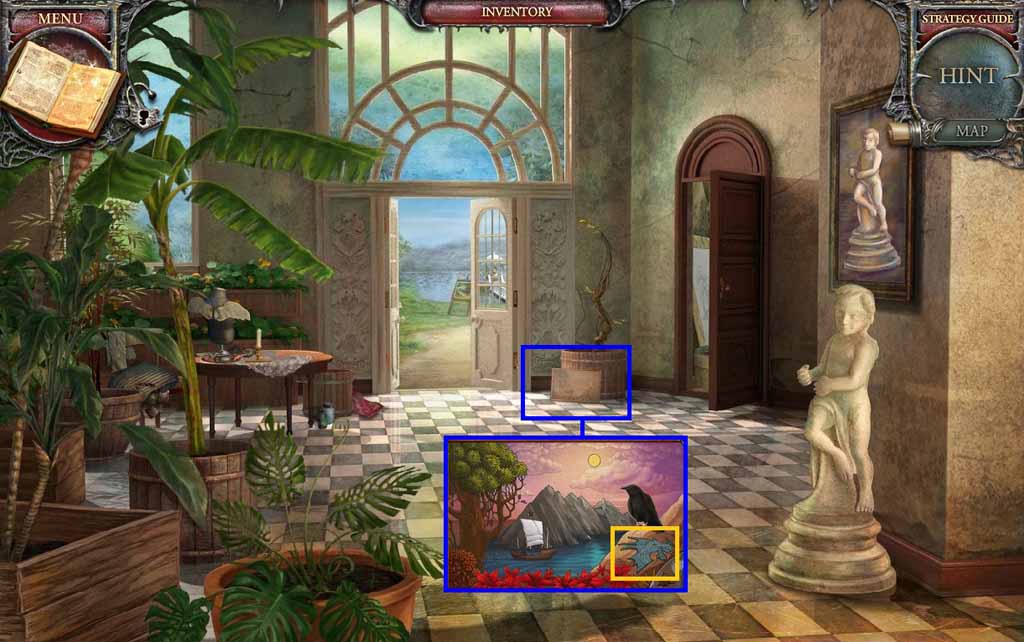
- Examine the drawing; insert the 3 landscape parts and the palette to trigger a mini-game.
- Color in the painting to solve the game.
- Collect the mosaic piece.
- Move to the Lake.
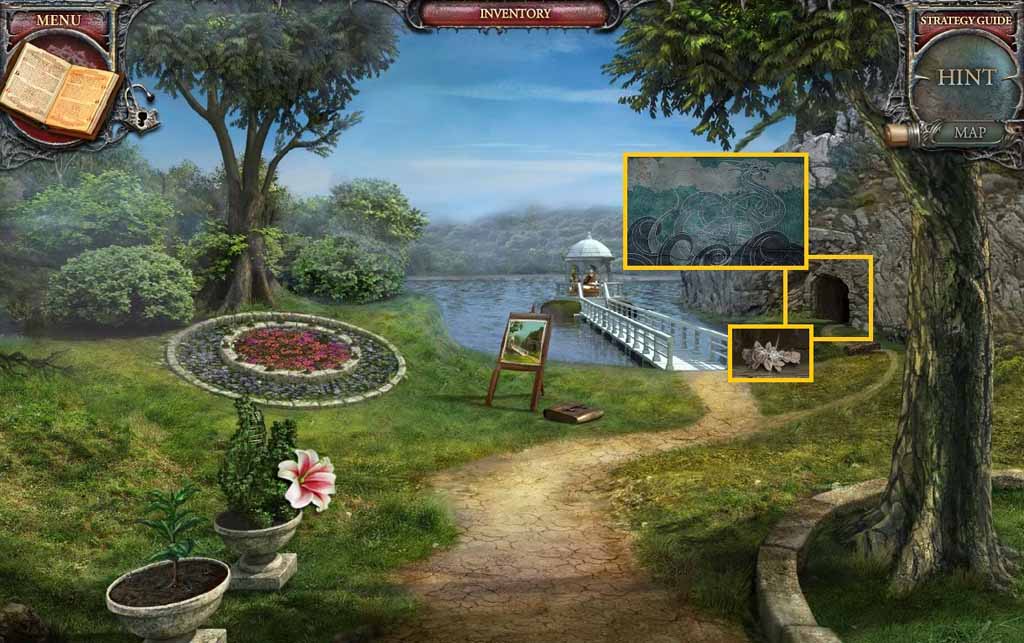
- Examine the cave.
- Insert the mosaic piece into the mosaic; collect the alabaster wreath.
- Move to the Conservatory.
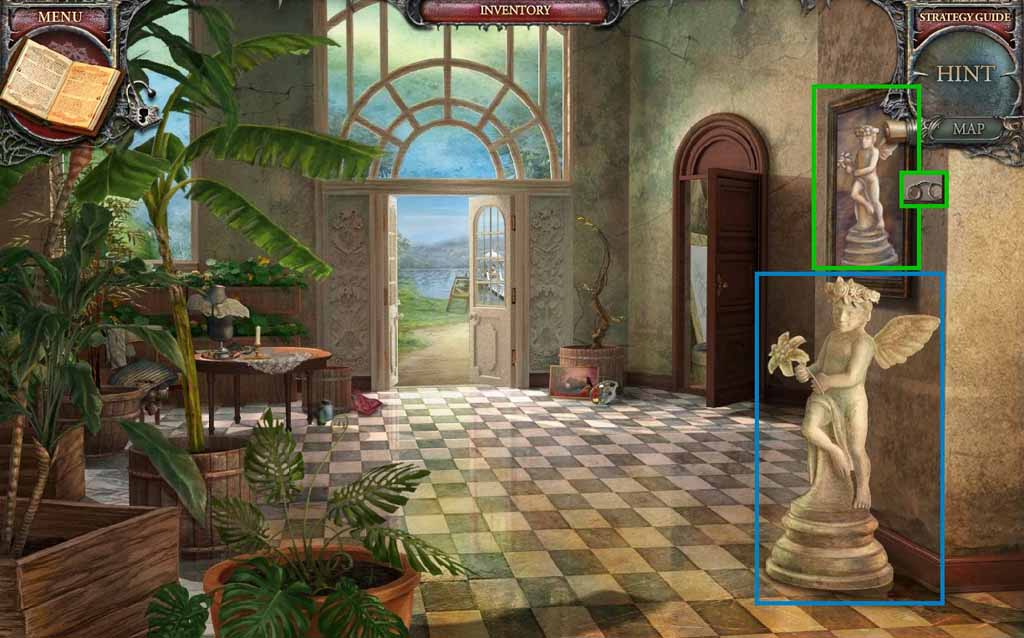
- Place the alabaster wings, wreath and flower onto the statue.
- Collect the angel picture and the glasses.
- Move to the Pergola.
- Click the hidden objects area.
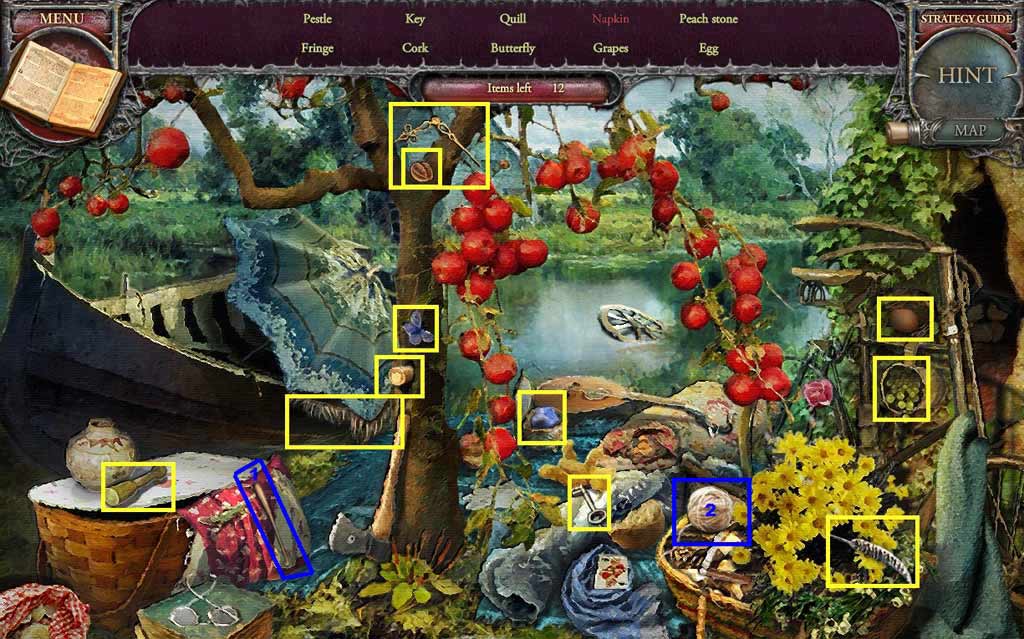
- Find the listed items.
- Select the needle and place it with the yarn; collect the napkin.
- Collect the picture fragments.
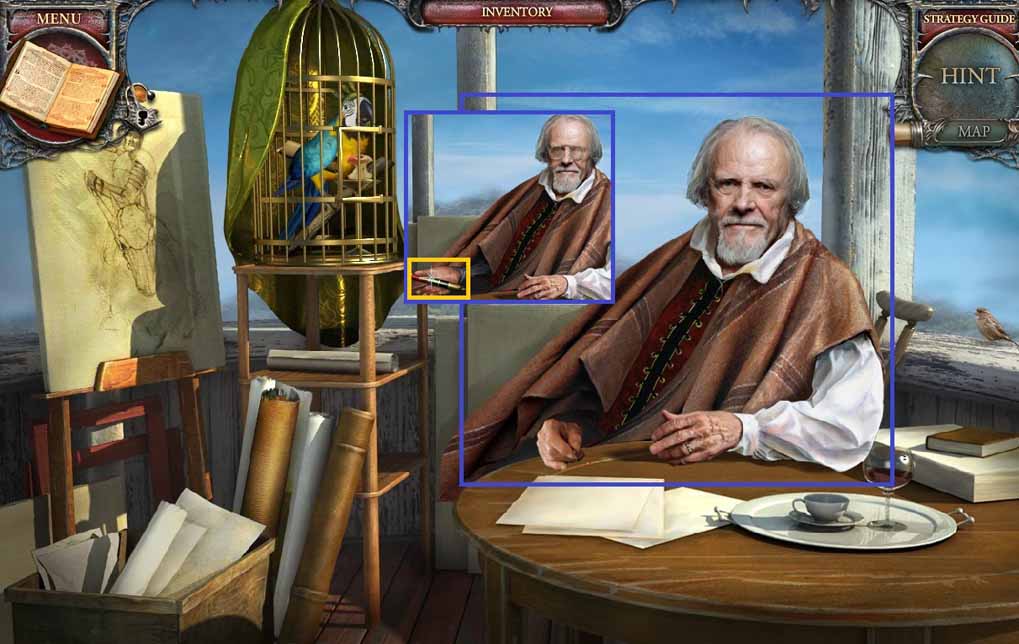
- Give the old man the glasses.
- Collect the multi colored pencil.
- Move to the Artist’s Studio.
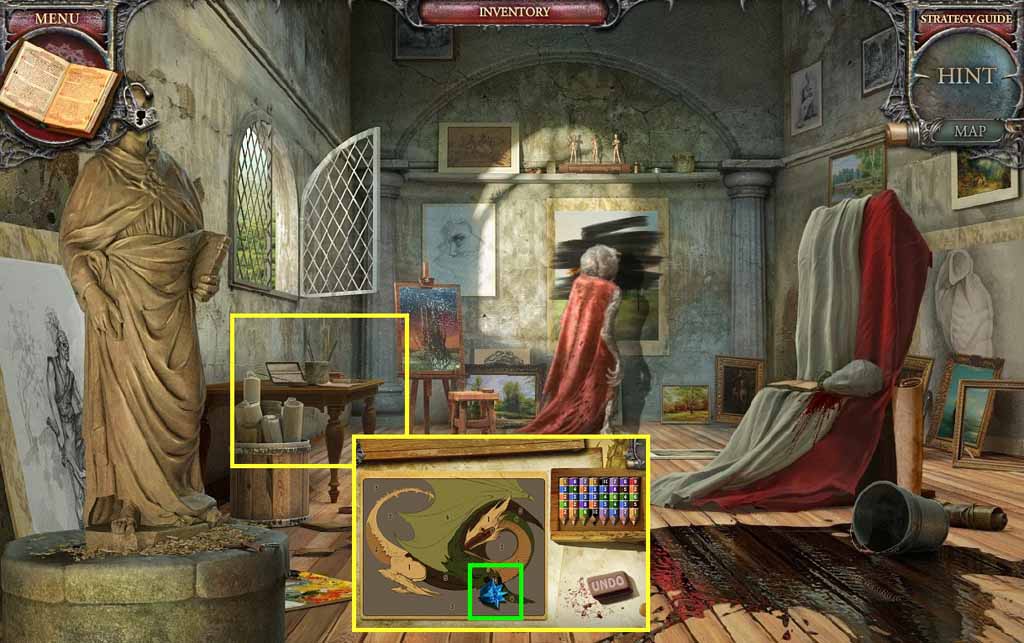
- Examine the table.
- Place the multicolored pencil with the others to trigger a mini-game.
- Solve the game by coloring by numbers.
- Collect the crystal.
- Move to the Gallery.
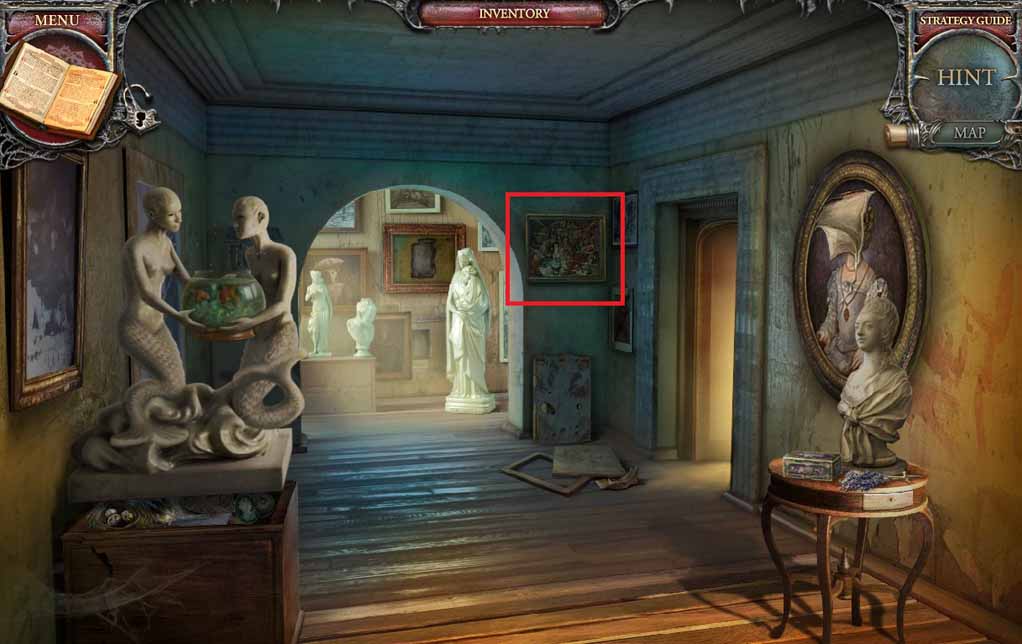
- Examine the painting; insert the picture fragments to trigger a reverse hidden objects area.
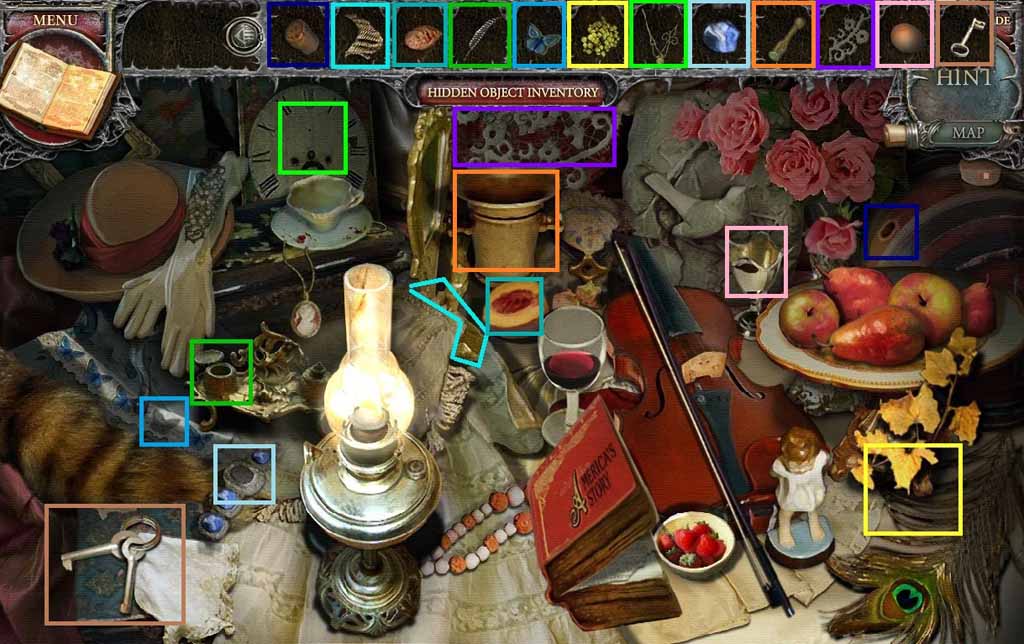
- Place the items where they belong.
- Collect the apple.
- Move to the Pergola.
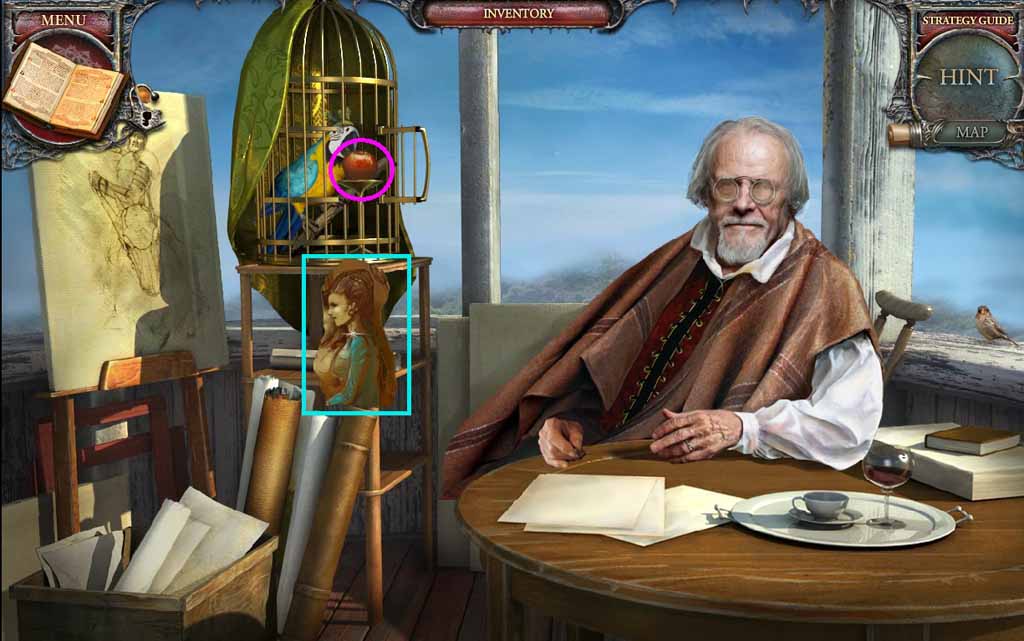
- Give the parrot the apple.
- Collect the picture of the young woman.
- Move to the Artists’ Studio.
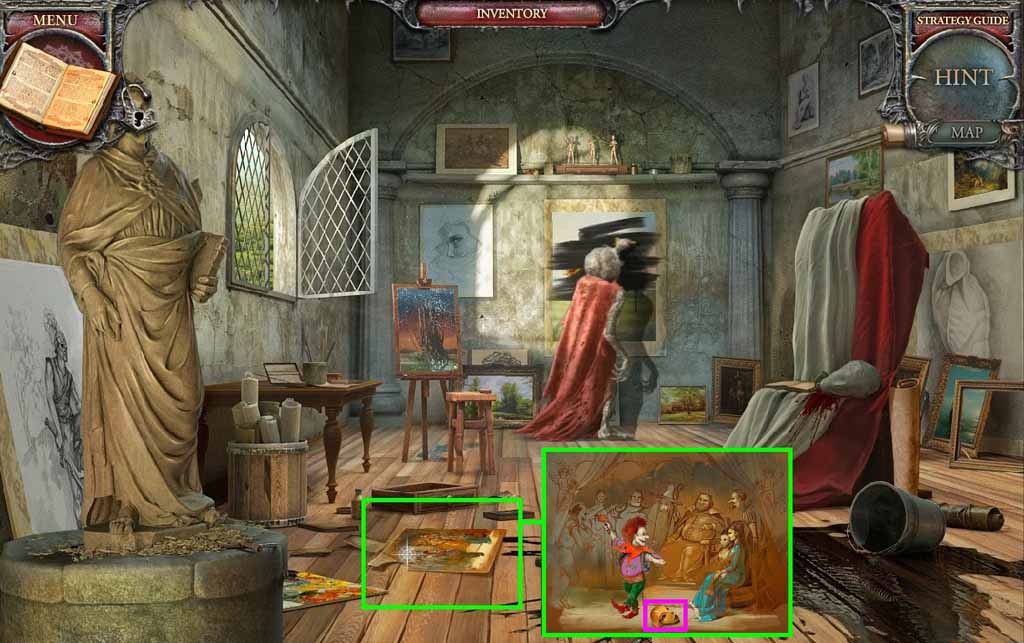
- Examine the painting on the floor.
- Insert the pictures of the old man, the young woman and the angel; collect the metal mask.
- Move to the Mirror Room.
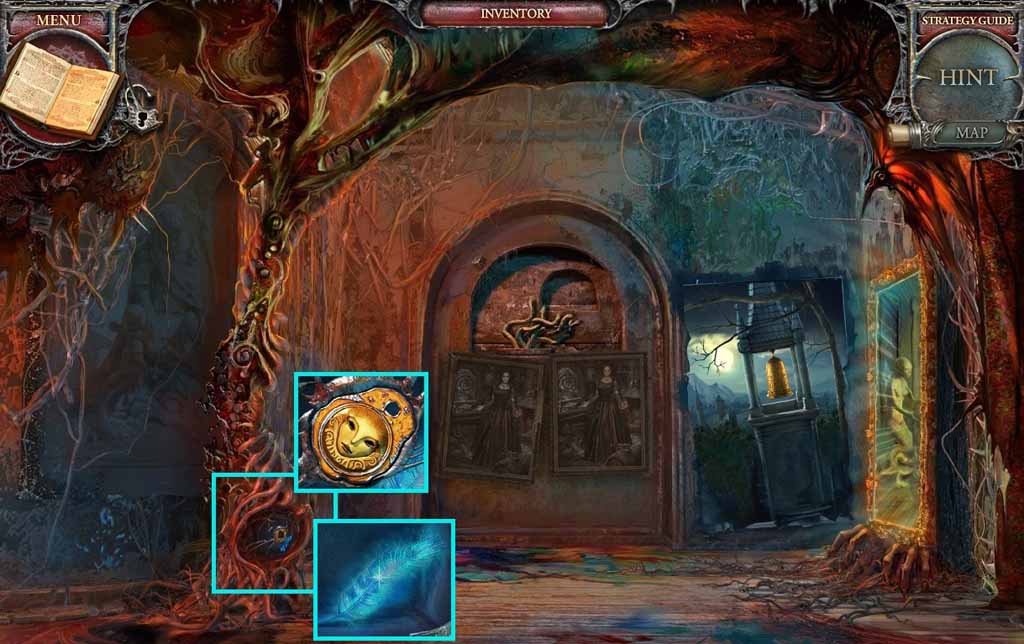
- Examine the niche.
- Place the metal mask onto the grate.
- Collect the Artist’s Virtue.
- Move to the Artists’ Studio.
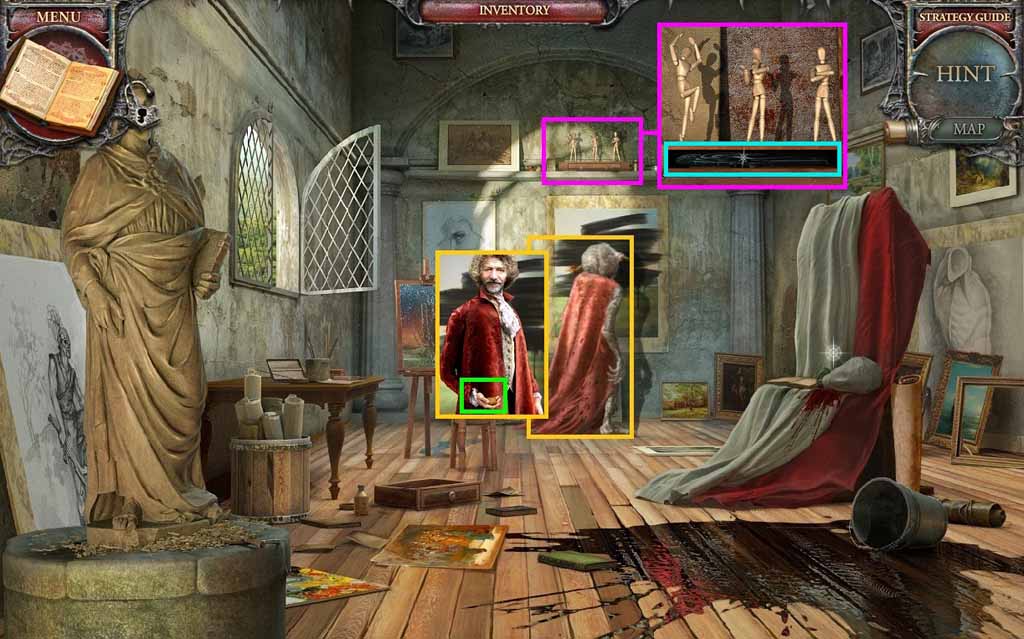
- Give the artist the Artists’ Virtue.
- Collect the book amulet.
- Examine the models and attach the statuette part to trigger a mini-game.
- Align the models as shown in the Journal to solve the game.
- Collect the mirror shard.
- Move to the Book of Spells.
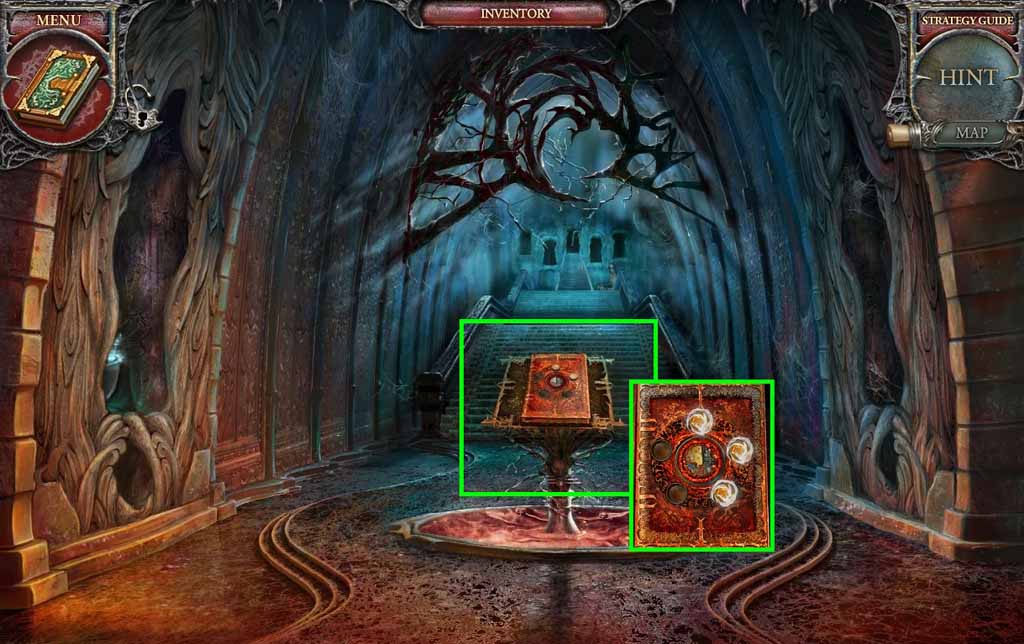
- Examine the book and insert the amulet.
- Move to the Stairs.
- Enter into the Owl Doorway.
Comments will load when you reach this part of the walkthrough.