
Chapter Two: The Knight
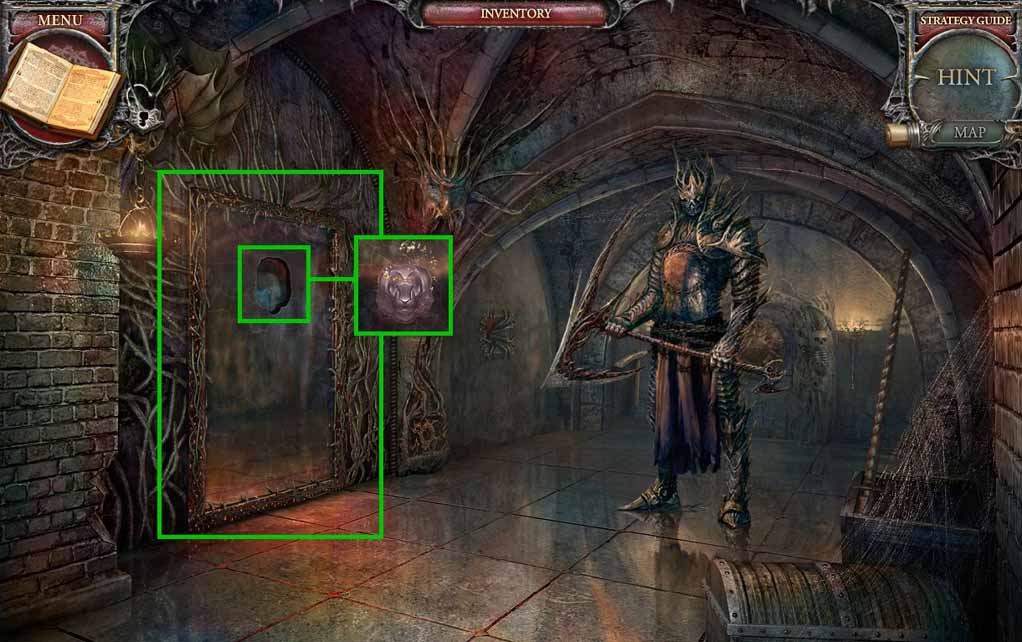
- Examine the mirror and insert the mirror shard.
- Enter the mirror to access the Cell.
- Collect the wire cutter and the fountain piece.
- Move to the Mirror Room behind the Heart Door.
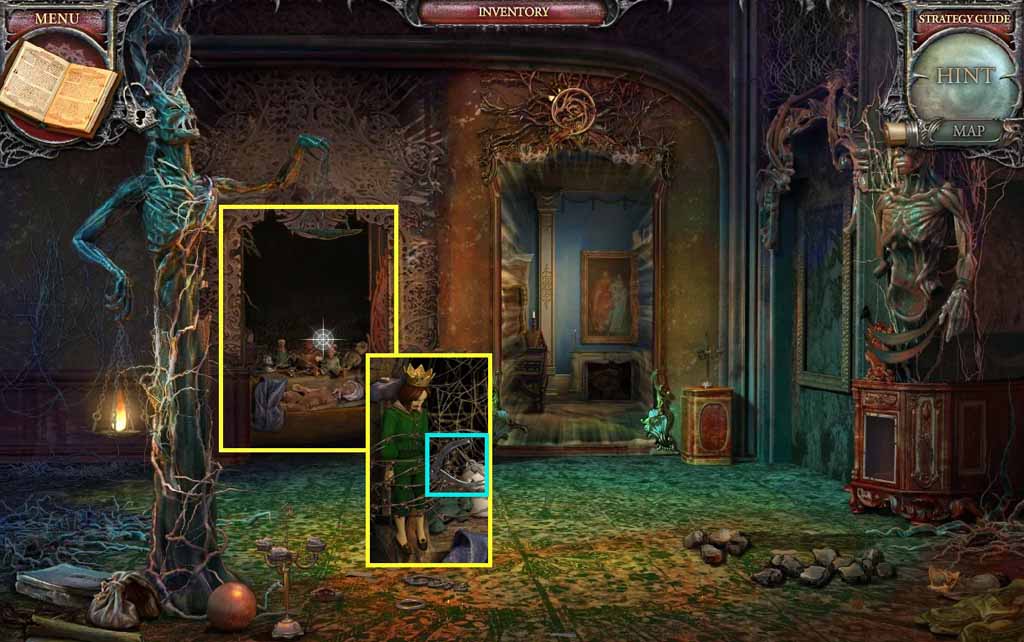
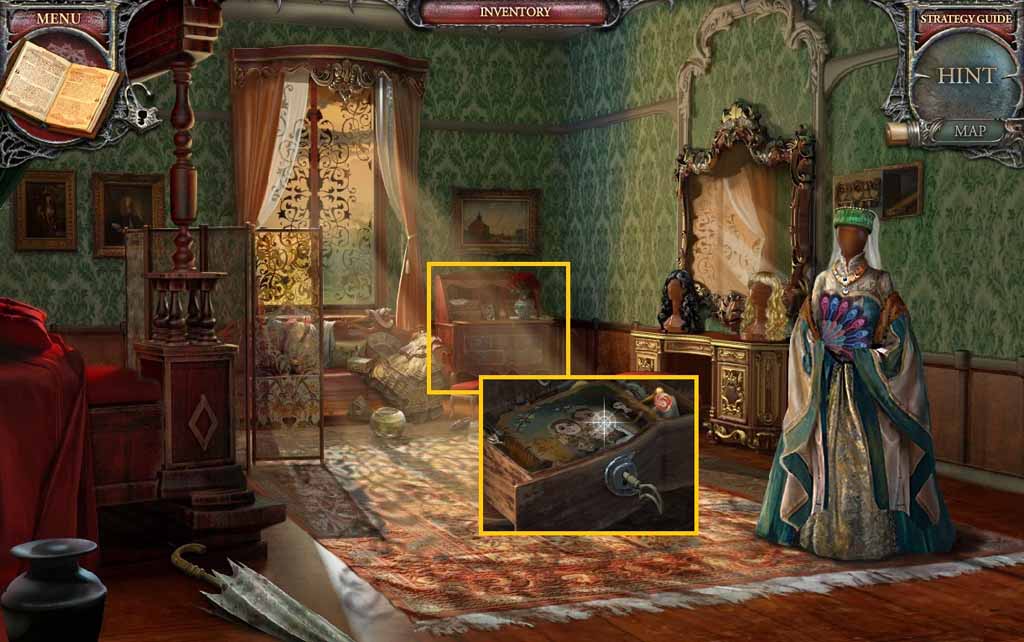
- Examine the bedroom.
- Select the wire cutter to cut the wire; collect the toy prince and the hammer.
- Move to the Nursery.
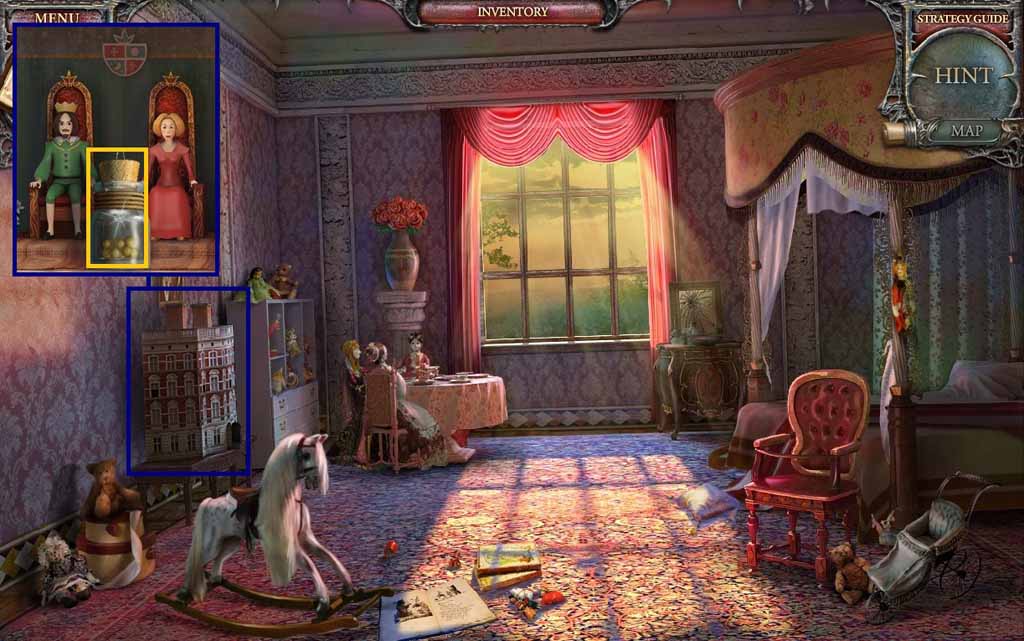
- Examine the doll house.
- Place the toy prince onto the throne; collect the sleeping pills.
- Move to the Garden.
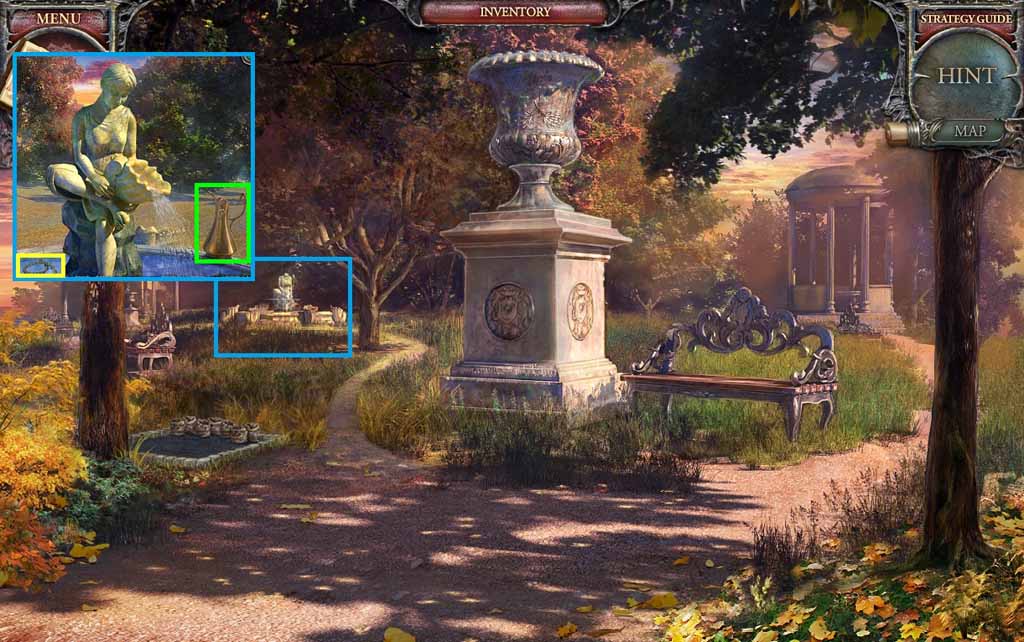
- Examine the fountain; insert the fountain piece and the fountain part.
- Collect the big hook.
- Select the jug and place it into the water; collect the jug with water.
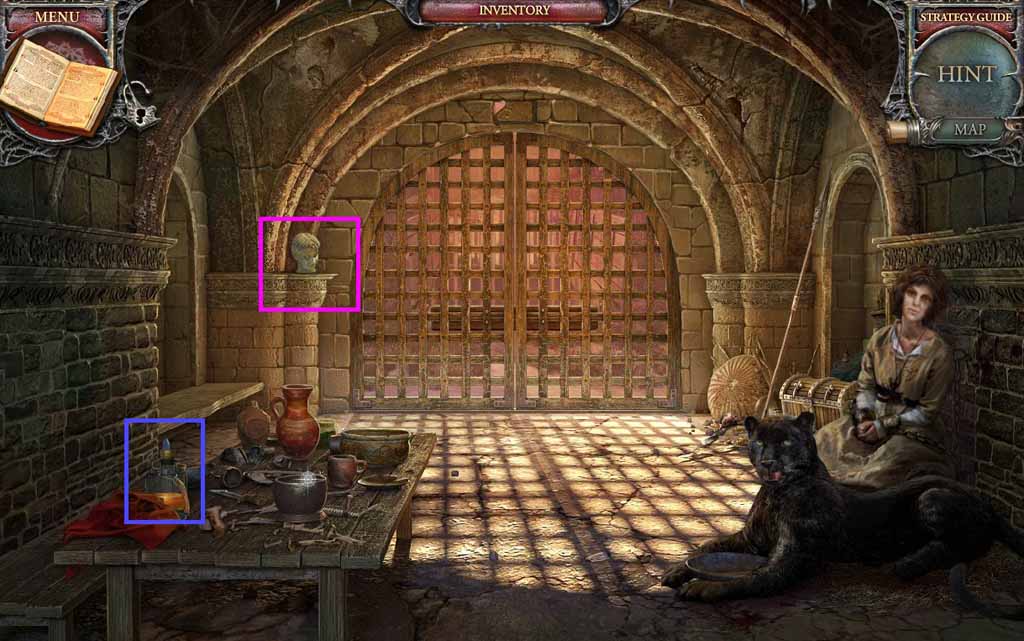
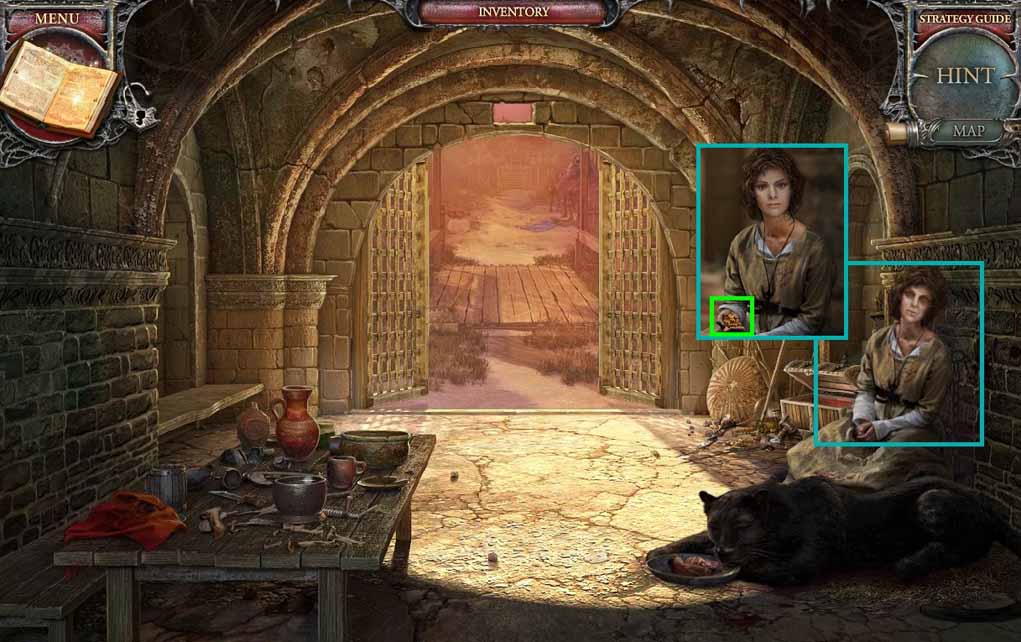
- Move to the Cell.
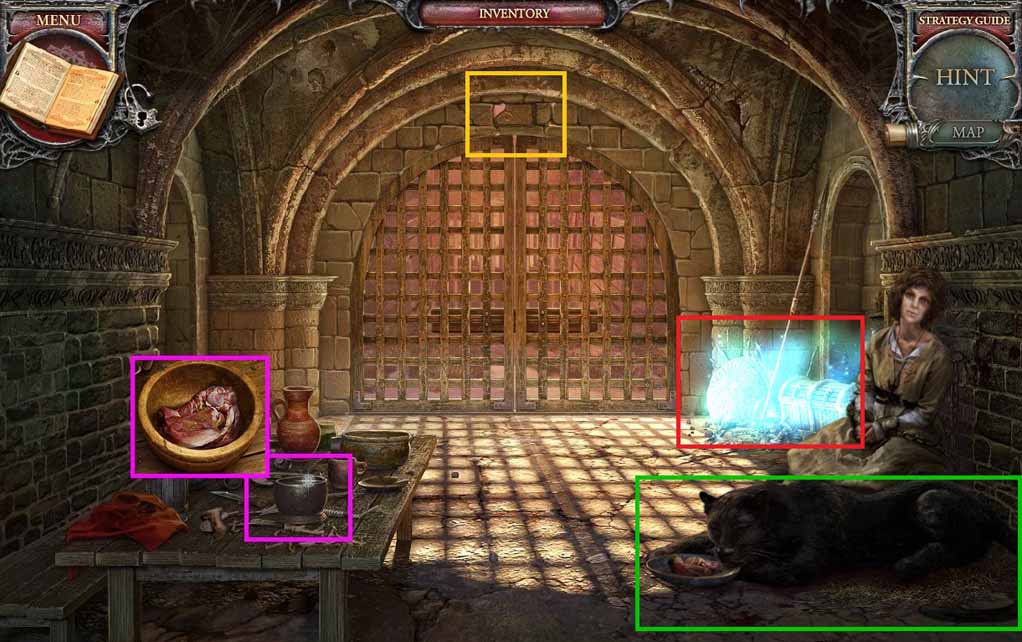
- Examine the table and place the sleeping pills into the meat.
- Collect the meat laced with sleeping pills.
- Give the panther the meat laced with sleeping pills.
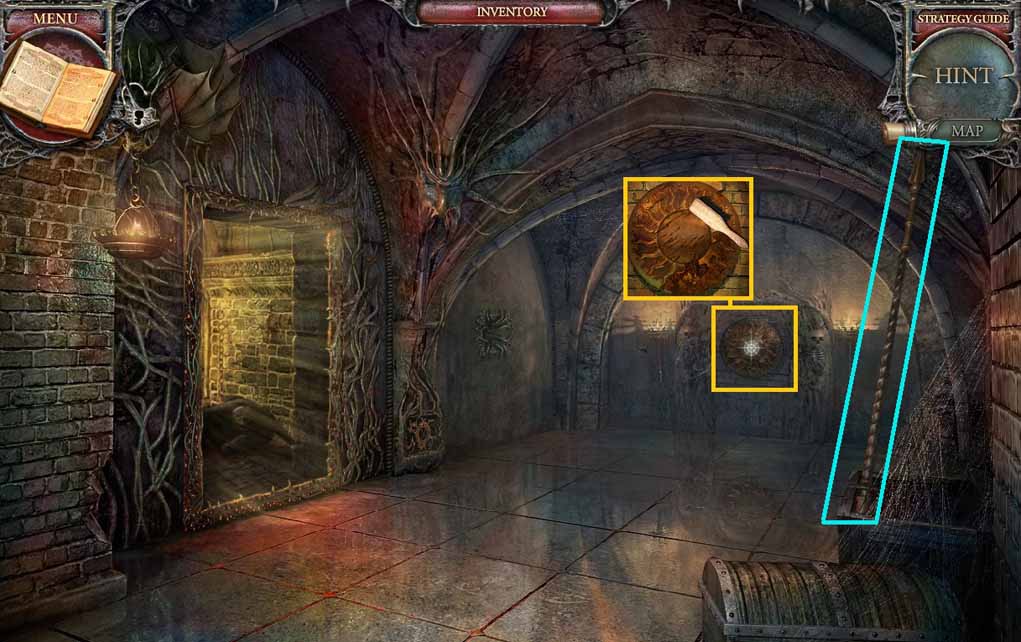
- Examine the stone above the door.
- Select the hammer to dislodge it.
- Insert the big hook into the hole.
- Click the hidden objects area.
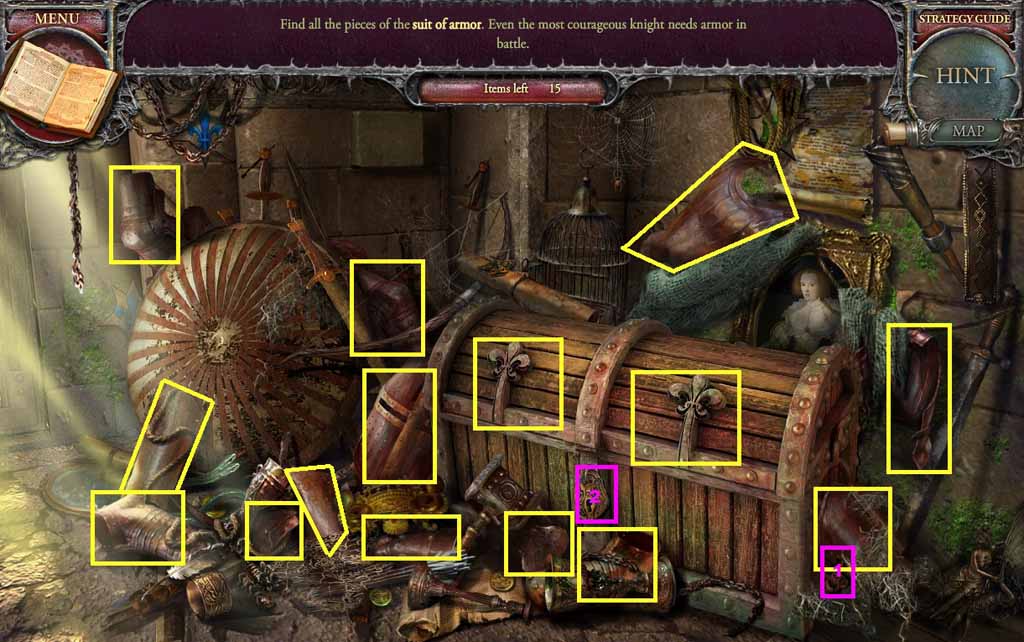
- Find the pieces of armor.
- Select the key and insert it into the chest; collect 2 pieces of armor.
- Collect the armor.
- Move ahead to the Camp.
- Collect the rust remover and read the scroll.
- Move to the Mirror Room.
- Select the rust remover to use on the knight.
- Collect the pick.
- Move to the Cell.
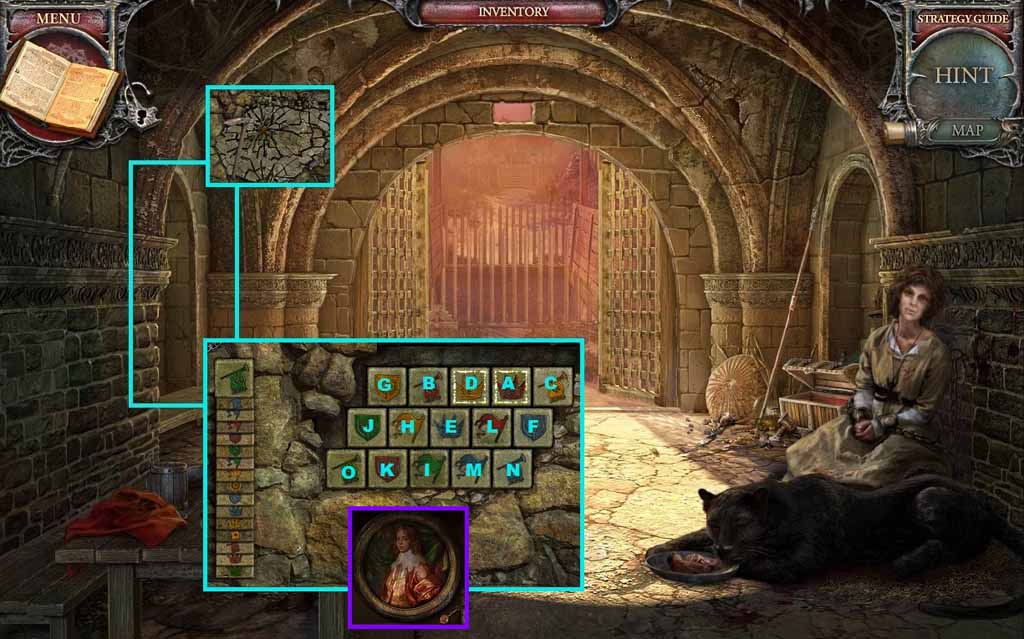
- Zoom into the alcove.
- Select the pick to use on the wall and trigger a mini-game.
- Solve the game by removing the stones and piling them onto the tile with the green crown.
- Make sure every stone has either the matching icon or color of the prior stone.
- Click the stones in ABC order.
- Collect the Prince’s Portrait and the pendulum.
- Move to the Nursery.
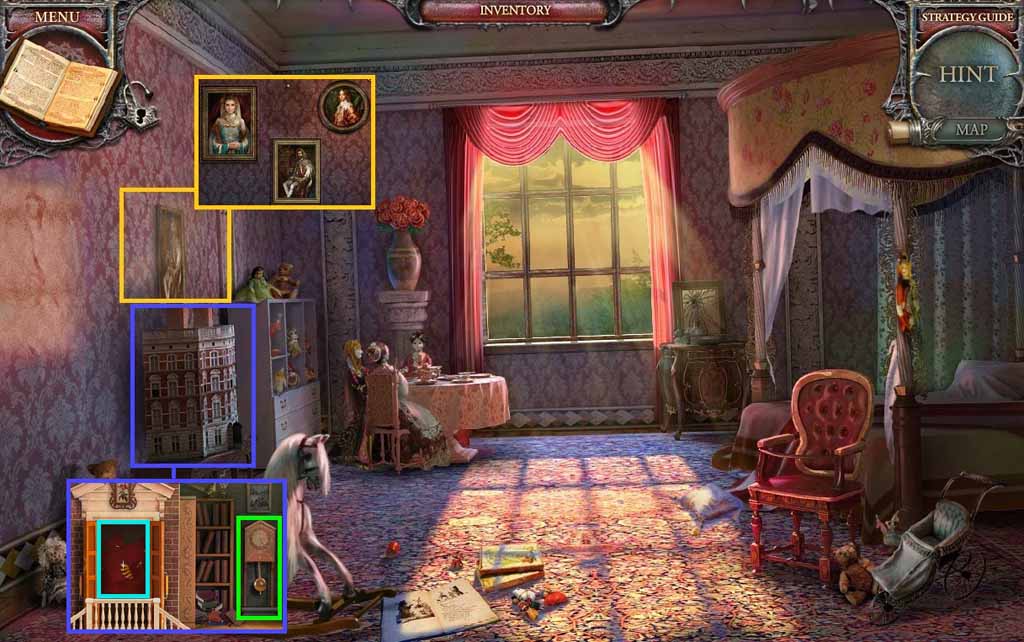
- Examine the doll house.
- Insert the pendulum into the clock; collect the flag pieces.
- Examine the wall.
- Hang the Prince’s Portrait and the Queen’s Portrait.
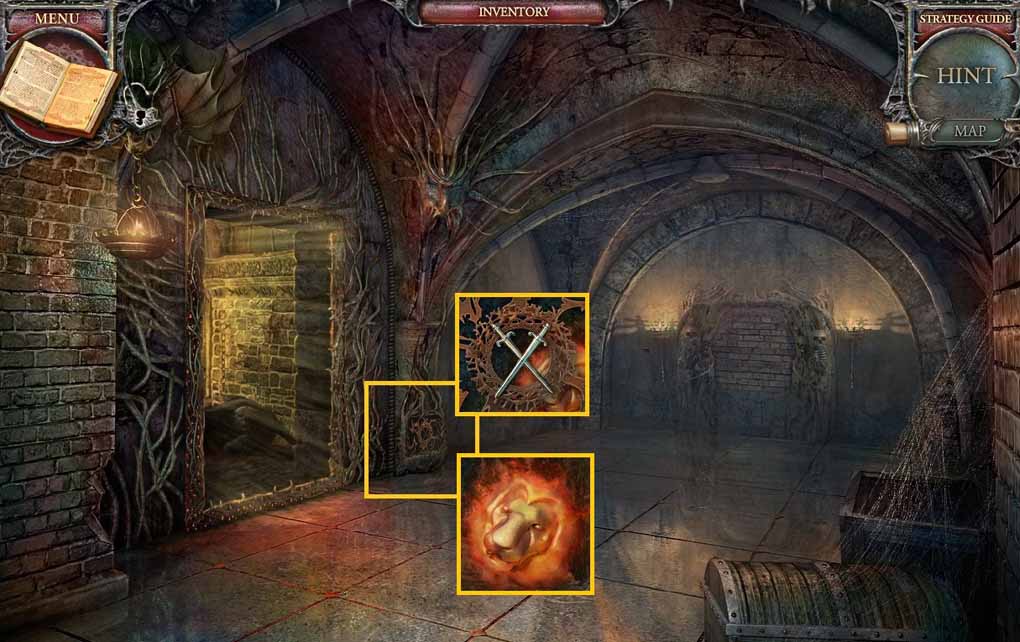
- Move through the Lion Door.
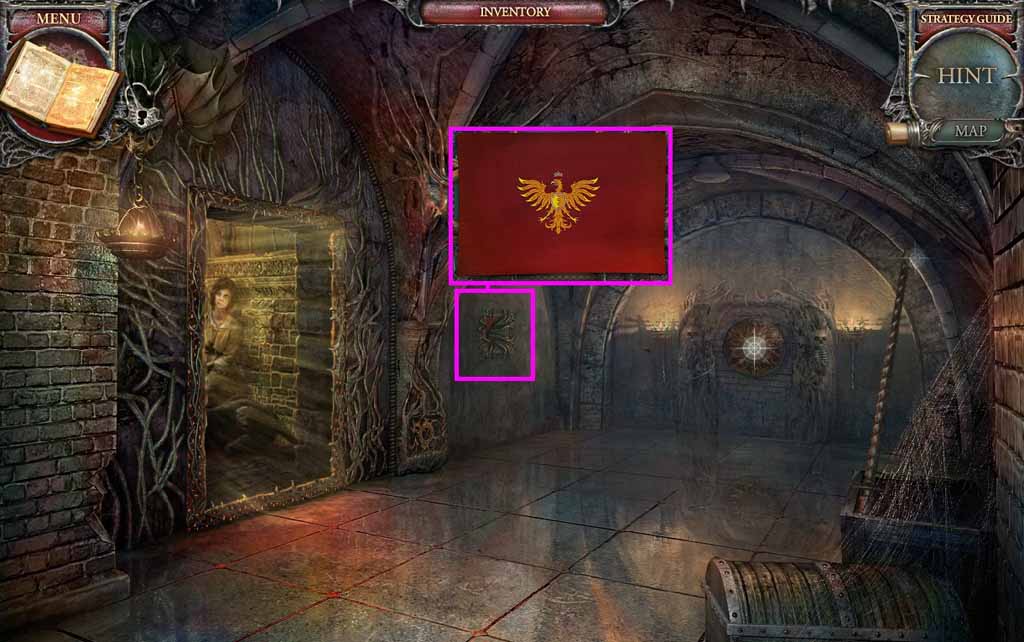
- Examine the wall and place the flag pieces onto it to trigger a mini-game.
- Click and drag the pieces to create the flag to solve the game.
- Collect the flag.
- Move to the Camp.

- Place the flag onto the flagpole.
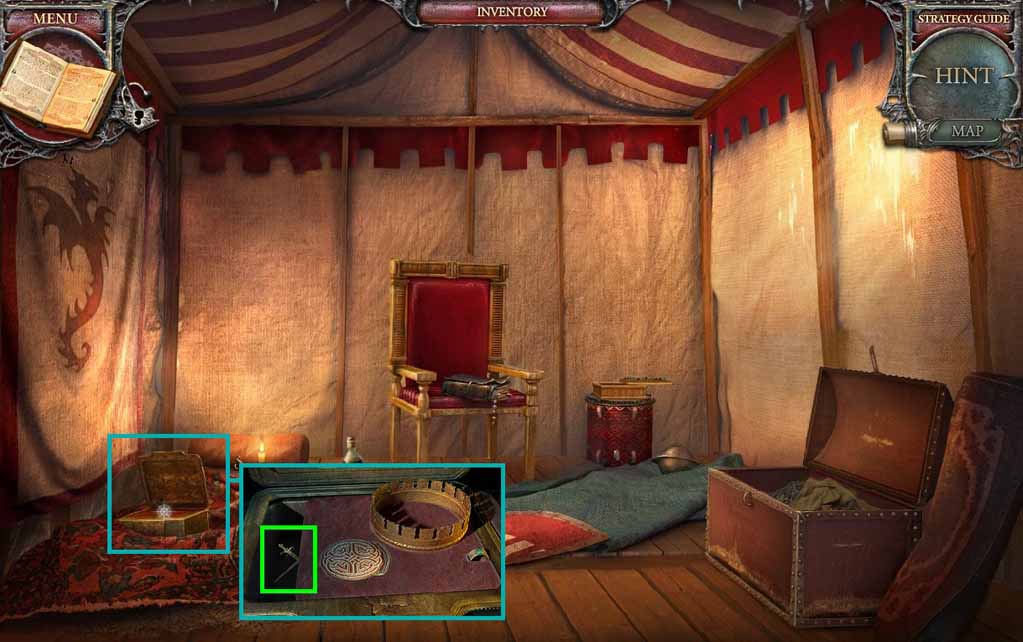
- Move into the Tent.
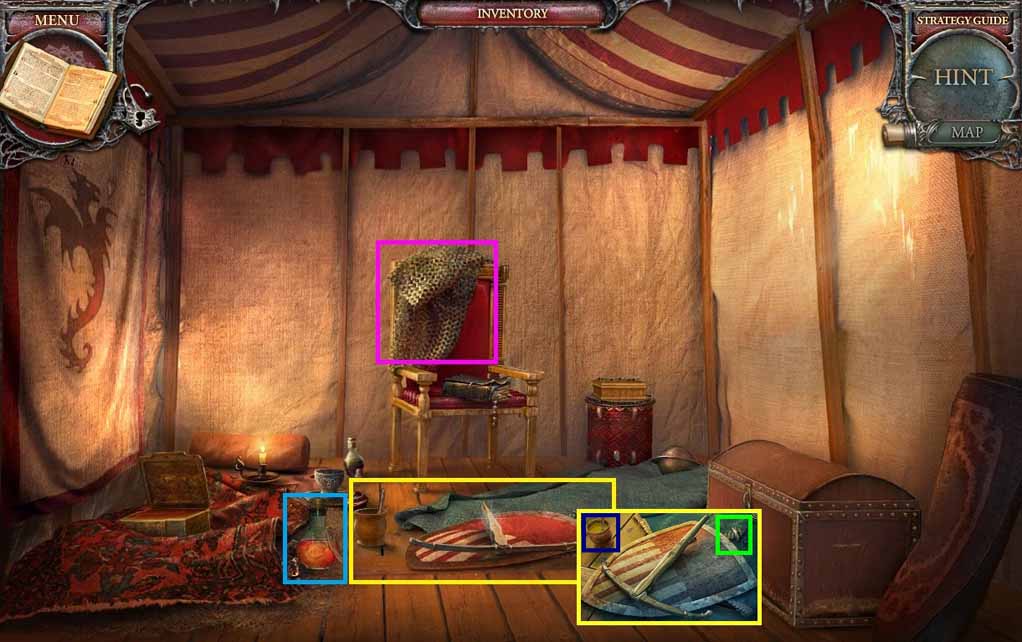
- Collect the handcuff key and the chain armor.
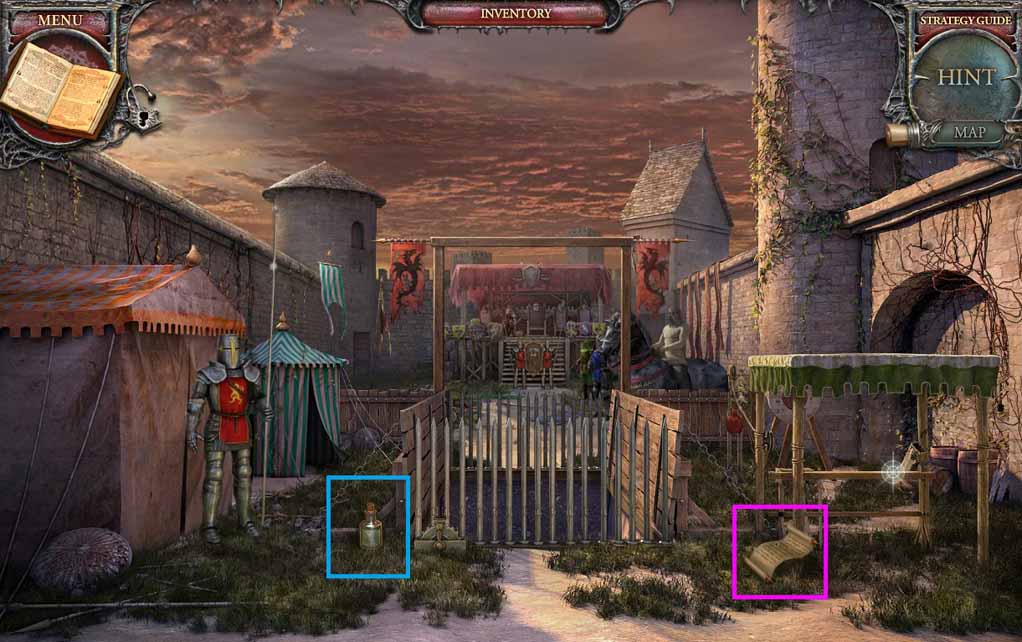
- Examine the shield; collect the lever.
- Select the jug with water and pour it into the jar; collect the yellow paint.
- Move to the Camp.
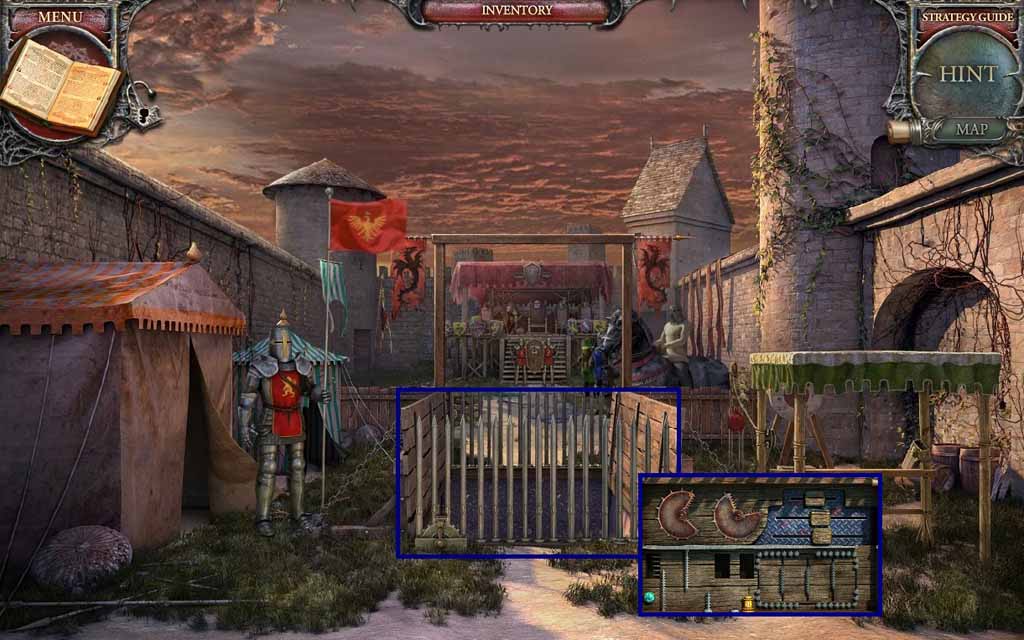
- Examine the fence and insert the lever to trigger a mini-game.
- Solve the game by moving the ball through the maze while avoiding the obstacles.
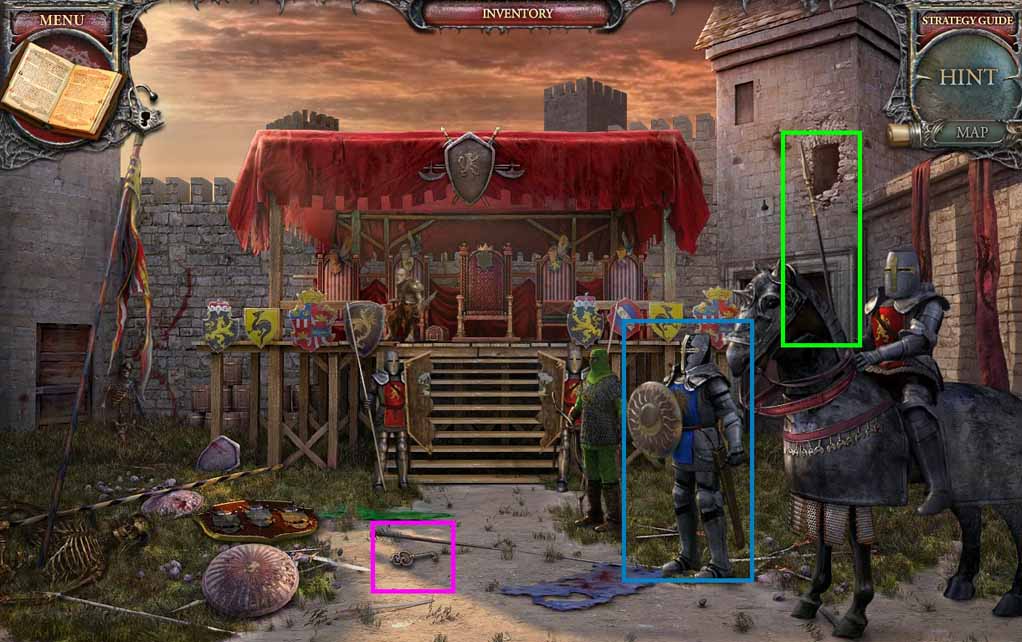
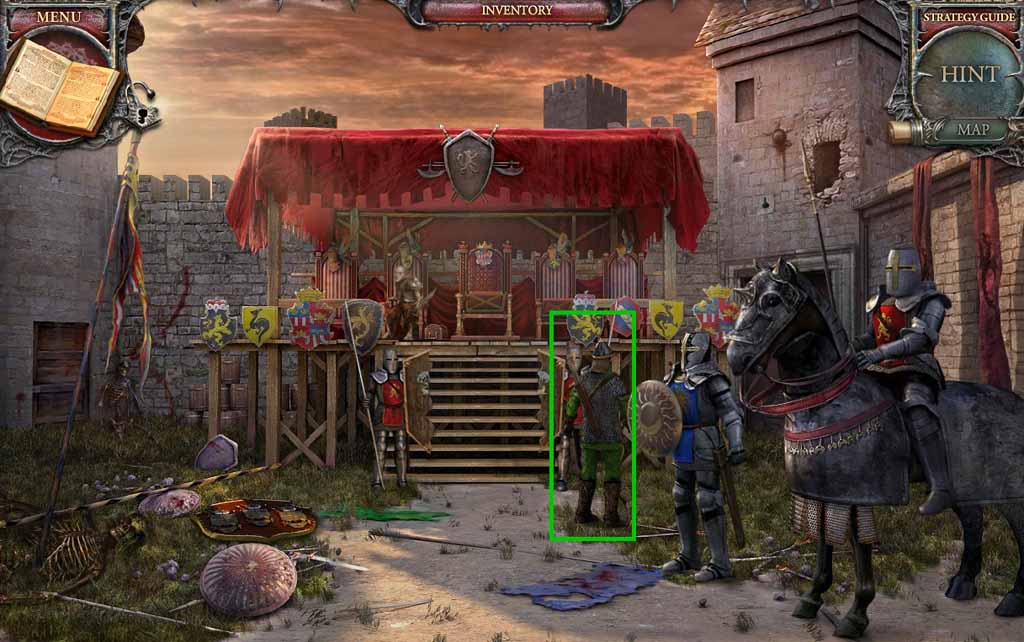
- Move ahead to the Jousting Grounds.
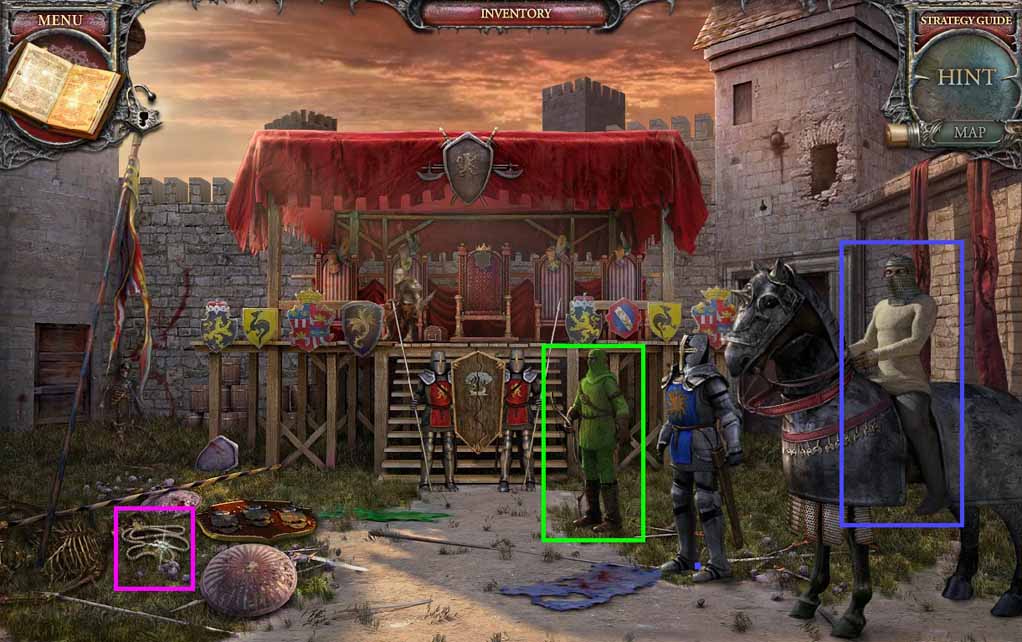
- Collect the bow string.
- Give the horseman the armor.
- Give the archer the chain armor.
- Move to the Cell.
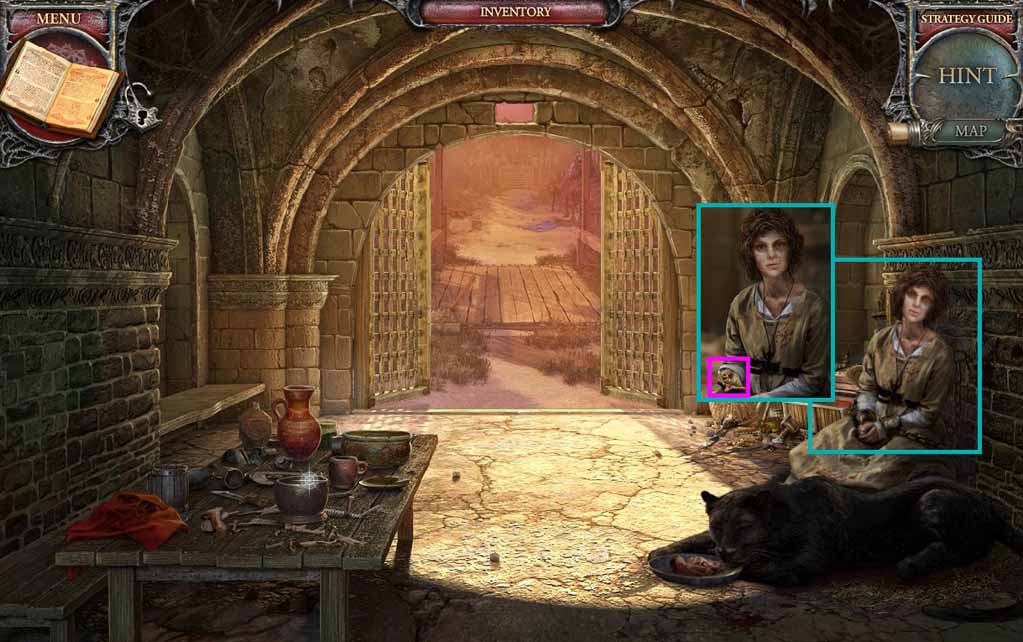
- Free the prisoner using the handcuff key.
- Collect the moon shaped key.
- Move to the Boudoir.
- Examine the desk.
- Insert the moon shaped key into the moon shaped drawer; collect the note and the toy tableware.
- Move to the Nursery.
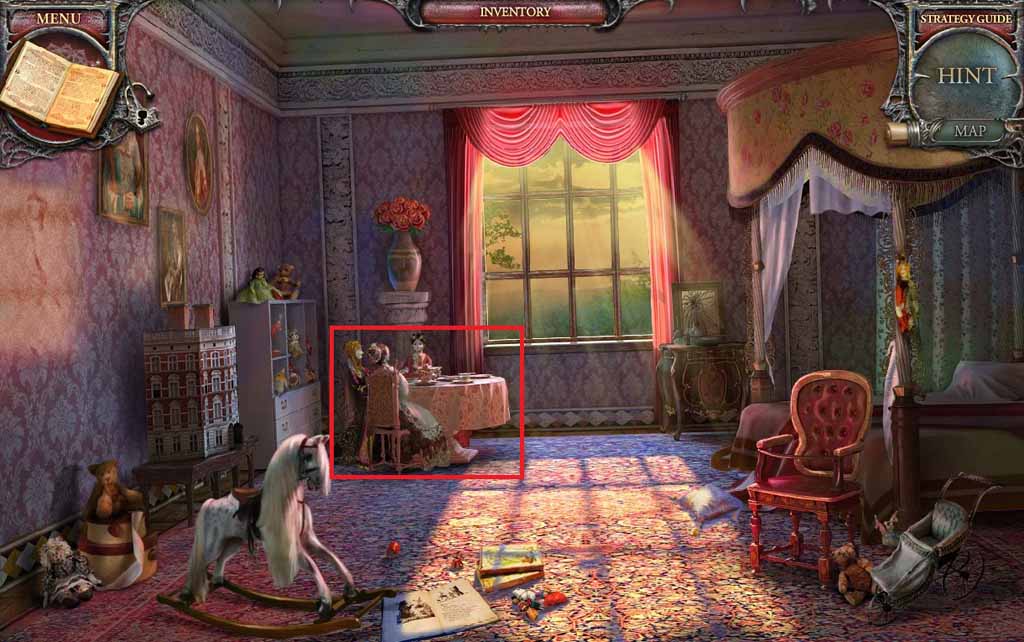
- Examine the table and place down the toy tableware to trigger a reverse hidden objects area.
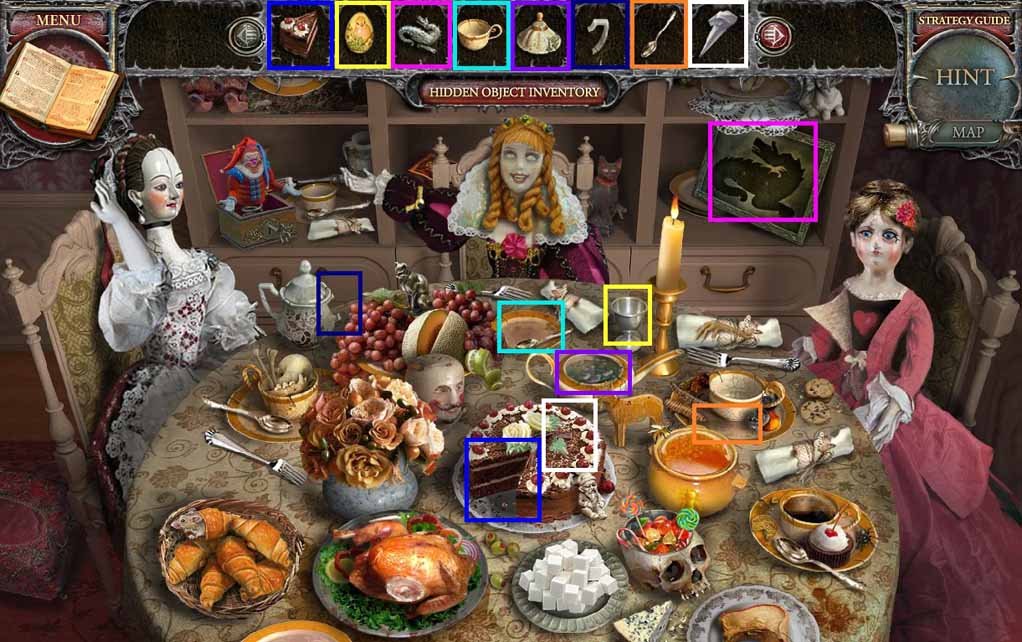
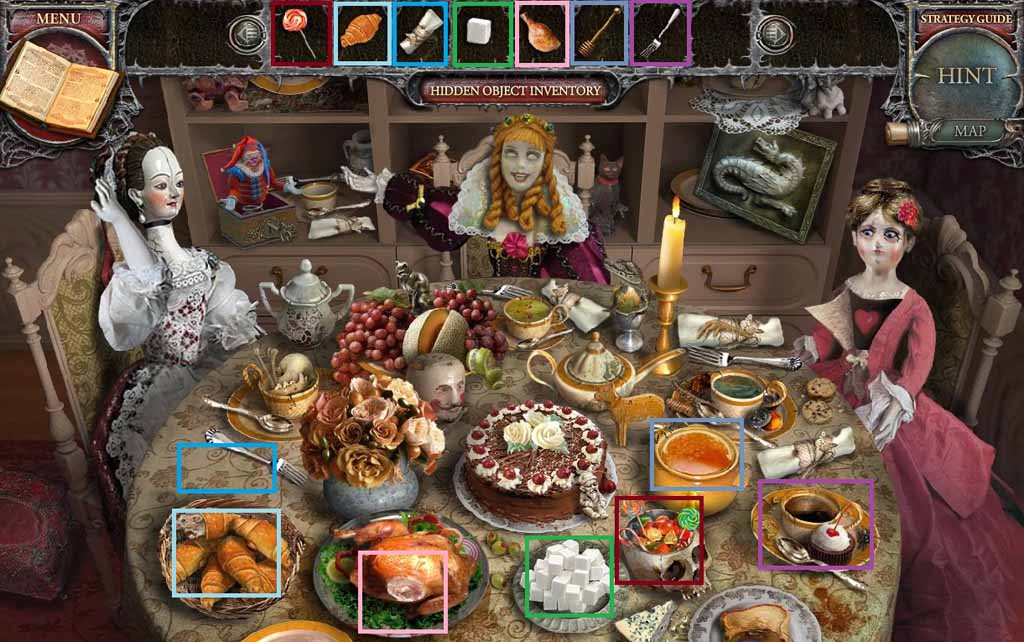
- Place the items where they belong.
- Collect the aqua vita.
- Move to the Cell.
- Give the prisoner the aqua vita; collect the handles.
- Move to the Jousting Grounds.

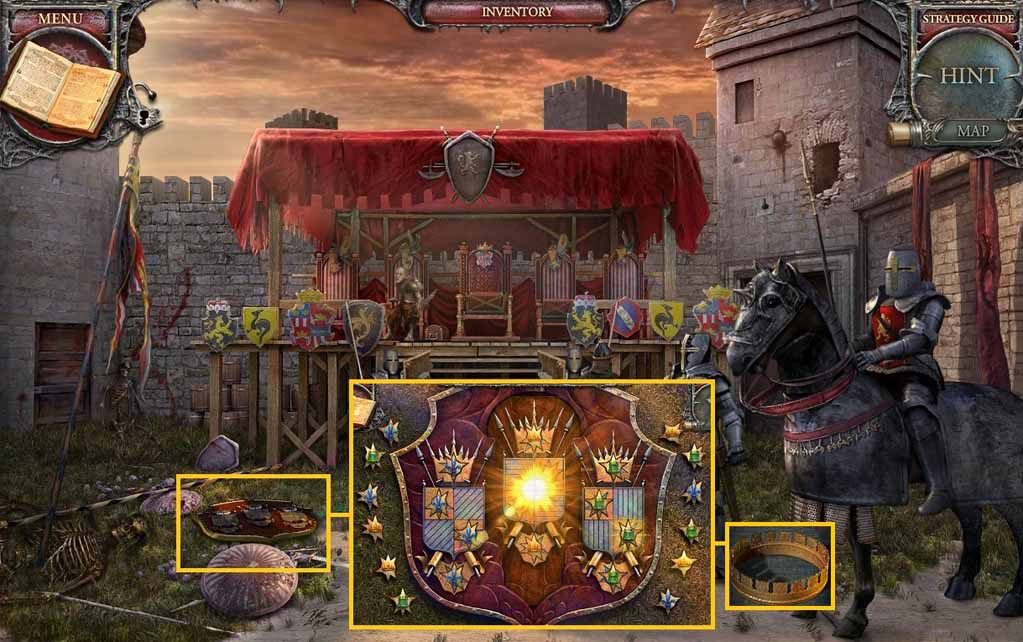
- Examine the shield and attach the handles to trigger a mini-game.
- Solve the game by clicking the handles until the shield all show the same images.
- Click the handles as follows: A- 2x’s , B- 11x’s , D – 9x’s, E – 2x’s, F – 10x’s
- Move ahead to the Podium.

- Click the seat on the right chair 2 times; collect the bracelet.
- Move to the Stairs.
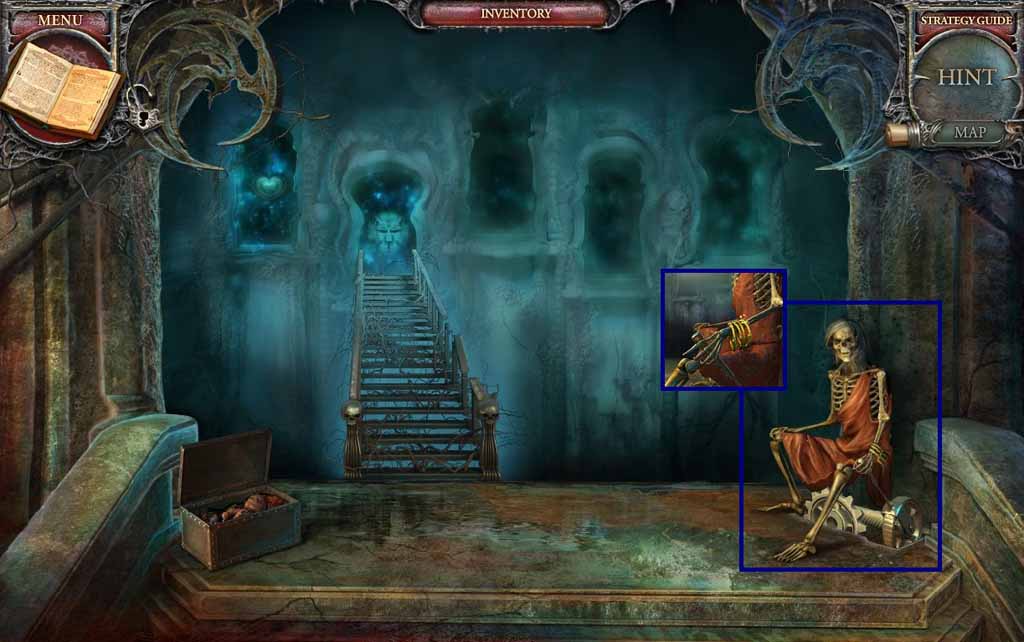
- Examine the skeleton; give him the bracelet.
- Enter the Feather Doorway.
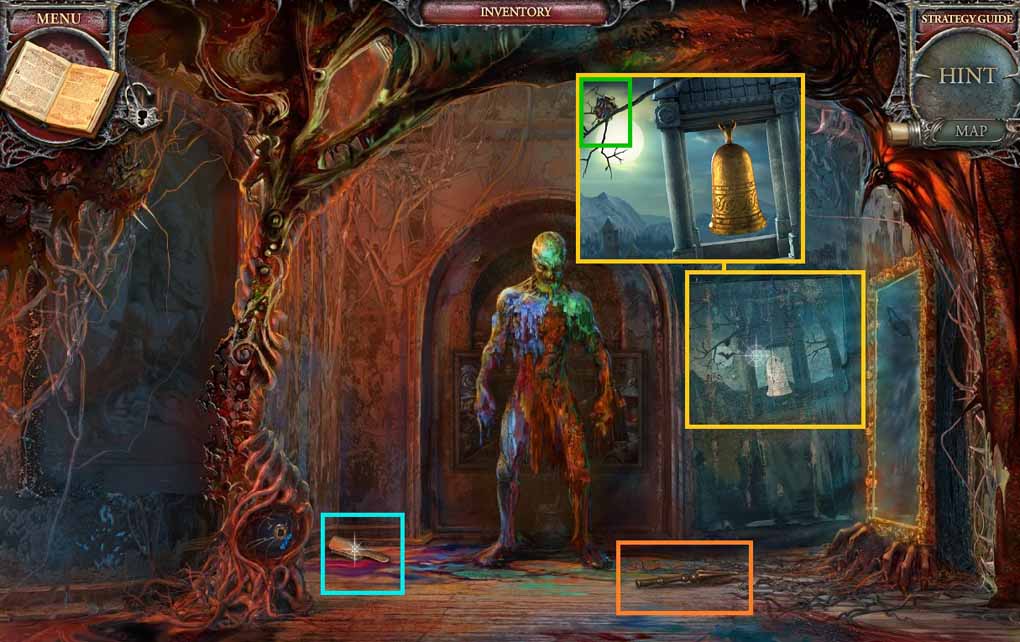
- Collect the spear point and the metal brush.
- Examine the mural; paint the bell yellow using the yellow paint.
- Collect the heraldry part.
- Move to the Mirror Room behind the Lion Doorway.
- Place the spear point onto the spear.
- Examine the shield and use the metal brush to scrub it.
- Collect the shield.
- Move to the Jousting Grounds.
- Give the blue knight the shield.
- Give the horseman the spear.
- Collect the chest key.
- Move to the Podium.
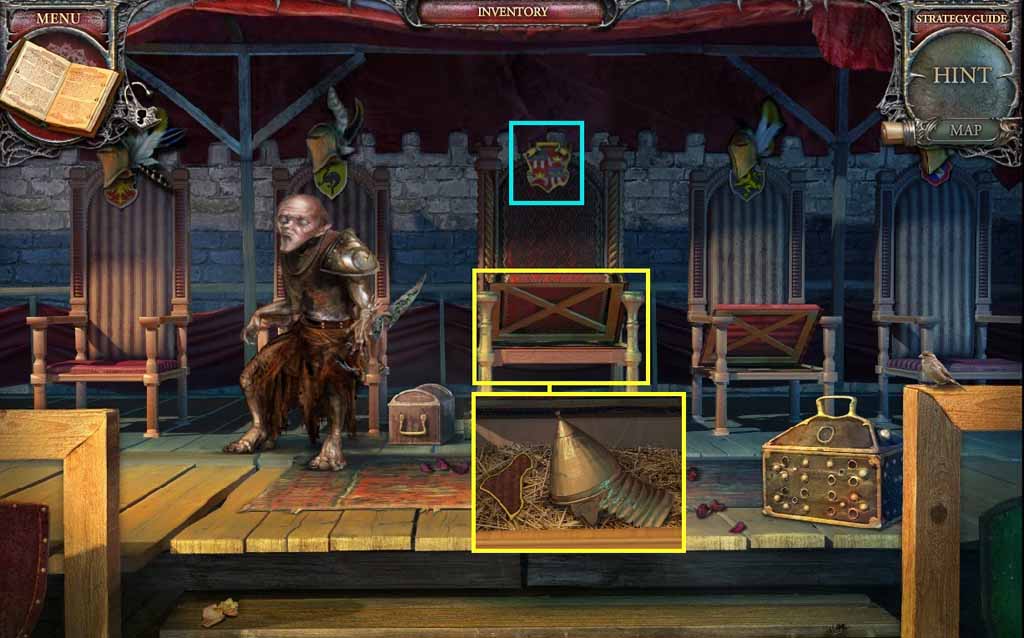
- Click the middle chair and insert the heraldry part.
- Click the chair again and collect the helmet and the map piece.
- Move down once.
- Give the archer the helmet; collect the arrows.
- Move into the Tent.
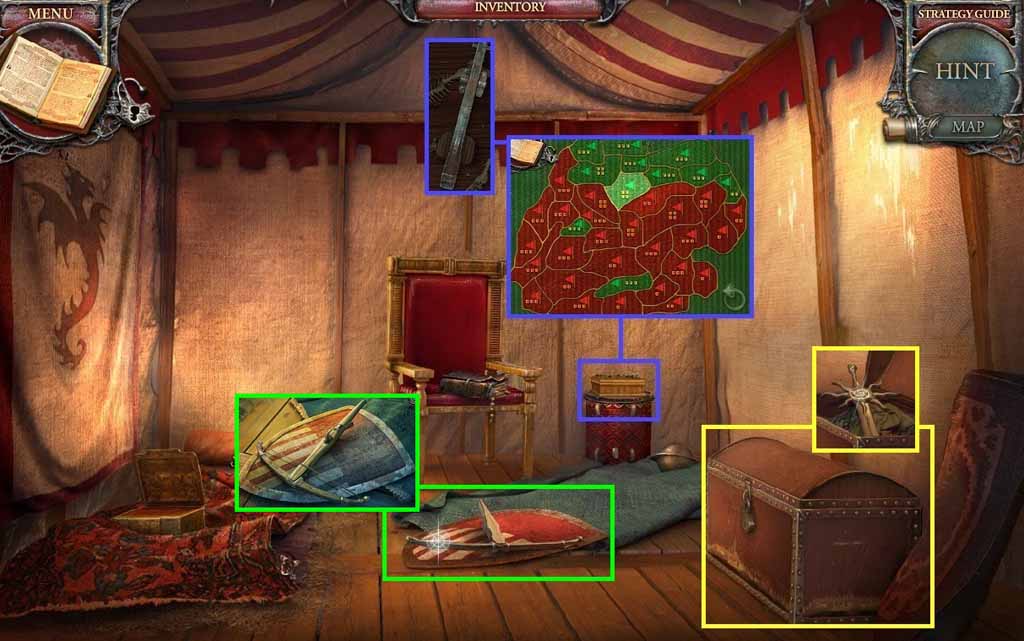
- Examine the small box and insert the map piece to trigger a mini-game.
- Solve the game by conquering the armies.
- Collect the crossbow part.
- Insert the chest key into the chest; collect the sword.
- Examine the crossbow and attach the bow string and the crossbow part.
- Collect the crossbow.
- Move down once.
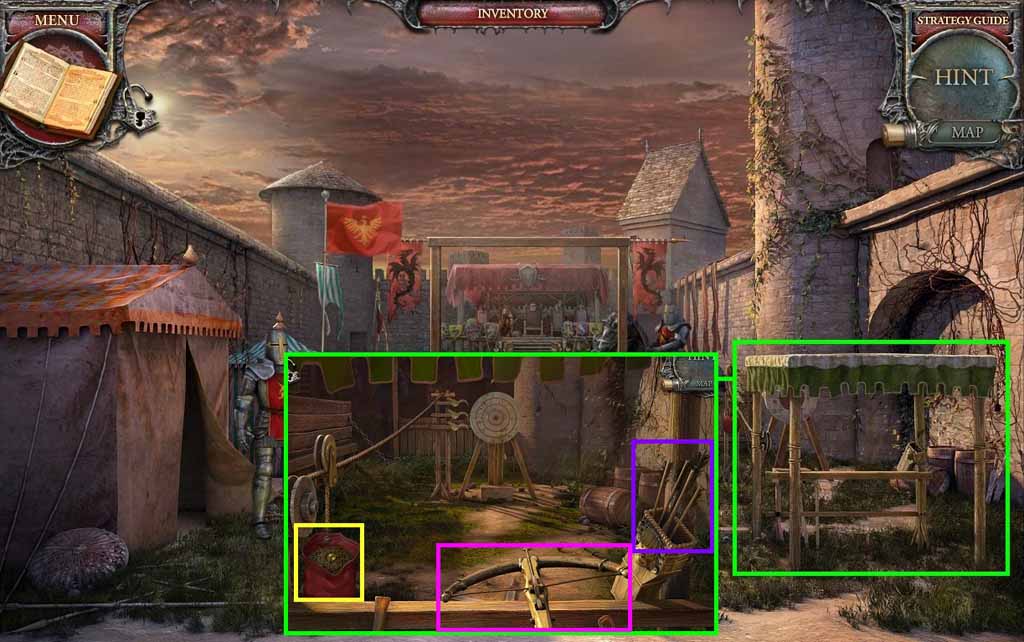
- Zoom into the Shooting Range.
- Place the arrows into the quiver.
- Put the crossbow onto the barrier to trigger a mini-game.
- Solve the game by hitting the bull’s eye 3 times.
- Collect the golden ring.
- Move down once and click the hidden objects area.

- Find the royal emblems.
- Click the loose brick; collect the royal emblem.
- Collect the royal emblems.
- Move to the Jousting Grounds.
- Examine the shield and place down the royal emblems to trigger a mini-game.
- Solve the game by fitting the emblems into their slots.
- Collect the golden crown.
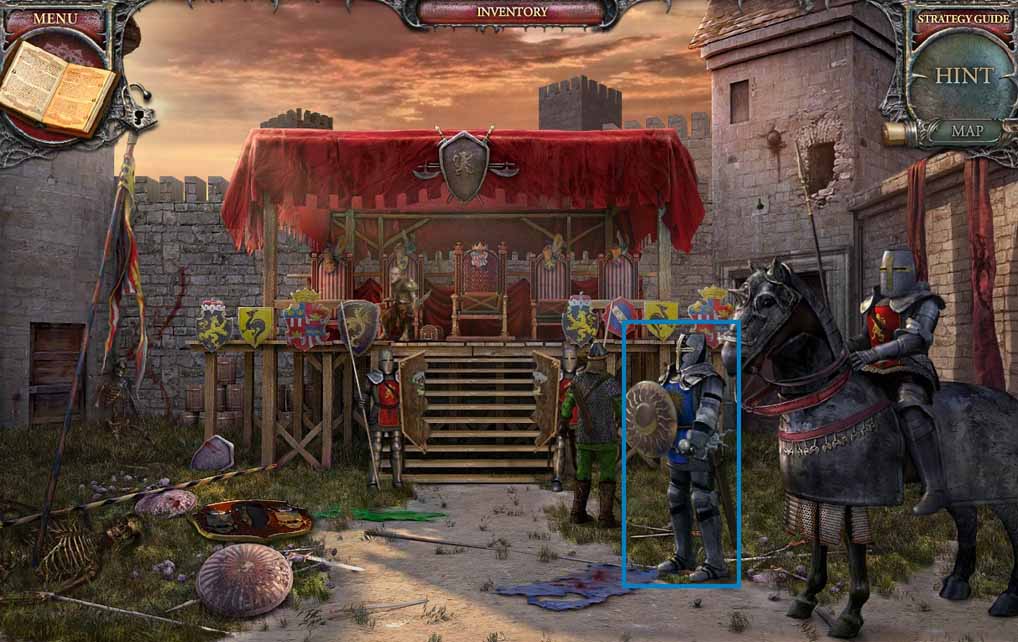
- Give the blue knight the sword; collect the big pearl.
- Move to the Podium.
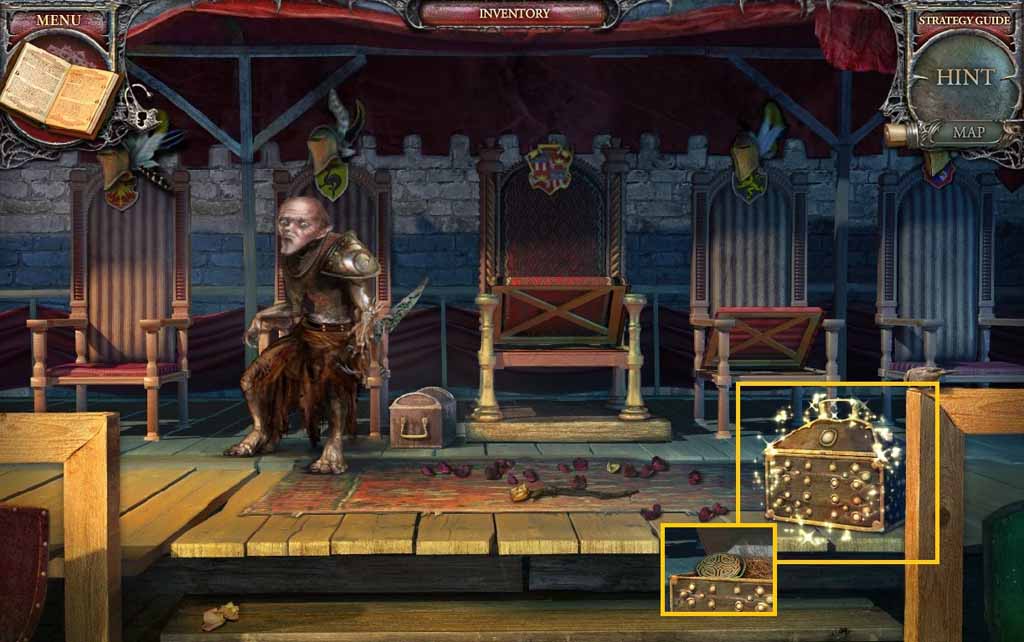
- Insert the Pearls and the Big Pearl into the chest; collect the golden buckle.
- Move to the Tent.
- Examine the chest.
- Place the golden crown, the golden ring and the golden buckle onto it; collect the metal swords.
- Move to the Mirror Room.
- Examine the metal grate.
- Place the metal swords onto the grate; collect the knight’s virtue.
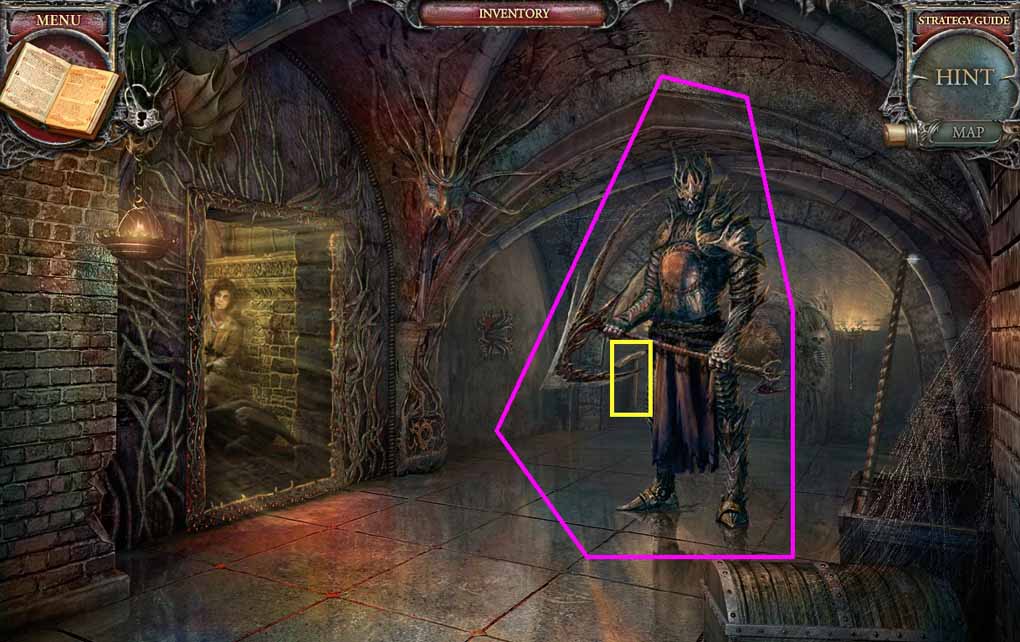
- Move to the Podium.
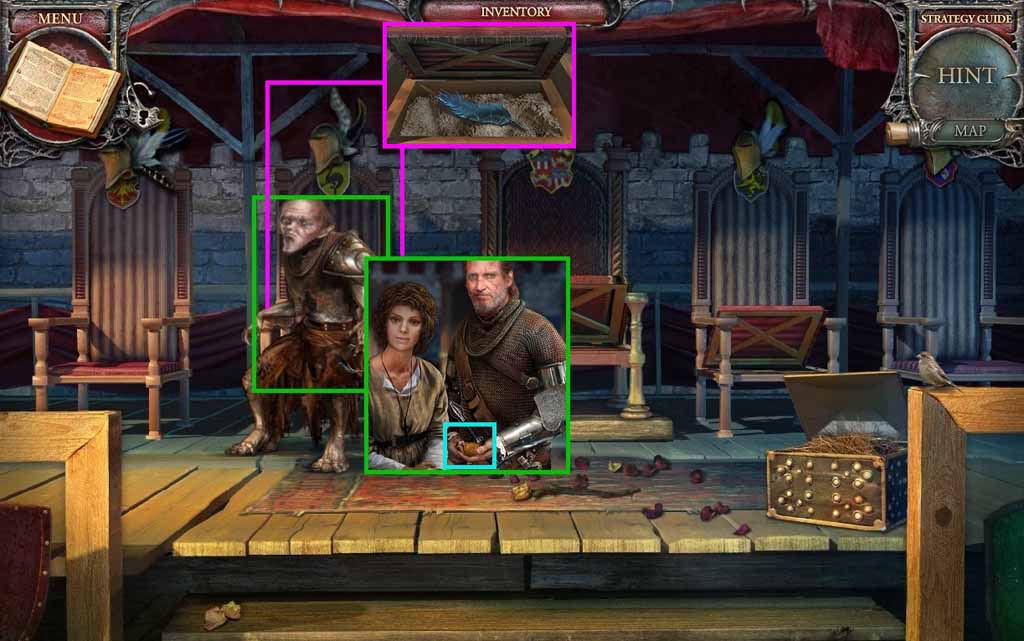
- Give the creature the Knight’s Virtue; collect the book amulet.
- Zoom into the seat of the chair on the left; collect the mirror shard.
- Move to the Book of Spells.
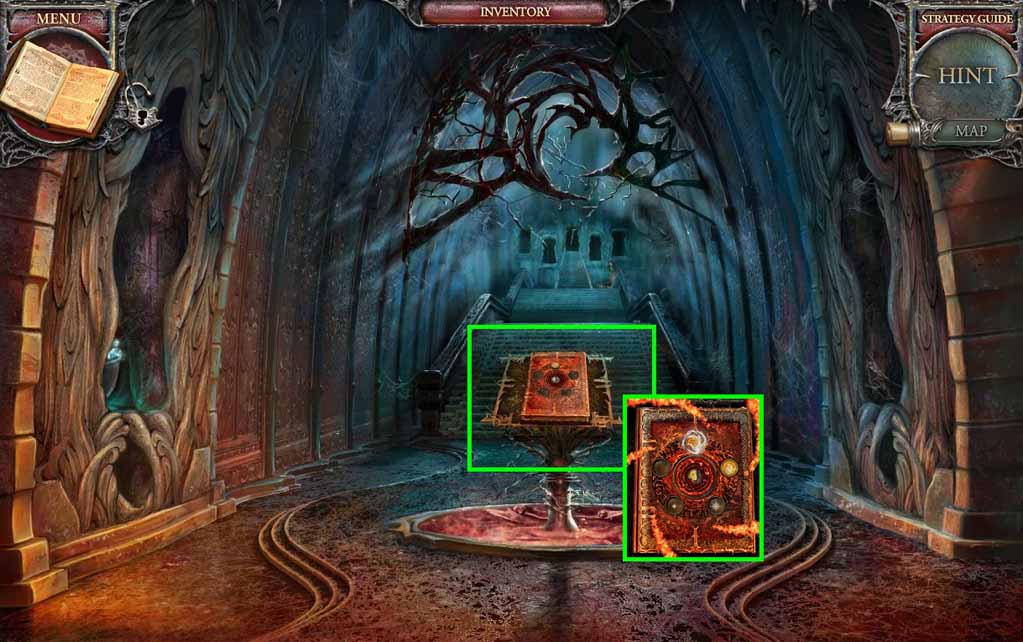
- Examine the book and insert the book amulet into it.
- Move to the Stairs and enter the Feather Doorway.
Comments will load when you reach this part of the walkthrough.