

Chapter One: Enter Sebastian’s Manor
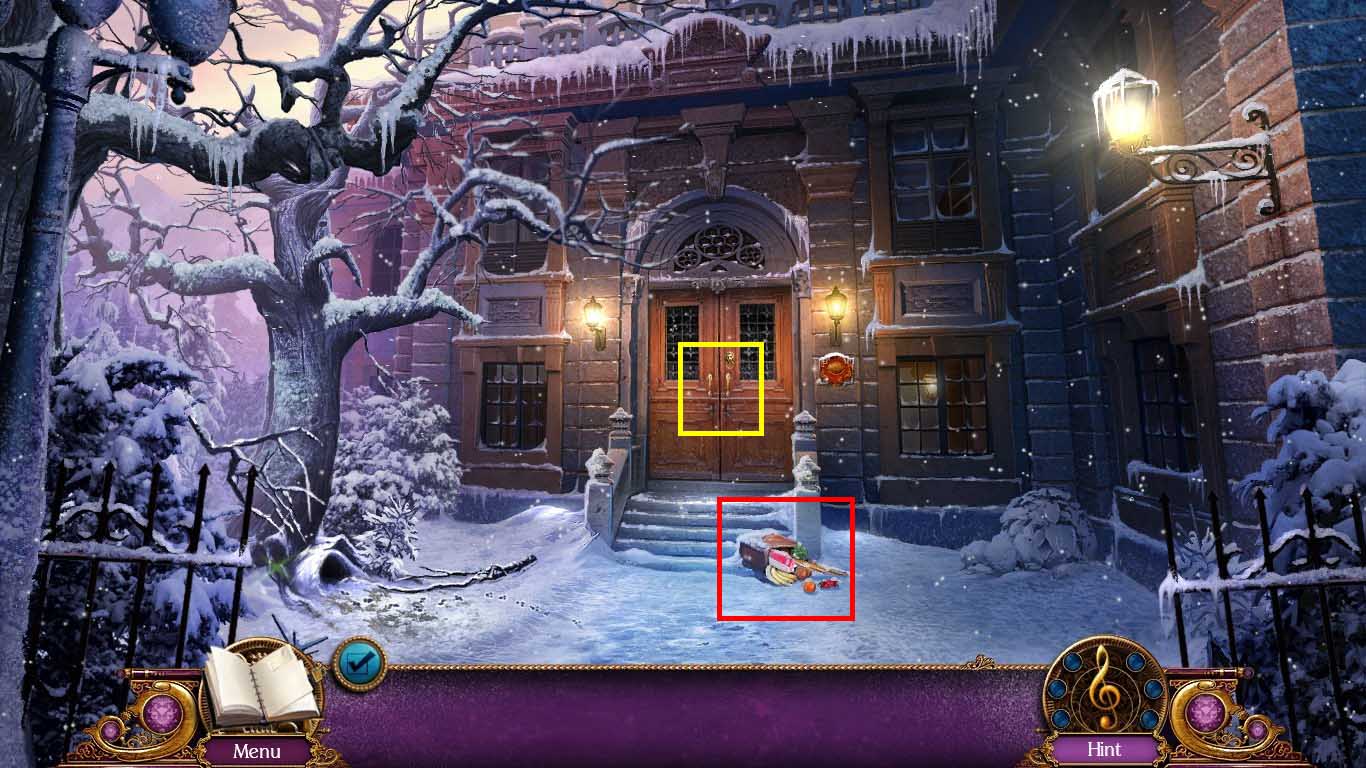
- Zoom into the door.
- Click the groceries to access a hidden objects area.
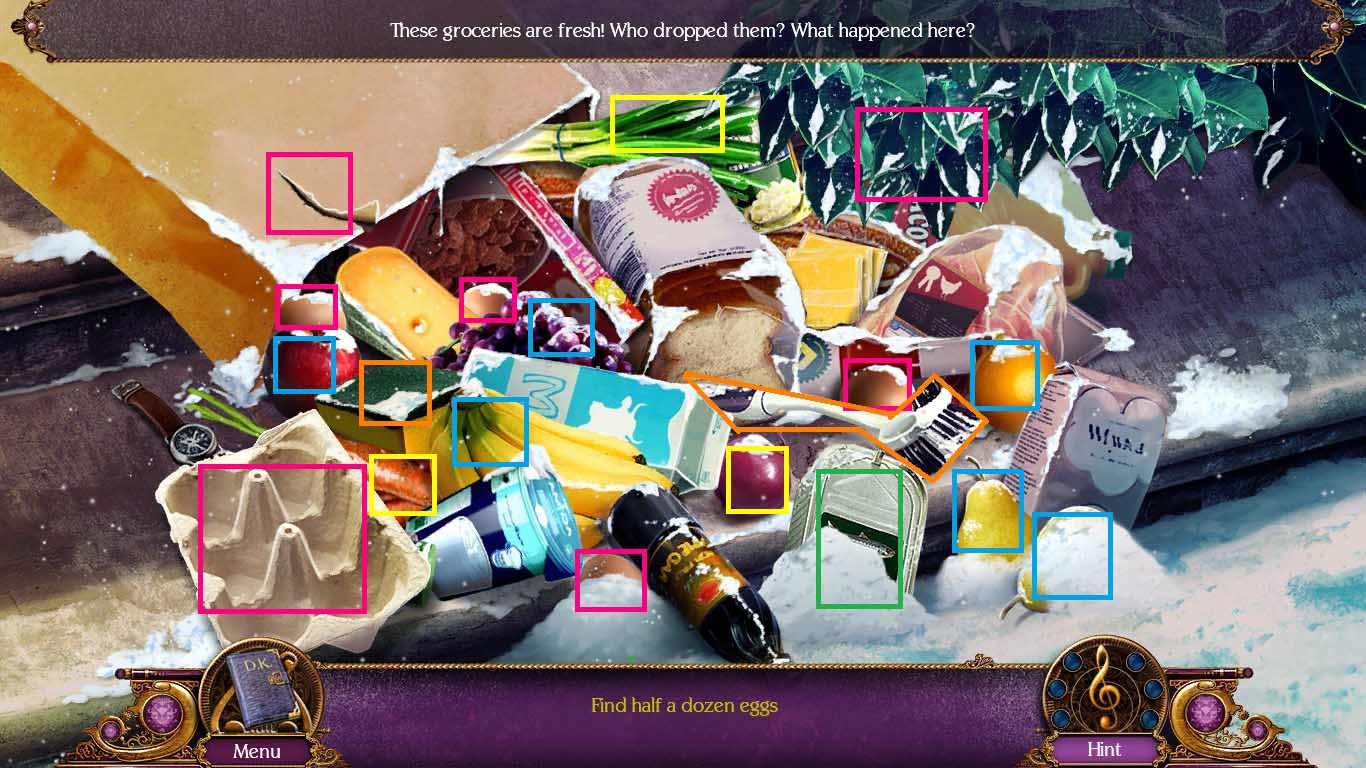
- Click and drag the leaves and rip the bag open.
- Find the six eggs and put them into the carton to collect the half dozen eggs.
- Find the five fruits.
- Find the three vegetables.
- Find the two cleaning utensils.
- Use the can opener on the can of sardines; click the opener.
- Collect the open can of sardines.
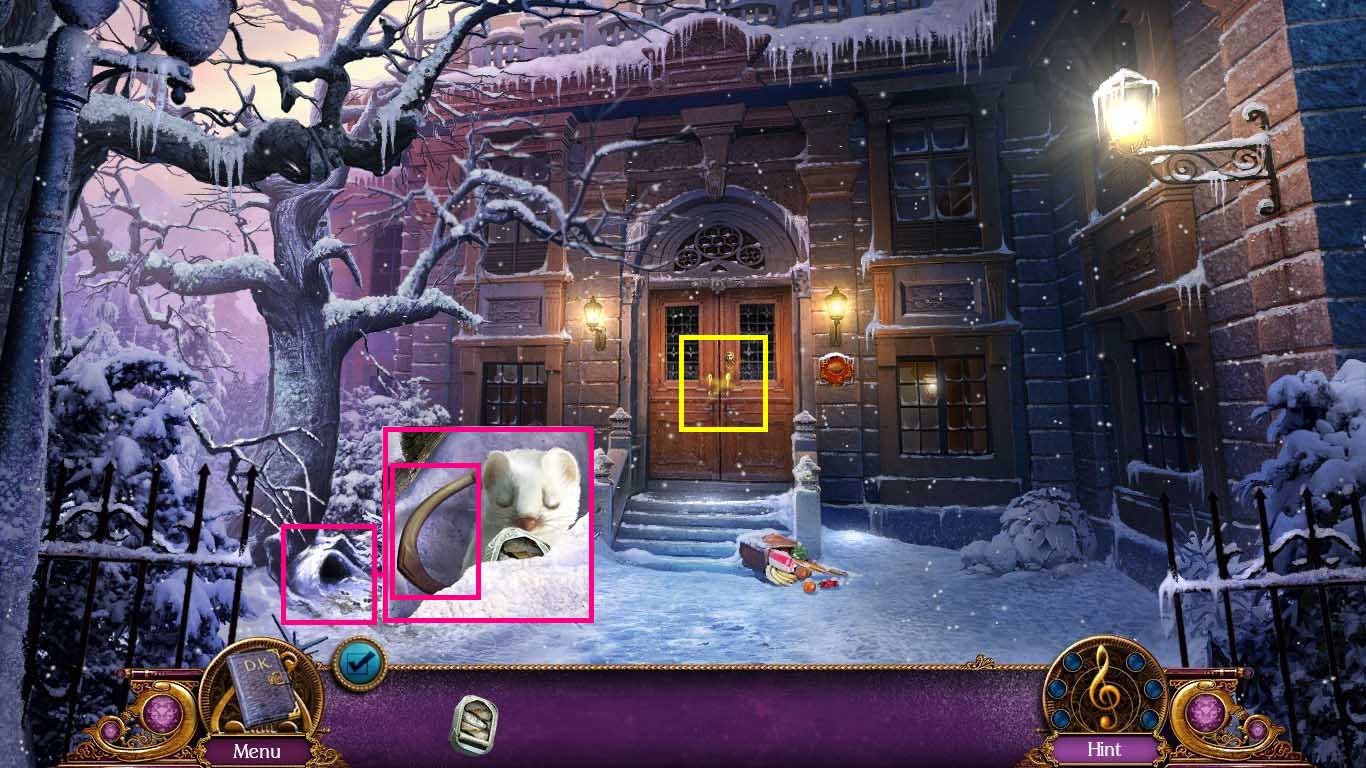
- Examine the burrow.
- Try to get the brass knocker.
- Give the ermine the sardines and collect the brass knocker.
- Examine the door.
- Place the brass knocker into the lion’s mouth.
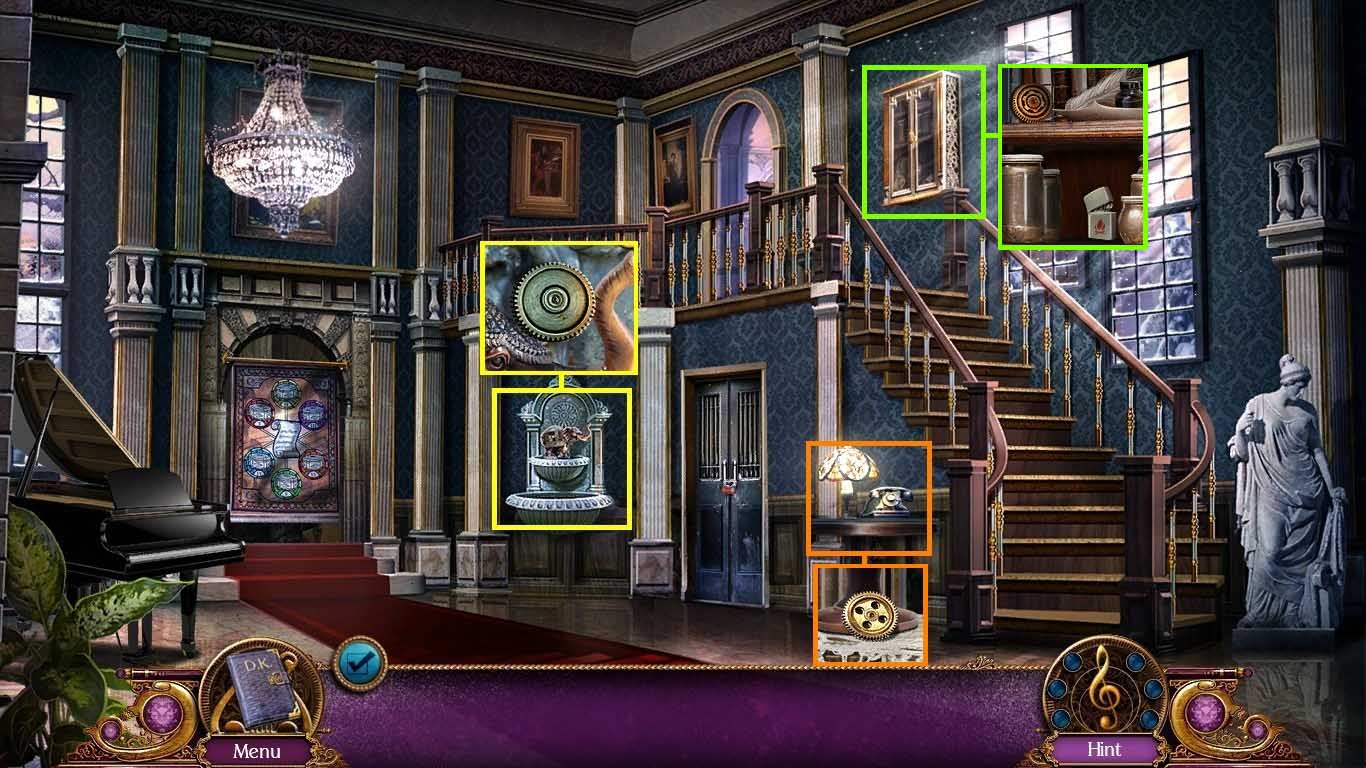
- Examine the fountain; collect the 1/10 gear.
- Examine the side table; click the phone and collect the 2/10 gear.
- Examine the cabinet; click the handle to open the door.
- Click the jars.
- Collect the lighter and the 3/10 gear.
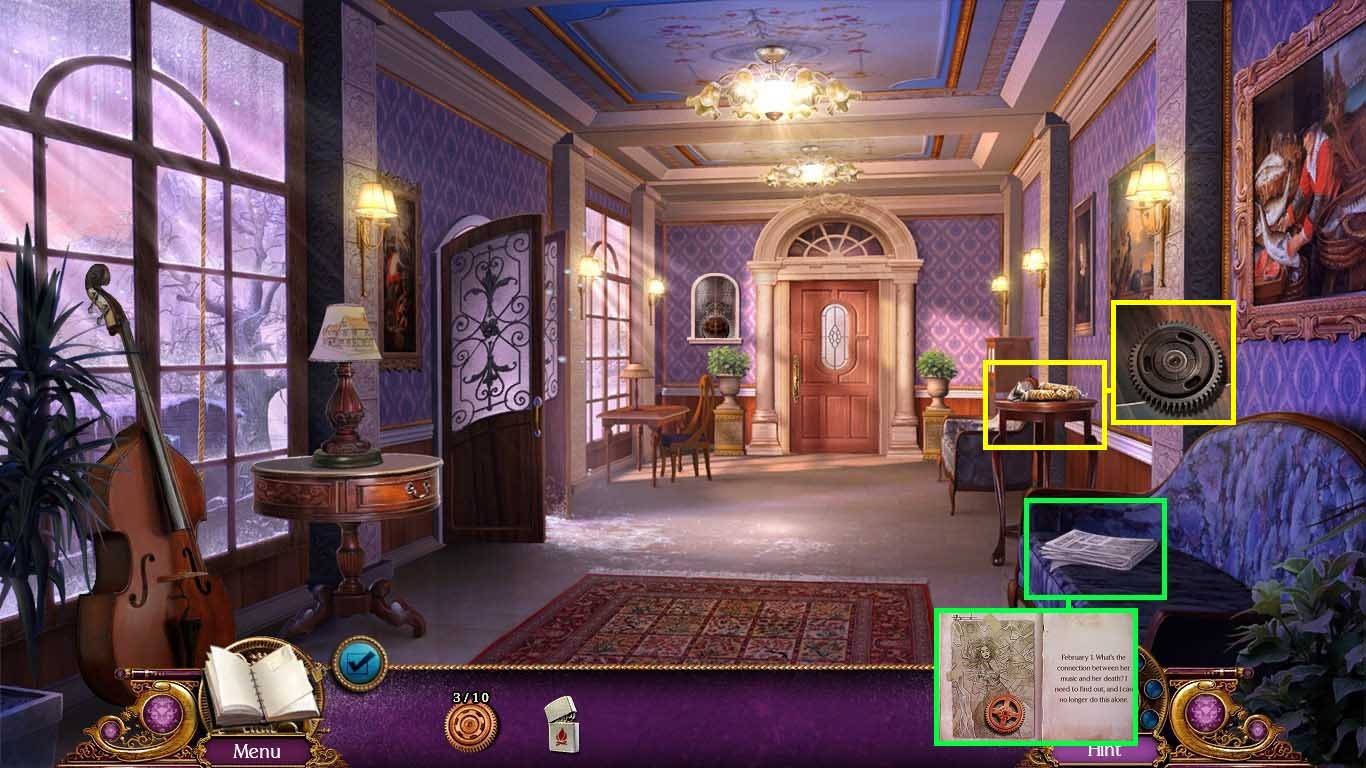
- Examine the newspaper and collect it.
- Click the pages of the book two times to collect the 4/10 gear.
- Examine the side table; collect the 5/10 gear
- Go left to the ski lift.
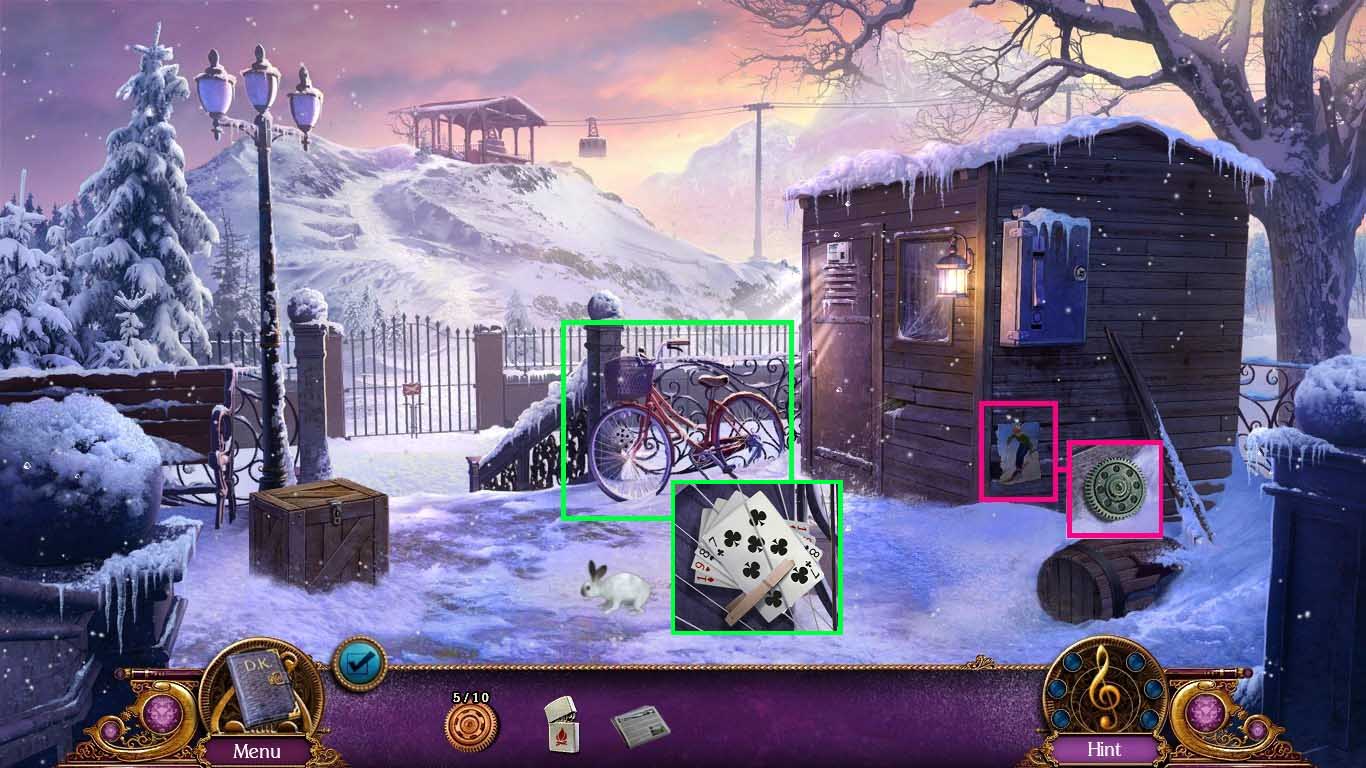
- Examine the poster; click it to remove it.
- Collect the 6/10 gear.
- Examine the bike; click the snow away and collect the cards to get the bike lock code.
- Walk down two times to the grand foyer.
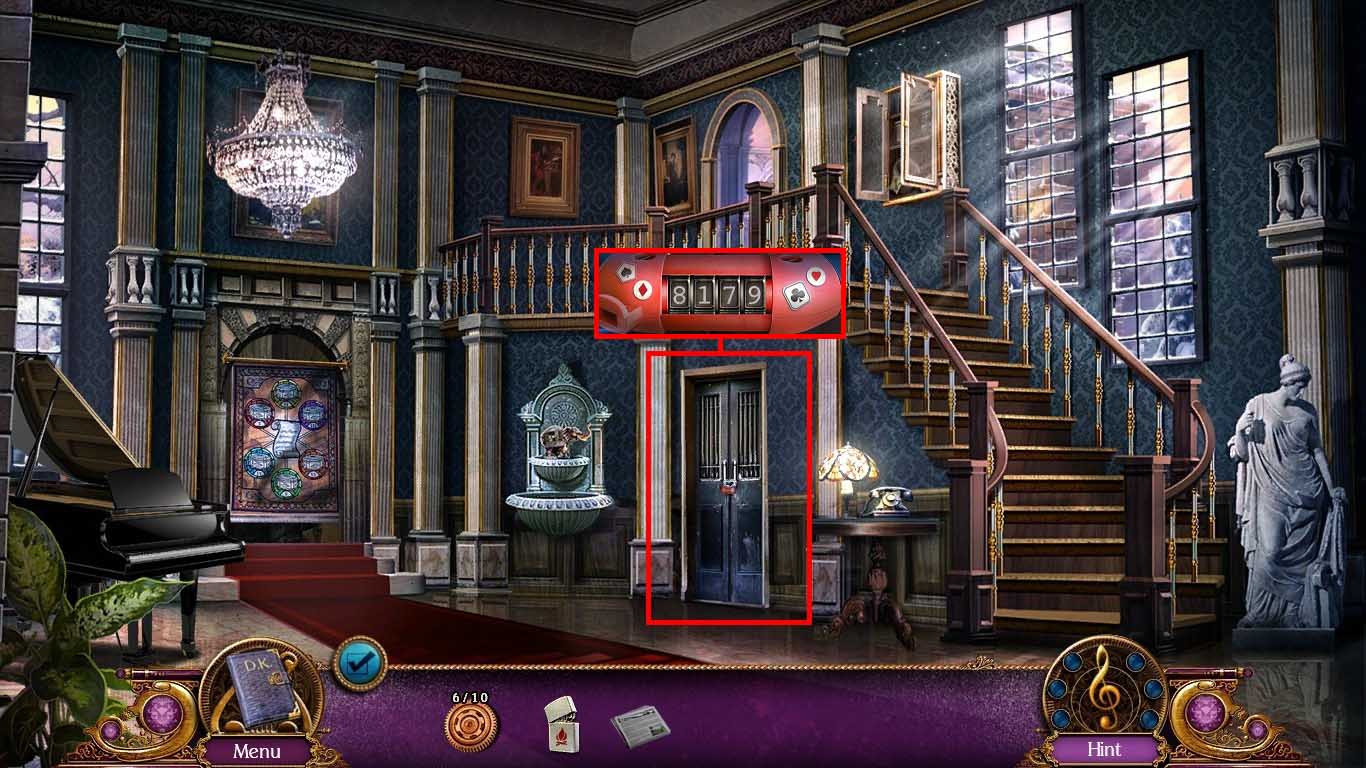
- Examine the storage room; open the lock using the code: 8179.
- Examine the storage room again to access a hidden objects area.
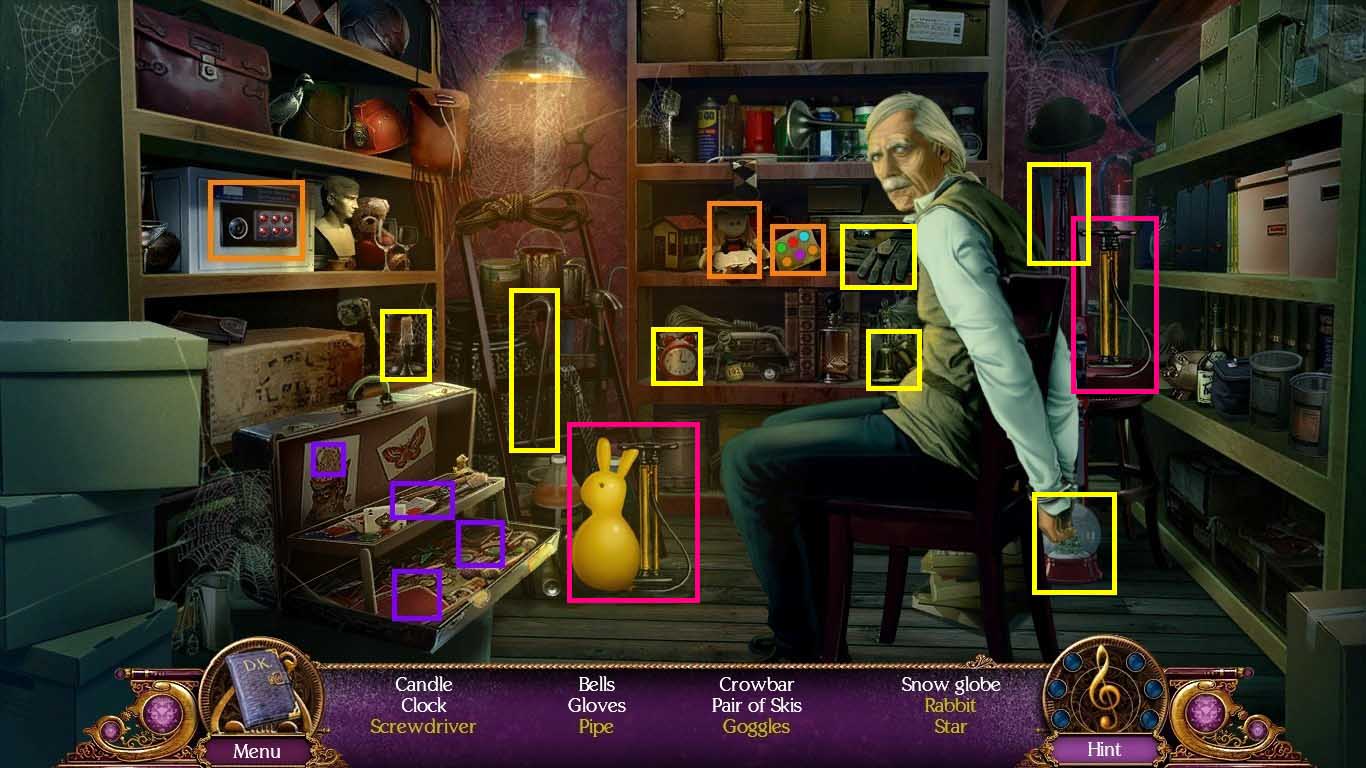
- Click the doll to get the safe code.
- Examine the safe and set the color coded buttons.
- Collect the key; open the luggage with it.
- Examine the luggage.
- Collect the pump; inflate the balloon with it and collect the rabbit.
- Find the remaining items on the list.
- Collect the screwdriver.
- Go to the ski lift.
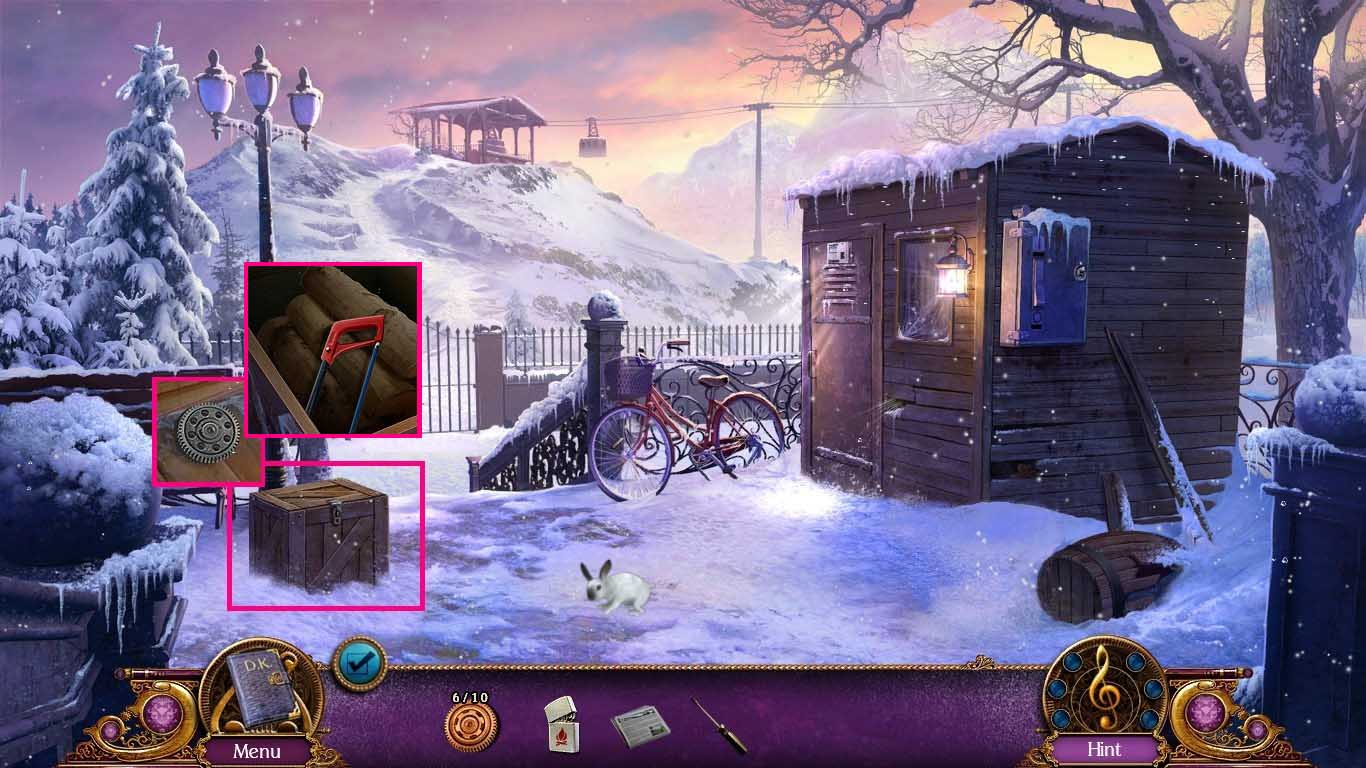
- Examine the crate.
- Collect the 7/10 gear; use the screwdriver to remove the screws.
- Click the crate open; collect the hacksaw and the logs.
- Walk down two times to the grand foyer and enter the storage room.
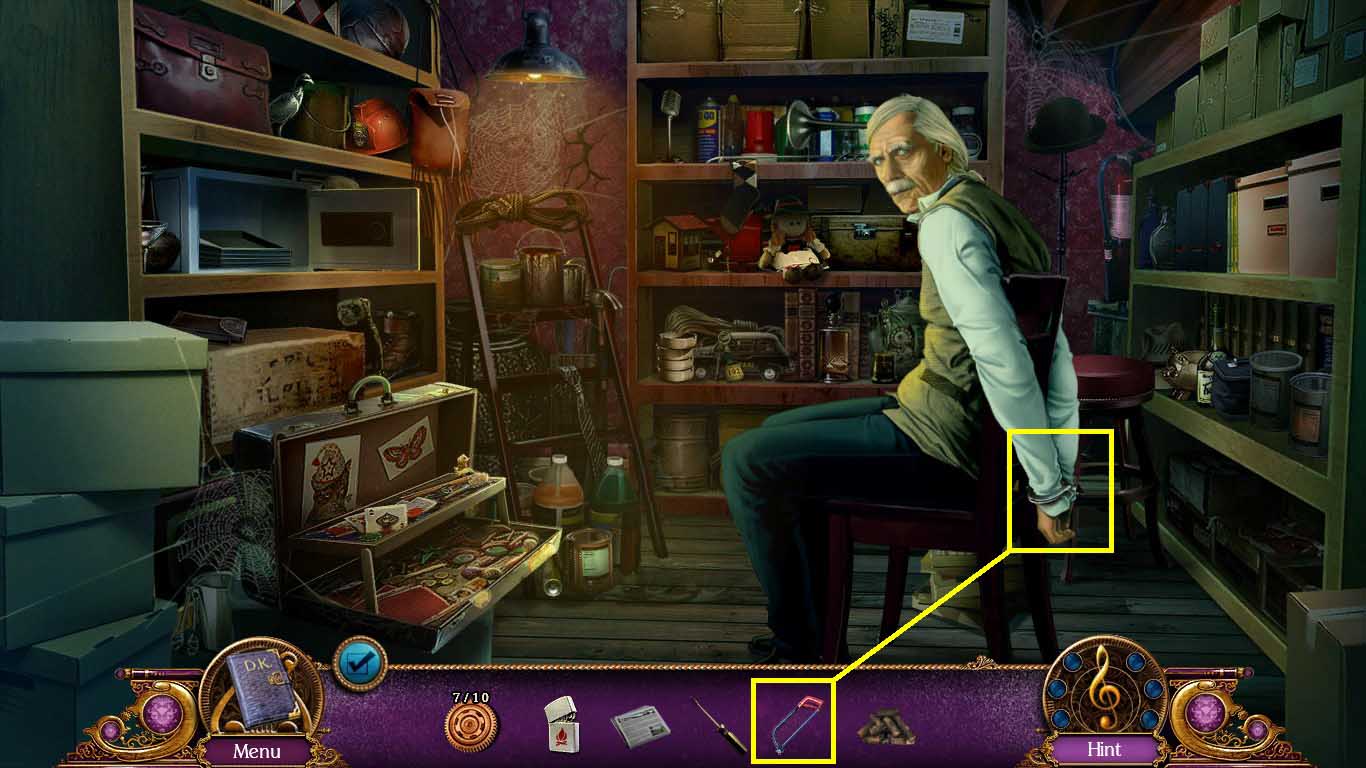
- Use the hacksaw to cut the bonds and set the butler free.
- Collect the room key.
- Go forward to the hallway.
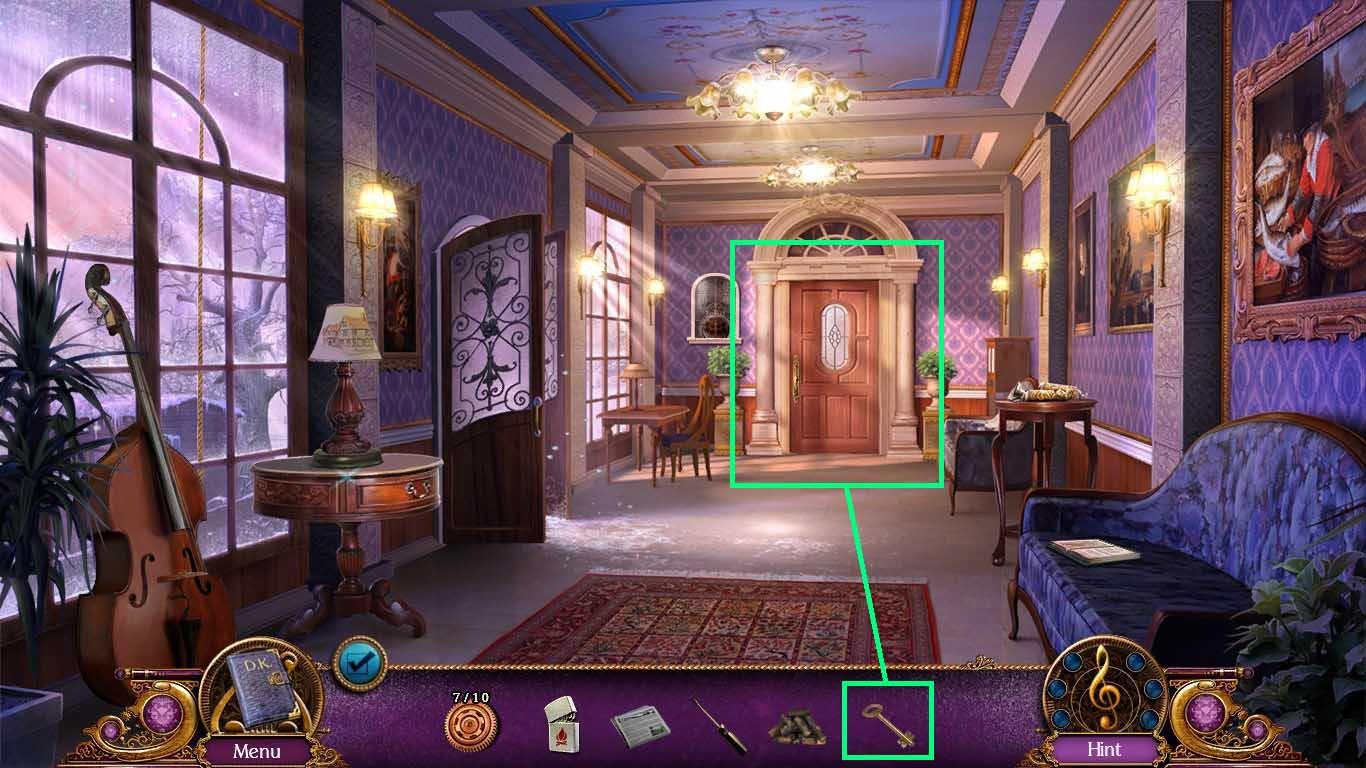
- Examine the door; insert the room key into the lock and open the door.
- Go forward.
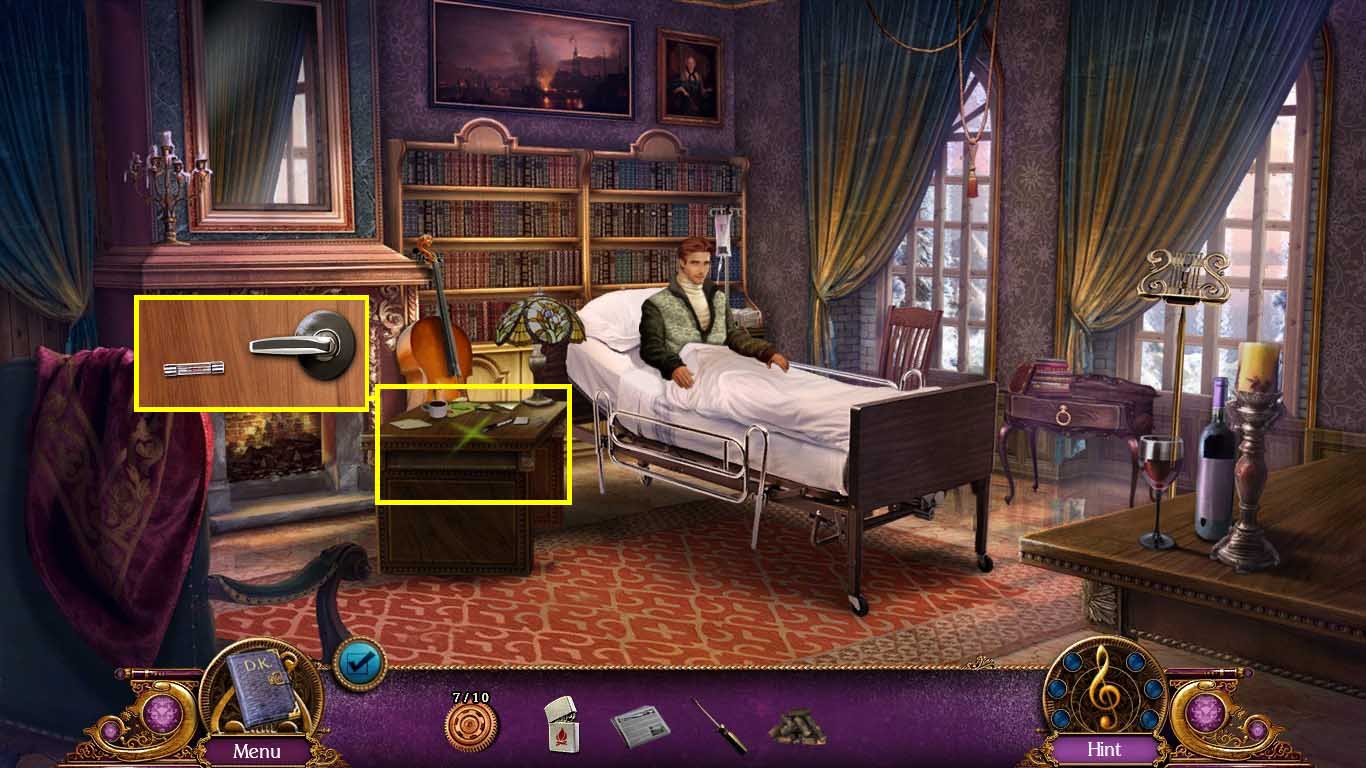
- Click Sebastian.
- Examine the desk and collect the 1/5 fuse and the door handle.
- Back out of the desk scene.
- Walk down two times to the grand foyer.
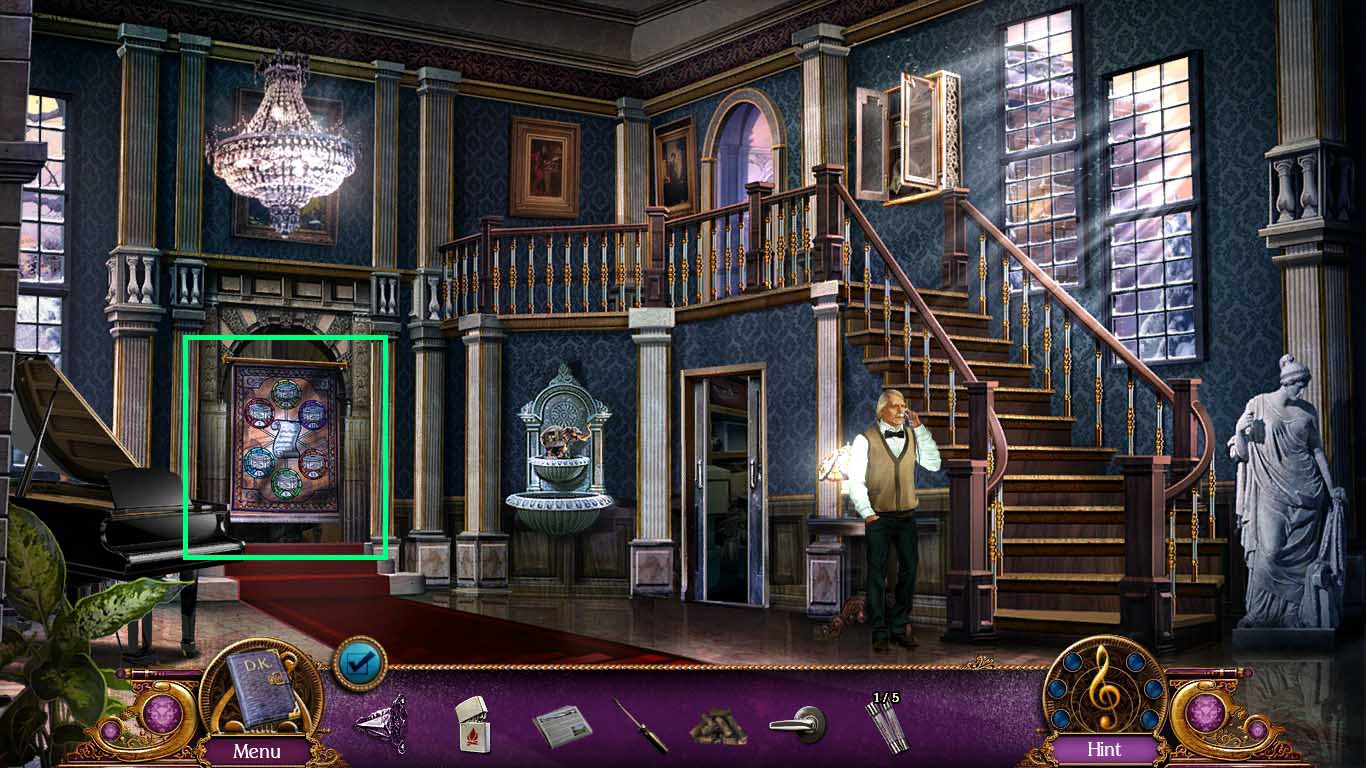
- Examine the tapestry and click it to remove it.
- Move into the hallway.
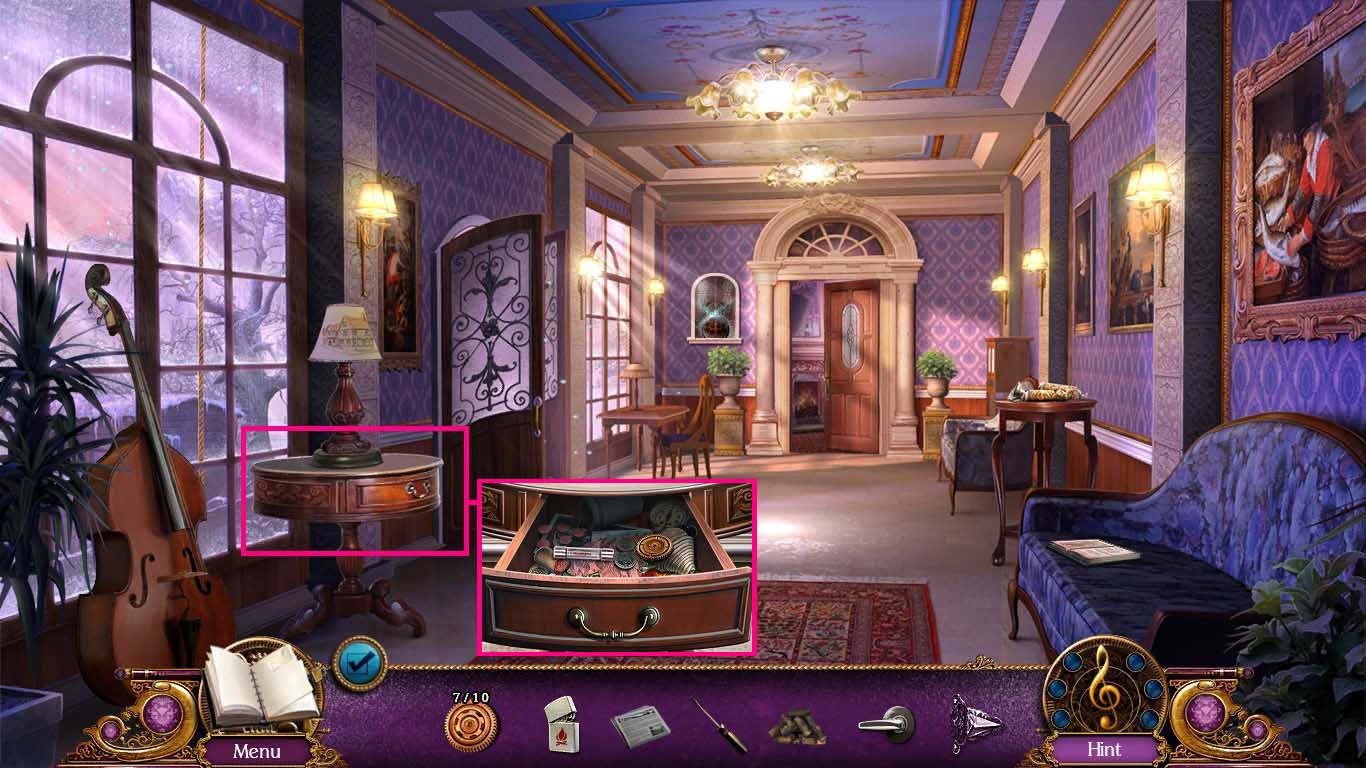
- Examine the side table; use the screwdriver to open the drawer.
- Collect the 8/10 gear and the 2/5 fuse.
- Walk down two times to the main entrance.
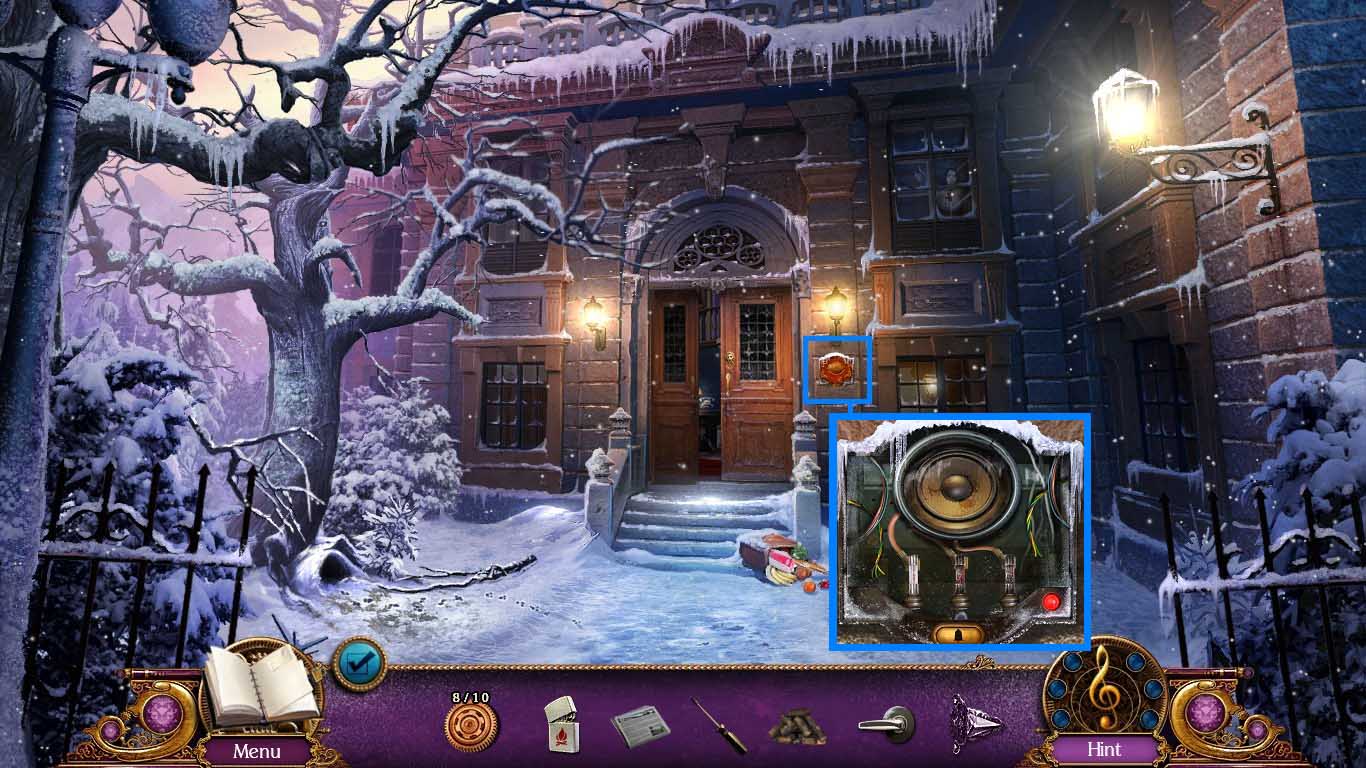
- Examine the intercom.
- Use the screwdriver on the screws to remove the lid.
- Collect the 3/5 fuse.
- Go forward two times and go left to the ski lift.
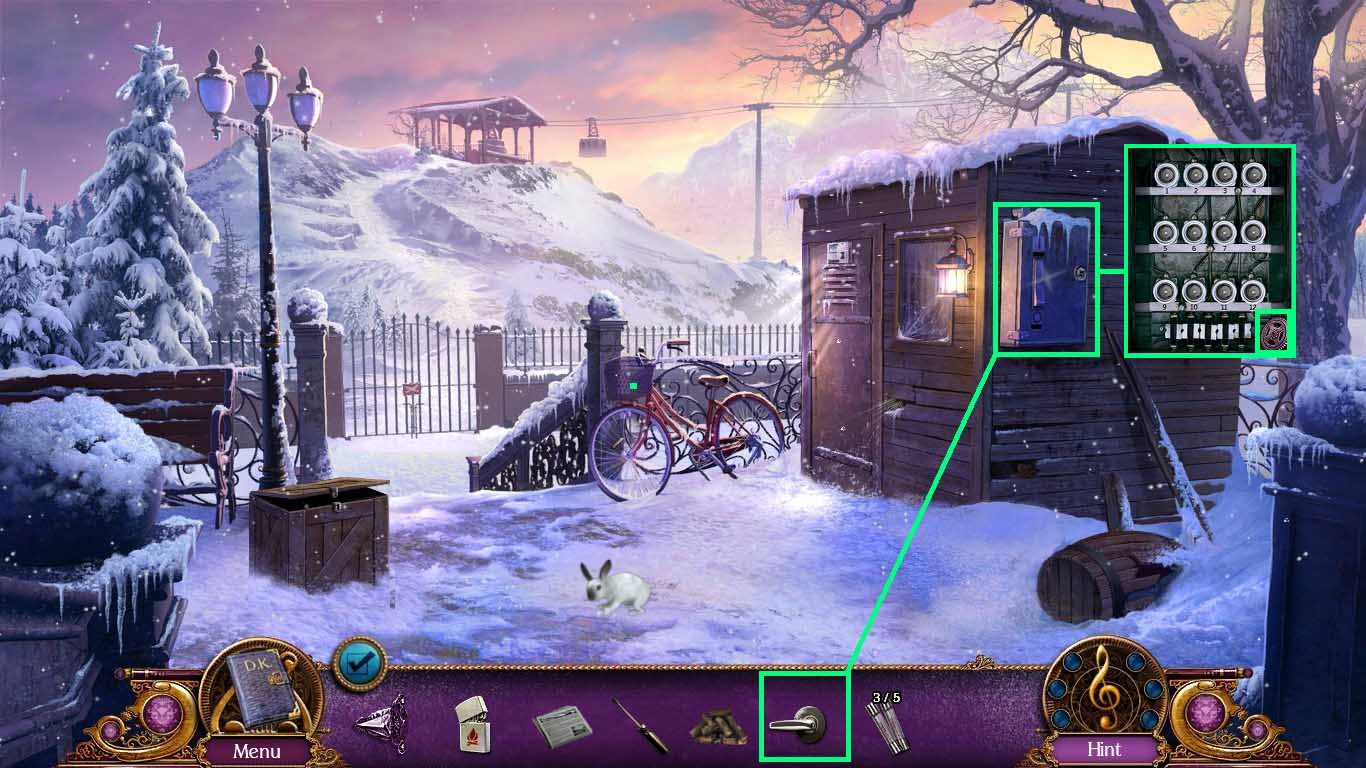
- Examine the circuit breaker; insert the door handle.
- Click it to open the door.
- Collect the 9/10 gear.
- Walk down two times to the grand foyer.
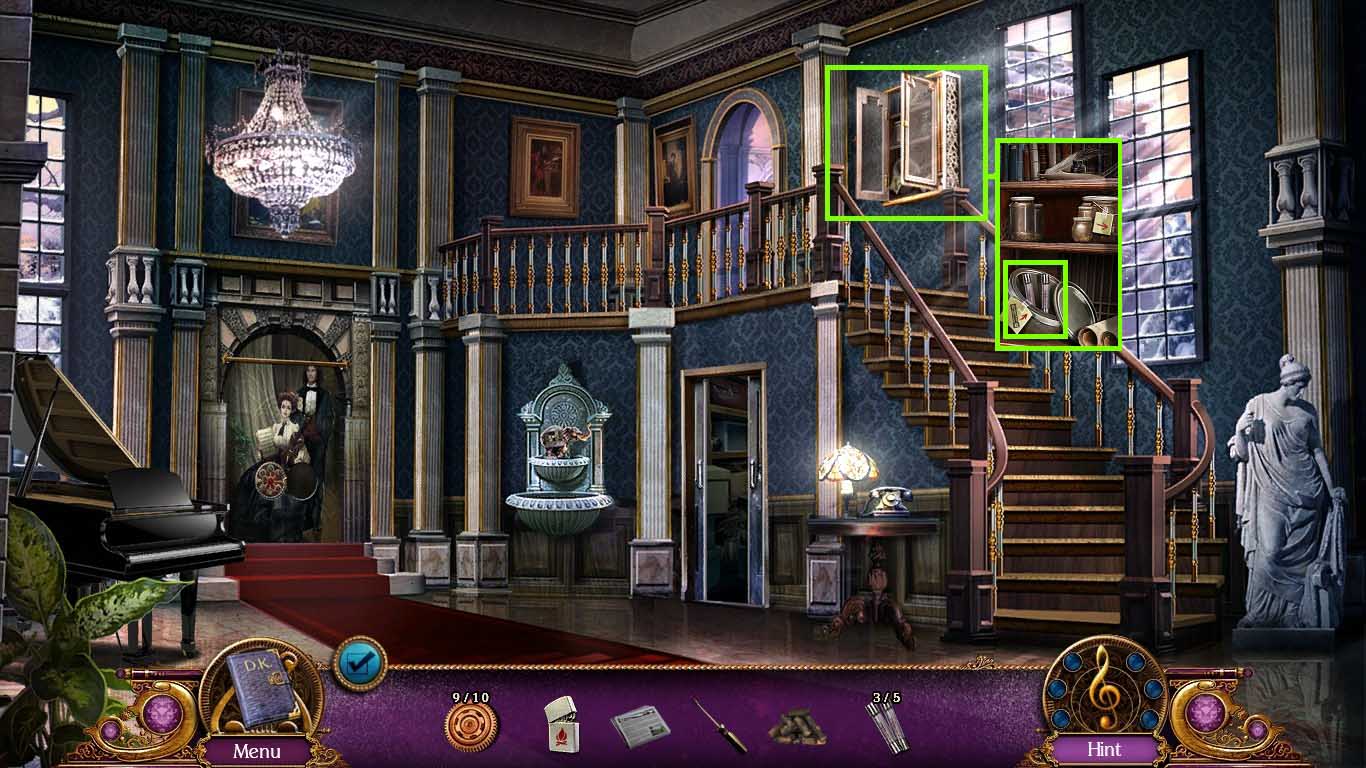
- Examine the cabinet; use the screwdriver to open the box.
- Collect the 4/5 fuse and the 5/5 fuse.
- Go forward and go left to the ski lift.
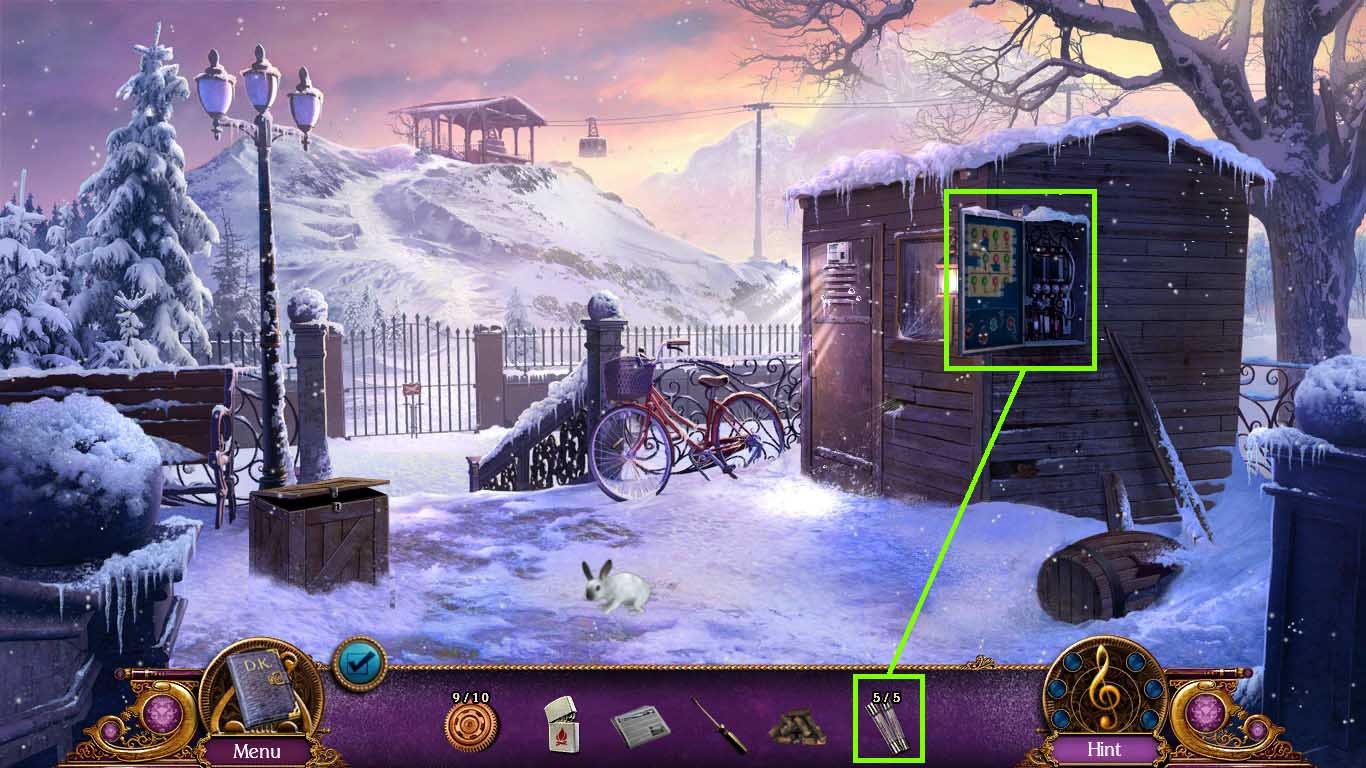
- Examine the circuit breaker; insert the 5 fuses.
- Play the mini-game.
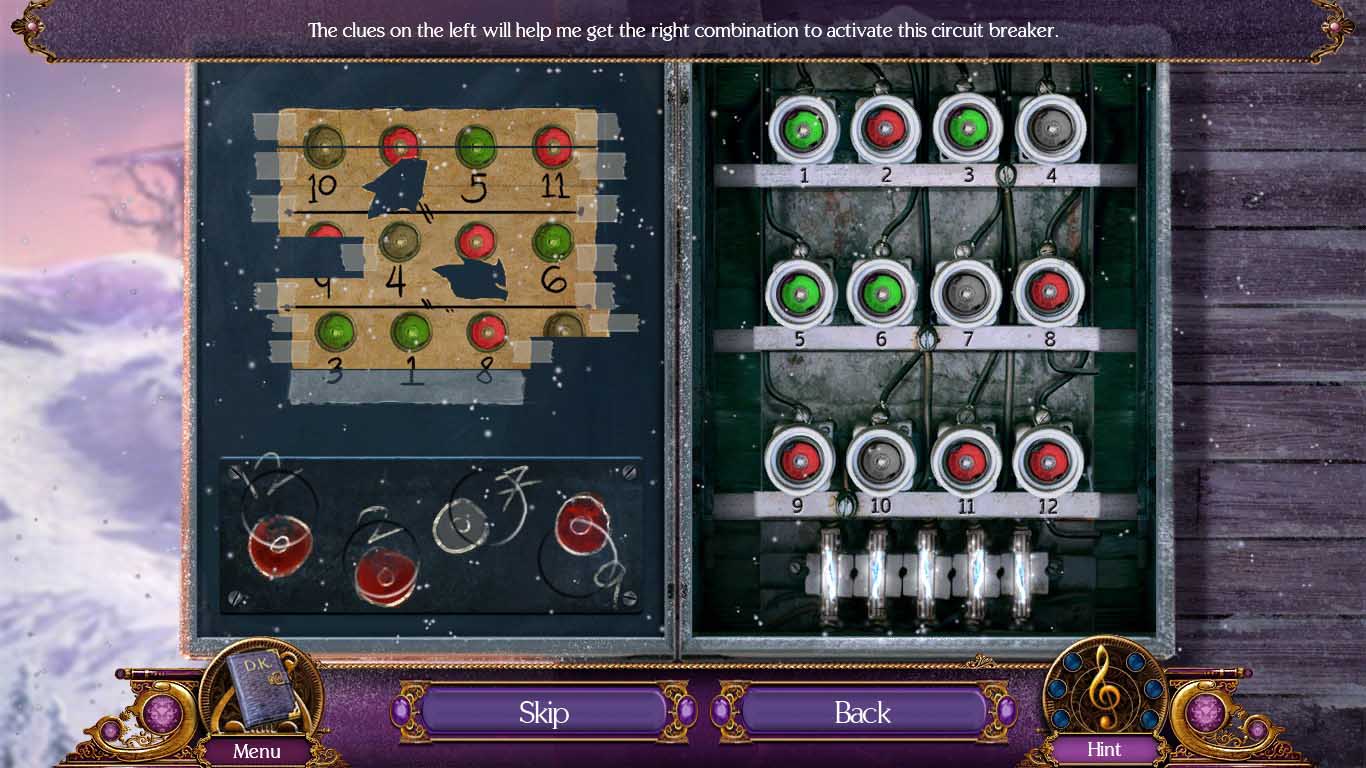
- Re-organize the clues.
- Click the bulbs to change the colors.
- Solve as shown above.
- Examine the shed to access the hidden objects area.
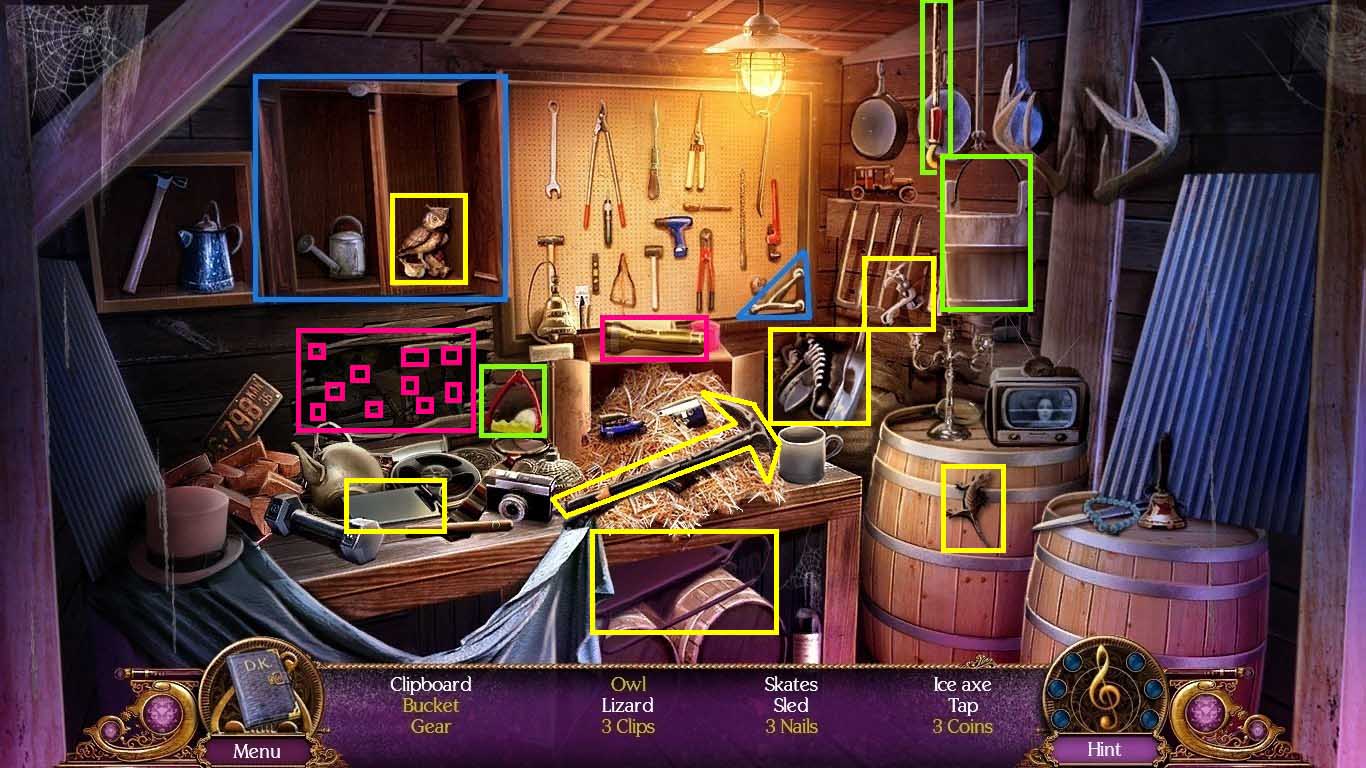
- Collect the handle and place it onto the cabinet.
- Click the cabinet open and collect the owl.
- Collect the red handle, add it to the hook, click the handle and collect the bucket.
- Use the flashlight to examine the dark hole.
- Collect the gear, 3 clips, 3 nails and 3 coins.
- Find the remaining items on the list.
- Collect the 10/10 gears.
- Walk down one time into the hallway.
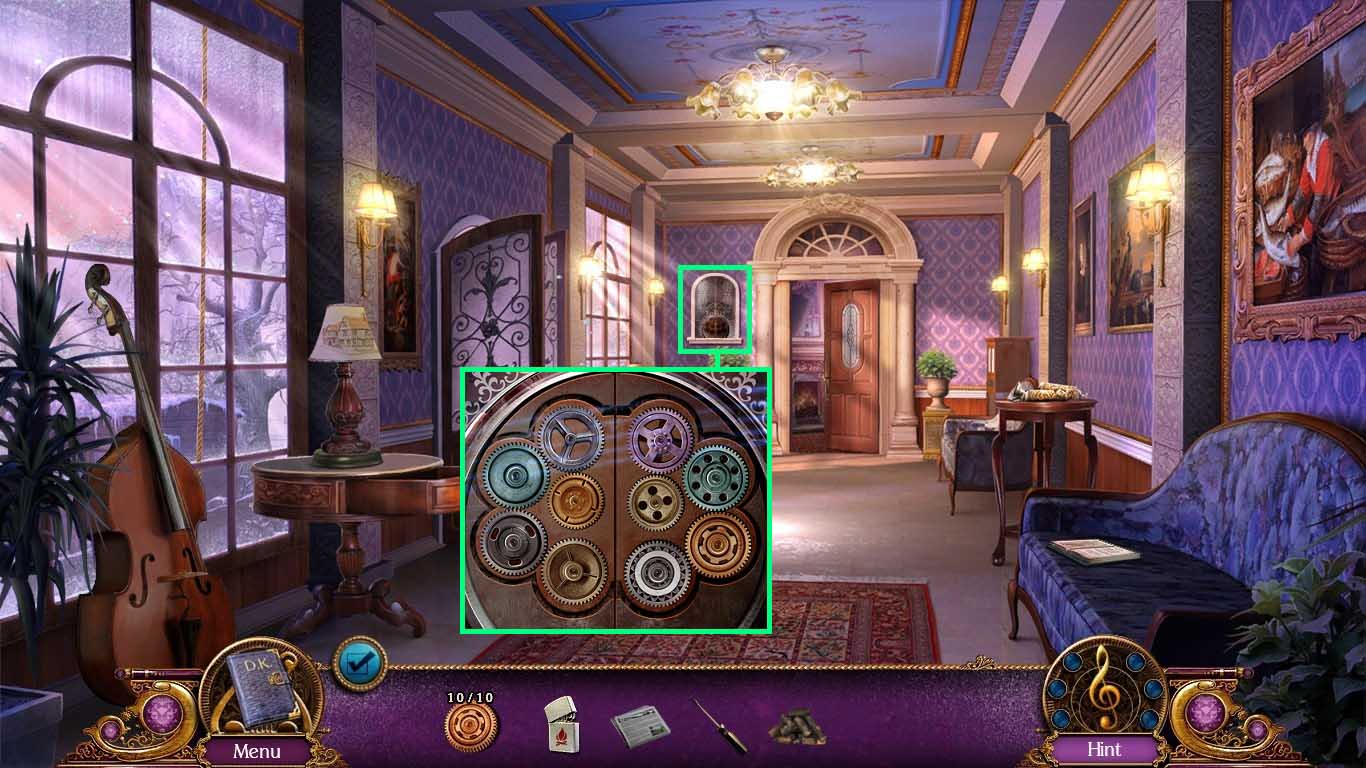
- Examine the glass display; insert the 10 gears into the panel.
- A mini-game will trigger.
- Place the gears into the right positions.
- Collect the emblem.
- Walk down one time to the grand foyer.
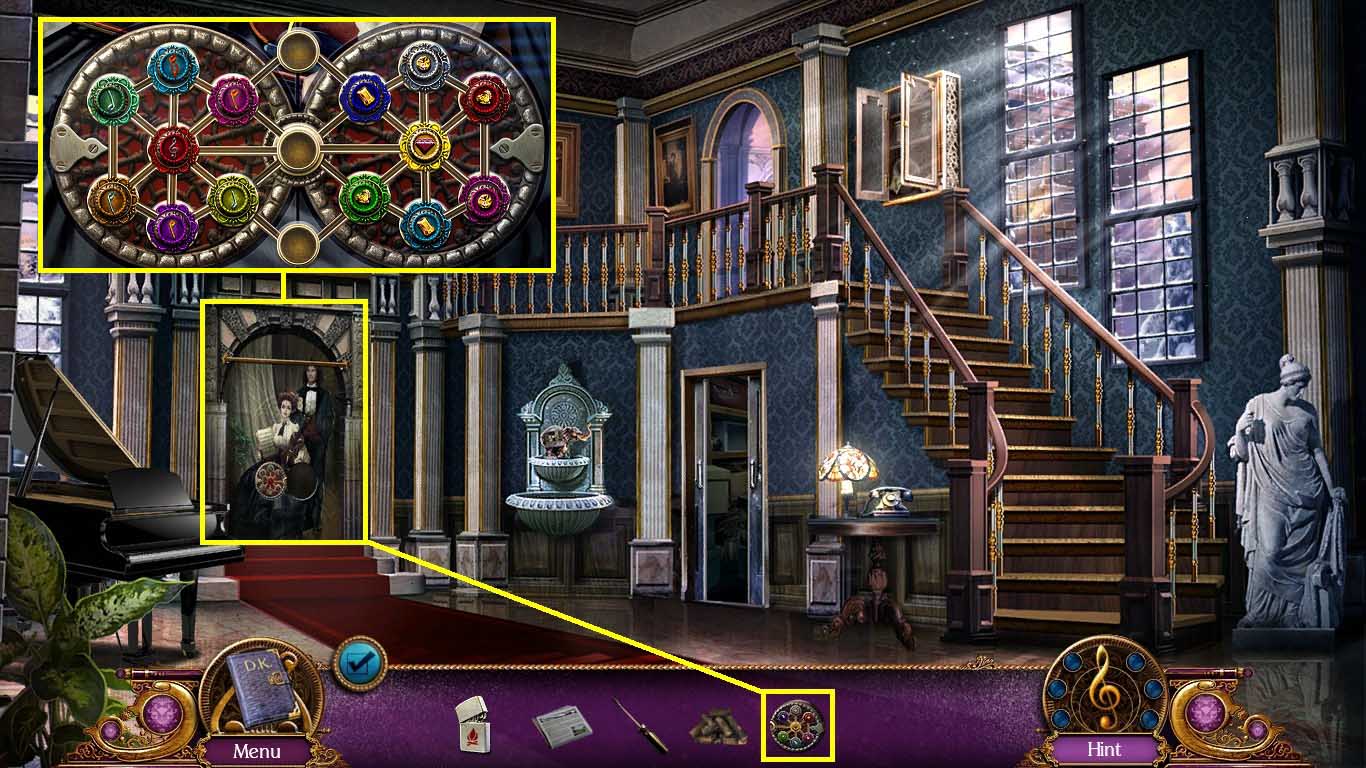
- Examine the tapestry; place the emblem into the groove.
- A mini-game will trigger.
- Move the buttons to the color and symbol matched slots.
- Solve as shown above.
- Go into the parlor.
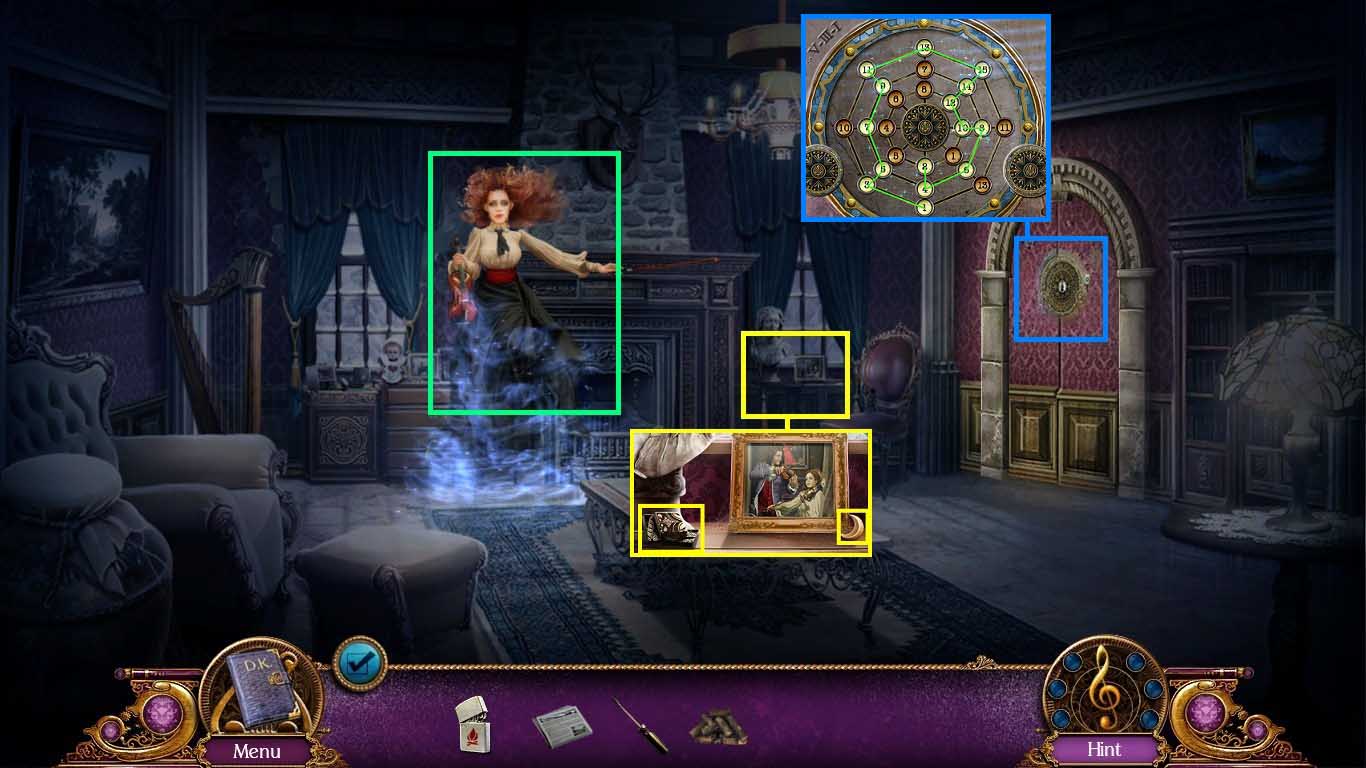
- Click the ghost.
- Examine the table near the window.
- Collect the tiles and the moon.
- Examine the wall to trigger a mini-game.
- Solve the puzzle by connecting the number buttons.
- Walk down one time to the grand foyer.
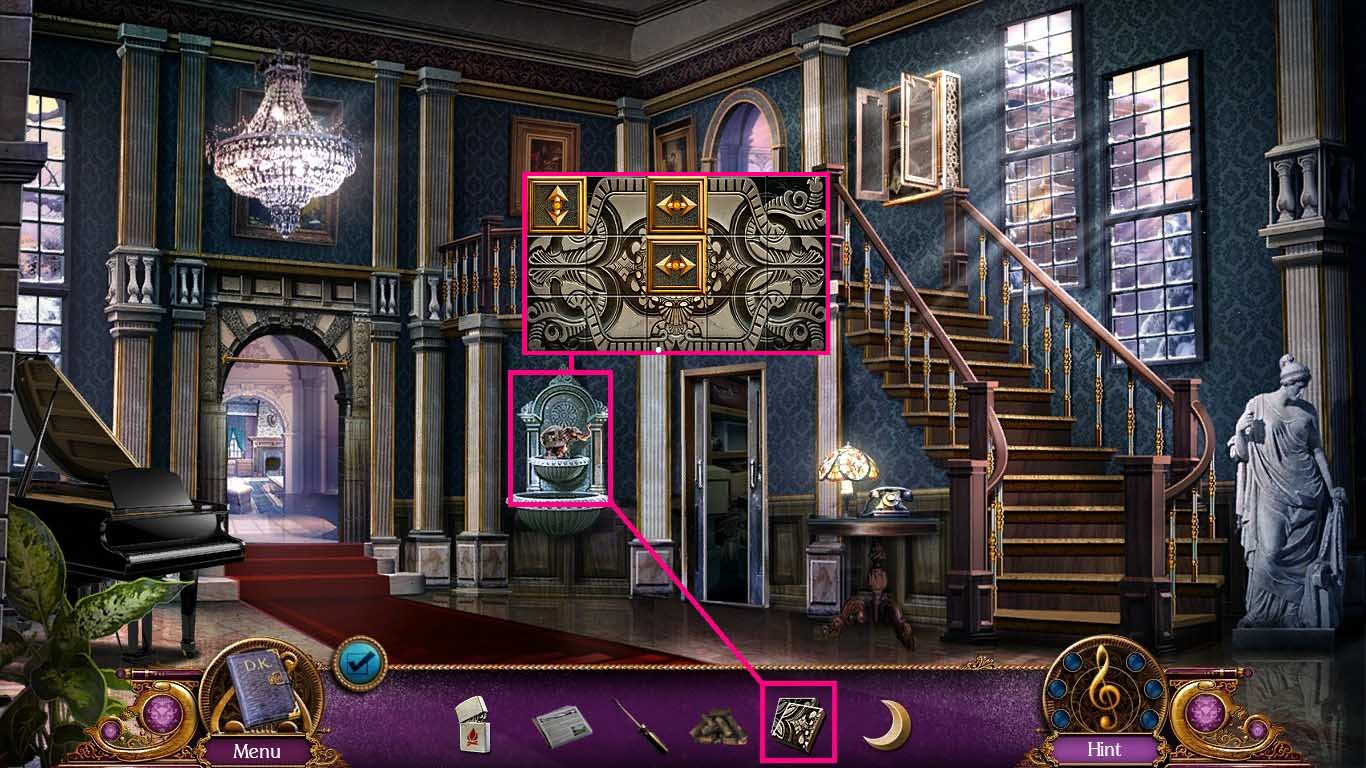
- Examine the fountain; place the tiles onto the elephant.
- A mini-game will trigger.
- Move the pieces around to create a picture.
- Solve as shown above.
- Collect the figurine.
- Move to the parlor.
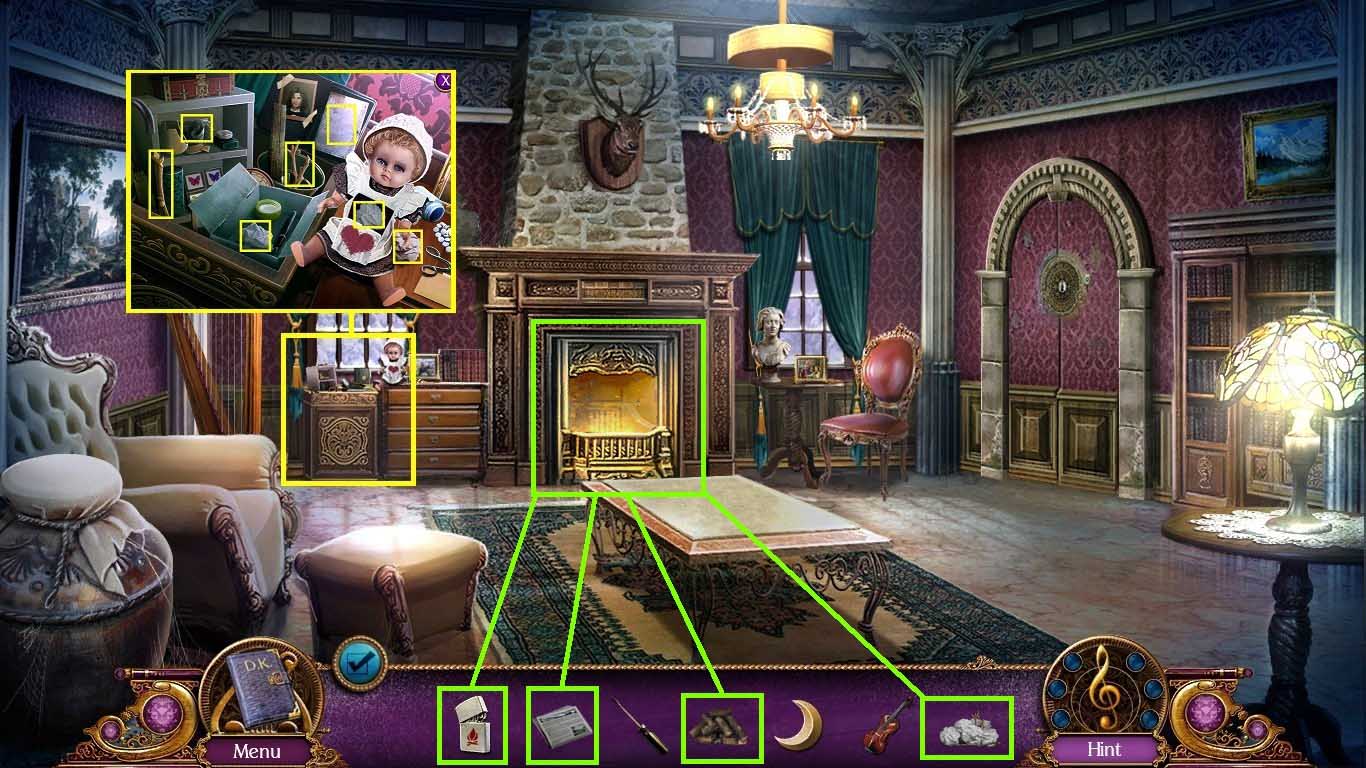
- Examine the basket to access the hidden objects area.
- Click the box, the doll and the case.
- Collect the pieces of paper and the twigs.
- Examine the fireplace.
- Put the paper and twigs, the newspaper and the logs into the fireplace.
- Use the lighter to light the fire, scare the rat and collect the star.
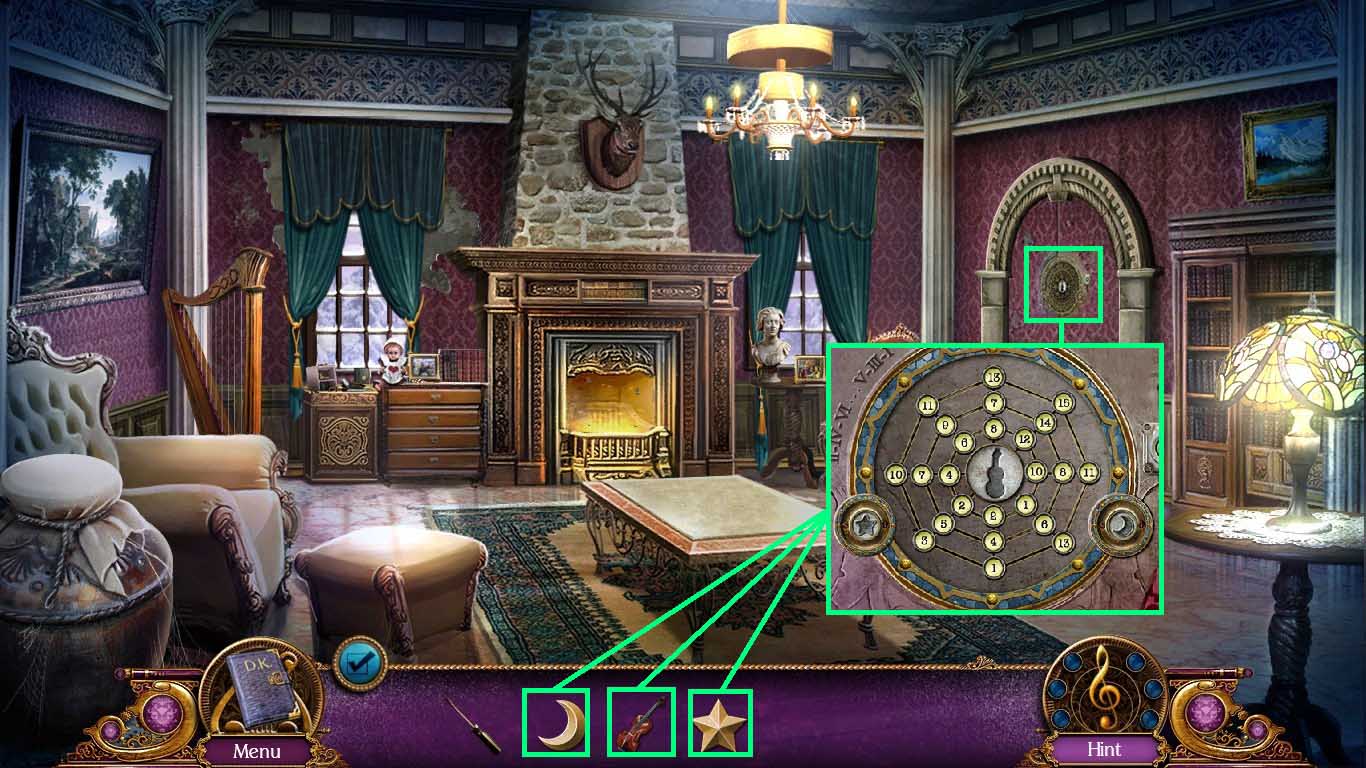
- Examine the wall.
- Insert the moon the figurine and the star into the grooves.
- Go into the elevator and press the up button.
- Examine the emergency power.
- Use the screwdriver to open the latches.
- Click the panel open and zoom into it to trigger a mini-game.
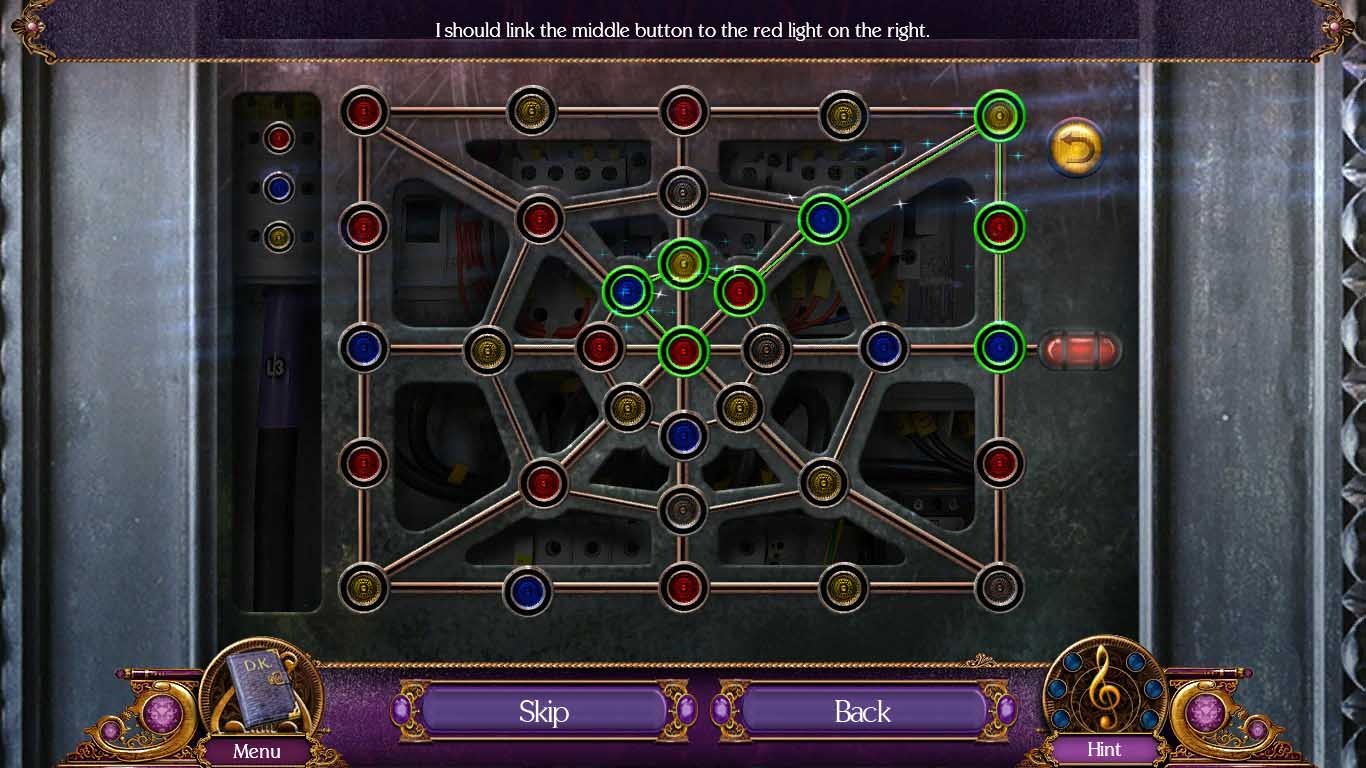
- Move from red lights to blue lights and from blue lights to yellow lights and from yellow lights to red lights.
- The central button needs to be connected to the red light on the right side to solve this puzzle.
- Solve as shown above.
- Go forward to the secret floor.
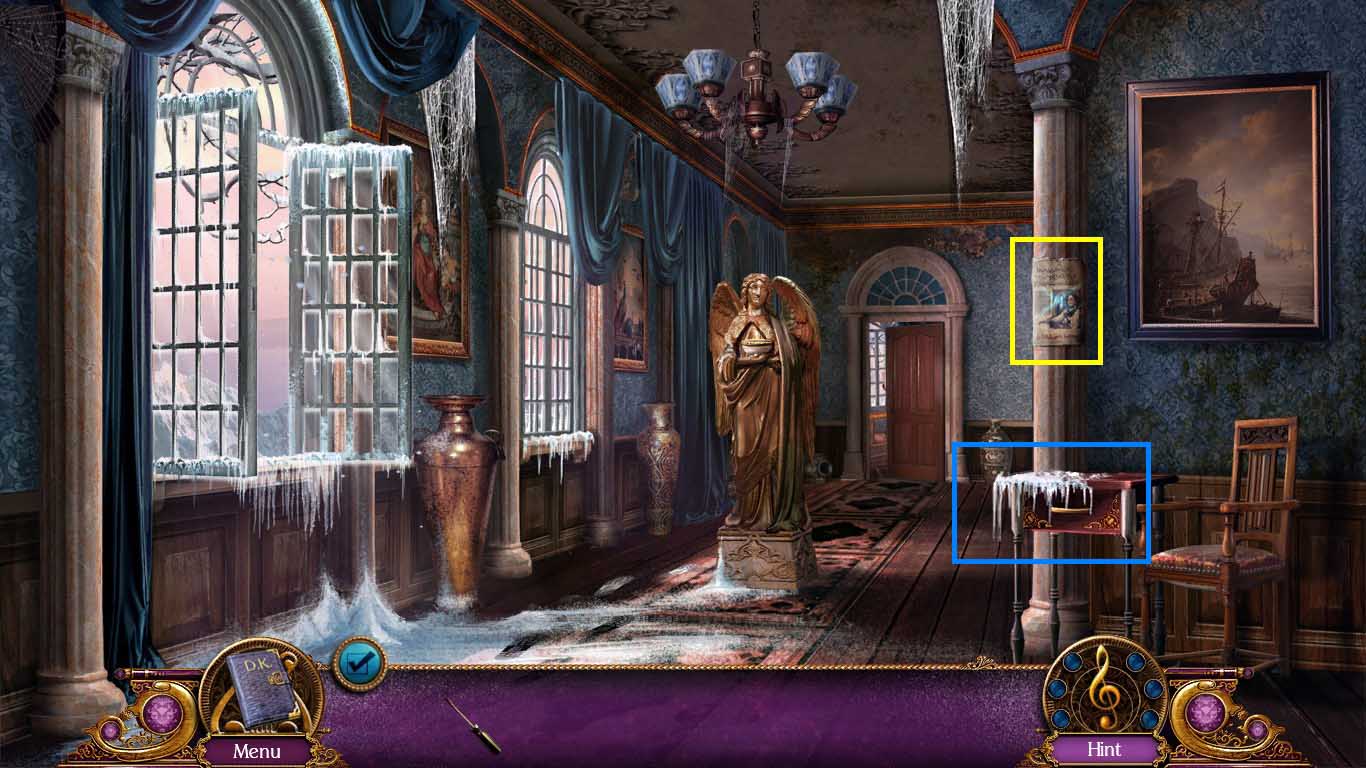
- Examine the poster; collect the 1/3 angel’s wing.
- Examine the side table; click the snow and collect the 2/3 angel’s wing.
- Notice the pattern.
- Go forward to the music room.
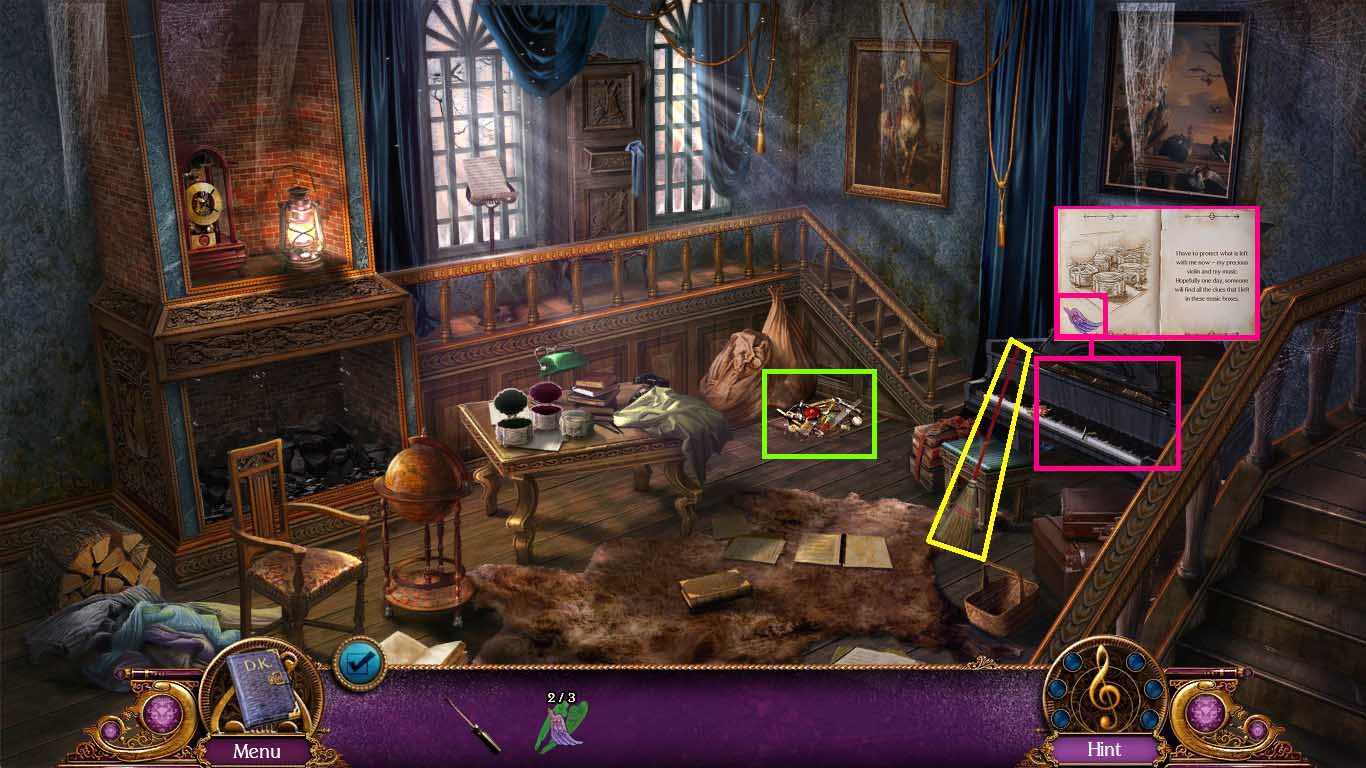
- Collect the broom.
- Examine the piano.
- Click the book pages two times and collect the 3/3 angel’s wing.
- Examine the junk pile to access the mini-game.
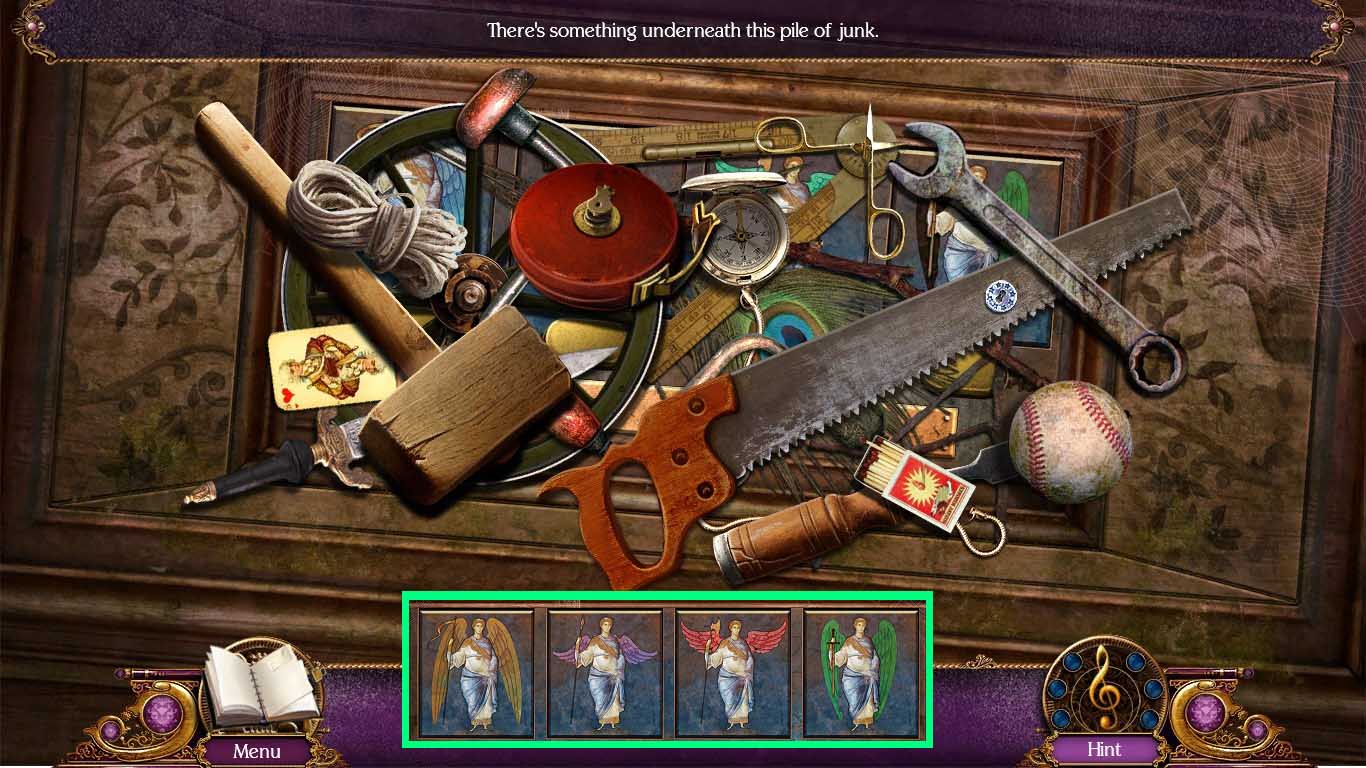
- Remove the items starting at the top moving to the bottom.
- Place the 3 angel’s wings into the grooves.
- The positioning will be randomized.
- Solve as shown above.
- Exit the puzzle scene and walk down one time.
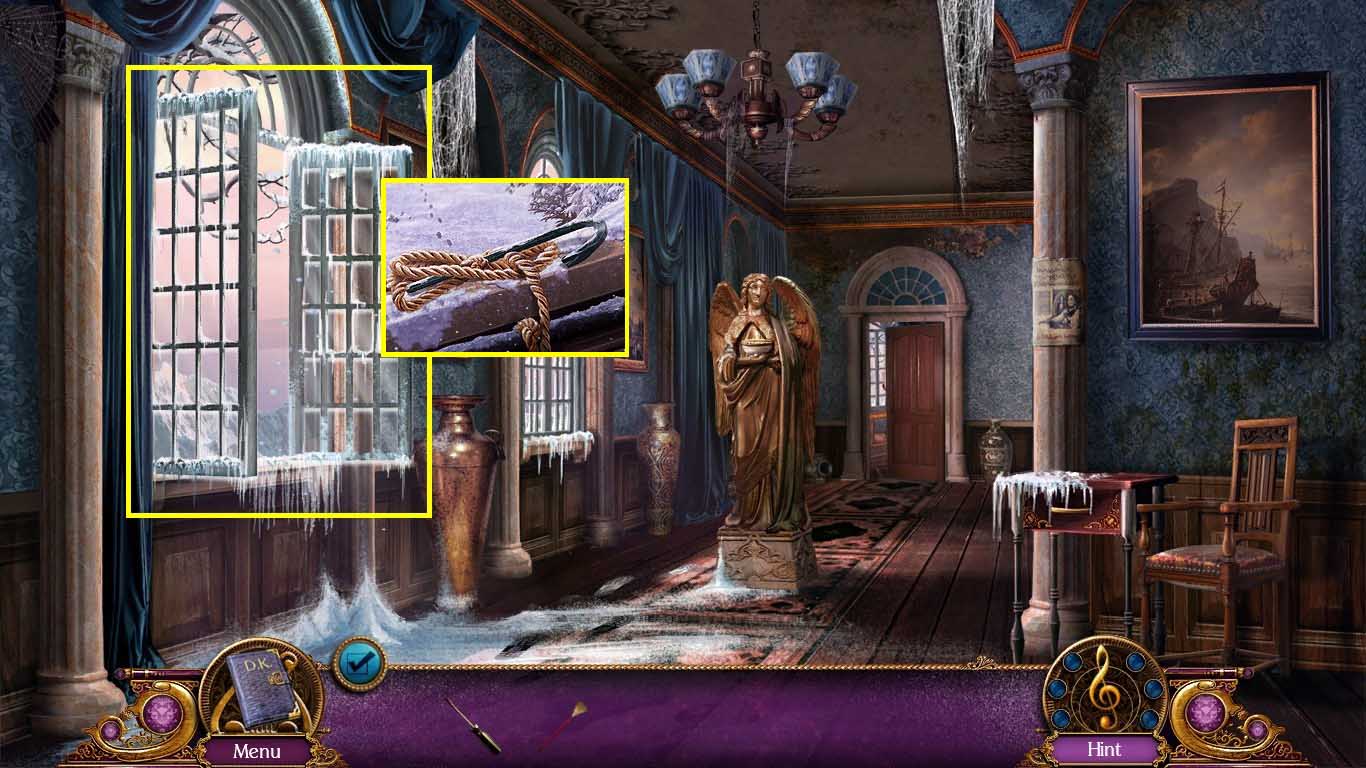
- Examine the window.
- Click the rope 3 times and collect the crowbar.
- Walk down one time, click the down button, go forward, walk down one time, go upstairs and go left to the ski lift.
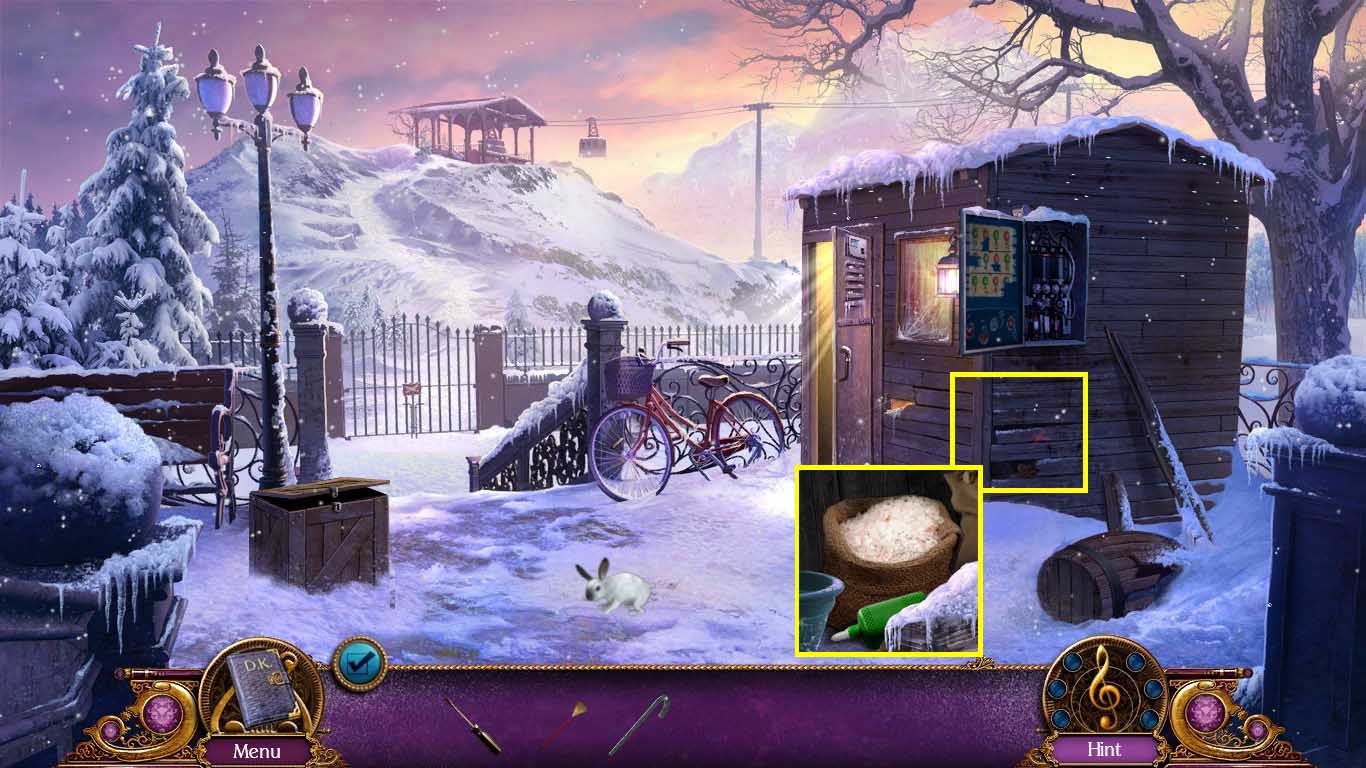
- Examine the hole under the fuse box.
- Remove the boards using the crowbar.
- Collect the glue and salt.
- Walk down one time to the hallway.
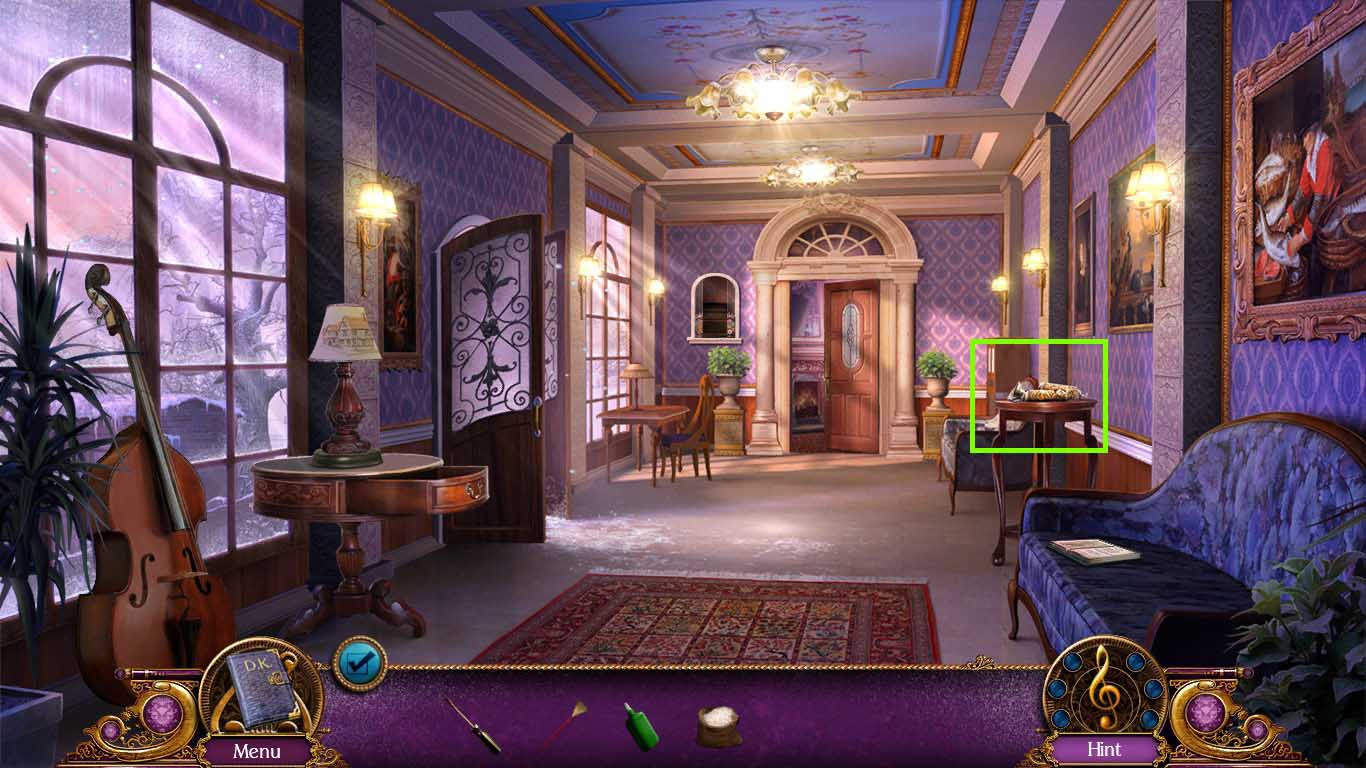
- Examine the side table.
- Use the glue on the broken beer stein.
- Play the mini-game.
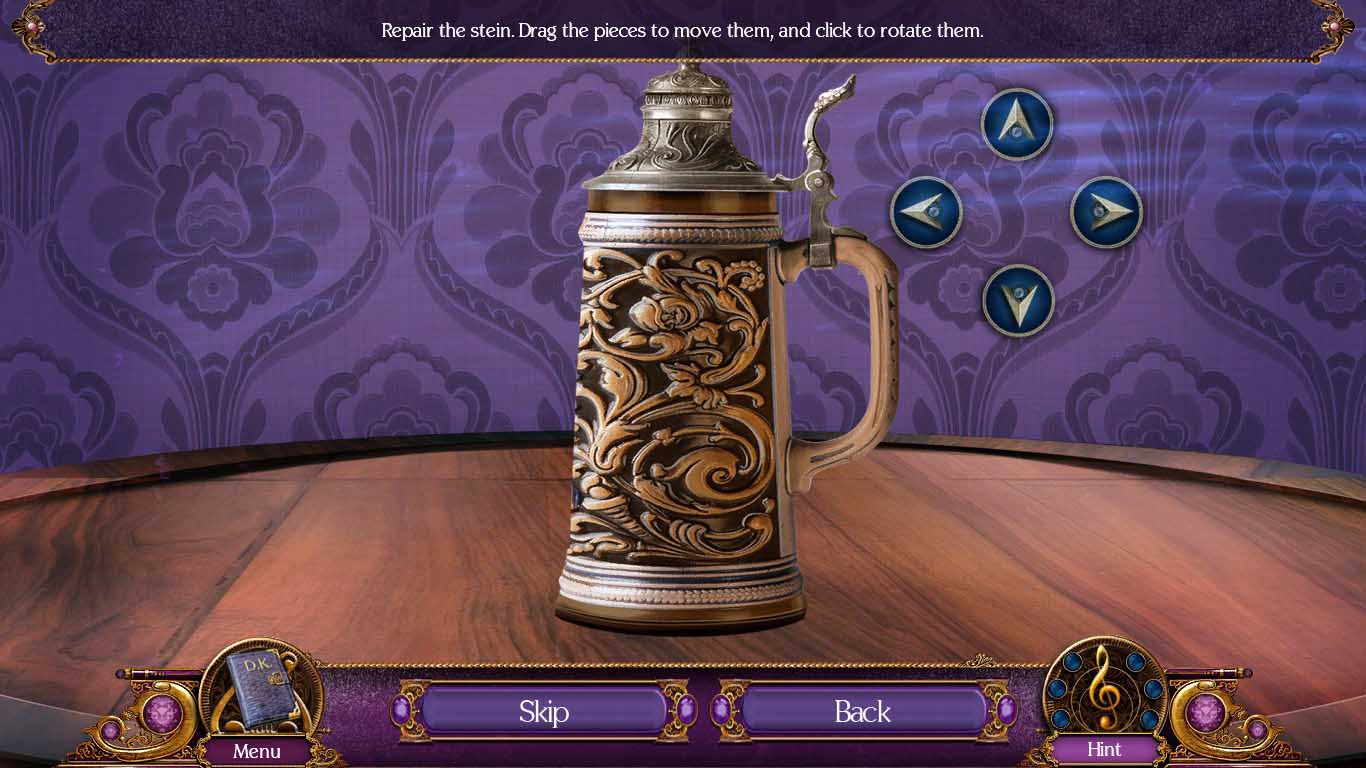
- Move the pieces to fit the holes.
- Solve as shown above.
- Walk down once to the grand foyer.
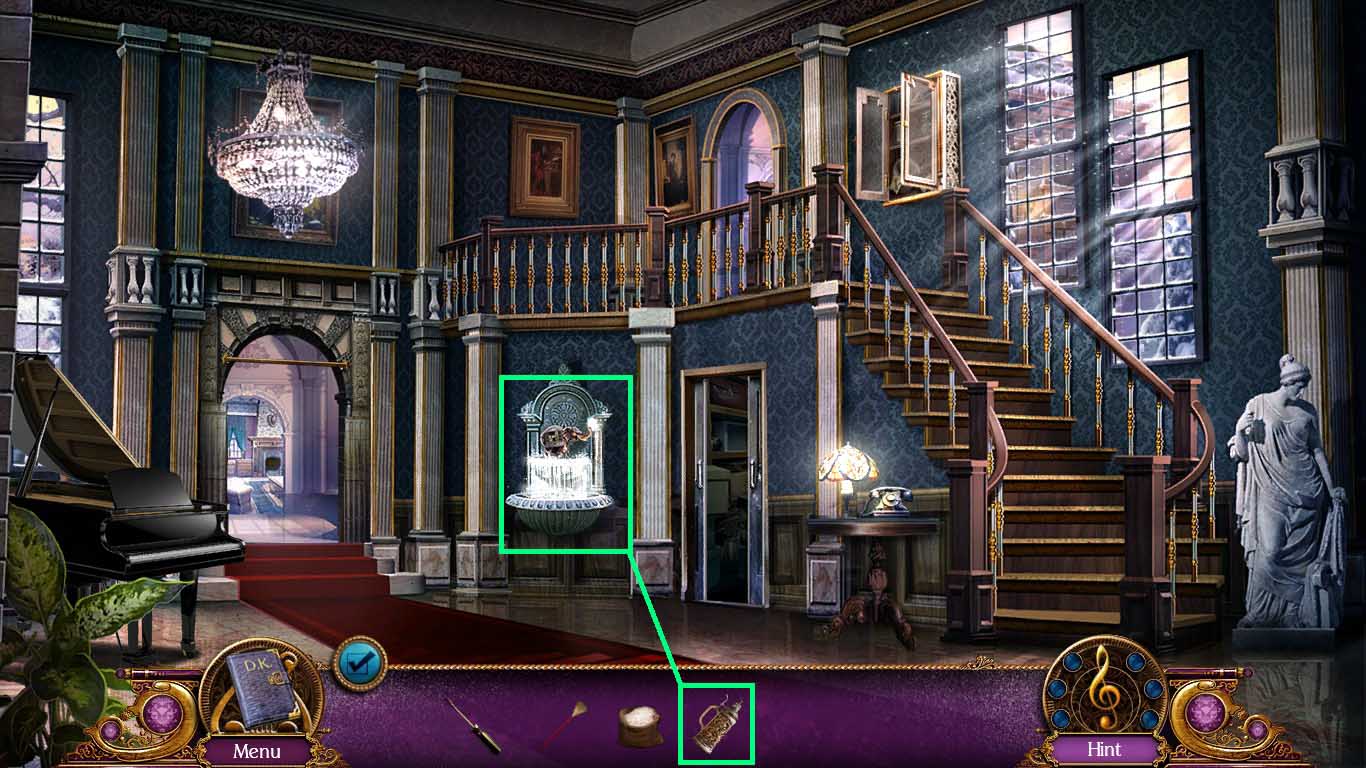
- Place the beer stein into the fountain; get the water.
- Move forward two times, click the up button and go forward to the secret floor.
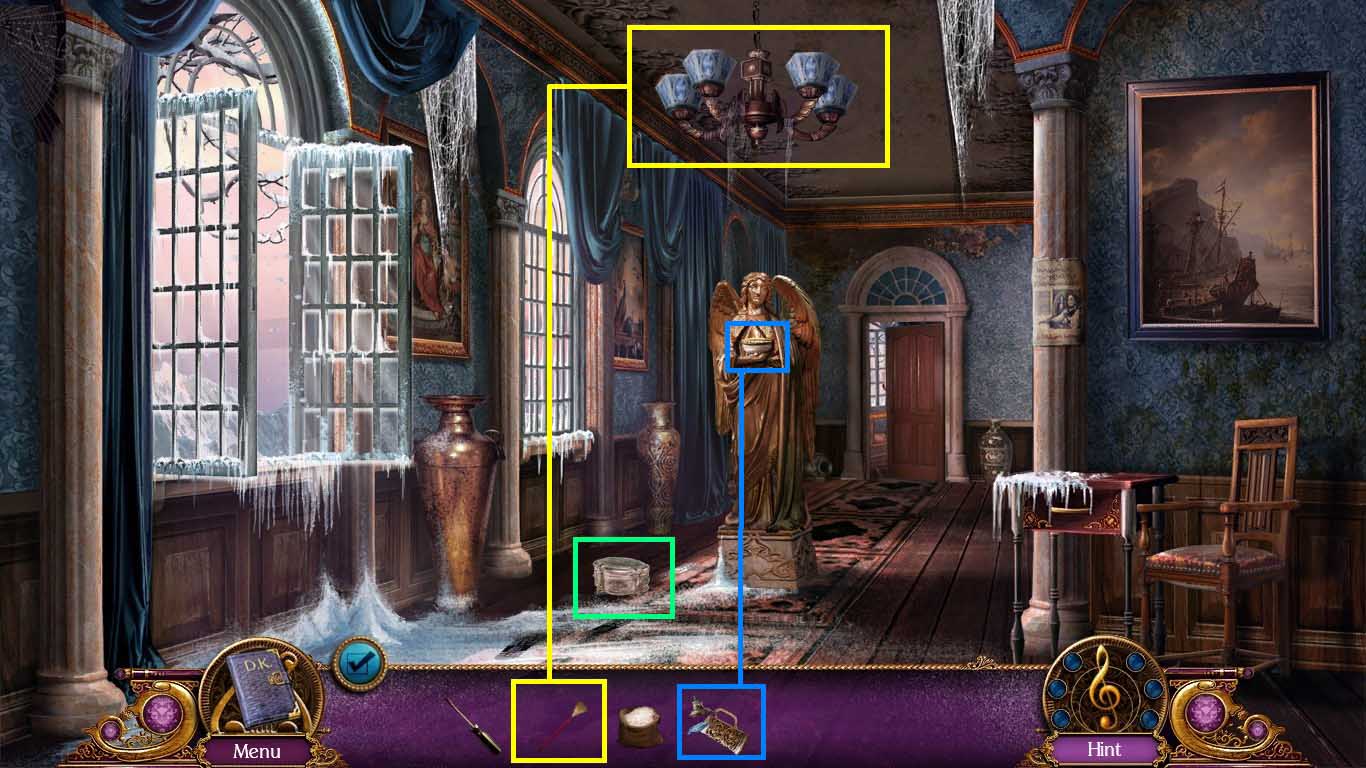
- Examine the angel; pour the water into the bowl.
- Use the broom to poke the chandelier 3 times.
- Examine the box to access a mini-game.
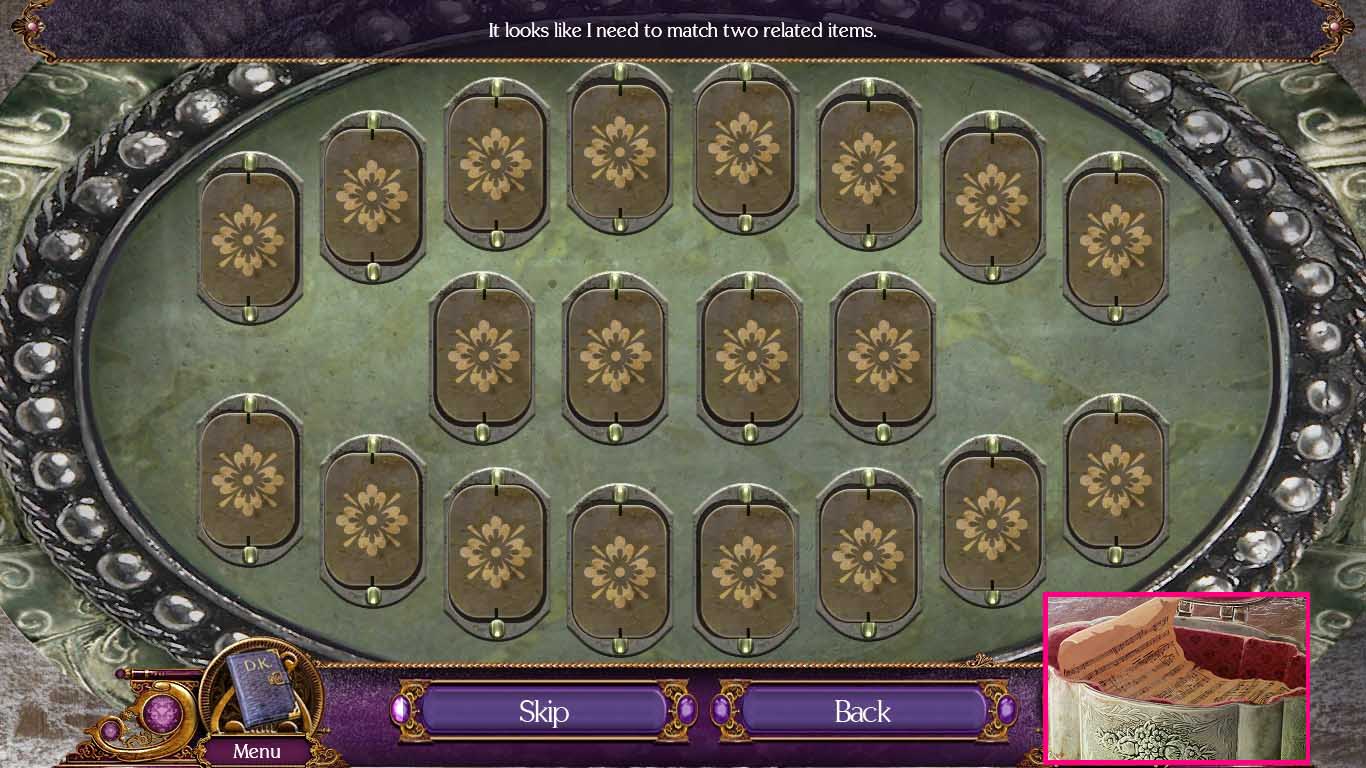
- Find the pairs.
- The solution is randomized.
- Collect the music sheet.
- Go forward to the music room.
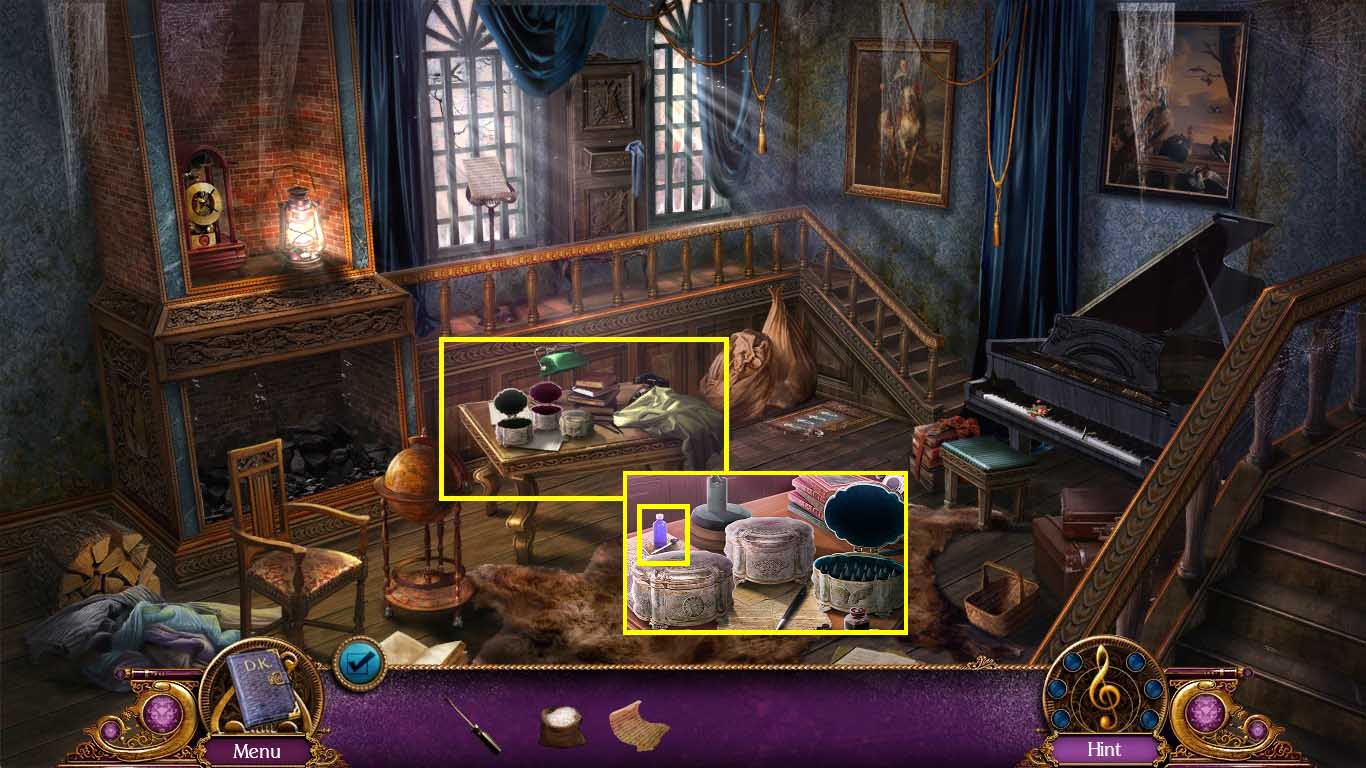
- Examine the table.
- Click the first two boxes.
- Click the third box open and collect the solvent.
- Leave the table scene.
- Go to Sebastian’s bedroom.
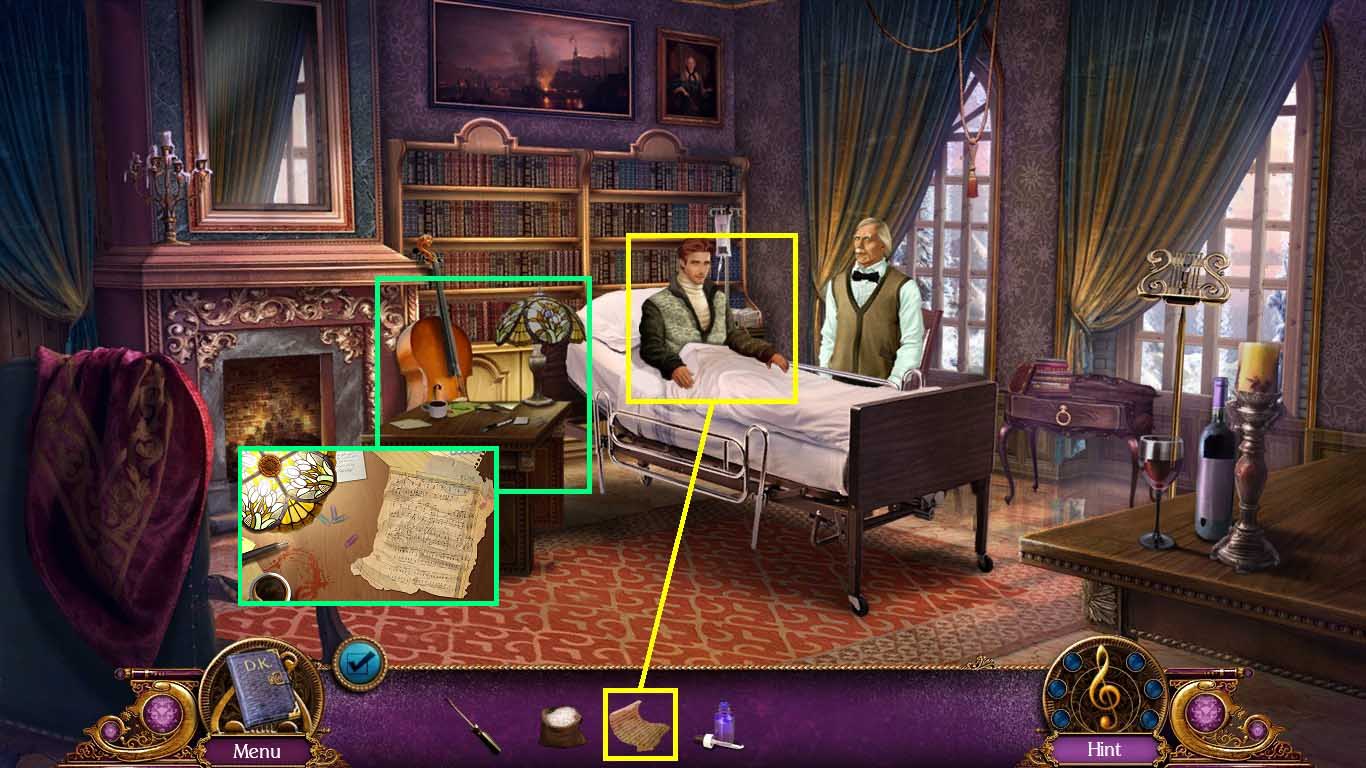
- Give Sebastian the music sheet.
- Move into the desk and place the music sheet on the desk.
- Click on the light.
- Pour the solvent on the music sheet to trigger a mini-game.
- Pour the solvent on the music sheet 4 times and collect the music sheet.
- Leave the table scene.
- Walk down and go forward two times to the boarding area.
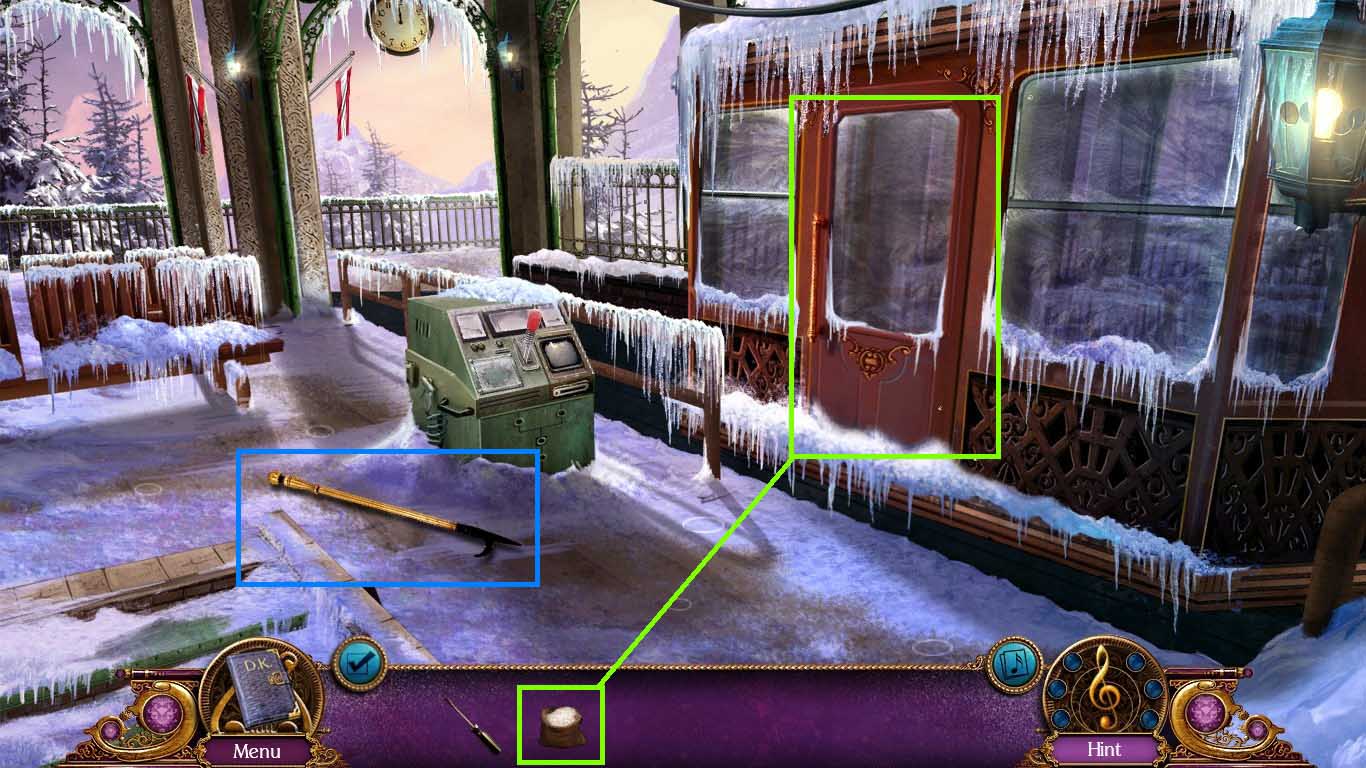
- Collect the hook.
- Examine the door.
- Use the salt on the ice to open the door.
- Walk down once.
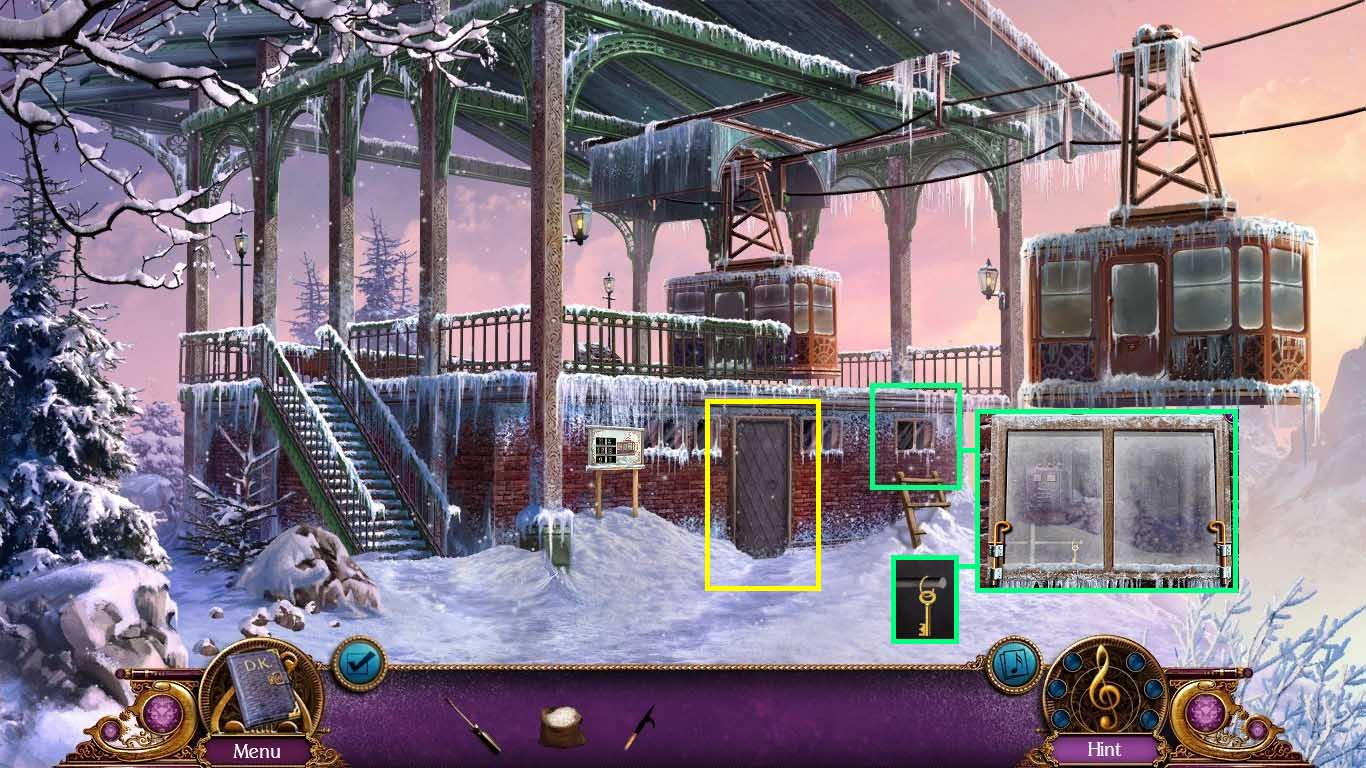
- Examine the window.
- Click both latches to open the window.
- Use the hook to get the key.
- Examine the door.
- Insert the key into the lock and open the door.
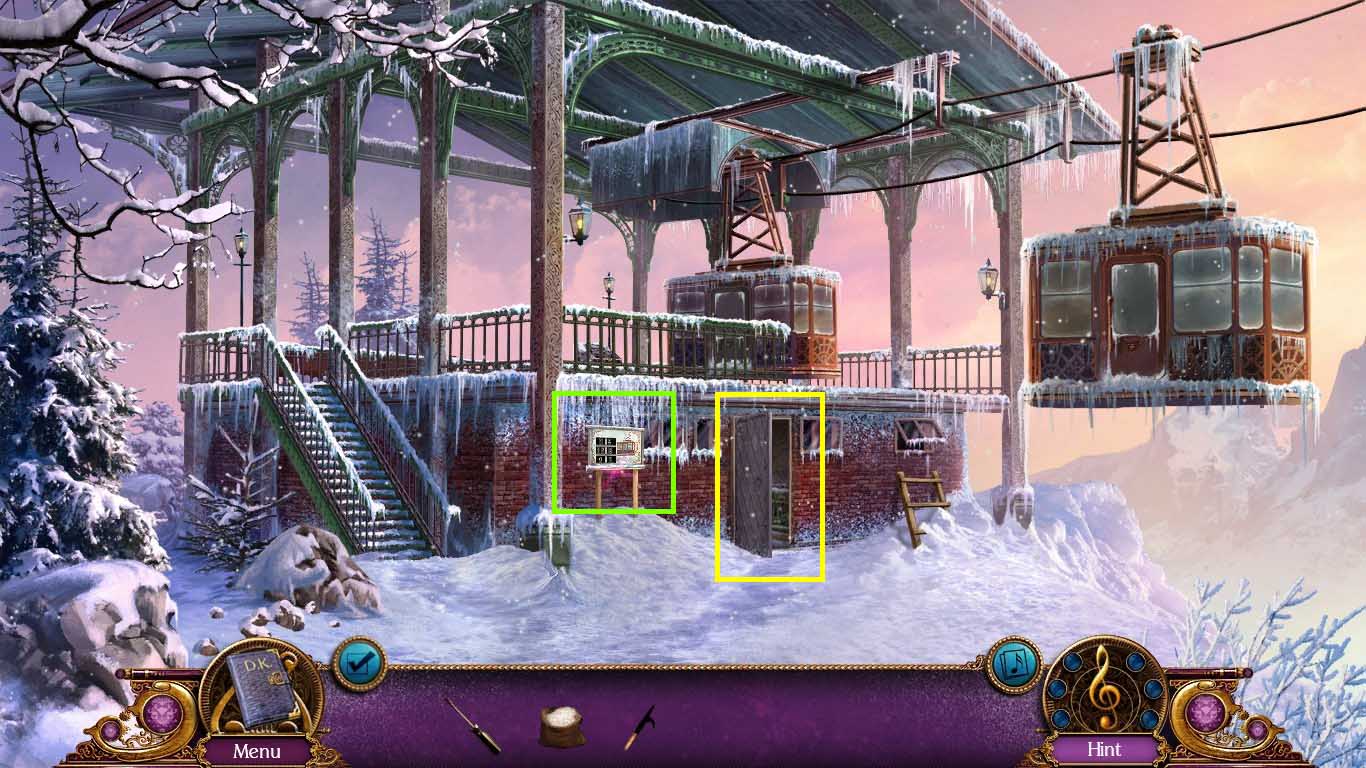
- Examine the schedule.
- Move the plates around and collect the 4 machine parts.
- Go into the machinery room.
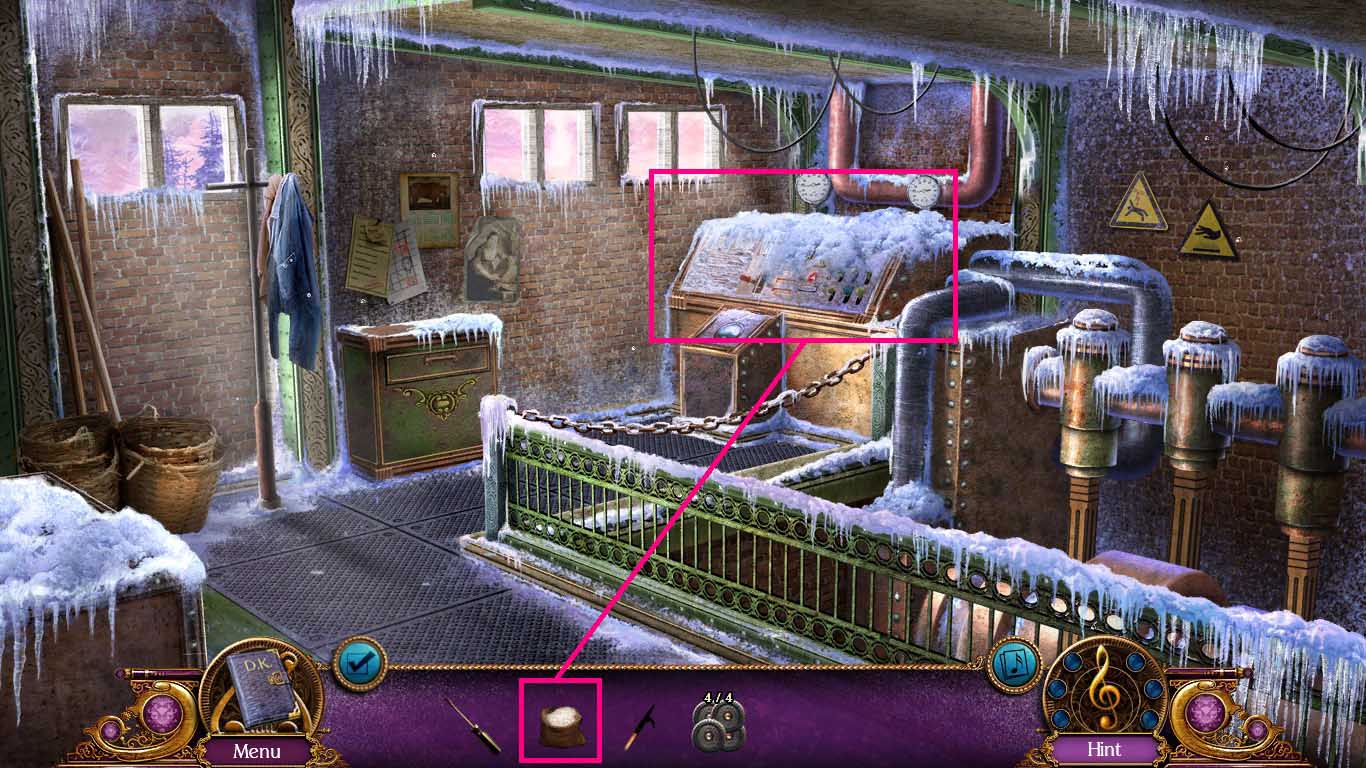
- Examine the power generator.
- Remove the ice by using the salt on the generator.
- Click the cover.
- Examine the engine to trigger a mini-game.
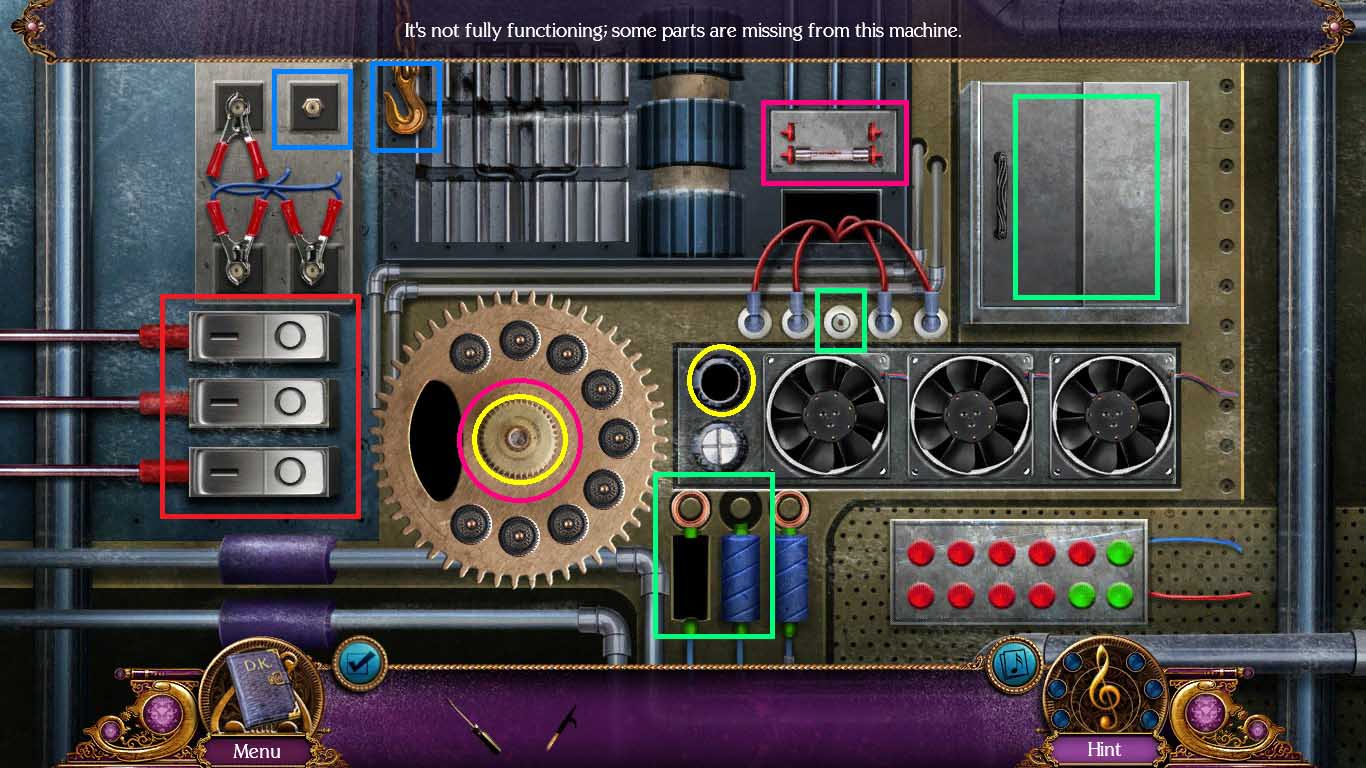
- Insert the 4 machine parts into the valve slots.
- Click the valve and insert the screw into the slot.
- Click the valve and insert the fuse into the niche.
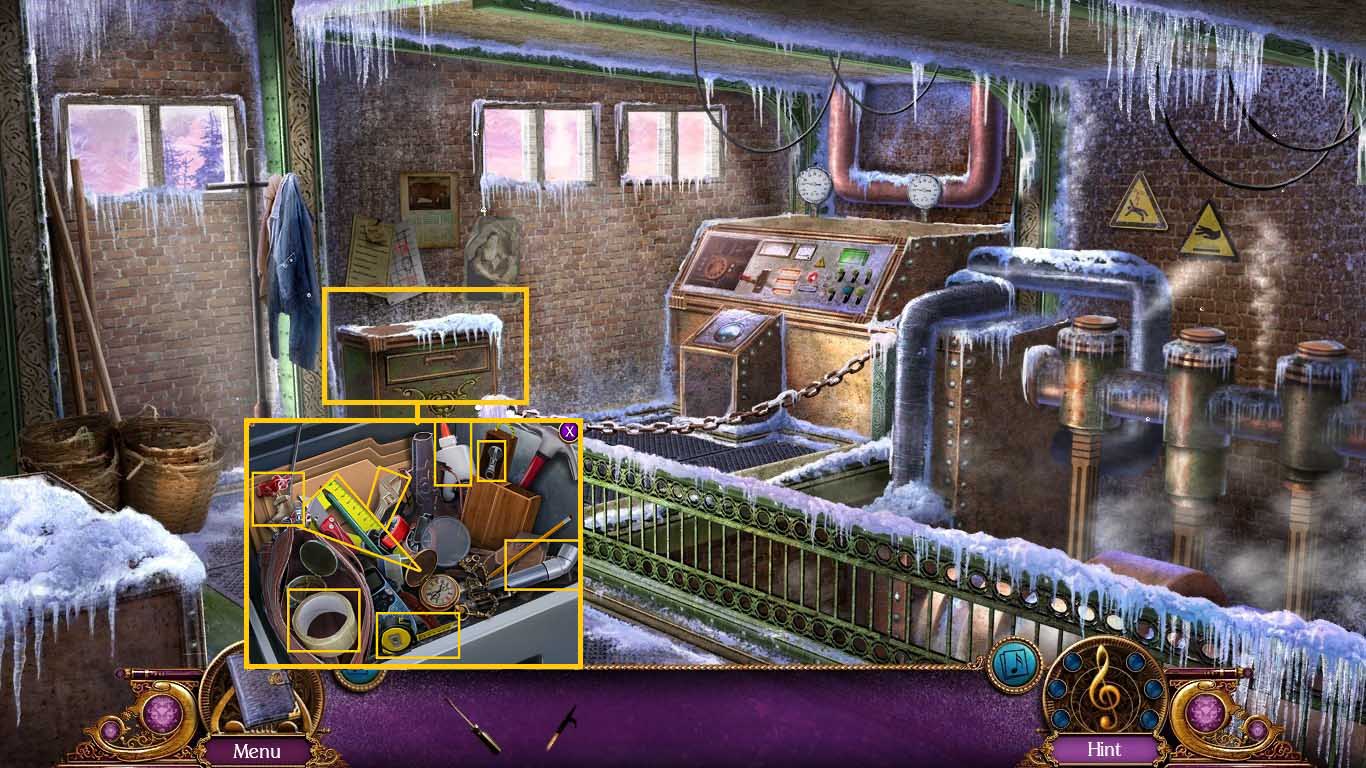
- Examine the drawer.
- Click the tiny drawer and collect the zipper.
- Click the bag with the zipper.
- Collect the 2 adhesives.
- Collect the 2 measuring tools.
- Collect the 3 plumbing tools.
- Collect the wrench.
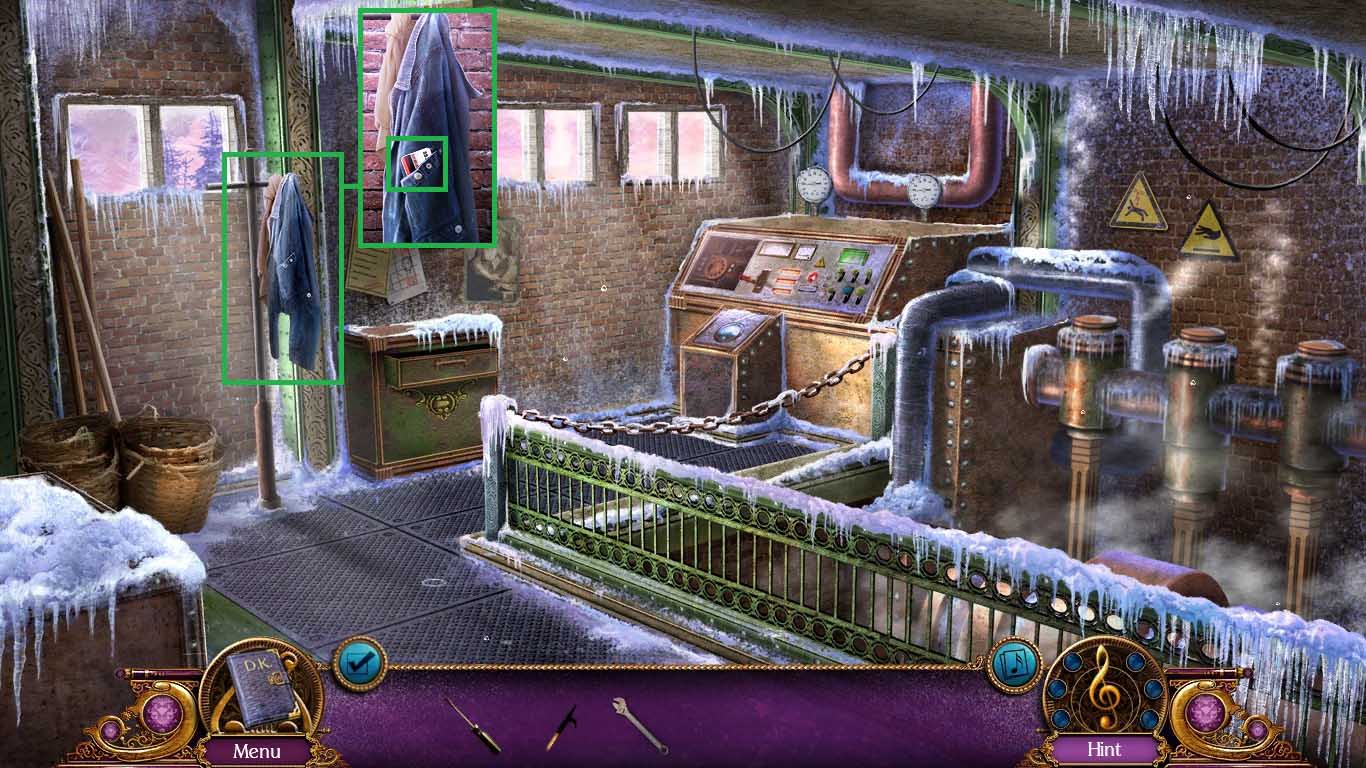
- Examine the jacket.
- Collect the ID card.
- Walk down once, go to the boarding area, and go into the gondola.
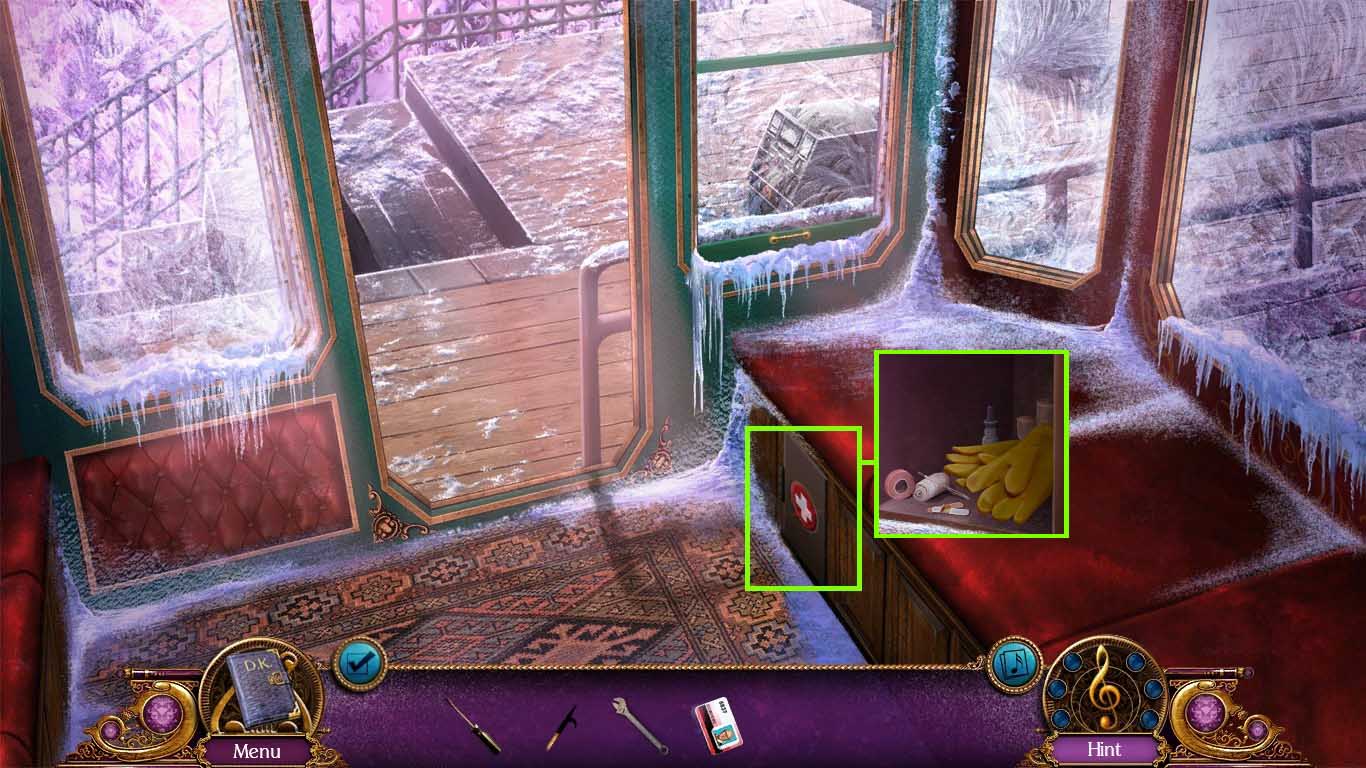
- Examine the first aid compartment.
- Click open the door and collect the gloves.
- Go forward.
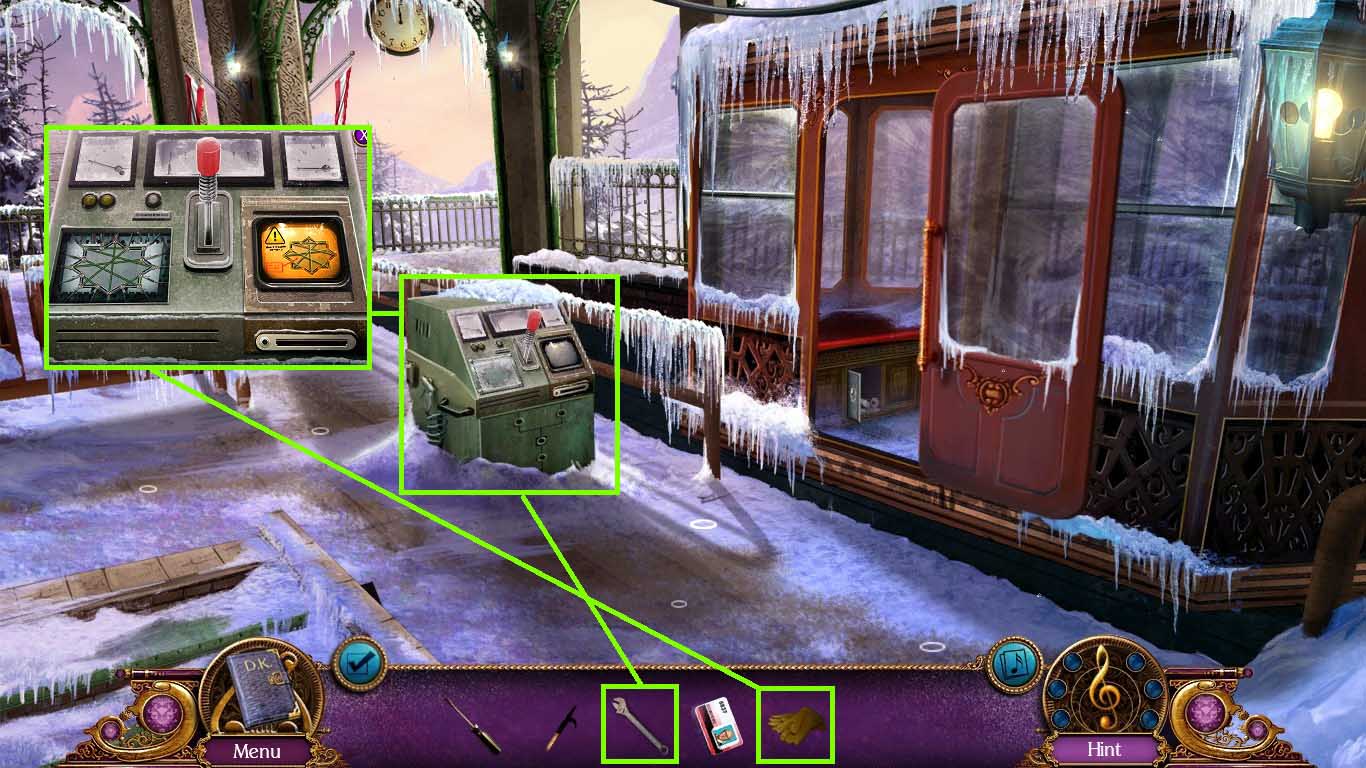
- Examine the control panel.
- Remove the cover using the wrench.
- Use the gloves on the wires to trigger a mini-game.
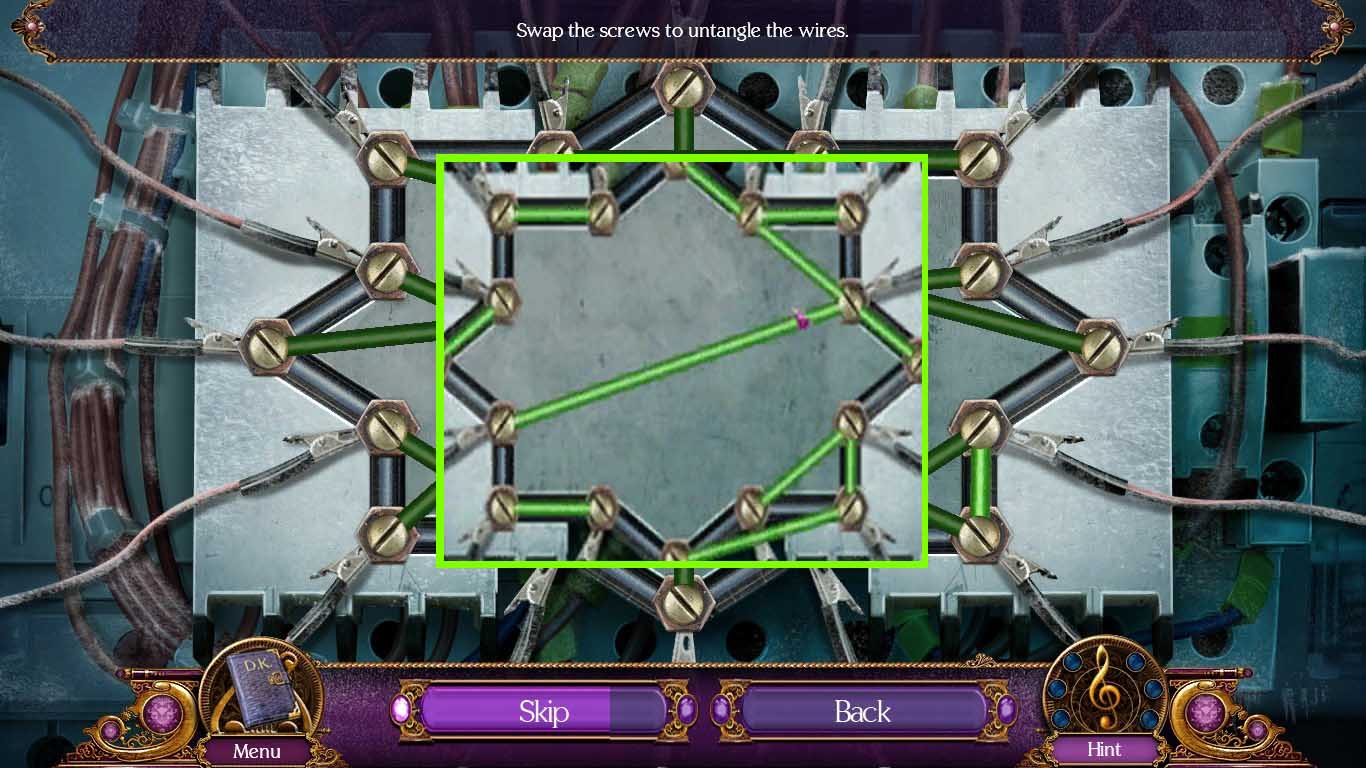
- Move the screws around and untangle to wires.
- Solve as shown above.
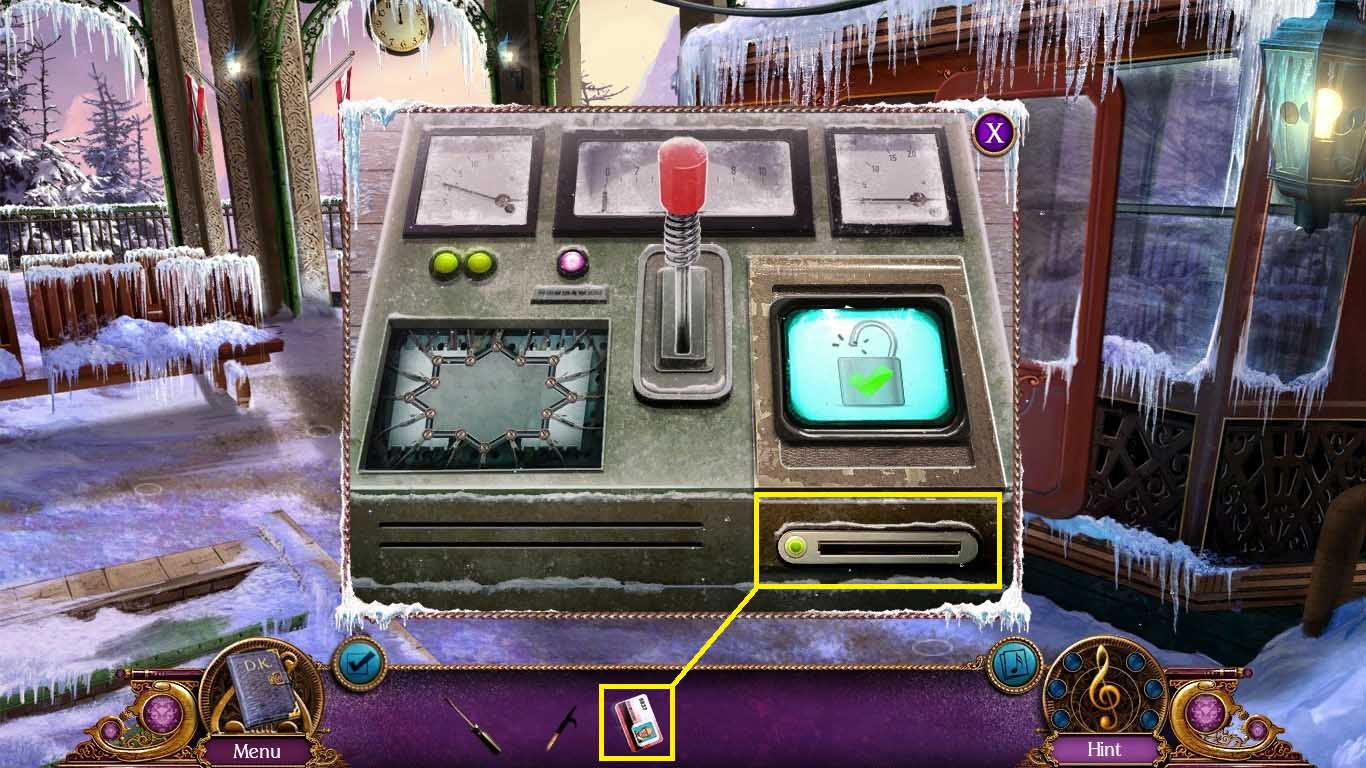
- Place the ID card into the slot.
- Go into the gondola.
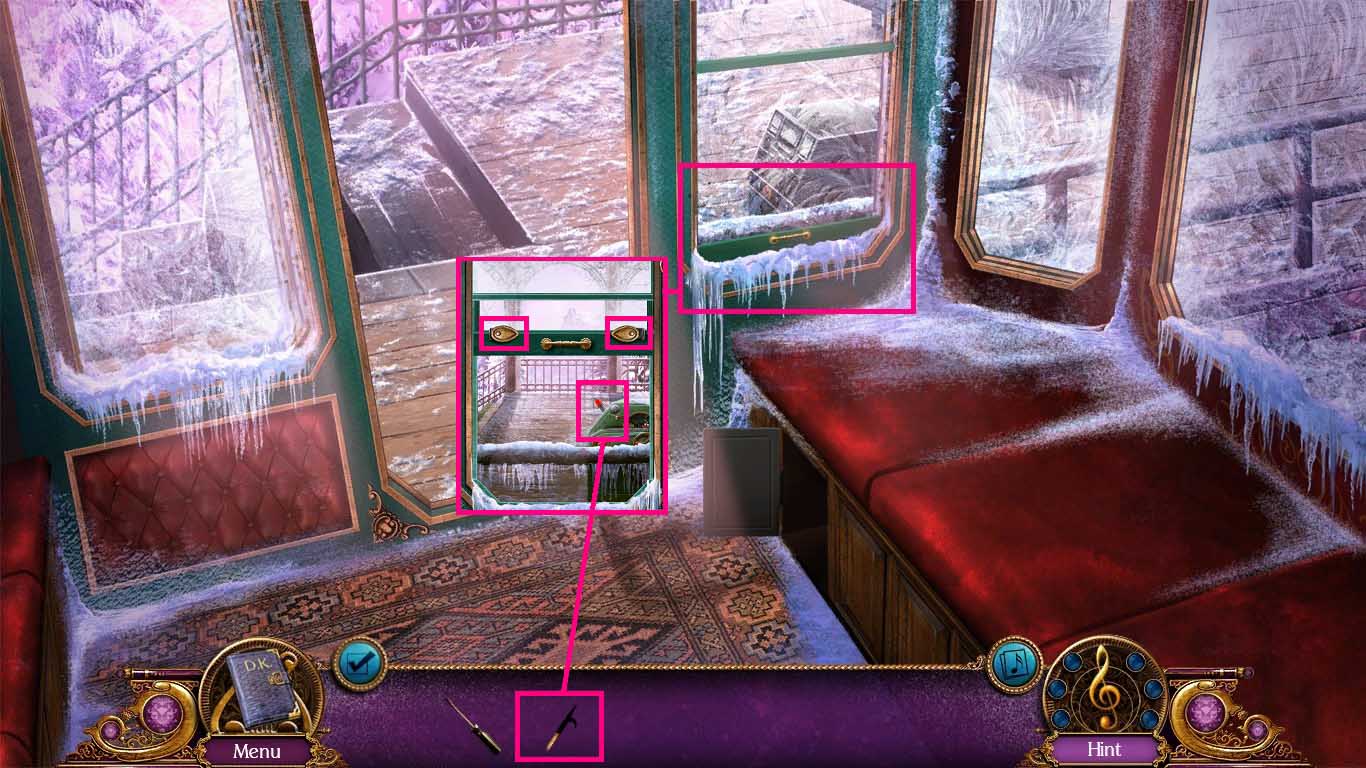
- Examine the window.
- Click the 2 latches and open the window.
- Pull the lever using the hook.
Comments will load when you reach this part of the walkthrough.