
Chapter 6: The Mine and Train Station
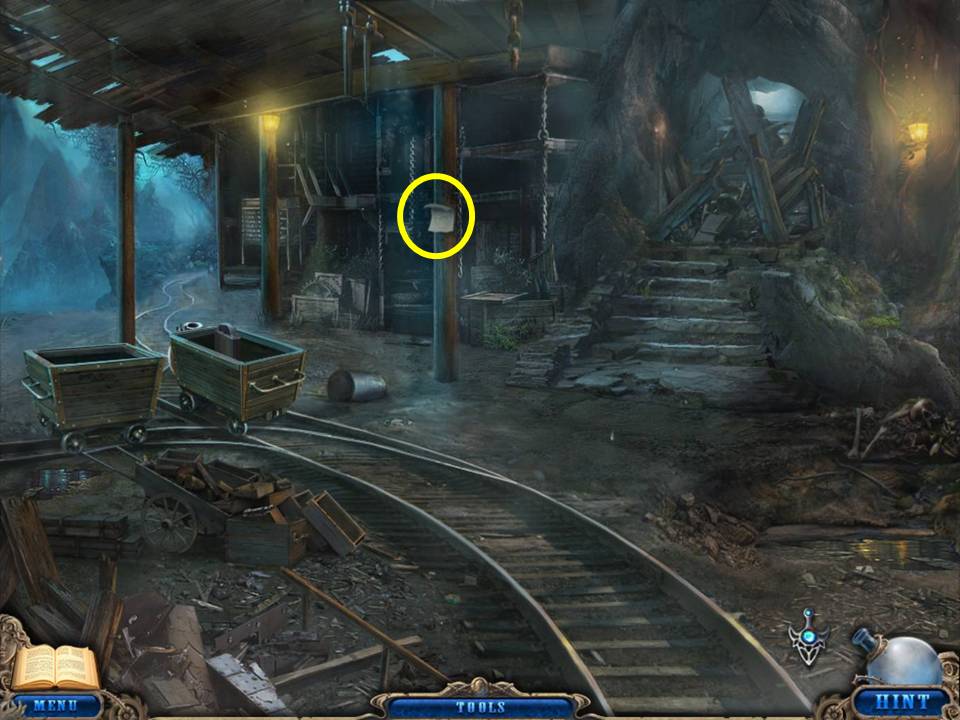
- Zoom into the note nailed to the pillar.
- Take the block. Return to the fire escape.
- Go up the ladder and through the open window.
- Light the dark cabinet with the KEROSENE LAMP.
- Zoom into the grid at the back of the cabinet.
- Place the BLOCK on the empty square to initiate a puzzle.
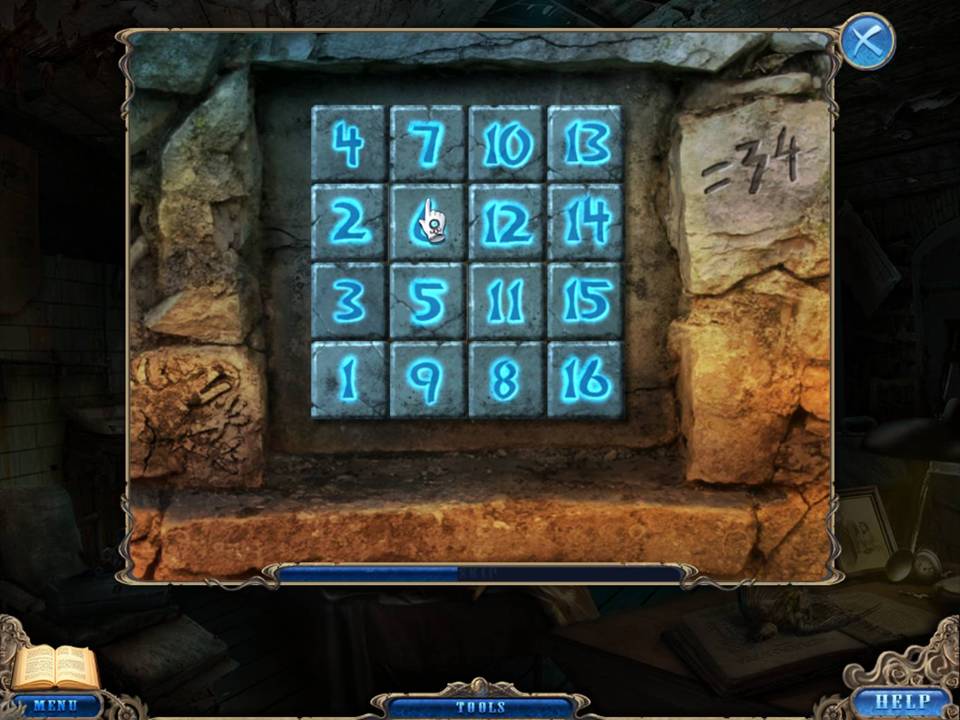
- The object of the puzzle is to click and switch the squares to have the numerical value of each horizontal row total 34.
- See screenshot for one solution.
- When finished an entrance will open.
- Move through the entrance.
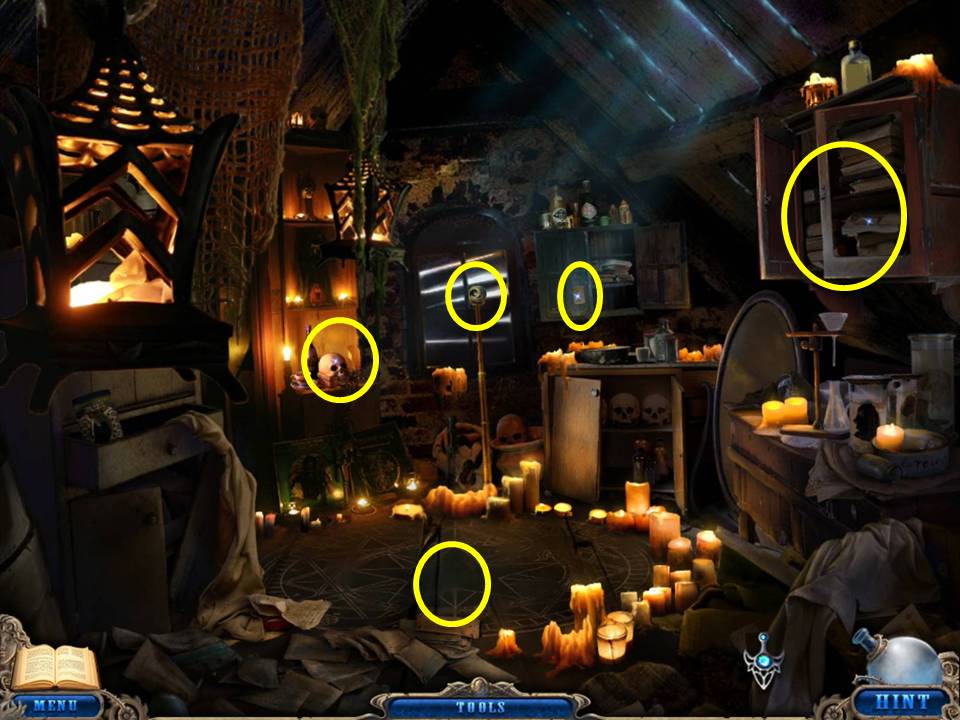
- Zoom into the shelf with the skull.
- Take the GRAPPLING HOOK.
- Note the skull requires a key.
- Place the TELESCOPE LENS on the telescope.
- Look through the telescope and adjust the view.
- Note the code 457 in the viewfinder.
- Zoom into the note on the cabinet door.
- Zoom into the cabinet at the upper right and use the 457 code on the lock to open the book.
- Take the CHALK and the three files for a journal update.
- Zoom into the book on the floor.
- Flip through the pages.
- Take the half-page SHEET and the EGG.
- Take the BOOK itself, as well.
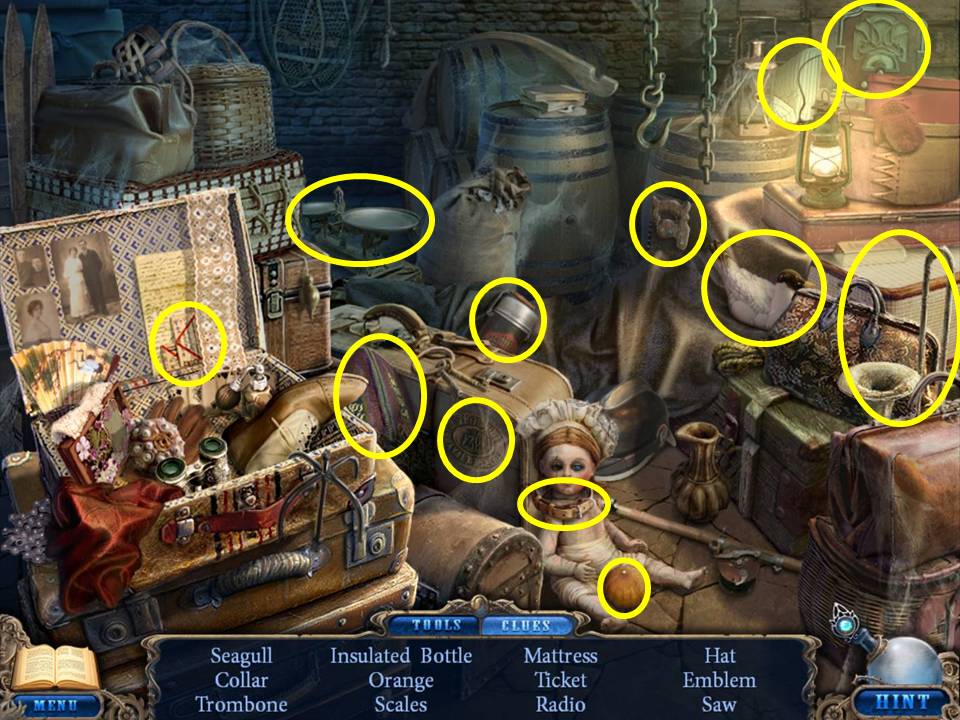
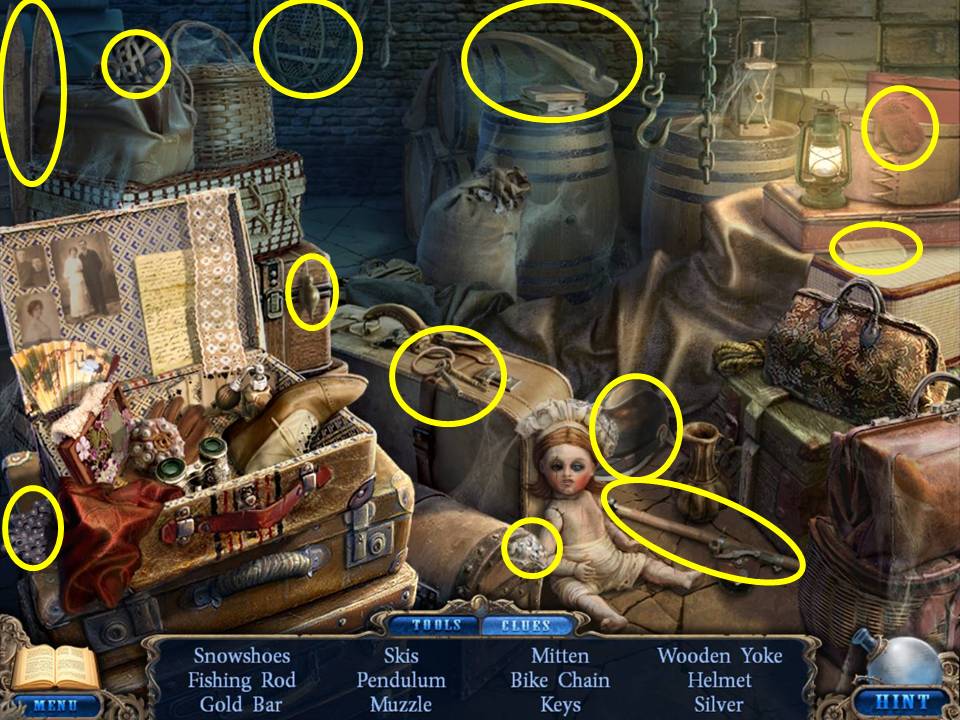
- Back out once and play the Hidden Object Area by the table.
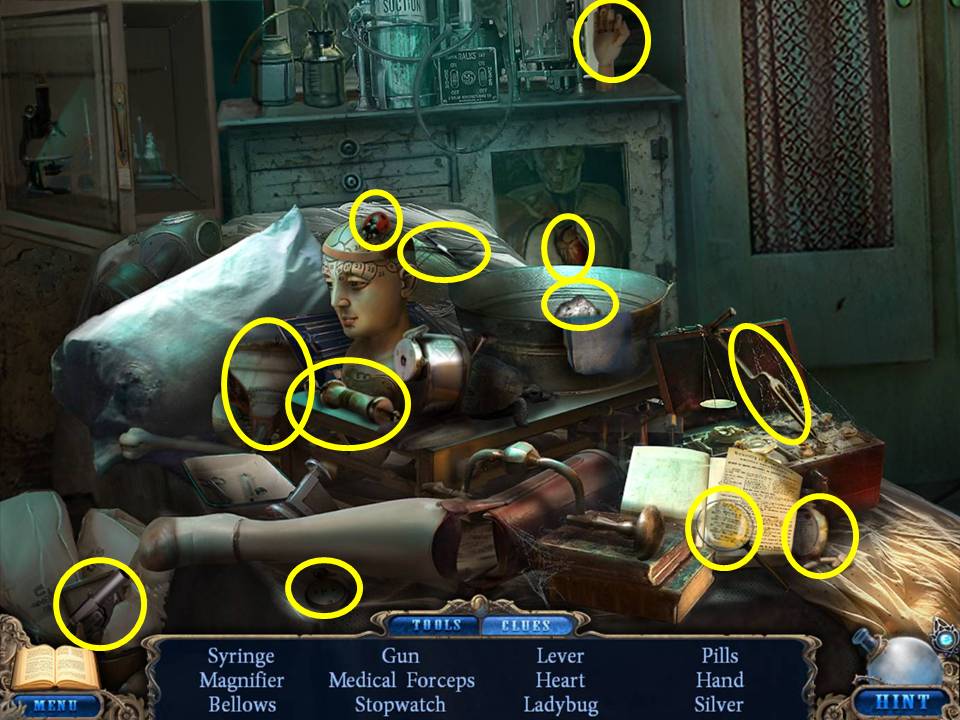
- Find the items listed.
- Receive a TRAIN CAR LEVER.
- Go through the Statue Park to the mines and left up the tracks.
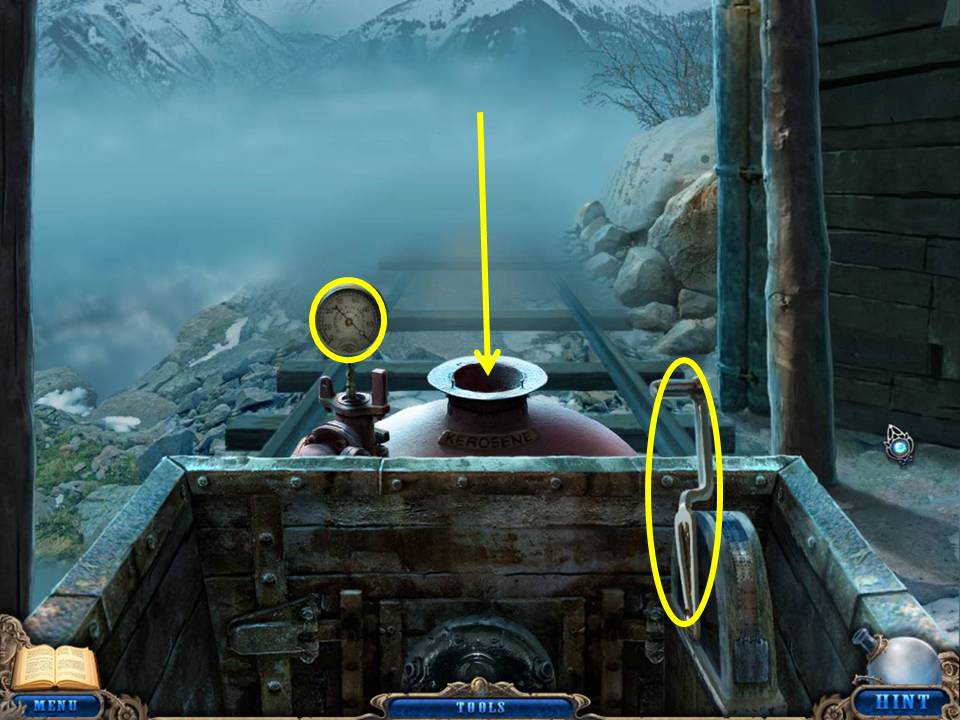
- Put the KEROSENE in the tank.
- Place the MANOMETER on the left.
- Place the TRAIN CAR LEVER on the right and pull it to start the train.
- Take the BRICK.
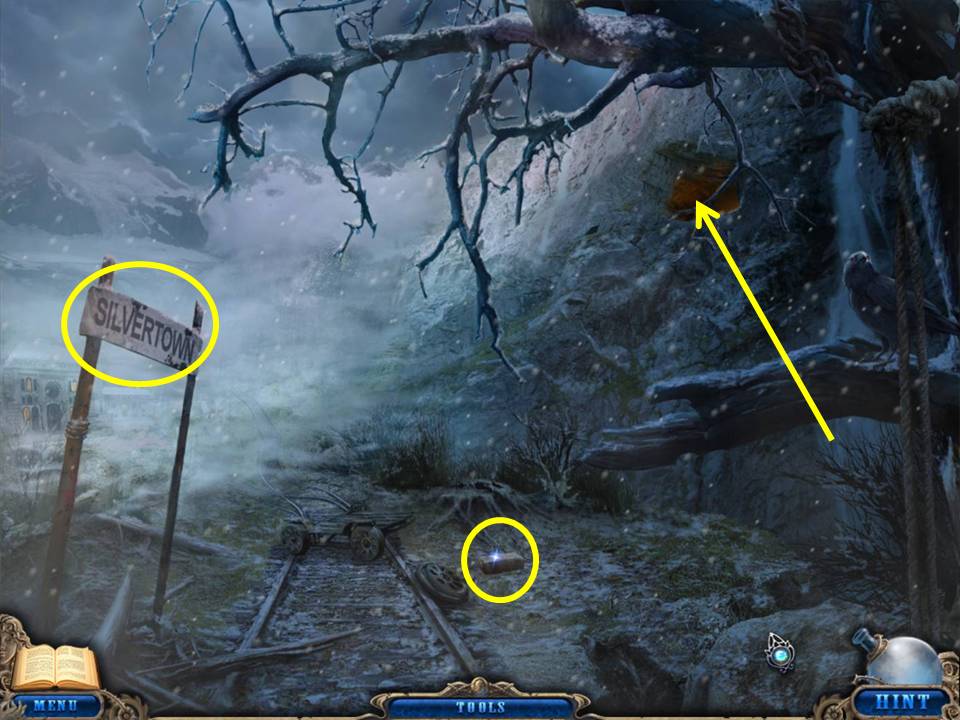
- Zoom into the cave on the upper right.
- Click the SILVERTOWN sign to proceed to the train station.
- Take the SPADE.
- Click on the door to the train station to initiate a puzzle.
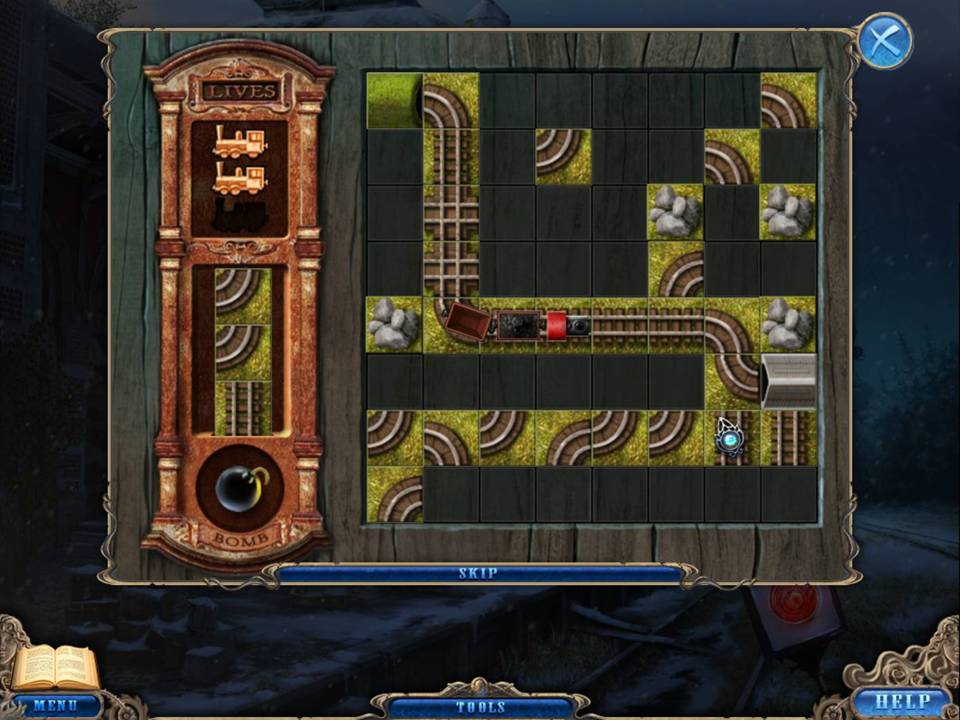
- The object of the puzzle is to complete the train track on the right with track pieces that appear in the left inset.
- Once a piece of track has been clicked, it must be placed before another piece is available.
- Discard unwanted track pieces by clicking and dropping on the right.
- You have a few chances to play this puzzle.
- The tracks will stay in place during your chances to you can continue track building.
- This puzzle is random. See screenshot for one solution.
- The best strategy is to begin building the track from the top left.

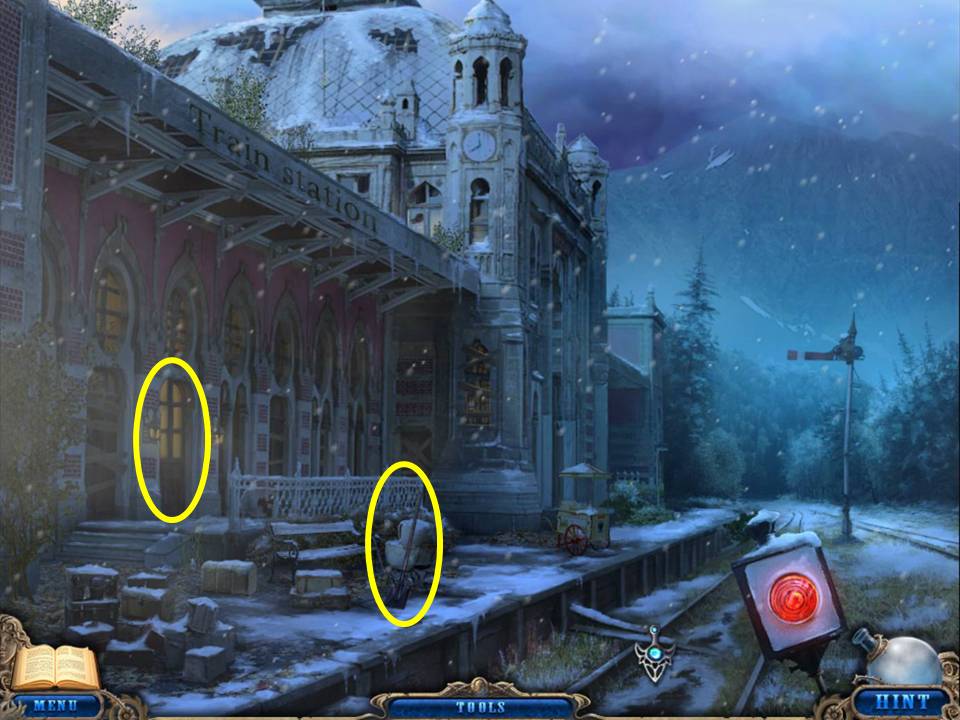
- Zoom into the ticket office.
- Take the key.
- Zoom into the door and the boarded up window on the left.
- Open the luggage storage door to access a Hidden Object Area.
- Find the items listed.
- Receive a SAW.
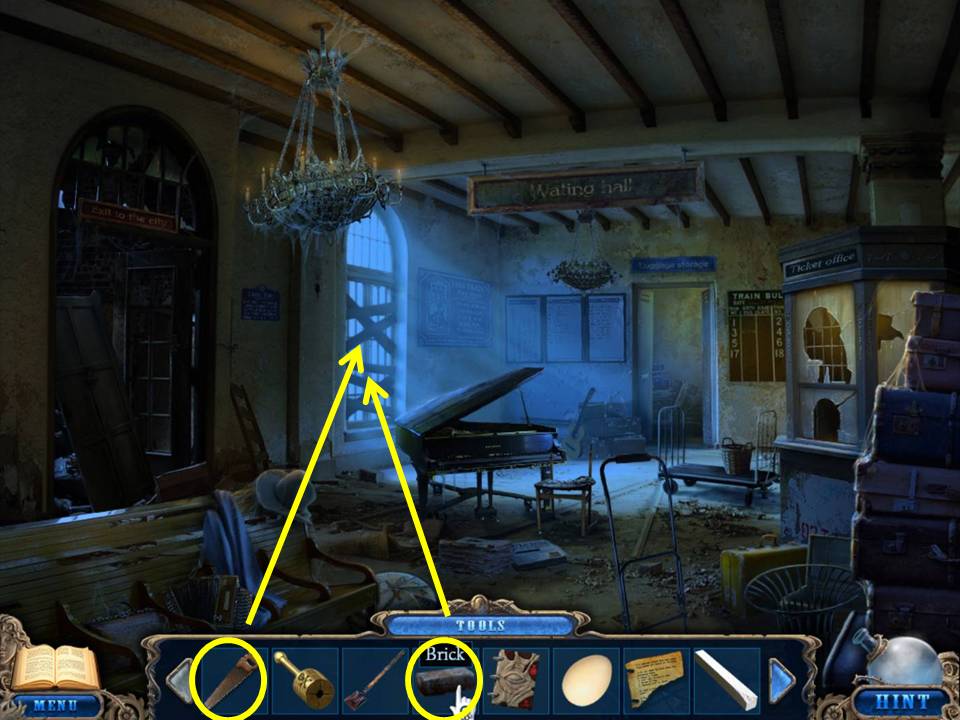
- SAW the boards on the boarded up window.
- Smash the window glass with the BRICK.
- Exit through the window to note a new shortcut.
- Return through the window and back up to the Silvertown sign.
- Toss the GRAPPLING HOOK up to access the cave entrance.
- Zoom into the skeleton at the back on the left side of the cave entrance.
- Dig with the SPADE to reveal a note. Complete the note with the SHEET.
- The completed page is a journal update.
- Take the CLOVER on the ground that was under the note.
- Zoom into the ritual ring. Read the journal page update concerning the curse banishing ritual.
- Note what is needed. Exit the cave and return to the train station.
- Go through the station and out the window to the station courtyard.
- Proceed to the workroom via the fire escape, window, and cabinet.
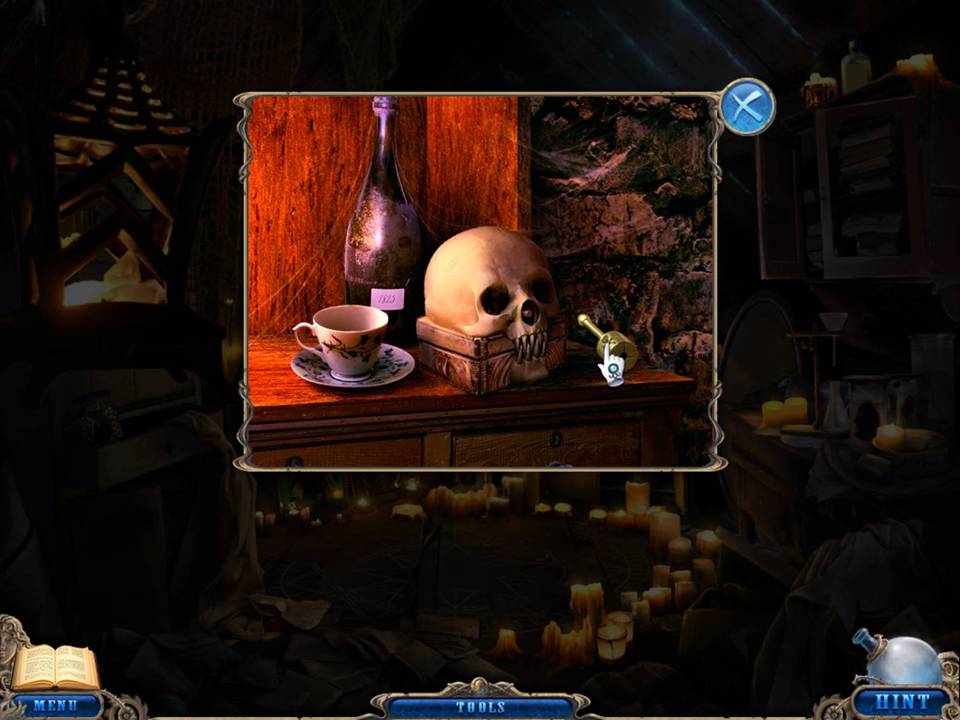
- Zoom into the skull on the shelf.
- Use the KEY on the skull.
- Take the poppy.
- Return through the window of the train station.
- Play the Hidden Object Area in the luggage storage room again.
- Find the items listed.
- Receive the SILVER.
- Return to the cave.
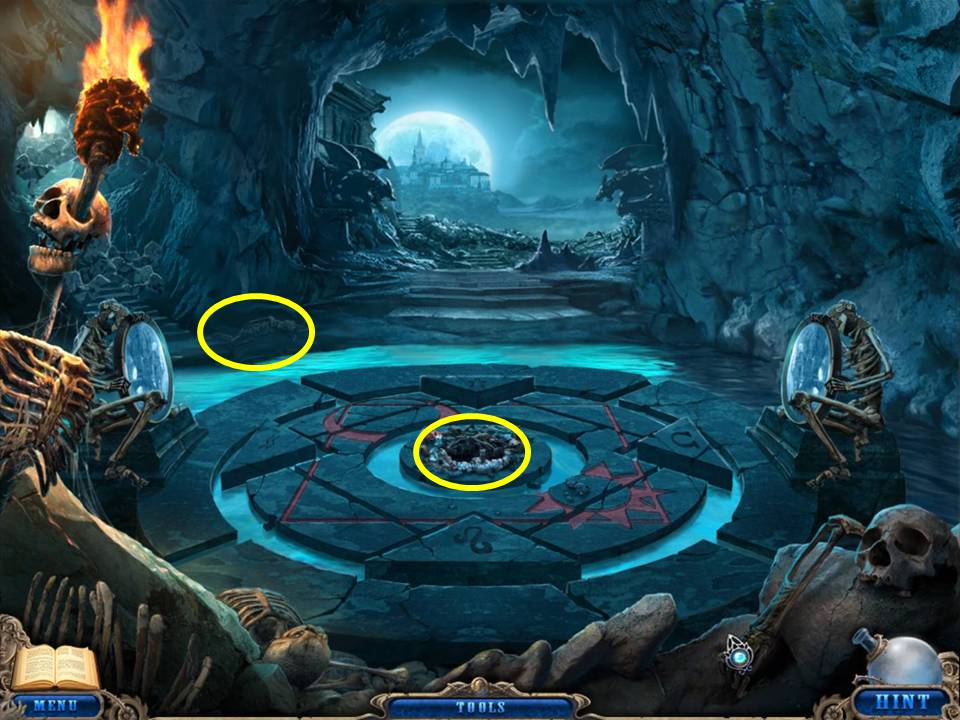
- Zoom into the floor center.
- Light the candles with the MATCHES.
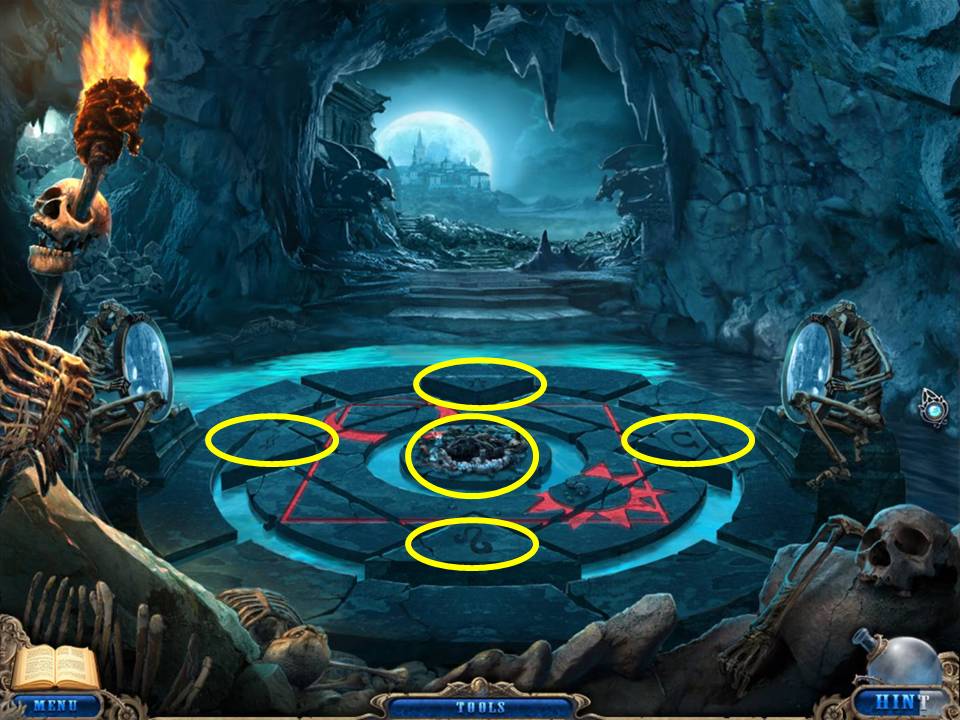
- Zoom into the triangular pedestals ringing the floor center.
- CHALK on each pedestal.
- Place LILLIAN’S CURL on the right pedestal.
- Place the CLOVER on the bottom pedestal.
- Place the POPPY on the left pedestal.
- Place the SILVER on the top pedestal.
- Place the SAGEBRUSH in the center.
- Light the SAGEBRUSH with the MATCHES.
- When the flame turns blue, toss the book on the flame.
- Add the FEATHERS and the EGG.
- Click on the right mirror.
Congratulations!
Comments will load when you reach this part of the walkthrough.