
Chapter 4: The Farmhouse
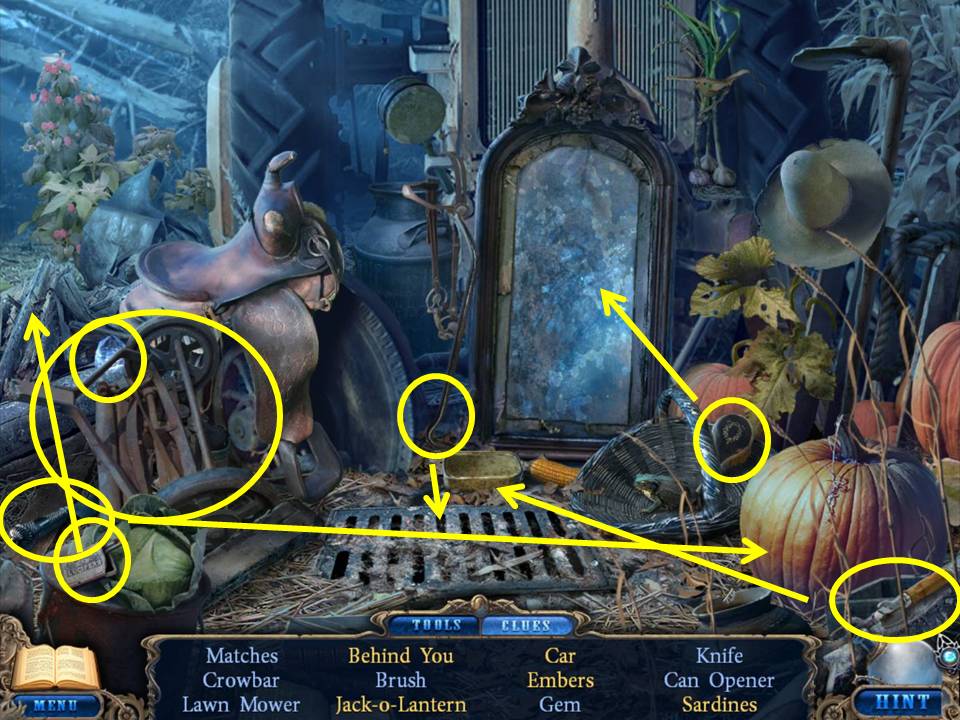
- Find the items listed.
- Burn the pile of twigs with the matches to get the embers.
- Open the can with the can opener to get the sardines.
- Brush the mirror to get the words “Behind You!”
- Pry the grate with the crowbar to get the car.
- Carve the pumpkin with the knife to get the jack-o-lantern.
- Receive the third GEM.
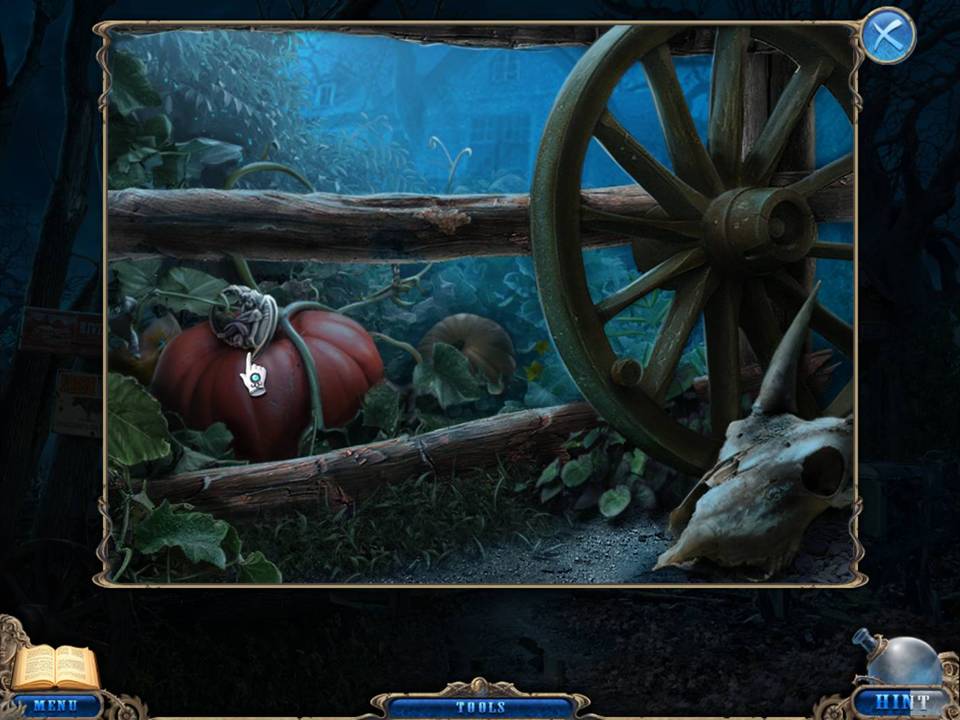
- Zoom into the pumpkin patch and take the second ANGEL.
- Click on the gate and place a RAM in the empty spot to initiate a puzzle.
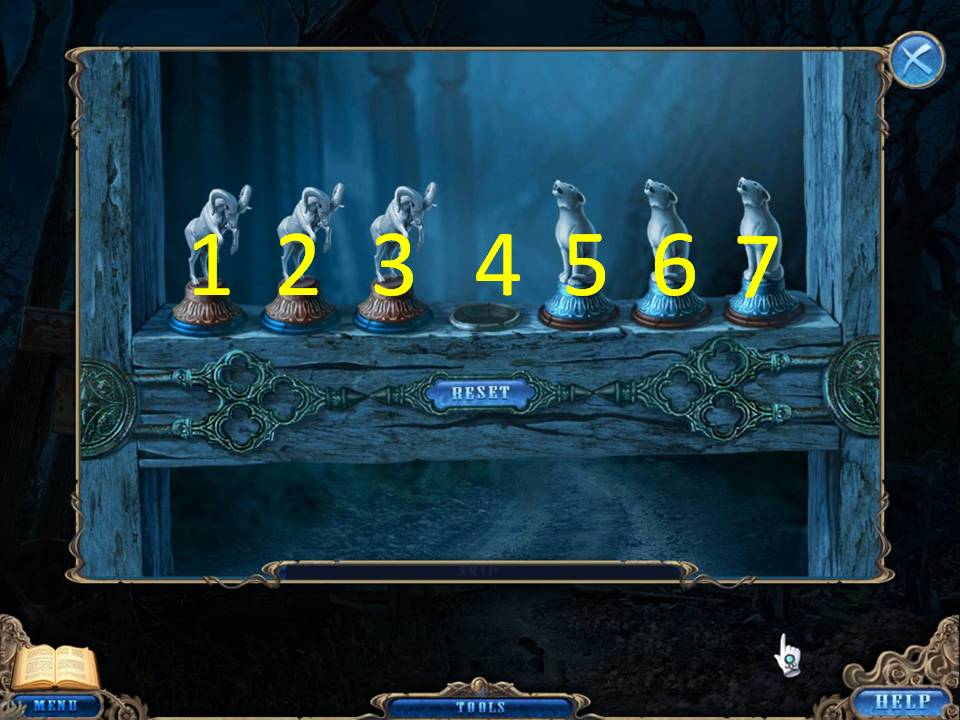
- The object of the puzzle is to move the dogs to the blue spots on the left and the rams to the red spots on the right.
- Assuming the spots are numbered, left to right, one to seven, click in this order: 5, 3, 2, 4, 6, 7, 5, 3, 1, 2, 4, 6, 5, 3, 4.
- When finished, proceed through the gate to the Farmhouse.
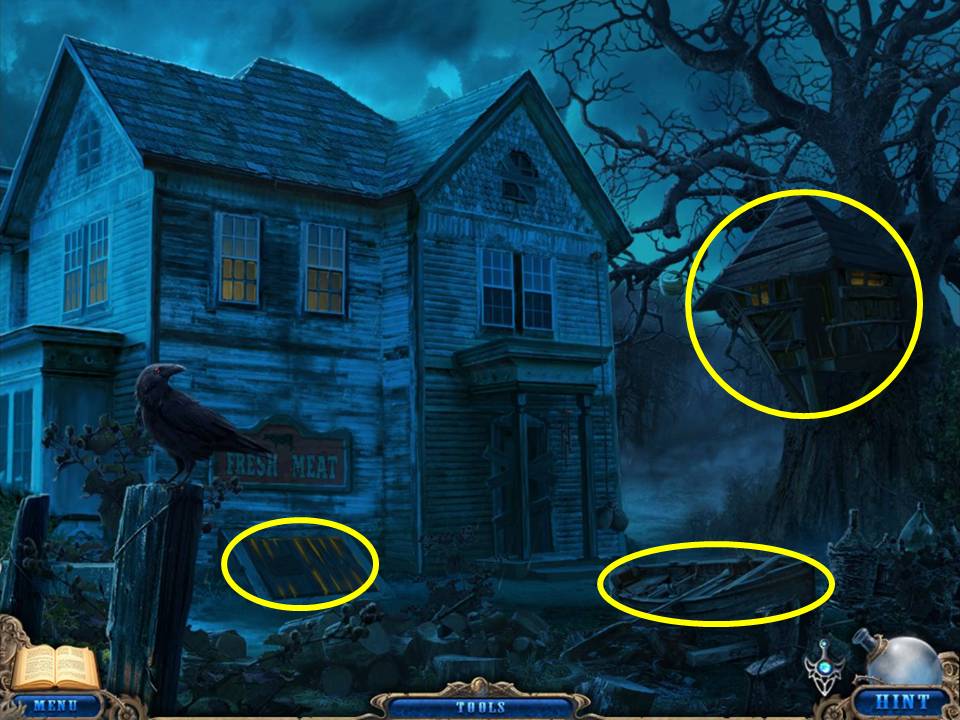
- Zoom into the rowboat and take the CROWBAR and the ROSE.
- Place the LADDER on the tree trunk.
- Zoom into the treehouse.
- Take the KEROSENE.
- Examine the pulley and note that it’s missing a weight.
- Look at the symbol written on the paper.
- Leave the treehouse.
- Zoom into the cellar door and note that a thin object will be required.
- Return to the Cemetery.
- Play the Hidden Object Area near the front of the piano statue.
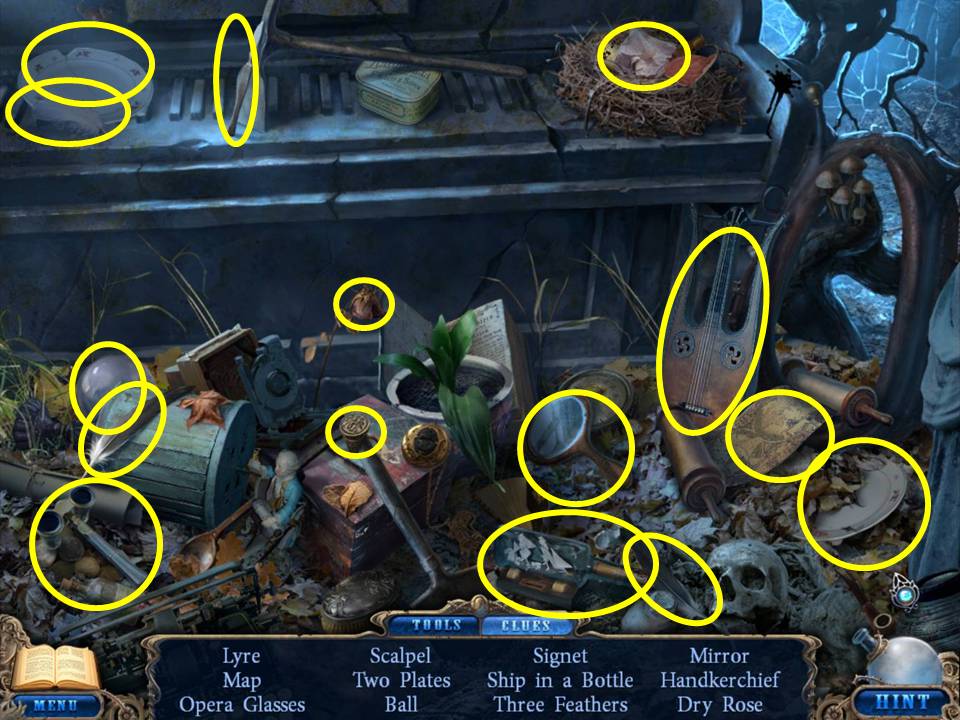
- Find the items listed.
- Receive the SCALPEL.
- Return to the Cemetery.
- Place the ROSE in the space on the gravestone at the right.
- Take the fourth GEM.
- Return to the Farmyard.
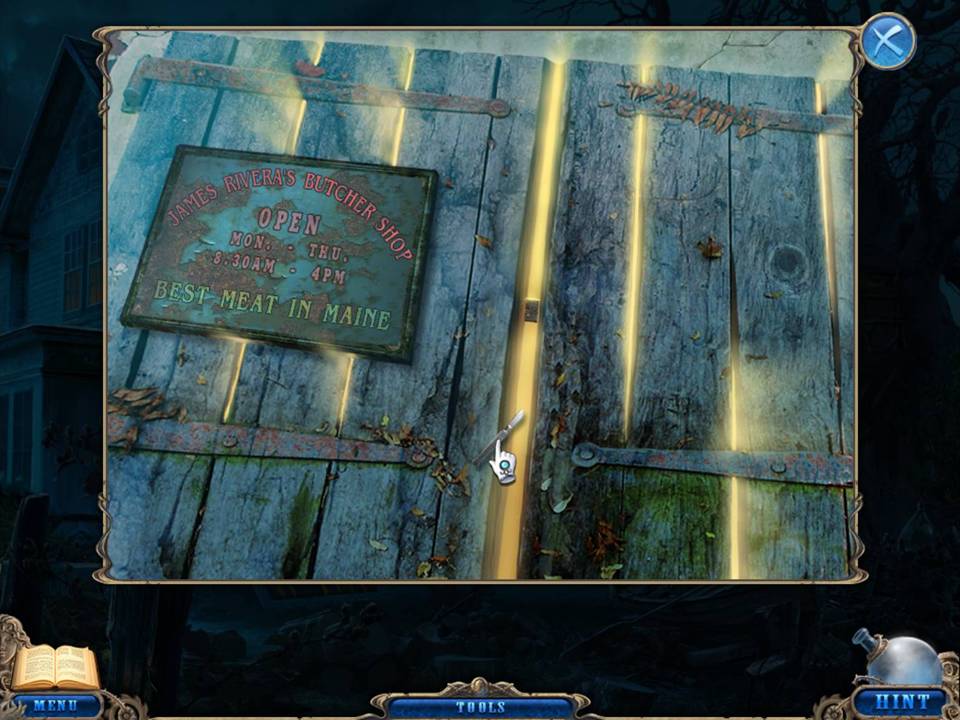
- Zoom into the cellar door.
- Use the SCALPEL on the center latch.
- Enter the cellar and play the Hidden Object Area located at the butcher table on the right.
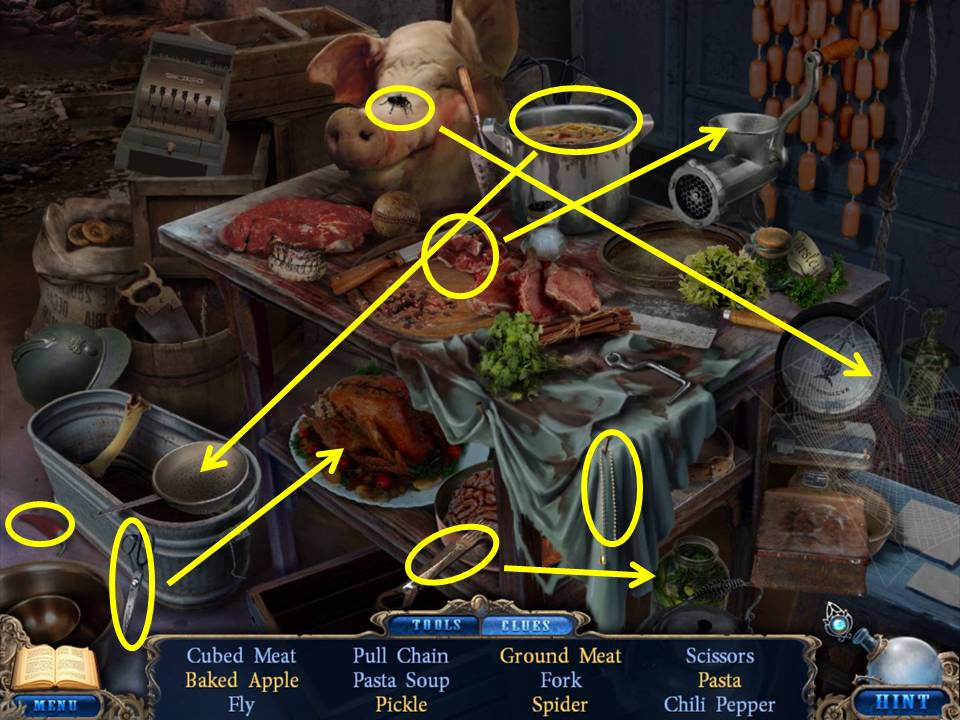
- Find the items listed.
- Grind the cubed meat to get the ground meat.
- Place the fly in the web to get the spider.
- Get a pickle from the jar with a fork.
- Clip the turkey with the scissors to get the baked apple.
- Strain the soup to get the pasta.
- Receive a PULL CHAIN.
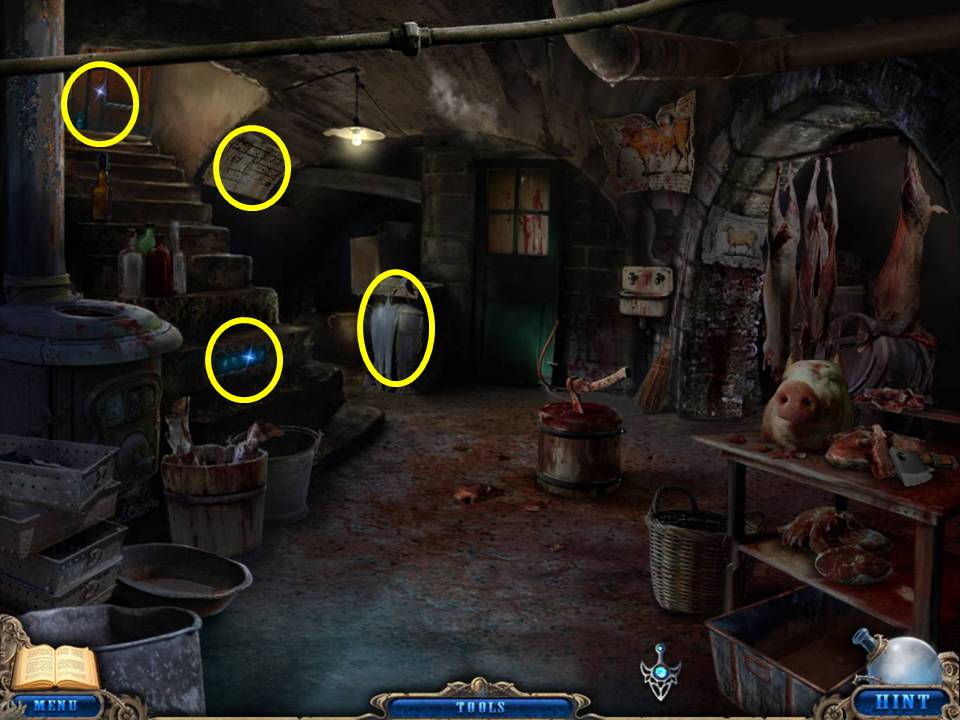
- Zoom into the floorplan to the right of the stairs.
- Zoom into the barrel in the corner.
- Take the directions for developing photos, which will update the journal.
- Take the DEVELOPER.
- Zoom into the glowing symbols on the stair riser.
- A code is required.
- Zoom into the lock on the door at the top of the stairs.
- Something is required to remove the lock.
- Return to the Photo Studio and play the Hidden Object Area near the trunk at lower left.
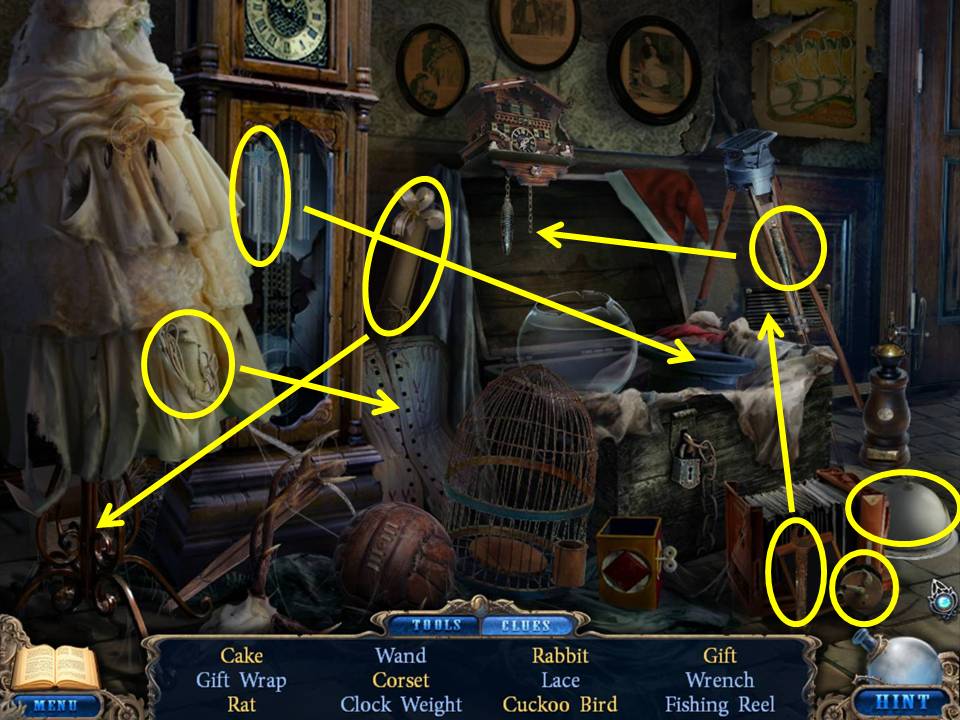
- Find the items listed.
- Wrap the box to get the gift.
- Place the wand on the top hat to get the rabbit.
- Open the serving plate to get the cake.
- Lace the corset.
- Wrench open the grate to get the rat.
- Place the clock weight on the clock to get the cuckoo bird.
- Receive a SPINNING REEL.
- Go into the darkroom on the left.
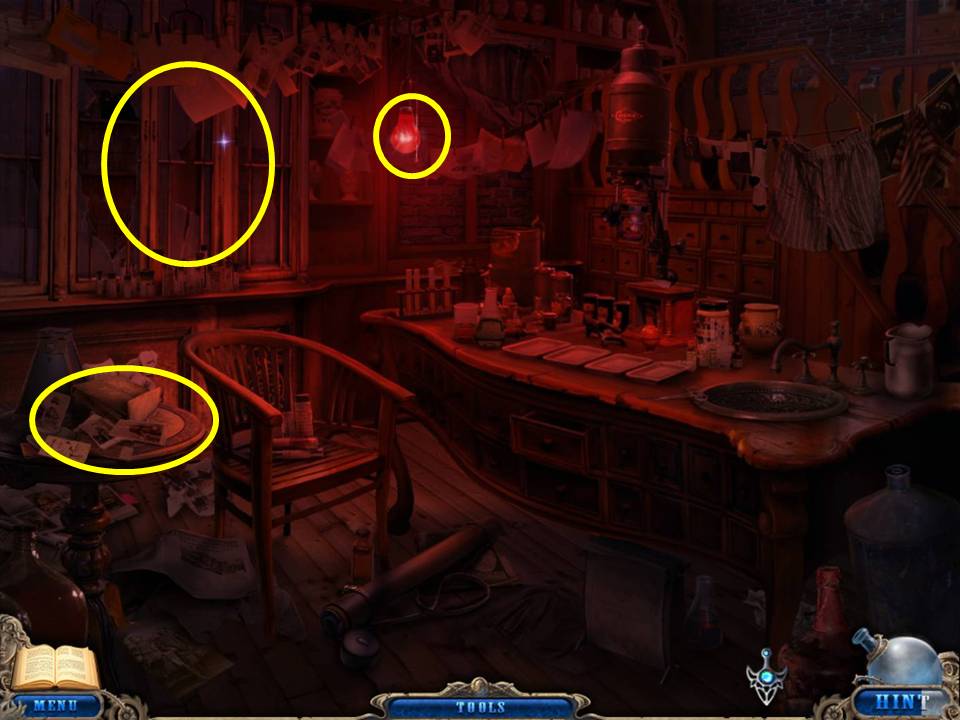
- Place the PULL CHAIN on the red light.
- Zoom into the table on the left.
- Move the page and take the third ANGEL.
- Zoom into the glass cabinet and take the FIXER.
- Zoom into the developing trays.
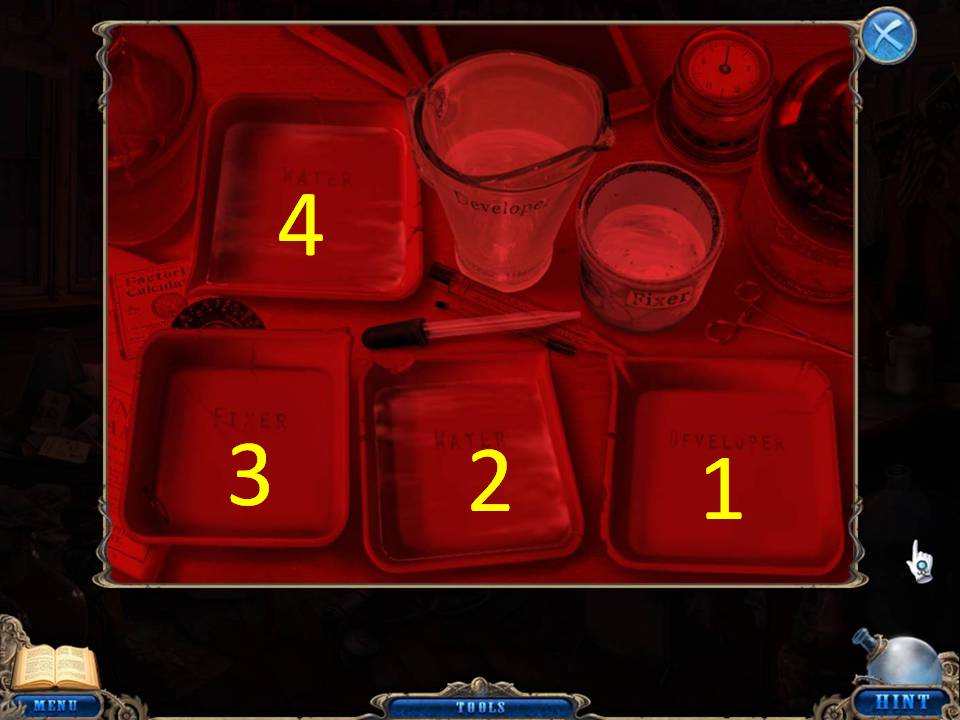
- Place the DEVELOPER and FIXER in their proper containers.
- Use the pipette to place developer in the developer tray and fixer in the fixer tray.
- You may now develop the photos as follows.
- Place NEGATIVE #1 in the developer tray (1).
- Place the photo in water to the left (2).
- Move the photo to the fixer tray (3).
- Place the photo in the final water tray (4).
- Take the photo to add to your journal.
- Return to the Bridge to play the Hidden Object Area by the baby carriage.
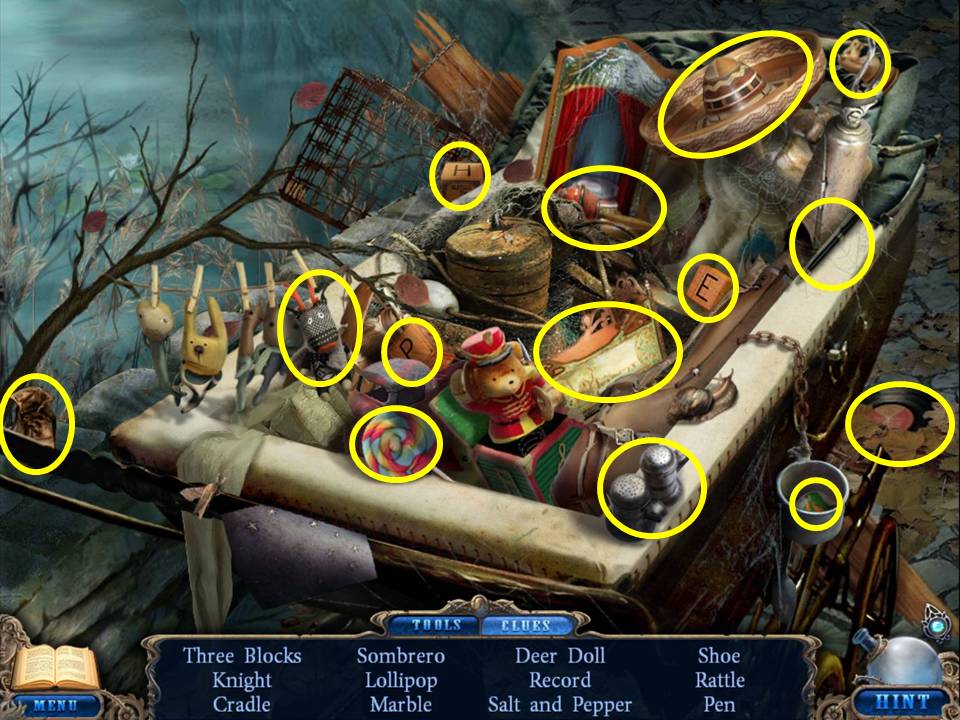
- Find the items listed.
- Receive a PEN.
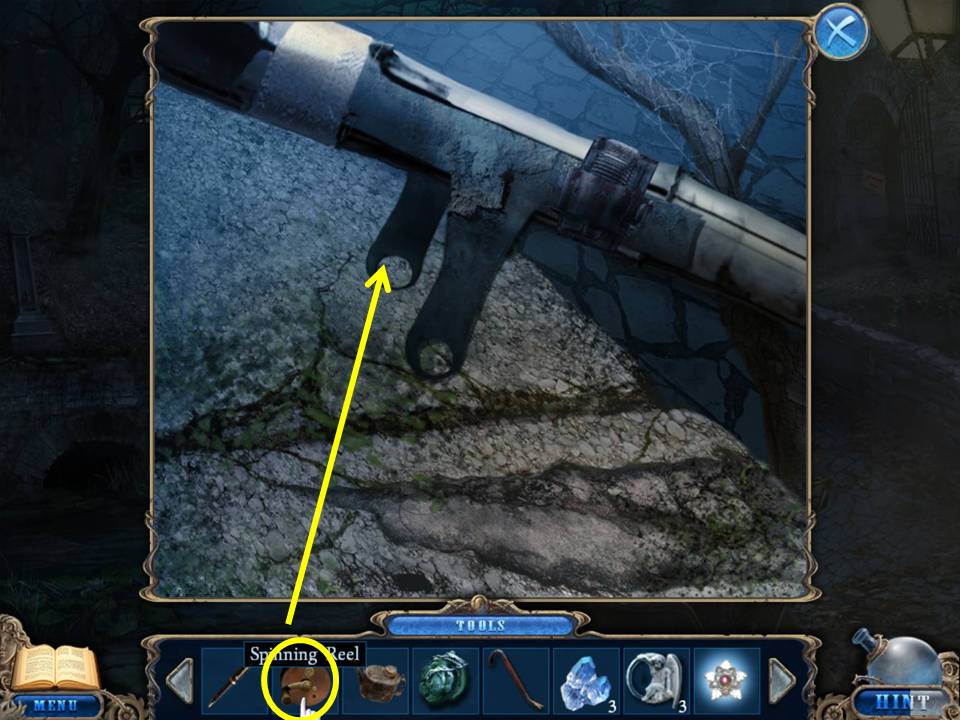
- Zoom into the fishing rod.
- Place the SPINNING WHEEL on the rod.
- Click to reel in the line.
- Take the COUNTERWEIGHT from the end of the line.
- Return to the Farmyard.
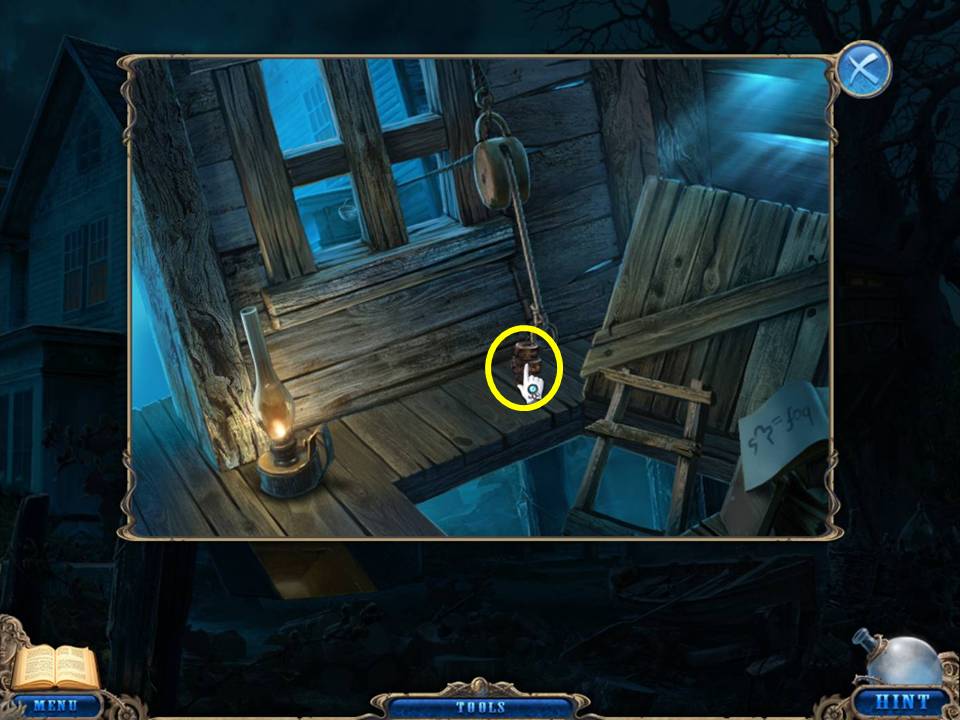
- Zoom into the treehouse.
- Place the COUNTERWEIGHT at the end of the rope.
- Take the fourth ANGEL.
- Return to the Cellar.
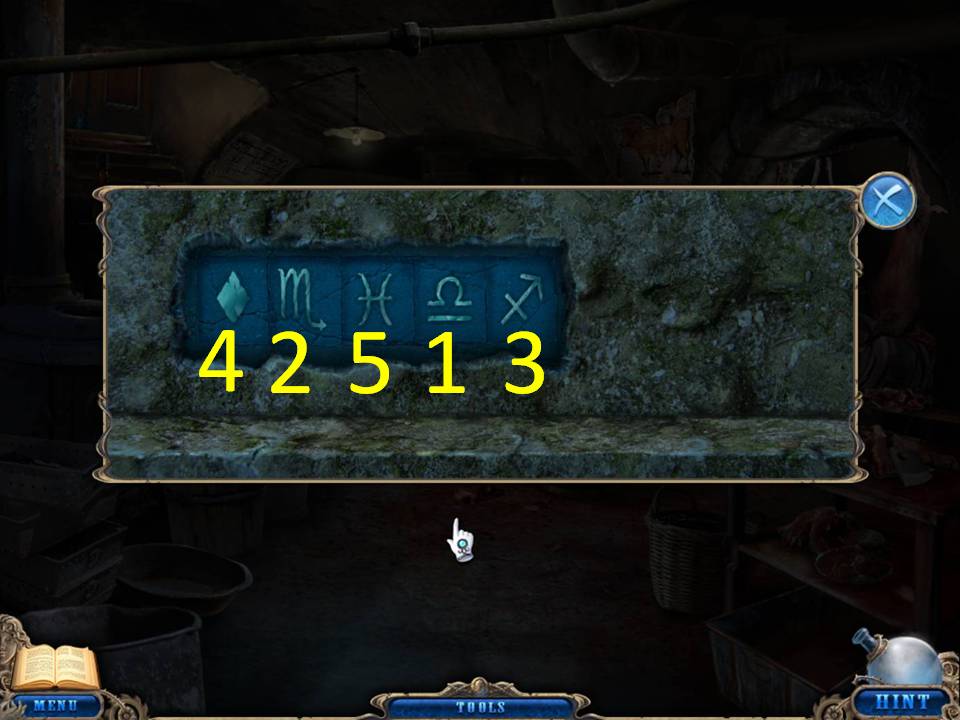
- Zoom into the glowing symbols on the stair riser.
- Take the code from the journal which is on the photo you developed.
- Click the symbols until they match the code.
- See Screenshot for proper order.
- Take the fifth GEM. Return to the Cemetery.
- Zoom into the mausoleum.
- Place the SHINING STAR in the center of the stone.
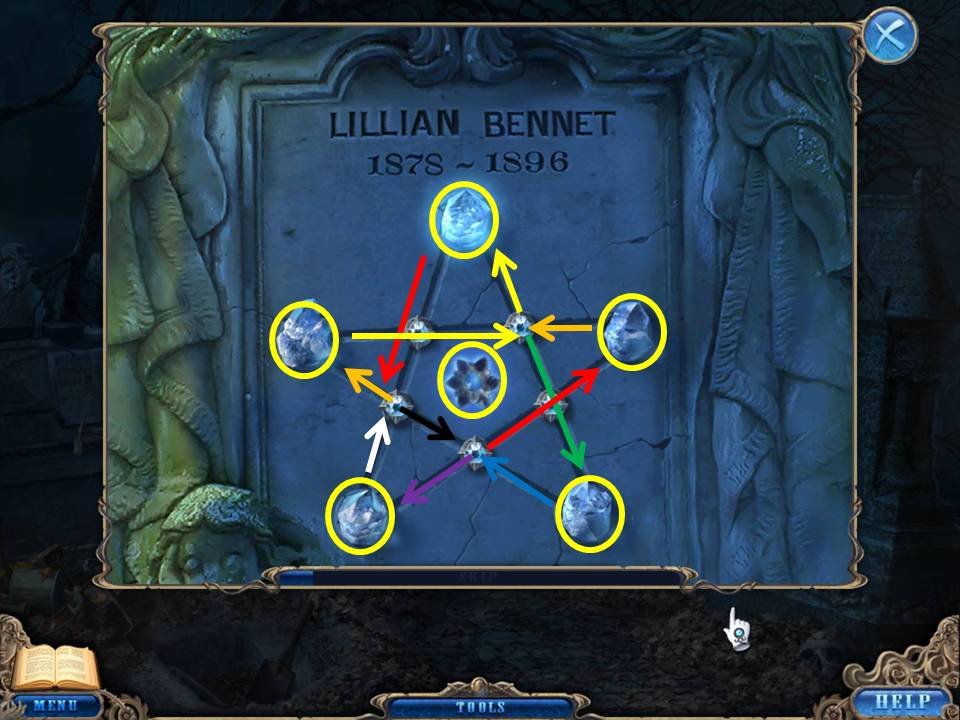
- Place the five GEMS on the five points of the star.
- The object of this puzzle is to light up the points and the paths using each path just once.
- See screenshot for solution.
- Beginning at the top point of the star, follow the arrows this way: red to orange to yellow to green to blue to purple to white to black to red to orange to yellow.
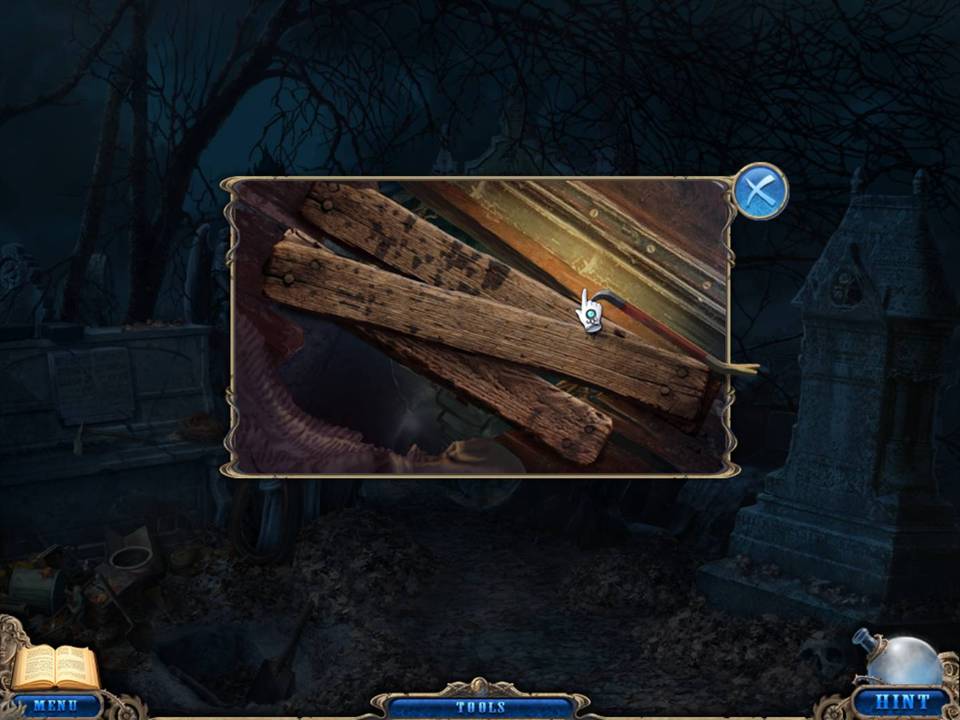
- Zoom into the open coffin.
- Click on the stitching.
- Pry the exposed boards with the CROWBAR.
- Take the NEWSPAPER.
- Click on the ladder and note the body has been removed.
- Return to the House.
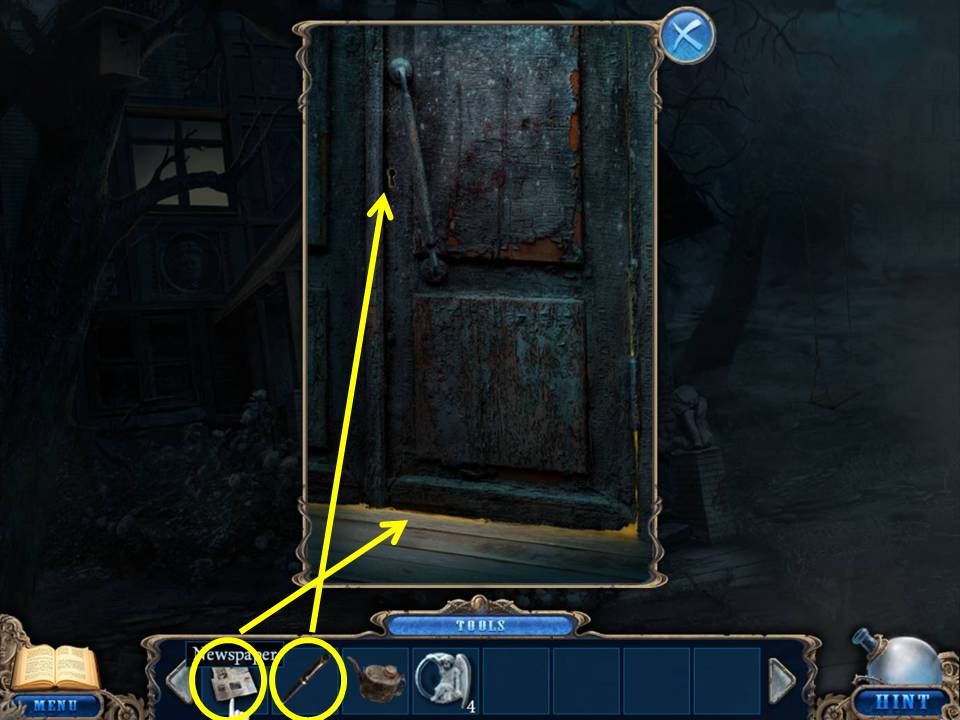
- Zoom into the front door.
- Place the NEWSPAPER under the door.
- Zoom into the keyhole.
- Use the PEN to push the key from the keyhole.
- Pull out the NEWSPAPER and take the DOOR KEY.
- Open the door with the KEY.
- Enter the House and play the Hidden Object Area to the left of the staircase.
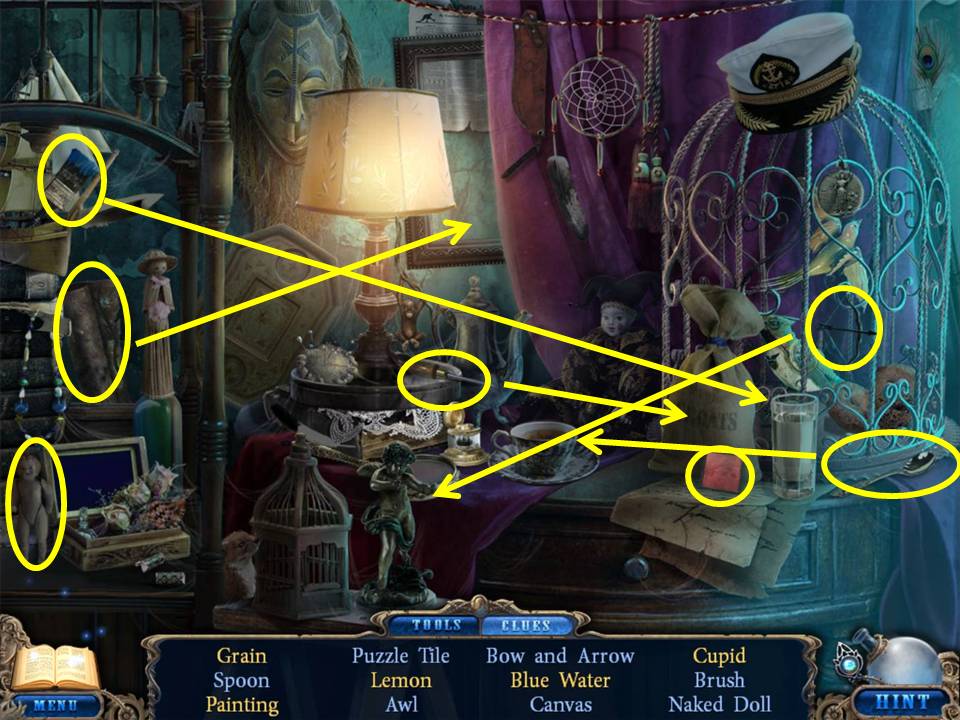
- Find the items listed.
- Use the awl on the grain bag to get the grain.
- Use the brush on the glass to get blue water.
- Place the bow and arrow on the statue to get the cupid.
- Place the canvas on the frame to get the painting.
- Scoop the lemon out of the teacup with the spoon.
- Receive a PUZZLE TILE.
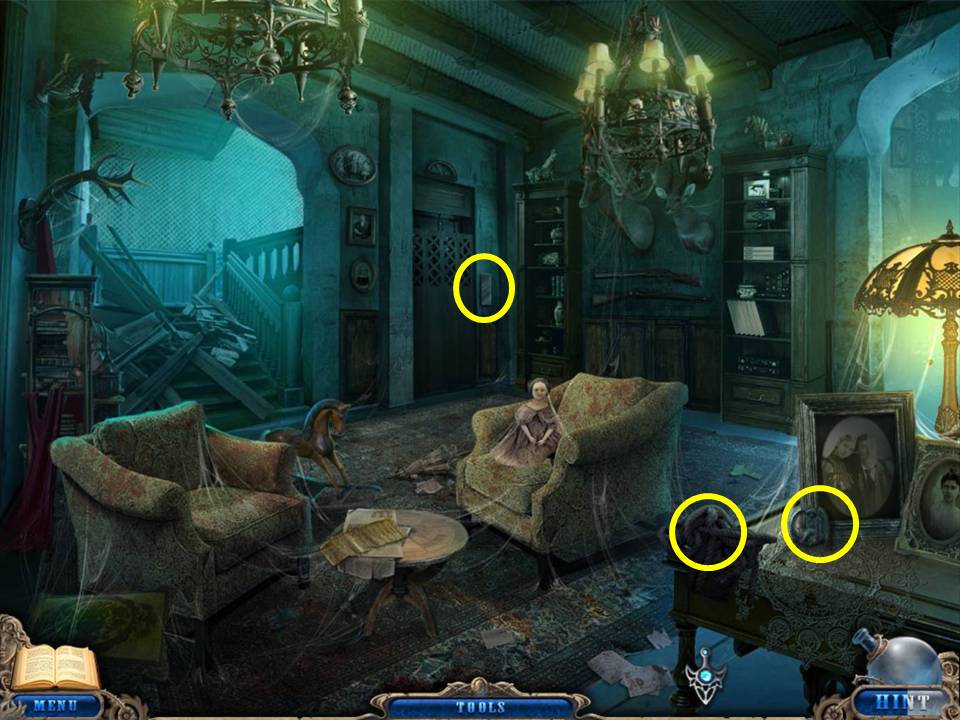
- Take the ROPE and the fifth ANGEL from the table on the right.
- Zoom into the panel to the right of the elevator door.
- Note a missing button. Return to the Train Station exterior.
- Play the Hidden Object Area on the left side of the stairs.

- Find the items listed.
- Use the needle and thread on the embroidery hoop to get the rose.
- Smash the hourglass with the hammer to get the sand.
- Cut the apple with the knife to get the worm.
- Place the cheese outside the mousehole to get the mouse.
- Place the sail on the boat to get the ship.
- Receive an UMBRELLA.
- Return to the Photo Studio’s alley.
Comments will load when you reach this part of the walkthrough.