

Chapter 5: The Doctor’s House
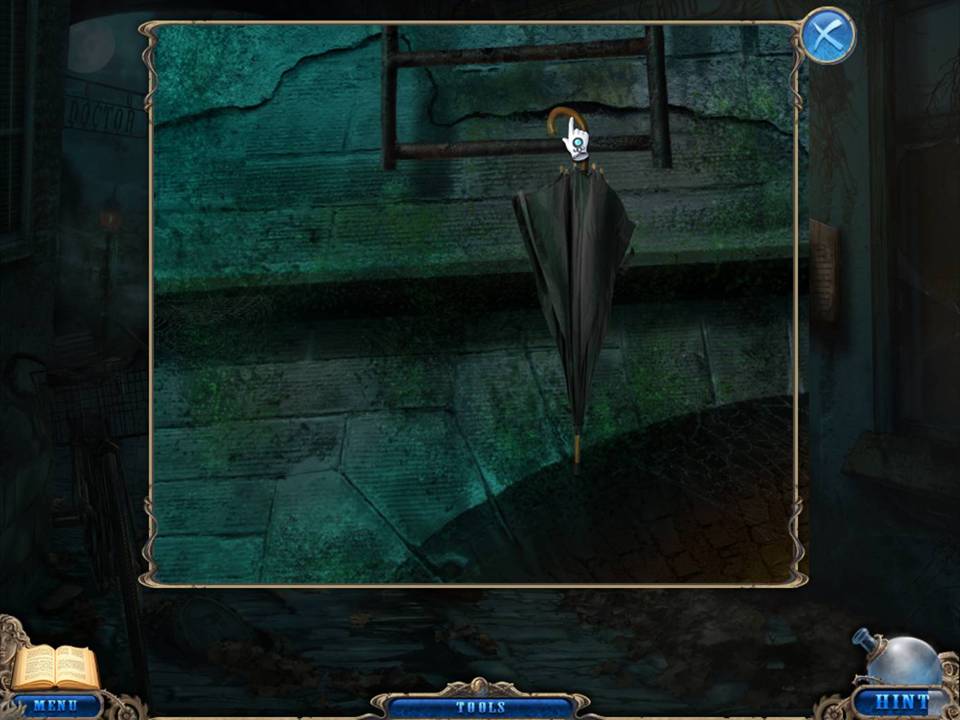
- Zoom into the fire escape.
- Use the UMBRELLA handle to pull down the fire escape ladder.
- Move up the ladder to the roof.
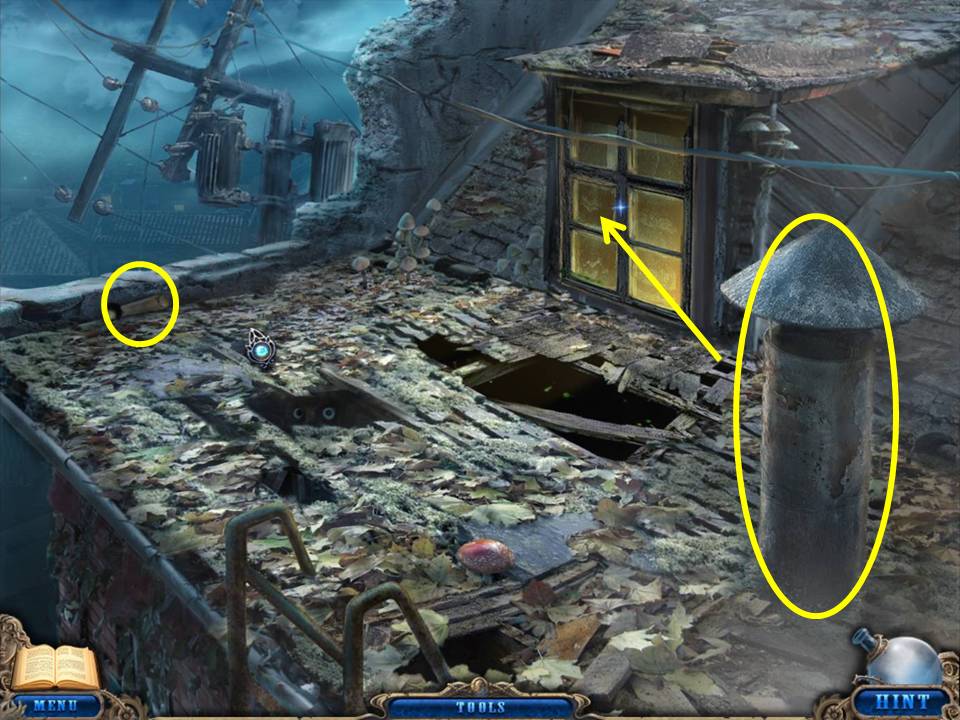
- Take the ELEVATOR HANDLE.
- Open the window.
- Tie the ROPE around the chimney and use it to enter the Doctor’s Office through the window.
- Play the Hidden Object Area by the table.
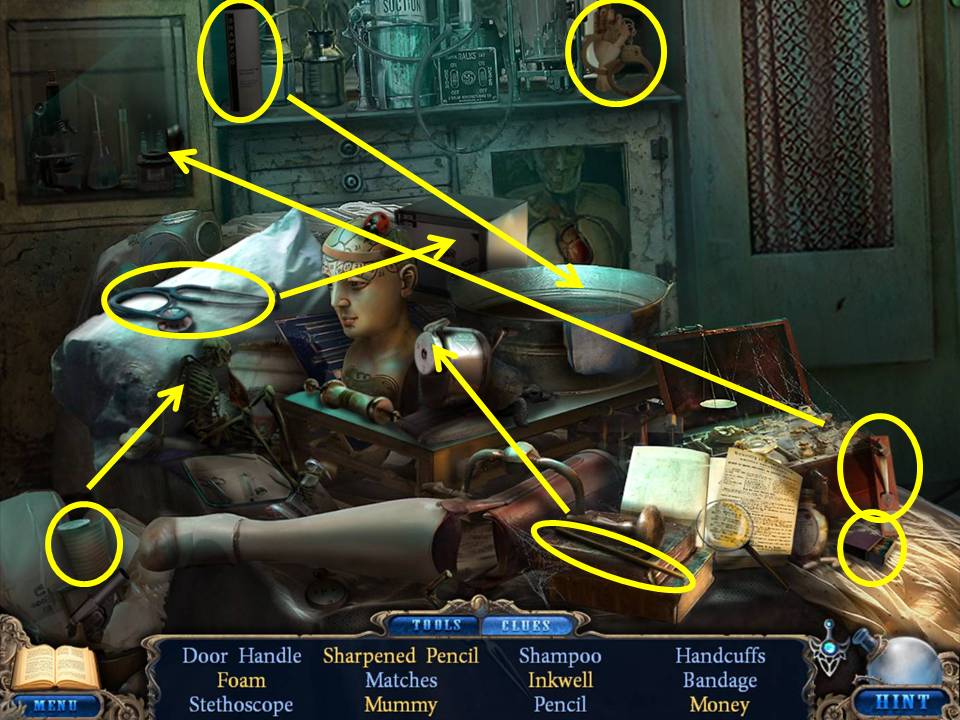
- Find the items listed.
- Place the door handle on the cabinet to open and get the inkwell.
- Sharpen the pencil in the sharpener to get the sharpened pencil.
- Place shampoo in the tub to get foam.
- Bandage the skeleton to get the mummy.
- Place the stethoscope on the safe to get the money.
- Receive the MATCHES.
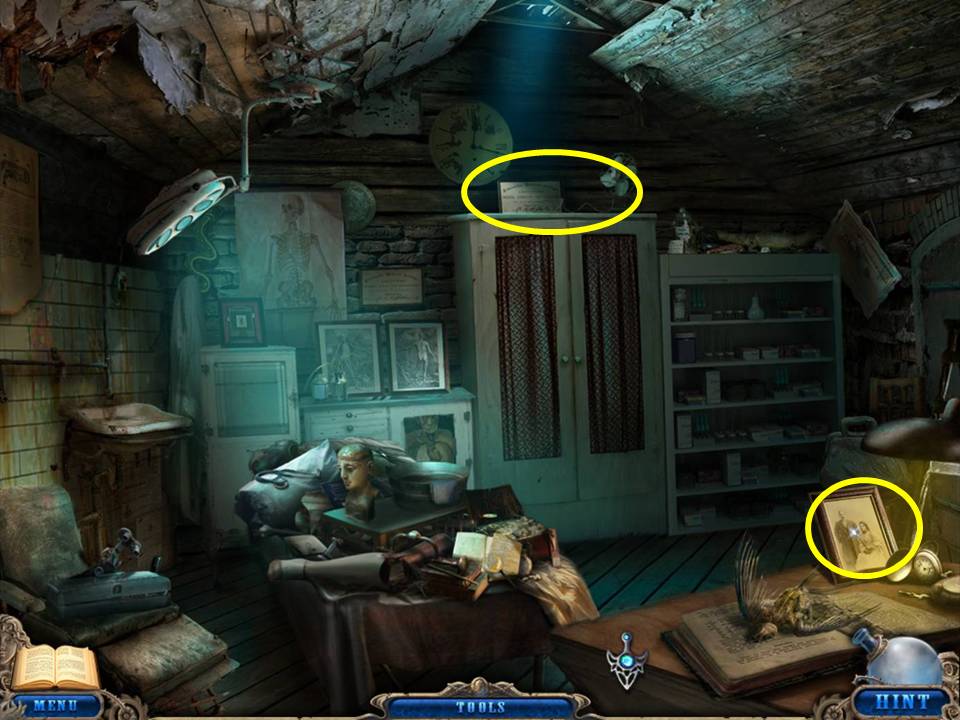
- Zoom into the top of the cabinet.
- Take the ACID.
- Zoom into the picture on the right table.
- Take the ELEVATOR BUTTON.
- Click on the cabinet and note that it is too dim to see inside.
- Return to the House.
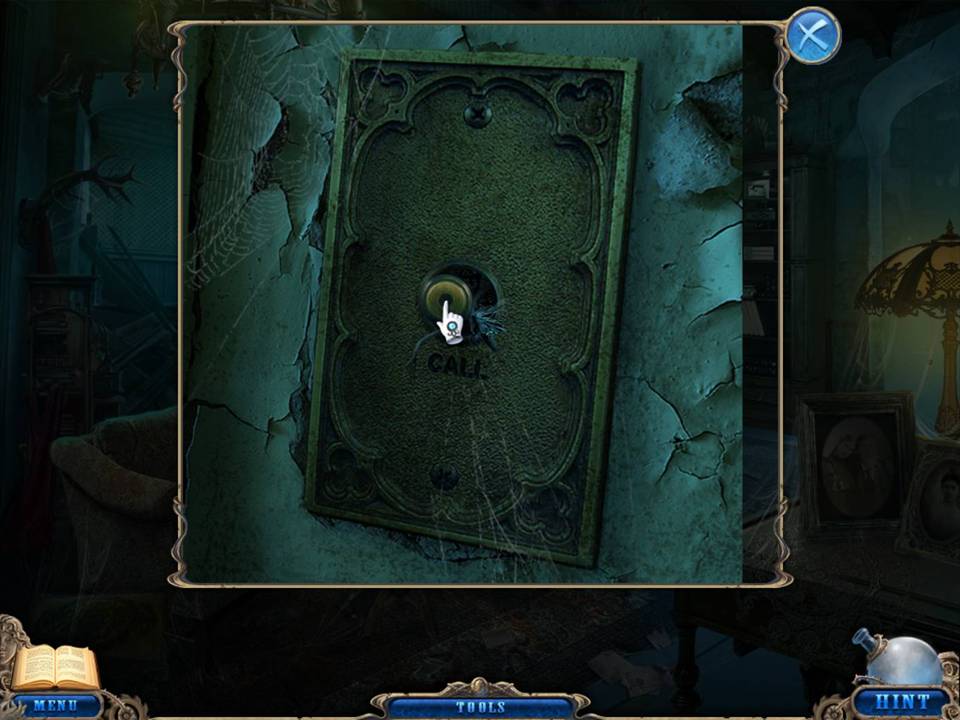
- Zoom into the panel on the right of the elevator.
- Place the ELEVATOR BUTTON on the panel.
- Push the button to enter the elevator.
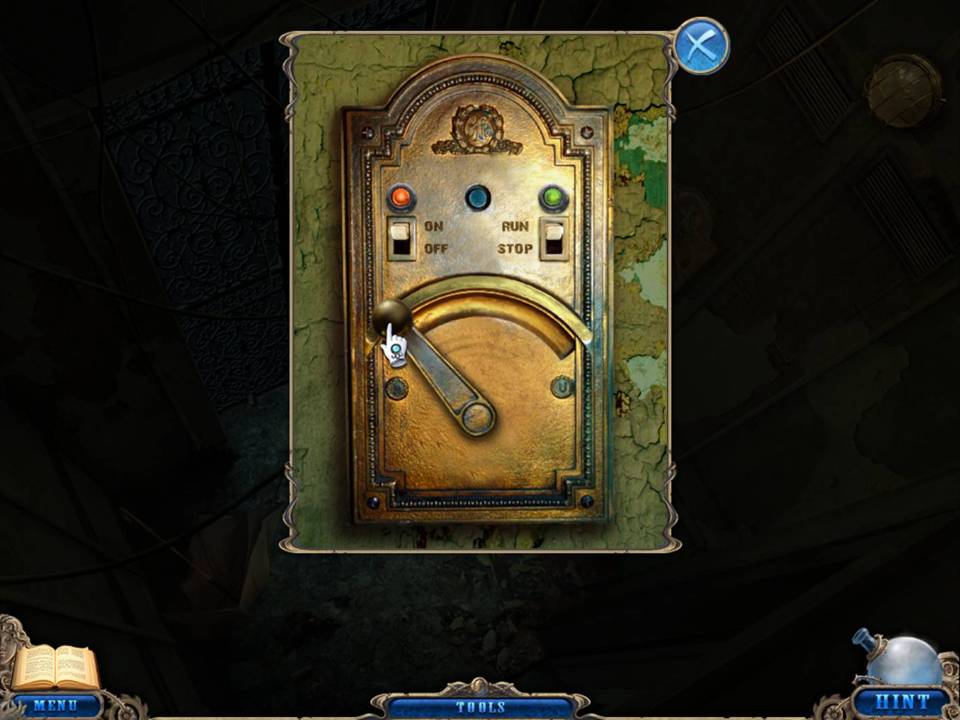
- Zoom into the panel on the inside of the elevator.
- Place the ELEVATOR HANDLE on the bottom of the panel.
- Slide the button on the left to the “on” position.
- Slide the button on the right to the “run” position.
- Move the ELEVATOR HANDLE to the right.
- Take the sixth ANGEL from the elevator floor.
- Exit the elevator through the door.
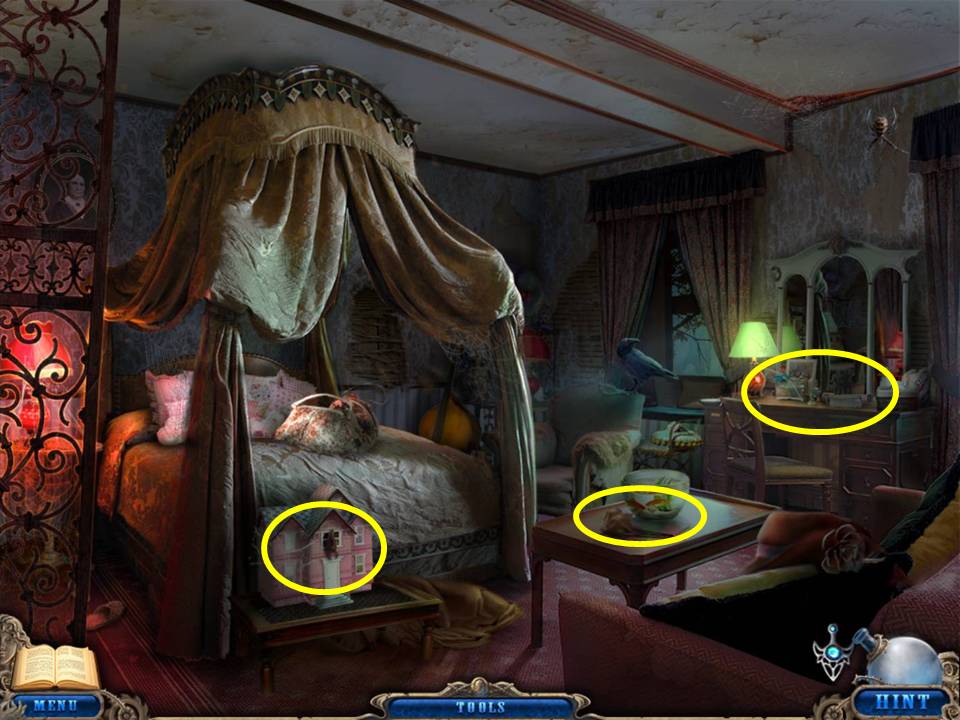
- Zoom into the dollhouse and note that a tool is needed.
- Zoom into the dressing table and take the seventh ANGEL.
- Read the note next to the bowl on the table to get a journal update.
- Return to the elevator. Zoom into the elevator panel and slide the handle to the left.
- Return to the Farmyard and play the Hidden Object Area by the tractor to the right of the gate.
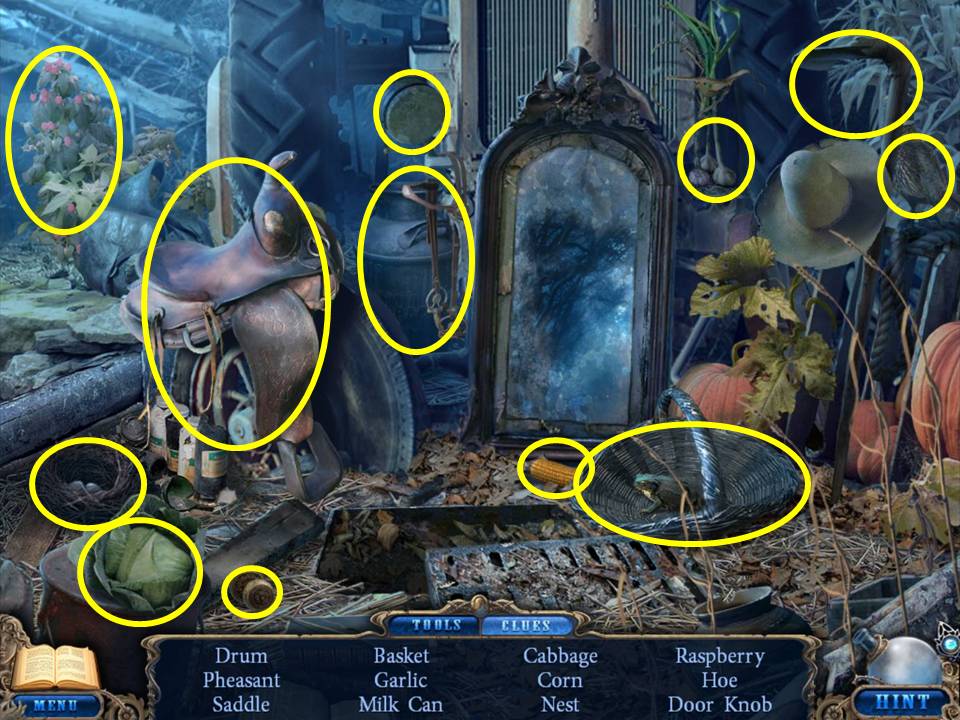
- Find the items listed.
- Receive a DOOR HANDLE.
- Return to the Cellar.
- Play the Hidden Object Area near the table to the right.
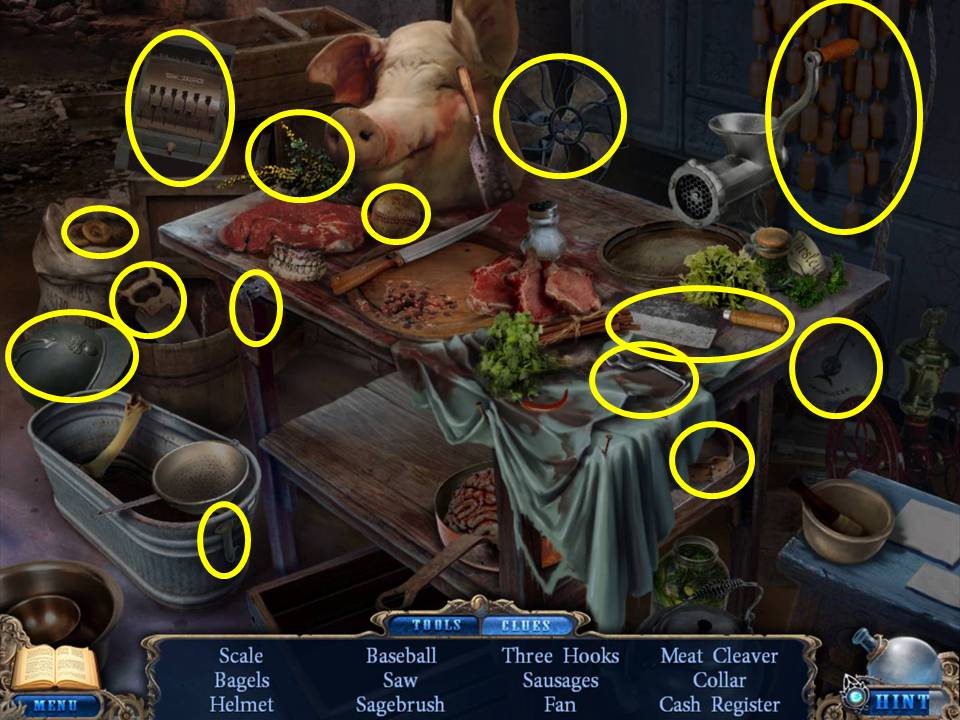
- Find the items listed.
- Receive the SAGEBRUSH.
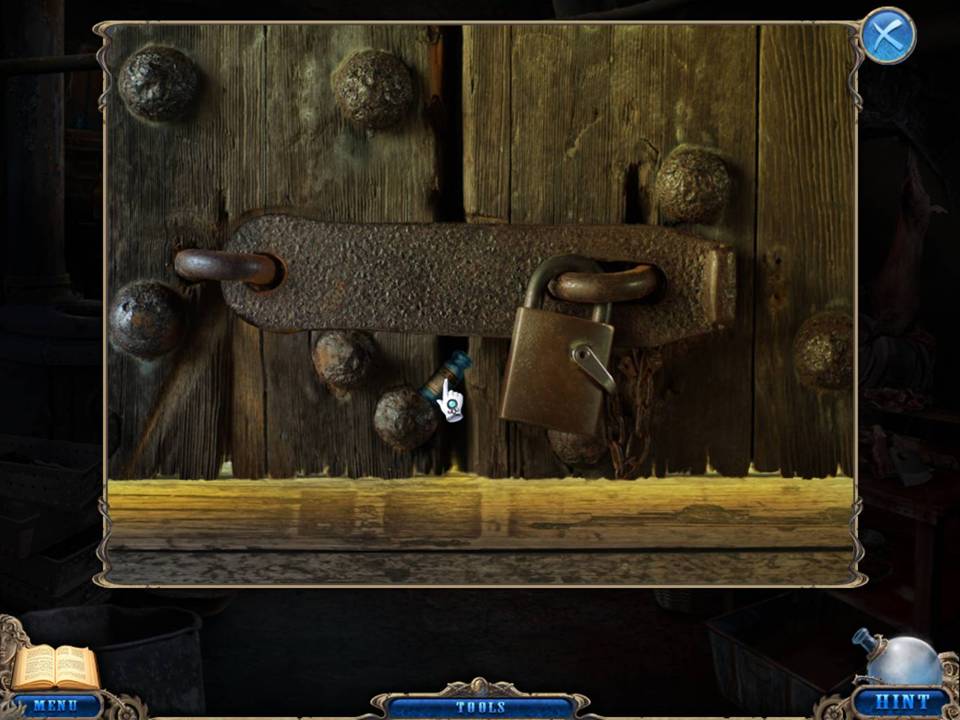
- Zoom into the door at the top of the stairs.
- Pour ACID on the lock.
- Move through the now-opened doorway.
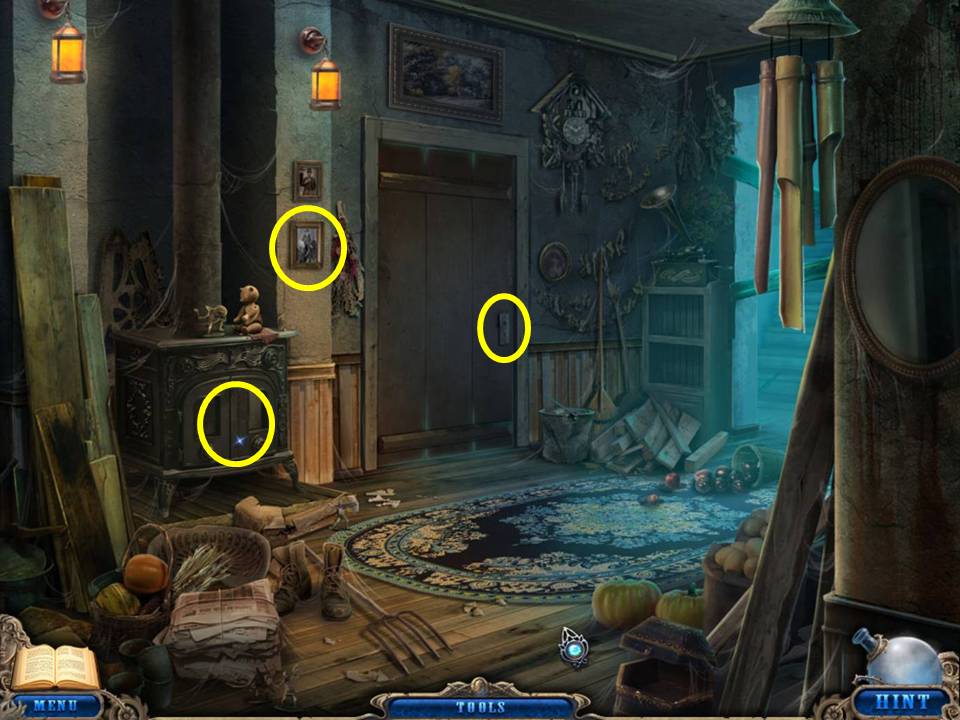
- Open the right stove door.
- Take the eighth ANGEL.
- Zoom into the photo to the left of the door.
- Take the DOLLHOUSE KEY.
- Zoom into the handle plate on the door.
- Place the DOOR HANDLE on the plate.
- Go through the door to the bedroom.
- Play the Hidden Object Area on the bookshelf to the left of the bed.
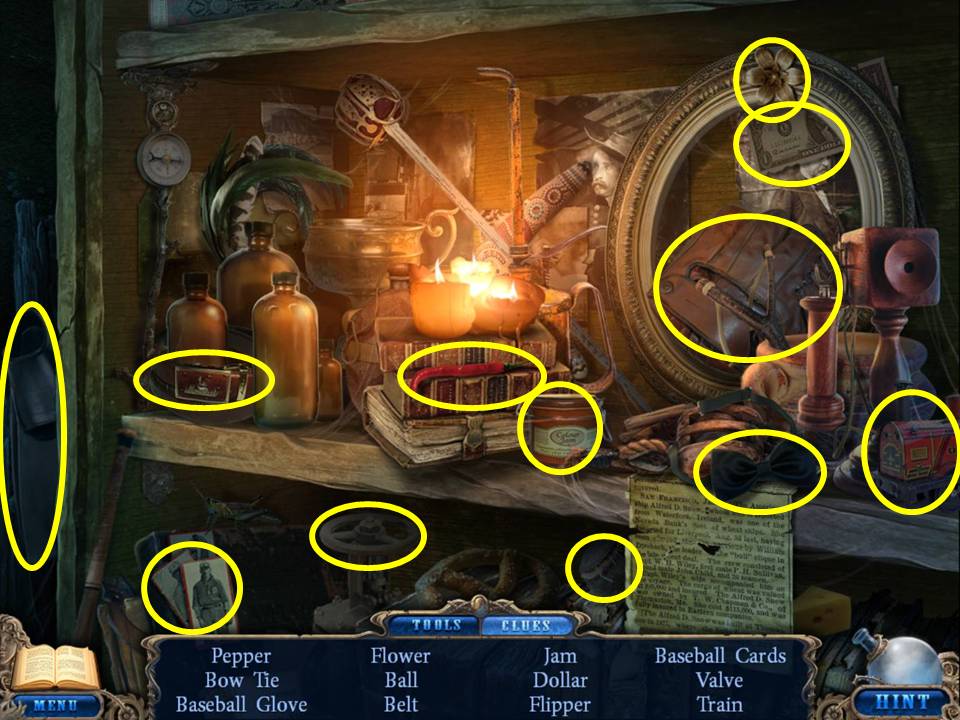
- Find the items listed.
- Receive a FLOWER.
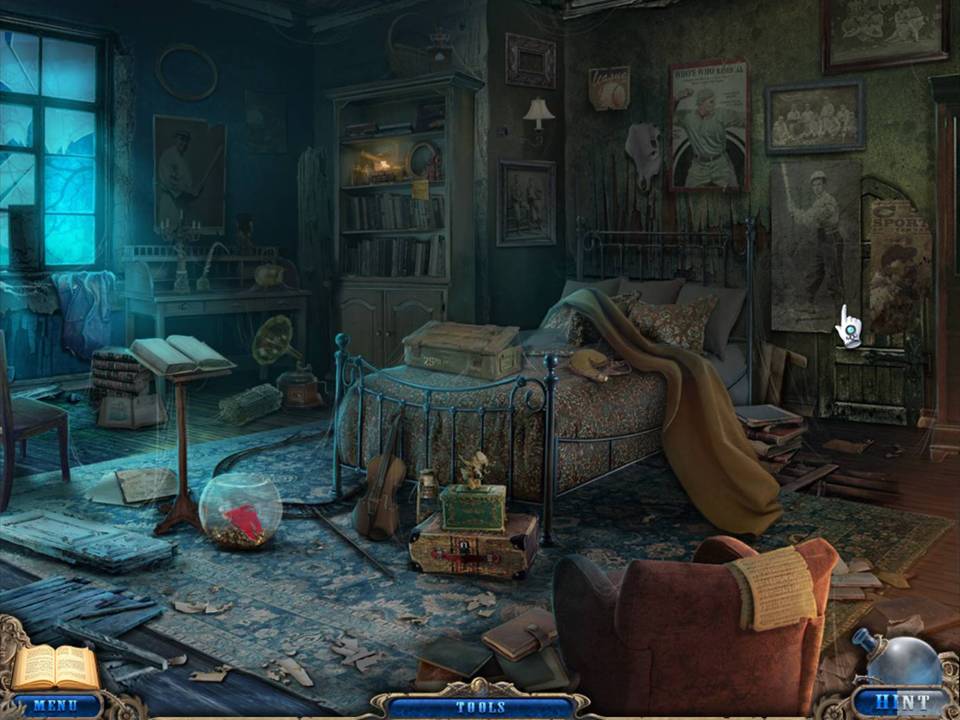
- Move the poster to the right of the bed to expose a door.
- Zoom into the door and note that the puzzle is missing a tile.
- Return to the House.
- Play the Hidden Object Area to the left of the staircase.
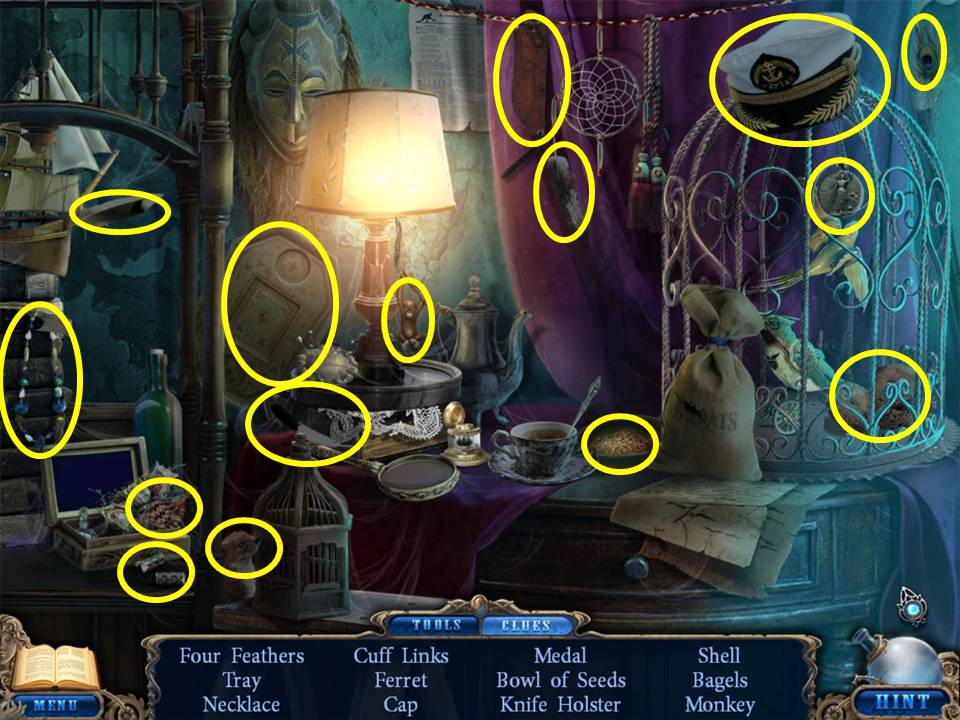
- Find the items listed.
- Receive a FEEDER.
- Enter the elevator.
- Zoom into the elevator panel and slide the handle to the right.
- Exit the elevator.
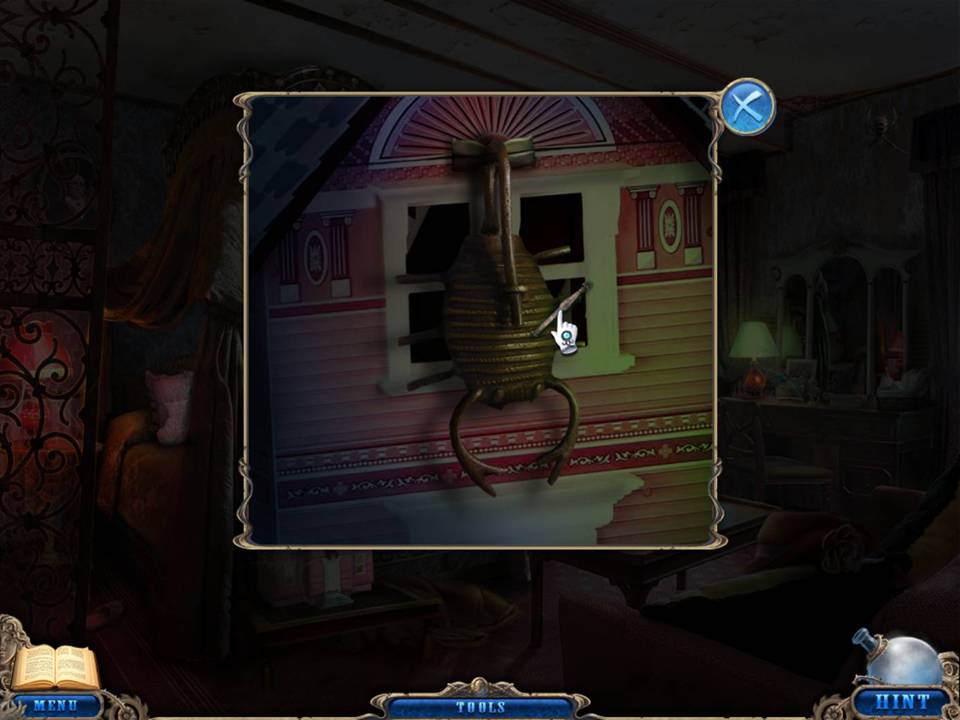
- Zoom into the dollhouse.
- Open the lock with the DOLLHOUSE KEY.
- Play the Hidden Object Area at the open dollhouse.
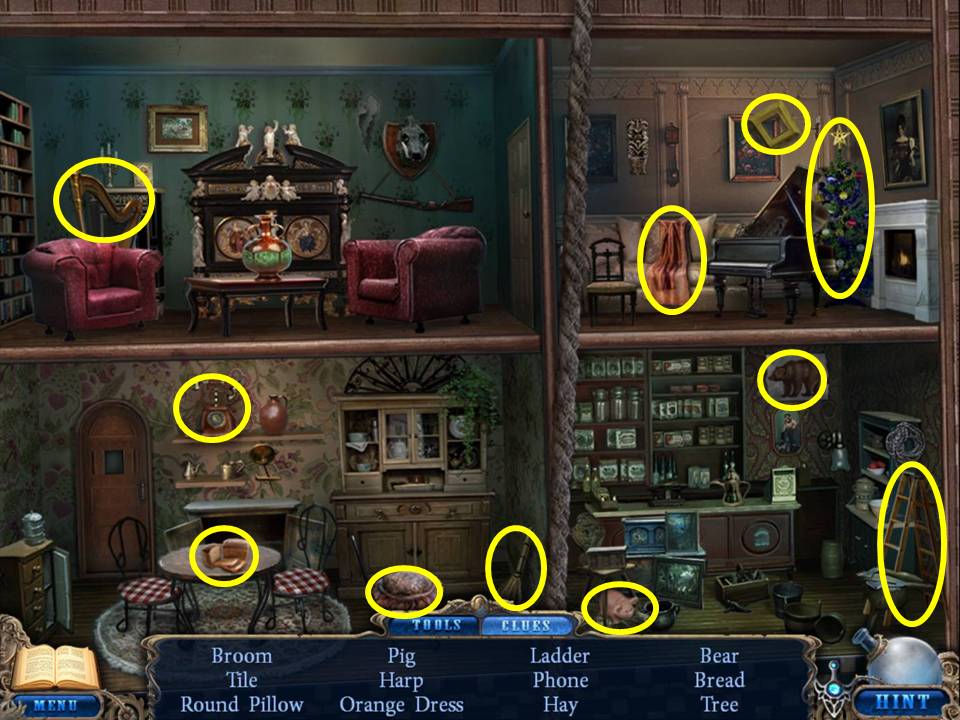
- Find the items listed.
- Note: The pig is on the hay and can’t be indicated in the screenshot.
- Receive the YELLOW TILE.
- Return to the elevator.
- Zoom into the panel and slide the handle to the left.
- Return to the front of the House.
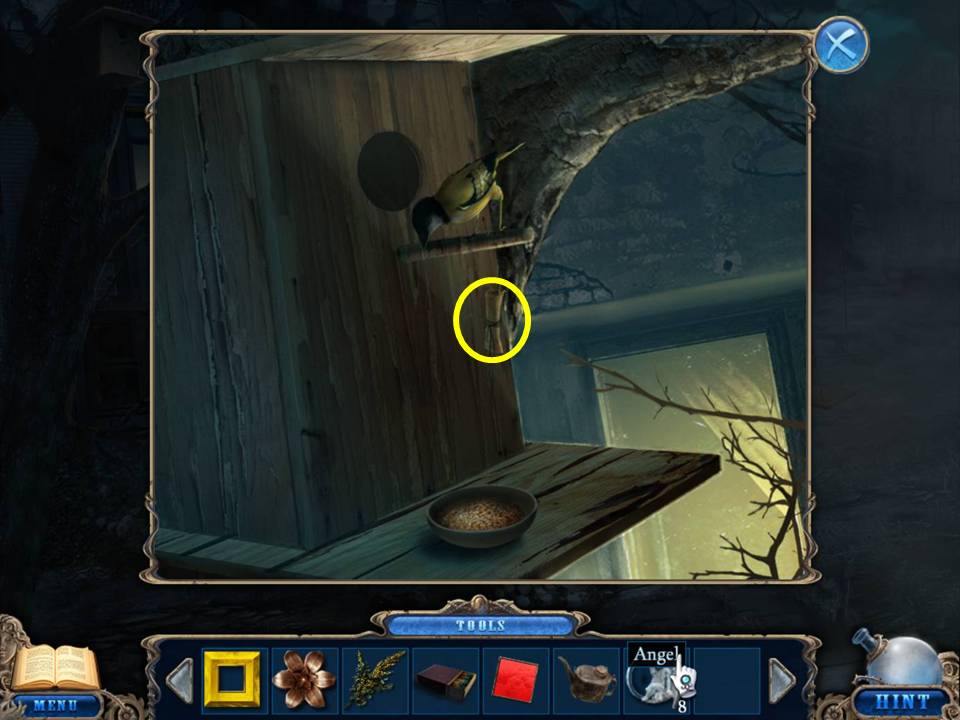
- Zoom into the birdhouse.
- Place the FEEDER on the shelf of the birdhouse.
- Take the DIARY KEY from the bird.
- Return to the Farmhouse Bedroom through the Cellar.
- Zoom into the door to the right of the bed.
- Place the YELLOW TILE on the blank space second from the right to initiate a puzzle.
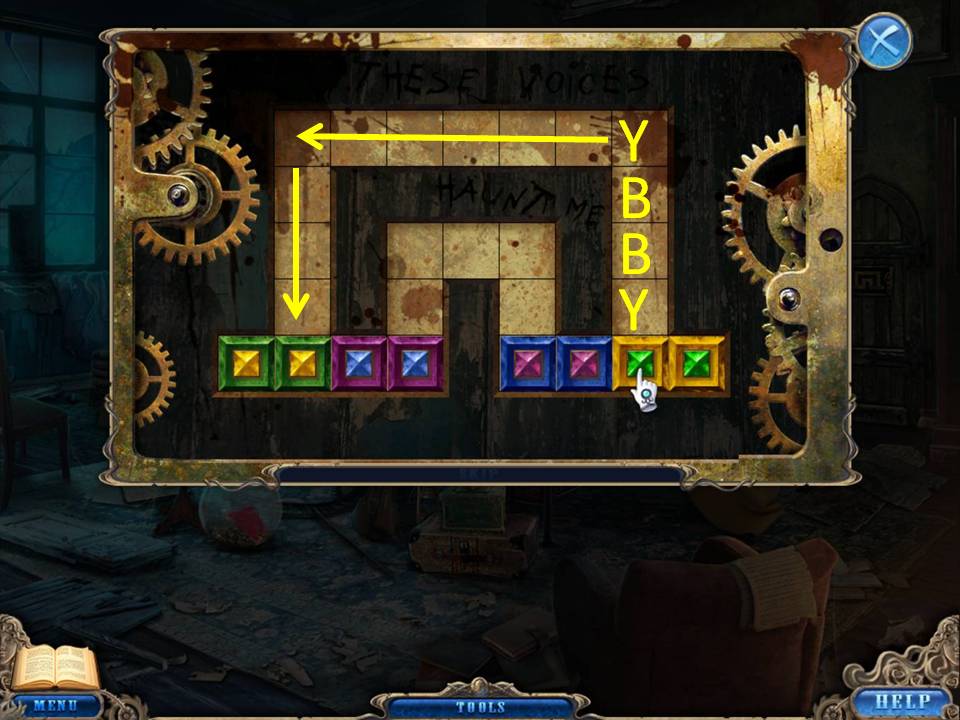
- The object of the puzzle is to match a colored tile with its identically colored center.
- You do this by clicking and holding a tile to drag it in the direction you desire.
- No tile may jump or pass through any other tile.
- See screenshot for solution.
- Move the yellow and blue tiles into position marked YBBY for yellow, blue, blue, yellow.
- Slide the four purple and green tiles inward through the smaller archway.
- Slide yellow and blue up and over the larger ring and into position.
- Move green, purple, purple, green into the YBBY spot and then into proper position.
- When completed the door will open.
- Proceed through the door.
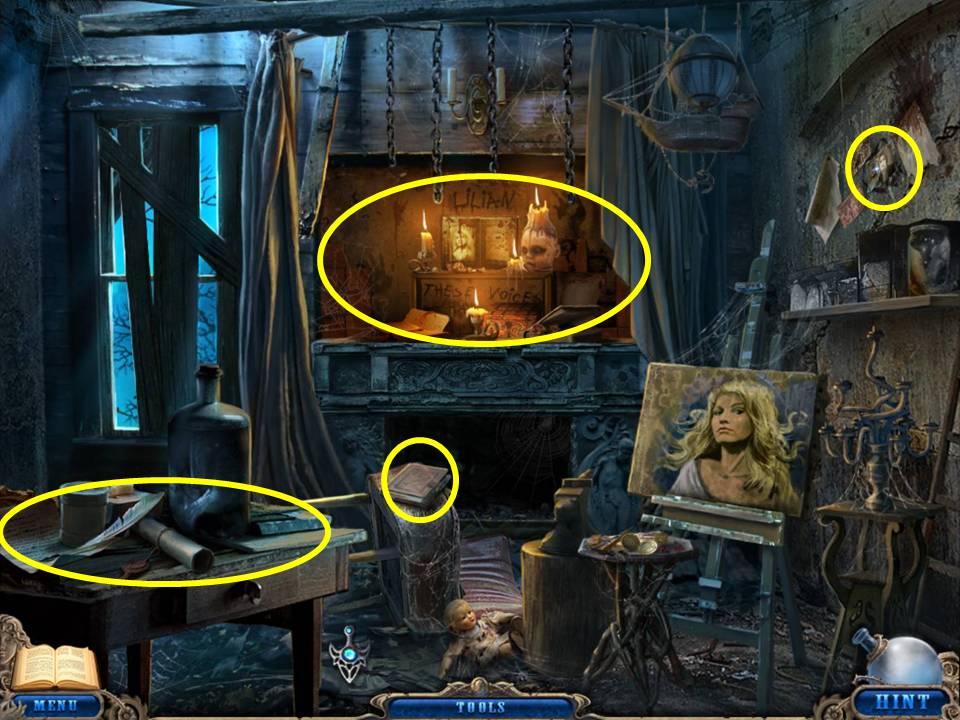
- Zoom into the table on the left.
- Take the KEY. Zoom into the diary.
- Open with the DIARY KEY.
- Take the letter and the ninth ANGEL.
- Zoom into the shrine.
- Place the FLOWER in front of the box.
- Take LILLIAN’S CURL and the HANDLE from the box.
- Zoom into the photos on the right wall.
- Take the 10th ANGEL.
- Back up once and play the Hidden Object Area to the left of the bed.
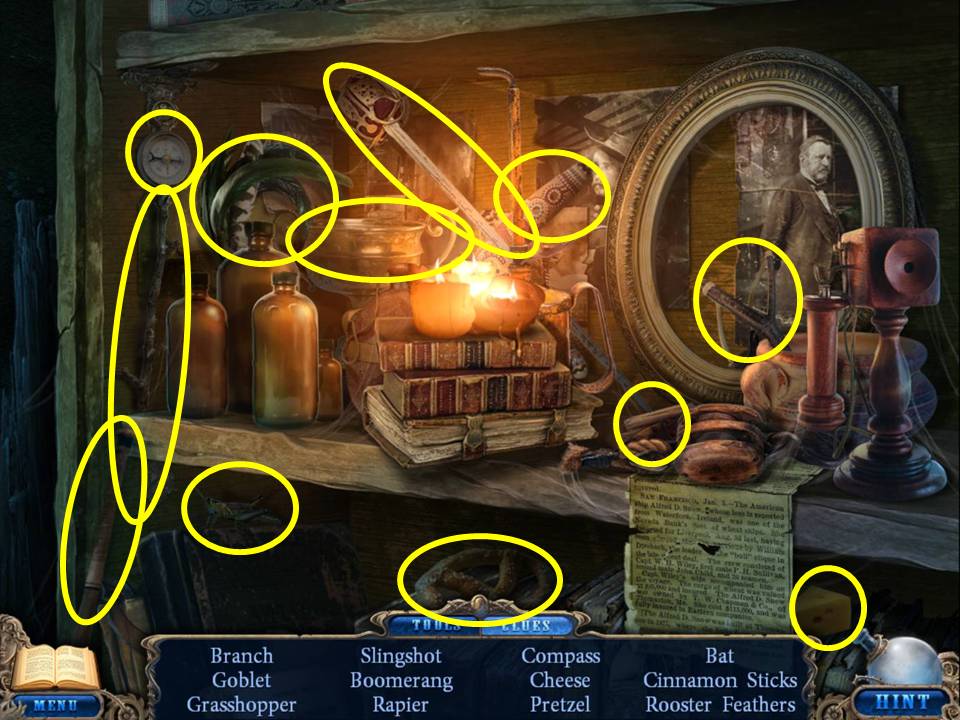
- Find the items listed.
- Receive the FEATHERS.
- Return to the Train Station.
- Zoom into the door on the building at the right.
- Place the PUZZLE TILE in the empty slot to initiate a puzzle.
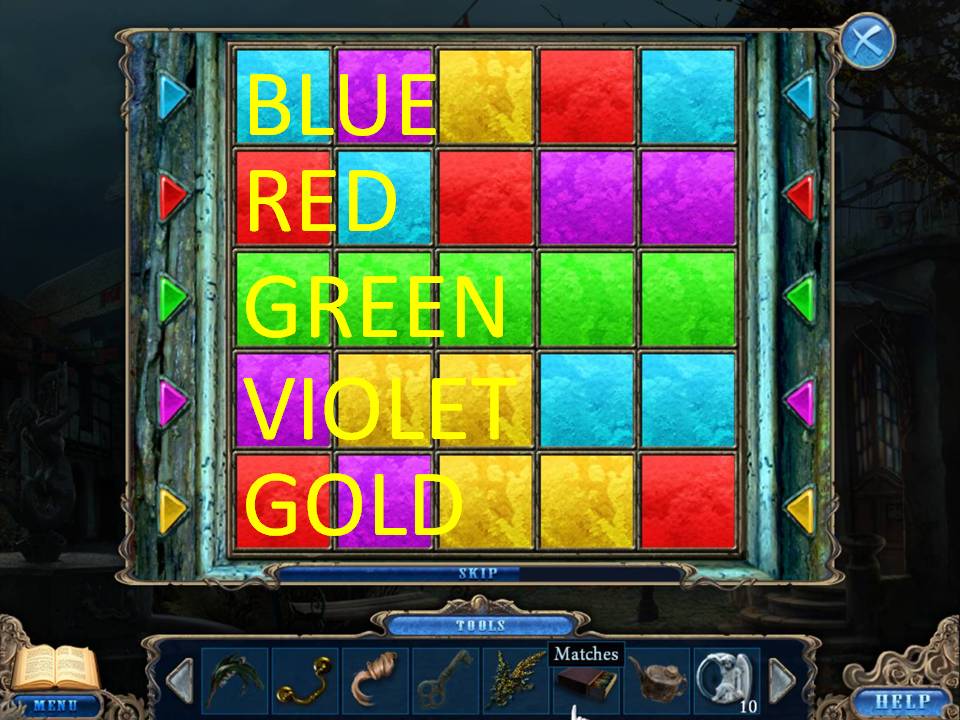
- The object of this puzzle is to click and drag to move the rows vertically and horizontally to align the tiles with their matching colored arrows on the side.
- The puzzle varies with each game play.
- Because of the random nature of this puzzle, trial and error is the only recommended strategy.
- When finished, insert the KEY in the keyhole and open the door.
- Play the Hidden Object area at the back of the room.
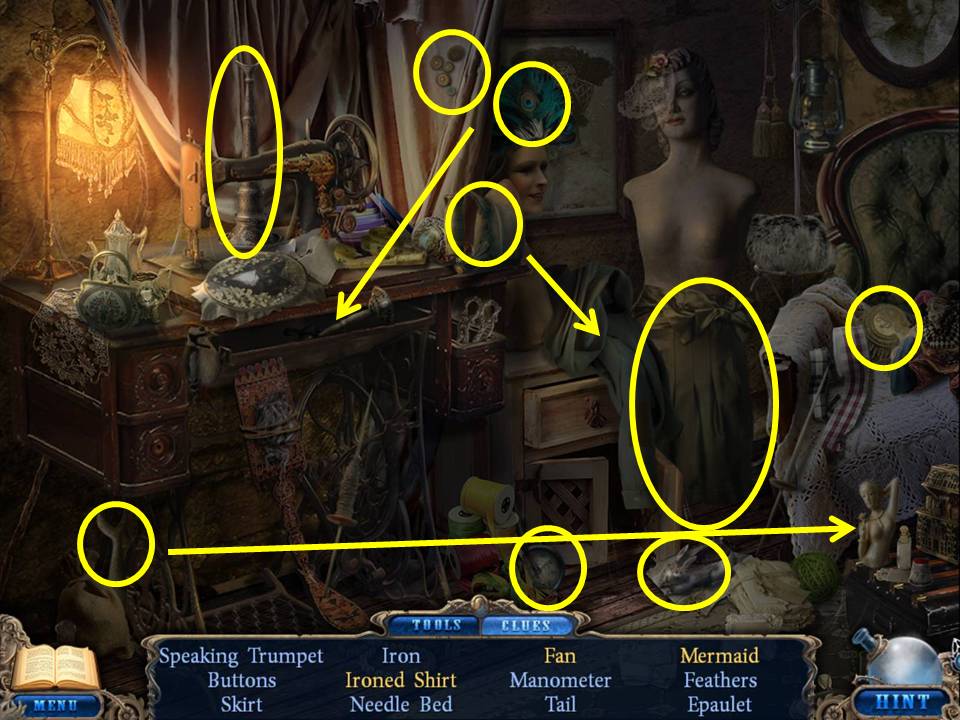
- Find the items listed.
- Place the fishtail on the torso to get the mermaid.
- Place the feathers on the handle to get the fan.
- Iron the shirt to get the ironed shirt.
- Receive a MANOMETER.
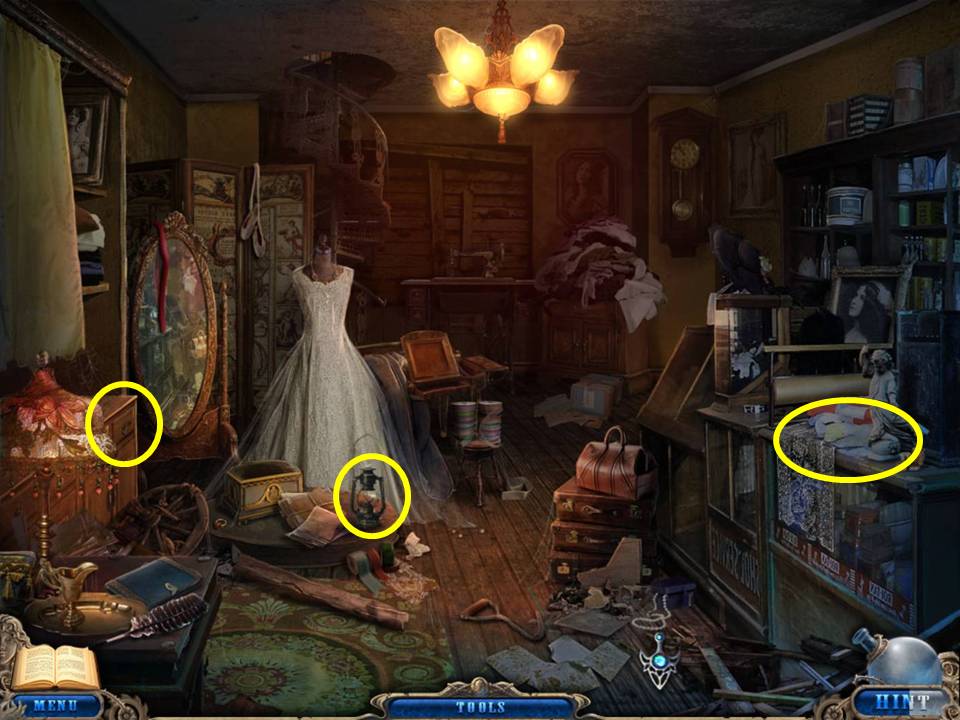
- Take the KEROSENE LAMP.
- Zoom into the drawers on the left.
- Place the HANDLE on the top drawer.
- Take the Angels vs. Demons Rules to get a journal update.
- Take the 11th ANGEL and the TELESCOPE LENS from the drawer.
- Zoom into the right counter and take the 12th ANGEL. Return to the Statue Park.
- Click on the base of the larger statue in the middle to initiate a game.
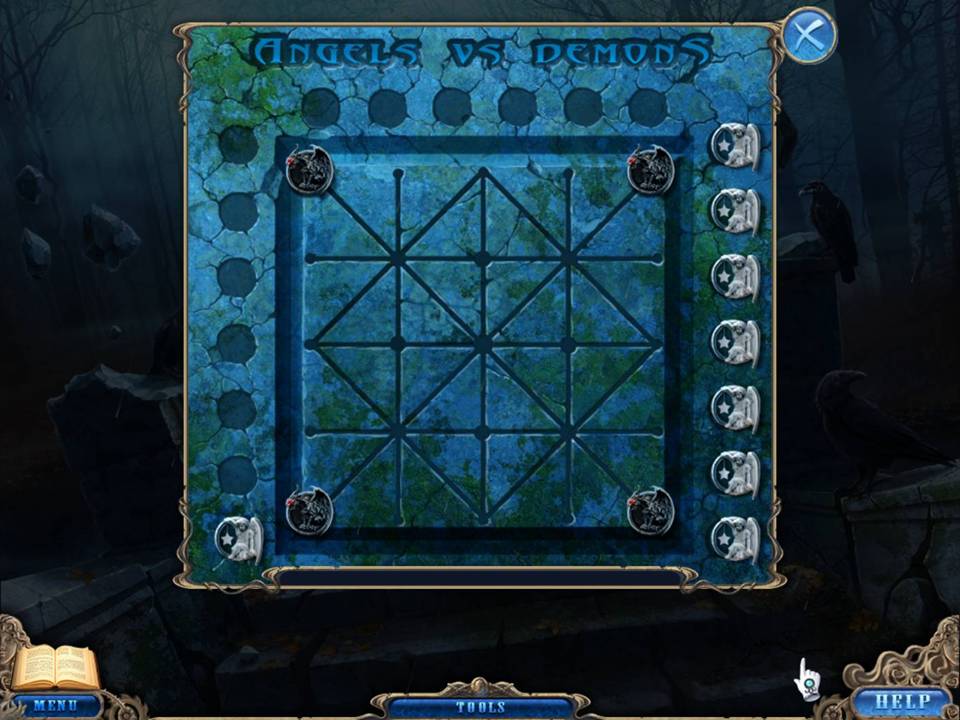
- Place the 12 ANGELS in the empty slots.
- The final ANGEL will remain on your cursor to start the game.
- Open your journal to read the rules at anytime during the game.
- The object of the game is to surround all four demons with no option for the demons to move or “jump.”
- The game is similar to checkers in that the demon can “jump” an angel if a free space is adjacent to the angel.
- Careful placement of the angels on the board to begin can help you.
- Upon placement angels may move one space only.
- If the demons jump six angels, the game is lost and will restart.
- Because of the random nature of this puzzle and myriad solution combinations, it is difficult to indicate a winning strategy.
- Your best bet is to begin by placing angels around the perimeter, moving inward to “trap” the demons. With each angel placement, a demon will move one space.
- After completing the game, proceed down the ladder in the base of the statue.
Comments will load when you reach this part of the walkthrough.