

Chapter Four: The Casino
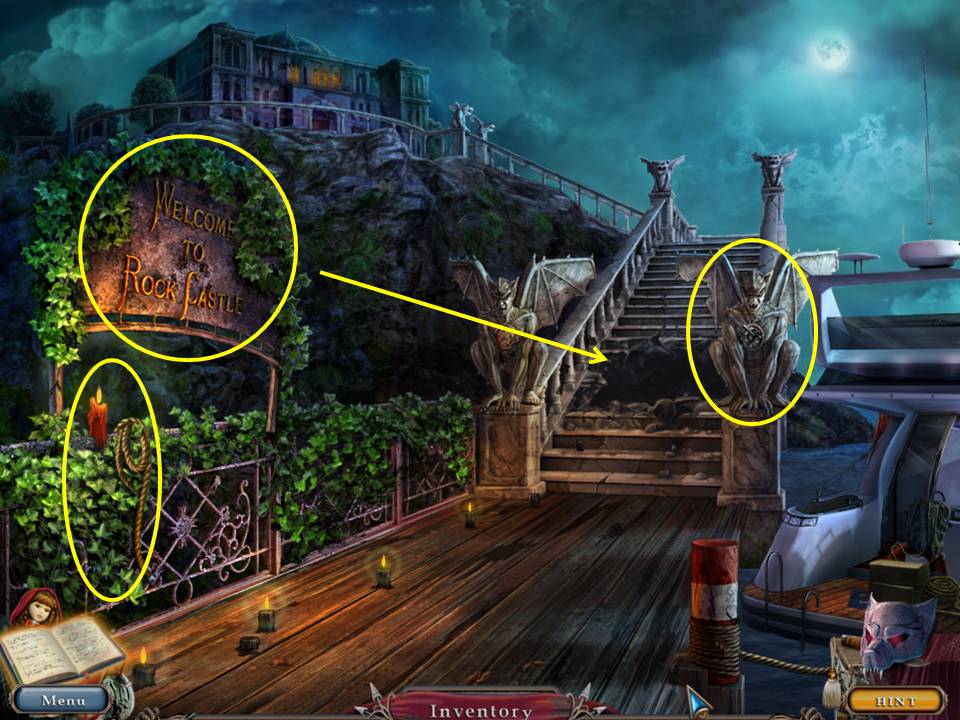
- Take the ROPE and CANDLE.
- Click the sign three times to take the SIGN.
- Zoom into the right gargoyle.
- Take the CHISEL.
- Place the SIGN in the gap.
- Go forward.
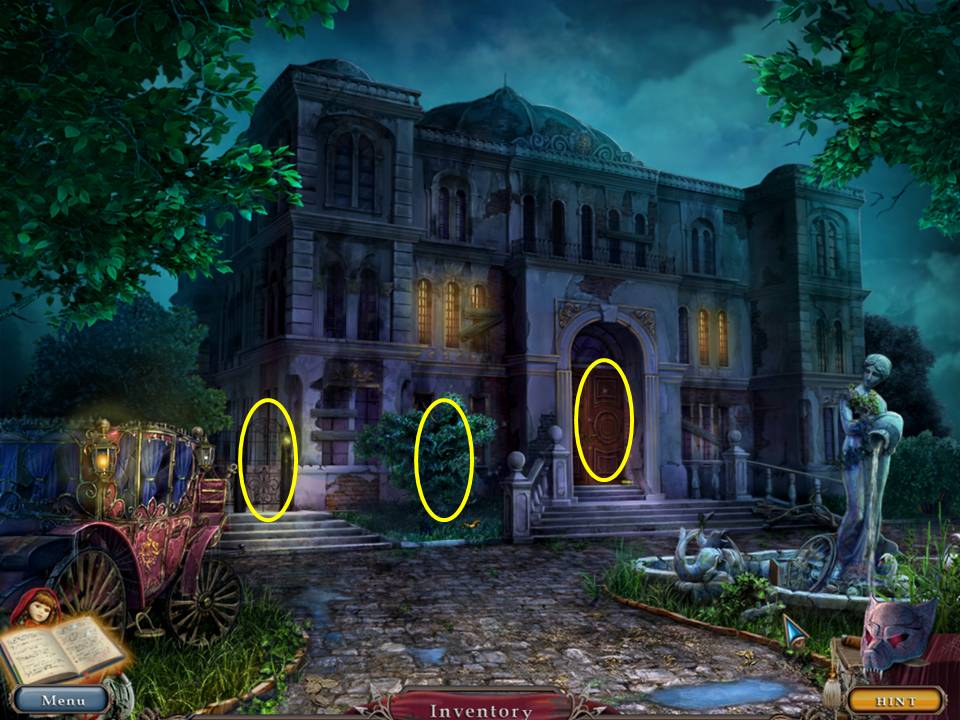
- Zoom into the gate.
- Take the ANKH.
- Zoom into the bush.
- Take the PHOENIX.
- Zoom into the door.
- Take the ANTI-RUST SPRAY.
- Insert the STRANGE KEY into the lock.
- Enter the building.
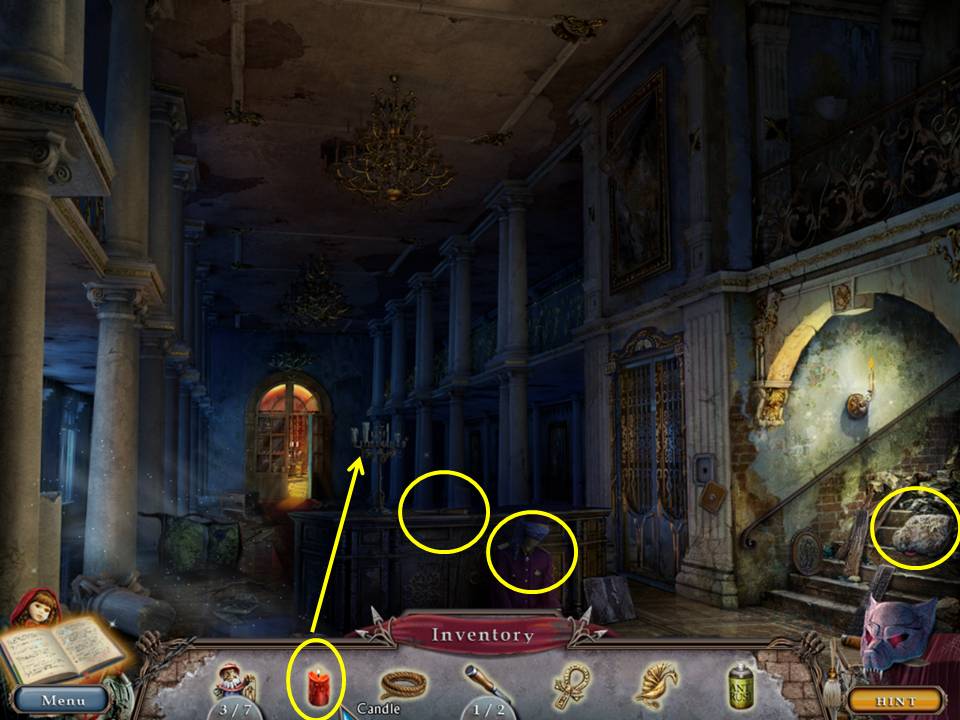
- Light the candlestick with the CANDLE.
- Zoom into the table.
- Take the HAMMER to make the HAMMER AND CHISEL.
- Zoom into the figure.
- Take the SCARF, the note, and the ELEVATOR BUTTON.
- Take the ROOM KEY.
- Zoom into the stairs.
- HAMMER AND CHISEL the large rock.
- Take the VALVE.
- Click down.
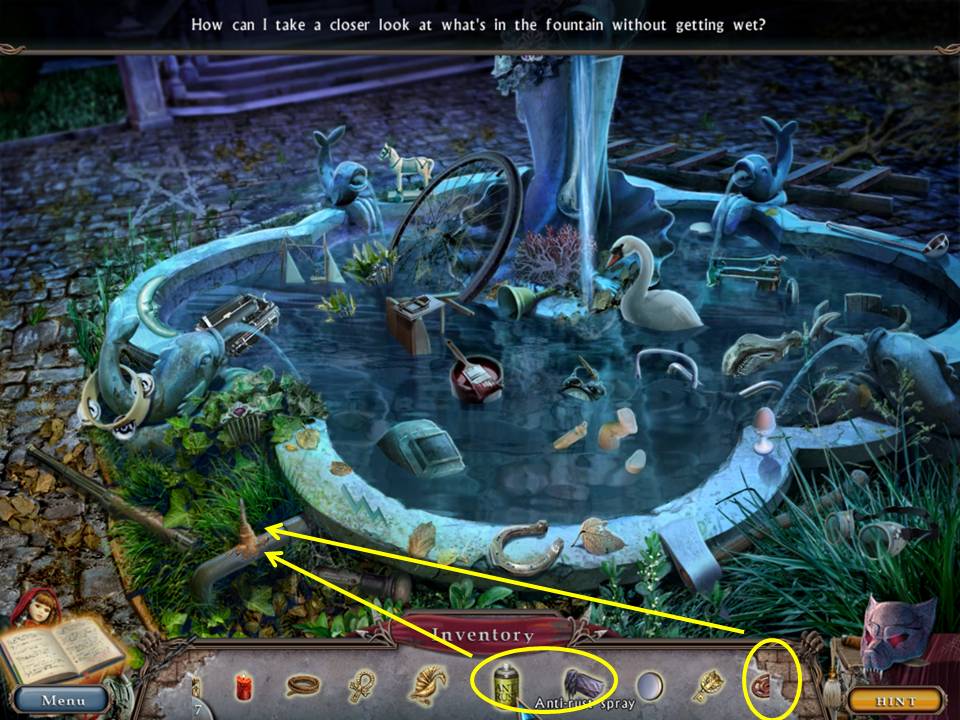
- Zoom into the fountain.
- Spray the pipe with the ANTI-RUST SPRAY.
- Rub the pipe with the SCARF.
- Place the VALVE on the pipe.
- Click the valve.
- Play the HOA.
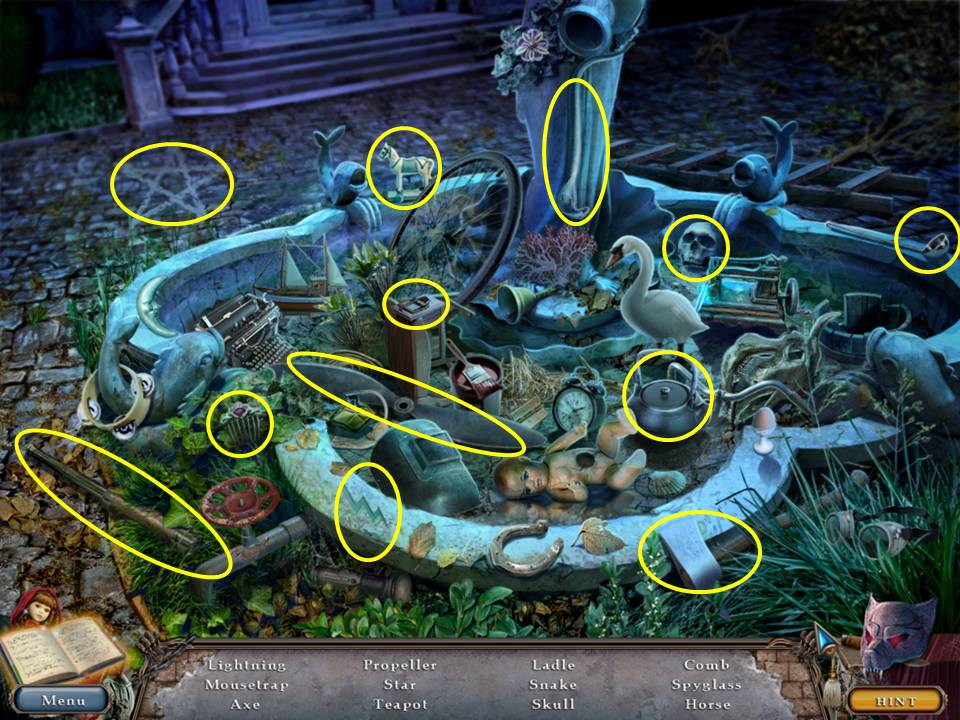
- Find the items listed.
- Receive the AXE.
- Go forward two times.
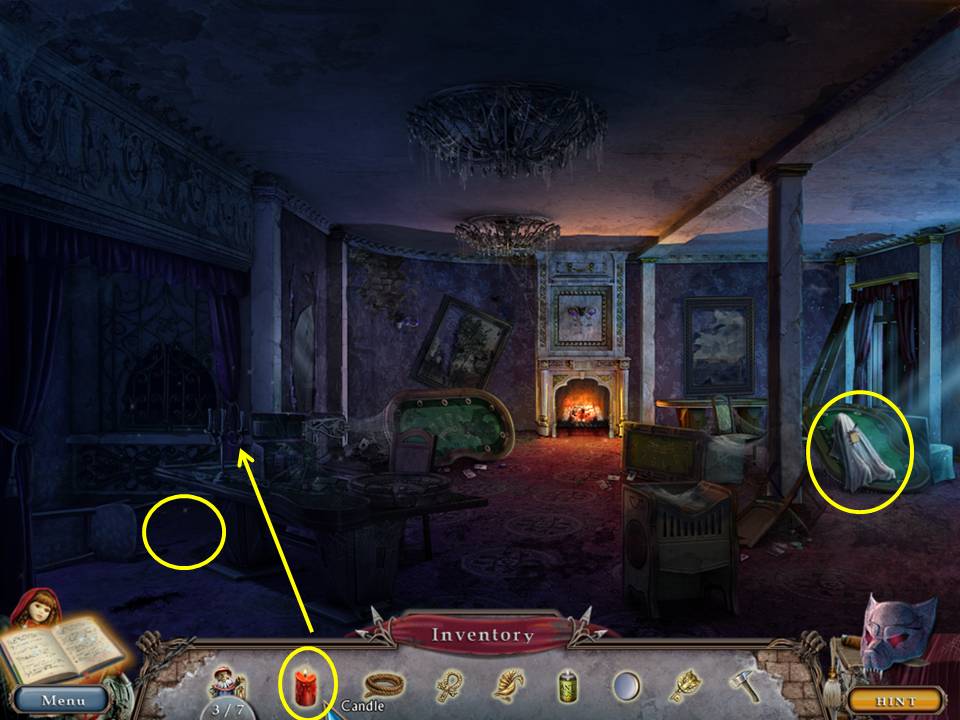
- Light the candlestick with the CANDLE.
- Zoom into the broken table.
- Take the note and the KNIFE.
- Click the sheet covering the figure.
- Click the arm on the figure.
- Zoom into the floor.
- Cut the carpet with the KNIFE.
- Chop the planks with the AXE.
- Place the ROPE at the opening.
- Descend the rope.
- Zoom into the wall.
- Click the light switch.
- Zoom into the wall cabinets.
- Open the doors.
- Take the screwdriver.
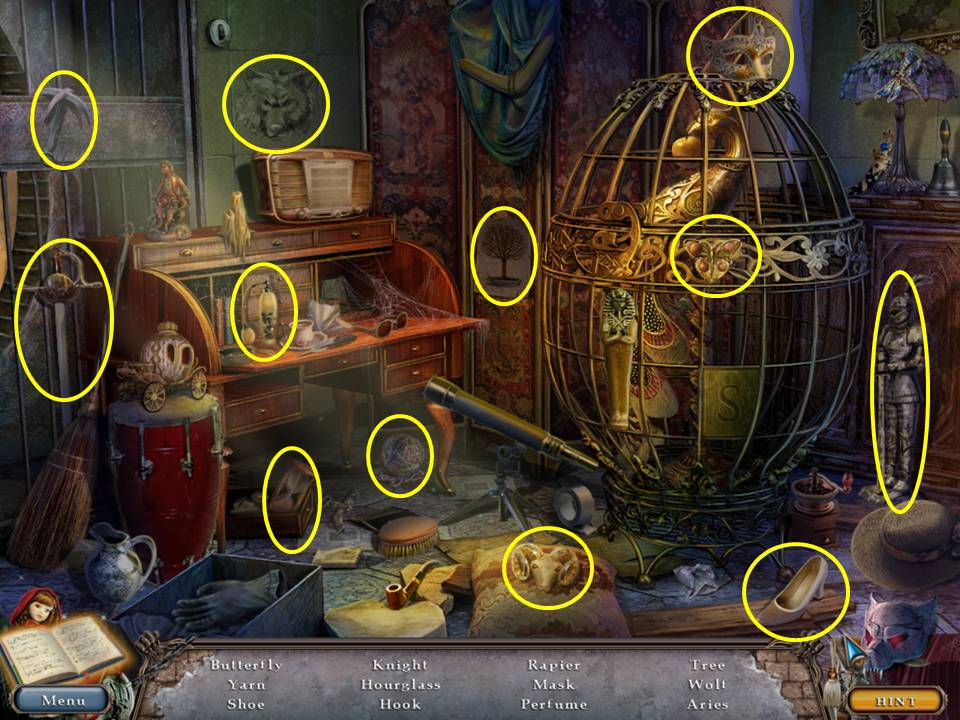
- Play the HOA.Find the items listed.
- Receive the GRAPPLING HOOK.
- Attach the rope to the GRAPPLING HOOK.
- Swing it through the opening and return the same way you came down.
- Click down.
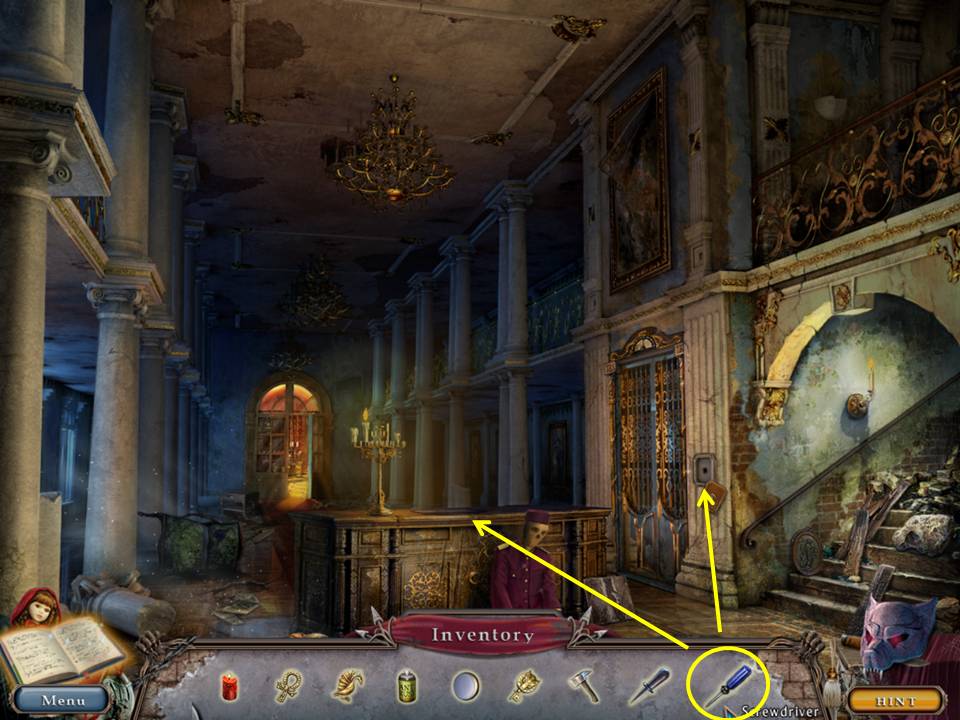
- Zoom into the table.
- Unscrew the glass display with the SCREWDRIVER.
- Receive the SCREWS.
- Take the LOCKET.
- Zoom into the elevator panel.
- Put the SCREWS into the display and screw them down with the SCREWDRIVER.
- Place the ELEVATOR BUTTON into the space.
- Enter the elevator.
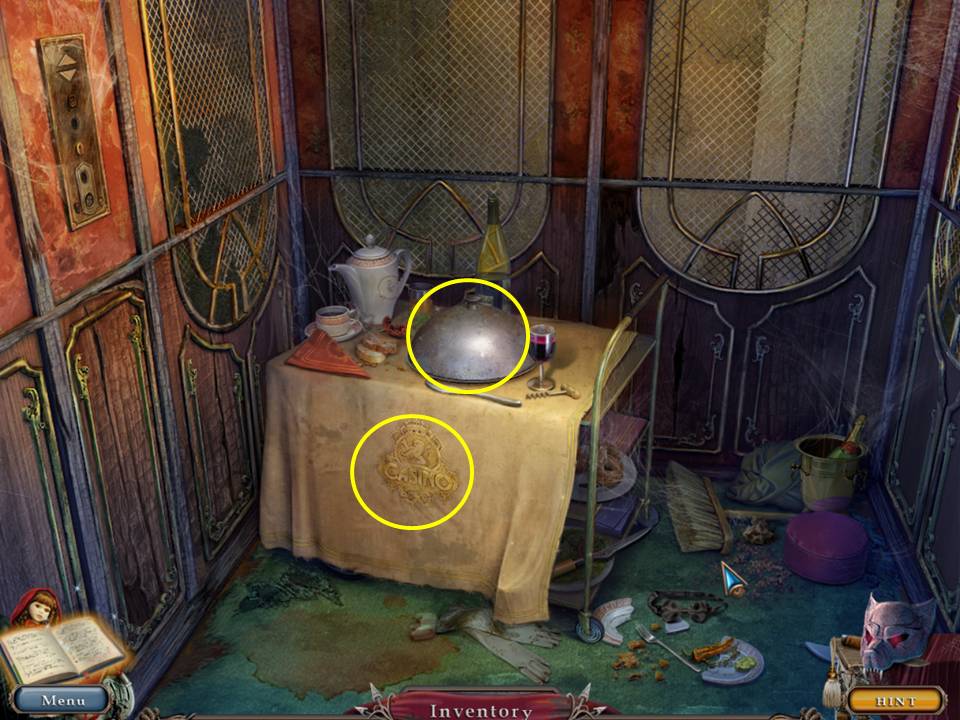
- Click the lid.
- Take the EGG TOP and note underneath.
- Click the tablecloth.
- Take the first PRUNING SHEARS PART.
- Click down.
- Go forward.
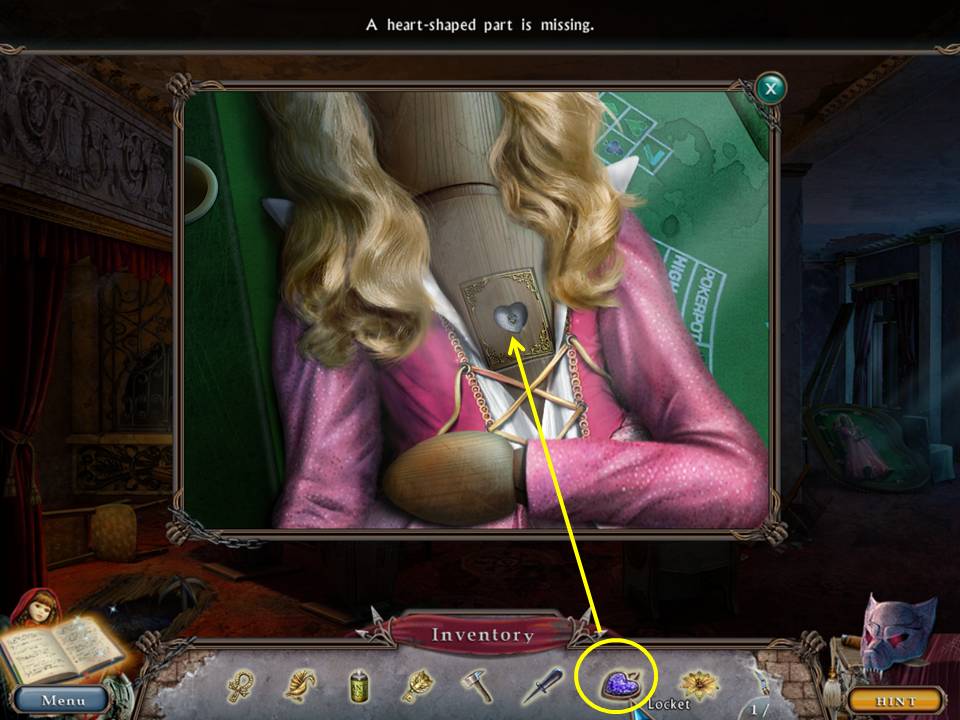
- Zoom into the broken table.
- Place the LOCKET in the space.
- Take the SAFE DIAL.
- Descend the rope.
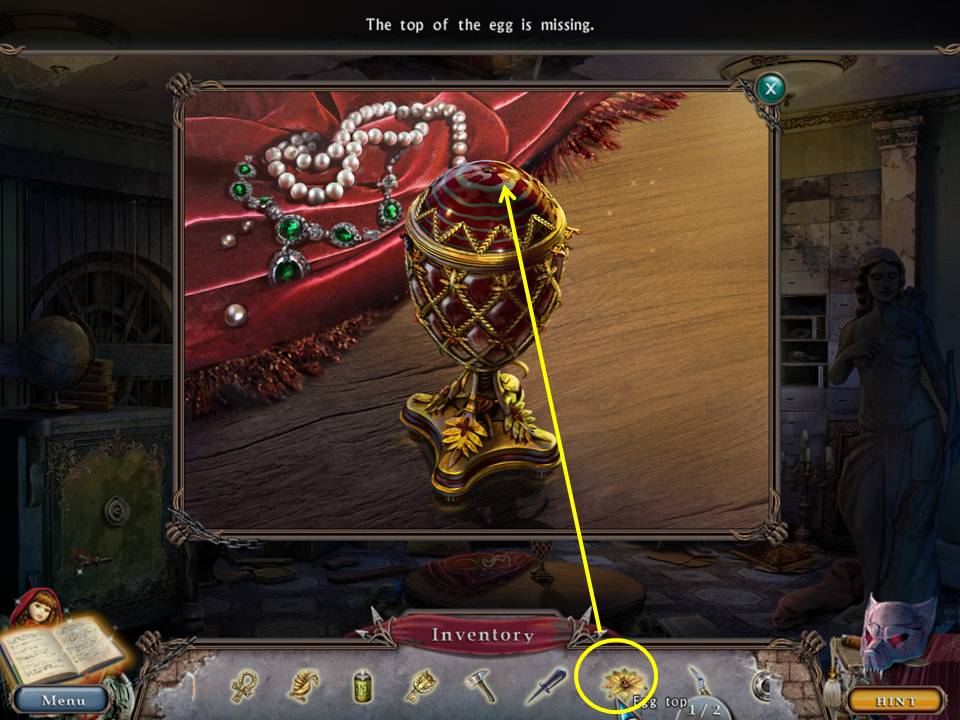
- Zoom into the table.
- Reunite the EGG TOP with the egg.
- Take the SECOND FLOOR BUTTON.
- Go up the rope.
- Click down.
- Enter the elevator.
- Zoom into the panel.
- Place the SECOND FLOOR BUTTON in the appropriate space.
- Click the button.
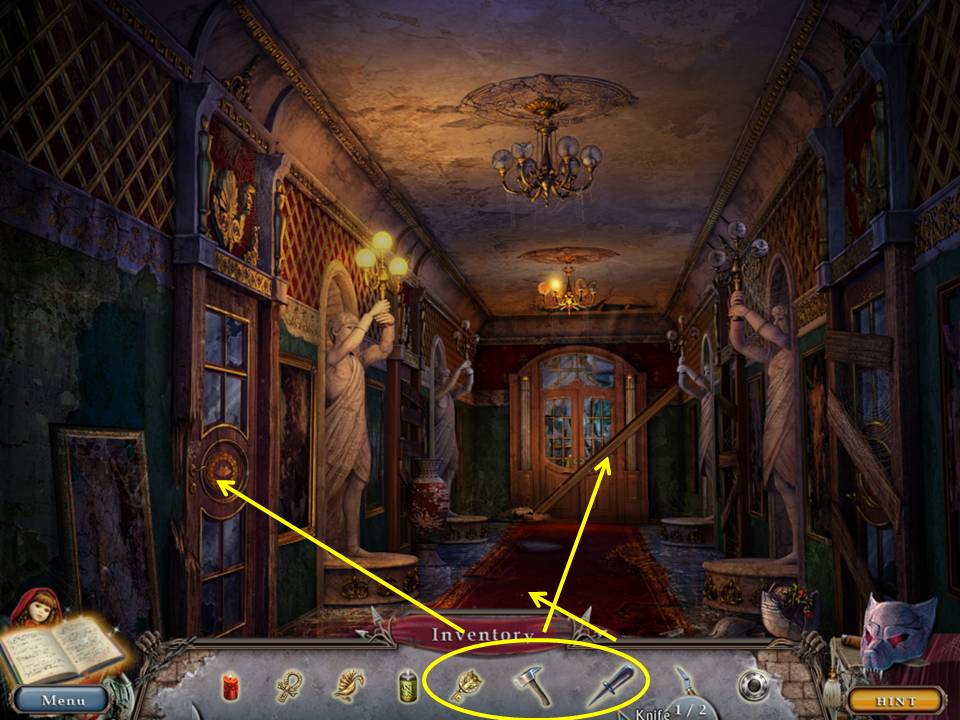
- Zoom into the carpet.
- Slice the carpet with the KNIFE.
- Take the first TRANQUILIZER GUN.
- Zoom into the door at the end of the hall.
- Chop the plank with the AXE.
- Zoom into the door at left.
- Insert the ROOM KEY into the lock.
- Enter the room.
- Play the HOA.
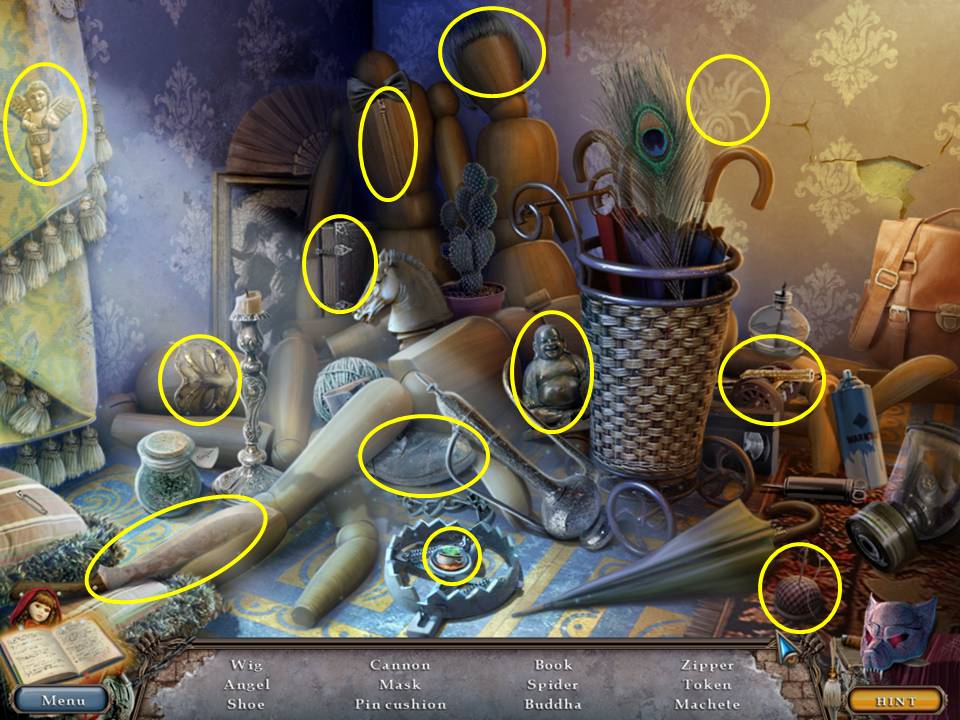
- Find the items listed.
- Receive the first of three TOKENS.
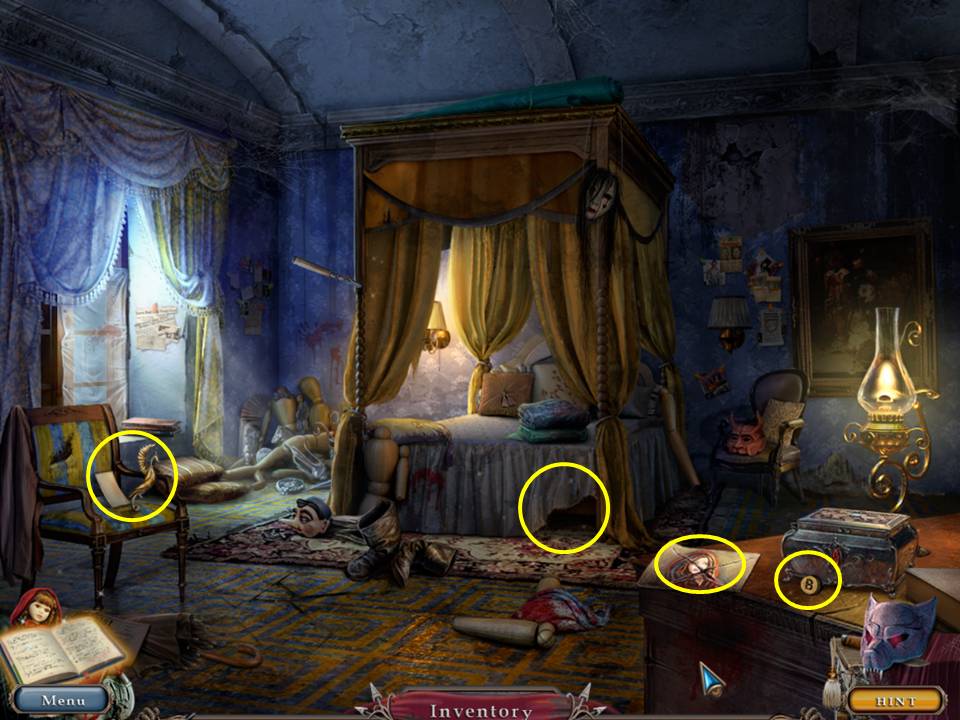
- Take the note, the PHOENIX, and the CELLAR BUTTON.
- Zoom under the bed.
- Place the CANDLE.
- Take the fourth GARDEN GNOME, the SAFETY DEPOSIT BOX KEY, and the CANDLE.
- Look at the photo.
- Click down two times.
- Push the first floor button.
- Click down.
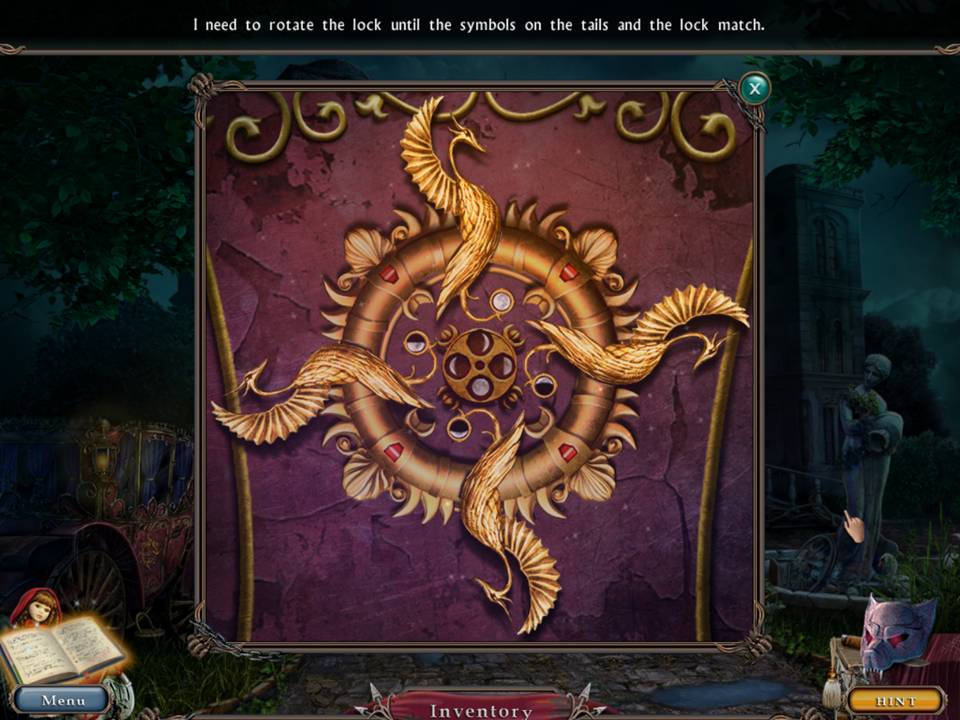
- Zoom into the carriage.
- Place the two PHOENIXES to initiate a puzzle.
- Turn the lock two times to solve the puzzle.
- When finished, play the HOA.
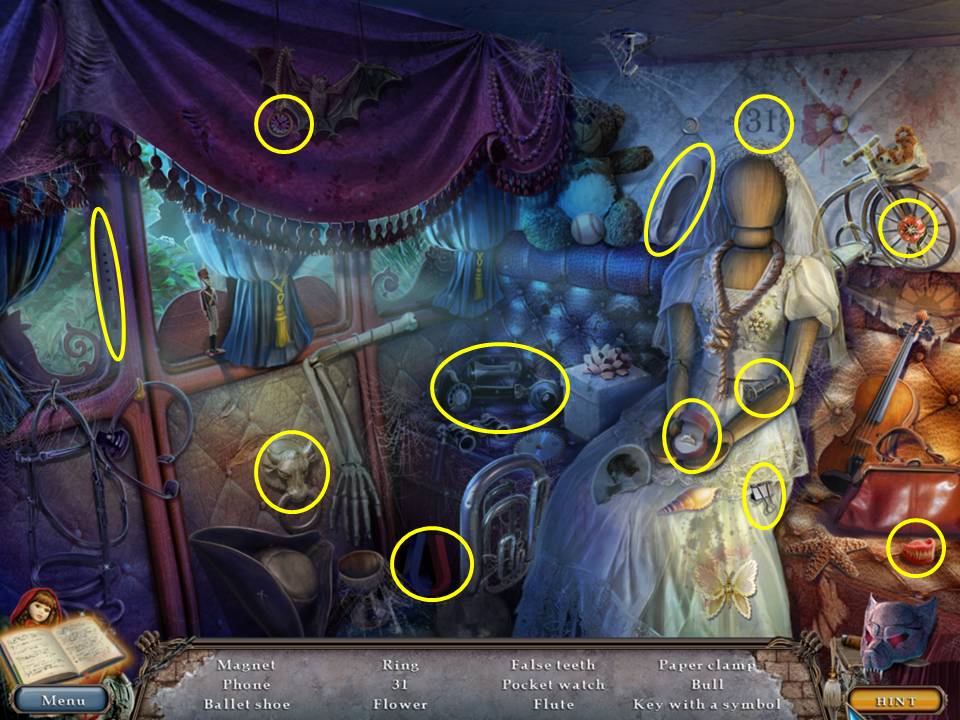
- Find the items listed.
- Receive the KEY WITH A SYMBOL.
- Enter the casino.
- Go forward.
- Descend the rope.
- Play the HOA.
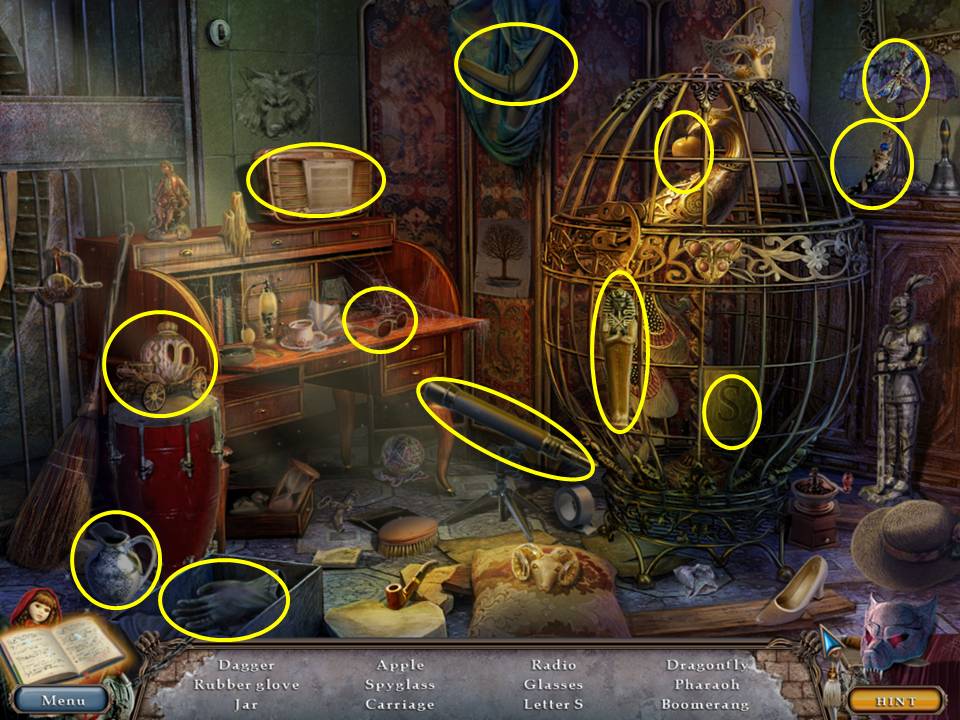
- Find the items listed.
- Receive the RUBBER GLOVE.
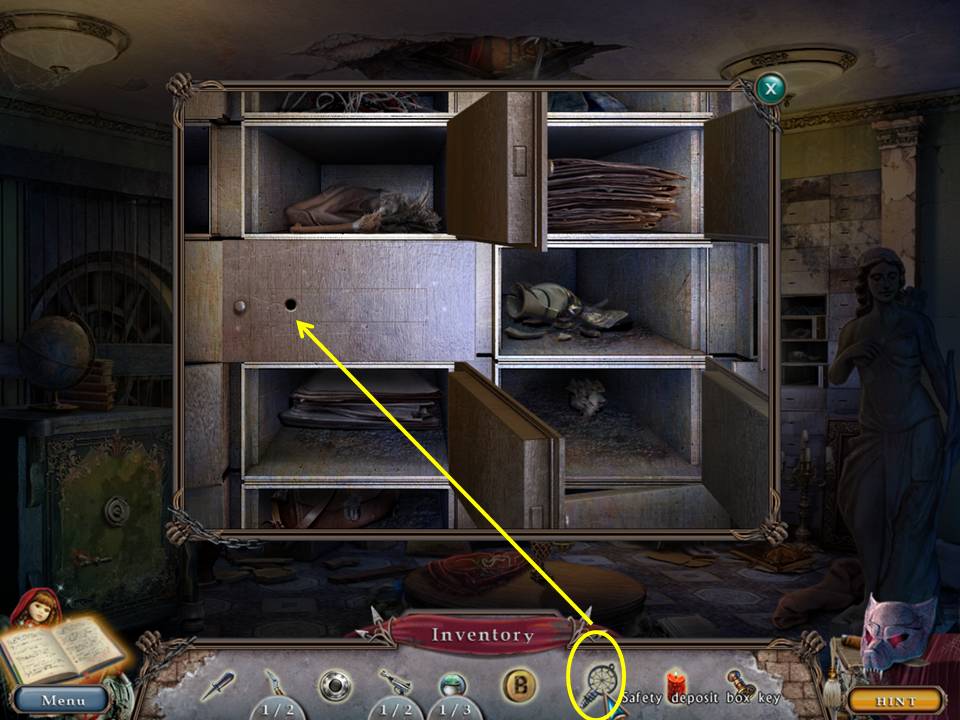
- Zoom into the wall cabinet.
- Insert the SAFETY DEPOSIT BOX KEY into the lock.
- Take the drawing.
- Go up the rope.
- Click down.
- Enter the elevator.
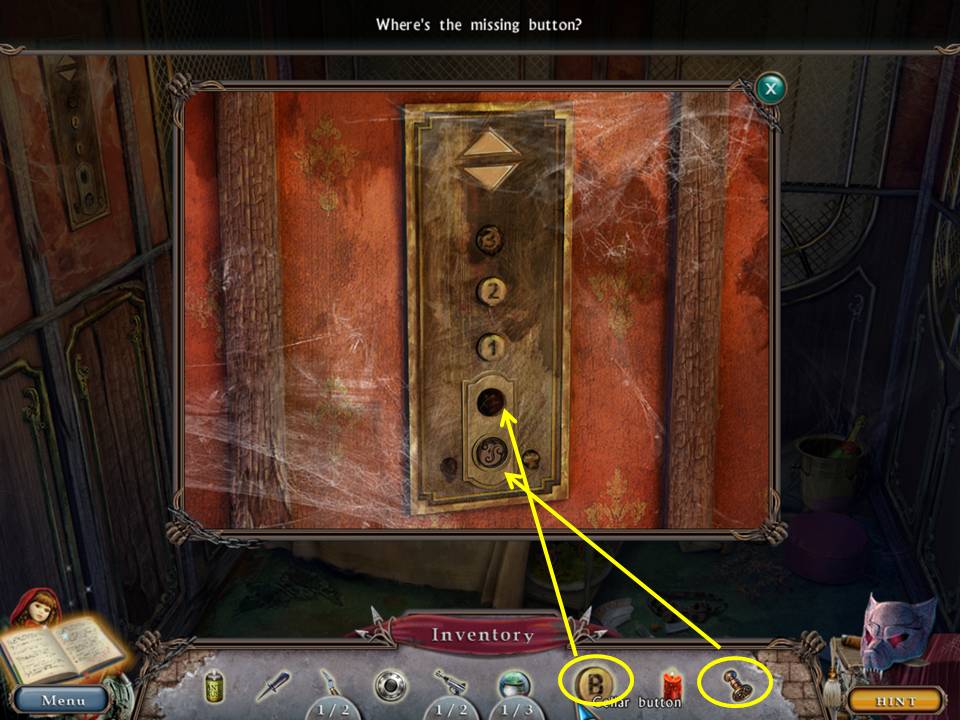
- Zoom into the panel.
- Place the CELLAR BUTTON into the space and the KEY WITH A SYMBOL into the slot.
- Push the cellar button.
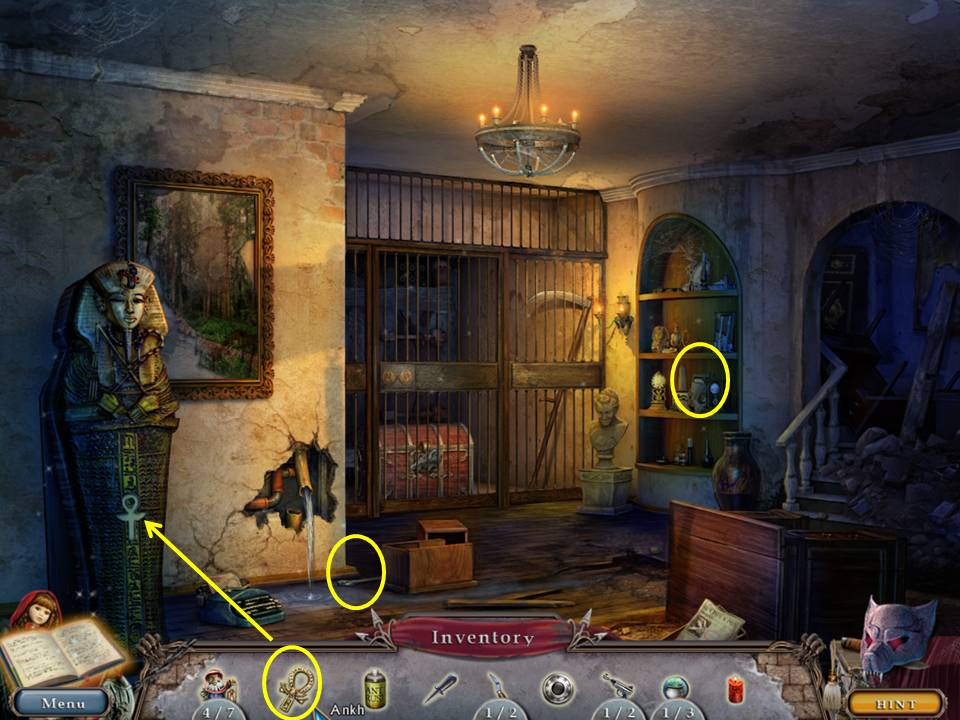
- Place the ANKH on the sarcophagus.
- Zoom into the wall.
- Take the WRENCH.
- Zoom into the shelf.
- Take the note and picture.
- Zoom into the grille to initiate a mini-game.
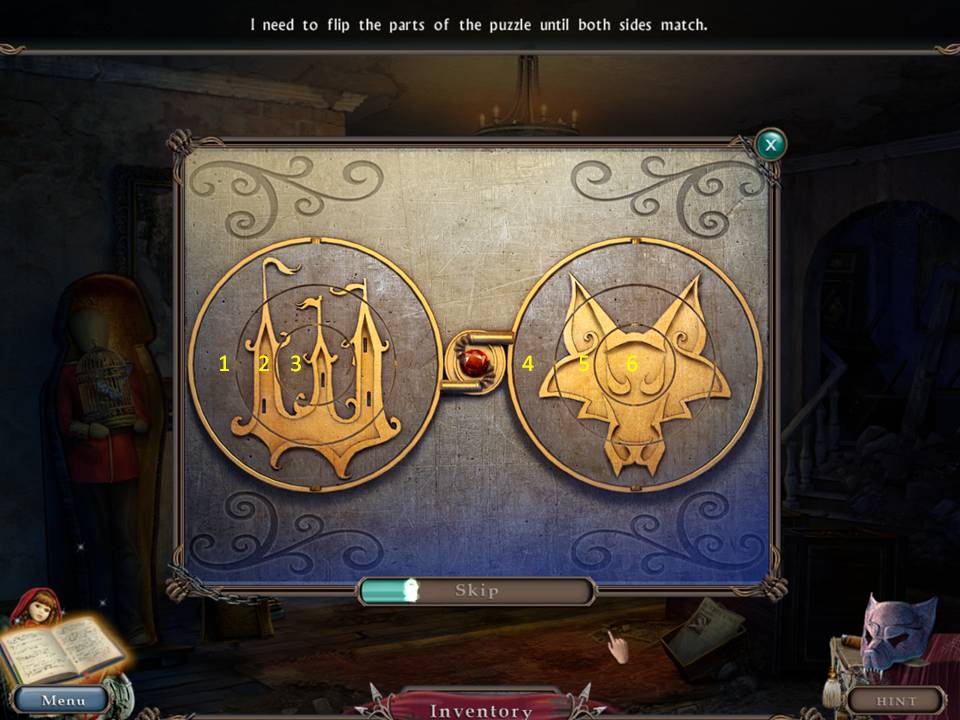
- The object of the game is to rotate the rings to correctly show the image.
- Assuming the rings are numbered 1 to 3 from outer to inner on the left and 4 to six from outer to inner on the right, click in this order: 1, 4, 3, 5, 1. When finished, take the SCYTHE. Click down.
- Press the first floor button.
- Click down two times.
- Zoom into the left gargoyle to initiate a mini-game.
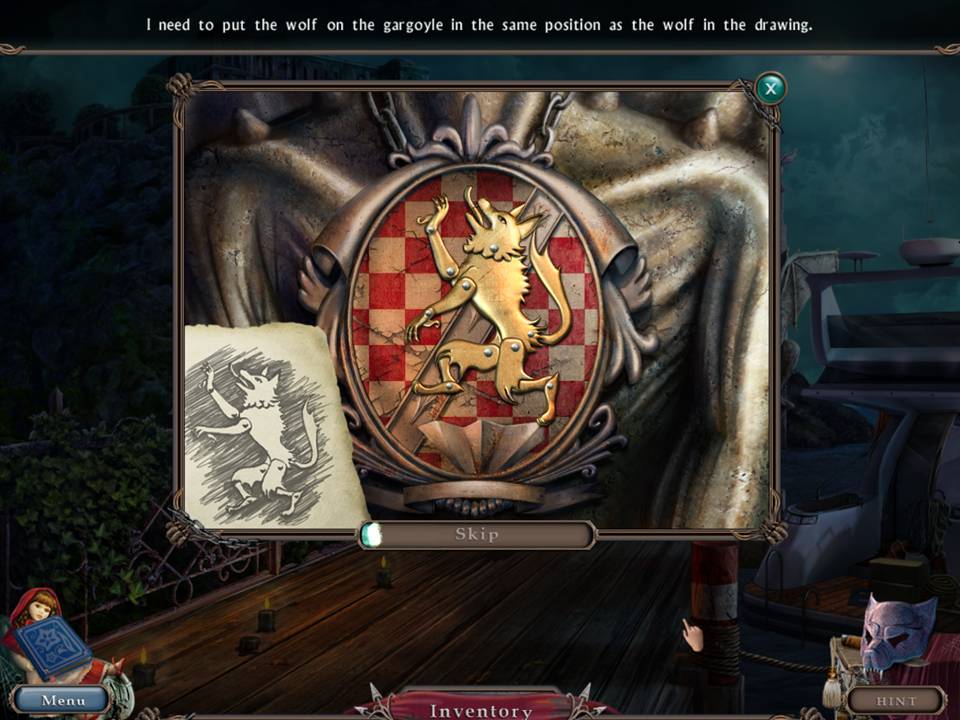
- The object of this game is to move the wolf into the correct position.
- Use the sketch in the corner for the correct positioning.
- When finished take the second TOKEN.
- Go forward two times.
- Enter the elevator and push the second floor button.
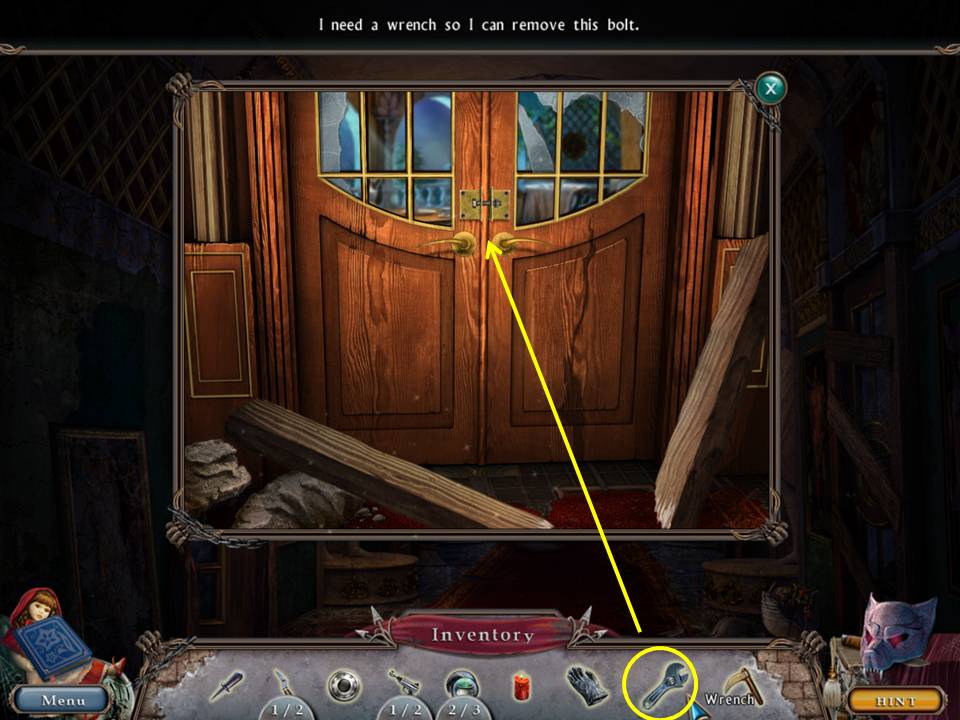
- Zoom into the door.
- Remove the bolt with the WRENCH.
- Click the handle.
- Go forward.
- Zoom into the table.
- Pluck the shards with the RUBBER GLOVE.
- Receive the WIND-UP BIRD.
- Take the note.
- Click down.
- Zoom into the door.
- Take the BEAM.
- Go forward.
- Zoom into the balcony.
- Place the BEAM in the scene.
- Go forward.
Comments will load when you reach this part of the walkthrough.