

Chapter Five: Into the Dungeon
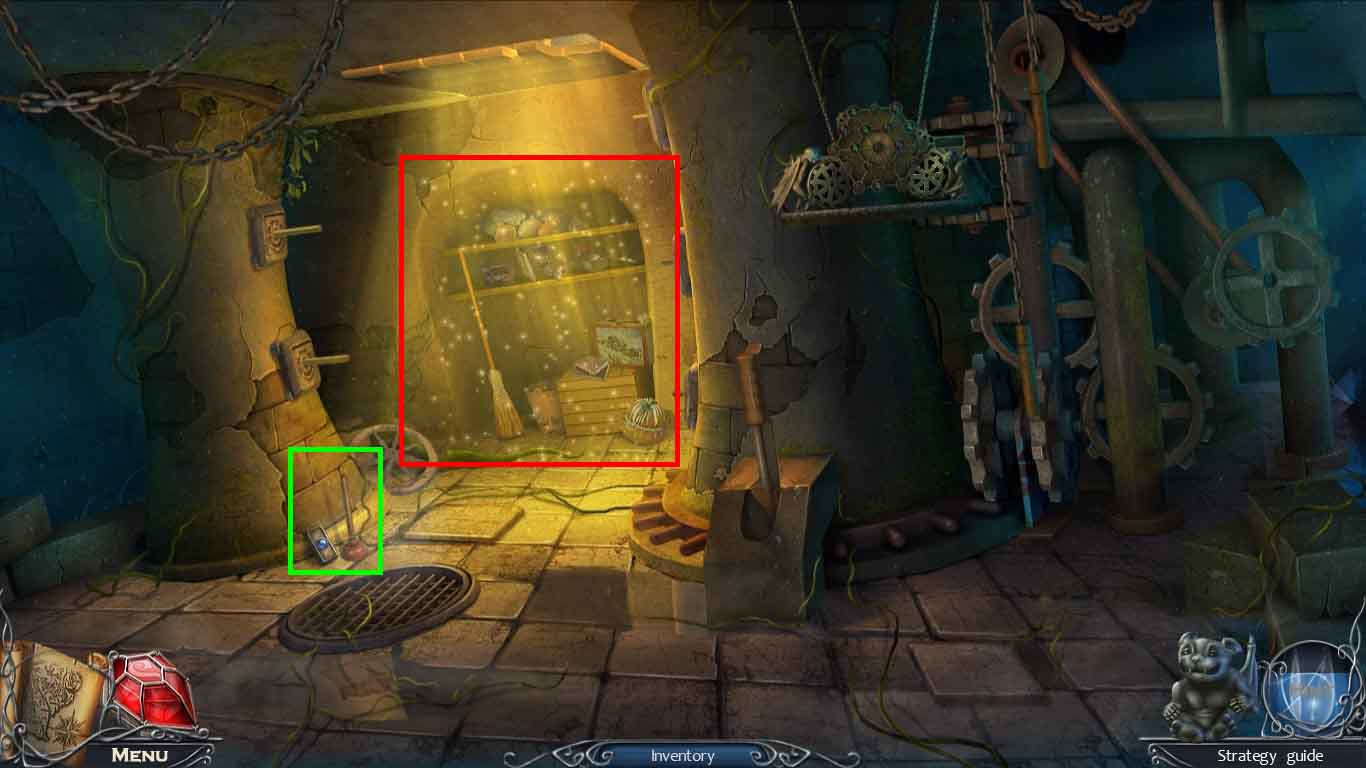
- Zoom into the base; collect the plunger and the decorative tile.
- Zoom into the shelf to access a hidden objects area.
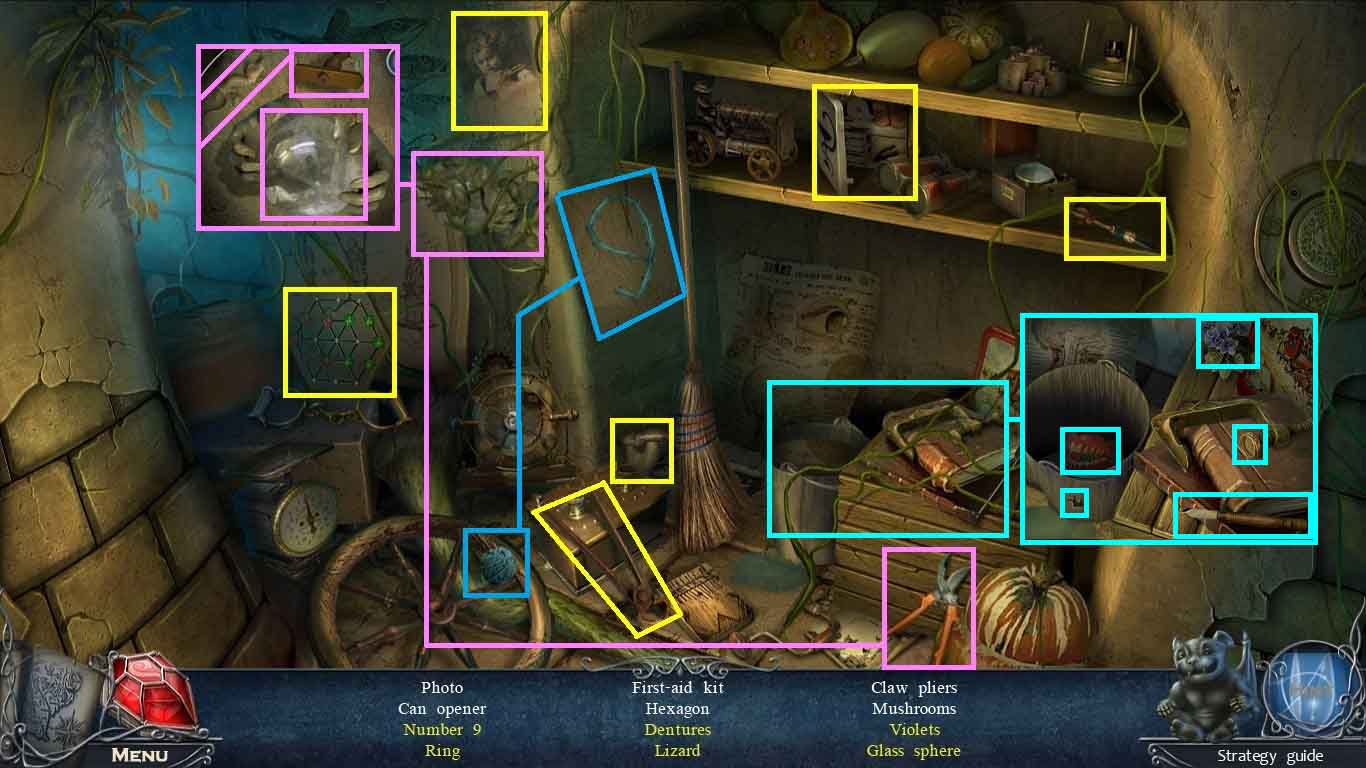
- Find the listed items.
- Examine the bucket and collect the ring and violets.
- Select the hole punch; use it on the bucket and collect the dentures.
- Cut the vines using the pruners.
- Examine the ball and collect the lizard.
- Click the handle and collect the glass sphere.
- Place the yarn ball onto the pin board to collect the number 9.
- Collect the coded hexagon.
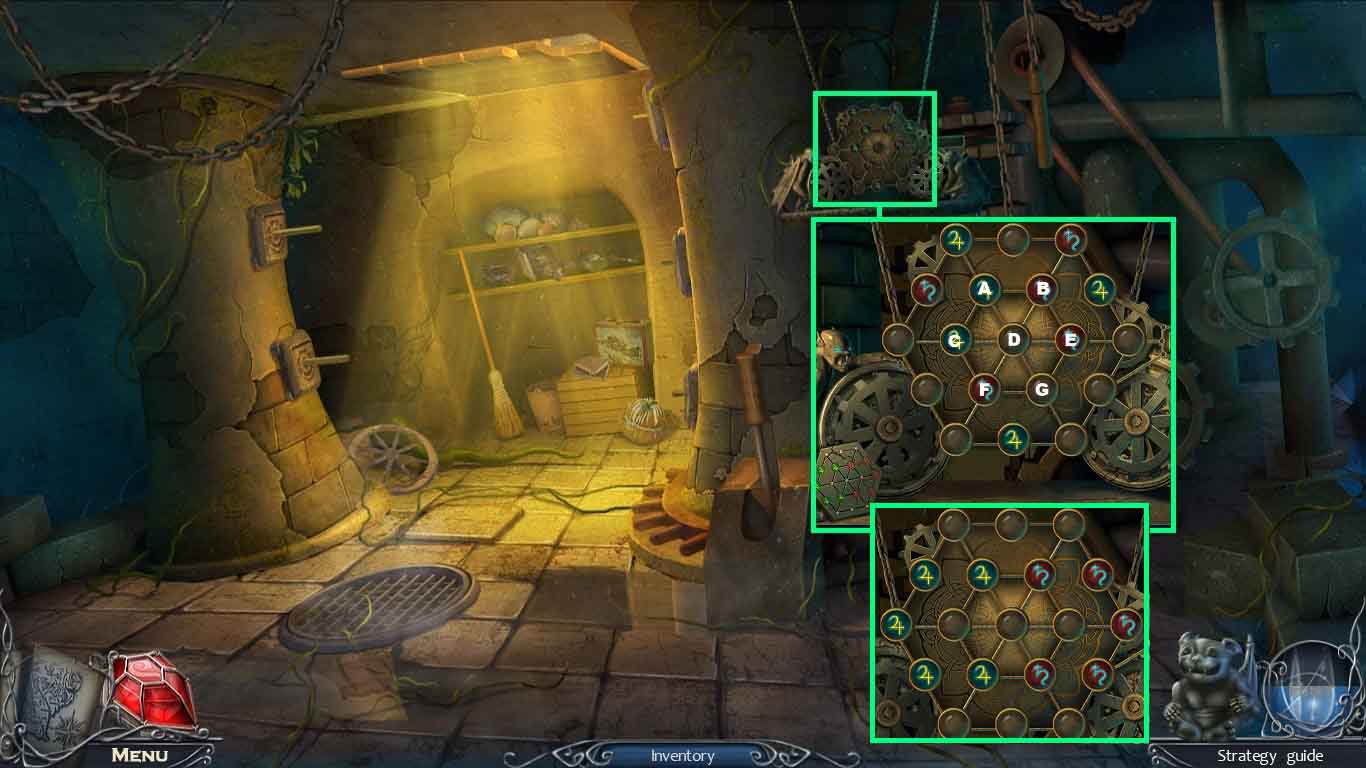
- Zoom into the mechanism an insert the coded hexagon to activate a puzzle.
- Rotate the tokens to replicate the code.
-
Solve the puzzle using the following sequence:
- C: 3x’s
- D: 5x’s
- A: 4x’s
- D: 1x
- G: 2x’s
- A: 1x
- B: 2x’s
- E: 1x
- B: 2x’s
- D: 4x’s
- G: 2x’s
- F: 2x’s
- C: 5x’s
- F: 3x’s
- C: 5x’s
- E: 1x
- B: 1x
- E: 1x
- B: 5x’s
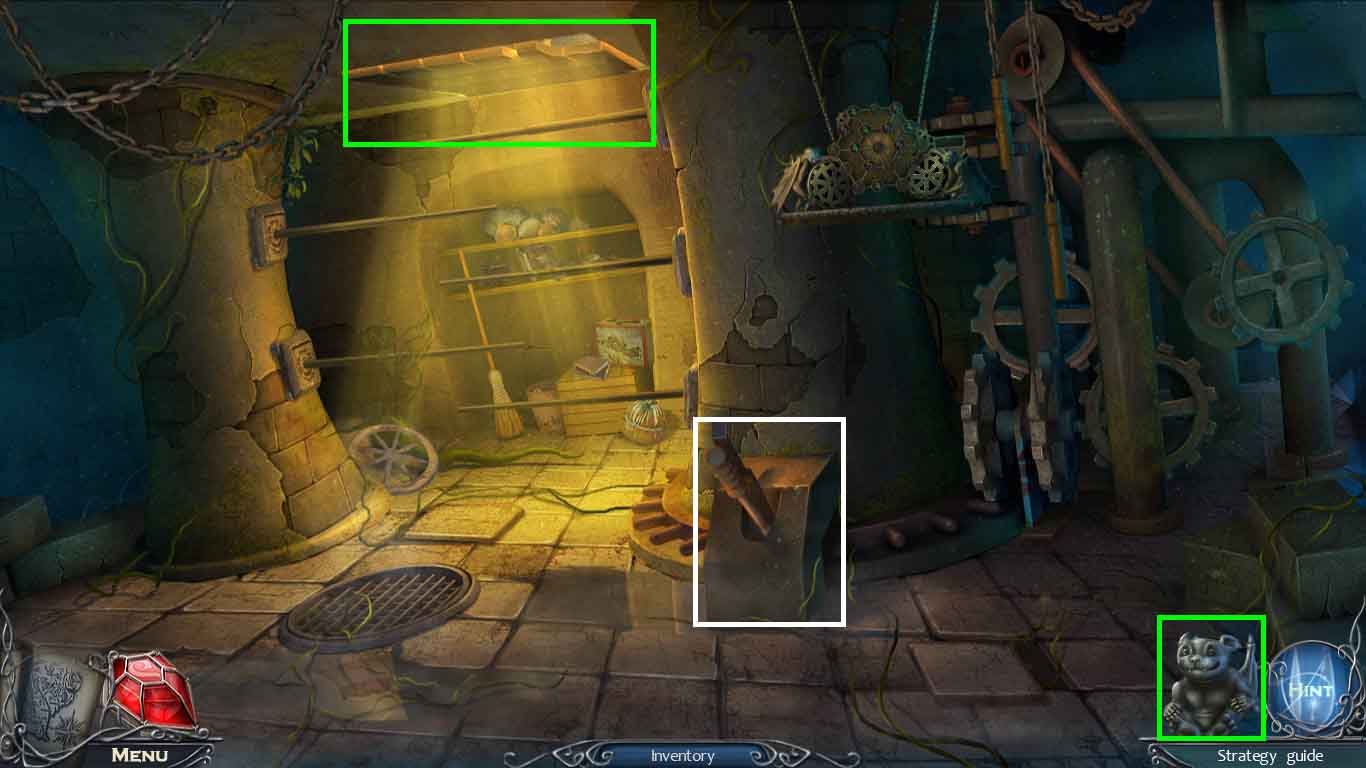
- Click the lever.
- Select Gladriel send him to the upper grate.
- Go up the grate.
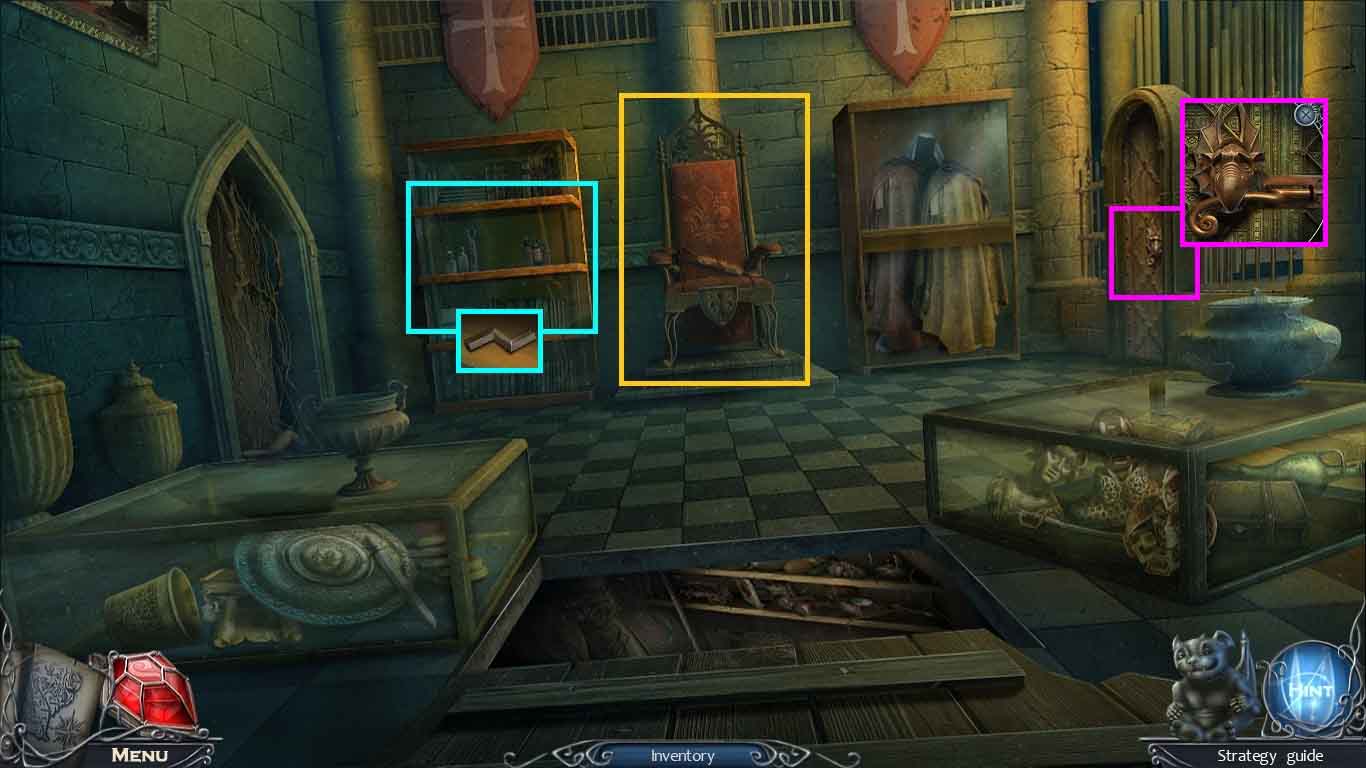
- Zoom into the throne; collect the dirty rolling pin.
- Zoom into the shelves; collect the Allen key.
- Zoom into the door on the right; slide the bolt.
- Move to the right of the exit and go to the cellular souvenir stand in Paris.
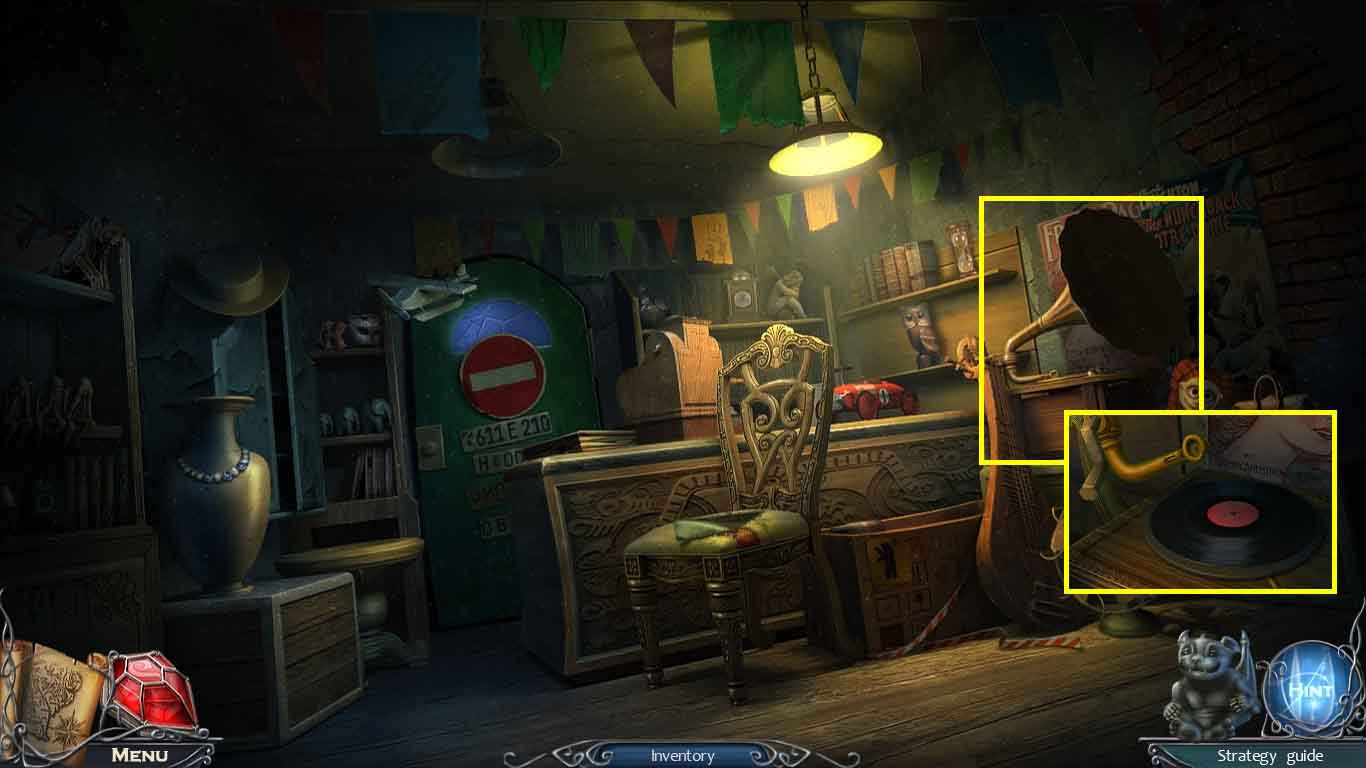
- Zoom into the gramophone; use the Allen key on the arm and collect the record.
- Move to the café and go forward to the café interior.
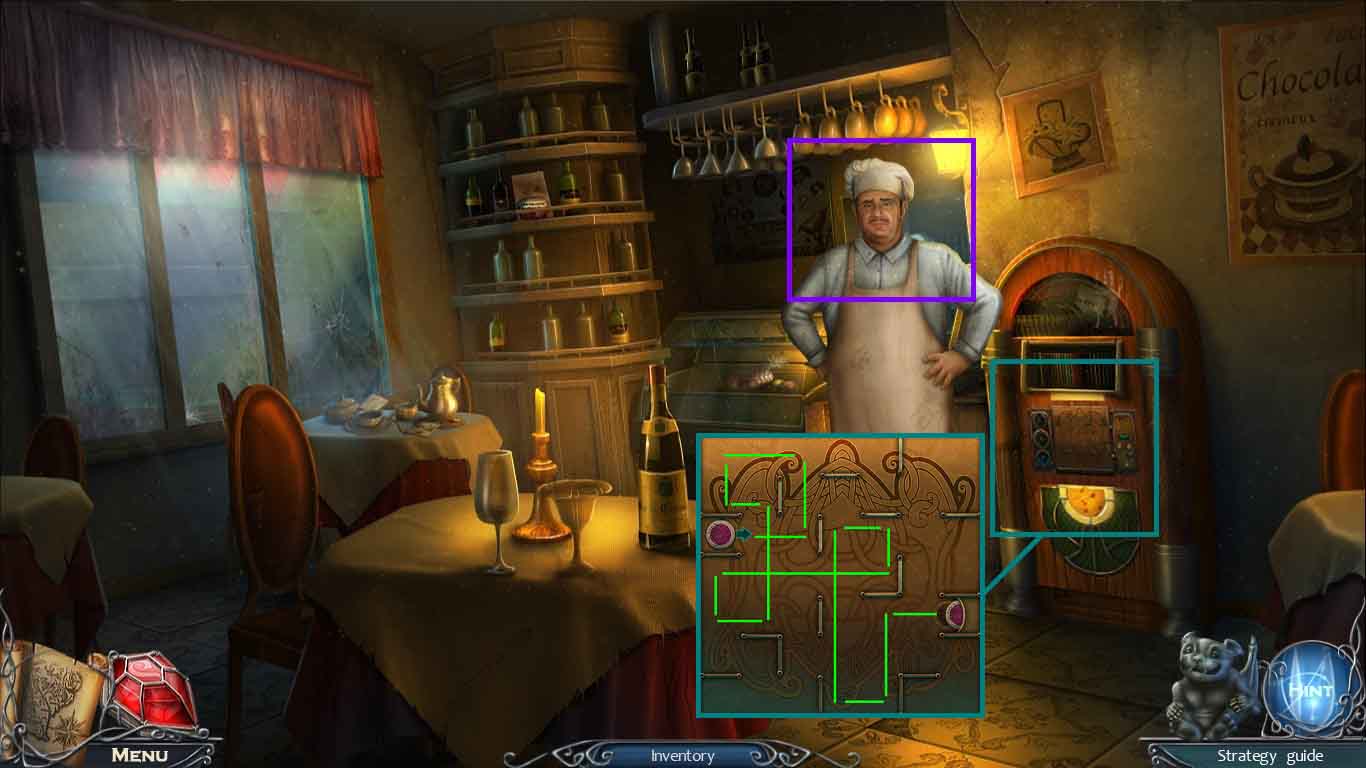
- Give the chef the record.
- Zoom into the jukebox and insert the jukebox token to activate a puzzle.
- Move the token into the coin slot.
- Solve the puzzle by moving as follows: right – up – left – down – right – down – left – up – right – up – left – down – right – up – right.
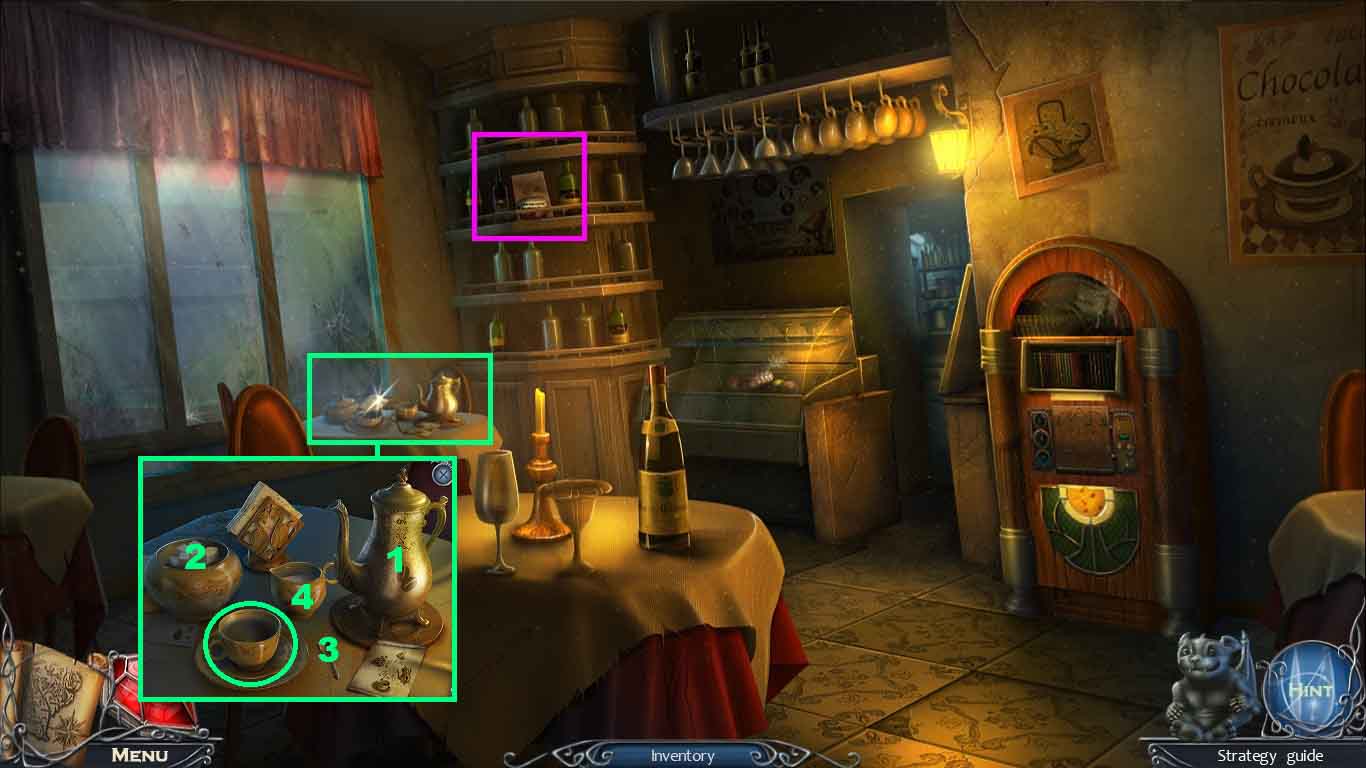
- Zoom into the table.
- Click the lid off the sugar bowl.
- Make the coffee according to the directions.
- Pour the coffee, place the sugar into the cup and use the spoon to stir it.
- Pour the cream into the cup; collect the cup of coffee.
- Zoom into the shelf; collect the jam and the empty paper bag.
- Move through the back doorway into the café kitchen.
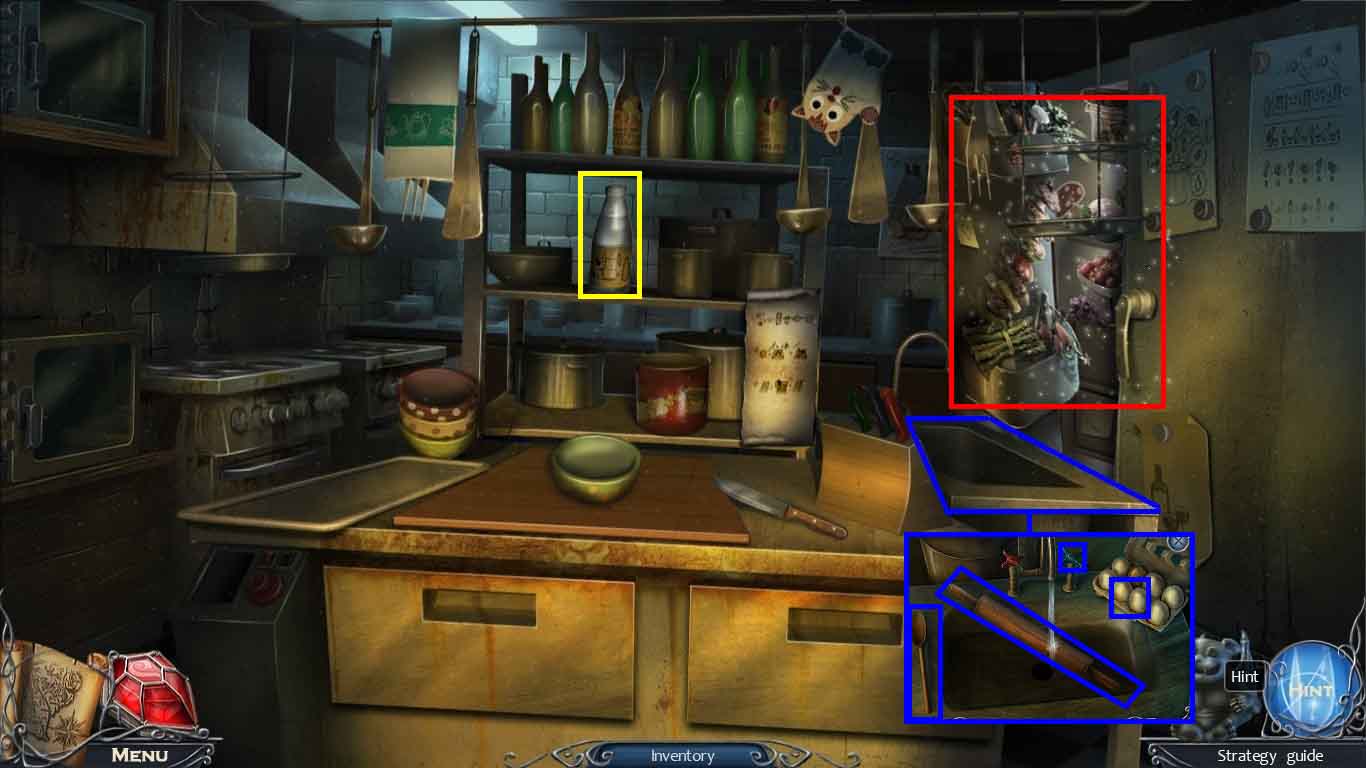
- Zoom into the sink.
- Put the dirty rolling pin into the sink and click the tap.
- Collect the wooden spoon, the clean rolling pin and the eggs.
- Collect the milk.
- Zoom into the fridge to access the hidden objects area.
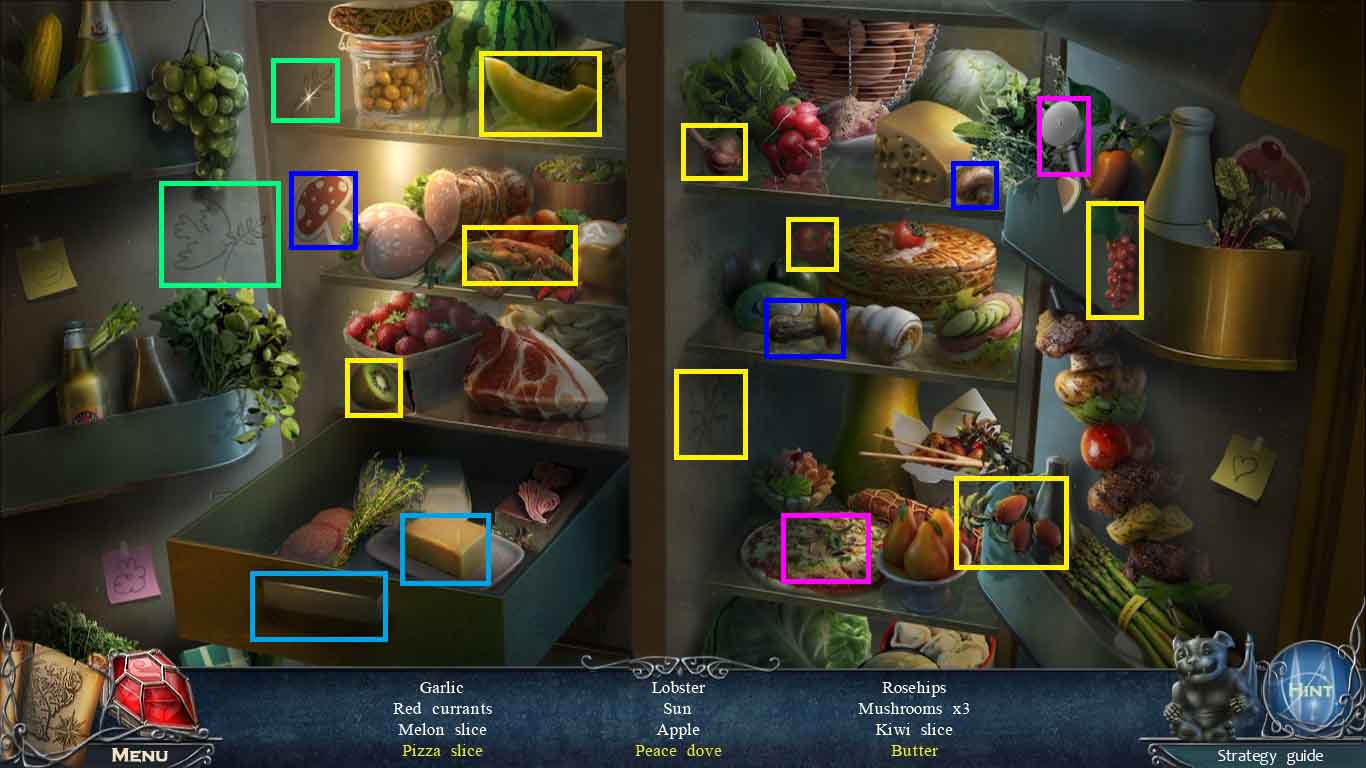
- Find the listed items.
- Click the drawer; collect the butter.
- Slice the pizza using the pizza cutter; collect the slice of pizza.
- Give the sprig to the bird; collect the peace dove.
- Collect the butter.
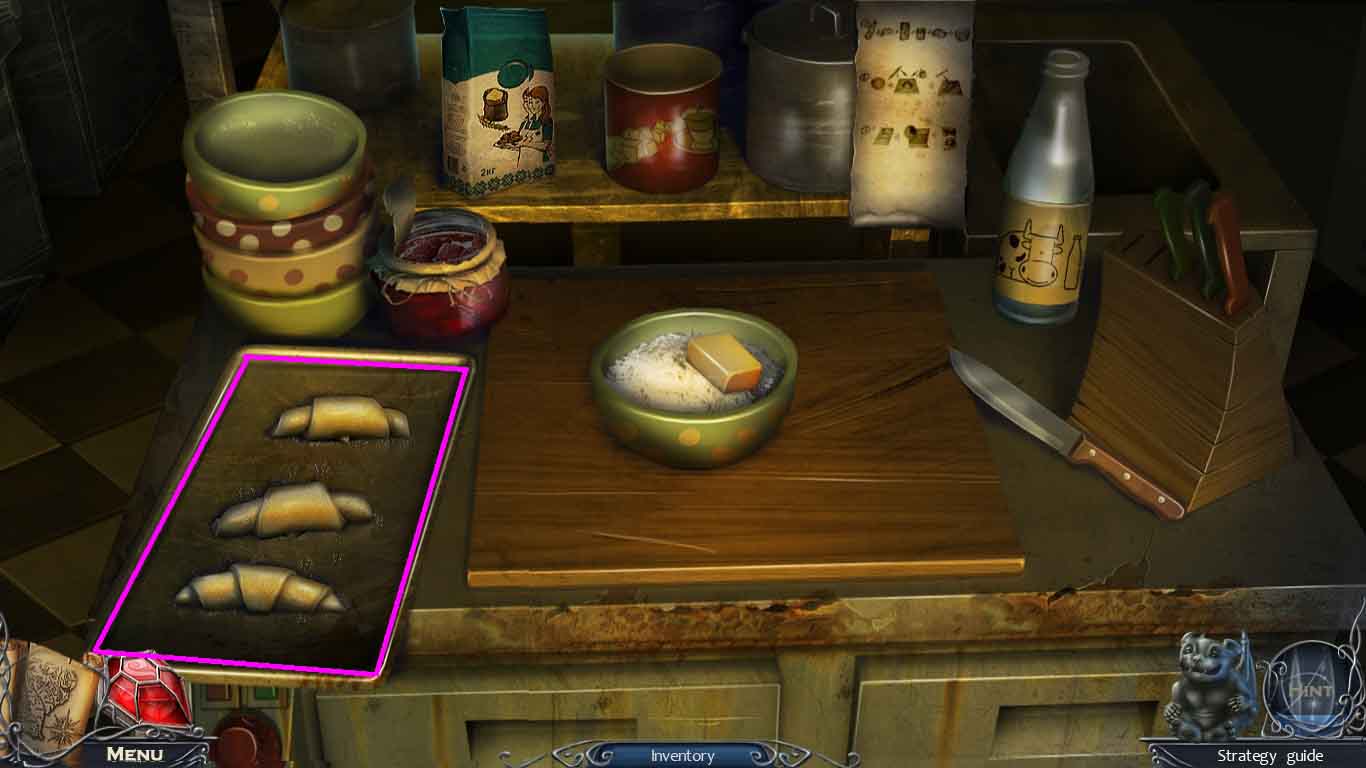
- Zoom into the counter.
- Place the items as follows into the bowl:
- Milk – eggs – baking powder – sugar and butter; stir them together using the wooden spoon.
- Select the rolling pin and use it on the newly made dough; pour on the jam.
- Roll the jam and dough using the knife to create the rolls.
- Collect the raw croissant.
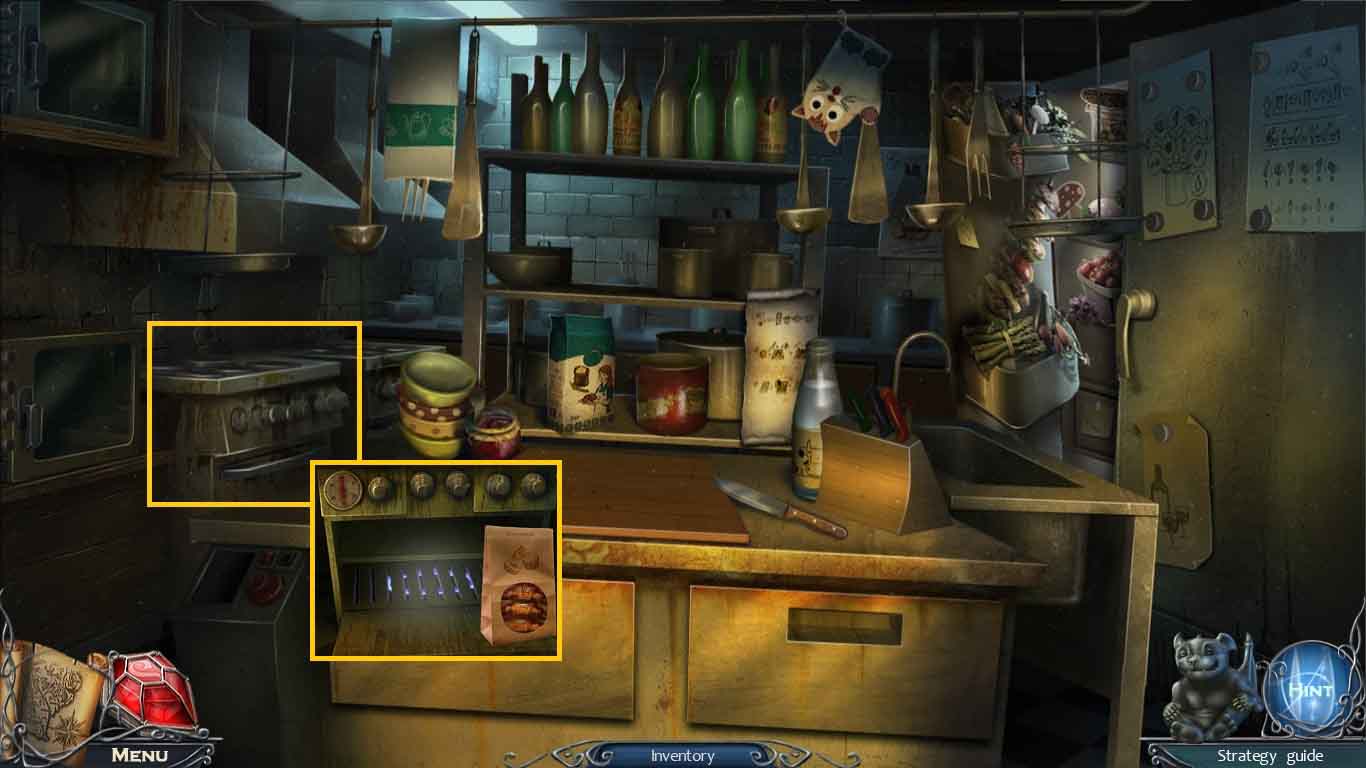
- Zoom into the stove.
- Click the oven and insert the raw croissants.
- Click the oven knob and open the oven,
- Put the empty paper bag onto the door to collect the paper bag with croissants.
- Move to the bell tower entrance on Notre Dame; move ahead to the bell tower.
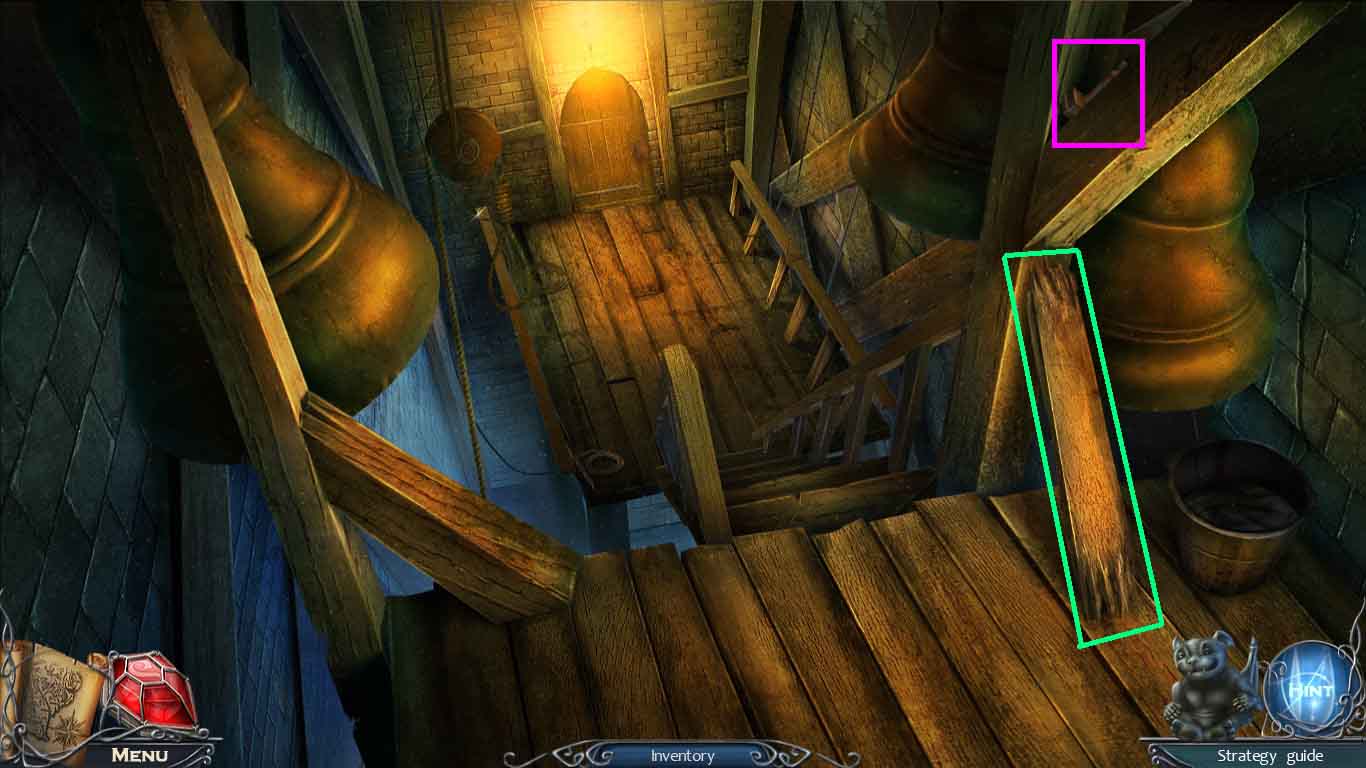
- Collect the plank.
- Zoom into the beam; collect the Esme figure.
- Move to the Paris police precinct.
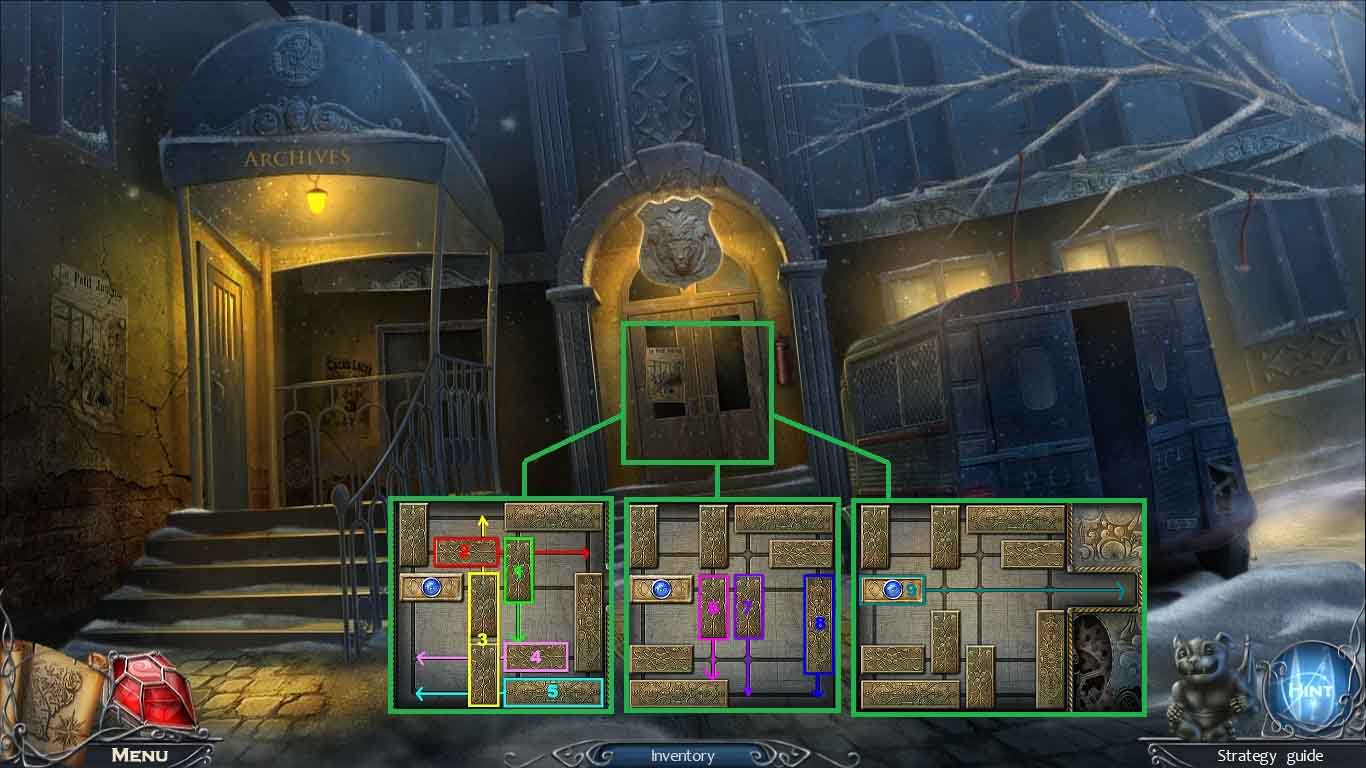
- Zoom into the door and insert the decorative tile to active a puzzle.
- Clear a path for the decorative tile to slide out.
- Move forward to the police hall.
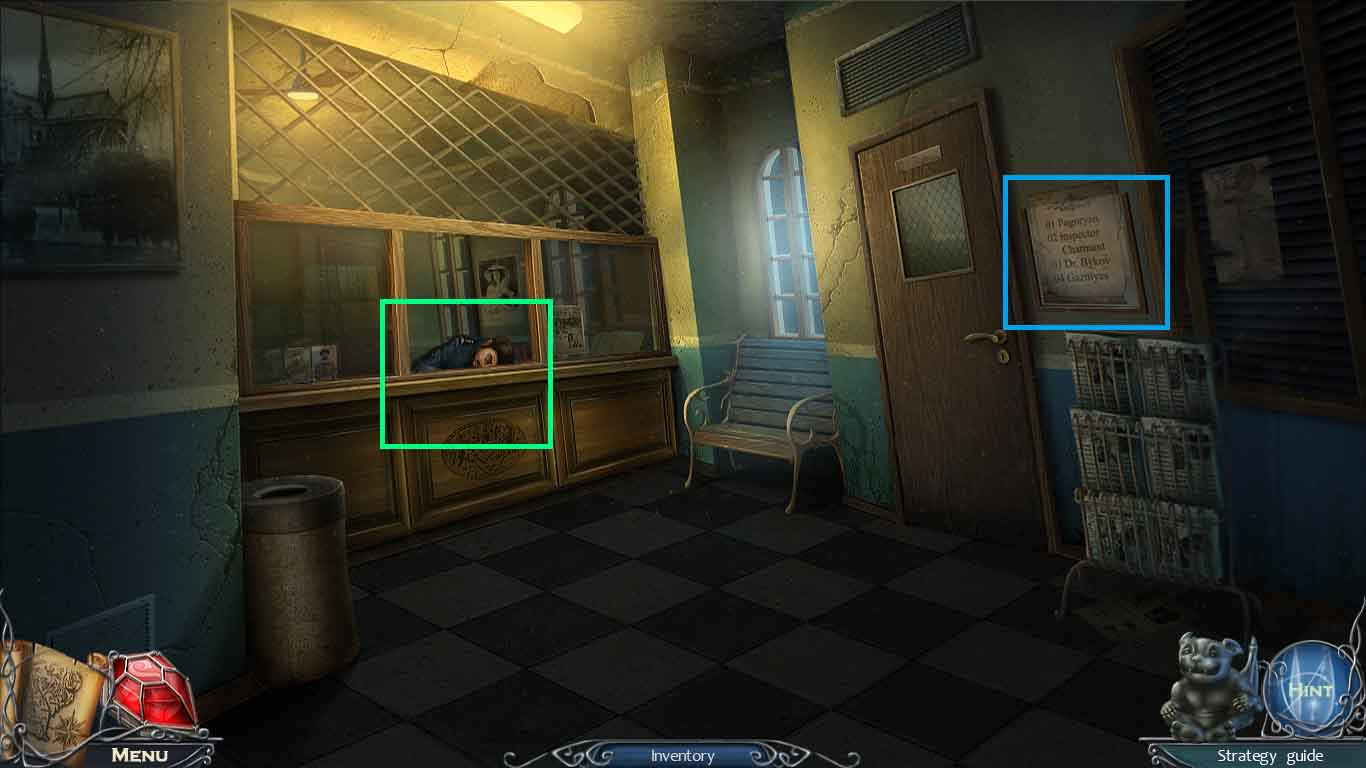
- Zoom into the numbers; collect the phone numbers.
- Zoom into the police officer.
- Hand him the cup of coffee, the paper bag with croissants and the phone numbers.
- Move through the door to the Inspector Charmant’s office.
- Collect the archive key.
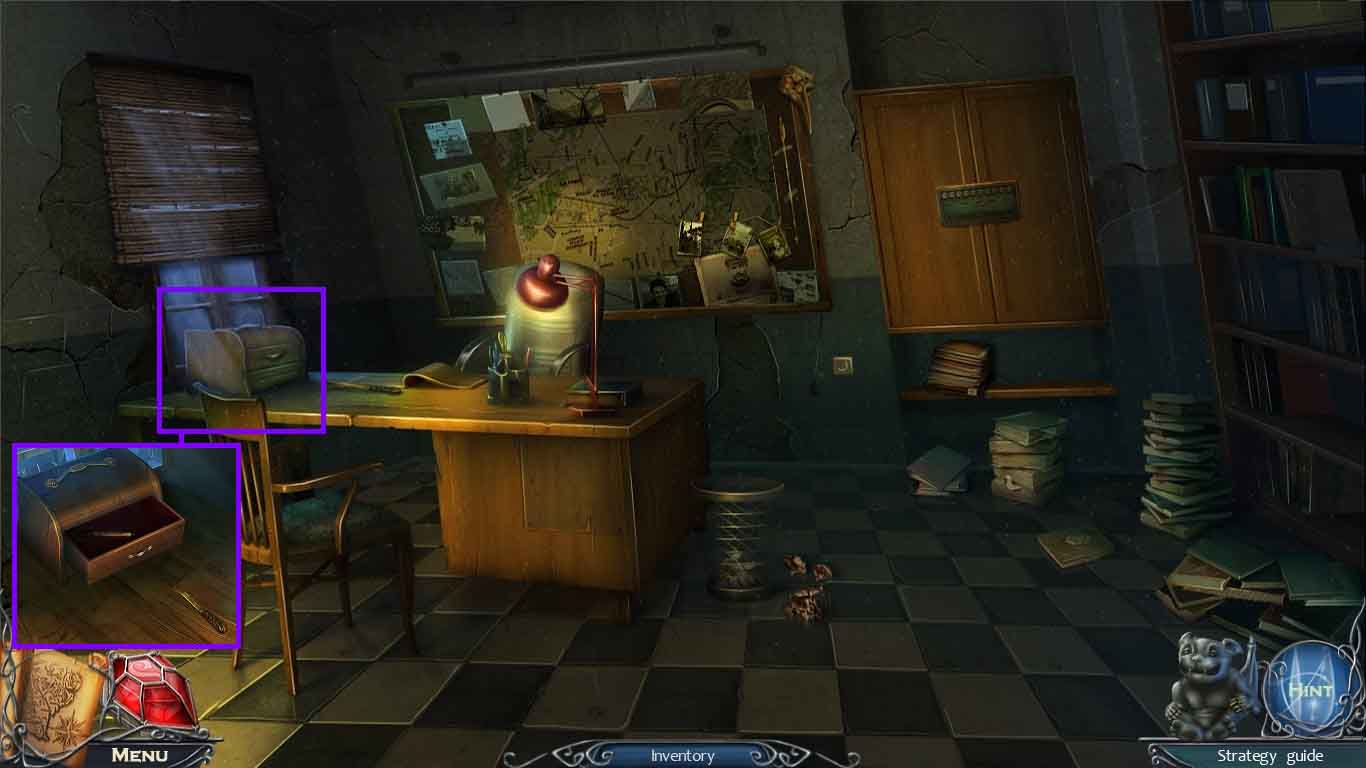
- Zoom into the desk; click the drawer.
- Collect the highlighter and the letter opener.
- Click the drawer.
- Move back two times.
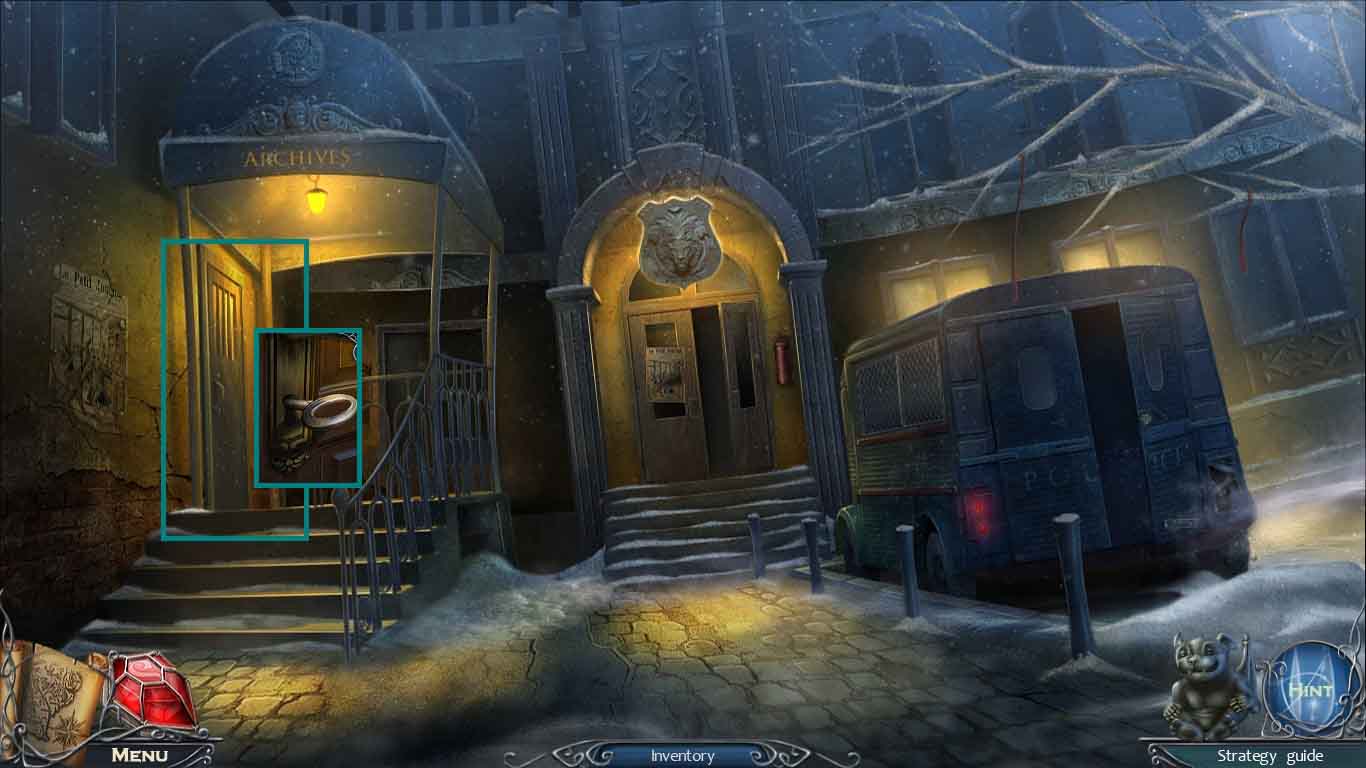
- Zoom into the archive door and insert the archive key.
- Go into the police archives.
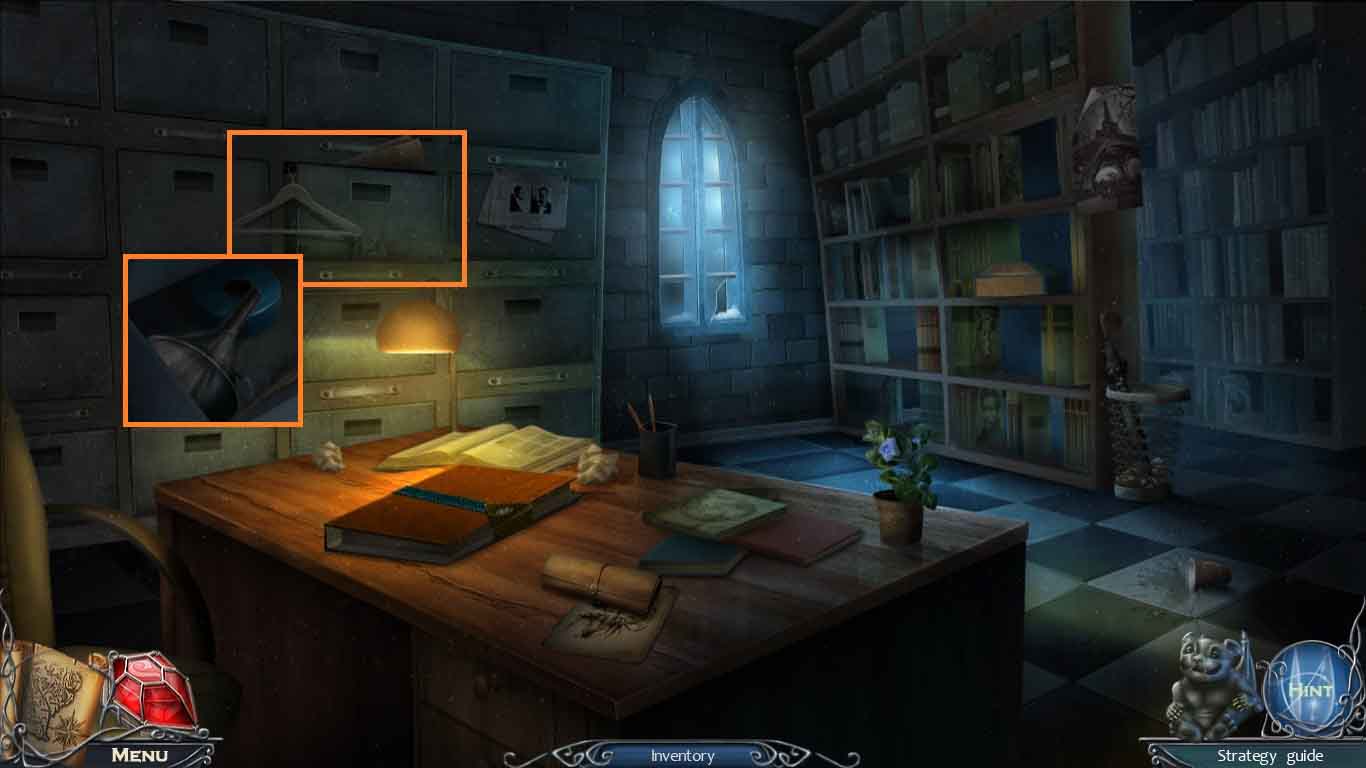
- Zoom into the cabinets; collect the funnel and the insulating tape.
- Move into the Inspector Charmant’s office.
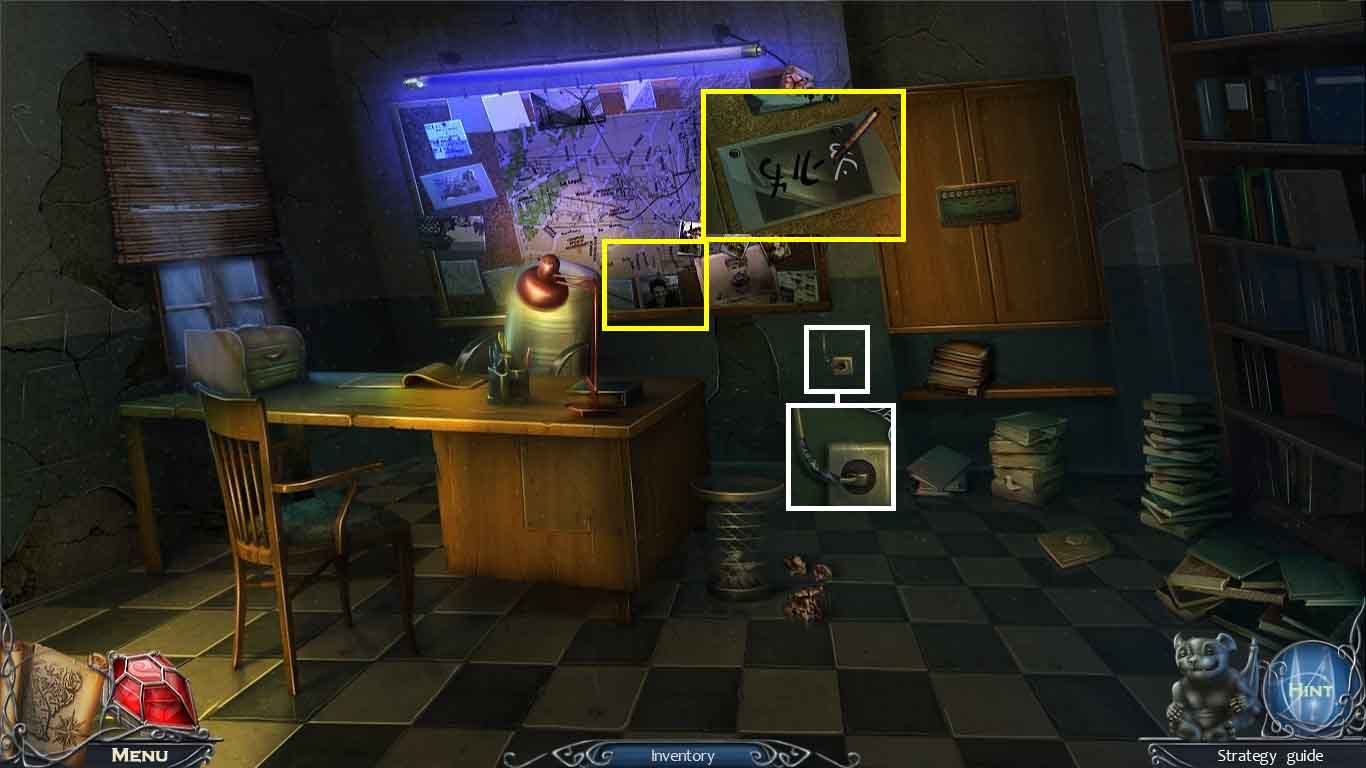
- Zoom into the outlet.
- Use the insulating tape to fix the plug and insert it into the outlet.
- Zoom into the bulletin board; use the highlighter on the photo.
- Collect the photo with code.
- Move to the police archives.
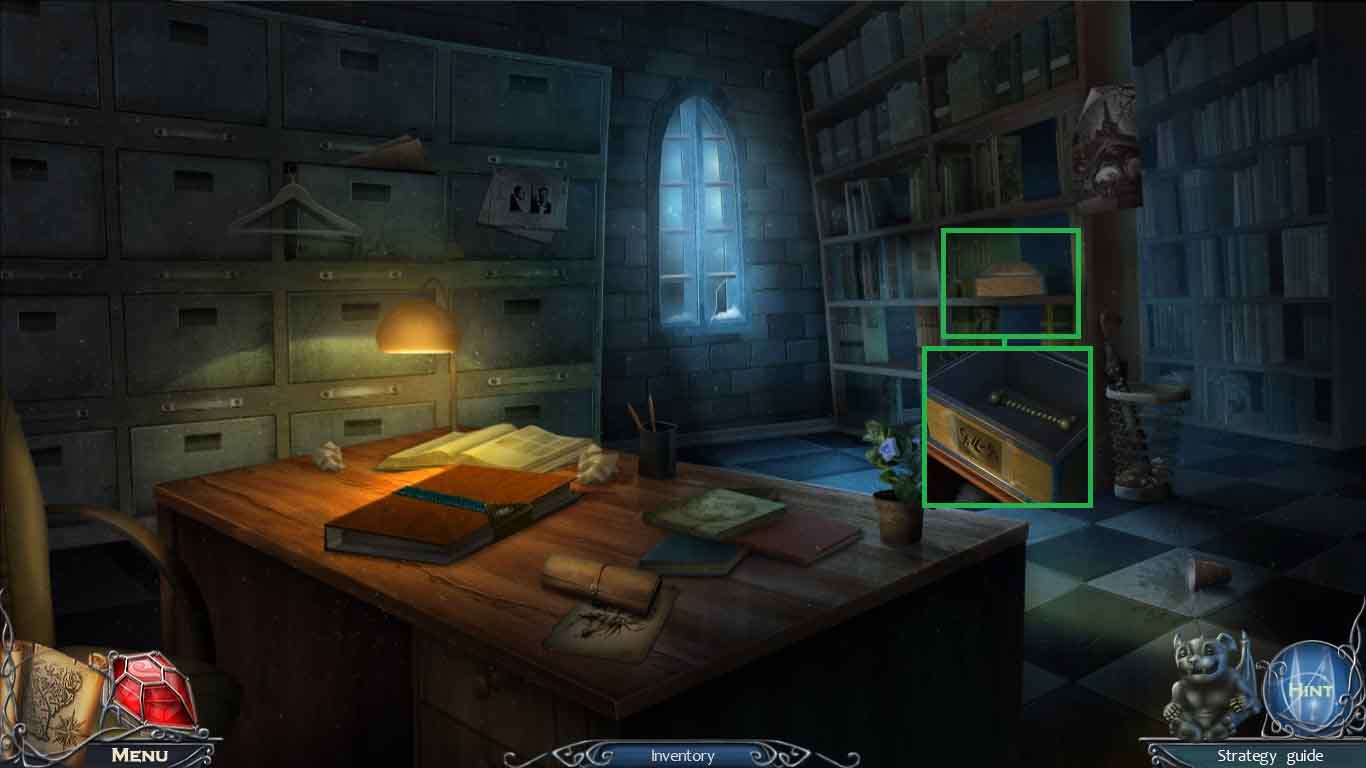
- Zoom into the box and put the photo with the code onto it.
- Click the symbols per the code.
- Collect the drawer handle.
- Move into Inspector Charmant’s office.
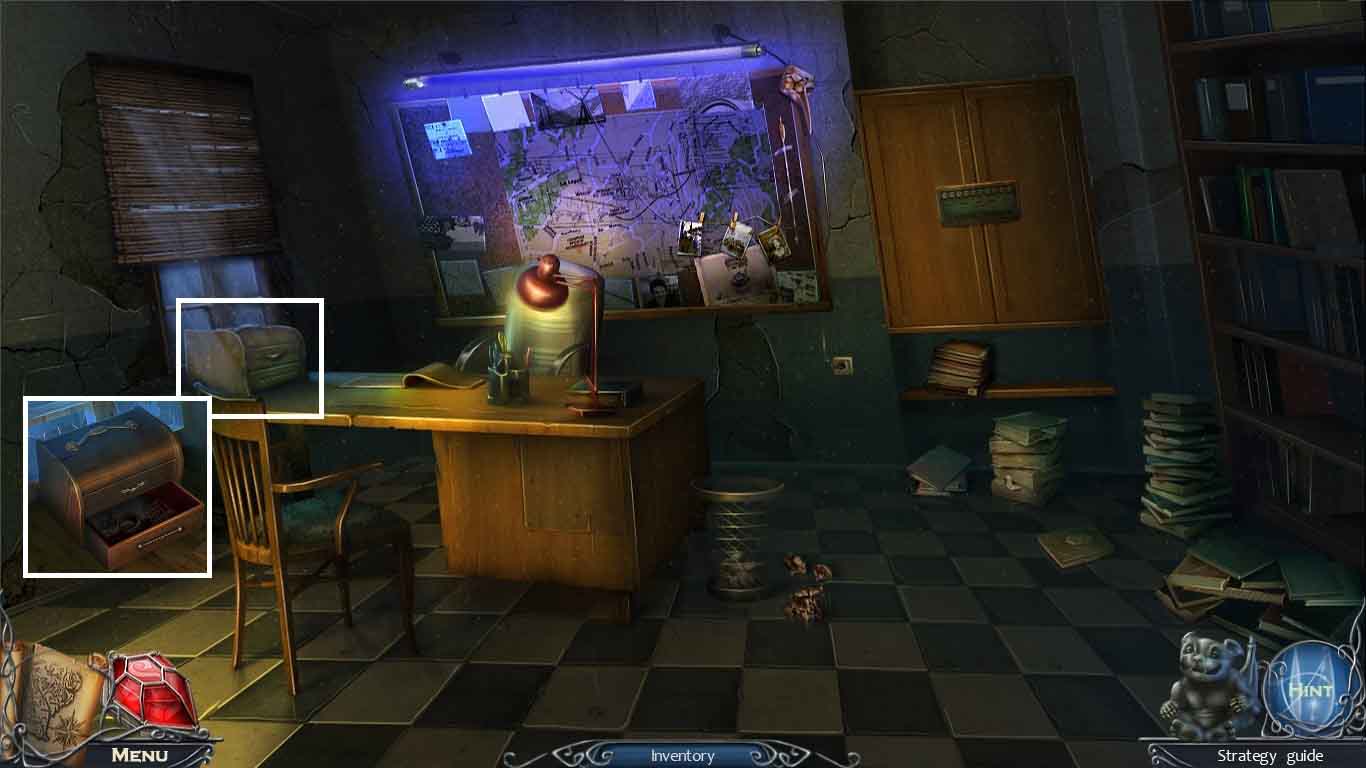
- Zoom into the desk and attach the drawer handle onto the bottom drawer.
- Click the drawer and collect the signet ring.
- Move to the police archives.
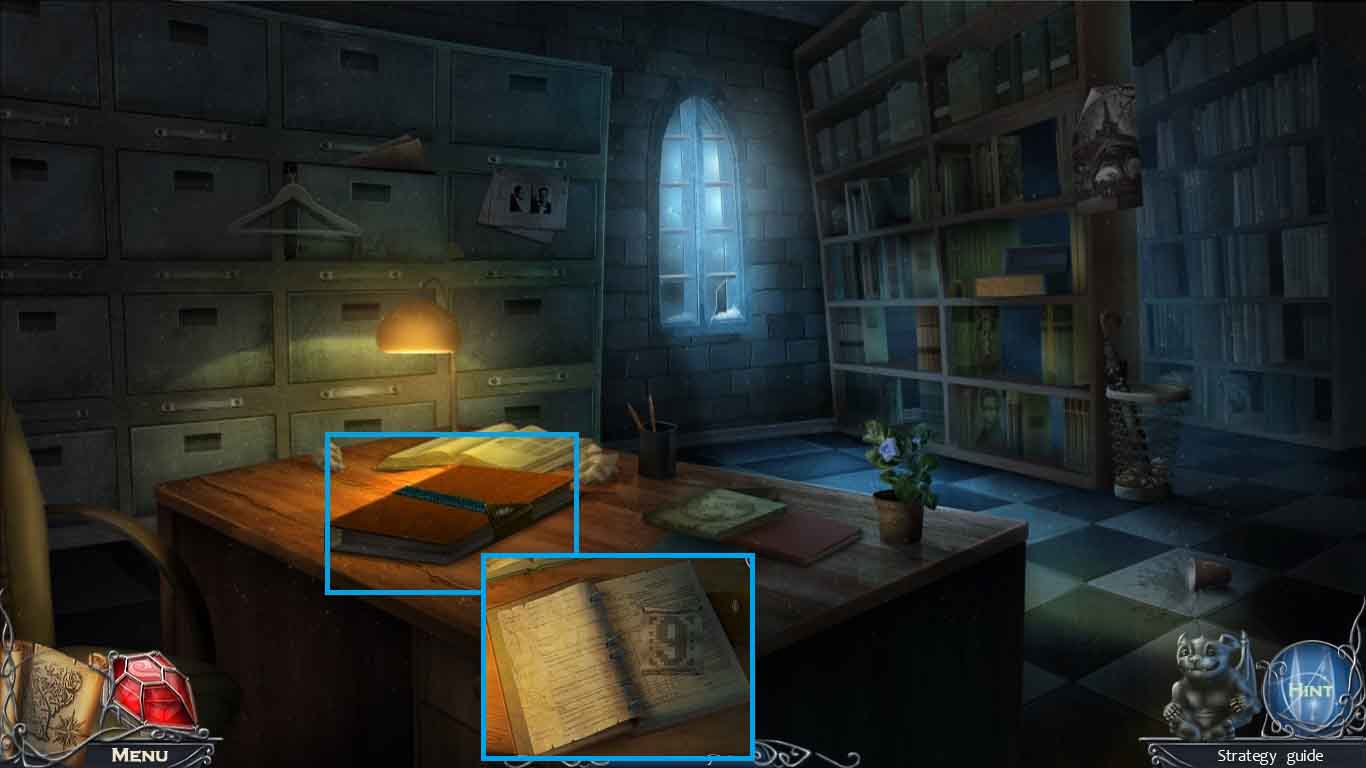
- Zoom into the desk.
- Insert the signet ring into the book.
- Click the pages and collect the pattern with the 9.
- Move to Fontaine Saint Michel.
Comments will load when you reach this part of the walkthrough.