

Chapter Eight: The Hidden Room
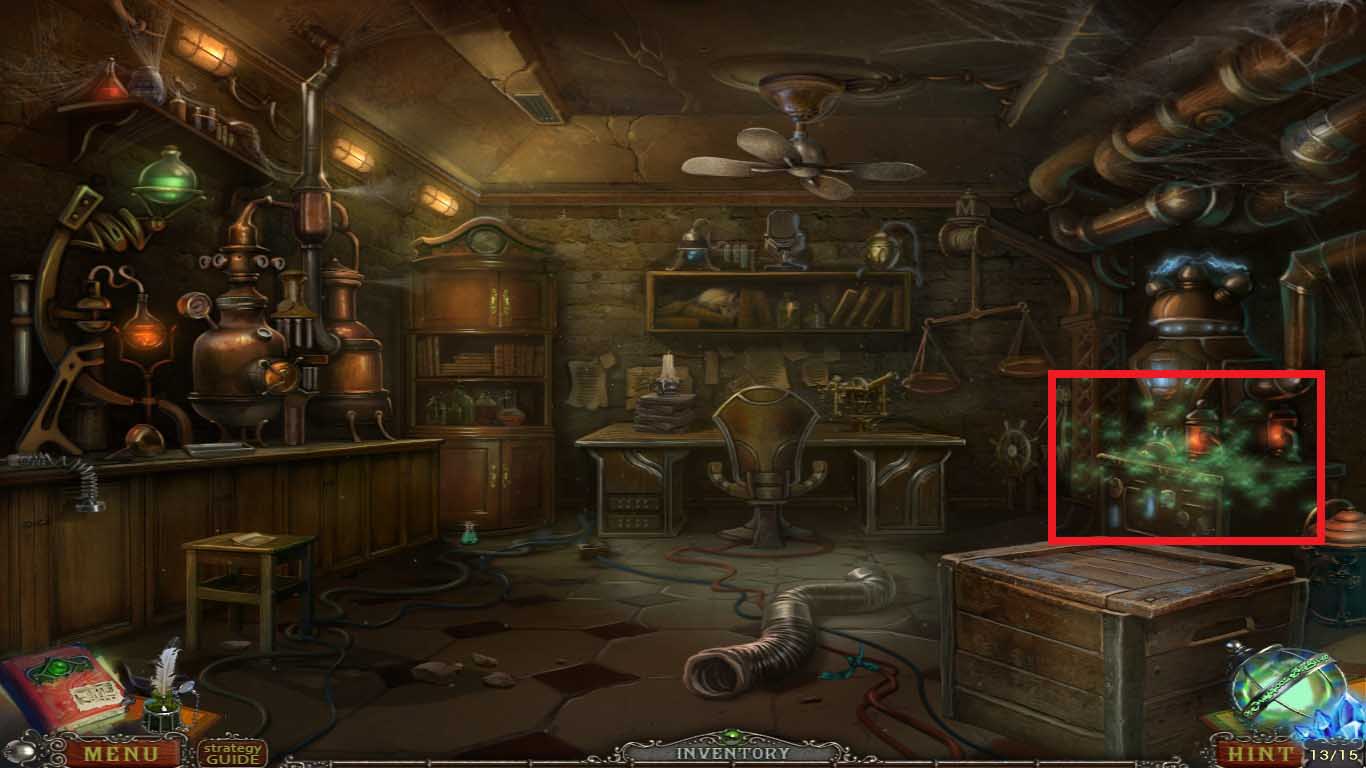
- Zoom into the mechanism (red rectangle) to access the hidden objects area.
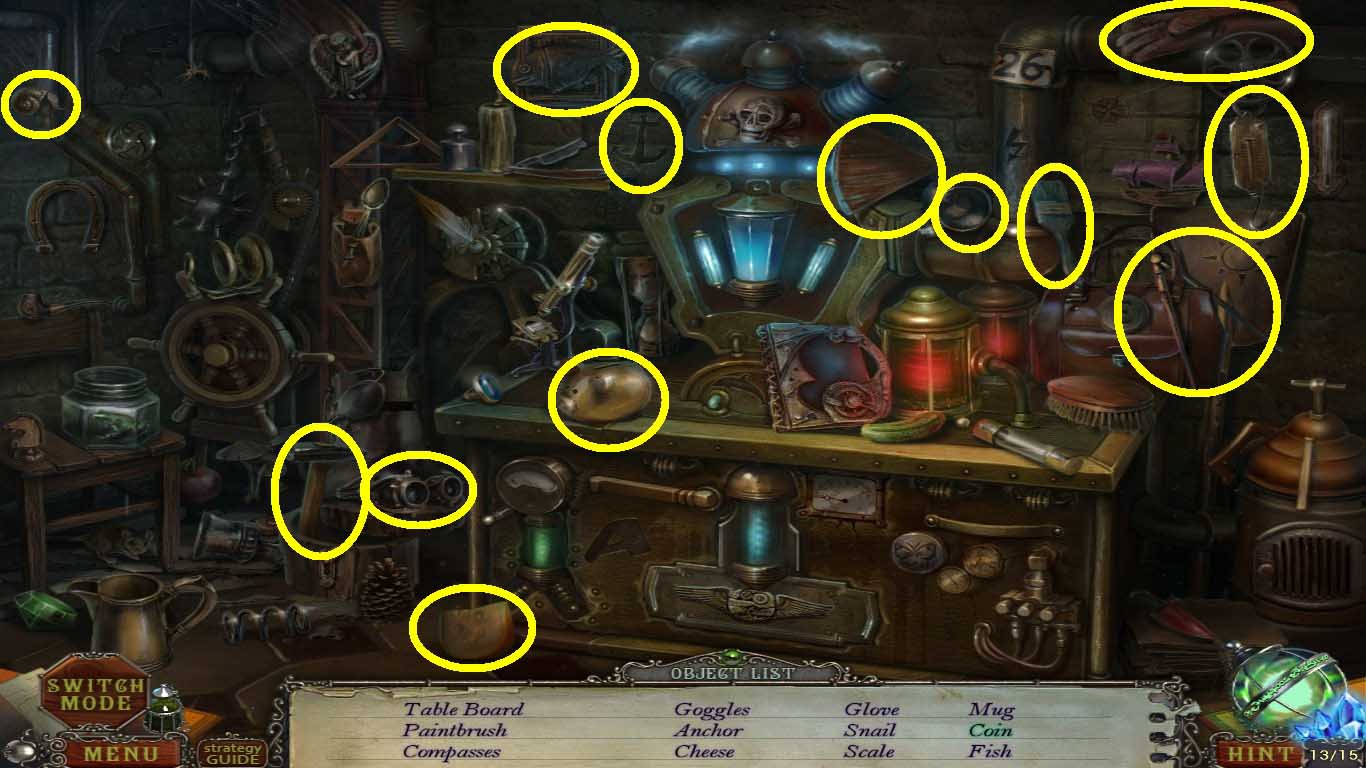
- Find the listed items (yellow circles).
- Collect the table board.
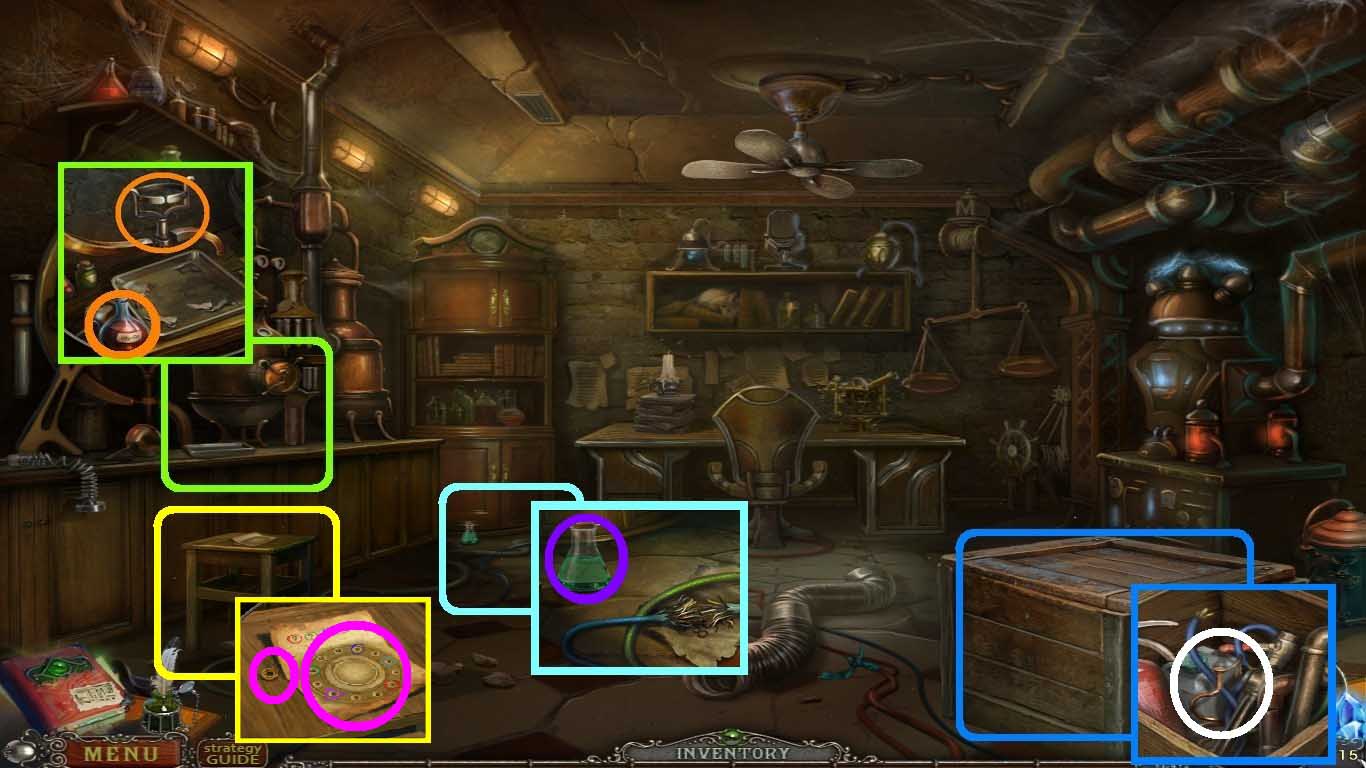
- Move into the bar (green square).
- Place the jar in the stand (orange circles).
- Move into the crate (blue square).
- Click the lid with the crowbar.
- Take the wires (white circle).
- Move into the wires (aqua square).
- Take the rust remover (purple circle).
- Move into the stool (yellow square).
- Take the note and the hour hand (pink circle).
- Move into the secret room: workplace.
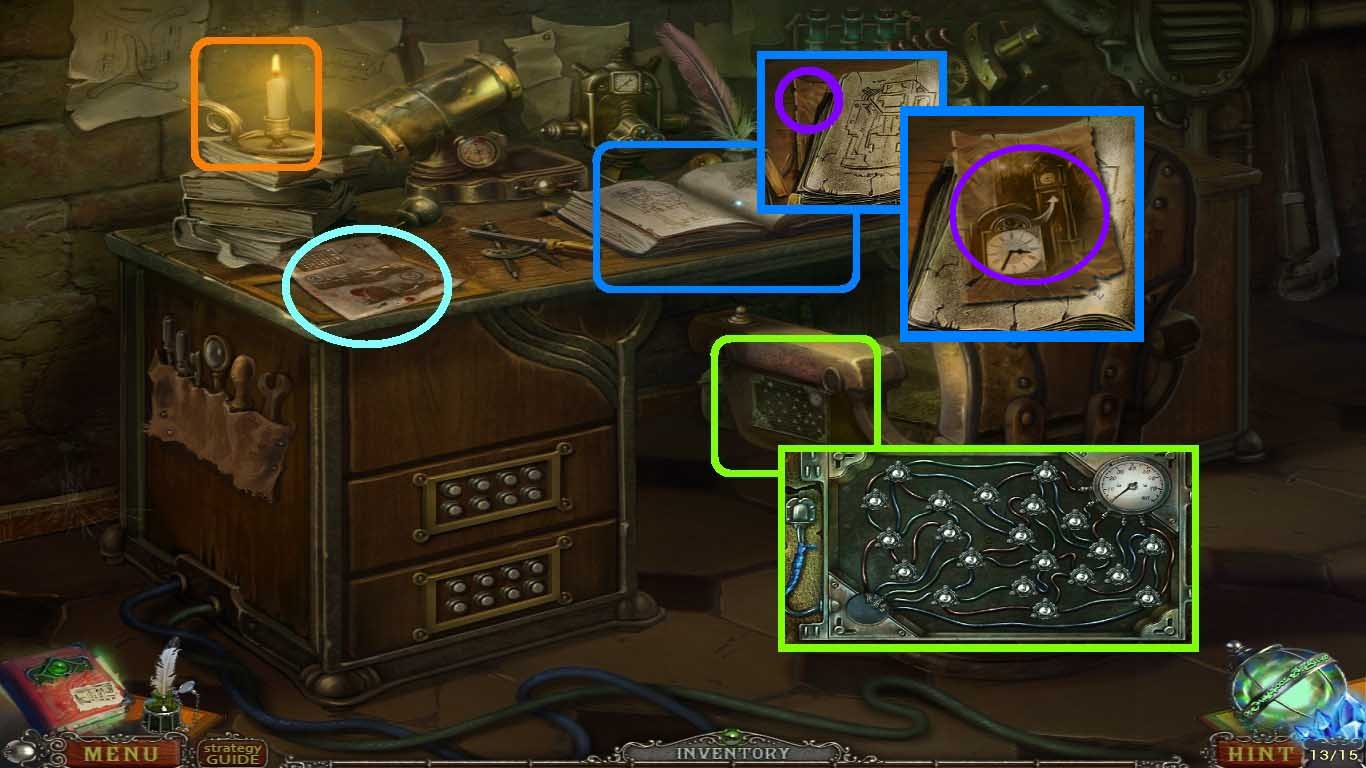
- Use the lighter to light the candle (orange square).
- Take the note (aqua circle).
- Move into the chair panel (green square).
- Use the insulating tape to fix the wires and place them on the puzzle.
- Move into the book (blue square).
- Click the page and take the note (purple circle).
- Go to the orphanage: downstairs.
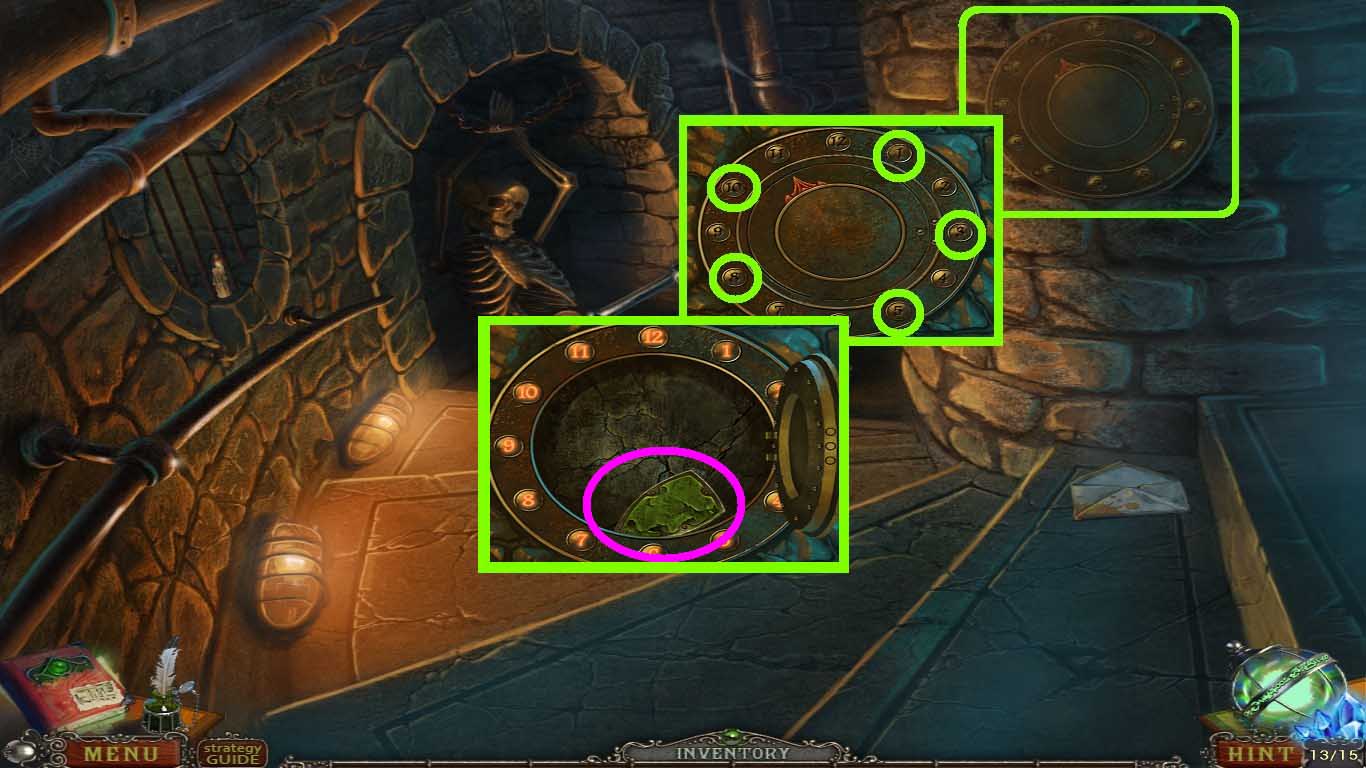
- Move into the wall panel (green square).
- Use the rust remover on the panel.
- Click the buttons as follows: 5 -10 – 3 – 8 – 1.
- Take the fountain puzzle piece (pink circle).
- Go to the orphanage: hall.
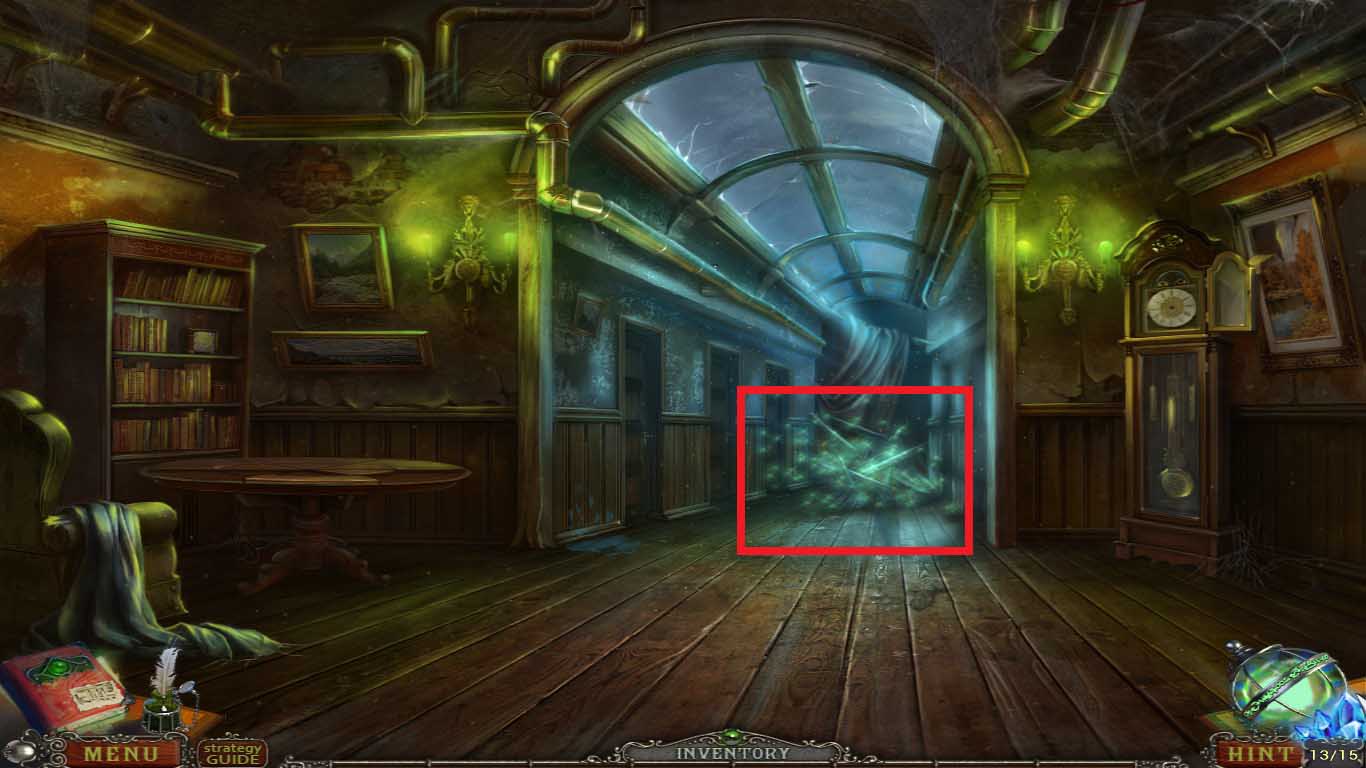
- Move into the debris (red rectangle) to access the hidden objects area.
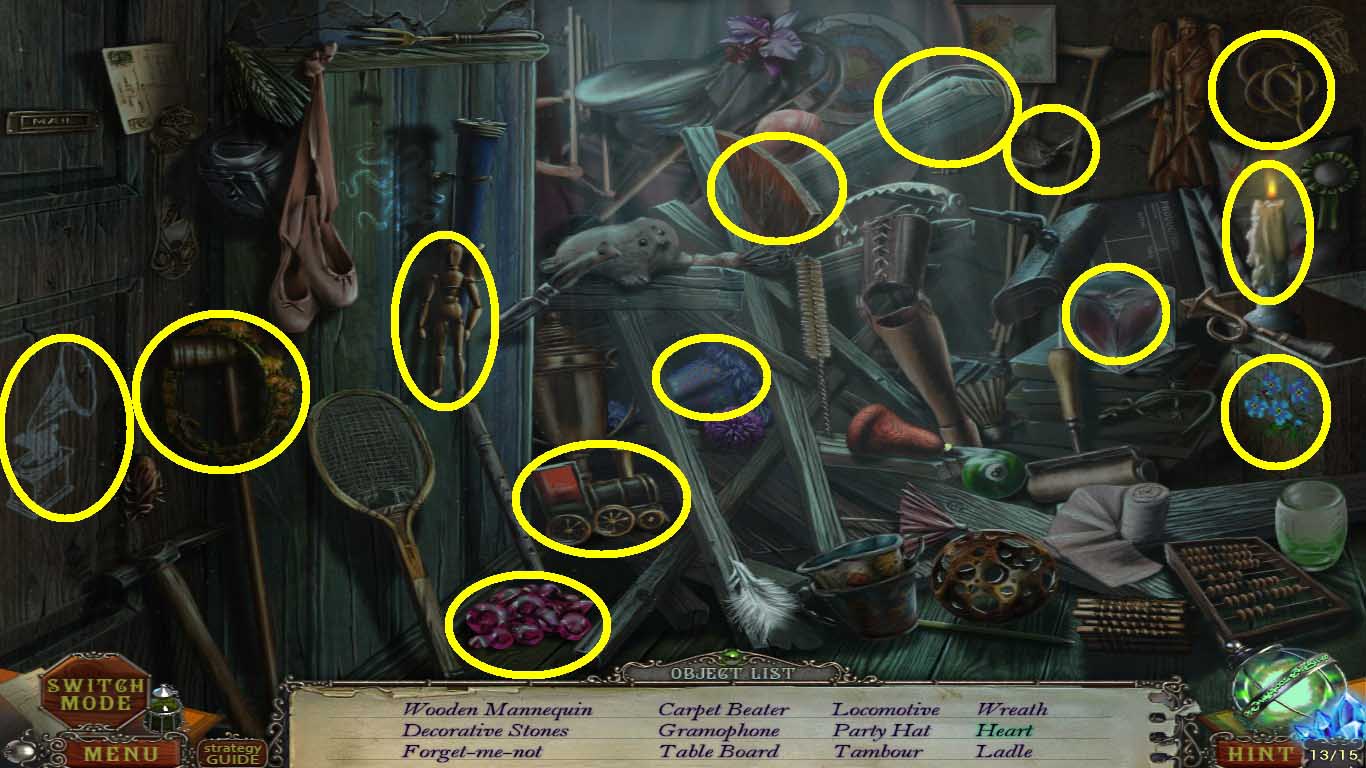
- Find the listed items (yellow circles).
- Collect the table board.
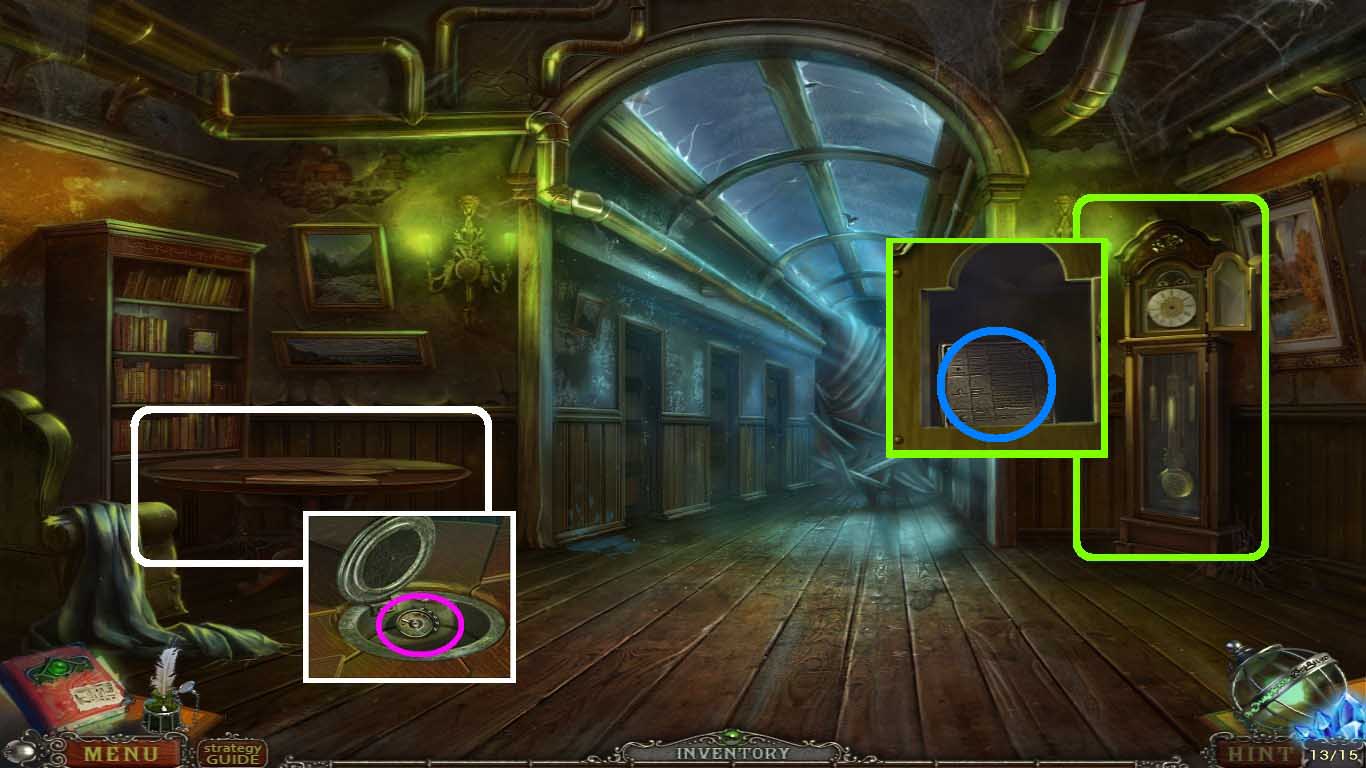
- Move into the table (white square).
- Insert the table boards.
- Click the top and then the hatch.
- Take the armchair mechanism piece (pink circle).
- Move into the clock (green square).
- Insert the minute hand and hour hand onto the clock face.
- Set the time to 3:35.
- Click the face.
- Take the portal instruction plate (blue circle).
- Go to the secret room: workplace.
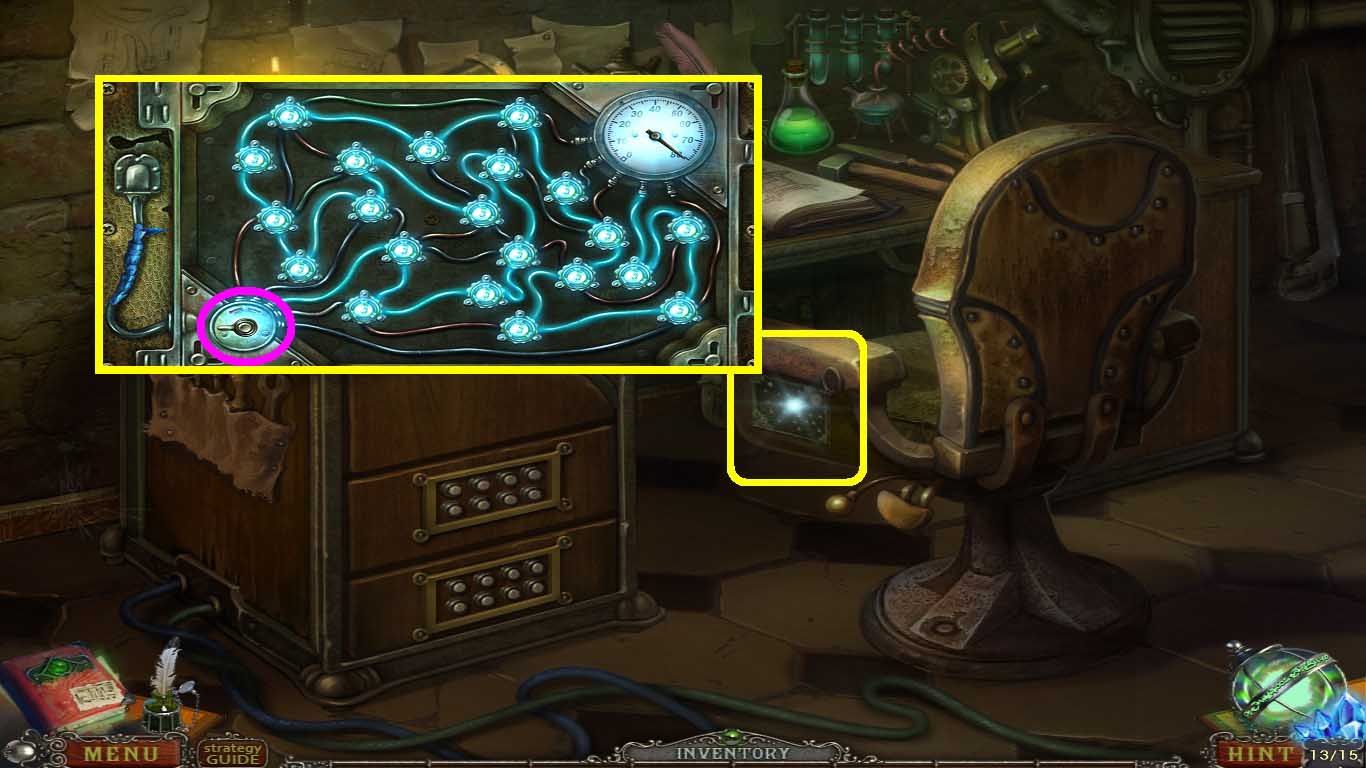
- Move into the chair (yellow square).
- Insert the armchair mechanism part (pink circle) into the slot.
- Solve as shown above to illuminate the lights.
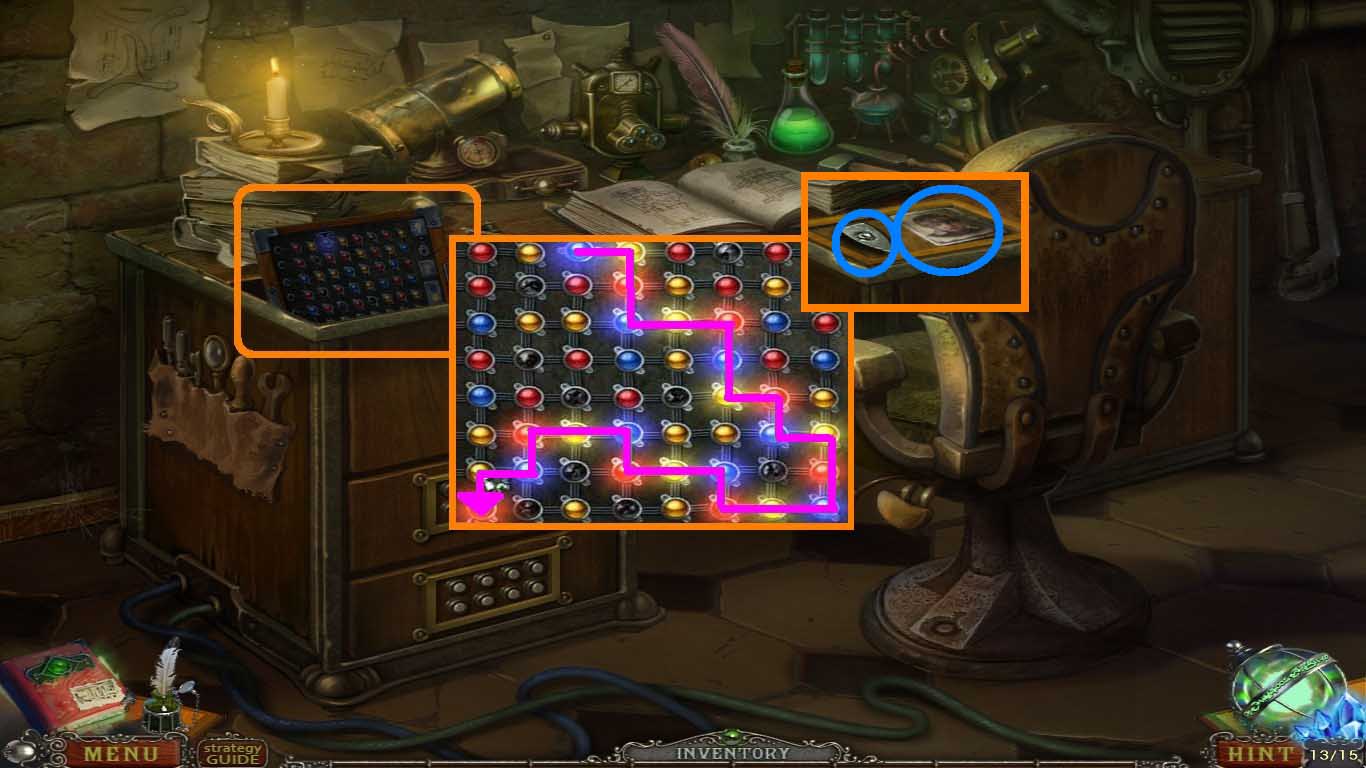
- Move into the panel (orange square).
- Follow the pink line to illuminate the lights.
- Take the fountain puzzle piece and the Tim photo (blue circles).
- Go to orphanage: secret room.
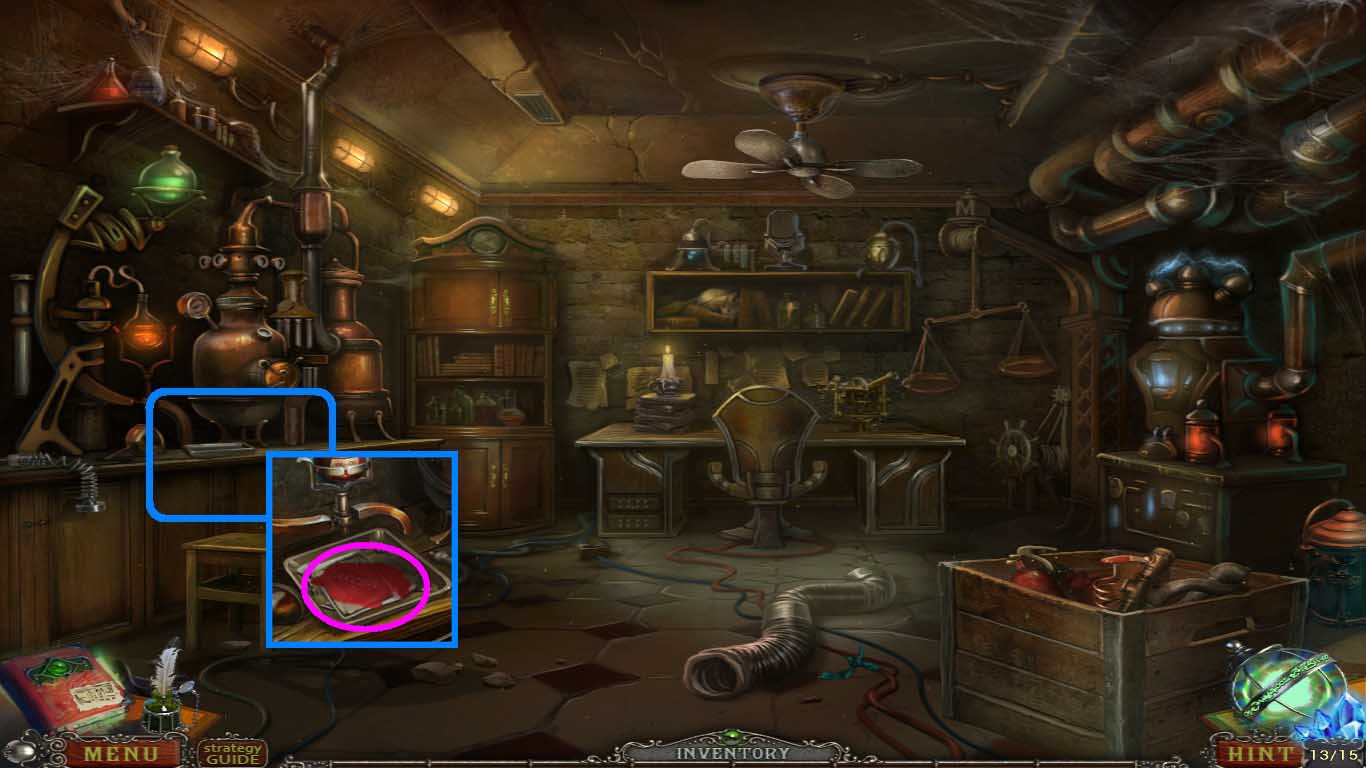
- Move into the bench (blue square).
- Insert the Tim photo into the pan.
- Take the Tim photo (pink circle).
- Go to the orphanage: near old fountain.
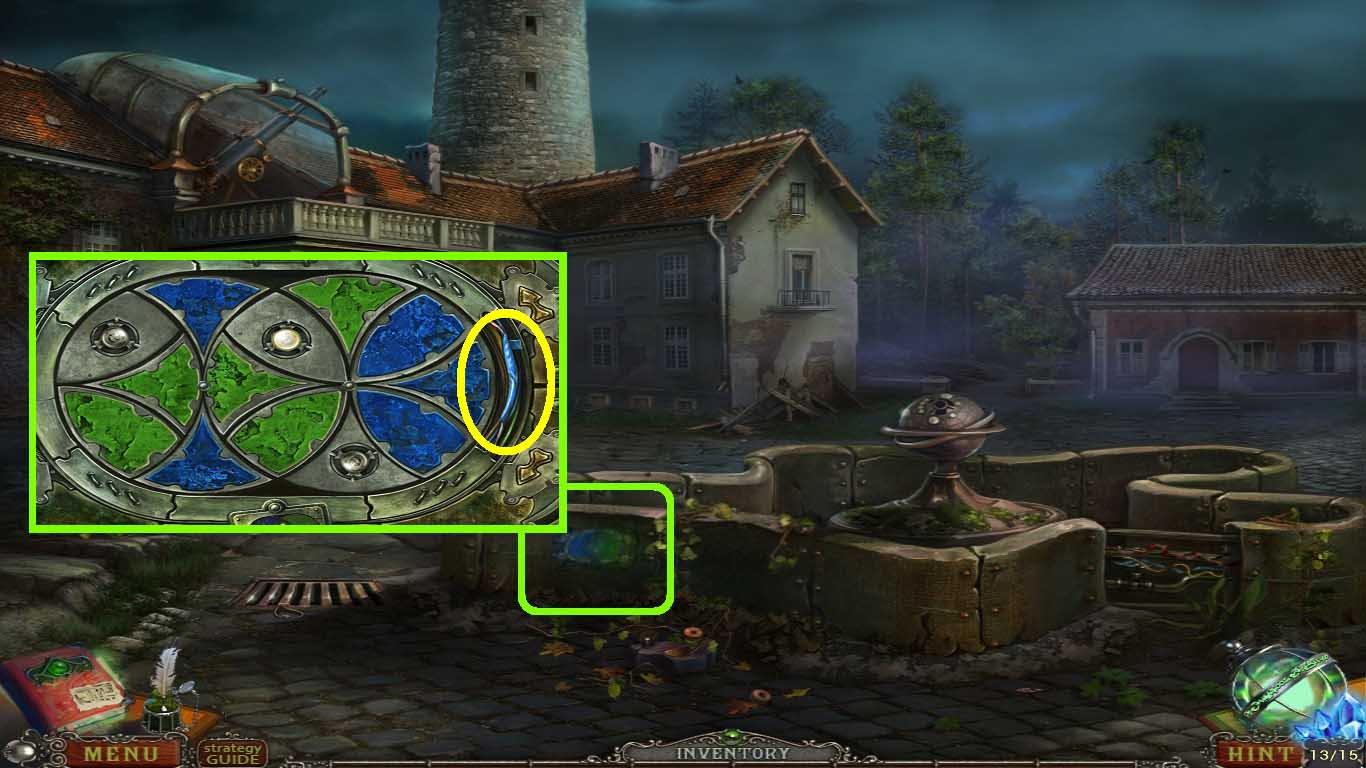
- Move into the fountain panel (green square).
- Use the insulating tape to fix the wires (yellow circle).
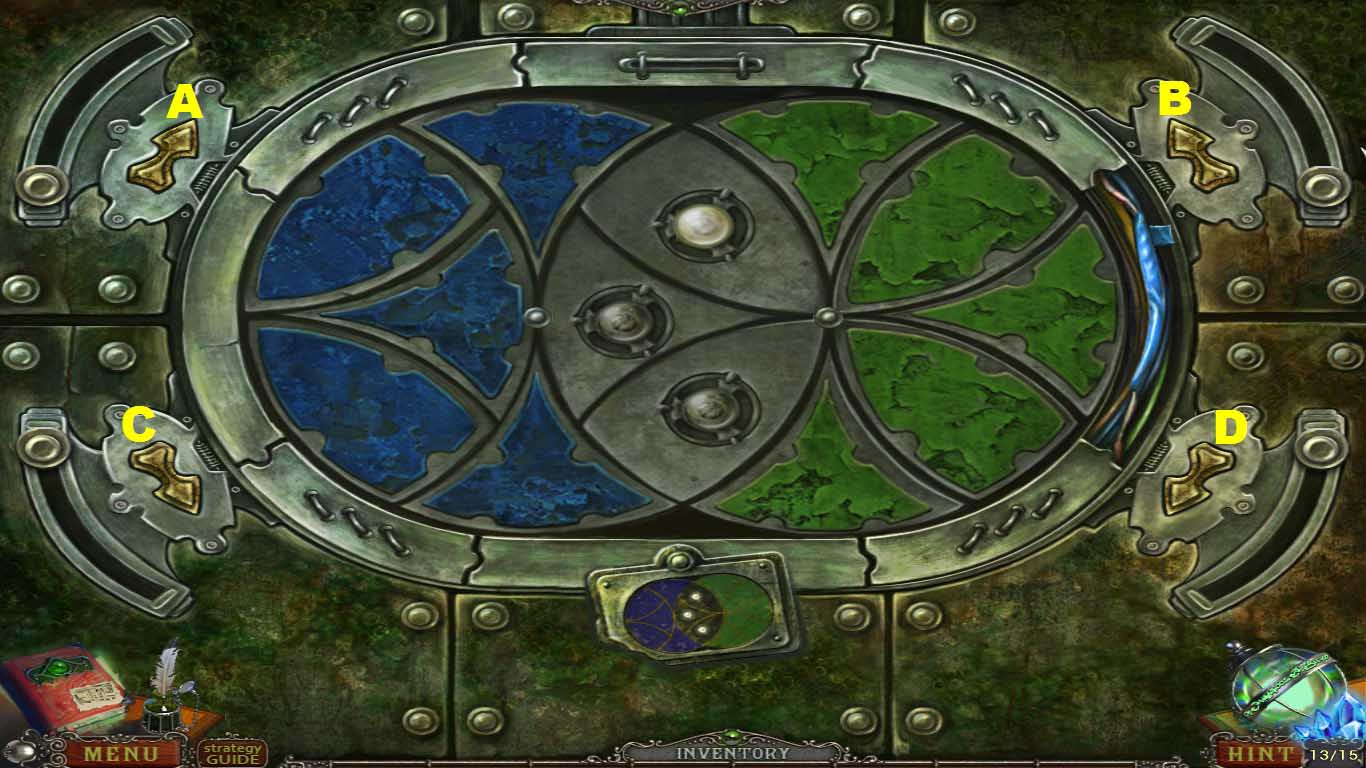
- Insert the fountain puzzle pieces into the lock.
- To set the pattern, follow the sequence below:
- C – D – D- A – B.
- Go into the secret room: under old fountain.
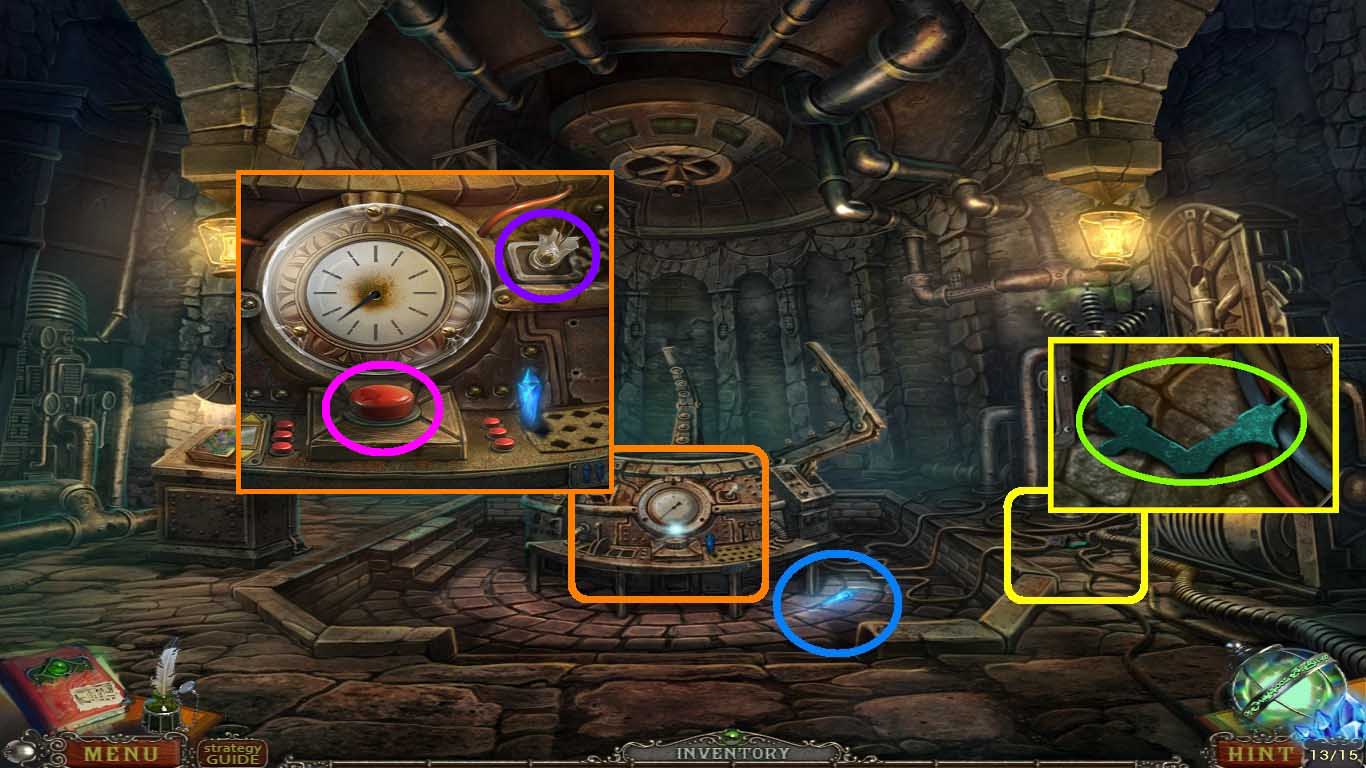
- Take the blue crystal (blue circle).
- Move into the ground (yellow square).
- Click the panel.
- Take the second pattern (green circle).
- Move into the machine (orange square).
- Click the red button (pink circle).
- Click the broken bulb (purple circle).
- Go to the orphanage: secret room.
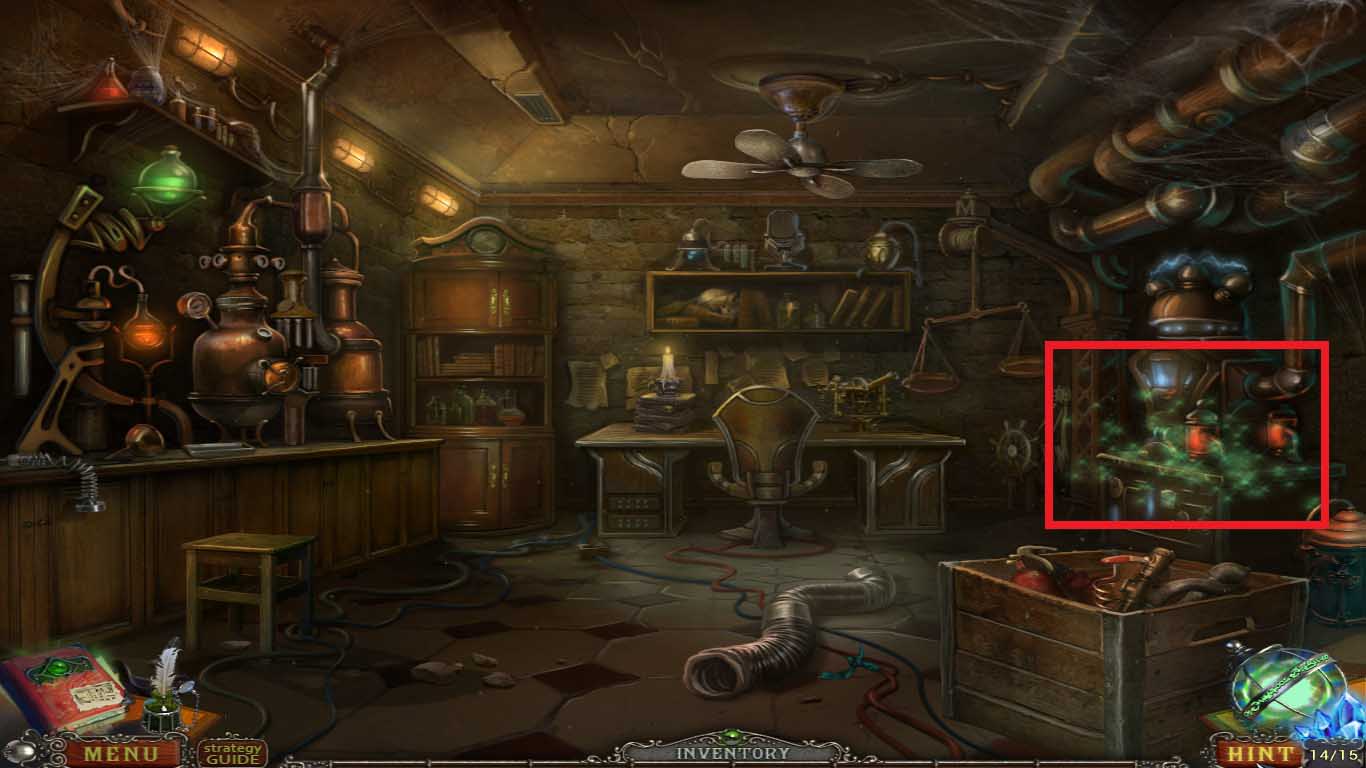
- Move into the mechanism (red rectangle) to access the hidden objects area.
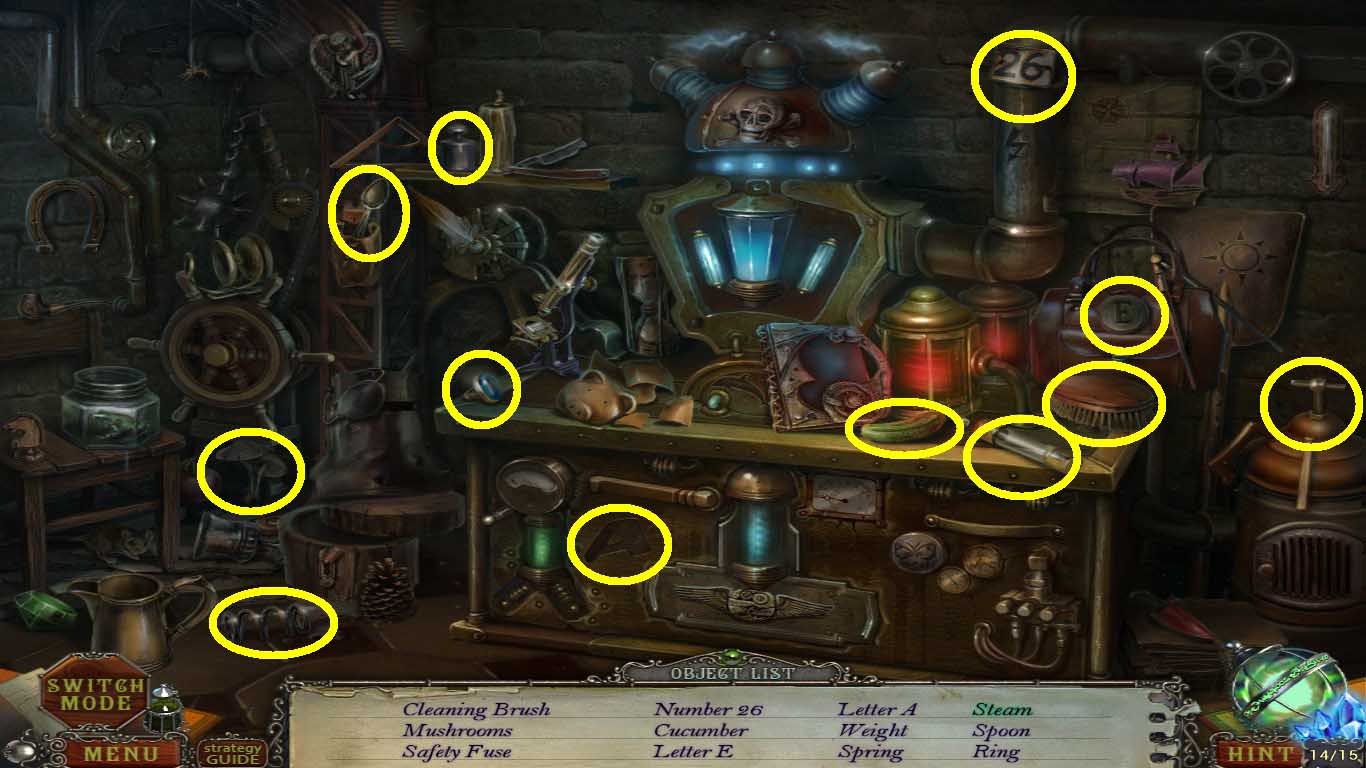
- Find the listed items (yellow circles).
- Collect the safety fuse.
- Move into the secret room: workplace.
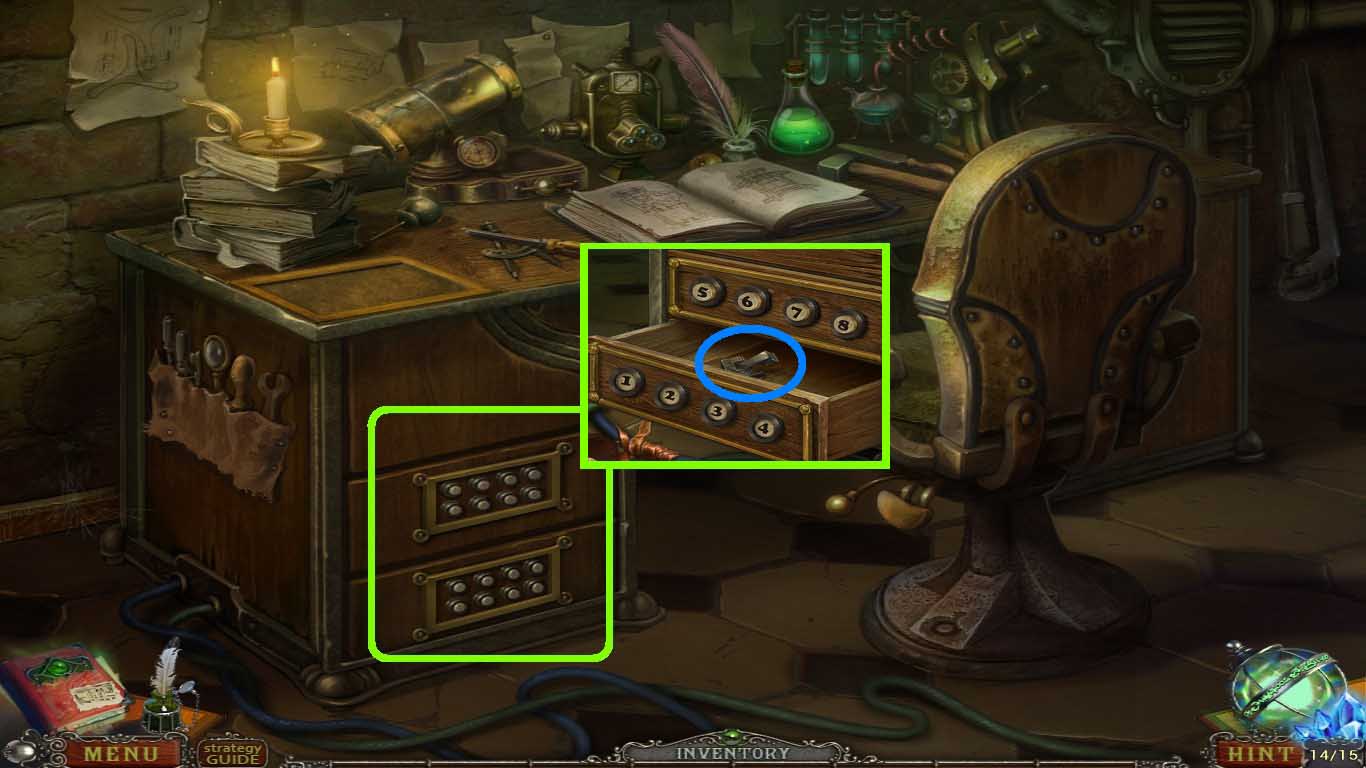
- Move into the drawer (green square).
- Click the code: 3- 4 – 1 – 2.
- Take the switch part (blue circle).
- Go to the orphanage: secret room.
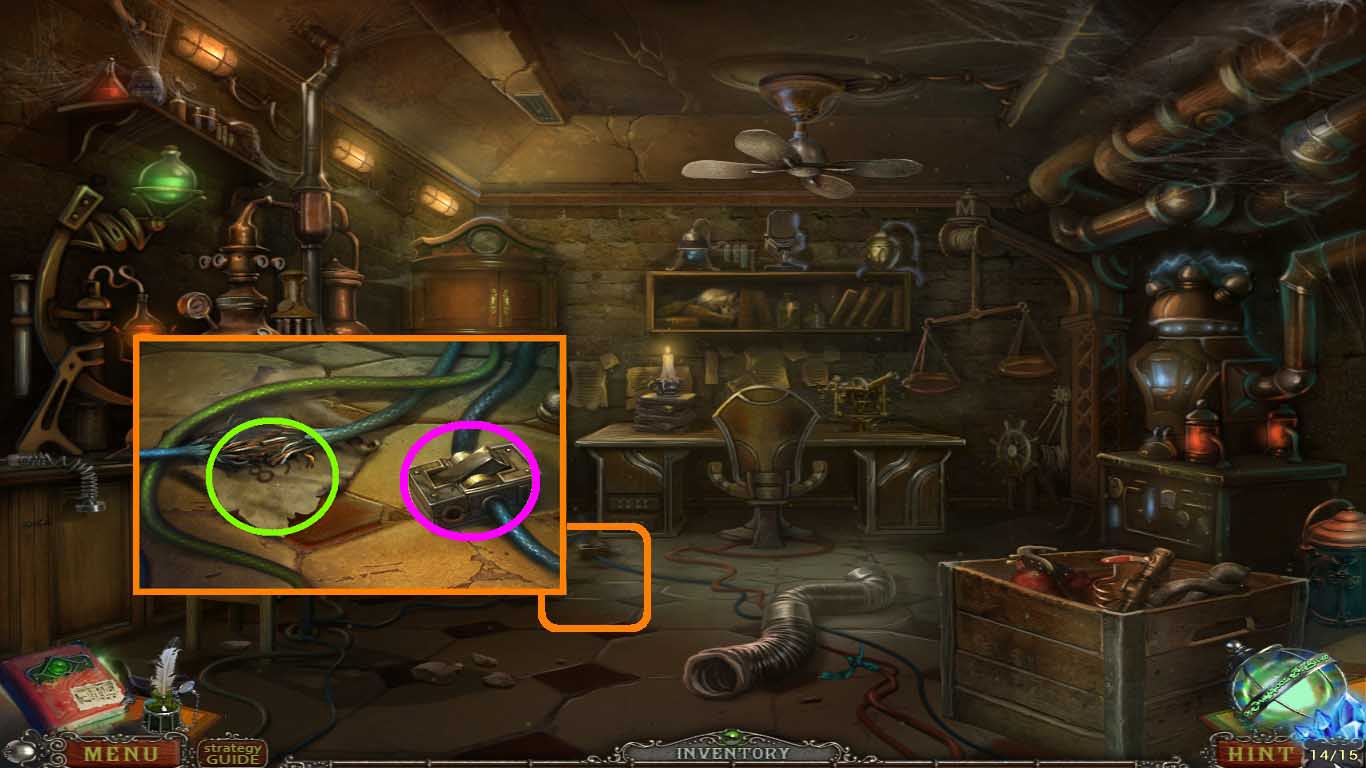
- Move into the wires (orange square).
- Insert the switch (pink circle) part into the slot.
- Click the switch.
- Take the note (green circle).
- Move into the secret room: workplace.
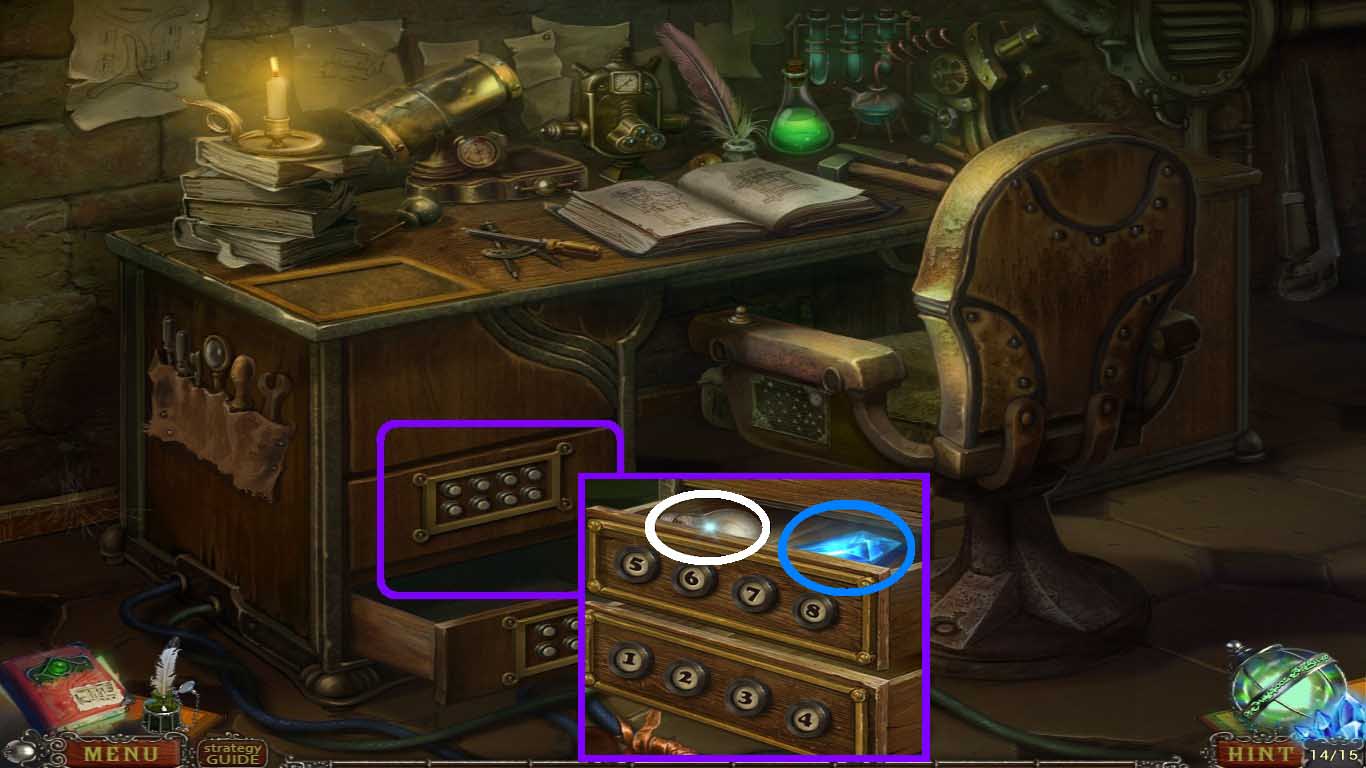
- Move into the drawer (purple square).
- Enter the following code: 8 – 5 -7 – 6.
- Take the blue crystal (blue circle).
- Take the bulb (white circle).
- Go to the orphanage front porch.
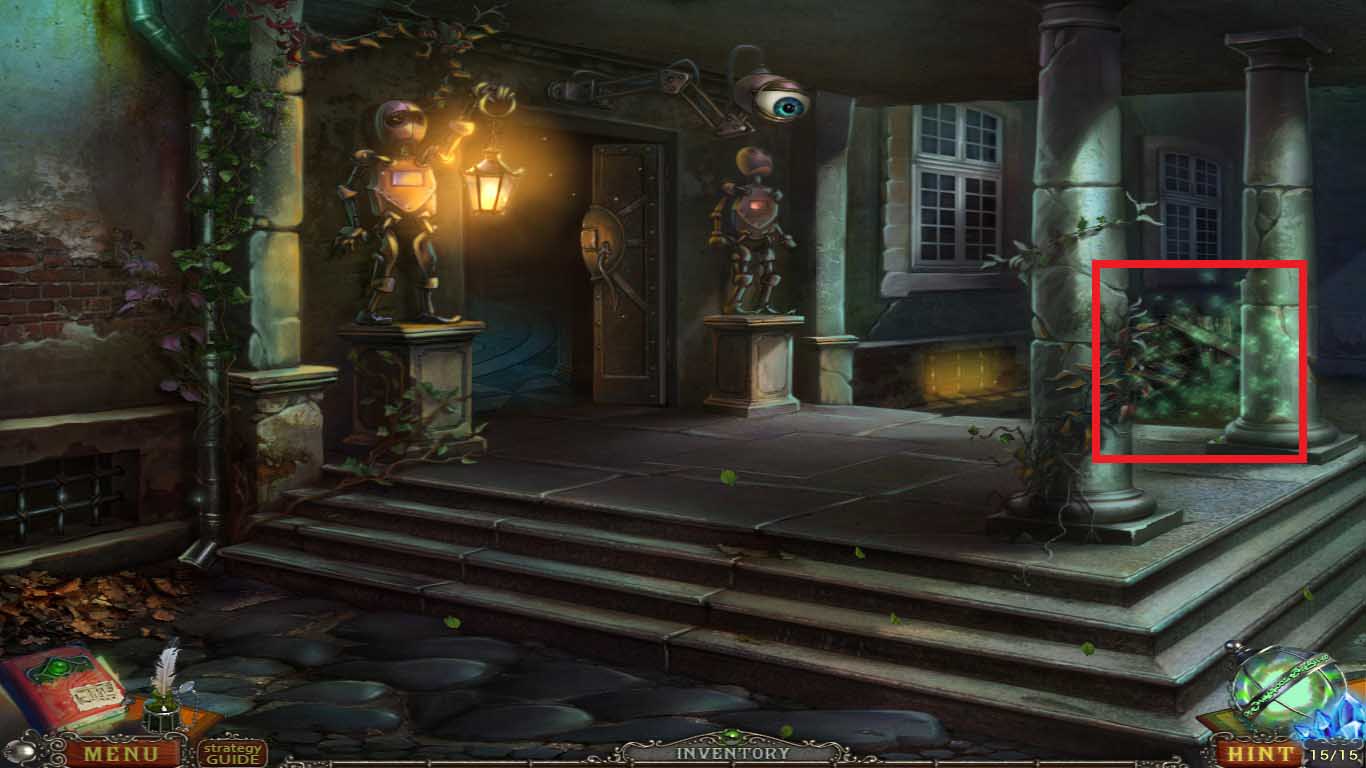
- Move into the debris (red rectangle) to access the hidden objects area.
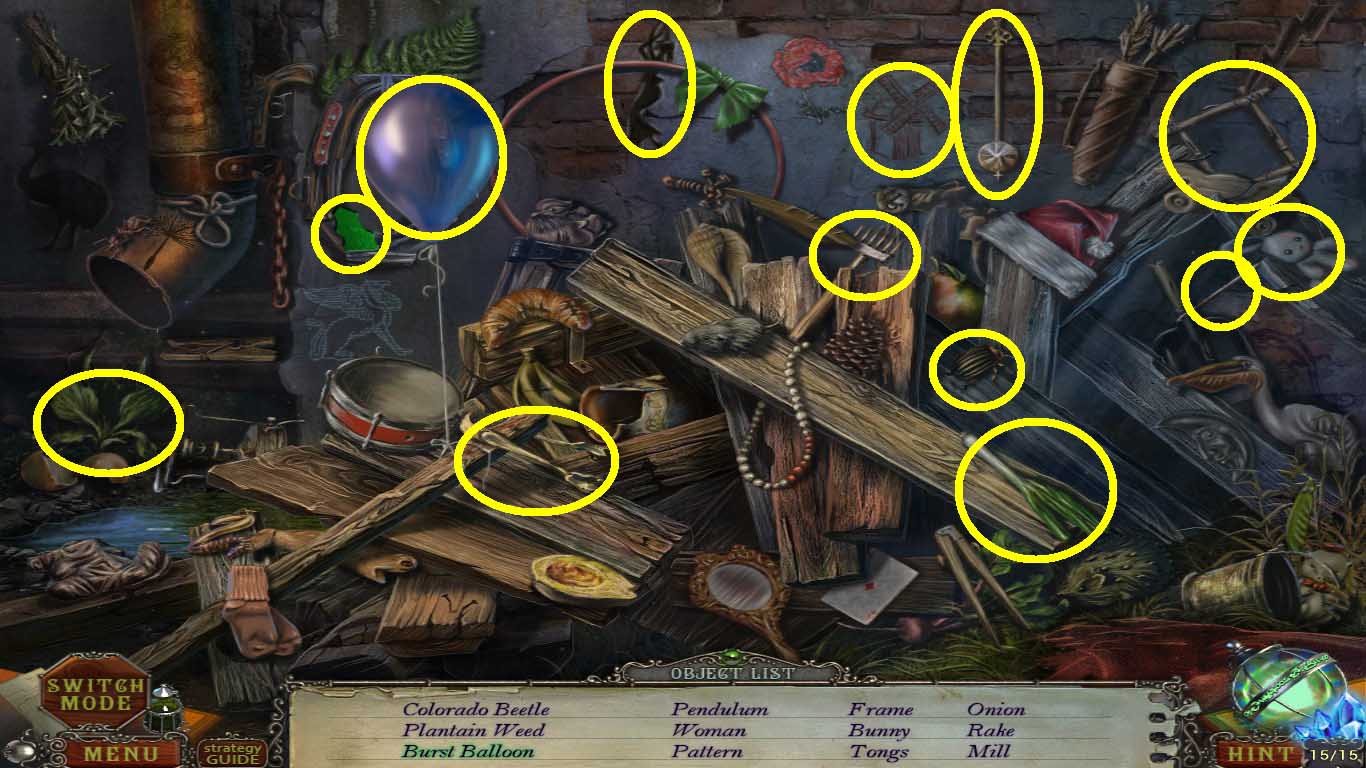
- Find the listed items (yellow circles).
- Collect the pattern.
- Go to the secret room: under old fountain.
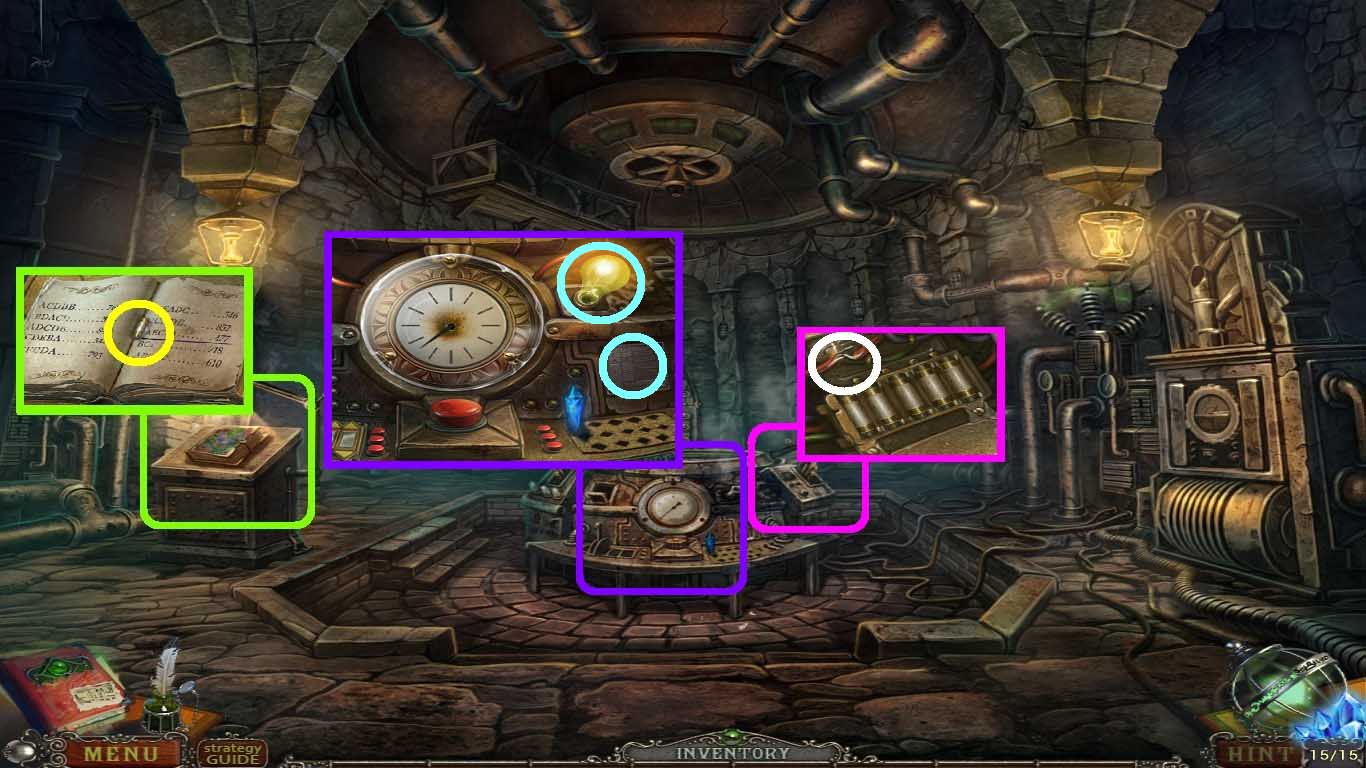
- Move into the book (green square).
- Insert the patterns onto the cover.
- Take the safety fuse (yellow circle).
- Move into the fuse panel (pink square).
- Click the old fuses.
- Insert the 3 safety fuses.
- Use the insulating tape to fix the wires (white circle).
- Move into the machine (purple square).
- Insert the portal instruction plate and bulb into the panel (aqua circles).
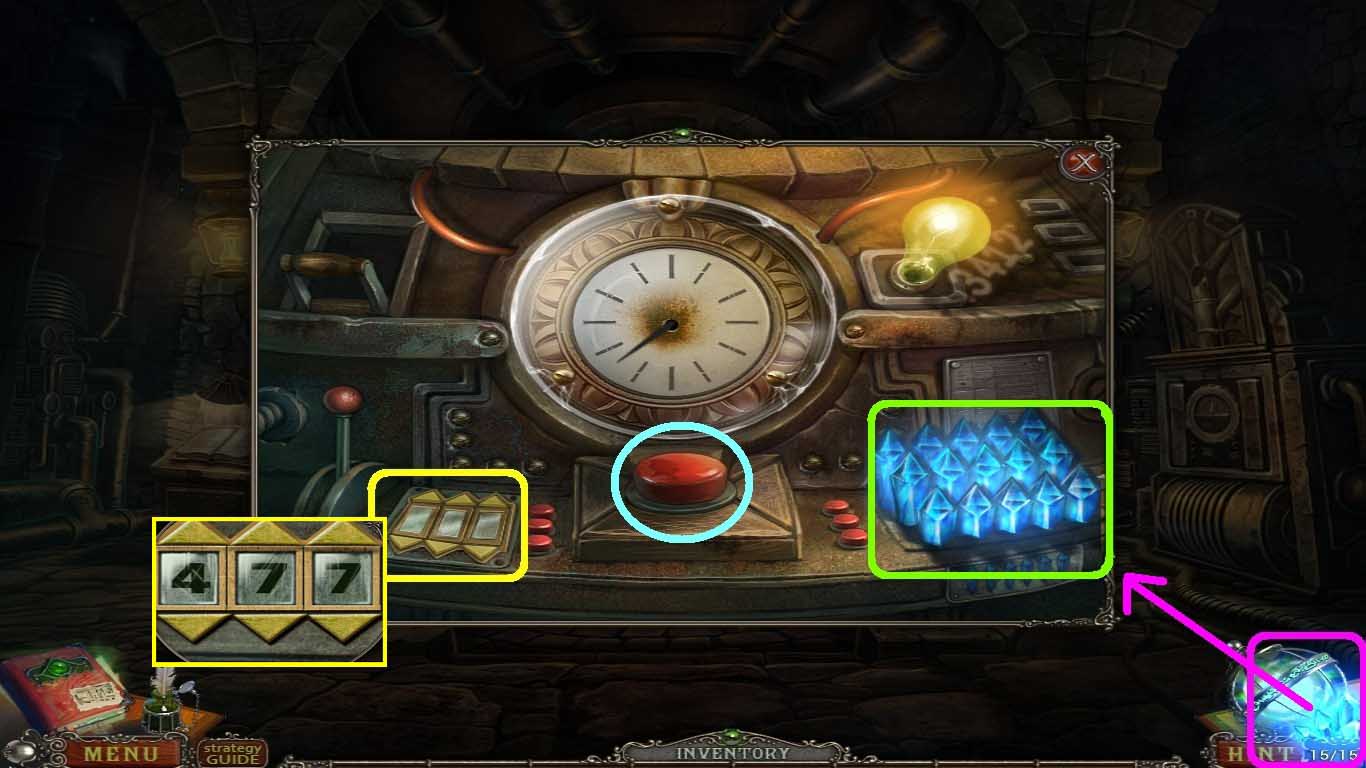
- Click the blue crystals (pink square).
- Move them to the panel (green square).
- Move into the code bar (yellow square).
- Insert code: 4-7-7.
- Click the red button (aqua circle).
Comments will load when you reach this part of the walkthrough.