

Bonus Game
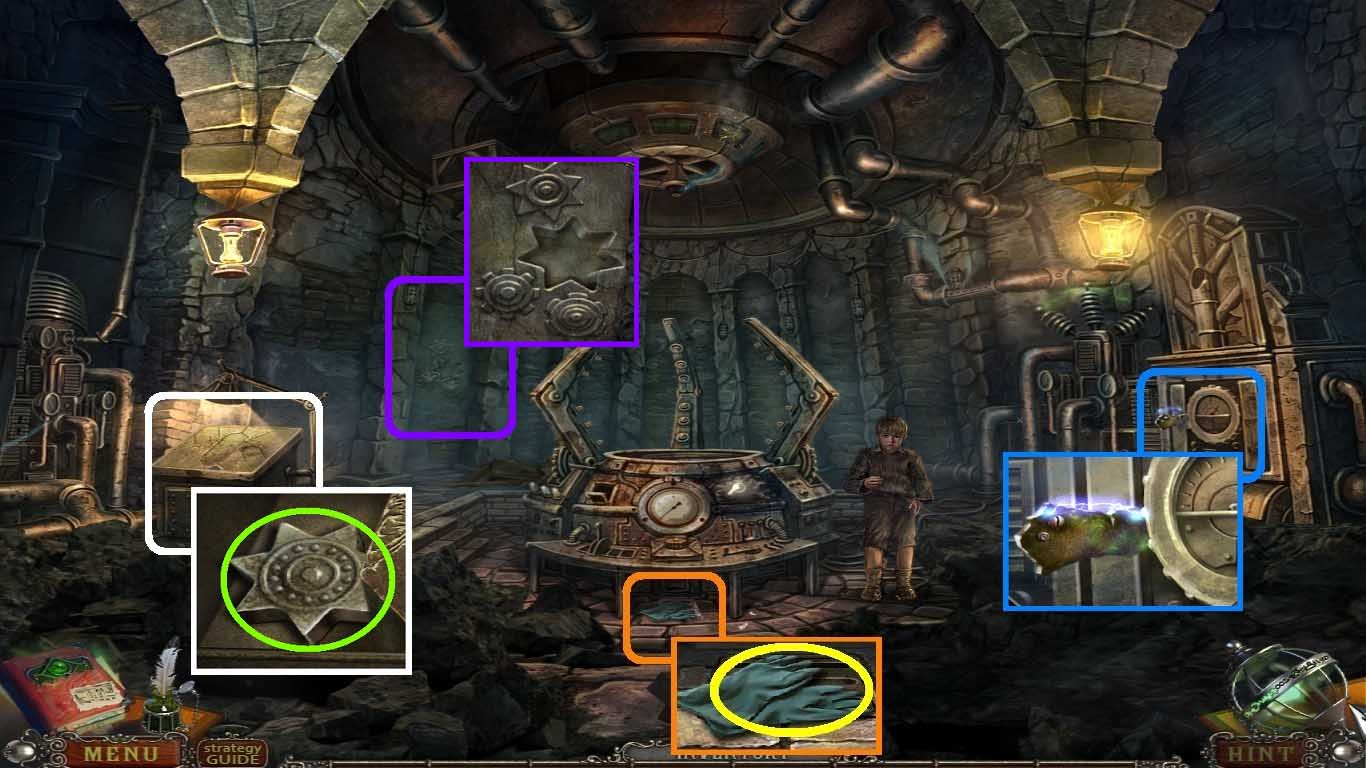
- Click Tim.
- Move into the grate (orange square).
- Take the rubber gloves (yellow circle).
- Move into the panel (blue square).
- Use the rubber gloves to dislodge the metal shard.
- Move into the podium (white square).
- Use the metal shard to cut the cover.
- Click the paper.
- Take the stone gear (green circle).
- Move into the wall (purple square).
- Insert the stone gear into the slot.
- Go into the pathway.
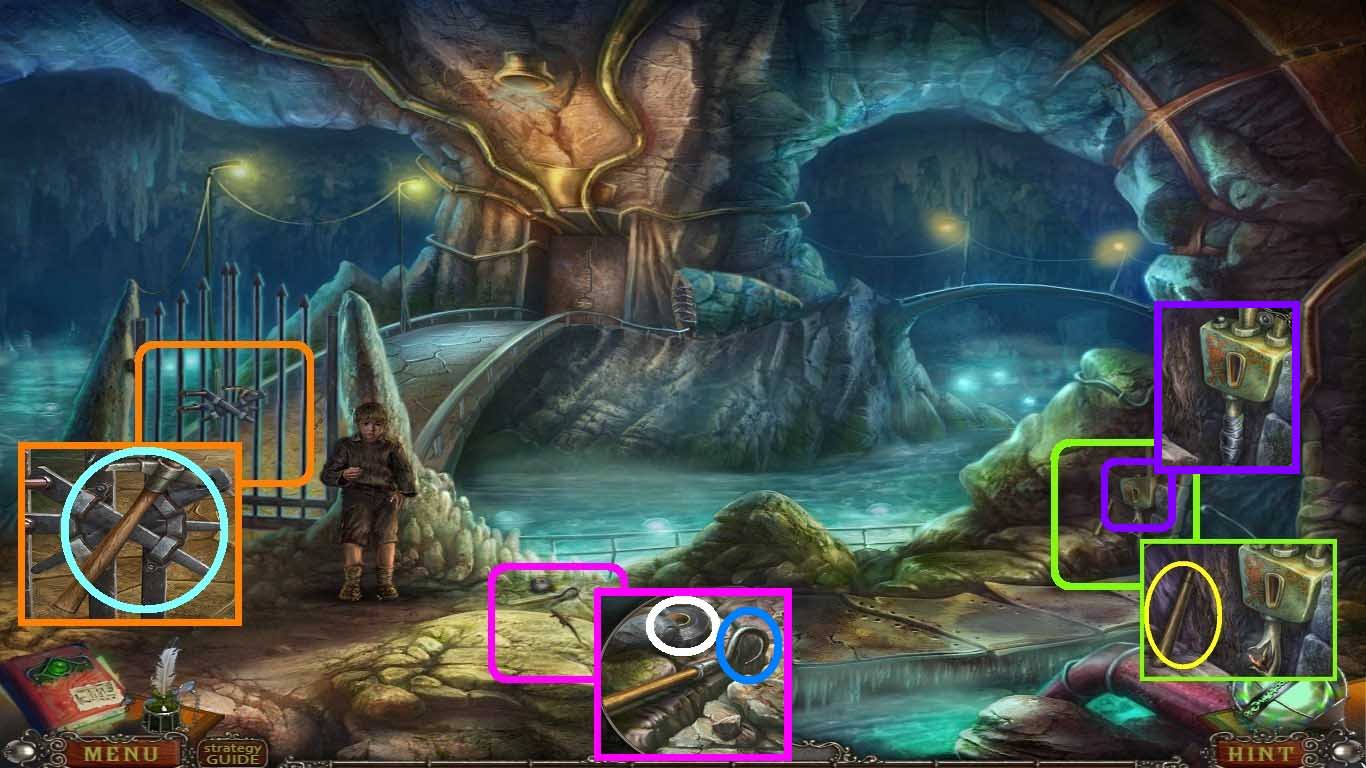
- Click Tim.
- Move into the switch (green square).
- Take the pick handle (yellow circle).
- Move into the gate (orange square).
- Put the pick handle with the pick.
- Take the pick (aqua circle).
- Move into the ground (pink square).
- Take the insulated tape (white circle).
- Use the pick to remove and take the iron hook (blue circle).
- Move into the switch (purple square).
- Fix the wires using the insulated tape.
- Go to the secret room: under old fountain.
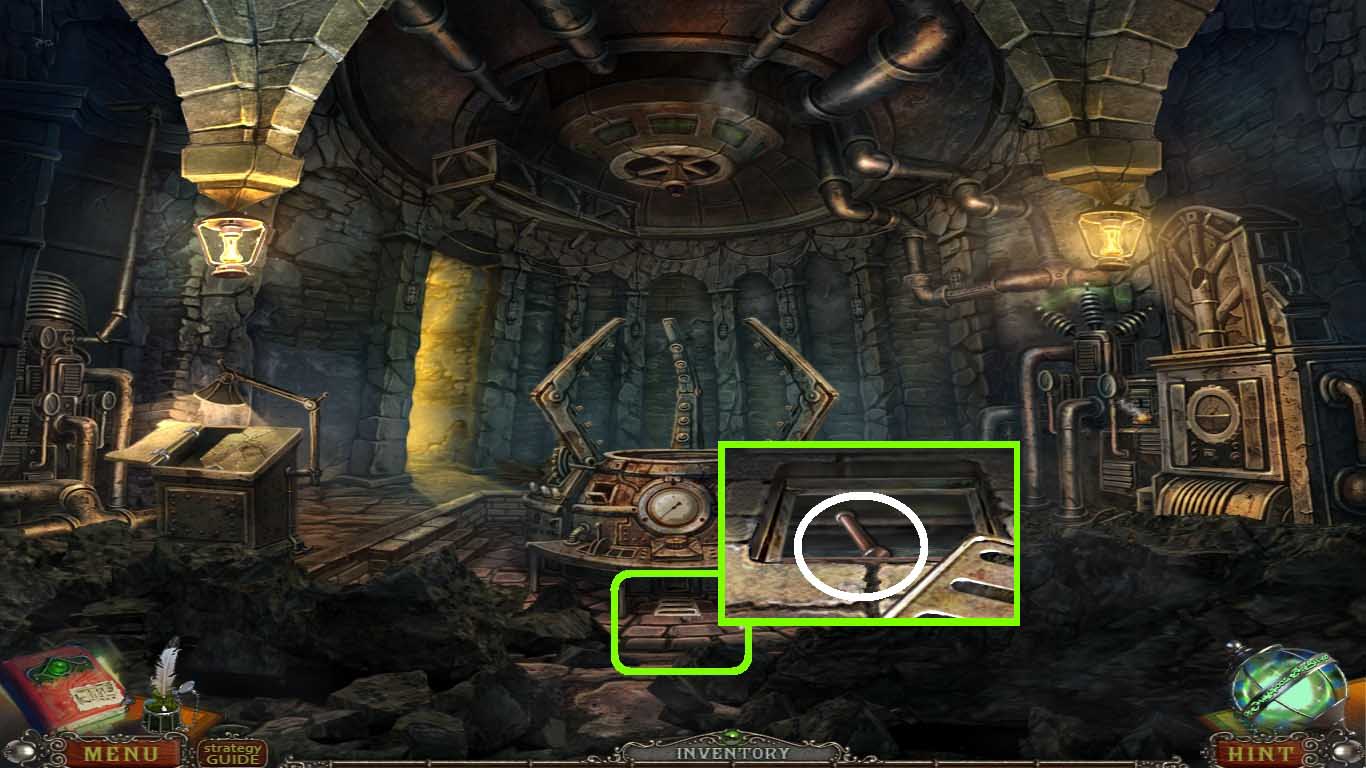
- Move into the grate (green square).
- Click the grate with the iron hook.
- Take the lock bar handle (white circle).
- Go back to the gate.
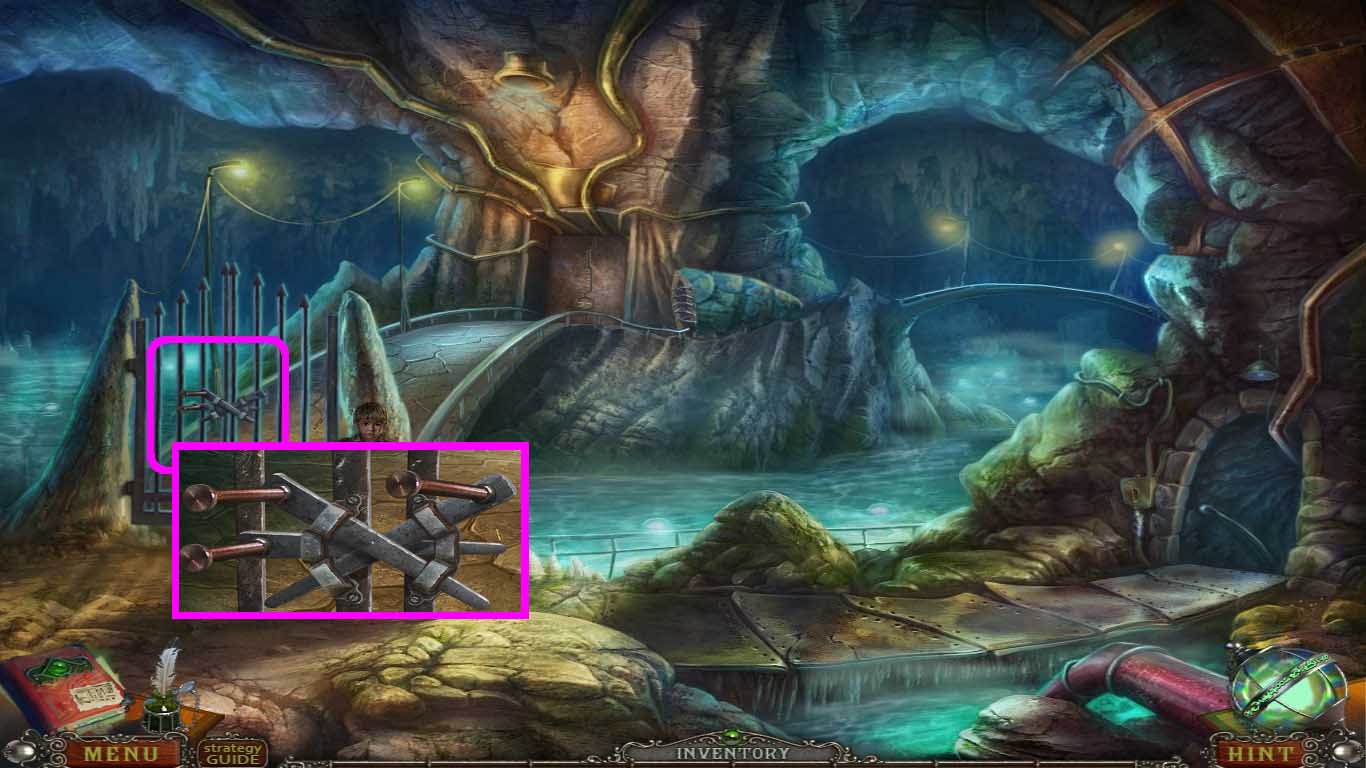
- Move into the gate (pink square).
- Insert the locking bar handle on the bar.
- Remove all the bars.
- Go through the gate to underground: on the bridge.
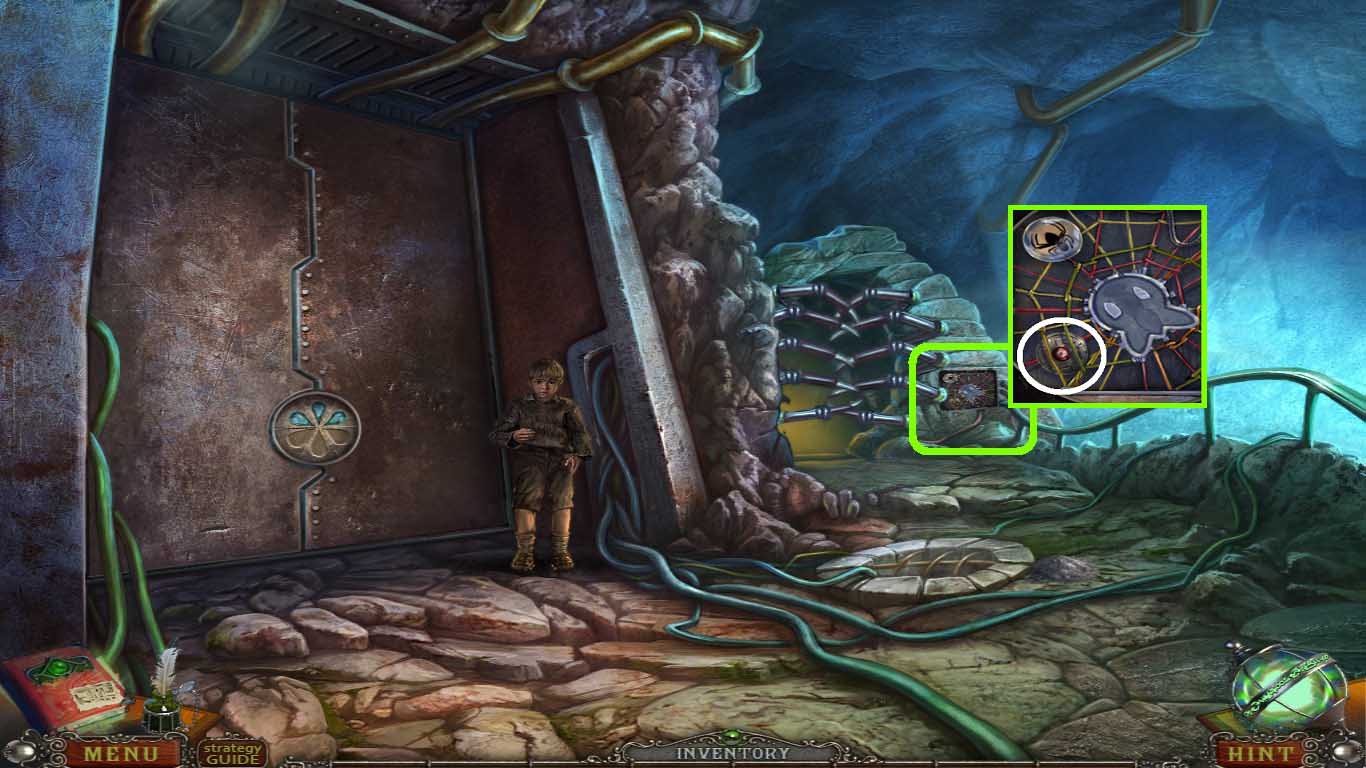
- Click Tim.
- Move into the gate panel (green square).
- Take the round medallion (white circle).
- Go to the secret room: under old fountain.
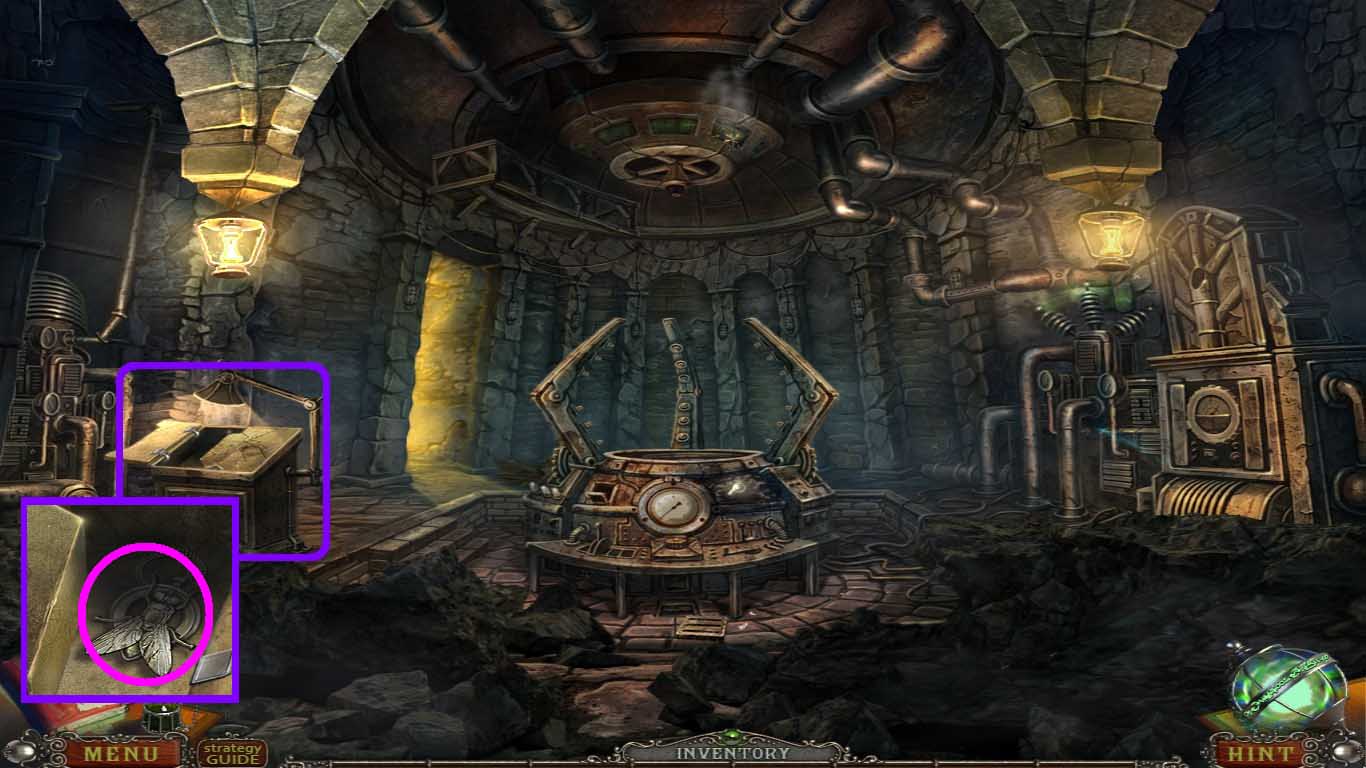
- Move into the podium (purple square).
- Insert the round medallion into the slot.
- Click the paper.
- Take the fly medallion (pink circle).
- Go to underground: on the bridge.
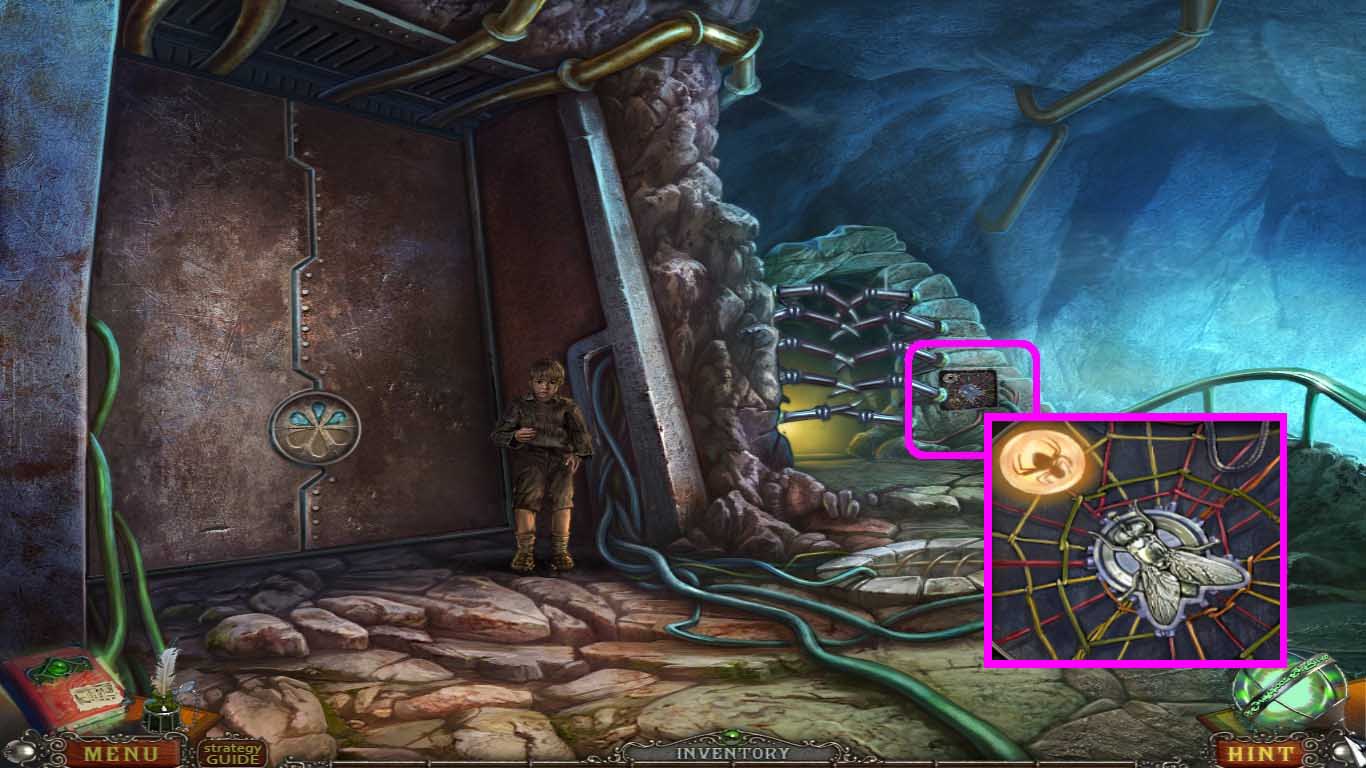
- Move into the gate panel (pink square).
- Insert the fly medallion into the slot.
- Go into the tunnel to underground: room with lift.
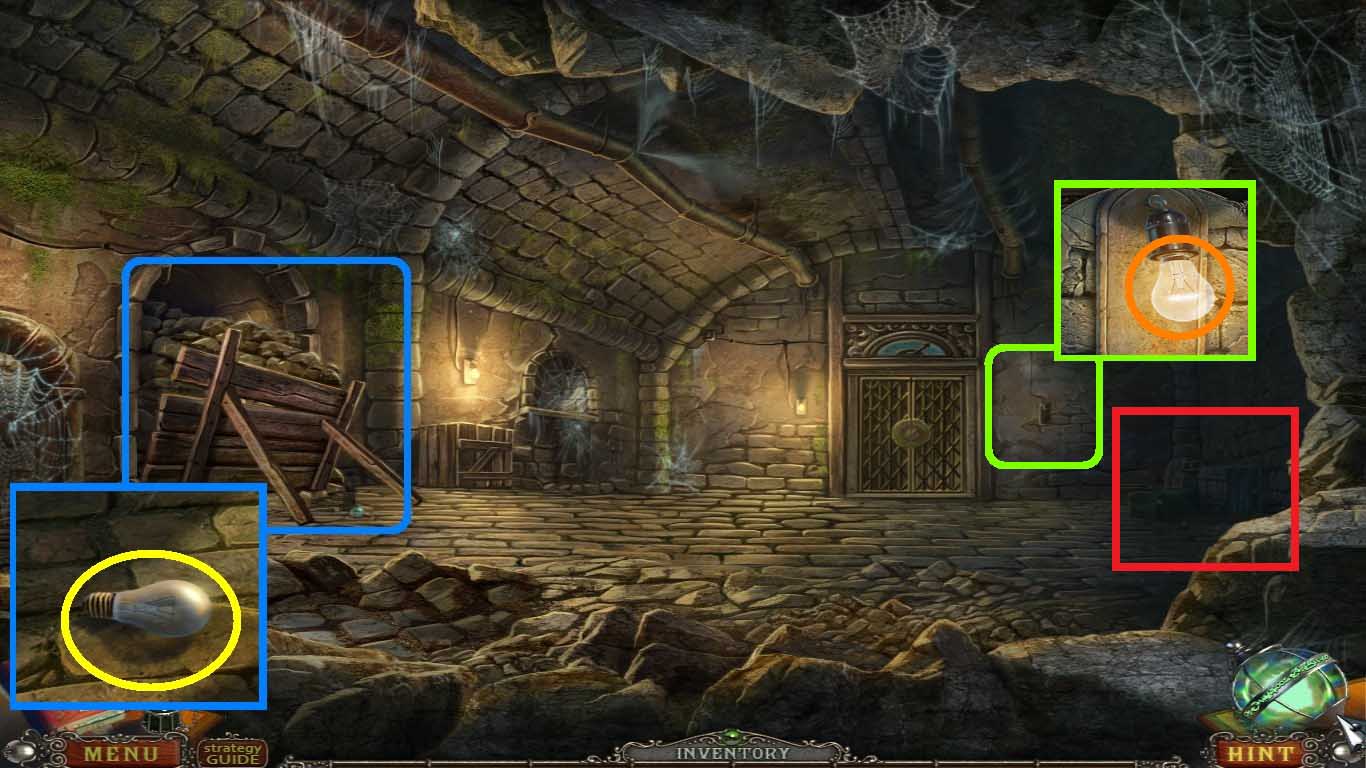
- Move into the blocked tunnel (blue square).
- Take the bulb (yellow circle).
- Move into the light fixture (green square).
- Put the bulb into the light fixture (orange circle).
- Click the bulb.
- Move into the barrels (red rectangle) to access the hidden objects area.
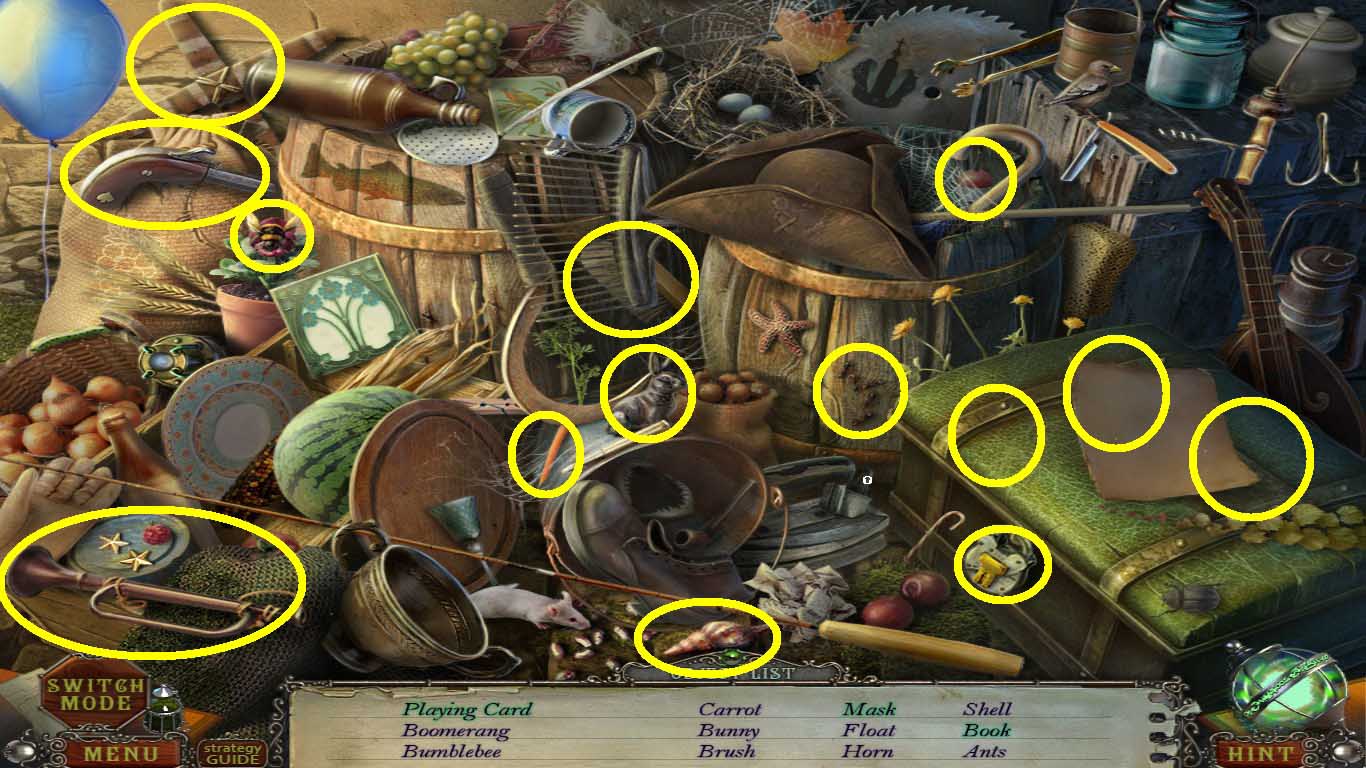
- Find the listed items (yellow circles).
- Collect the brush.
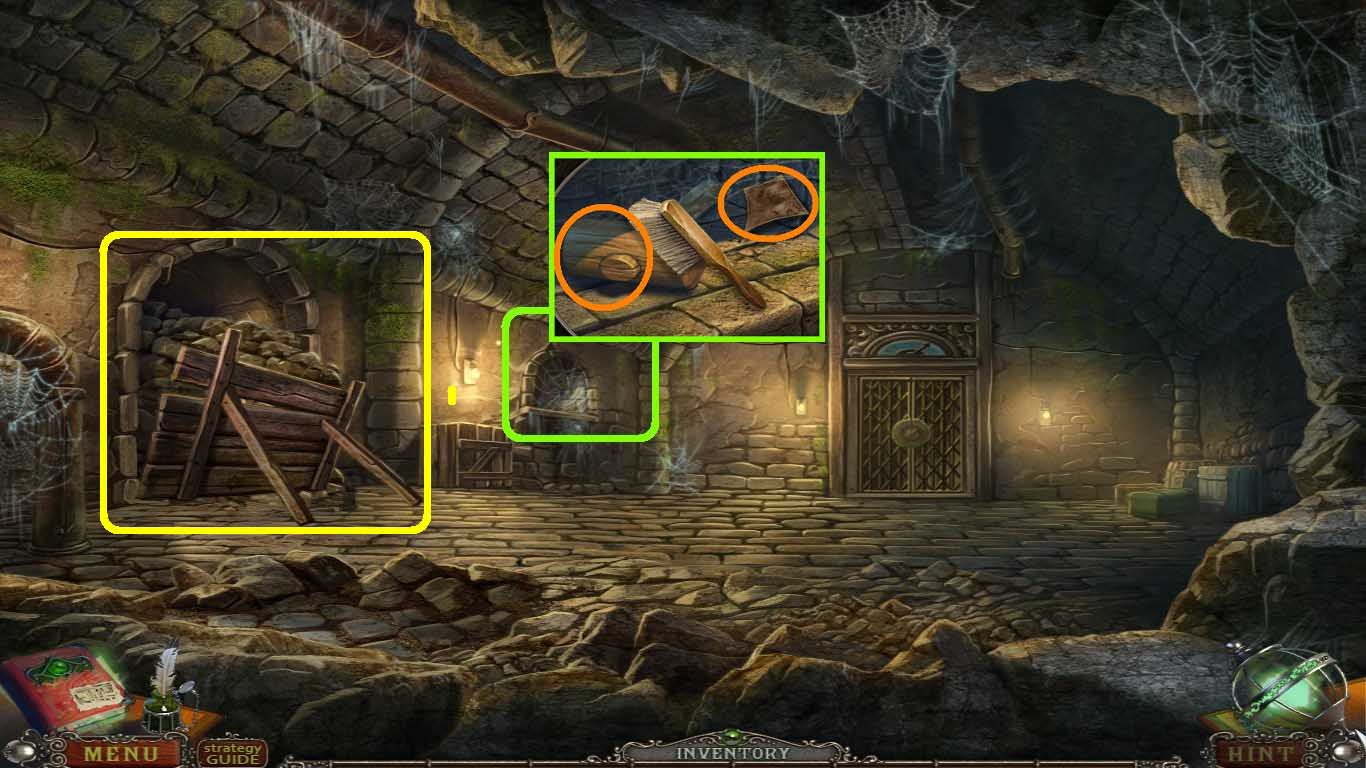
- Move into the window (green square).
- Clear the spider webs with the brush.
- Take the mallet and elevator puzzle piece (orange circles).
- Move into the blocked tunnel (yellow squares).
- Knock down the braces with the mallet.
- Open the passage to orphanage: basement.
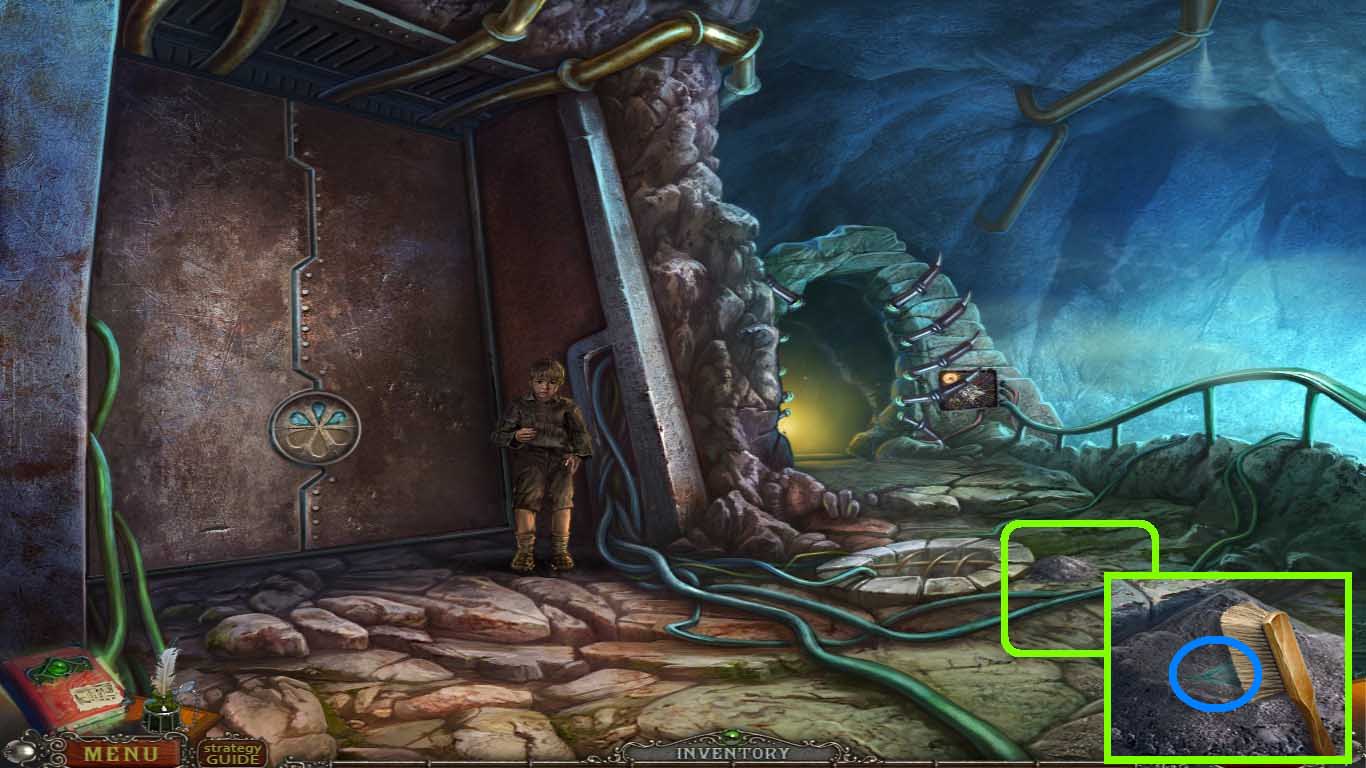
- Go back to underground: on the bridge.
- Brush the dust pile (green square).
- Take the blue crystal (blue circle).
- Take the tunnel to the orphanage: secret room.
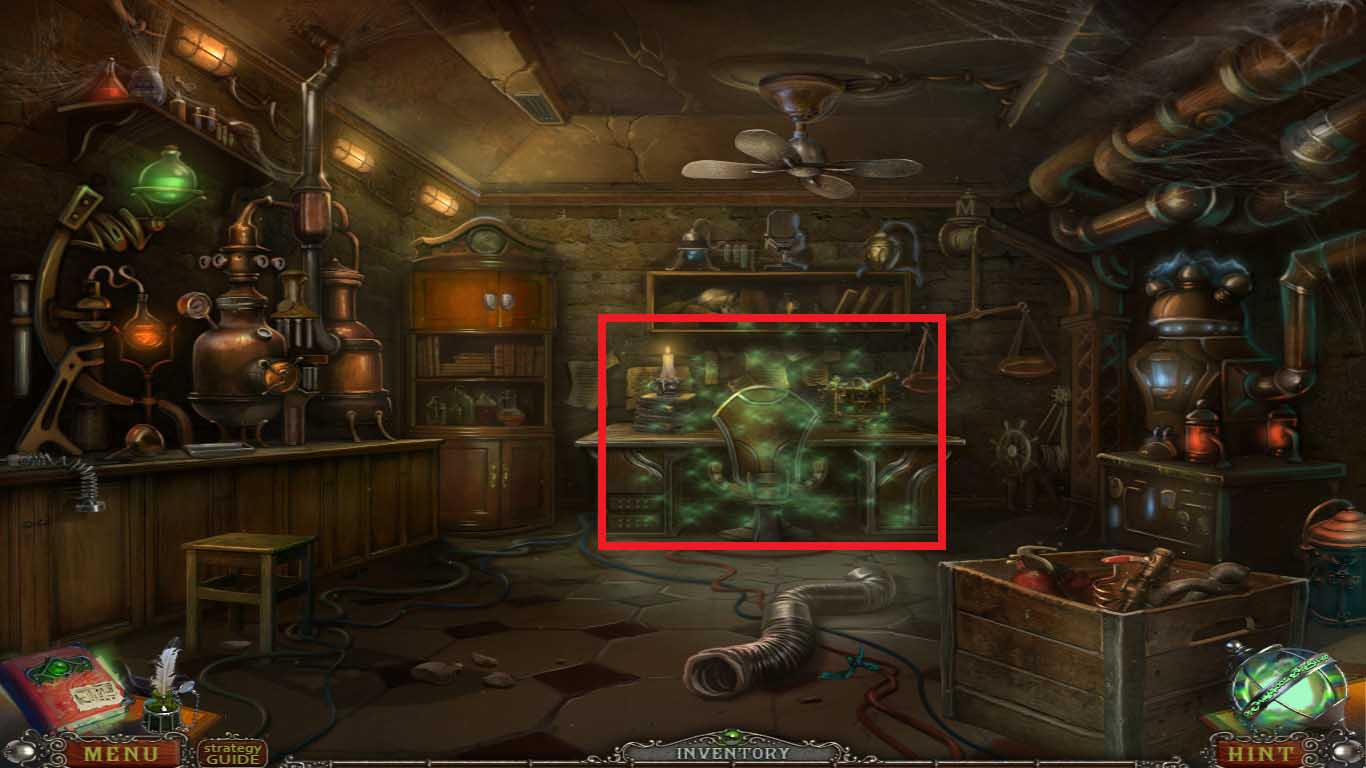
- Move into the desk chair (red rectangle) to find the hidden objects area.
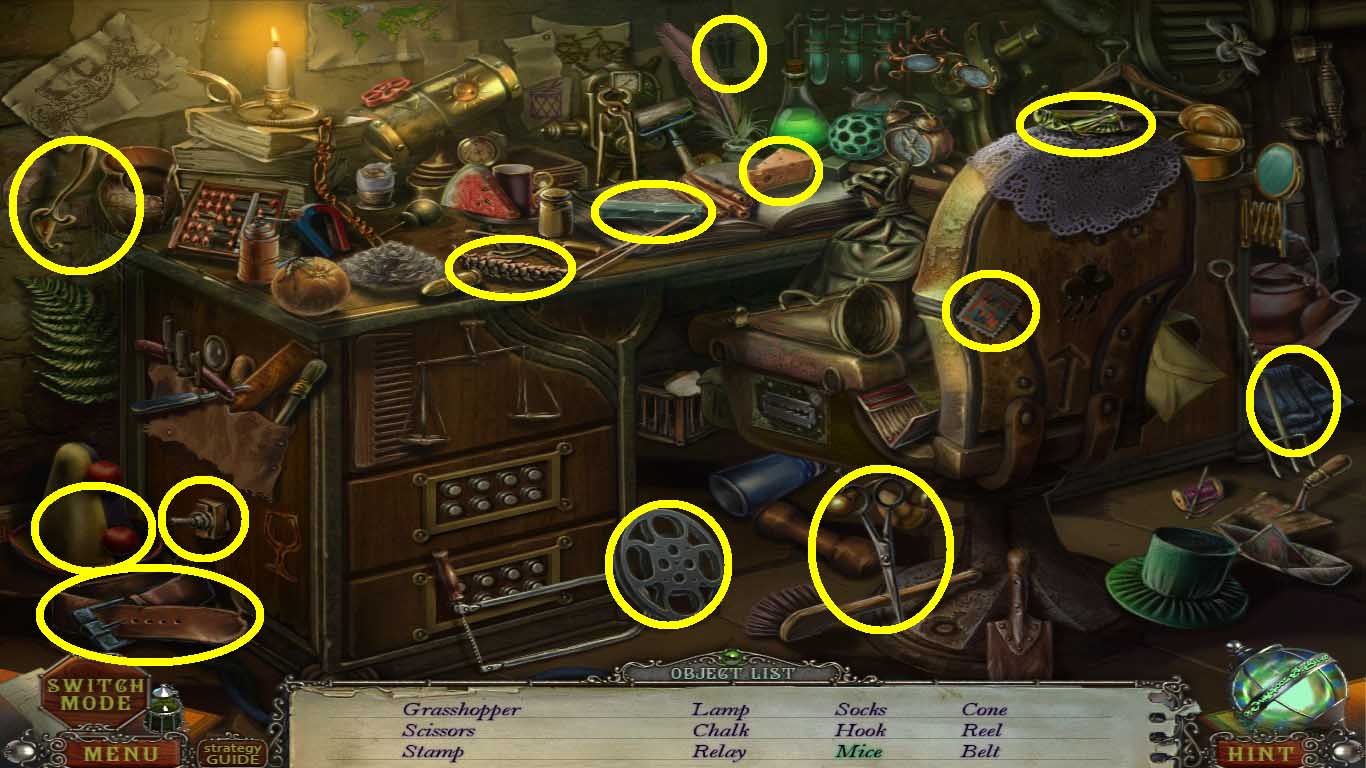
- Find the listed items (yellow circles).
- Collect the leather belt.
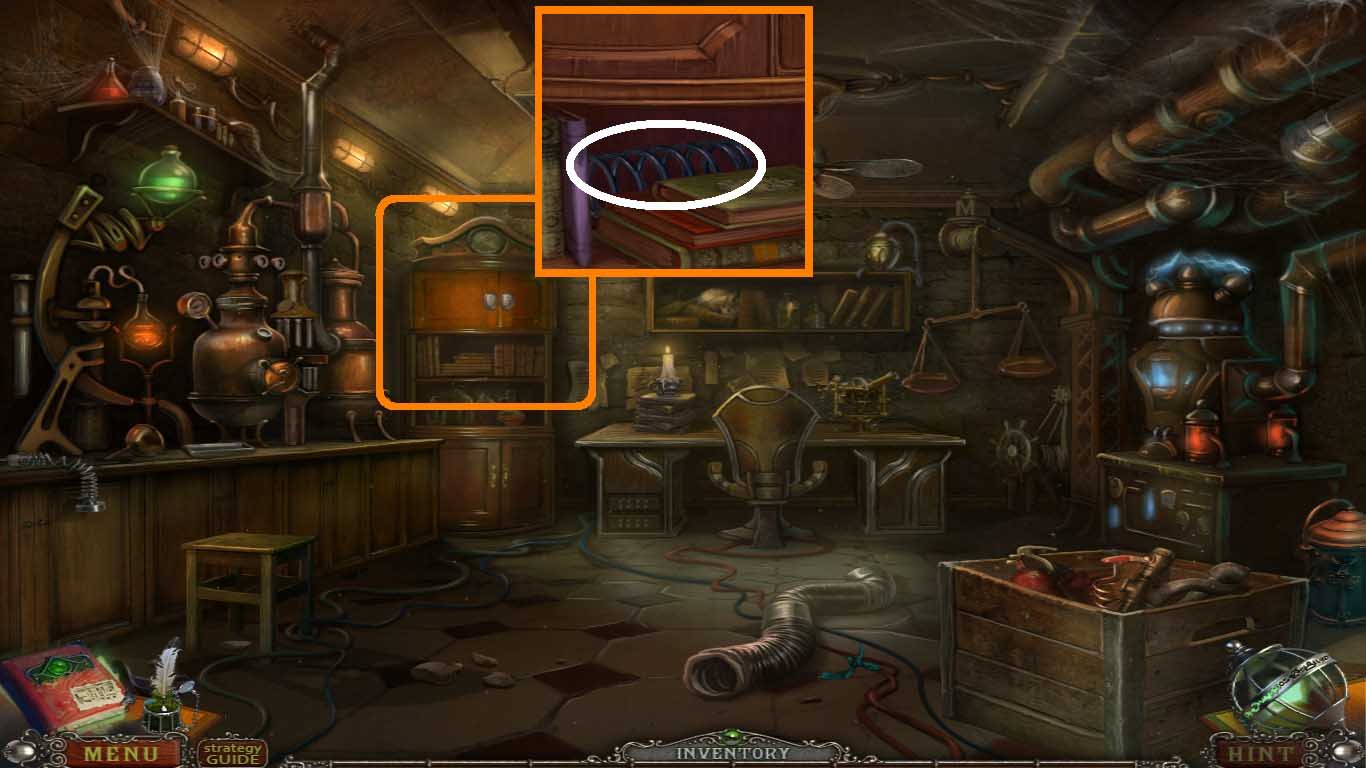
- Move into the cabinet (orange square).
- Collect the spring (white circle).
- Go to the orphanage: basement.
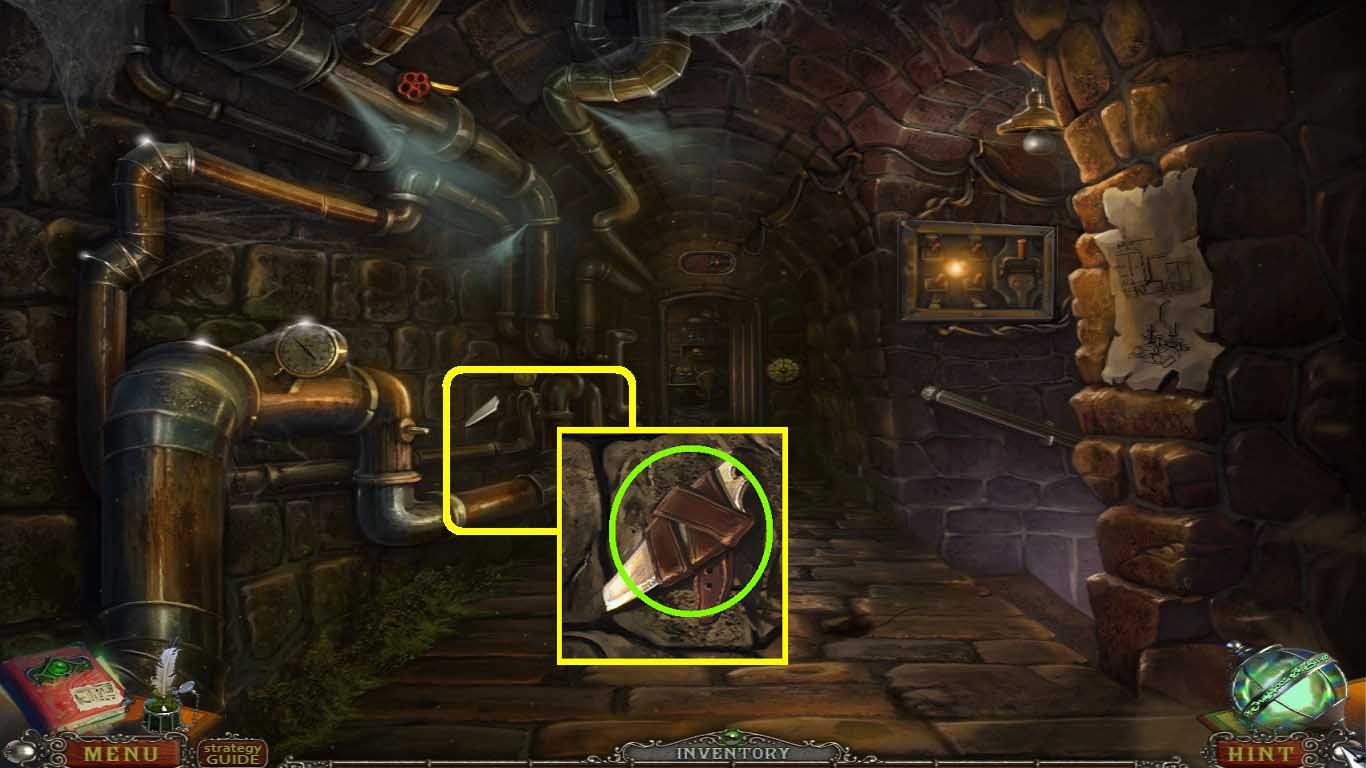
- Move into the wall (yellow square).
- Dislodge the knife with the leather belt (green circle).
- Go to the orphanage: secret room.
- Move into the secret room: devices near workplace.
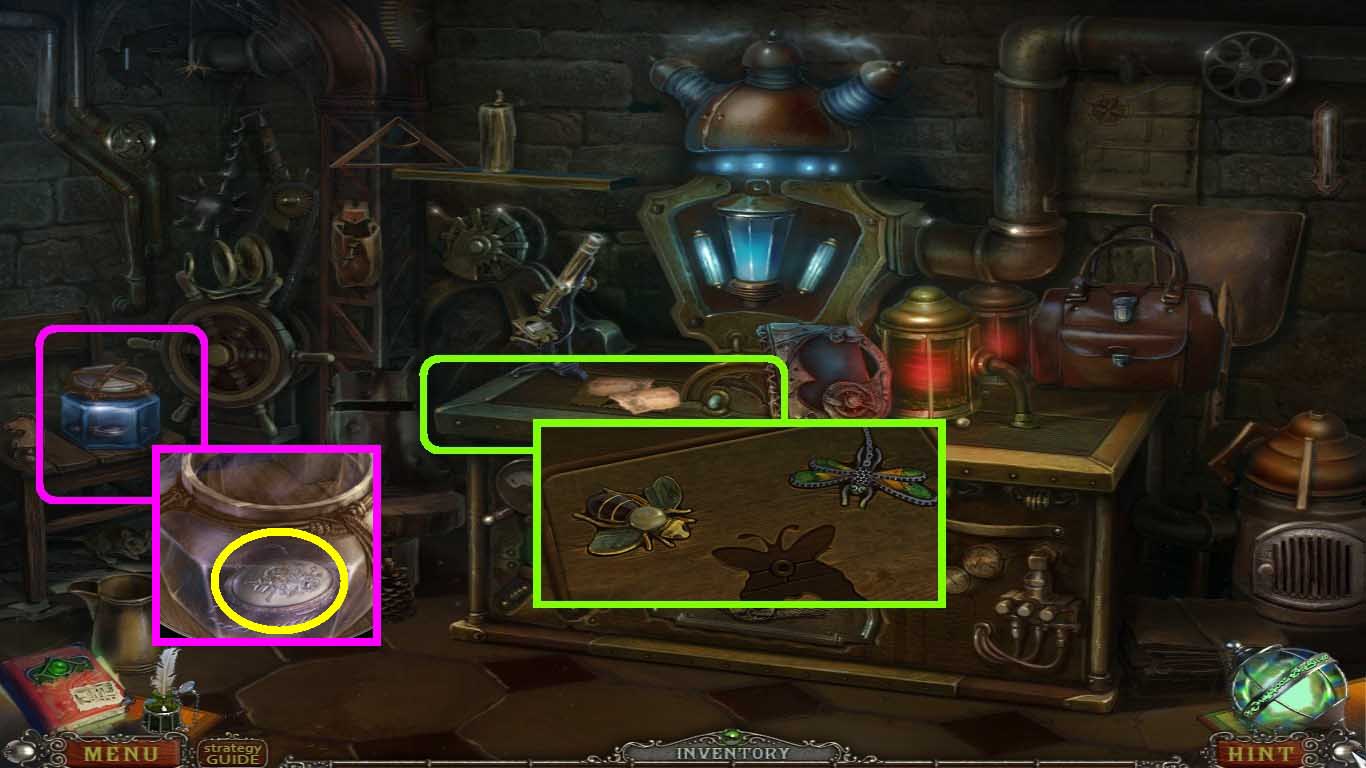
- Move into the table (green square).
- Click the papers to uncover the panel.
- Move into the jar (pink circle).
- Use the knife to slice the rope.
- Take the oval medallion (yellow circle).
- Go to the orphanage: secret room.
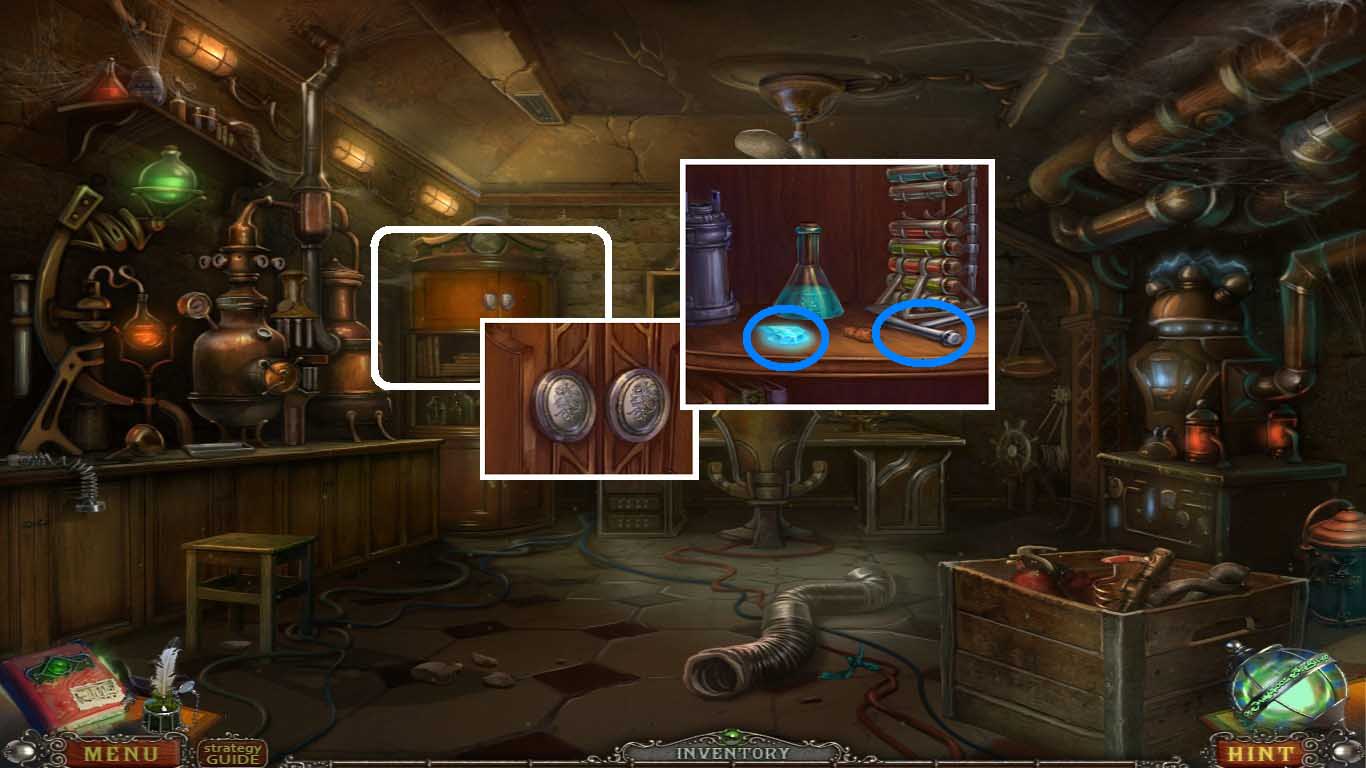
- Move into the cabinet (white square).
- Insert the oval medallion into the slot.
- Take the crystal and metal handle (blue circles).
- Go to the secret room: devices near workplace.
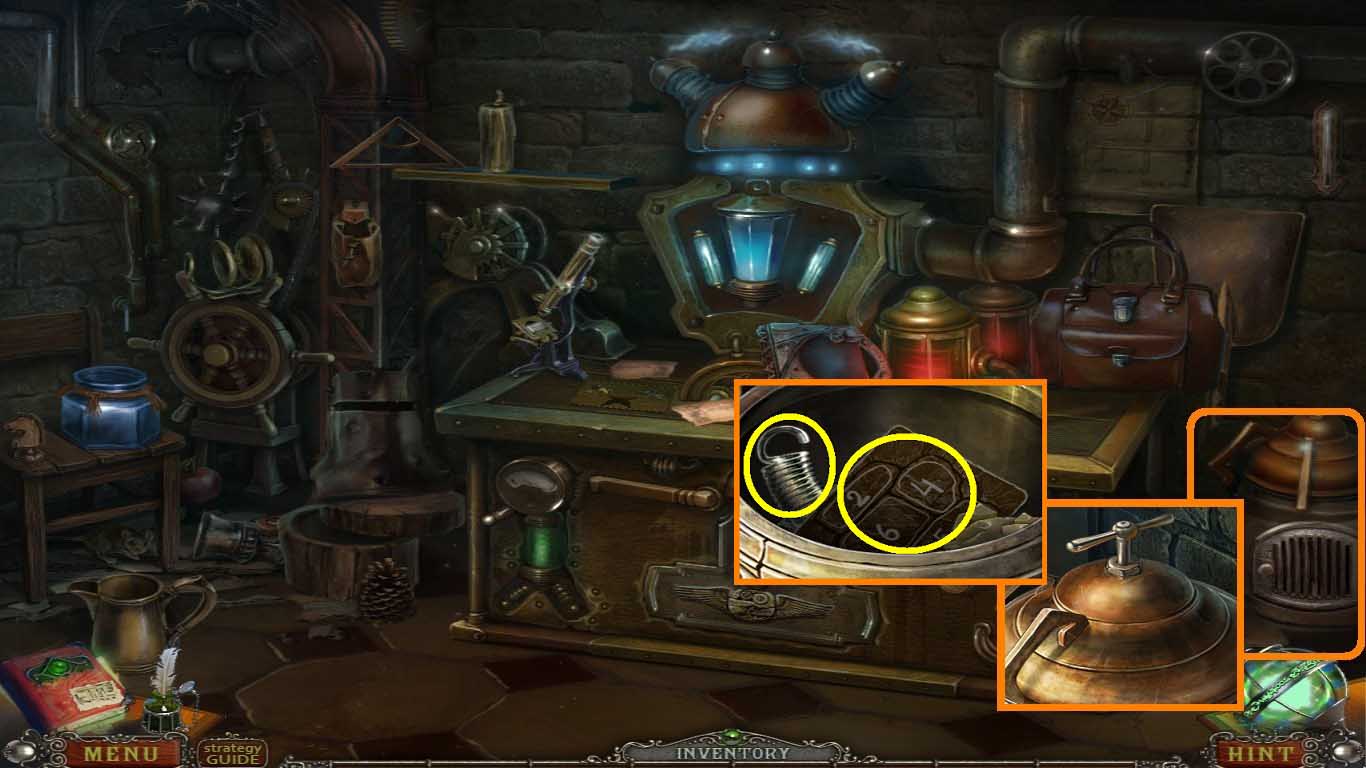
- Move into the container (orange square).
- Put the metal handle onto the container top.
- Click the top.
- Take the clue and the spring (yellow circles).
- Go to the orphanage: basement.
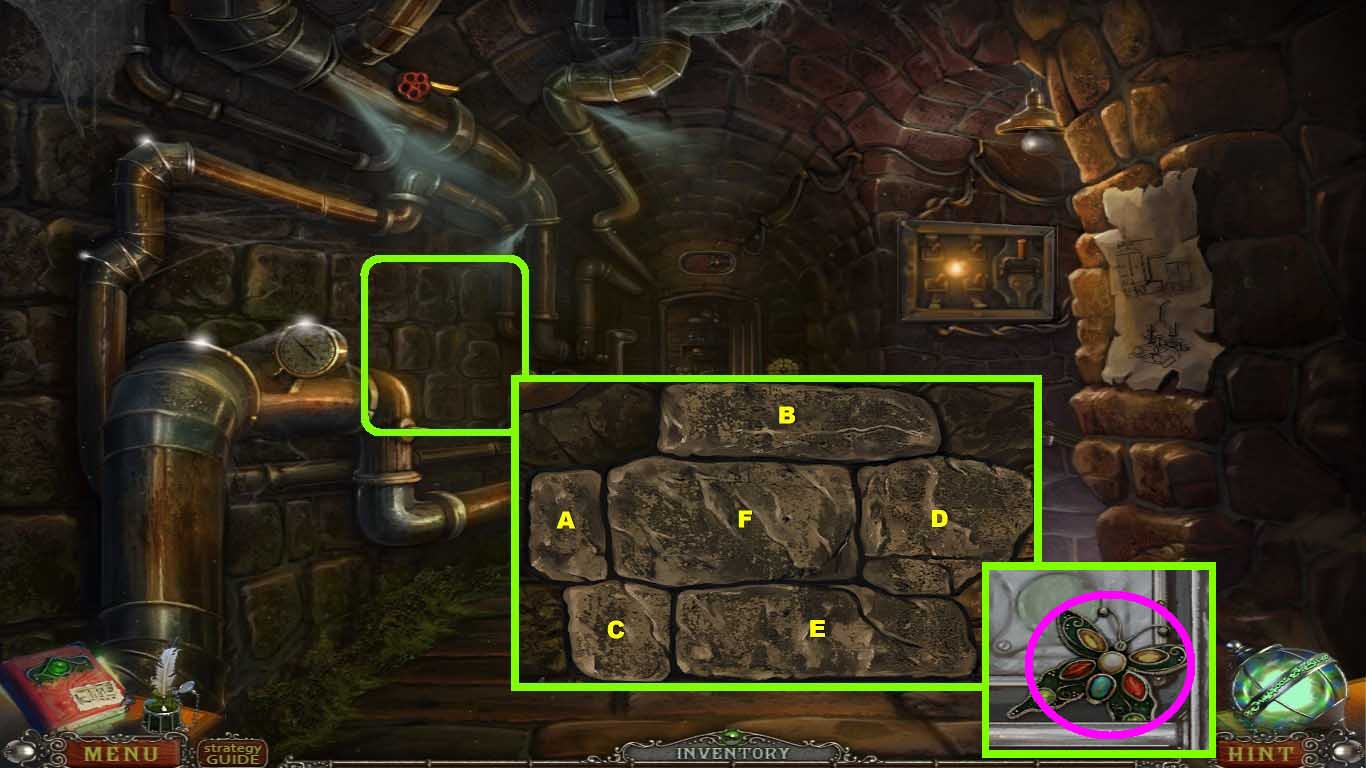
- Move into the wall (green square).
- Click the stones in the pattern A-F.
- Take the metal butterfly (pink circle).
- Go to the secret room: devices near workplace.
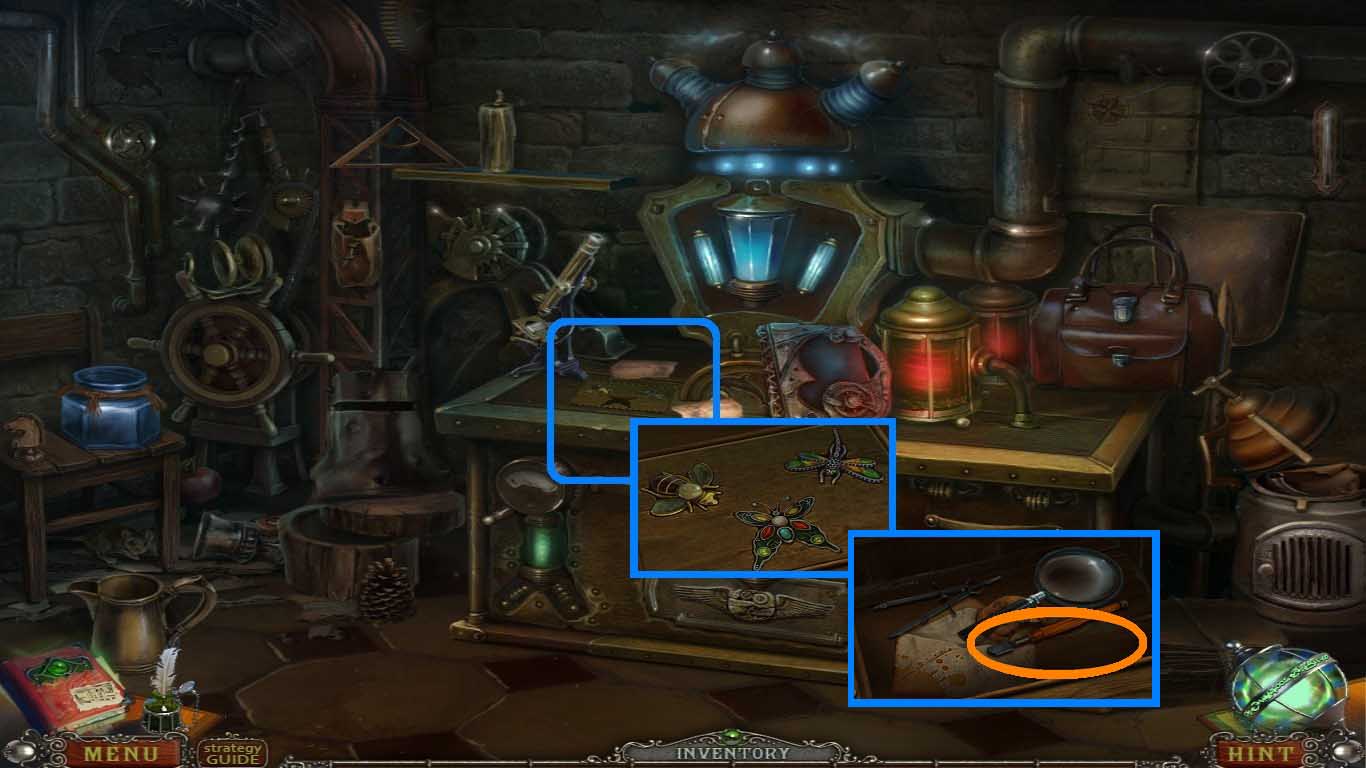
- Move into the table (blue square).
- Insert the metal butterfly into the panel.
- Take the glass cutter (orange circle).
- Go to orphanage: secret room.
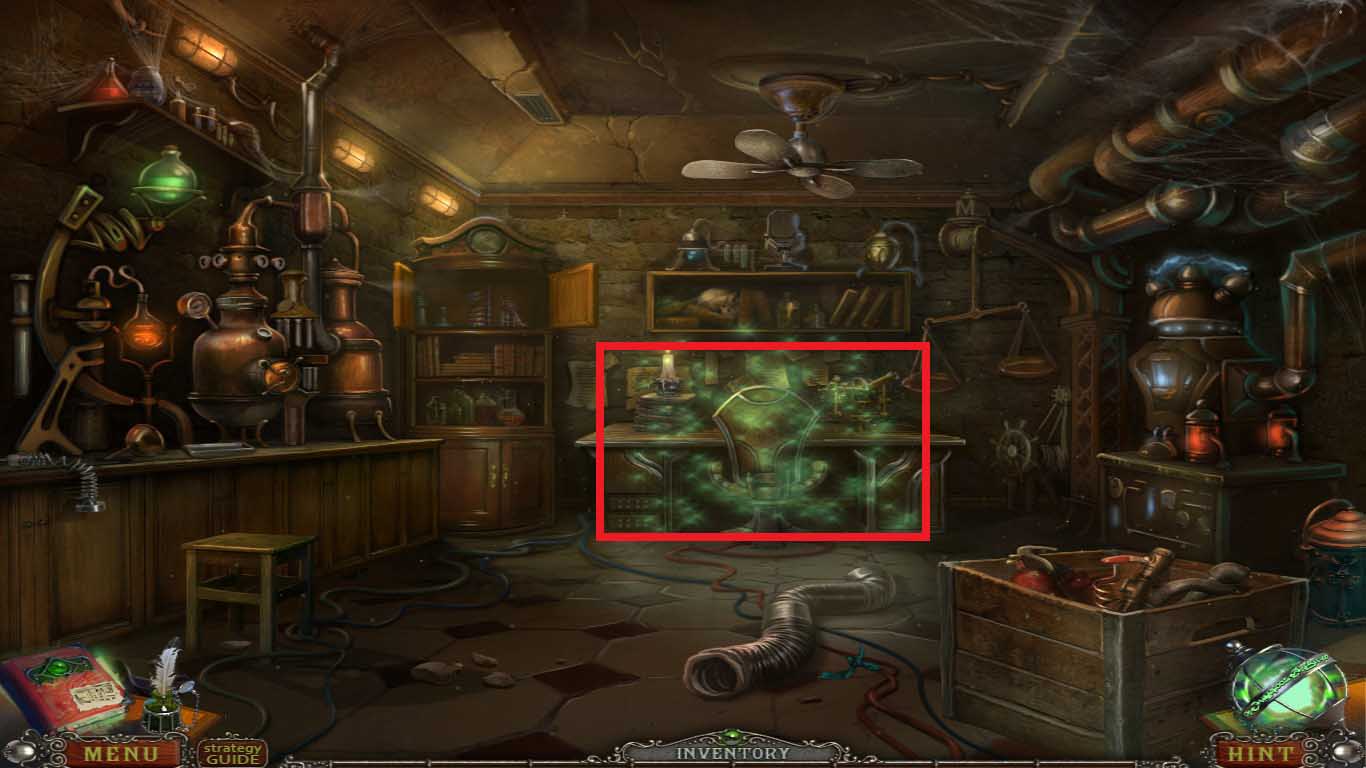
- Move into the desk chair (red rectangle) to access the hidden objects area.
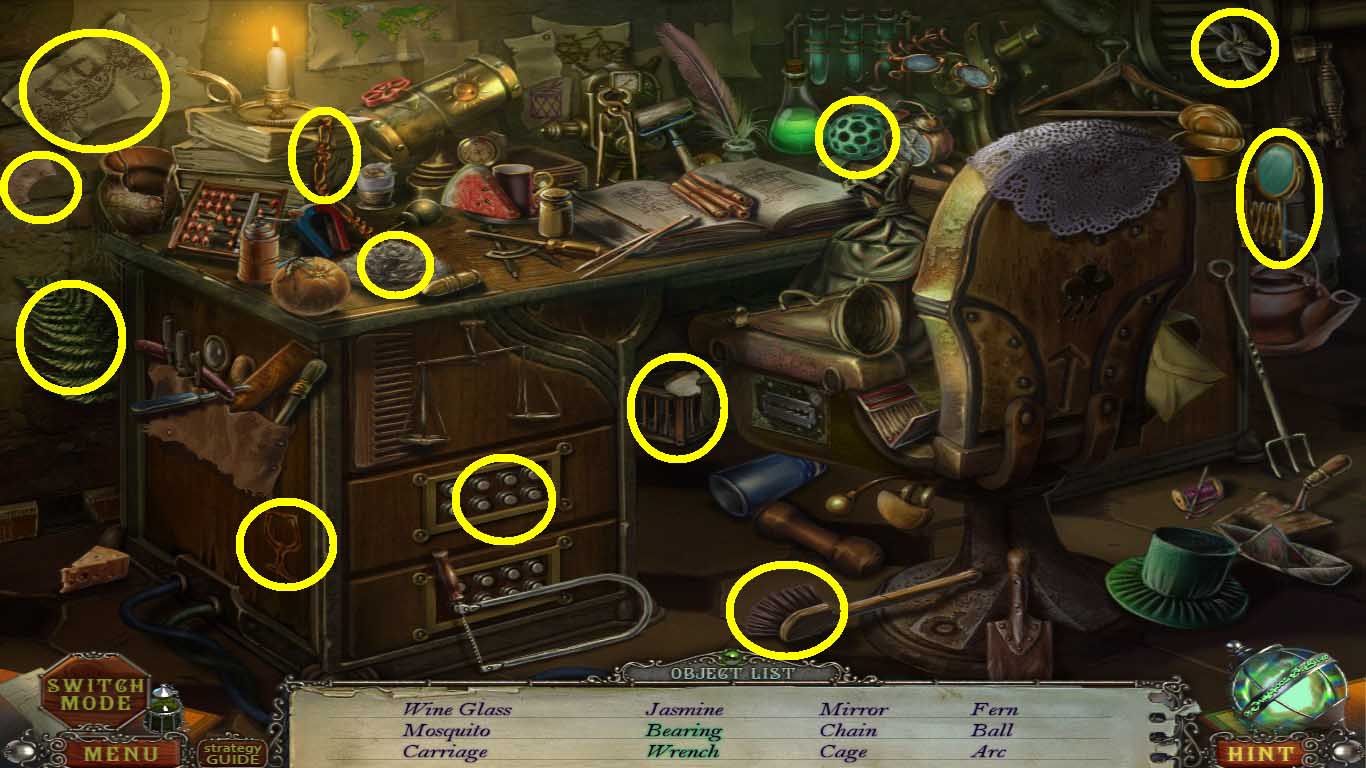
- Collect the elevator puzzle piece.
- Leave the orphanage: secret room.
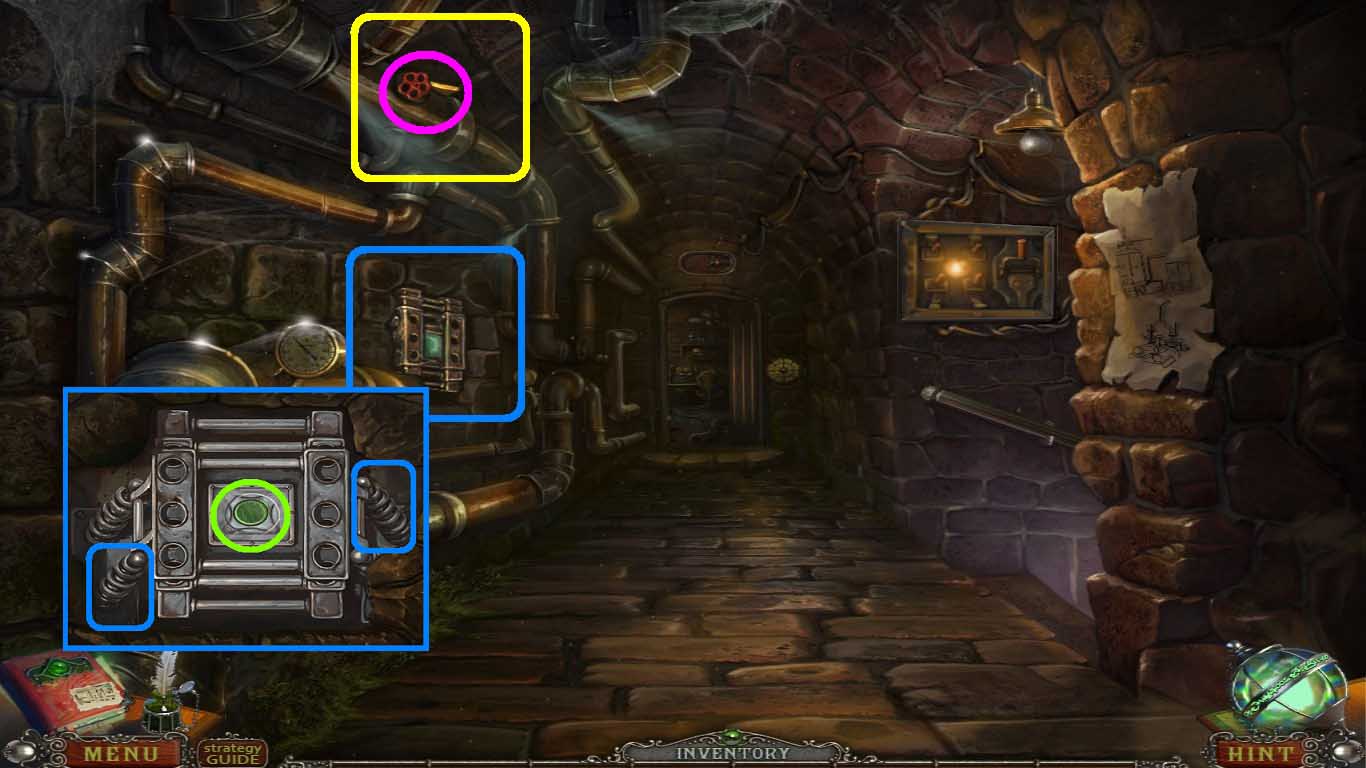
- Move into the wall (blue square).
- Insert the two big springs into the mechanism.
- Slice the glass with the glass cutter.
- Click the green button (green circle).
- Move into the pipe (yellow square).
- Take the elevator puzzle piece (pink circle).
- Go to underground: room with lift.
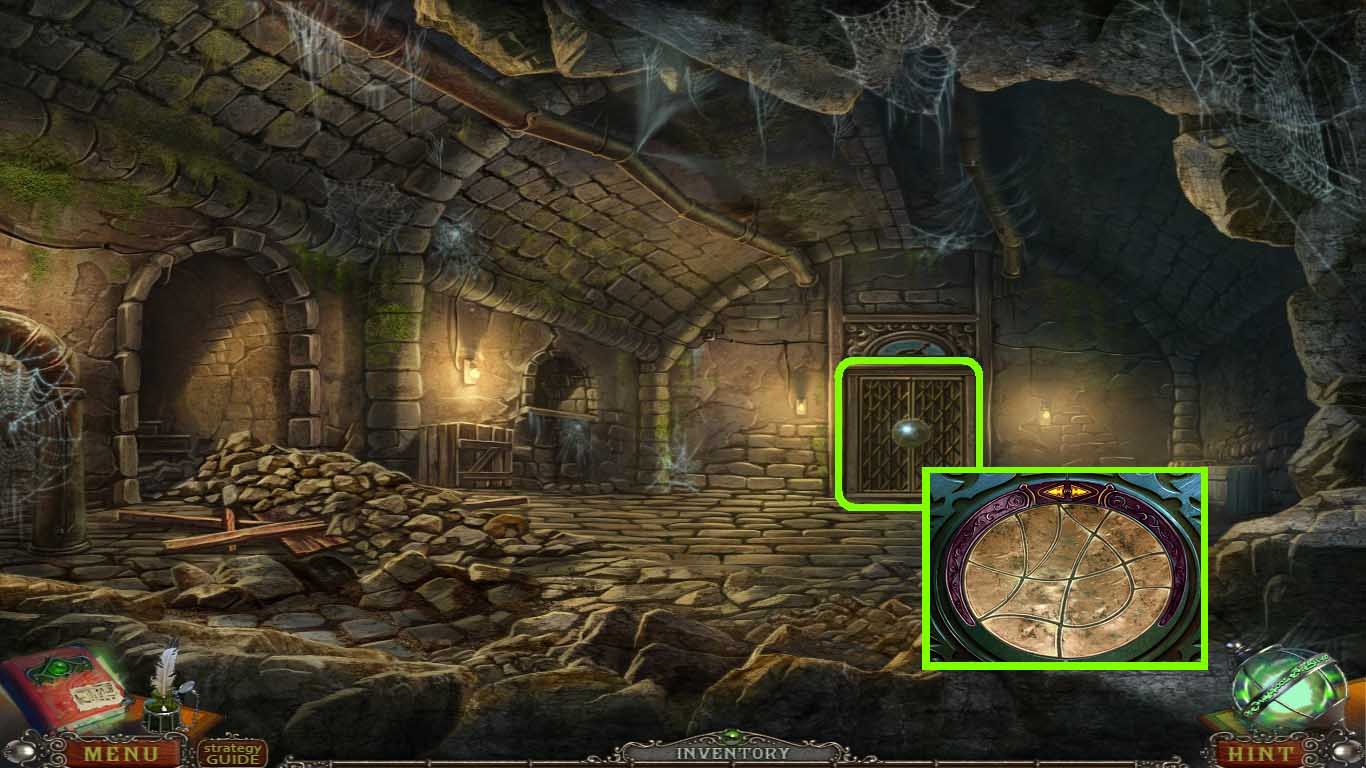
- Move into the elevator (green square).
- Insert the elevator puzzle piece into the lock.
- Solve puzzle as shown above.
- Go to underground: lift.
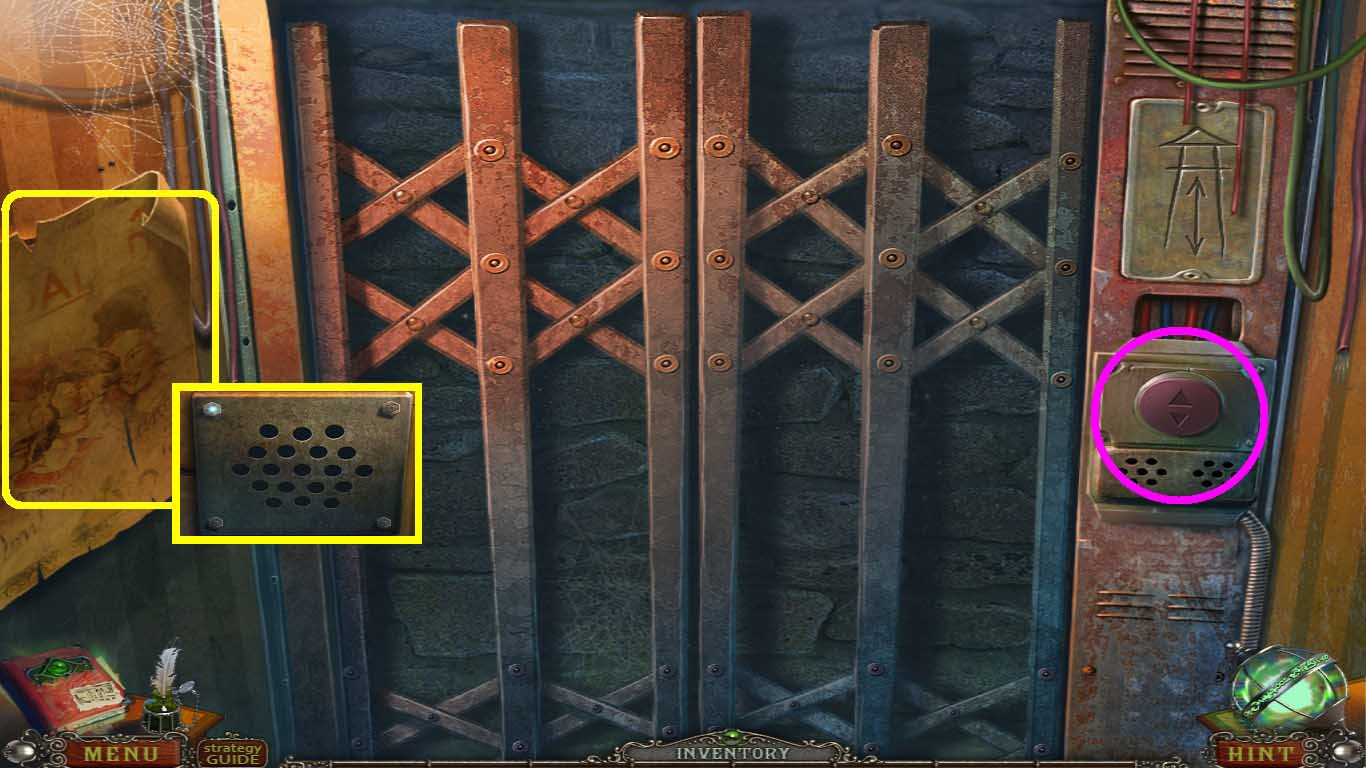
- Move into the paper (yellow square).
- Click the paper to uncover the panel.
- Click the elevator button (pink circle).
- Go to the lighthouse: astronomy room.
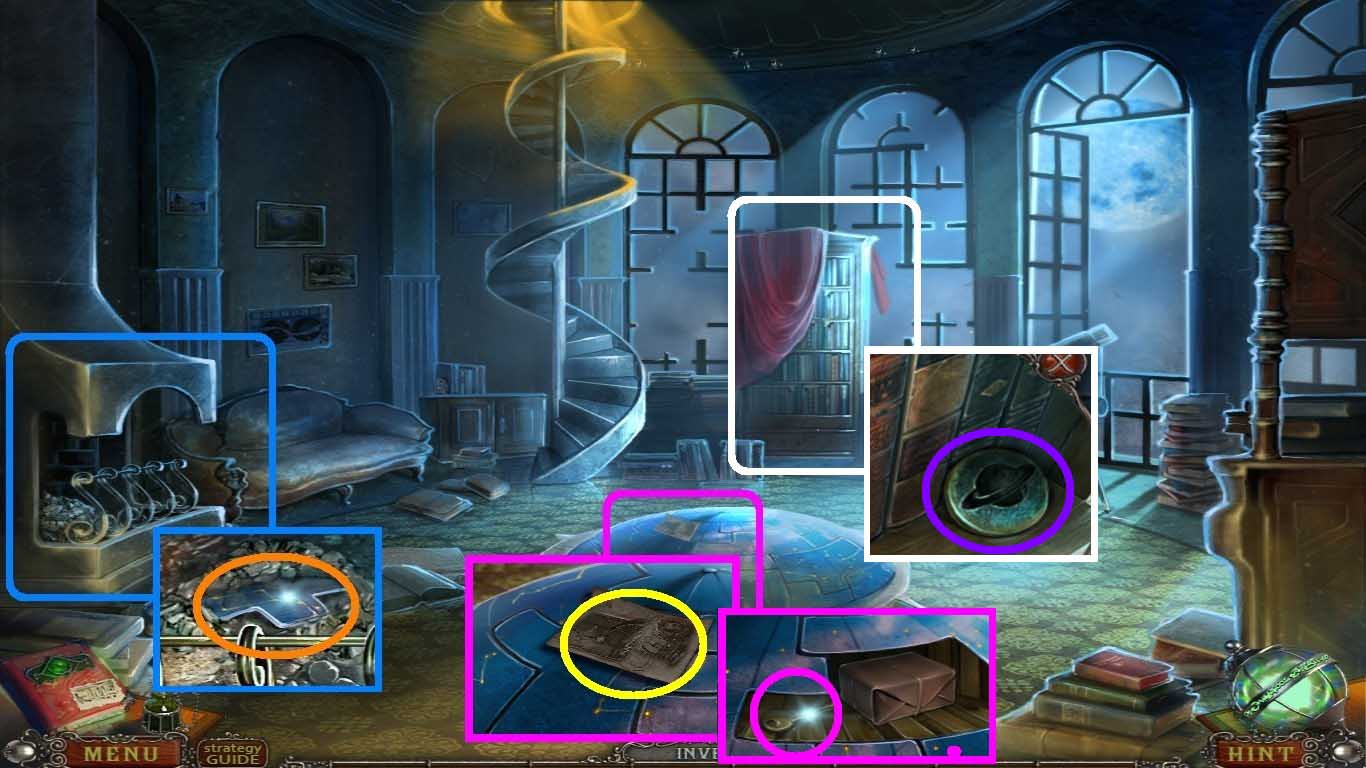
- Move into the fireplace (blue square).
- Brush away the ashes using the brush.
- Take the iron plate (orange circle).
- Move into the dome (pink square).
- Take the note (yellow circle).
- Put the iron plate onto the dome and take the key.
- Move into the shelf (white square).
- Take the gate puzzle piece (purple circle).
- Click the stairs.
- Go to the lighthouse: top room.
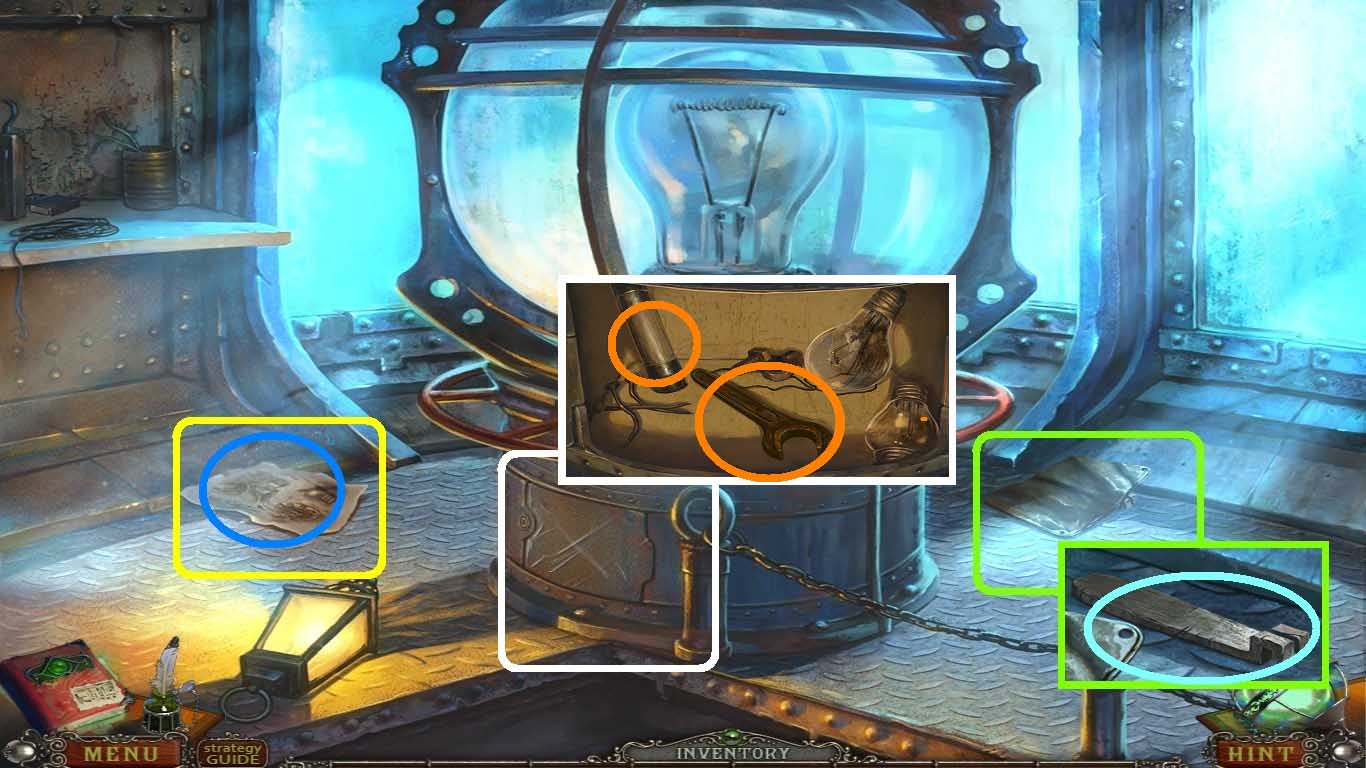
- Move into the ground (green square).
- Click the metal piece.
- Take the switch handle (aqua circle).
- Move into the paper (yellow square).
- Take the paper and the generator puzzle piece (blue circle).
- Move into the panel (white square).
- Use the key to unlock it.
- Take the wrench and the safety fuse (orange circles).
- Go to the underground: lift.
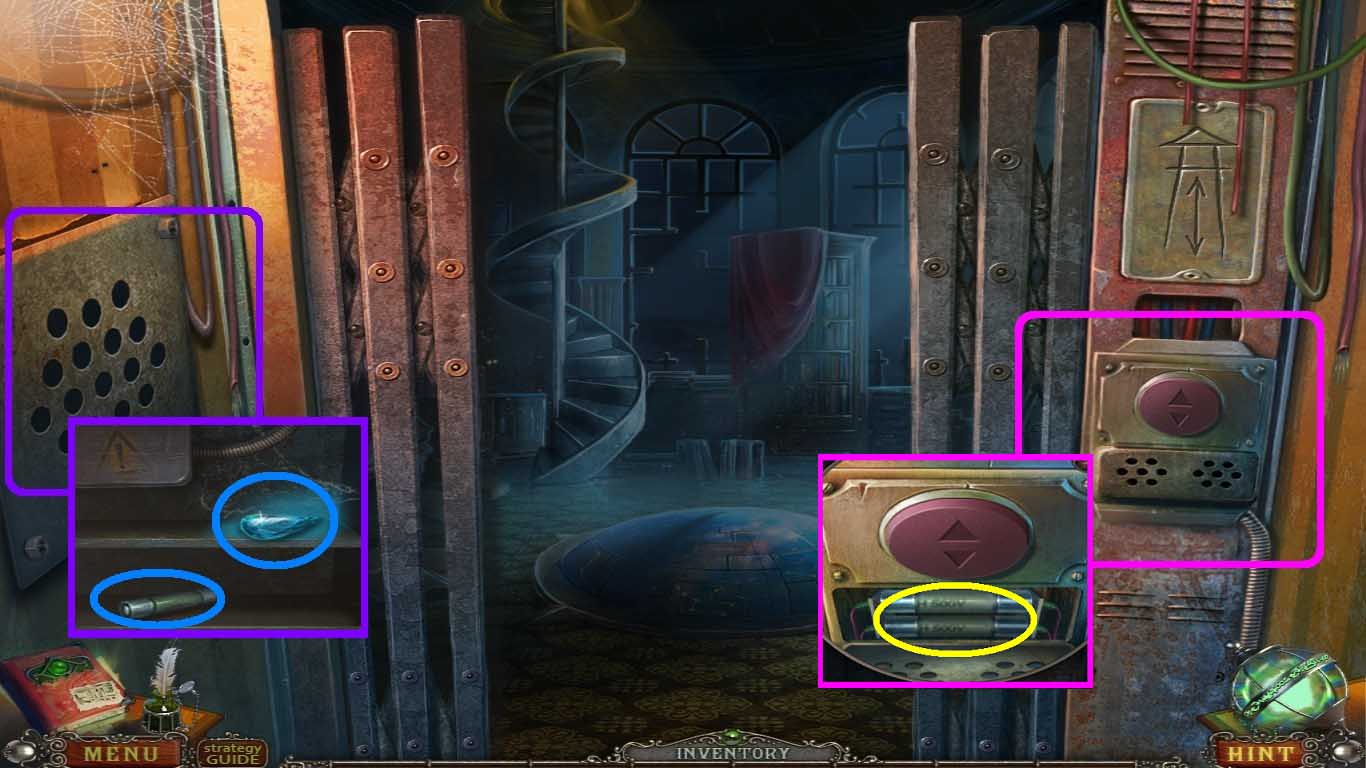
- Move into the panel (purple square).
- Use the wrench to remove the bolts.
- Click the panel.
- Take the crystal and the safety fuse (blue circles).
- Move into the elevator button (pink square).
- Click the fuse panel.
- Click the old fuses.
- Insert the 2 safety fuses (yellow circles).
- Click the button and go back to underground: room with lift.
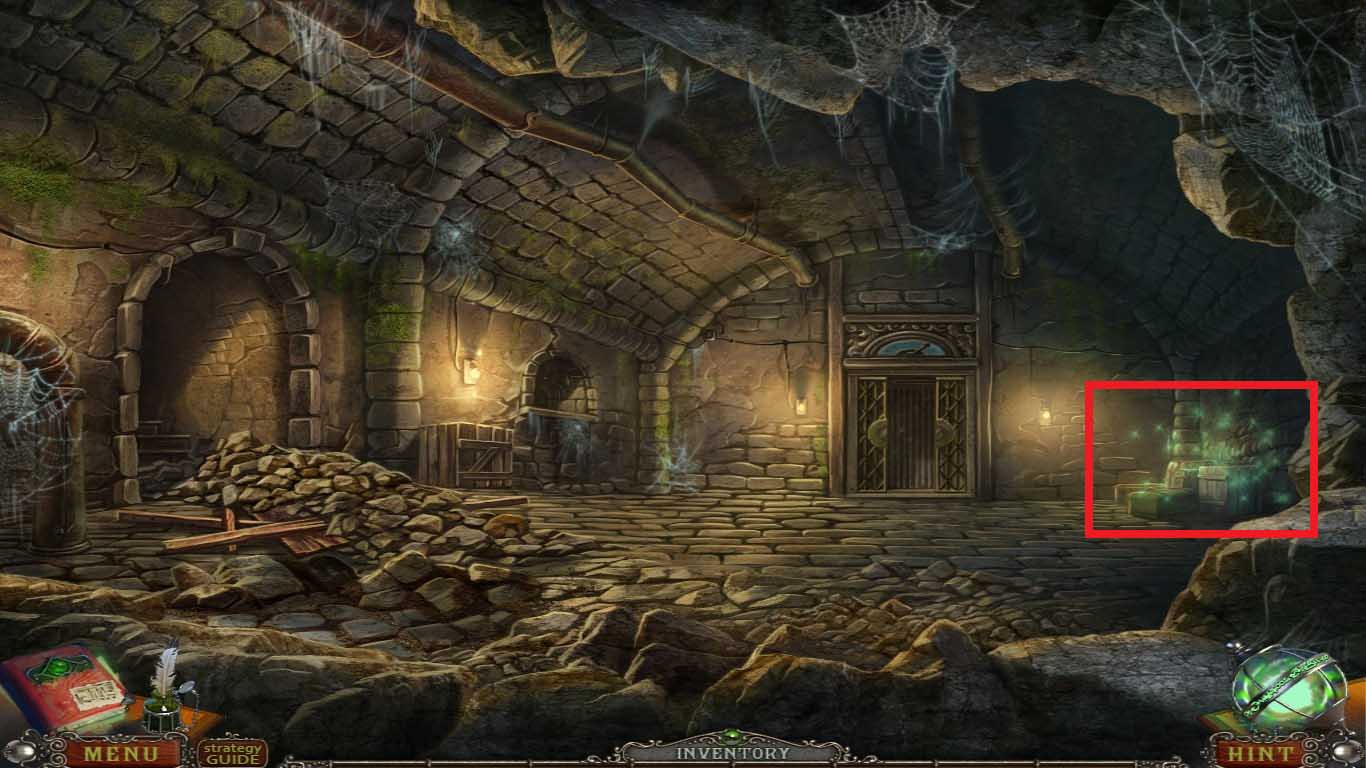
- Move into the barrels (red rectangle) to access the hidden objects area.
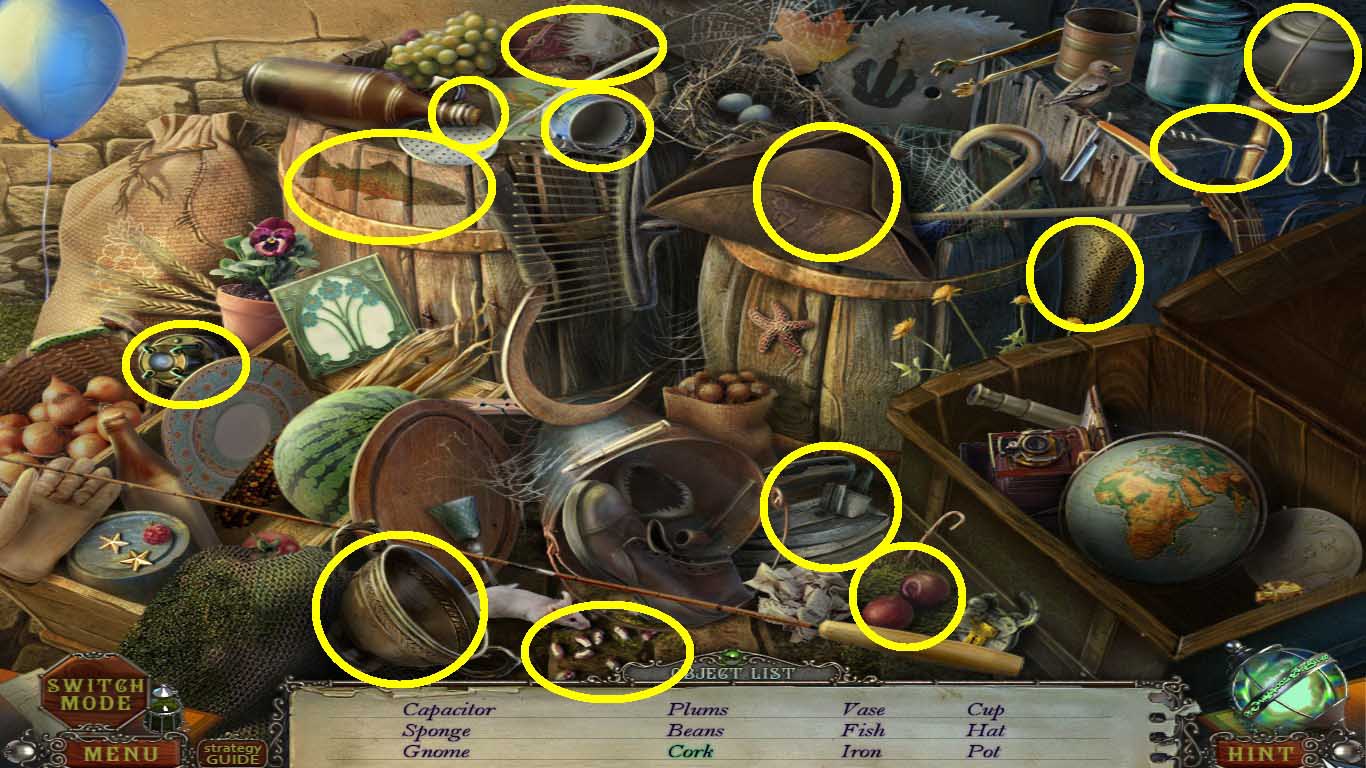
- Find the listed items (yellow circles).
- Collect the generator puzzle piece.
- Go to the underground: on the bridge.
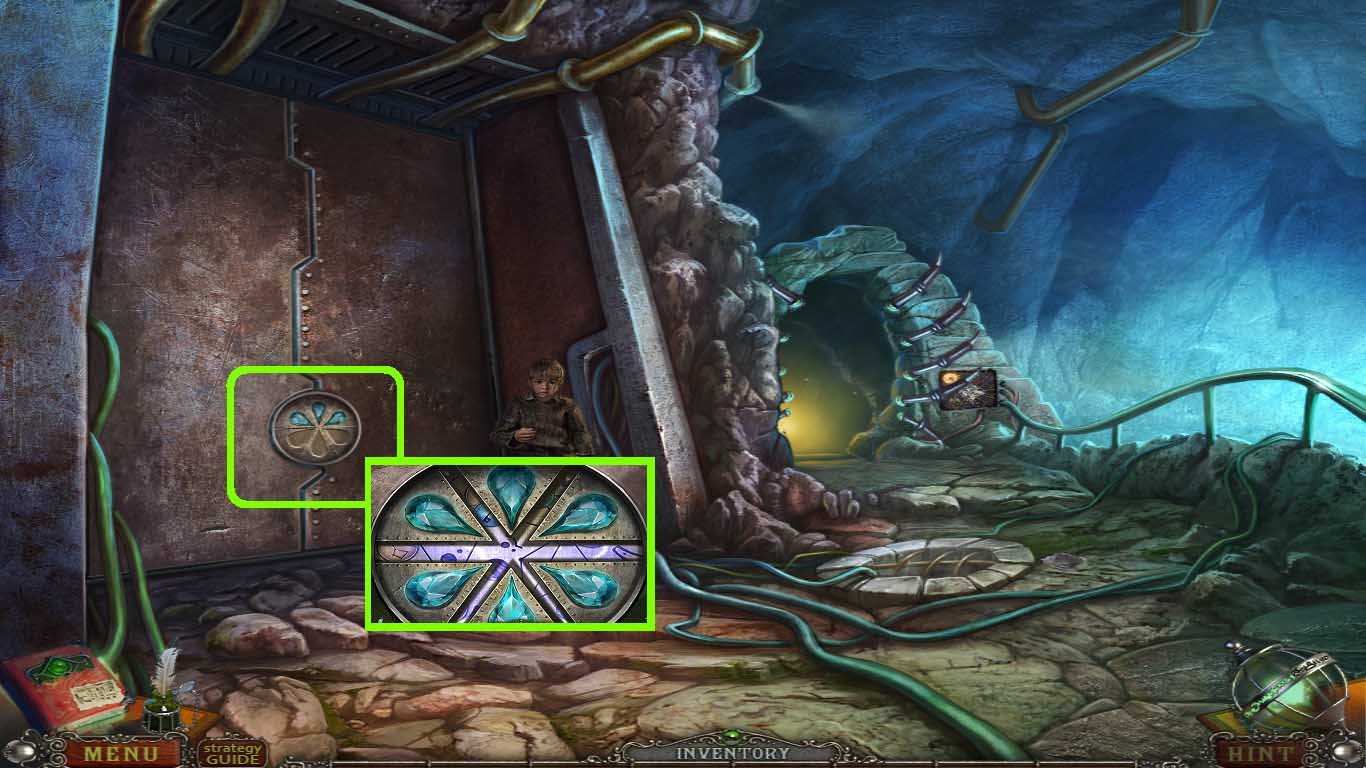
- Move into the door lock (green square).
- Insert the crystals into the lock.
- Go to underground: in front of bridge.
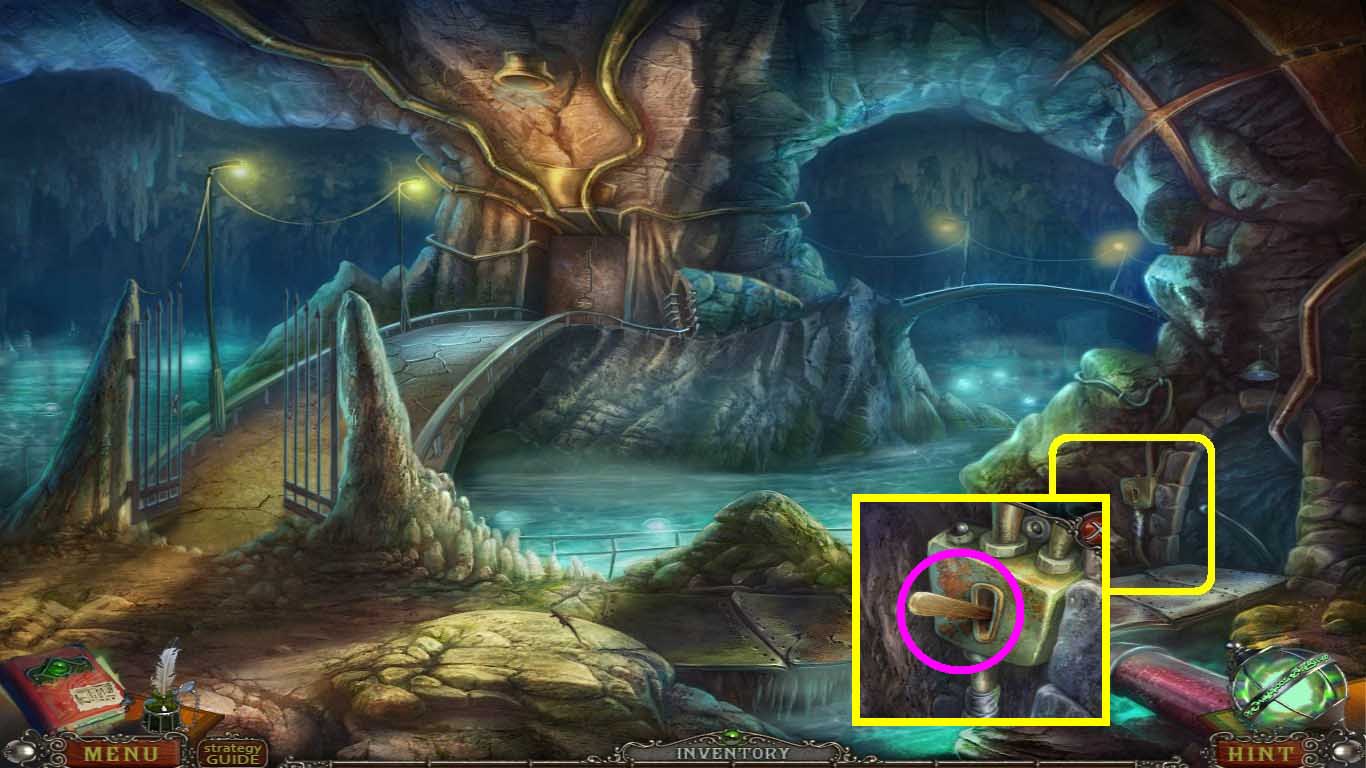
- Move into the switch (yellow square).
- Insert the switch handle into the slot.
- Click the handle (pink circle).
- Go into the generator room.
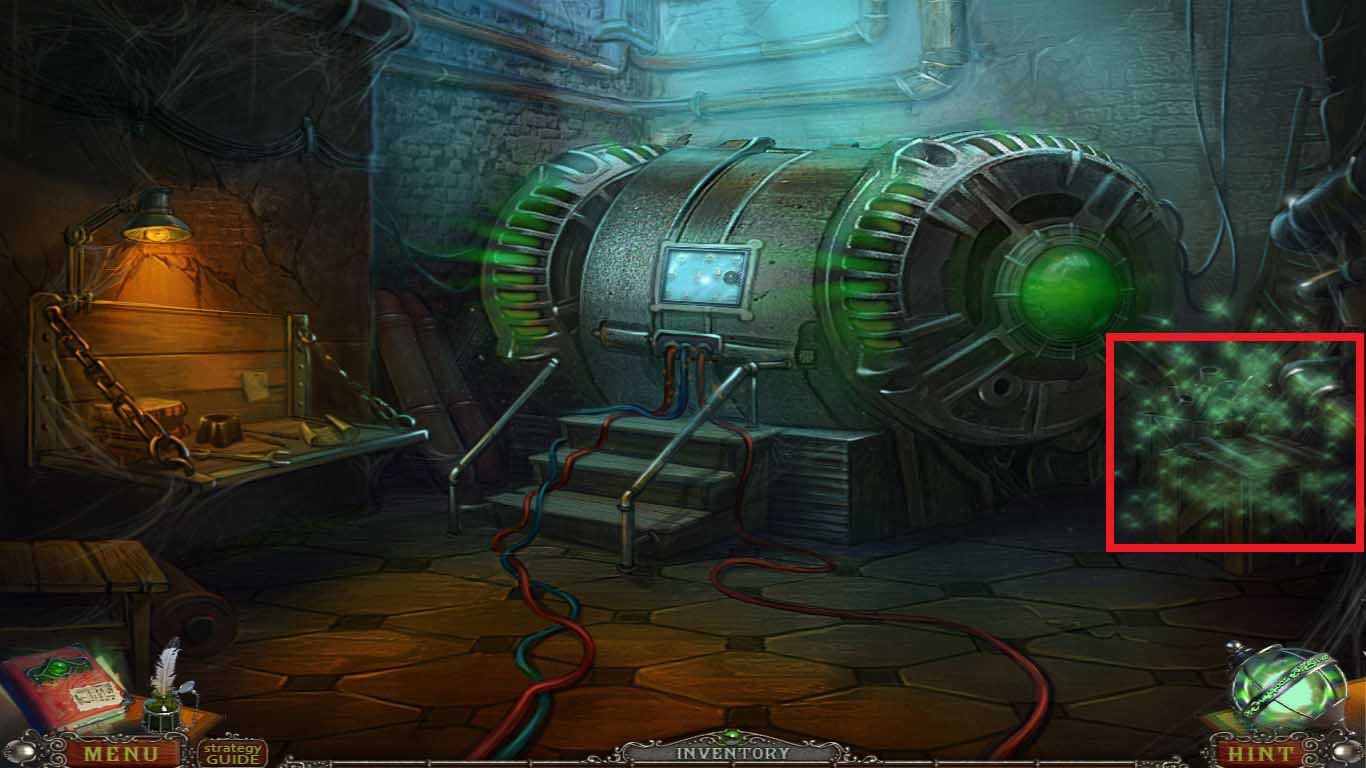
- Zoom into the crate (red rectangle) to access the hidden objects area.
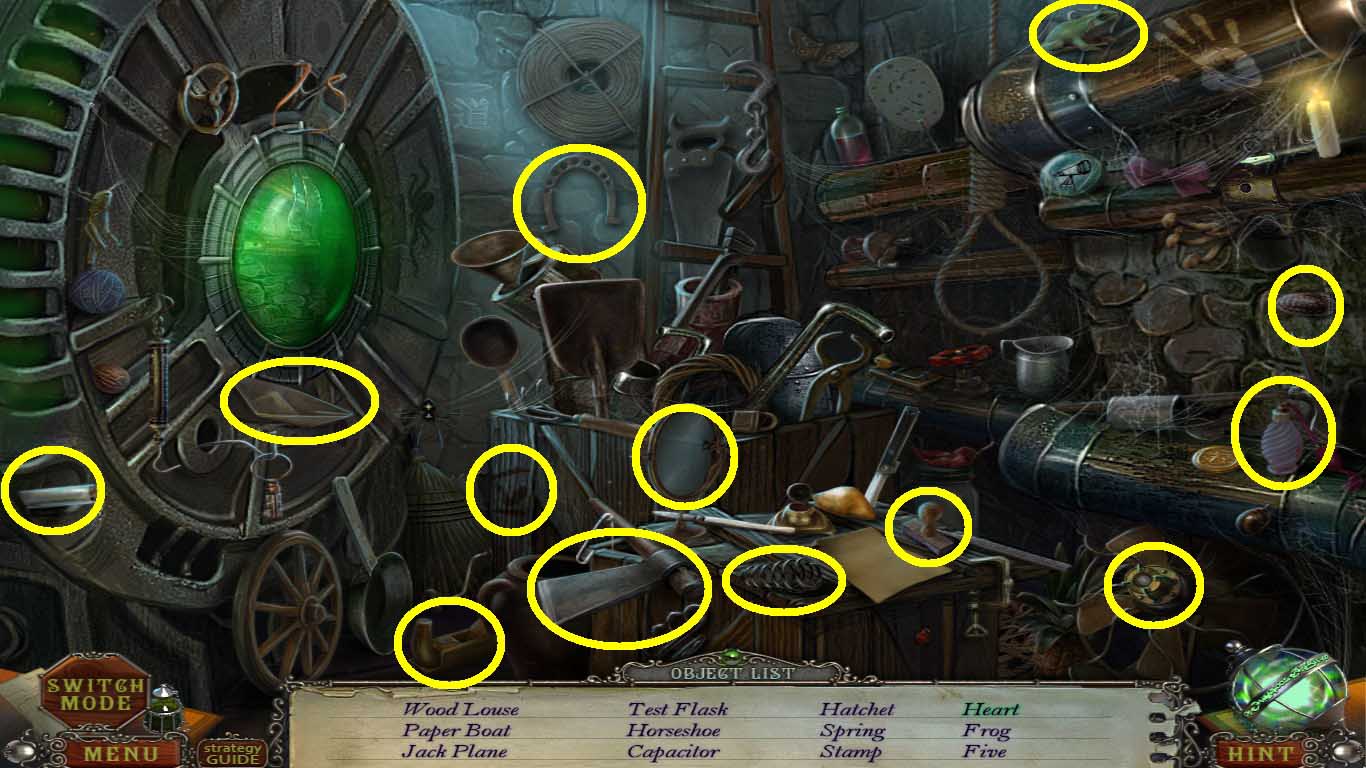
- Find the listed items (yellow circles).
- Collect the generator puzzle piece.
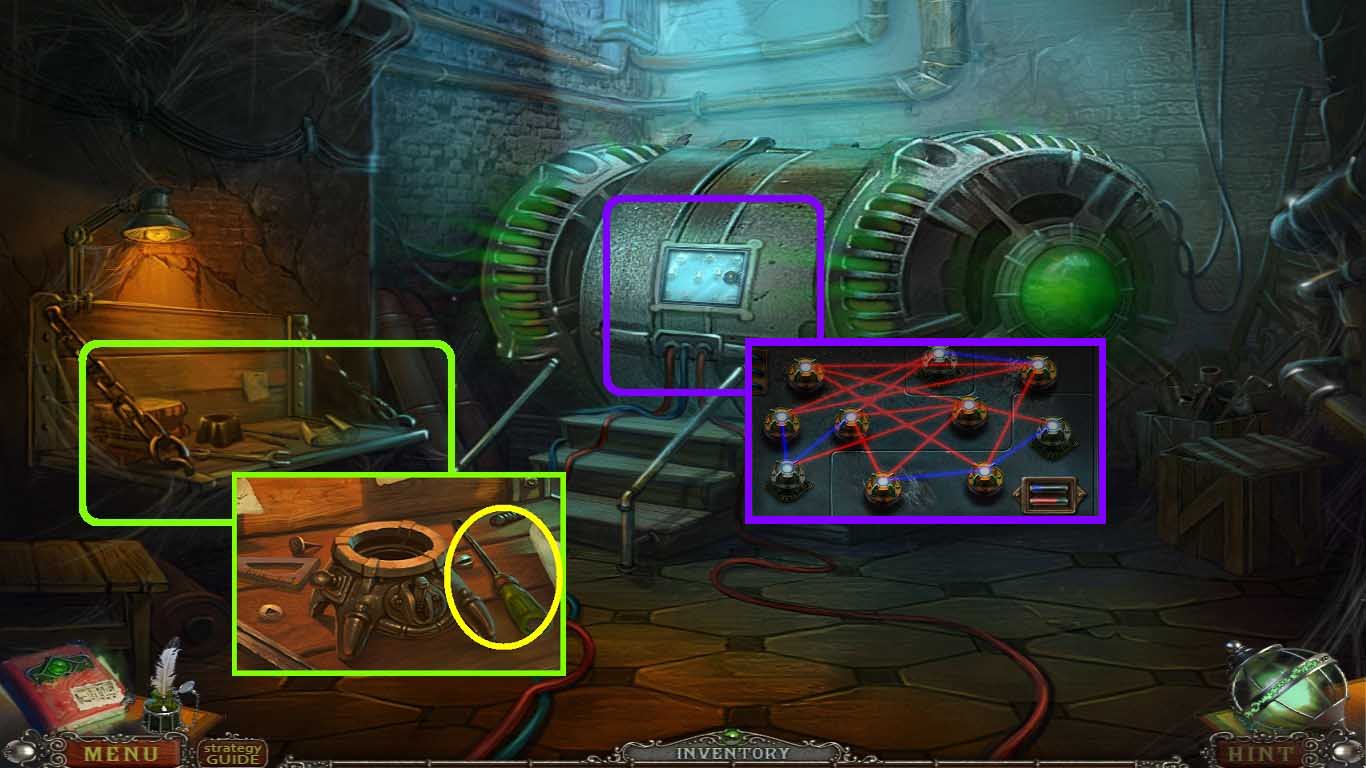
- Move into the table (green square).
- Take the screwdriver (yellow circle).
- Move into the generator (purple square).
- Use the screwdriver to remove the screws.
- Insert the generator puzzle pieces into the board.
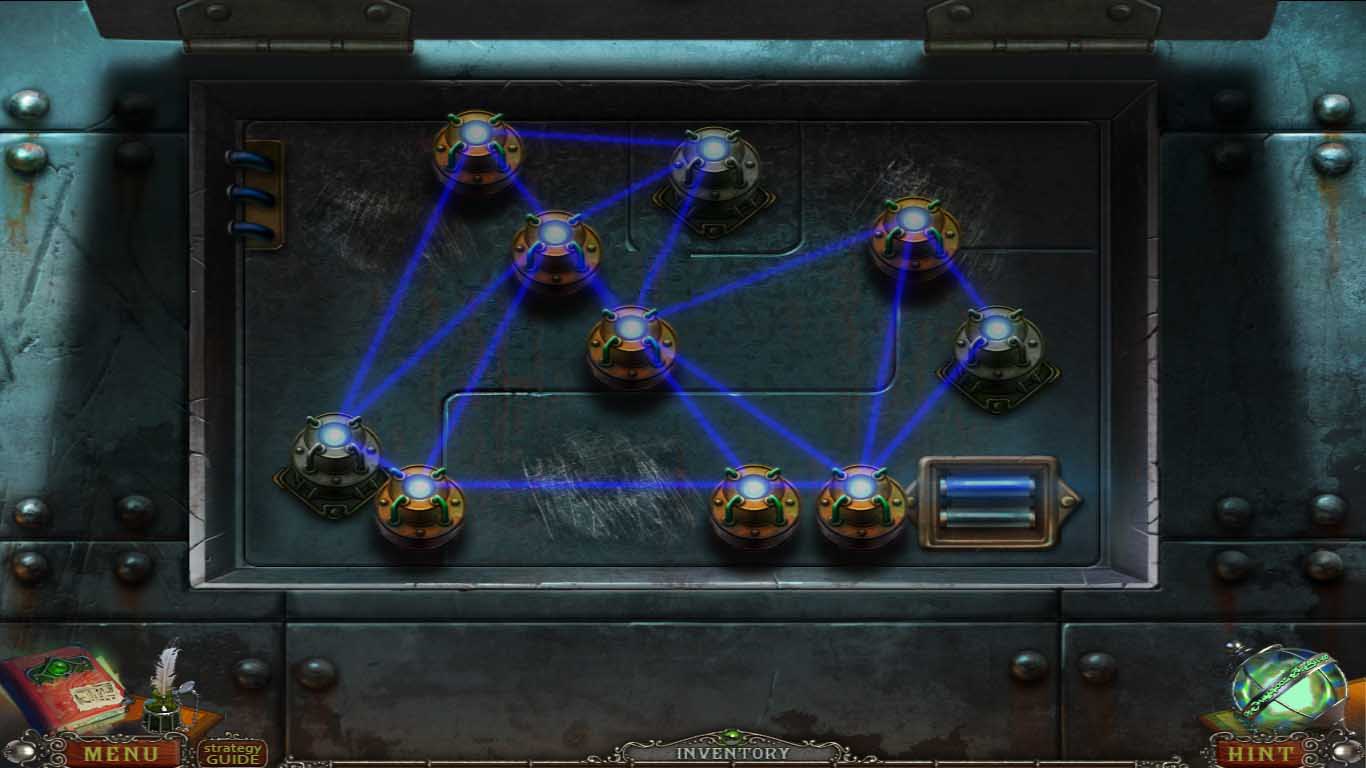
- Solve as shown above.
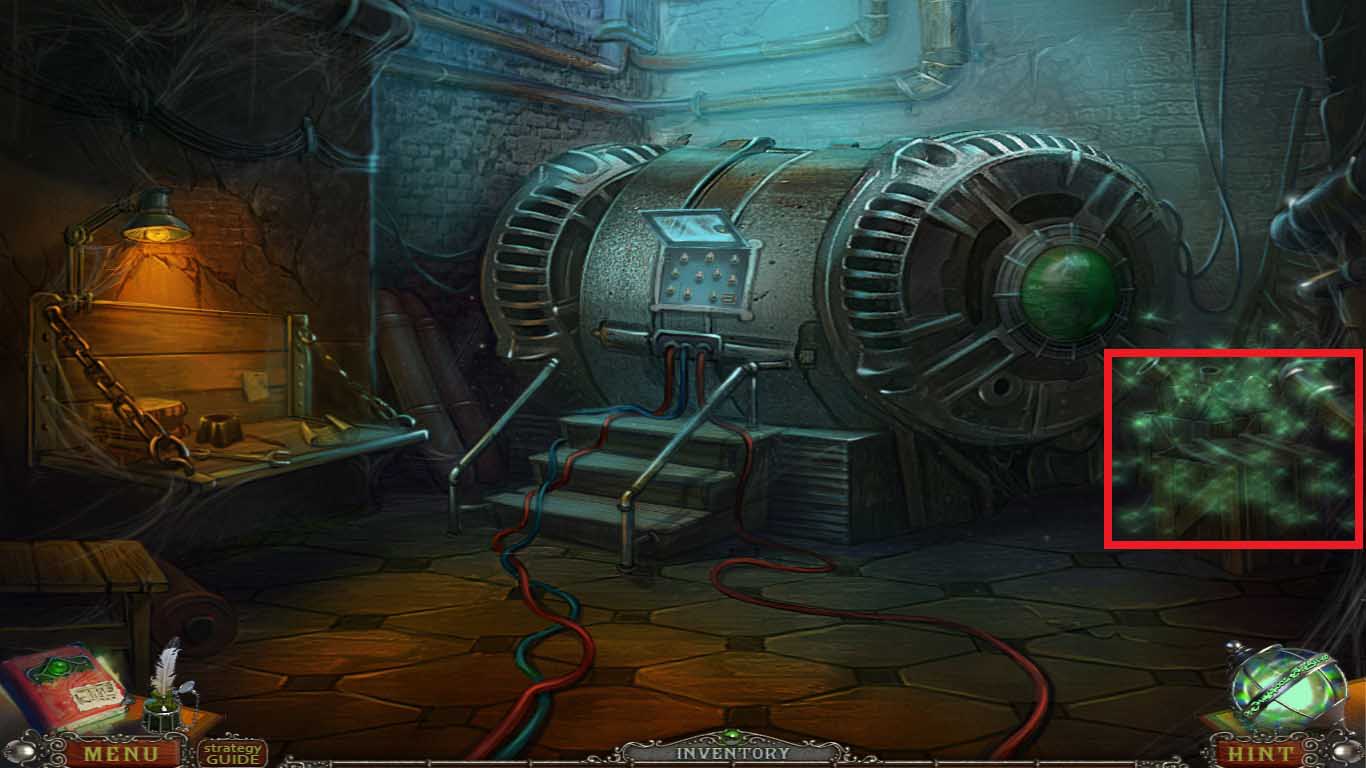
- Move into the crate (red rectangle) to access the hidden objects area.
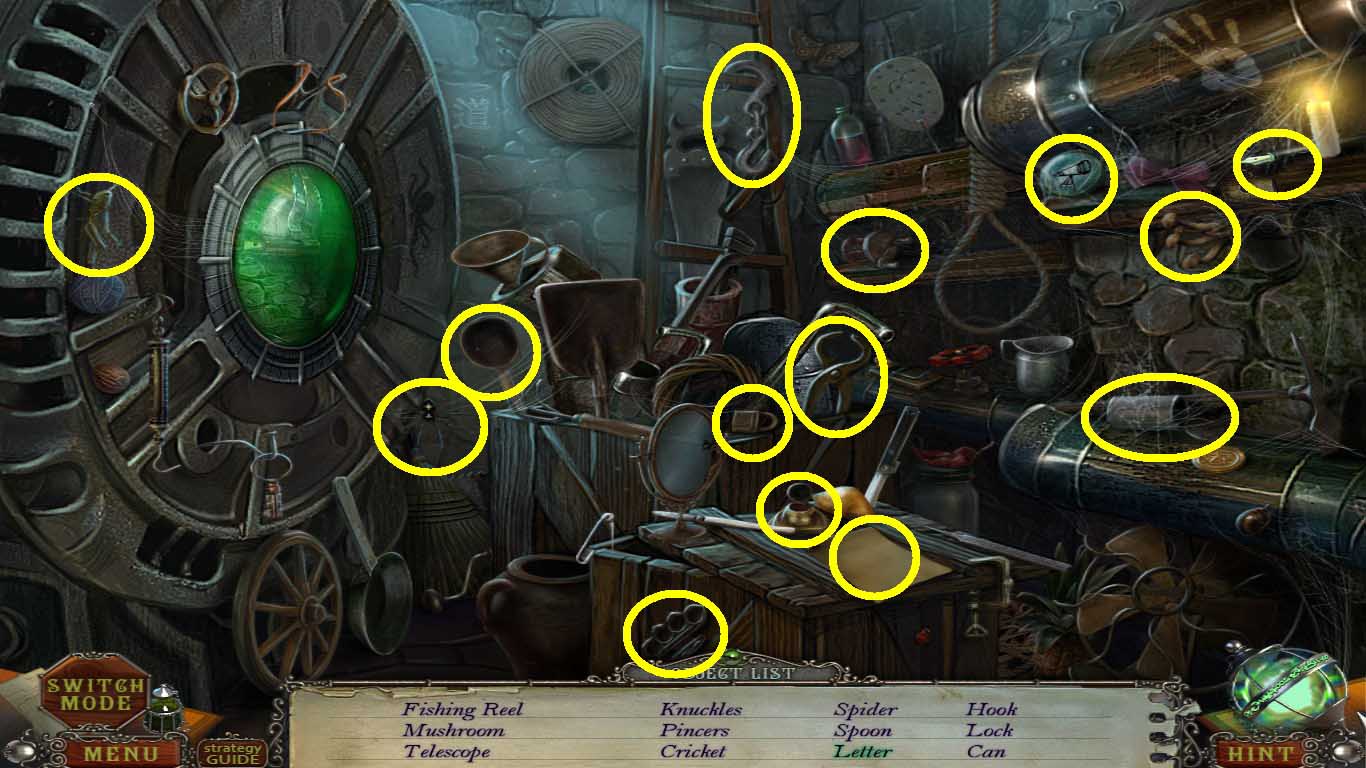
- Find the listed items (yellow circles).
- Collect the gate puzzle piece.
- Go to underground: on the bridge.
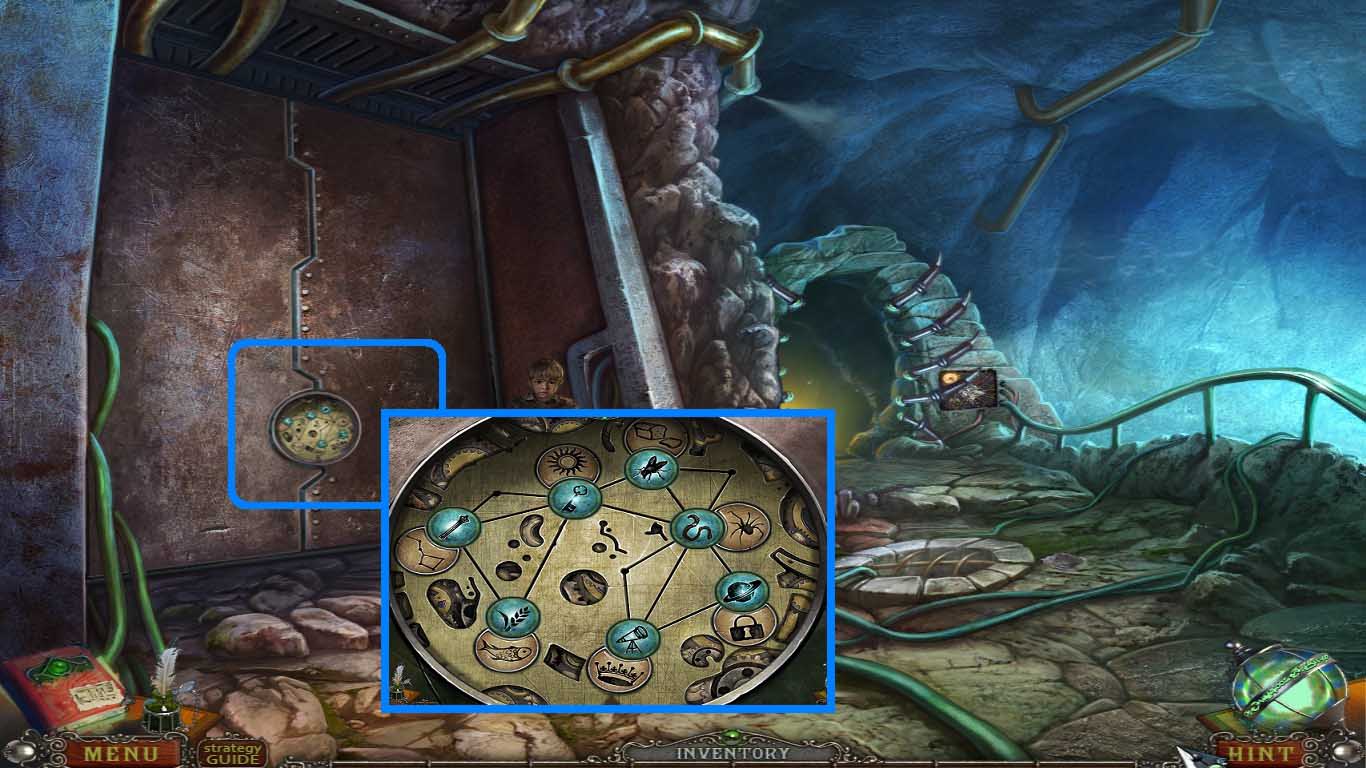
- Move into the door lock (blue square).
- Insert the gate puzzle pieces into the lock.
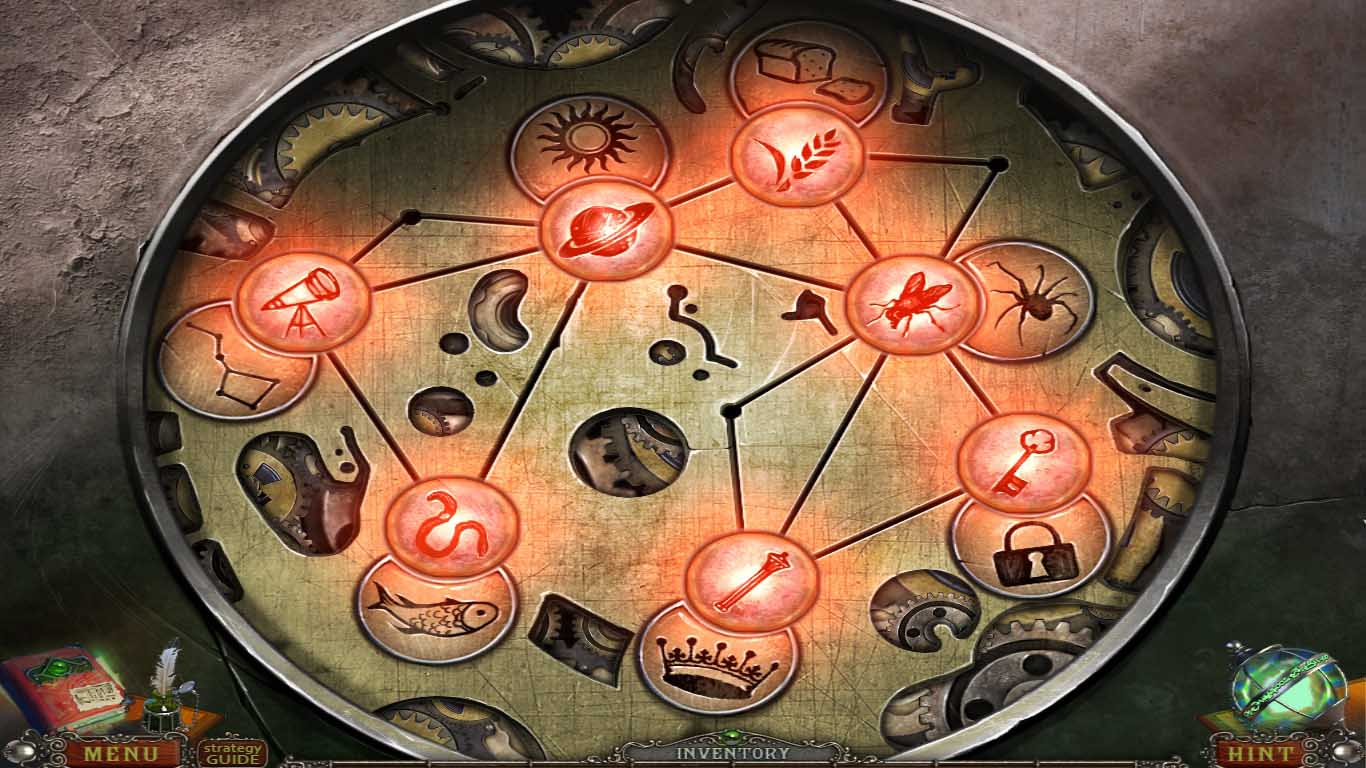
- Solve as shown above.
- Go into the underground: laboratory.
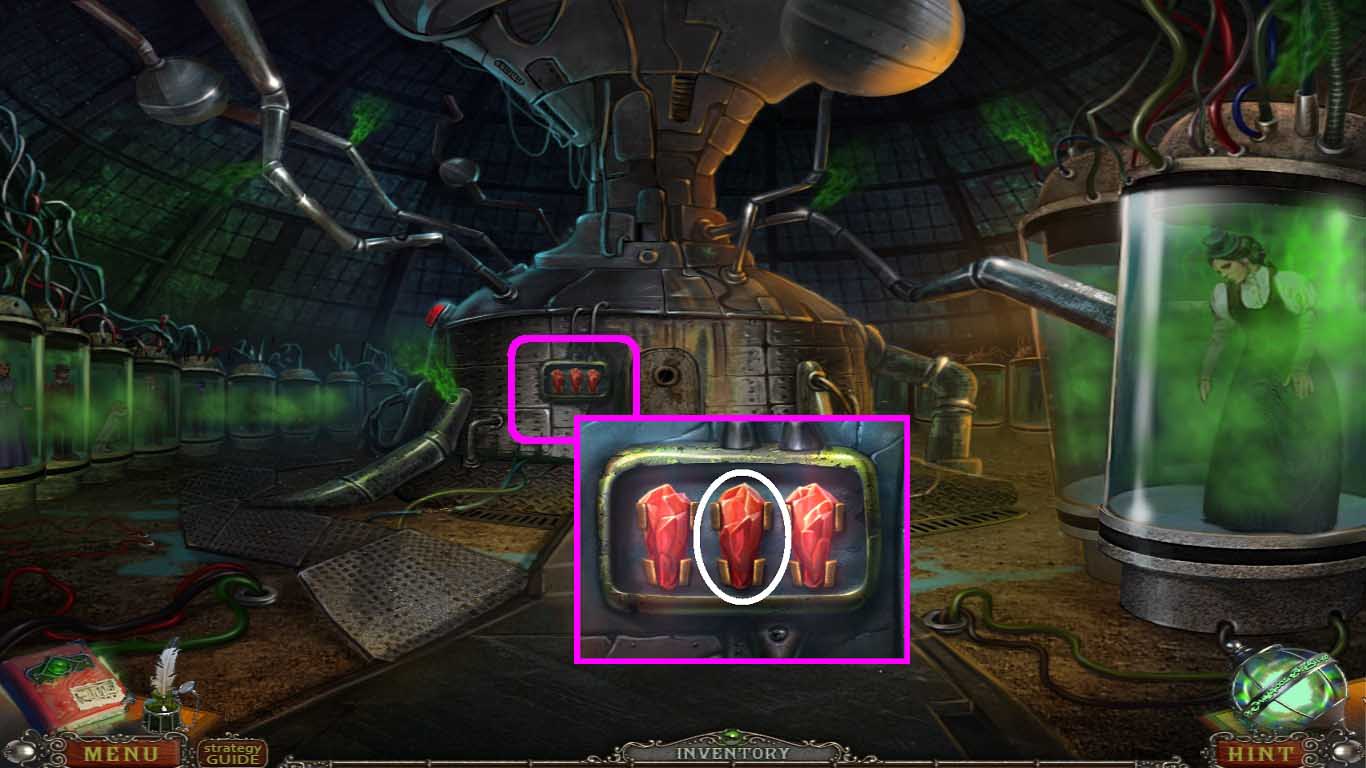
- Move into the panel (pink square).
- Take out the red crystal (white circle).
- Go to the generator room.
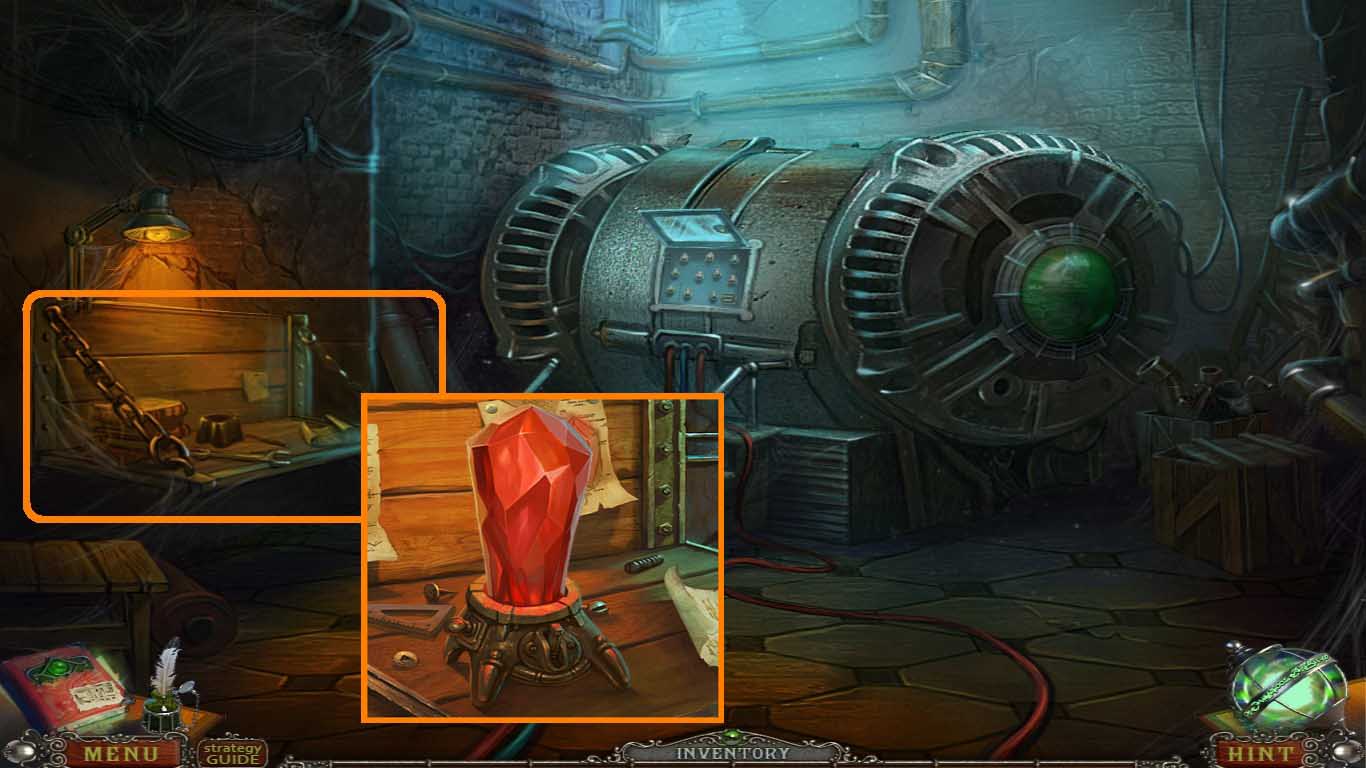
- Move into the table (orange square).
- Insert the red crystal into the stand.
- Go to the underground: laboratory.
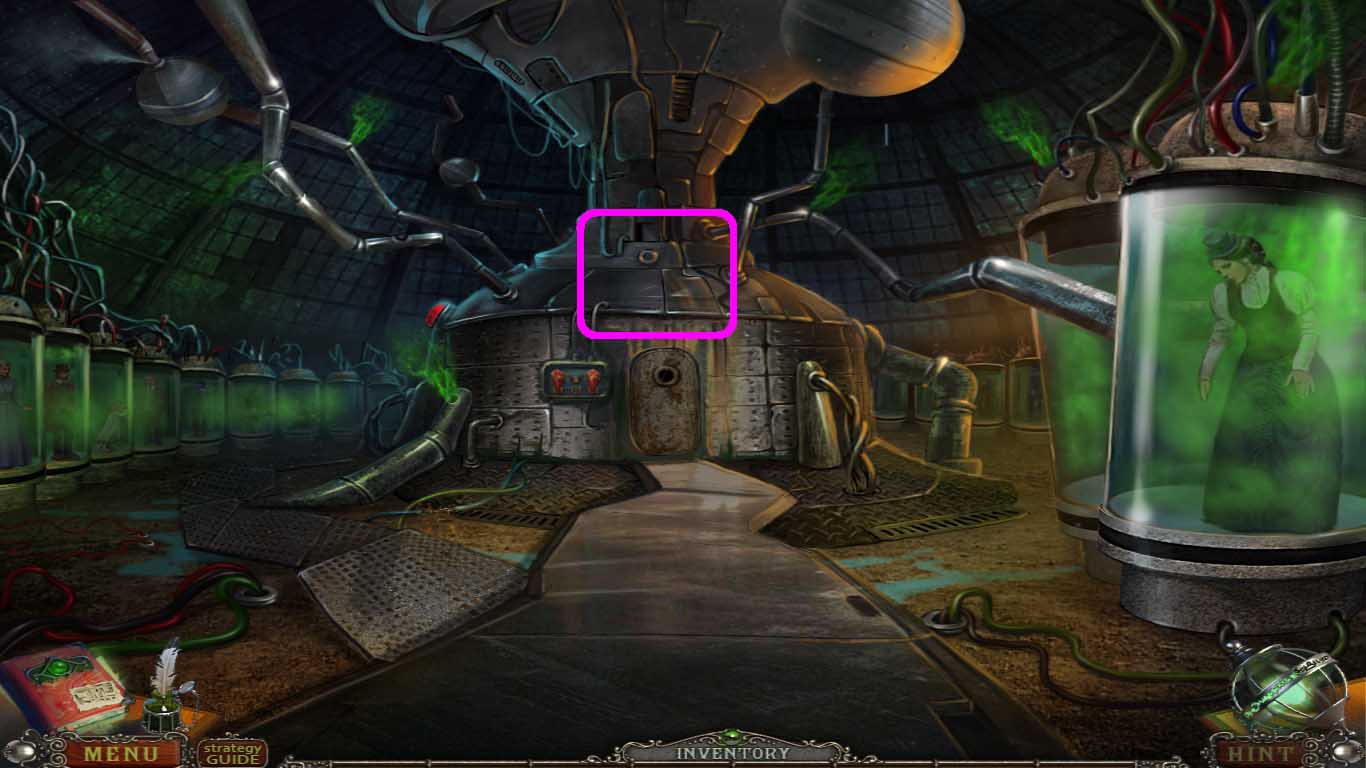
- Insert the pulsar device over the machine (pink square).
Congratulations! You have finished Whispered Secrets: The Story of Tideville.
Comments will load when you reach this part of the walkthrough.