

Chapter Four: Shadows
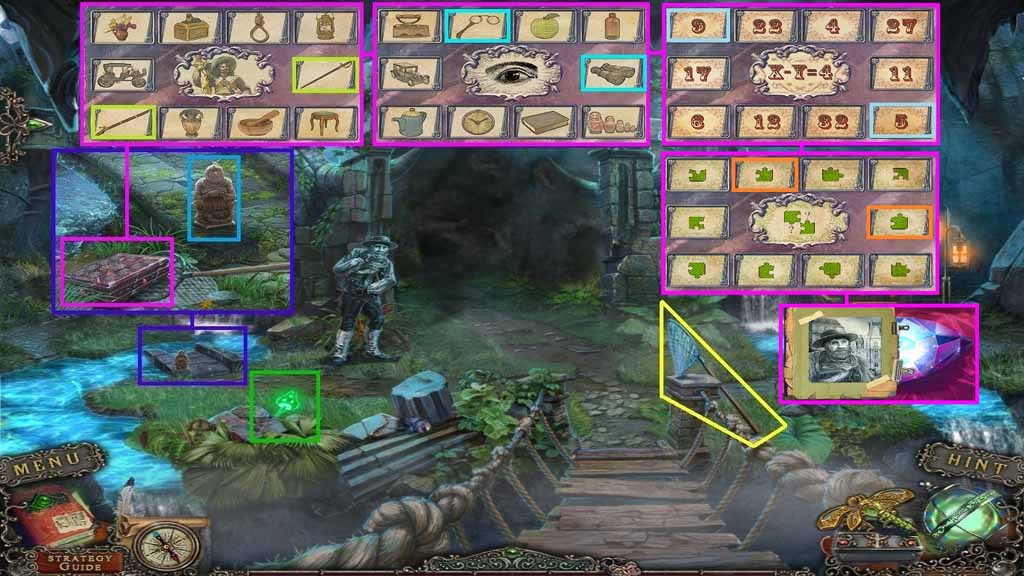
- Collect the net.
- Collect 1 / 3 toadstools.
- Collect the statuette.
- Select the net to collect the box.
- Click the box to trigger a puzzle.
- Solve the puzzle by finding the matching pairs.
- Click the pages 2 times; collect the note and the blue stone.
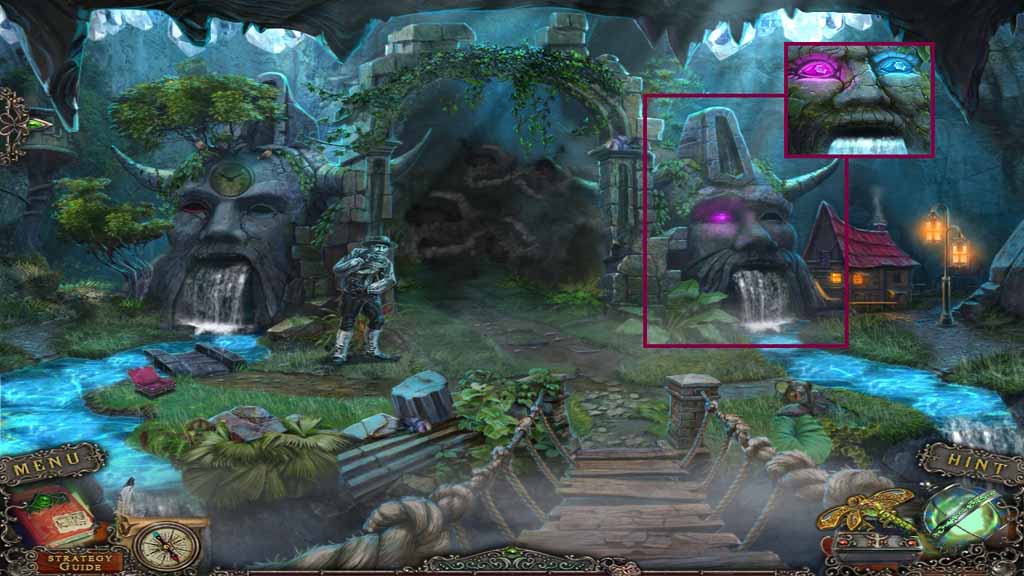
- Insert the blue stone into the eye socket.
- Click both eyes.
- Move to the right.
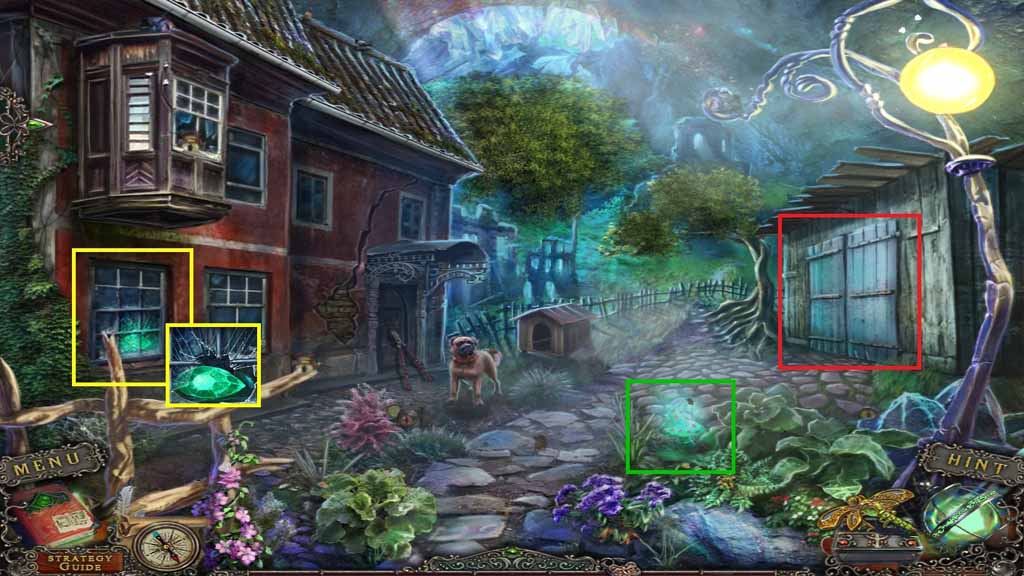
- Select the statuette to smash the window.
- Collect the green stone.
- Collect 2 / 3 toadstools.
- Click the door to trigger a hidden objects area.
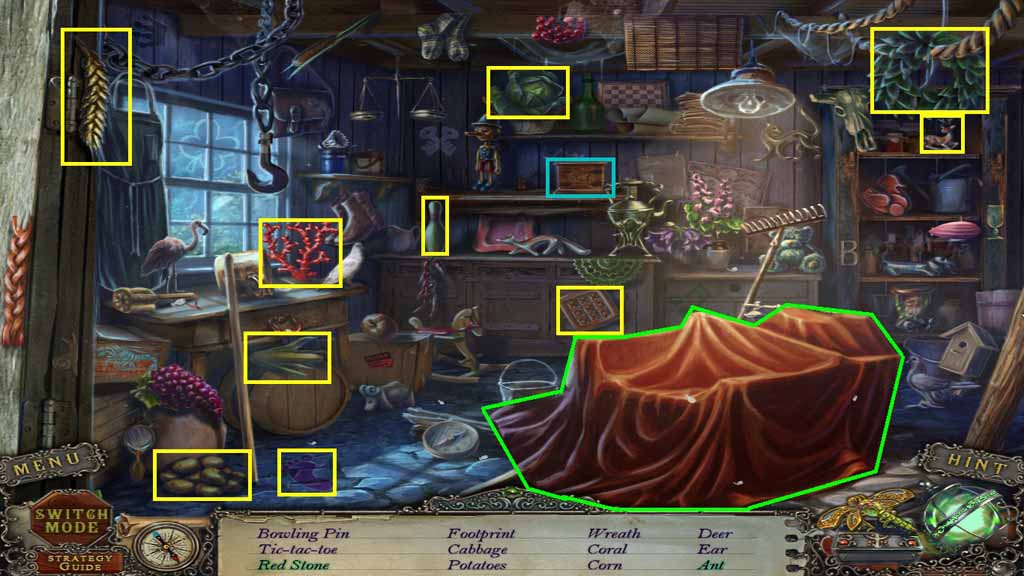
- Find the listed items.
- Click the box; collect the red stone.
- Click the cloth; collect the ant.
- Collect the red stone.
- Move down once.
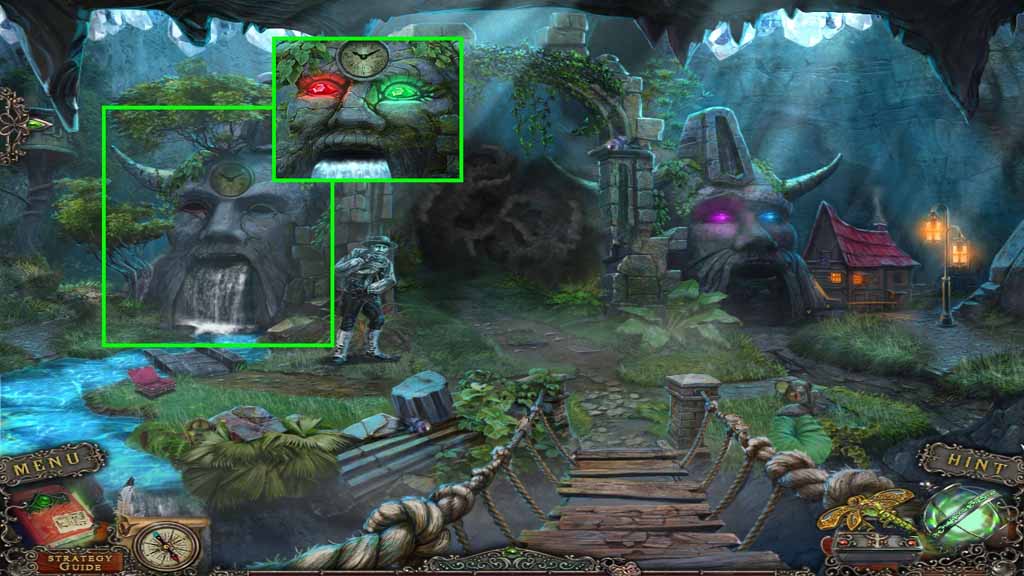
- Insert the red and green stones into the correct sockets and click them.
- Move left.
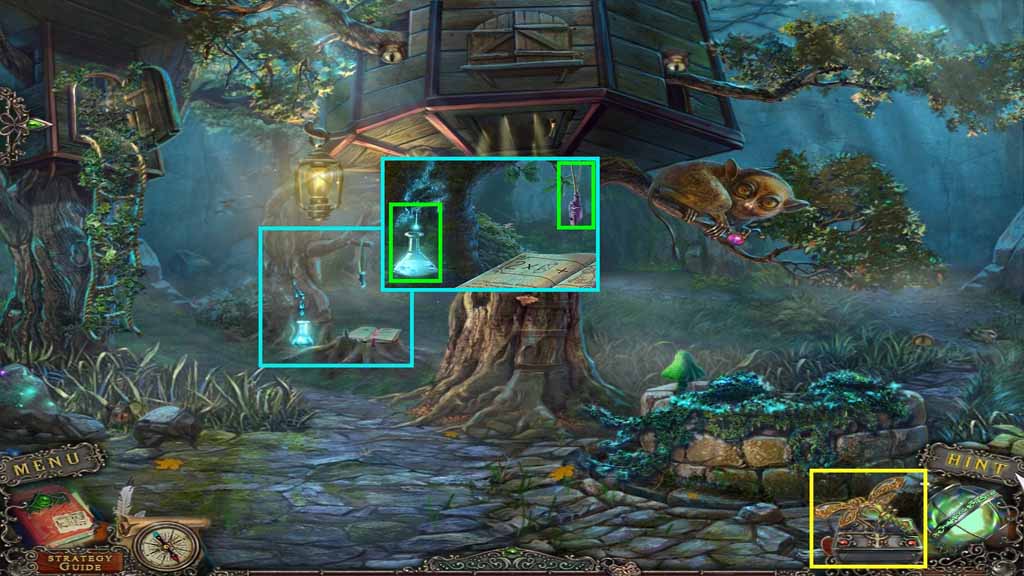
- Click the dragonfly.
- Collect the resin and the dog whistle.
- Move down once and go right.
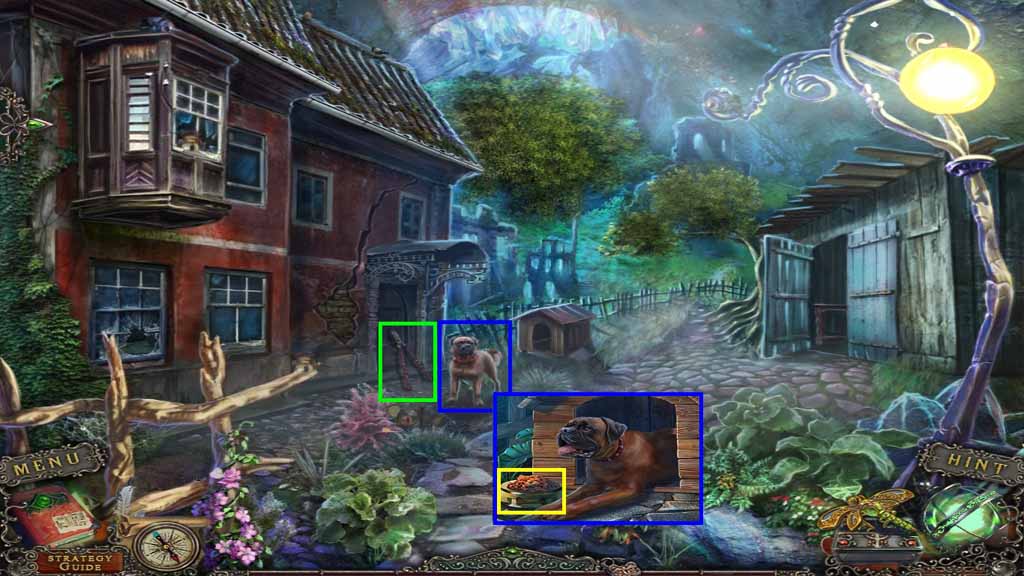
- Select the dog whistle to use on the dog; collect the dog food.
- Collect the pruners.
- Move down once and move left.
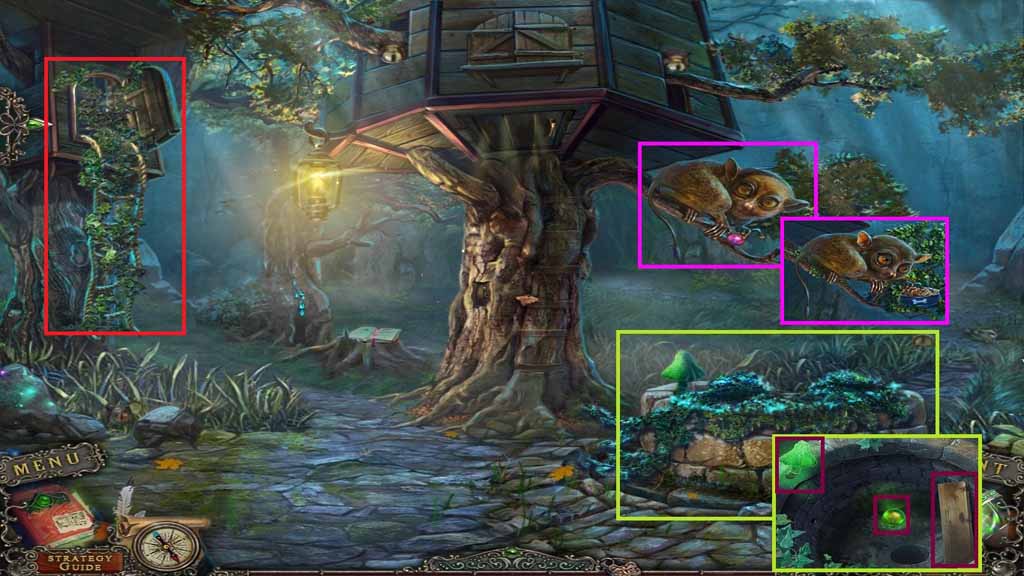
- Select the pruners to clear the ivy and zoom in.
- Collect 1 / 3 boards, 3 / 3 toadstools and the green bubble.
- Give the creature the dog food; collect the red bubble.
- Select the pruners to cut the ivy and trigger a hidden objects area.
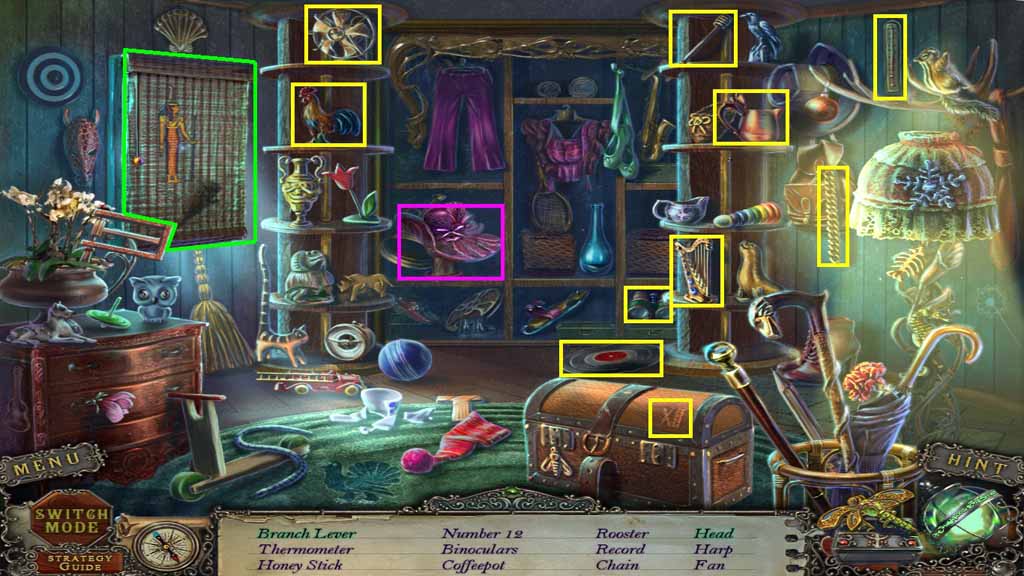
- Find the listed items.
- Click the window shade; collect the branch lever.
- Click the hat; collect the head.
- Collect the branch lever.
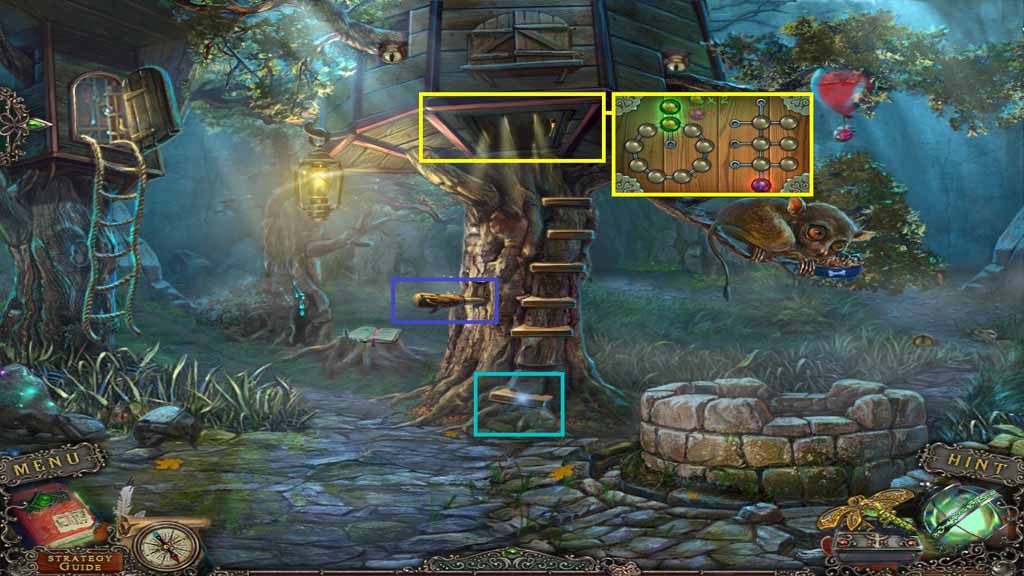
- Insert the branch lever into the hole and click it.
- Collect 2 / 3 boards.
- Zoom into the hatch and insert the red and green bubbles to trigger a puzzle.
- Solve the puzzle by moving the colored balls to their matching spaces.
- Move up.
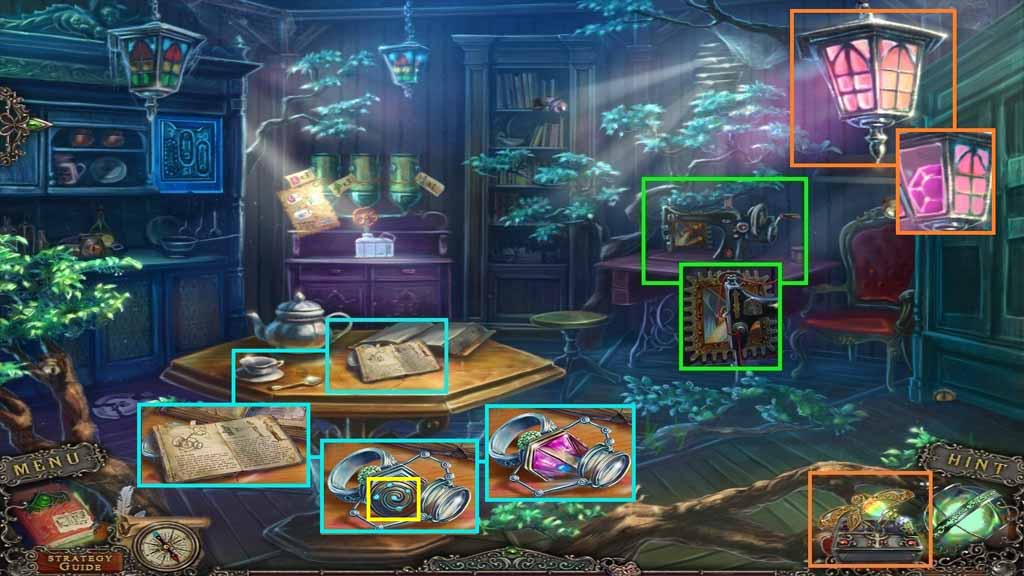
- Click the dragonfly.
- Collect the picture.
- Collect the notes and 1 / 4 panel buttons.
- Insert the temple stone into the hole; collect the de-petrification device.
- Click the lamp and collect 1 / 3 crystals.
- Move down 2 times.
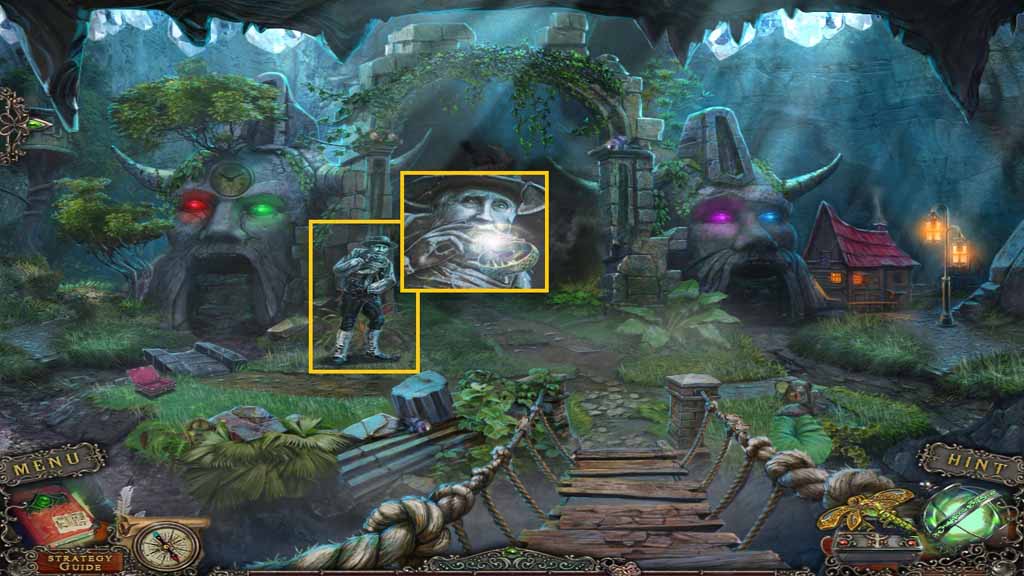
- Select the de-petrification device to use on the old man.
- Collect the crowbar.
- Move back once and go to the right.
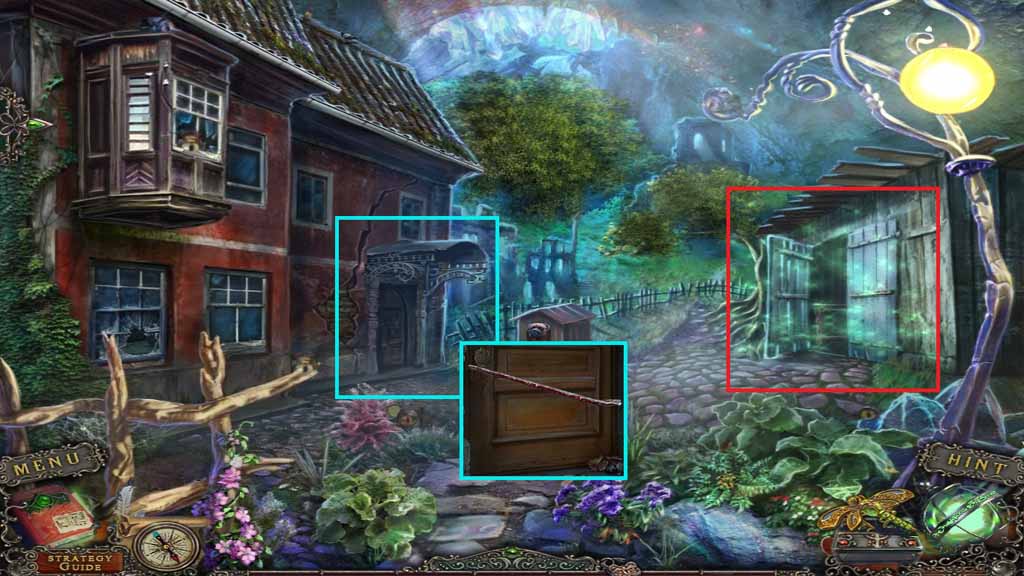
- Select the crowbar to pry open the door.
- Zoom into the shed to access a hidden objects area.
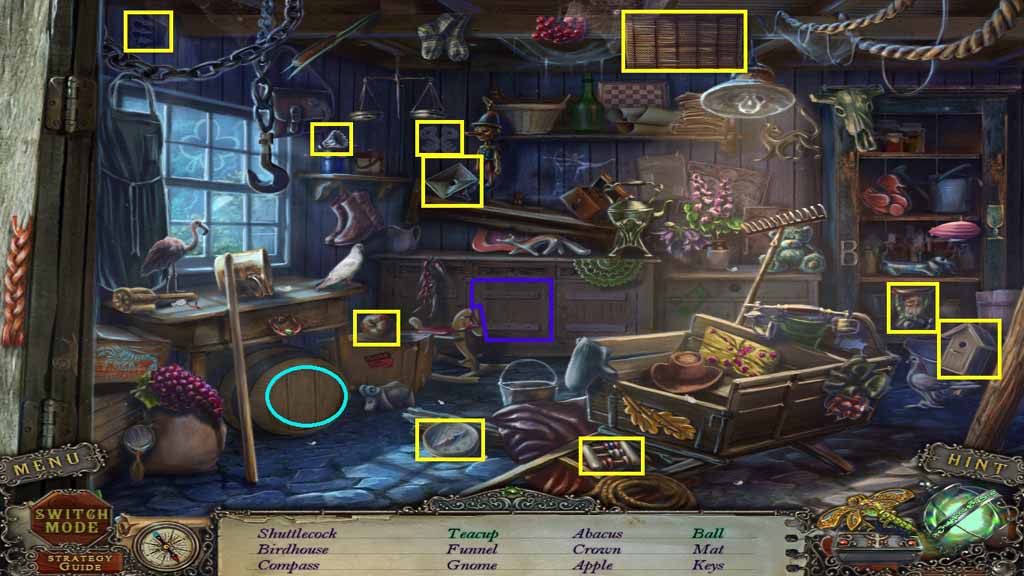
- Find the listed items.
- Click the barrel; collect the ball.
- Click the cupboard; collect the tea cup.
- Collect the funnel.
- Move upstairs.
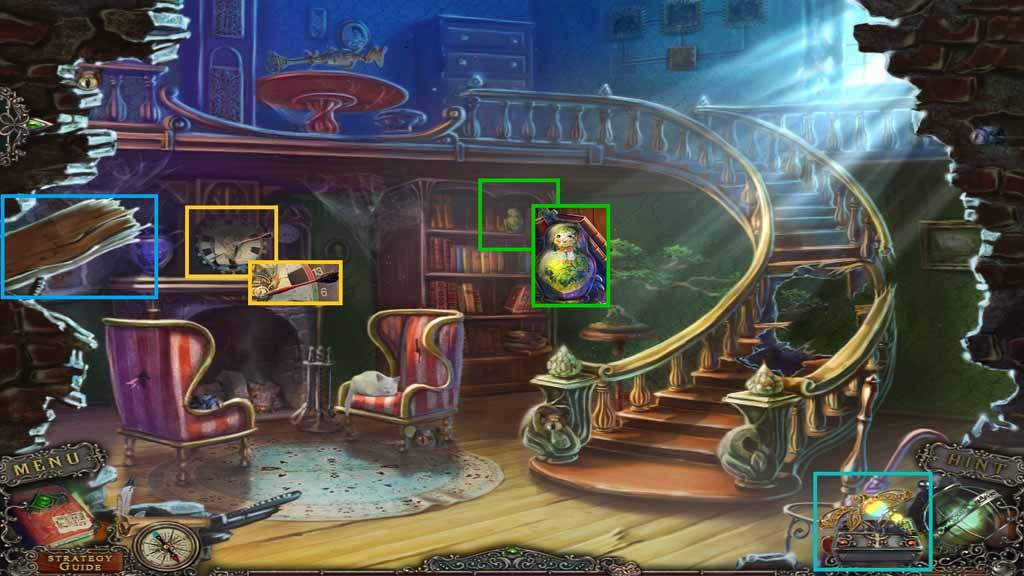
- Click the dragonfly.
- Collect the dart.
- Collect the green matryoshka and the 2nd picture behind it.
- Collect 3 / 3 boards.
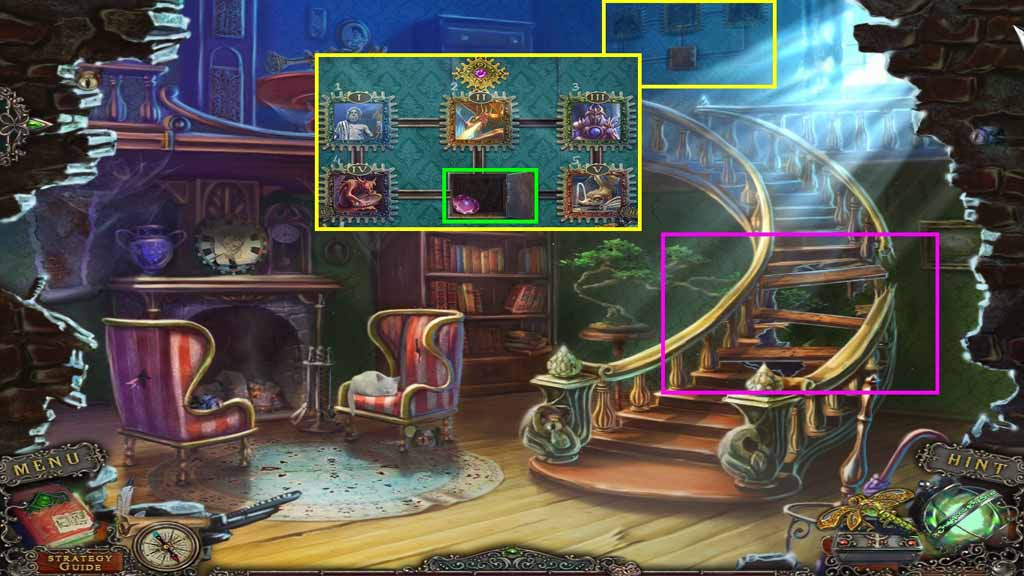
- Place the 3 boards onto the opening.
- Hand the 2 pictures on the wall to trigger a puzzle.
- Solve the puzzle by sliding the pictures into the correct places.
- Collect 2 / 3 crystals.
- Move back 2 times and move left.
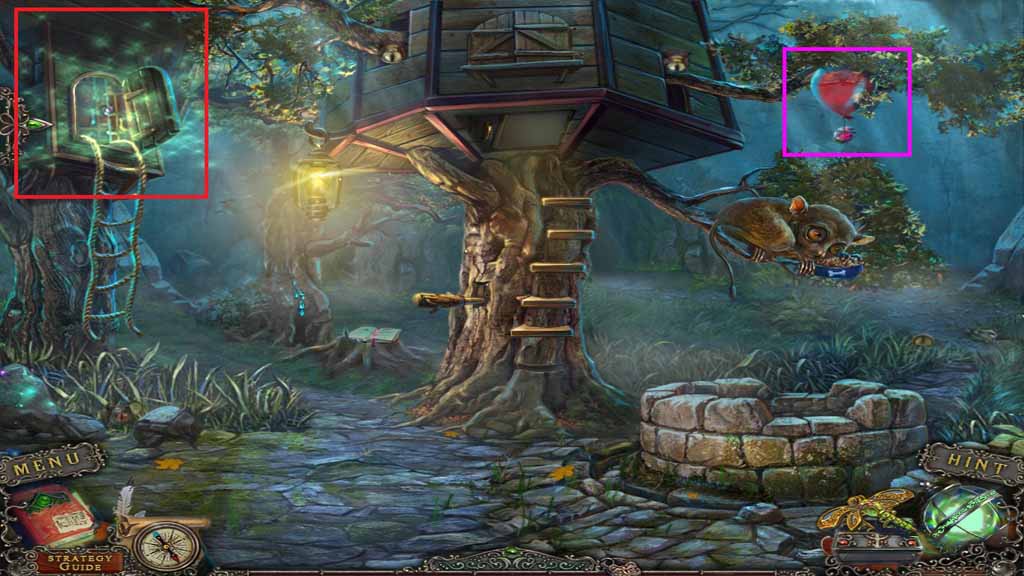
- Select the dart to pierce the balloon.
- Collect 3/ 3 crystals.
- Zoom into the tree house to trigger a hidden objects area.
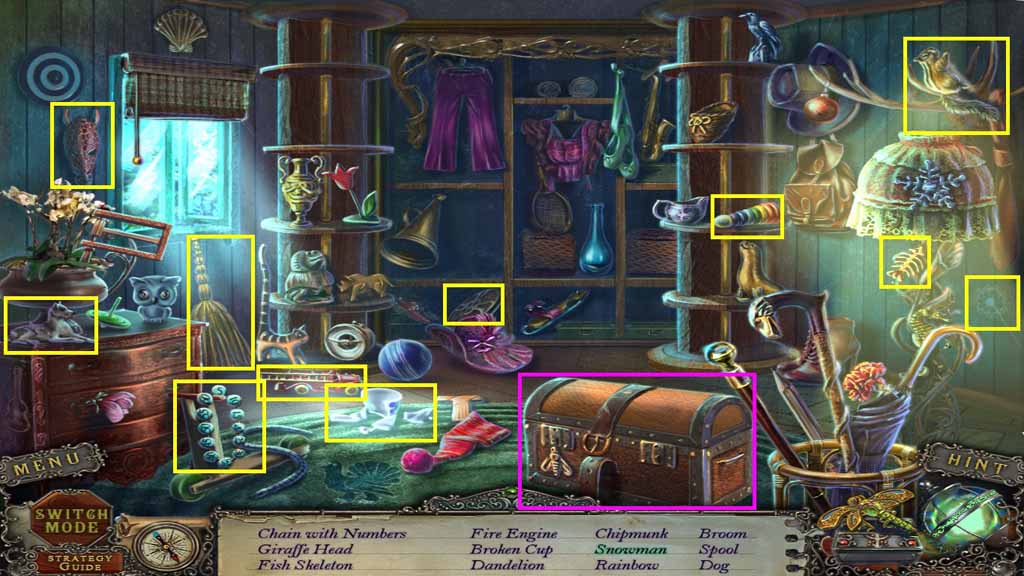
- Find the listed items.
- Click the trunk; collect the snowman.
- Collect the chain with numbers.
- Move up the tree house.
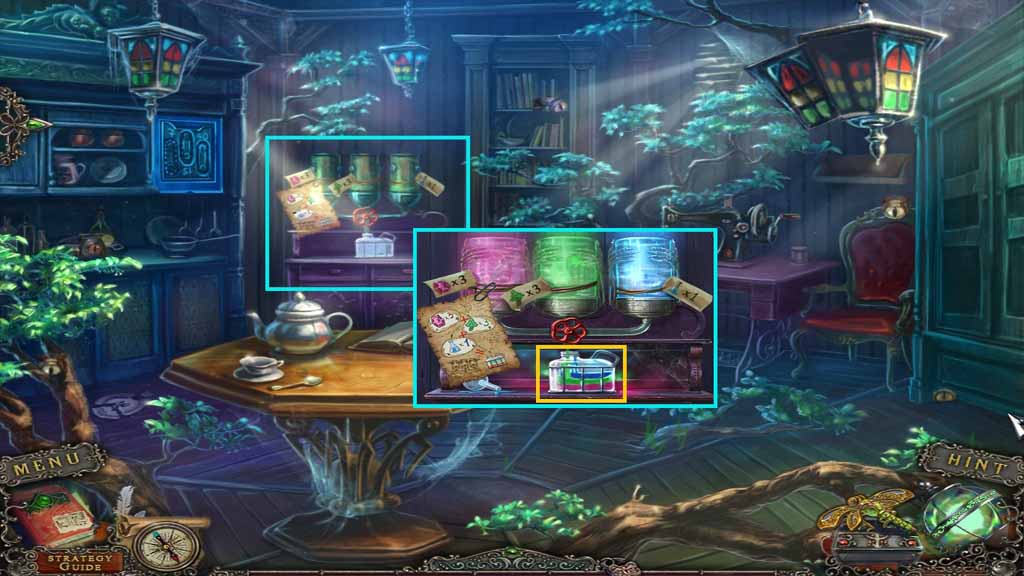
- Insert the 3 crystal, the 3 toadstools and the resin into the containers.
- Click the valve; collect the luminescent fuel.
- Move back 2 times, move to the right and go upstairs.
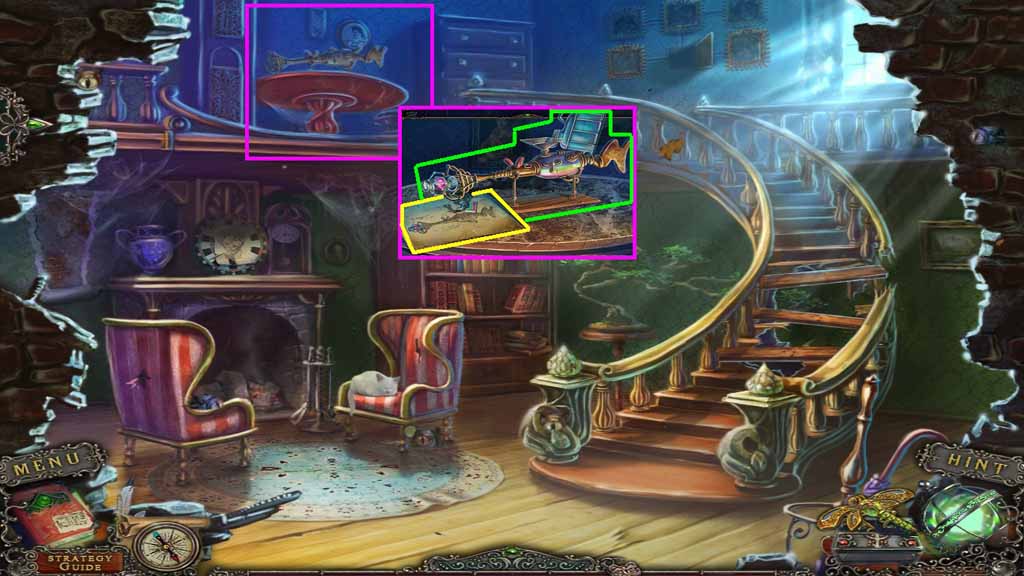
- Collect the note and select the de-petrification device, the funnel and the luminescent fuel to use on the emitter.
- Collect the light emitter.
- Move back 2 times.
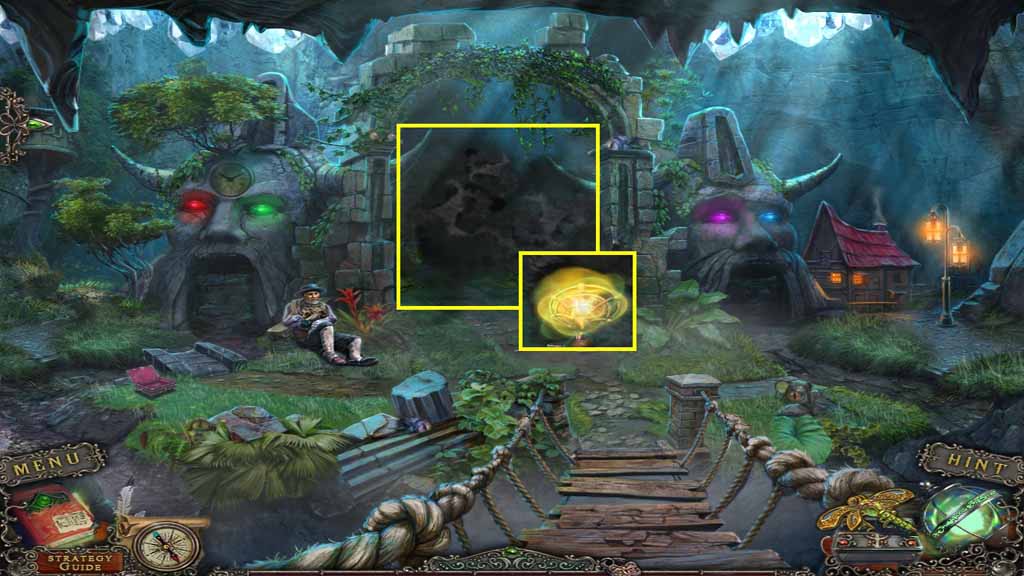
- Select the light emitter to use on the black smoke.
- Move ahead.
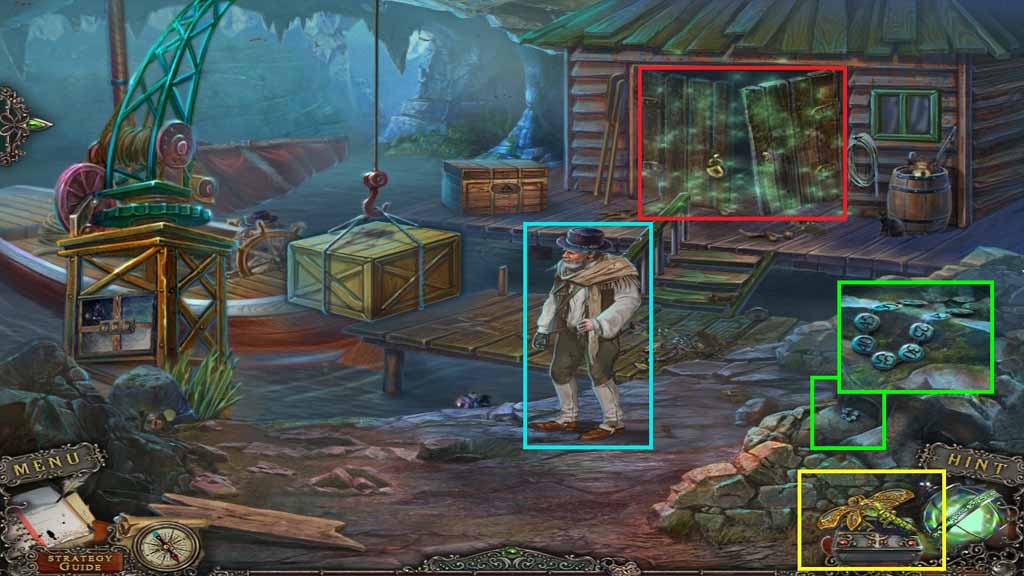
- Speak to the old man.
- Click the dragonfly.
- Collect the 2nd chain with numbers.
- Click the boathouse to access a hidden objects area.
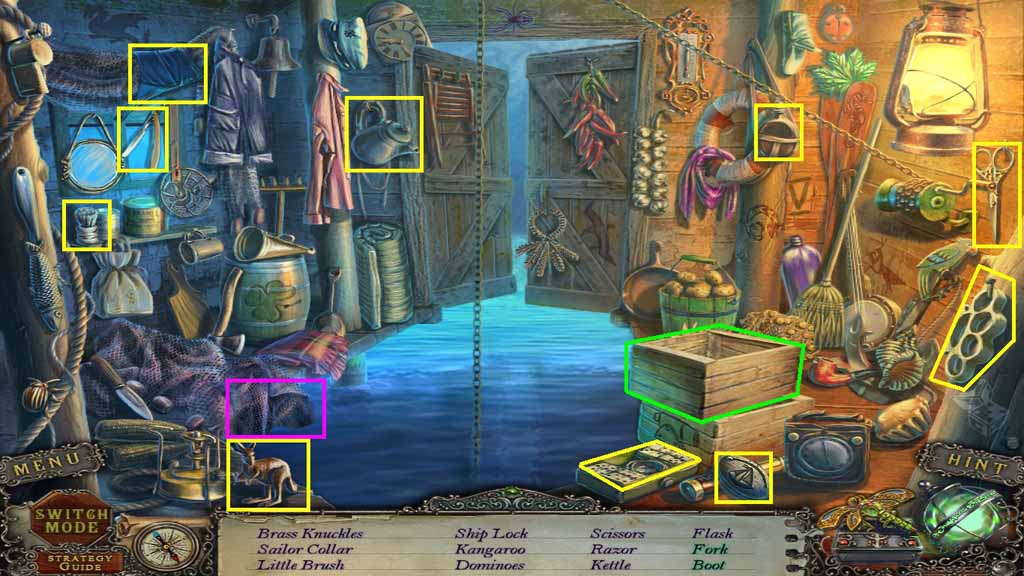
- Find the listed items.
- Click the crate to reveal and collect the fork.
- Click the edge of the net; collect the boot.
- Collect the ship lock.
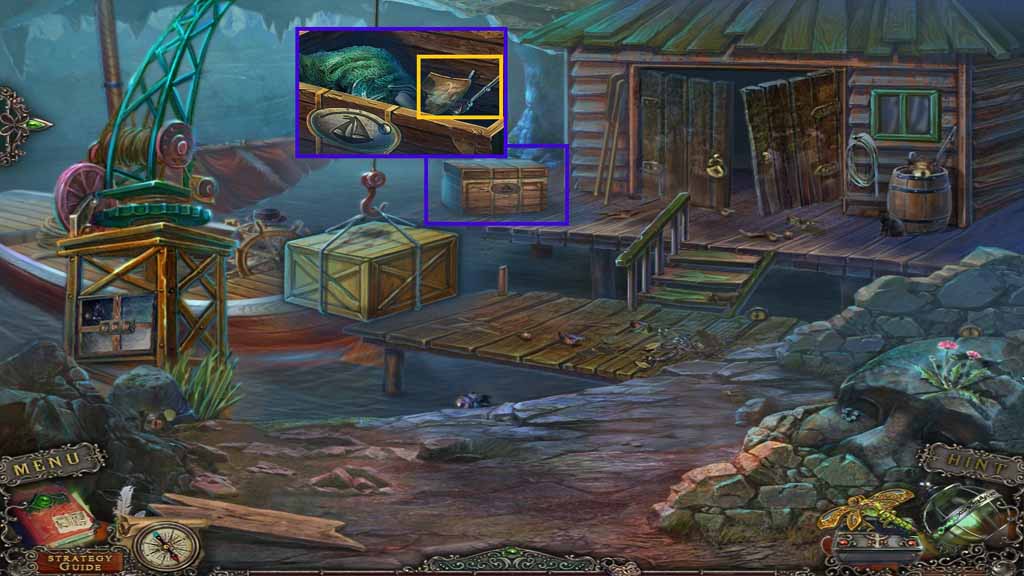
- Insert the ship lock into the crate and click it 2 times.
- Click the netting and collect the photo and clippers.
- Move back once, move to the left and move up.
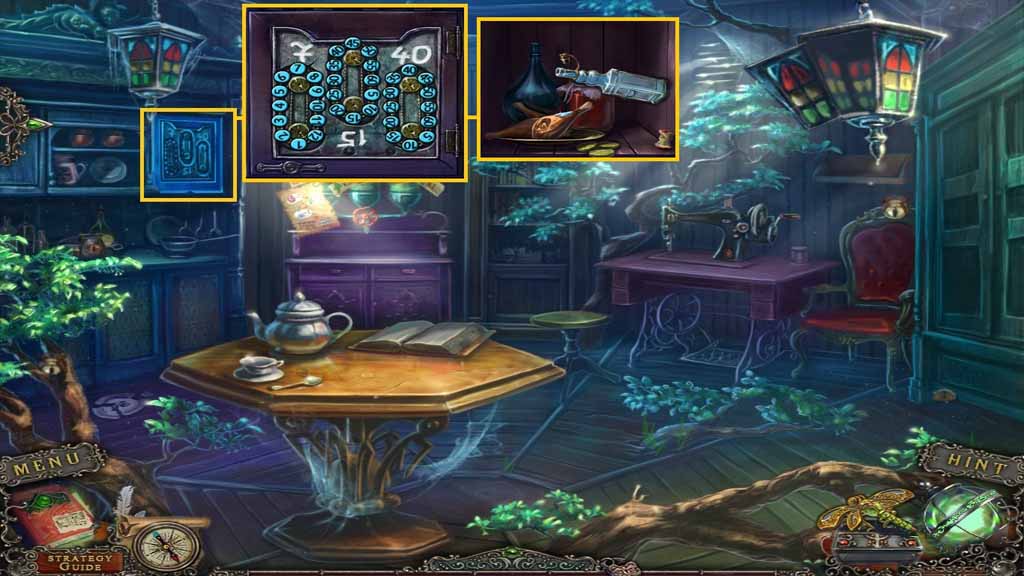
- Place the chain with numbers onto the cupboard to trigger a puzzle.
- Solve the puzzle by clicking the chains to match the numbers.
- Click the cabinet.
- Click the bottle and collect the soporific chicken leg.
- Move back 2 times and move to the right.
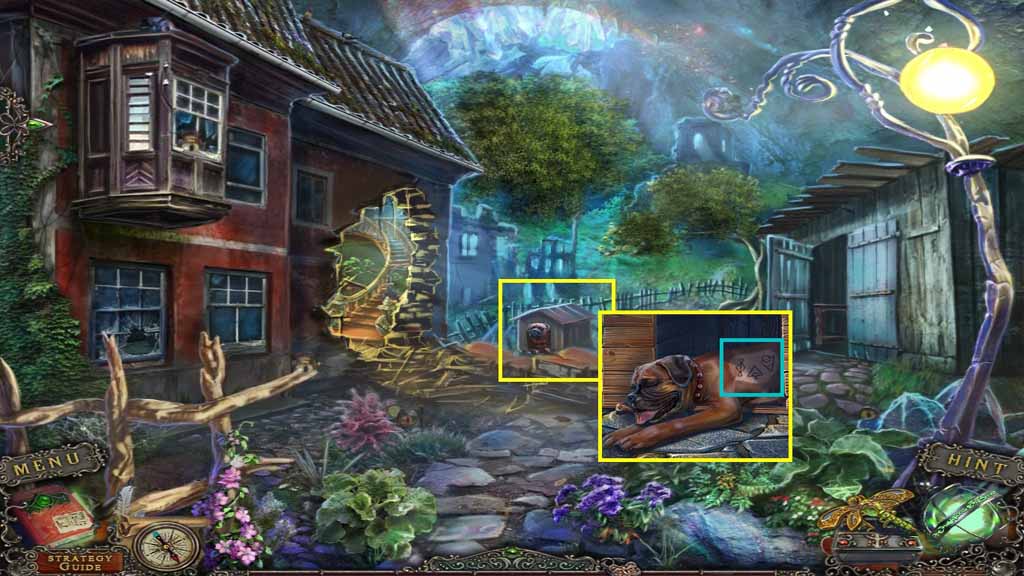
- Give the dog the soporific chicken leg.
- Select the clippers to shave his side and collect the code.
- Move back once and then move ahead.
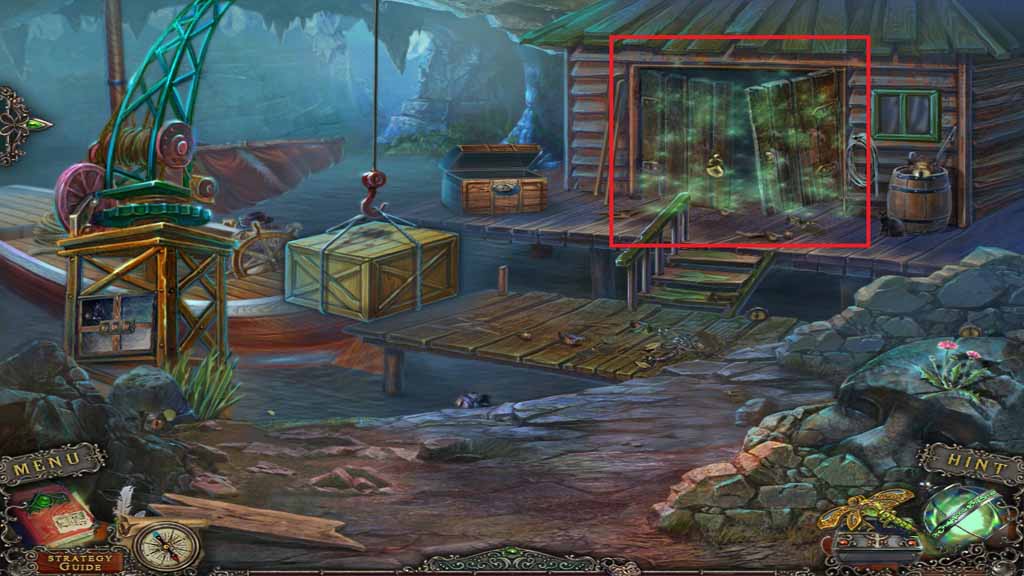
- Click the boathouse to access a hidden objects area.
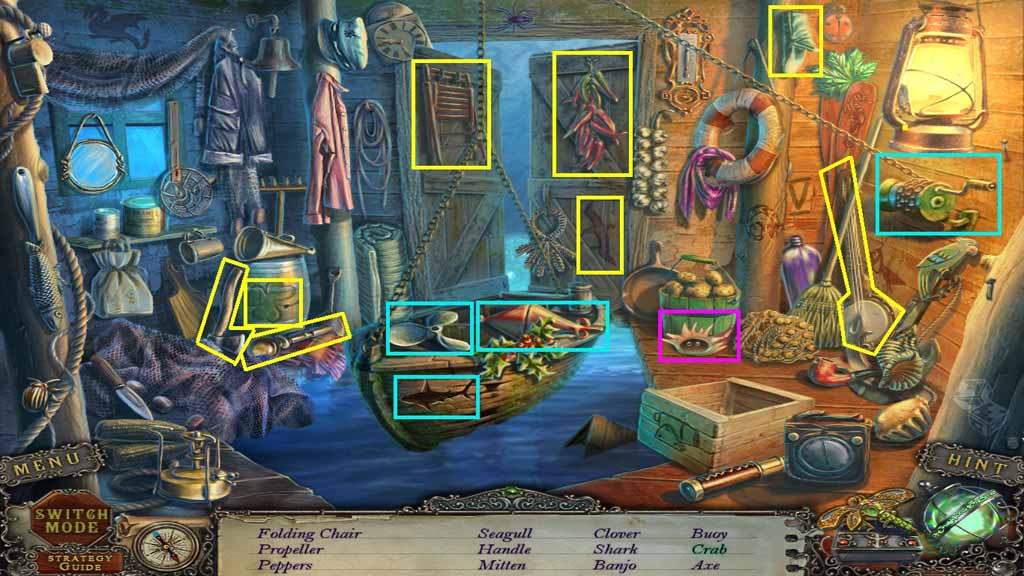
- Find the listed items.
- Click the winch; collect the propeller, the shark and the buoy.
- Click the shell; collect the crab.
- Collect the handle.
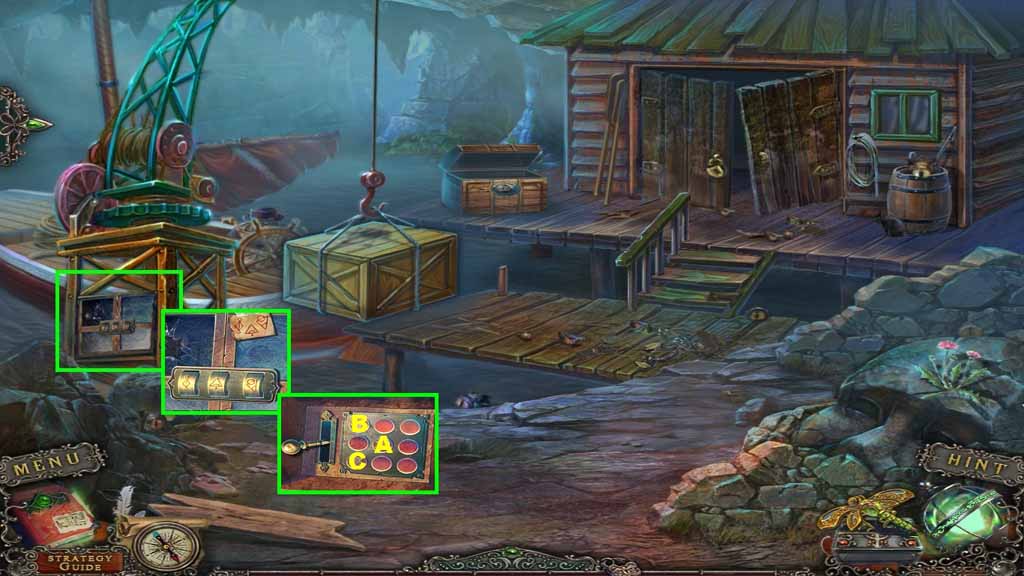
- Use the code to open the door.
- Attach the handle and click it.
- Click the buttons in ABC order.
- Move into the ship.
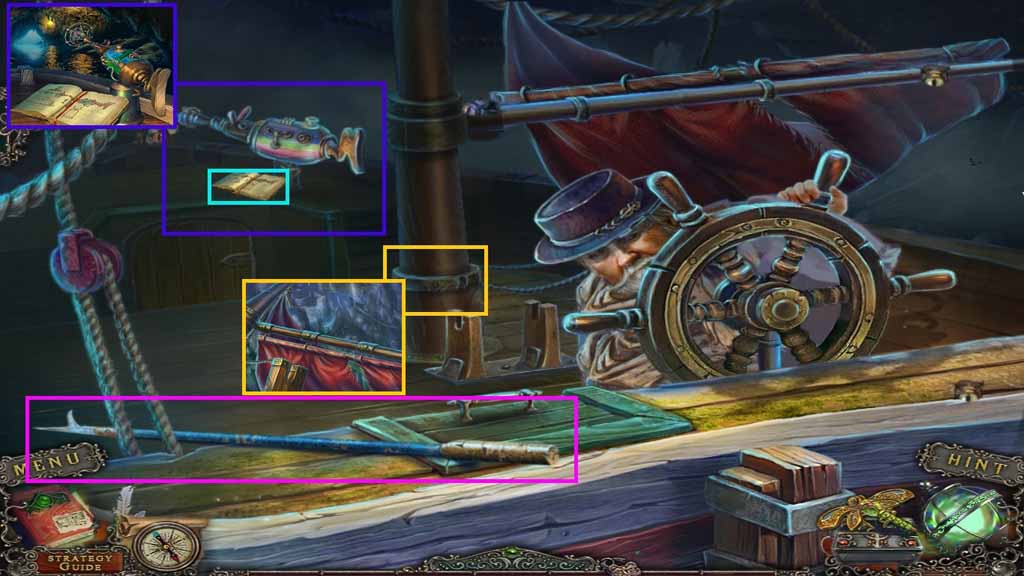
- Speak to Rudy.
- Click the book and insert the light emitter into the holder; click it 3 times.
- Collect the hook.
- Collect the torn sail.
- Move back 2 times, move to the left and go up.
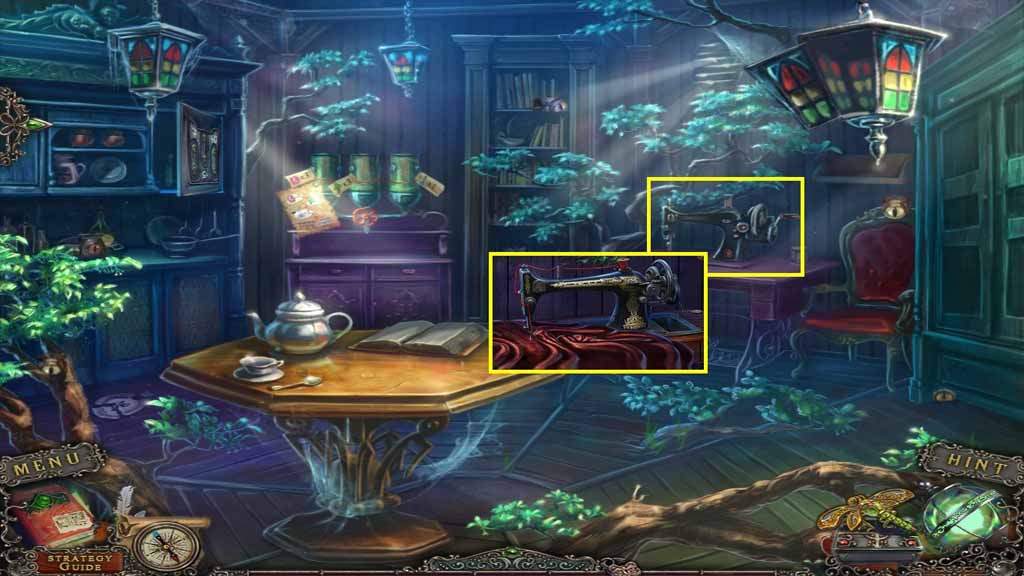
- Lay the torn sail onto the sewing machine.
- Click the fabric 2 times; collect the sail.
- Move back 2 times and move ahead.
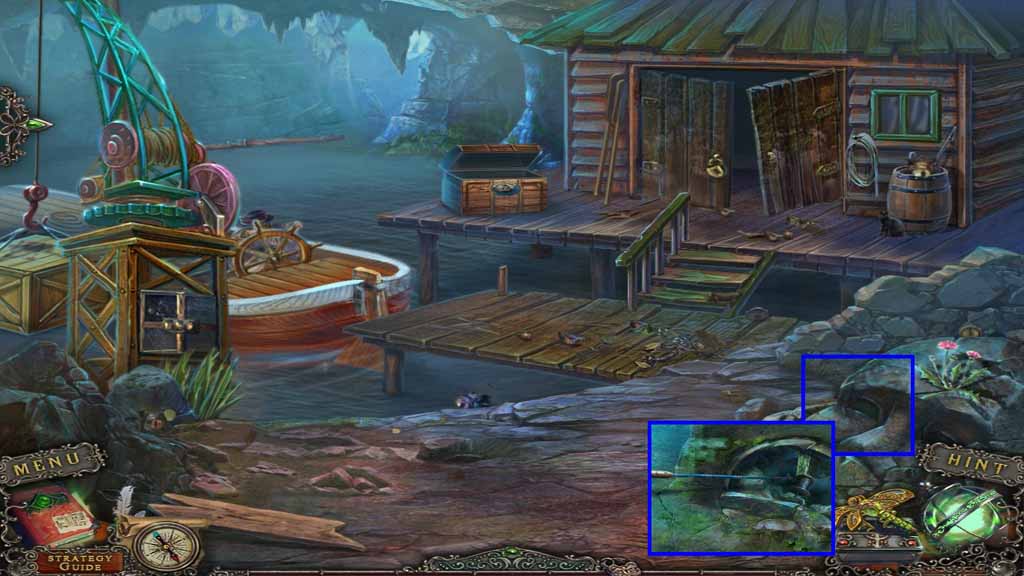
- Select the hook to collect the spool.
- Move into the ship.
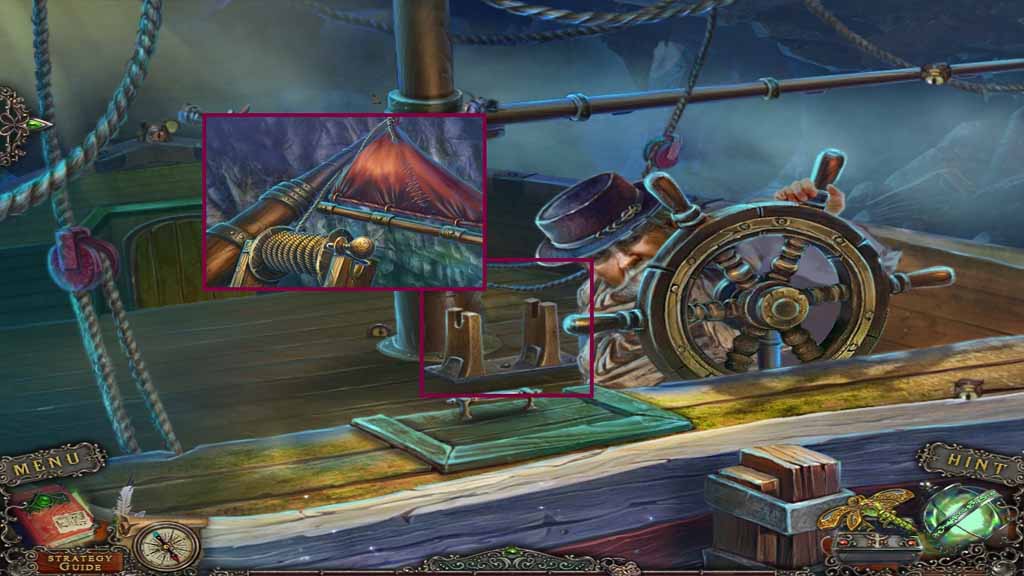
- Attach the spool and the sail onto the mast.
- Click the crank.
- Click the wrecked boat to trigger a hidden objects area.
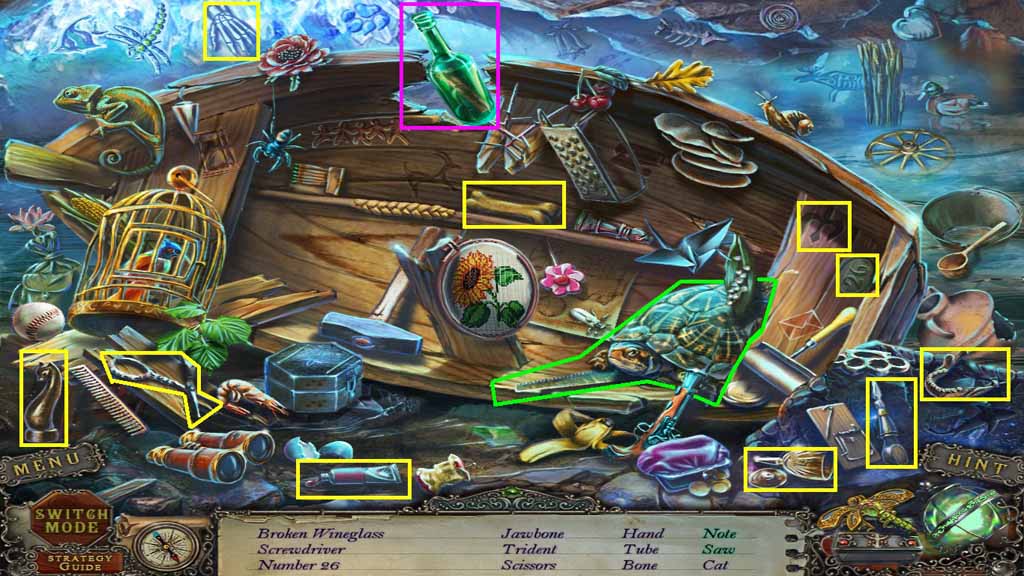
- Find the listed items.
- Click the bottle; collect the note.
- Click the tortoise; collect the saw.
Comments will load when you reach this part of the walkthrough.