
Chapter Eleven: The Greenhouse
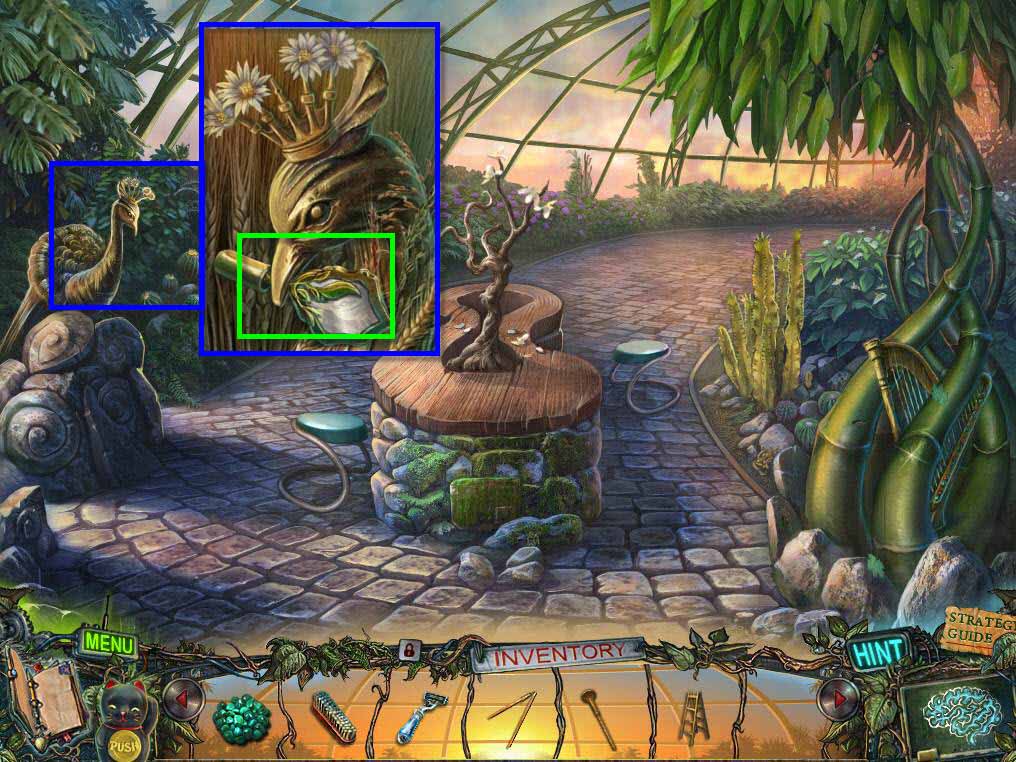
- Click on the peacock on the left.
- Take the MIRROR.
-
Go forward one screen.
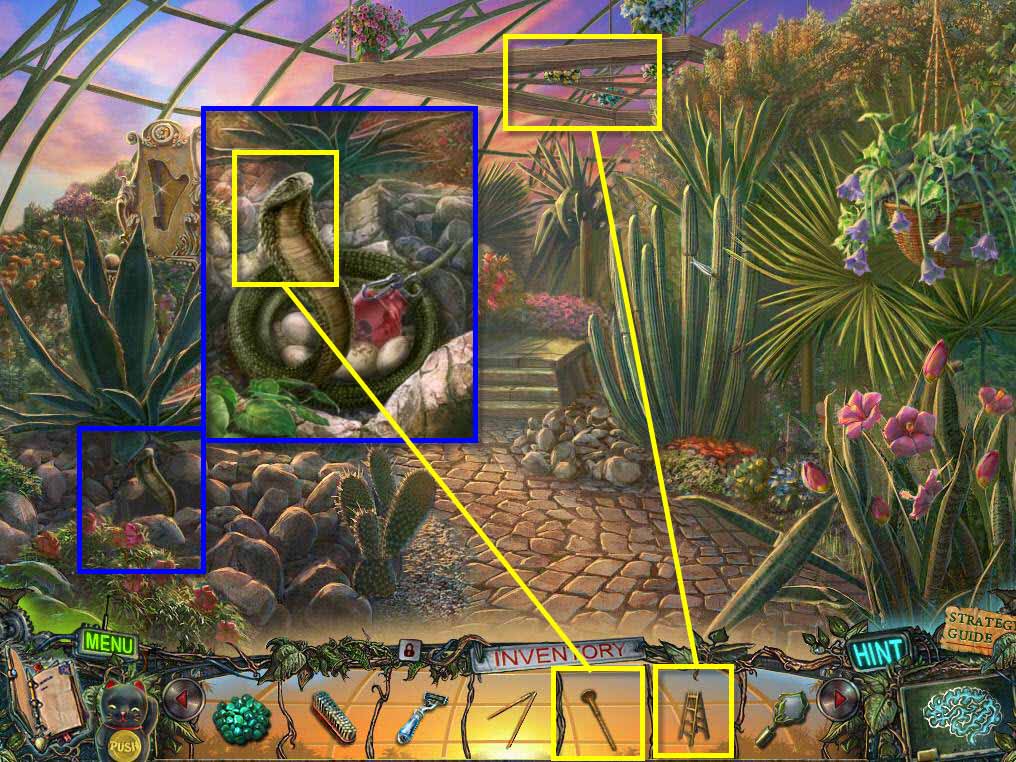
- Click on the snake to zoom in.
- Use the FLUTE on the snake.
- Take the STONE COBRA and the PESTICIDES.
- Use the STEP LADDER under the flower pots.
-
Click on the flowers to start a mini-game.
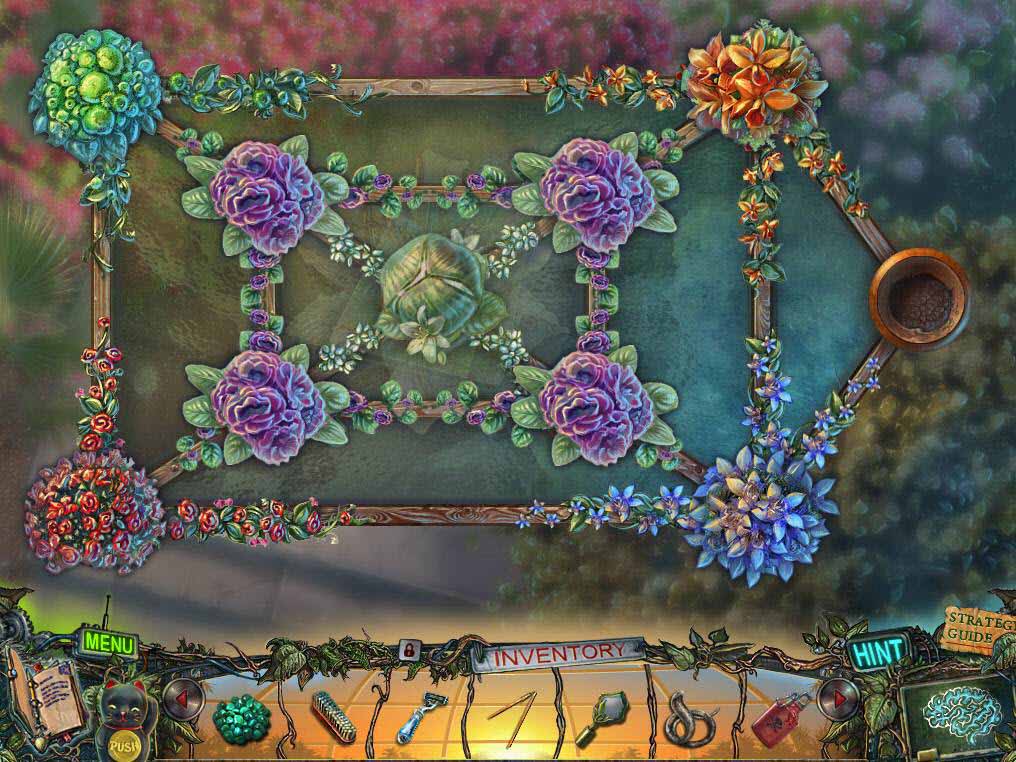
- The goal of the puzzle is to get the pots in the correct place by moving them around.
- Take a look at the screenshot for the solution.
- Get the green cabbage in the middle and go from there.
- Take the LADYBUG TILE when you are done.
-
Go back one screen.
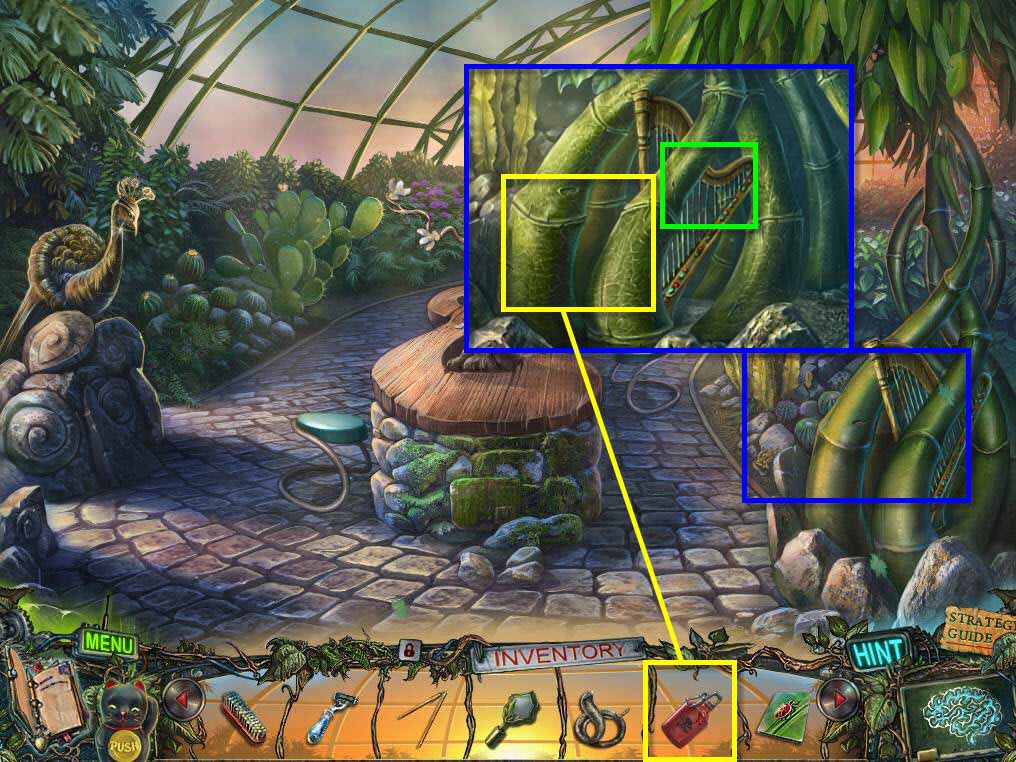
- Click to zoom in on the vines and the harp on the right.
- Use the PESTICIDES on the vines.
- Take the HARP.
-
Go forward one screen.
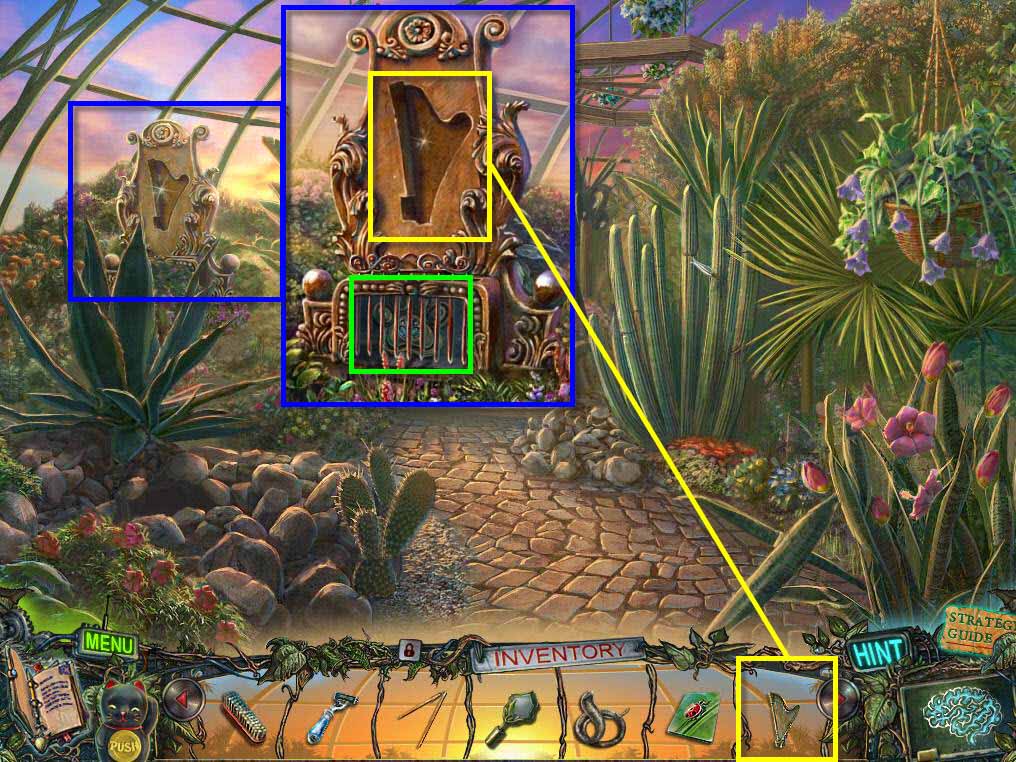
- Click on the area with the harp indentation on it.
- Use the HARP on it.
- Take the PAWPRINT.
-
Go back two screens and into the dovehouse.
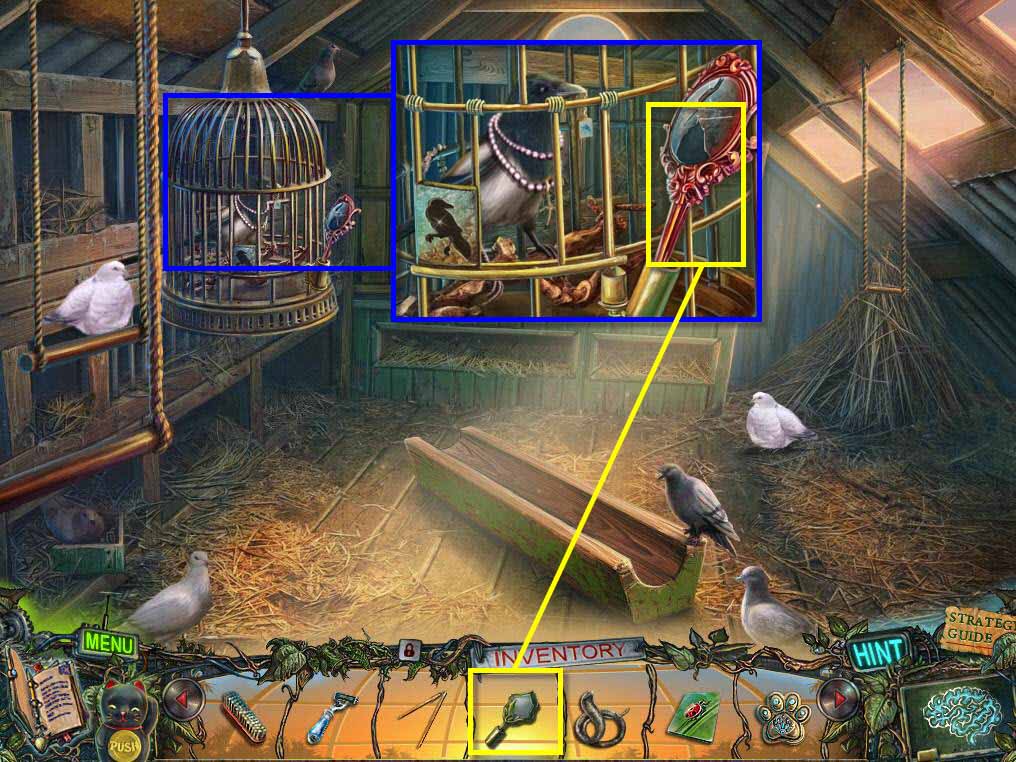
- Click on the cage to zoom in.
- Click to remove the broken mirror.
- Replace it with the MIRROR from your inventory.
- Take the SHARK TILE from the bird.
-
Go back to the greenhouse.
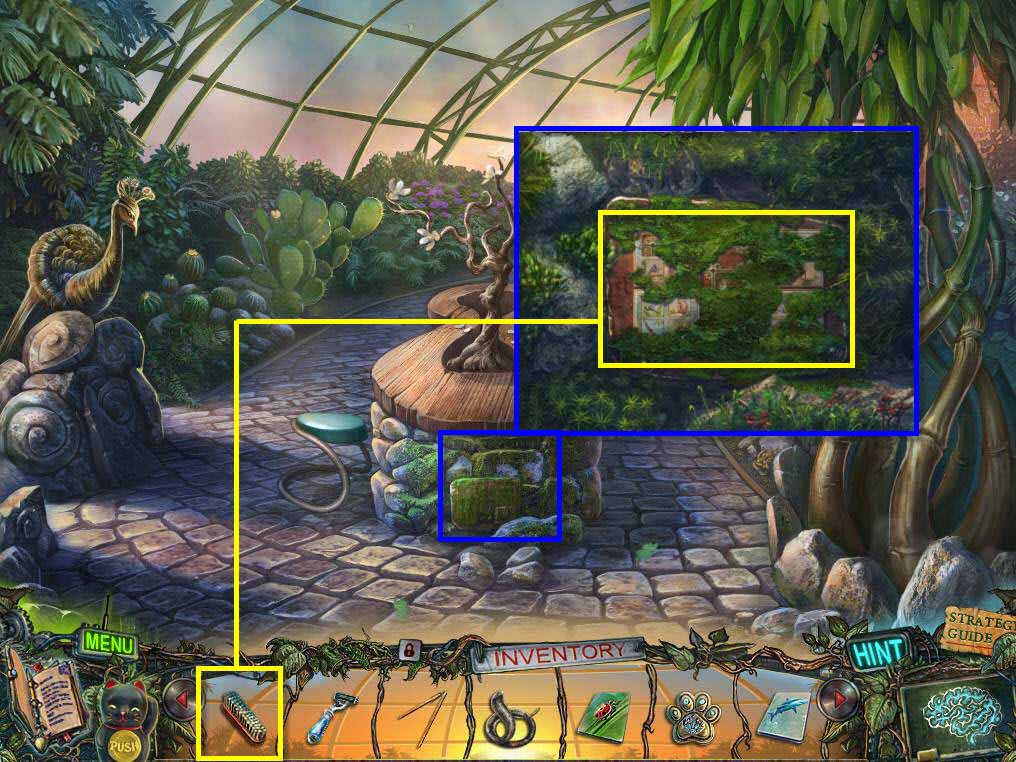
- Click to zoom in on the moss covered stone.
-
Use the BRUSH to scrape away the moss.
- Click to zoom in on the tiles.
- Use the LADYBUG TILE and the SHARK TILE on the area that's missing tiles.
-
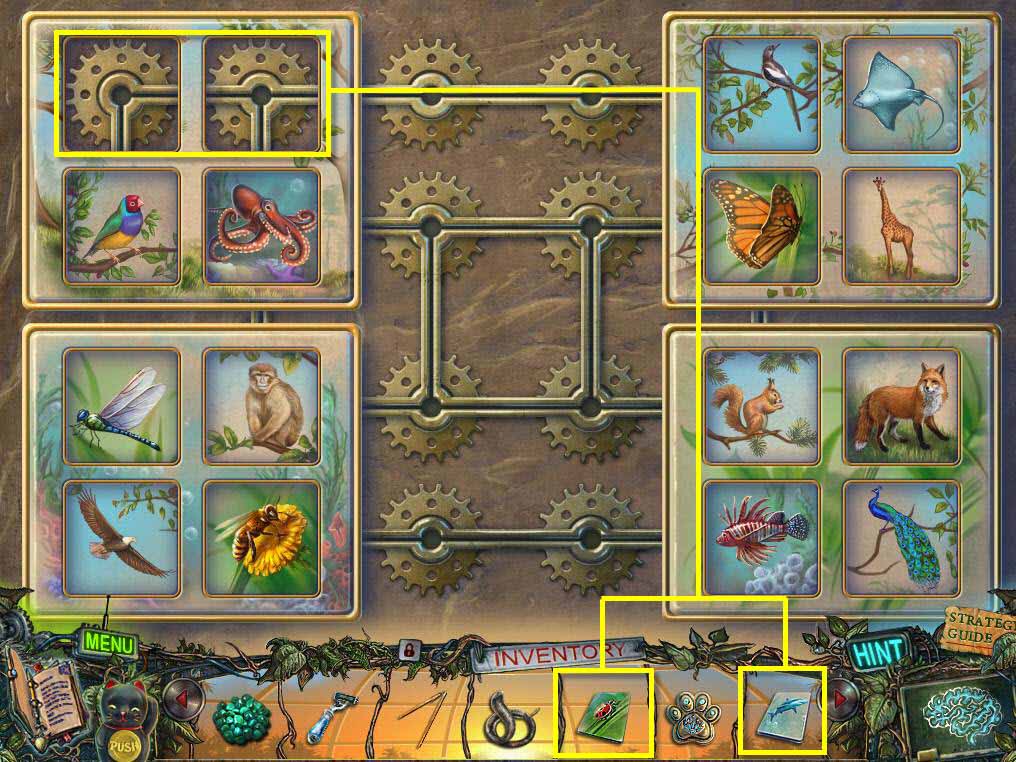
This will start a mini-game.
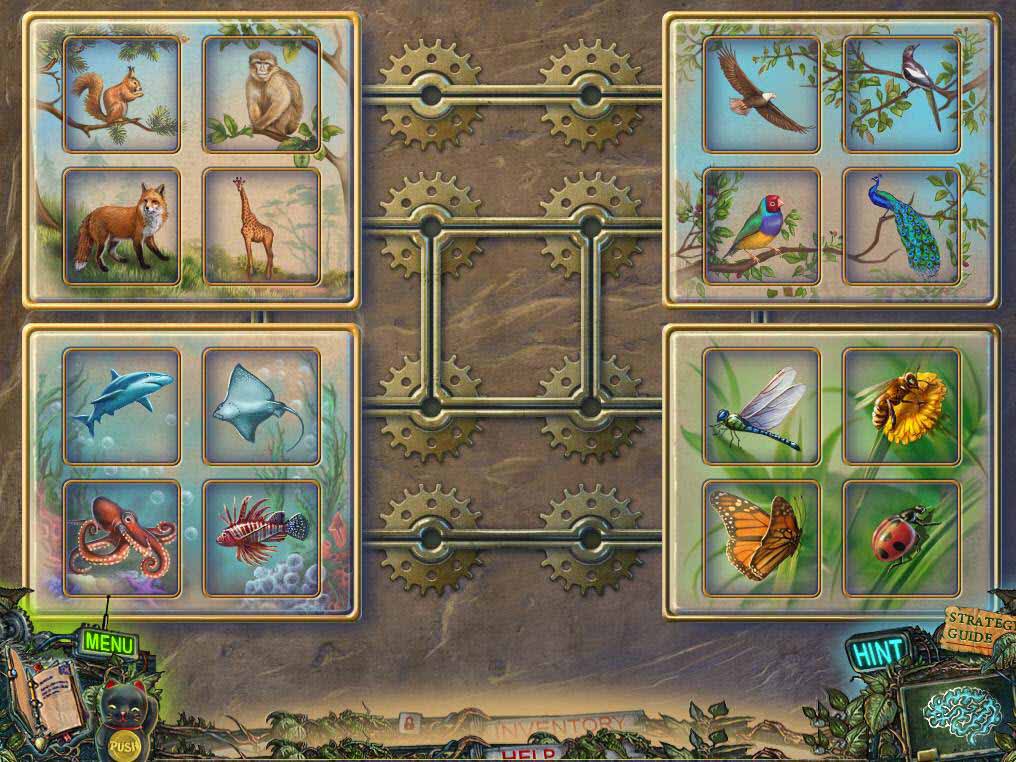
- The goal of the puzzle is to get each of the creatures in their correct environment by sliding the tiles.
- The puzzle itself is fairly easy if a little tedious.
- See the screenshot above for the final solution.
- Take the MAGPIE CHARM when you are done.
-
Go back to the dovehouse.
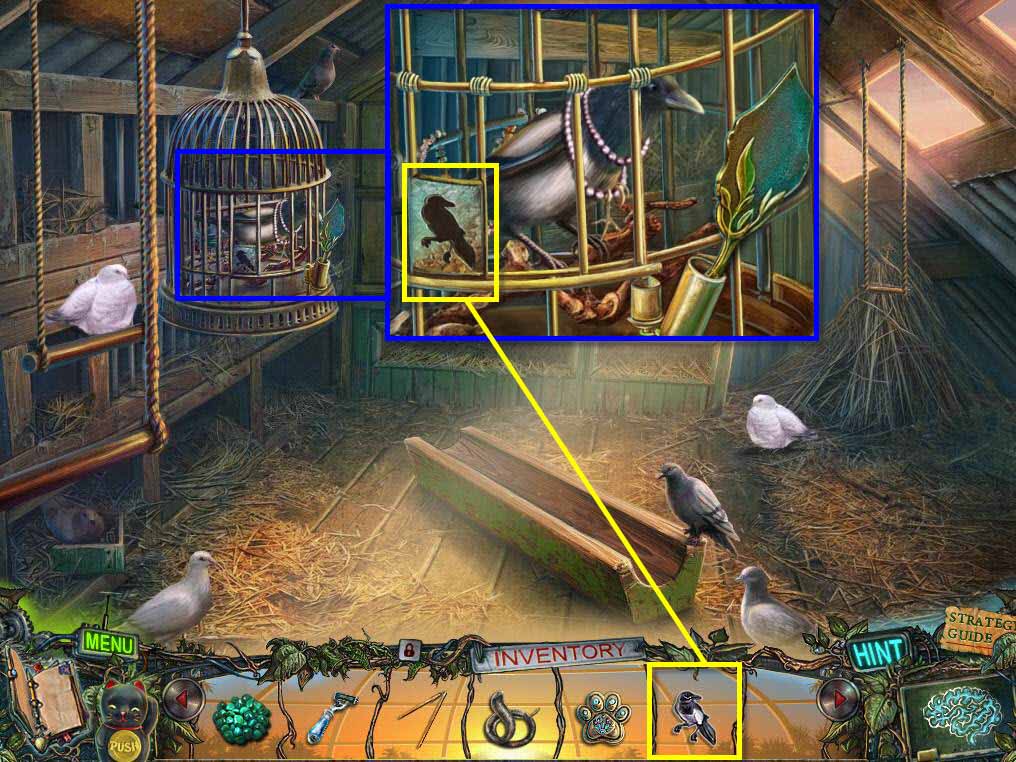
- Click on the birdcage to zoom in.
- Use the MAGPIE CHARM on the lock.
- Take the AMBER NECKLACE and the DRINKING BOWL.
-
Go back to the greenhouse to the scene where the cobra was.
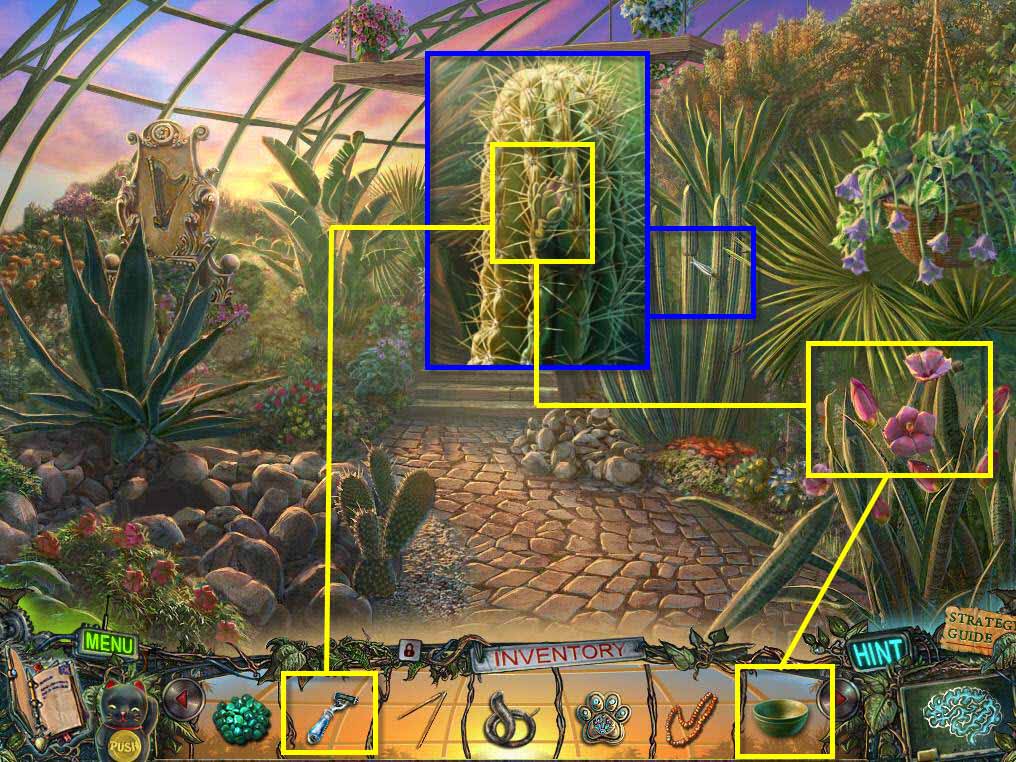
- Use the DRINKING BOWL on the flowers on the right to collect the DEW.
- Click on the cactus to zoom in.
- Use the DEW on the cactus flower.
- Once the flower blooms, use the RAZOR on it to get rid of the spikes.
- Take the CACTUS FLOWER.
-
Go back one screen.
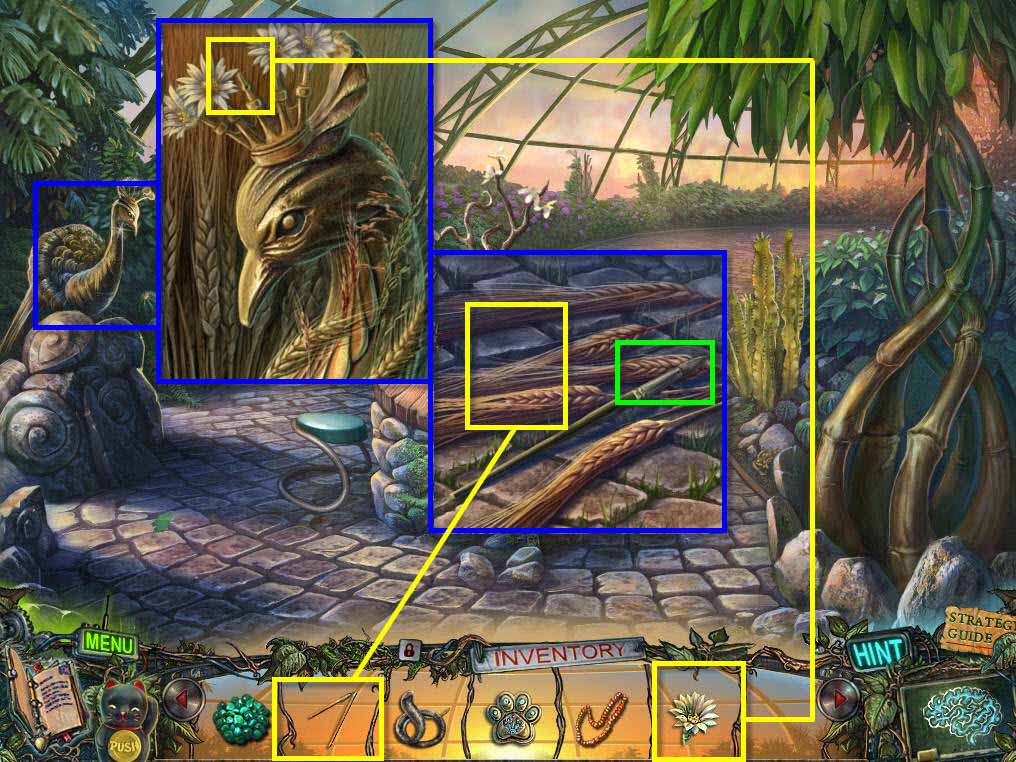
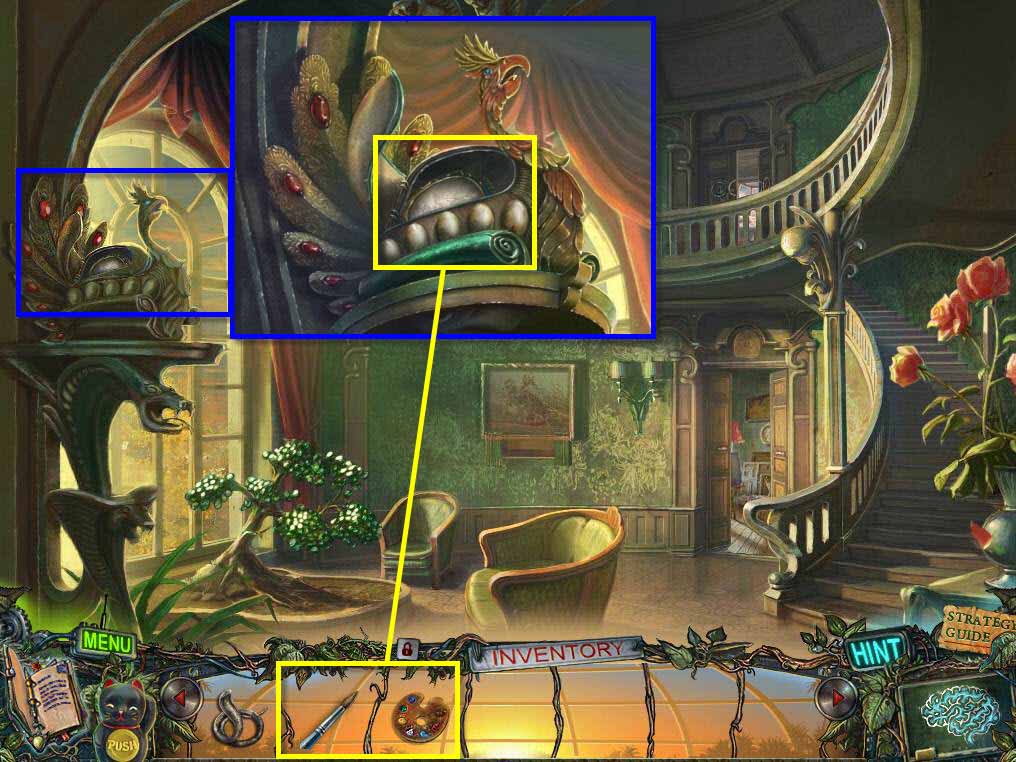
- Click on the peacock to zoom in.
- Use the CACTUS FLOWER on its crown.
- Click to zoom in on the wheat it dropped.
- Take the PAINTBRUSH.
- Use the FLAIL on the wheat.
- Take the WHEAT GRAINS.
-
Go back one screen.
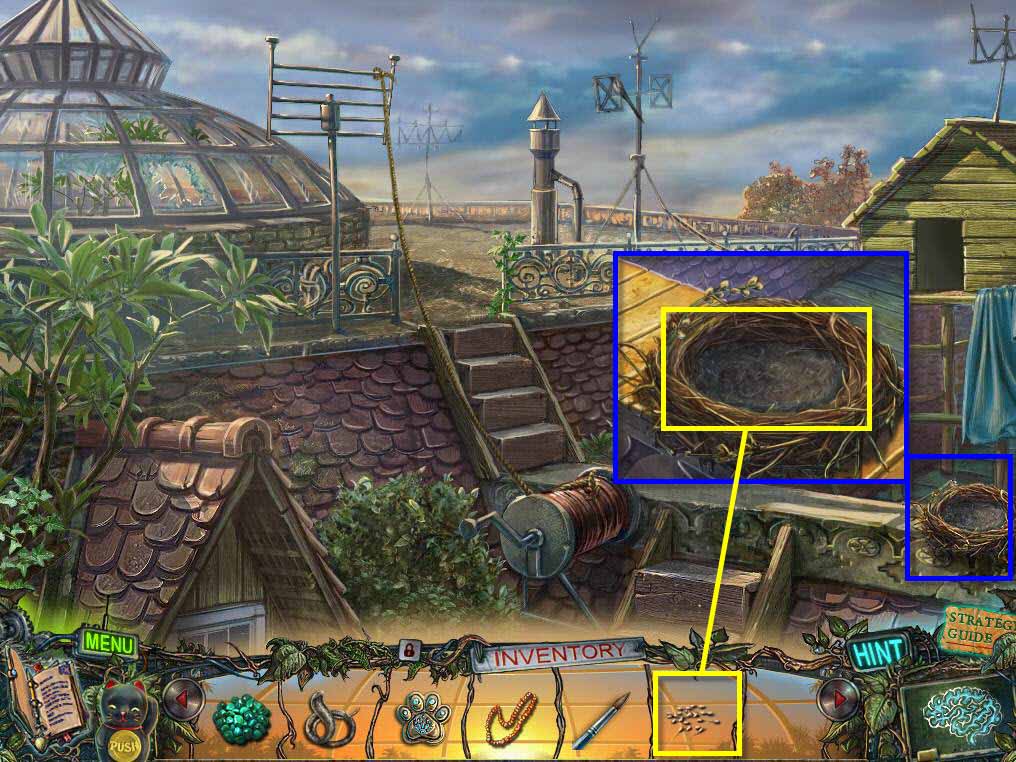
- Click on the nest to zoom in.
- Use the WHEAT GRAINS on the nest.
- When the bird lands in the nest, take the BIRD'S FOOT from it.
-
Go back to the dovehouse.
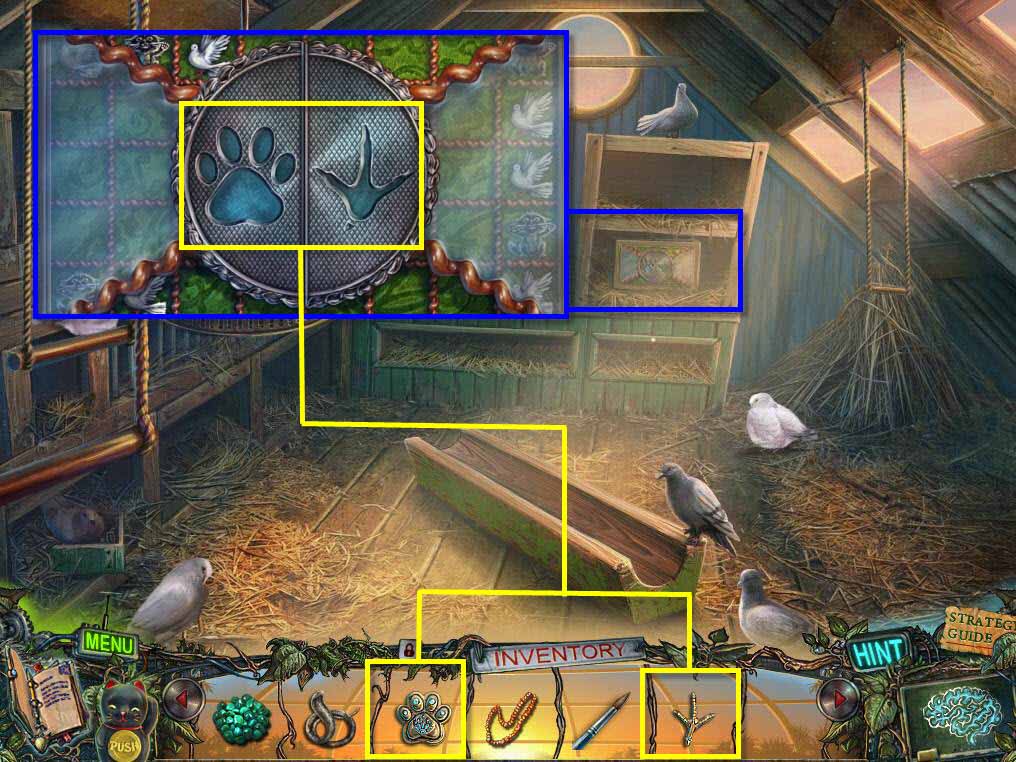
- Click on the back shelf to zoom in.
- Use the BIRD'S FOOT and the PAWPRINT on the indentations.
-
This will start a mini-game.
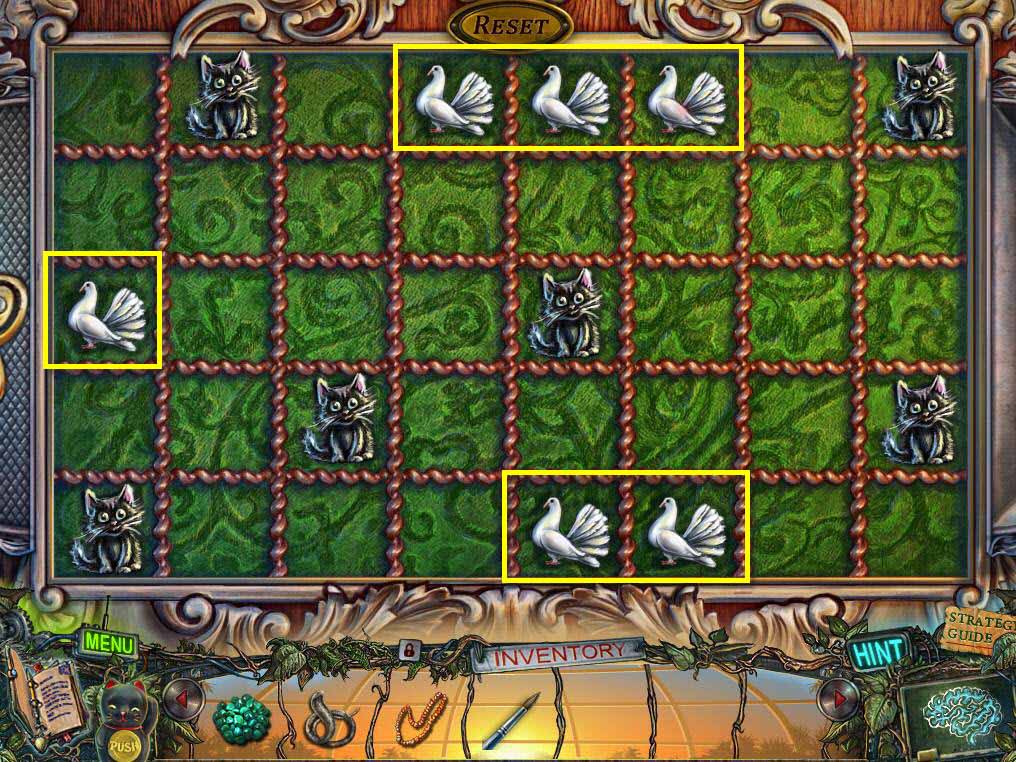
- The goal of the game is to get the doves to the safe zones on the board.
- Safe zones are far away from cats. Doves can't be next to or diagonal to a cat.
- See the screenshot above for the safe zones and the final solution to the puzzle.
- Take the LAZURITE STONES when you are done.
-
Go back three screens and then forward through the door on the first floor.
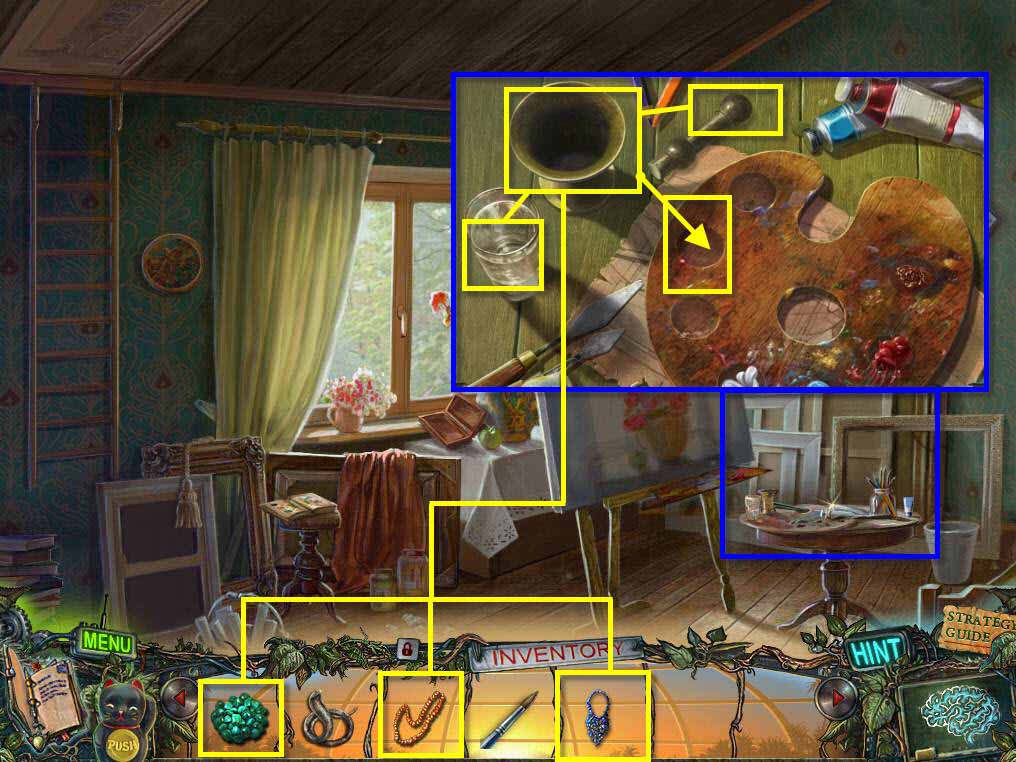
- Click on the table to zoom in.
- Use the LAZURITE STONES on the bowl.
- Click on the pestle next to the bowl and drag it to the stones to grind them up.
- Next use the glass of water on the powdered stones.
- Click and drag the paint to the palette.
- Repeat these steps with the AMBER NECKLACE and the MALACHITE STONES.
- When you are done, take the PALETTE.
-
Go back one screen.
- Click to zoom in on the peacock.
- Click to zoom in on the egg.
- Use the PALETTE and the BRUSH on the egg.
-
This will start a mini-game.
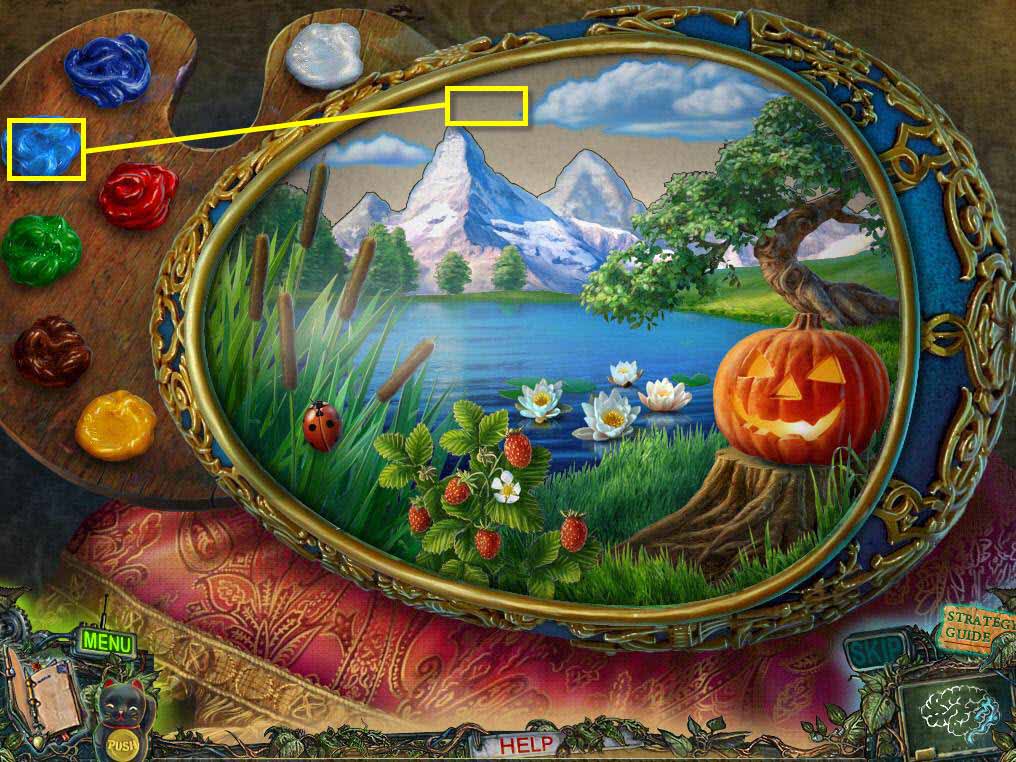
- The goal of the game is to paint the egg the right colors.
- Click on the brush to pick it up and then click on a color.
- Select areas of the painting to paint it.
- You can't paint something the wrong color, so just keep trying until you get the right color on a certain area.
- See the screenshot for the solution.
- Take the INKPOT and the TRIANGLE STAMP when you are done.
-
Go back one screen.
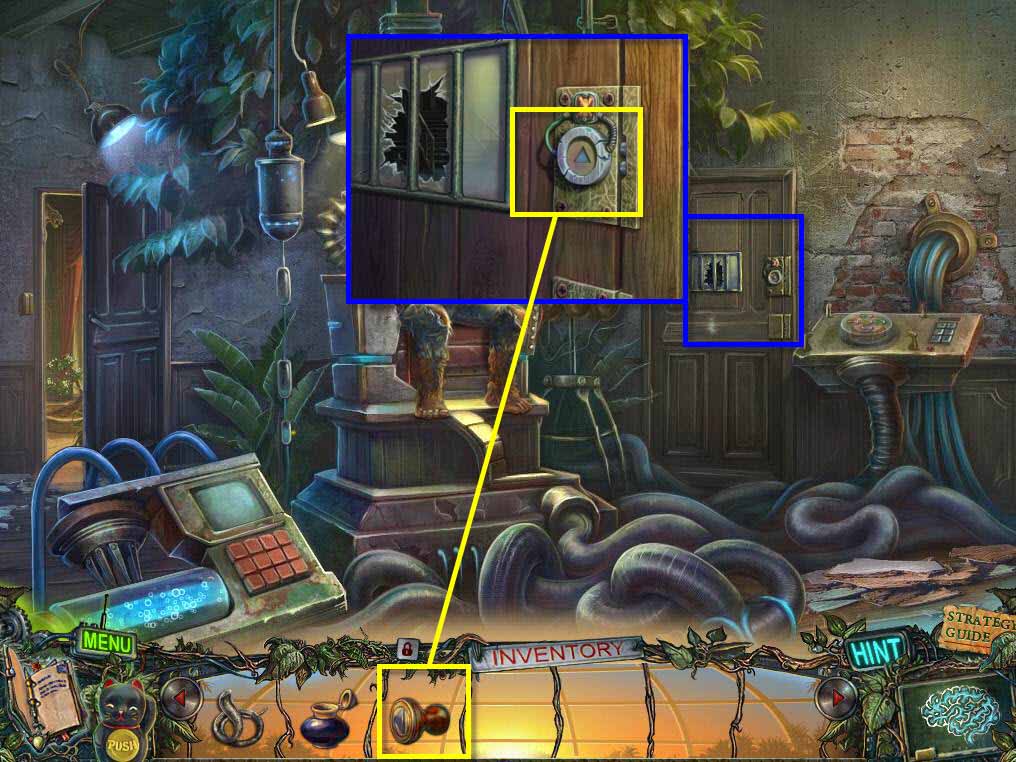
- Click on the door on the right to zoom in.
- Use the TRIANGLE STAMP on the lock.
- Go through the door.
-
Go through the door on the right first.
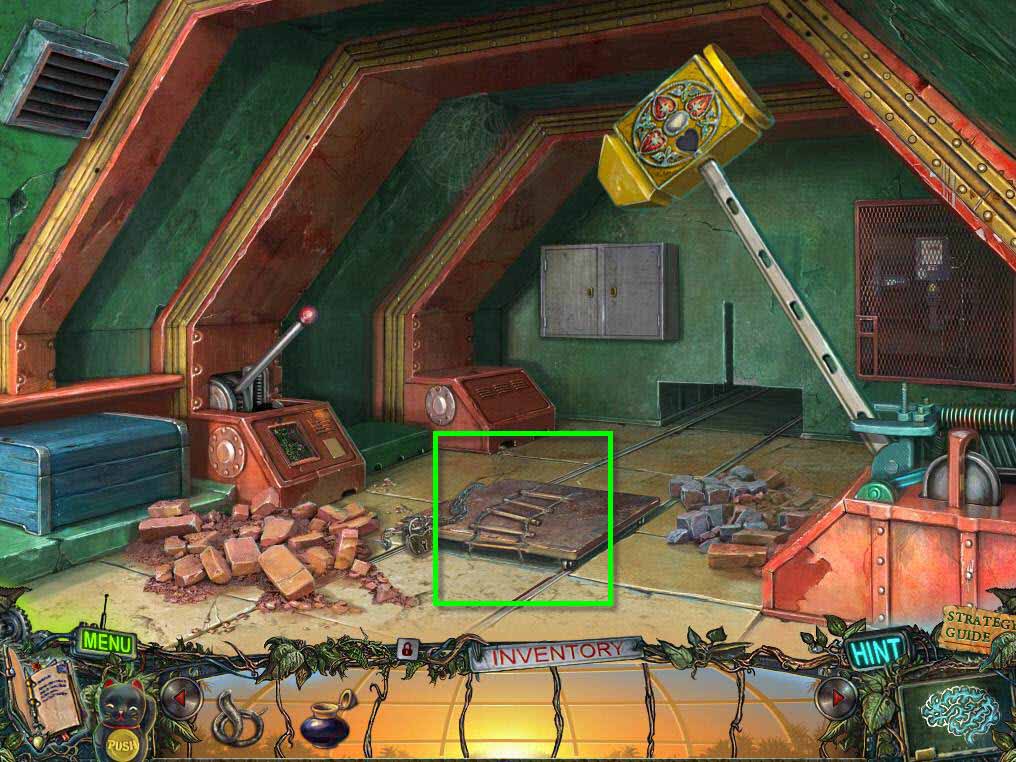
- Click on the hatch to zoom in.
- Take the ROPE LADDER.
-
Go back one screen.
- Click on the door on the left.
- Go through the door to the next room.
Comments will load when you reach this part of the walkthrough.