

Chapter 5: The Duchess Mansion
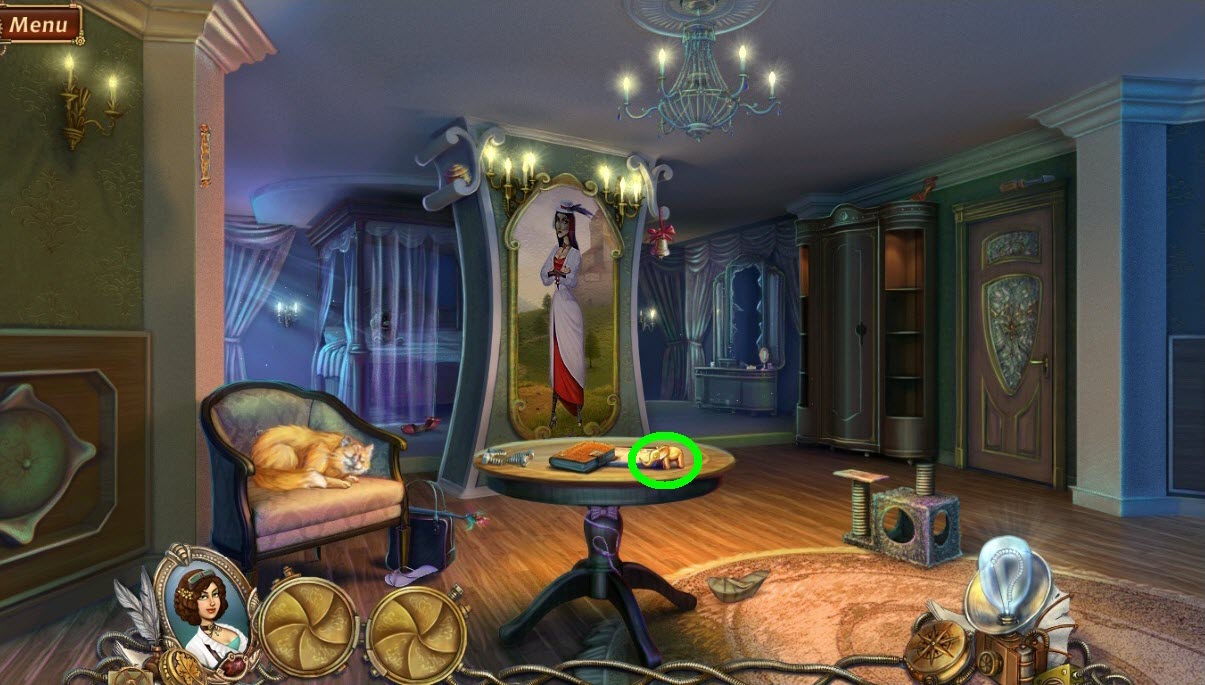
- Pick up the elephant (green circle).
- Go into the hallway.
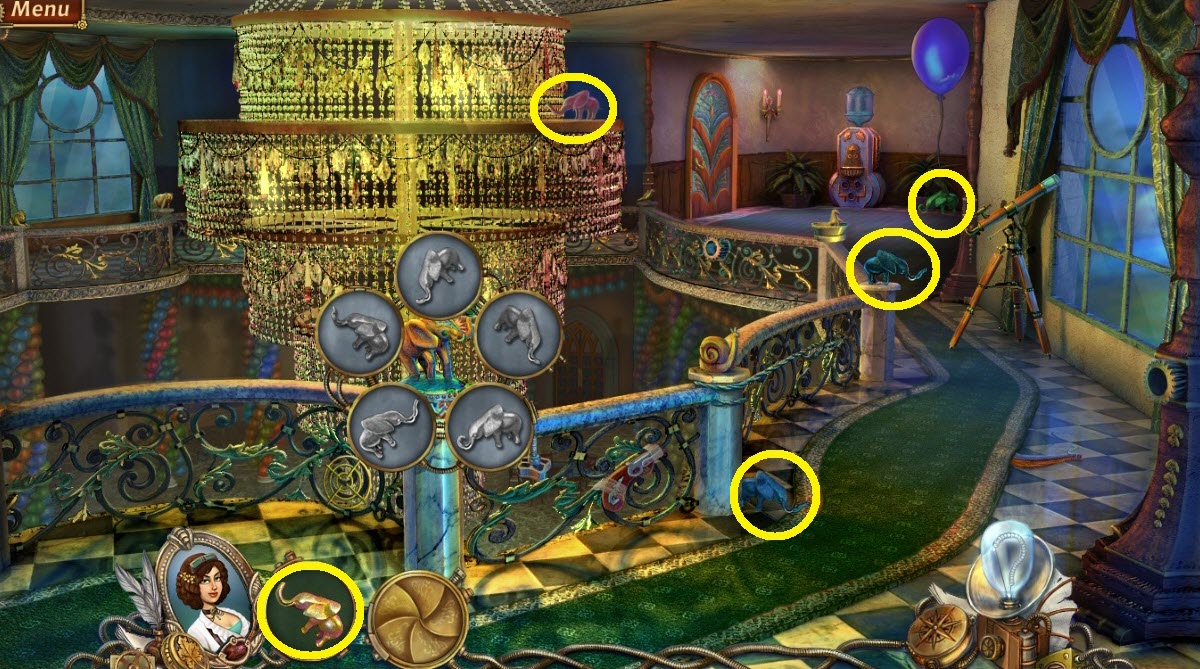
- Find the Banister Key Objects (yellow circles).
- Pick up the handle.
- Go back into the bedroom.
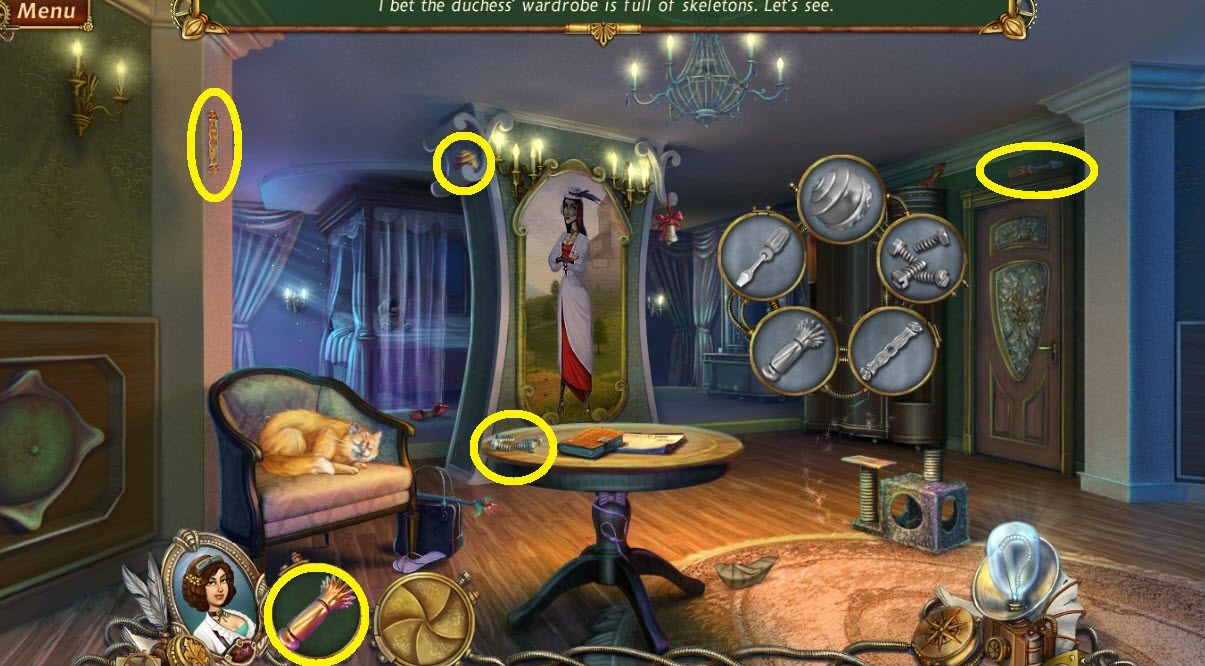
- Find the Closet Key Objects (yellow circles).
- Go through portal into backwards world.
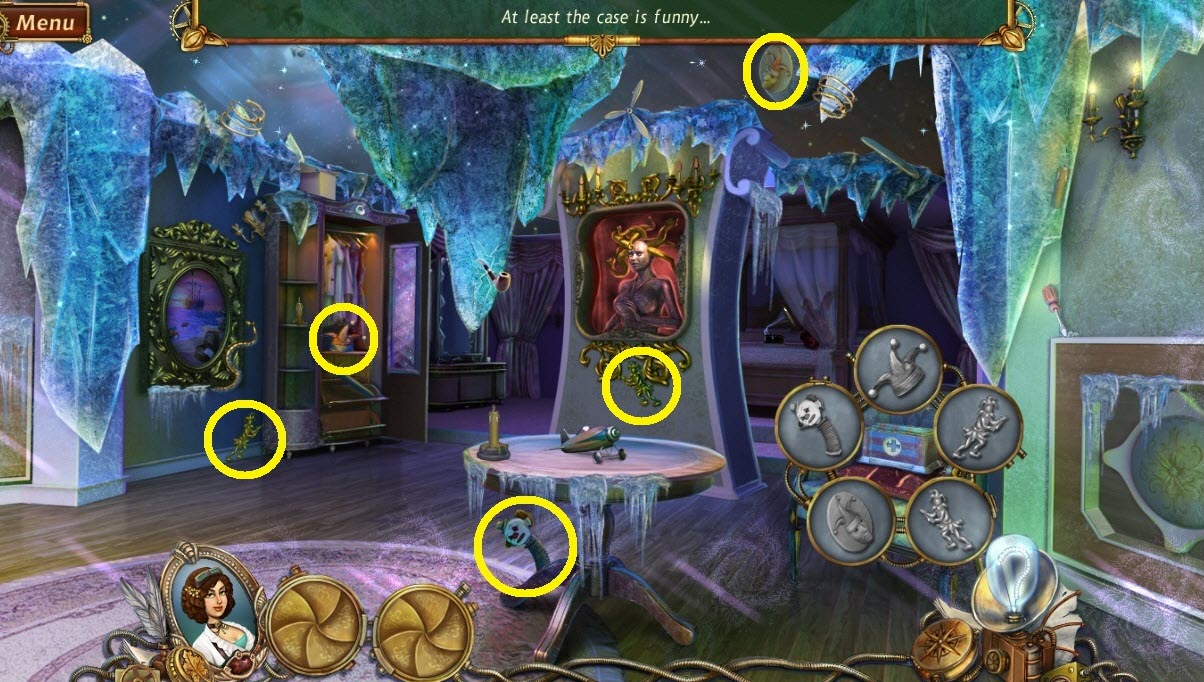
- Find the Jack in the Box Key Objects (yellow).
- Pick up the mouse.
- Go back into the portal.
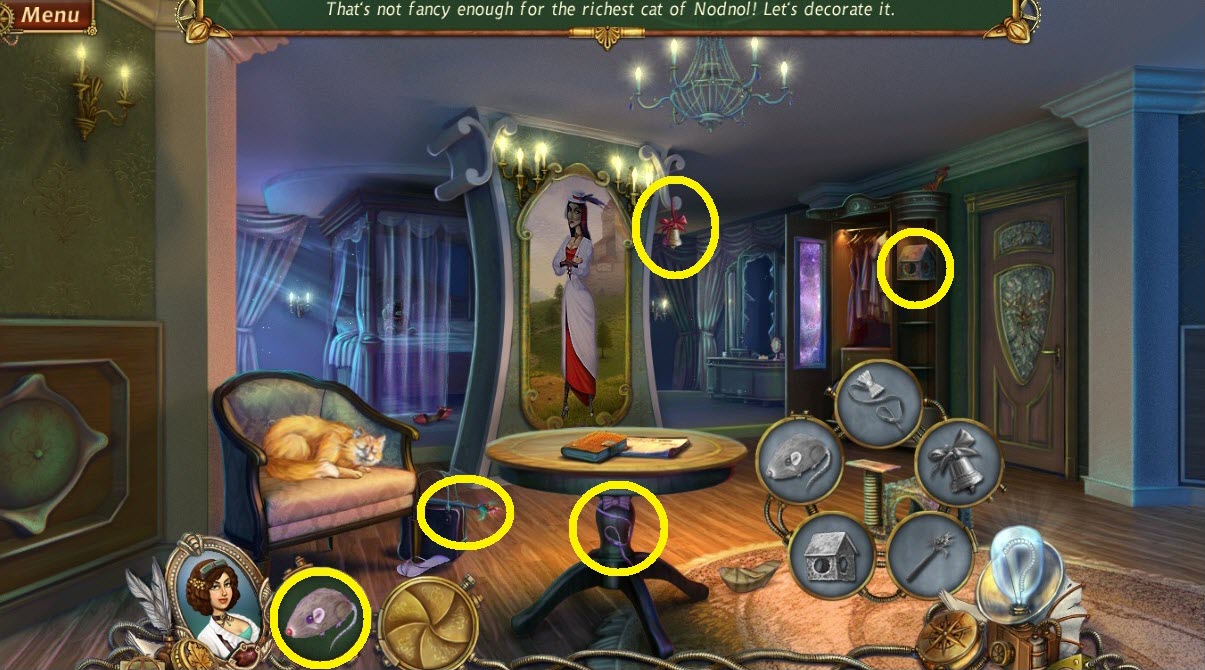
- Find the Cat Toy Key Objects (yellow circles).
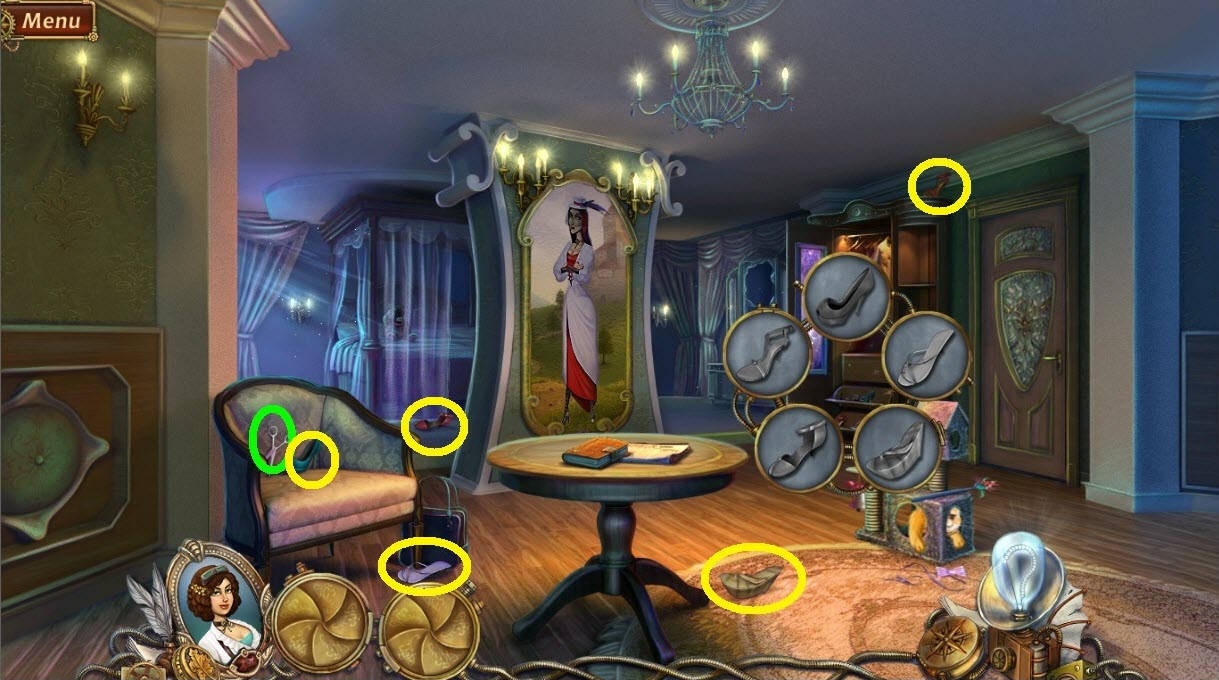
- Pick up the scissors (green circle).
- Find the Shoe Key Objects (yellow circles).
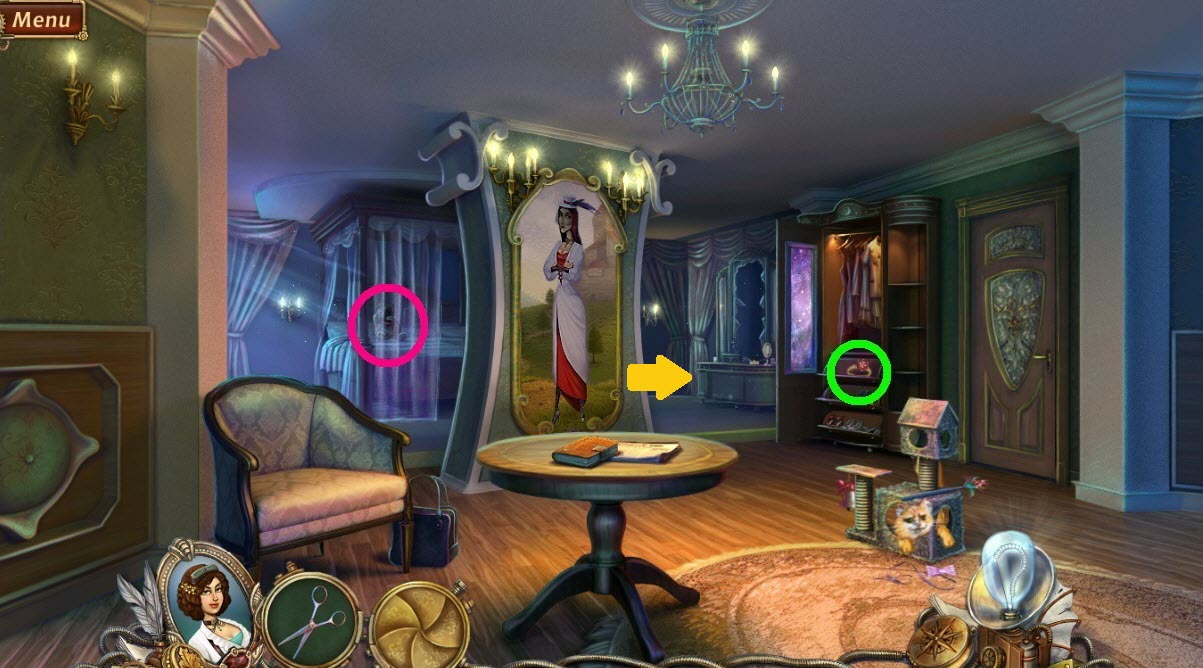
- Pick up the ring (green circle).
- Zoom into the teddy (pink circle).
- Notice the bureau (orange arrow).
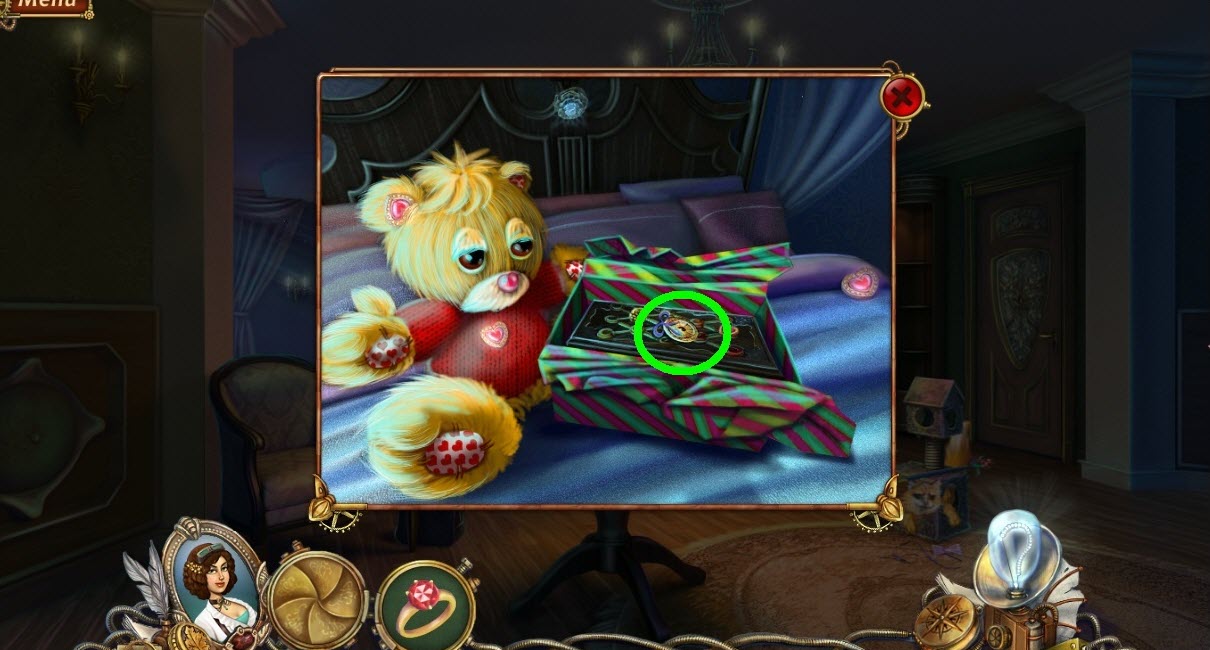
- Cut the package open with the scissors.
- Pick up the locket (green circle).
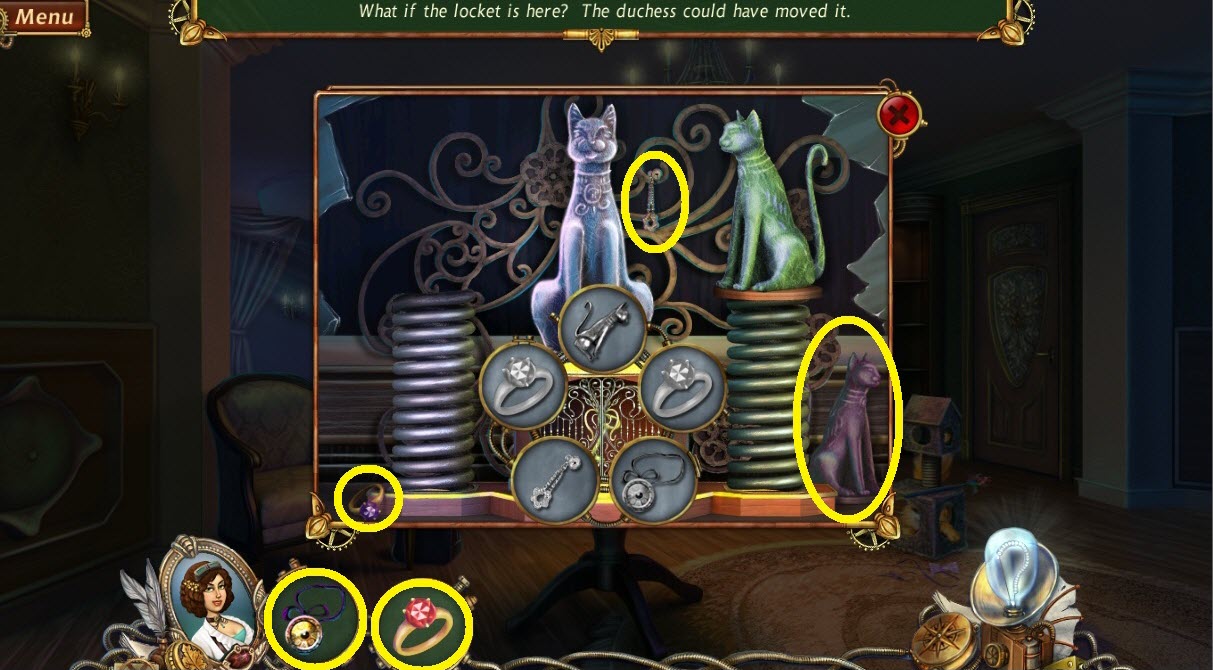
- Zoom to the bureau.
- Find the Cat Weight Objects (yellow circles).
- Pick up the key.
- Go back to the hallway.
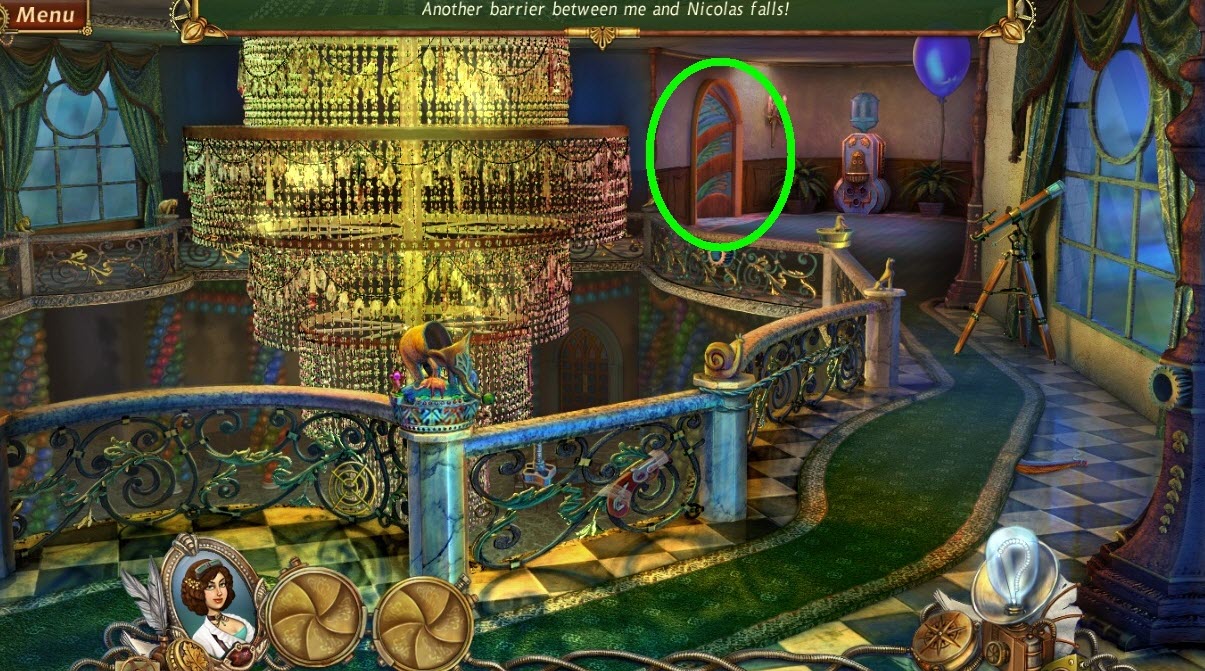
- Zoom to office door (green circle).
- Open the door with the key.
- Go into the office.
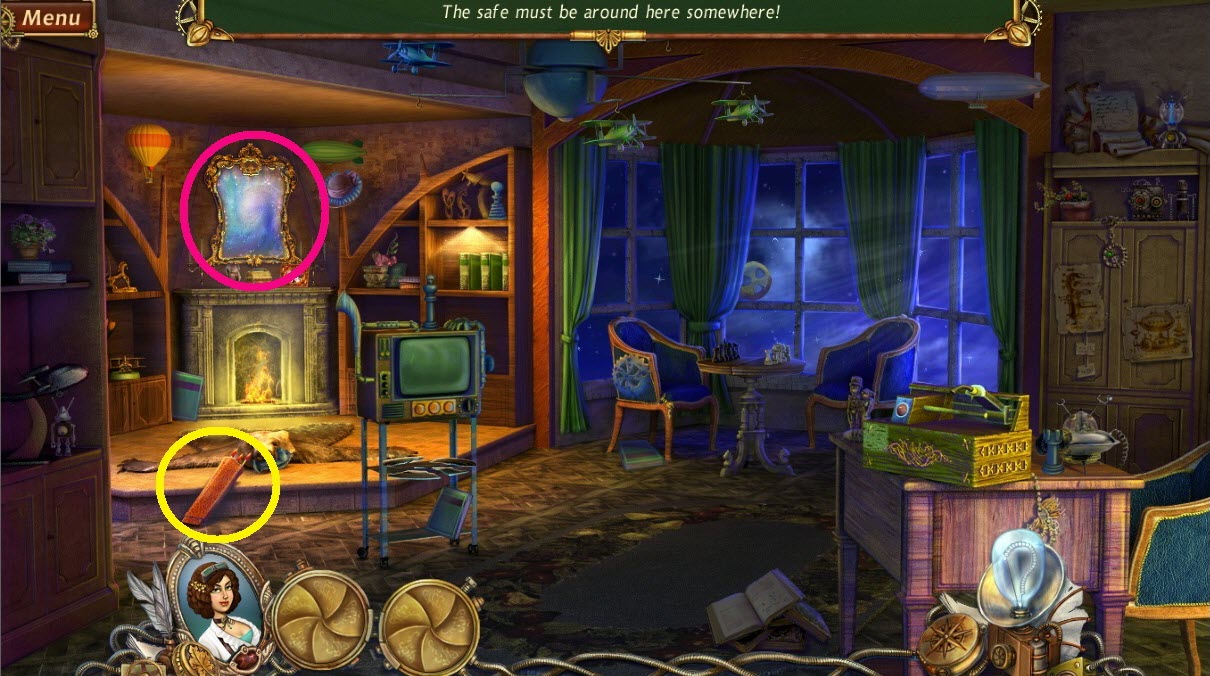
- Pick up the quiver and arrows (yellow circle).
- Leave through portal (pink circle).
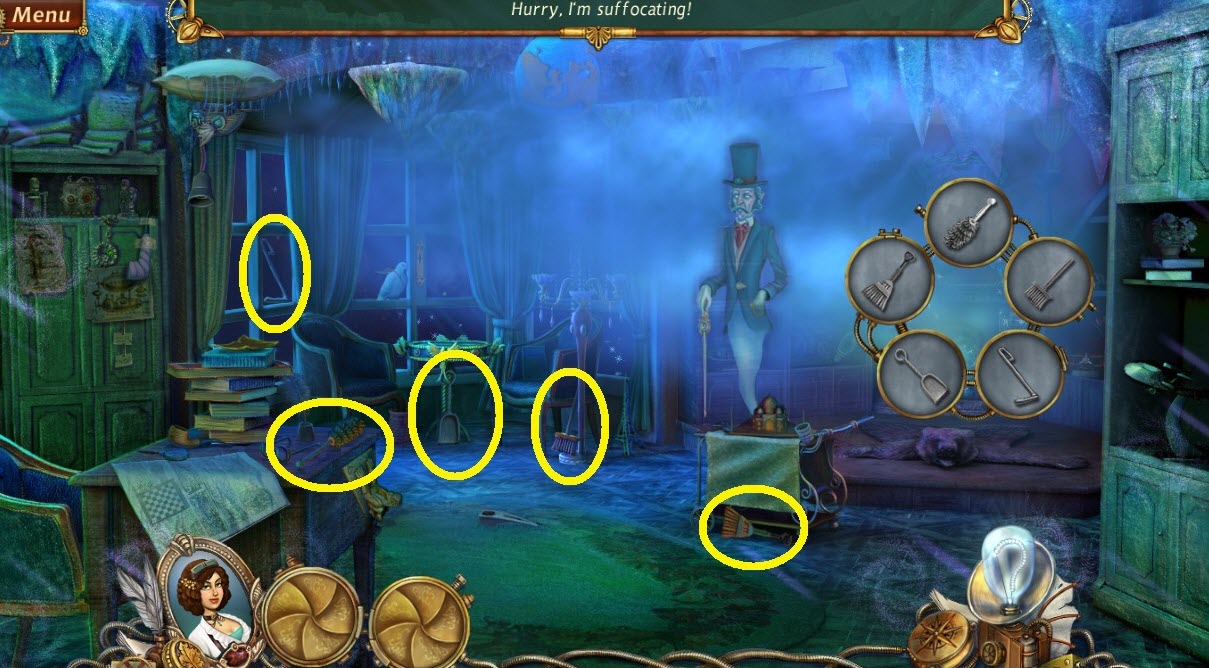
- Find the Fireplace Key Objects (yellow circles).
- Go back to the hallway.
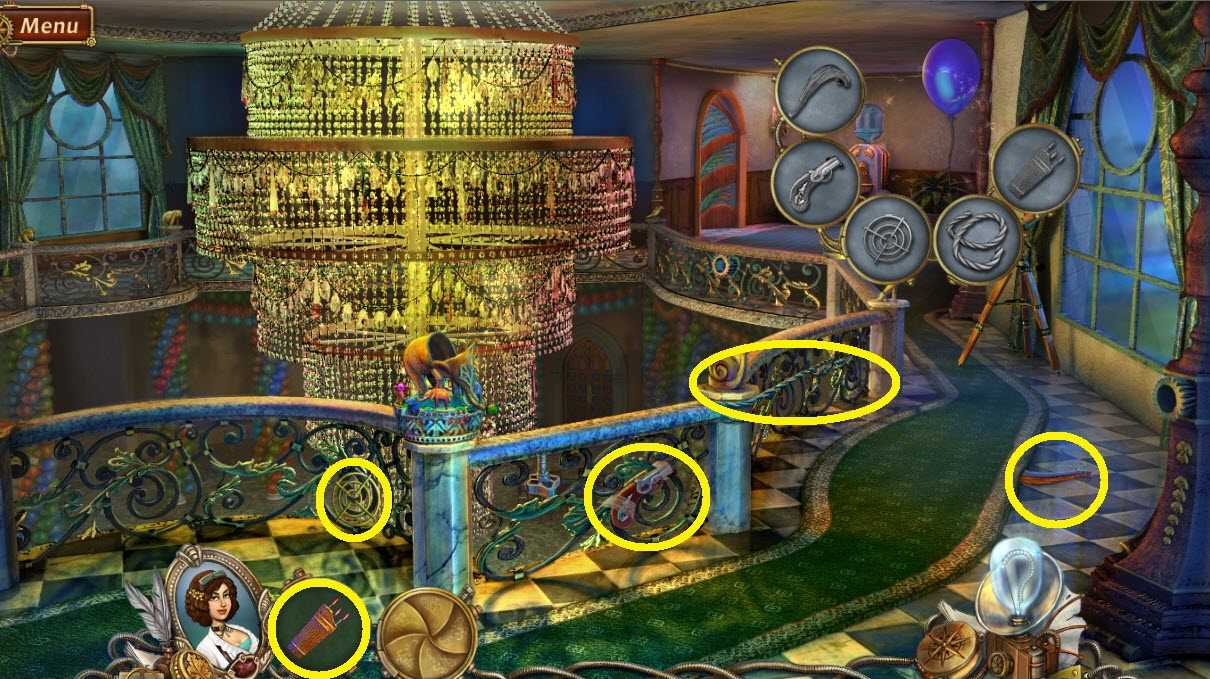
- Find the Balloon Key Objects (yellow circles).
- Pick up the chess piece.
- Go into the office.
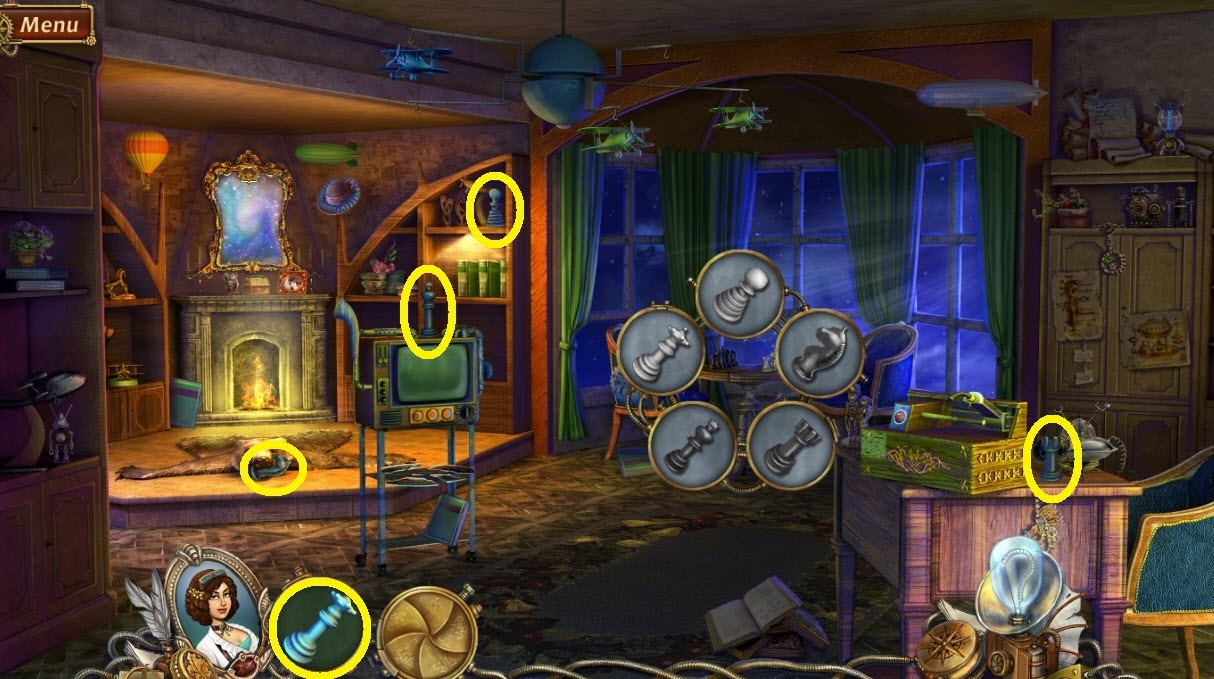
- Find the Chess Board Key Objects (yellow circles).
- Pick up the rooster head.
- Go to the backwards world.
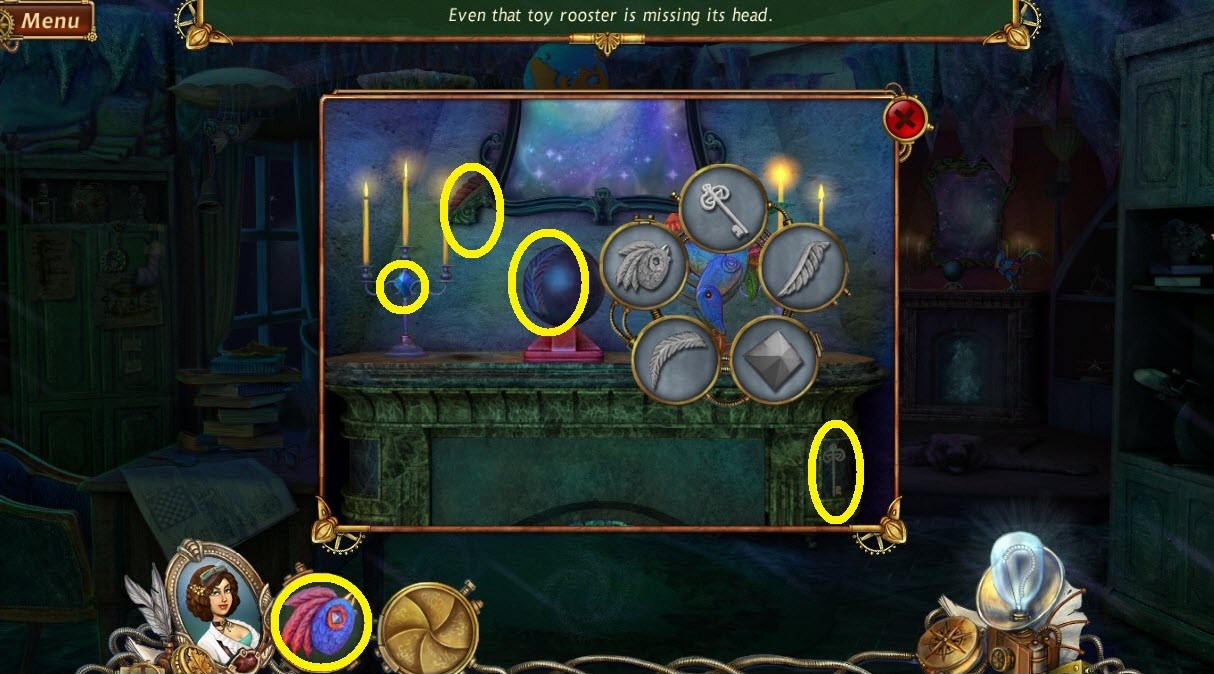
- Zoom to fireplace.
- Find the Rooster Key Objects (yellow circles).
- Pick up the bulb.
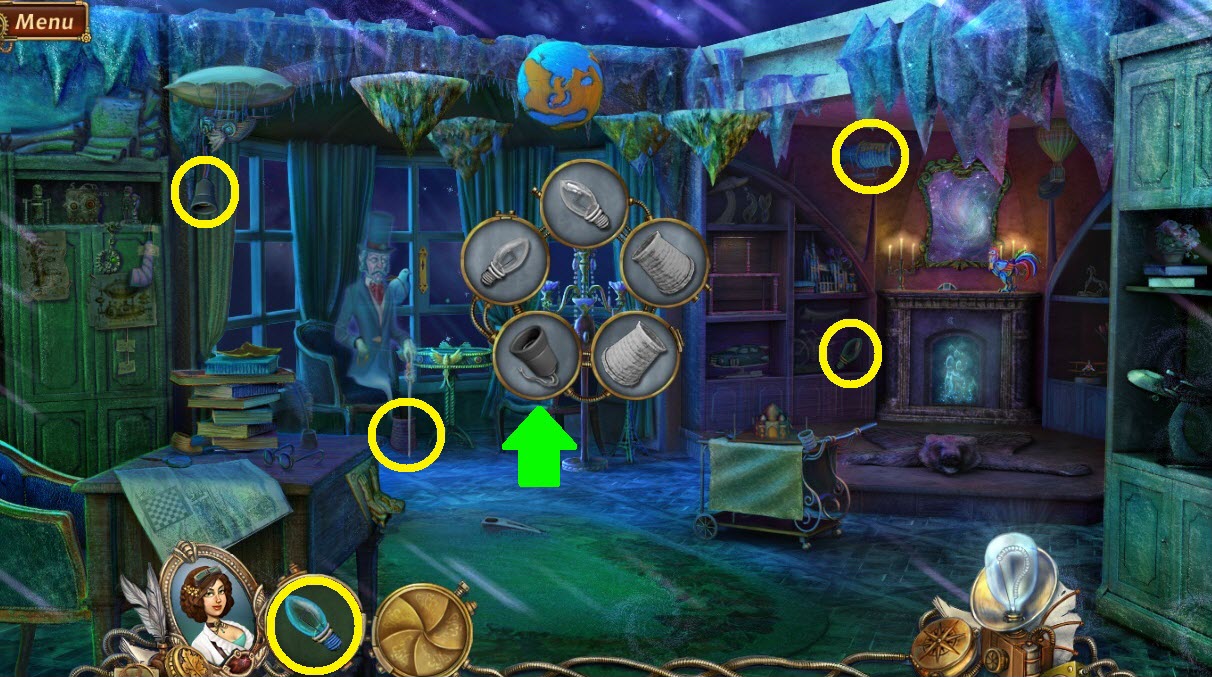
- Find the Lamp Key Objects (yellow circles).
- Pick up the book (green arrow).
- Go through the portal.
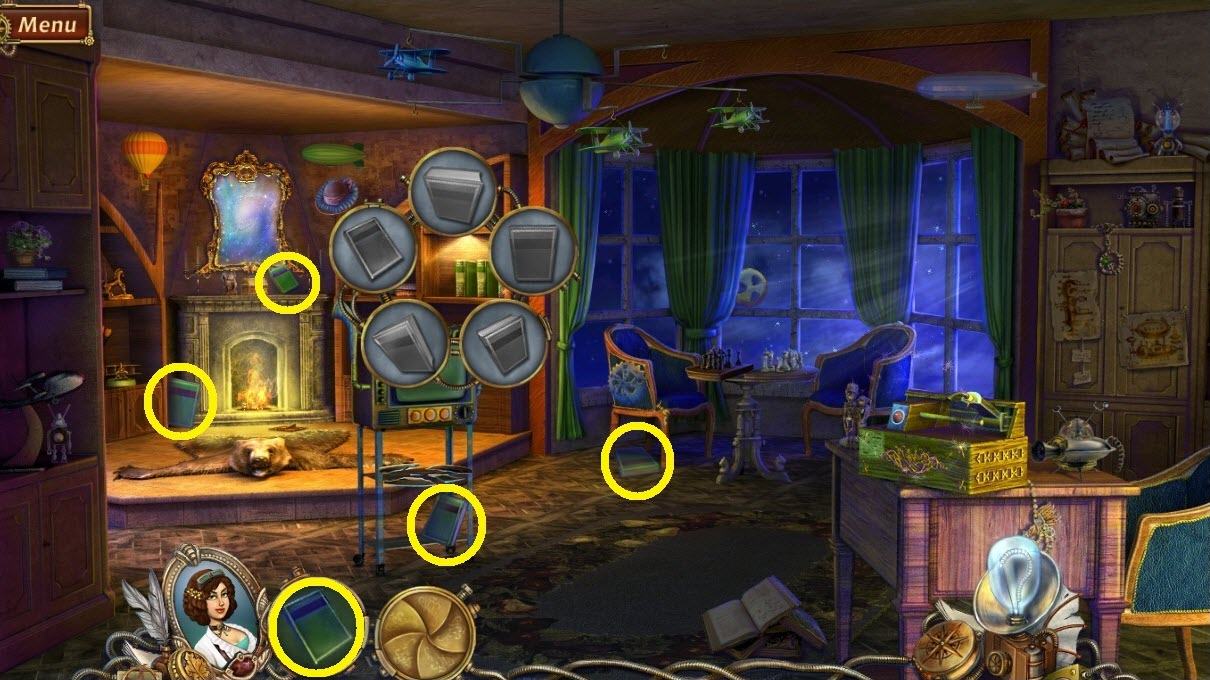
- Find the Shelf Key Objects (yellow circles).
- Pick up the key.
- Go back to the bedroom.
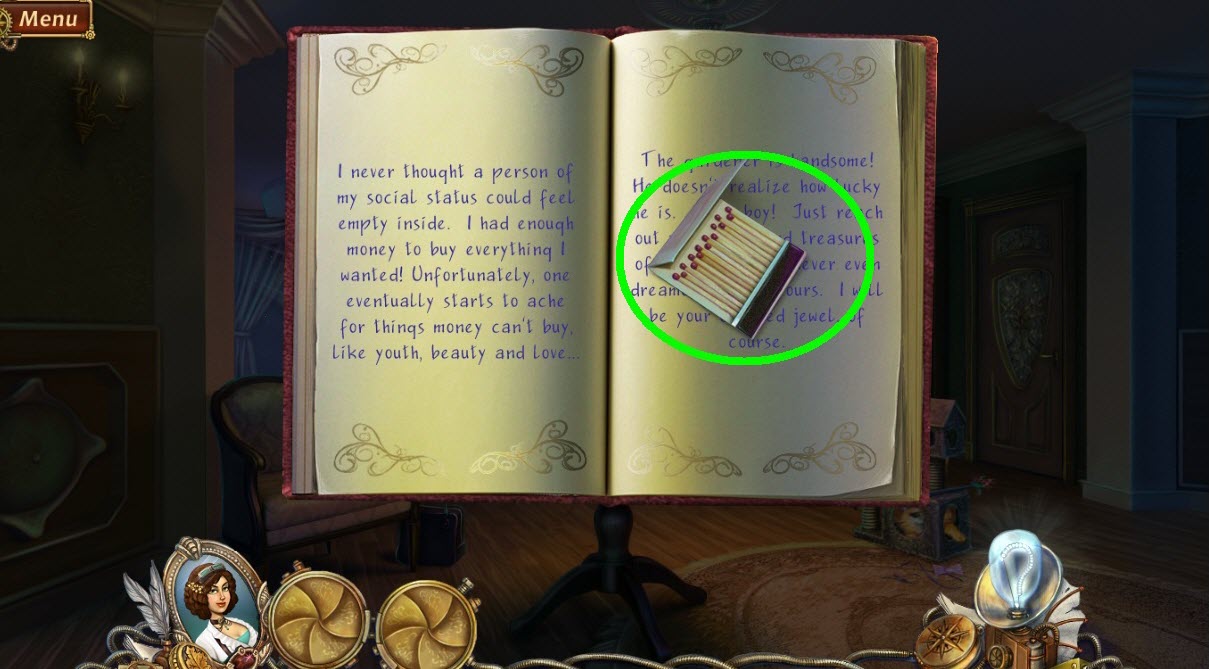
- Zoom to the table.
- Open the book with the key.
- Flip the pages and pick up the matches (green circle).
- Go through the portal.
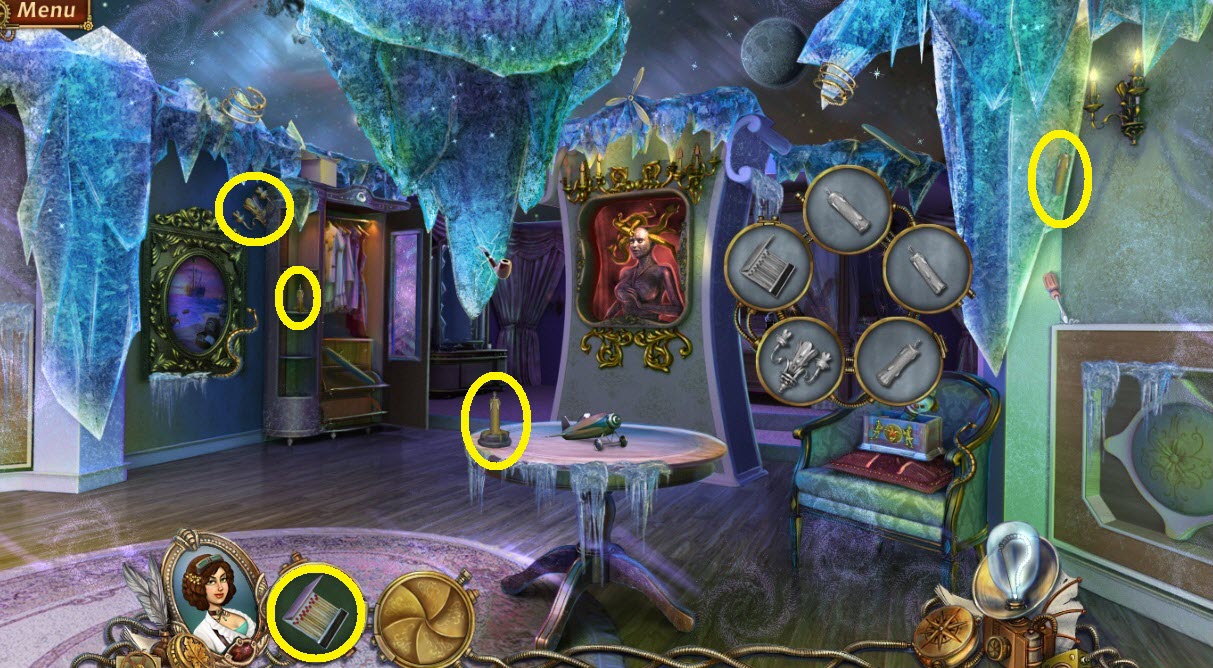
- Find the Candle Key Objects (yellow circles).
- Zoom into the bed.
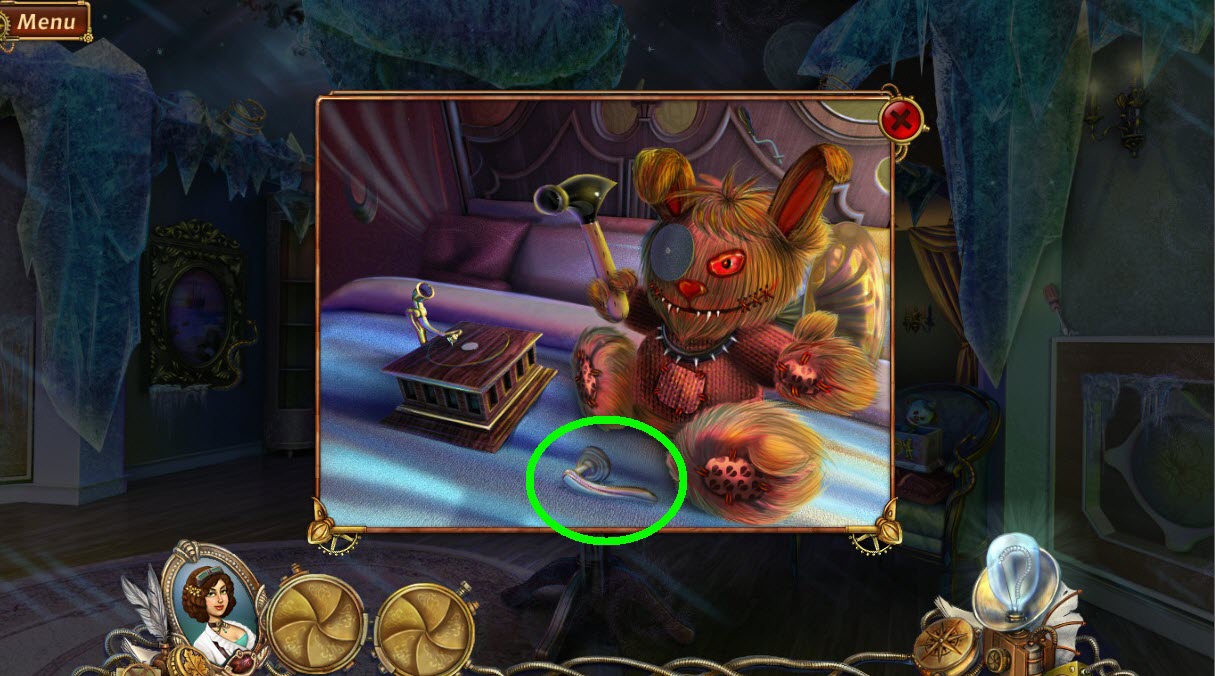
- Pick up the handle (green circle).
- Go back into the office.
- Go through the backward world portal.
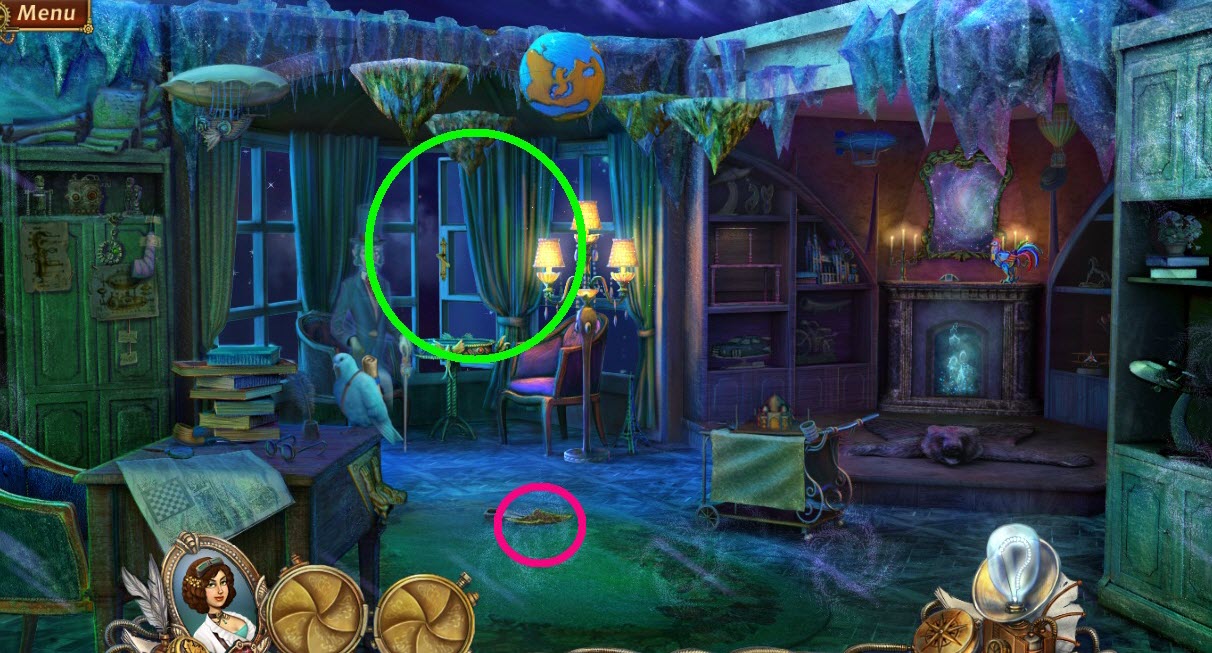
- Zoom to the window (green circle).
- Attach the handle.
- Pick up the note (pink circle).
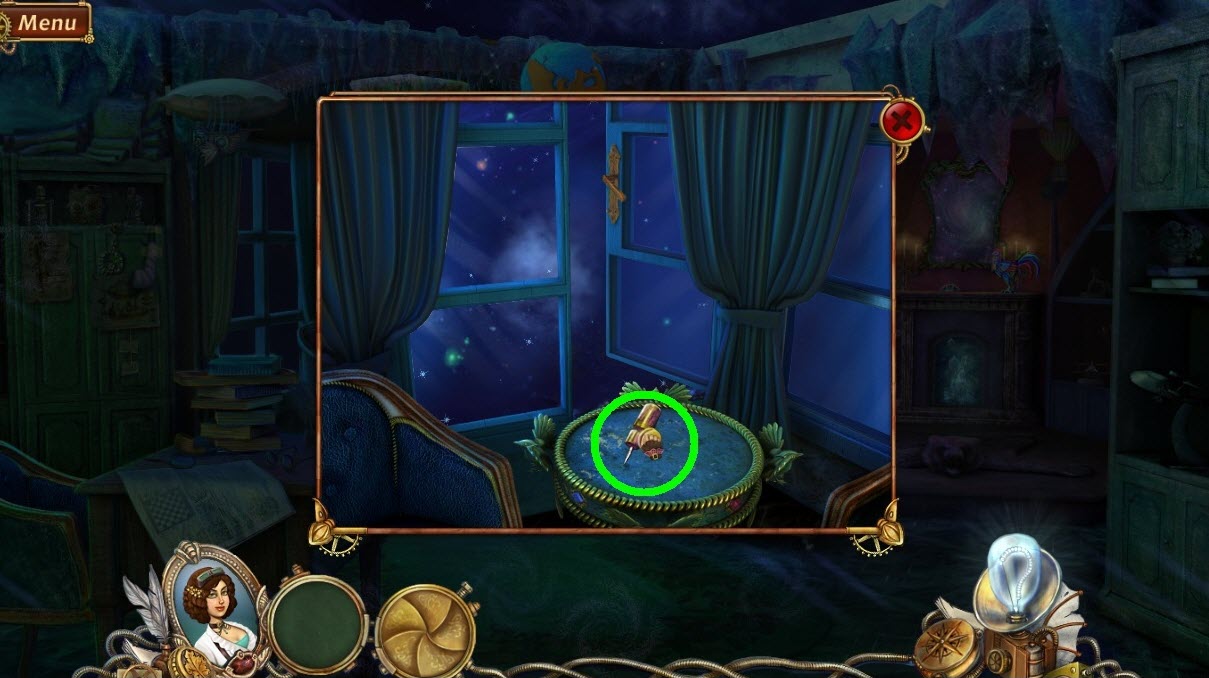
- Zoom back into the window.
- Pick up the needle (green circle).
- Go back to the bedroom.
- Enter into the closet portal.
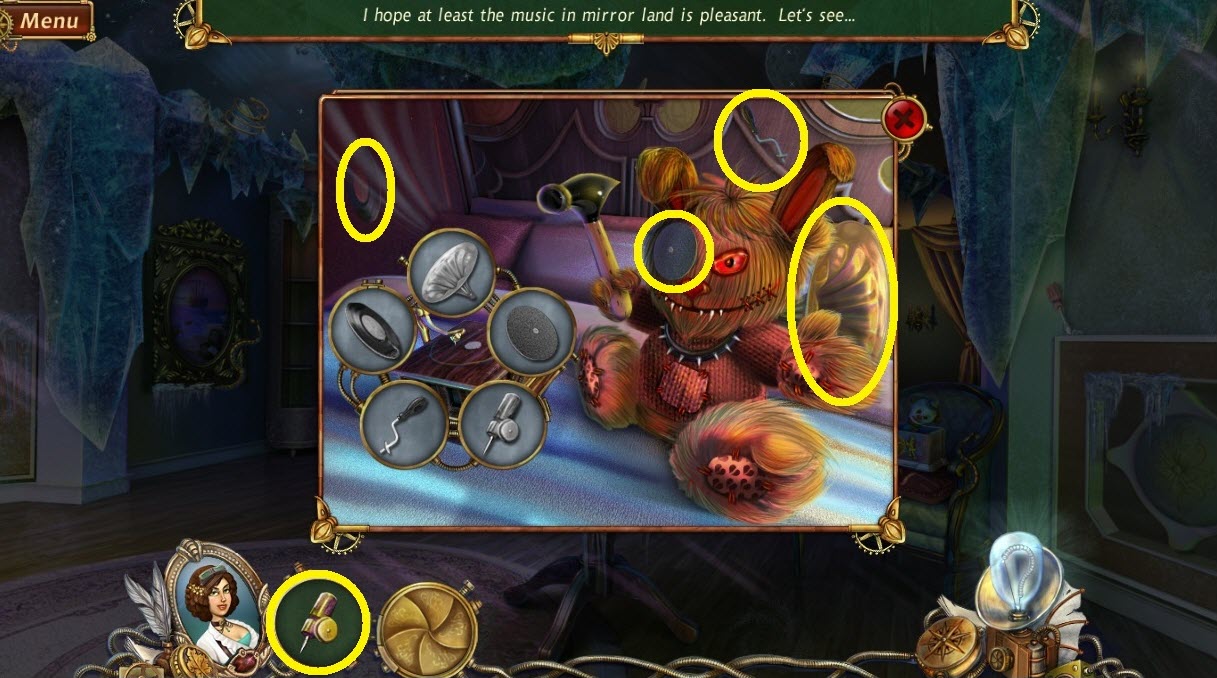
- Zoom into the bed.
- Find the Record Player Key Objects (yellow circles).
- Pick up the glue.
- Go back to the office.
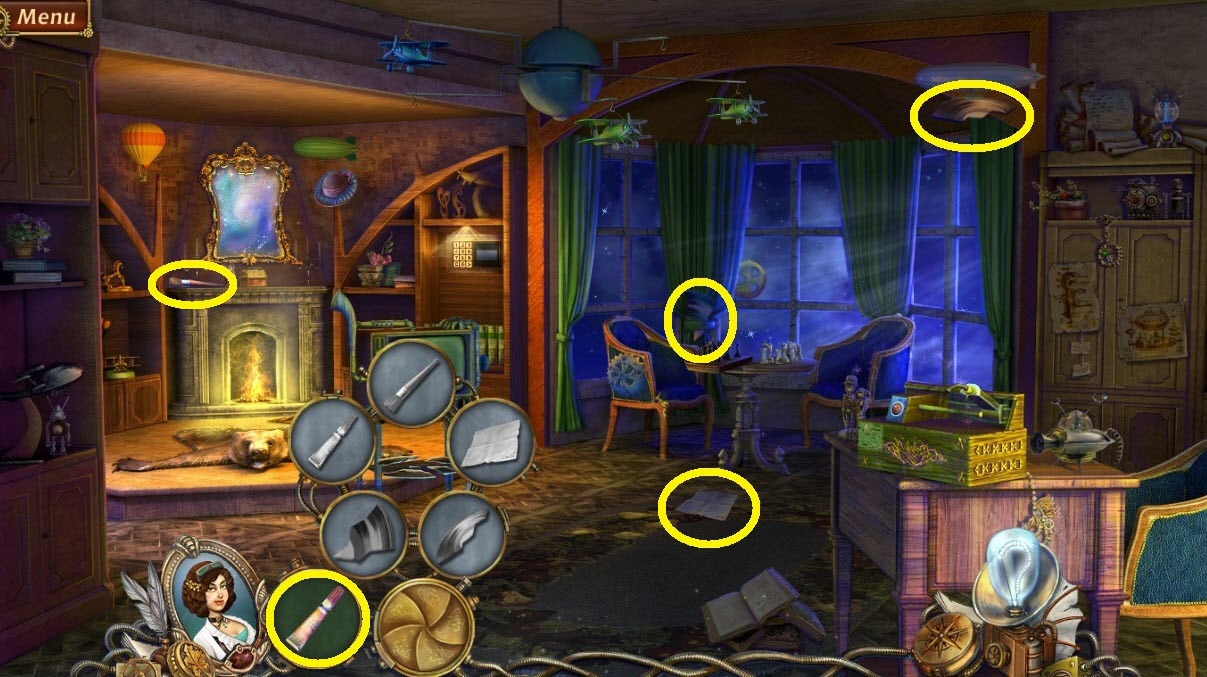
- Zoom to broken record under the television.
- Find the Broken Record Key Objects (yellow circles).
- Go to the bedroom and enter the closet portal.
- Zoom to the bed.
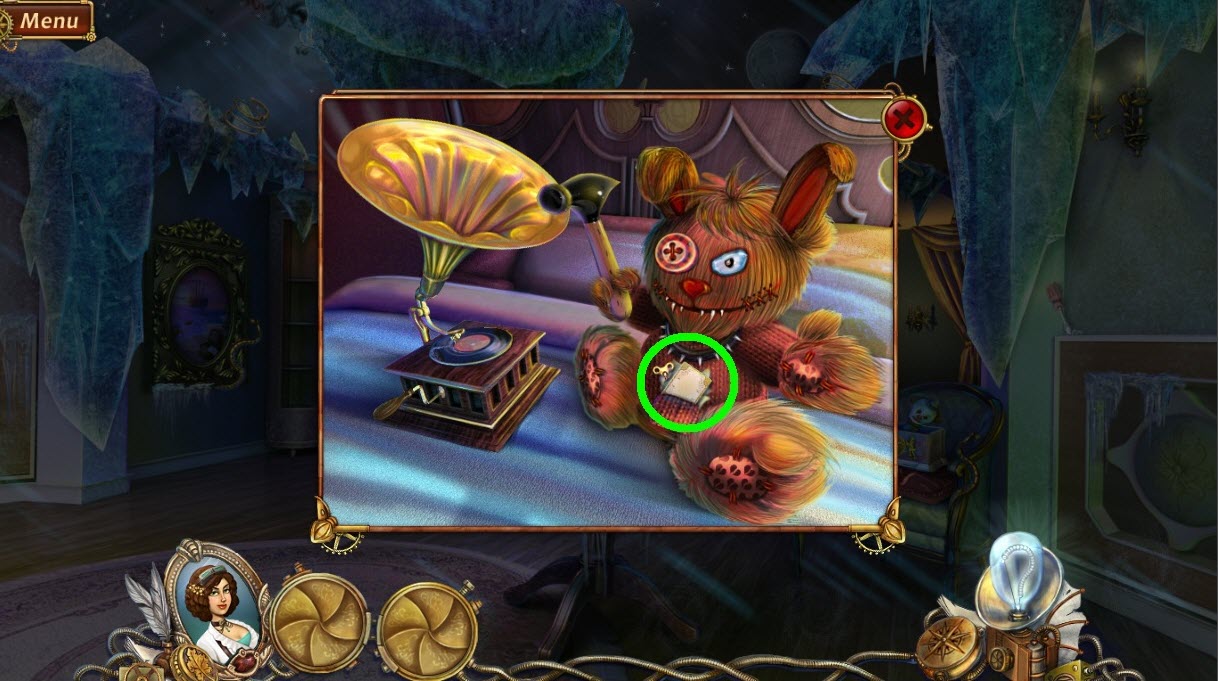
- Click the broken record.
- Replace the record on the player.
- Pick up the wind-up key and read the note (green circle).
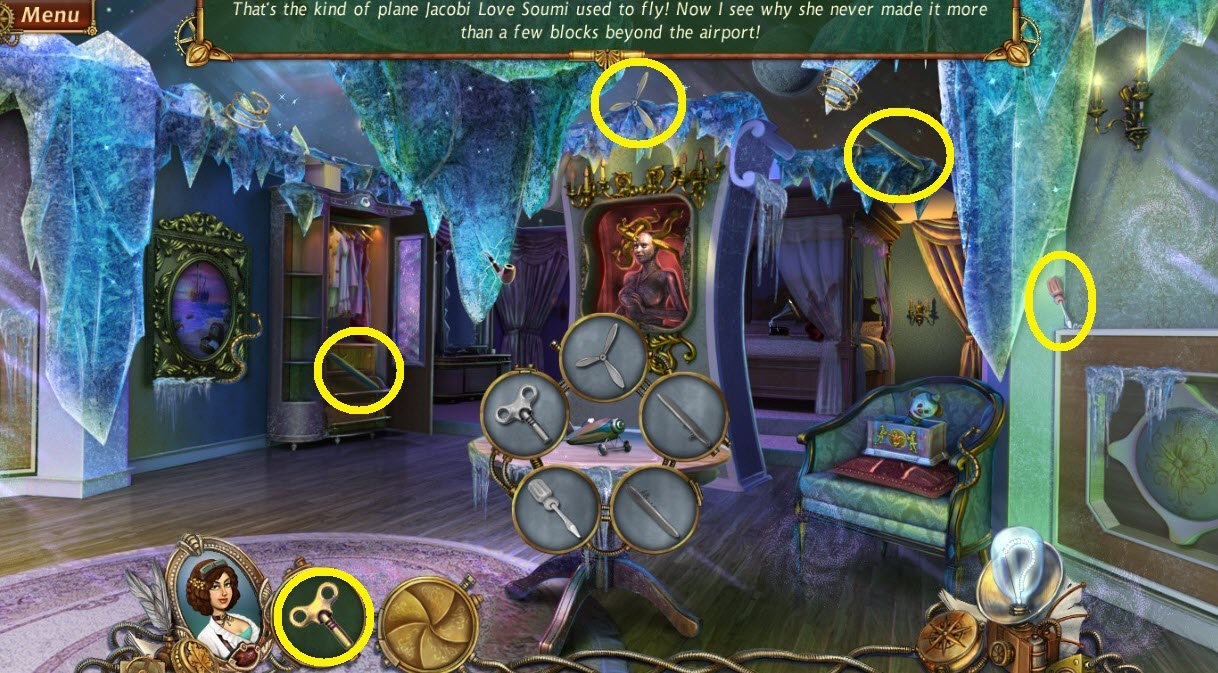
- Find the Airplane Key Objects (yellow circles).
- Pick up the airplane.
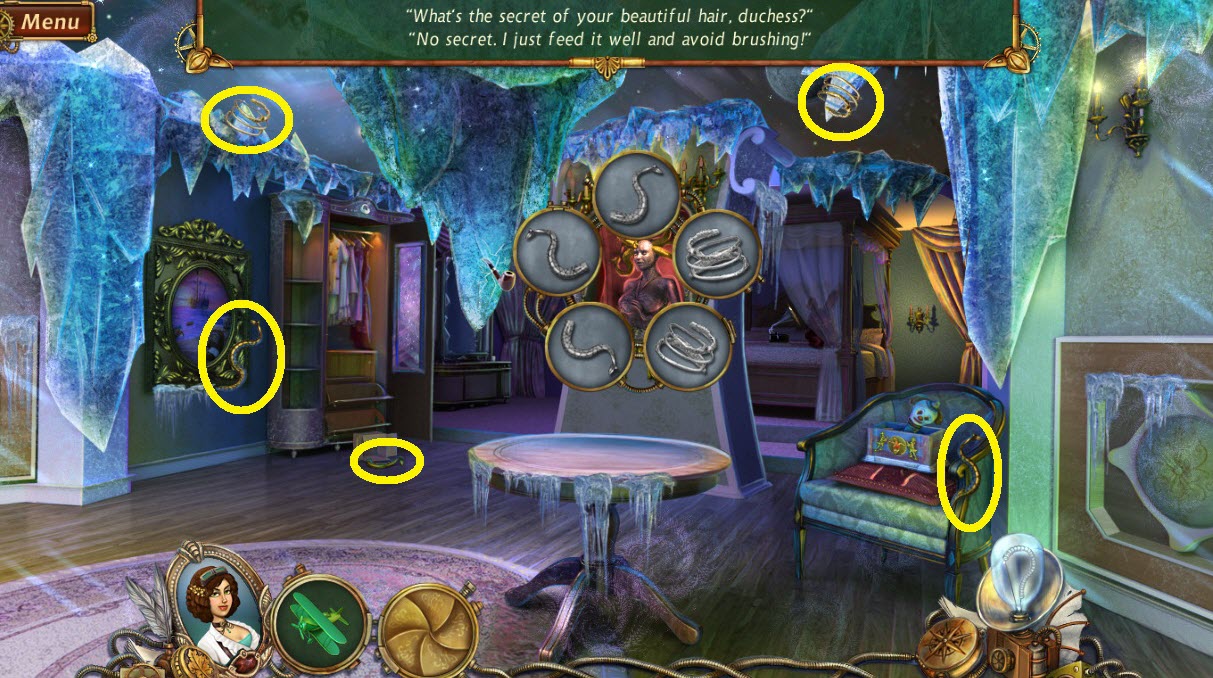
- Find the Medusa Key Objects (yellow circles).
- Pick up the pipe.
- Go back to the backwards world office.
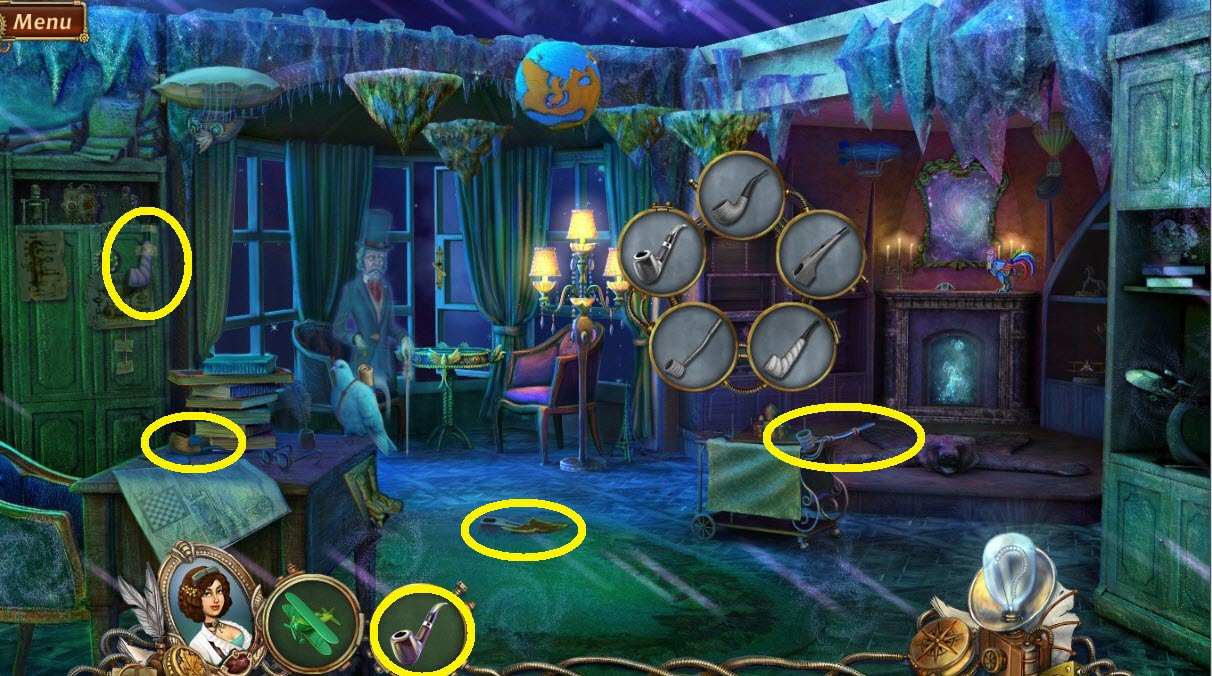
- Find the Pipe Key Objects (yellow circles).
- Go back to the office.
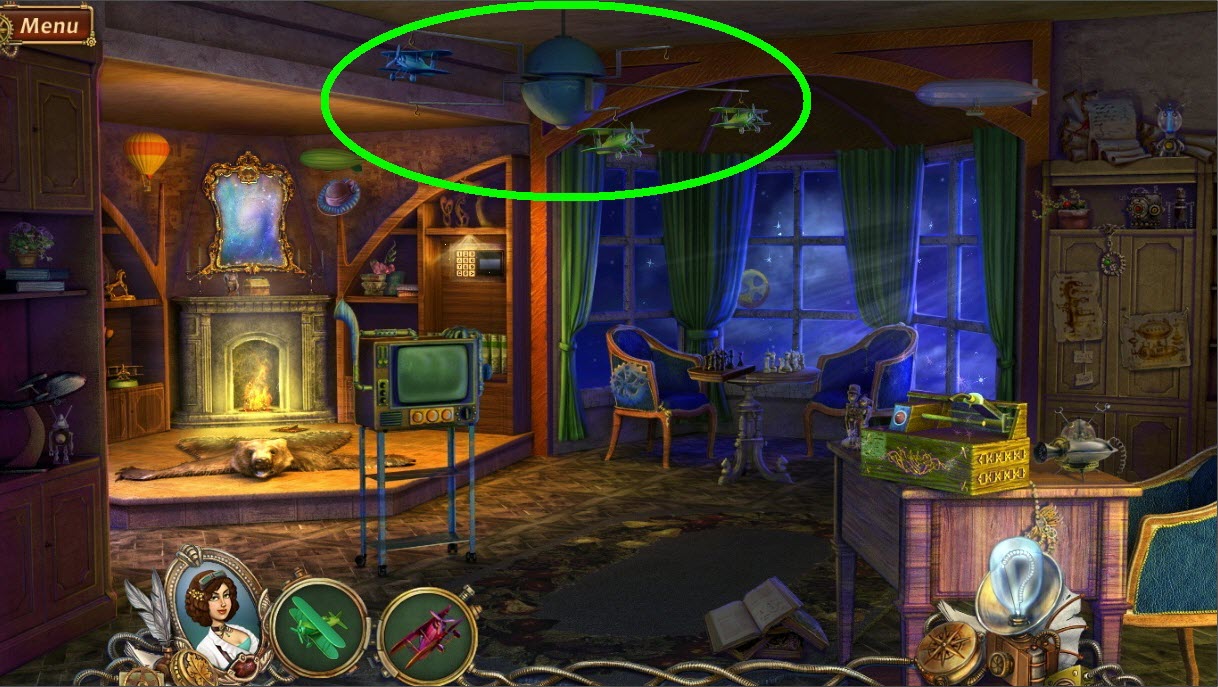
- Hang both planes onto the mobile (green circle).
- Pick up the flag.
- Go back through the portal.
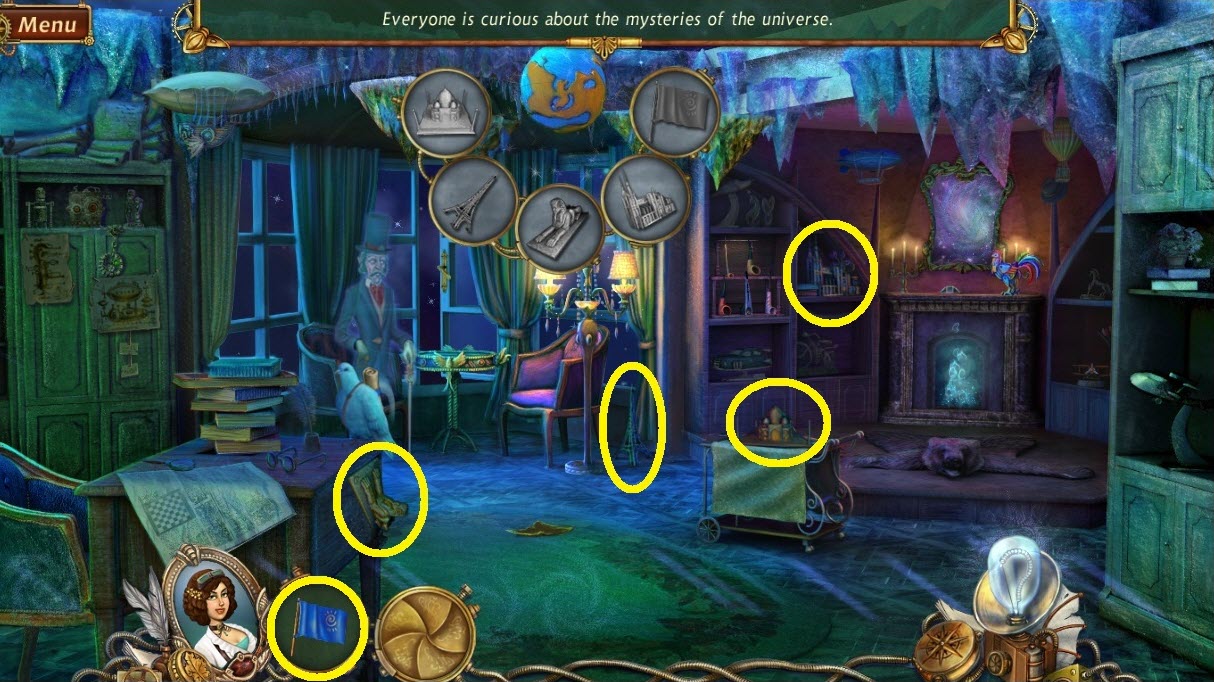
- Find the Earth Key Objects (yellow circles).
- Pick up the tap in the globe.
- Go back into the hallway.
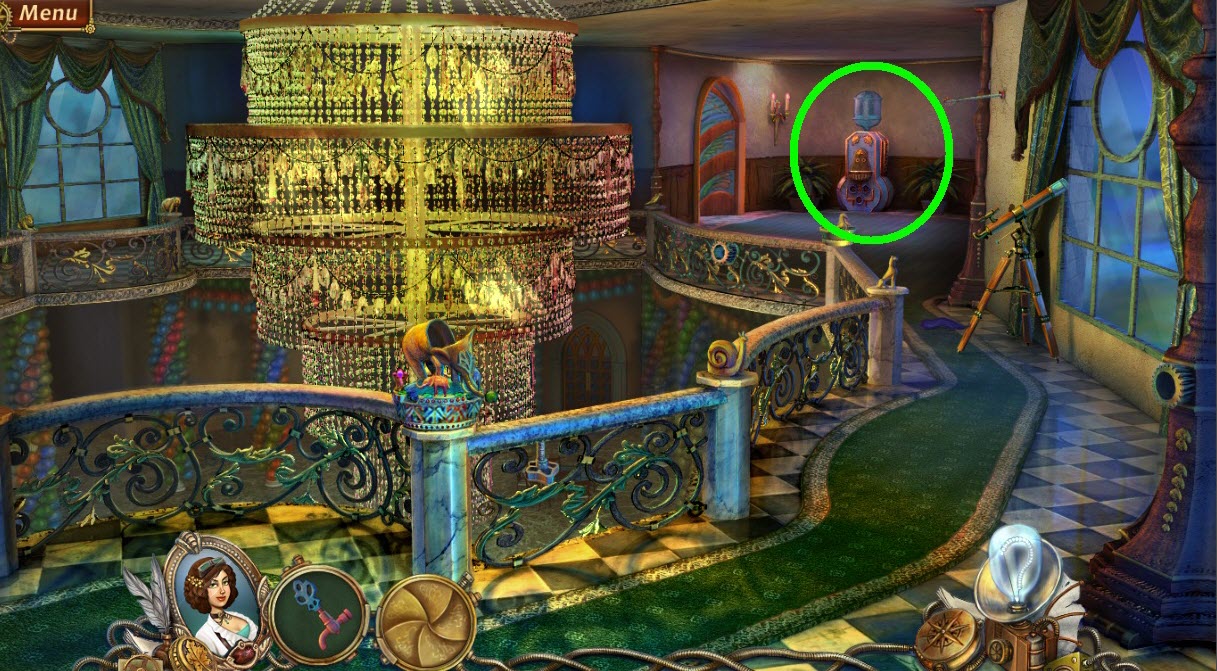
- Zoom into the water cooler (green circle).
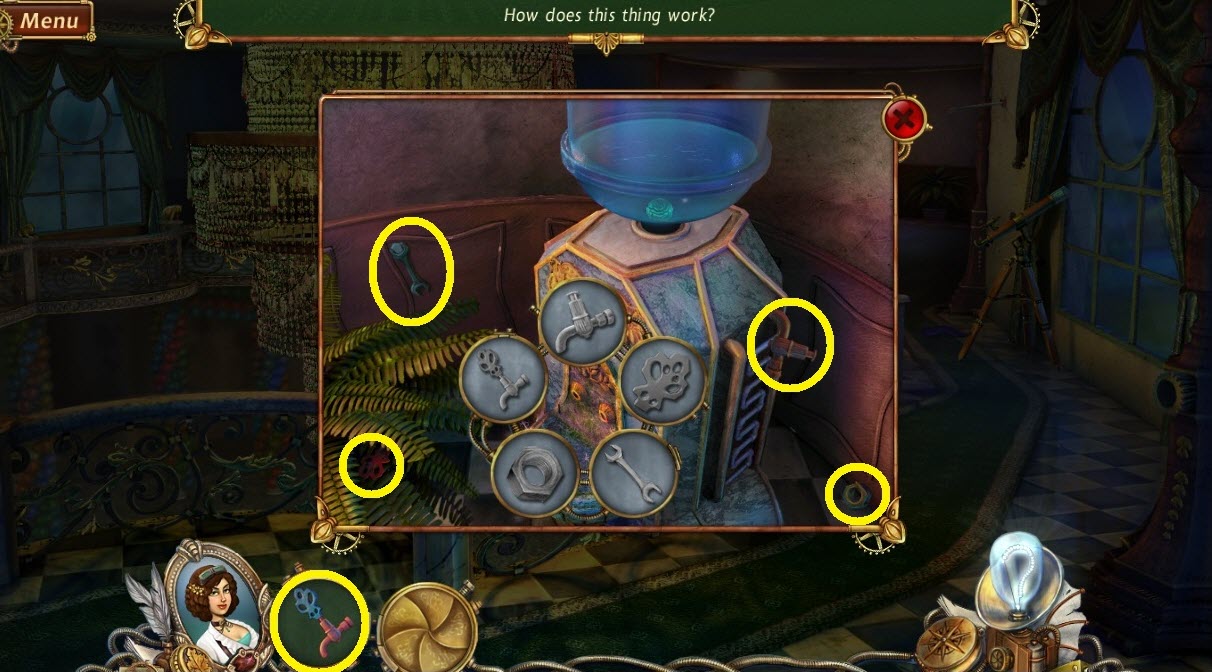
- Find the Water Cooler Key Objects (yellow circles).
- Pick up the rosebud.
- Go to the bedroom.
- Zoom to the teddy on the bed.
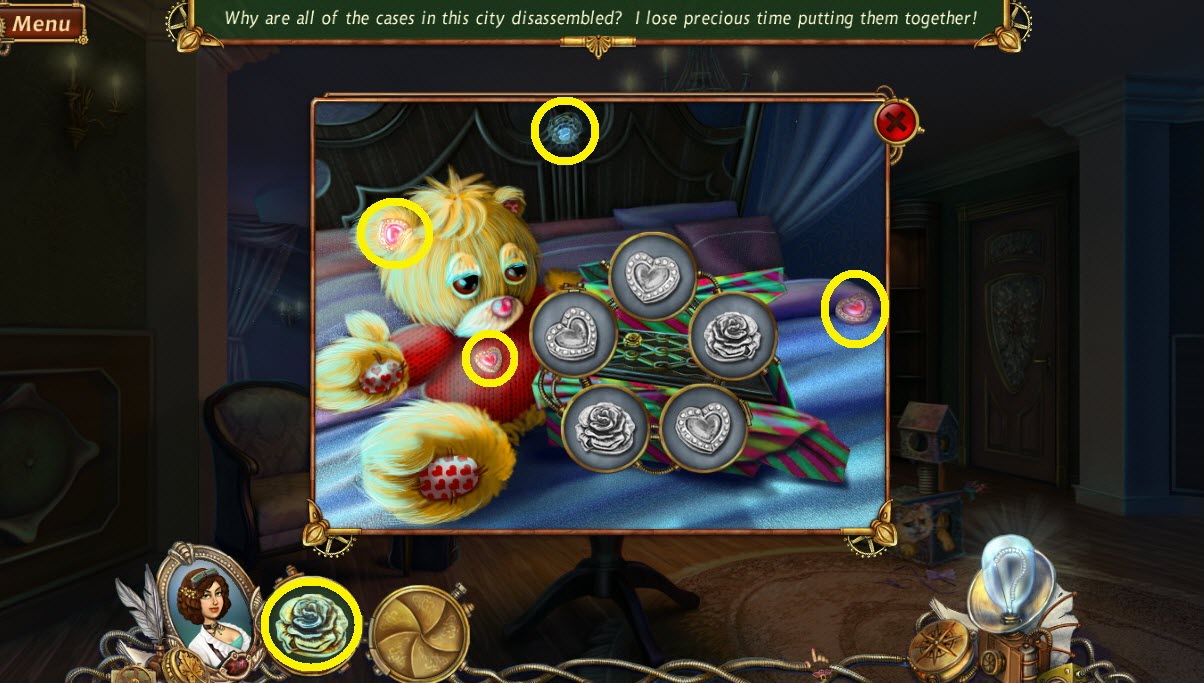
- Find the Box Key Objects (yellow circles).
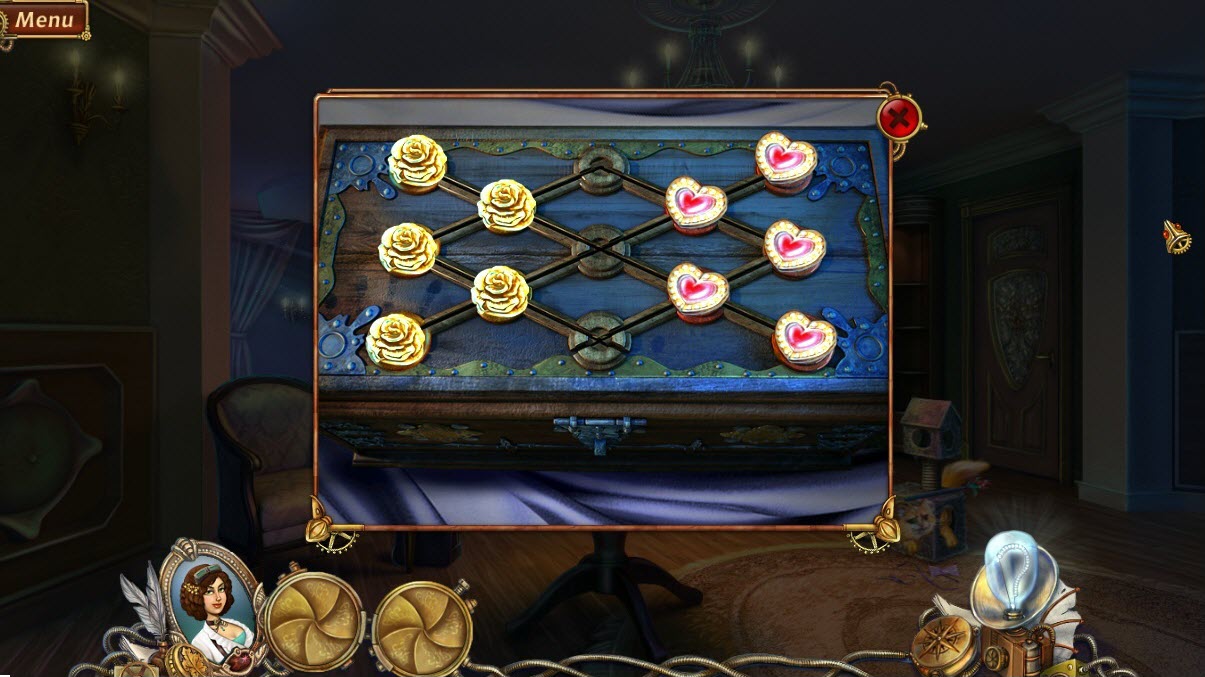
- To open the box the pattern should look like the screenshot.
- In the beginning the roses are all on the right and hearts are all on the left.
- Your goal is to move the all roses and hearts to the opposite side.
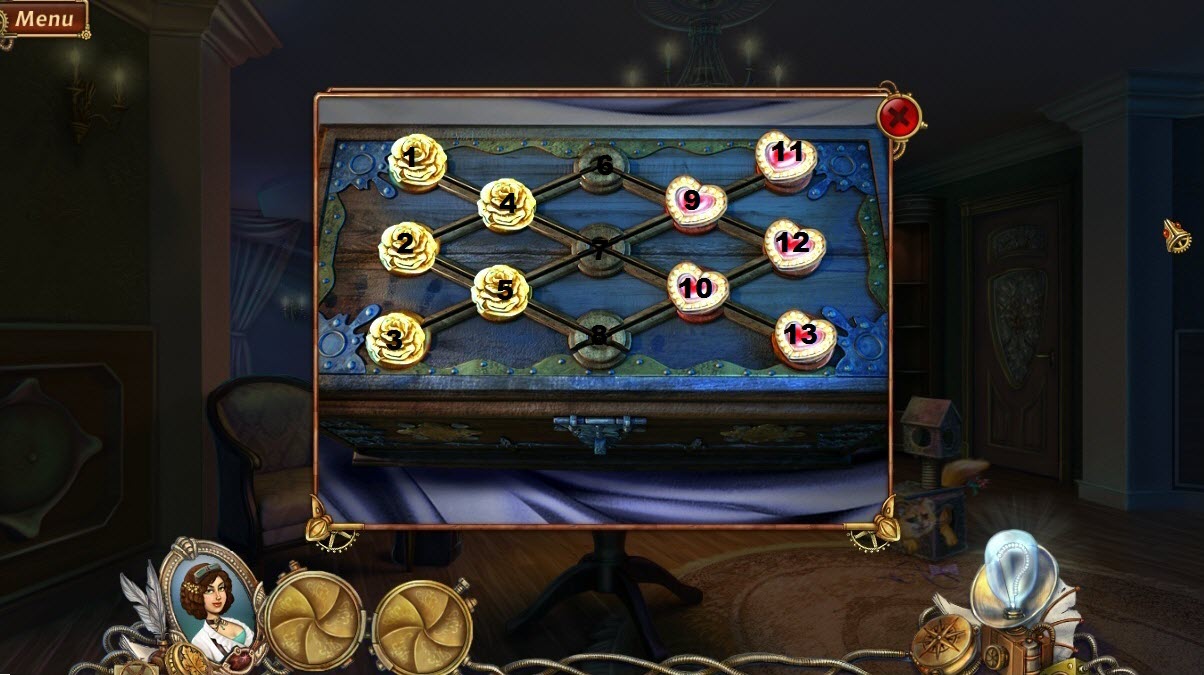
- Use this pattern to open the box.
- Move position 4 to position 6.
- Move position 5 to position 4.
- Move position 3 to position 7.
- Move position 10 to position 3.
- Move position 13 to position 5.
- Move position 12 to position 8.
- Move position 7 to position 13.
- Move position 4 to position 12.
- Move position 2 to position 10.
- Move position 9 to position 2.
- Move position 11 to position 7.
- Move position 1 to position 9.
- Move position 7 to position 1.
- Move position 5 to position 4.
- Move position 8 to position 4.
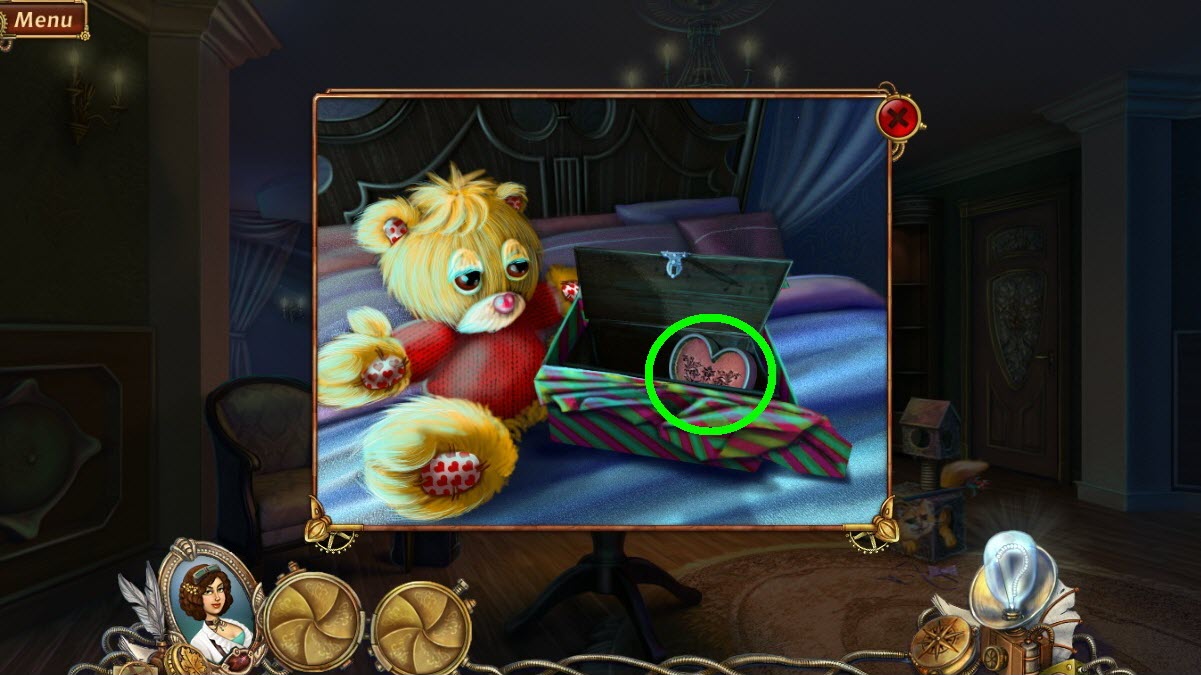
- Pick up the heart (green circle).
- Go back through the closet portal.
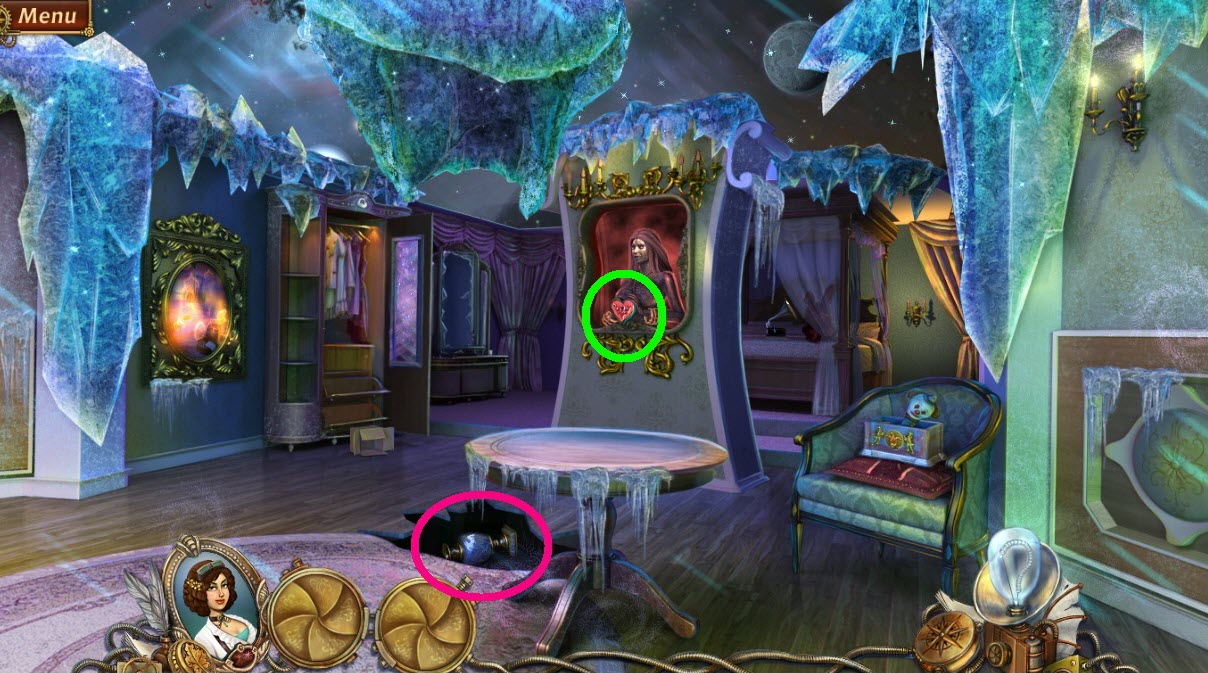
- Put the heart in Medusa’s hand (green circle).
- Pick up the vase (pink circle).
- Go back to the hallway.
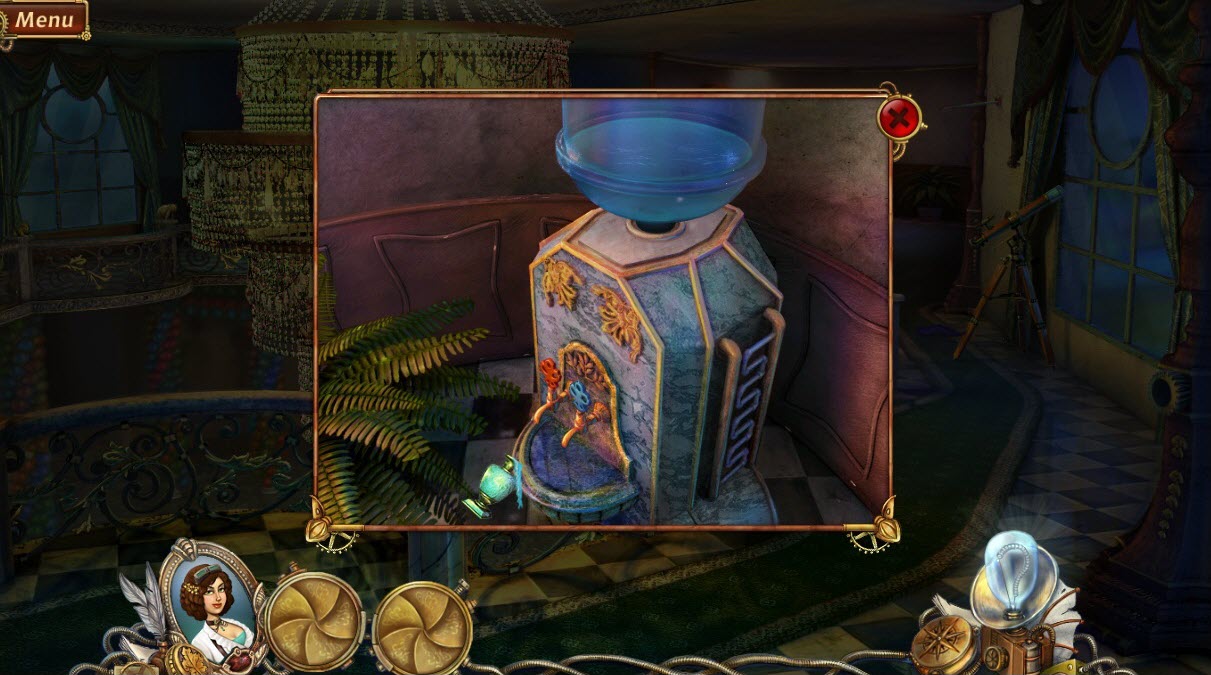
- Zoom into the water cooler and put the vase under the faucet.
- Go back to backward bedroom.
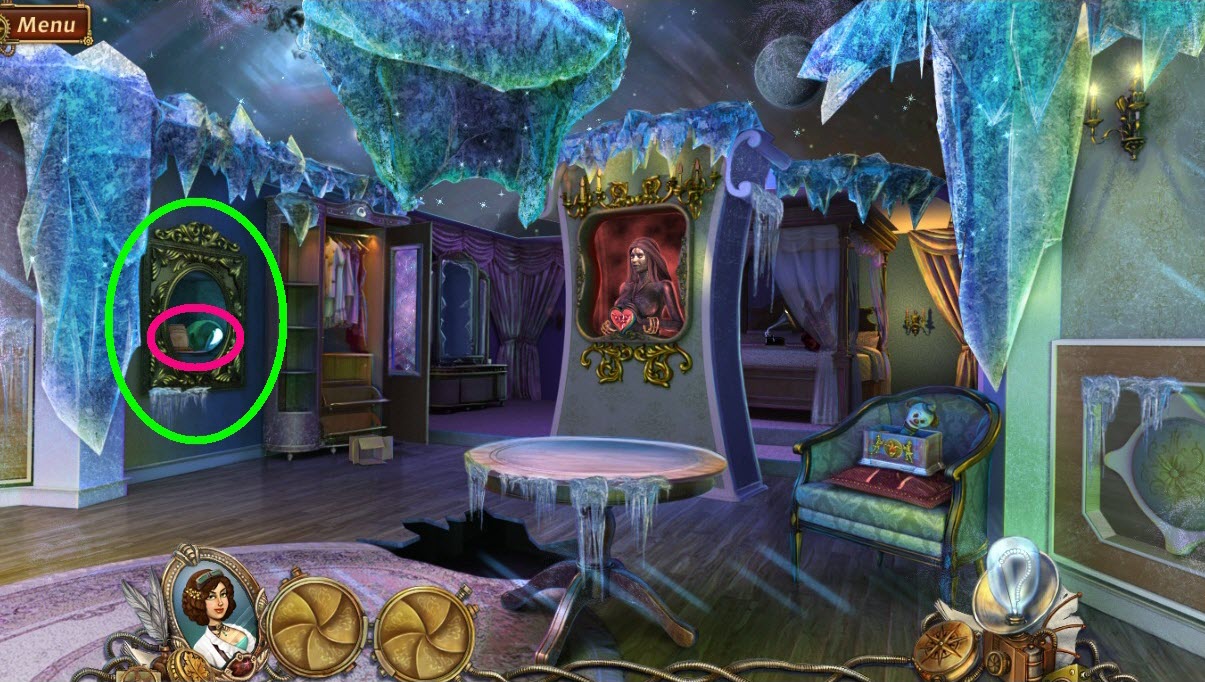
- Pour vase water over painting (green circle).
- Pick up the lens and bread (pink circle).
- Go back to the hallway.
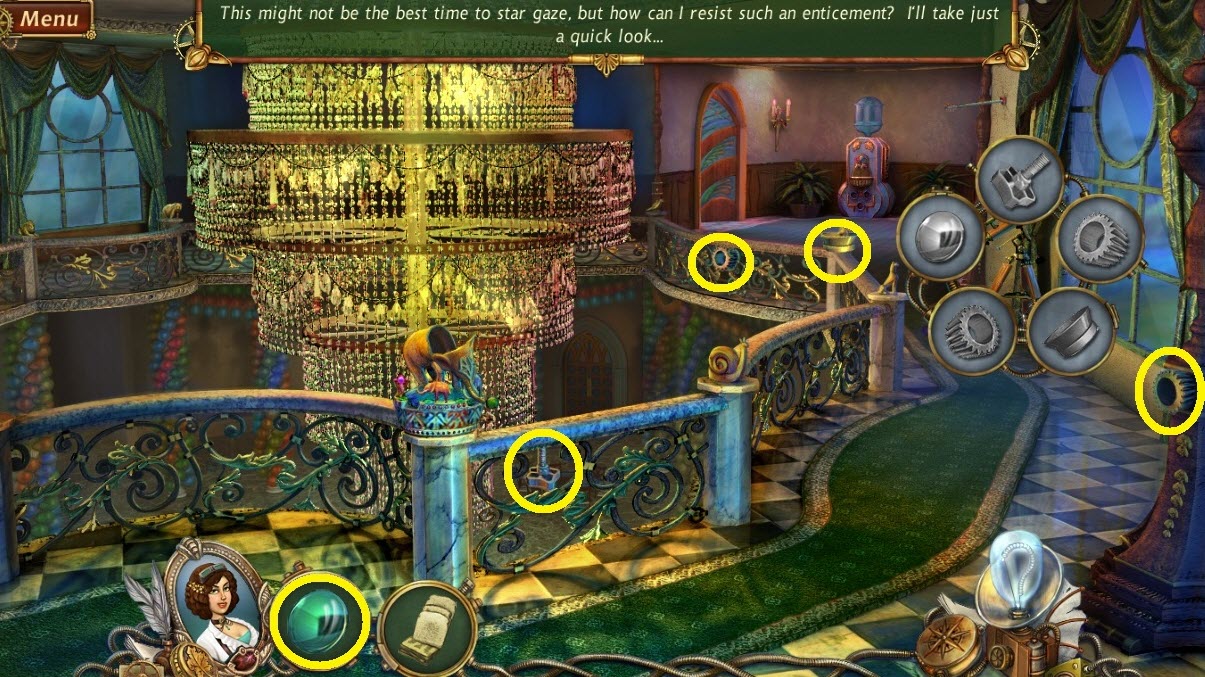
- Find the Telescope Key Objects (yellow circles).
- Zoom into the telescope.
- Take off the tape and remember the number of towers in the skyline.
- Get the tape.
- Go back to the backwards office.
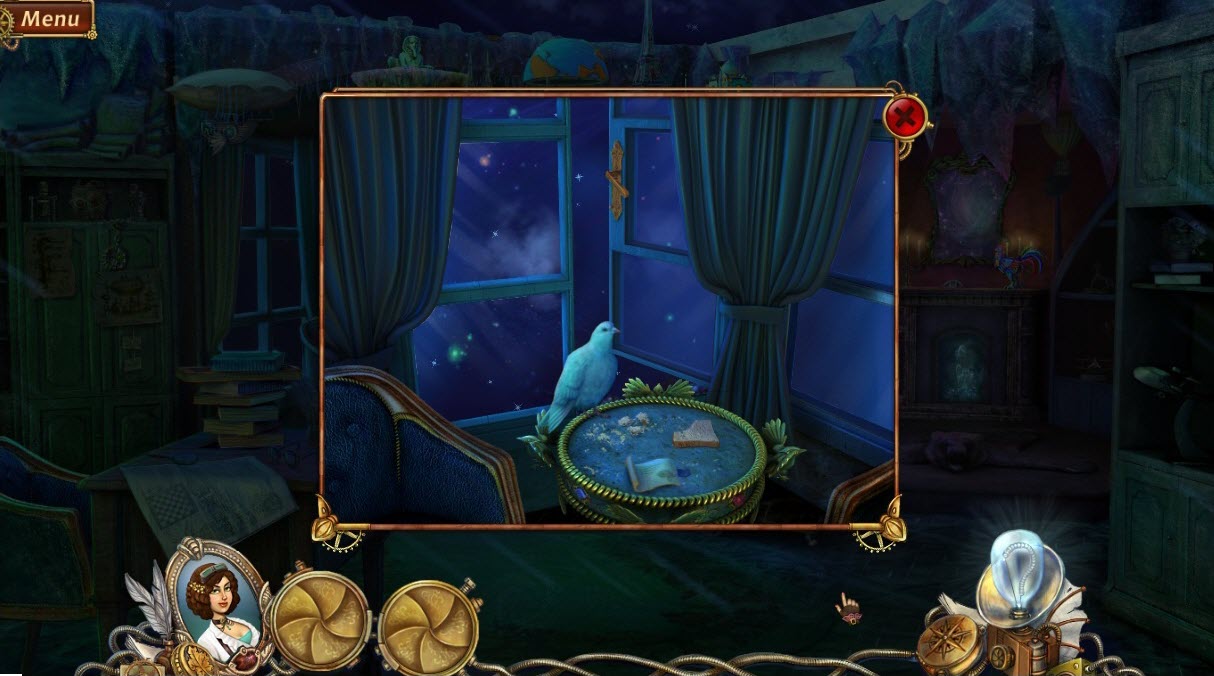
- Go toward the window and put the bread on the table.
- Fix the note that the bird drops with tape and read it.
- Go back through the portal into the office.
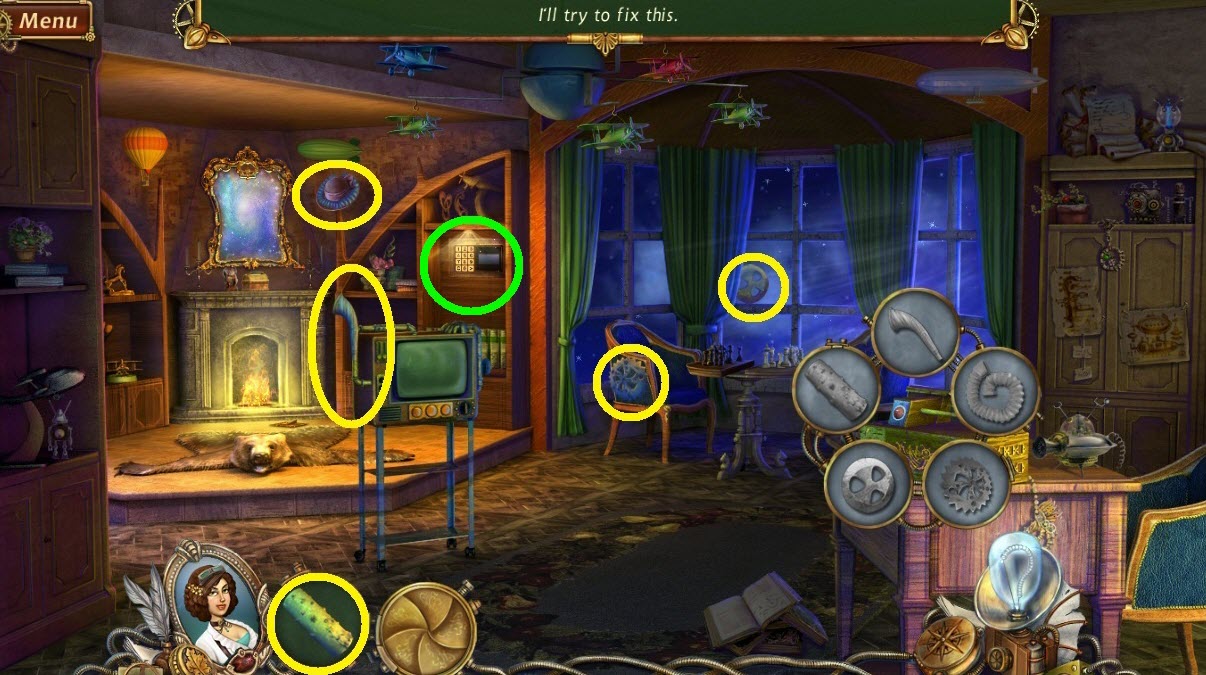
- Find the Radio Key Objects (yellow circles).
- Zoom to the wall safe (green circle).
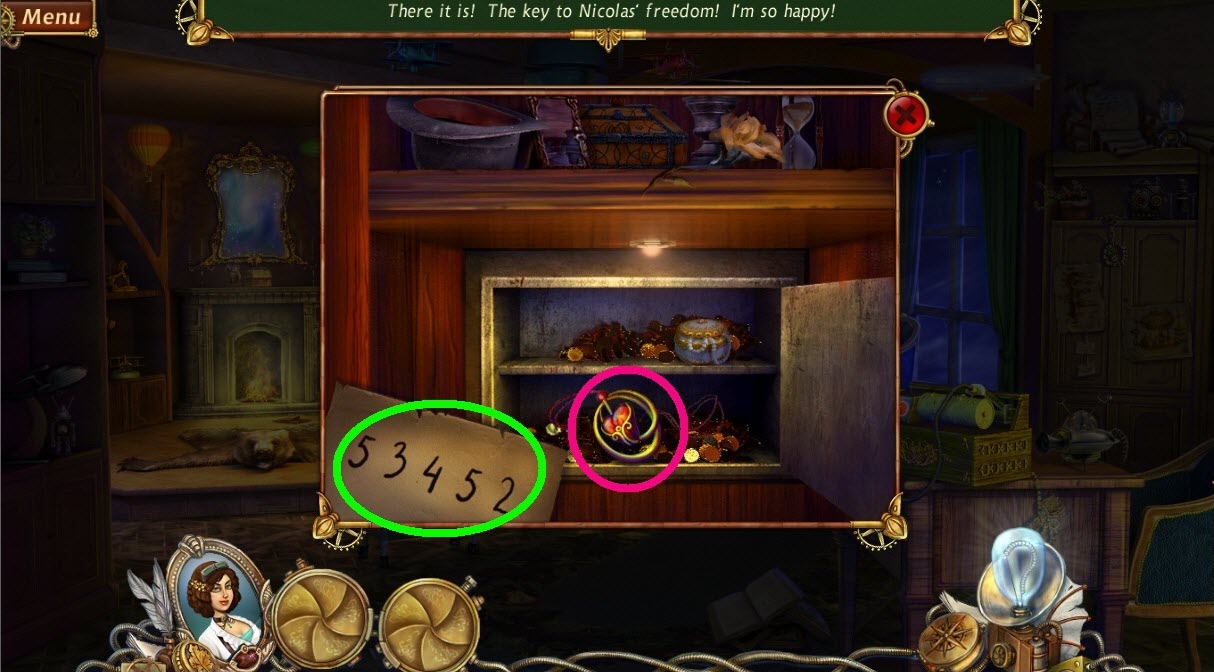
- Enter in the code (green circle).
- Pick up the locket (pink circle).
- Congratulations! You have cleared your fiancés name.
- You have finished Snark Busters High Society.
Comments will load when you reach this part of the walkthrough.