

Chapter One: The Village
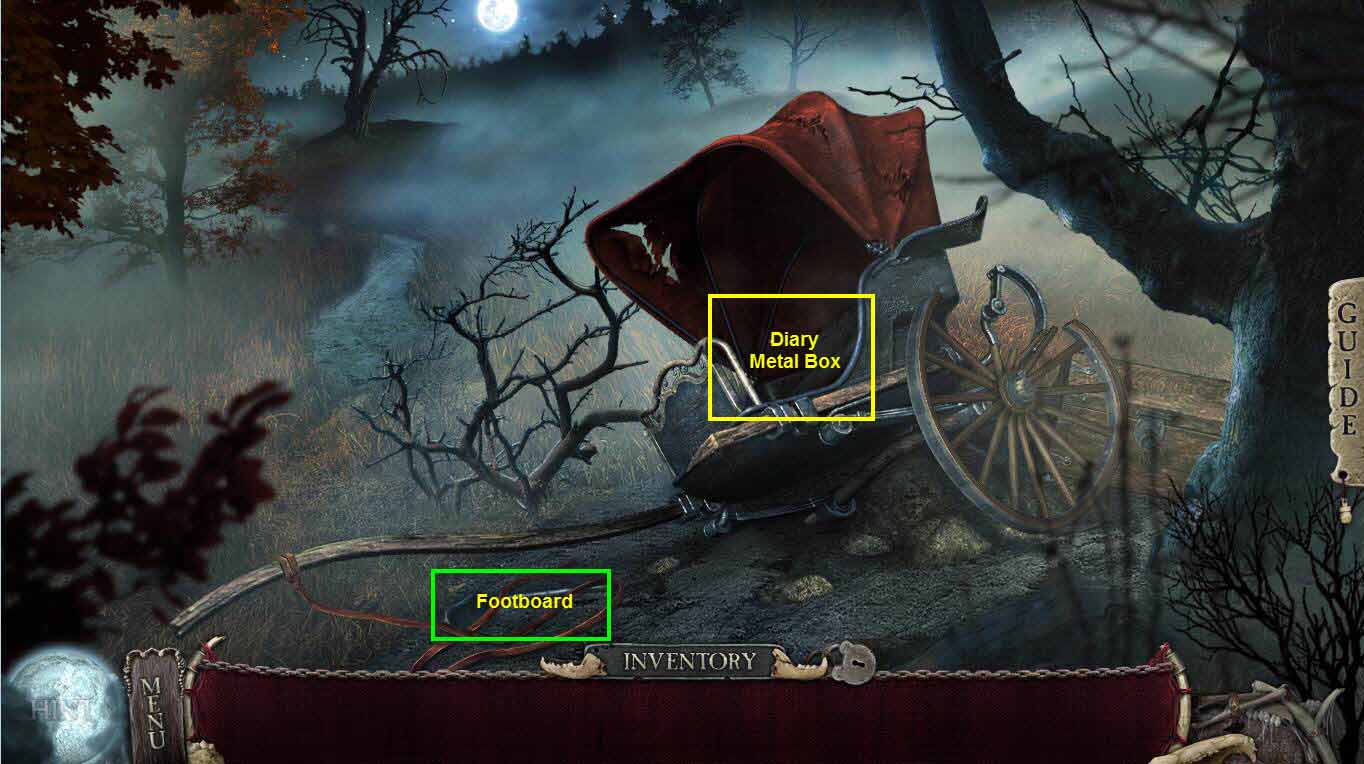
- Click on the carriage to zoom in.
- Take the DIARY.
- Click on the carriage again to zoom in.
- Take the METAL BOX.
- Click on the reigns to zoom in.
- Take the FOOTBOARD.
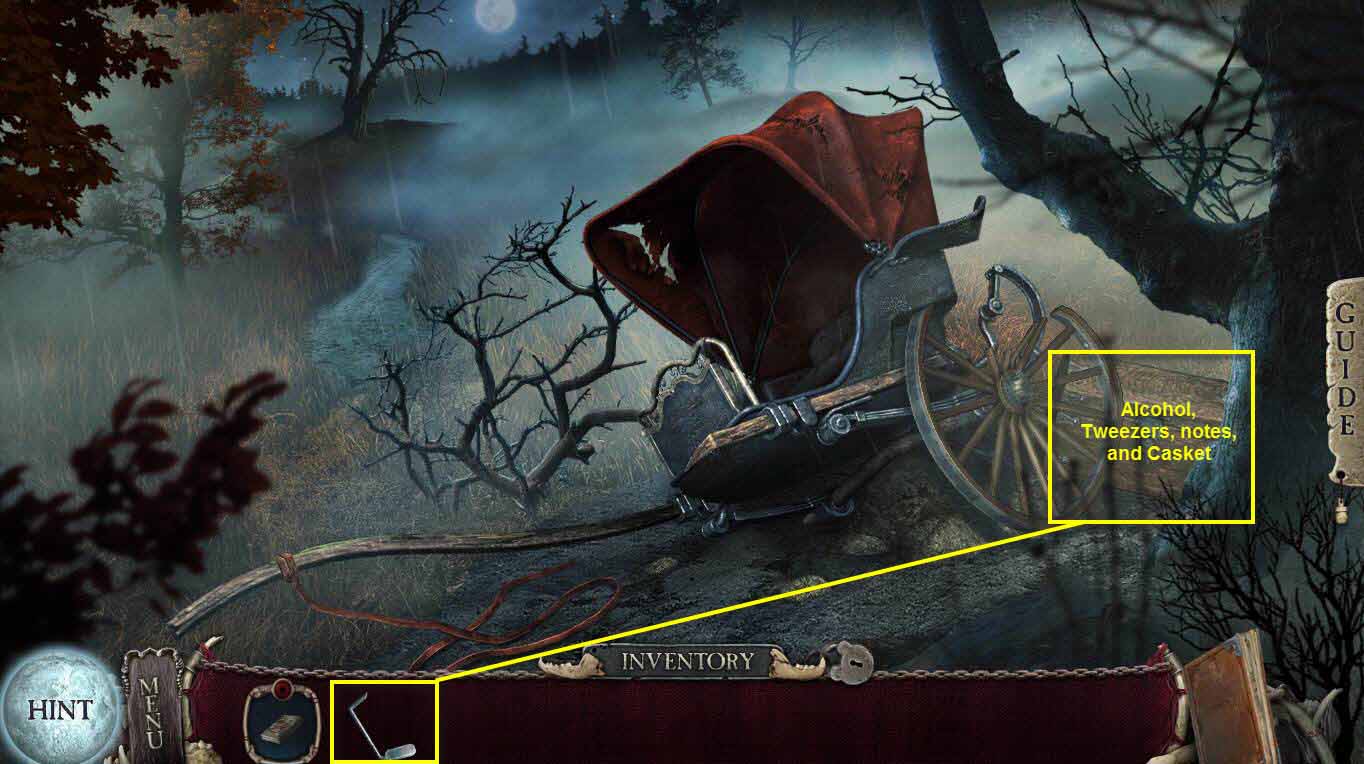
- Click on the chest to zoom in.
- Use the FOOTBOARD on the lock.
- Take the ALCOHOL, the TWEEZERS, the notes, and the CASKET.
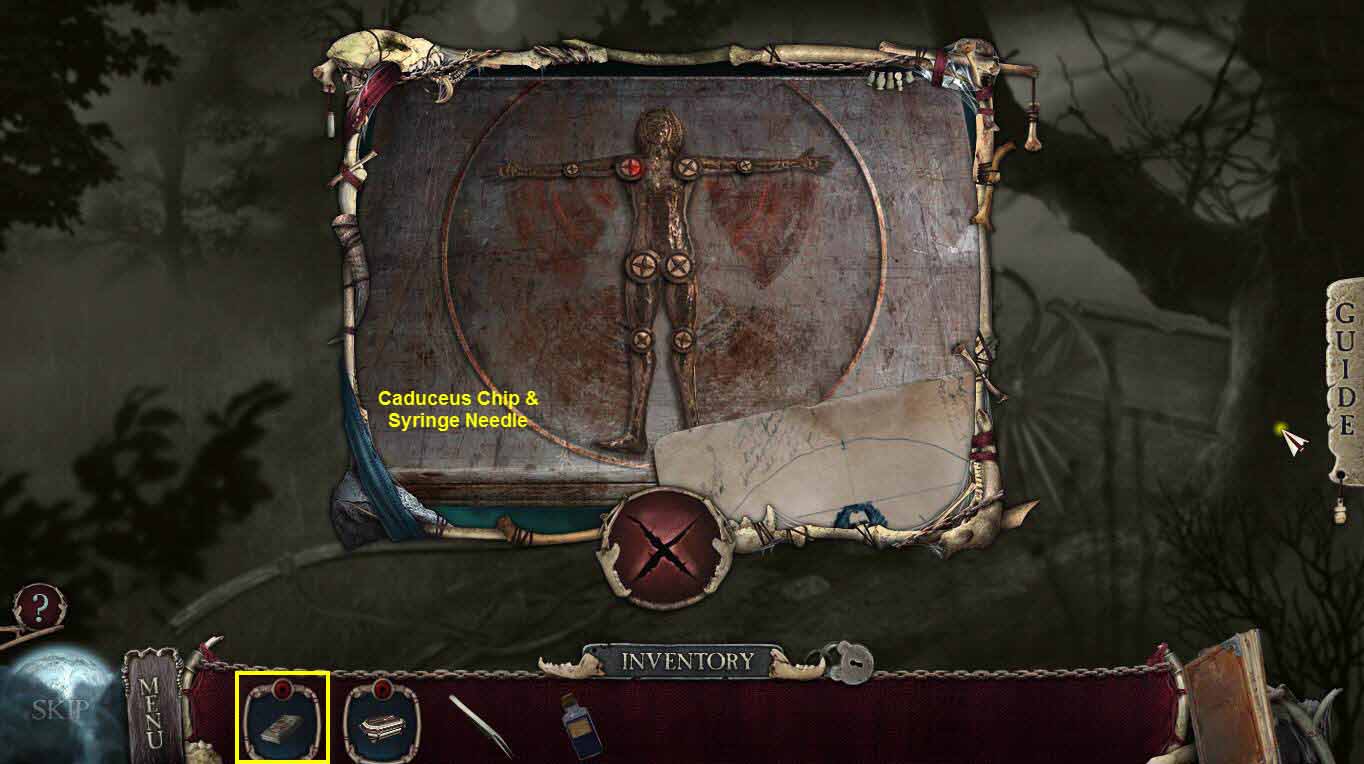
- Click on the METAL BOX in your inventory for a puzzle.
- Refer to the note to see the correct placement of the hands and arms.
- Take the CADUCEUS CHIP.
- Take the SYRINGE NEEDLE.
- Go forward.
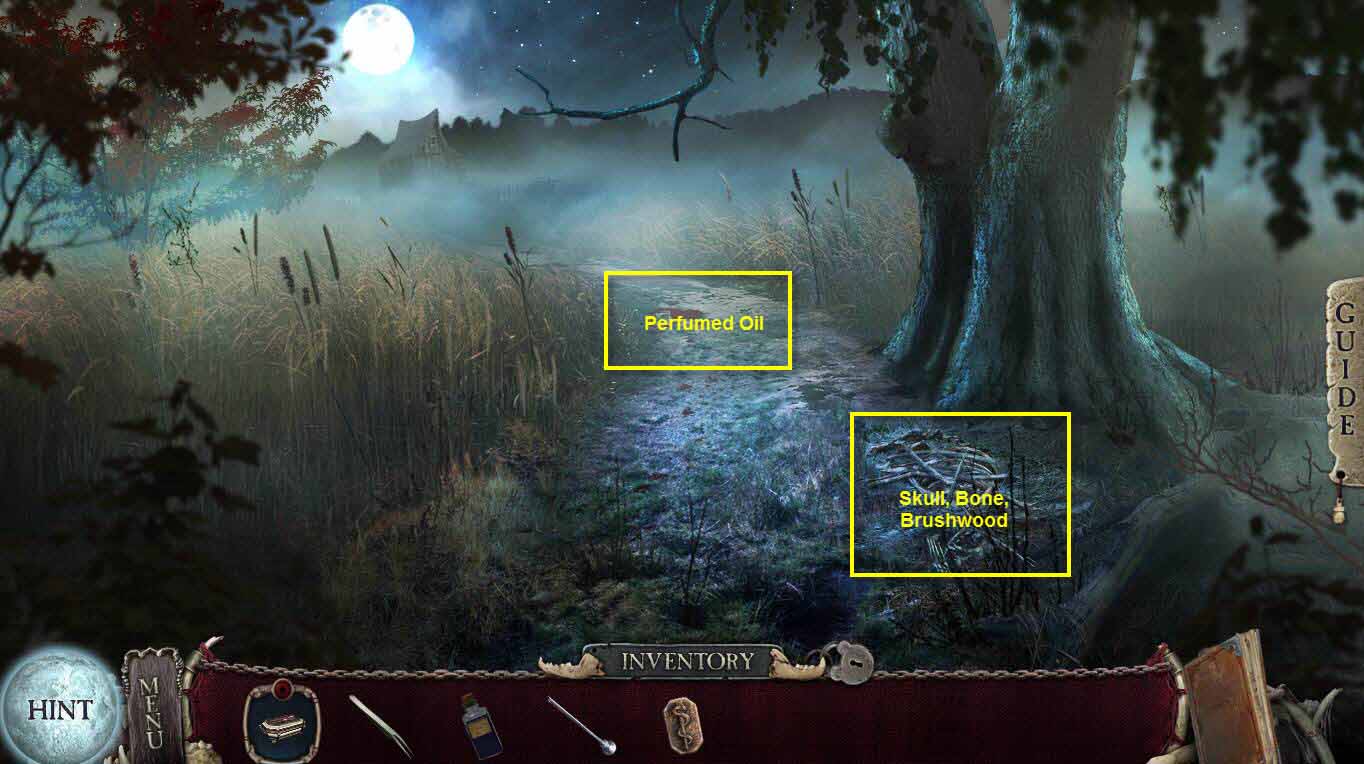
- Click to zoom in on the debris.
- Take the BRUSHWOOD, the BONE, and the SKULL.
- Click to zoom in on the blood.
- Take the PERFUMED OIL.
- Go forward.
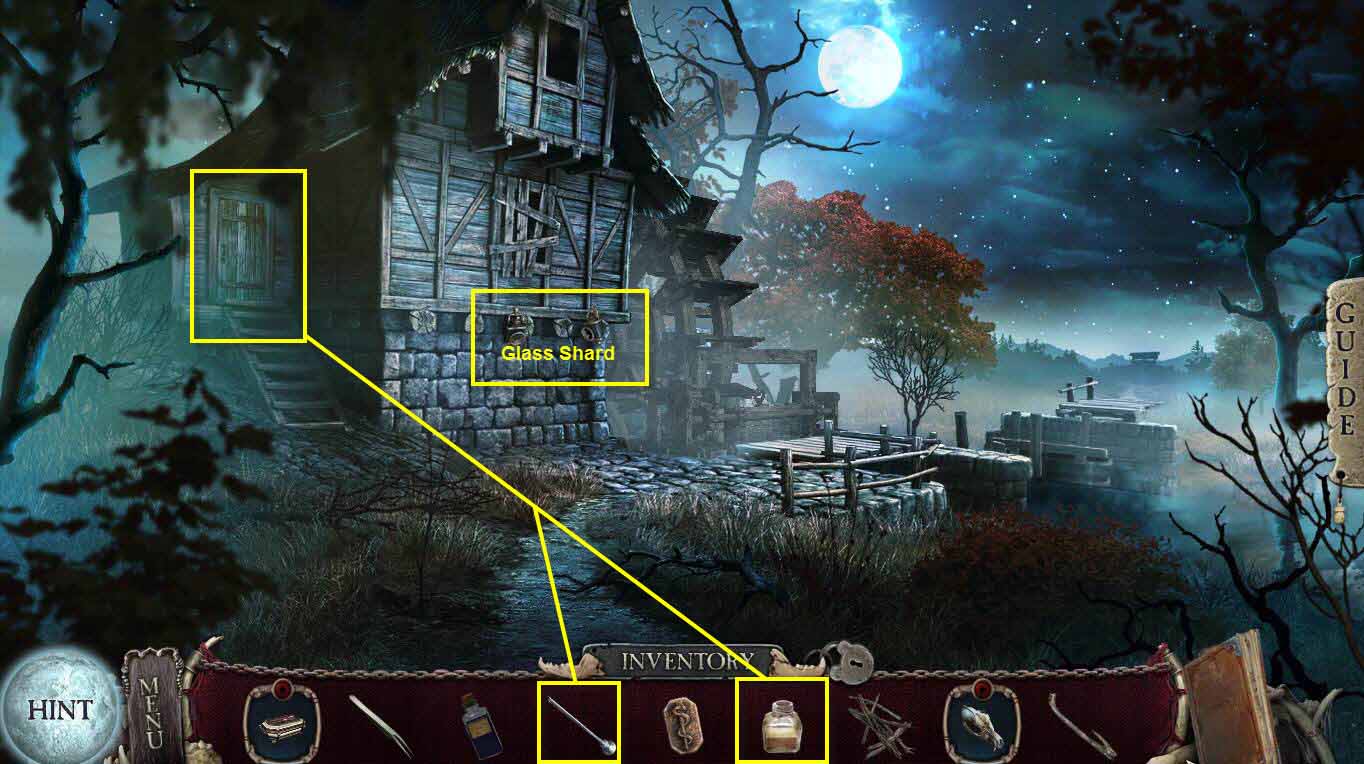
- Click to zoom in on the wall.
- Take the GLASS SHARD.
- Click on the door to zoom in.
- Use the PERFUMED OIL on the lock.
- Use the SYRINGE NEEDLE on the lock.
- This will start a minigame.
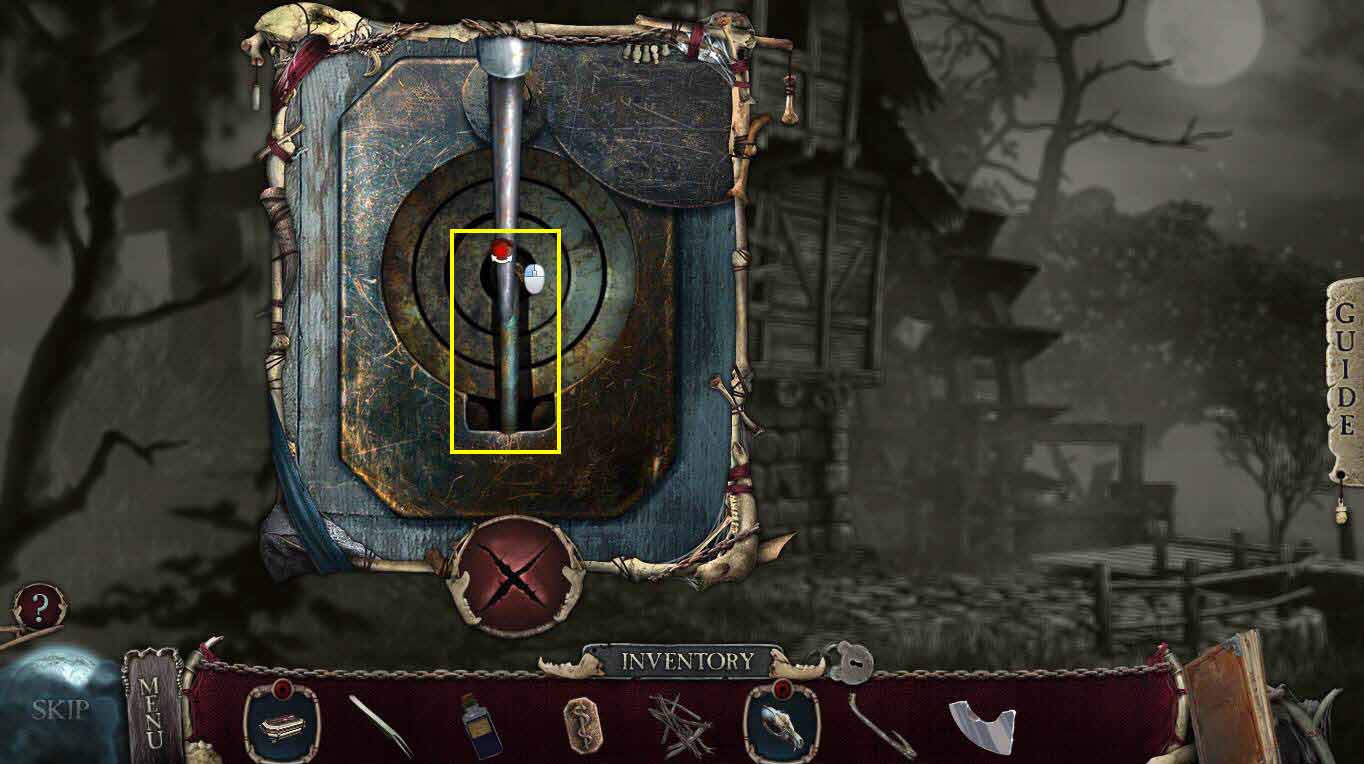
- The goal of the game is to drag the needle to each of the slots in the lock and then move the slot down.
- Do this for each slot.
- Go into the mill.
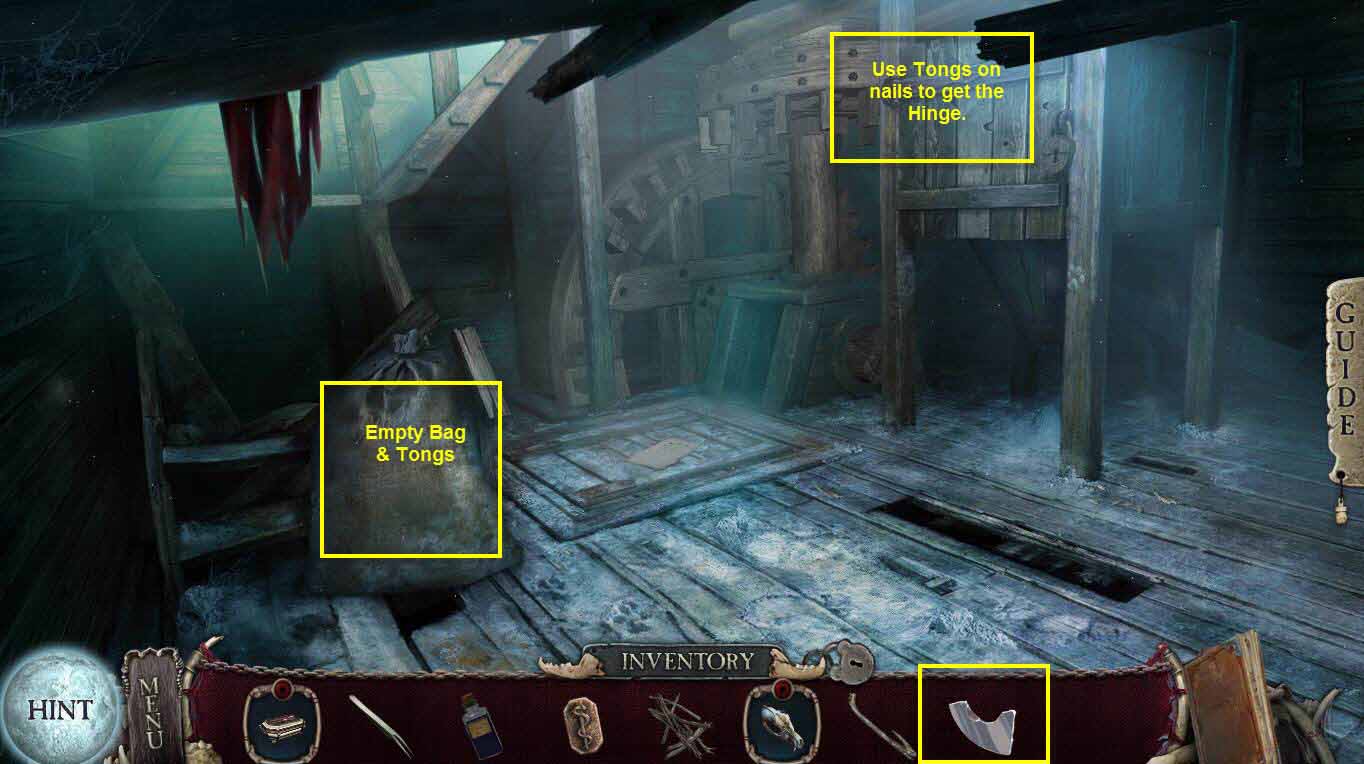
- Click on the bag to zoom in.
- Use the GLASS SHARD on the bag.
- Take the EMPTY BAG and the TONGS under it.
- Click to zoom in on the door on the right.
- Use the TONGS to get rid of the three nails.
- You will receive the HINGE.
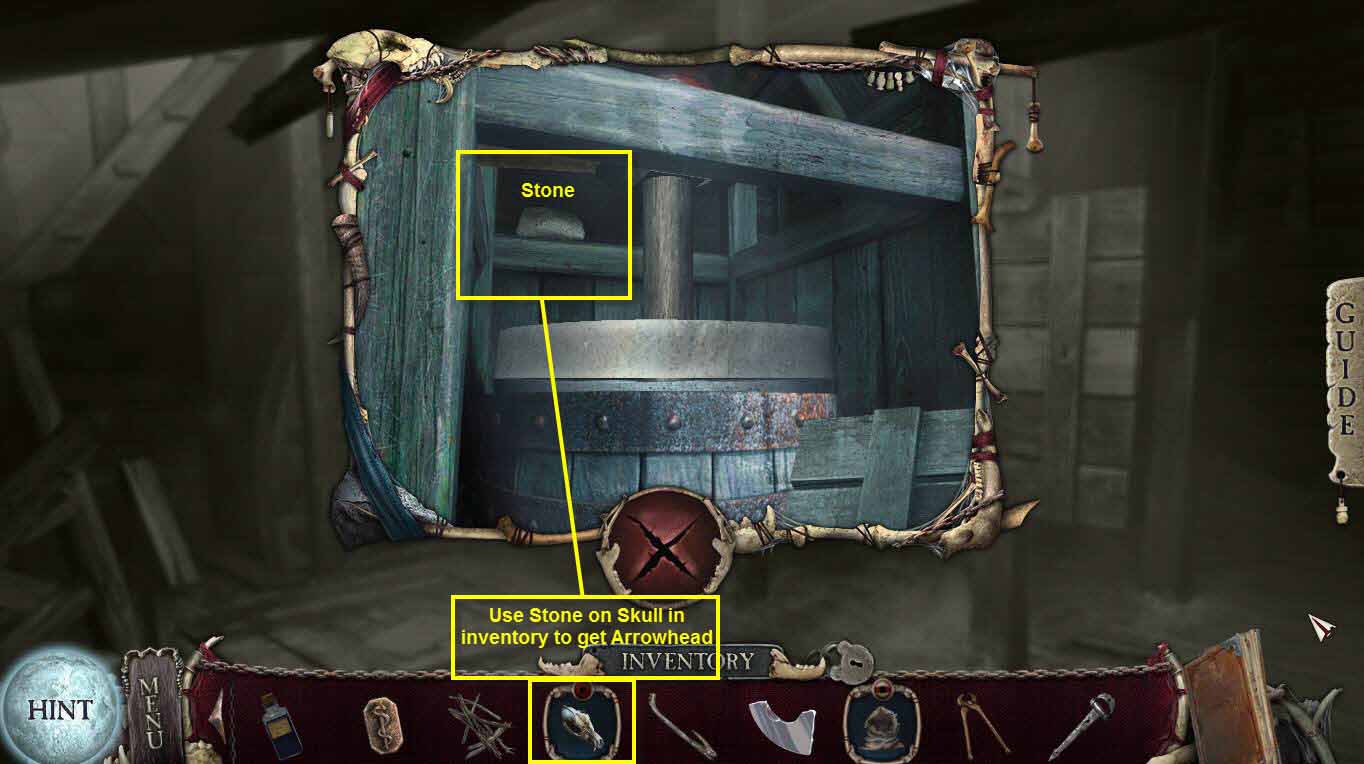
- Take the STONE.
- Click the SKULL in your inventory.
- Use the STONE on the skull to smash it three times.
- Take the ARROWHEAD.
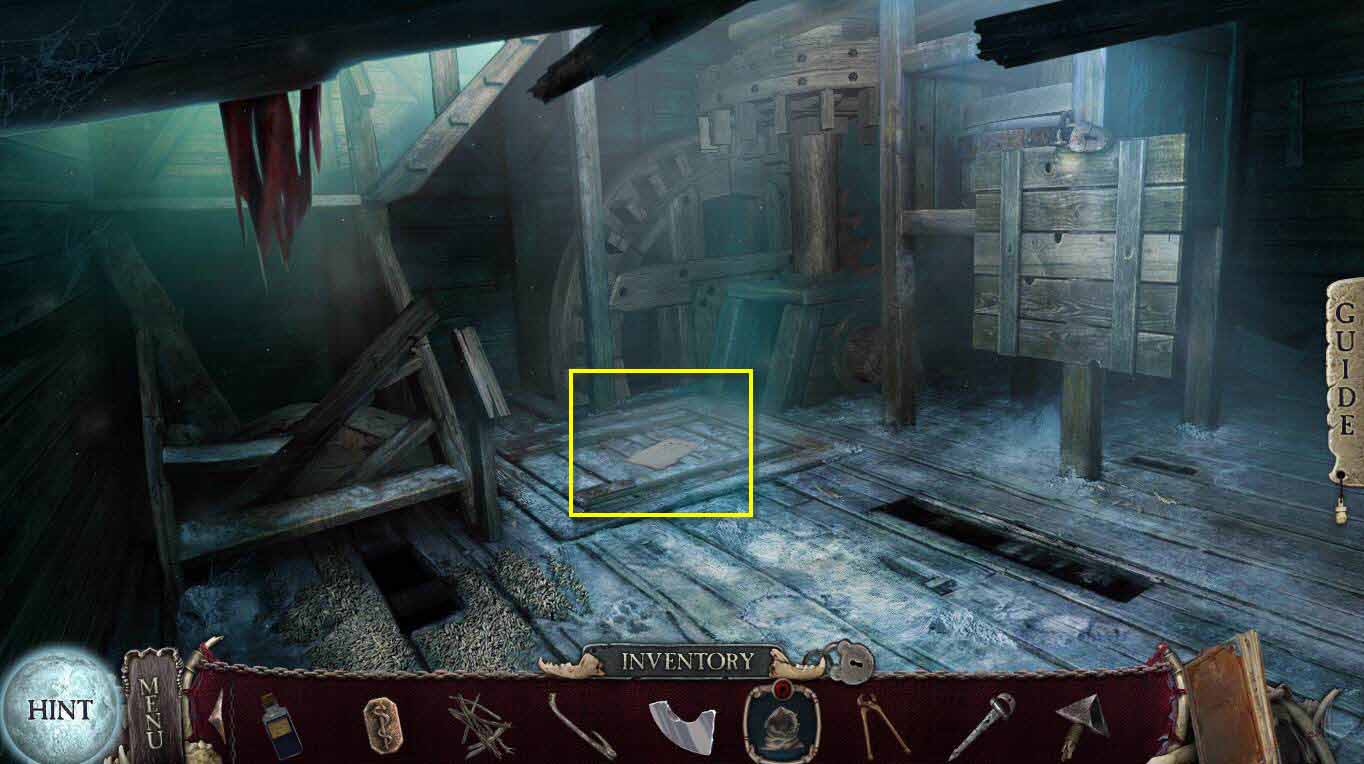
- Click on the trapdoor to zoom in.
- Read the note.
- Go back twice.
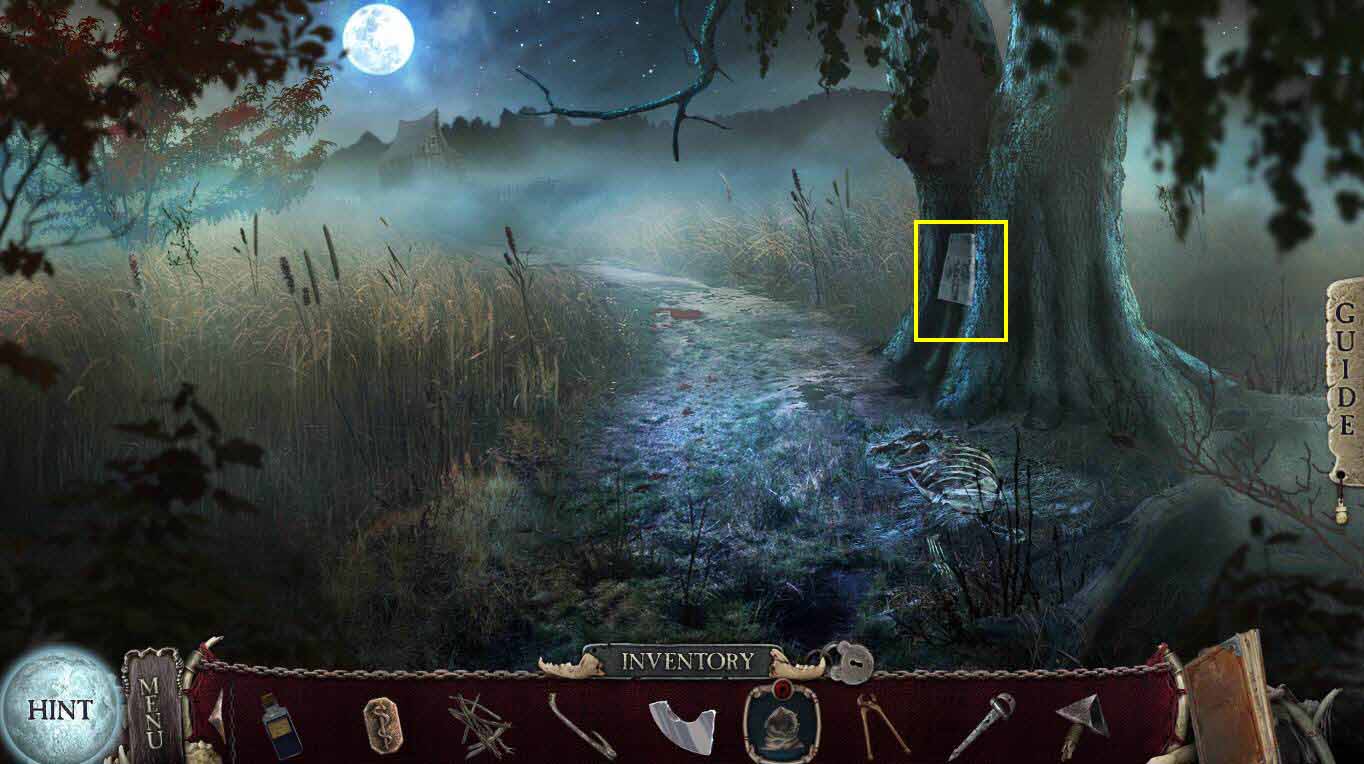
- Read the newspaper on the tree.
- Go back one screen.
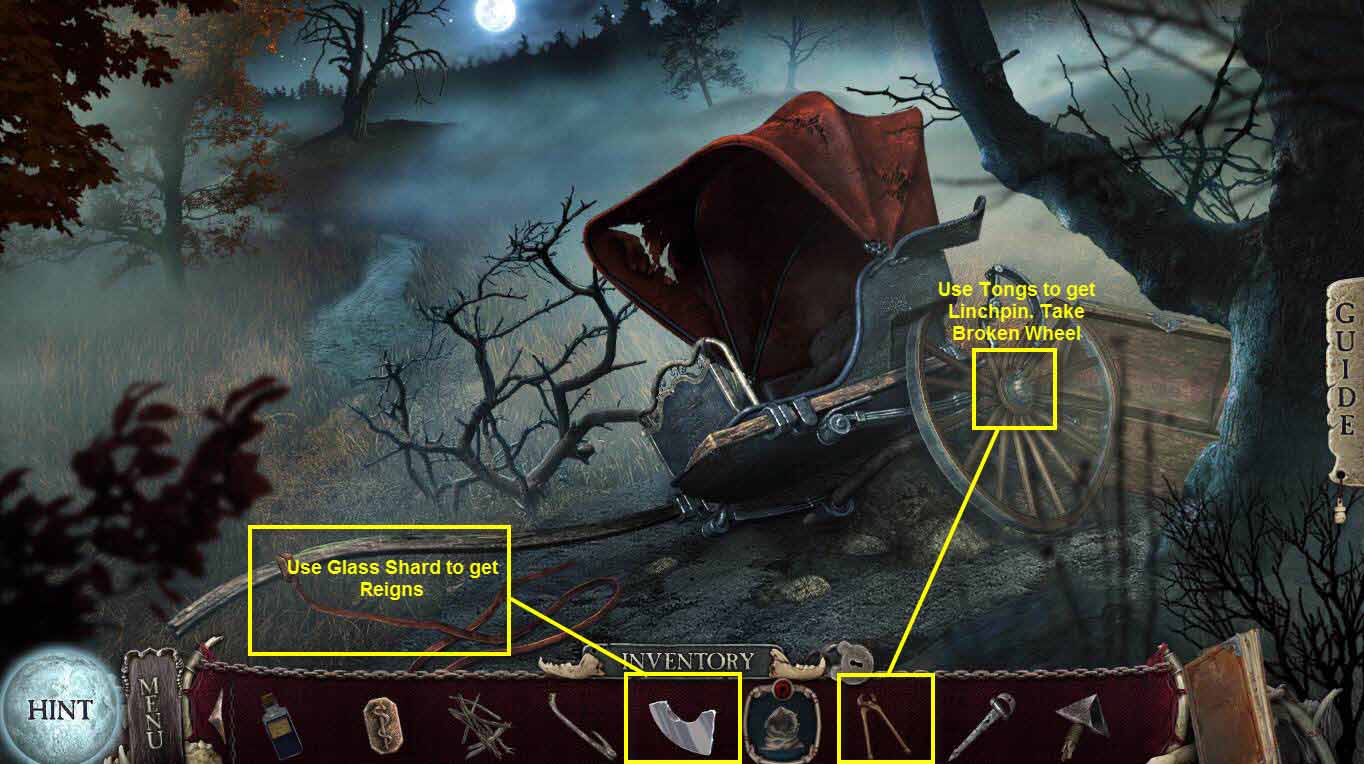
- Click on the reins to zoom in.
- Use the GLASS SHARD on the reigns to cut them.
- Take the REIGNS.
- Click on the wheel to zoom in.
- Use the TONGS to remove the LINCHPIN.
- Take the BROKEN WHEEL.
- Go forward three screens.
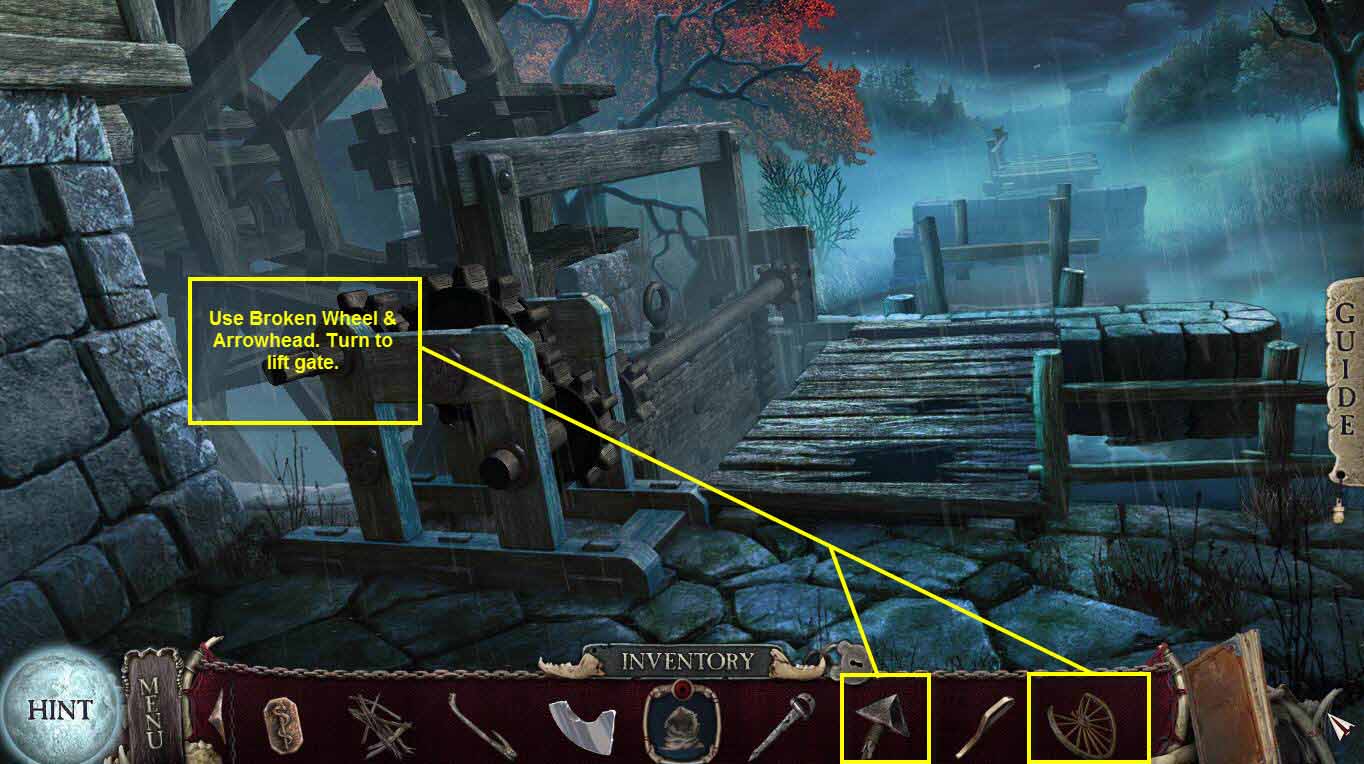
- Use the BROKEN WHEEL on the winch.
- Use the ARROWHEAD on the wheel to hold it in place.
- Click and drag the wheel clockwise to raise the dam.
- The water will recede.
- Go forward.
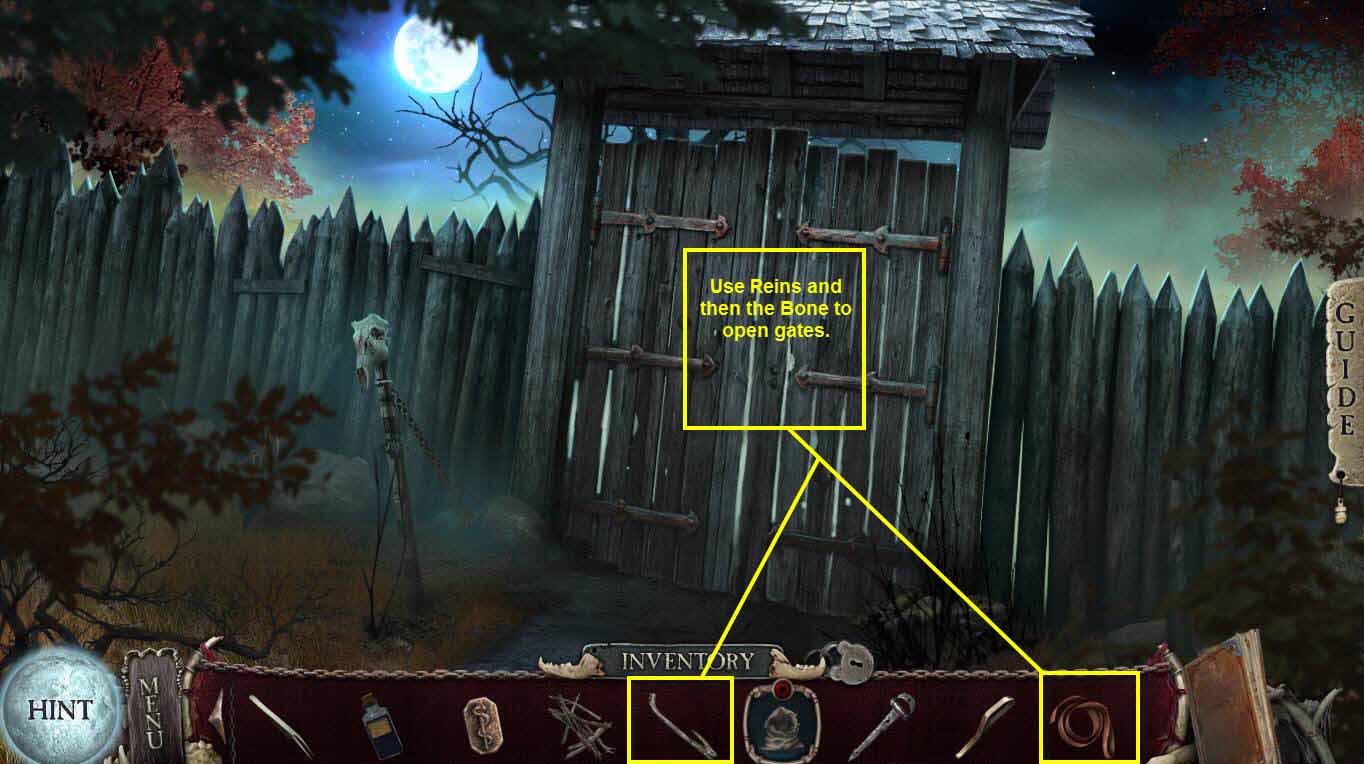
- Click on the gates to zoom in.
- Use the REINS on the lock.
- Use the BONE on the rein to pull it.
- Click the reins to pull the latch up.
- Click on the gates to open them.
- Enter the village.
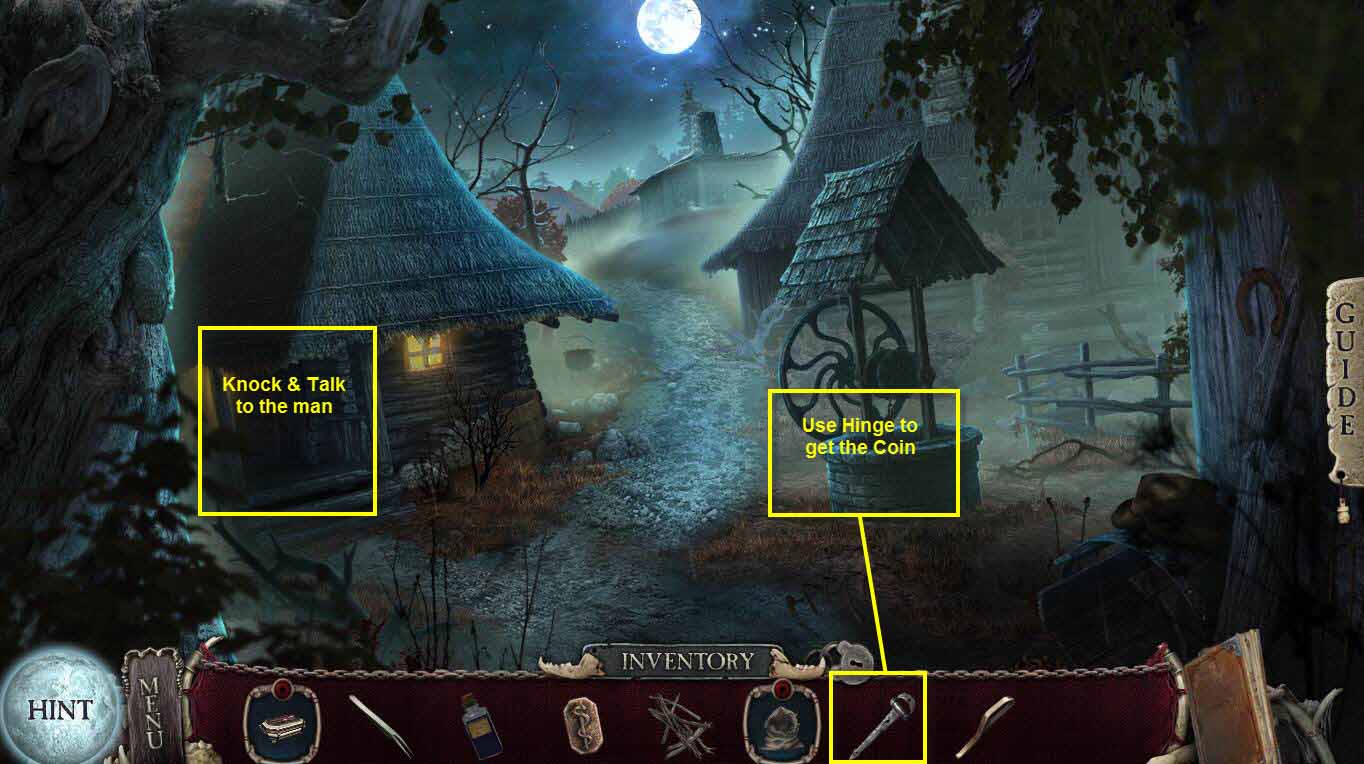
- Click to zoom in on the well.
- Use the HINGE on the coin.
- Click the hinge to move the stones.
- Take the COIN.
- Click to zoom in on the hut.
- Click to knock.
- Talk to the man.
- Go into the hut.
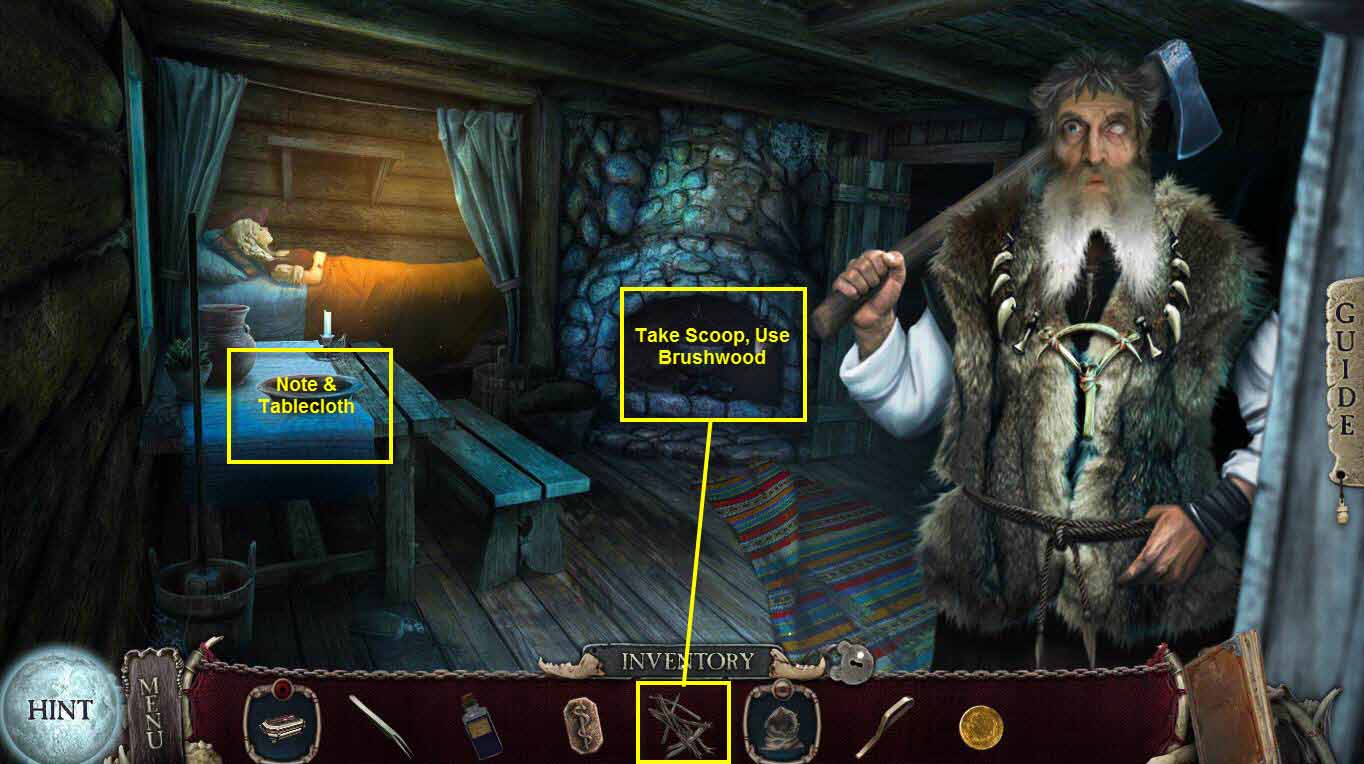
- Click to zoom in on the fireplace.
- Take the SCOOP.
- Use the BRUSHWOOD on the fireplace.
- Click on the table.
- Click on each of the items to move them.
- Click to read the note.
- Take the TABLECLOTH.
- Go back one screen and then forward twice.
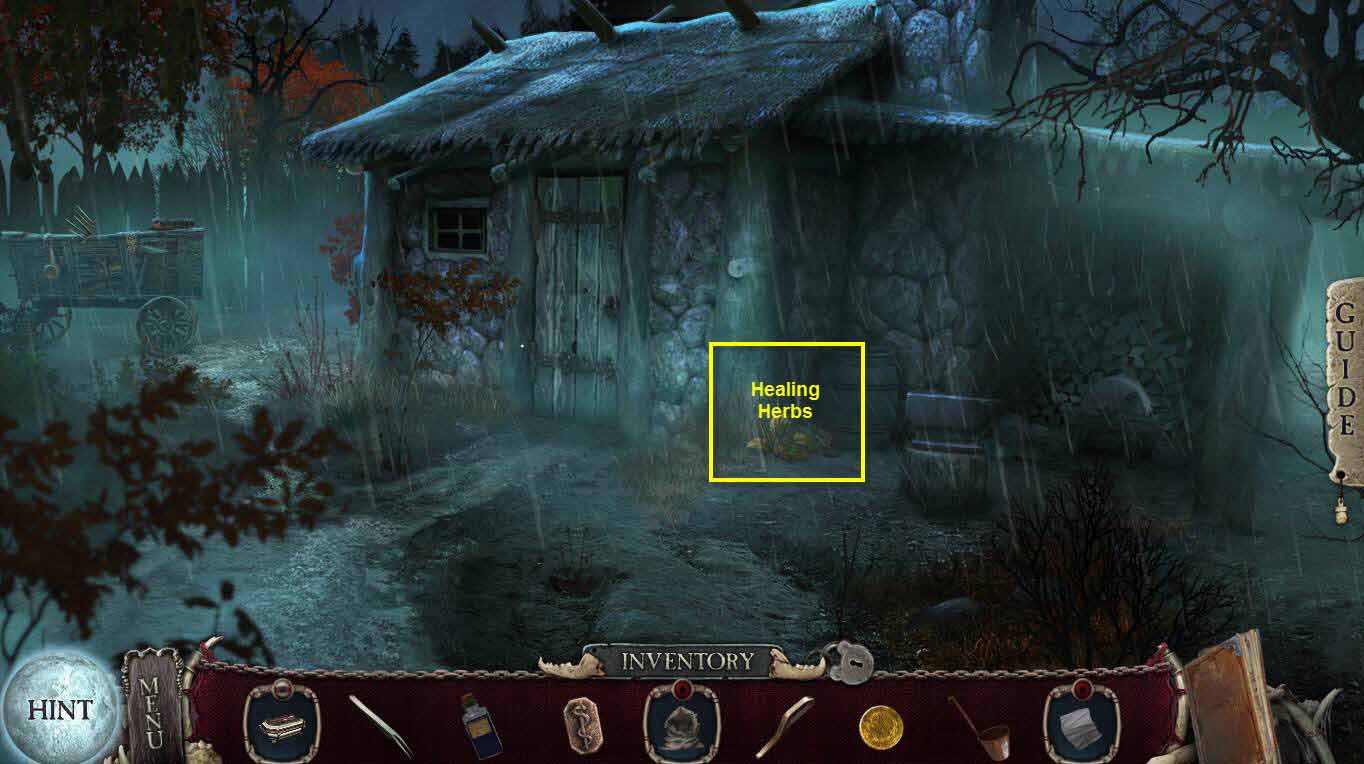
- Click on the plant by the house to zoom in.
- Take the HEALING HERBS.
- Go to the left toward the wagon.
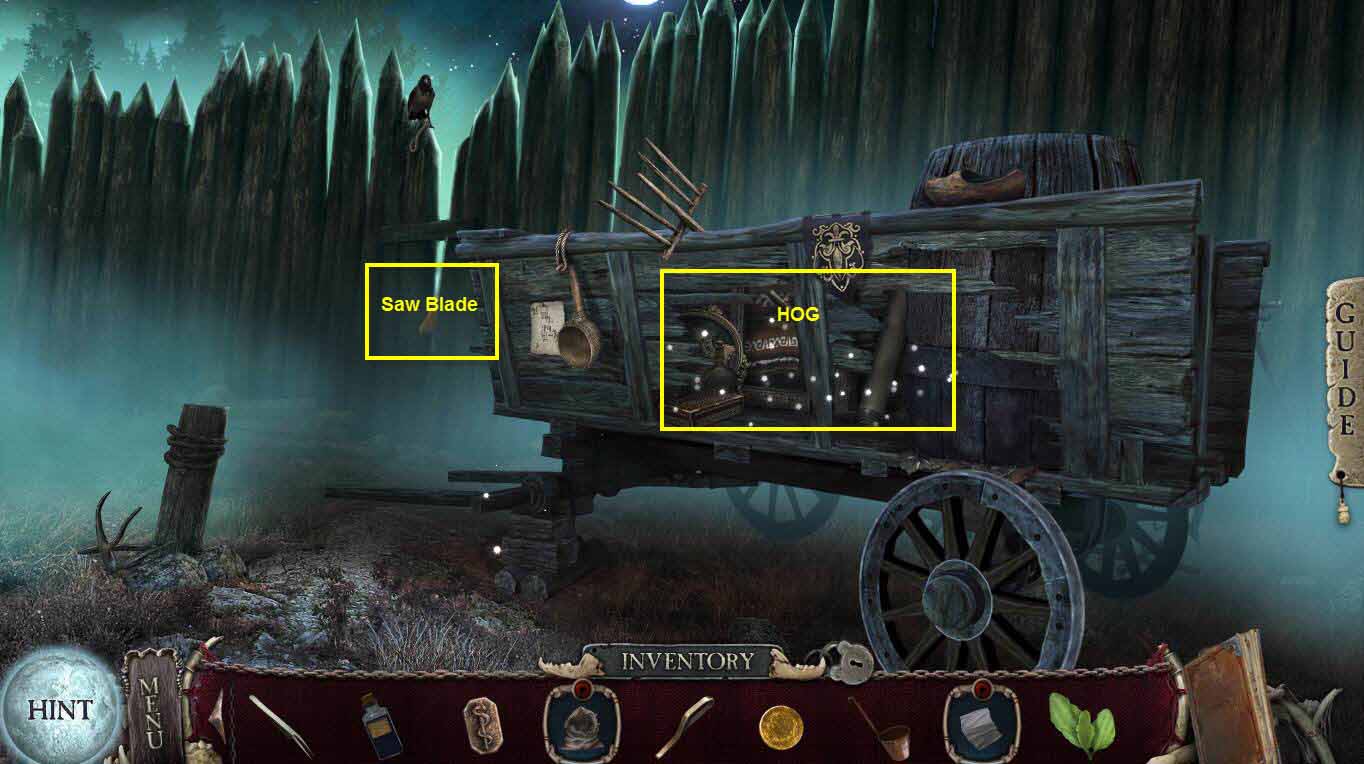
- Click to zoom in on the crack in the fence.
- Take the SAW BLADE.
- Click on the wagon to play a hidden object scene.
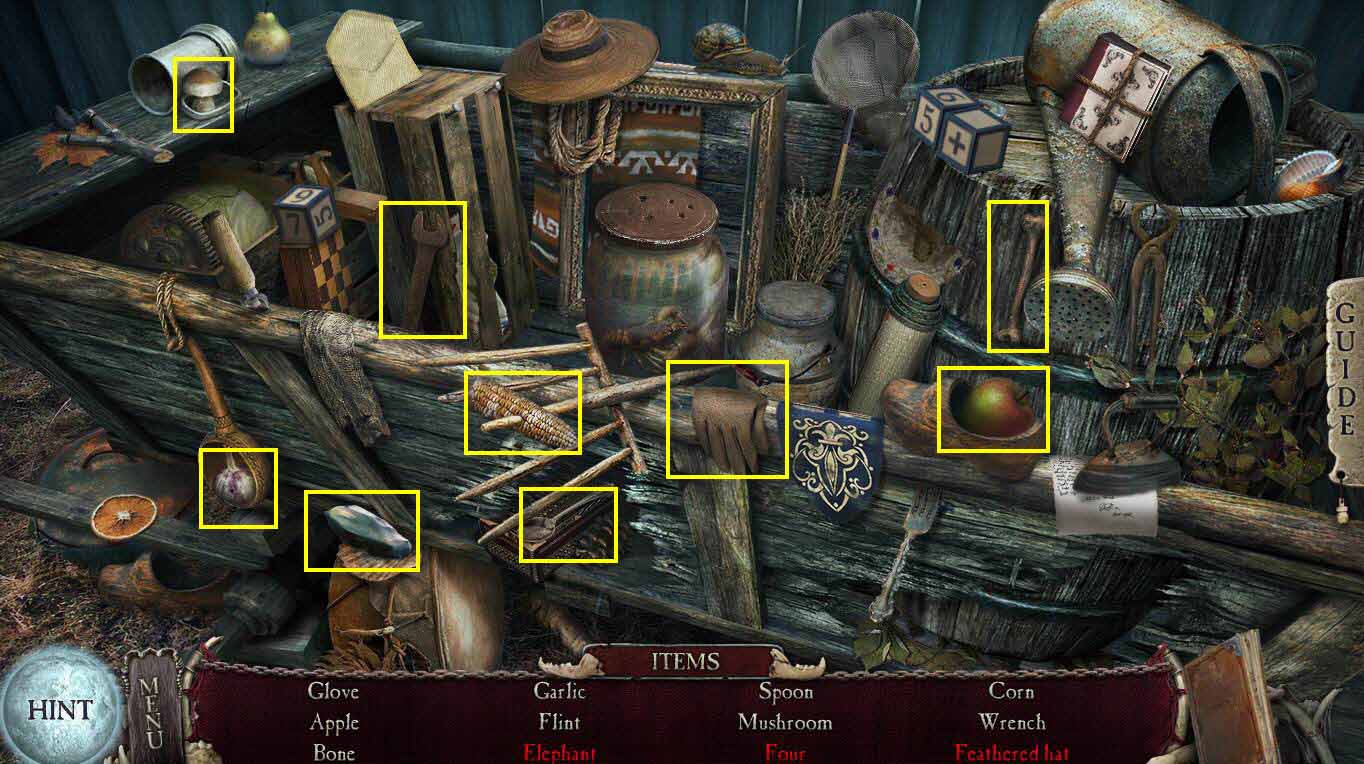
- Find all the items in white on the list.
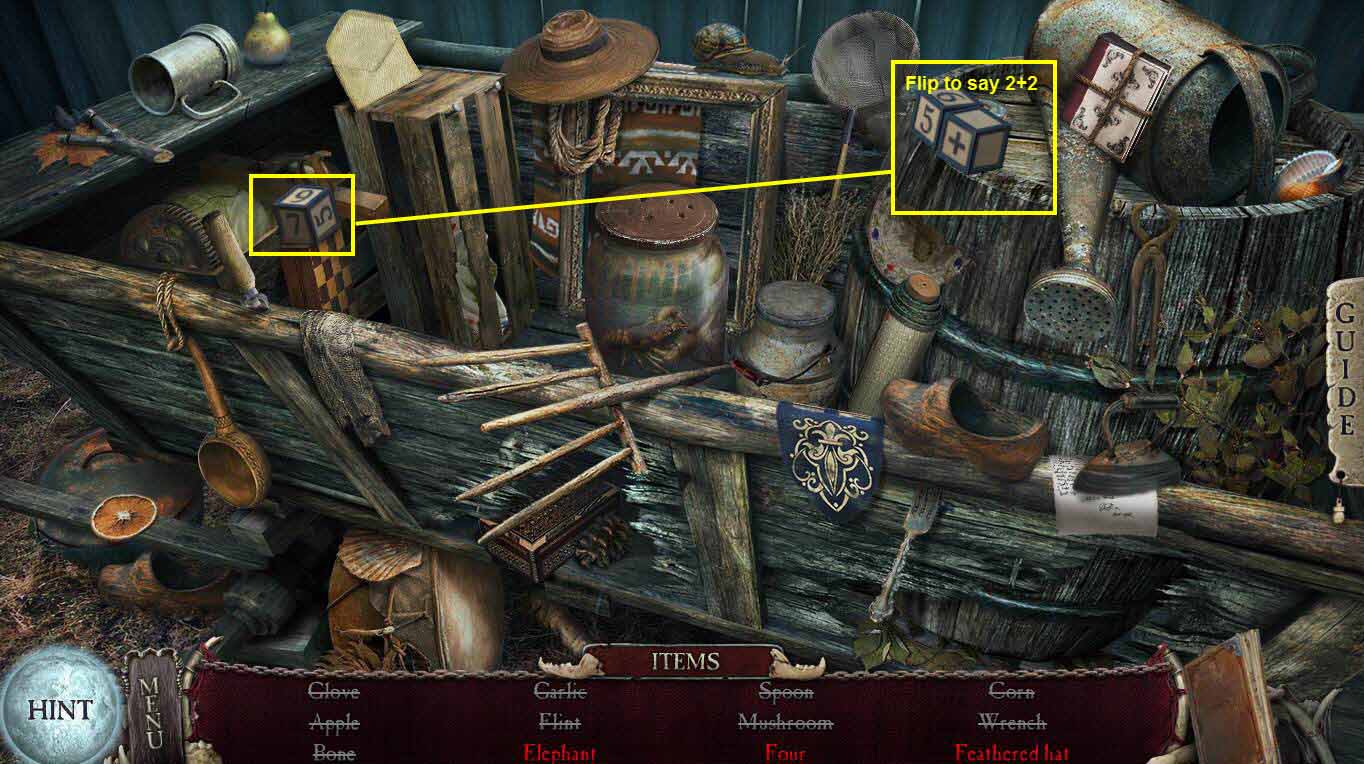
- To find the four, move the the block on the other two blocks.
- Turn the numbers so they read 2+2 to make 4.
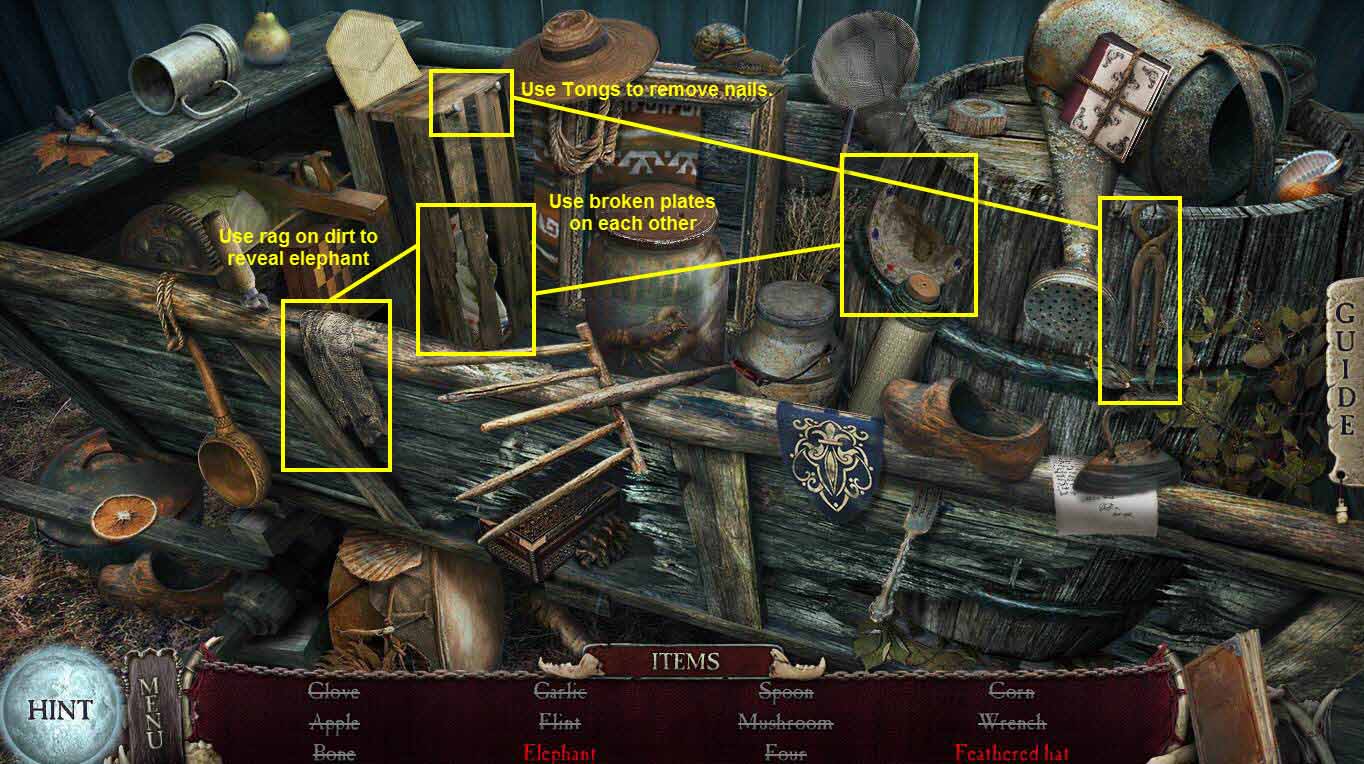
- To find the elephant, use the tongs to open the crate.
- Use the 2 plate pieces on each other.
- Use the rag on the plate to reveal the elephant.
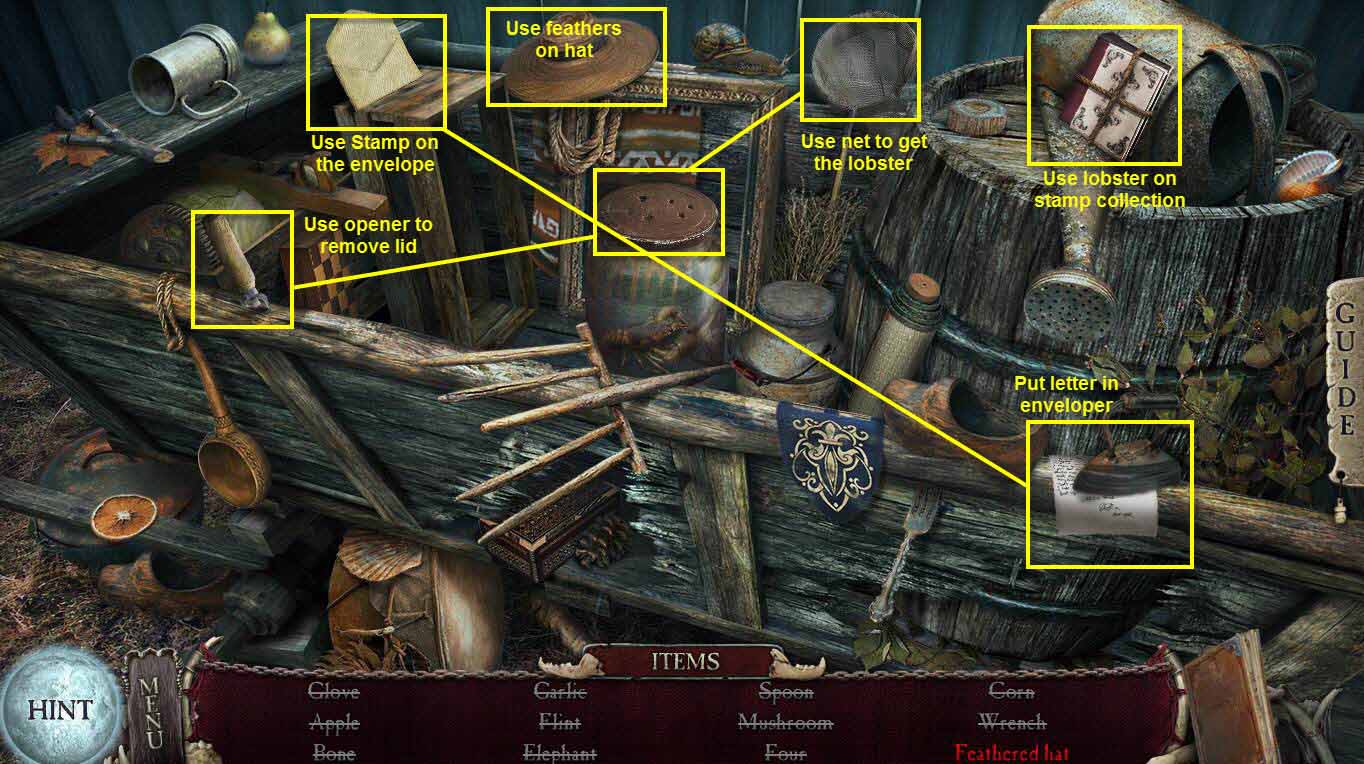
- To find the Feathered Hat, use the opener on the lid of the jar.
- Use the net to get the lobster.
- Use the lobster on the string around the stamp collection.
- Put the letter in the envelope.
- Use the stamp on the envelope.
- Use the feathers the bird drops on the hat to get the feathered hat.
- You will receive the FLINT.
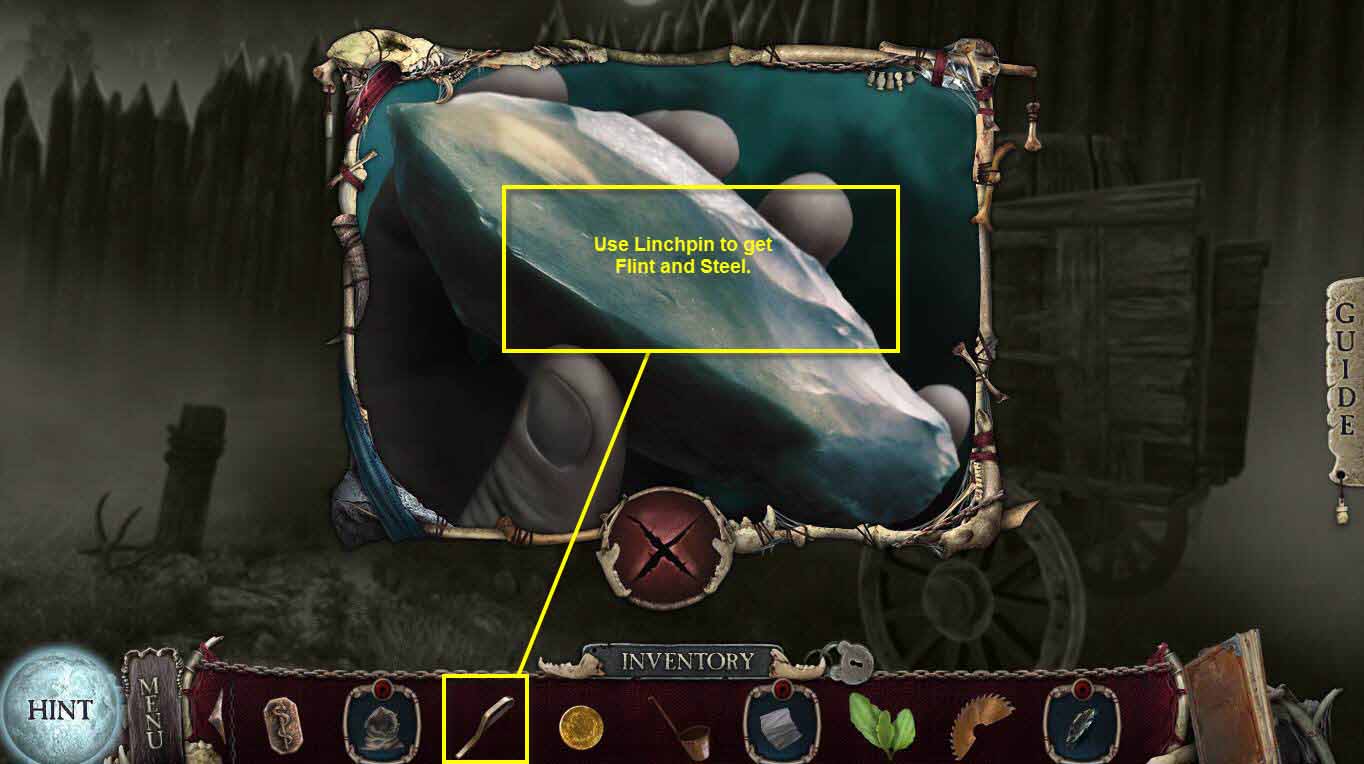
- Click on the FLINT in your inventory.
- Use the LINCHPIN on it.
- You will receive FLINT AND STEEL.
- Go back outside the mill.
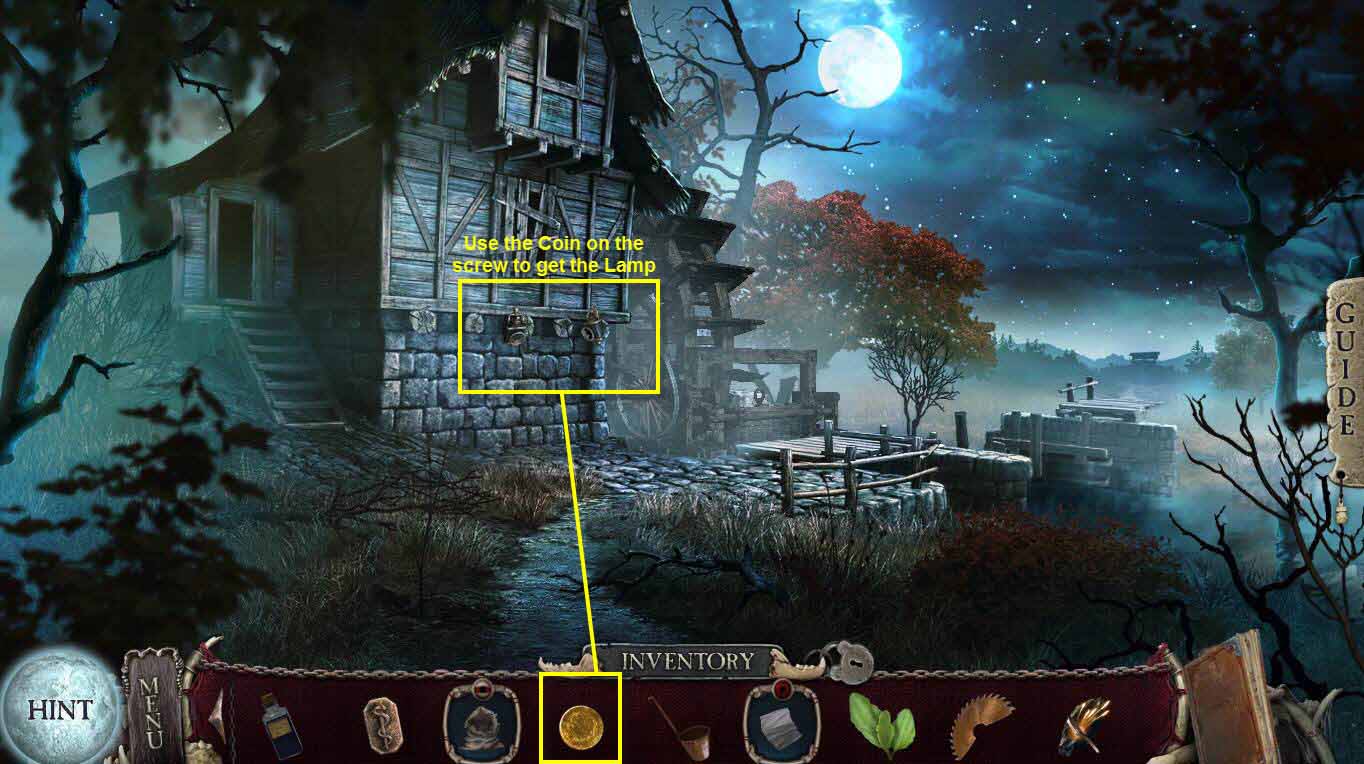
- Click on the wall to zoom in.
- Use the COIN on the screw.
- Take the LAMP.
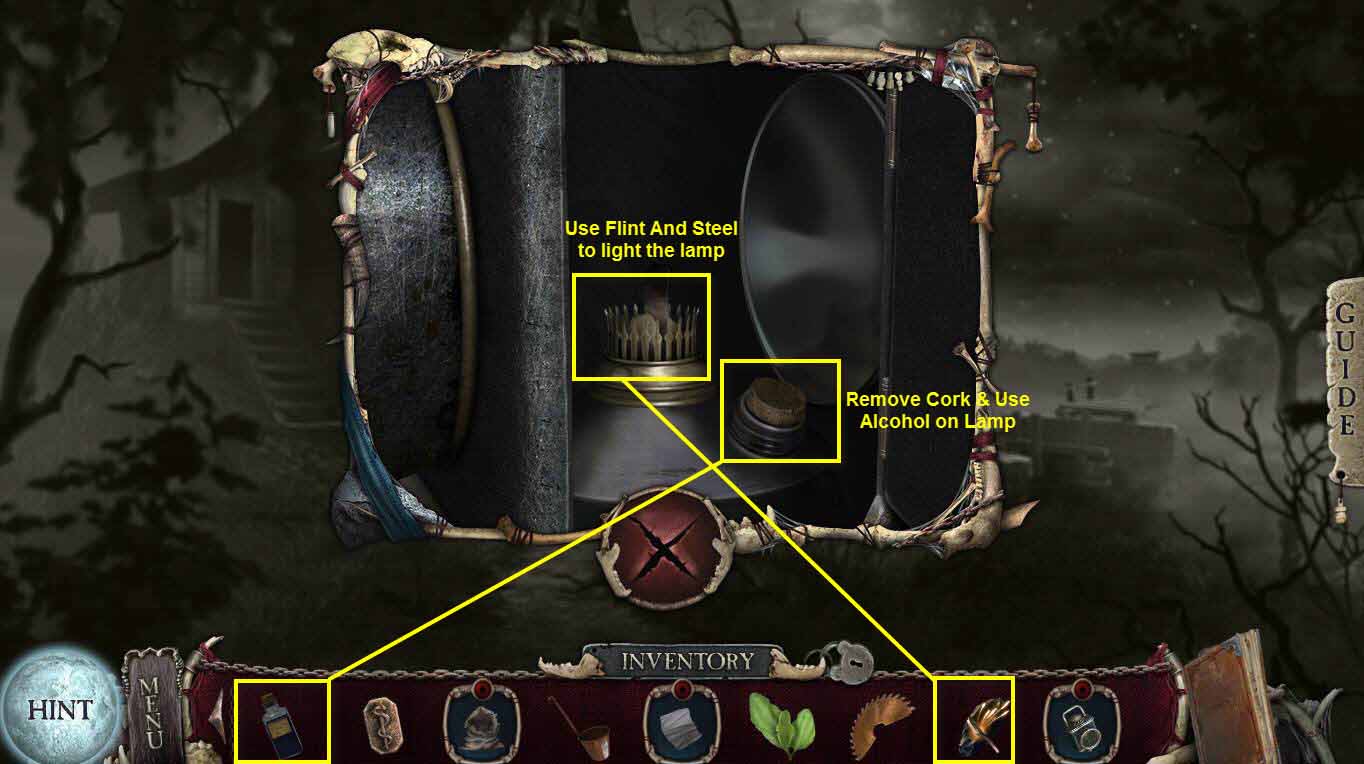
- Click on the LAMP in your inventory.
- Click on the cover to open it.
- Click on the cork to remove it.
- Use the ALCOHOL on the lamp.
- Use the FLINT AND STEEL on the wick.
- You will now have a lit lamp on your screen in the lower right.
- Go into the mill.
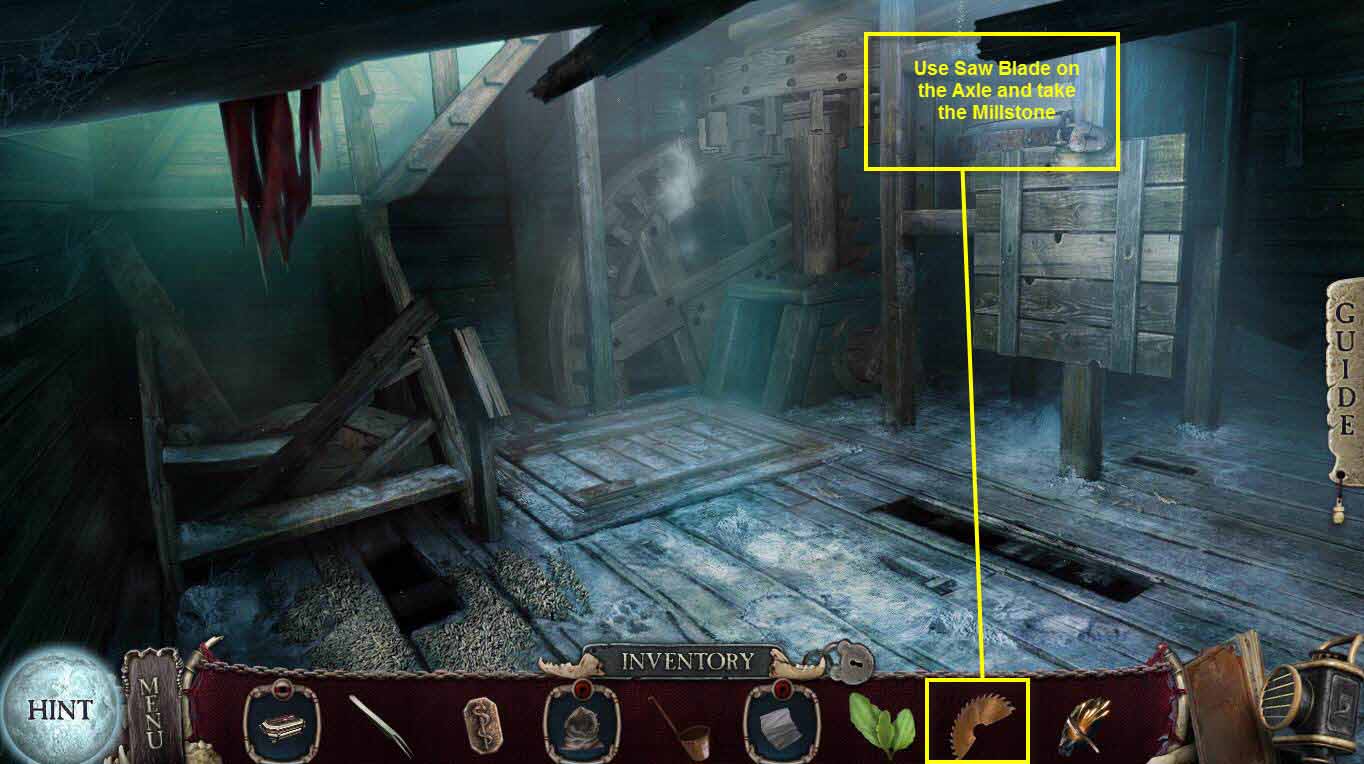
- Click on the mill stone area to zoom in.
- Use the SAW BLADE on the axle.
- Take the MILLSTONE.
- Return to the wagon in the village.
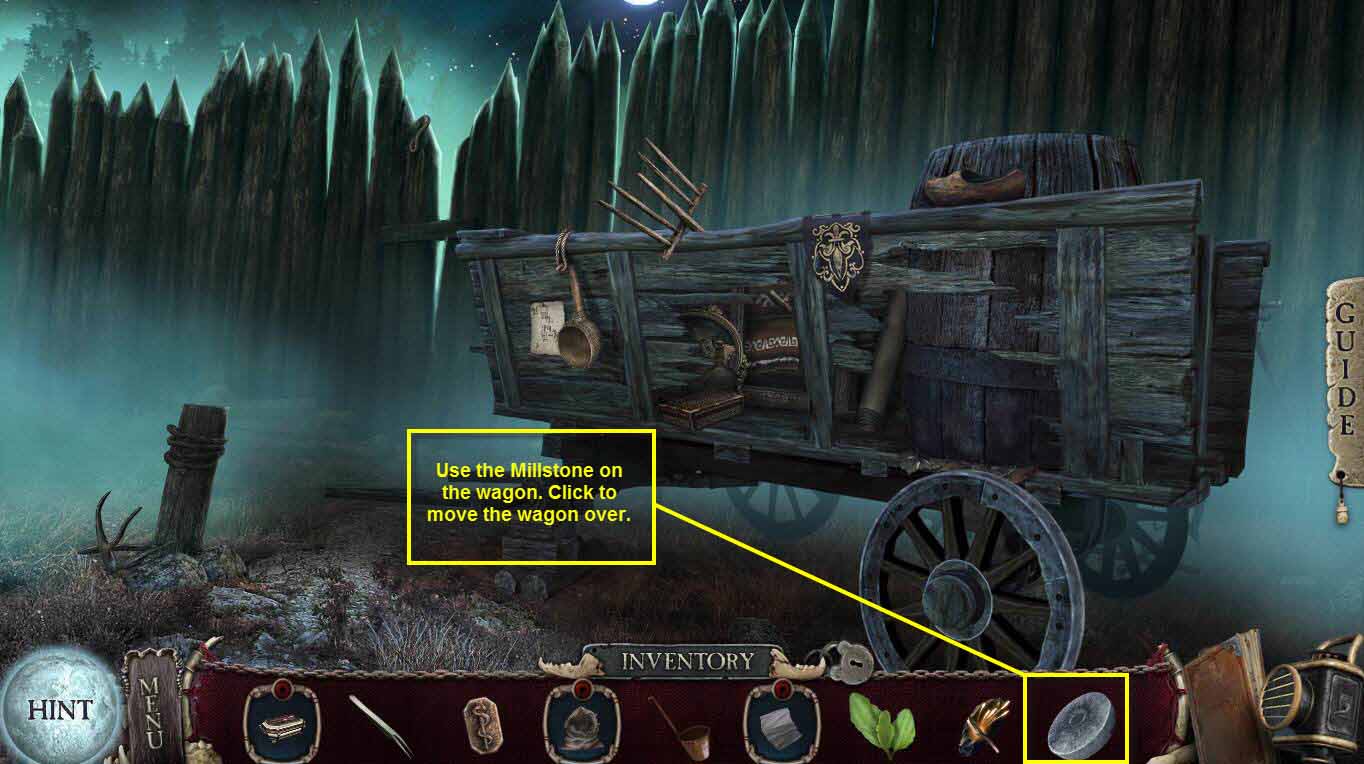
- Use the MILLSTONE on the wagon.
- Click on the wagon and move it to the left.
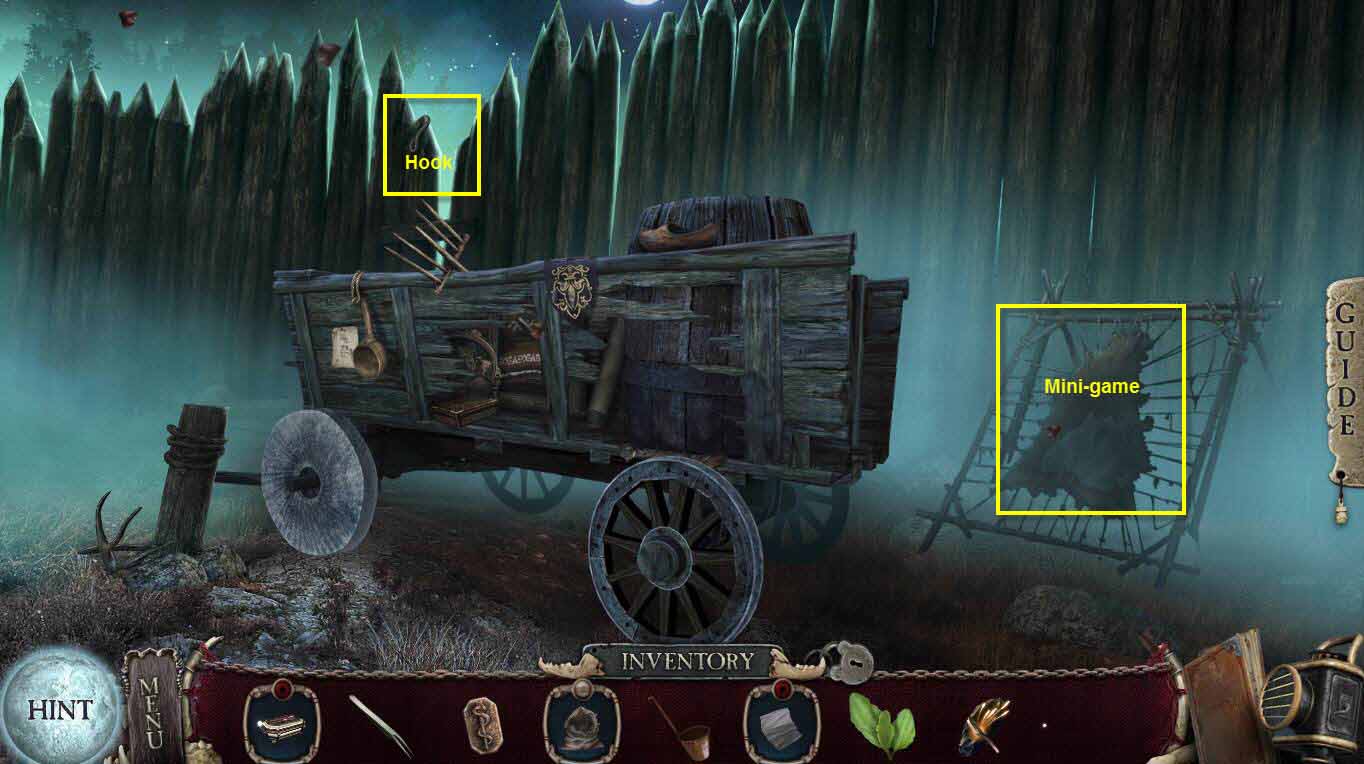
- Click on the fence to zoom in.
- Take the HOOK.
- Click on the hide to start a mini-game.
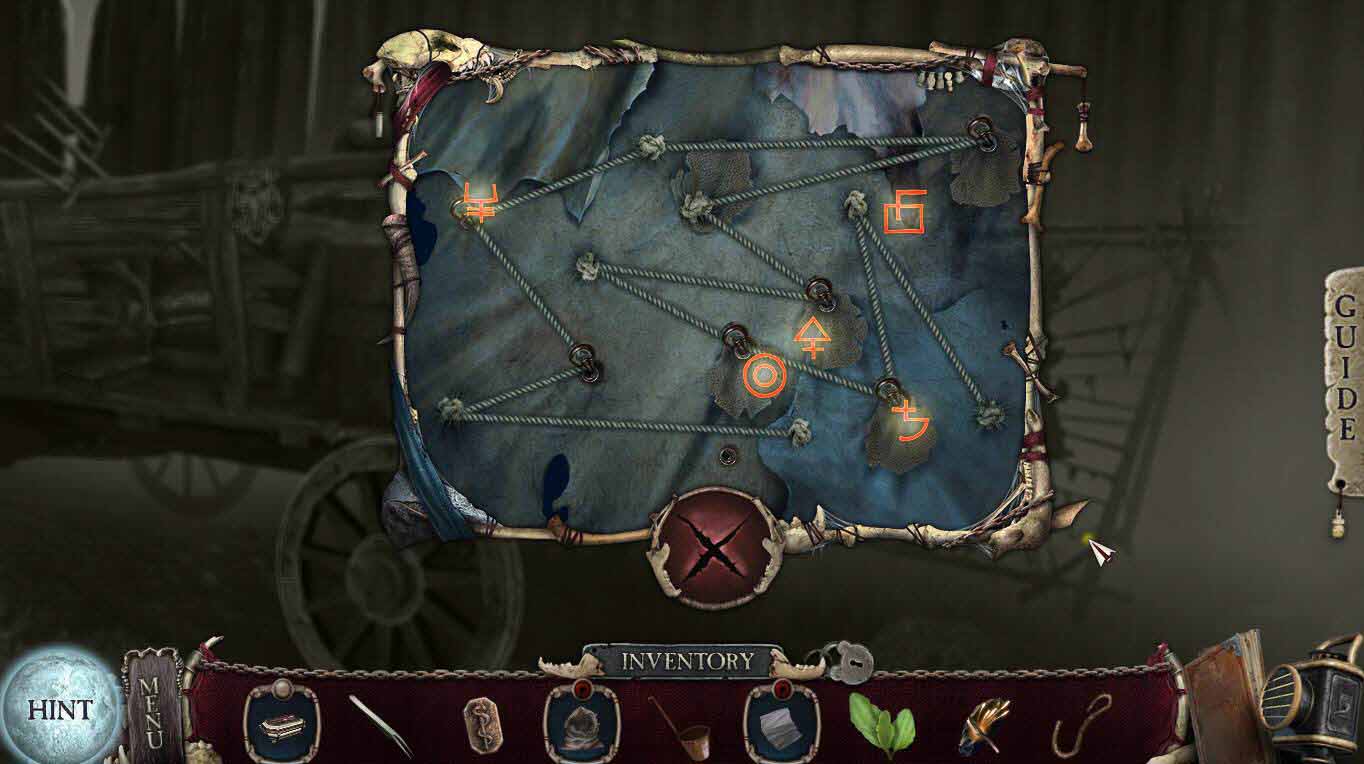
- The goal of the game is to untangle the rope by moving the metal rings around to the different holes.
- The hole that is empty at the start of the puzzle will need to be empty at the end.
- You will get the code for the casket.
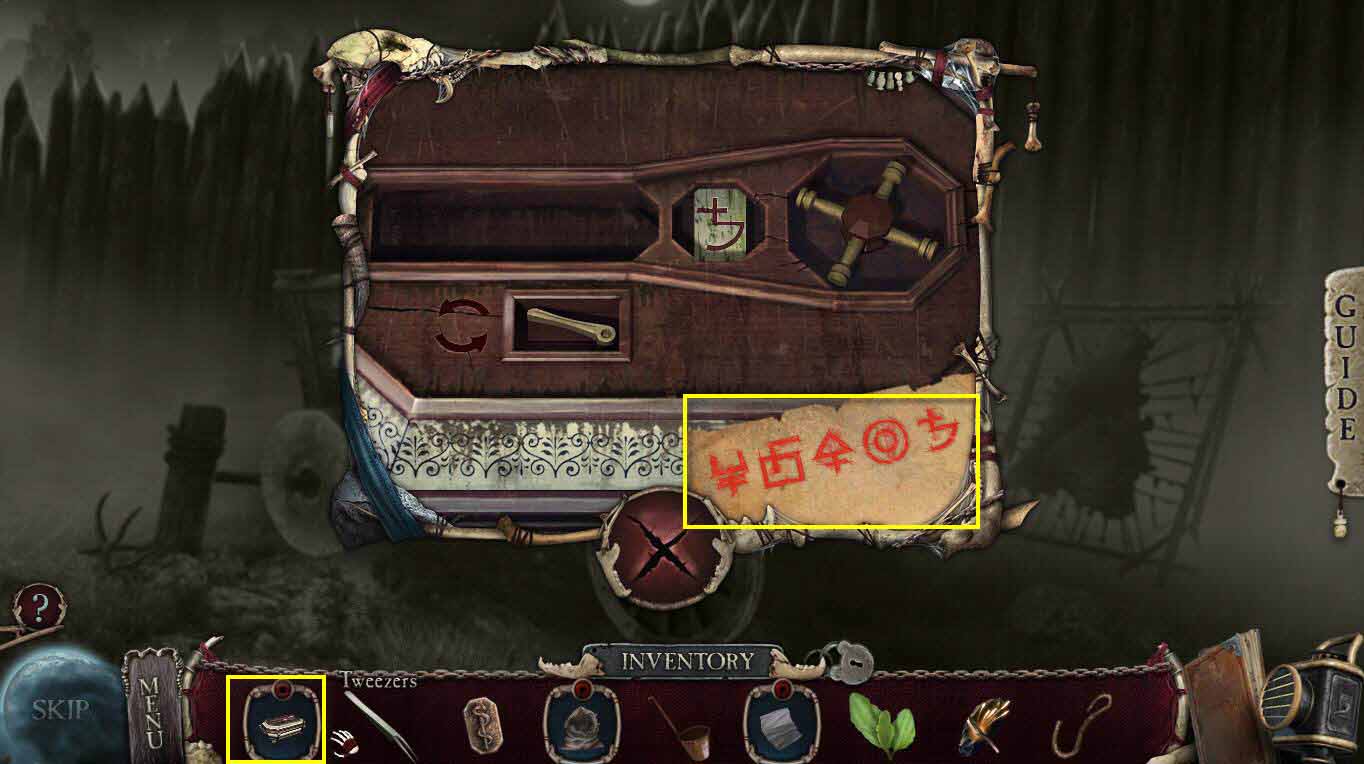
- Click on the CASKET that's in your inventory.
- This will start a mini-game.
Comments will load when you reach this part of the walkthrough.