

Chapter Five: Hope's Edge
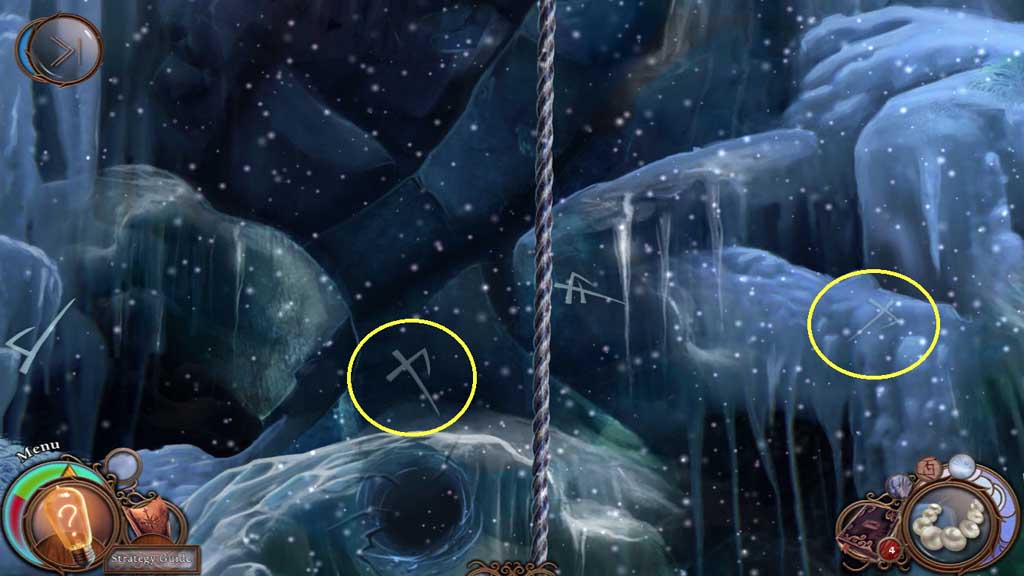
- Toss the grappling rope.
- Use the climbing gear to trigger a mini game.
- Solve the game by finding the matching symbols.
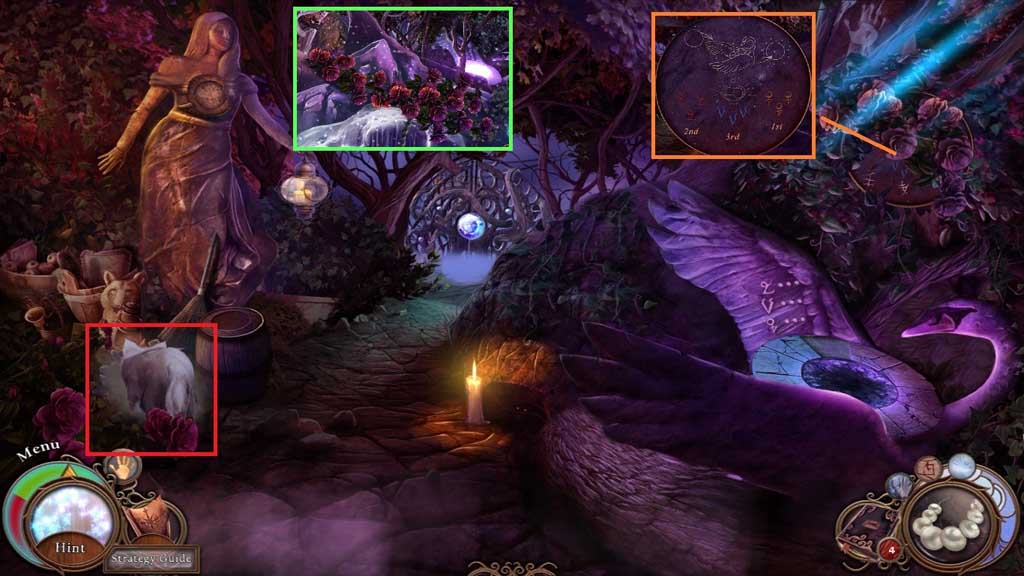
- Click the ledge.
- Click the branch and use the translator.
- Use the wolf cub to uncover the hidden objects area.
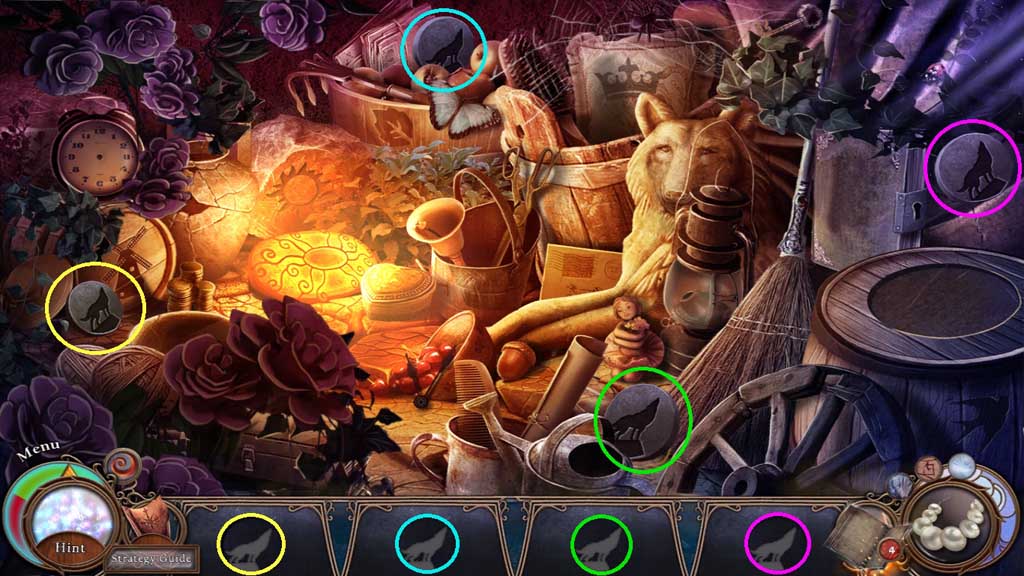
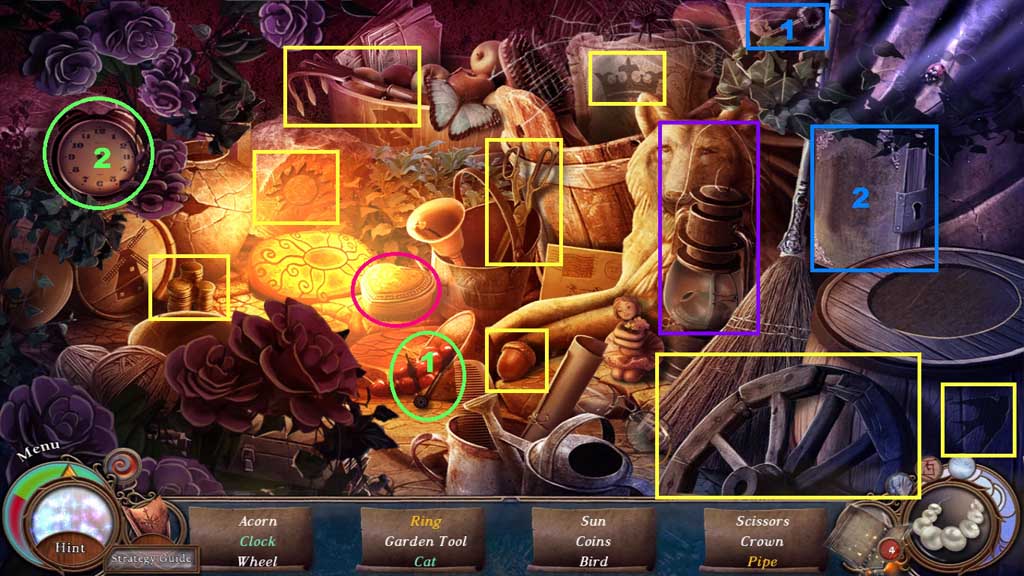
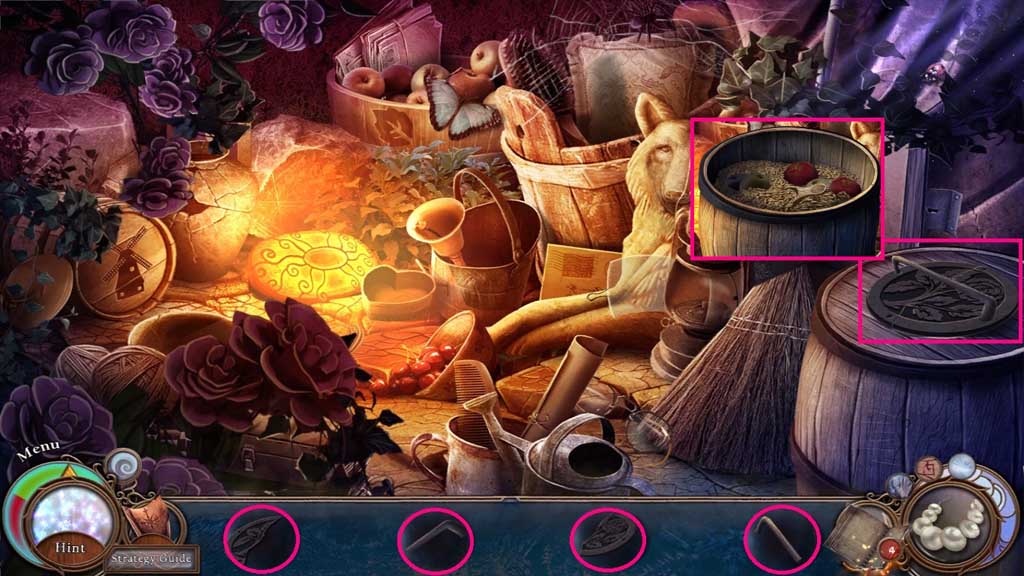
- Find the items.
- Select the clock hands and place it onto the clock; collect the clock.
- Click the heart shaped box; collect the ring.
- Select the key and place it into the lock; collect the cat.
- Click the lantern; collect the pipe.
- Collect the grain.
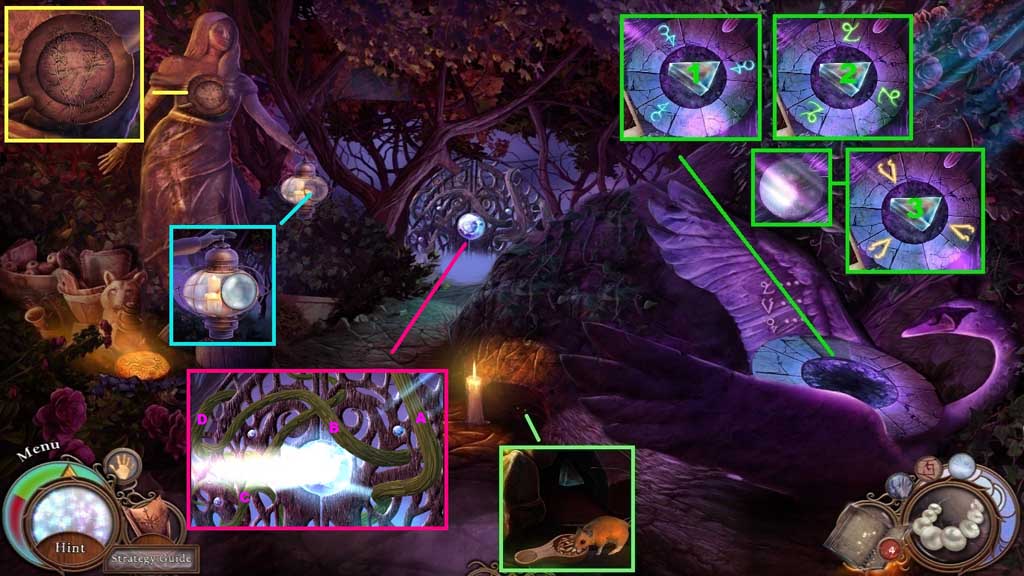
- Place the grain down.
- Collect the prism and place it and 2 /2 lost symbols to trigger a mini game.
- Solve the game by picking the matching symbols.
- Collect the carved lens.
- Click the discs to create the image and insert the carved lens.
- Click the vines in the correct sequence.
- Move ahead.
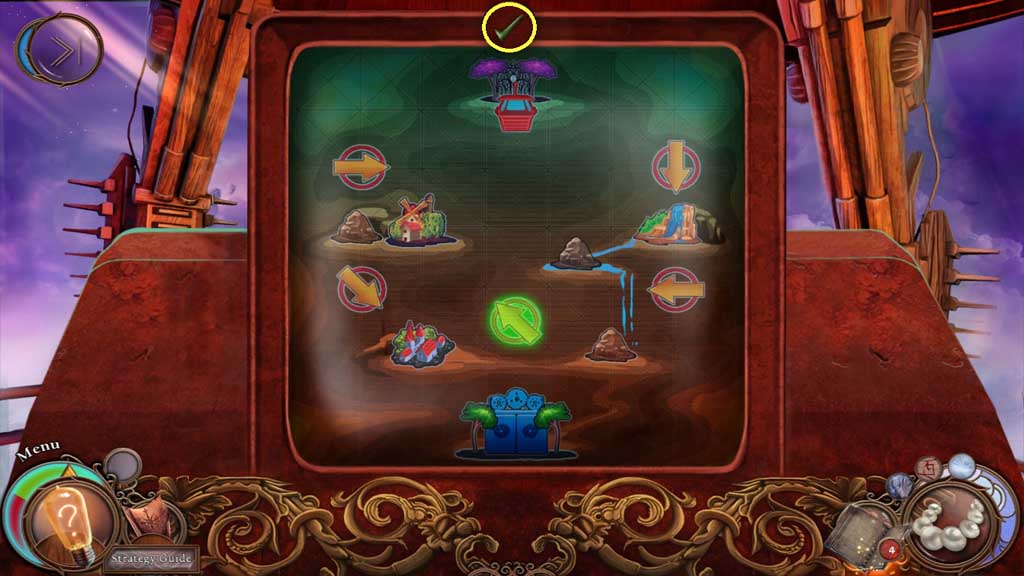
- Click the check mark to trigger a mini game.
- Solve the game by clicking the arrows in the correct directions to guide the cable car.
- Click the check mark.
- Exit the cable car.
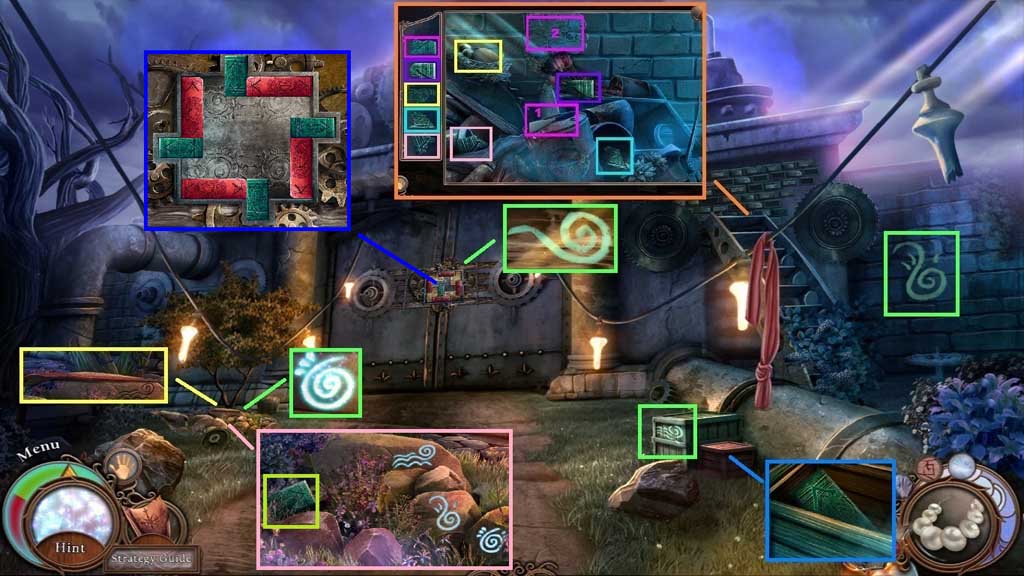
- Click the eggs to uncover a tile piece and use the scraper to uncover another.
- Collect 1 /3 stone tiles.
- Collect the crowbar and use it to remove the lid.
- Collect 2 /3 stone tiles.
- Click the 4 symbols and arrange them to match the previously located symbols.
- Collect 3/3 stone tiles and insert them to trigger a puzzle.
- Solve the puzzle by sliding the green bars into the open spaces.
- Move ahead.
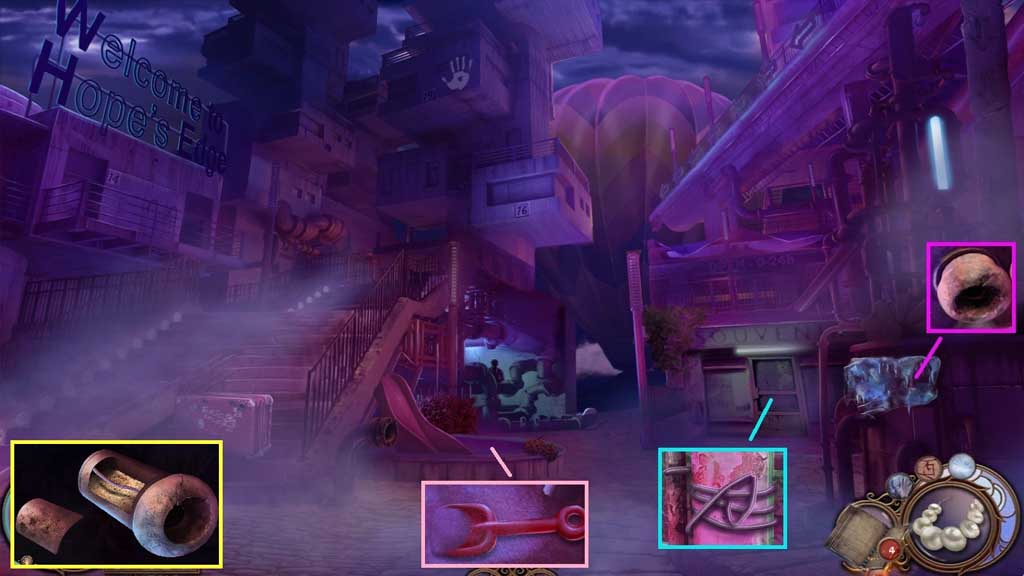
- Use the ice breaker to melt the ice.
- Collect the blown fuse and the wire.
- Click the shovel; collect the sand.
- Zoom into the blown fuse and click the panel.
- Click the wire and the sand.
- Replace the wire and the sand; click the panel and receive the fuse.
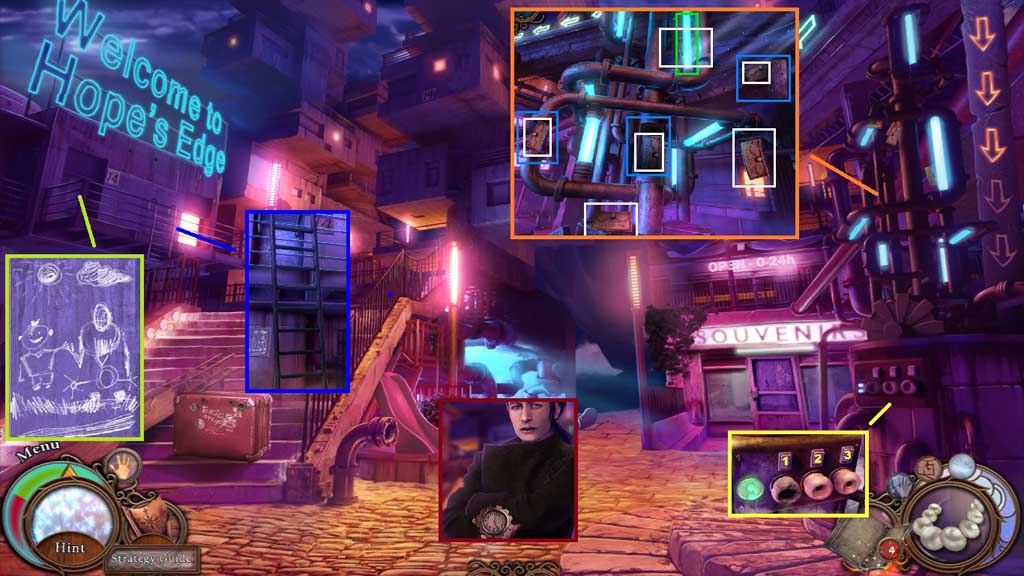
- Insert the fuse; click the switches as follows: 2 – 3 – 1.
- Collect the wooden clock.
- Click the 3 panels; collect the light bulb.
- Collect the coupons; receive the 6 coupons.
- Examine the chalkboard and reassemble the image.
- Click the ladder and move into the House No.14.
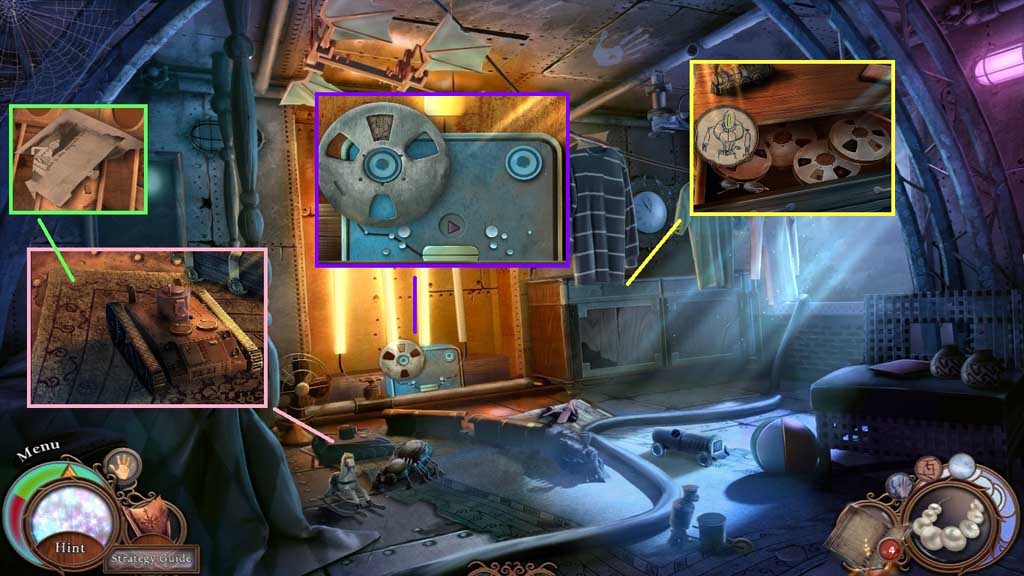
- Examine the film reel; click the film.
- Click the switch.
- Insert the toy part.
- Click the rug.
- Collect the torn notebook page.
- Click the drawer and zoom into the reels.
- Find the one that shows the robot and click it once.
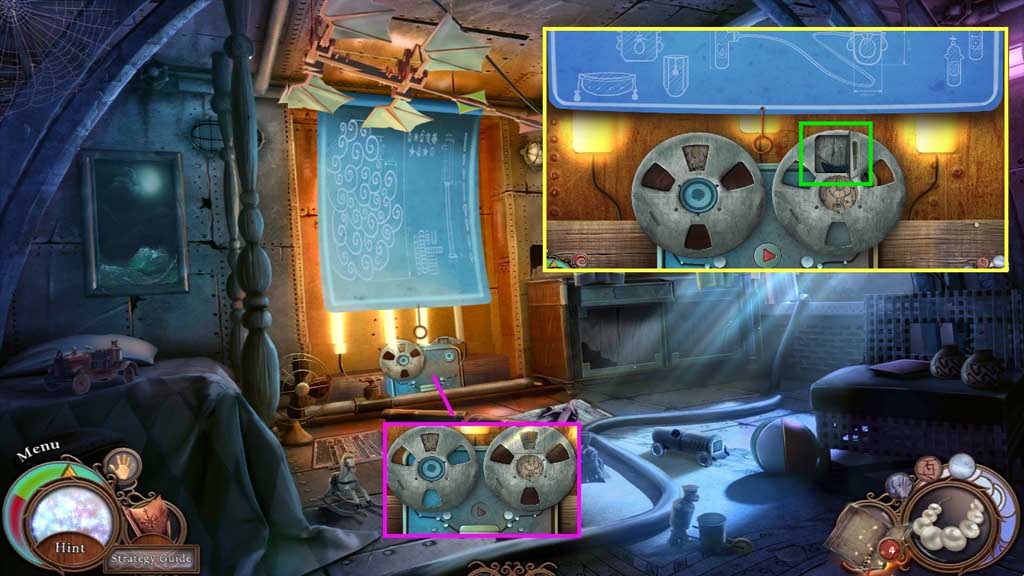
- Receive the tape recording; insert it into the recorder and click the button to trigger a mini game.
- Solve the game by building the parts correctly.
- Click the panel; collect the boat.
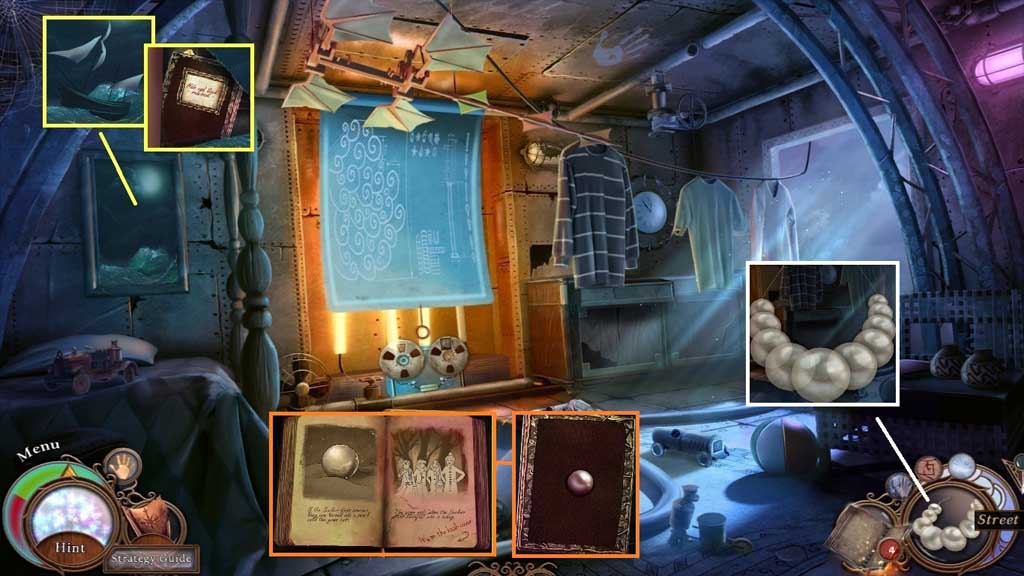
- Place the boat.
- Click the sails parts on the picture; collect the hide and seek rulebook.
- Collect 1 /3 oval tokens behind it.
- Click the hide and seek rule book; click the page and insert the torn notebook page.
- Reassemble the page and click it once.
- Collect the pearl and place it onto the necklace.
- Move down once.
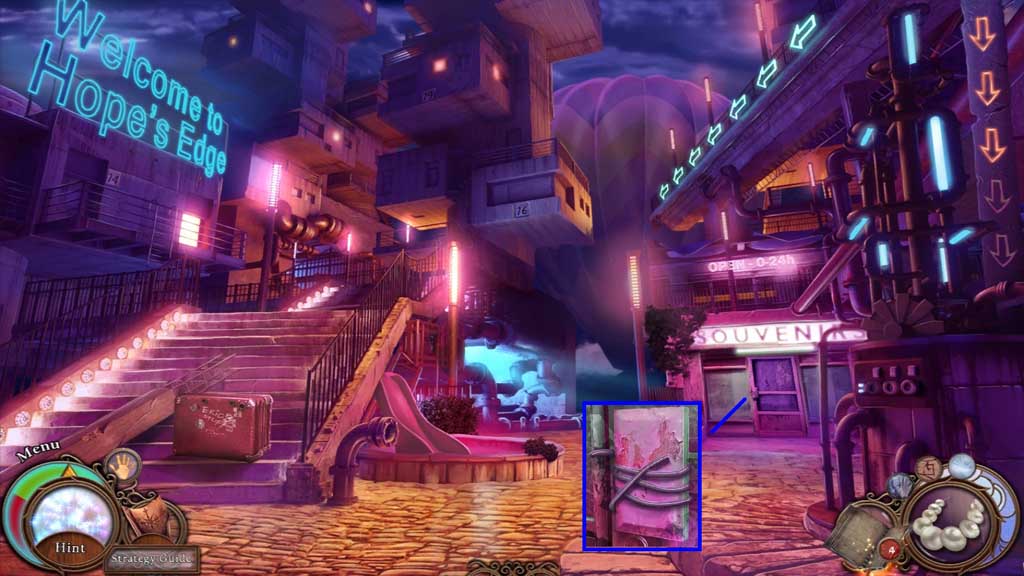
- Click the wires; click the door open.
- Move into the Souvenir Shop.
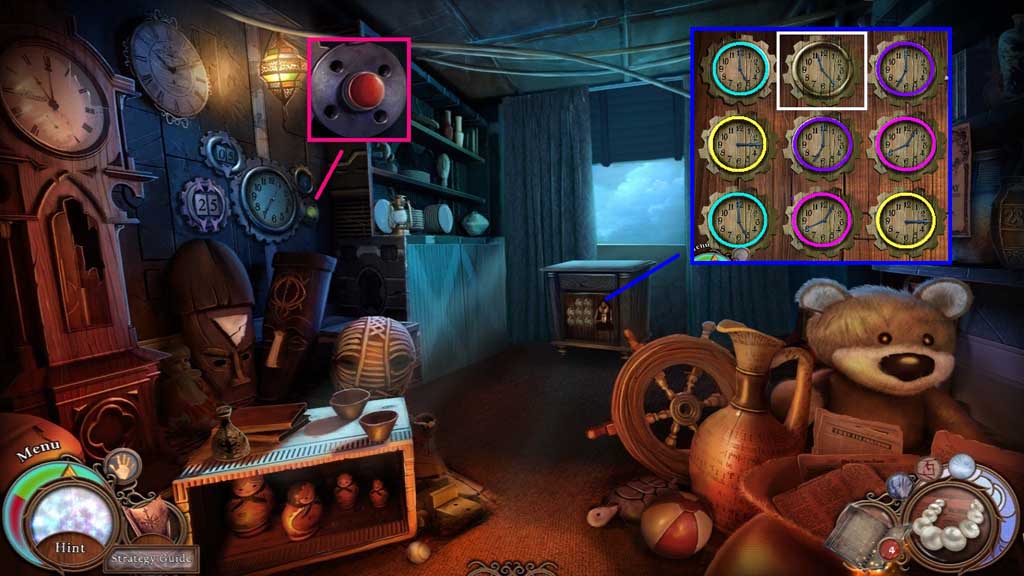
- Click the button.
- Insert the wooden clock to trigger a mini game.
- Solve the game by matching the pairs.
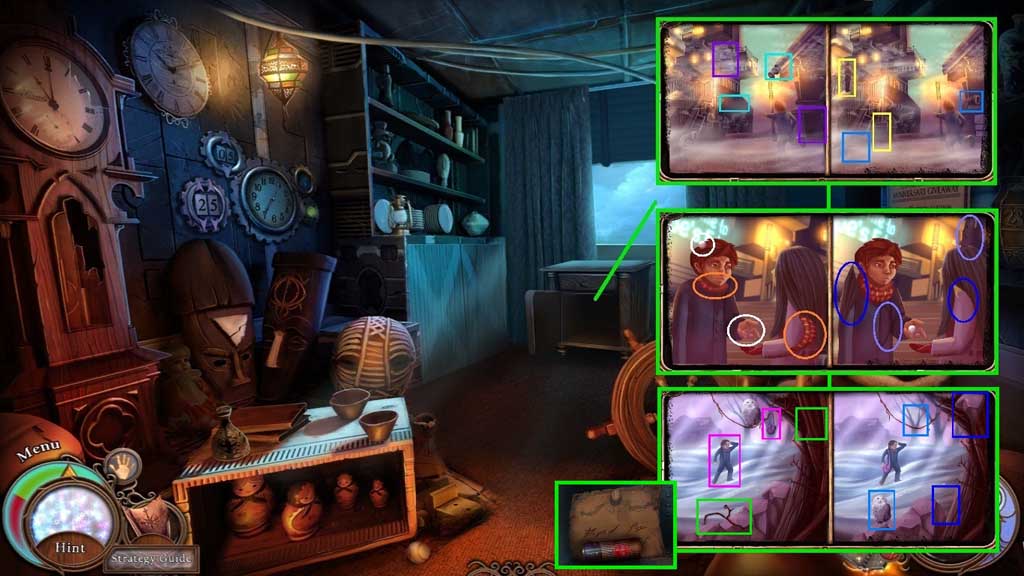
- Click the clock to trigger a mini game.
- Solve the game by placing the items correctly.
- Collect the battery and the note.
Comments will load when you reach this part of the walkthrough.