

Chapter Four: The Windmill
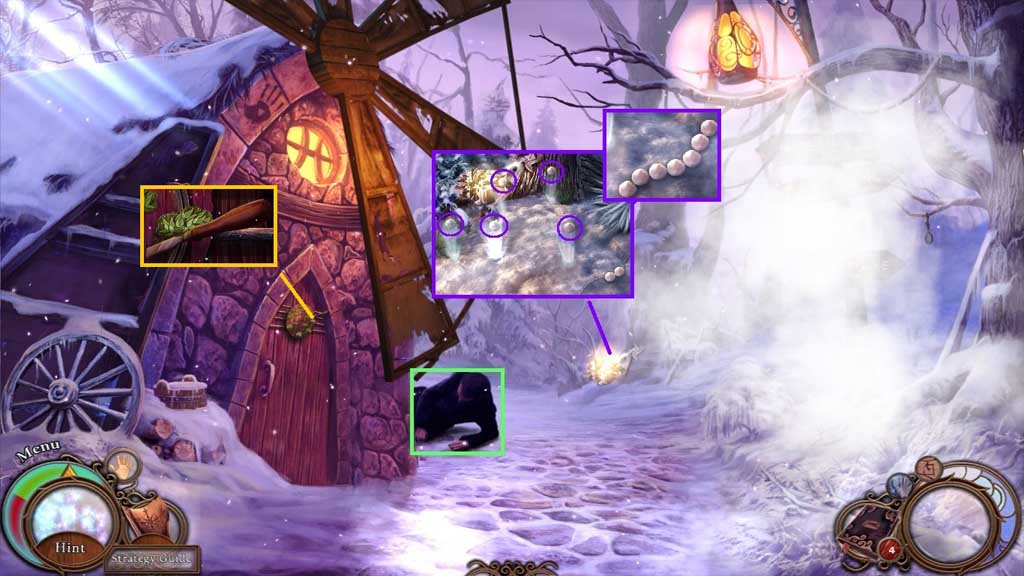
- Speak to Victor.
- Click the ice patches; collect the beads.
- Collect the pearl necklace.
- Click the handle 3x’s to receive the chisel.
- Move down once.
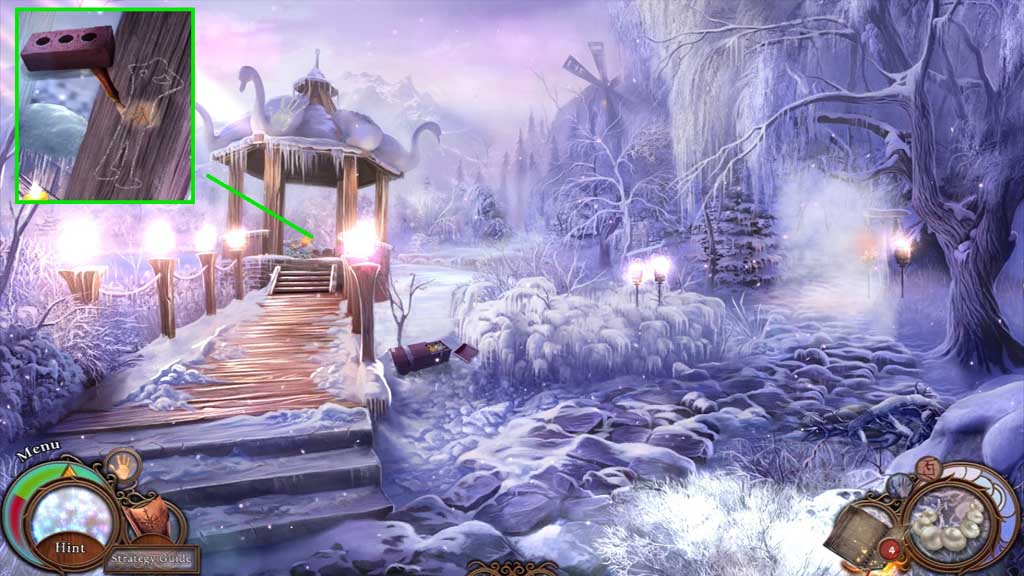
- Place the chisel into the carving of the boy; use the brick to strike it.
- Click the brick to receive it.
- Collect the boy.
- Move to the right.
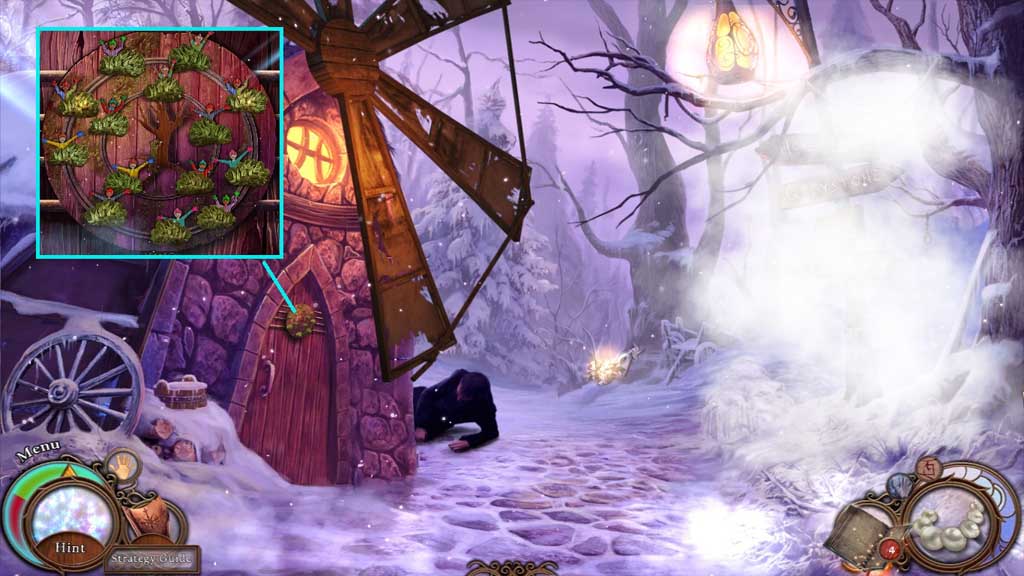
- Insert the boy to trigger a mini game.
- Solve the game by matching the pairs of children.
- The solution is random.
- Move into the Windmill Interior.
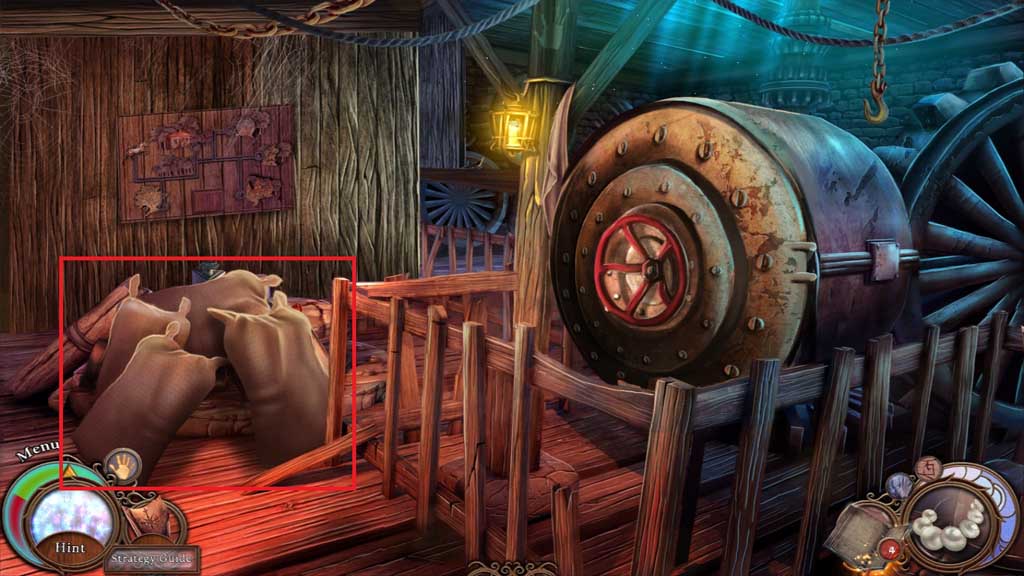
- Click the sacks to reveal a hidden objects area.
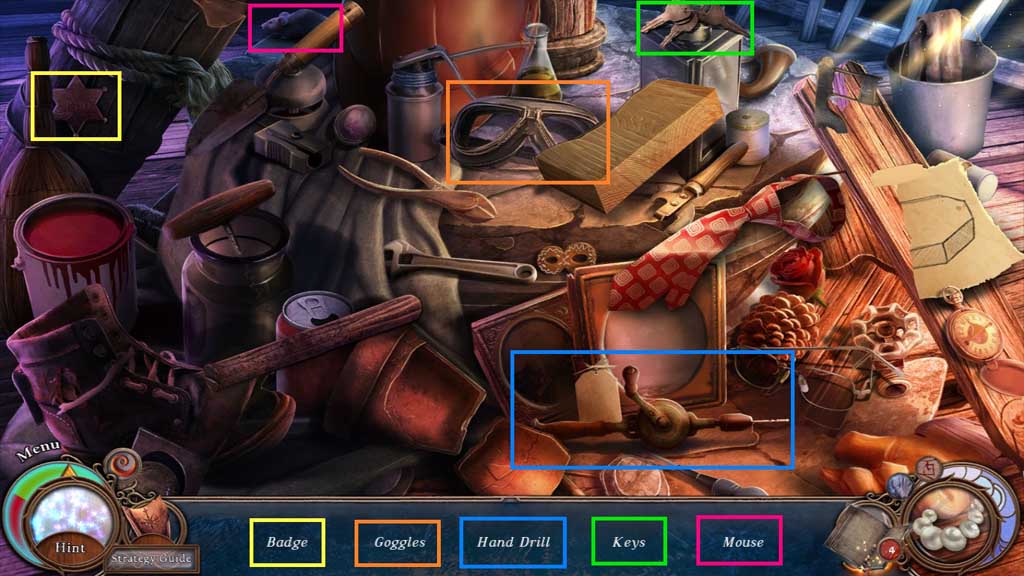
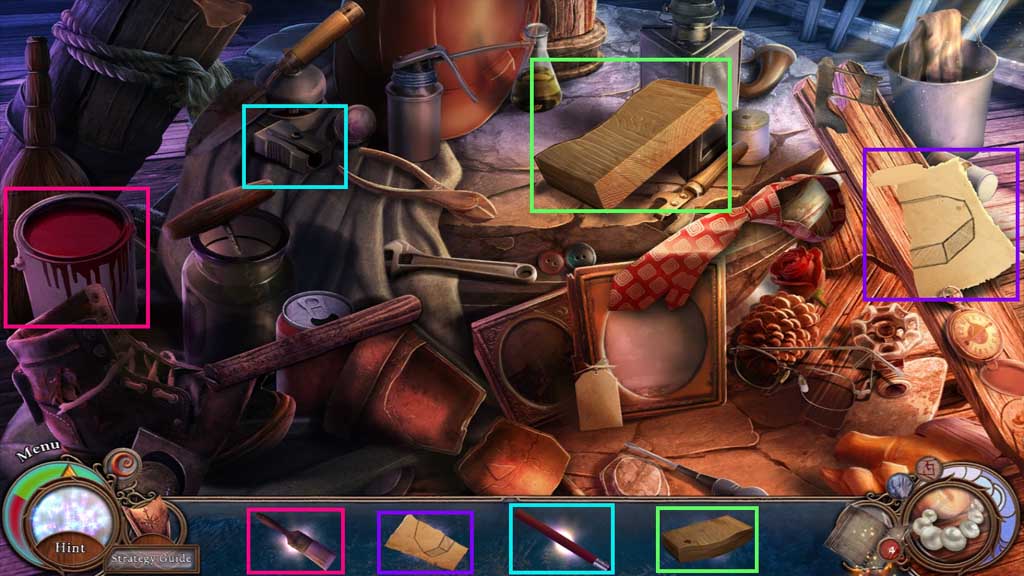
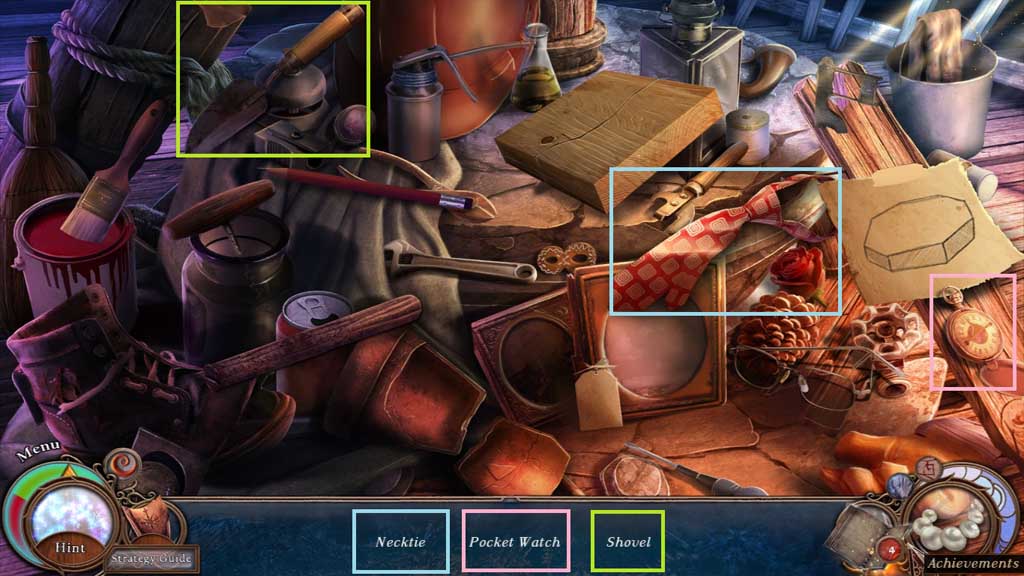
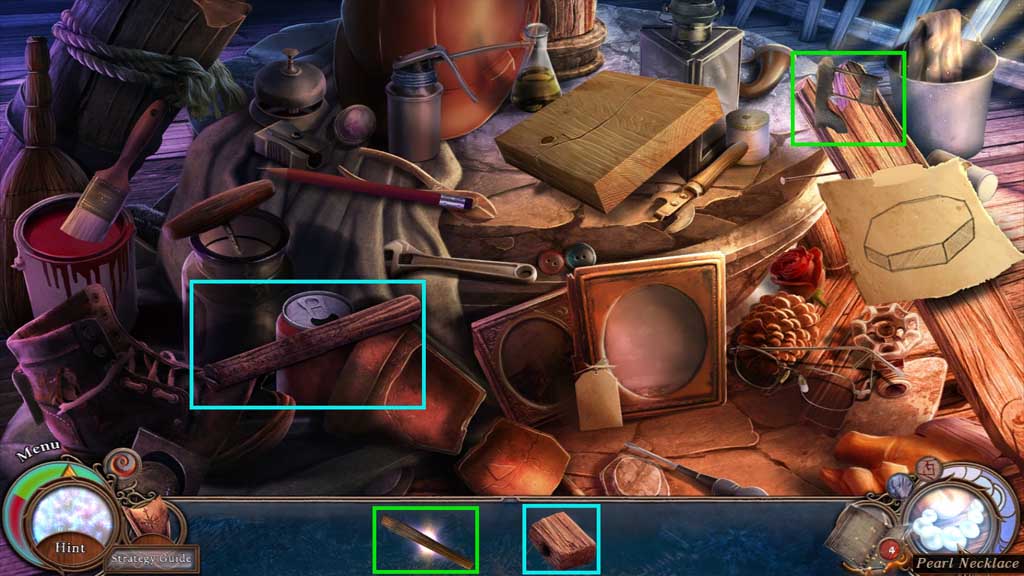
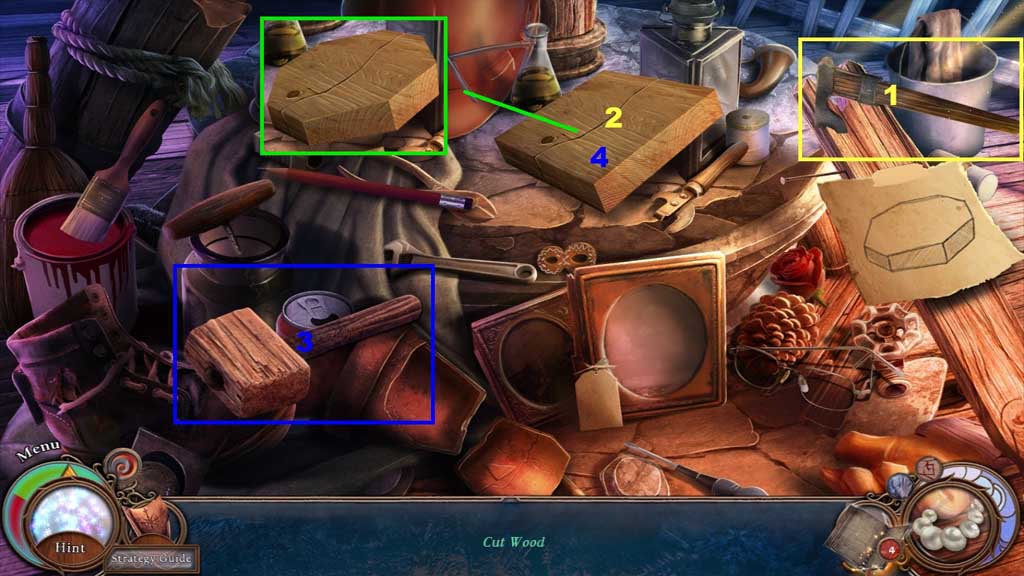
- Find the items.
- Place the items where they belong.
- Collect the octagonal block.
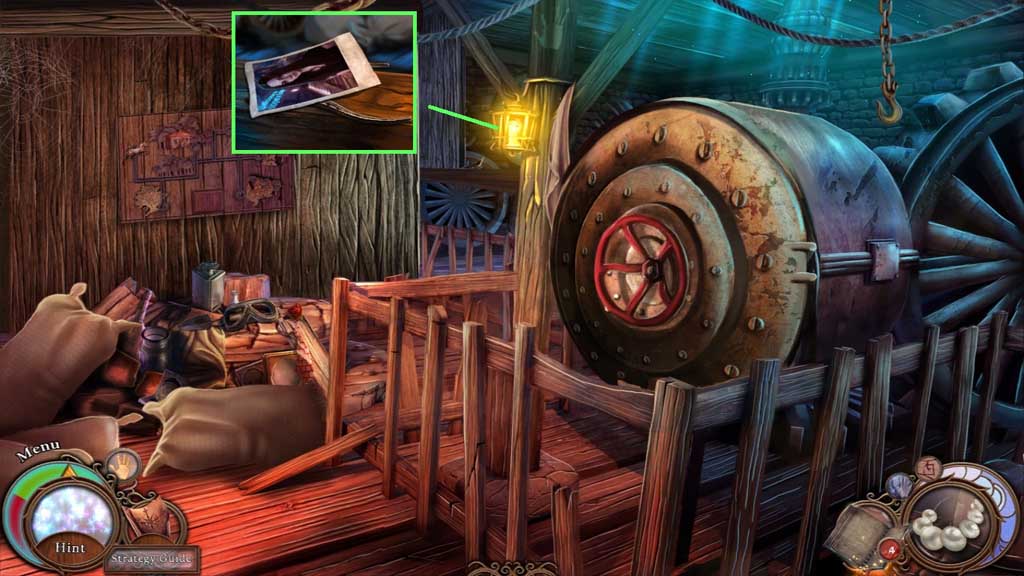
- Examine the photo.
- Collect the pliers beneath it.
- Move down 2x’s.
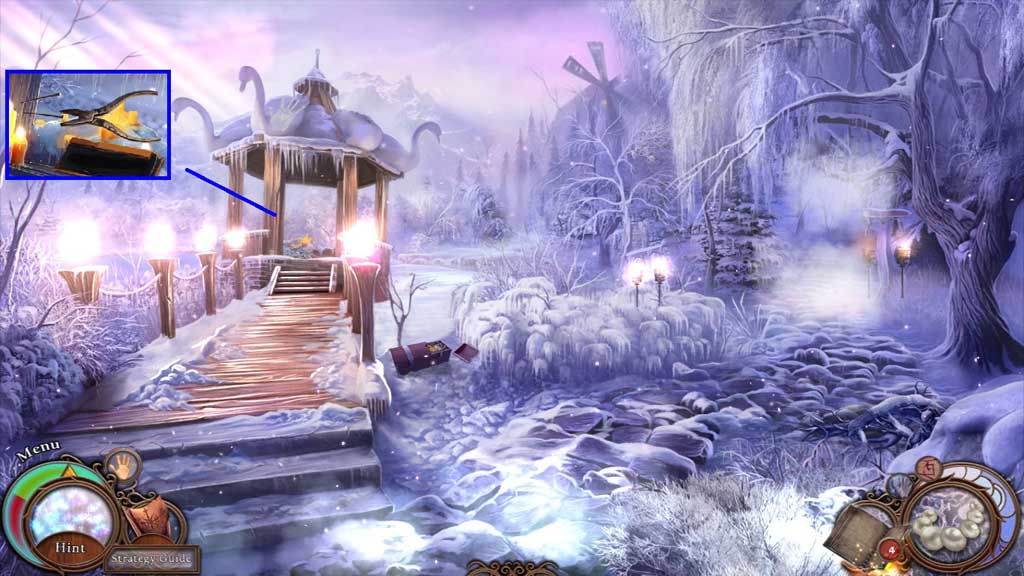
- Collect the nails using the pliers.
- Move to the Windmill Interior.
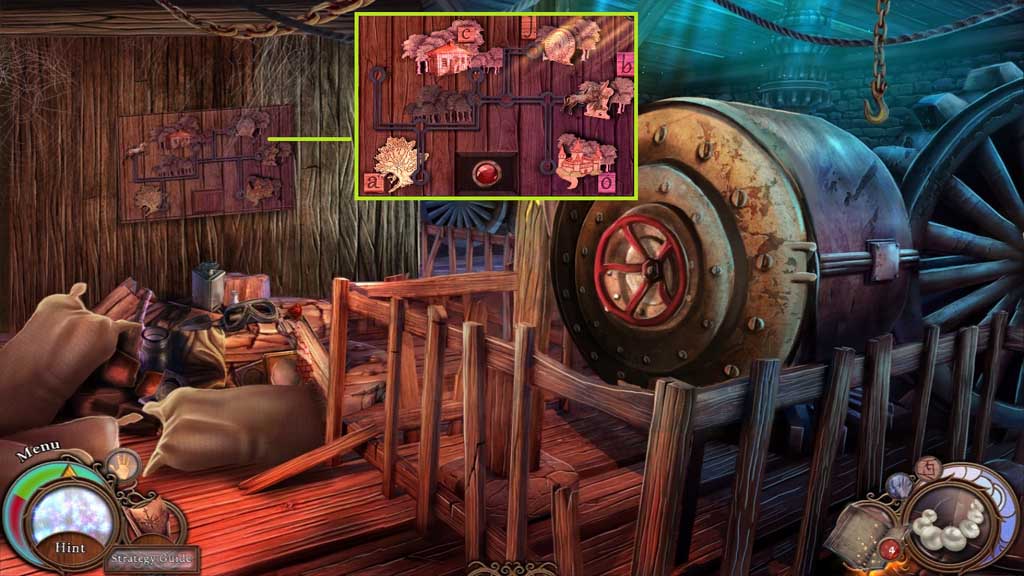
- Zoom into the board to trigger a mini game.
- Solve the game by moving the horse the areas that spell JACOB.
- Click the button.
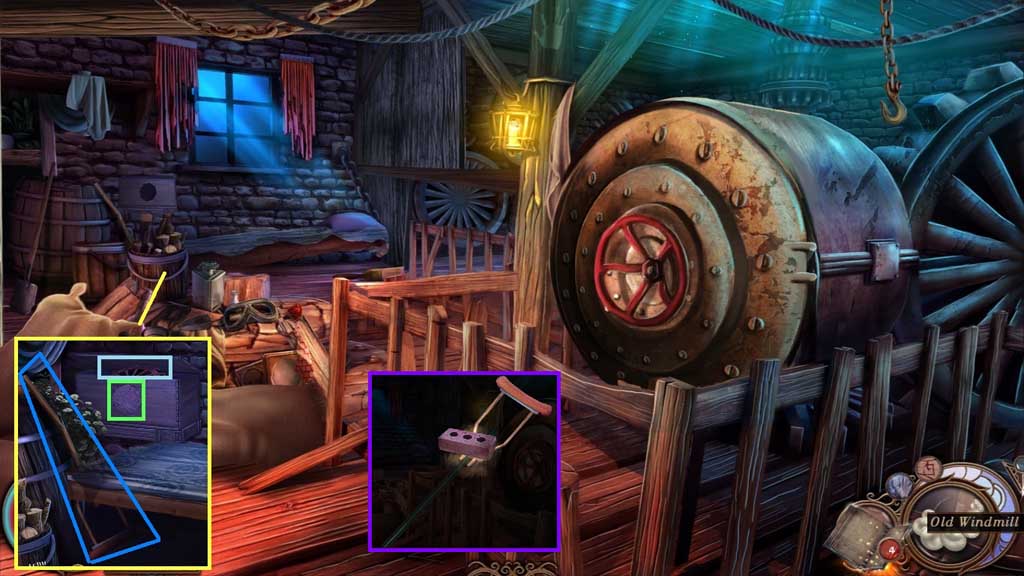
- Click the barrel 2x’s and insert the octagonal block.
- Collect the broken crutch and the cogwheel.
- Zoom into the broken crutch and click it once.
- Place the pole and the nails into the crutch.
- Use the brick to secure it and receive the crutch.
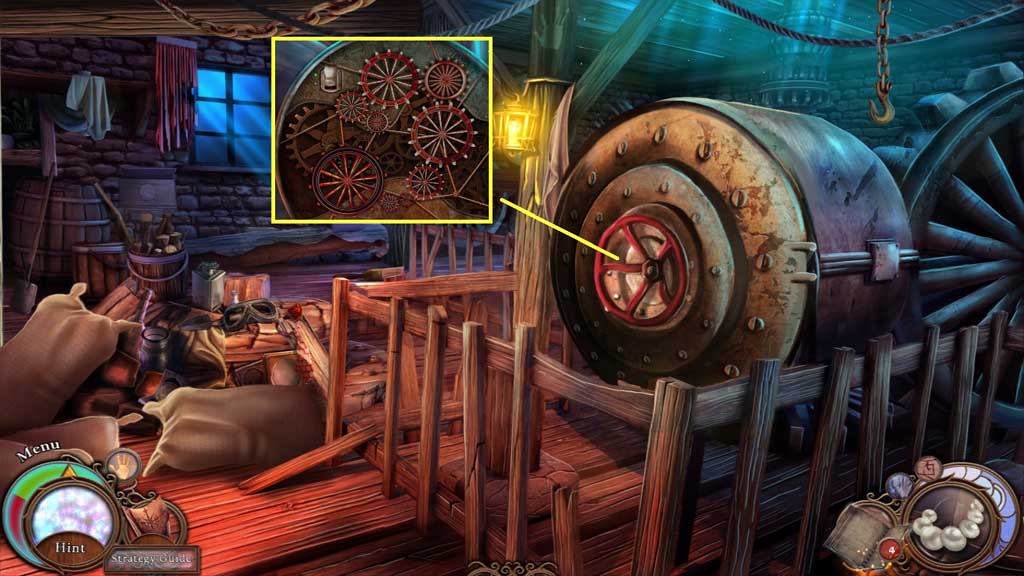
- Click the hatch followed by the switch.
- Attach the cogwheel using the cogs to trigger a mini game.
- Solve the game by arranging the cogs correctly.
- Click the hatch.
- Move down once.
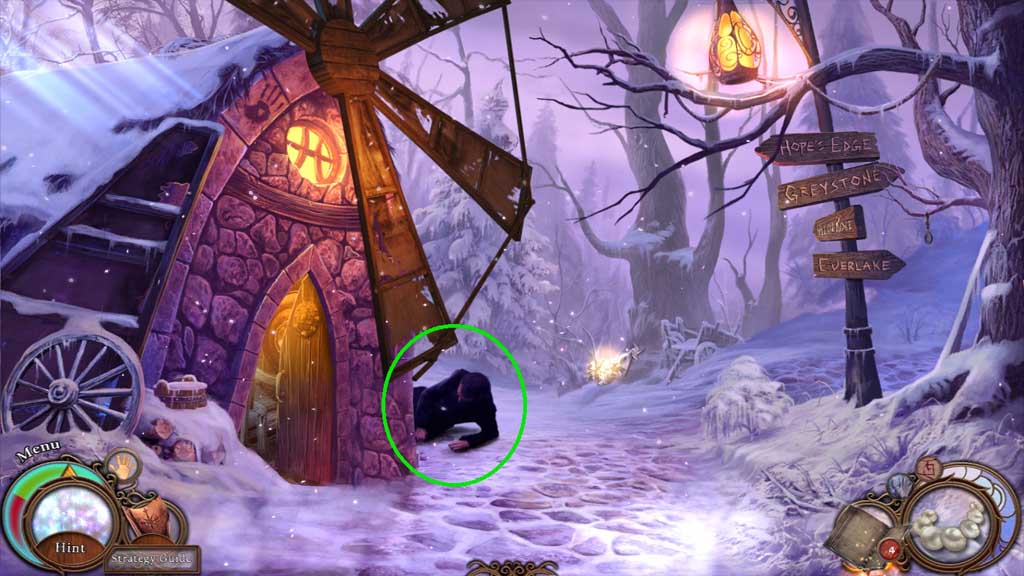
- Give Victor the crutch.
- Move to the Windmill Interior.
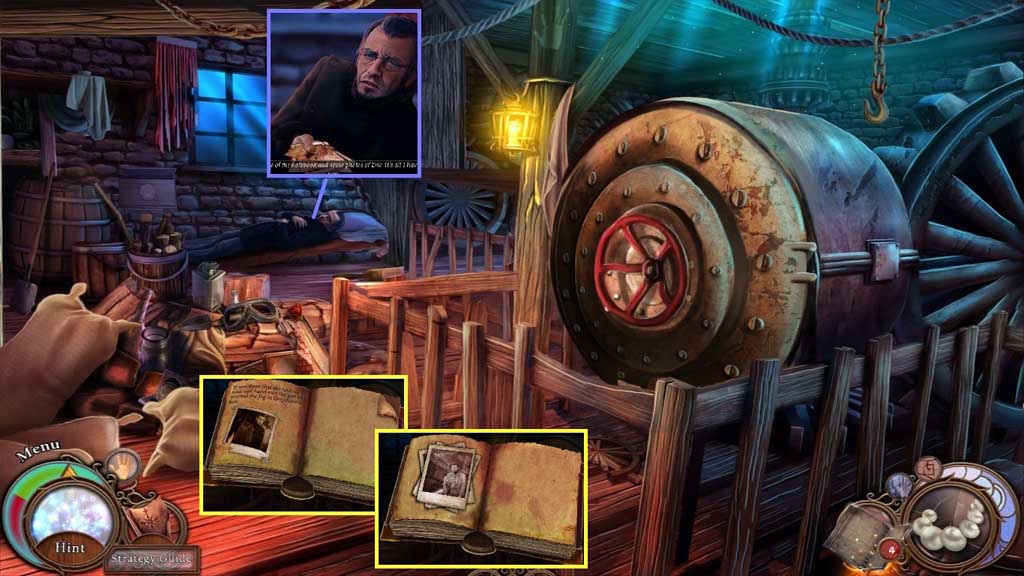
- Speak to Victor; collect Victor’s papers.
- Zoom into Victor’s notebook; insert Victor’s papers.
- Assemble the photo.
- Click the page and examine the photos.
- Move down once.
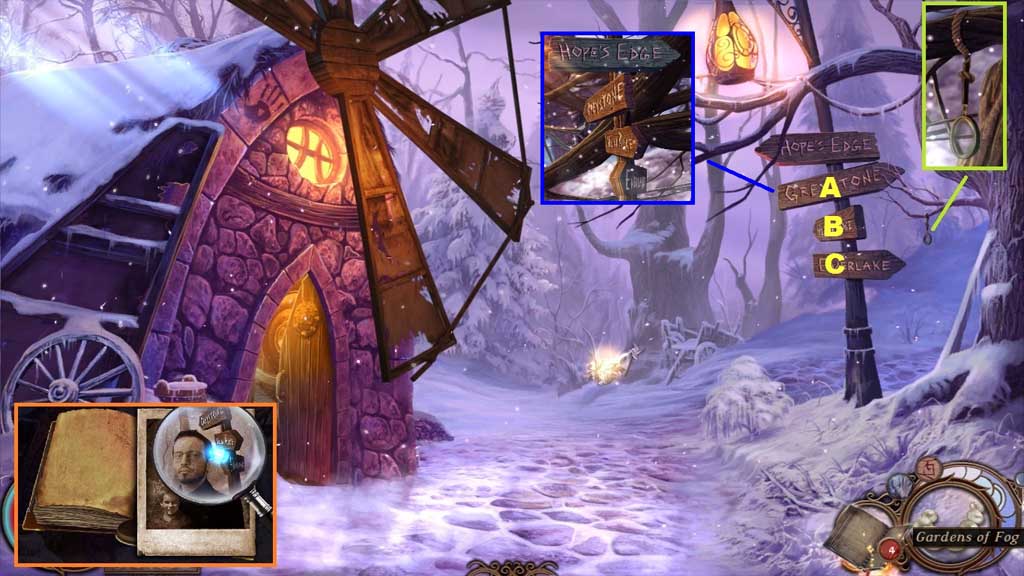
- Collect the magnifying glass.
- Zoom into Victor’s notebook; use the magnifying glass
- Examine the signpost to trigger a mini game.
- Solve the game by clicking the signs into the correct directions.
- Use the following sequence to solve: A x 3 – B x 3 – C x 2.
- Move to the Cathedral of the Lost on the right.
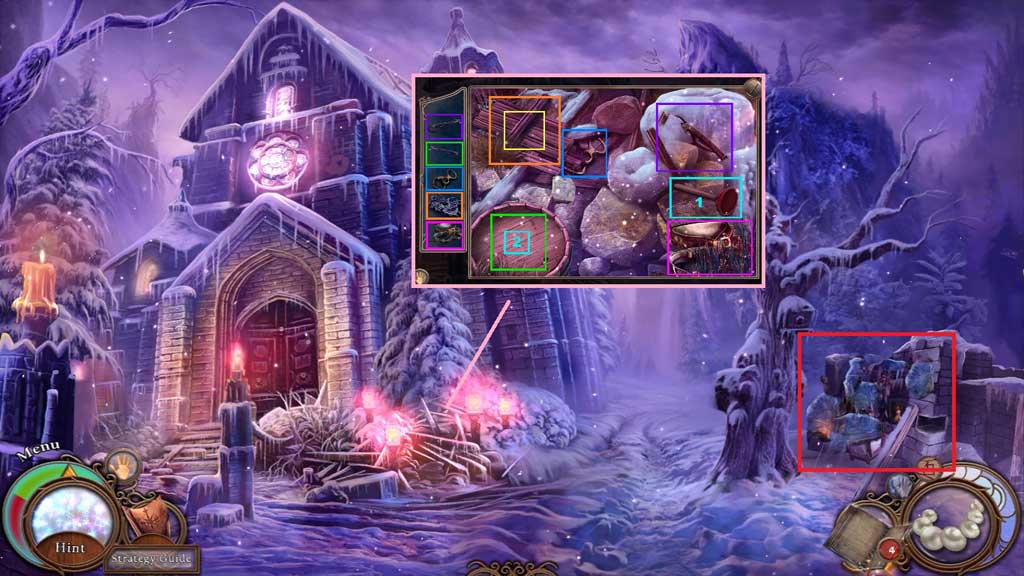
- Click the boards; use the plunger to remove the barrel lid.
- Find the items and collect the climbing gear.
- Use the icebreaker to reveal a hidden objects area.
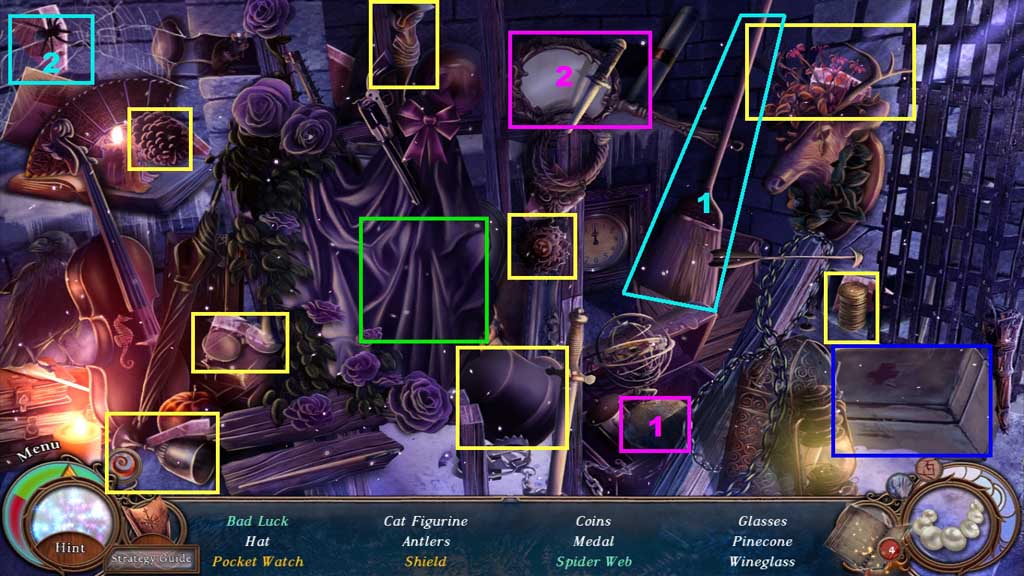
- Find the items.
- Select the rock and use it to smash the mirror; collect the bad luck.
- Click the first aid kit; collect the pocket watch.
- Click the cloth; collect the shield.
- Use the broom to get rid of the spider; collect the spider web.
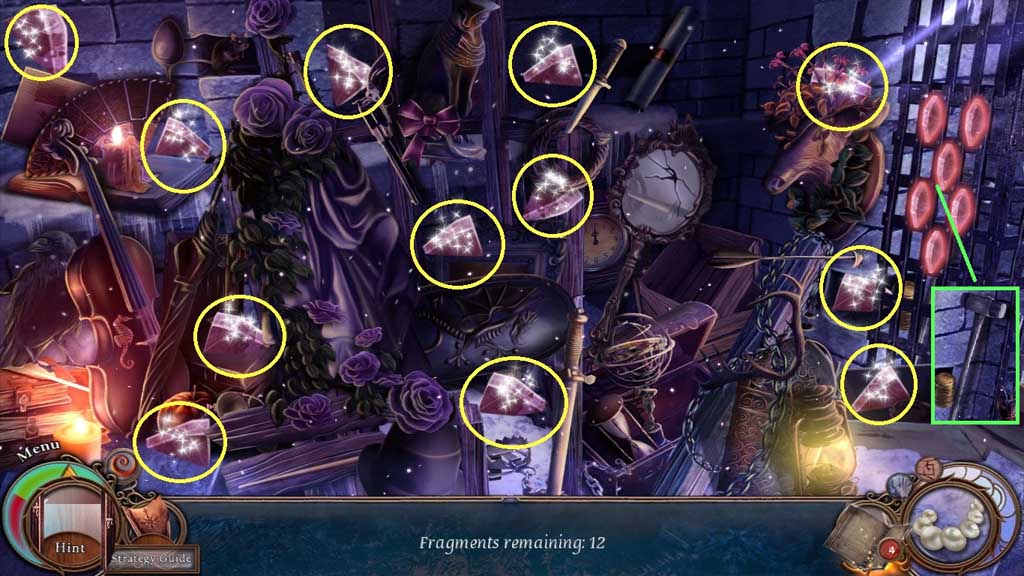
- Click the fragments.
- Collect the hammer.
- Move ahead.
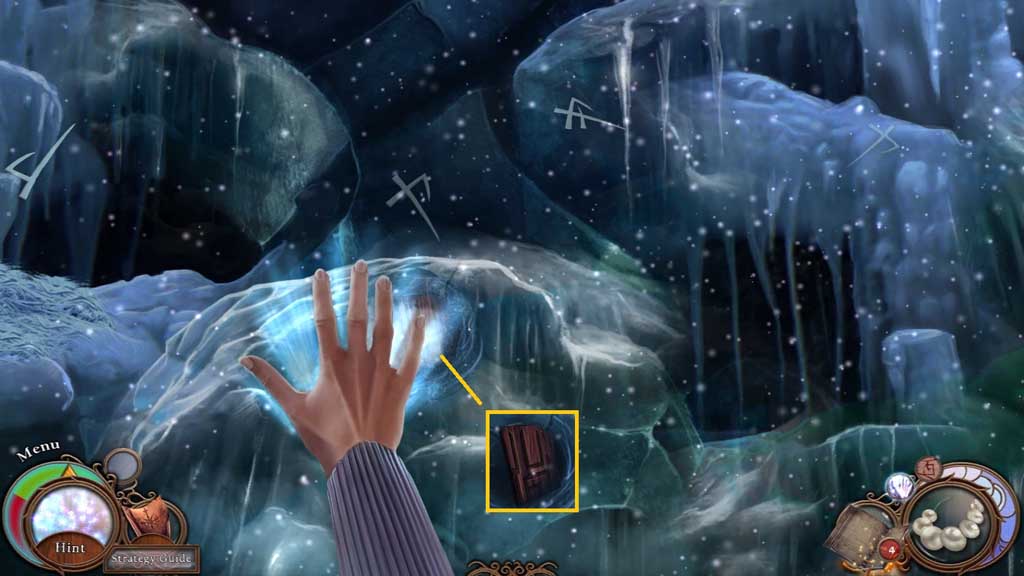
- Use the icebreaker to melt the ice; collect the wooden plate.
- Move down and enter the Cathedral Interior.
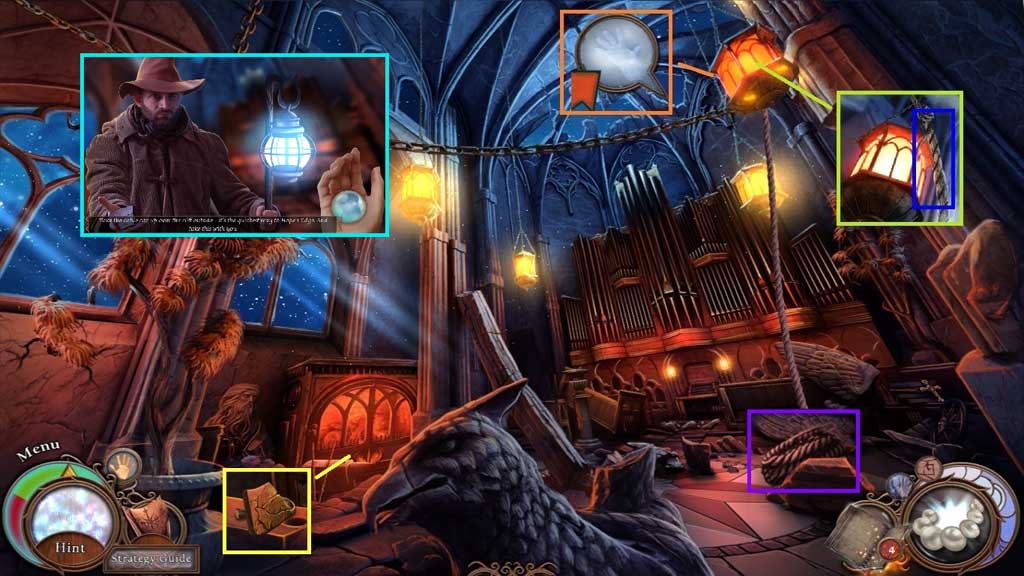
- Collect 1 /2 lost symbols; receive the pearl.
- Click the lantern and click the summoner talent; use it on the lantern.
- Click the rope and collect it.
- Collect 2 /2 lost symbols.
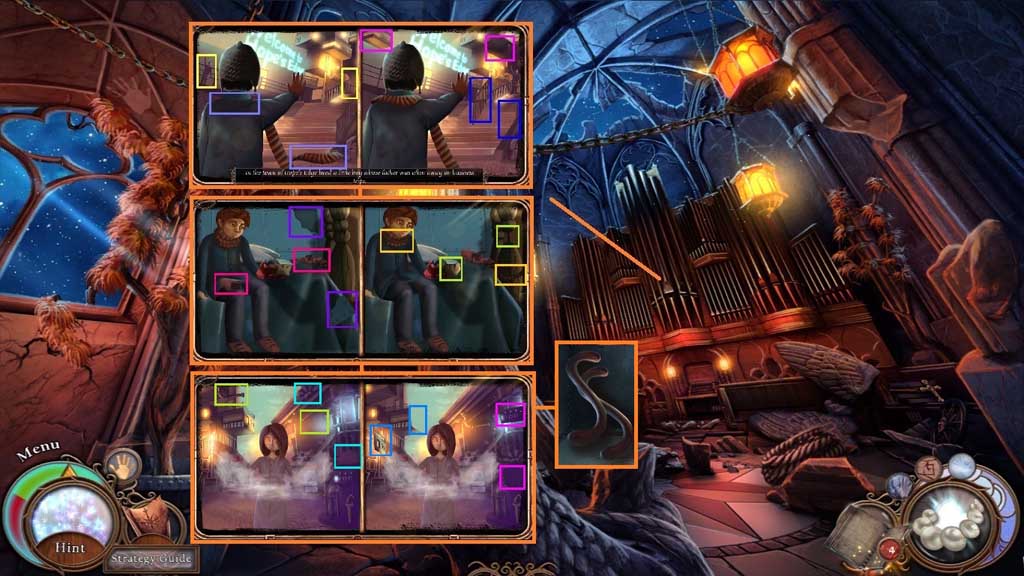
- Insert the wooden plate to trigger a mini game.
- Place the items where they belong to solve the game.
- Collect the metal piece.
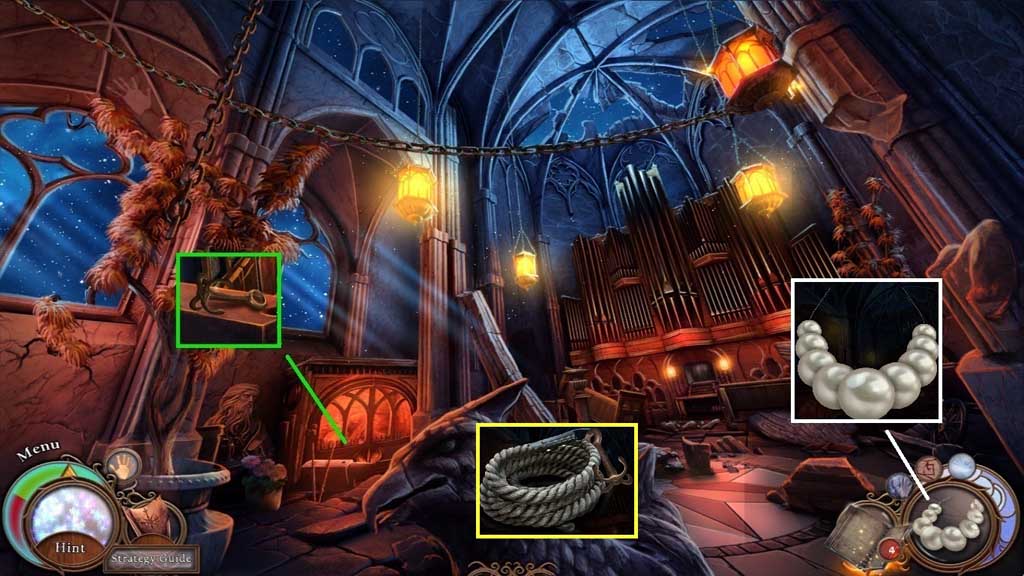
- Click the necklace and attach the pearl.
- Click the fireplace and insert the metal piece.
- Use the tongs to retrieve it and place it onto the anvil.
- Use the hammer to mold it into shape; click the bucket.
- Collect the improvised hook.
- Zoom into the rope and attach the improvised hook to create and collect the grappling rope.
- Move to the Cliff Side.
Comments will load when you reach this part of the walkthrough.