

Chapter Five: The Journey Continues
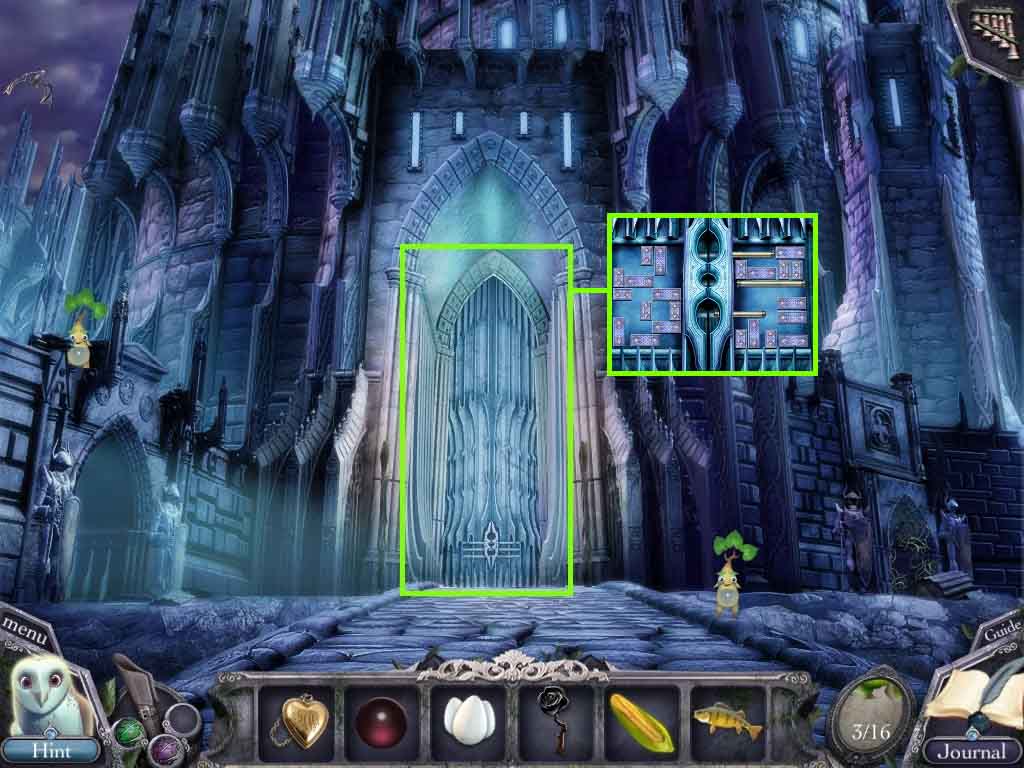
- Click the front doors to access a mini-game.
- Move the blocks so the locks can be removed.
- Enter the Castle.
- Click the stairs to access a hidden objects area.
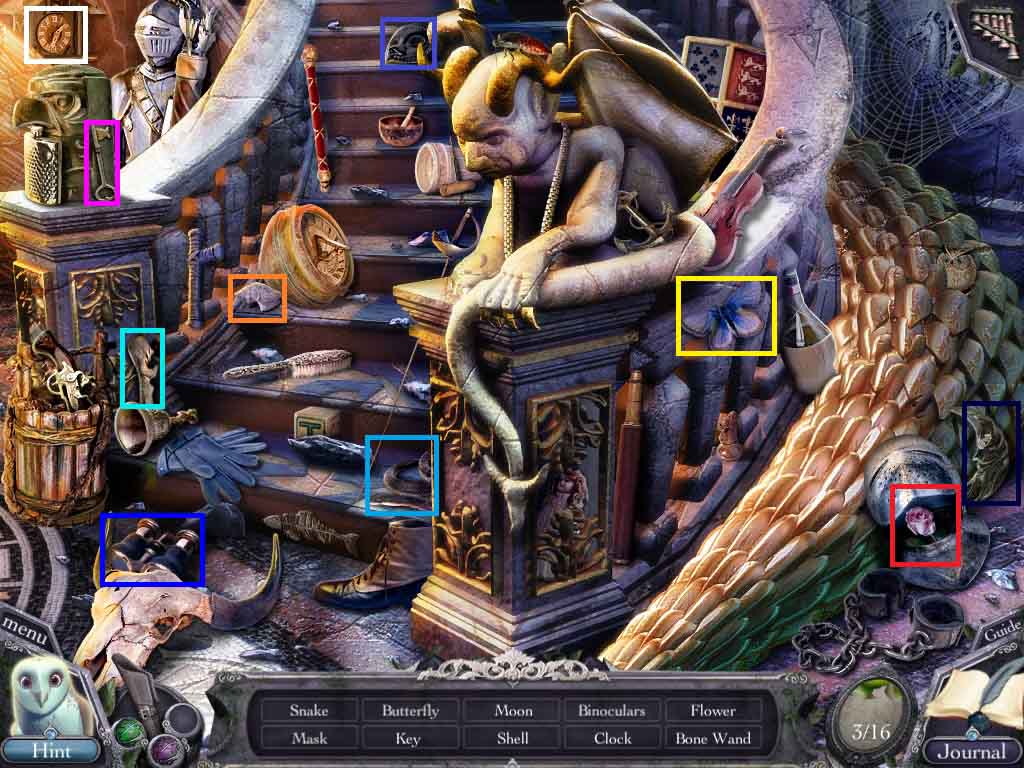
- Find the listed items.
- Collect the bone.
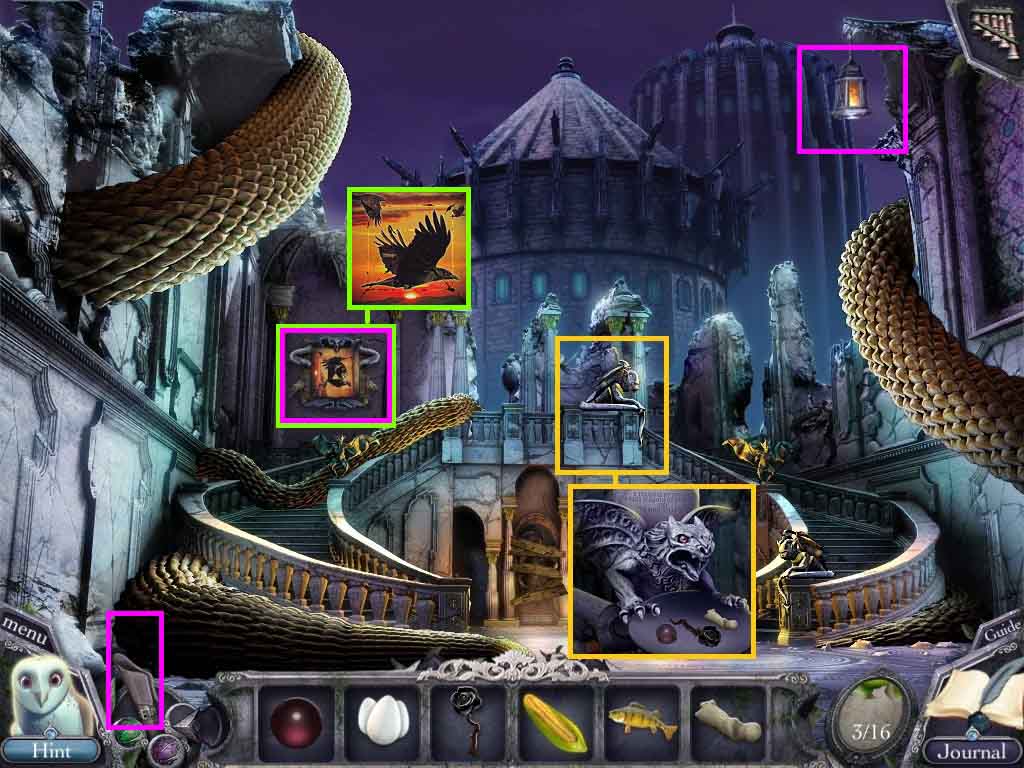
- Click the gargoyle.
- Select the pearl, black rose and the bone to collect the dark magic wand.
- Click the picture frame.
- Move the pieces into the correct placement.
- Select the magic wand to use on the crow painting.
- Then use it to select the lantern.
- Go to the hedge maze entrance and go into the 2nd path on the right.
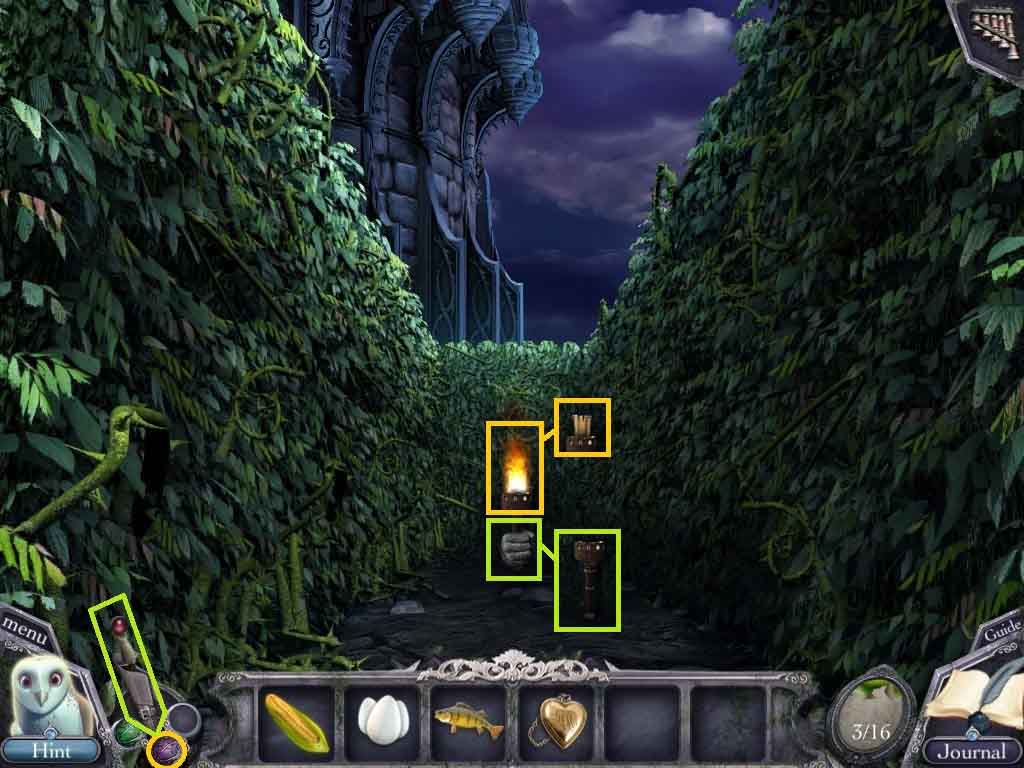
- Select the wind ability and use it to collect the portrait piece 4 /16.
- Select the magic wand and use it on the stone hand.
- Collect the torch 1 / 3.
- Go to the hedge maze entrance.
- Go to the 2nd path on the left and move ahead once more.
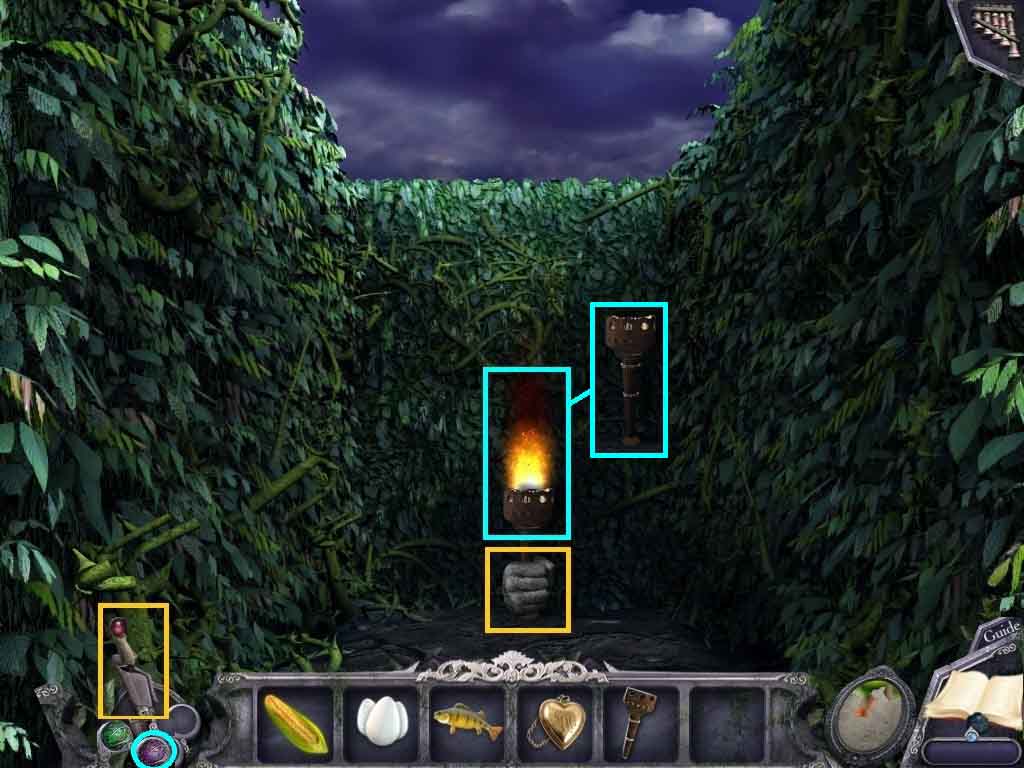
- Select the magic wand and use it on the stone hand.
- Collect the torch 2 / 3.
- Go to the hedge maze entrance.
- Go to the 3rd path on the left and move ahead once.
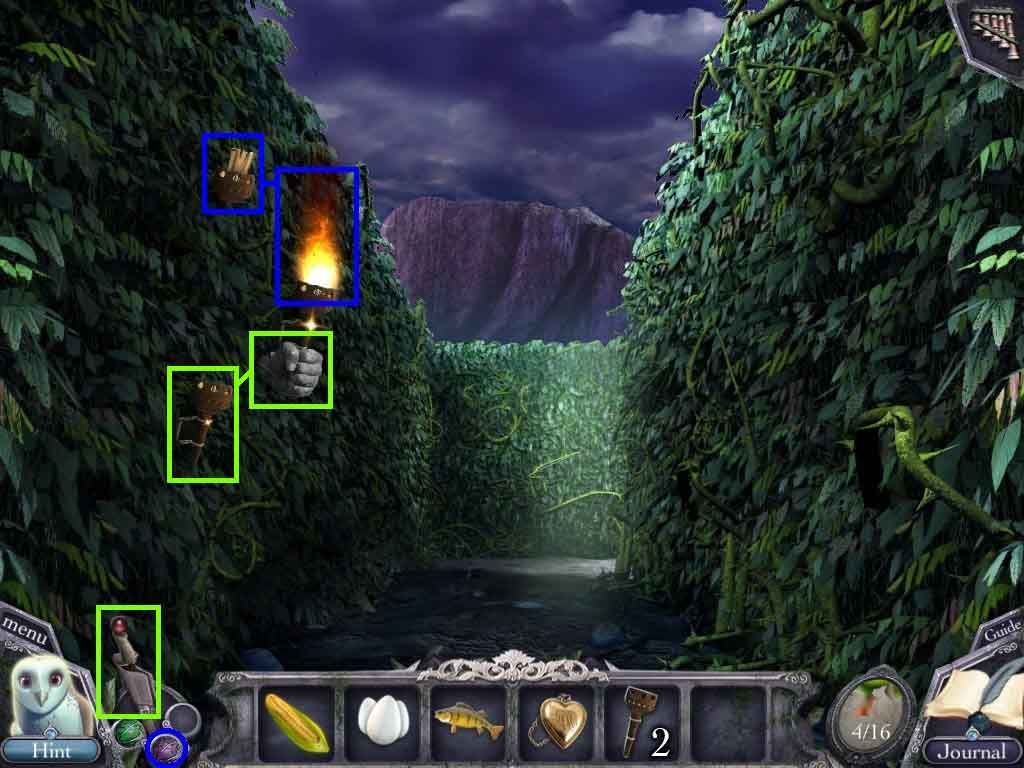
- Select the wind ability and use it to blow out the torch.
- Collect the portrait piece 5 /16.
- Select the magic wand and use it on the stone hand.
- Collect the torch 3 / 3.
- Move to the beach area.
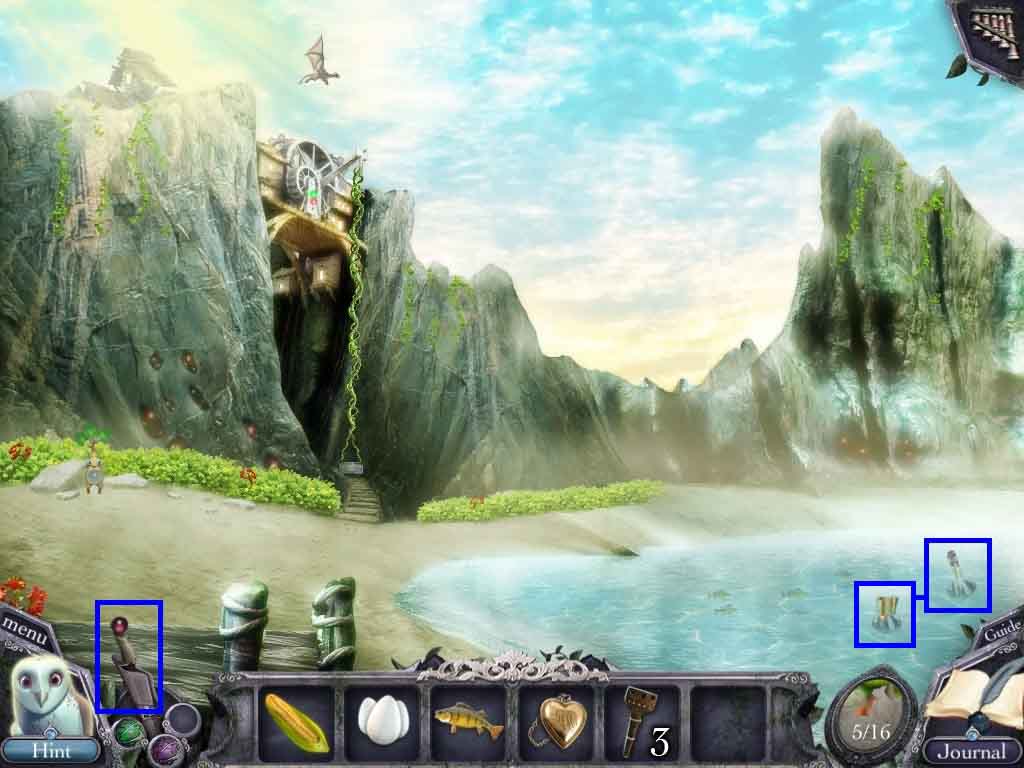
- Select the magic wand and use it to crack the bottle.
- Collect the portrait piece 6 /16.
- Move to the Castle entrance.
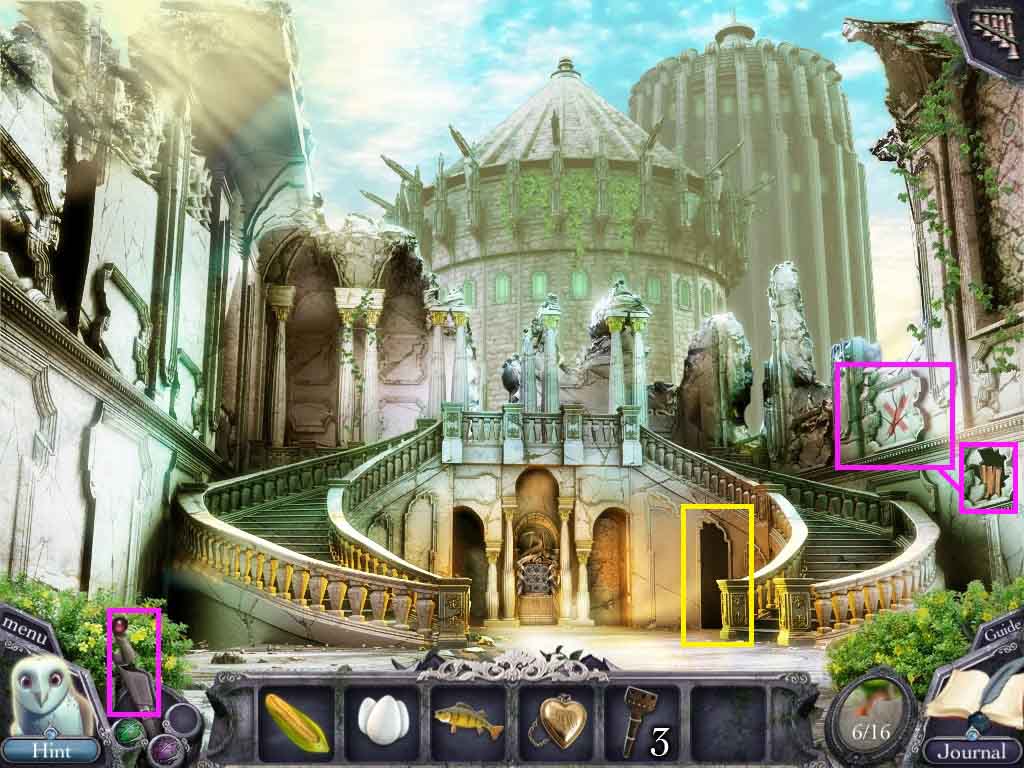
- Select the magic wand and use it on the “X” marking.
- Collect the portrait piece 7/16.
- Go through the doorway on the right to the dungeon.
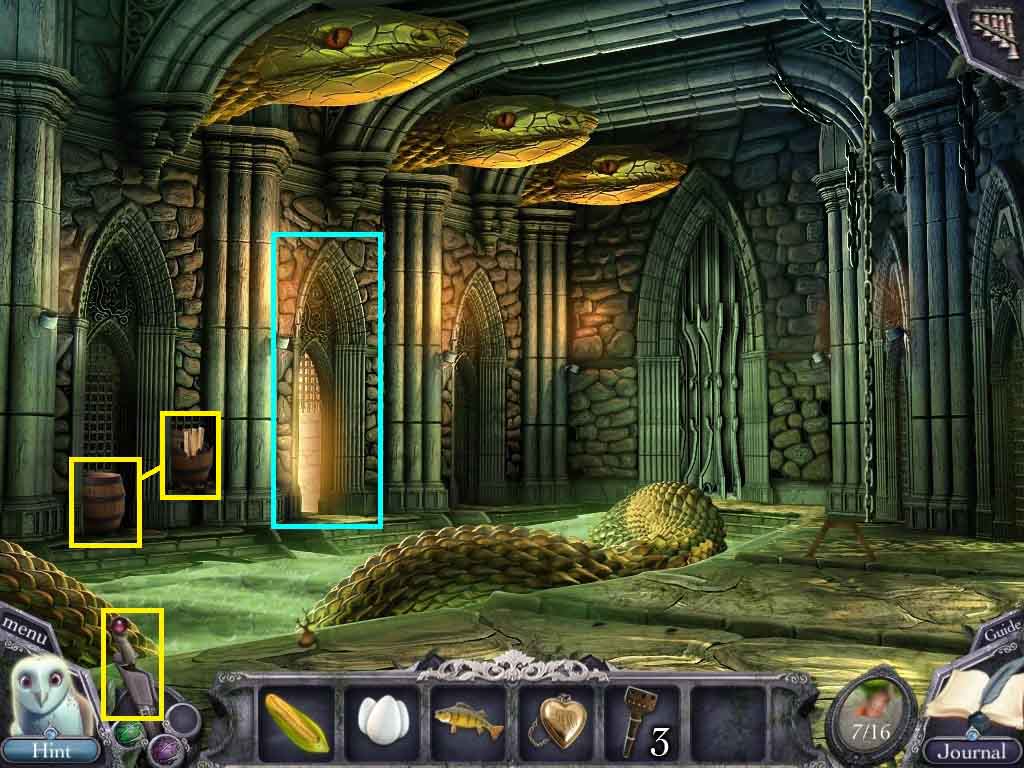
- Select the magic wand and use it on the barrel.
- Collect the portrait piece 8 /16.
- Go into the doorway on the left into the Prison Room.
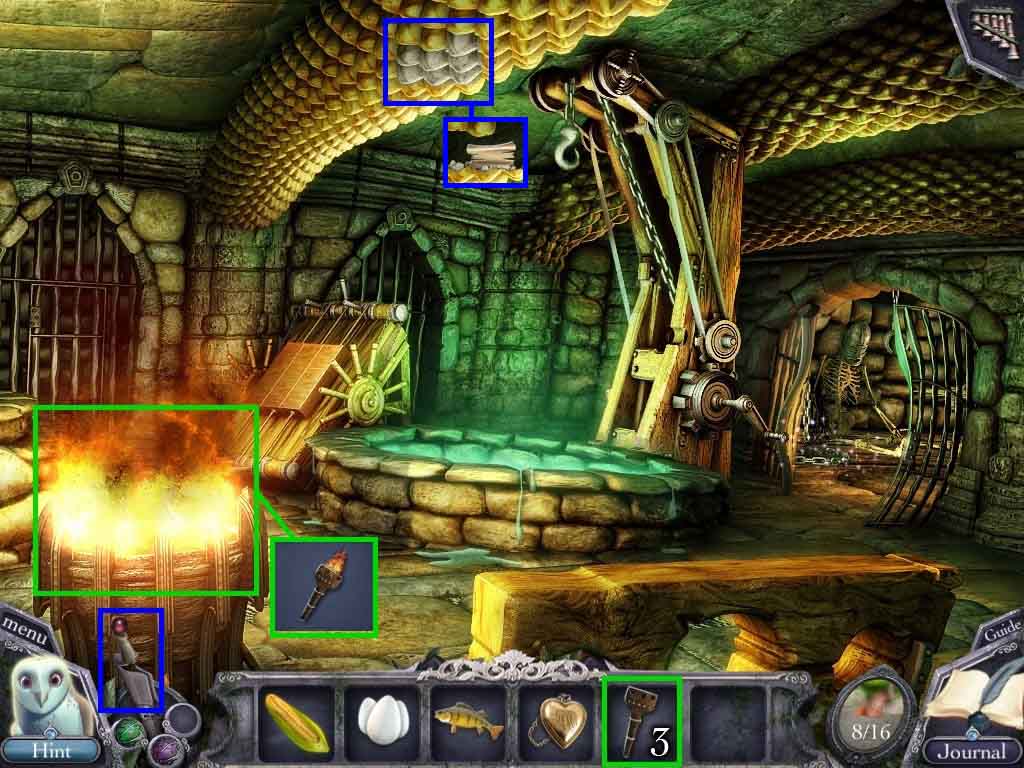
- Place the 3 torches into the fire; collect the lit torches.
- Select the magic wand and use it crack open the snake scales.
- Collect the portrait piece 9 /16.
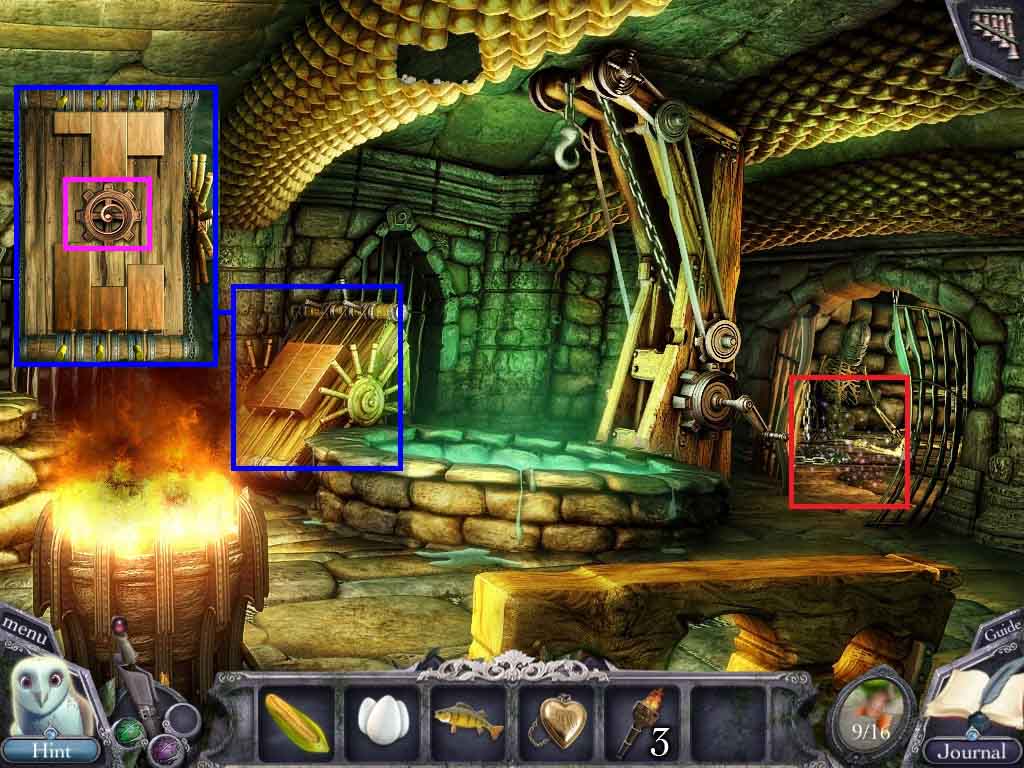
- Click the torture rack to access a mini-game.
- Click the switches into the correct alignment and click the wheel.
- Collect the rusted gear.
- Click the cell to access the hidden objects area.
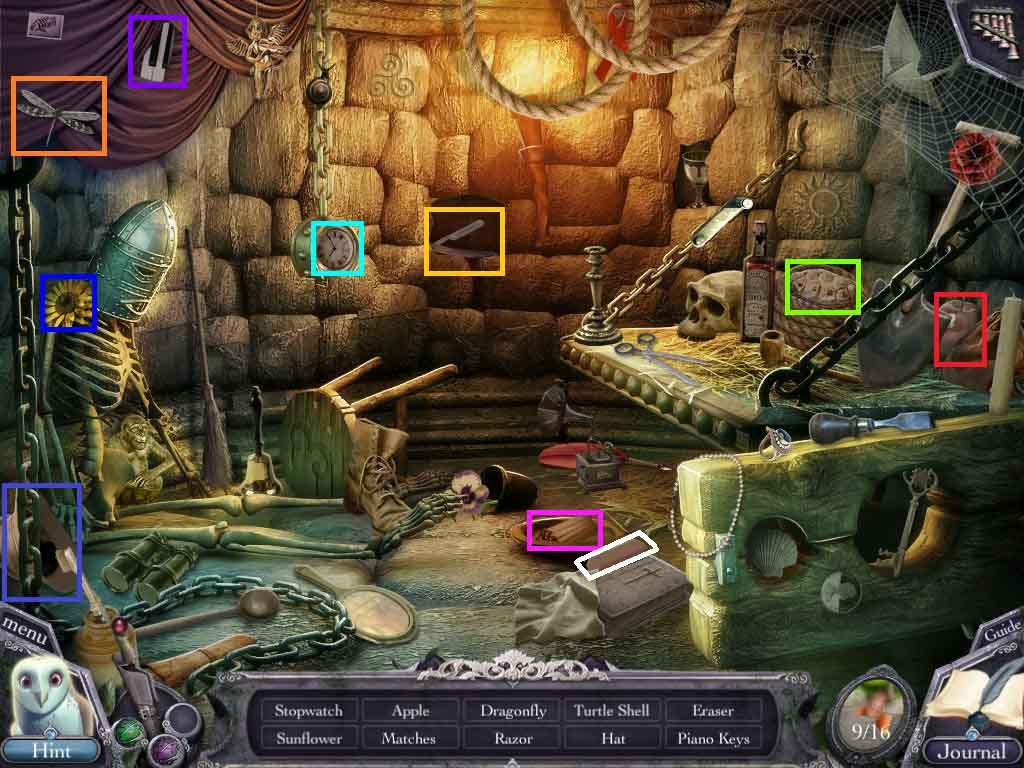
- Find the listed items.
- Collect the organ key 1 /6.
- Move to the dungeon.
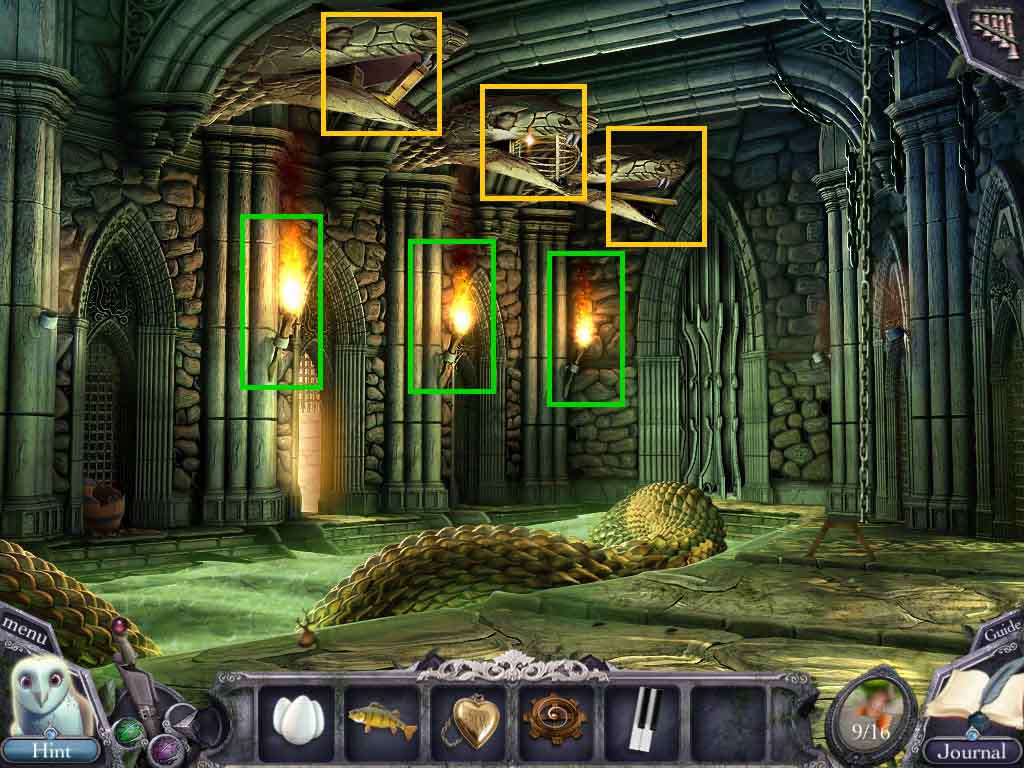
- Put the 3 torches underneath the 3 snake heads.
- Collect the wooden stand, the cage and the wooden pole.
- Move to the Prison Room.
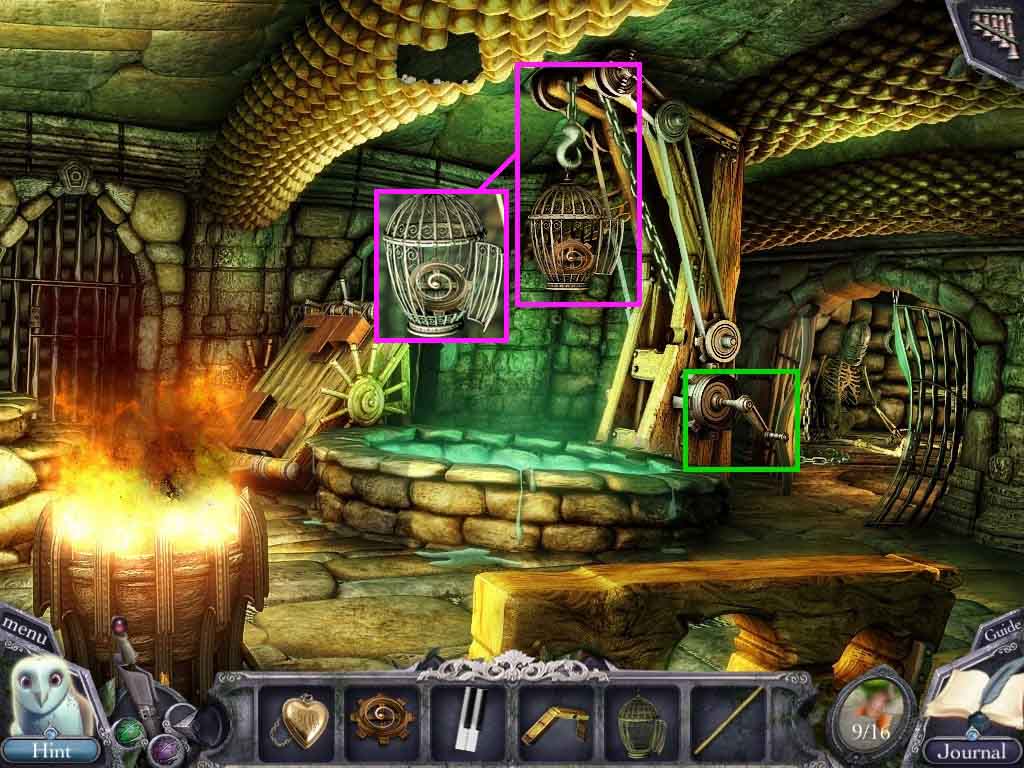
- Click the hook and attach the cage to the hook.
- Insert the rusted gear into the cage.
- Click the lever.
- Click the cage and collect the gear.
- Move to the Castle entrance.
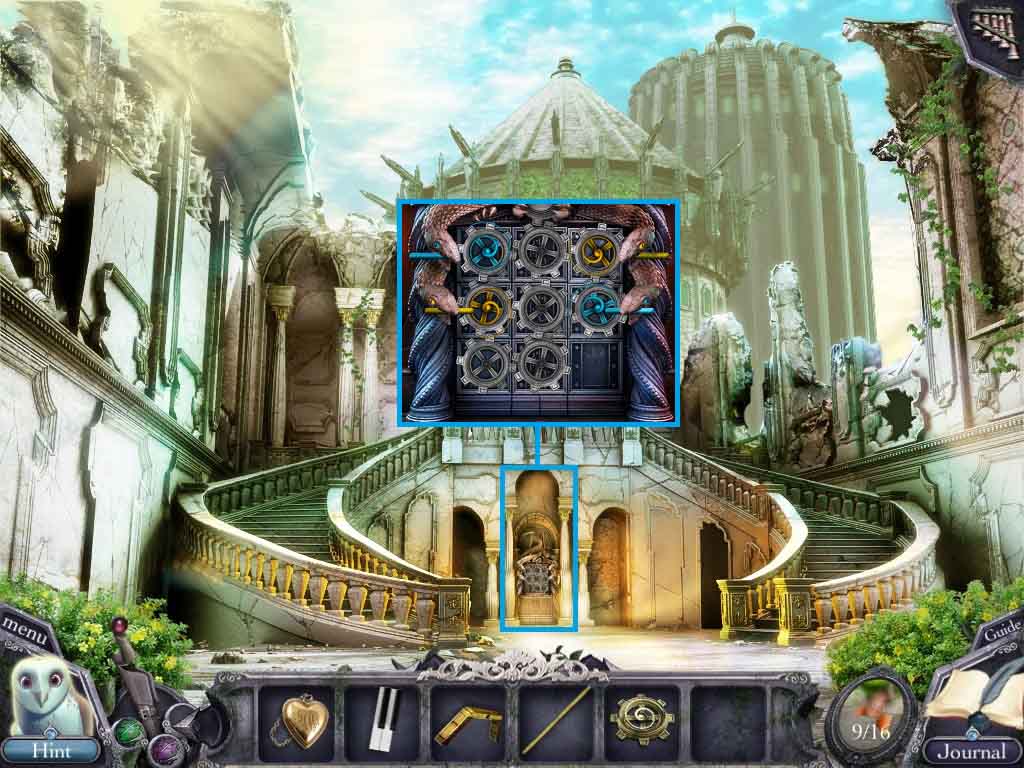
- Click the archway and insert the gear to trigger a mini-game.
- Move the gears into the correct alignment.
- Move through the doorway to the Minotaur Statue area.
- Click the Minotaur statue to access a hidden objects area.
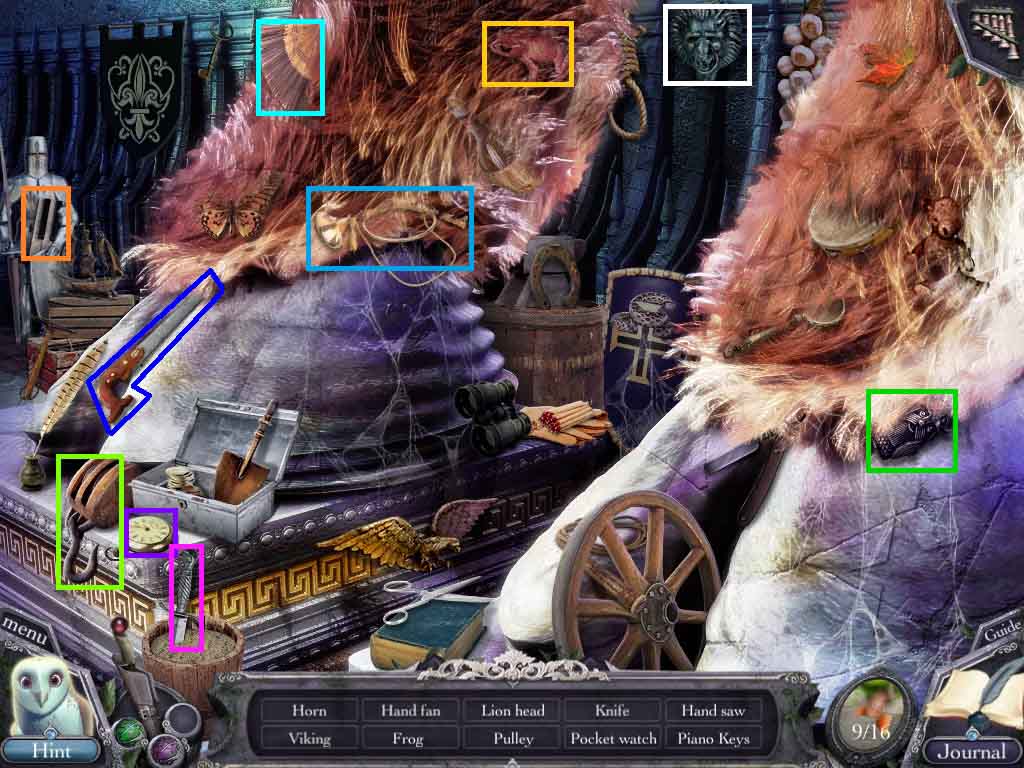
- Find the listed items.
- Collect the organ key 2 /6.
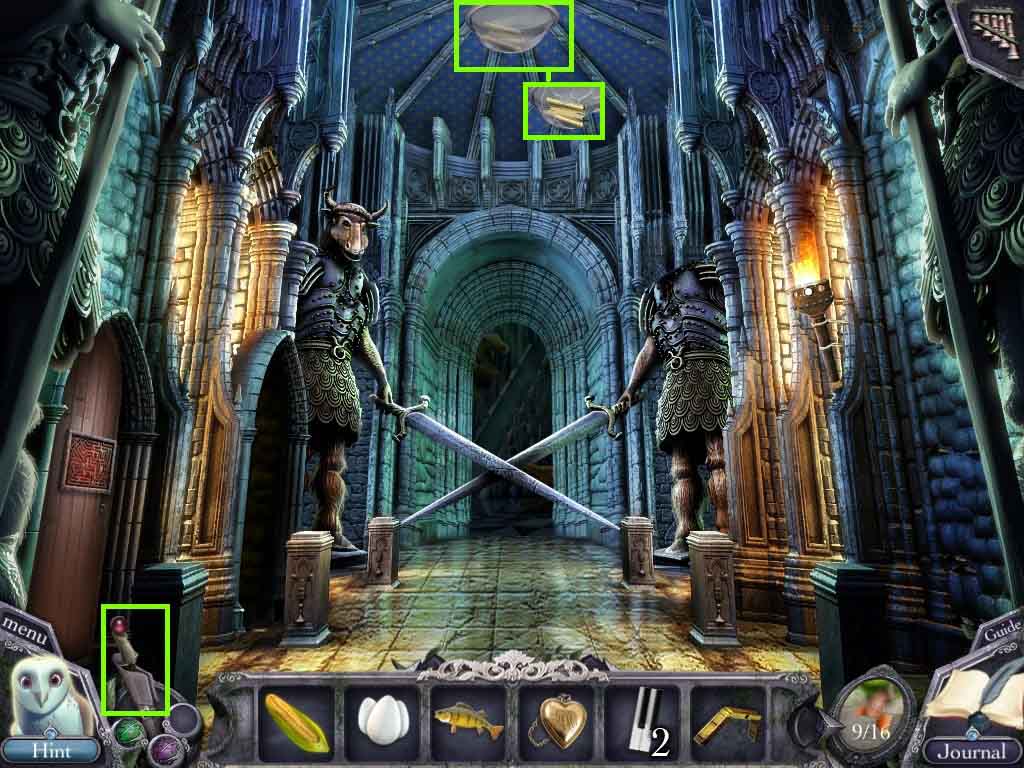
- Select the magic wand and use it to break the glass.
- Collect the portrait piece 10 /16.
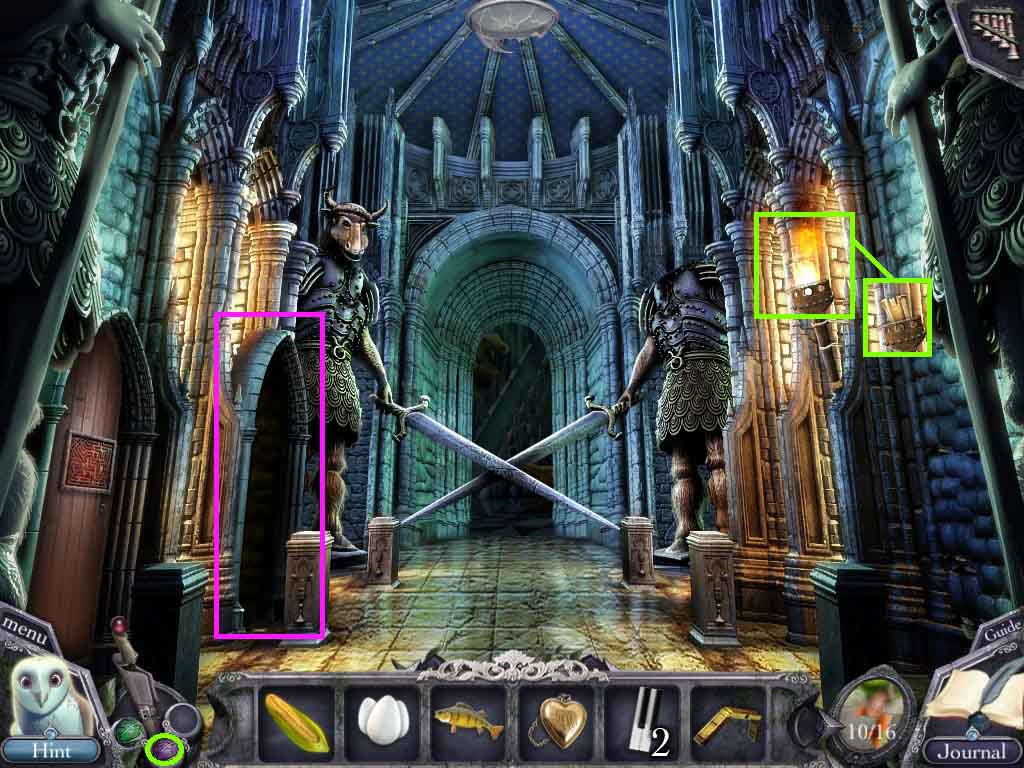
- Select the wind ability and use it on the torch.
- Collect the portrait piece 11/ 16.
- Go into the 2nd doorway on the left to the dining room.
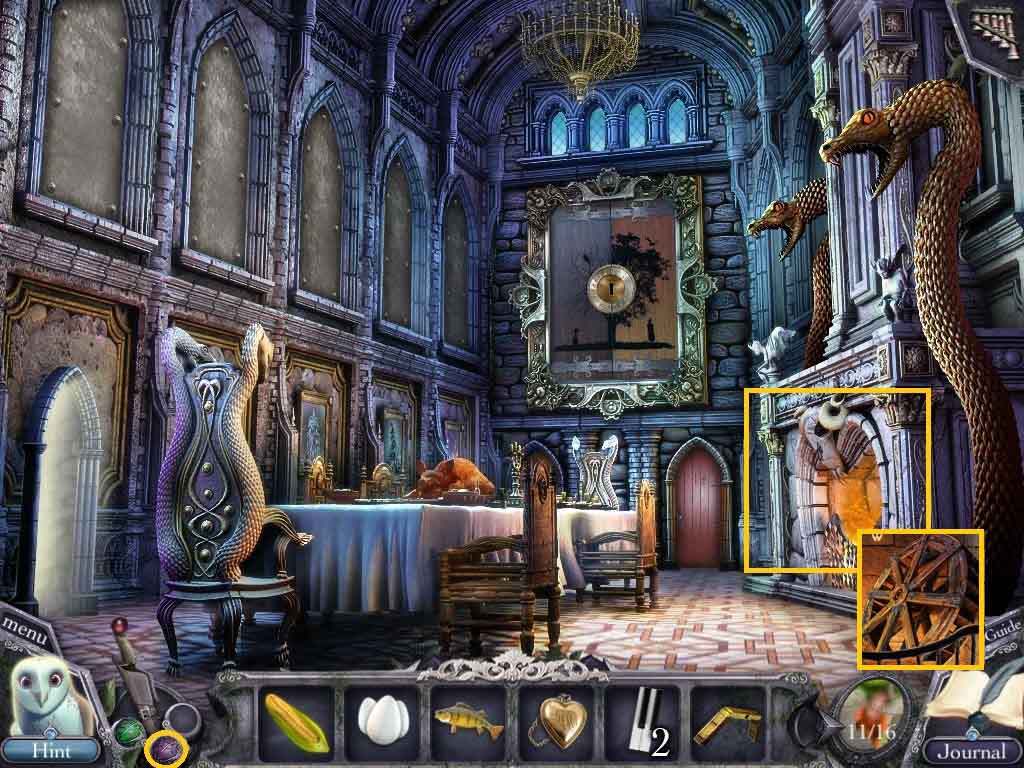
- Click the fireplace.
- Select the wind ability to out the fire and collect the wheel.
- Move to the dungeon.
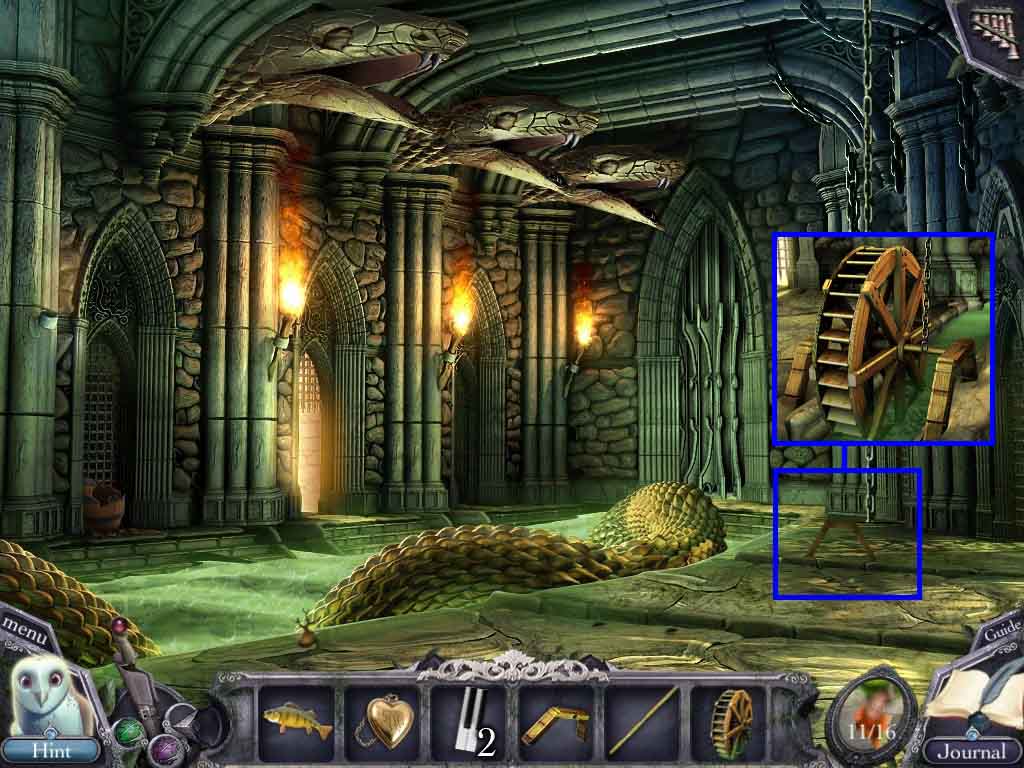
- Click the chain.
- Place down the wooden stand, wooden pole and the wheel to open the door.
- Move through the door to the snake egg area.
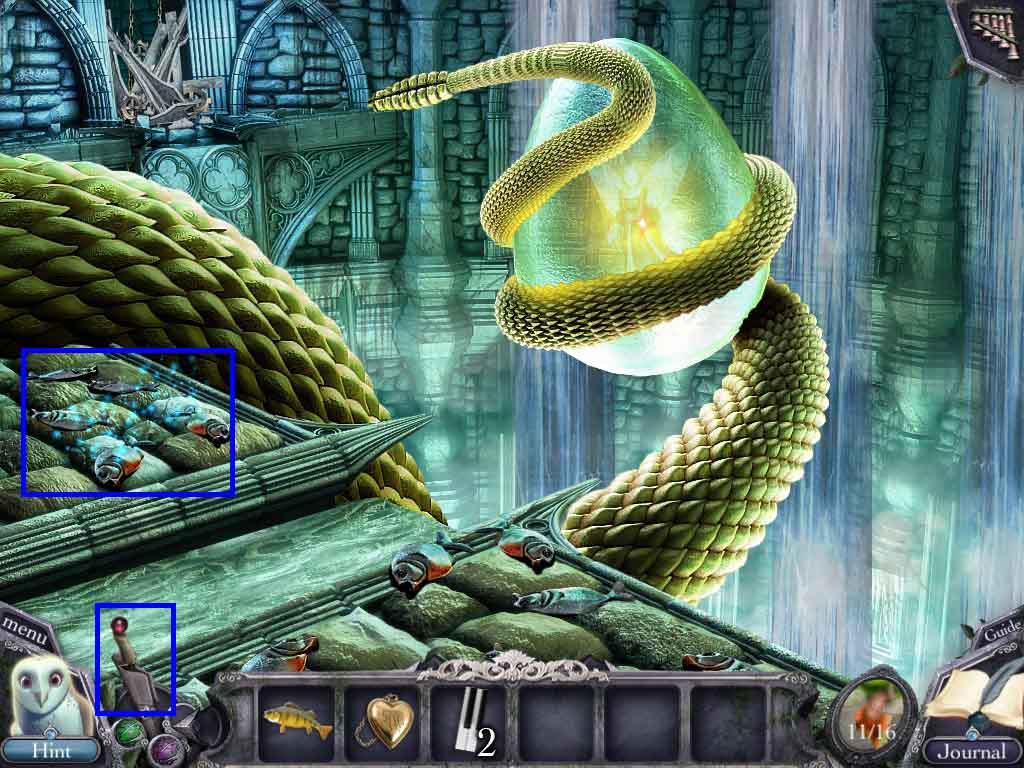
- Select the magic wand to use on the piranhas.
- Use the snake tail to crack open the egg.
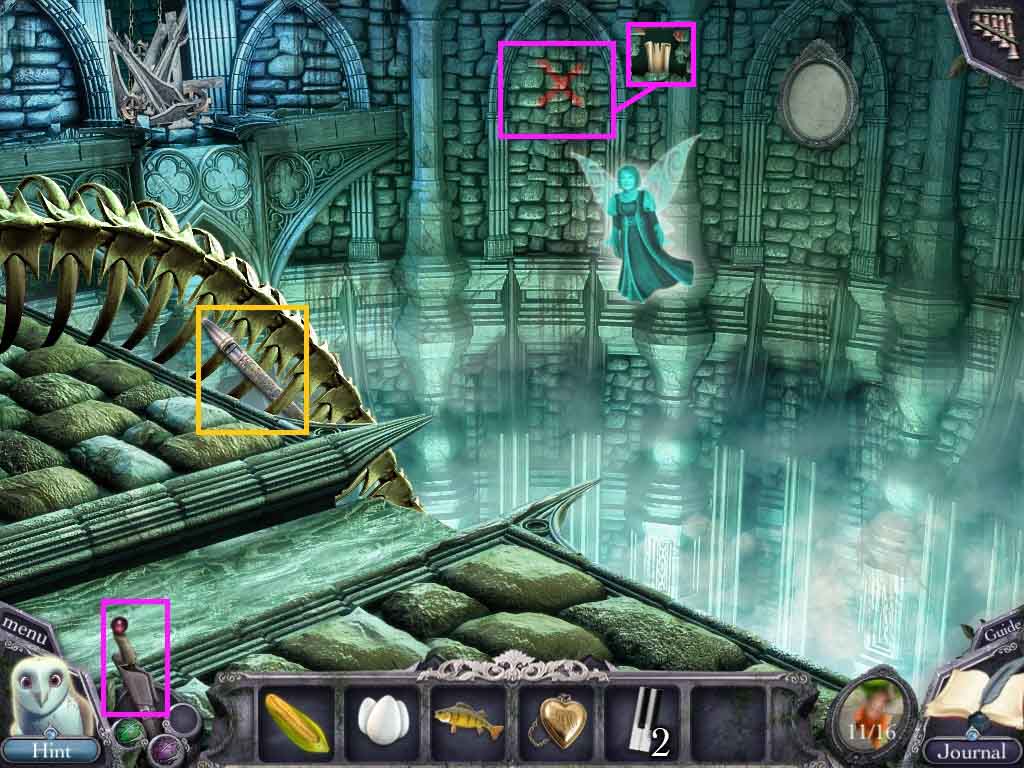
- Collect the organ pipe from the bones.
- Select the magic wand and use it on the “X” marking.
- Collect the portrait piece 12 /16.
Comments will load when you reach this part of the walkthrough.