

Chapter Six: Jaded
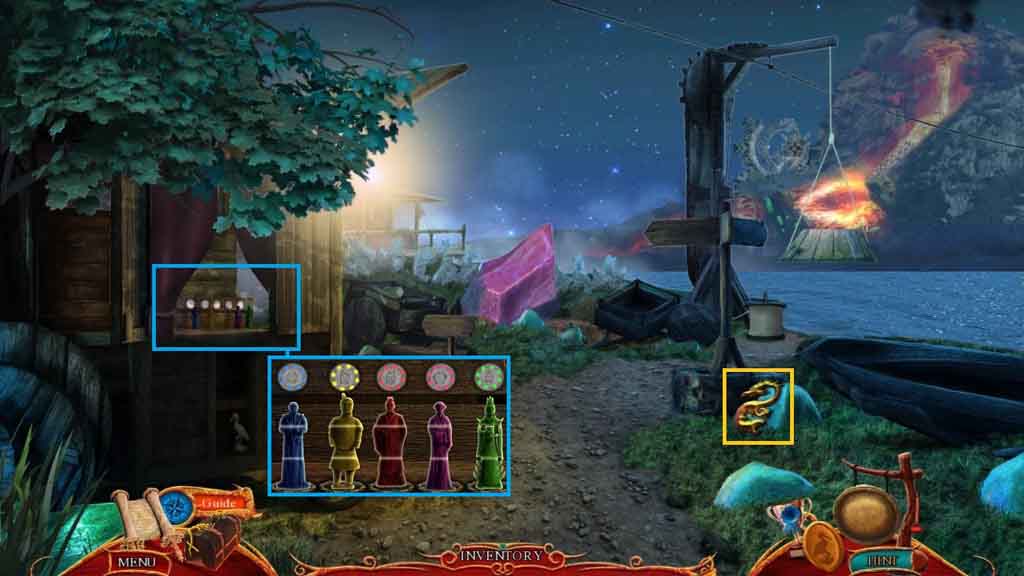
- Collect the jade key 1 / 4.
- Click the cart and insert the porcelain figurine to trigger a puzzle.
- Align the figurines as shown, use the circles above their heads as a clue.
- Collect the shack cabinet key.
- Move ahead to the River.
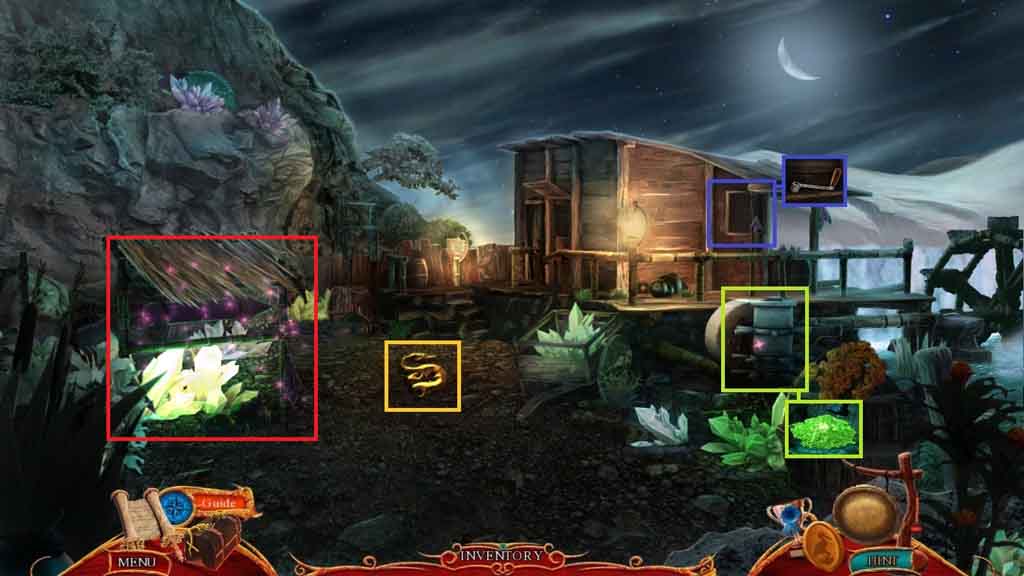
- Collect the jade key 2 /4.
- Click the cabinet and insert the shack cabinet key; collect the ferry crank.
- Click the mechanism and insert the light crystal; collect the light crystal dust.
- Select the light crystal dust to illuminate the dark spot to trigger a hidden objects area.
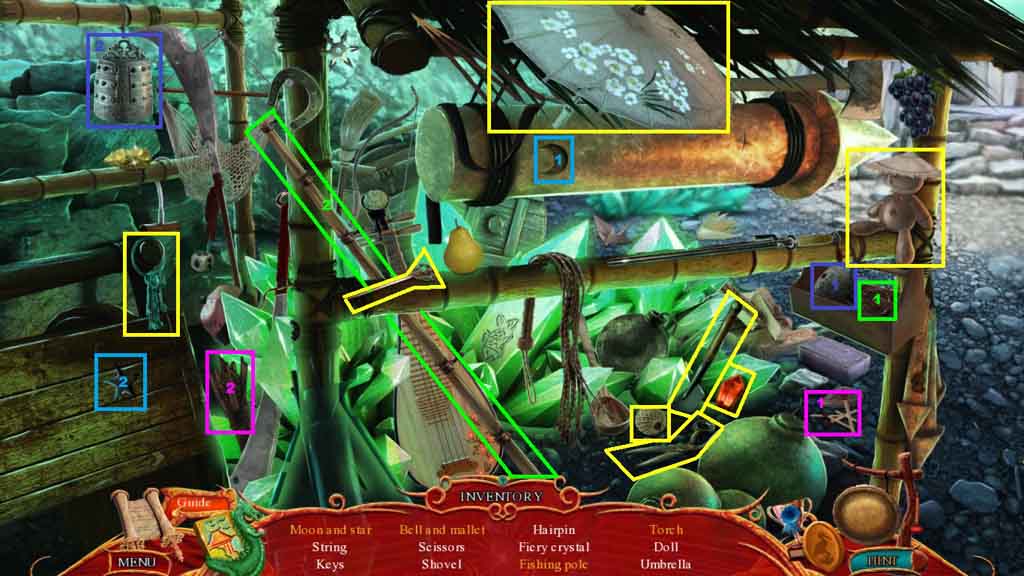
- Find the listed items.
- Select the moon and place it with the star; collect the moon and star.
- Select the mallet and place it with the bell; collect the bell and mallet.
- Select the fishing reel and place it with the rod; collect the fishing pole.
- Select the matches and use them to ignite the torch; collect the torch.
- Collect the burning torch.
- Move down once.
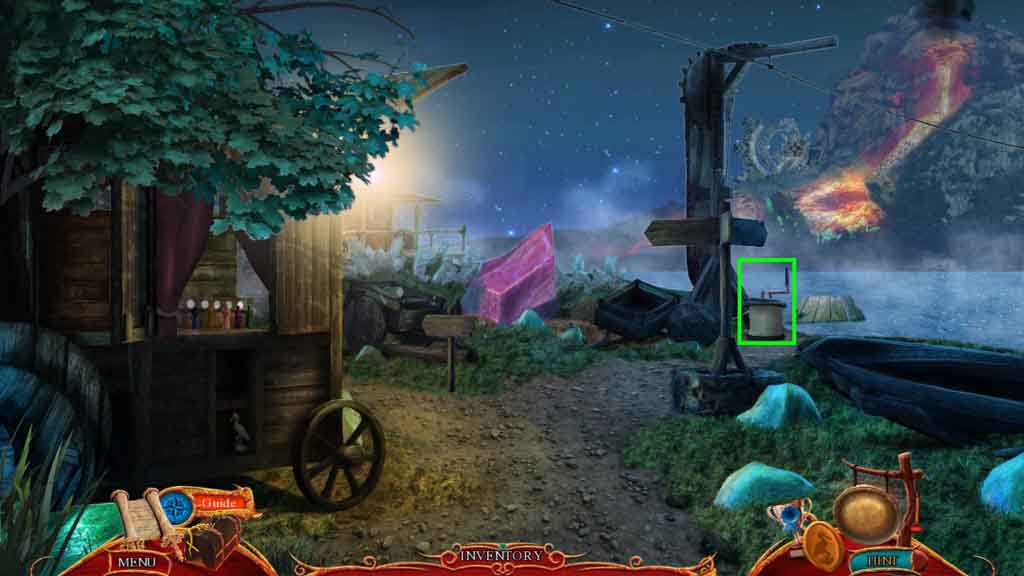
- Attach the ferry crank onto the mechanism.
- Move ahead to the Lava River.
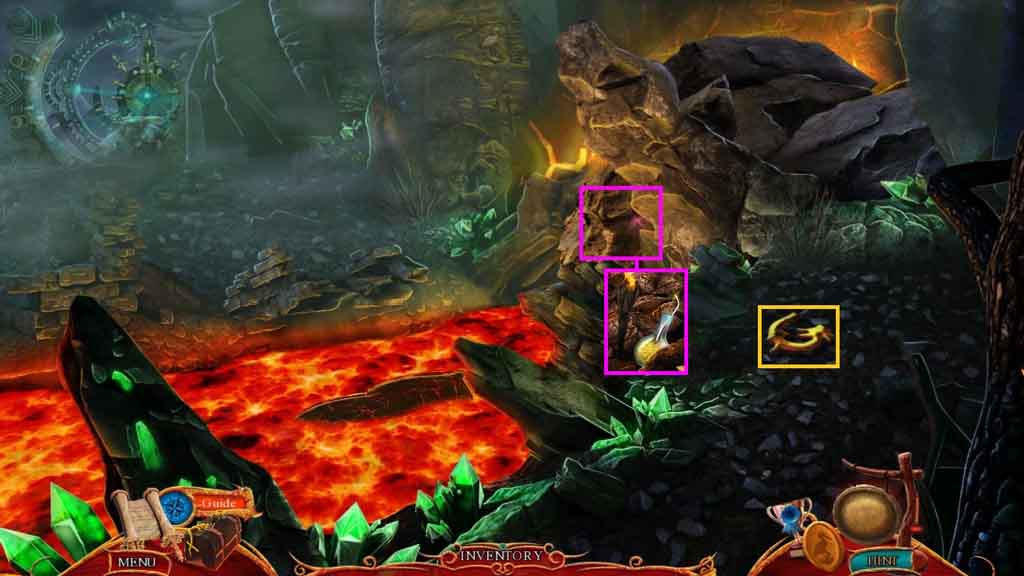
- Collect the jade key 3 /4.
- Click the rocks and place the explosives down.
- Select the burning torch to ignite the wick of the bomb.
- Move to the Jade Portal.
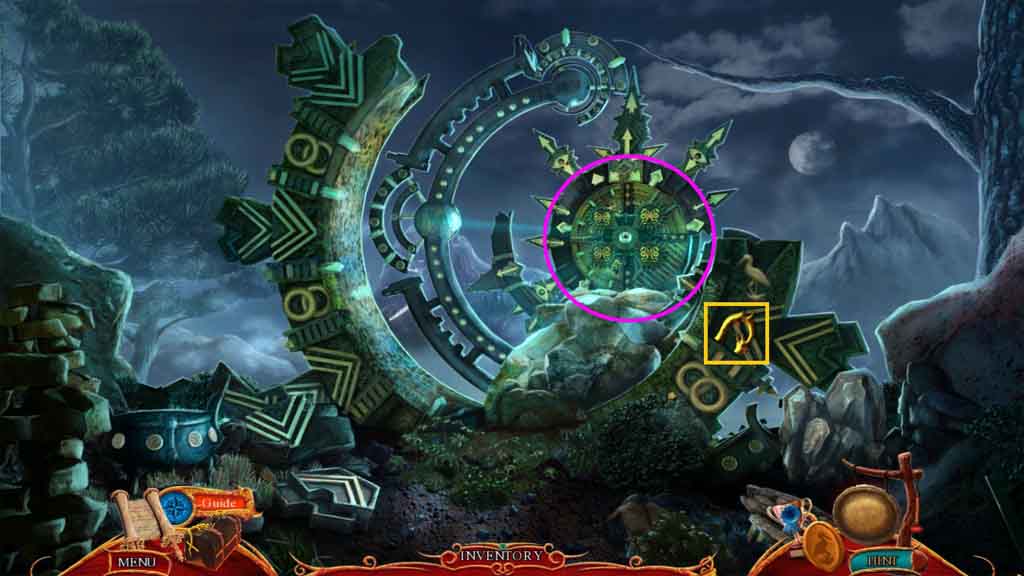
- Collect the jade key 4 /4.
- Click the lock and insert the 4 jade keys.
- Enter the portal.
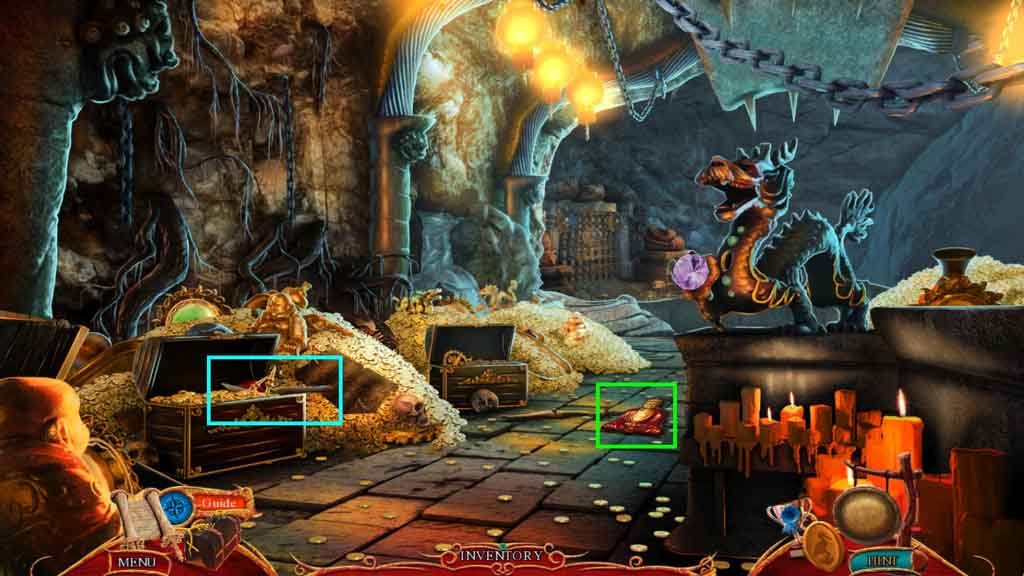
- Collect the checkers token 1 /6.
- Click the chest; collect the garden shears 1 /2.
- Move ahead to the Dragon Gate.
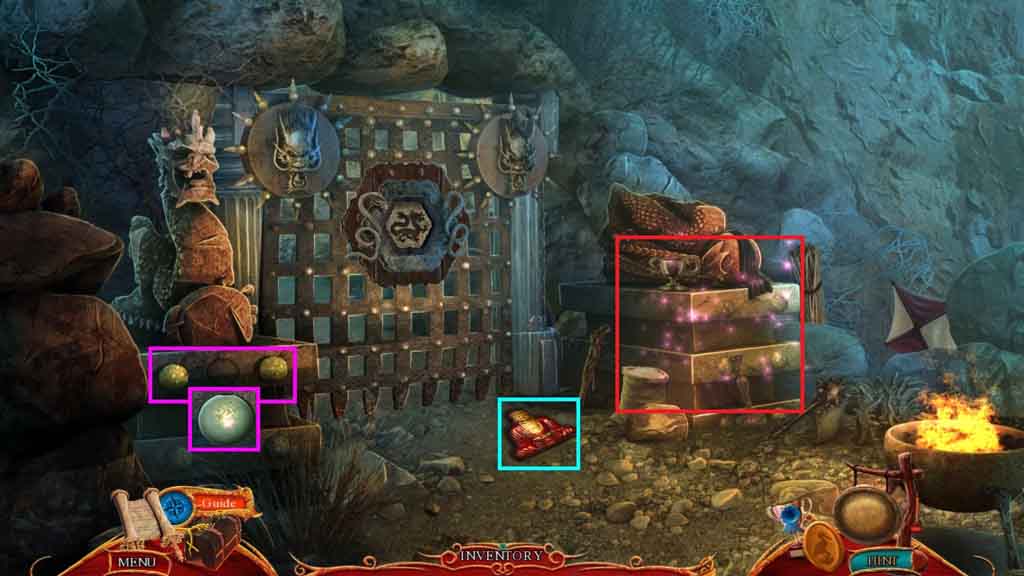
- Collect the checkers token 2 /6.
- Click the statue base and click both buttons.
- Collect the Dragon Chest Orb.
- Click the hidden objects area.
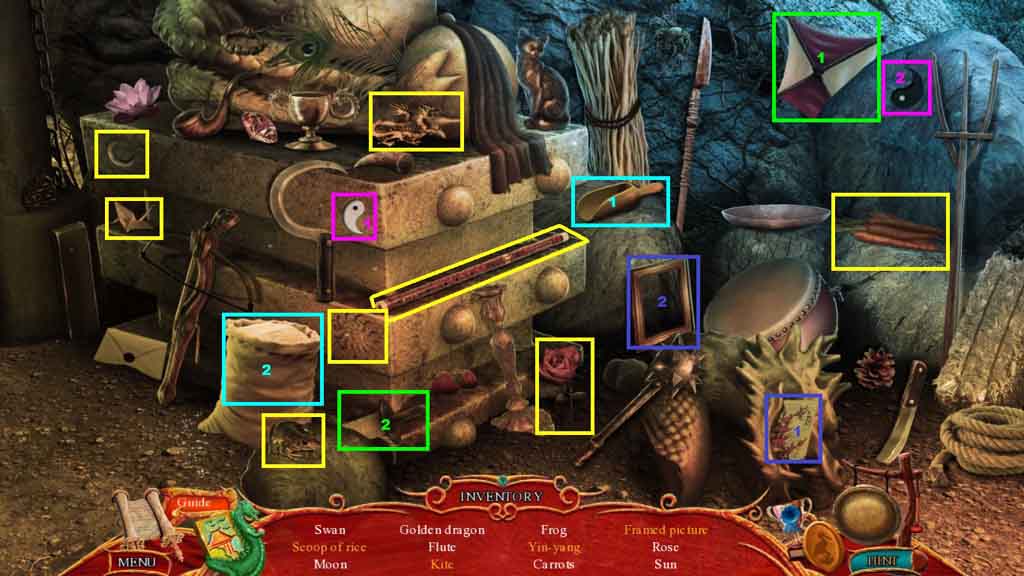
- Find the listed items.
- Select the scoop and insert it into the rice; collect the scoop of rice.
- Select the kite and attach it to the spool of string; collect the kite.
- Select the yin and place it with the yang; collect the yin-yang.
- Select the picture and insert it into the frame; collect the framed picture.
- Collect the gate piece.
- Move down once.
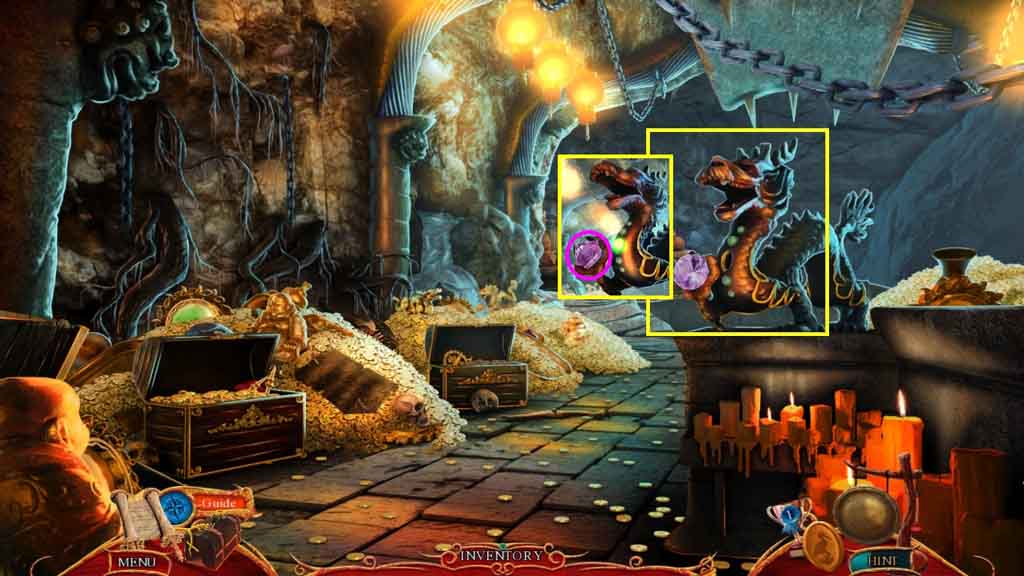
- Click the dragon and insert the dragon chest orb; collect the gem.
- Move ahead.
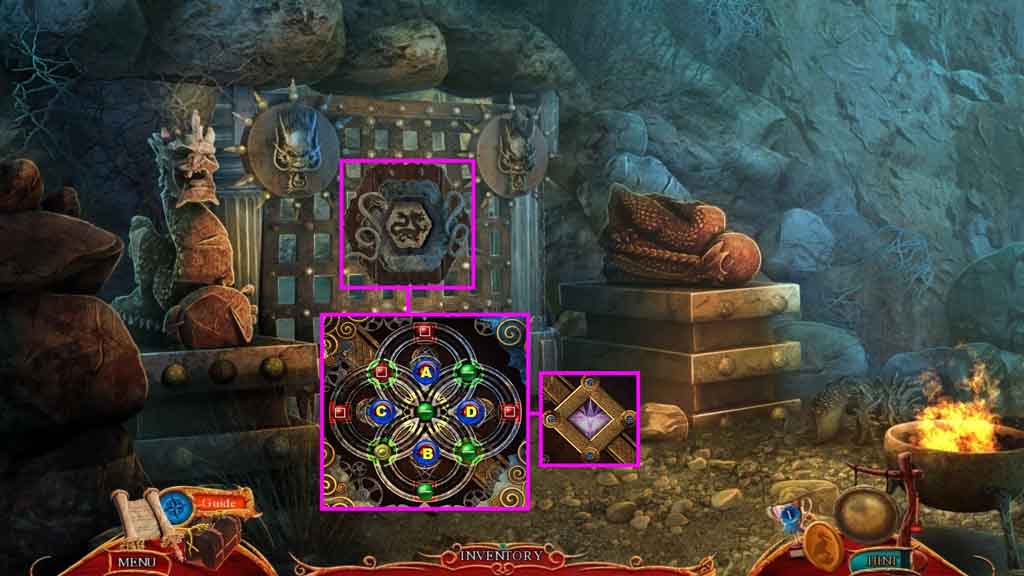
- Insert the gate piece into the lock.
- Click the lock to trigger a puzzle.
- Solve the puzzle by rotating the pebbles until they are in the correct spots.
- Use the following sequence to solve the puzzle.
- A – A – B – B – A – A – D – A – D – D
- Insert the gem.
- Move ahead to the Dragon Courtyard.
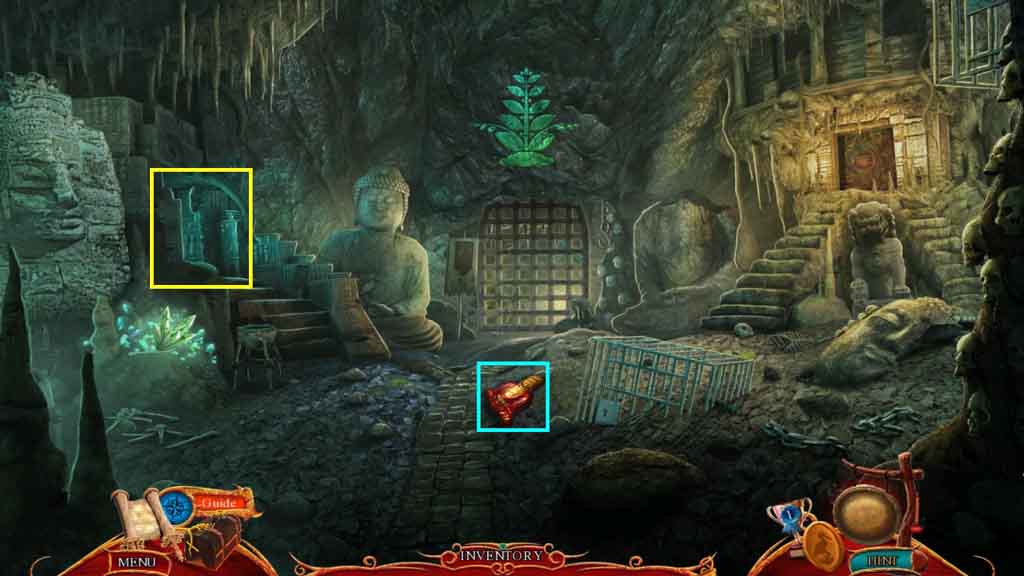
- Collect the checkers token 3 /6.
- Click the door.
- Move to the Dragon Armory.
- Click the hidden objects area.
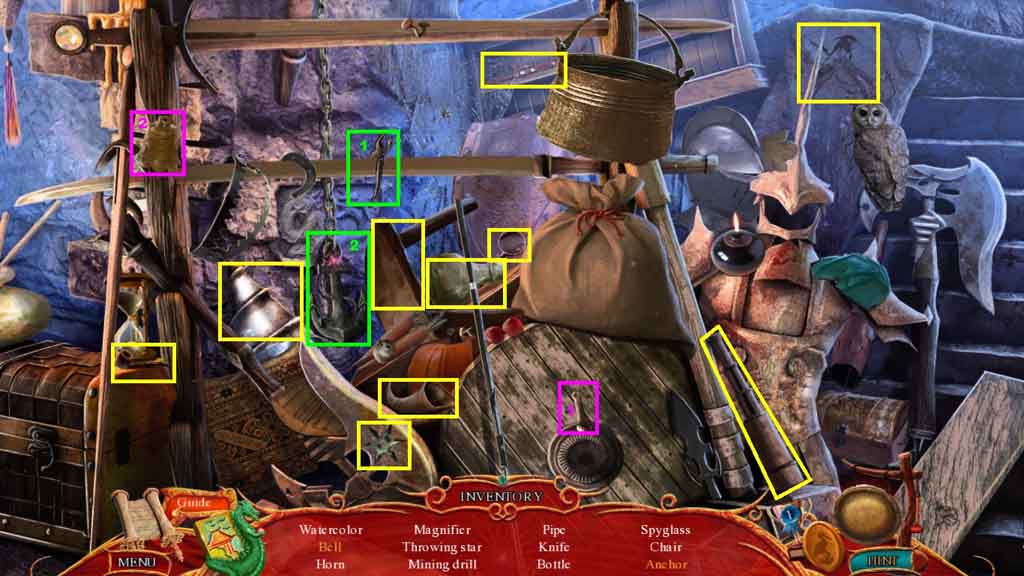
- Find the listed items.
- Select the bell clapper and insert it into the bell; collect the bell.
- Select the wire cutters and cut the chain to collect the anchor.
- Collect the mining drill.
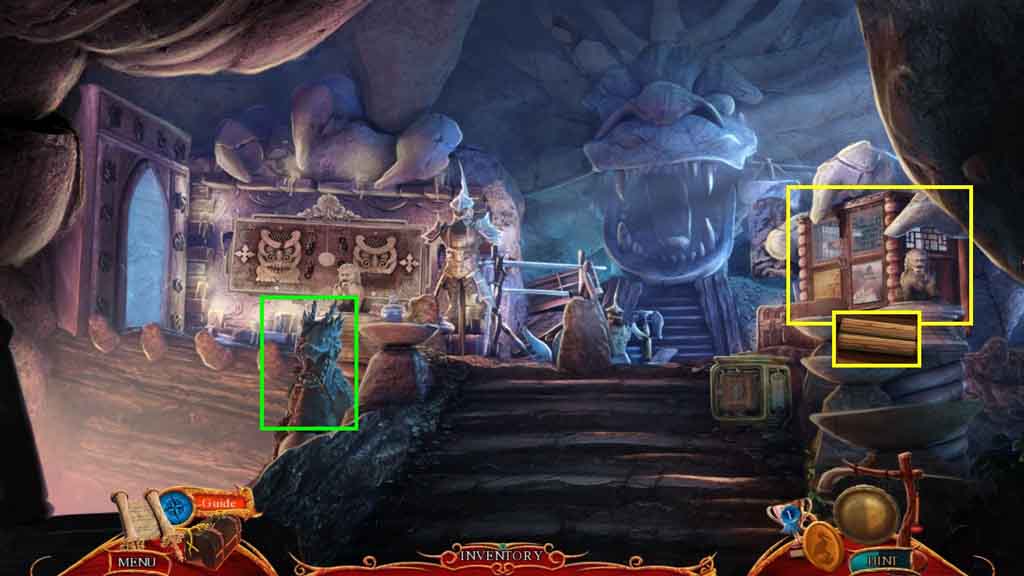
- Click the cabinet 2 times.
- Collect the ritual scroll and the diamond cutter.
- Click the statue; collect the piece of rope.
- Move down once.
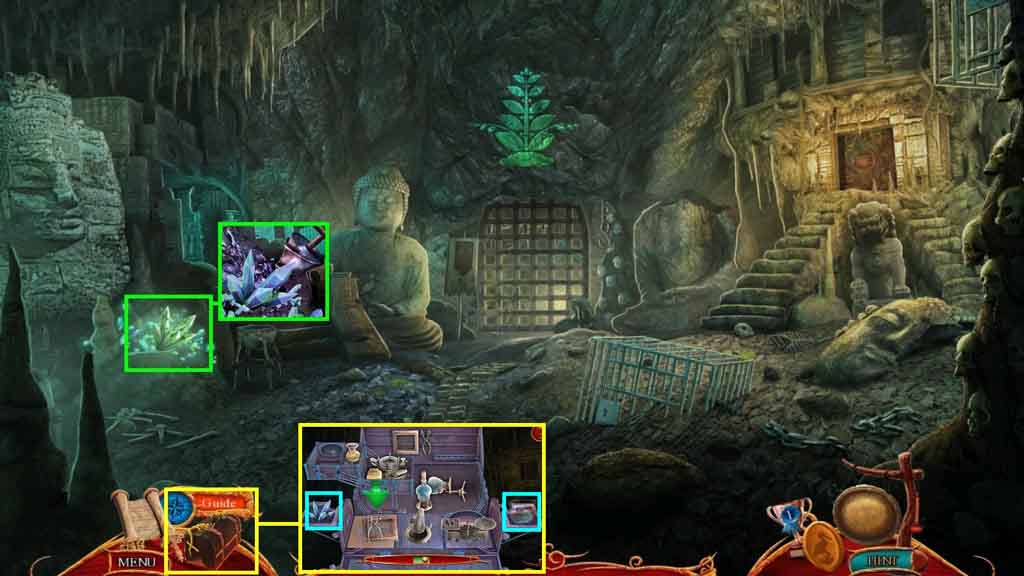
- Click the crystals.
- Select the mining drill to use on the crystals and collect the heavy crystal.
- Click the healer’s kit and place the heavy crystal down.
- Click the object that the arrow is indicating when the ball is on the green line; collect weight powder.
- Move to the Dragon Plateau.
Comments will load when you reach this part of the walkthrough.